- Overview
- Create converter and integration templates
- Modify Edge Root Rule Chain for downlinks
- Assign Integration to Edge
- Send uplink message
- Send downlink message
- Next steps
Overview
HTTP Integration allows converting existing protocols and payload formats to ThingsBoard Edge message format and is useful in several deployment scenarios:
- stream device and/or asset data from external system, IoT platform or connectivity provider back-end.
- stream device and/or asset data from your custom application running in the cloud.
- connect the existing device with custom HTTP based protocol to ThingsBoard Edge.
Create converter and integration templates
Converter and integration templates are created only on the ThingsBoard Professional Edition. So please use ThingsBoard Cloud or install your own platform instance to log in as Tenant administrator.
Follow the steps below to add the HTTP integration:
- Go to “Edge management” section -> “Integration templates” page and click “plus” button to add new integration. Select type ‘HTTP’. Name it “Edge HTTP integration”. Then, click “Next”;

- The next step is create an Uplink data converter.
Uplink is necessary in order to convert the incoming data from the device into the required format for displaying them in ThingsBoard. For this example, use the code below.
One can use either TBEL (ThingsBoard expression language) or JavaScript to develop user defined functions. We recommend utilizing TBEL as it’s execution in ThingsBoard is much more efficient compared to JS.
|
Copy the following script: Choose “Create new” and paste copied code to the Decoder function section. Click “Next”;
|
|
Copy the following script: Choose “Create new” and paste copied code to the Decoder function section. Click “Next”;
|
- At the next step is create a Downlink converter.
The Downlink converter transforms outgoing RPC message and then the integration sends it to your device. You can customize a downlink according to your configuration. Let’s consider an example where we send an attribute update message. For this example, use the code below.
One can use either TBEL (ThingsBoard expression language) or JavaScript to develop user defined functions. We recommend utilizing TBEL as it’s execution in ThingsBoard is much more efficient compared to JS.
|
Copy the following script: Choose “Create new” and paste copied code to the Encoder function section. Click “Next”;
|
|
Copy the following script: Choose “Create new” and paste copied code to the Encoder function section. Click “Next”;
|
-
Finally, we go to the “Connection” page:
- Enter IP address and port of your Edge instance in the format: ‘host:port’ as ‘Base URL’. Or, you can use placeholder ${{ATTRIBUTE_KEY}} to substitute integration field with attribute value from specific Edge entity. In this example, we will use the placeholder ${{baseUrl}} for ‘Base URL’.
- Then, click the “Add” button.

HTTP integration is created.
Modify Edge Root Rule Chain for downlinks
We can send a downlink message to the device from Rule chain using the rule node. To be able to send downlink over integration we need to modify “Edge Root Rule chain” on the ThingsBoard PE.
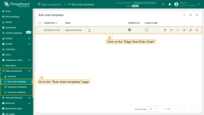
- Go to the "Edge management" section -> "Rule chain templates" page and click on the "Edge Root Rule Chain" to open it;
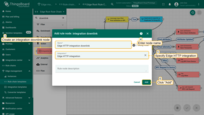
- Create an 'integration downlink' node. Specify your integration in its settings;
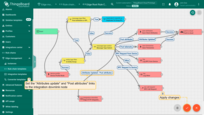
- Set the "Attributes Updated" and "Post attributes" links from the 'message type switch' node to the 'integration downlink' node. When the attribute is created or changes are made to the attribute, the downlink message will be sent to the integration. Apply changes.
Assign Integration to Edge
Once converter and integration templates are created, we can assign Integration template to Edge. Because we are using placeholder ${{baseUrl}} in the integration configuration, we need to add attribute ‘baseUrl’ to edge first. You need to provide IP address and port of your Edge instance as ‘baseUrl’ attribute. Once attribute added, we are ready to assign integration and verify that it’s added.
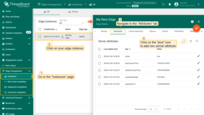
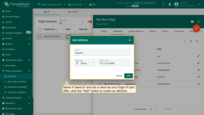
- Go to the "Edge management" section -> "Instances" page, click on your edge instance to open "Edge details" window, and navigate to the "Attributes" tab. Click "plus" icon to add new server attribute to Edge;
- Named baseUrl and set value as your Edge IP:port. After, click "Add" button;
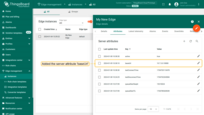
- Added the server attribute ''baseUrl'' to the edge;
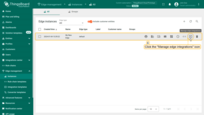
- Now, click "Manage edge integrations" icon of Edge entity;
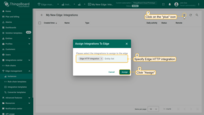
- Click the "+" icon at the top right of the corner. Specify your integration and click "Assign" button to assign it to the Edge;
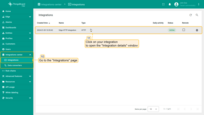
- Login to your ThingsBoard Edge instance and open "Integrations center" section -> "Integrations" page. You should see your integration. Click on it;
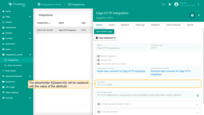
- In the "Integration details" window placeholder ${{baseUrl}} will be replaced with the value of the attribute.
Send uplink message
To send an uplink message, you need ‘HTTP endpoint URL’ from the integration. Log in to ThingsBoard Edge and go to the “Integrations center” section -> “Integrations” page. Find your HTTP integration and click on it. Find and copy the ‘HTTP endpoint URL’.
Use the command below to send a message. Don’t forget to replace $DEVICE_NAME and $YOUR_HTTP_ENDPOINT_URL with corresponding values.
1
curl -v -X POST -d "{\"deviceName\":\"$DEVICE_NAME\",\"temperature\":33,\"model\":\"test\"}" $YOUR_HTTP_ENDPOINT_URL -H "Content-Type:application/json"

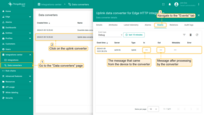
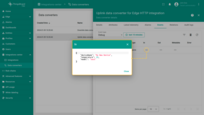
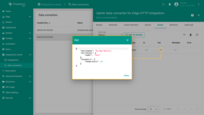
Now, navigate to the “Events” tab in your HTTP integration. If you have done everything correctly, you will find an uplink message with the status ‘OK’. To see the message itself, click the three dots in the ‘Message’ column.

When you sent the message, a new device was created. The created device with data can be seen in the “Entities” section -> “Devices” page on the Edge:

Also, received data can be viewed in the uplink converter. In the ‘In’ and ‘Out’ blocks of the “Events” tab:
Send downlink message
Now let’s check downlink functionality. Let’s add a ‘firmware’ shared attribute. Go to the “Devices” page, select your device, and navigate to the “Attributes” tab on the ThingsBoard Edge. Select the “Shared attributes” scope and click on the “plus” icon to create new attribute. Then set the attribute name, its value (for example, the key name is ‘firmware’, value: ‘01052020.v1.1’) and save the data.

To make sure that downlink message sent to integration you can check “Events” tab of the integration:

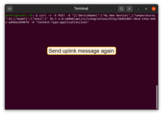
Now we’ll need to send again message to HTTP integration.
Please use the same command that was used before. Don’t forget to replace $DEVICE_NAME and $YOUR_HTTP_ENDPOINT_URL with corresponding values.
1
curl -v -X POST -d "{\"deviceName\":\"$DEVICE_NAME\",\"temperature\":33,\"model\":\"test\"}" $YOUR_HTTP_ENDPOINT_URL -H "Content-Type:application/json"
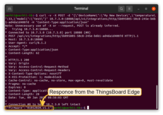
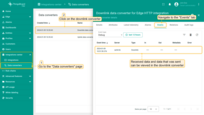
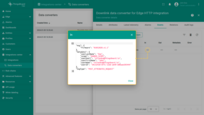
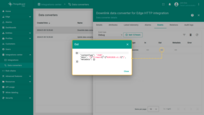
Received data and data that was sent can be viewed in the downlink converter. In the ‘In’ block of the “Events” tab, we see what data entered and in the ‘Out’ field, the message sent to the device is displayed:
Next steps
-
Getting started guide - Provide quick overview of main ThingsBoard Edge features. Designed to be completed in 15-30 minutes:
-
Installation guides - Learn how to setup ThingsBoard Edge on various available operating systems and connect to ThingsBoard CE server.
-
Edge Rule Engine:
-
Rule Chain Templates - Learn how to use ThingsBoard Edge Rule Chain Templates.
-
Provision Rule Chains from cloud to edge - Learn how to provision edge rule chains from cloud to edge.
-
- Security:
- gRPC over SSL/TLS - Learn how to configure gRPC over SSL/TLS for communication between edge and cloud.
-
Features:
-
Edge Status - Learn about Edge Status page on ThingsBoard Edge.
-
Cloud Events - Learn about Cloud Events page on ThingsBoard Edge.
-
-
Use cases:
-
Manage alarms and RPC requests on edge devices - This guide will show how to generate local alarms on the edge and send RPC requests to devices connected to edge:
-
Data filtering and traffic reduce - This guide will show how to send to cloud from edge only filterd amount of device data:
-
- Roadmap - ThingsBoard Edge roadmap.


