IoT Cricket Wi-Fi module

IoT Cricket Wi-Fi module
Things On Edge
- Platform
- ThingsBoard
- Hardware Type
- Sensors
- Connectivity
- Wi-Fi
- Industry
- Smart Buildings, Smart Agriculture, Industrial Manufacturing
- Use Case
- Smart Energy, Environment Monitoring, Smart Office
Introduction
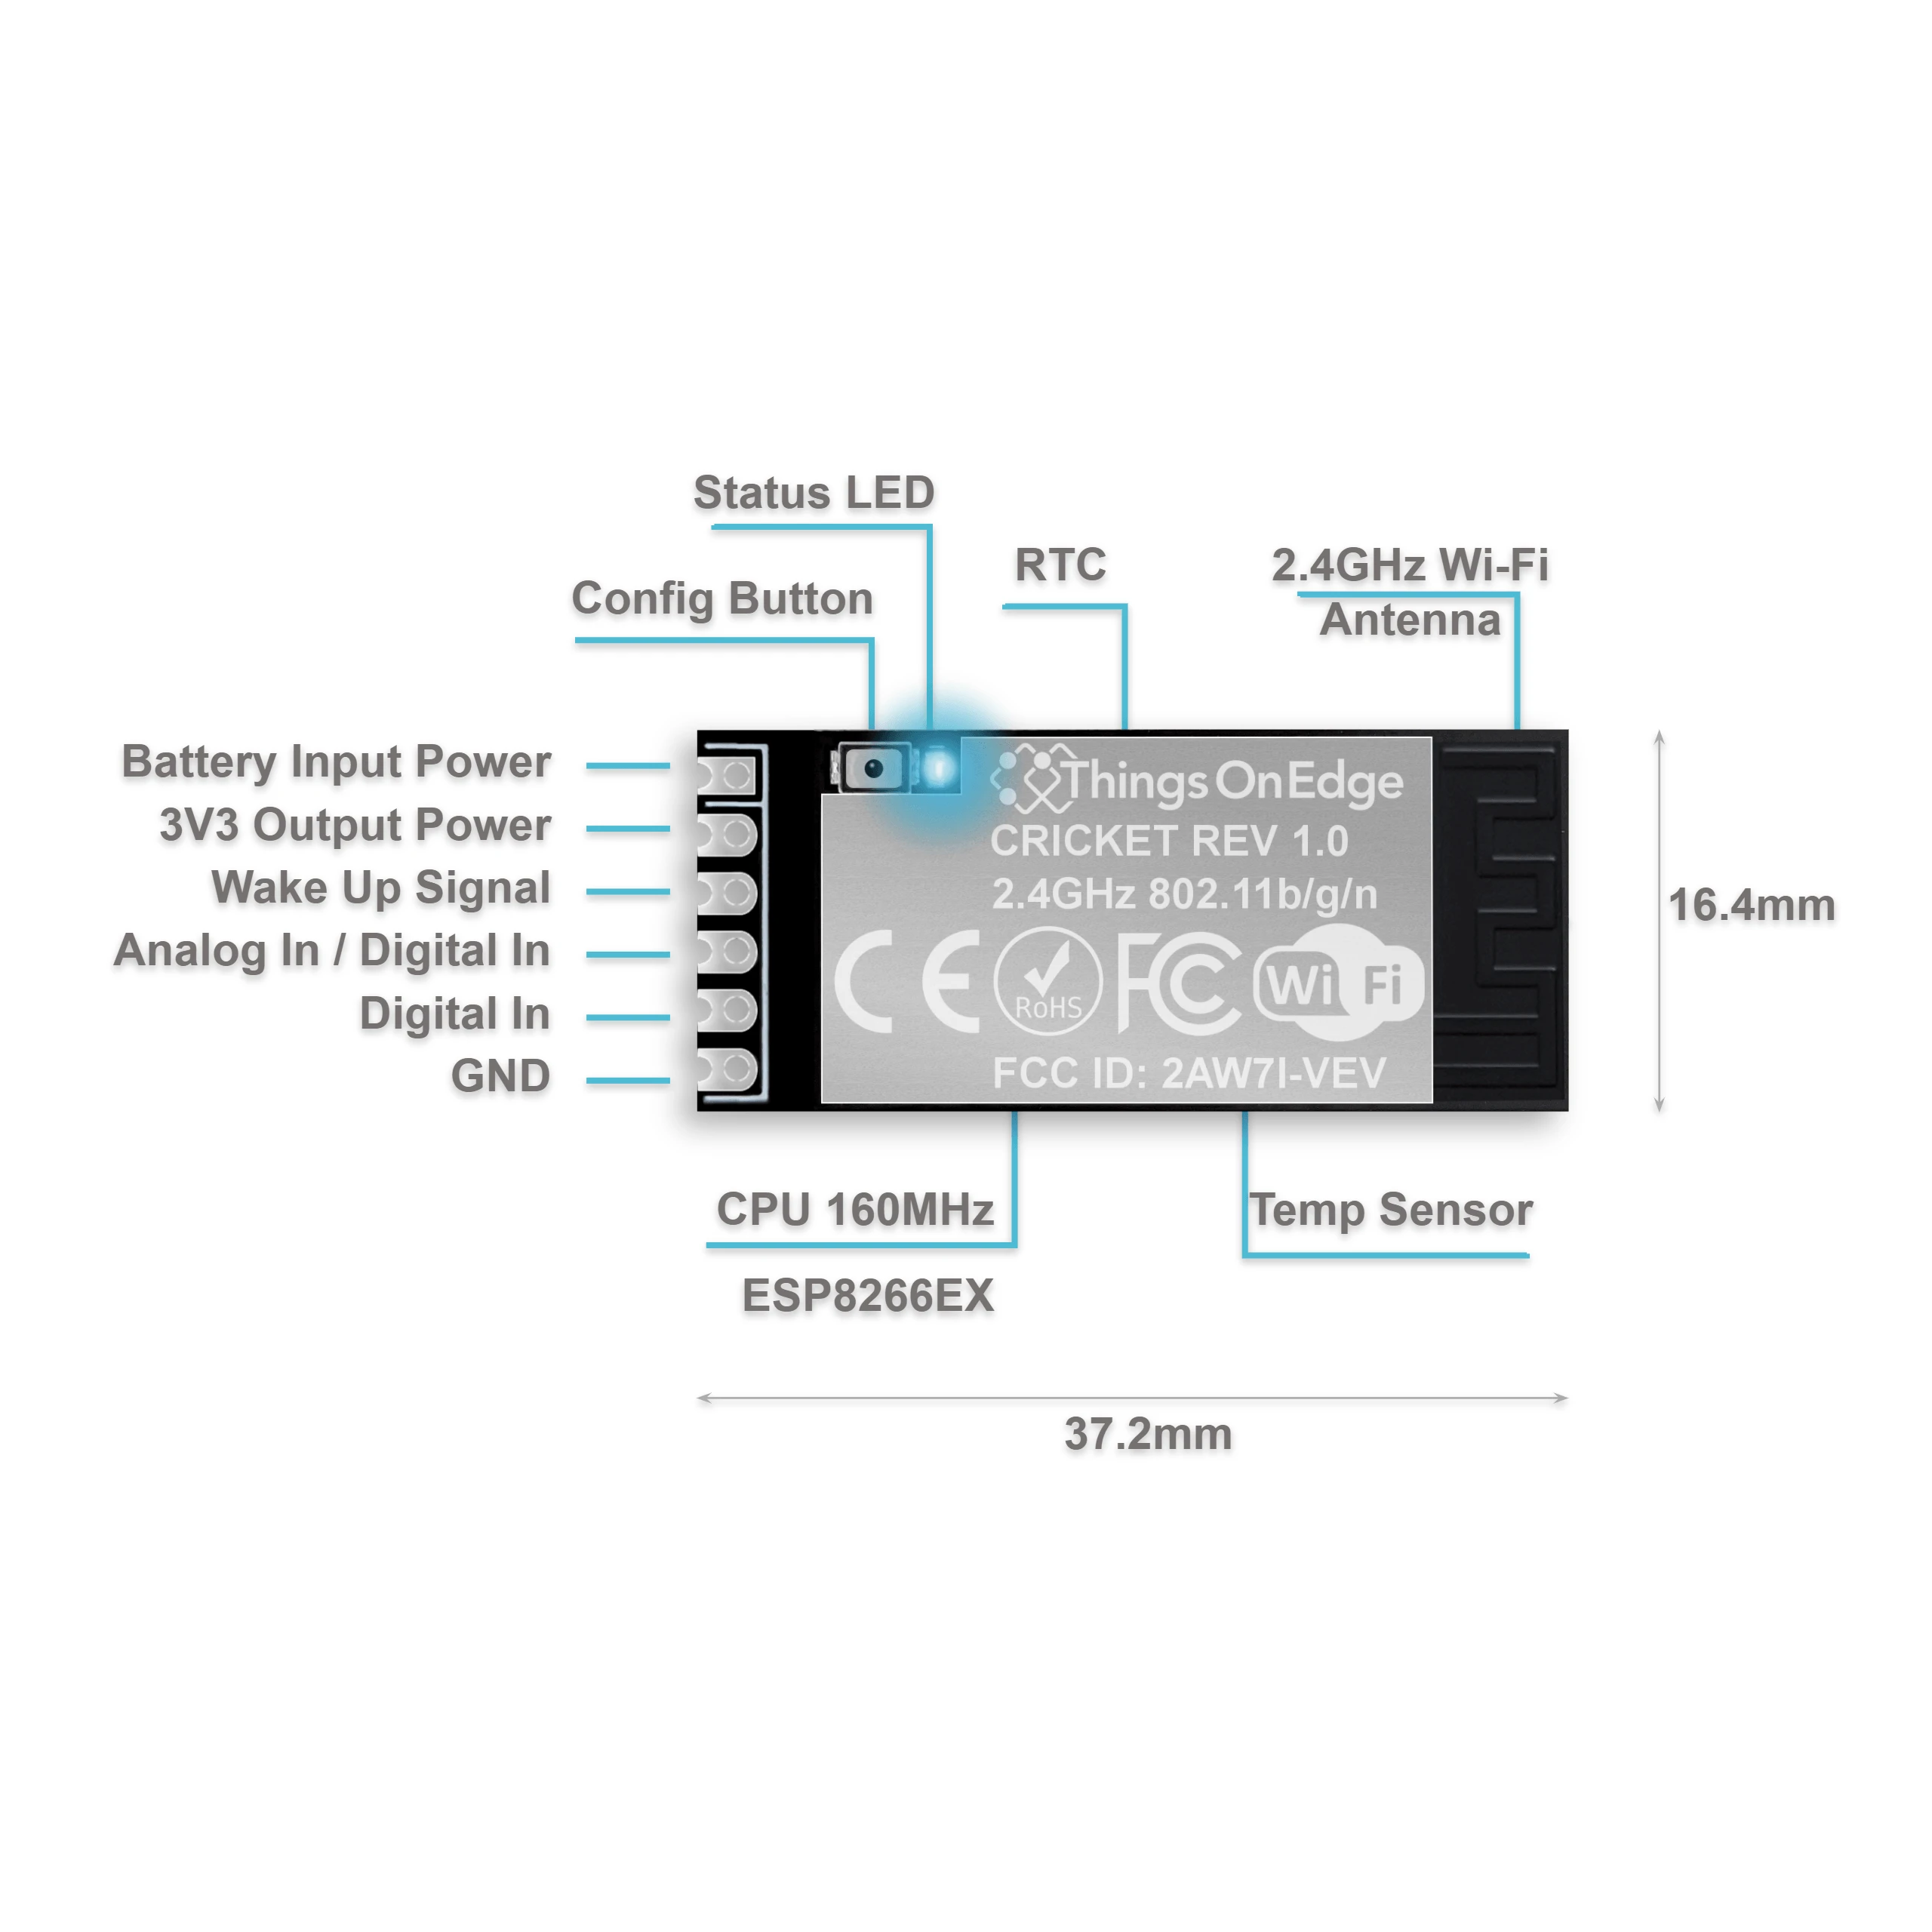
The Things On Edge IOT Cricket is an ultra-low-power Wi-Fi module designed for battery-powered IoT sensor nodes. It includes a built-in temperature sensor and supports external sensors like DS18B20. Cricket connects directly to Wi-Fi and sends data to ThingsBoard over HTTP — no gateway, no code required.
This guide covers assembling a battery-powered temperature sensor, connecting it to Wi-Fi, and configuring it to send data to ThingsBoard.
For full module specifications, see the IOT Cricket Wi-Fi module datasheet.
Prerequisites
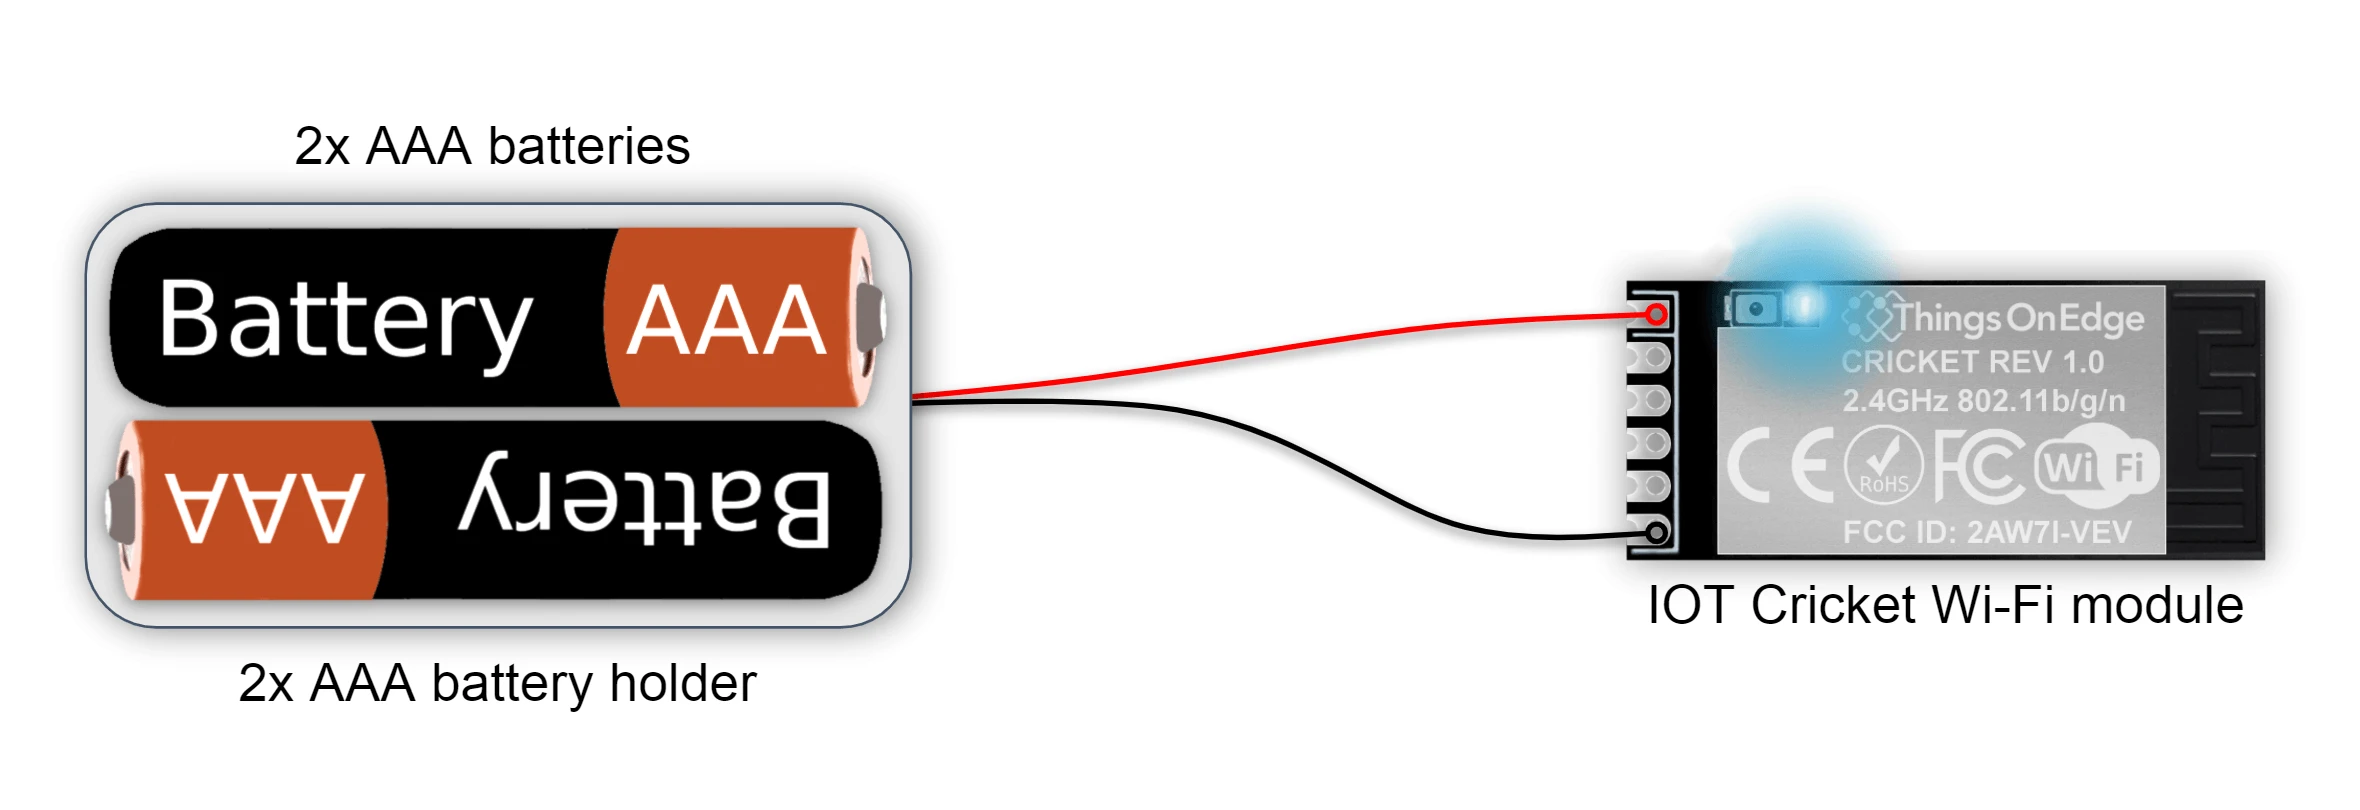
- IOT Cricket Wi-Fi module — 1×
- 2× AAA battery holder — 1×
- 2× AAA batteries (use fresh, quality batteries like Duracell or Energizer)
- ThingsBoard instance: use ThingsBoard Cloud or install a local server
Assemble the sensor
Cricket includes a built-in temperature sensor, so no additional hardware is required for a basic temperature reading. For more accurate results, an external sensor like DS18B20 is recommended.
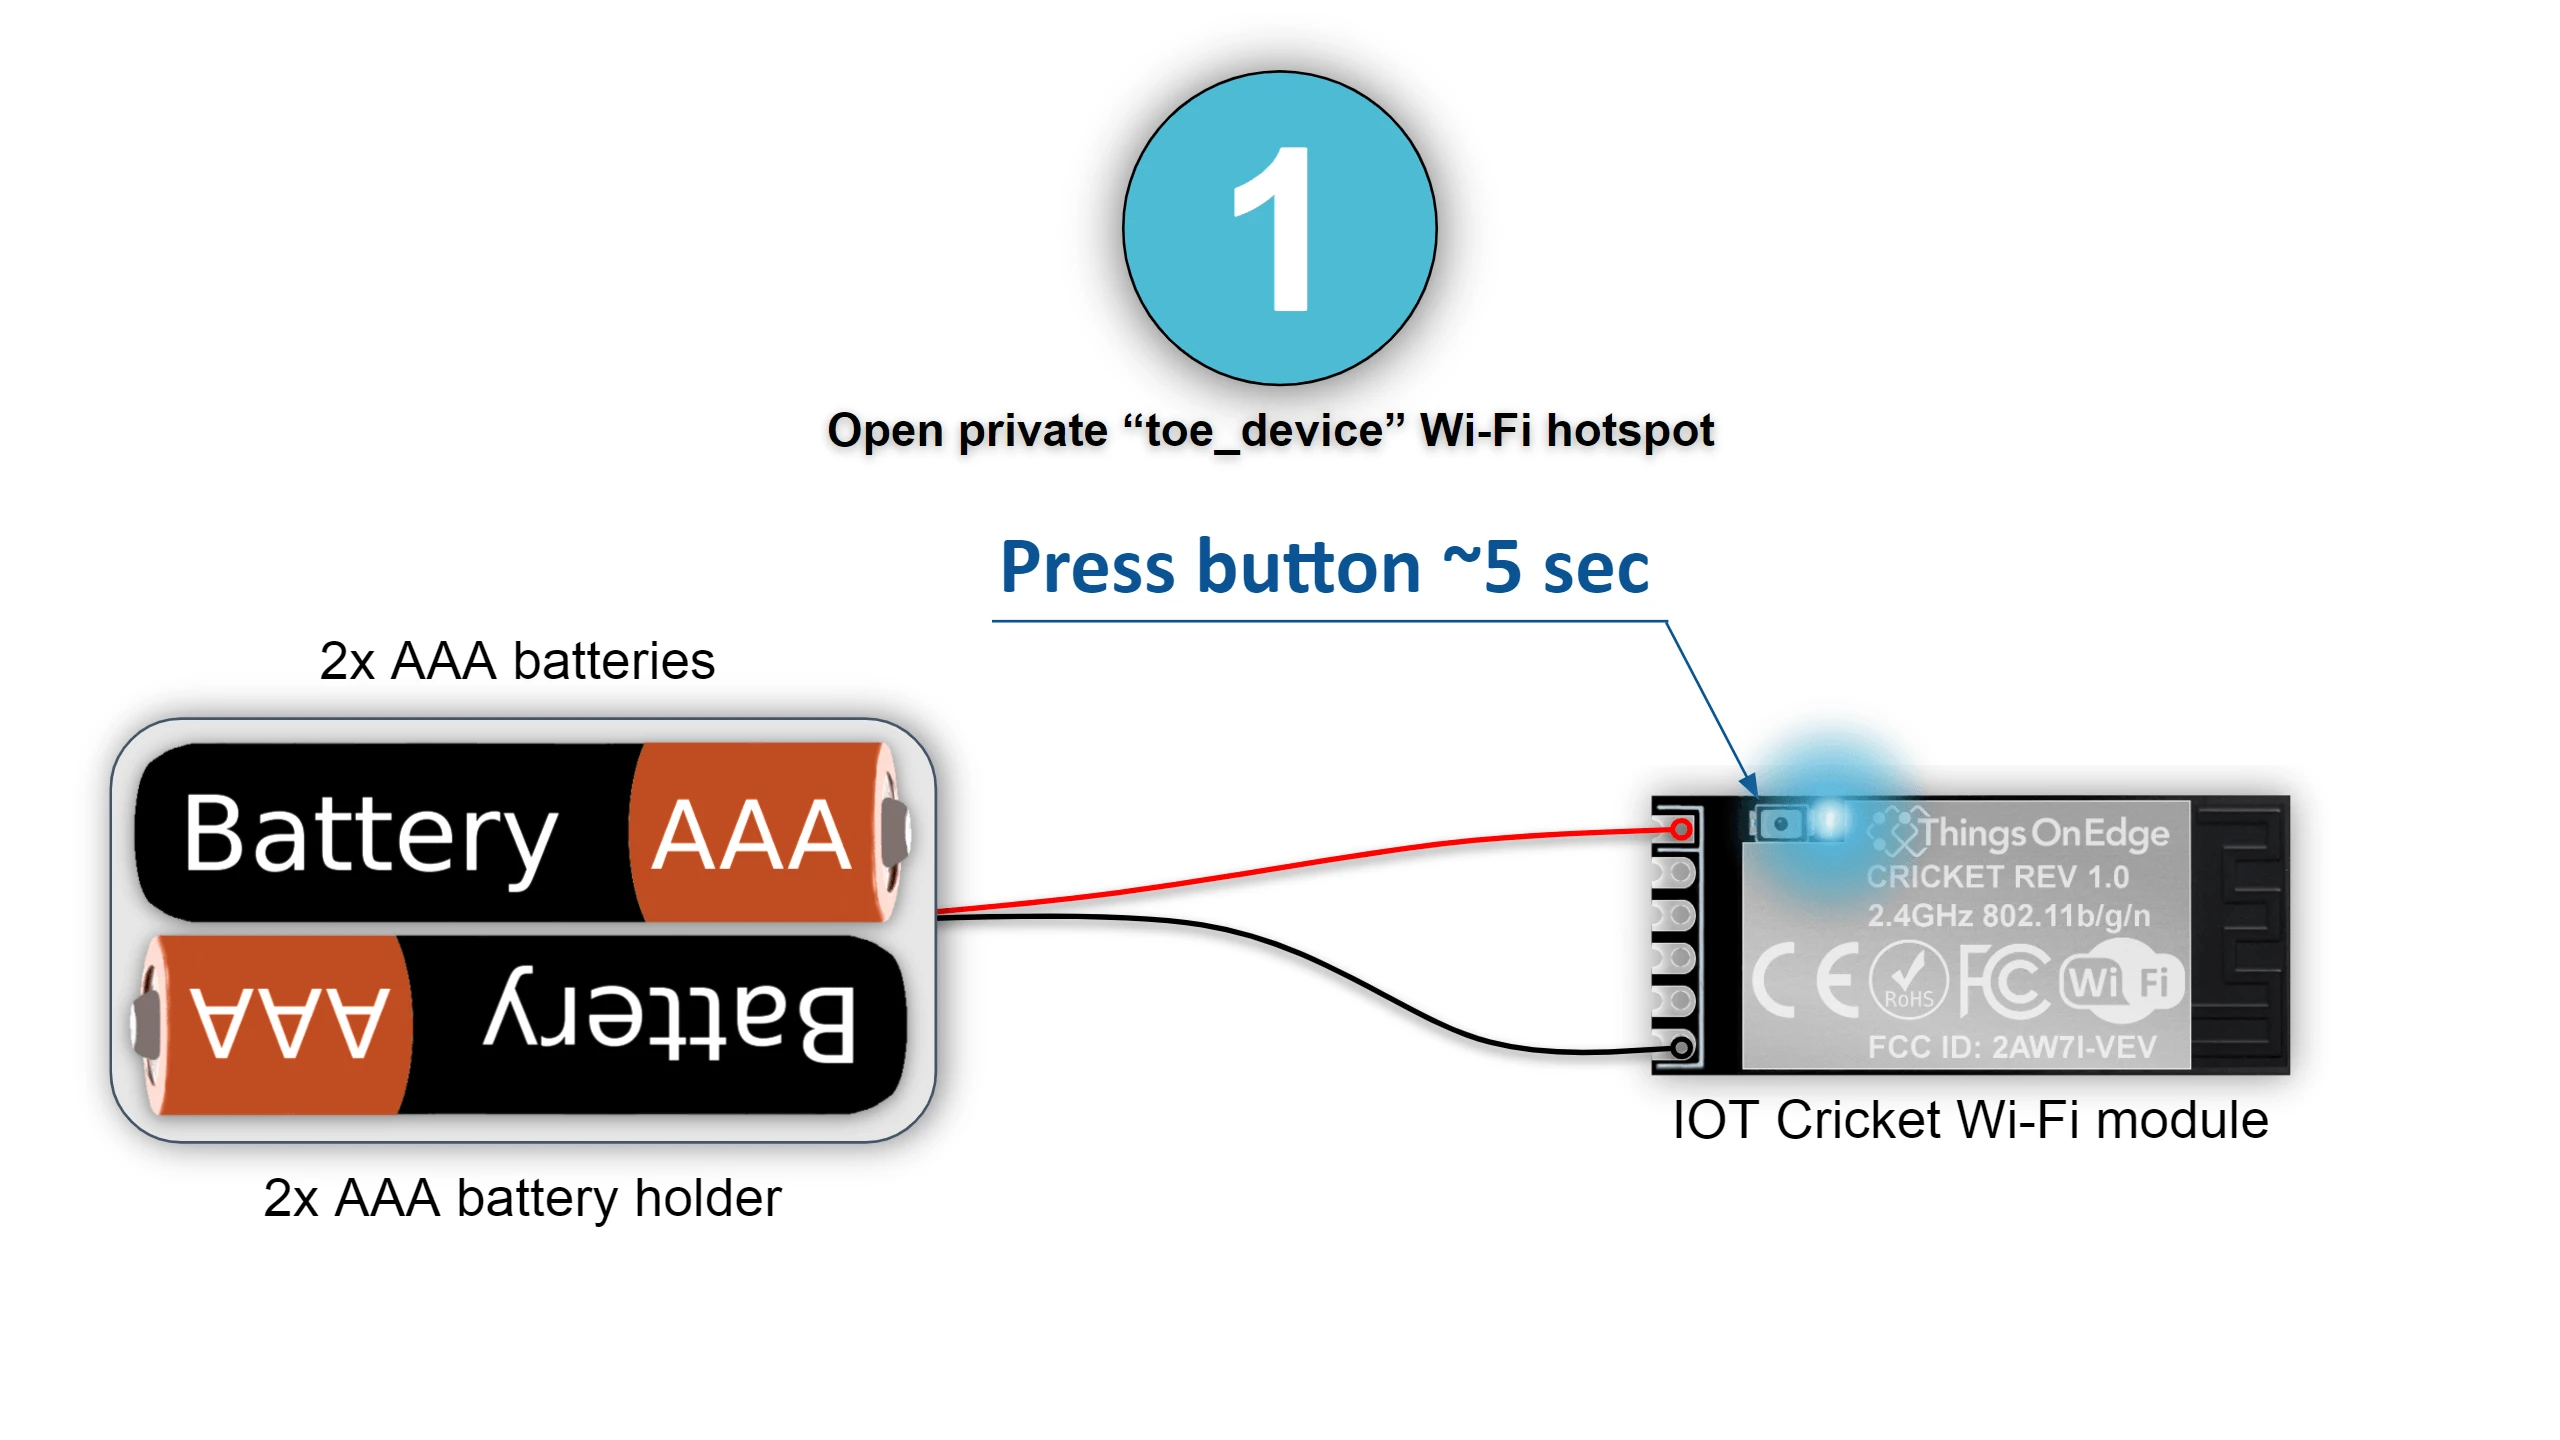
Attach the batteries to the Cricket module. The device is ready to power on.
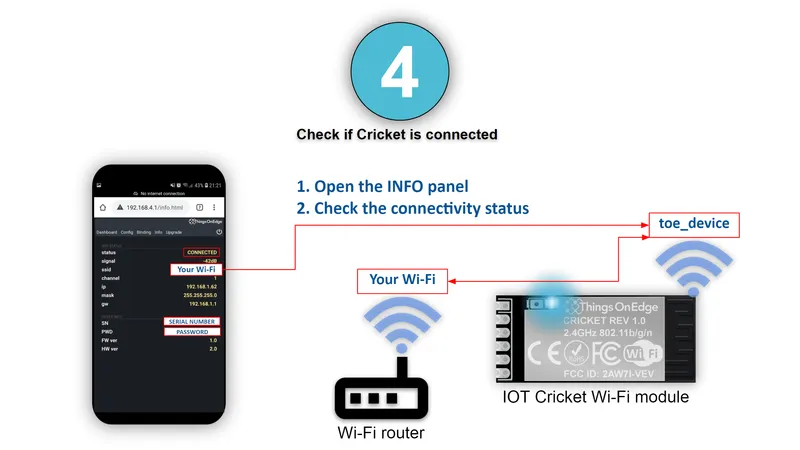
Connect to Wi-Fi
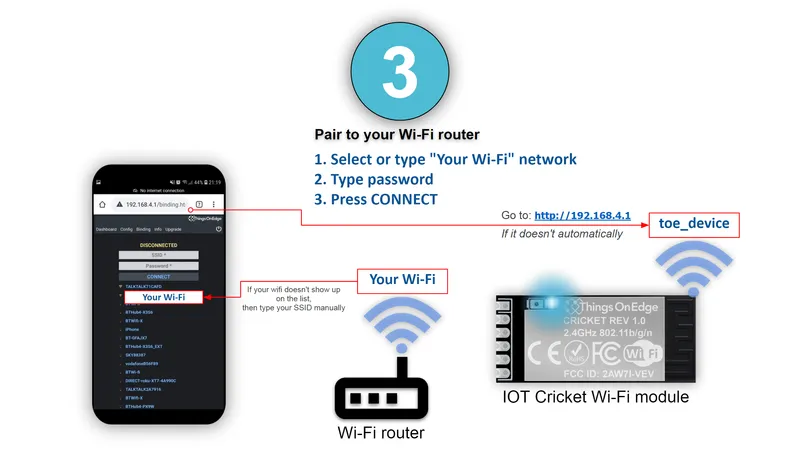
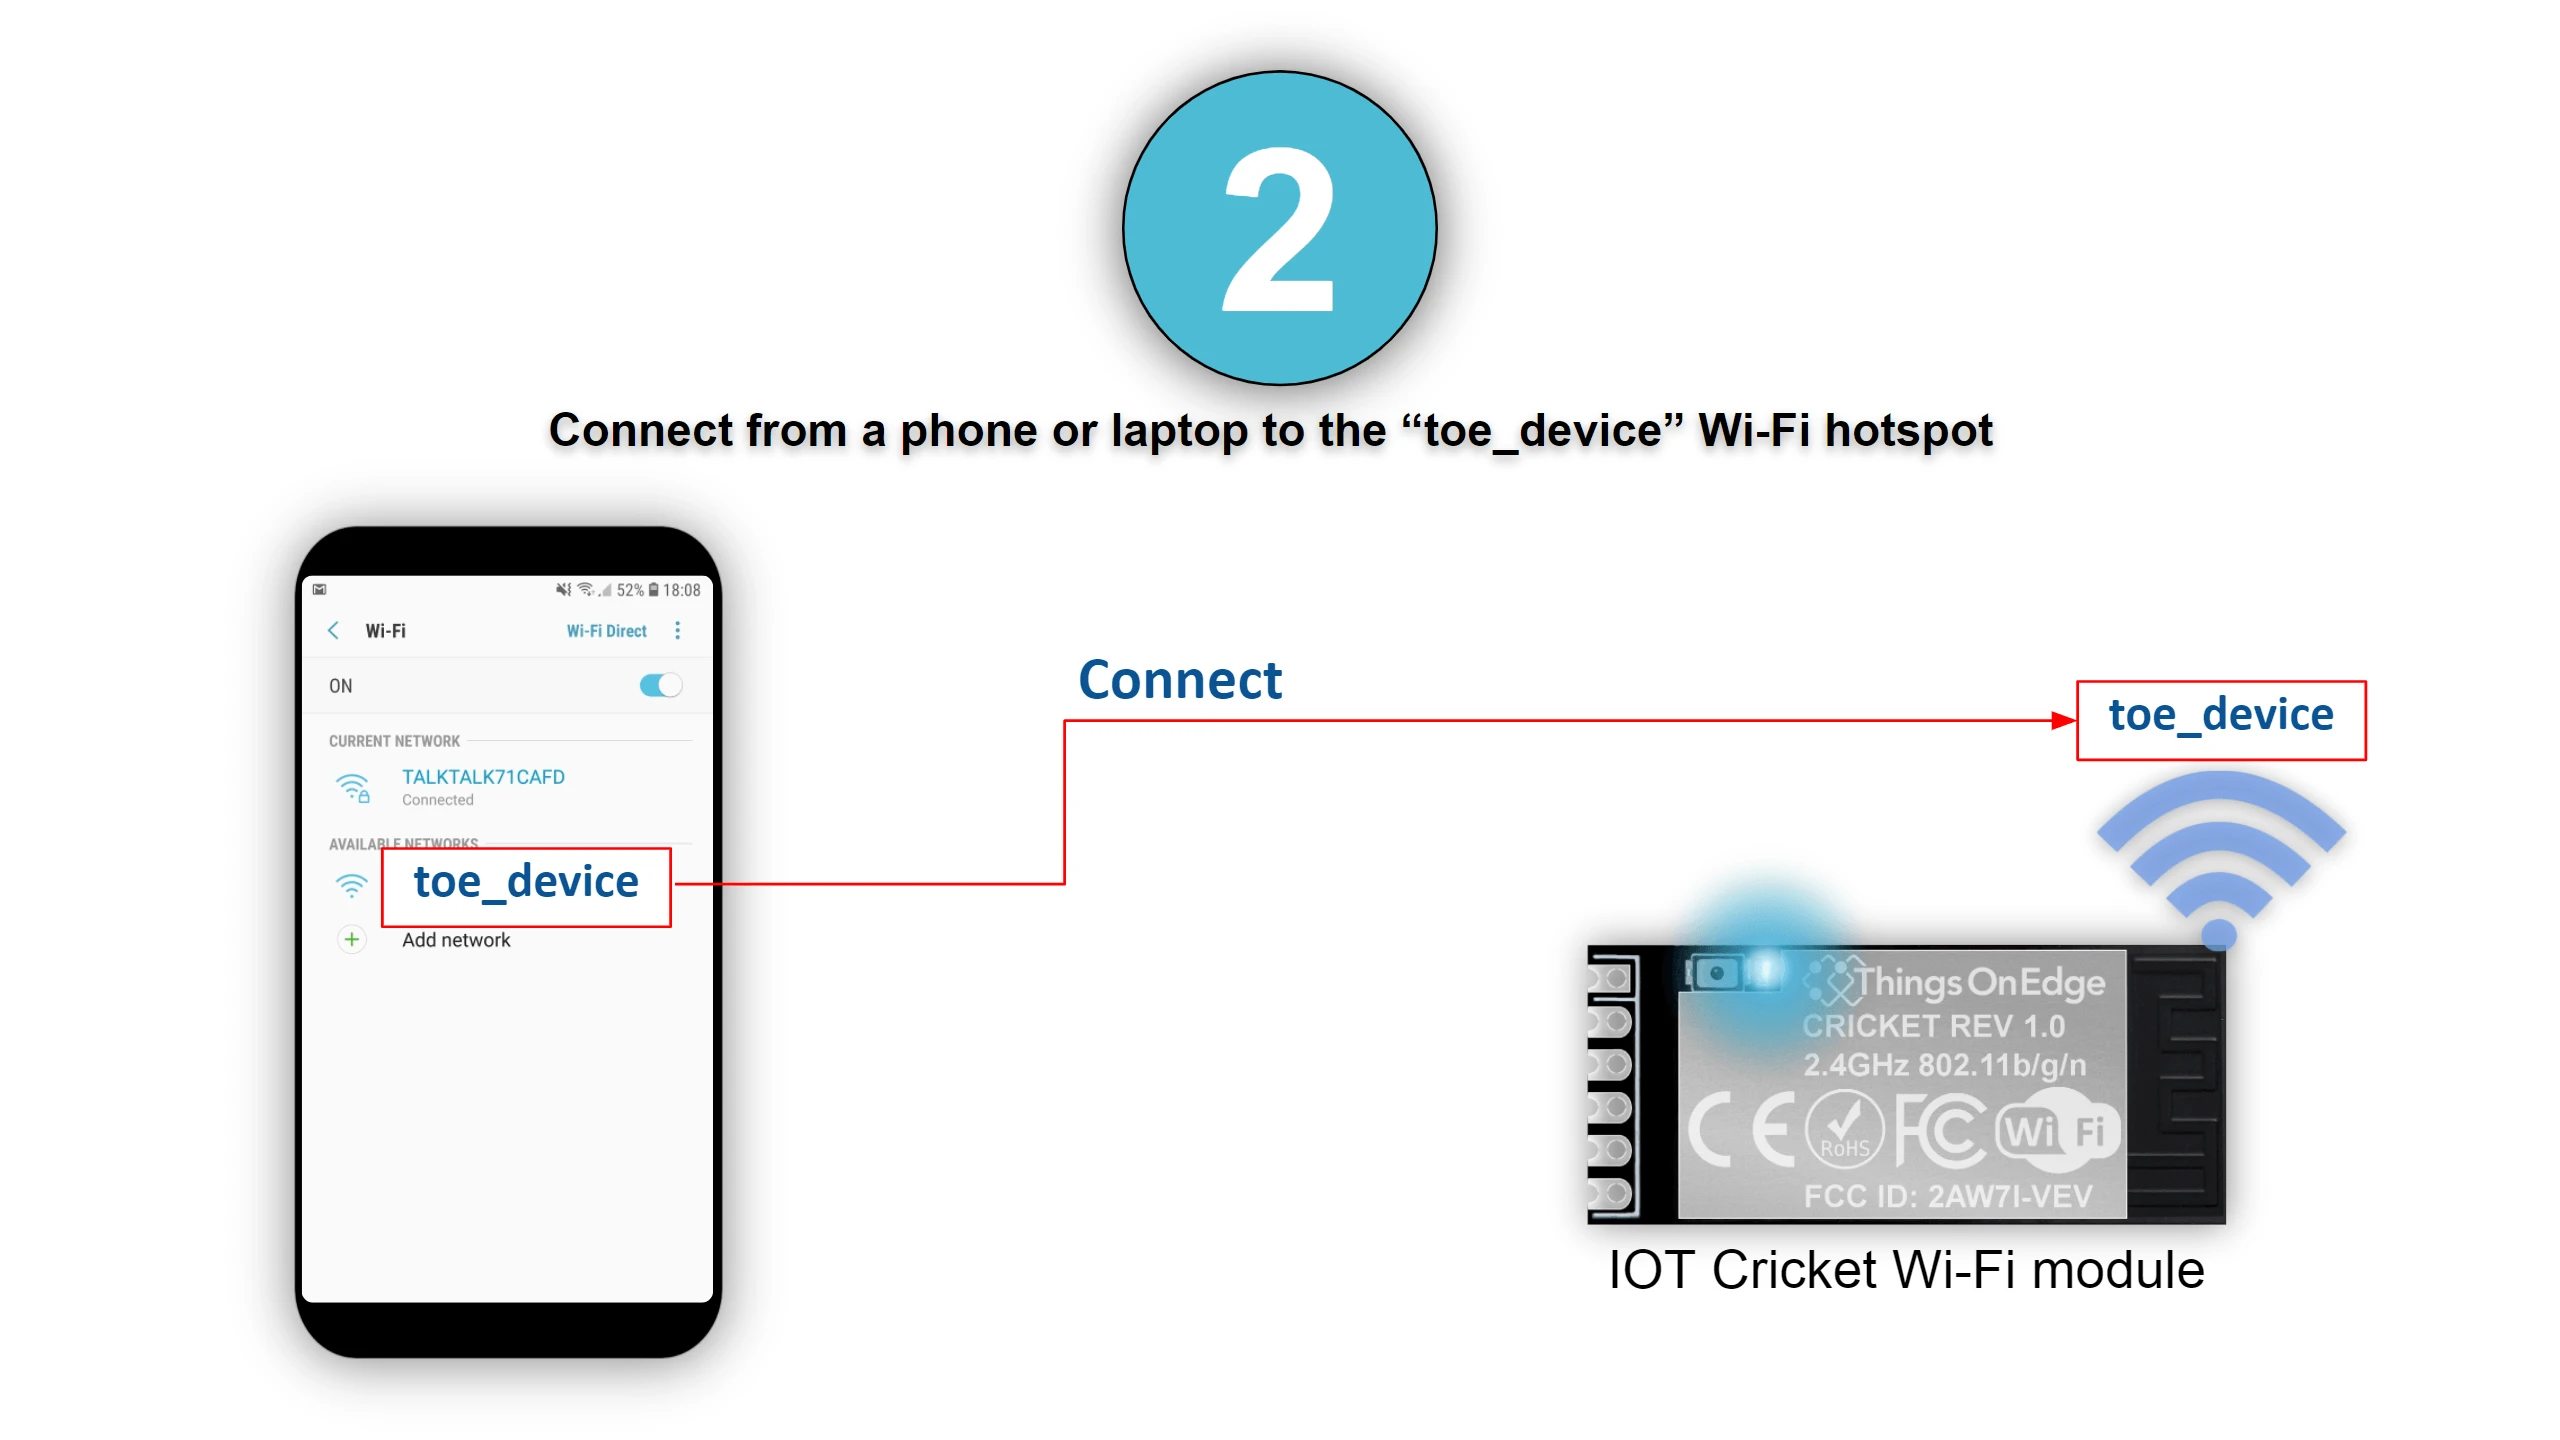
Cricket uses a built-in configuration portal for Wi-Fi setup. Follow these steps to connect it to your network.
-
Press the button on the Cricket module to start the configuration portal.

-
On your phone or laptop, connect to the Cricket Wi-Fi access point.

-
The configuration portal opens automatically. Select your Wi-Fi network from the list.
-
Enter your Wi-Fi password and confirm the connection.


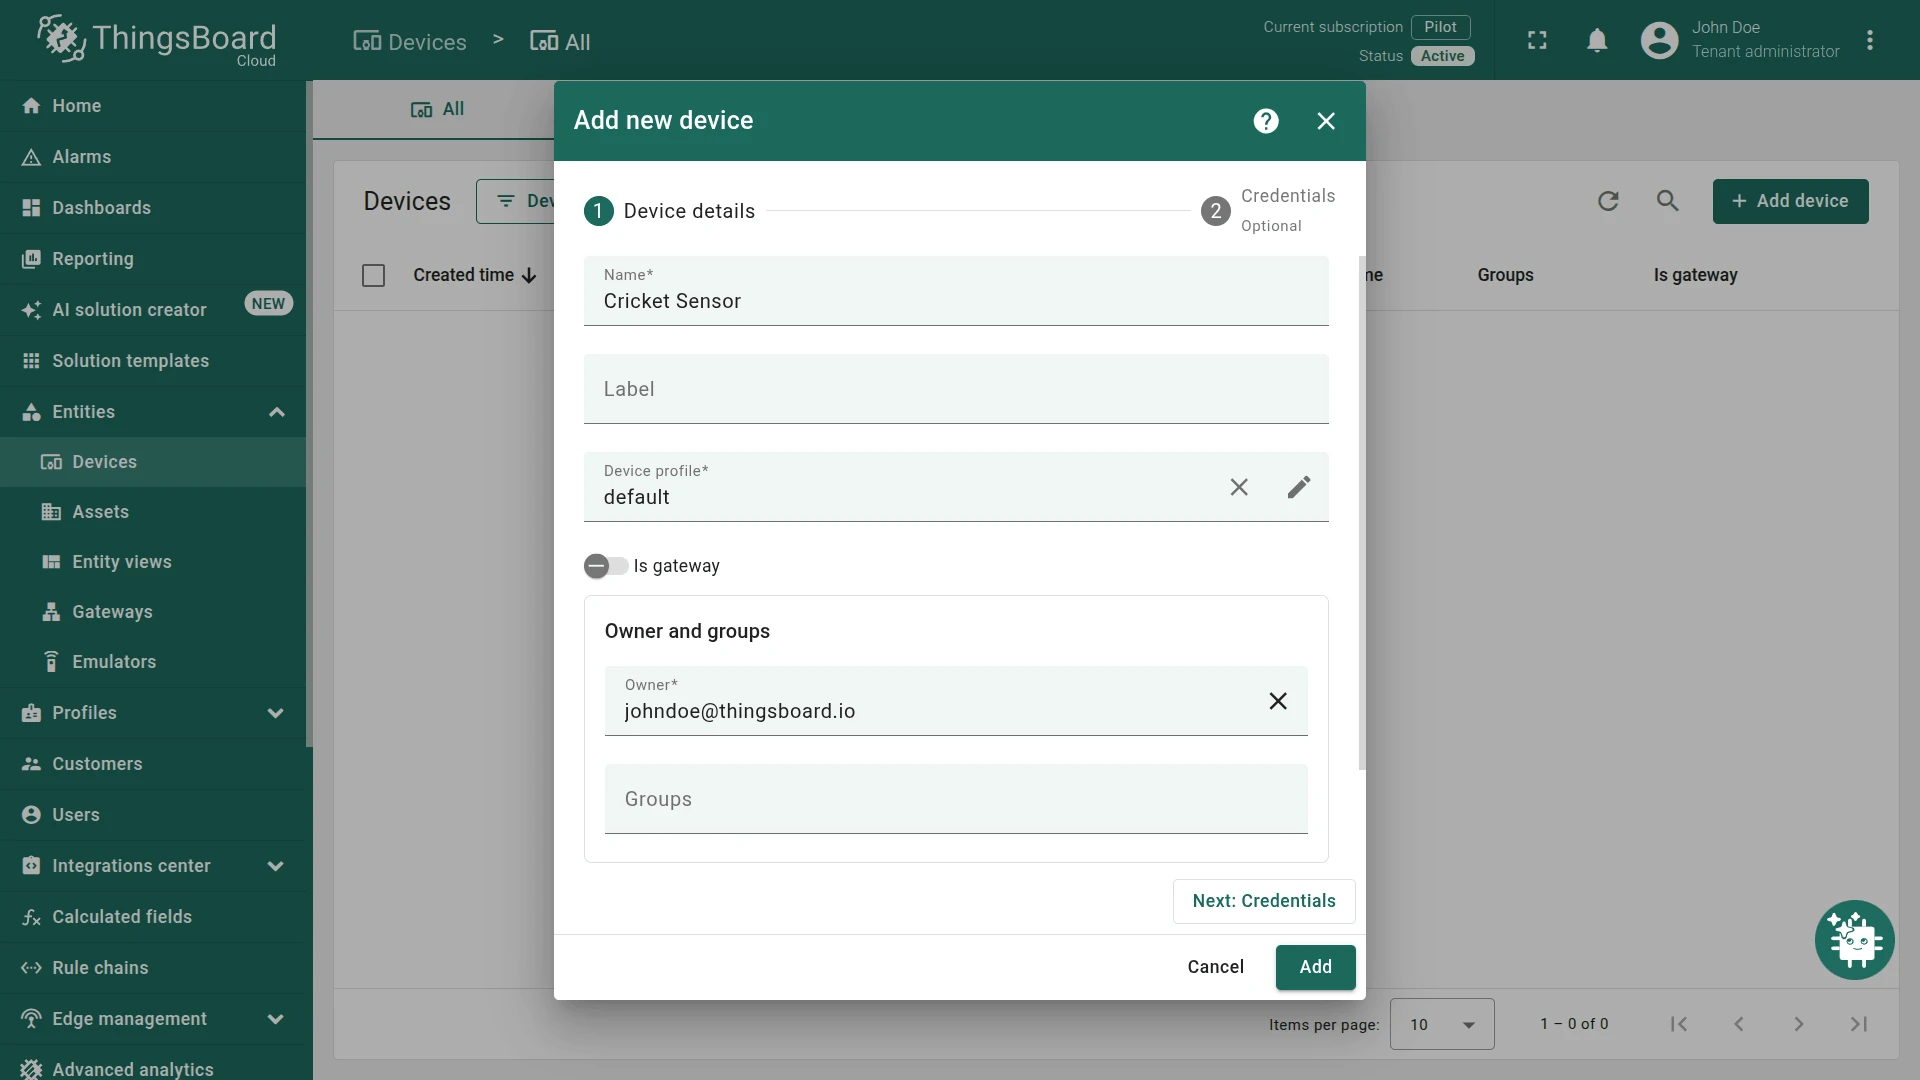
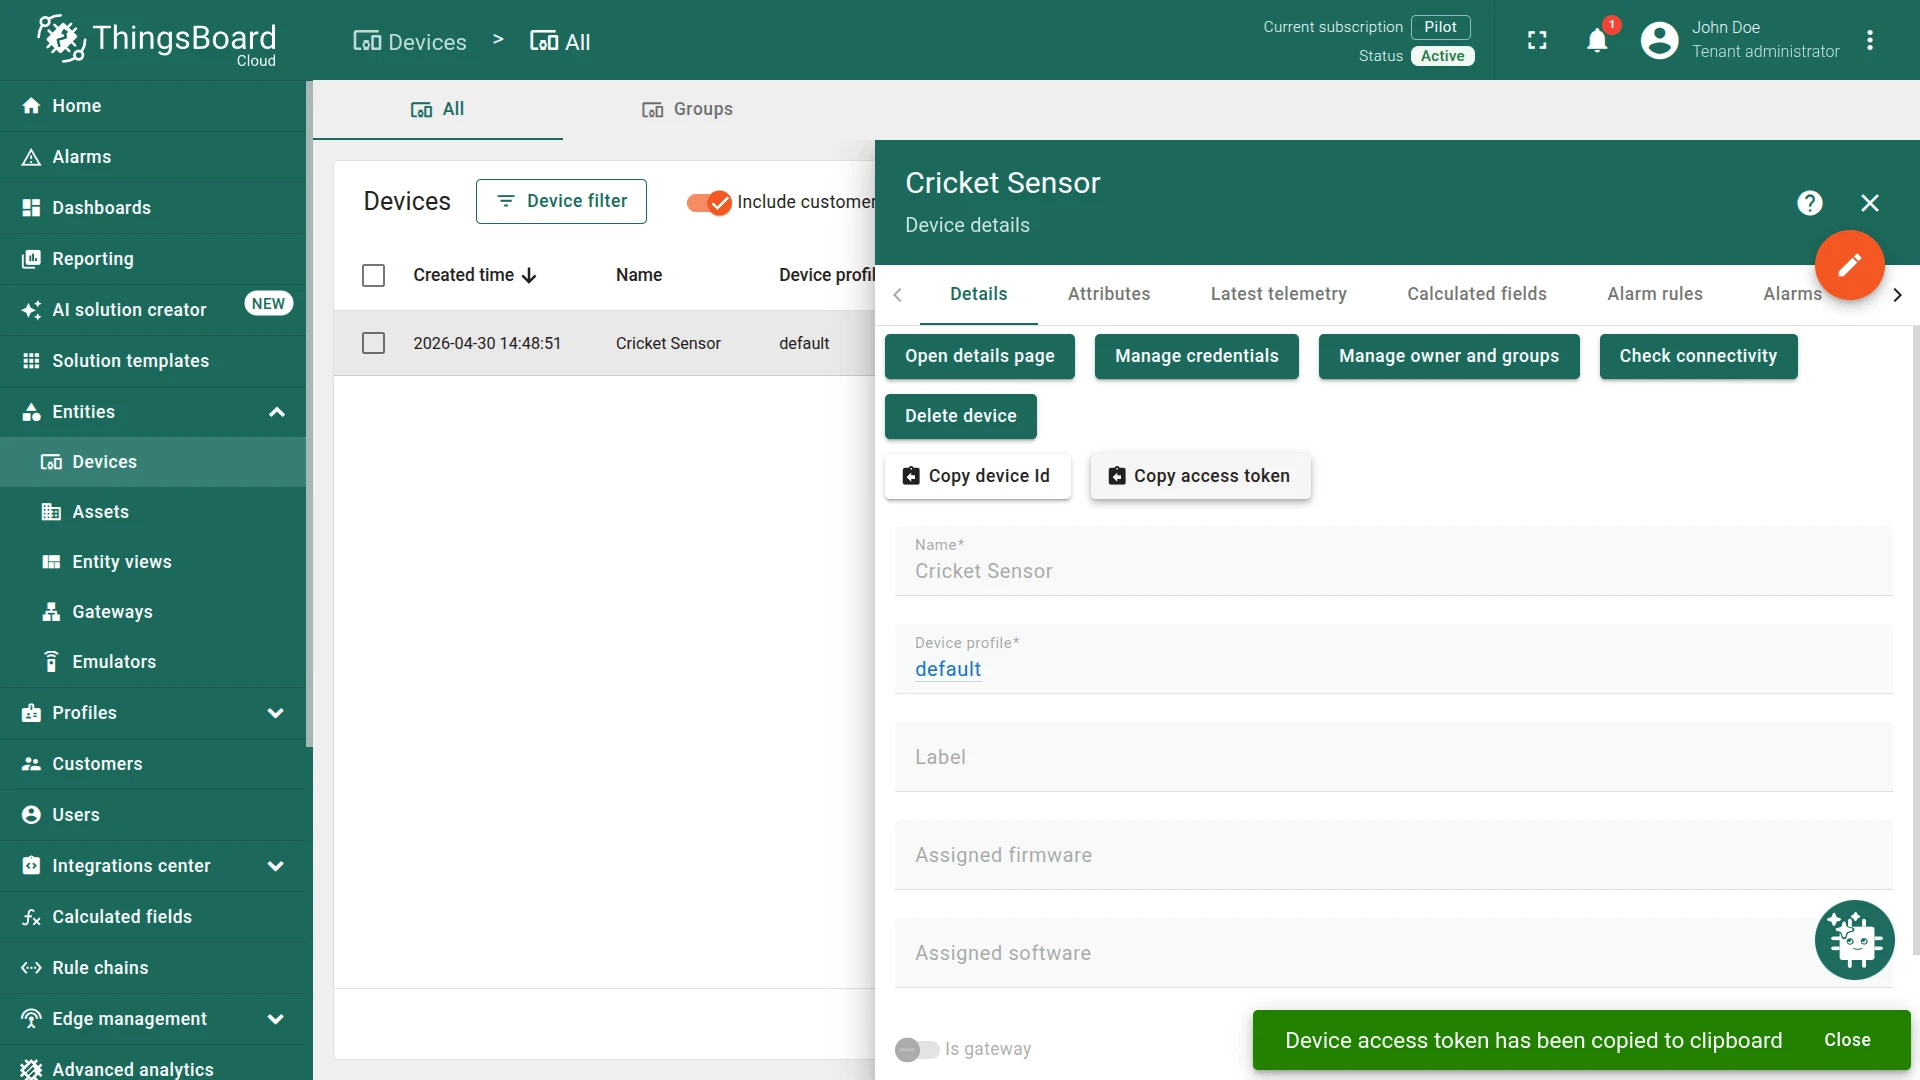
Add the device in ThingsBoard
-
Go to Entities ⇾ Devices and click + Add device ⇾ Add new device.
-
Enter a name, e.g.
Cricket Sensor, and click Add. -
Open the device, go to the Credentials tab, and copy the Access token.
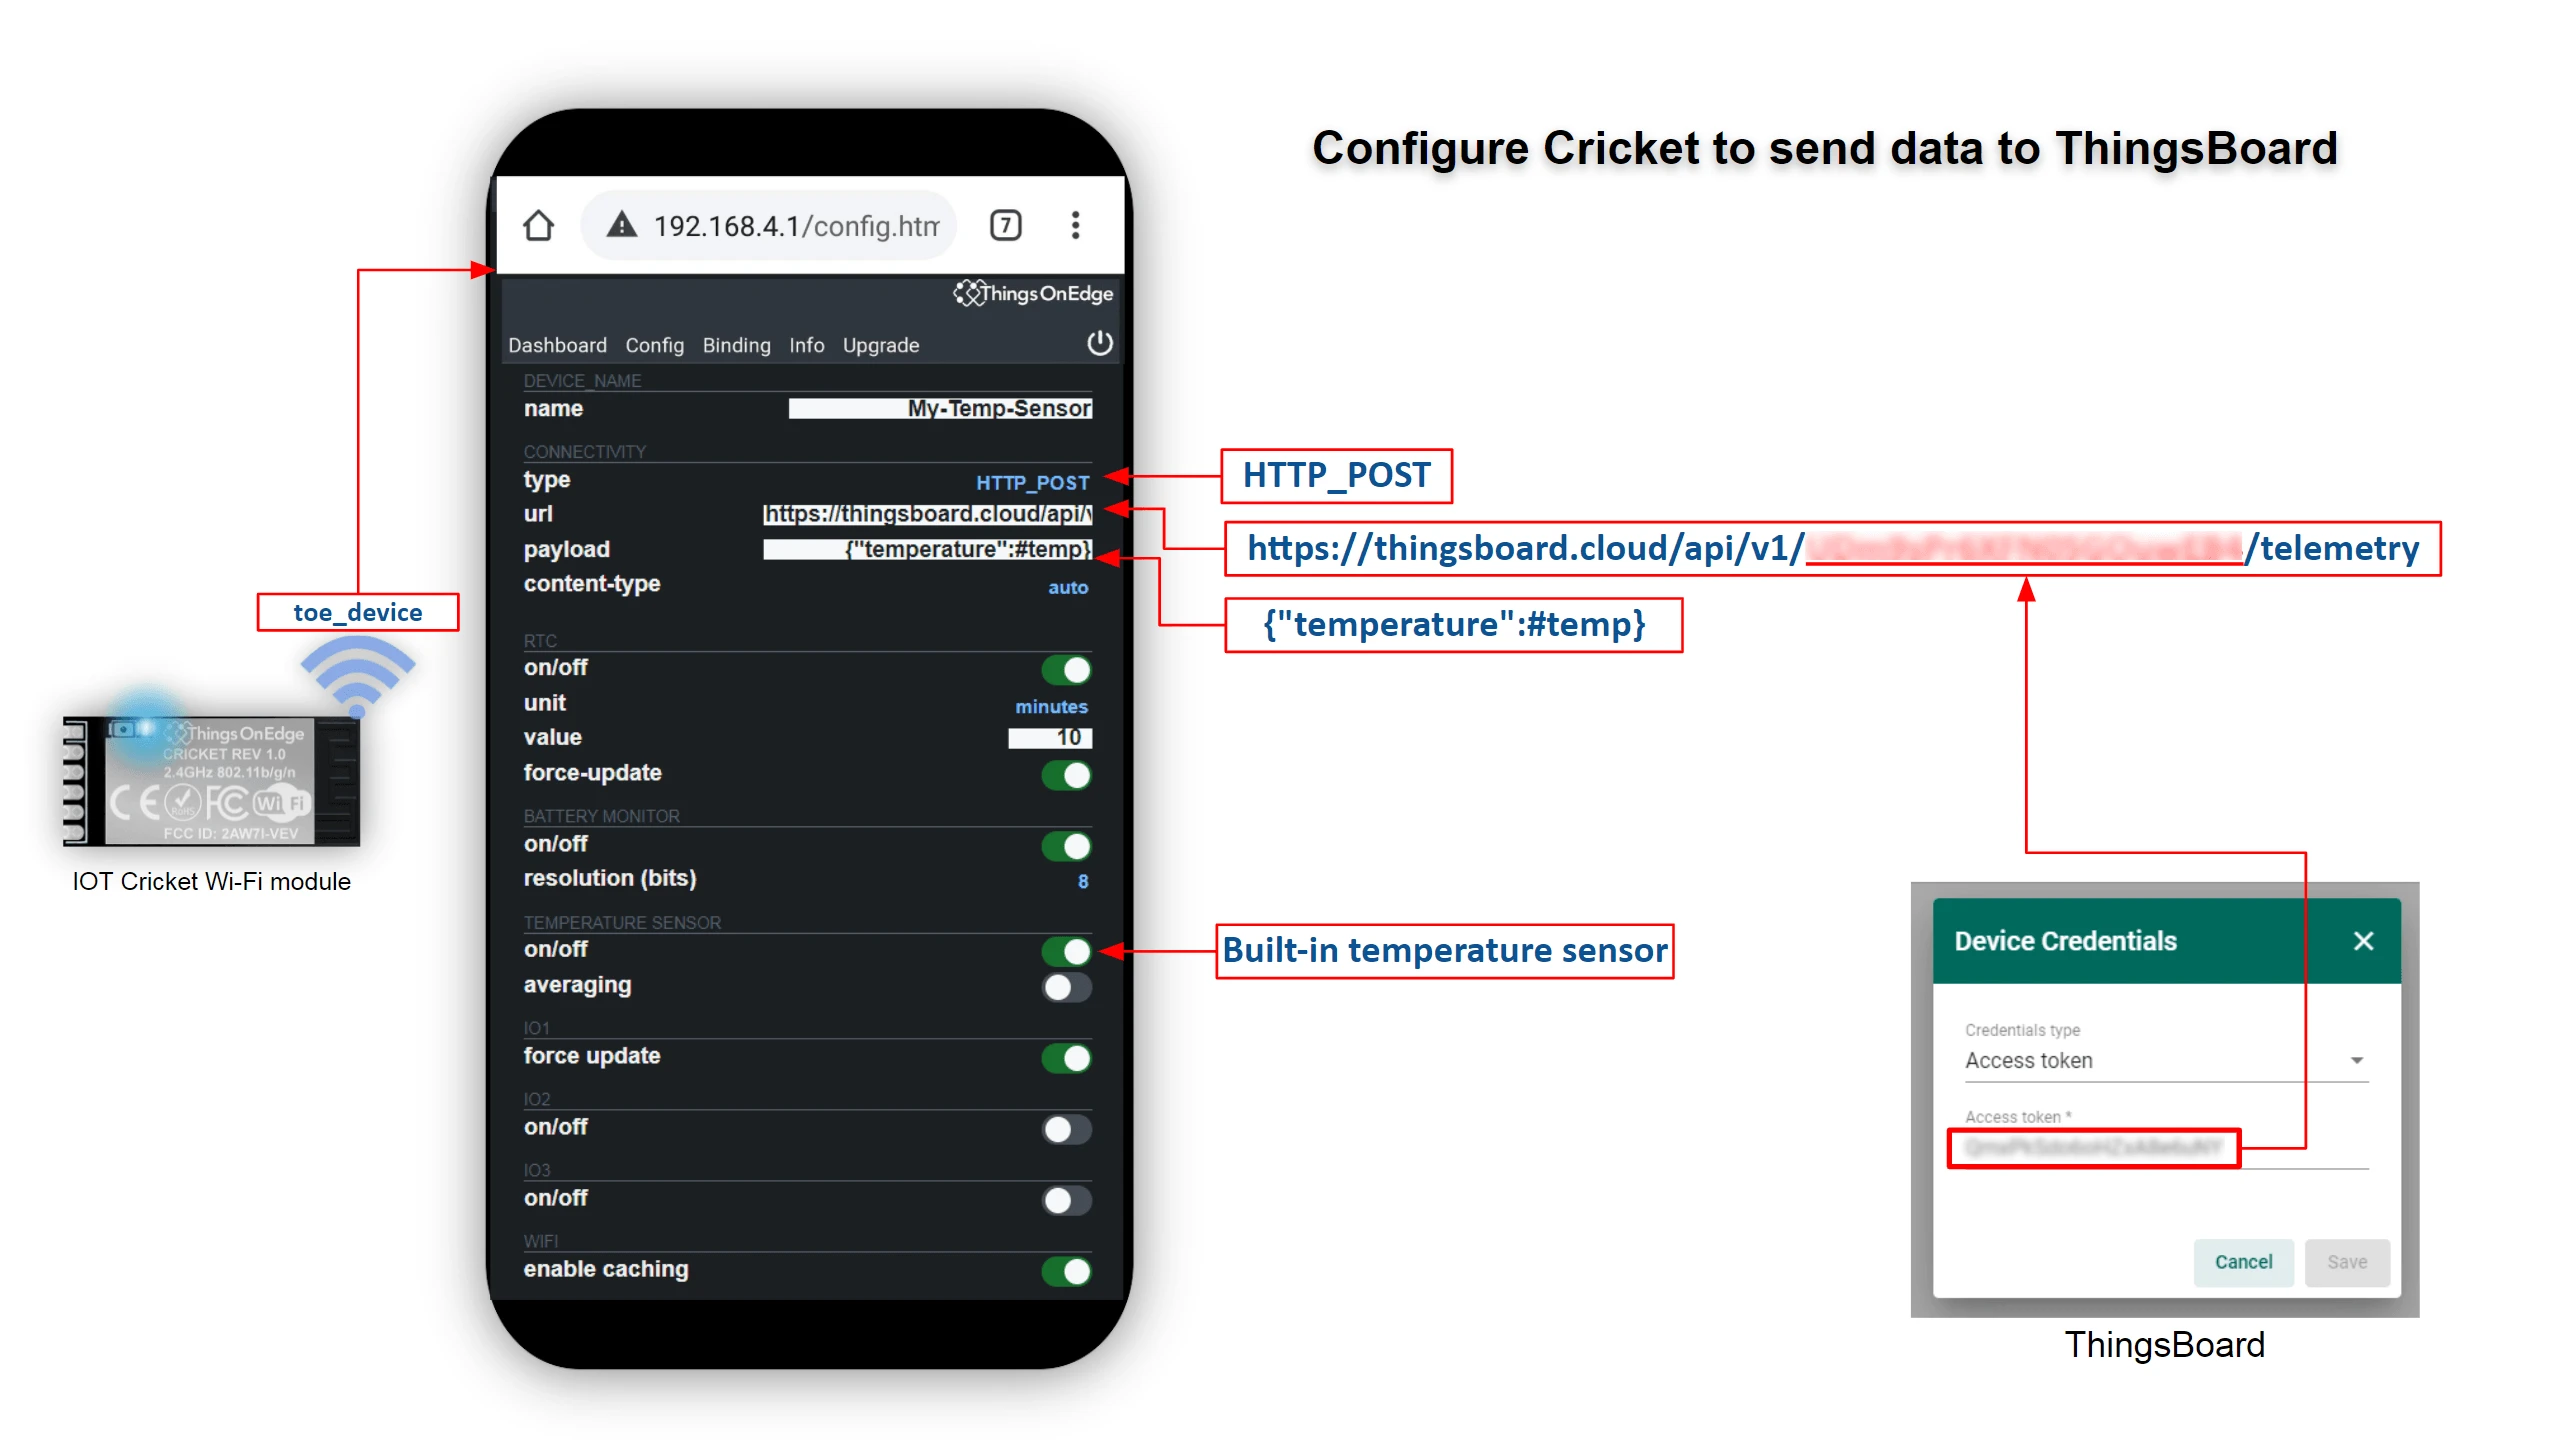
Configure Cricket to send data to ThingsBoard
Cricket supports both MQTT and HTTP. This guide uses HTTP.
-
Return to the Cricket configuration portal (repeat the Wi-Fi connection steps if the portal has closed).
-
In the URL field, enter the ThingsBoard HTTP telemetry endpoint with your access token:
https://YOUR_TB_HOST/api/v1/YOUR_ACCESS_TOKEN/telemetryFor ThingsBoard Cloud, replace
YOUR_TB_HOSTwiththingsboard.cloud. -
In the Payload field, enter the JSON template:
{"temperature":#temp}The
#temptag is replaced with the current temperature value before each transmission. -
Set the transmission interval (the default is every 10 minutes).

-
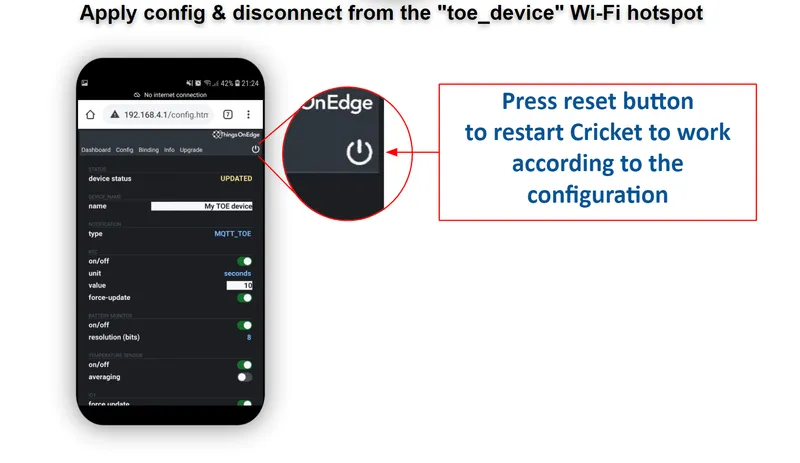
Press the reset button in the top-right corner of the portal to exit configuration mode and start sending data.

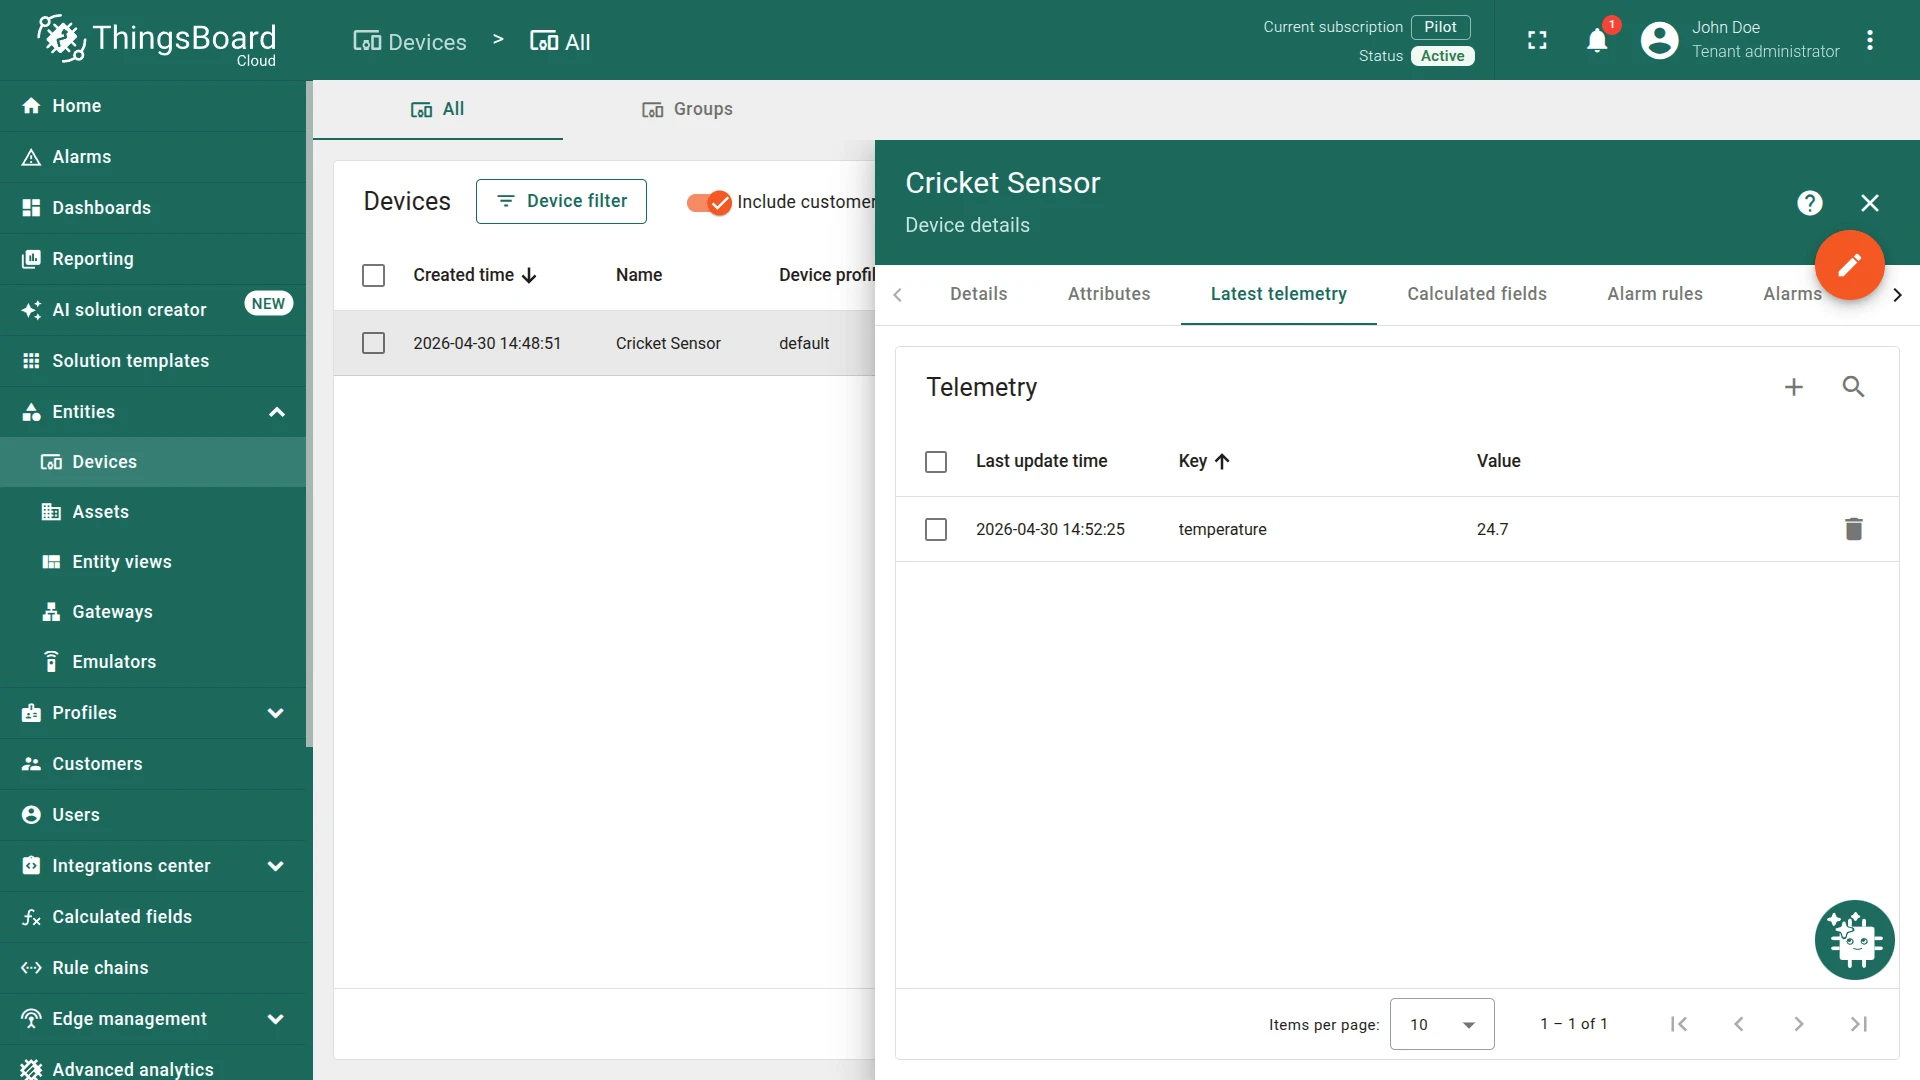
Verify data
After the first transmission, open the device in Entities ⇾ Devices and go to the Latest telemetry tab. The temperature key should appear with the current value.
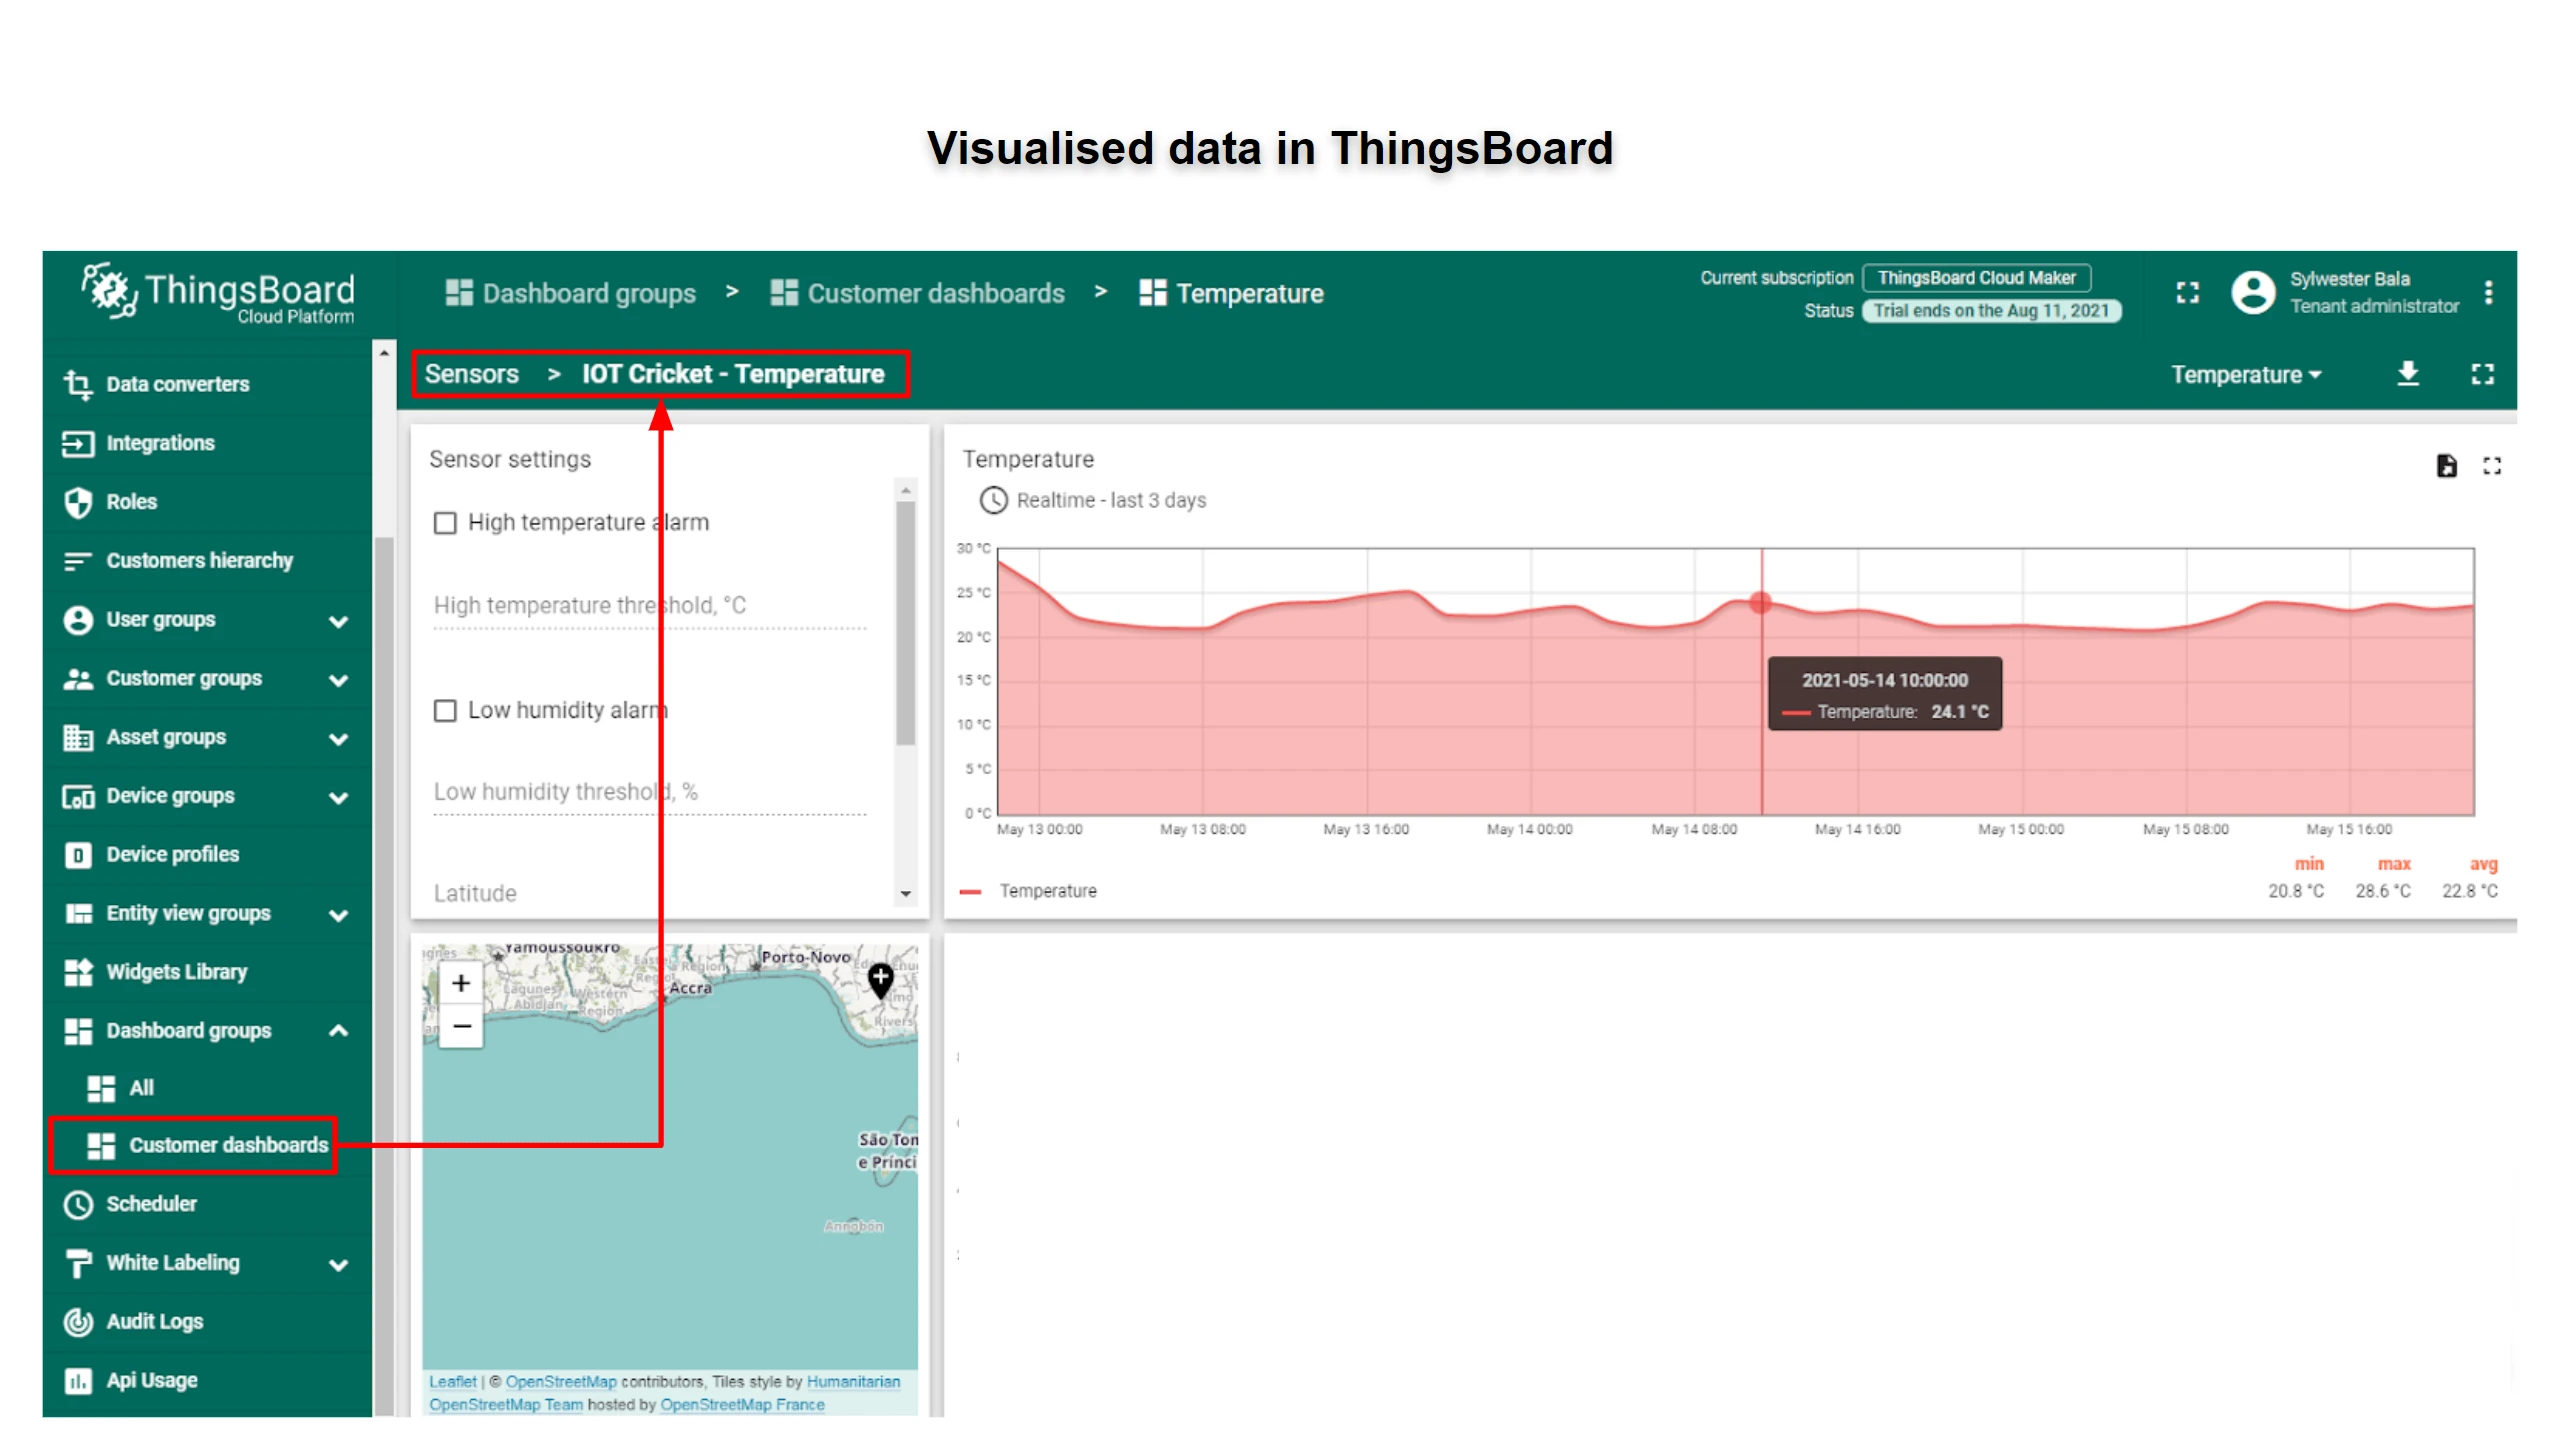
Visualize data with dashboards
Use ThingsBoard dashboards to build real-time visualizations of temperature readings. Add a time-series chart widget, set the device as the data source, and select the temperature key to see a live graph that updates with every transmission.