Temco Tstat10
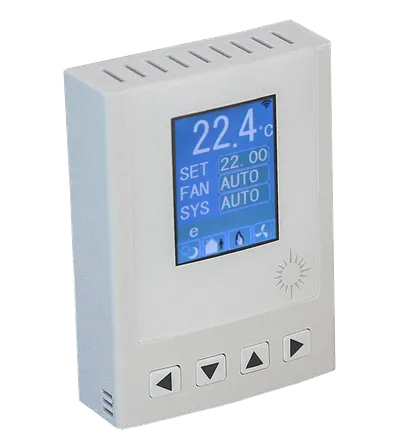
Temco Tstat10
Temco Controls
- Platform
- ThingsBoard
- Hardware Type
- Other devices
- Connectivity
- HTTP, Ethernet, WIFI, BACnet, RS485
- Industry
- Smart Buildings, Industrial Manufacturing, Energy Management
- Use Case
- Smart energy, Smart Office, Smart Metering
Introduction
Temco Tstat10 Bacnet programmable controller is a low-cost high performance programmable controller. With an I/O configuration, it can be extended through external I/O modules to form a complete building automation solution. There are five relays and two analog outputs as well as 8 universal inputs. These i/o can be configured using the free software. There are more than 300 settings with many options for each of the settings so it’s possible to configure these devices for almost any application. Once the unit is configured, save the config file for copying to other controllers and backing up project settings. Options are available for occupancy sensor, zigbee, and humidity / enthalpy. Supports Bacnet MSTP and Modbus RTU for the RS485 model. Wi-Fi version supports Bacnet IP and Modbus IP.
Prerequisites
To continue with this guide, we will need the following:
- Temco Tstat10
- Humidity and Temp Transmitter (in our case Temco HUM-W1)
- ThingsBoard IoT Gateway installed
- ThingsBoard account at
YOUR_TB_HOST
Devices connection
According to the official user manual, firstly you need to wired connection between the controller and the temperature sensor. The controller has to be connected to the PC using the RS485 to USB converter for configuration. Also, you need to download and install the T3000 software from the official website.
Controller configuration
Using the T3000 software, you can configure the controller. You need to connect the controller to your network over Wi-Fi or Ethernet. For this purpose, use the following steps:
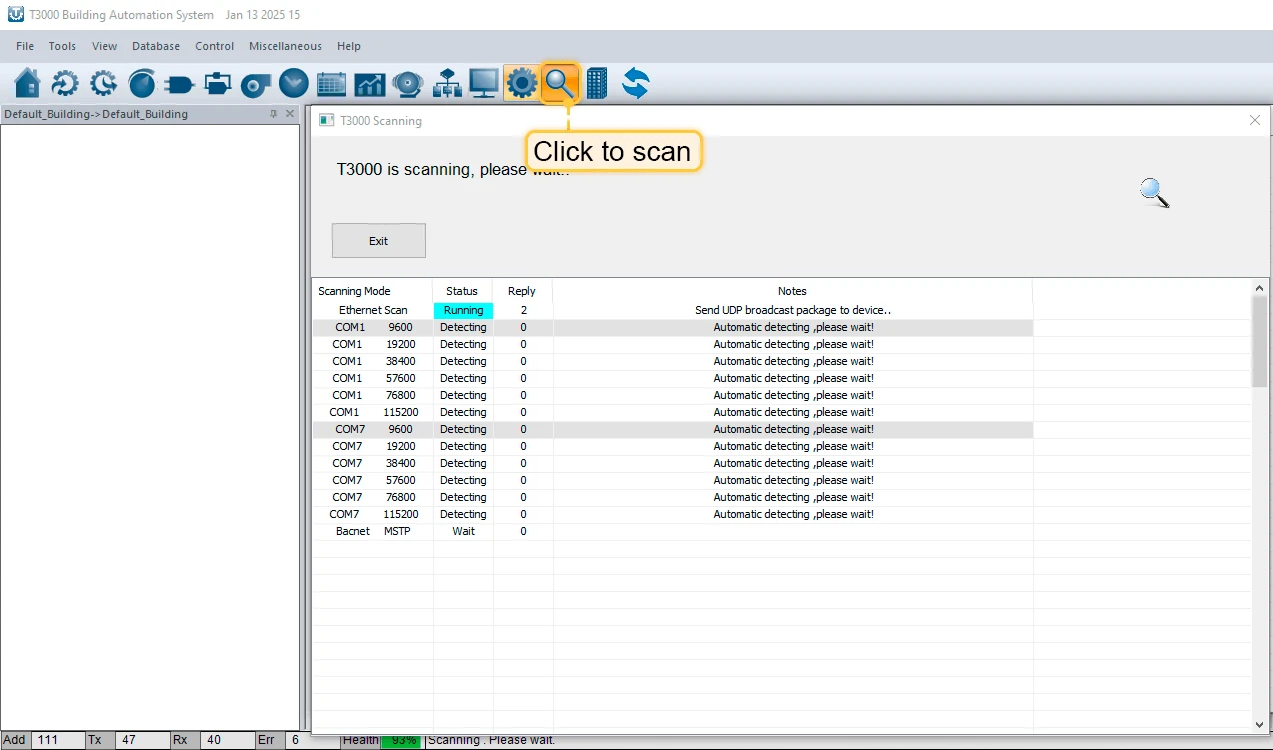
- Connect Tstat10 to PC by RS485 and start T3000 software. Click the button “Search” to scan your network, the following view will appear
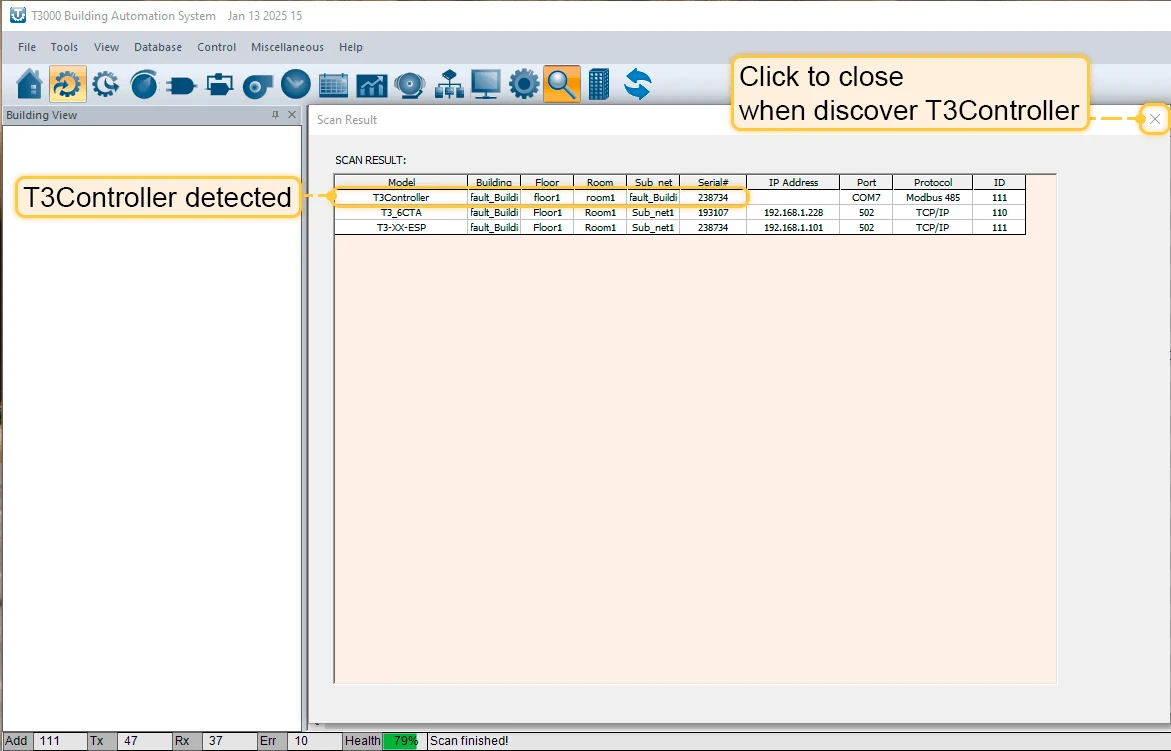
- When Tstat10 will discover, close the view
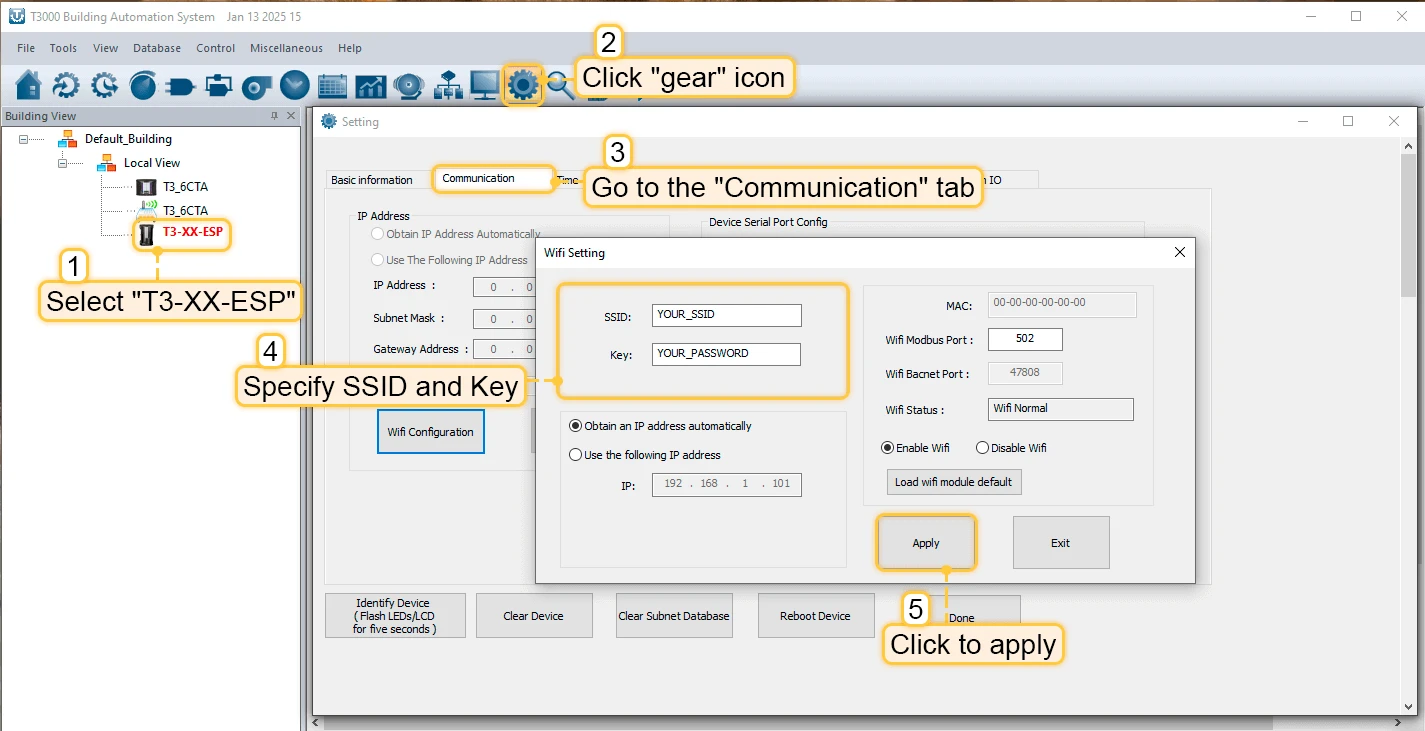
- Click on “Tstat10” device in the sidebar, in the opened window select “TCP/IP” tab and click on the “Wifi Configuration” button. In the opened window, provide your Wi-Fi network credentials and click “Apply”.
Creating and configuring ThingsBoard IoT Gateway
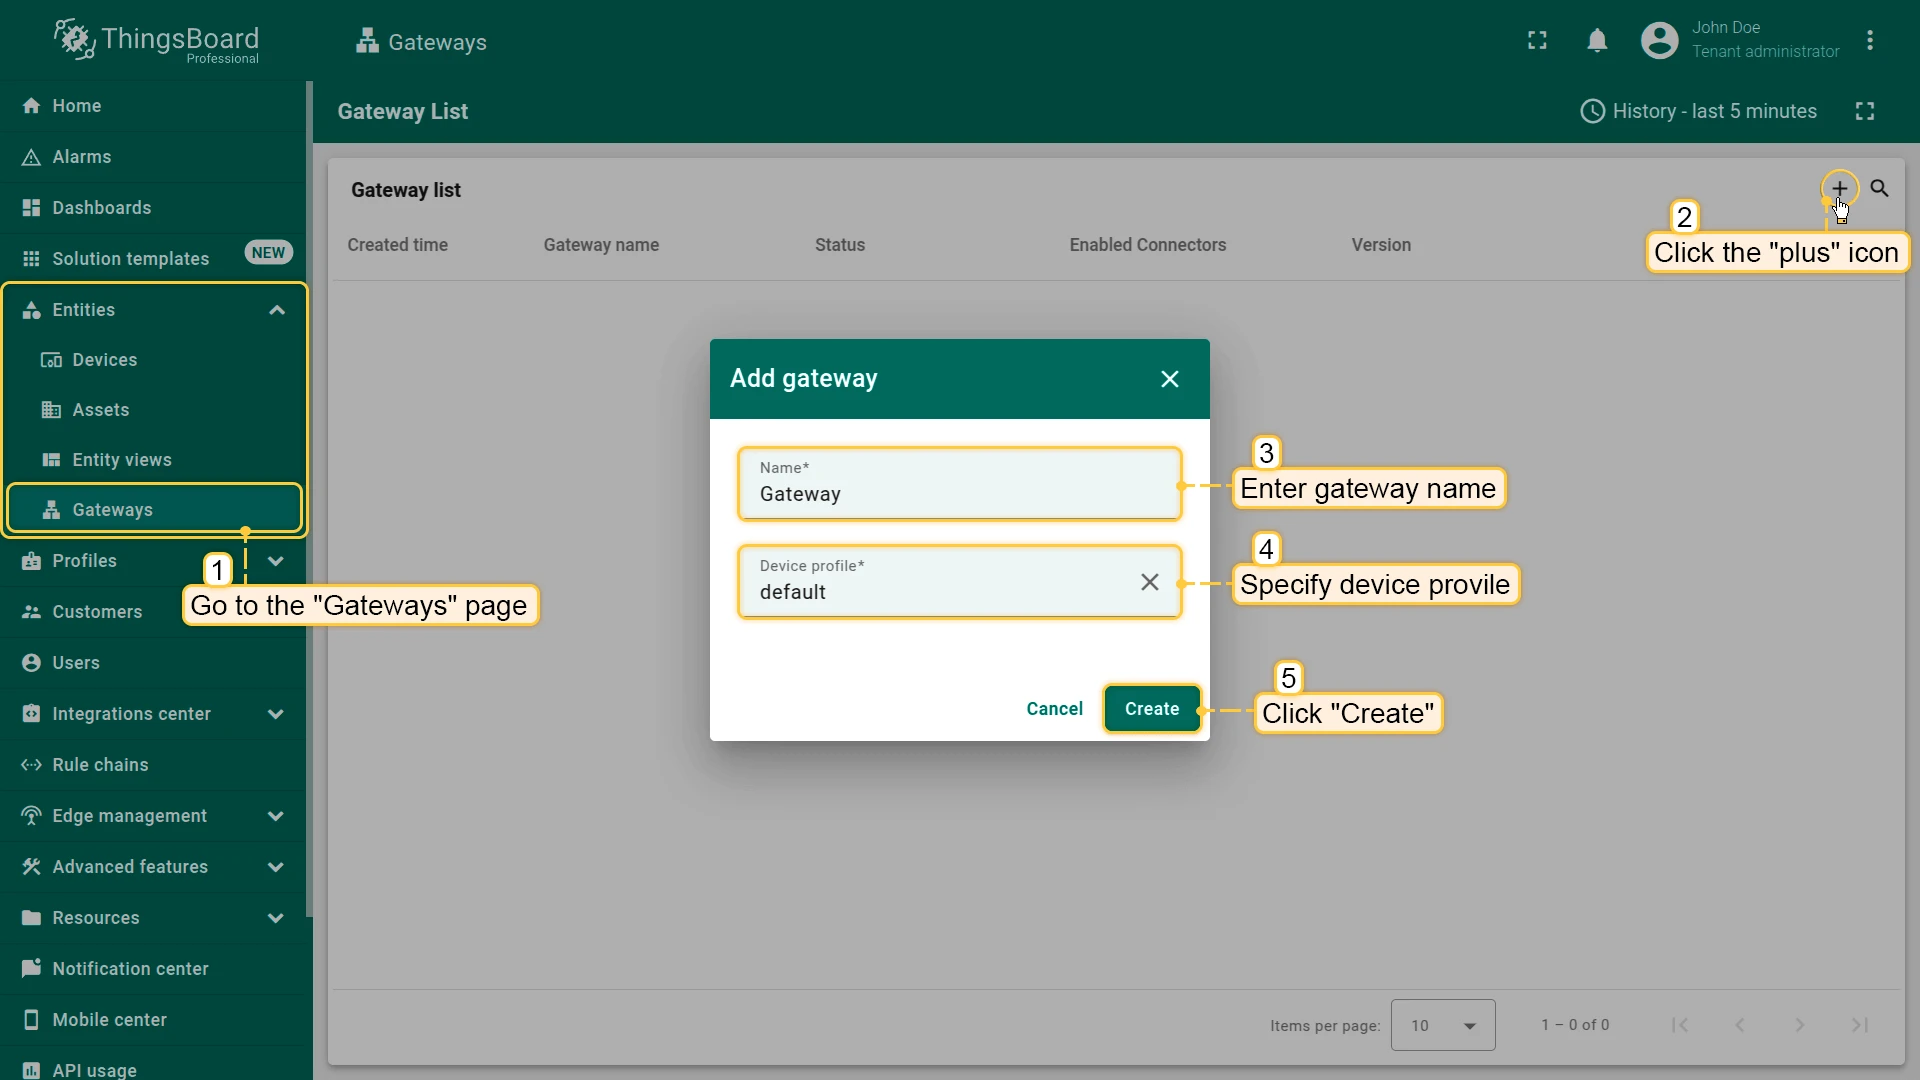
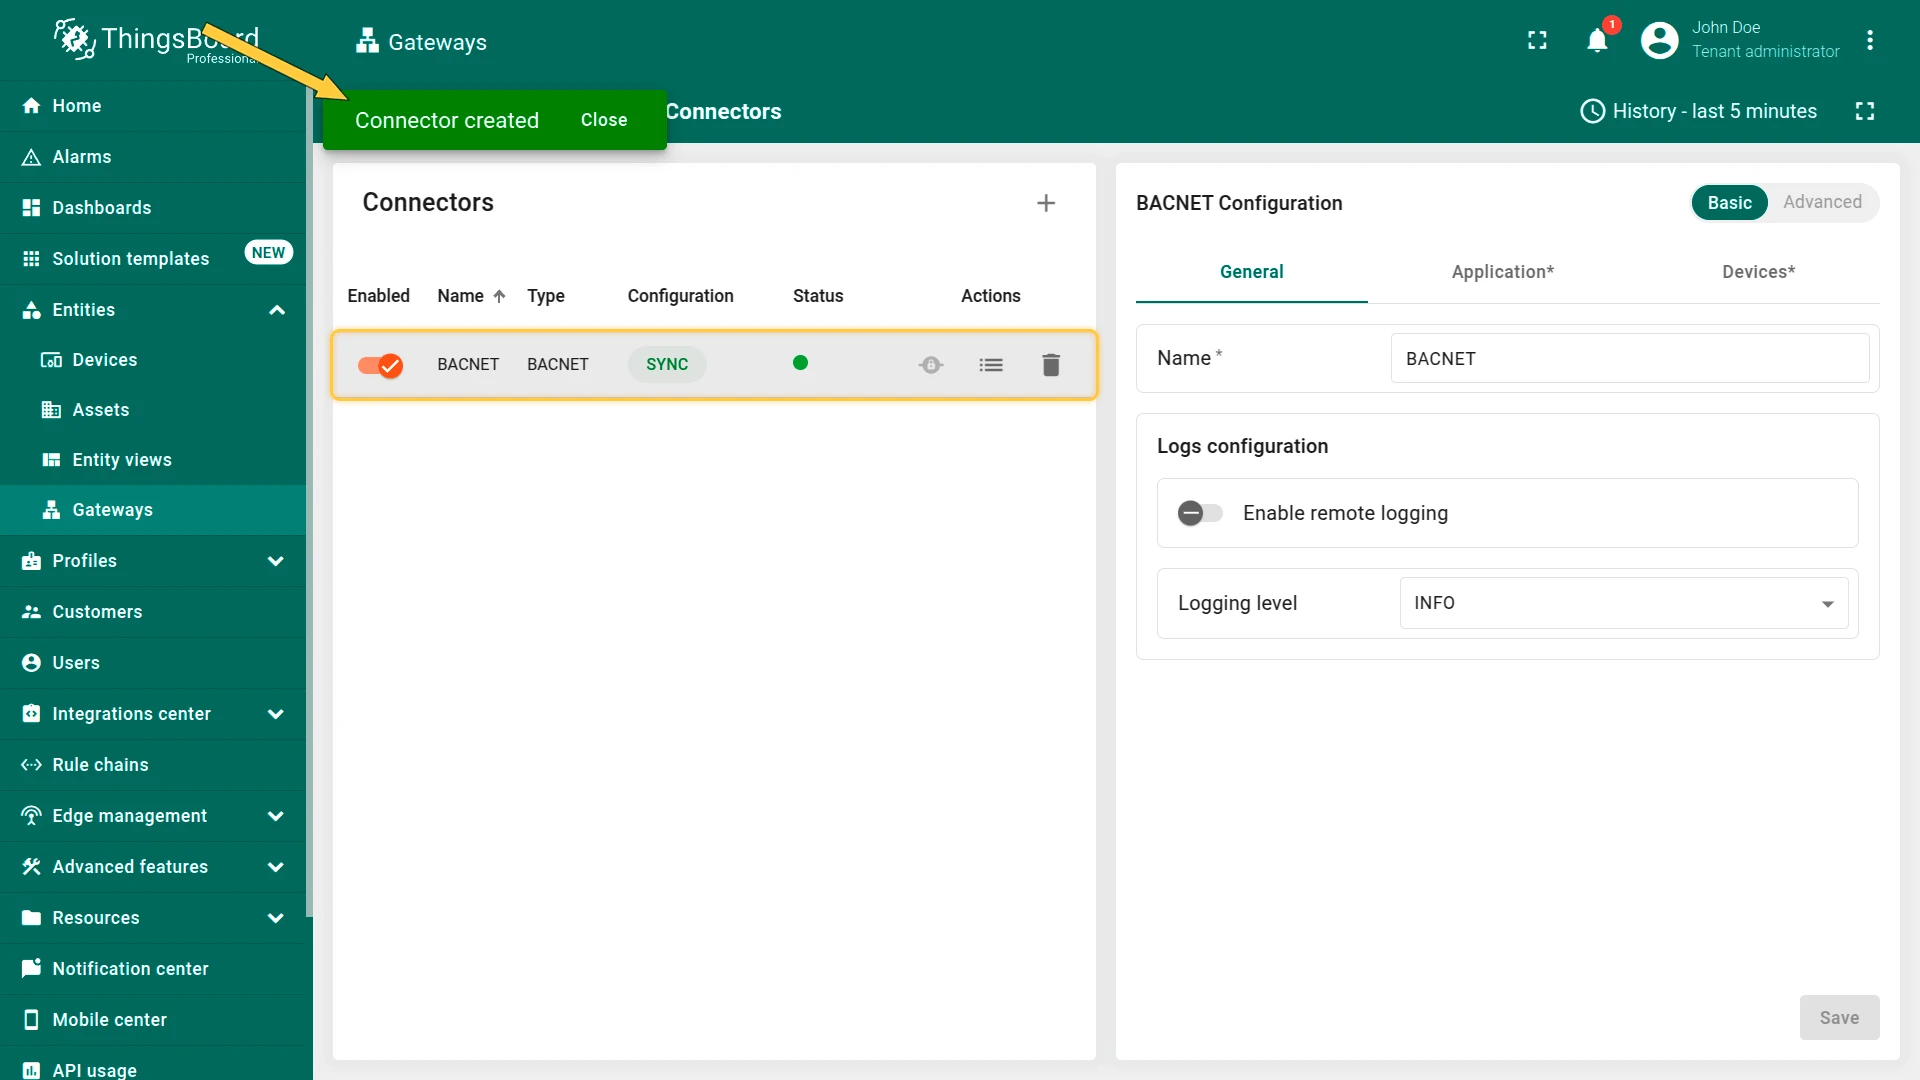
- Open the ThingsBoard in your browser and log in. Go to “Entities” > “Gateways” tab in the sidebar and click on ”+” button. Fill in “Name” and “Device profile” fields and click “Create” button
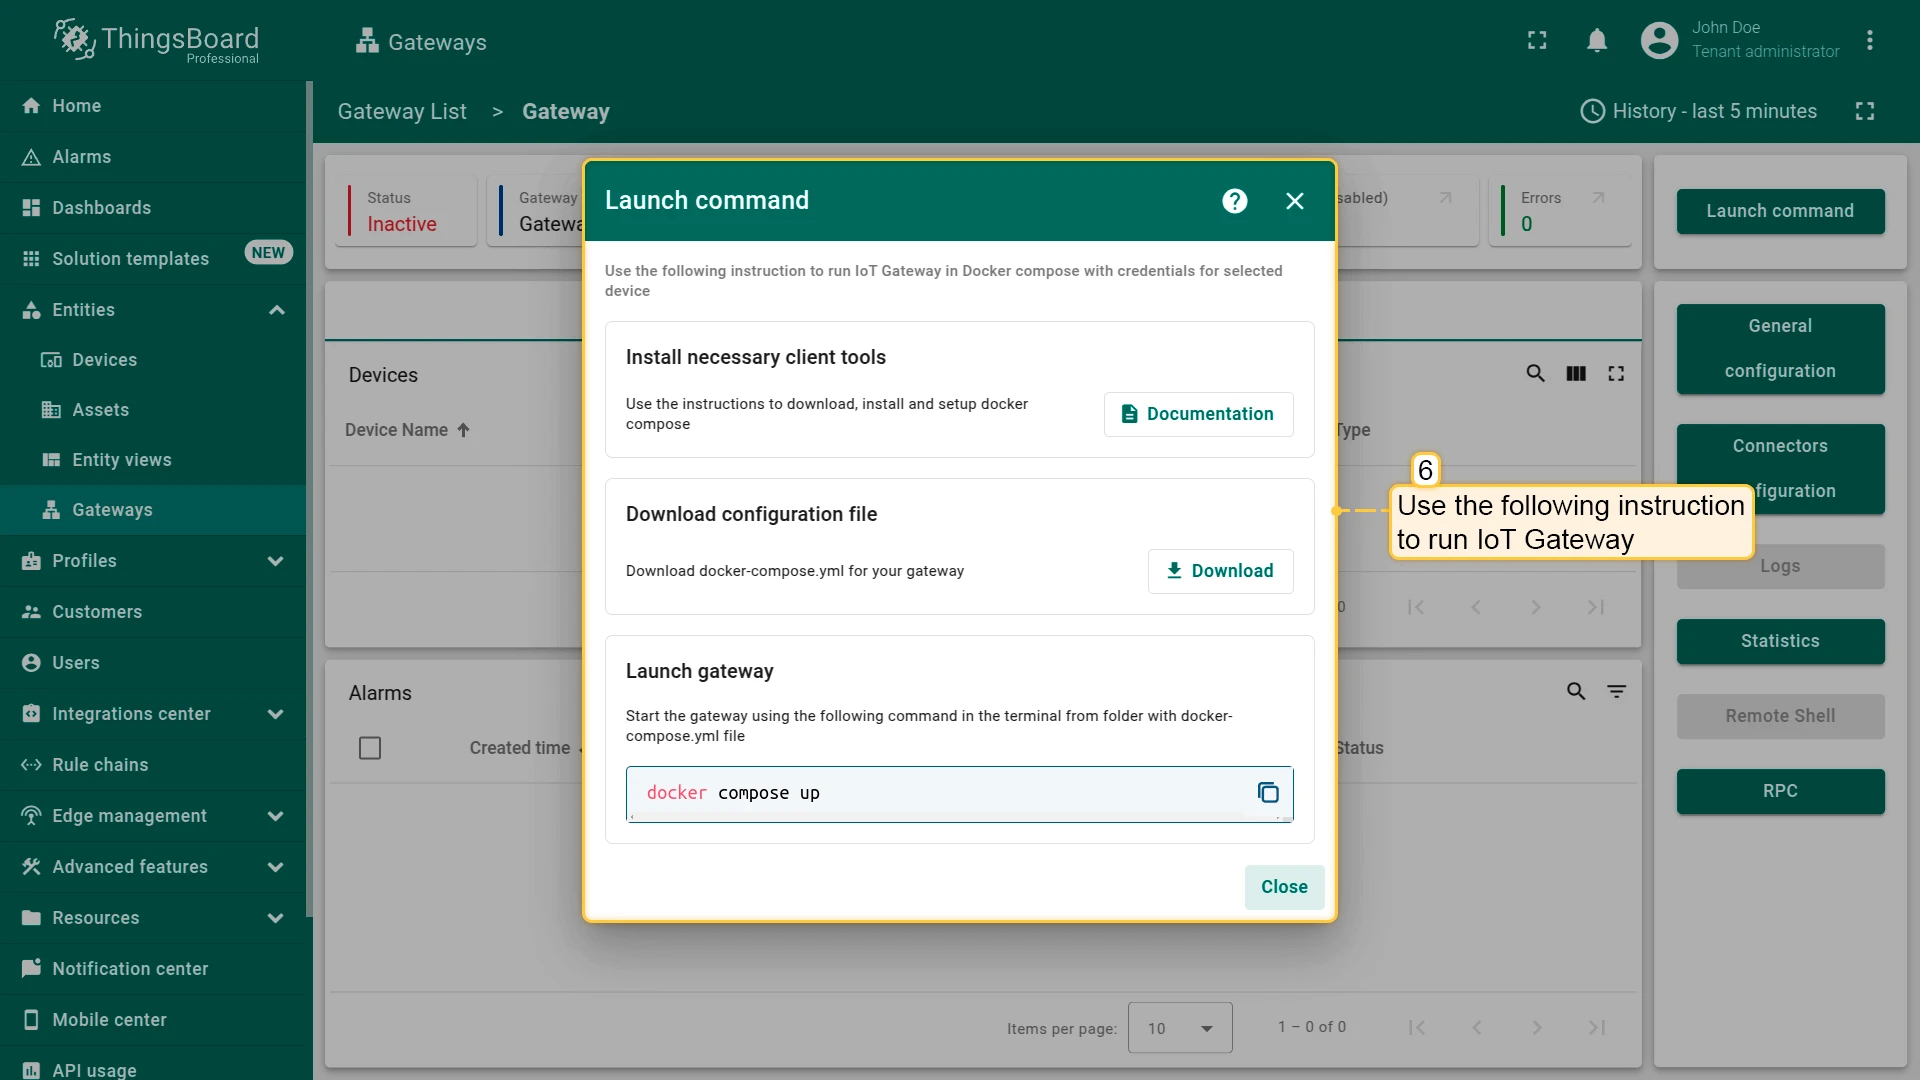
- Start gateway using launch command
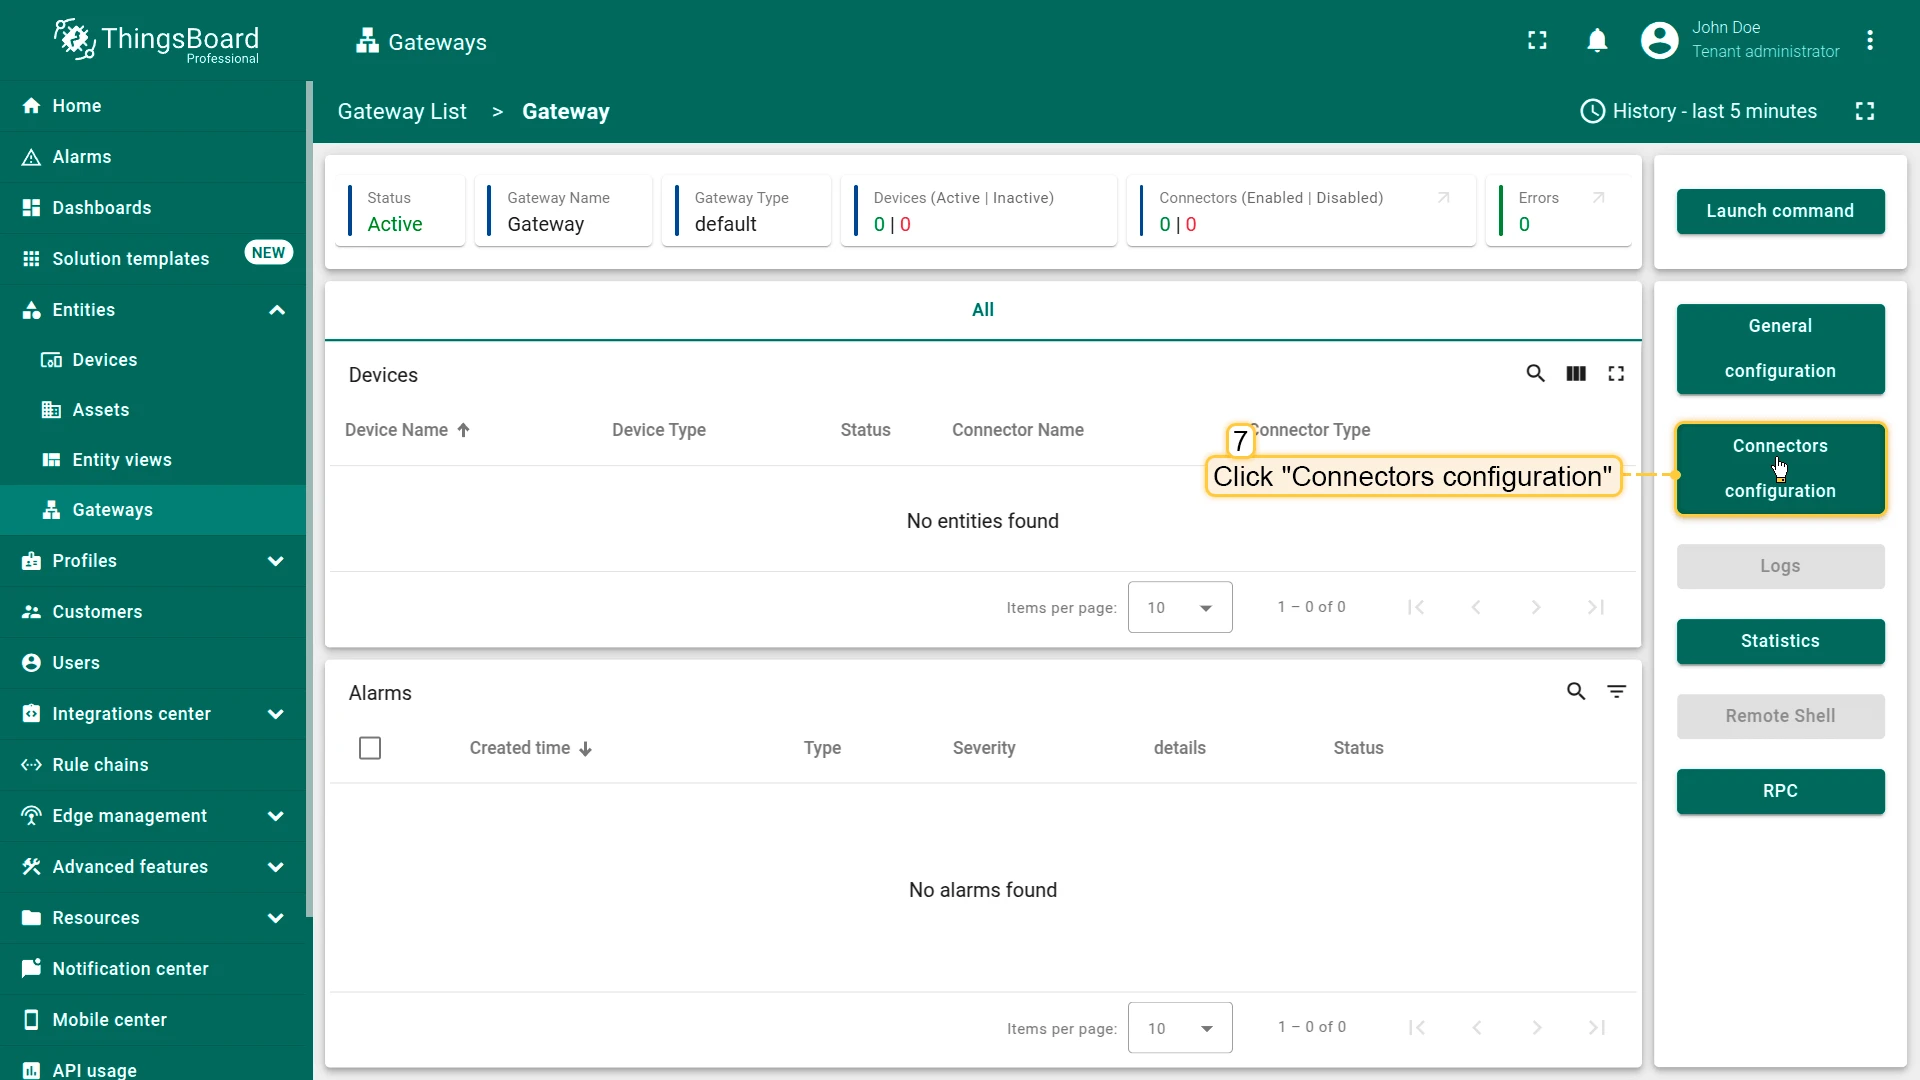
- The gateway has been created. Click on the “Connectors configuration” button in the sidebar menu
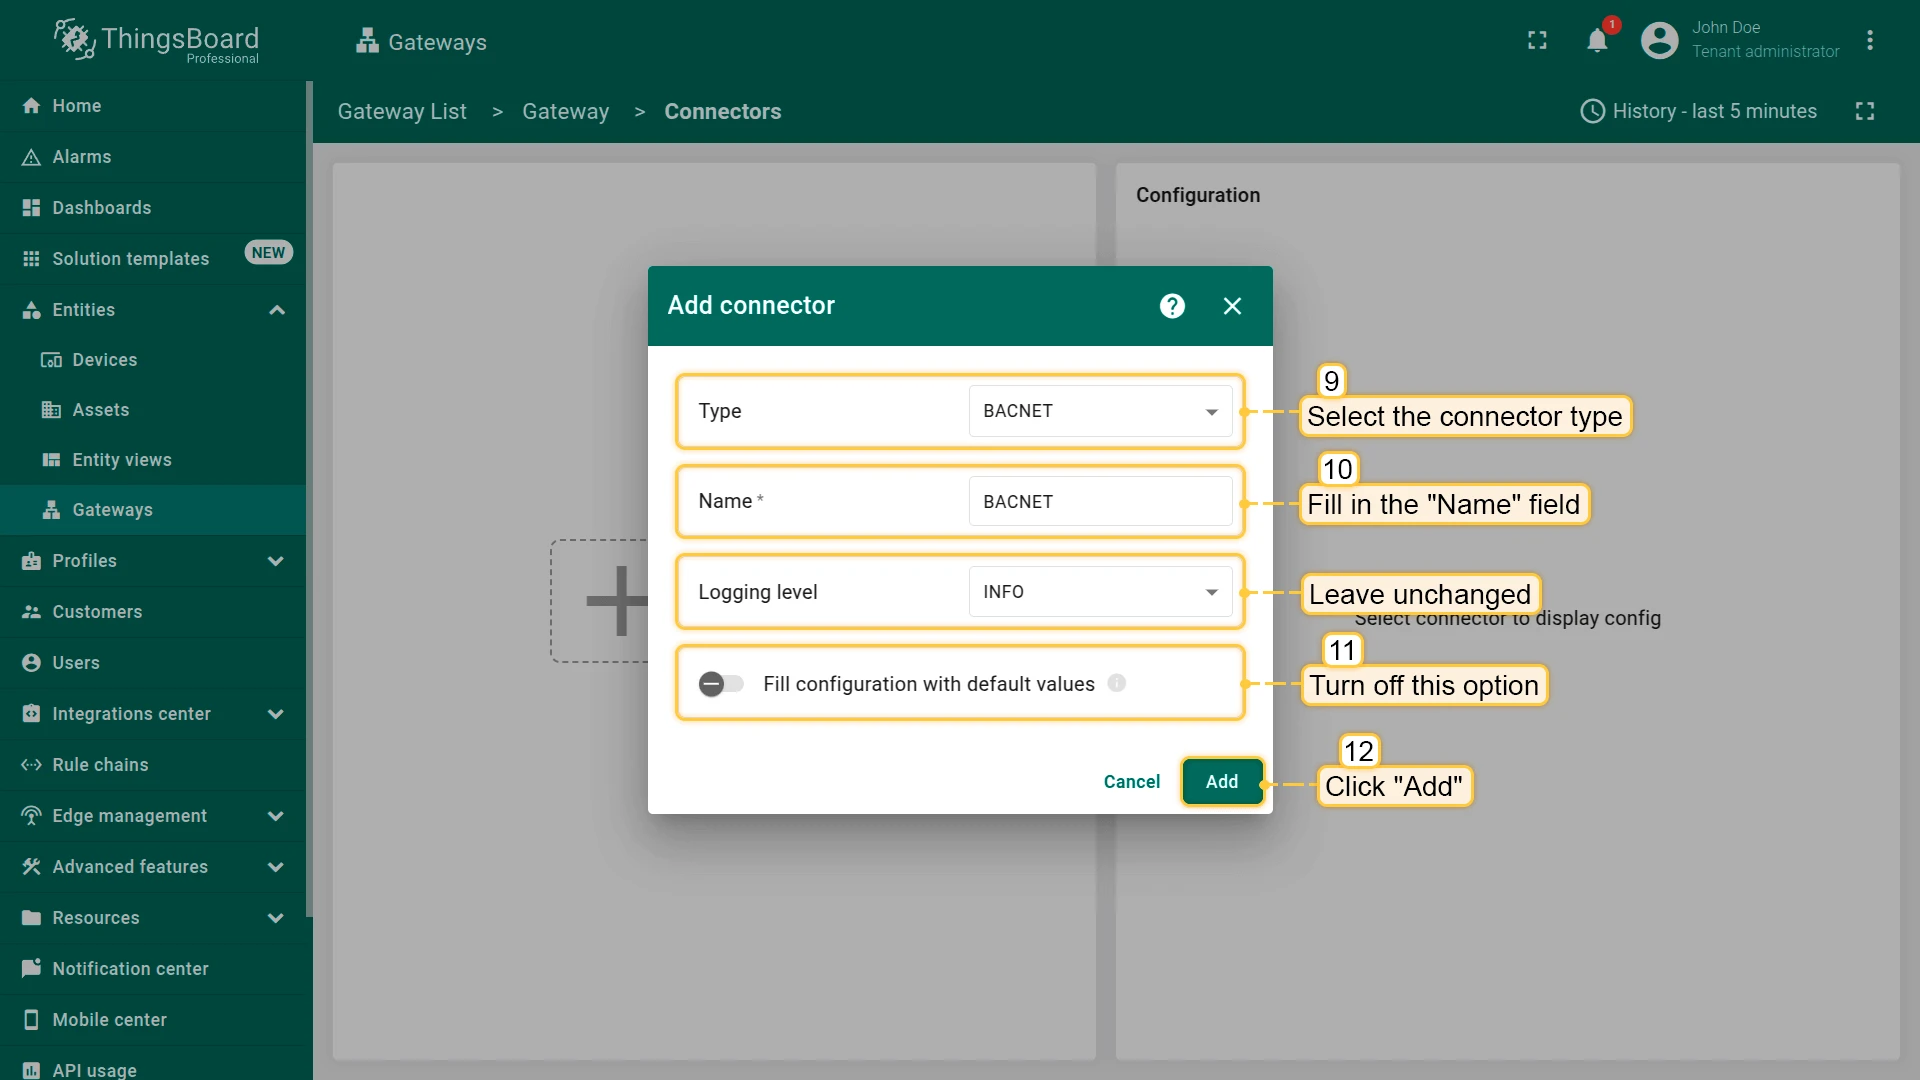
- Click on ”+” button to add a new connector
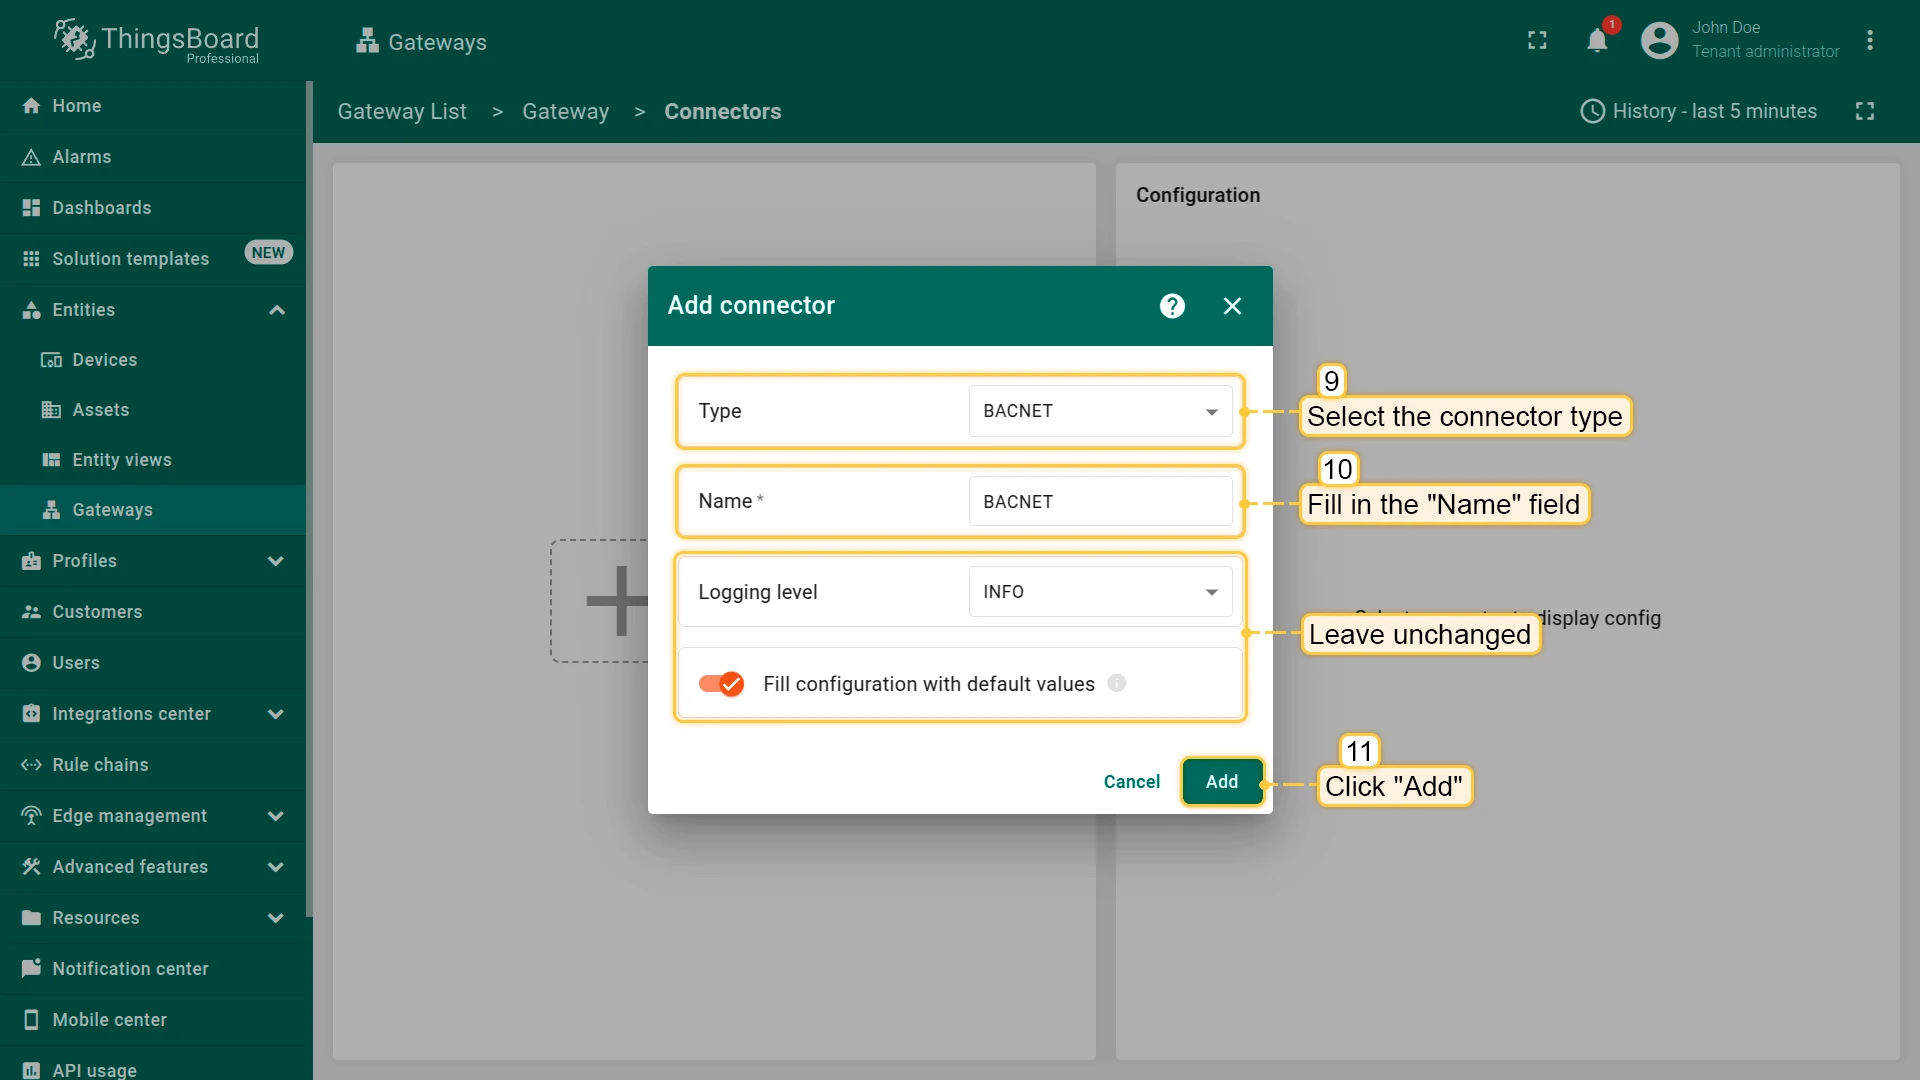
- Select “BACnet” connector type, fill in the “Name” field and click “Add” button
- The connector has been created
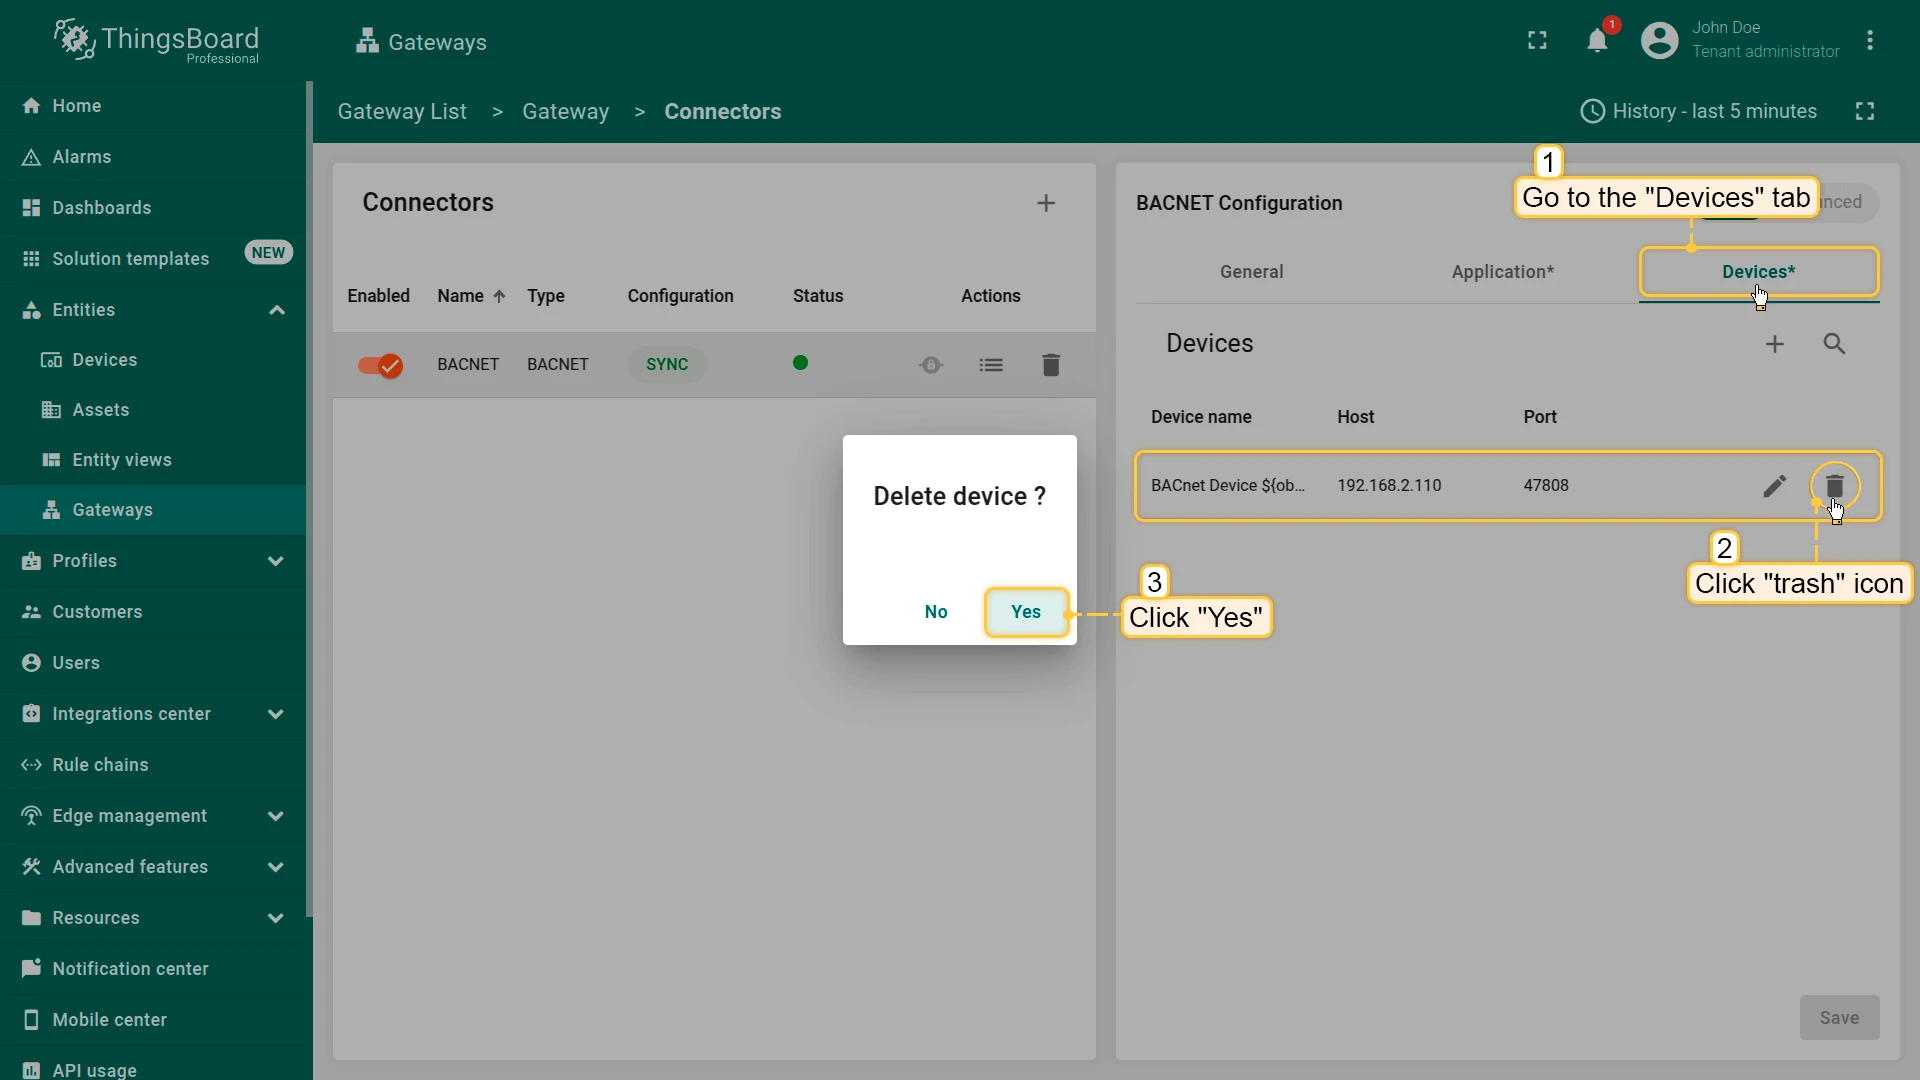
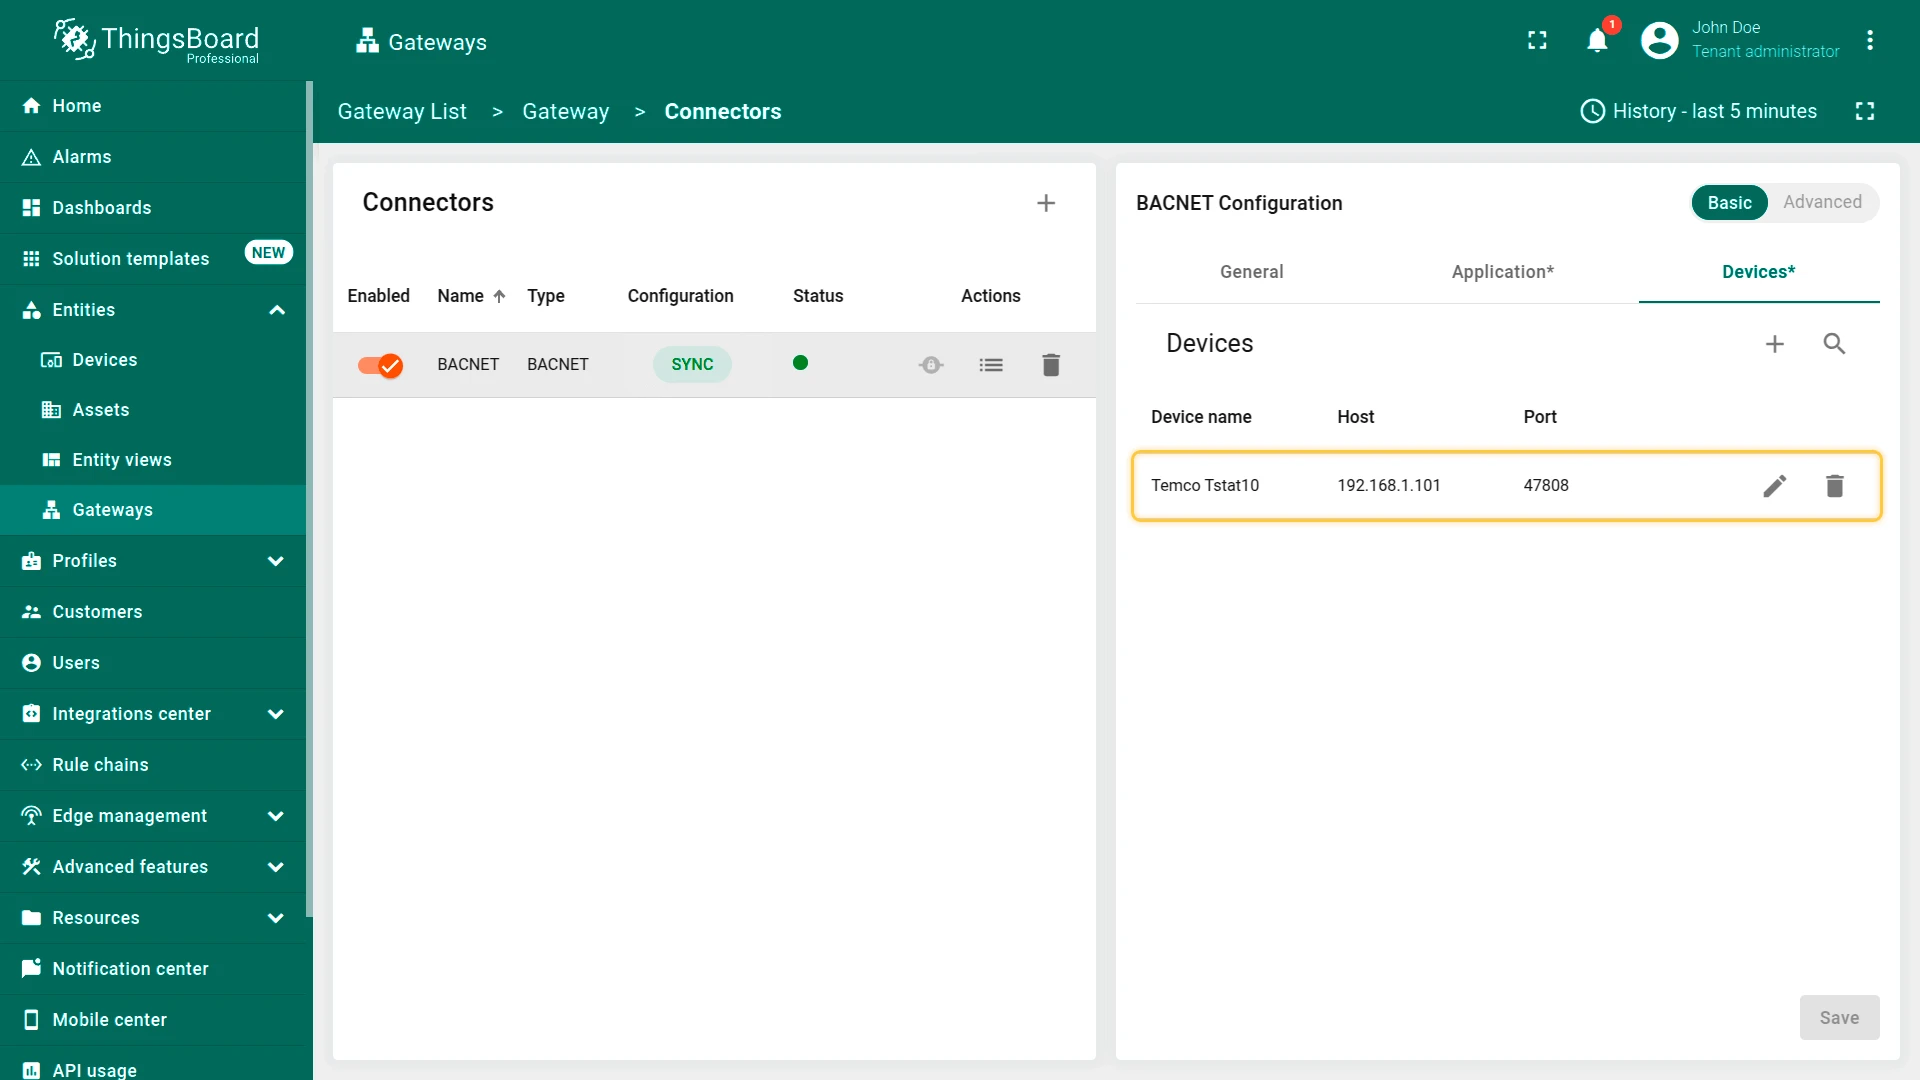
- In the created connector go to “Devices” tab and delete default device
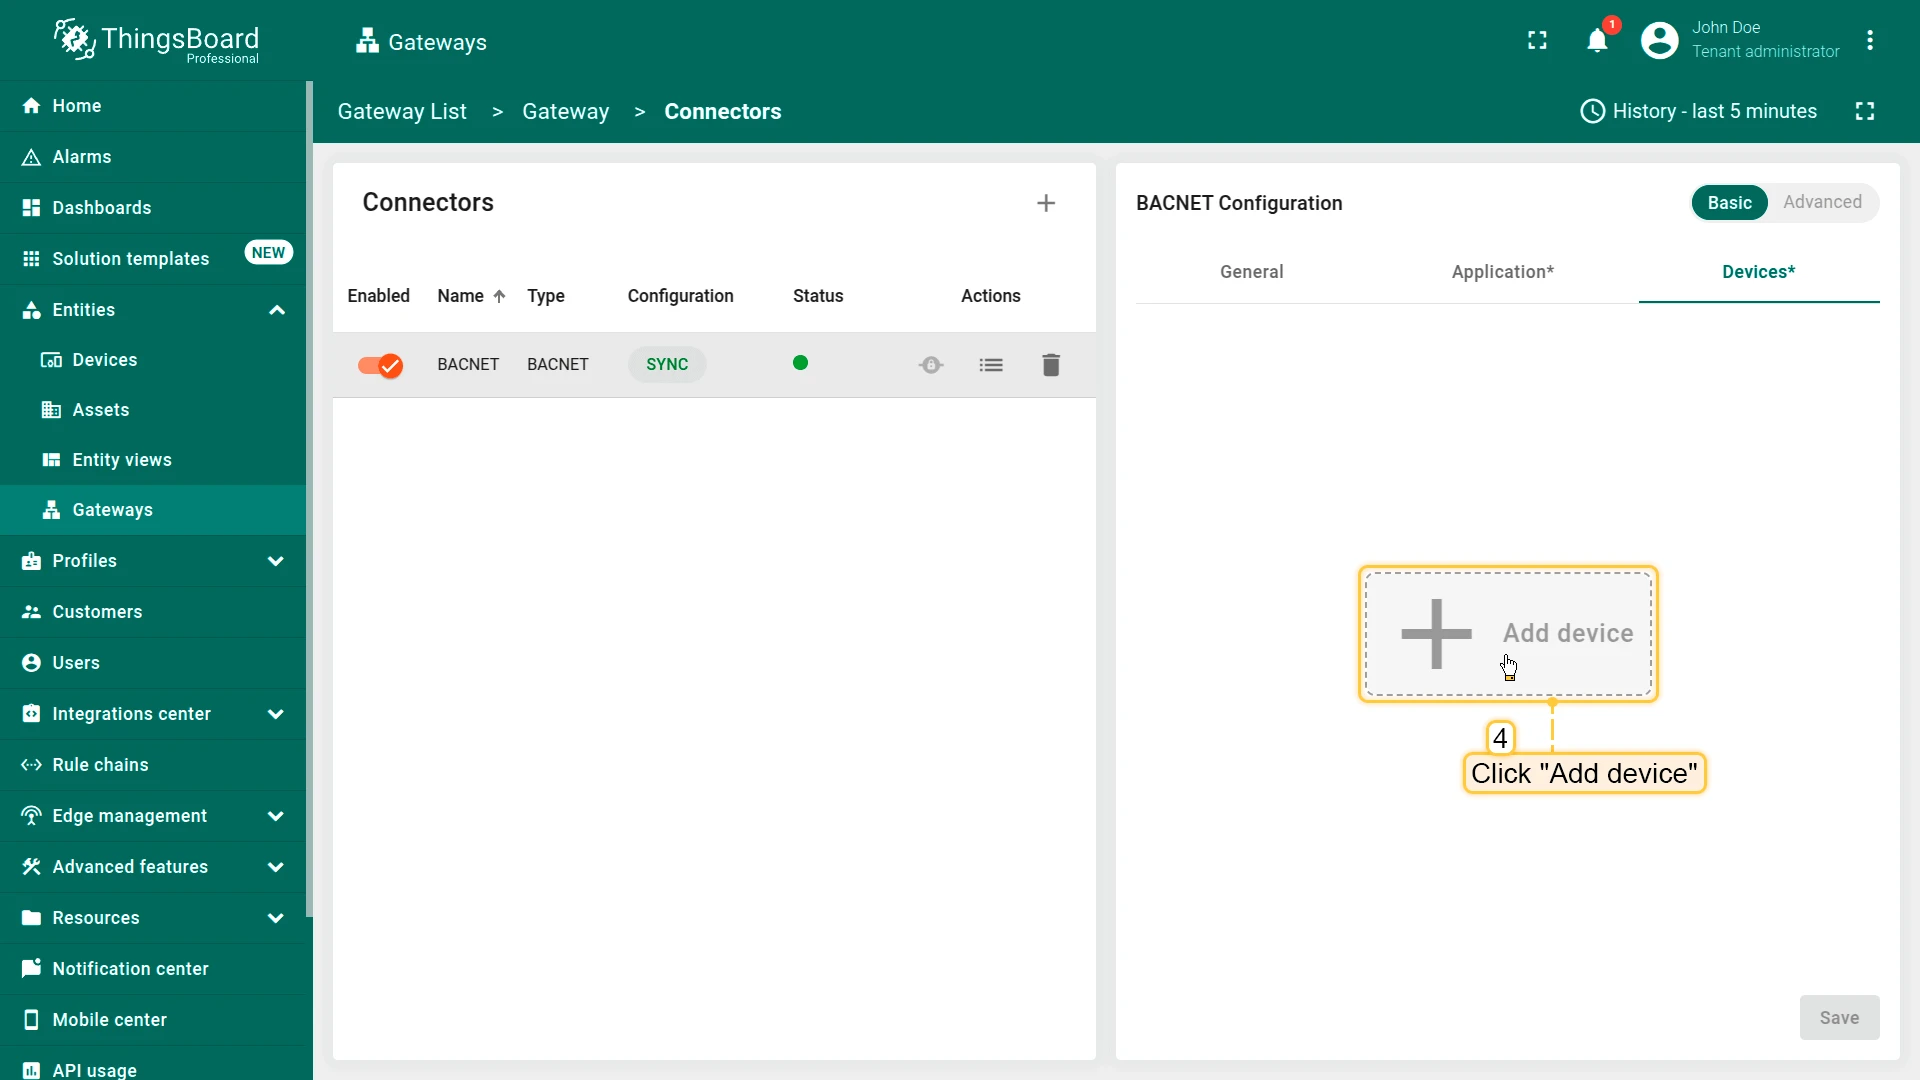
- Click on “Add device” button
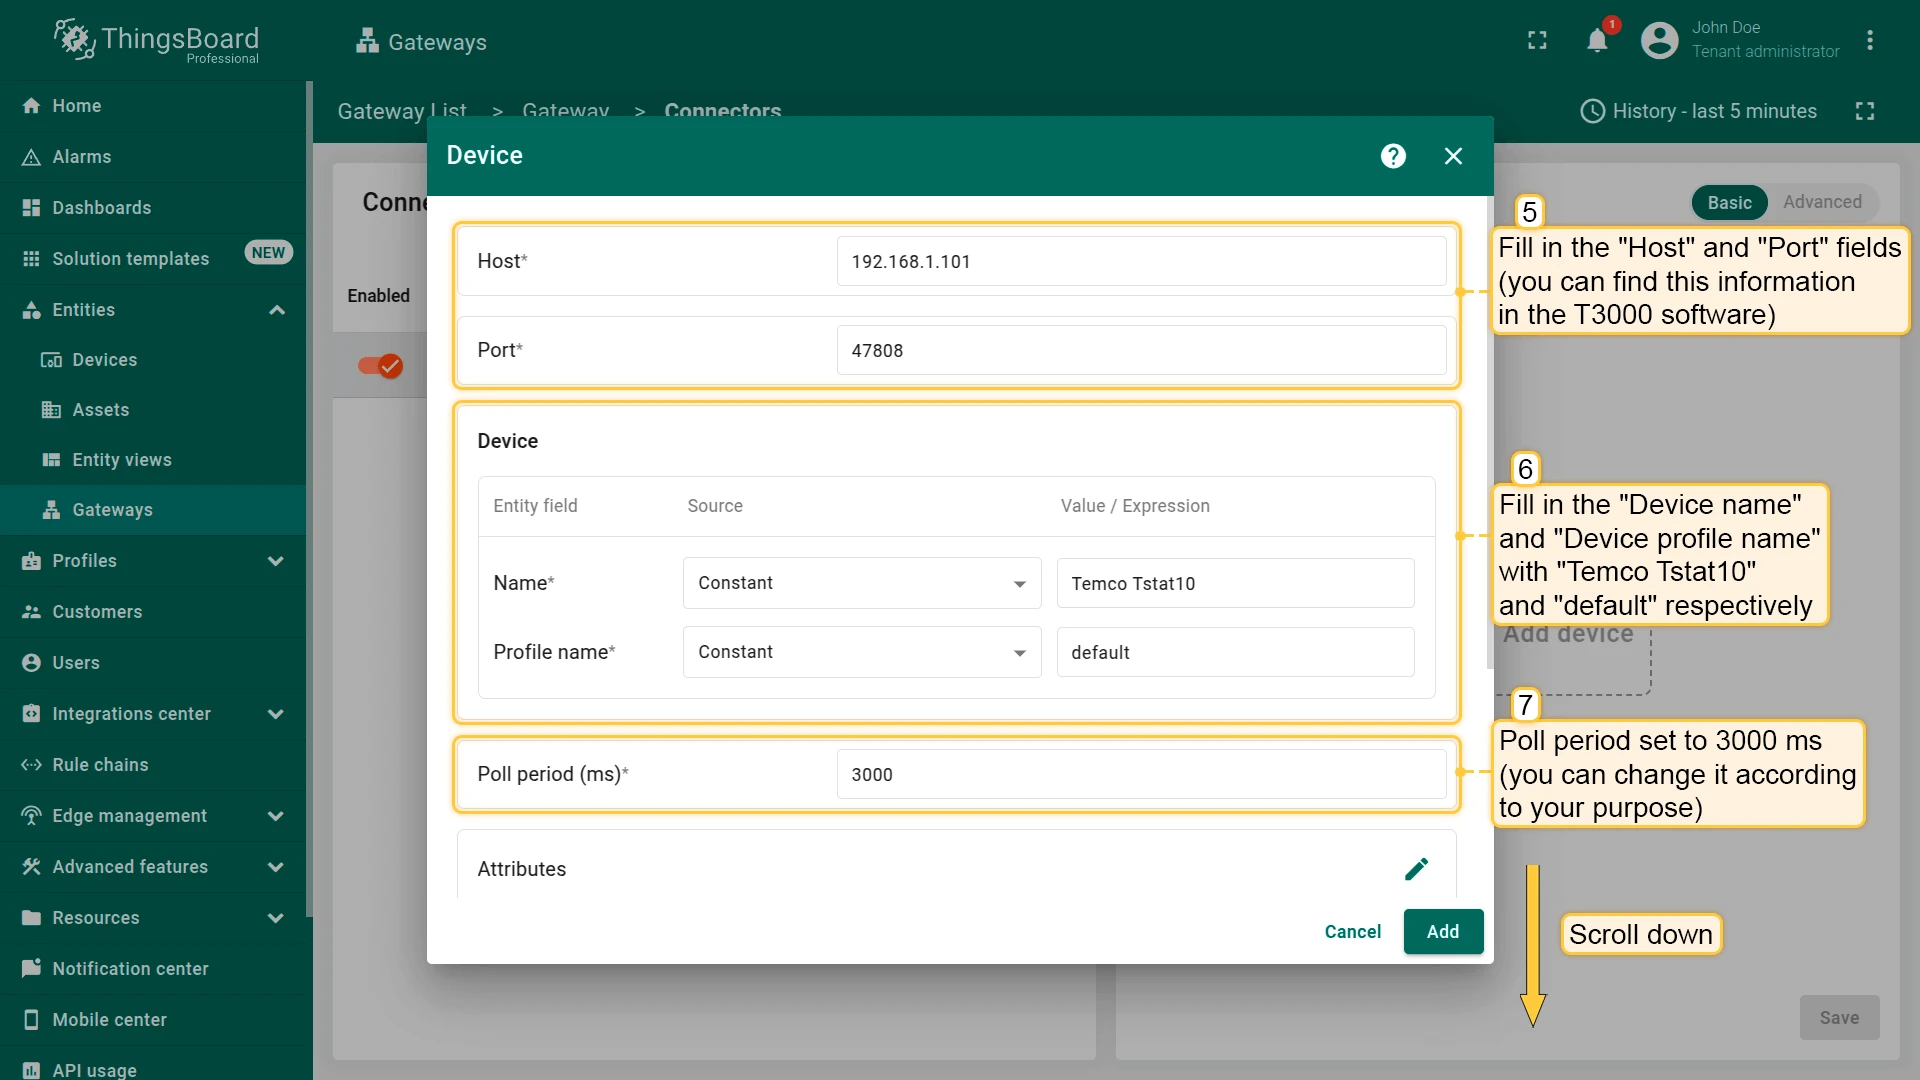
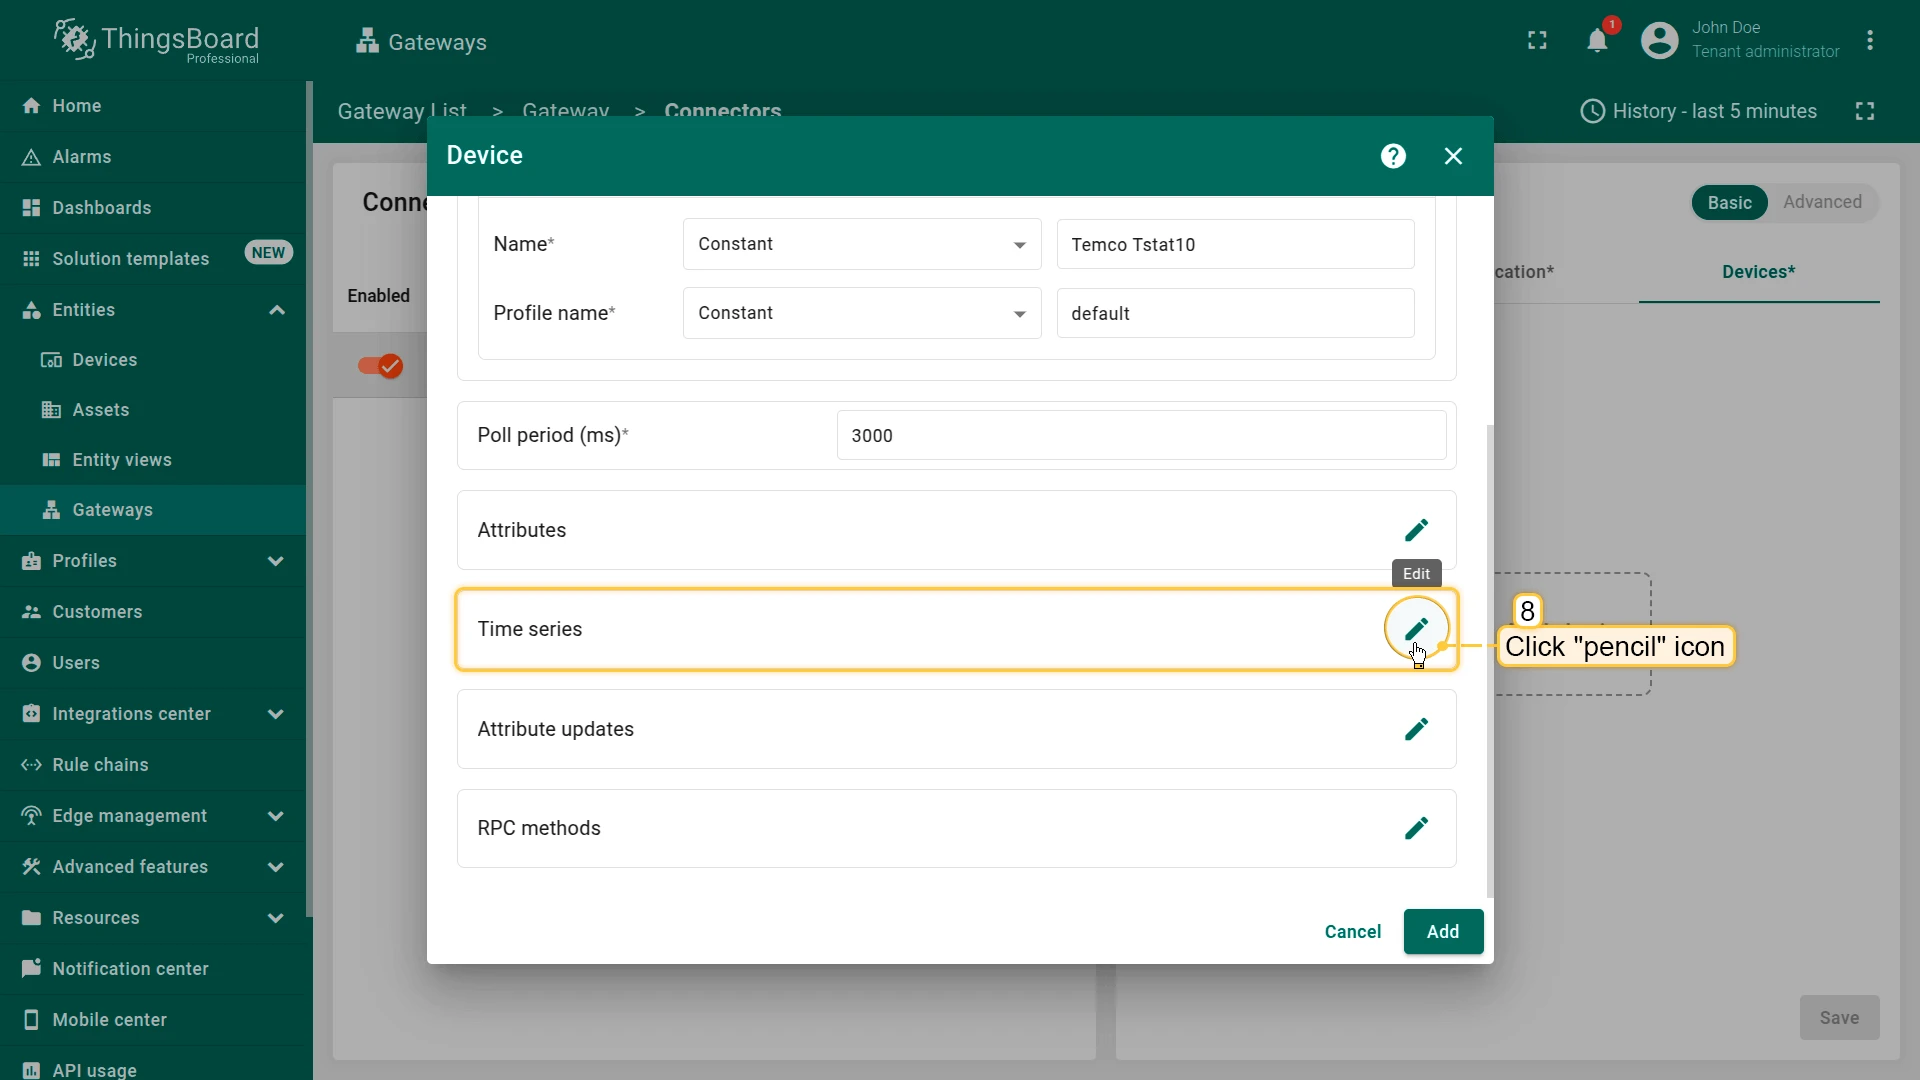
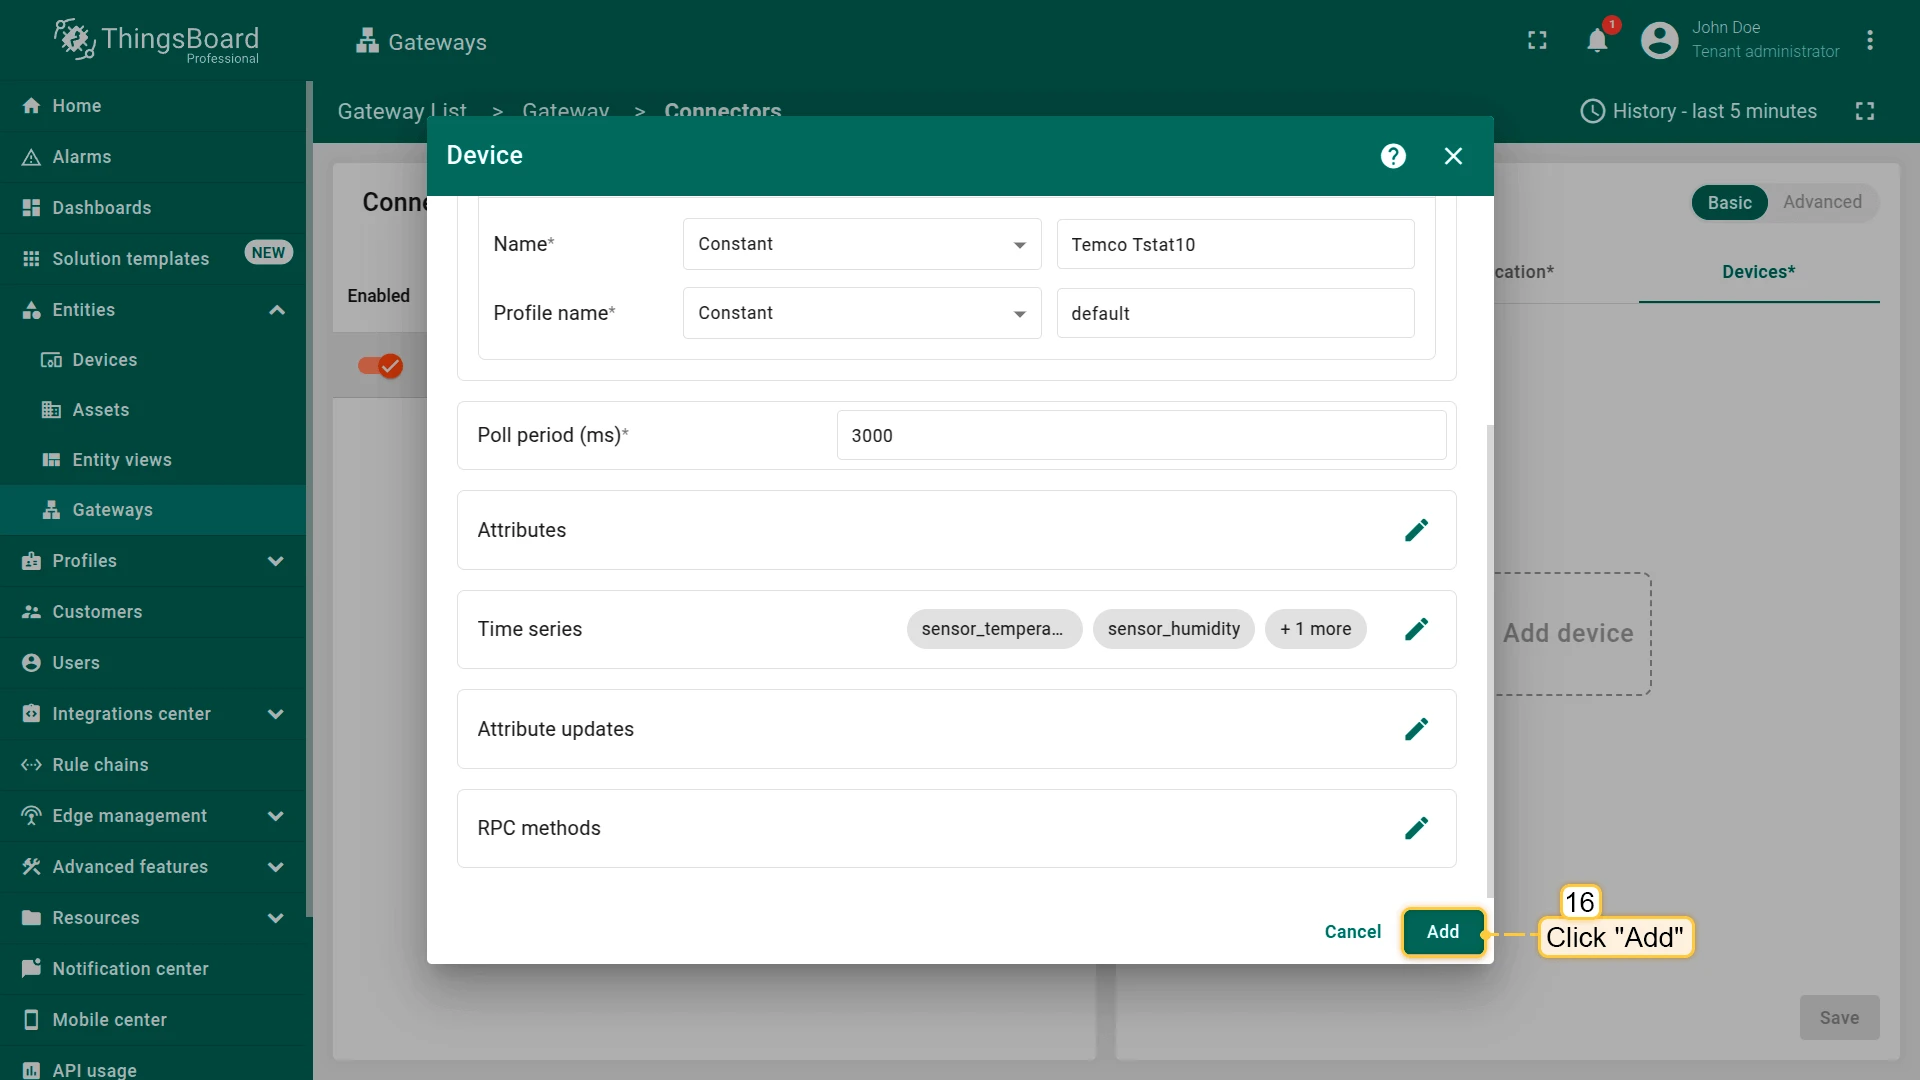
- Fill in the “Host” and “Port” fields (you can find this information in the T3000 software). Fill in the “Device name” and “Device profile name” with “Temco Tstat10” and “default” respectively. Poll period set to 3000 ms (you can change it according to your purpose)
- Click on “Time series pencil” icon
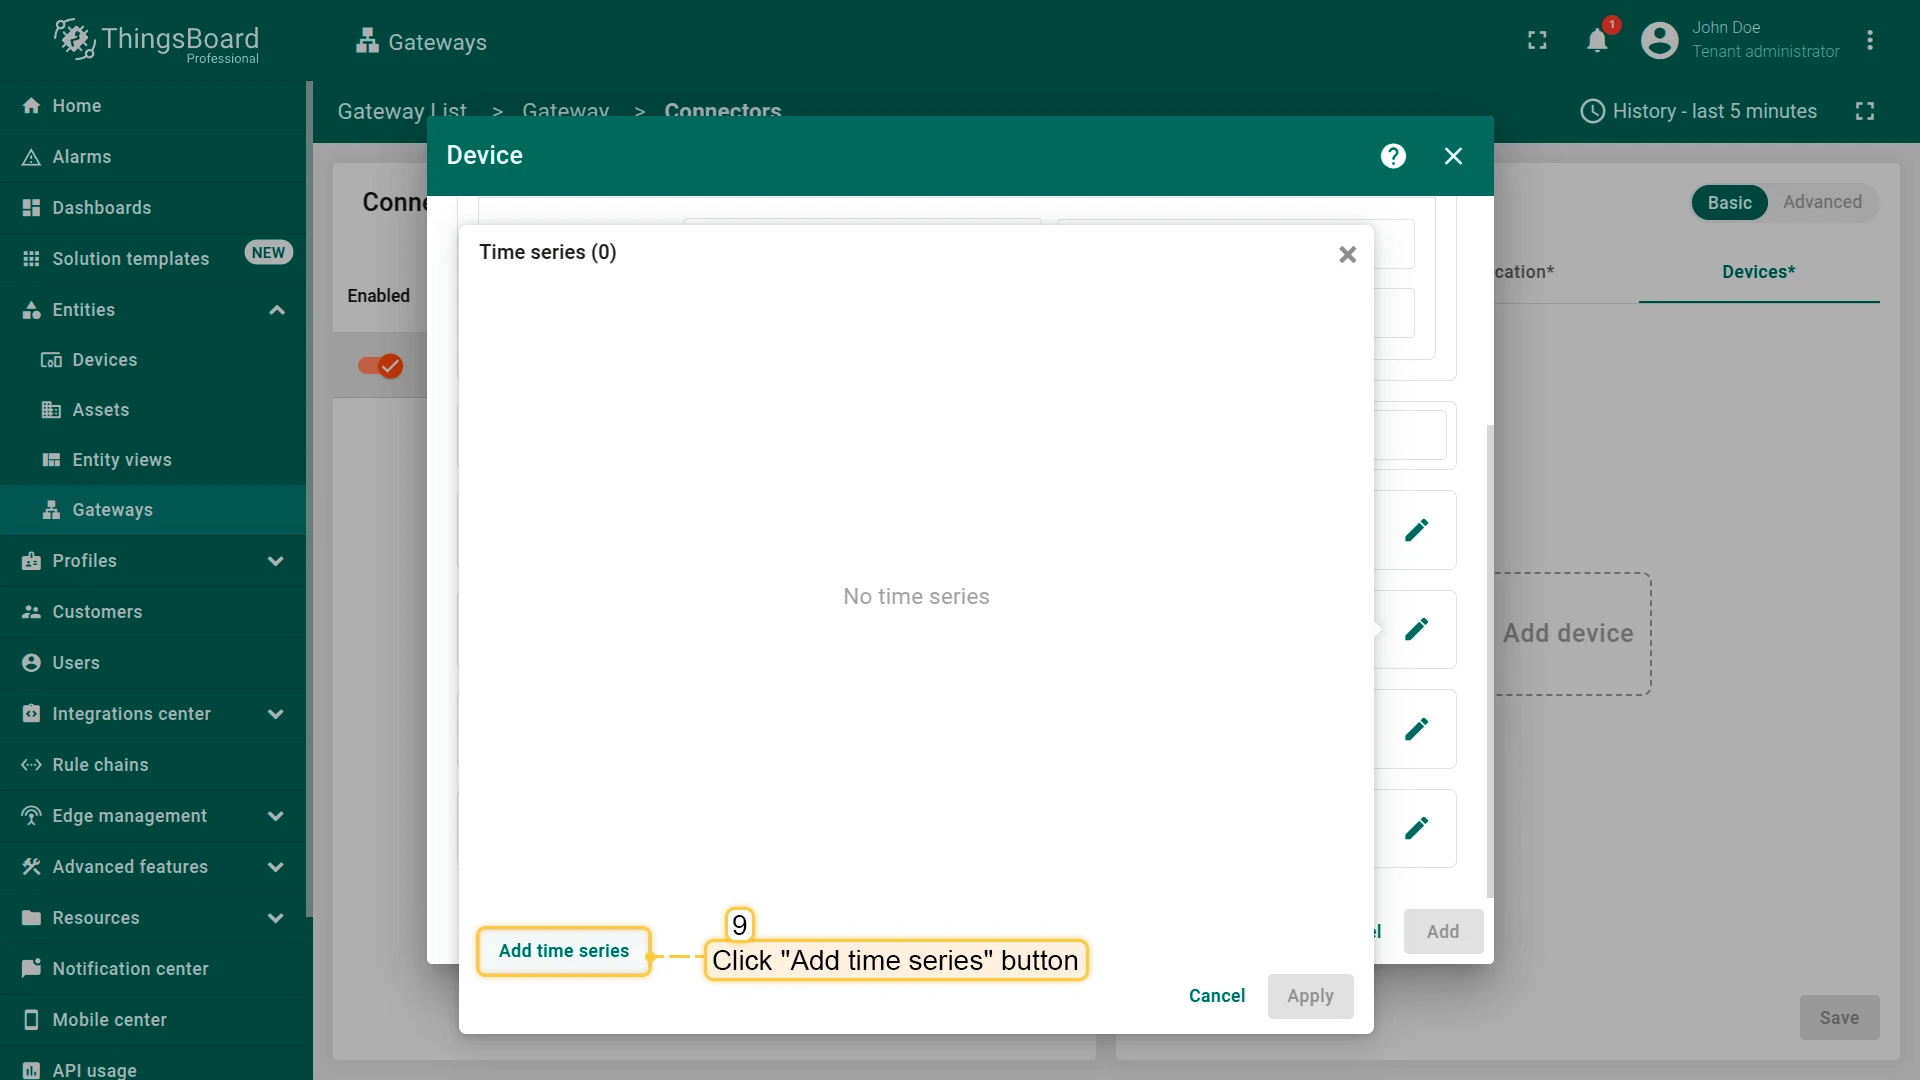
- In the opened window click on “Add time series” button
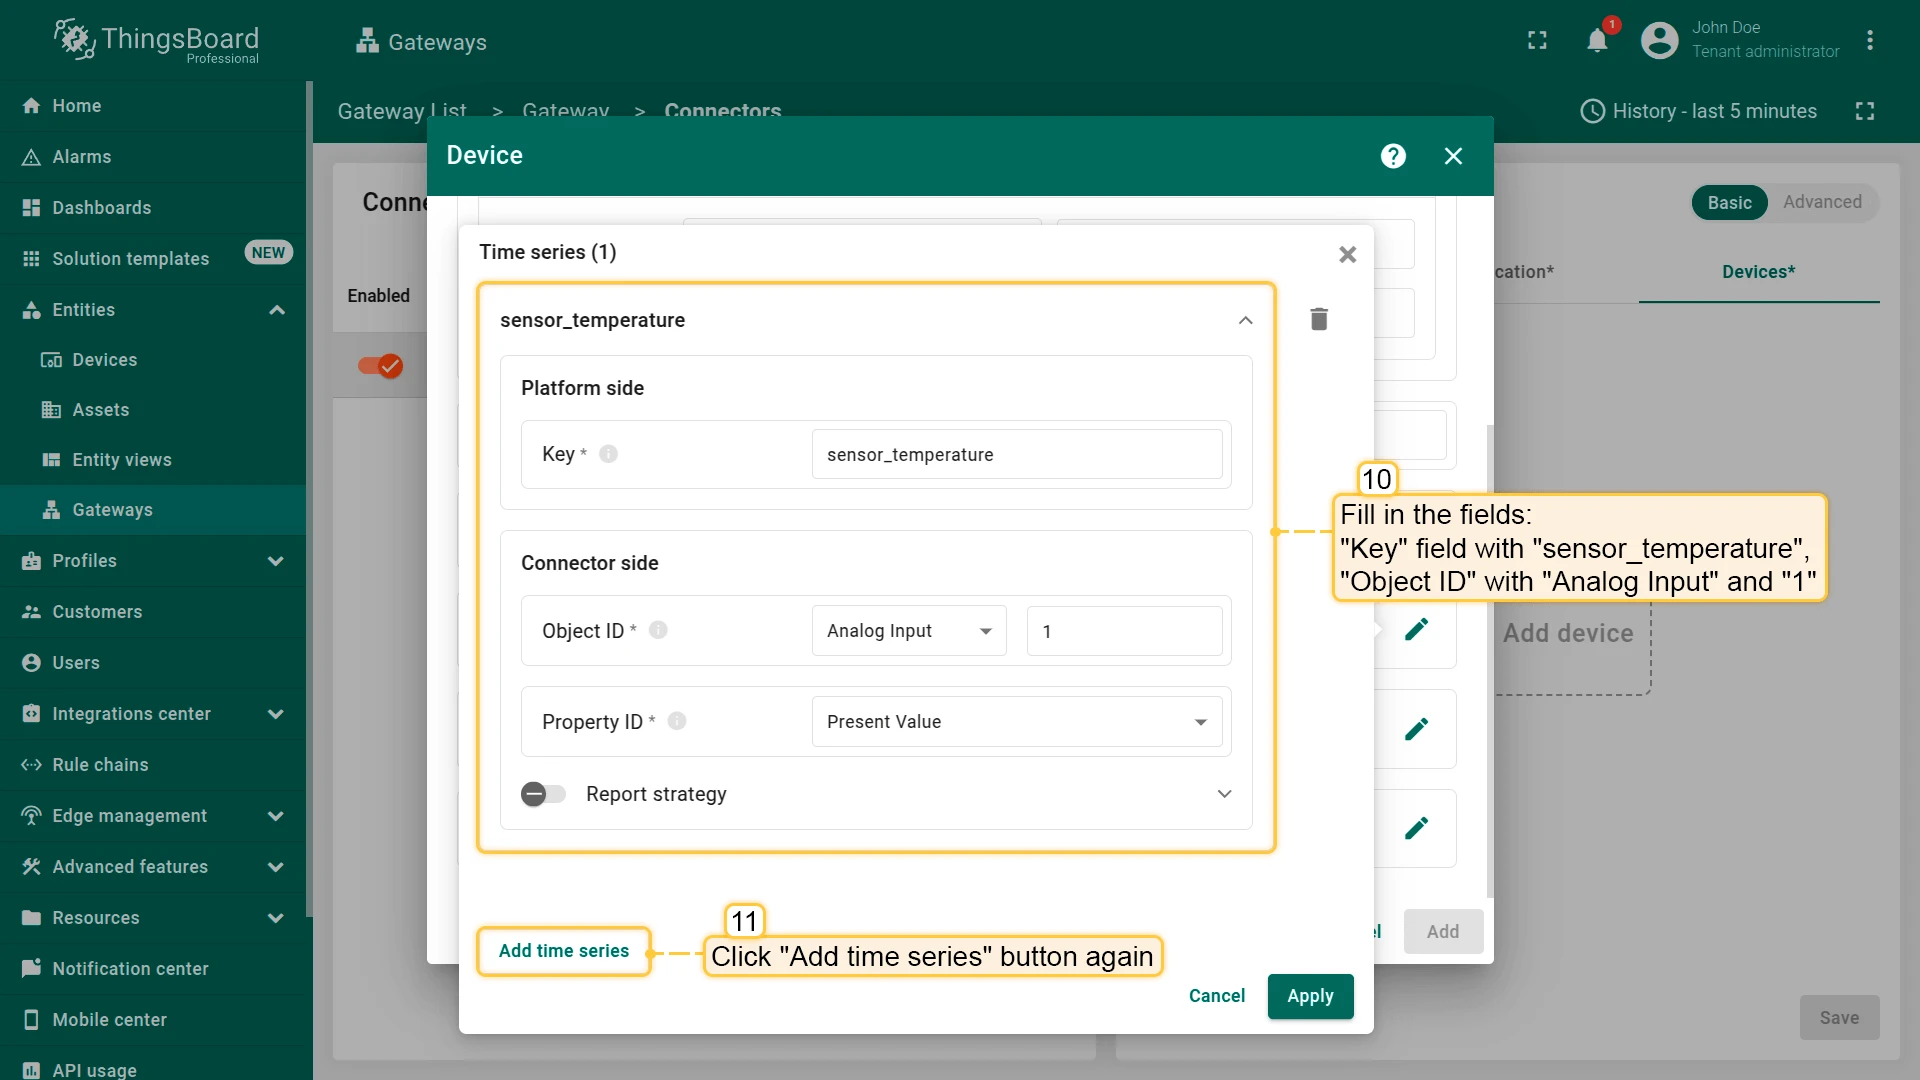
- Fill in the “Key” field with “sensor_temperature”, “Object ID” with “Analog Input” and “1”. Click “Add time series” button
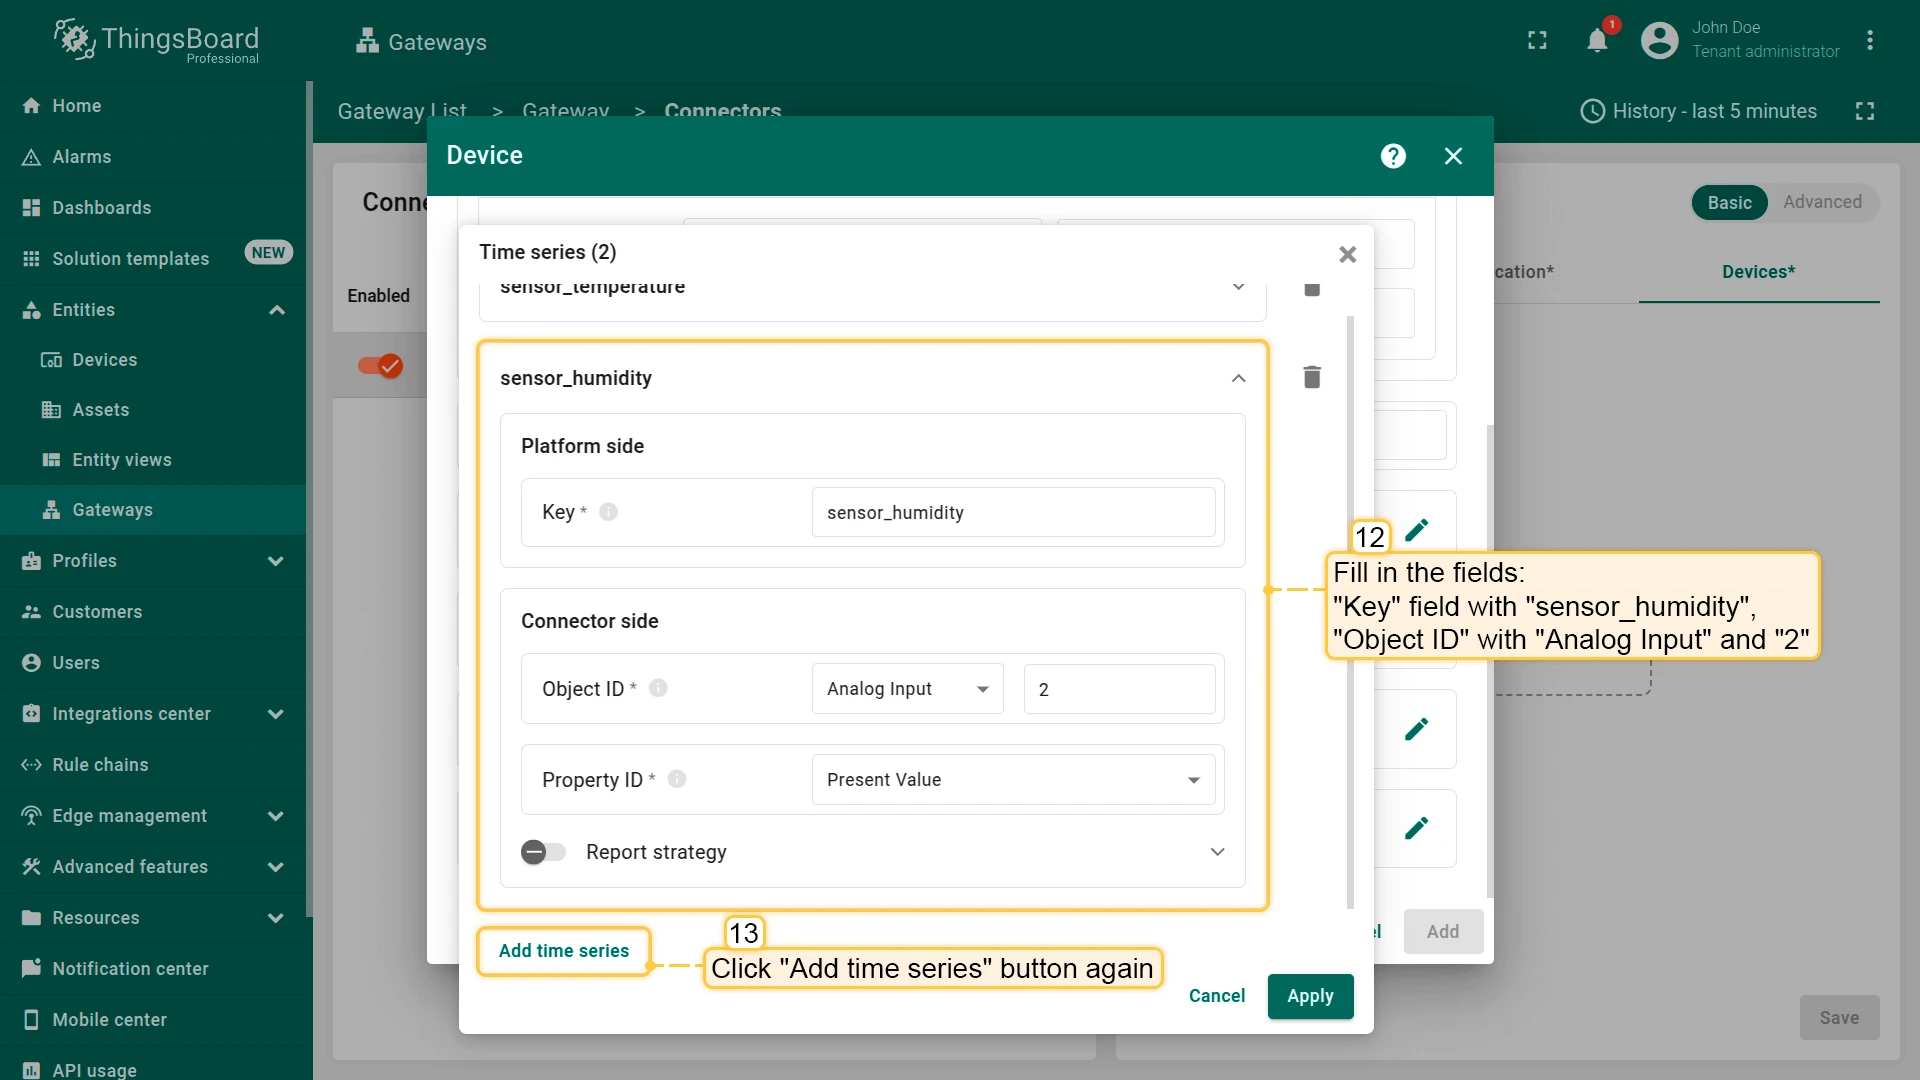
- Fill in the “Key” field with “sensor_humidity”, “Object ID” with “Analog Input” and “2”
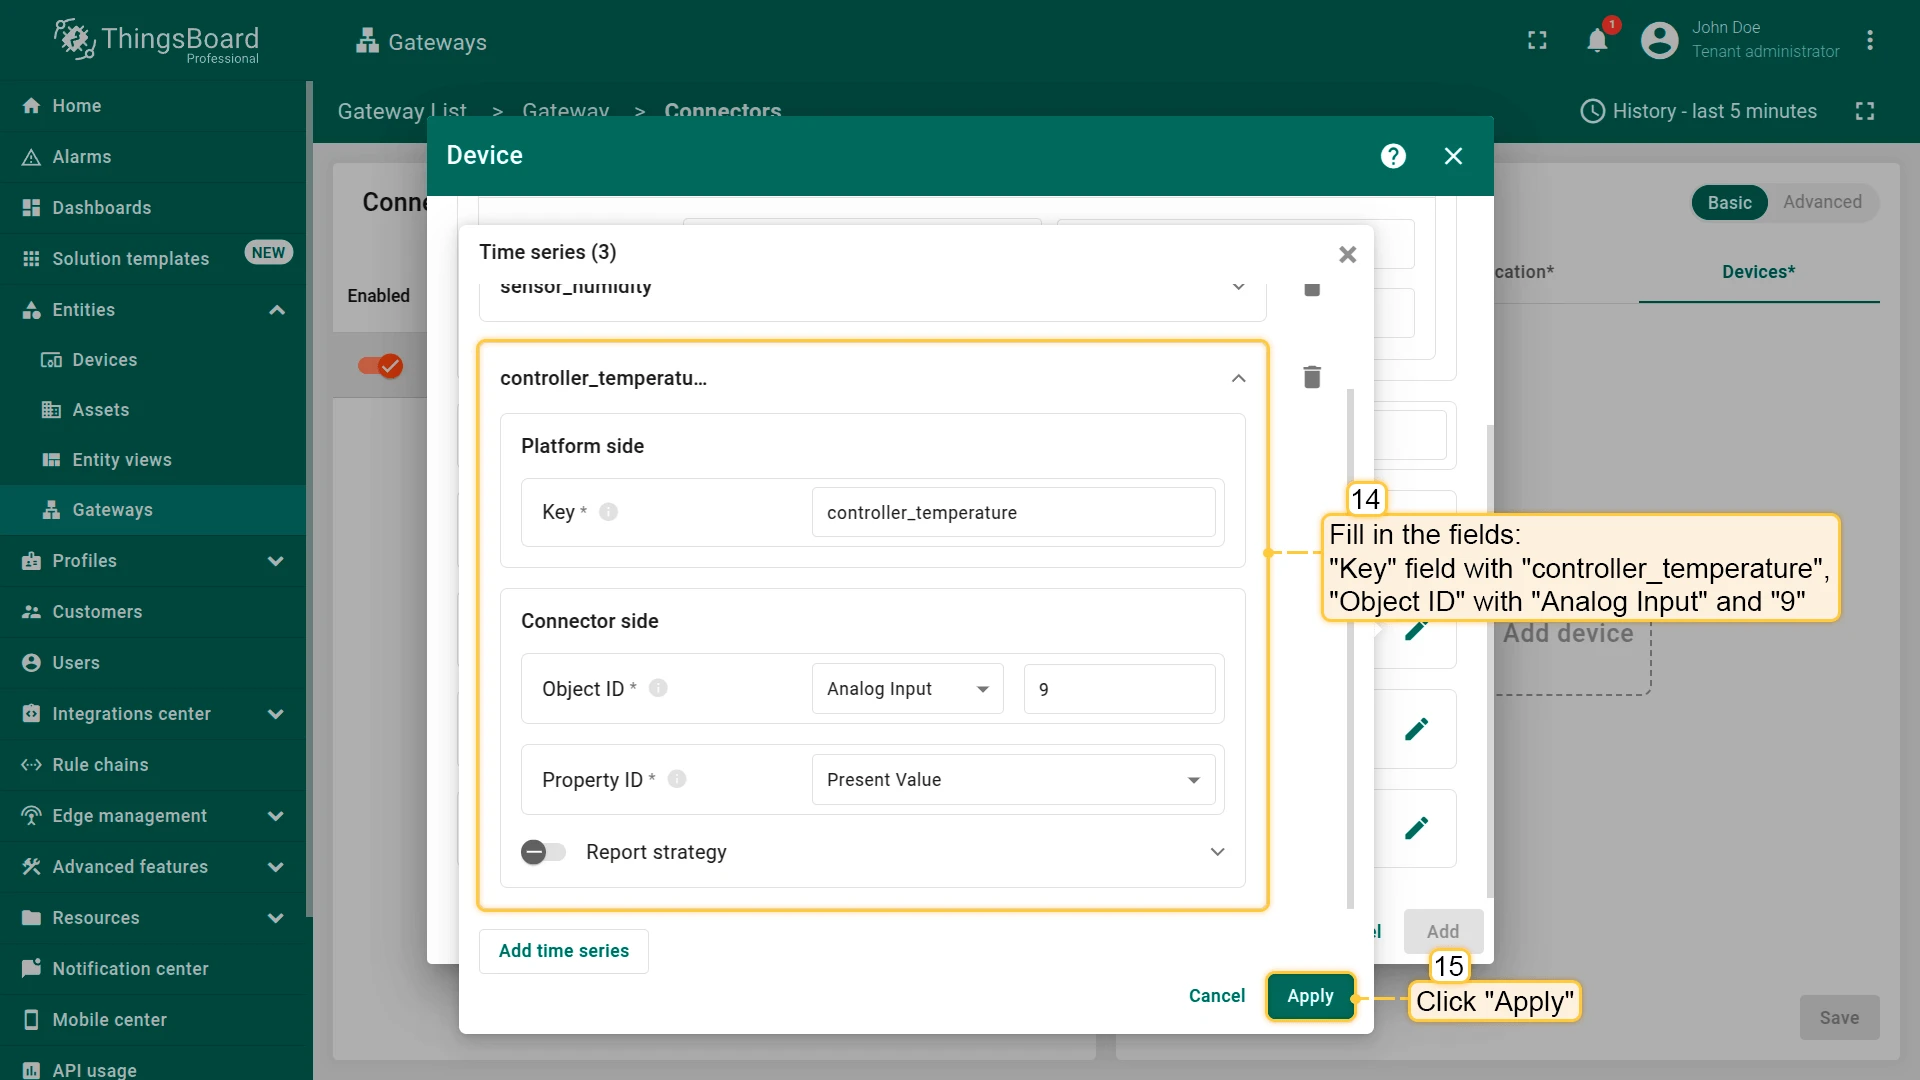
- Fill in the “Key” field with “controller_temperature”, “Object ID” with “Analog Input” and “9”. Click “Apply” button
- Click “Add” button
- Device added.

- Open the ThingsBoard in your browser and log in. Go to “Entities” > “Gateways” tab in the sidebar and click on ”+” button. Fill in “Name” and “Device profile” fields and click “Create” button
- Start gateway using launch command
- The gateway has been created. Click on the “Connectors configuration” button in the sidebar menu
- Click on ”+” button to add a new connector
- Select “BACnet” connector type, fill in the “Name” field, disable filling configuration with default values and click “Add” button
- In the created connector, go to “Advanced” section and paste the JSON configuration below. Replace host and port configuration parameter values with the device’s host and port. Also, replace “DEVICE_HOST” in “altResponsesAddresses” with device host. Click on “Save” button.
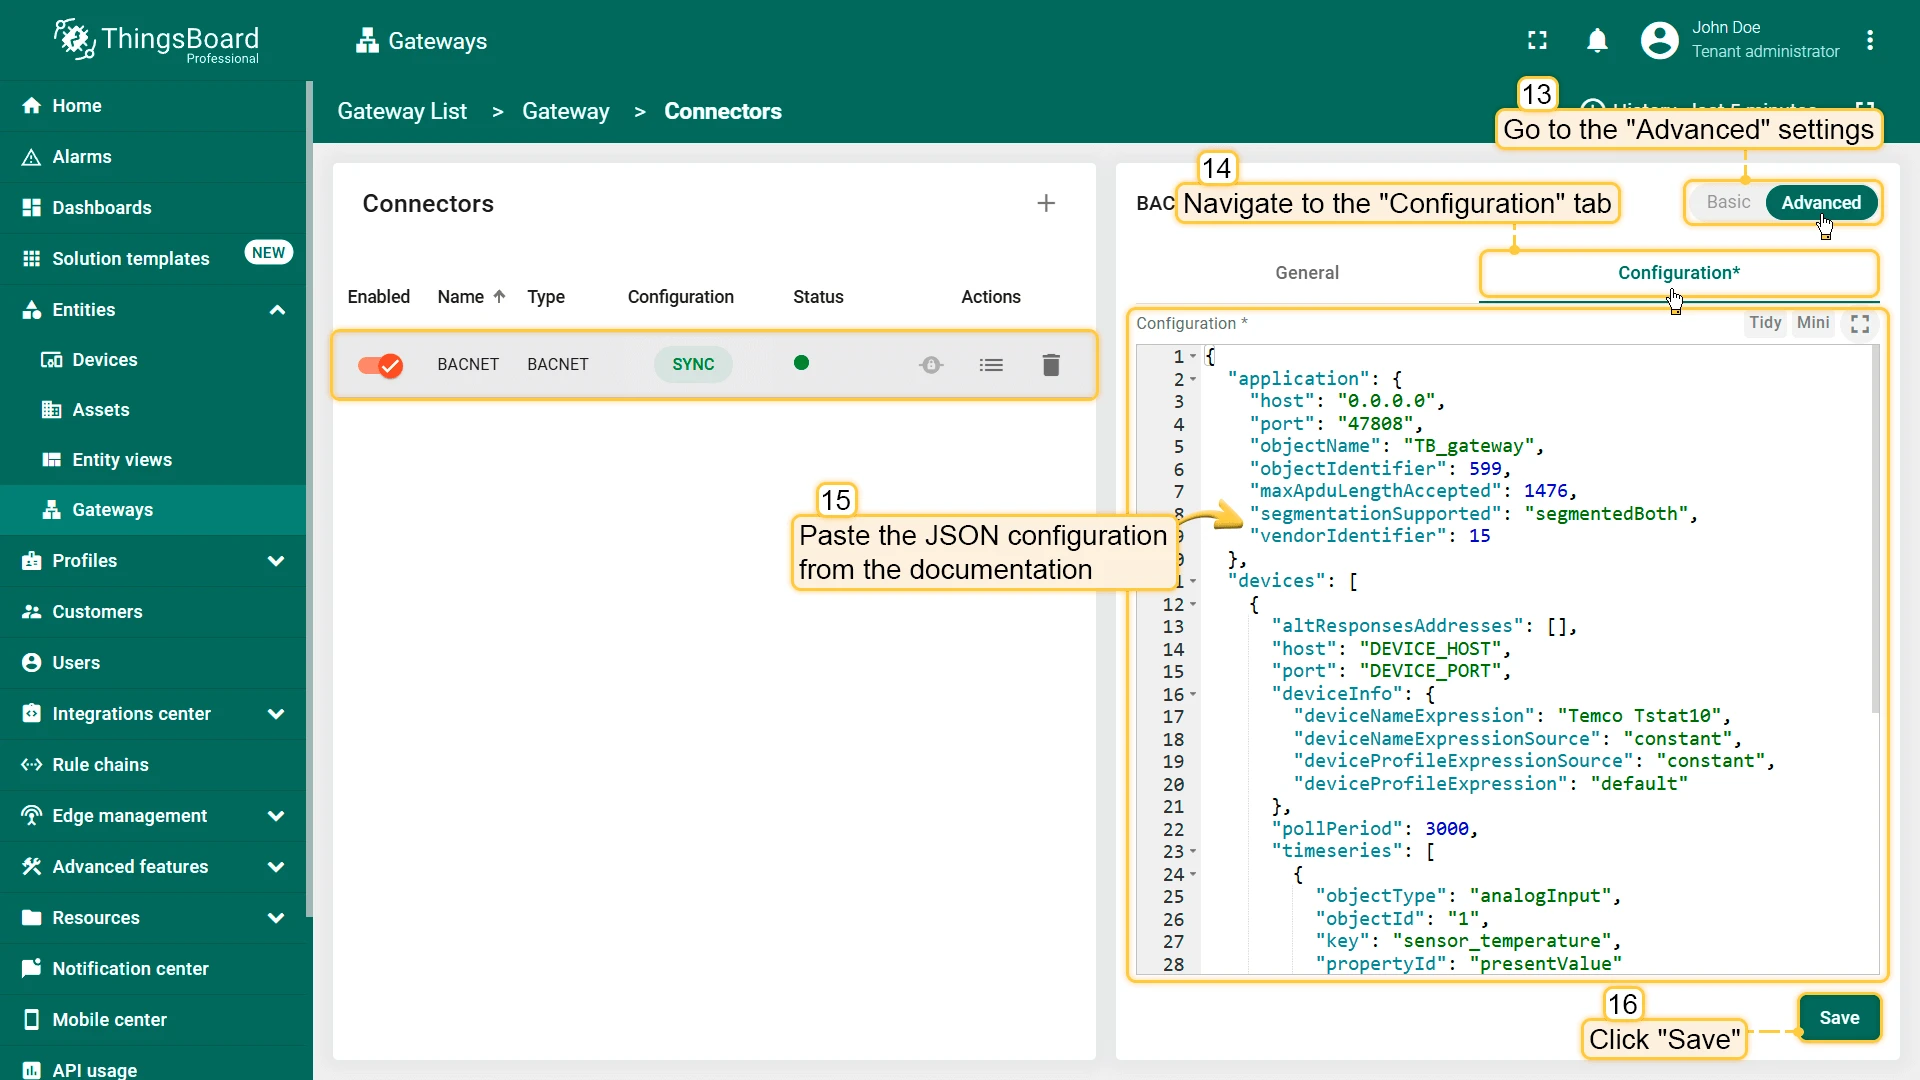
{ "application": { "host": "0.0.0.0", "port": "47808", "objectName": "TB_gateway", "objectIdentifier": 599, "maxApduLengthAccepted": 1476, "segmentationSupported": "segmentedBoth", "vendorIdentifier": 15 }, "devices": [ { "altResponsesAddresses": ["DEVICE_HOST"], "host": "DEVICE_HOST", "port": 47808, "deviceInfo": { "deviceNameExpression": "Temco Tstat10", "deviceNameExpressionSource": "constant", "deviceProfileExpressionSource": "constant", "deviceProfileExpression": "default" }, "pollPeriod": 3000, "timeseries": [ { "objectType": "analogInput", "objectId": "1", "key": "sensor_temperature", "propertyId": "presentValue" }, { "objectType": "analogInput", "objectId": "2", "key": "humidity", "propertyId": "presentValue" }, { "key": "controller_temperature", "objectType": "analogInput", "objectId": "9", "propertyId": "presentValue" } ], "attributes": [], "attributeUpdates": [], "serverSideRpc": [] } ]}Check data on ThingsBoard
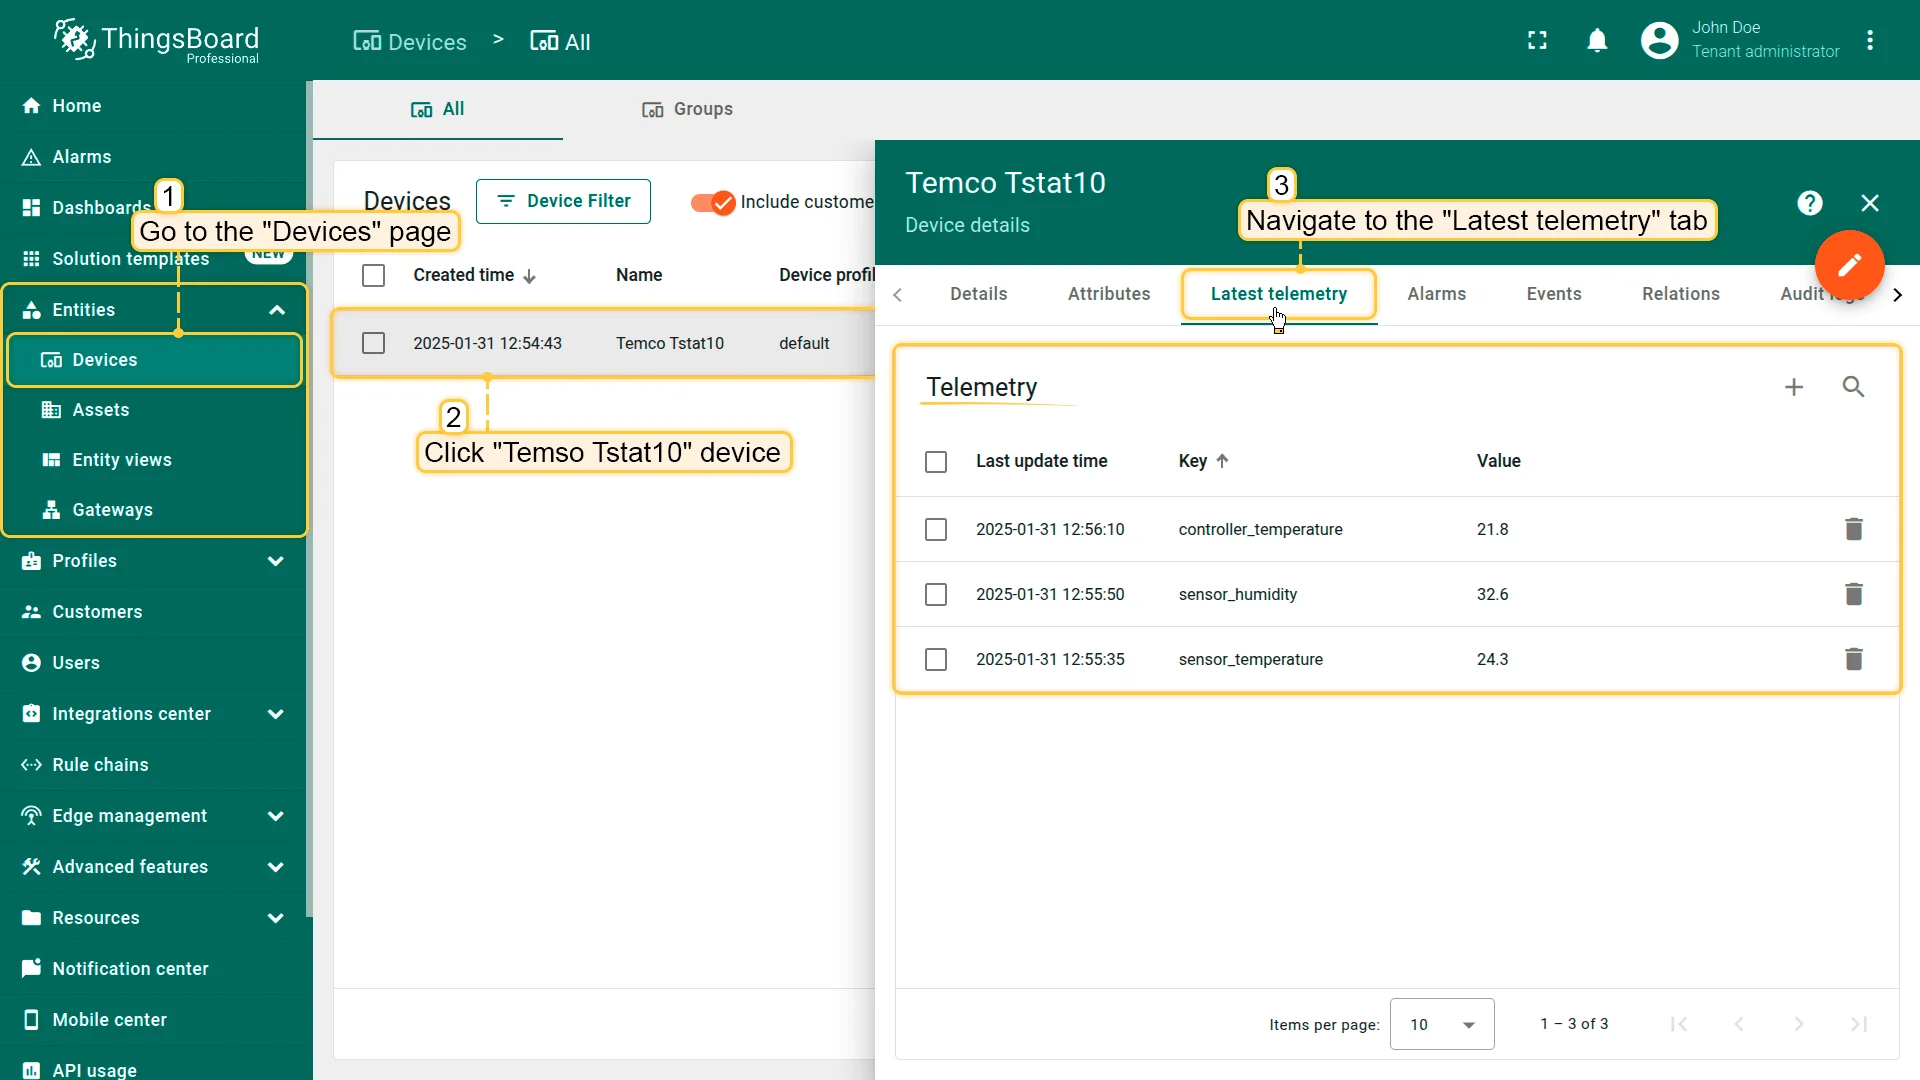
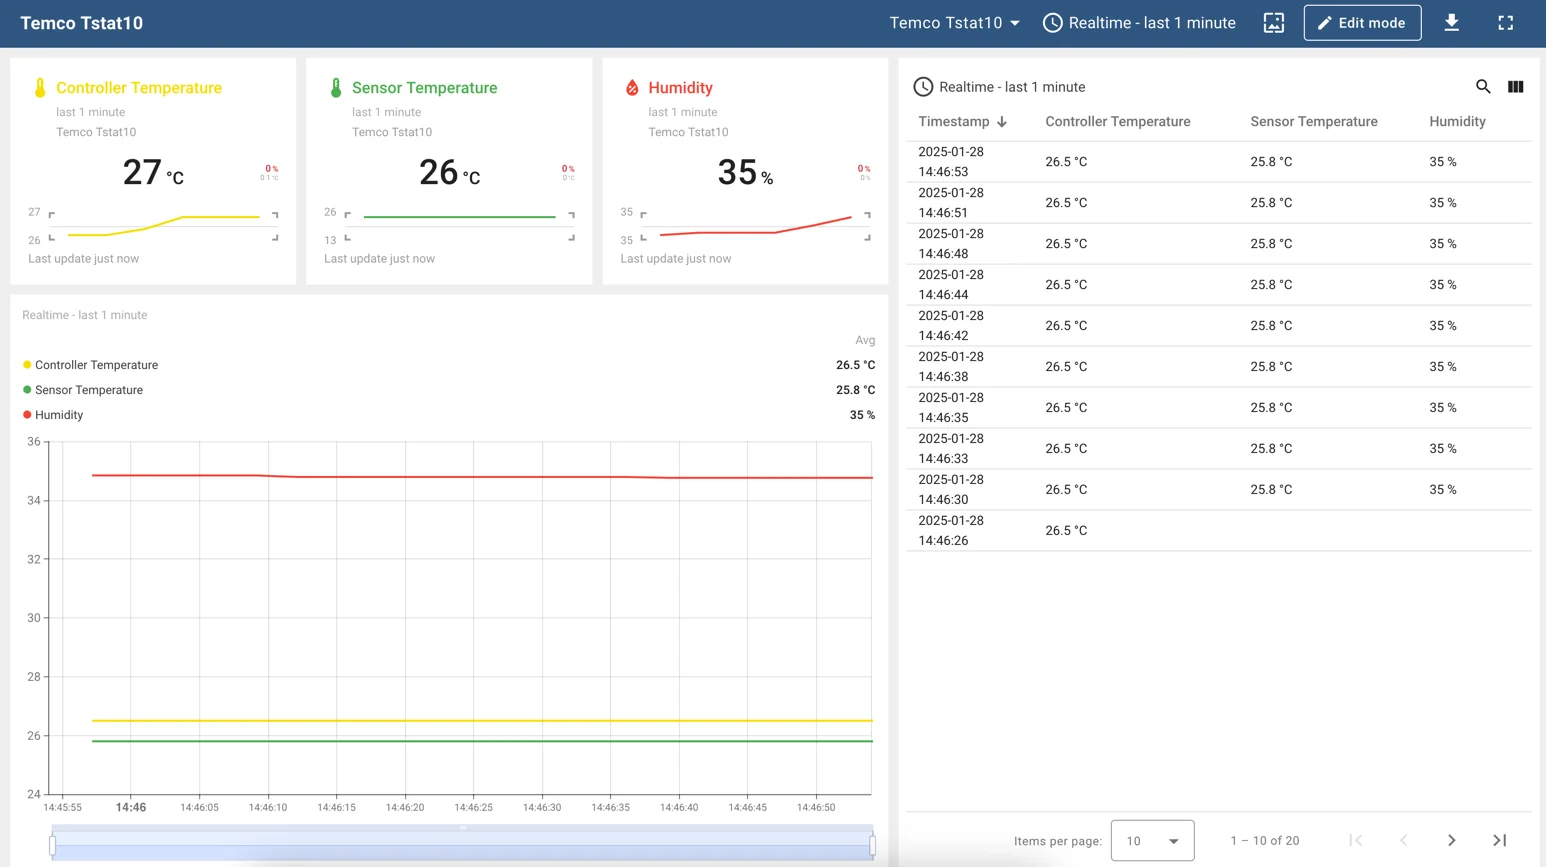
Once you have successfully done all the steps above and Gateway sent data, you can see it in the device telemetry tab:
- Click on the device row in the table to open its details;
- Navigate to the “Latest telemetry” tab.
Let’s display Temco Tstat10 time series on a dashboard. For this purpose, you can create your own dashboard with your custom widgets or use a ready-made dashboard and simply import it.
Import dashboard
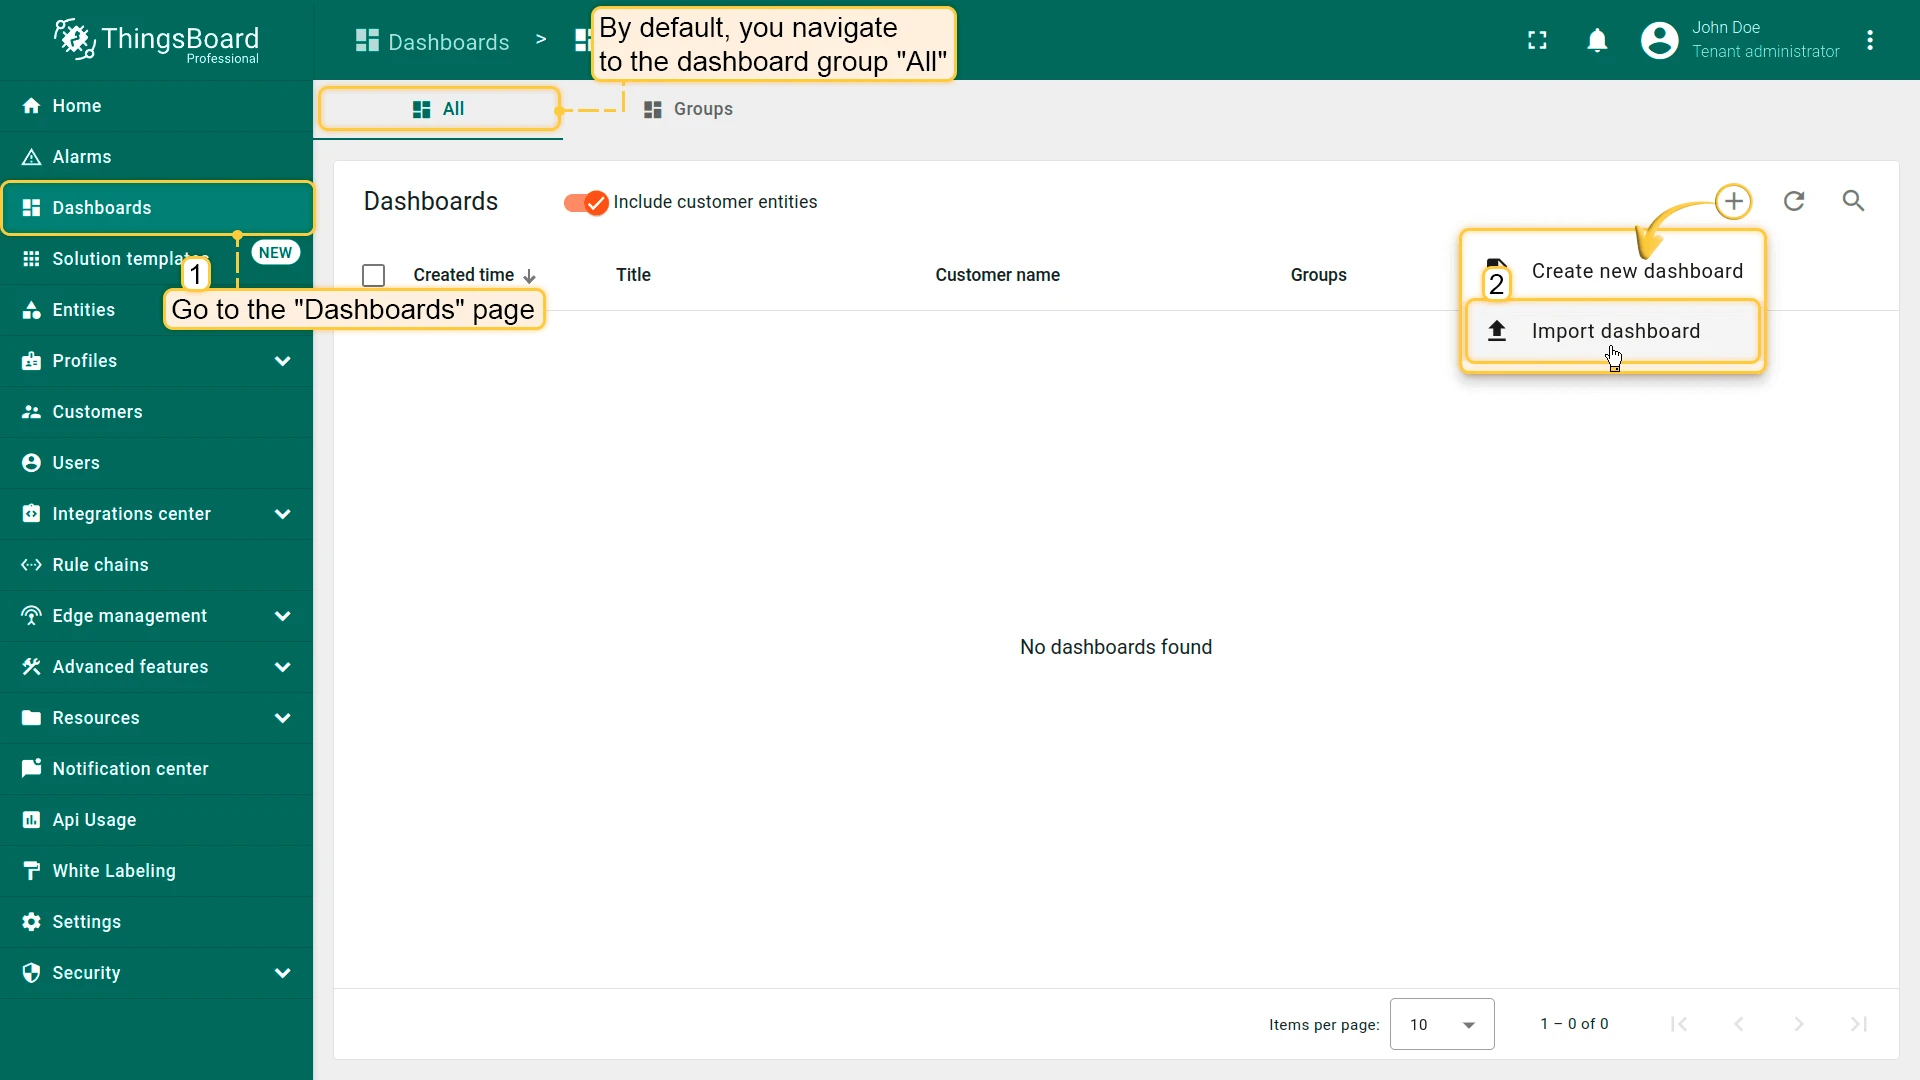
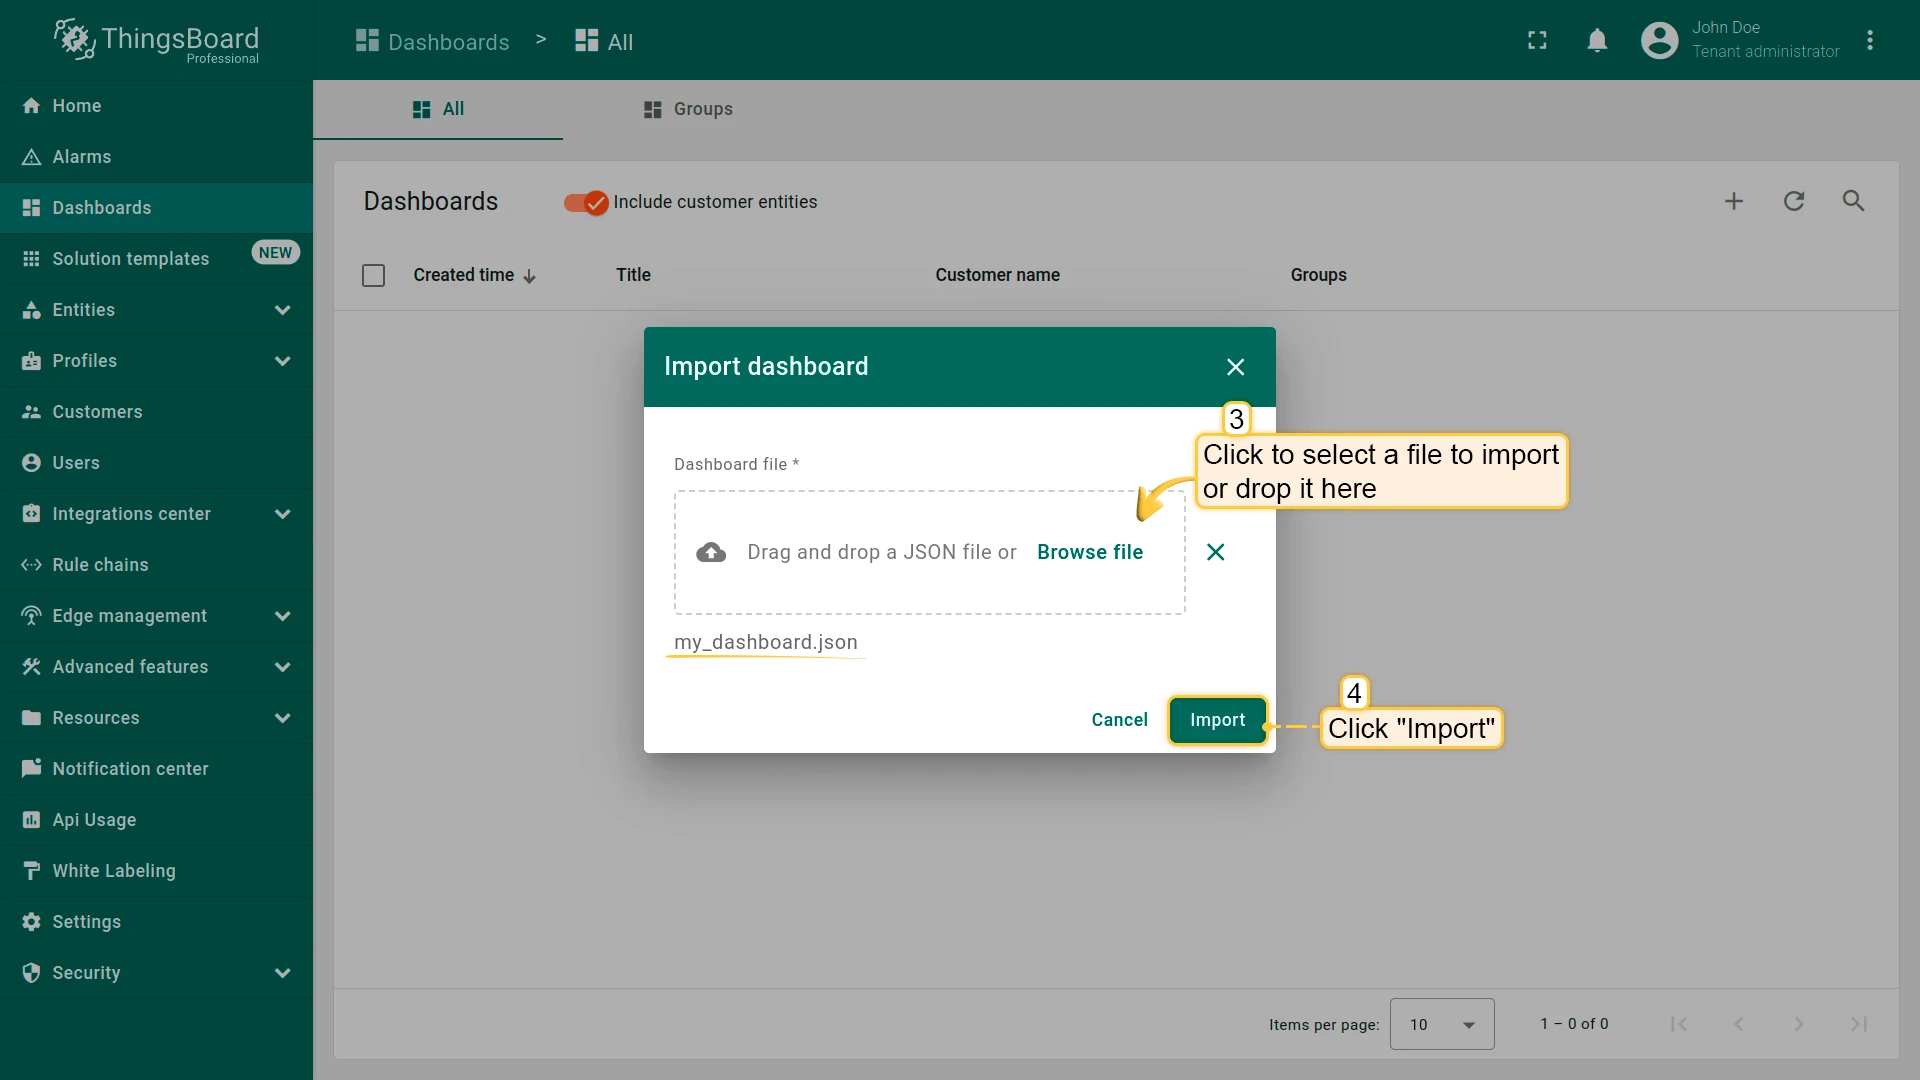
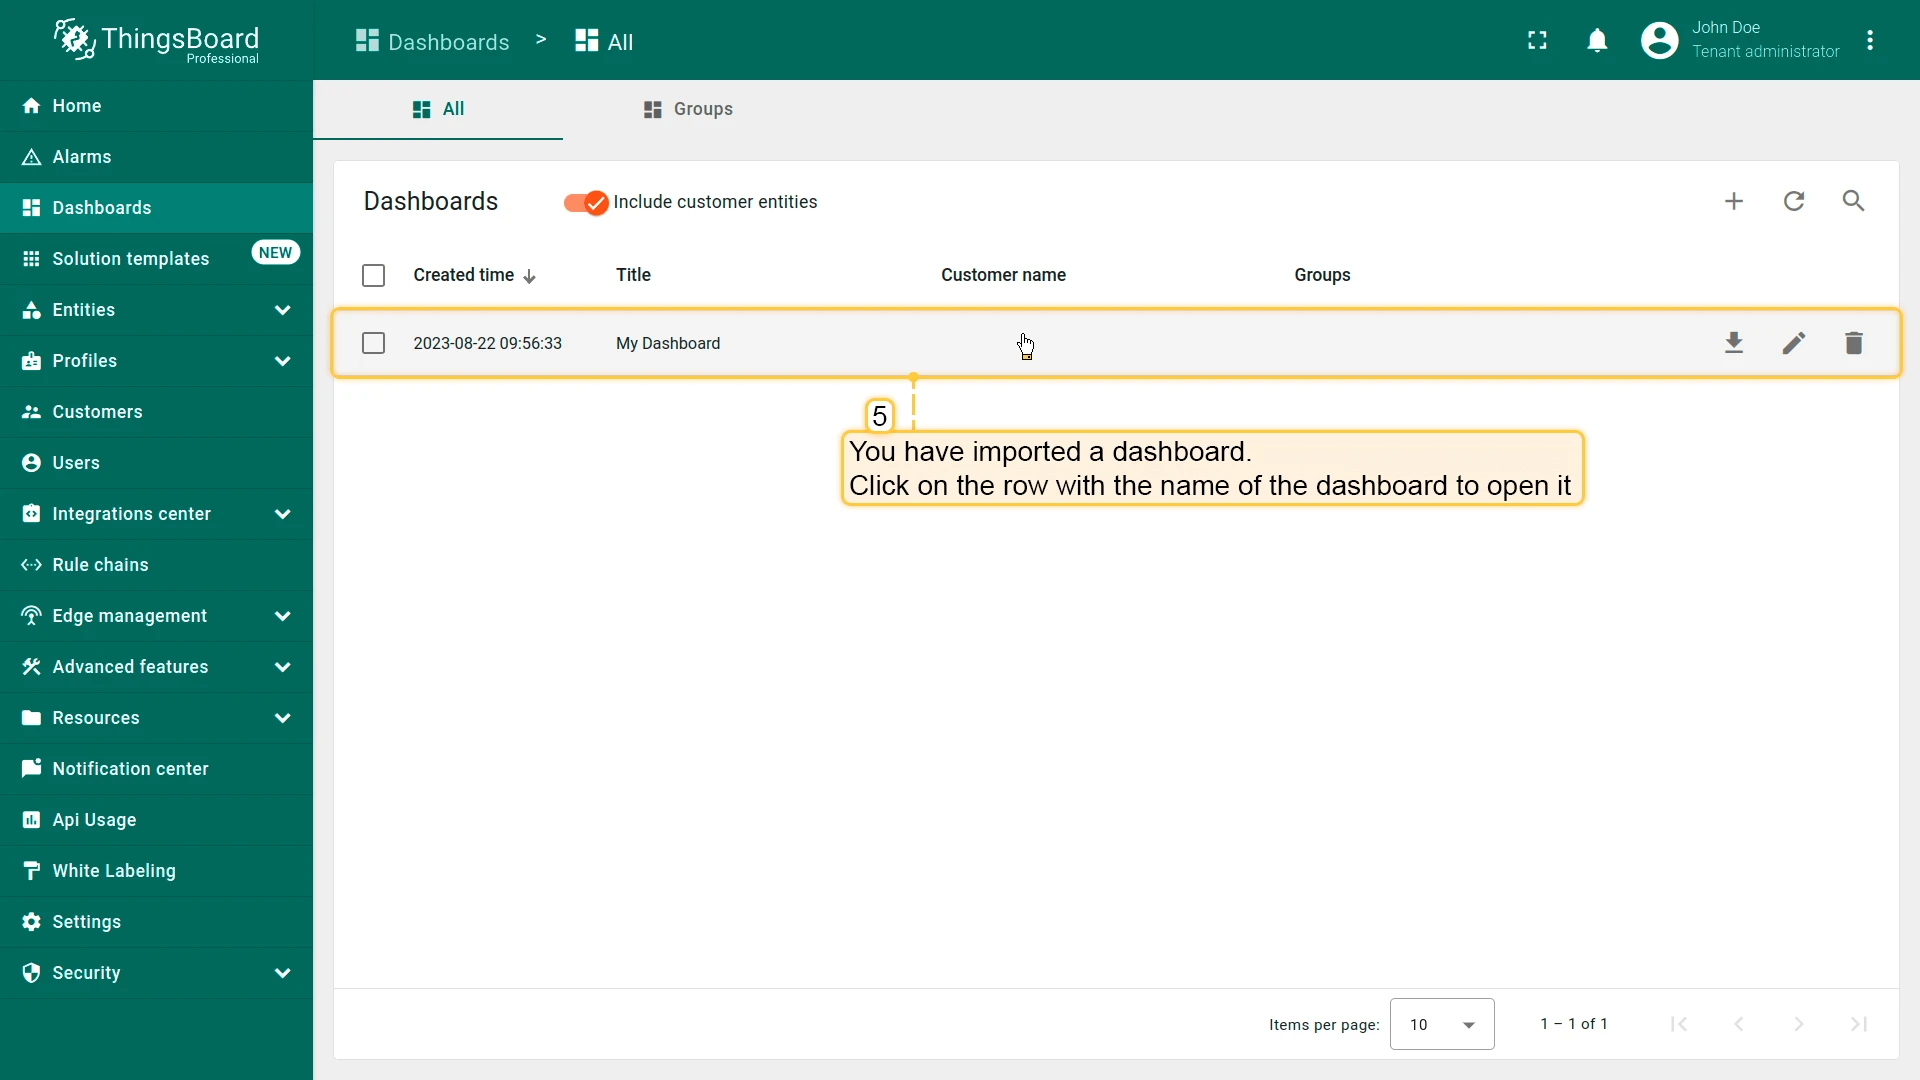
Download Check Device Data Dashboard and import it.
You can import a dashboard in JSON format. To do this, you should go to the Dashboard group, click on the ”+” button in the upper-right corner of the page and choose “Import dashboard”. The dashboard import window will appear, prompting you to upload the JSON file and click “Import”.
After importing, we should choose an entity alias for our device. Start by clicking the “pencil” icon, selecting entity aliases, choosing the “My device” alias and then clicking the “pencil” icon again to open it for editing. Then, choose the created device from dropdown list and save entity alias. Now, you should be able to see the data from the device.
If you did everything right, you should see the following dashboard:
Create new dashboard
We will create a dashboard and add the most popular widgets. See the instructions below.
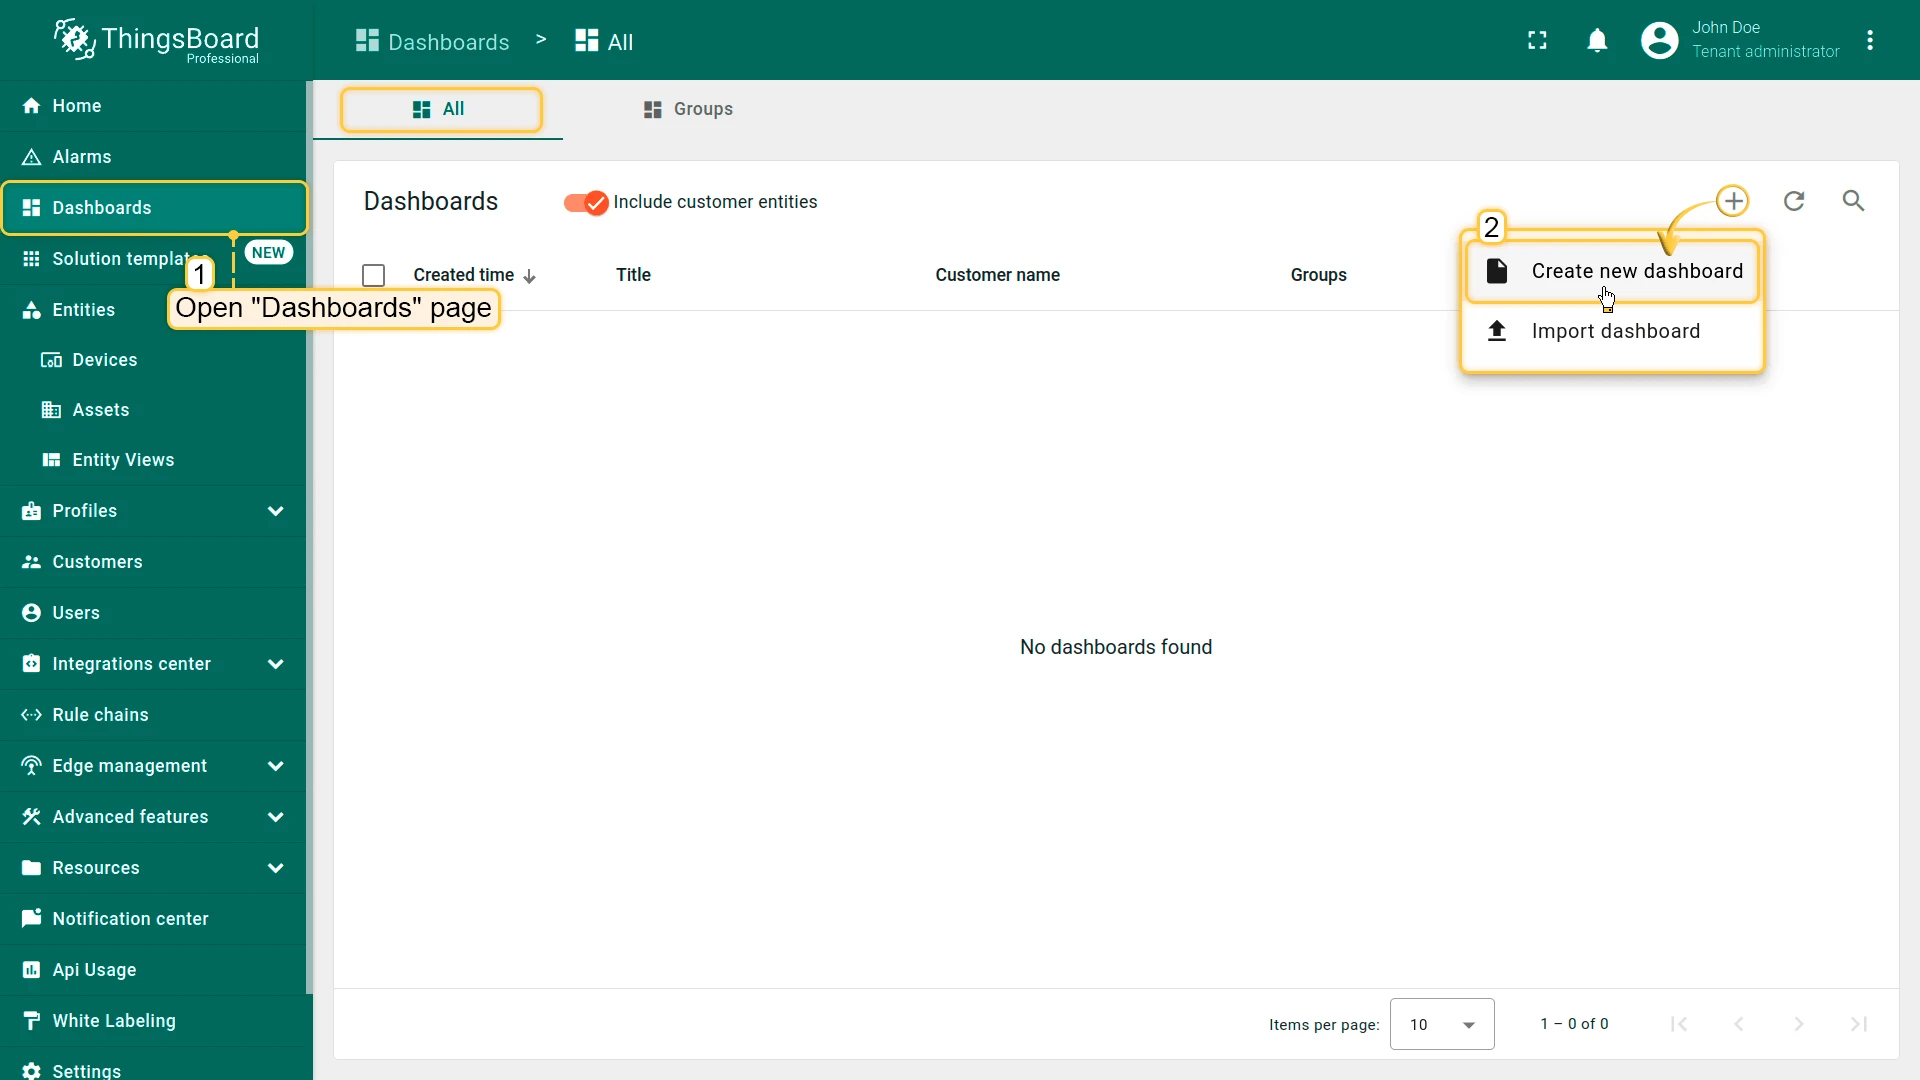
- Open the Dashboards page. Click on the ”+” icon in the top right corner. Select “Create new dashboard”
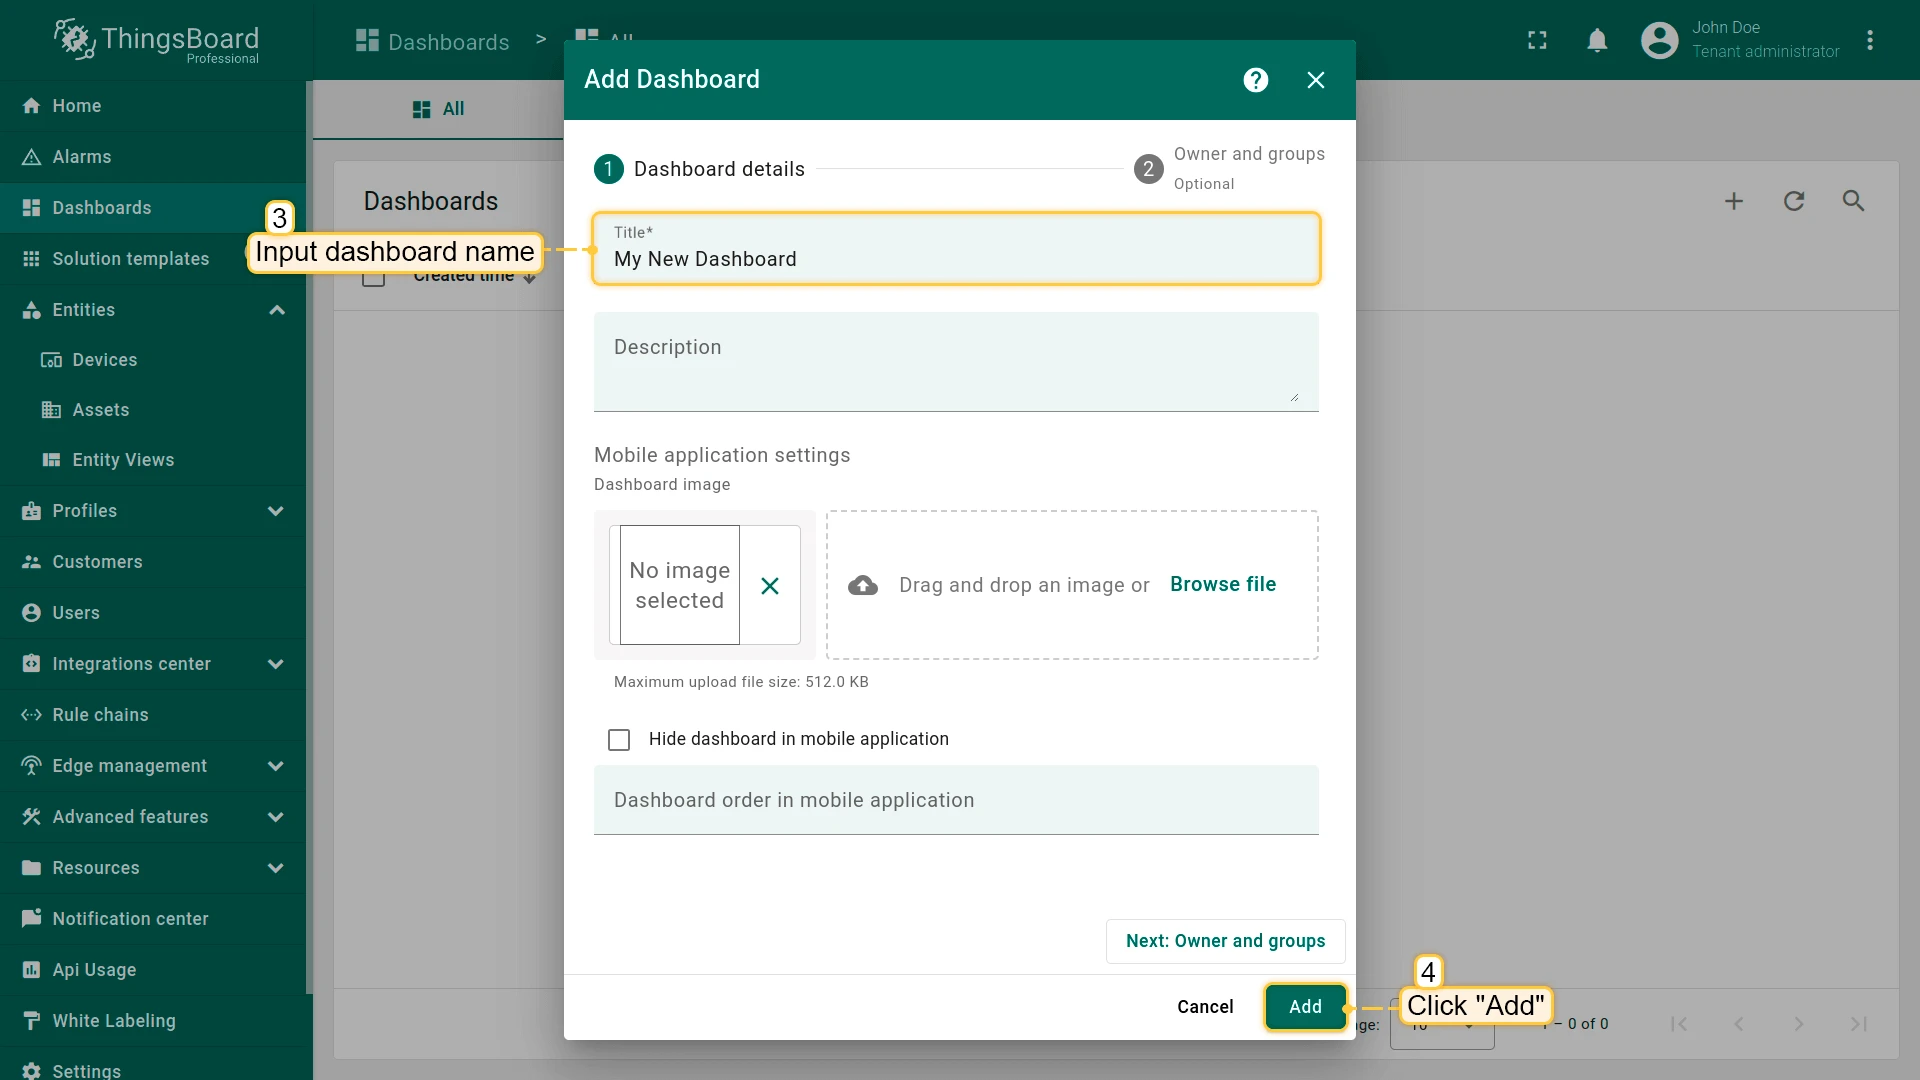
- Input dashboard name. For example, “My New Dashboard”. Click “Add” to add the dashboard
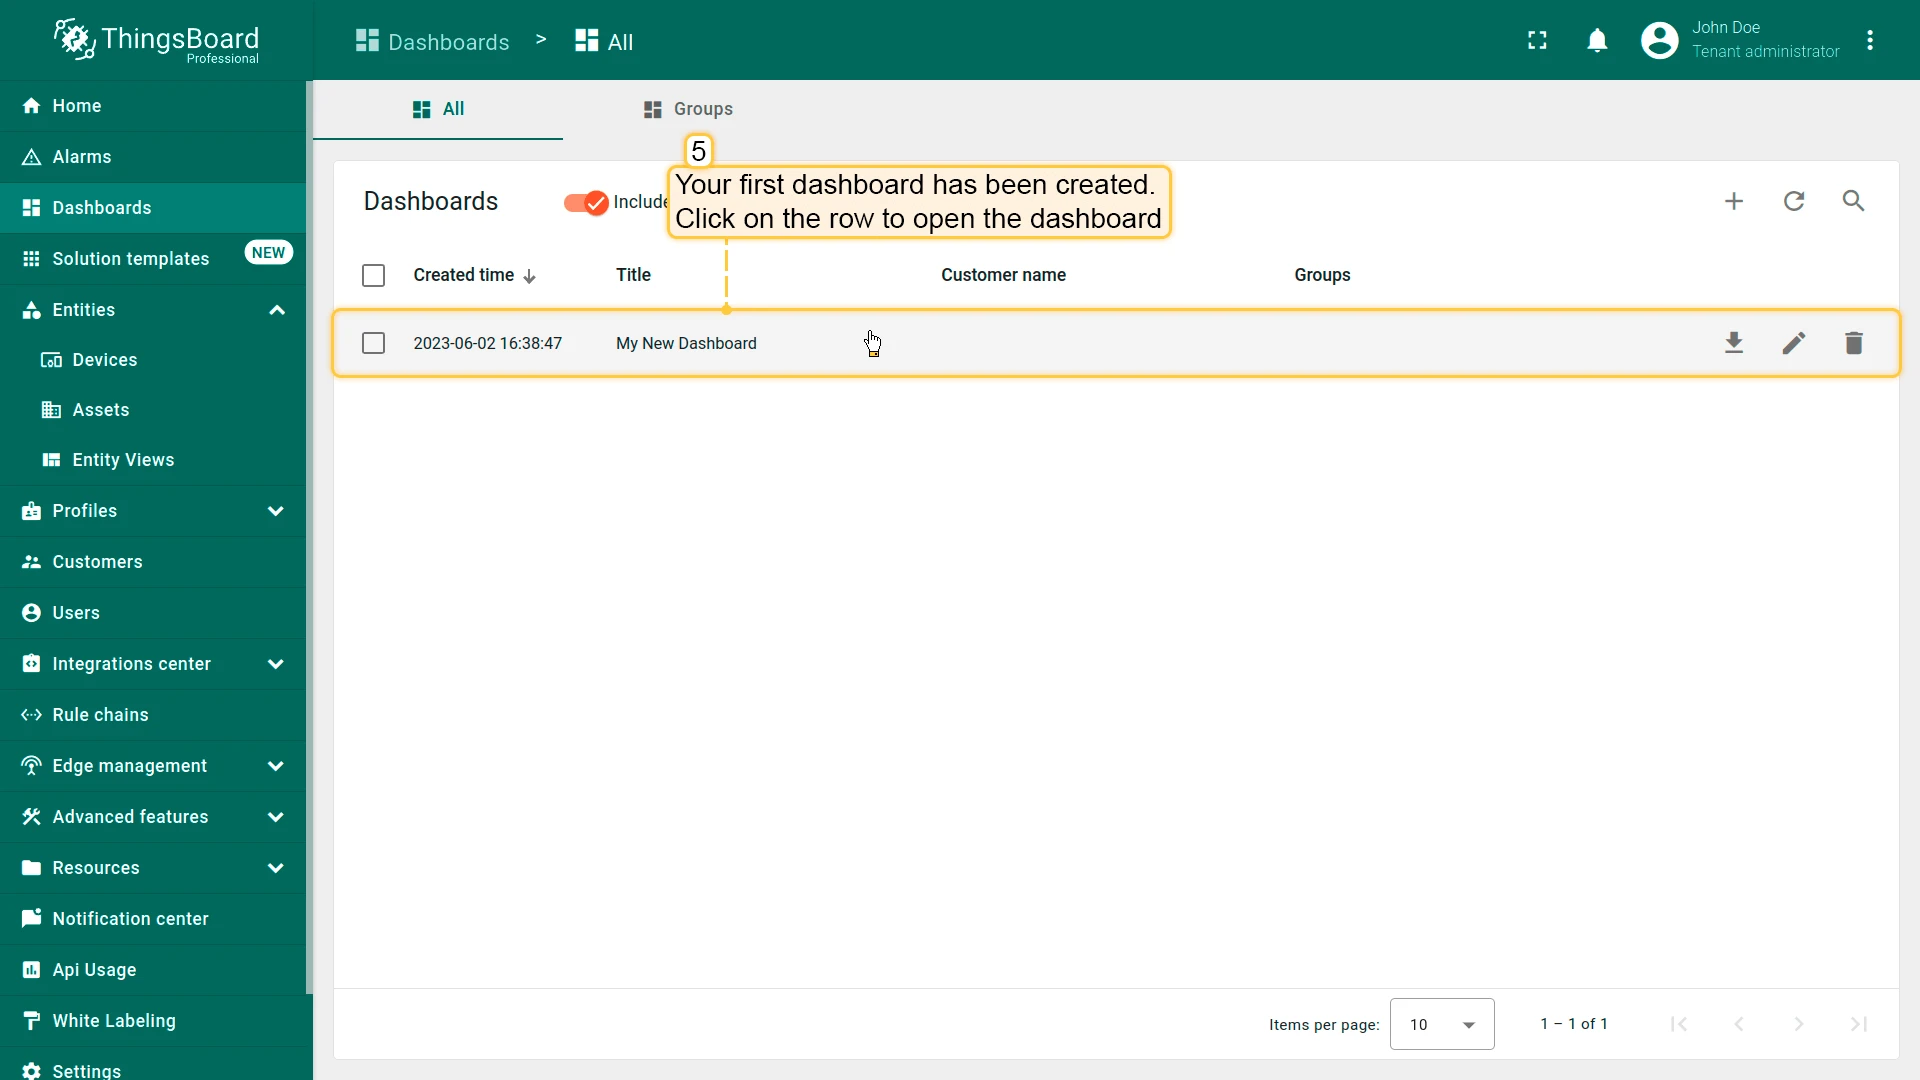
- Your dashboard should be listed first since the table sorts dashboards using the creation time by default. Click on the “Open dashboard” icon.
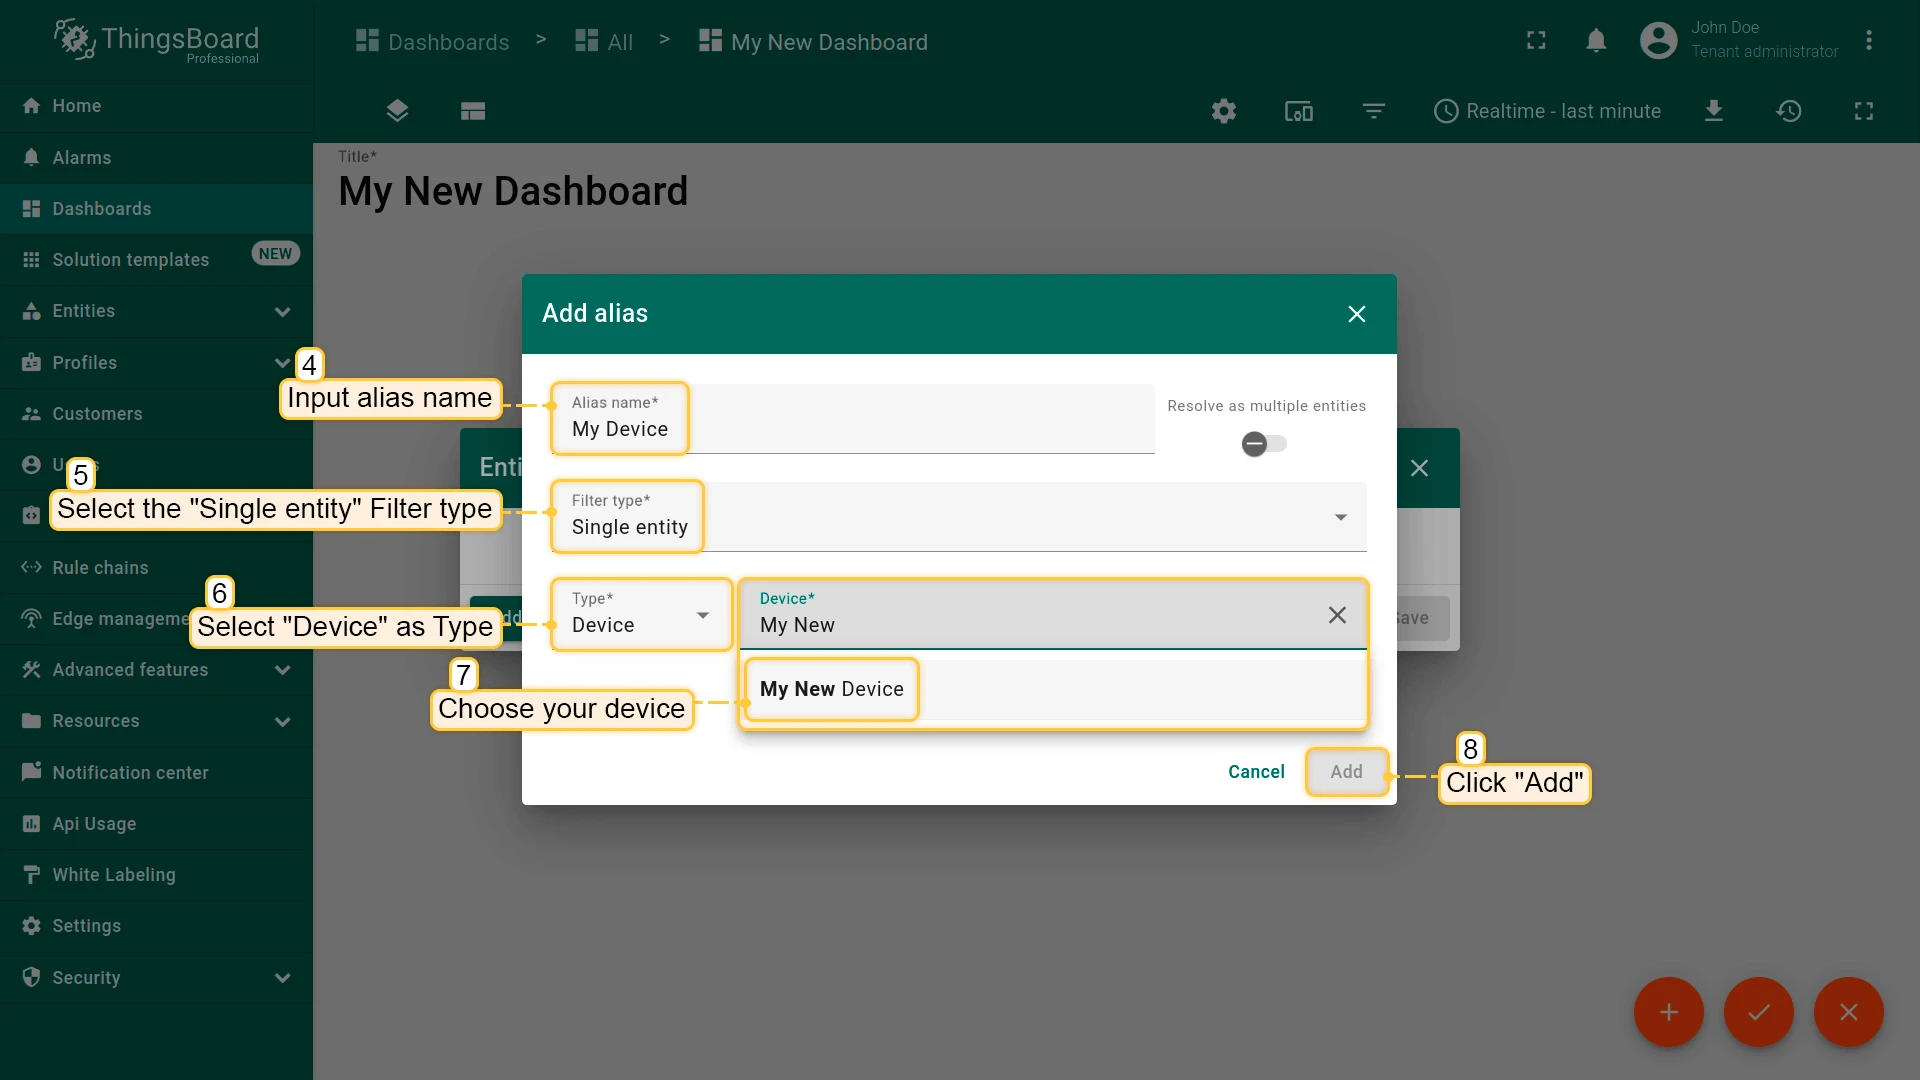
Add Entity Alias
Alias is a reference to a single entity or group of entities that are used in the widgets. An alias may be static or dynamic. We will use the “Single entity” alias, referring to a single entity. In this case, “Temco Tstat10”. It is possible to configure an alias that references multiple devices. For example, devices of a certain type or related to a certain asset. You may learn more about different aliases here.
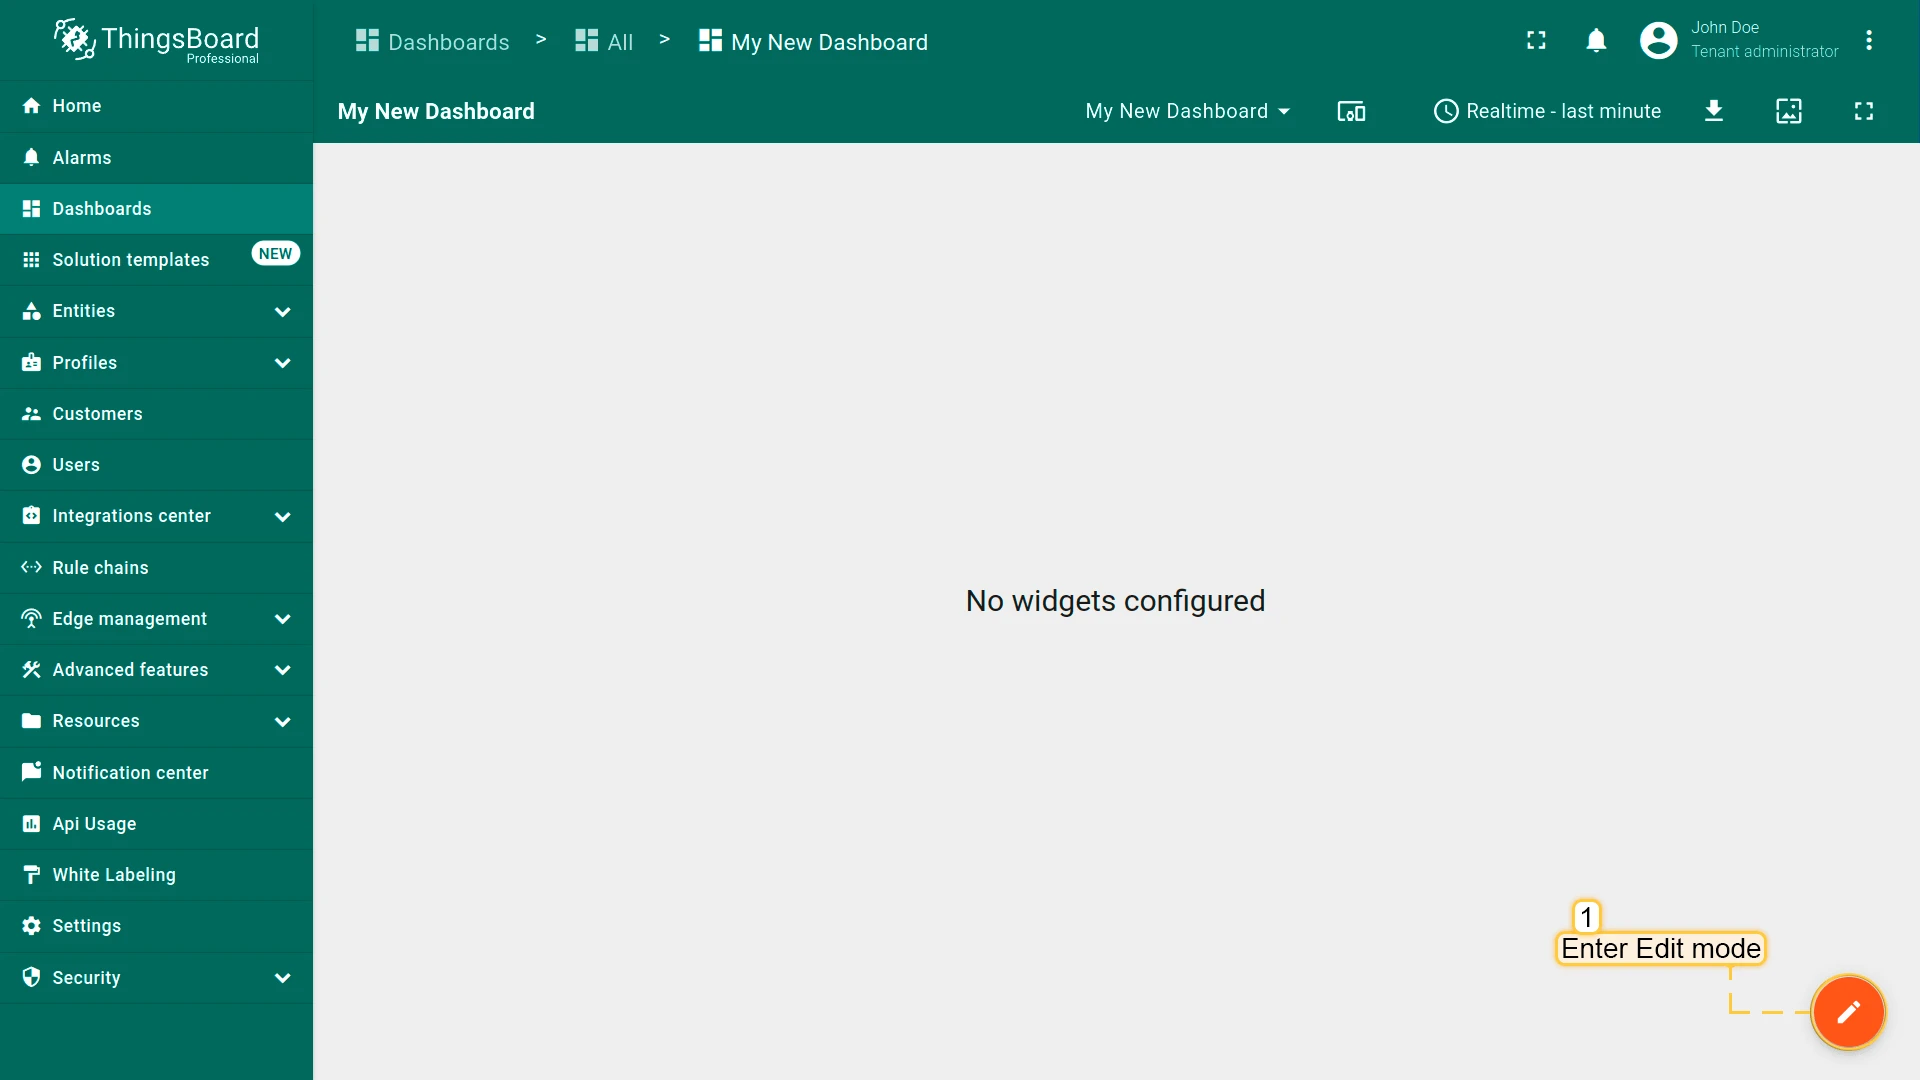
- Enter edit mode. Click on the pencil button in the bottom right corner
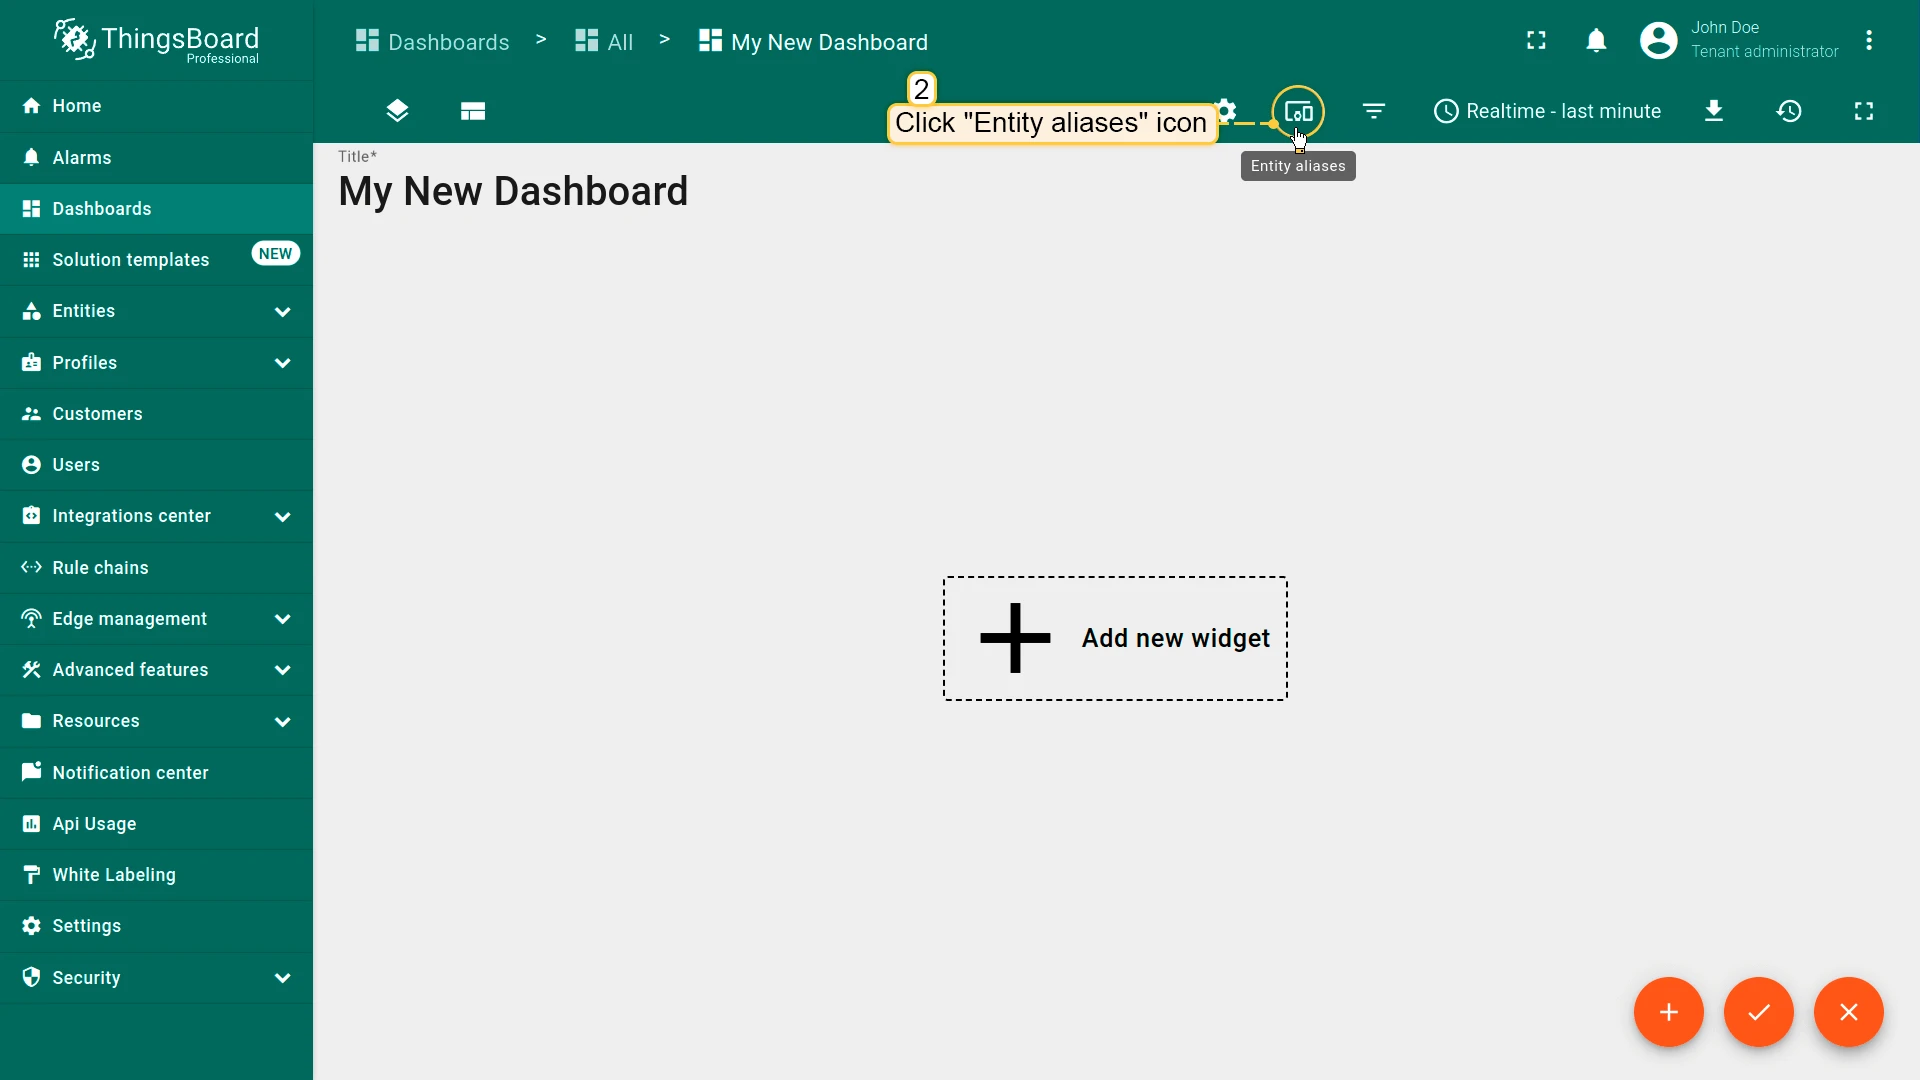
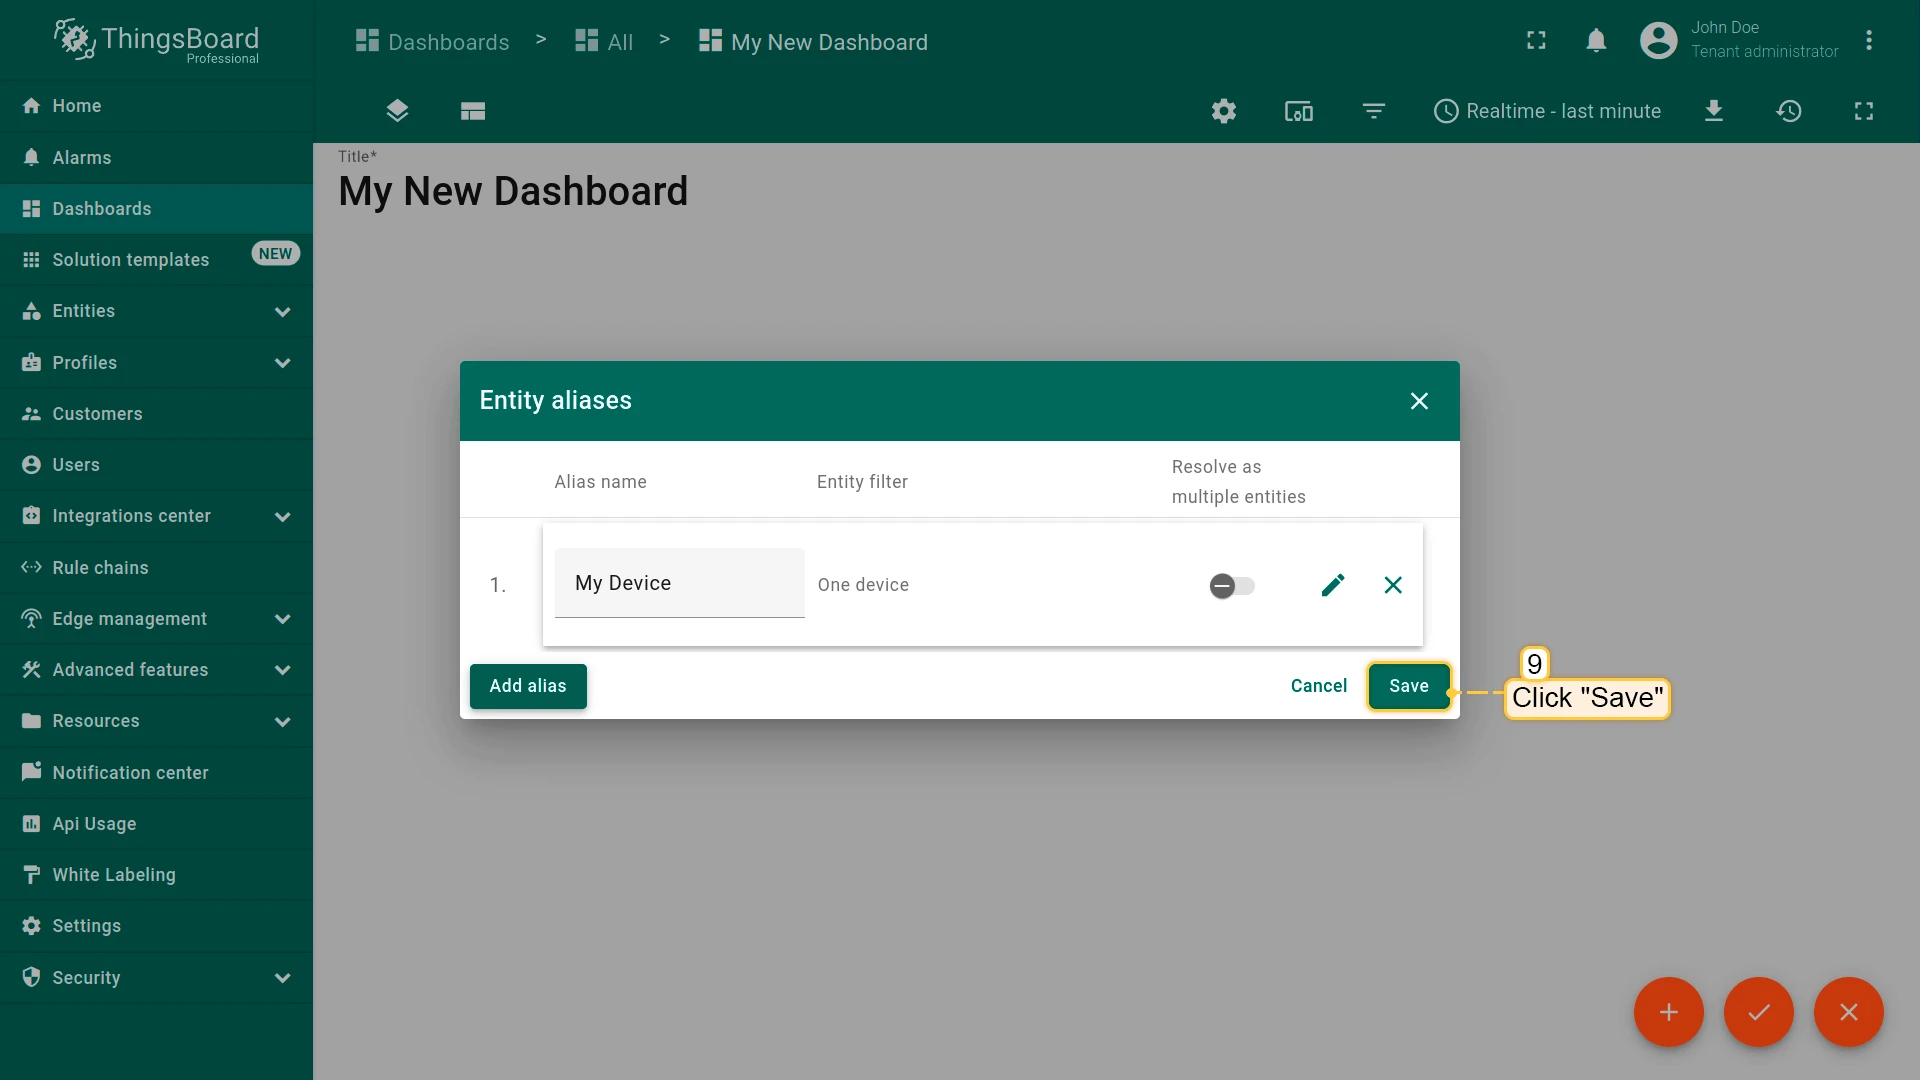
- Click the “Entity Aliases” icon in the top right part of the screen. You will see an empty list of Entity aliases
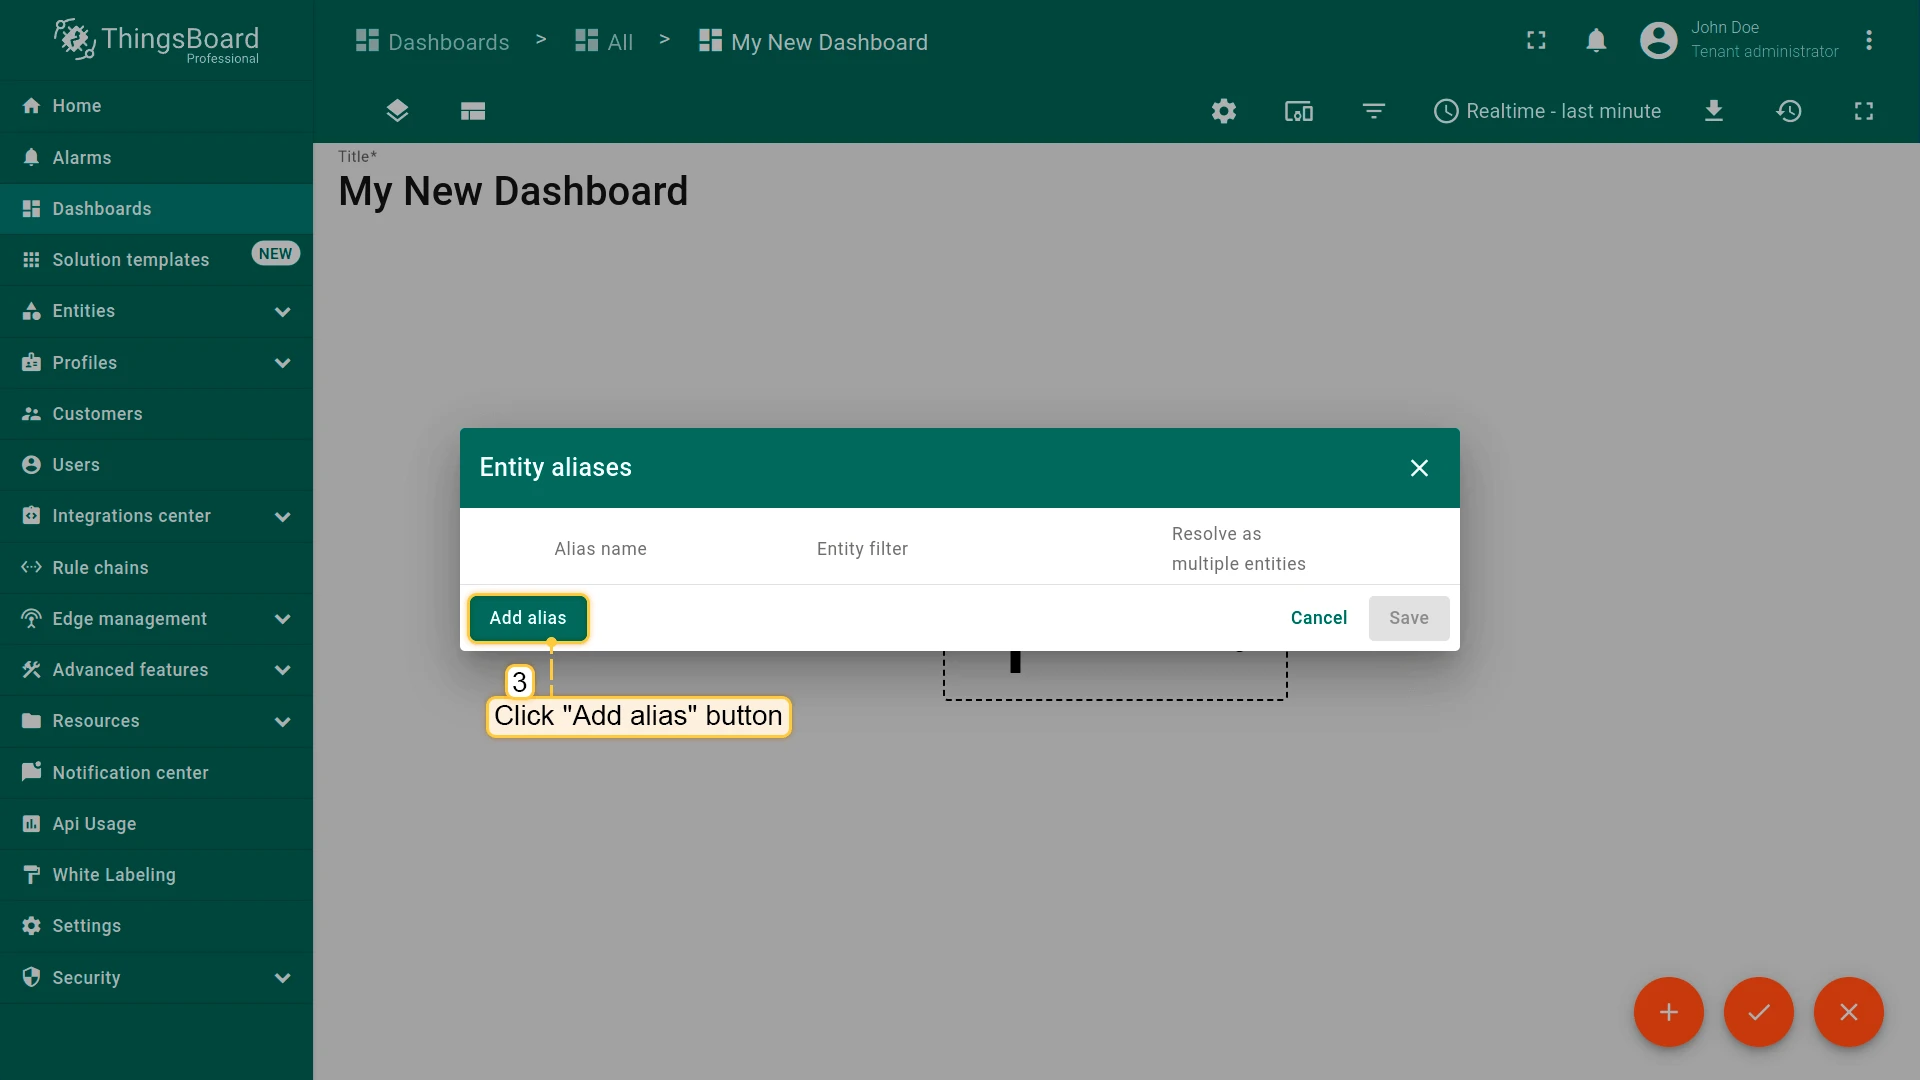
- Click “Add alias”
- Enter an alias name. Choose “Single entity” as the Filter type, select “Device” for Type, and begin typing “My New” to trigger autocomplete suggestions
- Click “Add” and then “Save”
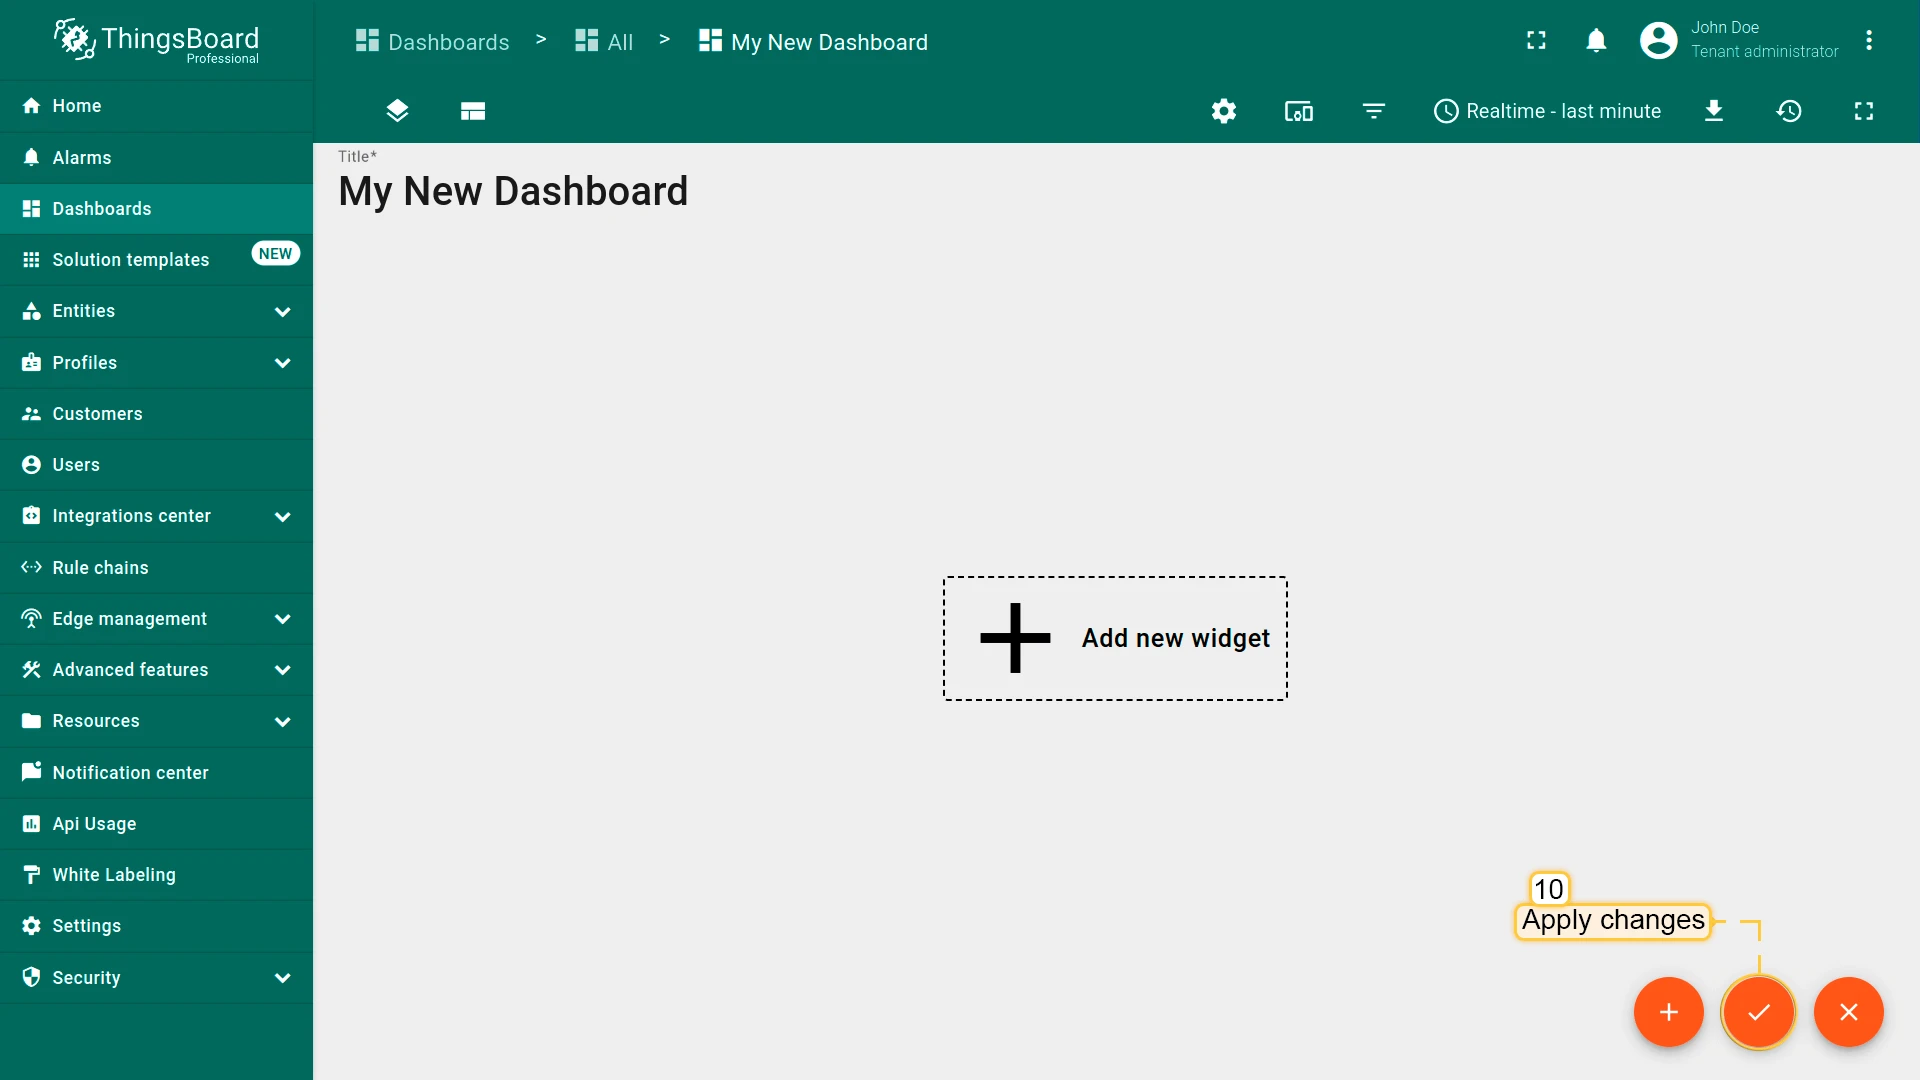
- Finally, click “Apply changes” in the dashboard editor to save the changes. Then you should enter edit mode again.
To add the new widget, we need to select it from the widget library. The widgets are grouped into widget bundles. Each widget has a data source. It is how the widget “knows” what data to display.
Conclusion
With the knowledge in this guide, you can easily connect your Temco Tstat10 controller with Temperature and humidity sensor to ThingsBoard. After connecting the devices to the gateway, you will be able to see and process the data coming from the devices on the ThingsBoard.
Explore the platform documentation to learn more about key concepts and features.