- Introduction
- Prerequisites
- Import Rule chain
- Create device profile
- Create device
- Gateway connection
- Check data on ThingsBoard
- Conclusion
Introduction
 Teltonika RUT955 offers dual-SIM cellular
connectivity, four Ethernet ports and Wi-Fi combined with RS232, RS485, USB interfaces and I/O for a wide variety of
professional application scenarios. This router is equipped with advanced RutOS software features such as Modbus, SNMP,
TR-069, NTRIP, MQTT protocol support and GNSS tracking capabilities.
Prerequisites
To continue with this guide, we will need the following:
- Teltonika RUT955
- Modbus Controller (in our case Siemens LOGO!)
- ThingsBoard account
Import Rule chain
Download Teltonika Rule Chain and import.
To import rule chain from а JSON file, you should:
-
Navigate to the “Rule chains” page and click on the “+” button in the upper right corner of the screen and then choose “Import rule chain” option. The toolbar import popup window will appear. Upload a JSON file and click on the “Import” button;
-
The imported rule chain will open. Click on the “Apply changes” button to save the rule chain. Then, go back to the main “Rule chains” page;
-
Rule chain is imported.
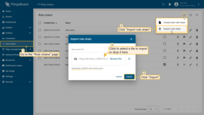
Navigate to the “Rule chains” page and click on the “+” button in the upper right corner of the screen and then choose “Import rule chain” option. The toolbar import popup window will appear. Upload a JSON file and click on the “Import” button;
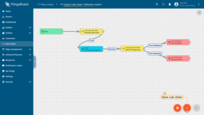
The imported rule chain will open. Click on the “Apply changes” button to save the rule chain. Then, go back to the main “Rule chains” page;
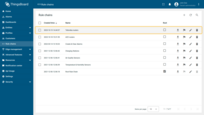
Rule chain is imported.
Create device profile
Now, we are ready to create device profile. For this, follow steps below:
-
Go to Profiles > Device profiles and click on “Add” button > “Create new device profile”;
-
Input Name field with “Teltonika routers” value. Select “Teltonika routers” imported rule chain from the step above;
-
Click on “Transport configuration” tab. Select MQTT transport type and change Telemetry topic filter value from “v1/devices/me/telemetry” to “RUT/”. Click on “Add” button;
-
Device Profile created.
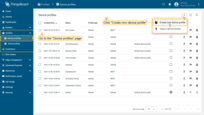
Go to Profiles > Device profiles and click on “Add” button > “Create new device profile”;
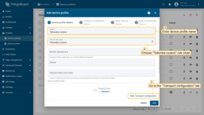
Input Name field with “Teltonika routers” value. Select “Teltonika routers” imported rule chain from the step above;
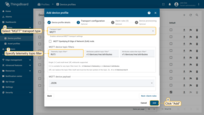
Click on “Transport configuration” tab. Select MQTT transport type and change Telemetry topic filter value from “v1/devices/me/telemetry” to “RUT/”. Click on “Add” button;
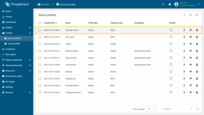
Device Profile created.
Create device
For simplicity, we will provide the device manually using the UI:
-
Open the Devices page. By default, you navigate to the device group “All”. Click on the “+” icon in the top right corner of the table and then select “Add new device”;
-
Input device name. For example, “Teltonika RUT955”. Select created device profile from the step above, in our case “Teltonika routers”;
-
Click on “Credentials” tab. Check “Add credentials” and select “MQTT Basic” credentials type. Click on “Generate” button on each field and click “Add” button;
-
Device added.
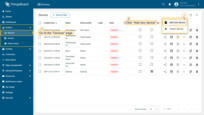
Open the Devices page. By default, you navigate to the device group “All”. Click on the “+” icon in the top right corner of the table and then select “Add new device”;
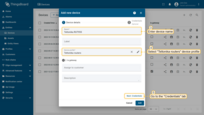
Input device name. For example, “Teltonika RUT955”. Select created device profile from the step above, in our case “Teltonika routers”;
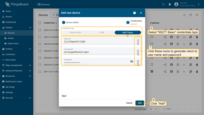
Click on “Credentials” tab. Check “Add credentials” and select “MQTT Basic” credentials type. Click on “Generate” button on each field and click “Add” button;
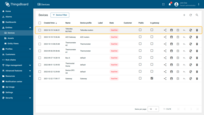
Device added.
Gateway connection
According to the official user manual and this guide you can connect the gateway to the network and get access to the WebUI in two ways:
|
Your PC must be on the same network as the Gateway: 192.168.1.XXX. If that’s not the case, change the IP address of your PC. For Windows:
For macOS:
For Ubuntu Linux:
|
Now, you can configure the gateway.
Once you are connected to the Teltonika RUT955, you can change its IP address if you wish:
- Go to Interfaces > General;
- Click “Edit” button on “lan” interface;
- Enter a new IP address that is not already being used by another device on your network.
Now we are ready to configure the MQTT connection and topics for both data reception and transmission and establishing the Modbus connection.
Let’s first configure Modbus Connection. As mentioned above, we use Siemens LOGO! with AM2 RTD module (used for connecting PT100) - which is the perfect choice for the fast, uncomplicated, and space-saving solution of simple control and regulation tasks. LOGO! has long since established itself as an intelligent logic module in small automation projects.
In our case, the following diagram for data reading and preparation was created in LOGO! Soft Comfort:

Don’t forget to enable TCP connection.

Also, we have to add Modbus slave device configuration. To do this, follow the steps below:
- Go to Services > Modbus > Modbus TCP Master;
- Click “ADD” button;
- Fill in all required fields with correct information about your device;
- Scroll down to “REQUESTS CONFIGURATION” section;
- Add all registers from which you want to read data;
- Click on “Save & Apply” button.
In our case, we have the following settings:

The next thing we have to do is configure the Data Sender. To do this, follow the steps below:
- Go to Services > Data to Server;
- Click “ADD” button;
- Fill in all required fields with correct credentials and other information for broker access;
- Click on “Save & Apply” button.
In our case, we have the following settings:

If you did everything right, you have to receive the following MQTT message:
1
{"data": 299, "reg": 300003, "ts": 1696838802}
Check data on ThingsBoard
Once you have successfully done all the steps above and Teltonika RUT955 sent data, you can see it in the Device Telemetry Tab:
-
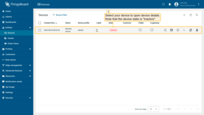
Click on the device row in the table to open device details;
-
Navigate to the telemetry tab.
Let’s display Teltonika RUT955 attributes and telemetry on a dashboard. For this, you can create your own dashboard with your custom widgets or use a ready-made dashboard and simply import it.
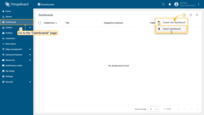
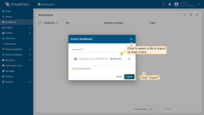
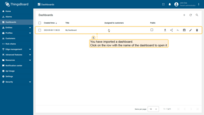
Import dashboardDownload Check Device Data Dashboard and import. You are able to import a dashboard in JSON format. To import a dashboard, you should go to the Dashboard group and click on the “+” button in the upper right corner of the page and choose “Import dashboard”. The dashboard import window should pop up, and you will be prompted to upload the JSON file and click “Import”. After importing, we should choose an entity alias for our device. If you did everything right, you have to see the following dashboard:
|
Conclusion
With the knowledge in this guide, you can easily connect your Teltonika RUT955 and use the built-in integration to retrieve data from devices connected to Teltonika RUT955.
After connecting the devices to the gateway, you will be able to see and process the data coming from the devices on the ThingsBoard.
Explore the platform documentation to learn more about key concepts and features.


