MOKO SMART LoRaWAN device and ThingsBoard
Introduction
Section titled “Introduction”This guide describes how to register a MOKO SMART LoRaWAN gateway and end devices in ThingsBoard using The Things Stack Community Edition (TTN) as the network server and a ThingsBoard MQTT integration to forward device data.
The guide applies to all MOKO SMART LoRaWAN end devices.
Add gateway
Section titled “Add gateway”Add gateway on TTN
Section titled “Add gateway on TTN”-
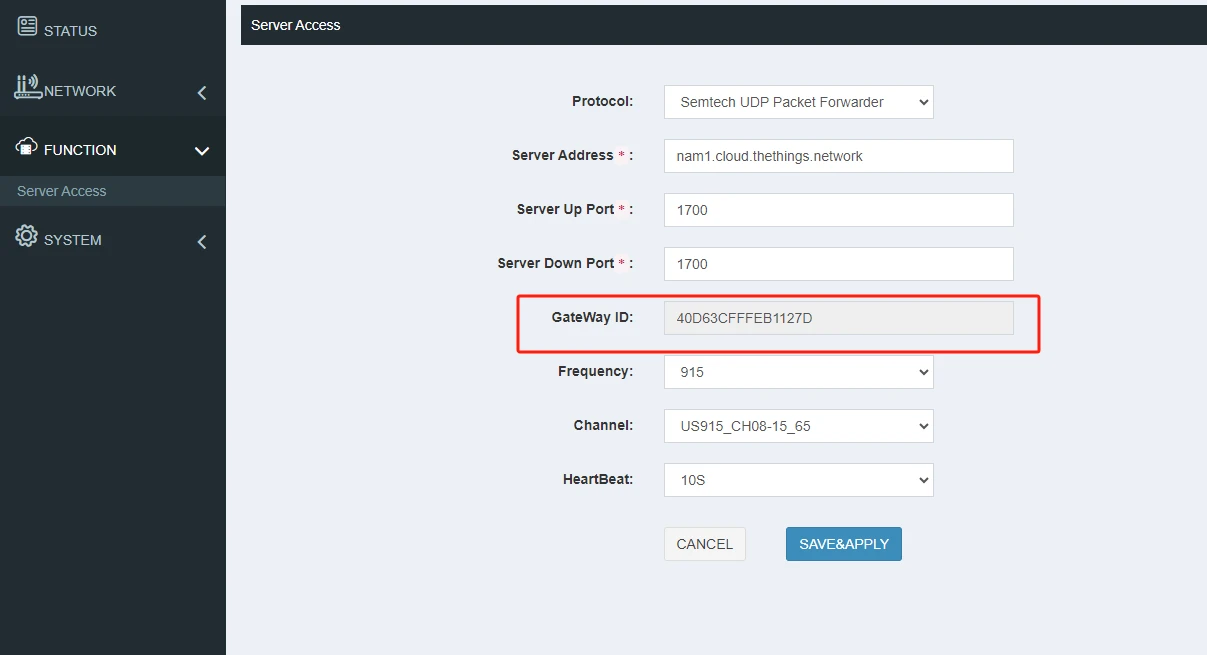
Power on the gateway and connect to its Wi-Fi access point. Open the Web GUI and note the gateway ID on the FUNCTION - Server Access page.

-
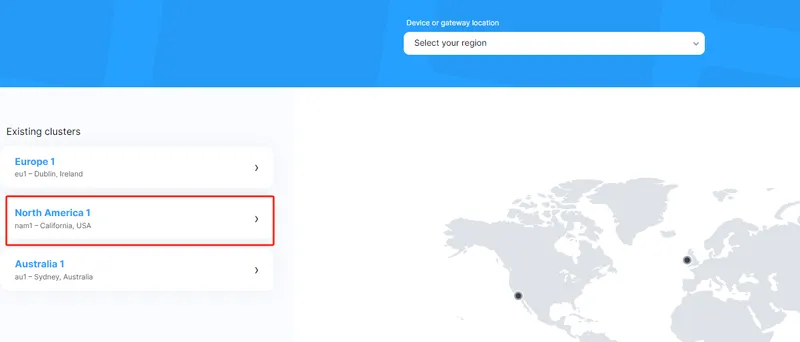
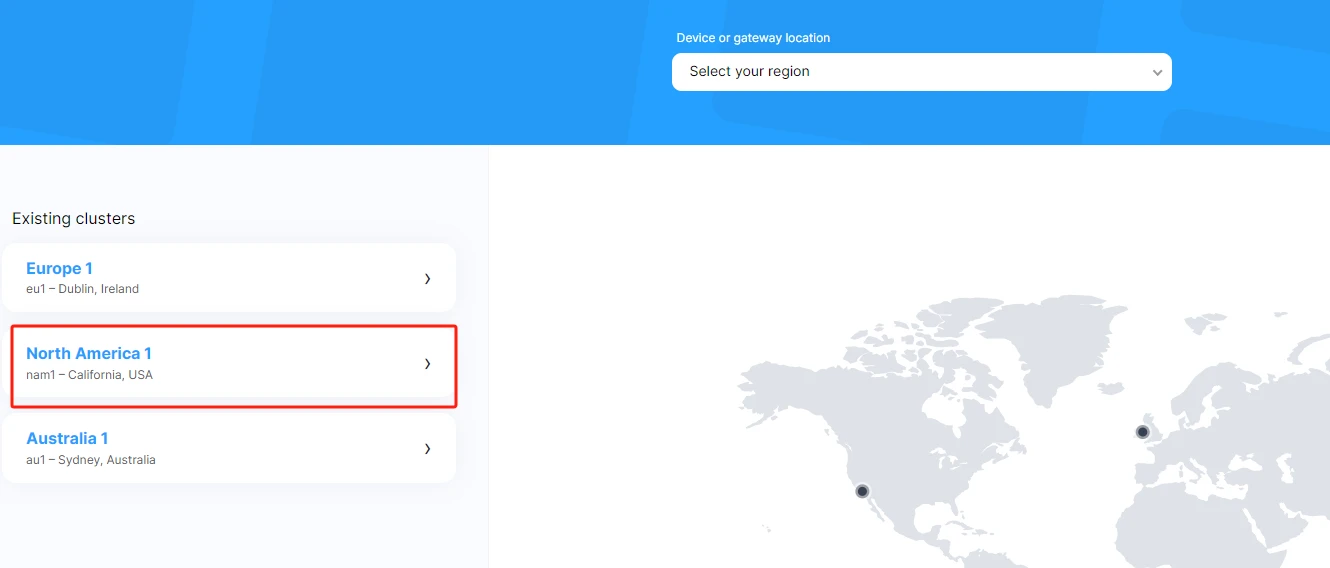
Log in to your TTN account and select the cluster for your frequency plan. For US915, select North America 1.
-
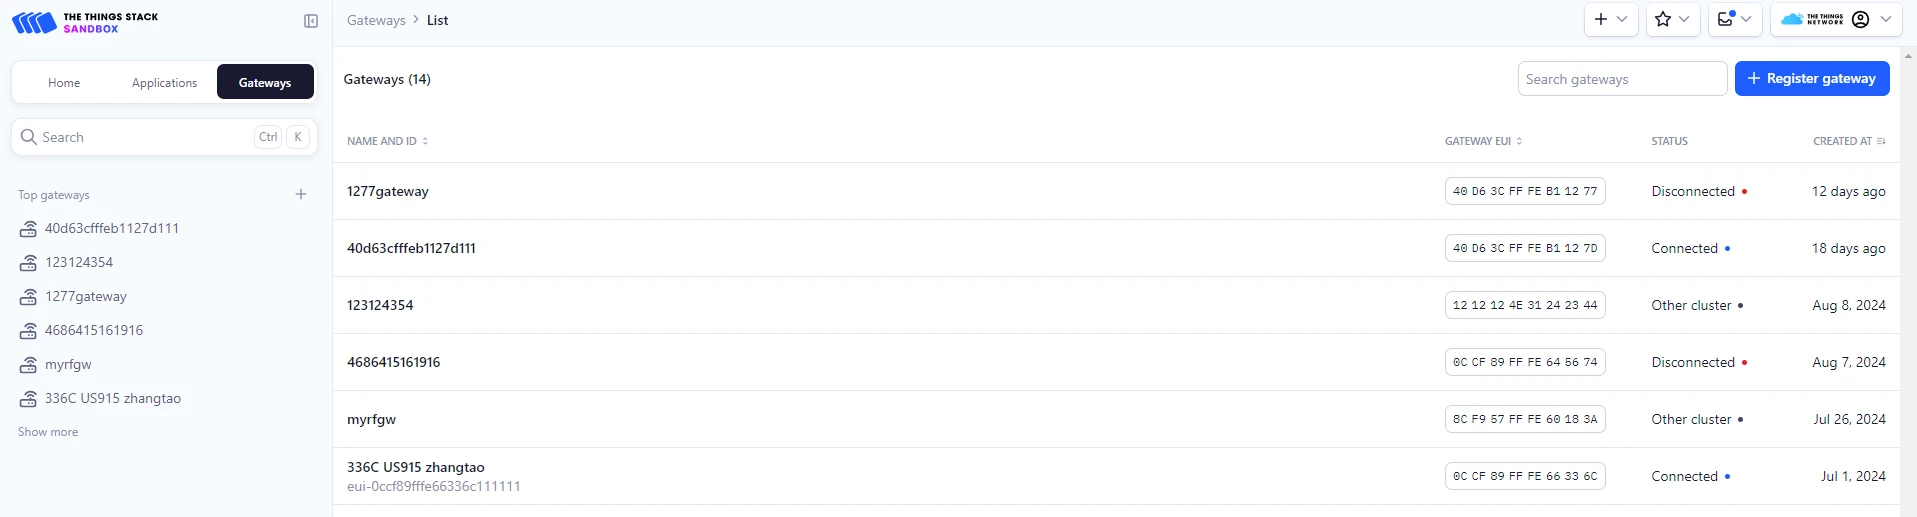
Go to the gateway console on the home page.

-
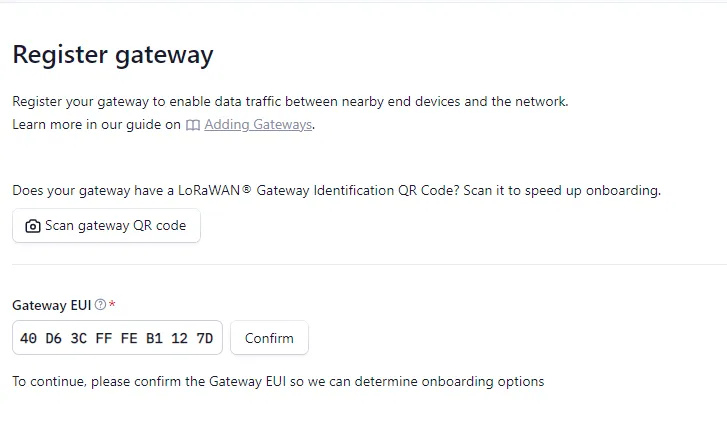
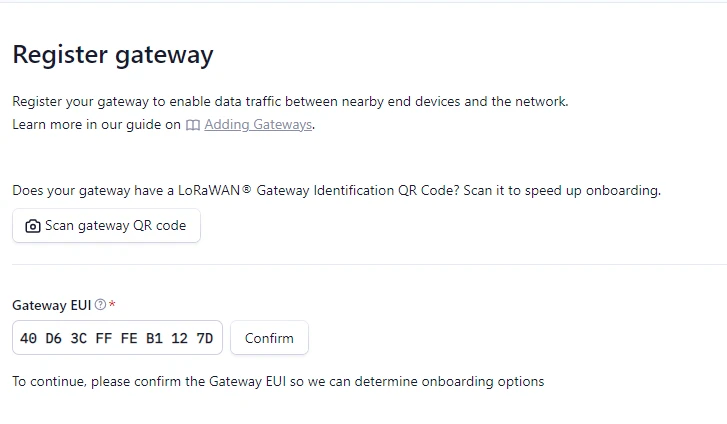
Click Register new gateway.

Enter the gateway ID from step 1.
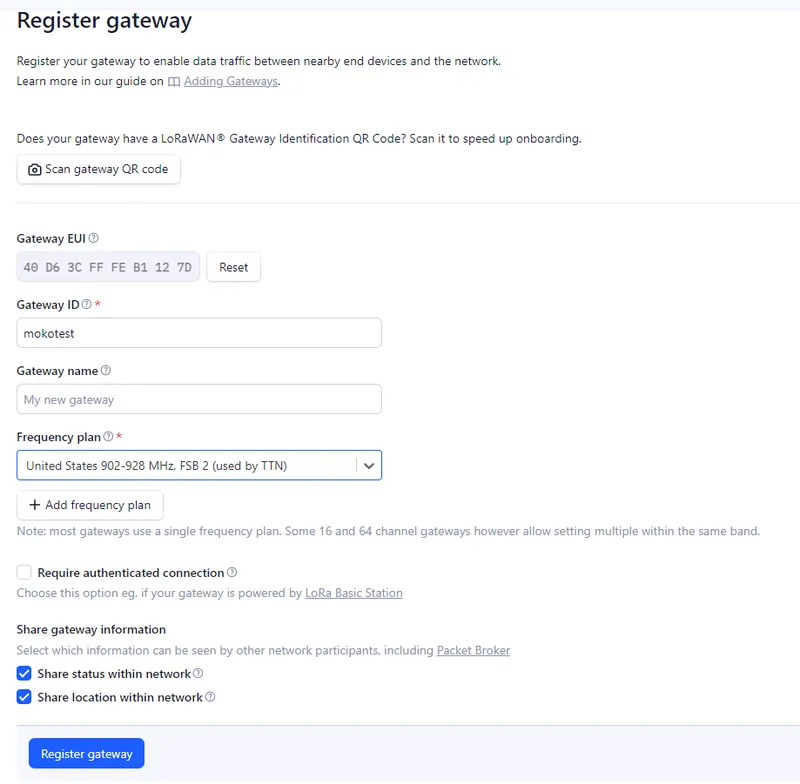
Enter a TTN gateway ID, select United States 902-928 MHz as the frequency plan, and click Register gateway.
-
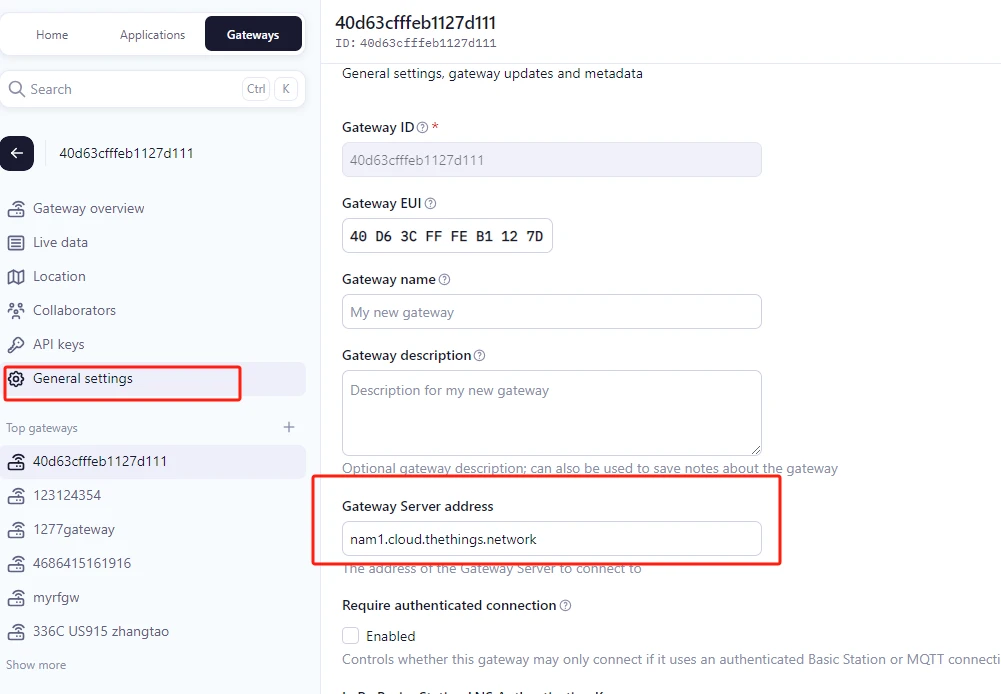
Get the gateway server address from the TTN General settings page.
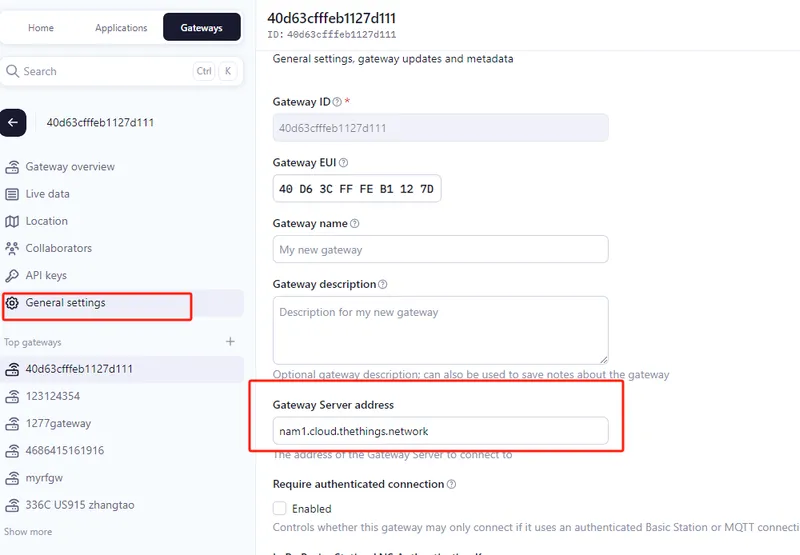
Enter the server address in the MKGW2 Web GUI with port
1700. Set the frequency to 915 and the channel to US915_CH08-15 to match the TTN configuration.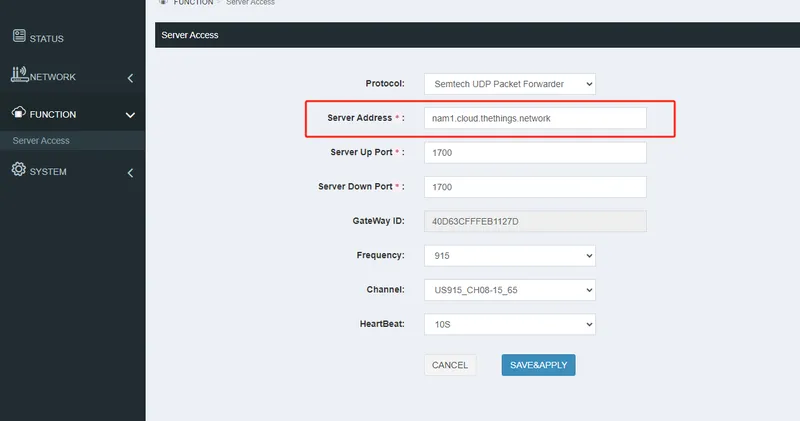
-
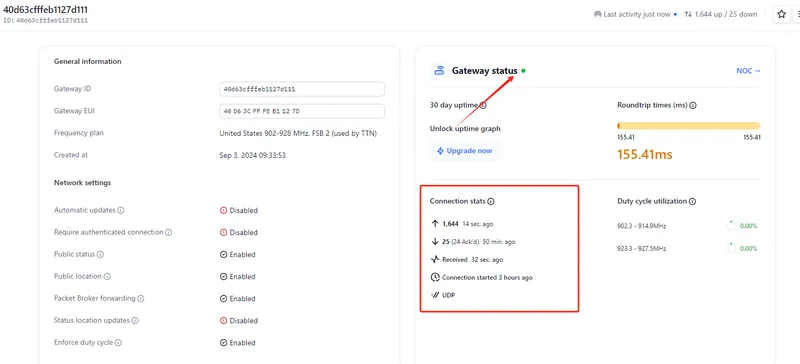
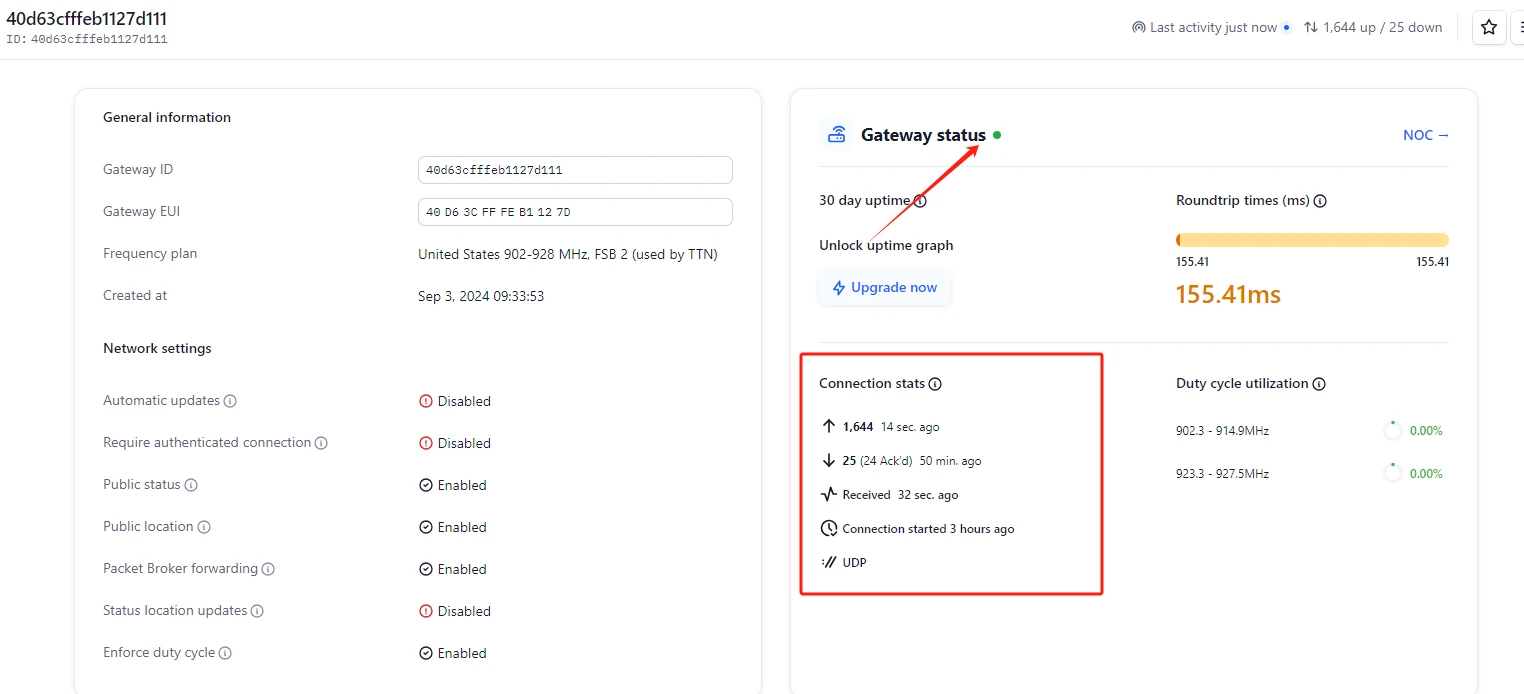
Verify the gateway connection. A green indicator in the Web GUI means the gateway connected successfully.
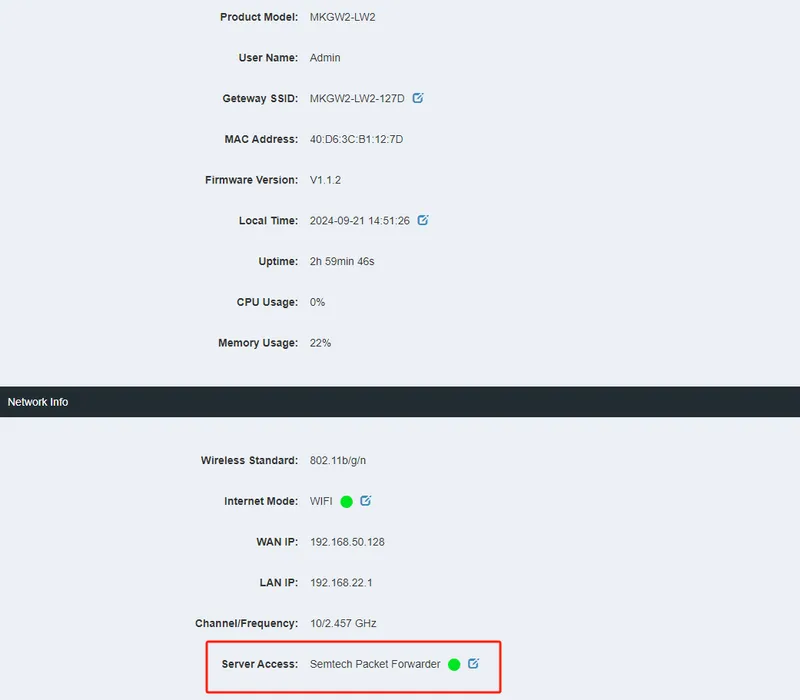
Confirm the status on TTN as well.


Create application on TTN
Section titled “Create application on TTN”-
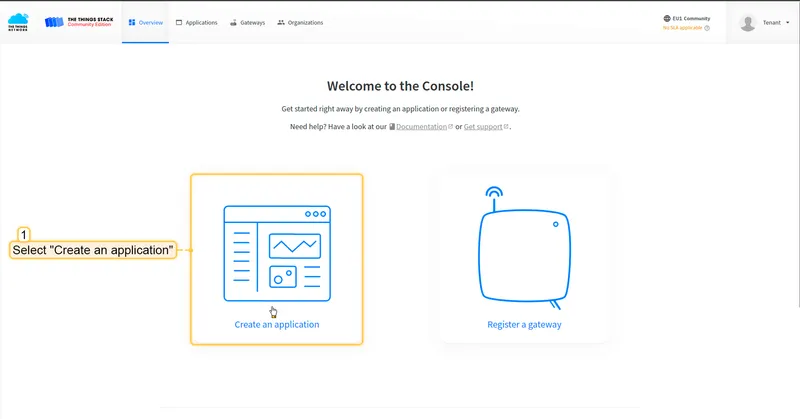
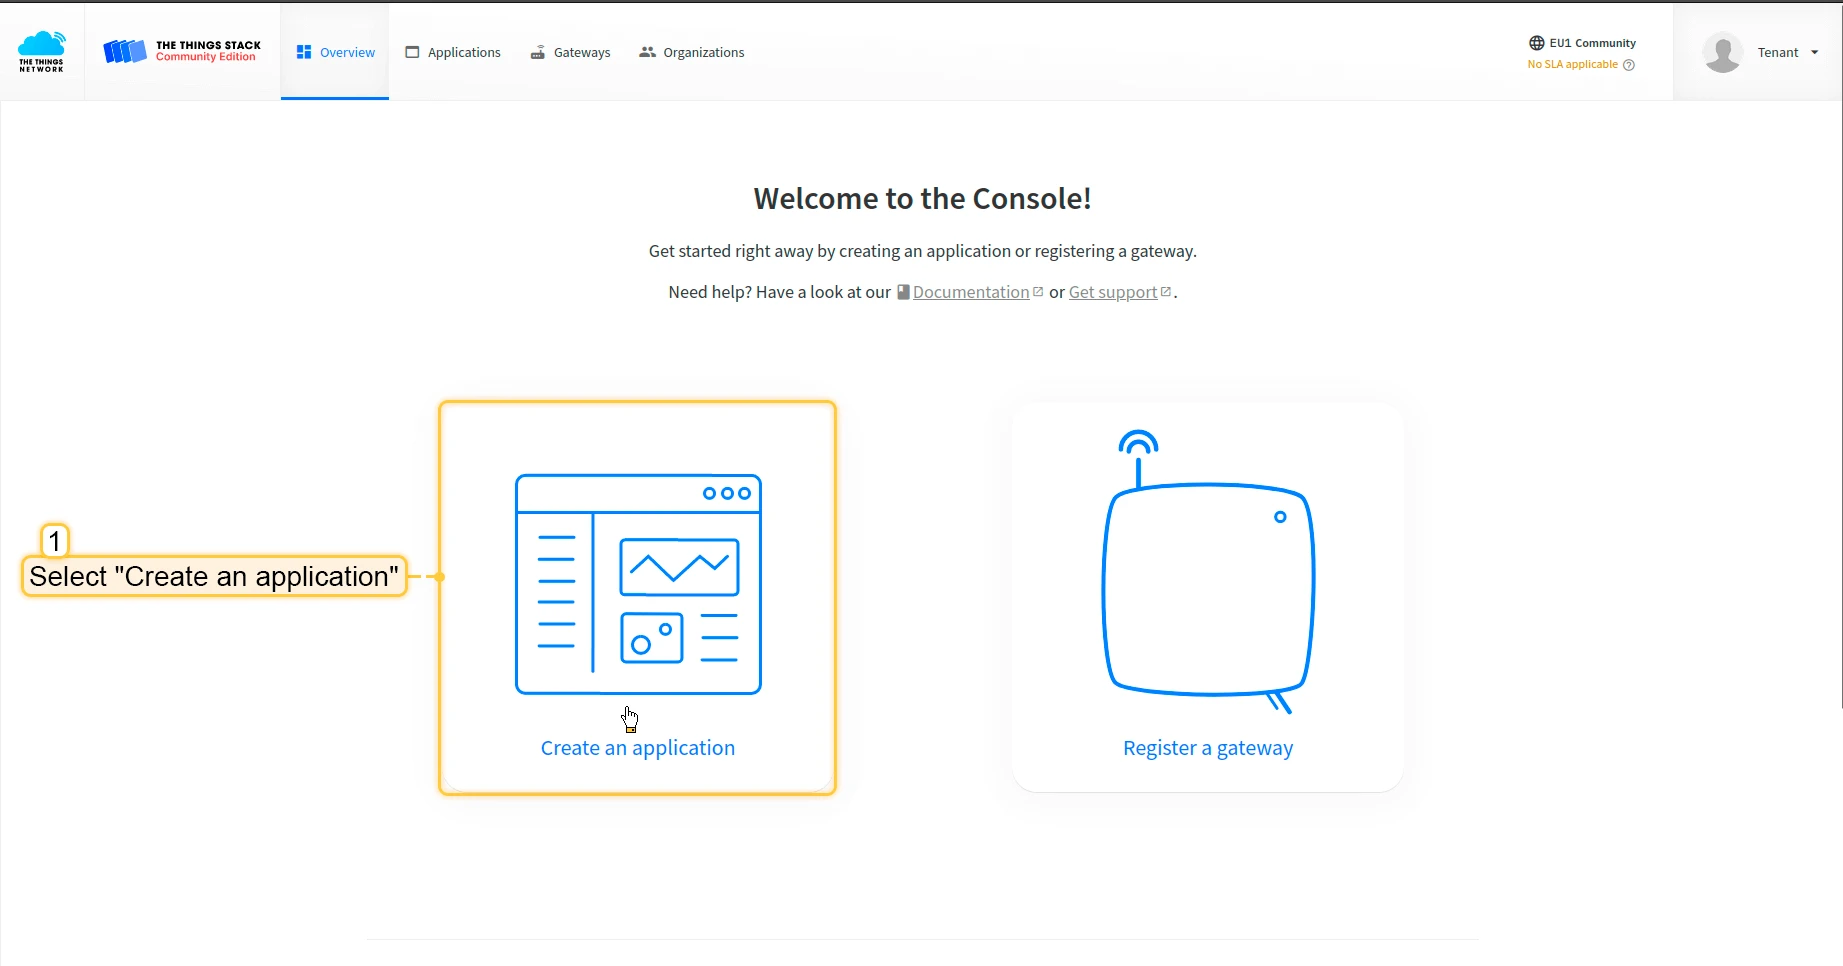
In the TTN console, click Create an application.
-
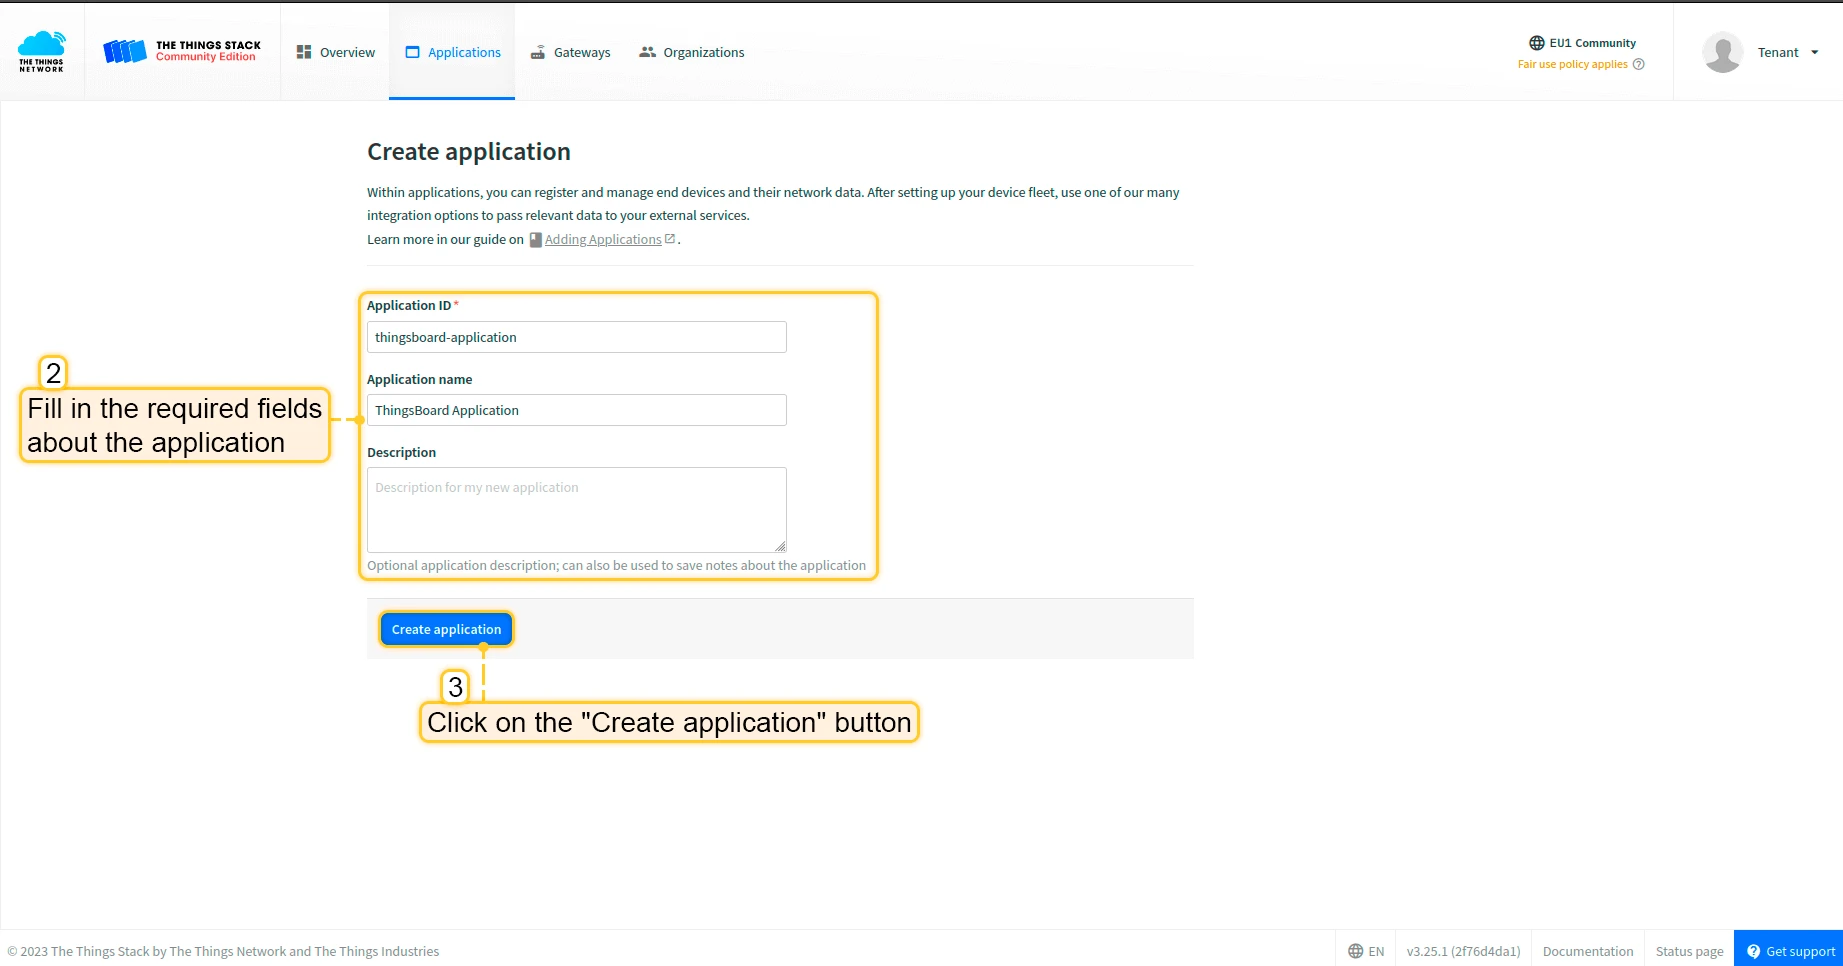
Fill in the required application fields and click Create application.

-
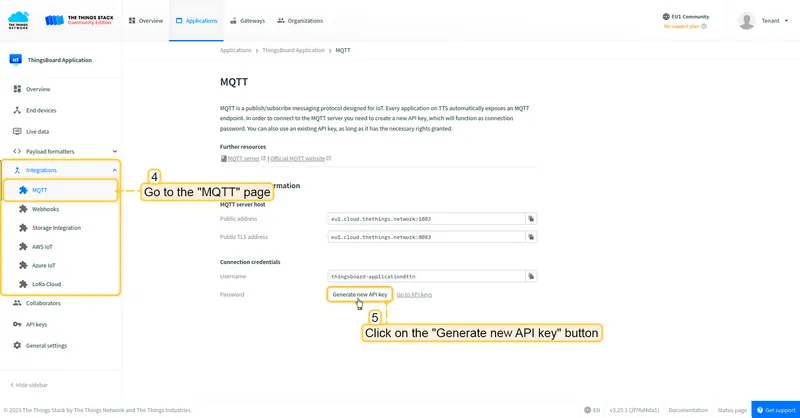
Go to Integrations > MQTT in the left menu, then click Generate new API key.
-
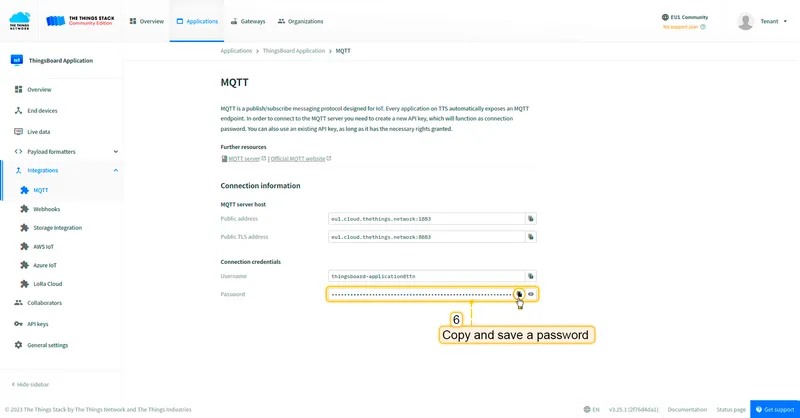
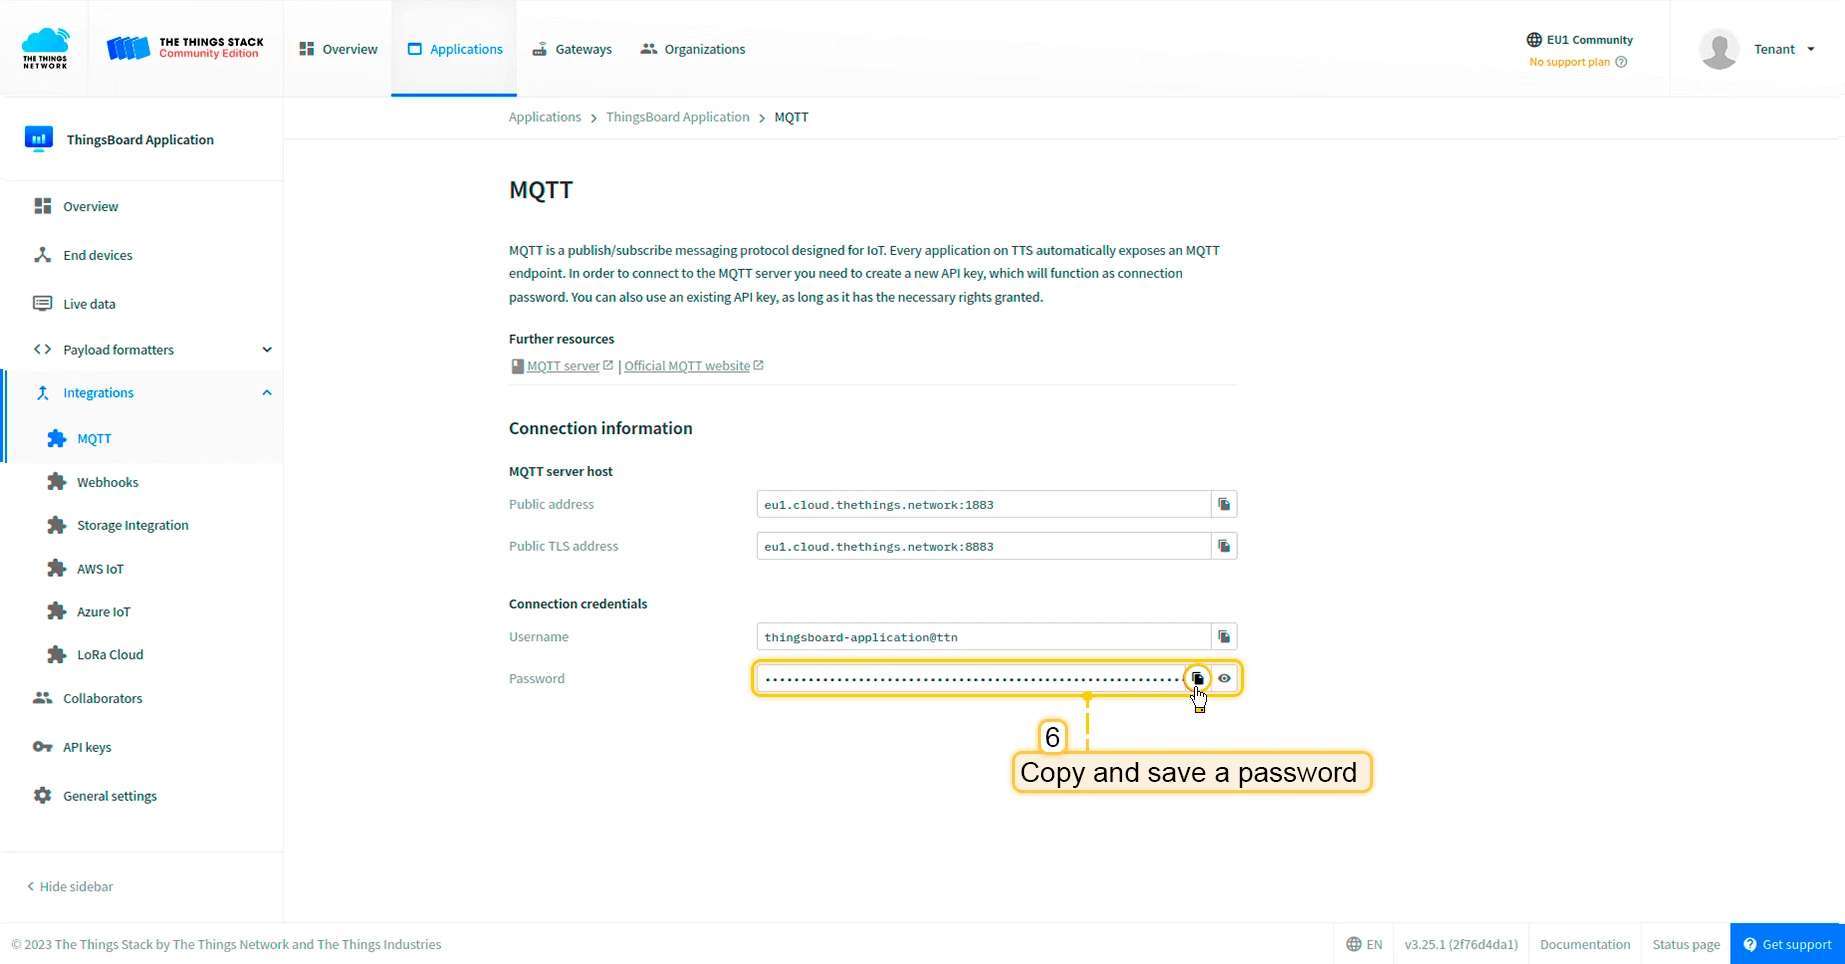
Copy and save the generated API key. It will not be shown again after leaving the page.

Create integration in ThingsBoard
Section titled “Create integration in ThingsBoard”-
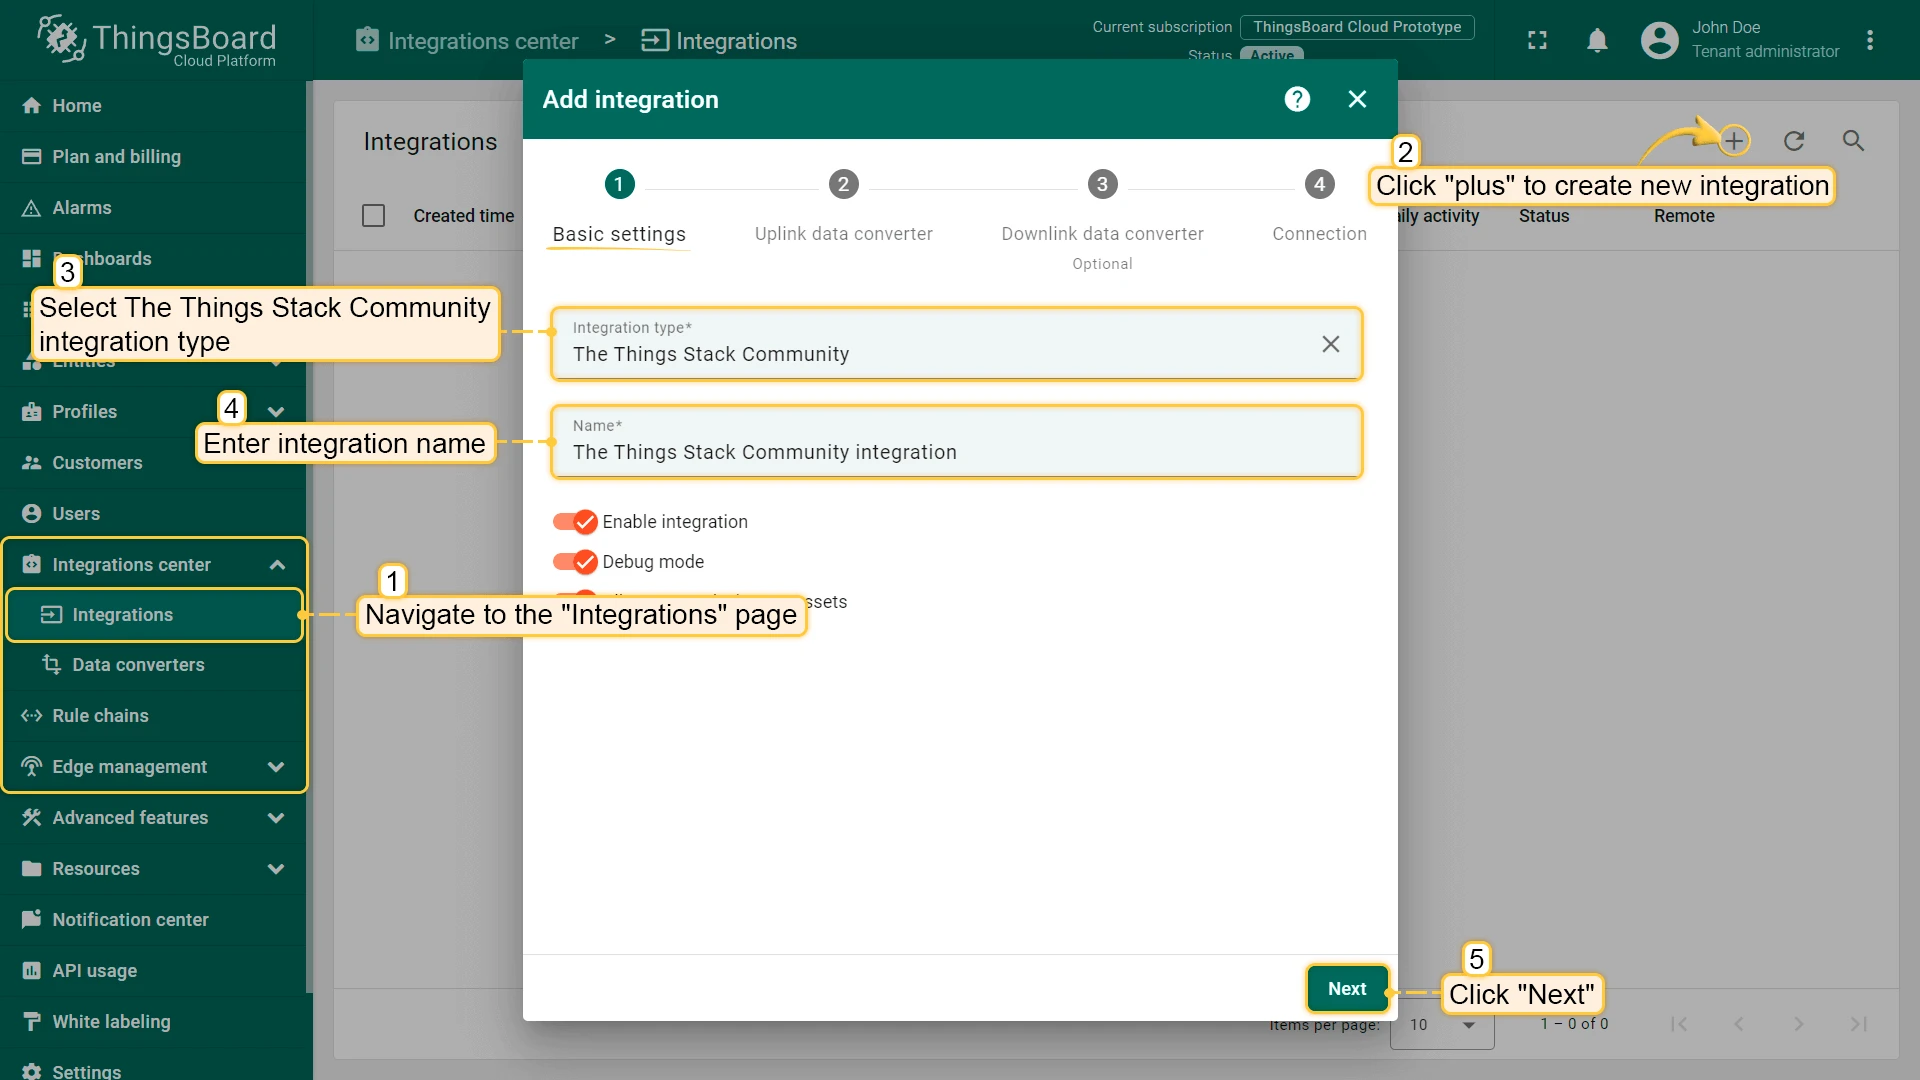
Go to Integrations center > Integrations and click + to add a new integration. Select The Things Stack Community as the type and click Next.

-
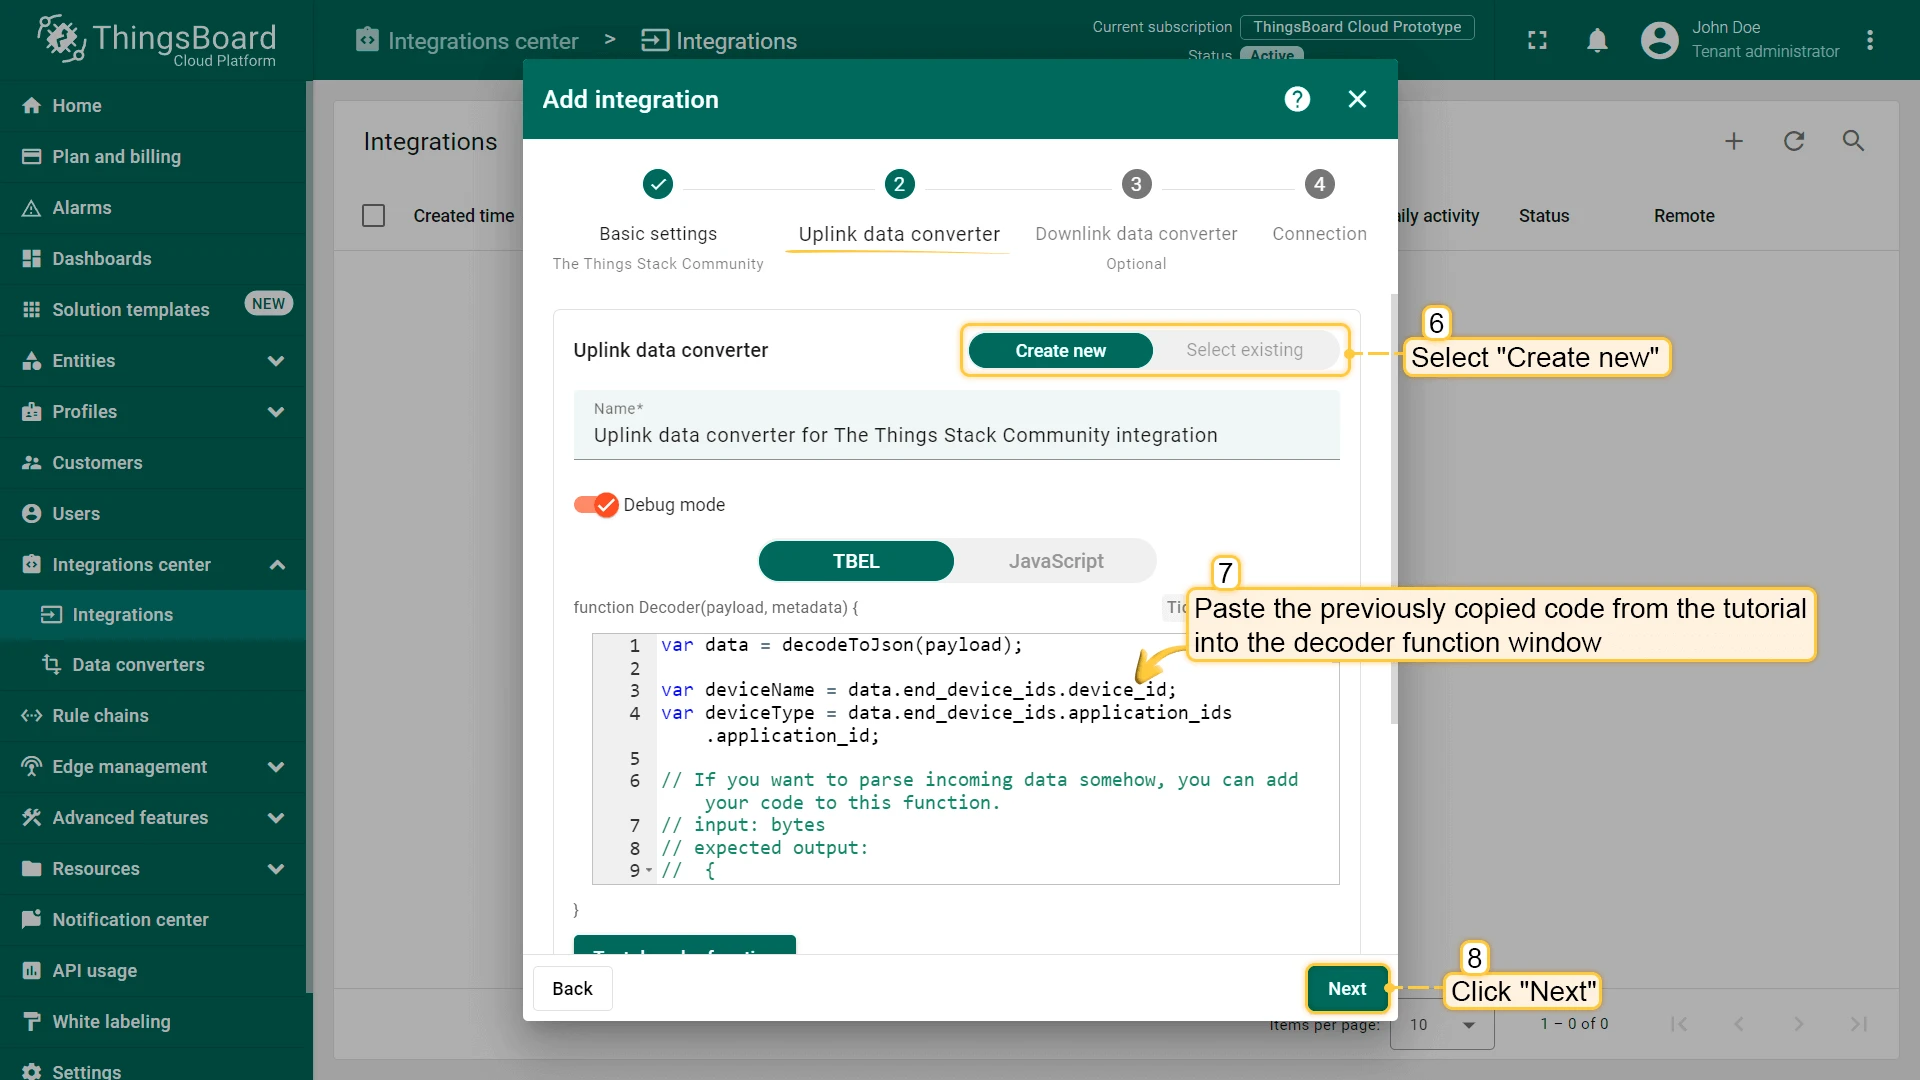
Paste the following decoder into the Uplink data converter field and click Next.
var data = decodeToJson(payload);var deviceName = data.end_device_ids.device_id;var deviceType = data.end_device_ids.application_ids.application_id;// If you want to parse incoming data somehow, you can add your code to this function.// input: bytes// expected output:// {// "attributes": {"attributeKey": "attributeValue"},// "telemetry": {"telemetryKey": "telemetryValue"}// }// default functionality - convert bytes to HEX string with telemetry key "HEX_bytes"function decodeFrmPayload(input) {var output = { attributes:{}, telemetry: {} };// --- Decoding code --- //output.telemetry.HEX_bytes = bytesToHex(input);// --- Decoding code --- //return output;}// --- attributes and telemetry objects ---var telemetry = {};var attributes = {};// --- attributes and telemetry objects ---// --- Timestamp parsingvar incomingDateString = data.uplink_message.received_at;var dateString = incomingDateString.substring(0, incomingDateString.lastIndexOf(".")+3) + "Z";var timestamp = new Date(dateString).getTime();// --- Timestamp parsing// You can add some keys manually to attributes or telemetryattributes.f_port = data.uplink_message.f_port;attributes.settings = data.uplink_message.settings;// We want to save correlation ids as single object, so we are excluding them from attributes parse and add manuallyattributes.correlation_ids = data.correlation_ids;// You can exclude some keys from the resultvar excludeFromAttributesList = ["device_id", "application_id", "uplink_message", "correlation_ids"];var excludeFromTelemetryList = ["uplink_token", "gateway_id", "settings"];// Message parsing// To avoid paths in the decoded objects we passing false value to function as "pathInKey" argument.// Warning: pathInKey can cause already found fields to be overwritten with the last value found, e.g. receive_at from uplink_message will be written receive_at in the root.var telemetryData = toFlatMap(data.uplink_message, excludeFromTelemetryList, false);var attributesData = toFlatMap(data, excludeFromAttributesList, false);// Passing incoming bytes to decodeFrmPayload function, to get custom decodingvar customDecoding = {};if (data.uplink_message.get("frm_payload") != null) {customDecoding = decodeFrmPayload(base64ToBytes(data.uplink_message.frm_payload));}// Collecting data to resultif (customDecoding.?telemetry.size() > 0) {telemetry.putAll(customDecoding.telemetry);}if (customDecoding.?attributes.size() > 0) {attributes.putAll(customDecoding.attributes);}telemetry.putAll(telemetryData);attributes.putAll(attributesData);var result = {deviceName: deviceName,deviceType: deviceType,telemetry: {ts: timestamp,values: telemetry},attributes: attributes};return result;
-
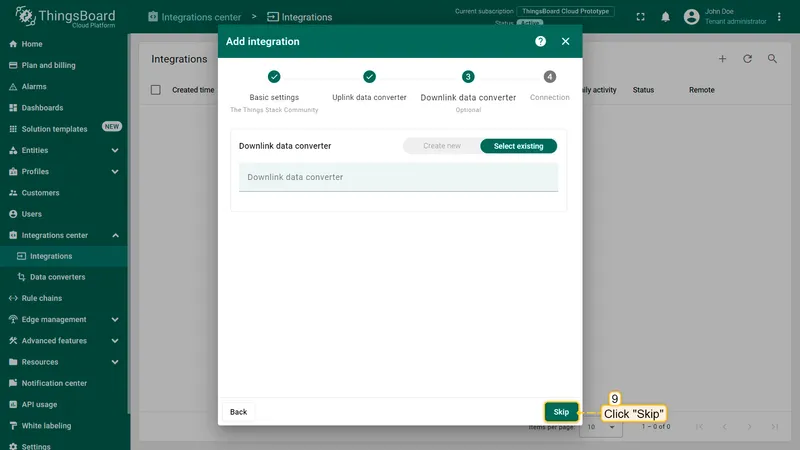
Leave the Downlink data converter field empty and click Skip.
-
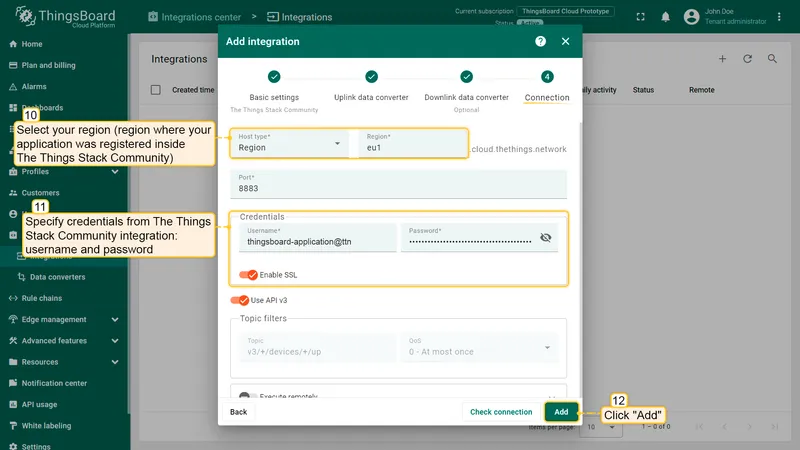
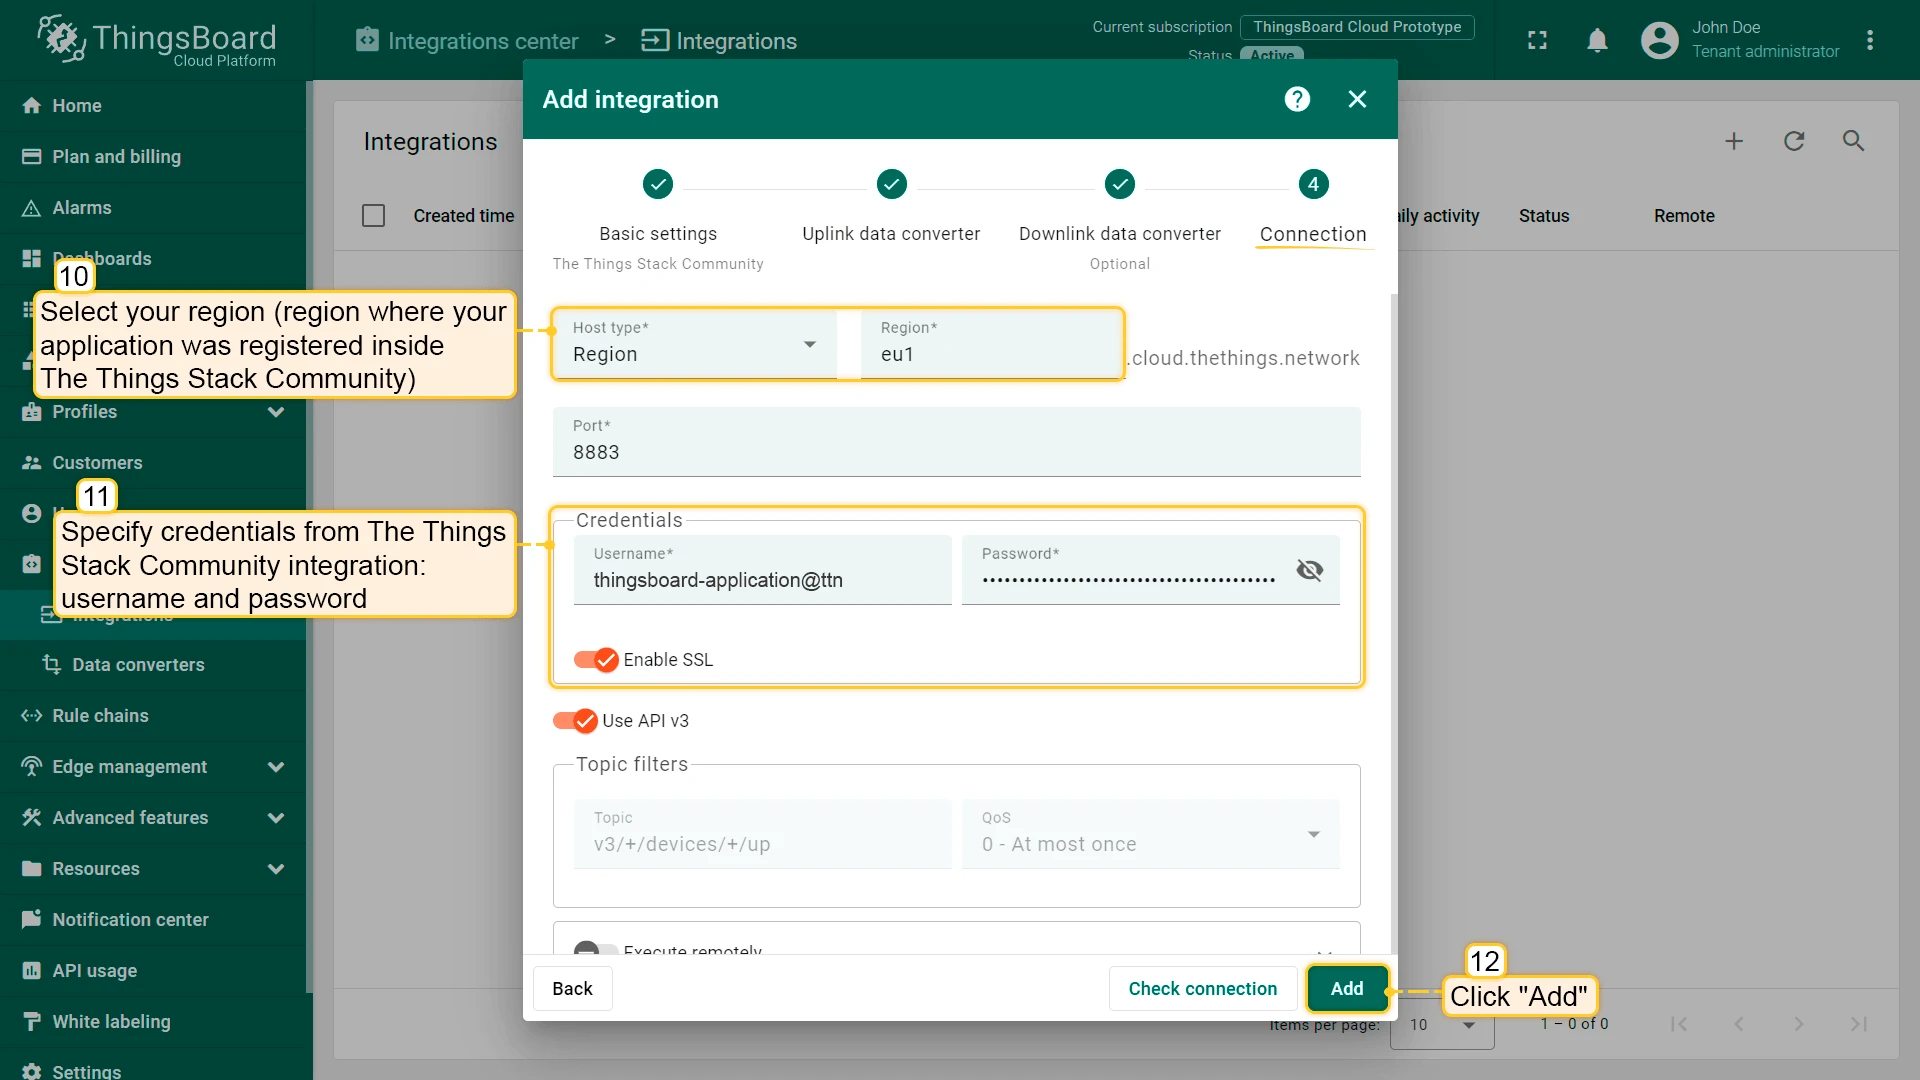
Fill in the connection fields with your TTN MQTT credentials and click Add.

Add device
Section titled “Add device”-
In the TTN application console, go to End devices and click Register end device.

-
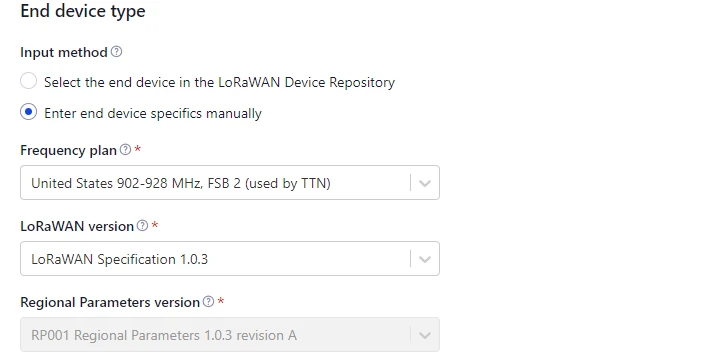
Select Enter end device specifics manually, choose the frequency plan matching your gateway, and select LoRaWAN version v1.0.3.

-
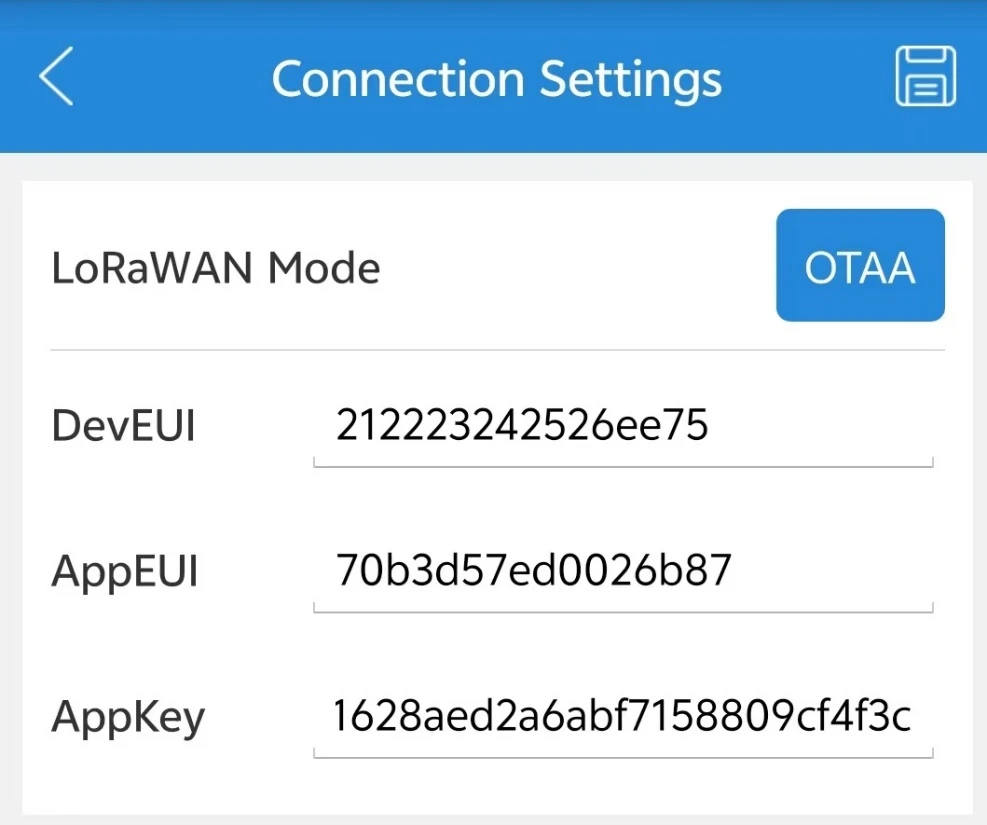
Enter the JoinEUI. The default MOKO SMART JoinEUI is
70 B3 D5 7E D0 02 6B 87. -
Enter the DevEUI and AppKey. The DevEUI is printed on the package label. The default AppKey is
2B 7E 15 16 28 AE D2 A6 AB F7 15 88 09 CF 4F 3C. You can also read both values from the device using the MKLora app.
-
Click Register end device.
-
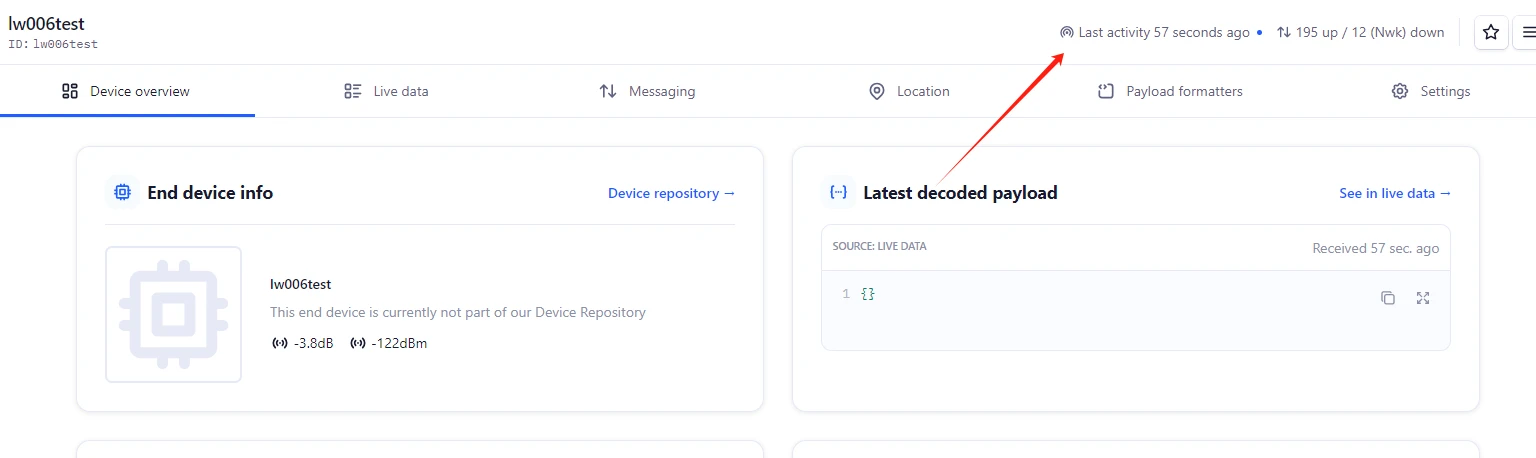
Verify the device status on TTN.
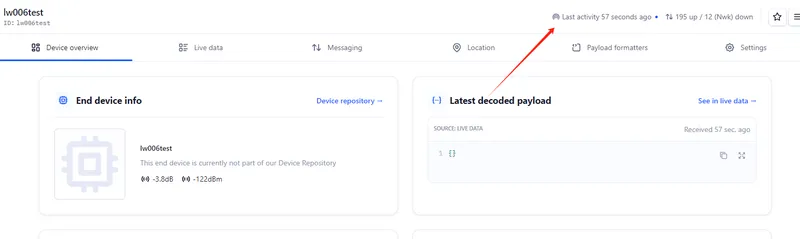
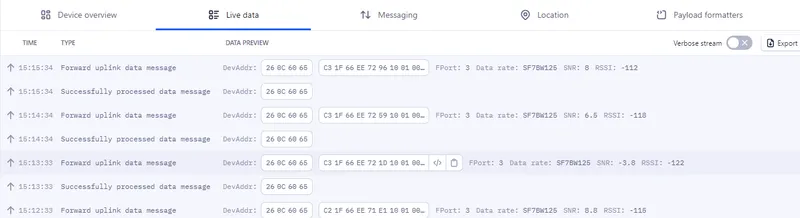
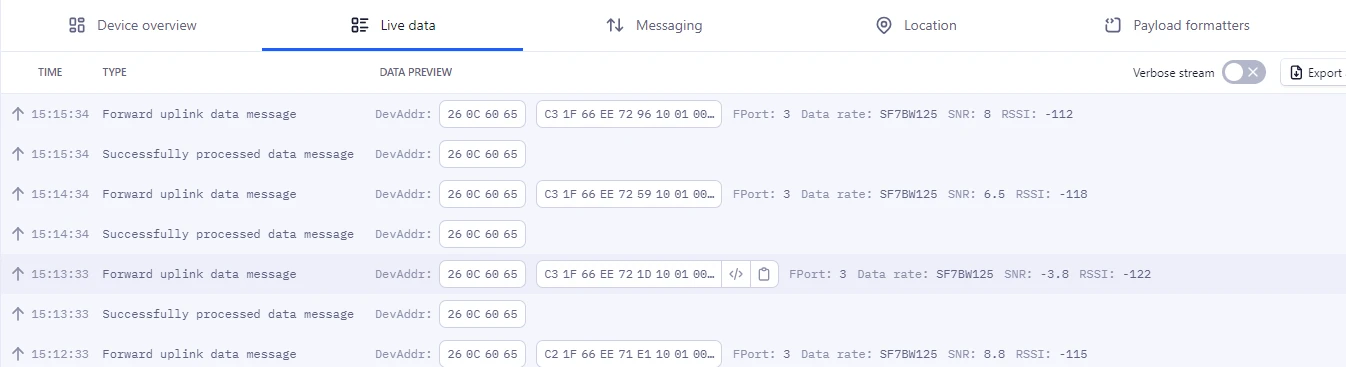
Check Live data to confirm the device is uploading payloads.
-
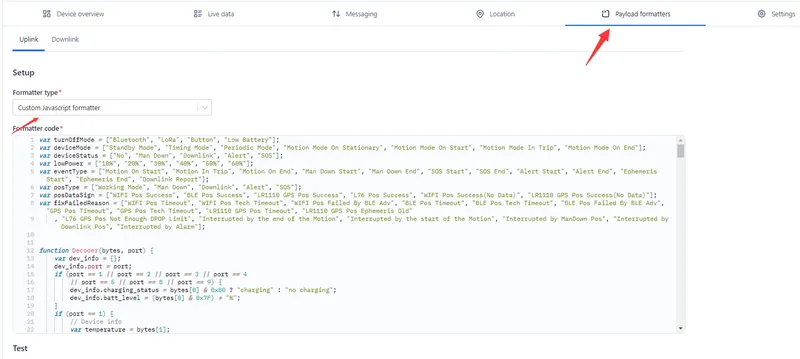
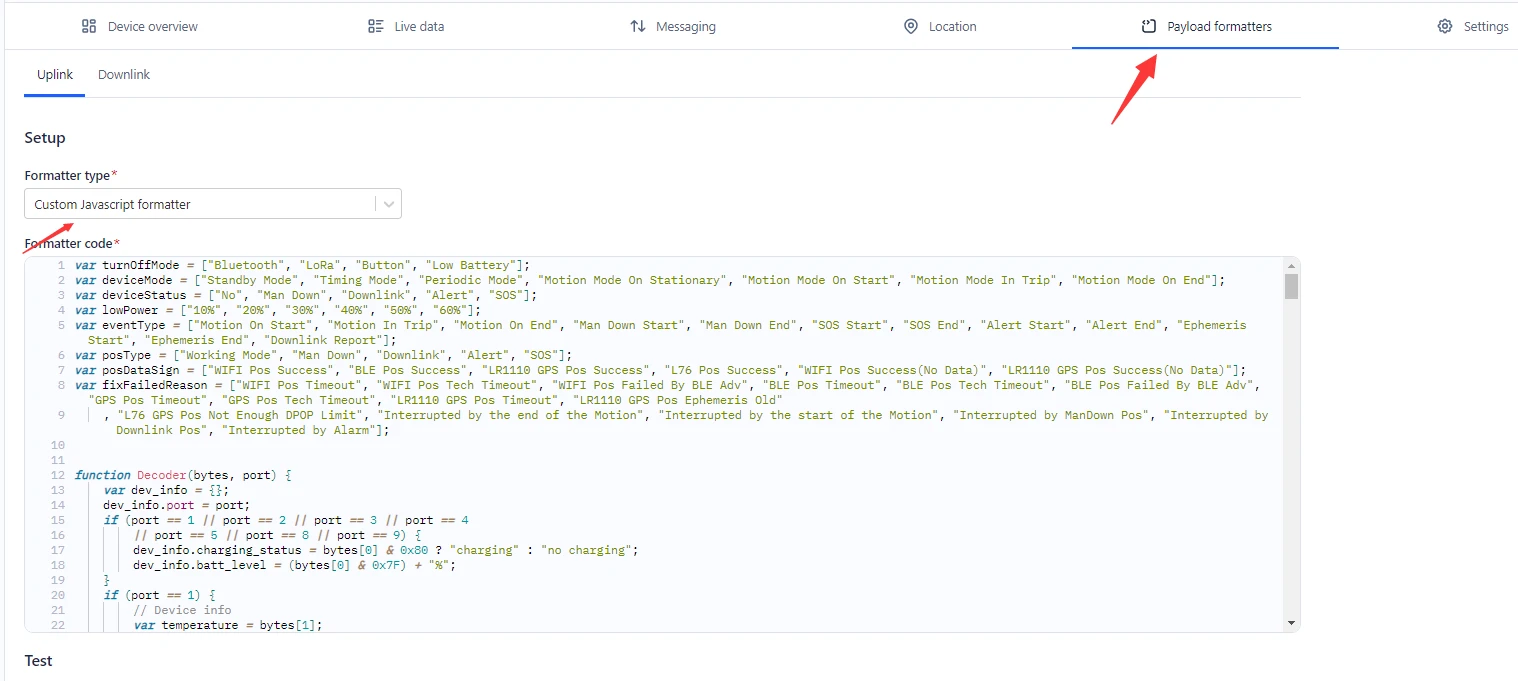
Go to Payload formatters, paste the decoder from the MOKO SMART LoRaWAN decoder repository, and click Save changes.
-
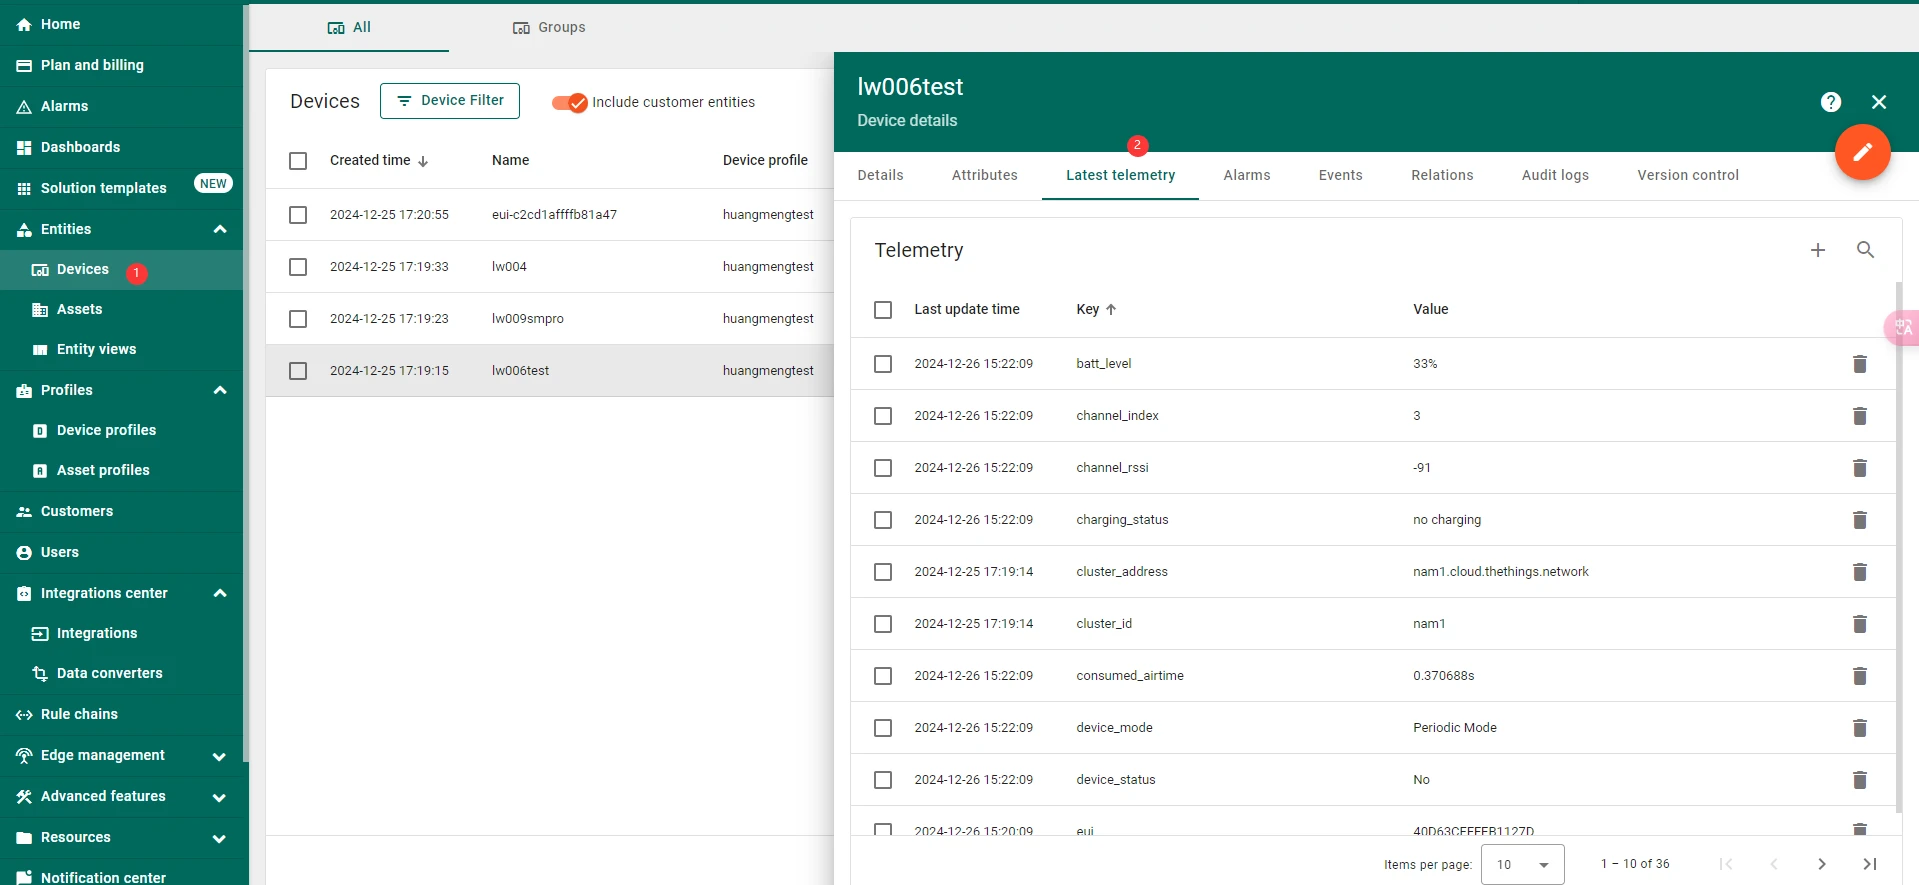
In ThingsBoard, go to Entities > Devices. Devices registered in TTN appear automatically via the integration. Open a device and go to Latest telemetry to confirm data is arriving.


Add dashboard
Section titled “Add dashboard”-
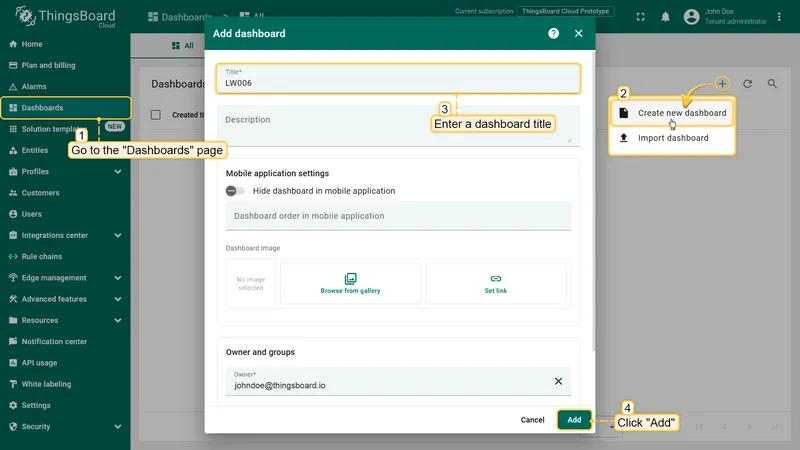
Go to Dashboards in the main menu, click + in the upper right corner, and select Create new dashboard. Enter a title and click Add.

Add battery level widget
Section titled “Add battery level widget”-
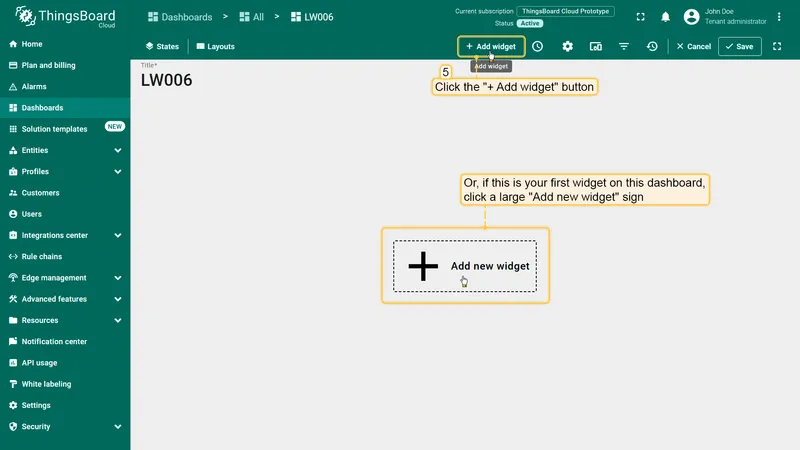
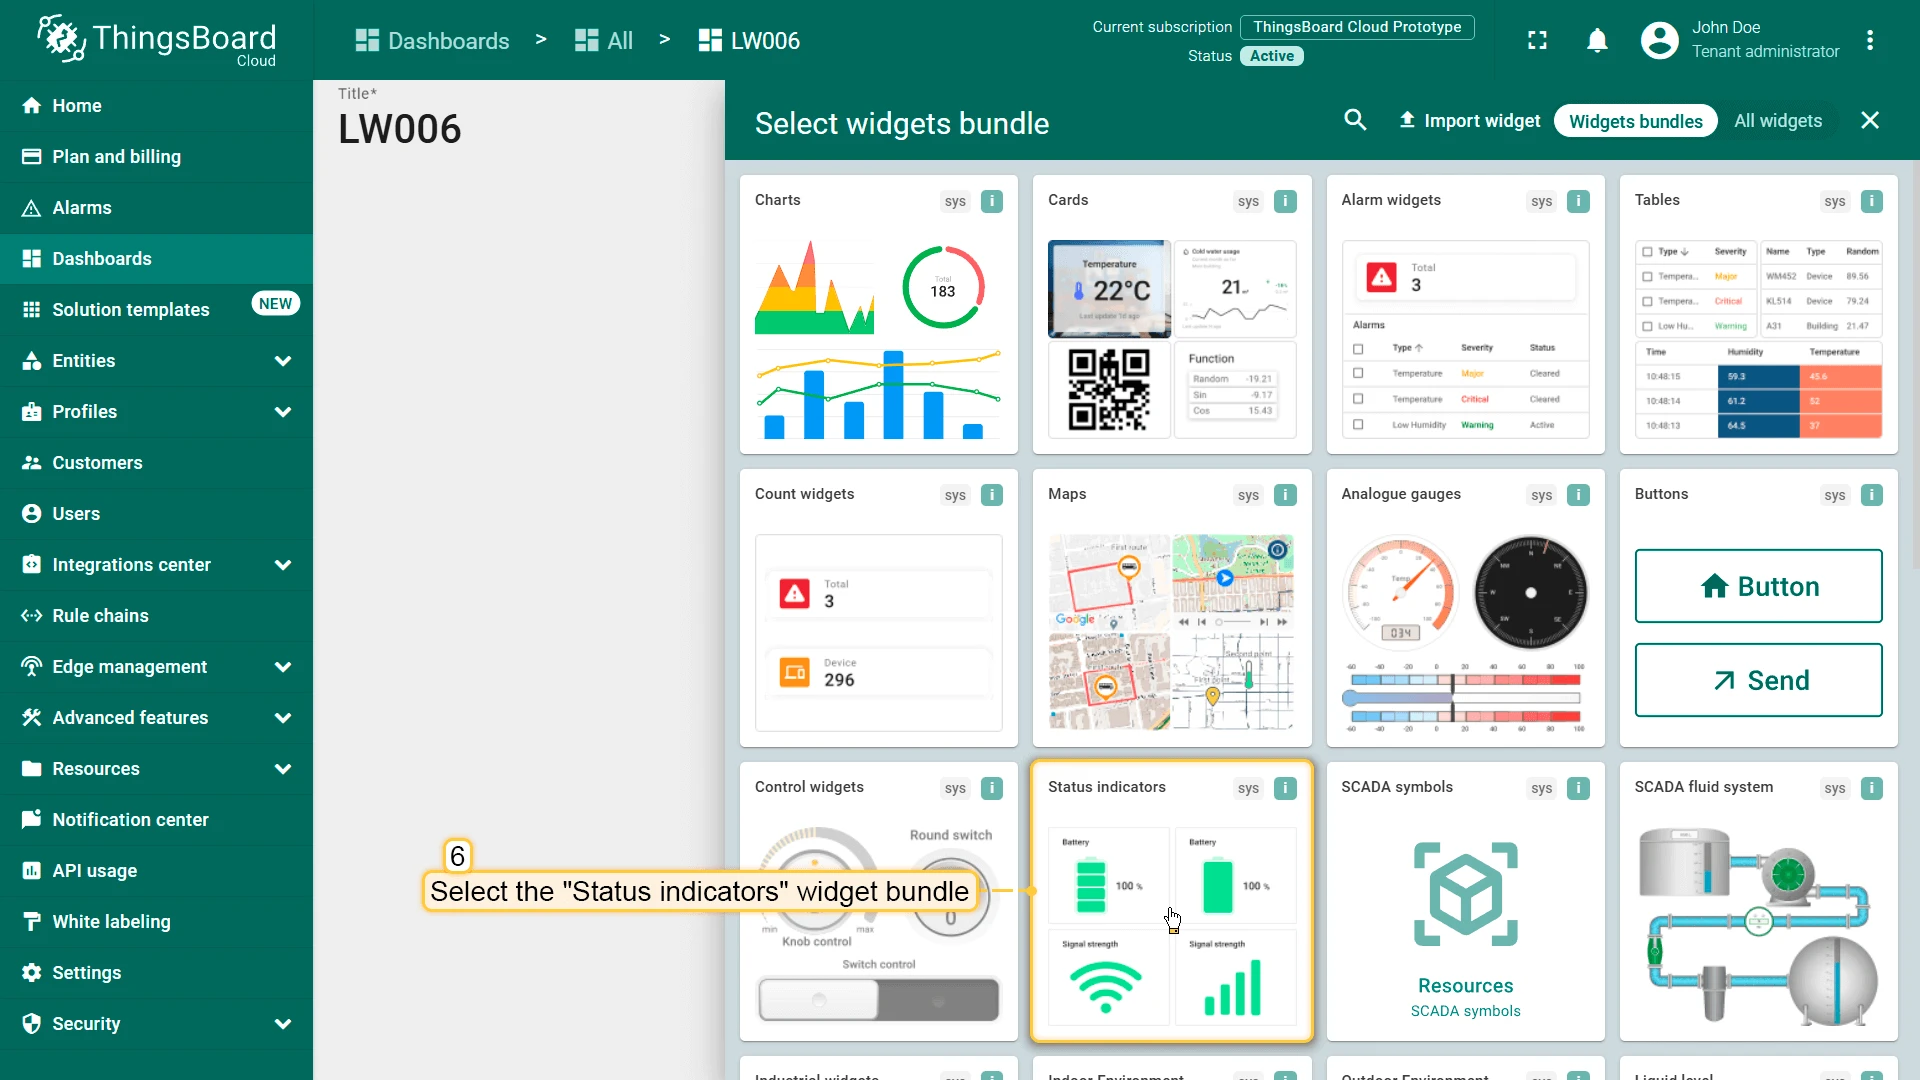
Click + Add widget or the Add new widget icon in the center of the dashboard.
-
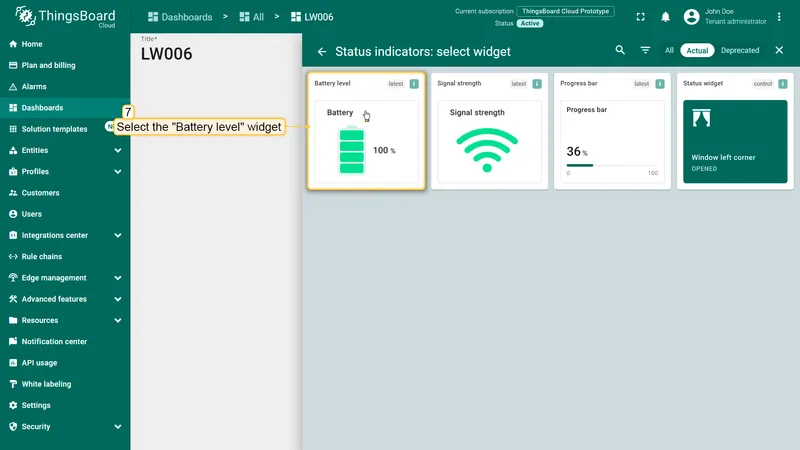
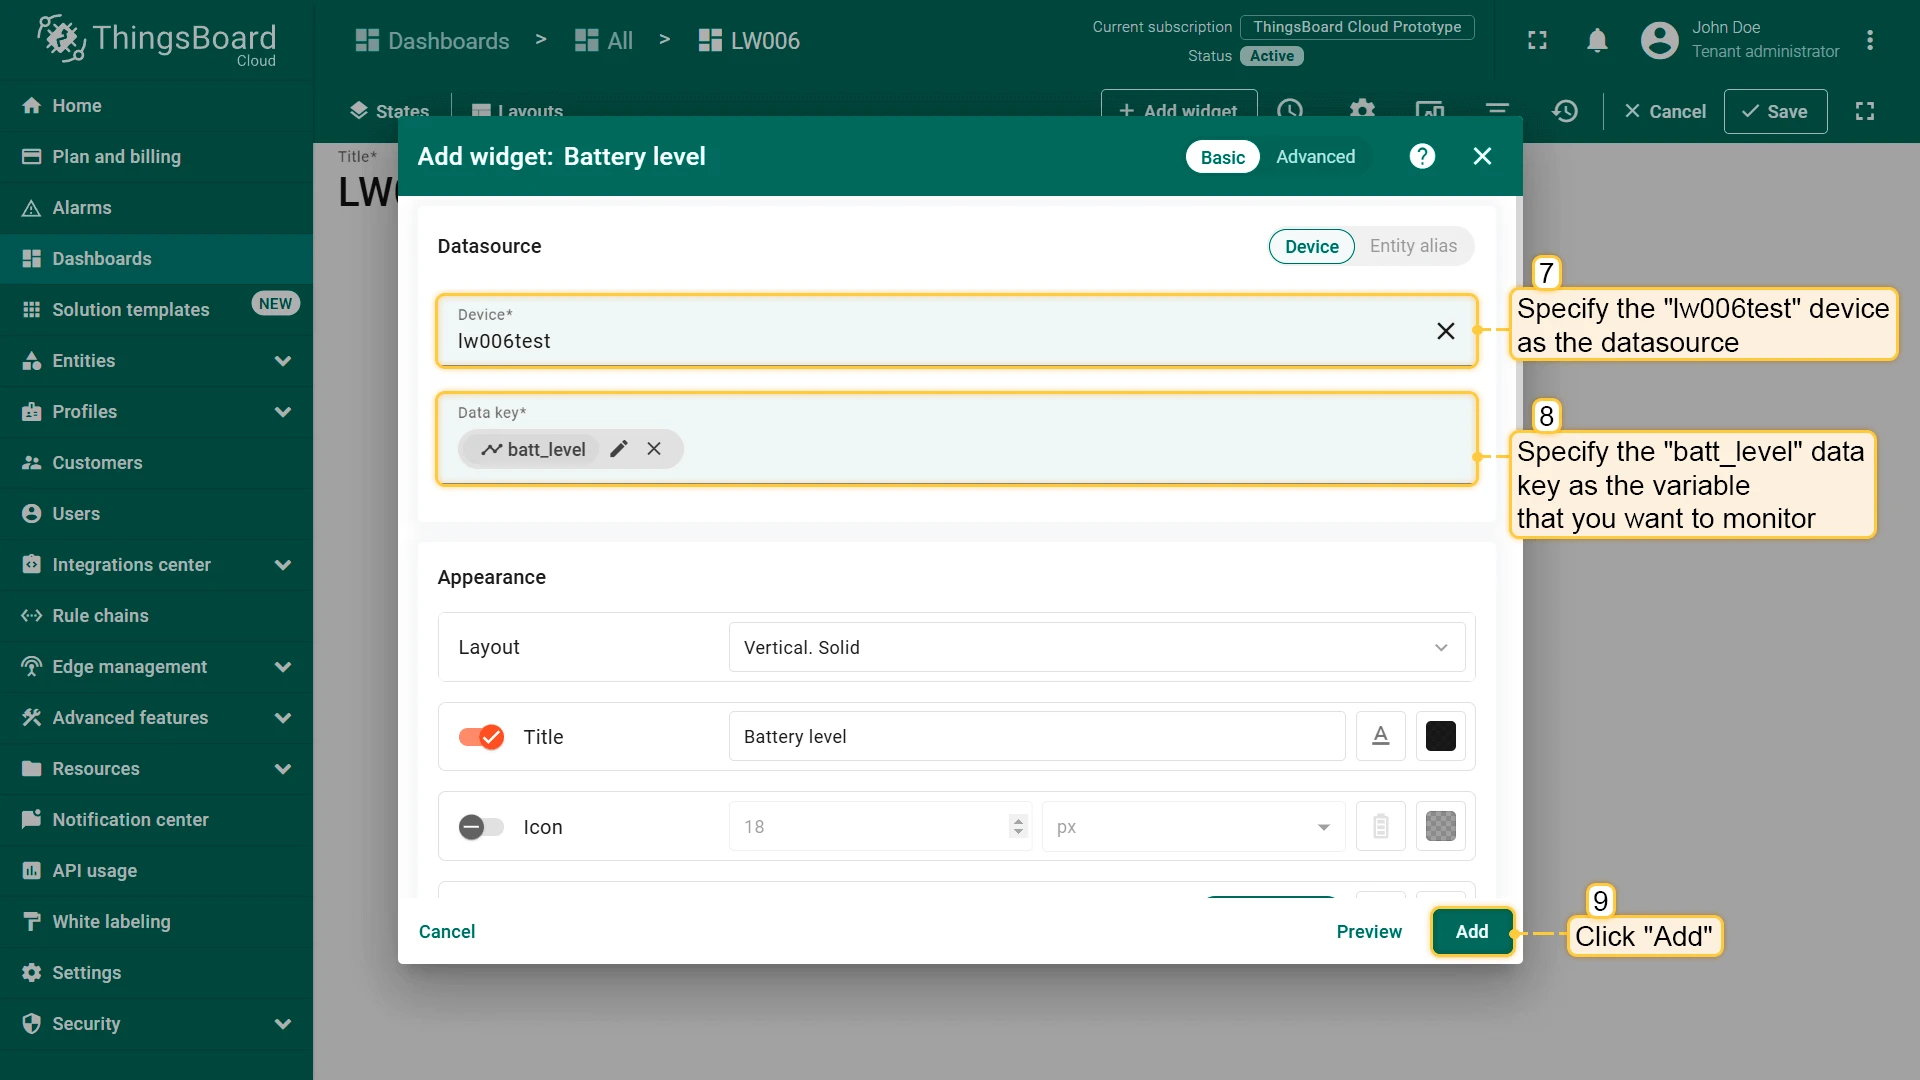
Find the Status indicators widget bundle and click on it.

-
Select the Battery level widget.
-
In the Add widget dialog, select your device as the datasource and set
batt_levelas the data key, then click Add.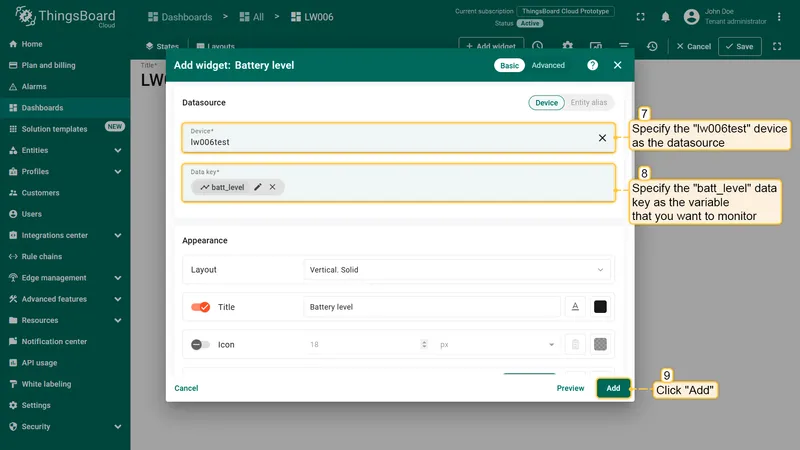
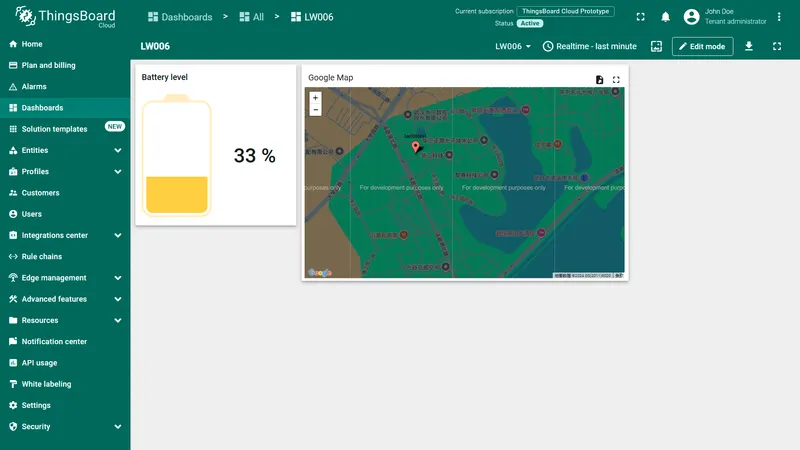
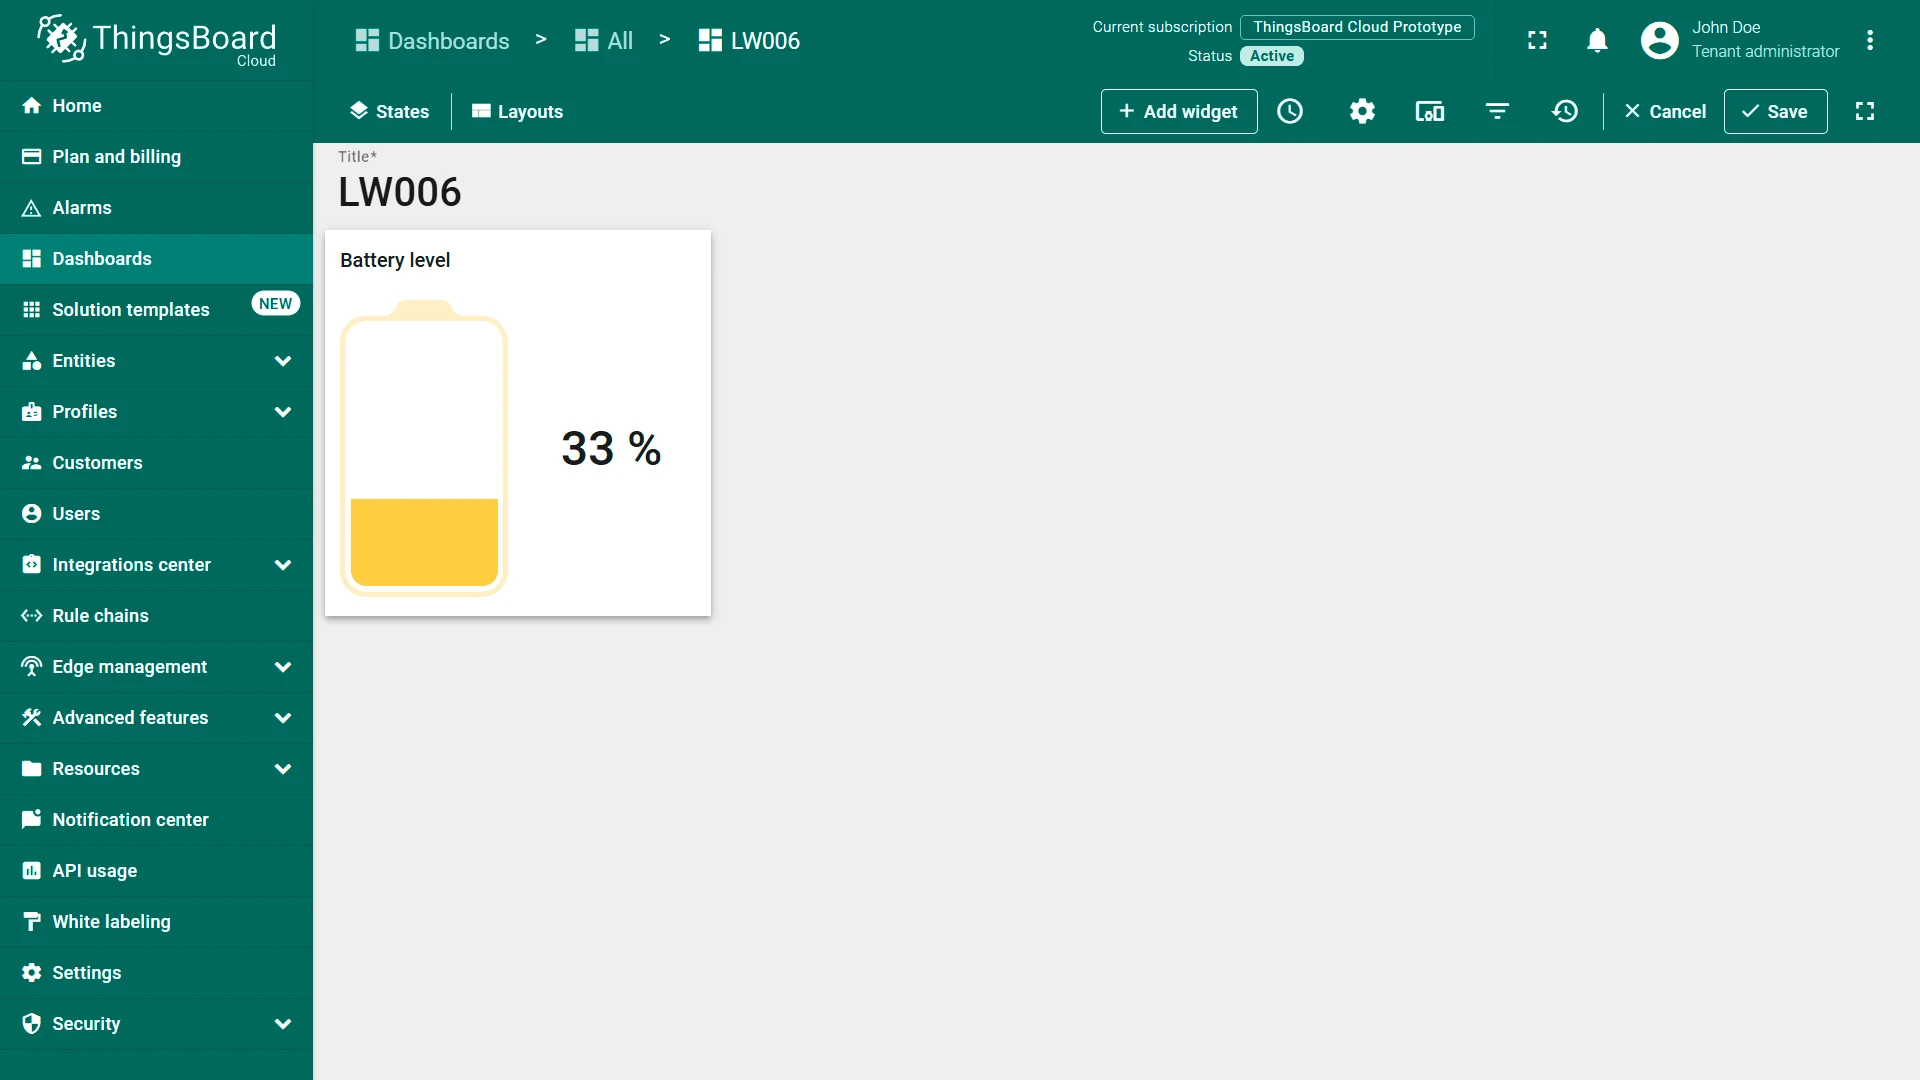
The battery level widget appears on the dashboard.


Add map widget
Section titled “Add map widget”-
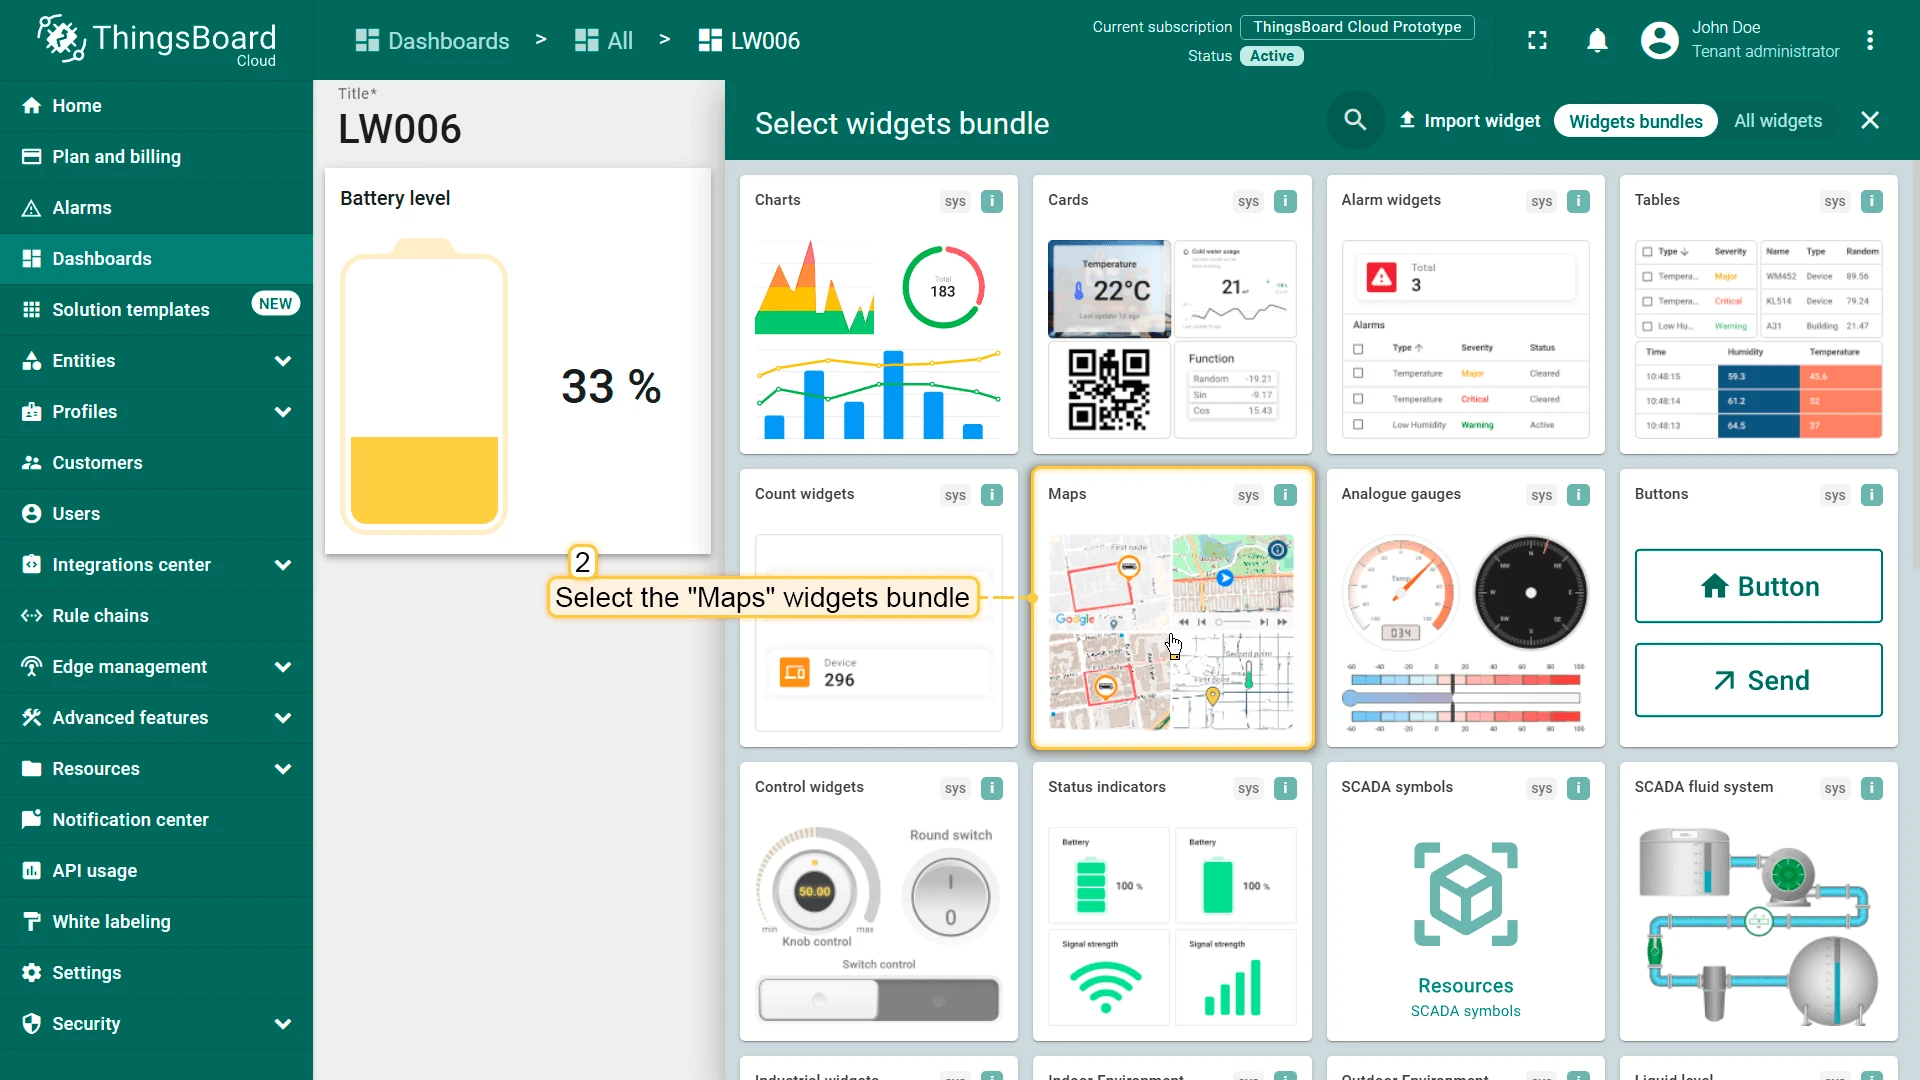
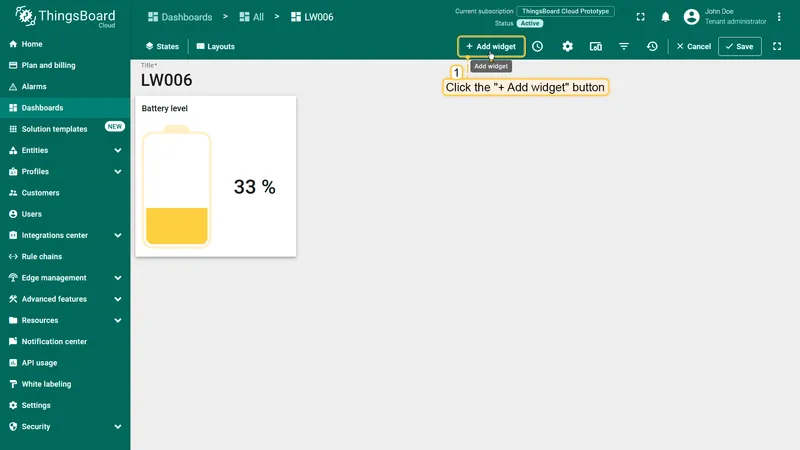
Click + Add widget to add another widget.
-
Find the Maps widget bundle and click on it.

-
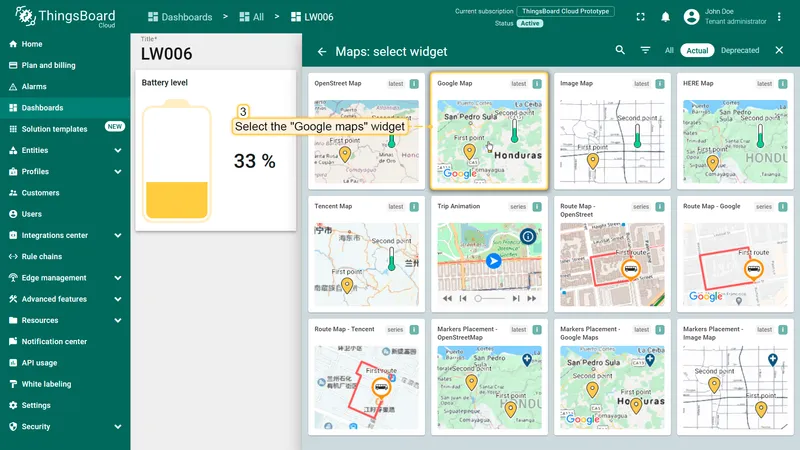
Select the Google map widget.
-
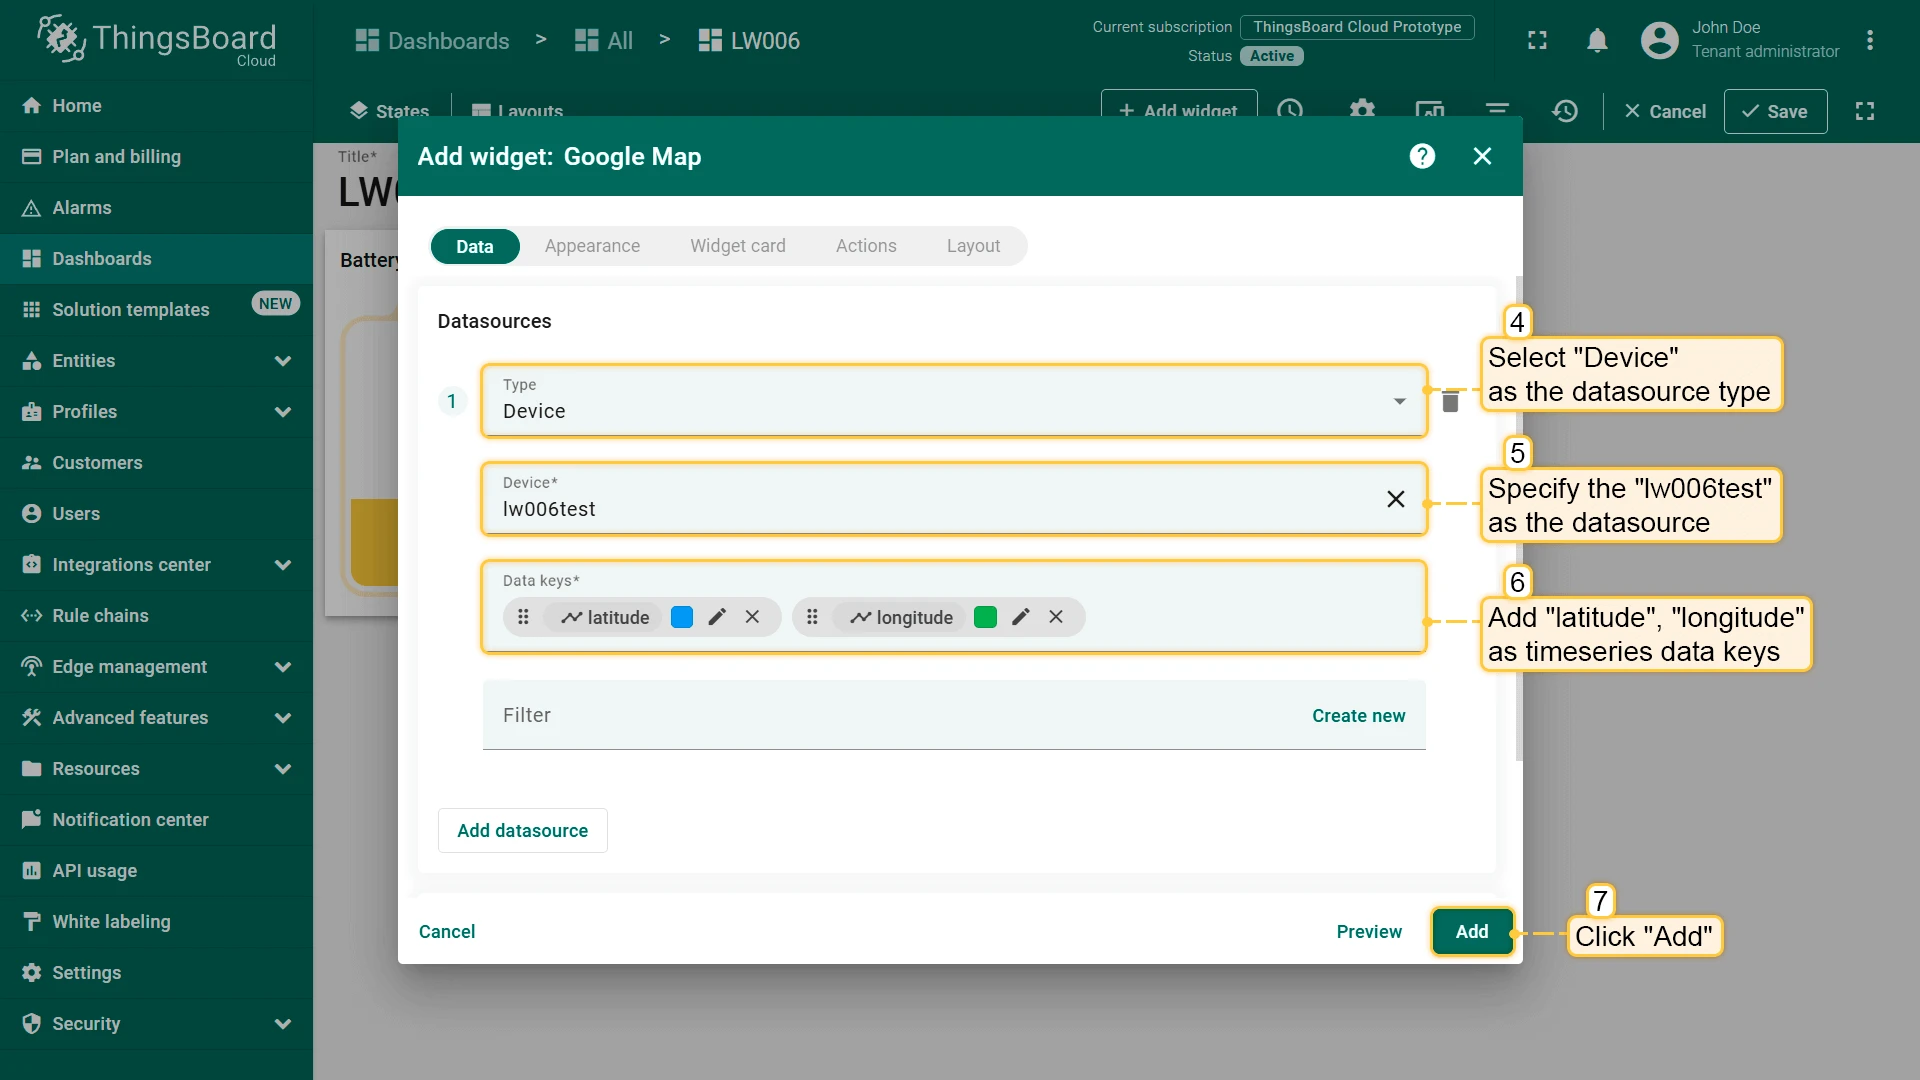
In the Add widget dialog, select Device as the datasource type, choose your device, and add
latitudeandlongitudeas time series data keys. Click Add.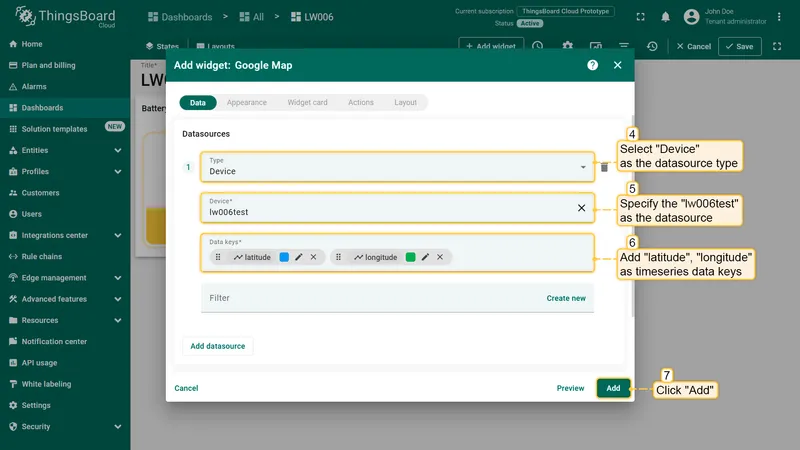
-
Click Save in the upper right corner to save the dashboard.
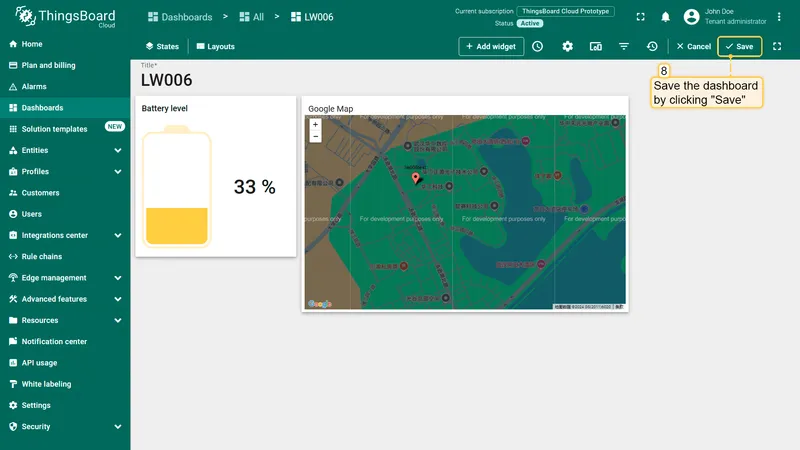
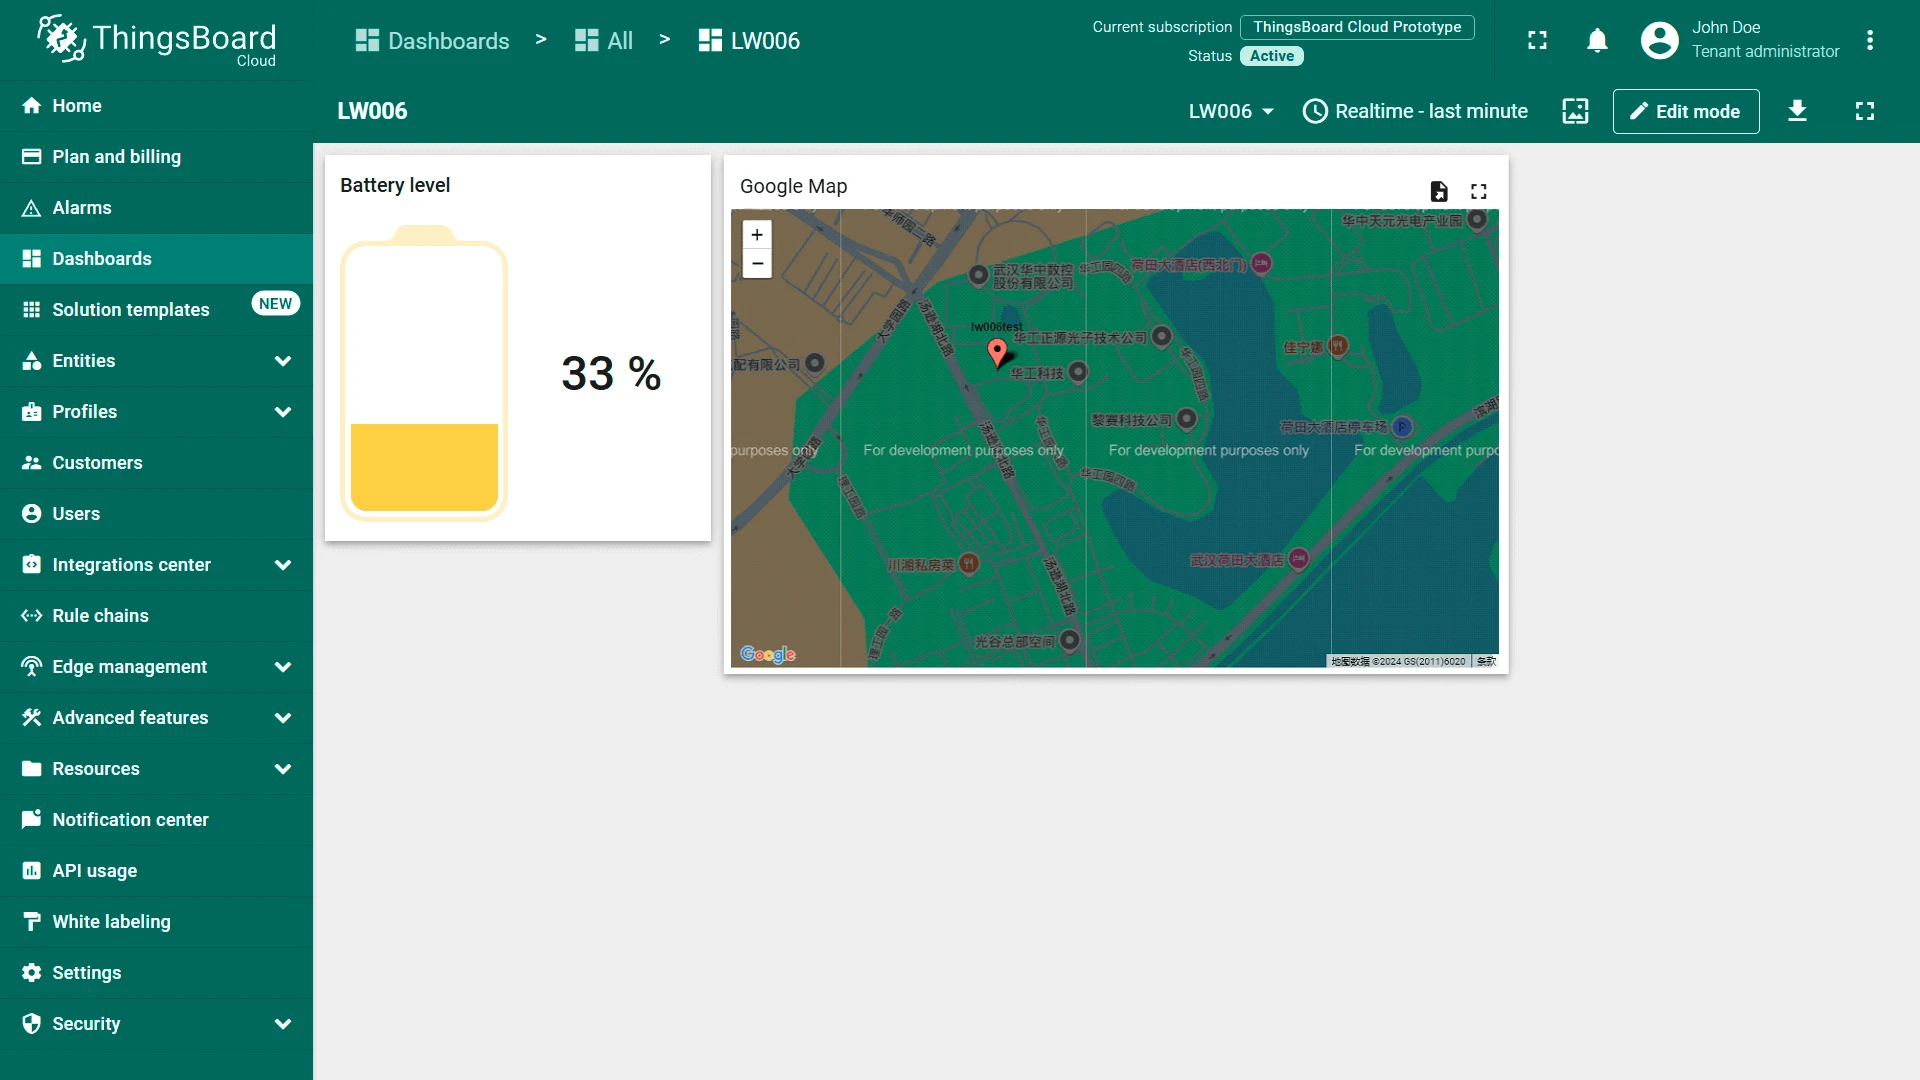
The map widget displays the device’s location.