IoT Gateway Cell 1024
IoT Gateway Cell 1024
EXXN
- Platform
- ThingsBoard
- Hardware Type
- Gateways
- Connectivity
- Ethernet, WIFI, Bluetooth, SIGFOX, 4G, 5G
- Chip
- ARM Cortex-A53
- Industry
- Transportation & Logistics, Smart Cities, Security
- Use Case
- Smart energy, Environment Monitoring, Smart Office, Smart Retail, Smart Farming, Fleet Tracking, Health Care, Air Quality Monitoring, Waste Management, Tank Level Monitoring
Introduction
The EXXN IoT Gateway is a versatile device with an ARM processor that can be adapted to a variety of use cases, including monitoring environmental sensors, energy consumption, radon gas levels, marine environments, and edge computing.
Prerequisites
To continue with this guide we will need the following:
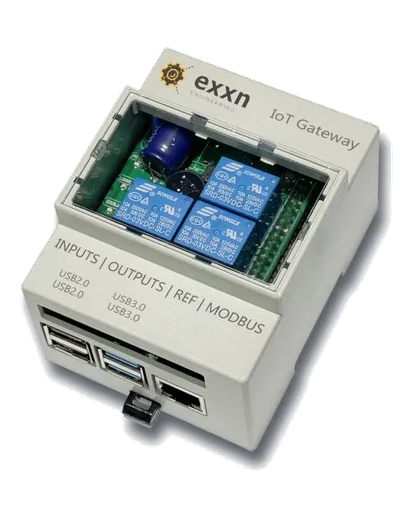
- IoT Gateway Cell 1024.
- Device have to be connected to the Internet via Ethernet, Modem or WIFI.
- ThingsBoard Cloud account.
Create device on ThingsBoard
Open your local platform instance or ThingsBoard Cloud in browser and login as tenant administrator.
- Go to Entities ⇾ Devices and click + Add device ⇾Add new device. Enter device name, select existing or create a new device profile and click Add.
- Your device has been created. Open its details and copy auto-generated access token by clicking on the “Copy access token” button.
Connect device to ThingsBoard
- Open a Browser to the administration web of Cell 1024 using the URL: https://[IP_DEVICE] and go to the “Cloud” tab.
- Activate the Cloud control and configure all the parameters to connect the device to the specific ThingsBoard platform via MQTT.
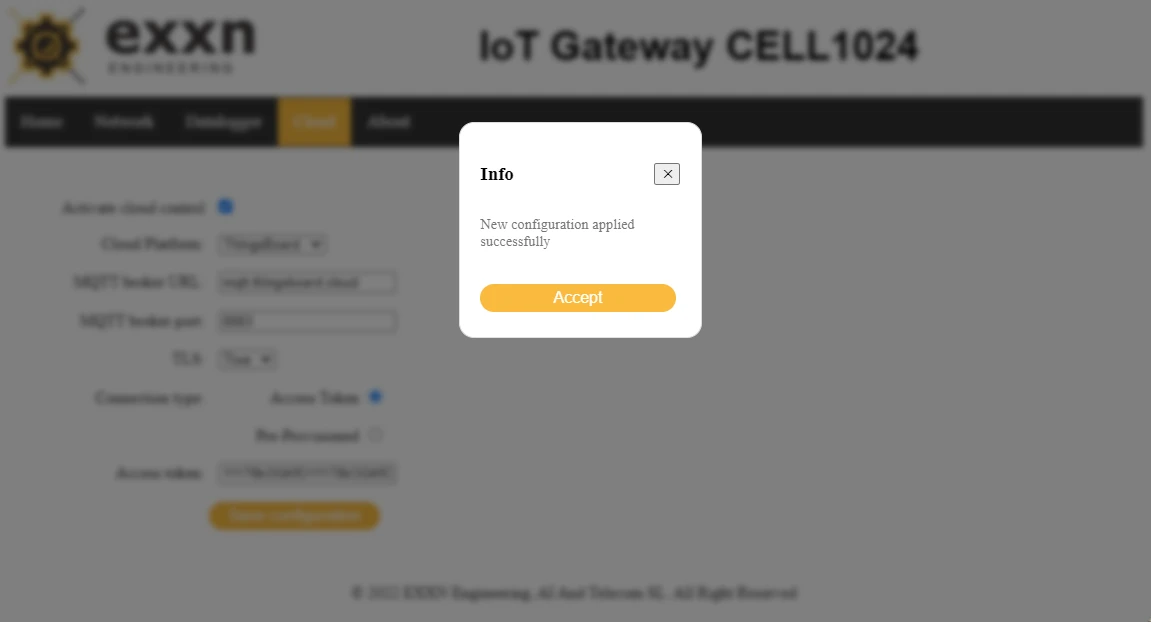
- Click “Save configuration” button.
![Open a Browser to the administration web of Cell 1024 using the URL: https://[IP_DEVICE] and go to the "<b>Cloud</b>" tab.](/_astro/conn1.CNbhB3dG_Z64oHH.webp)
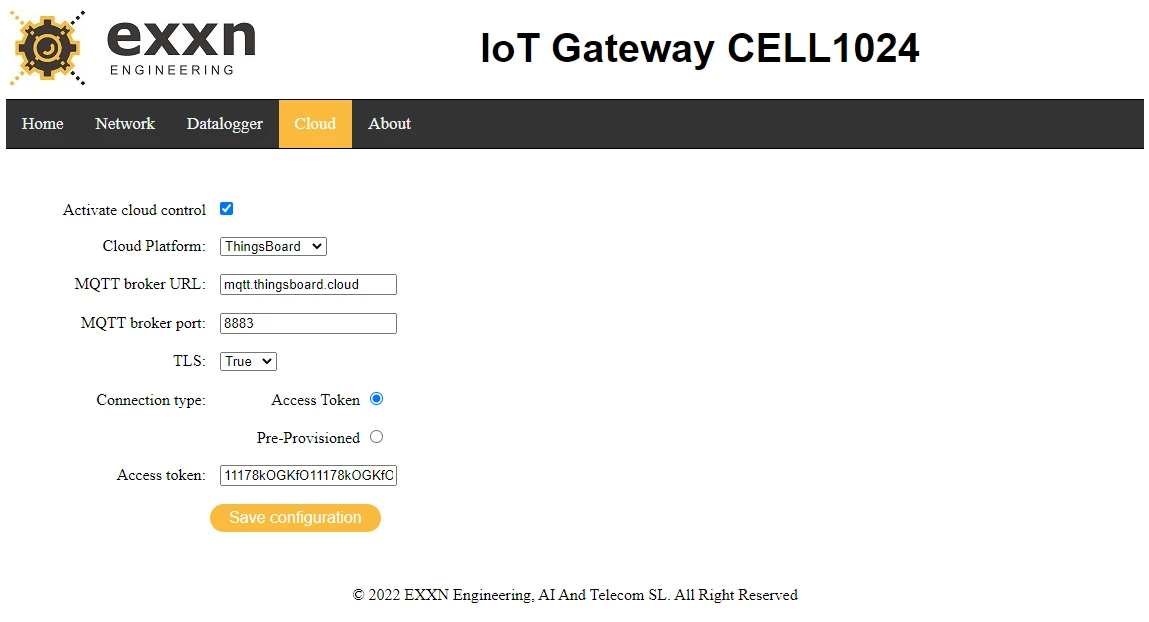
| Configuration parameters | Description |
|---|---|
| Cloud Platform | Select ThingsBoard. |
| MQTT broker URL | URL to de Broker of the server we want to integrate to. |
| MQTT broker port | Number of the port used by the server. |
| TLS | Select true if the server use the Transport Layer Security protocol. |
| Connection Type | Select ‘Access Token’ option. We will use an Access token previously created in ThingsBoard. |
| Access Token | Indicate the Access token previously copied in ThingsBoard. |
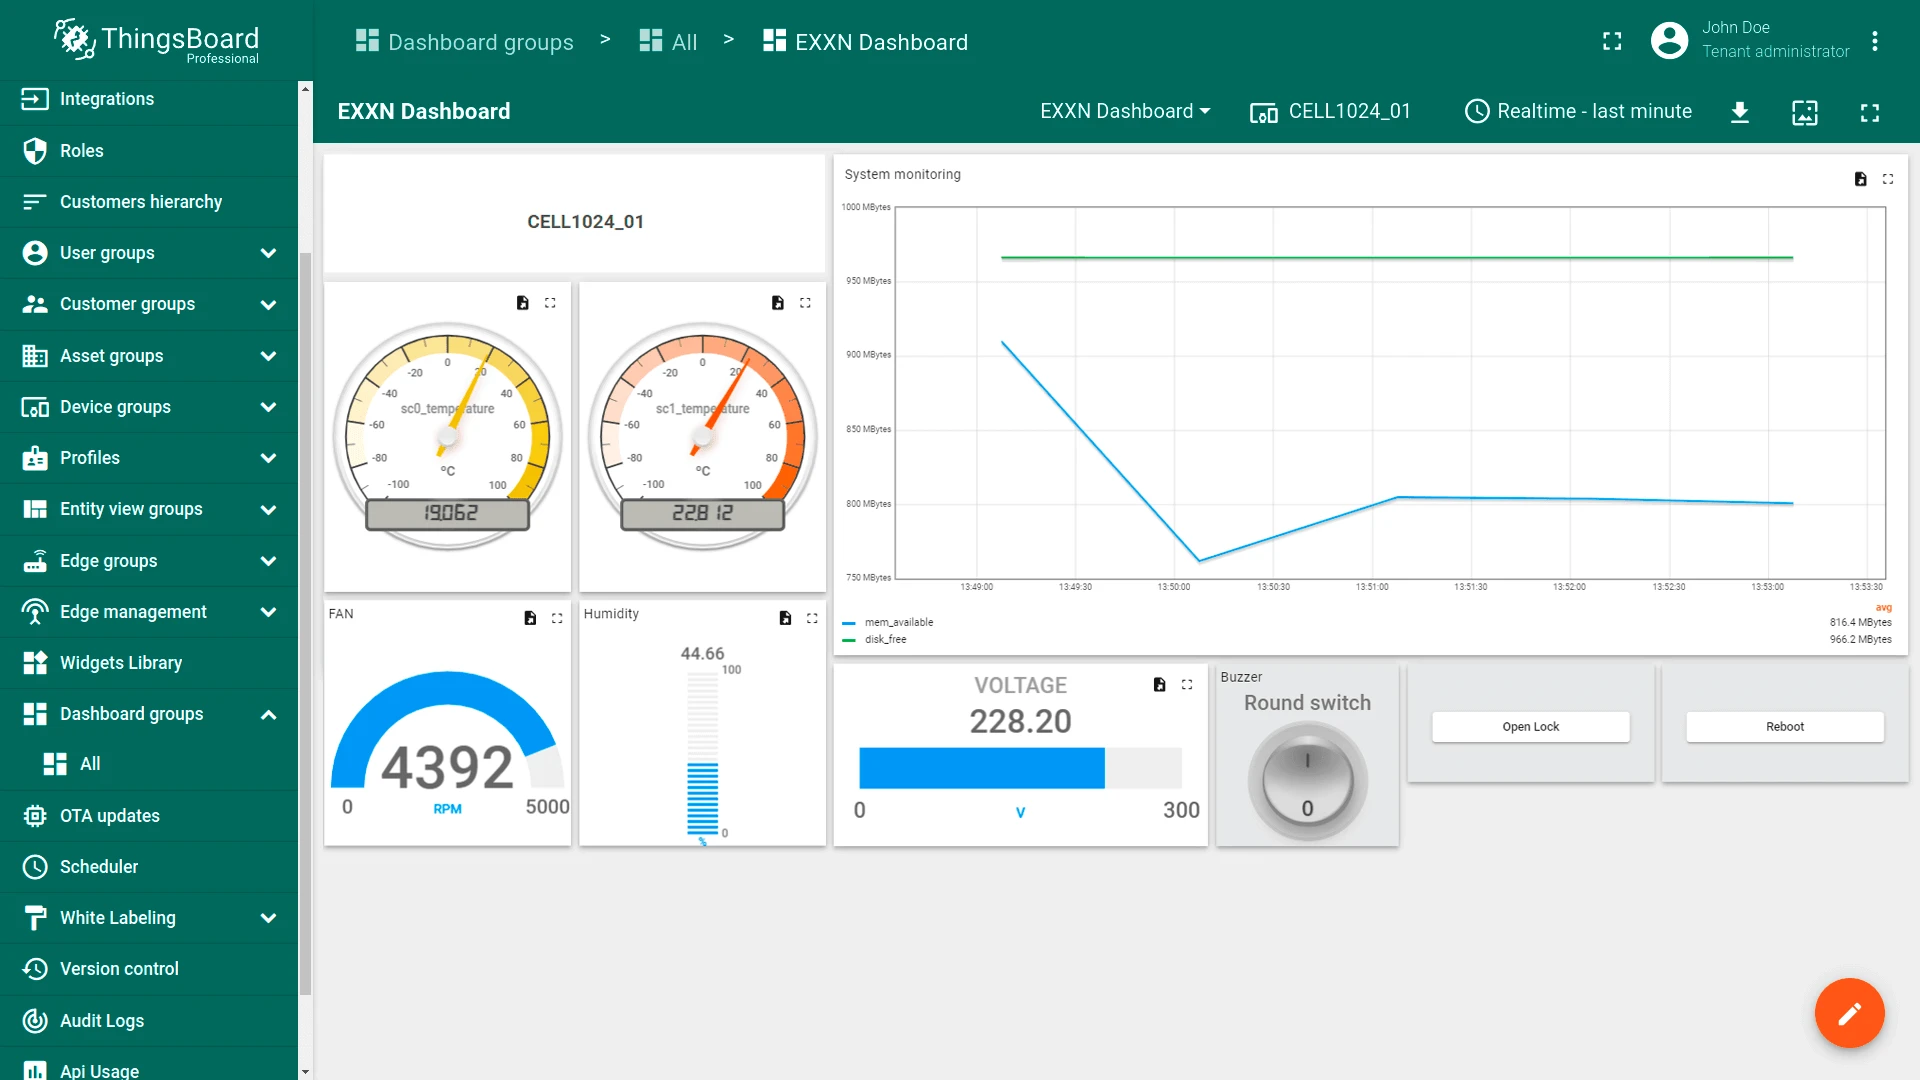
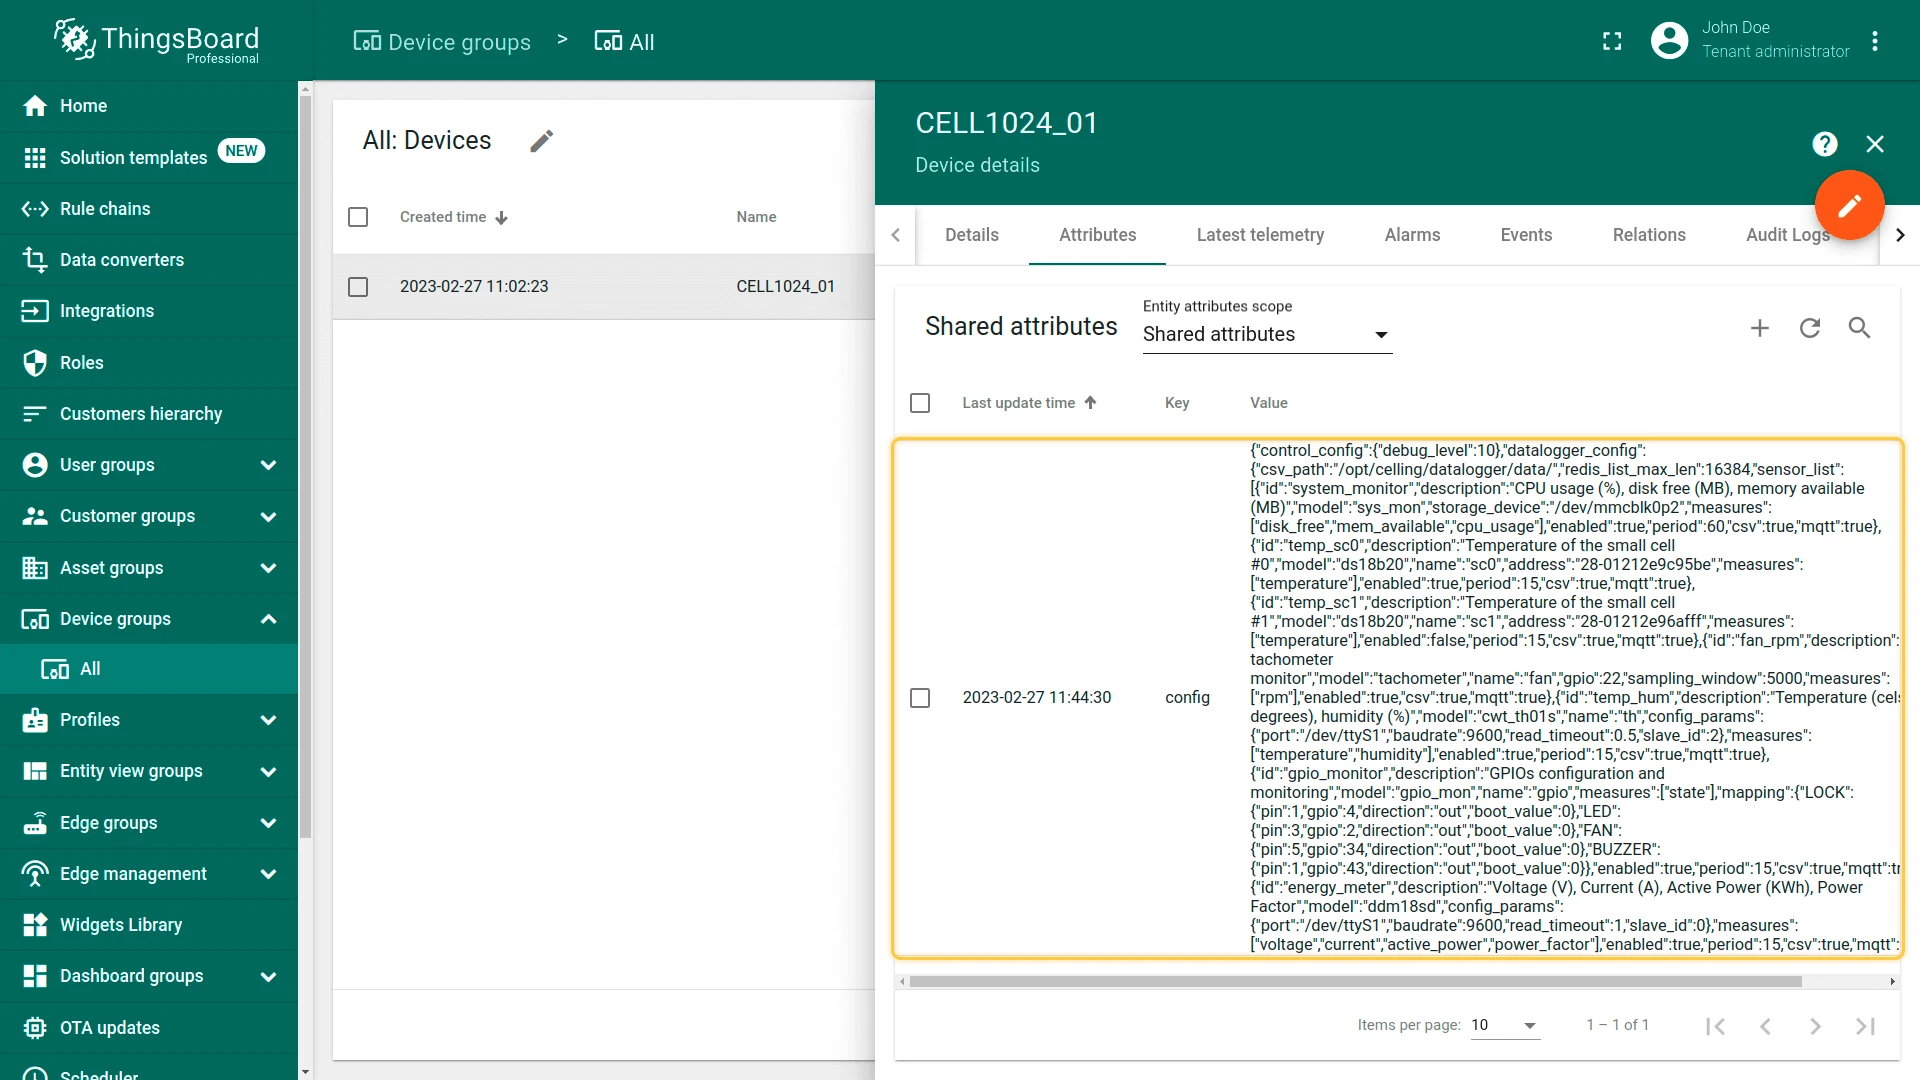
To verify that the device is connected correctly to ThingsBoard, go to the Device groups menu -> All devices, select your device. In the device details select client attributes tab and check if the client attributes have been communicated to the device.
- If you did everything is correct, we will see client attributes like the serial_number, last_reboot, device_model, etc.

The EXXN IoT Gateway will connect to ThingsBoard using the MQTT API. We have previously covered how to configure the device to connect to ThingsBoard. Now, we will show the steps to configure the device in ThingsBoard in order to monitor data and manage the device.
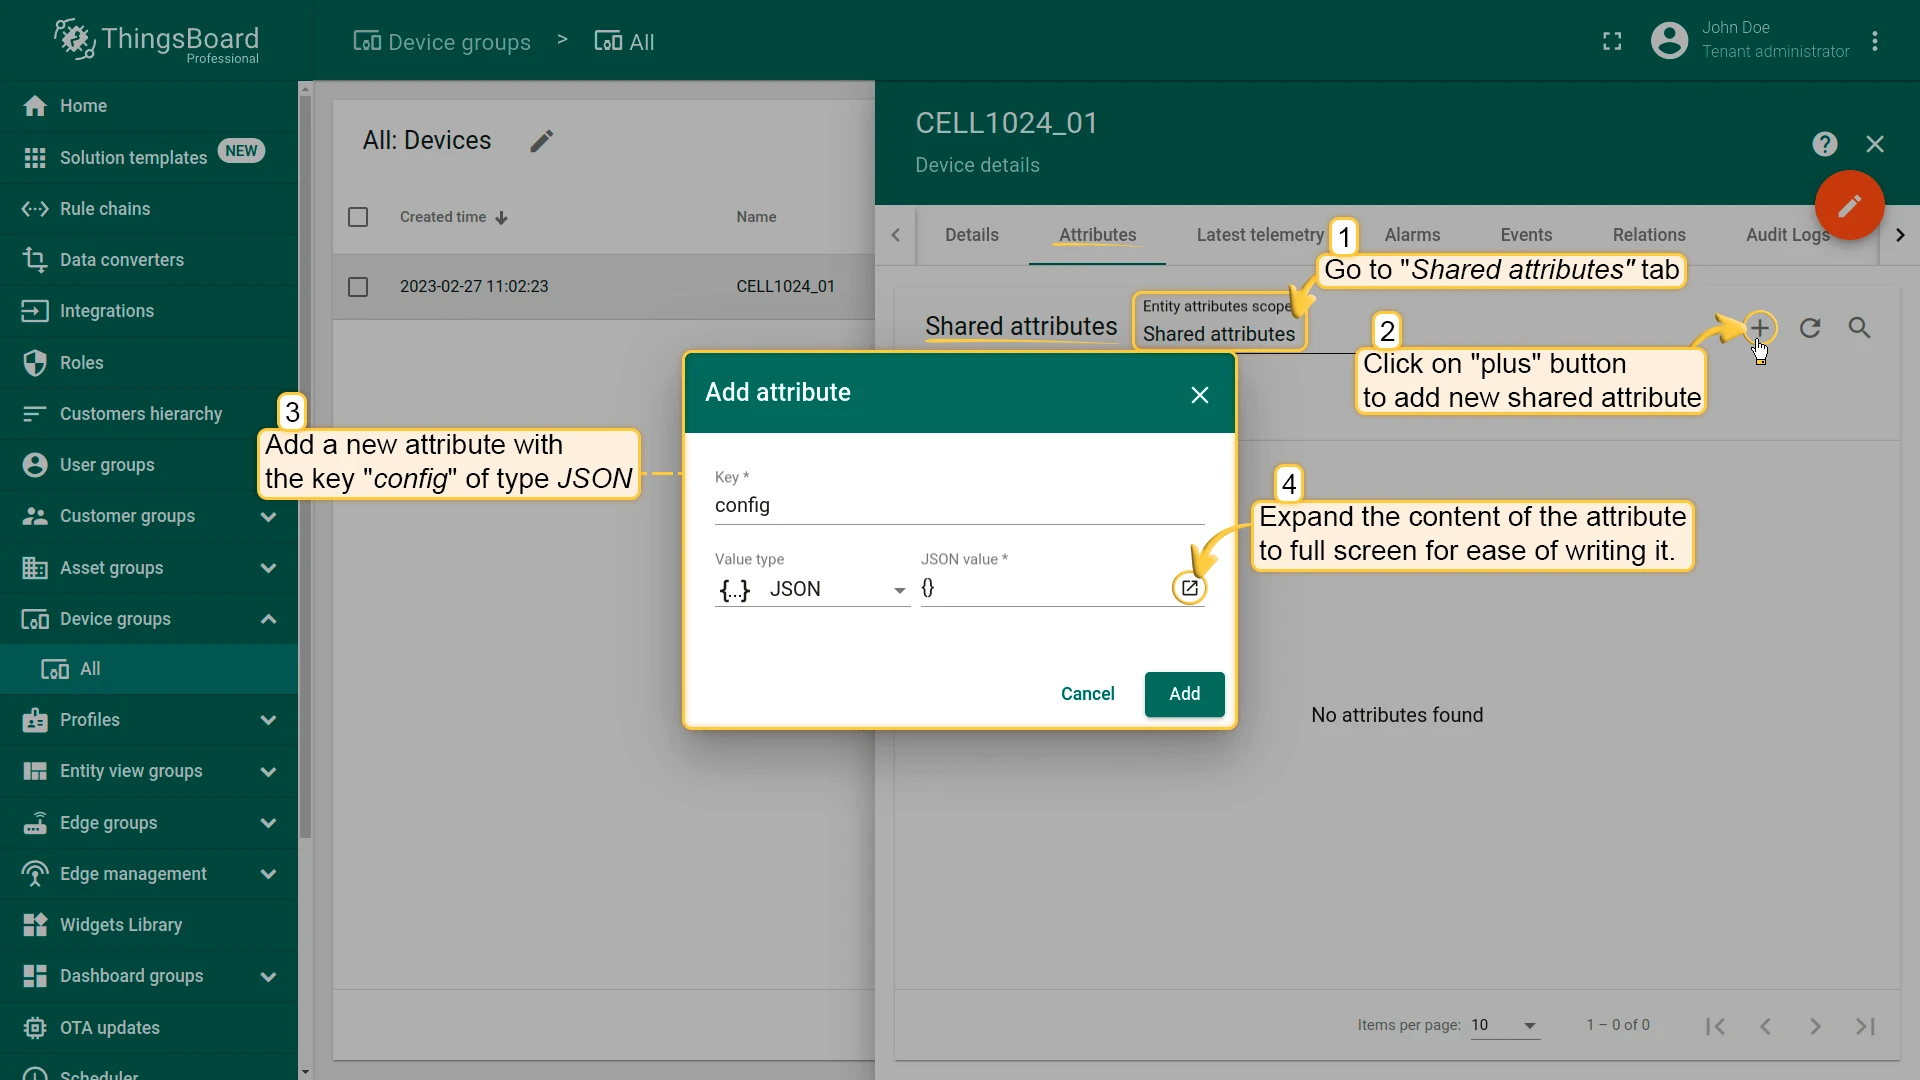
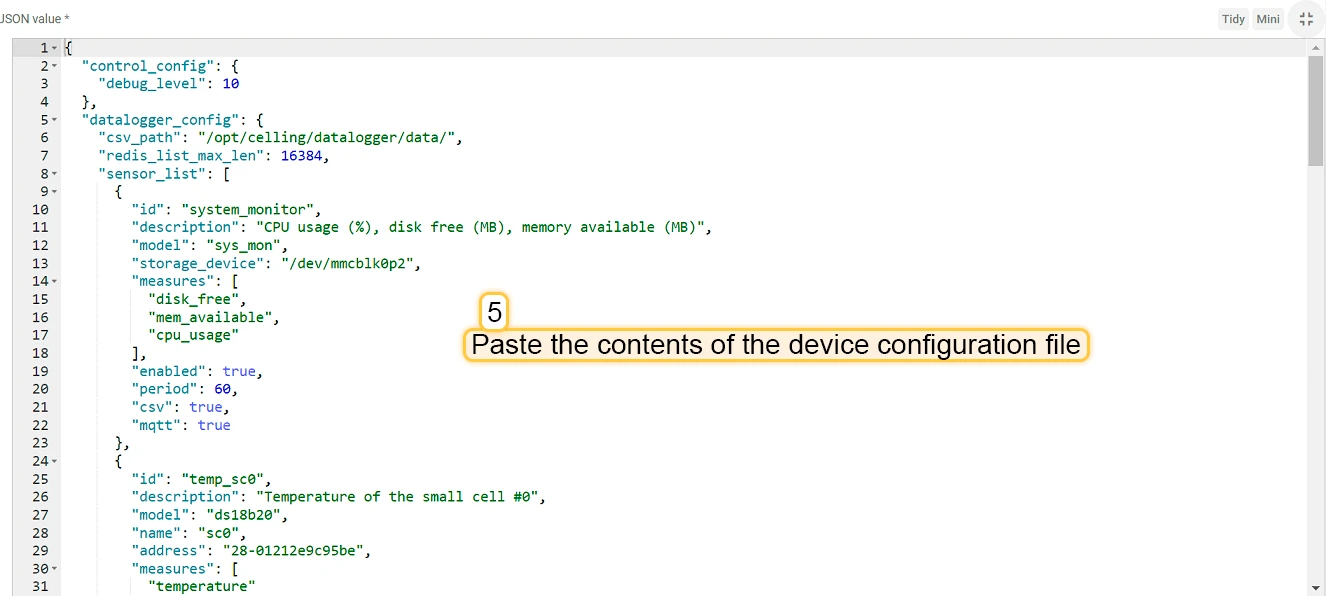
In order to configure the datalogger options of the EXXN IoT Gateway, we should create a new JSON “Shared Attribute” for the Device with the key “config”.
We will use the following JSON:
{ "control_config": { "debug_level": 10 }, "datalogger_config": { "csv_path": "/opt/celling/datalogger/data/", "redis_list_max_len": 16384, "sensor_list": [ { "id": "system_monitor", "description": "CPU usage (%), disk free (MB), memory available (MB)", "model": "sys_mon", "storage_device": "/dev/mmcblk0p2", "measures": [ "disk_free", "mem_available", "cpu_usage" ], "enabled": true, "period": 60, "csv": true, "mqtt": true }, { "id": "temp_sc0", "description": "Temperature of the small cell #0", "model": "ds18b20", "name": "sc0", "address": "28-01212e9c95be", "measures": [ "temperature" ], "enabled": true, "period": 15, "csv": true, "mqtt": true }, { "id": "temp_sc1", "description": "Temperature of the small cell #1", "model": "ds18b20", "name": "sc1", "address": "28-01212e96afff", "measures": [ "temperature" ], "enabled": false, "period": 15, "csv": true, "mqtt": true }, { "id": "fan_rpm", "description": "Fan tachometer monitor", "model": "tachometer", "name": "fan", "gpio": 22, "sampling_window": 5000, "measures": [ "rpm" ], "enabled": true, "csv": true, "mqtt": true }, { "id": "temp_hum", "description": "Temperature (celsius degrees), humidity (%)", "model": "cwt_th01s", "name": "th", "config_params": { "port": "/dev/ttyS1", "baudrate": 9600, "read_timeout": 0.5, "slave_id": 2 }, "measures": [ "temperature", "humidity" ], "enabled": true, "period": 15, "csv": true, "mqtt": true }, { "id": "gpio_monitor", "description": "GPIOs configuration and monitoring", "model": "gpio_mon", "name": "gpio", "measures": [ "state" ], "mapping": { "LOCK": { "pin": 1, "gpio": 4, "direction": "out", "boot_value": 0 }, "LED": { "pin": 3, "gpio": 2, "direction": "out", "boot_value": 0 }, "FAN": { "pin": 5, "gpio": 34, "direction": "out", "boot_value": 0 }, "BUZZER": { "pin": 1, "gpio": 43, "direction": "out", "boot_value": 0 } }, "enabled": true, "period": 15, "csv": true, "mqtt": true }, { "id": "energy_meter", "description": "Voltage (V), Current (A), Active Power (KWh), Power Factor", "model": "ddm18sd", "config_params": { "port": "/dev/ttyS1", "baudrate": 9600, "read_timeout": 1, "slave_id": 0 }, "measures": [ "voltage", "current", "active_power", "power_factor" ], "enabled": true, "period": 15, "csv": true, "mqtt": true } ] }}All the information to configure the device correctly through this JSON File can be found in the EXXN IoT Gateway Manual.
- Go to device’s attributes tab in the device details. Add a new “Shared attribute” with the key “config” of type JSON.
- Expand the content of the attribute to full screen for ease of writing it. Paste the contents of the device configuration file into the attribute value.
- Click “Add” attribute.
Check data on ThingsBoard
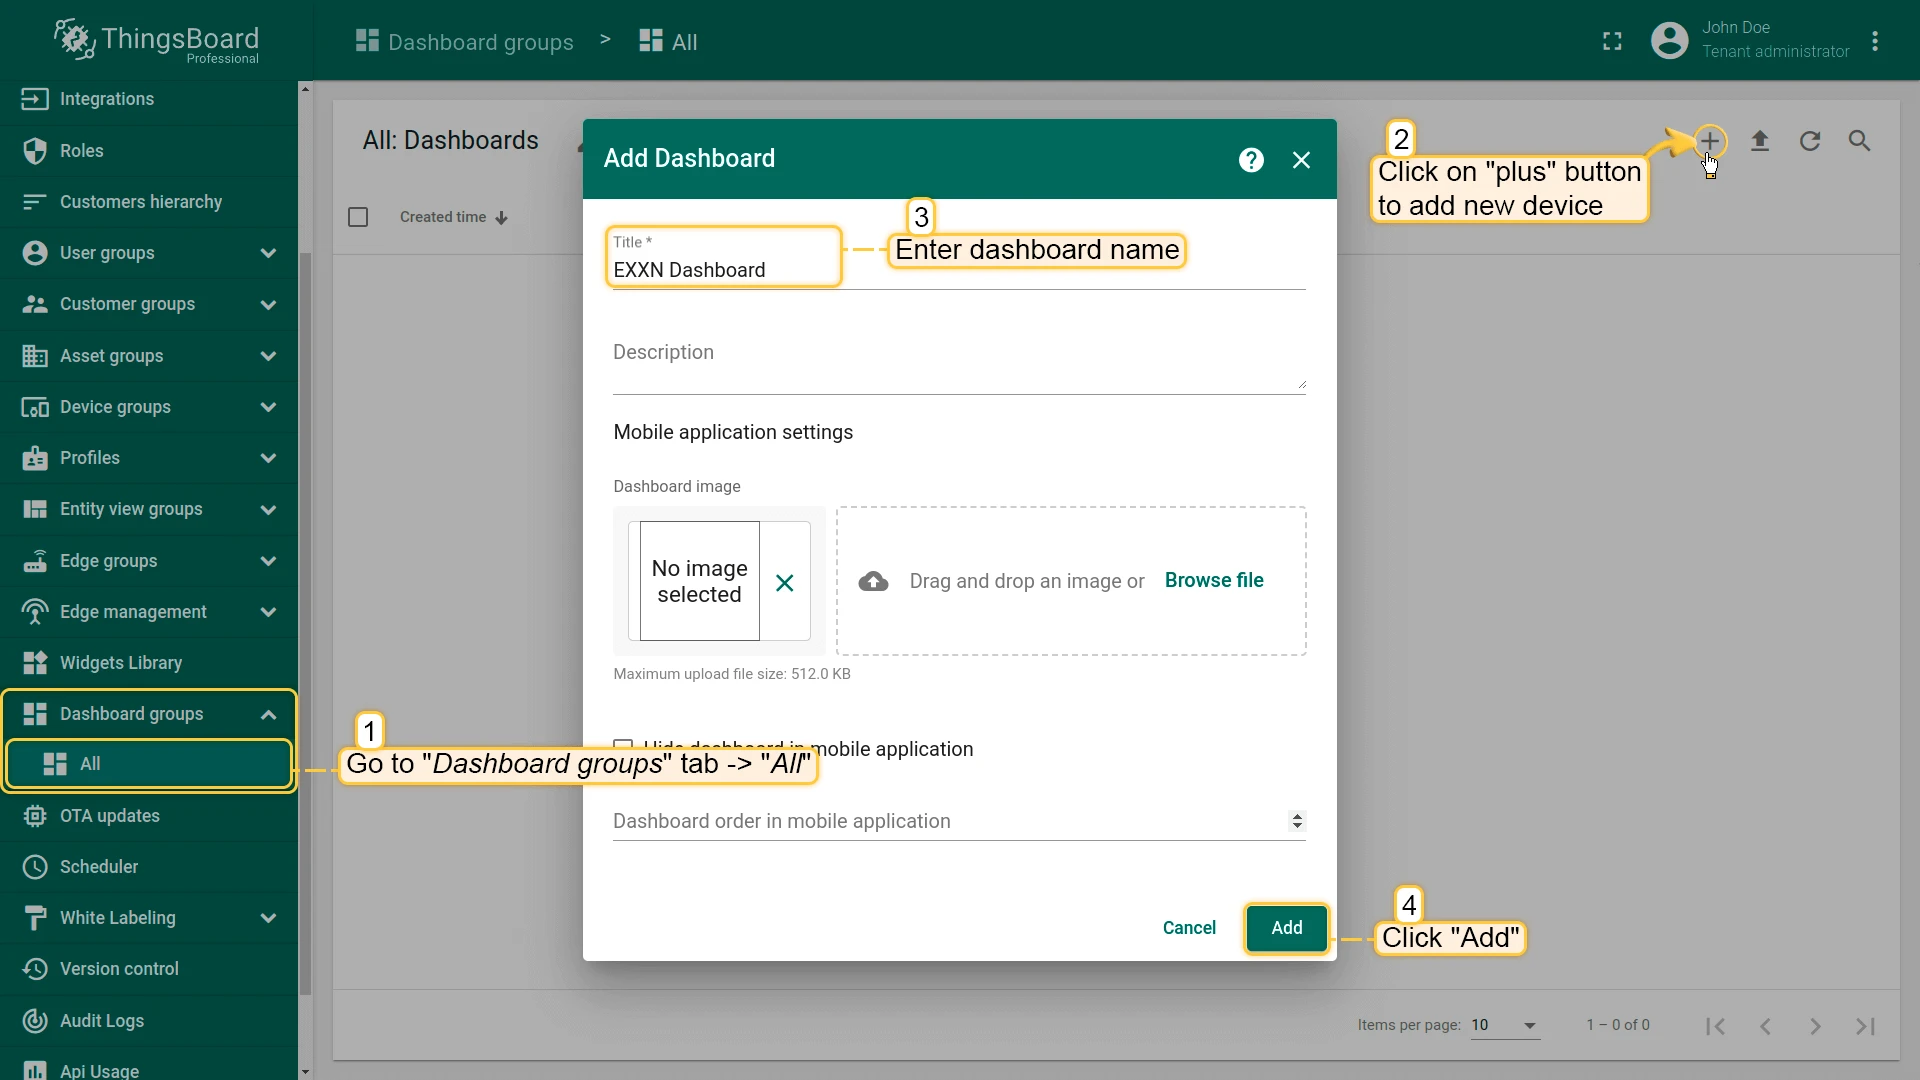
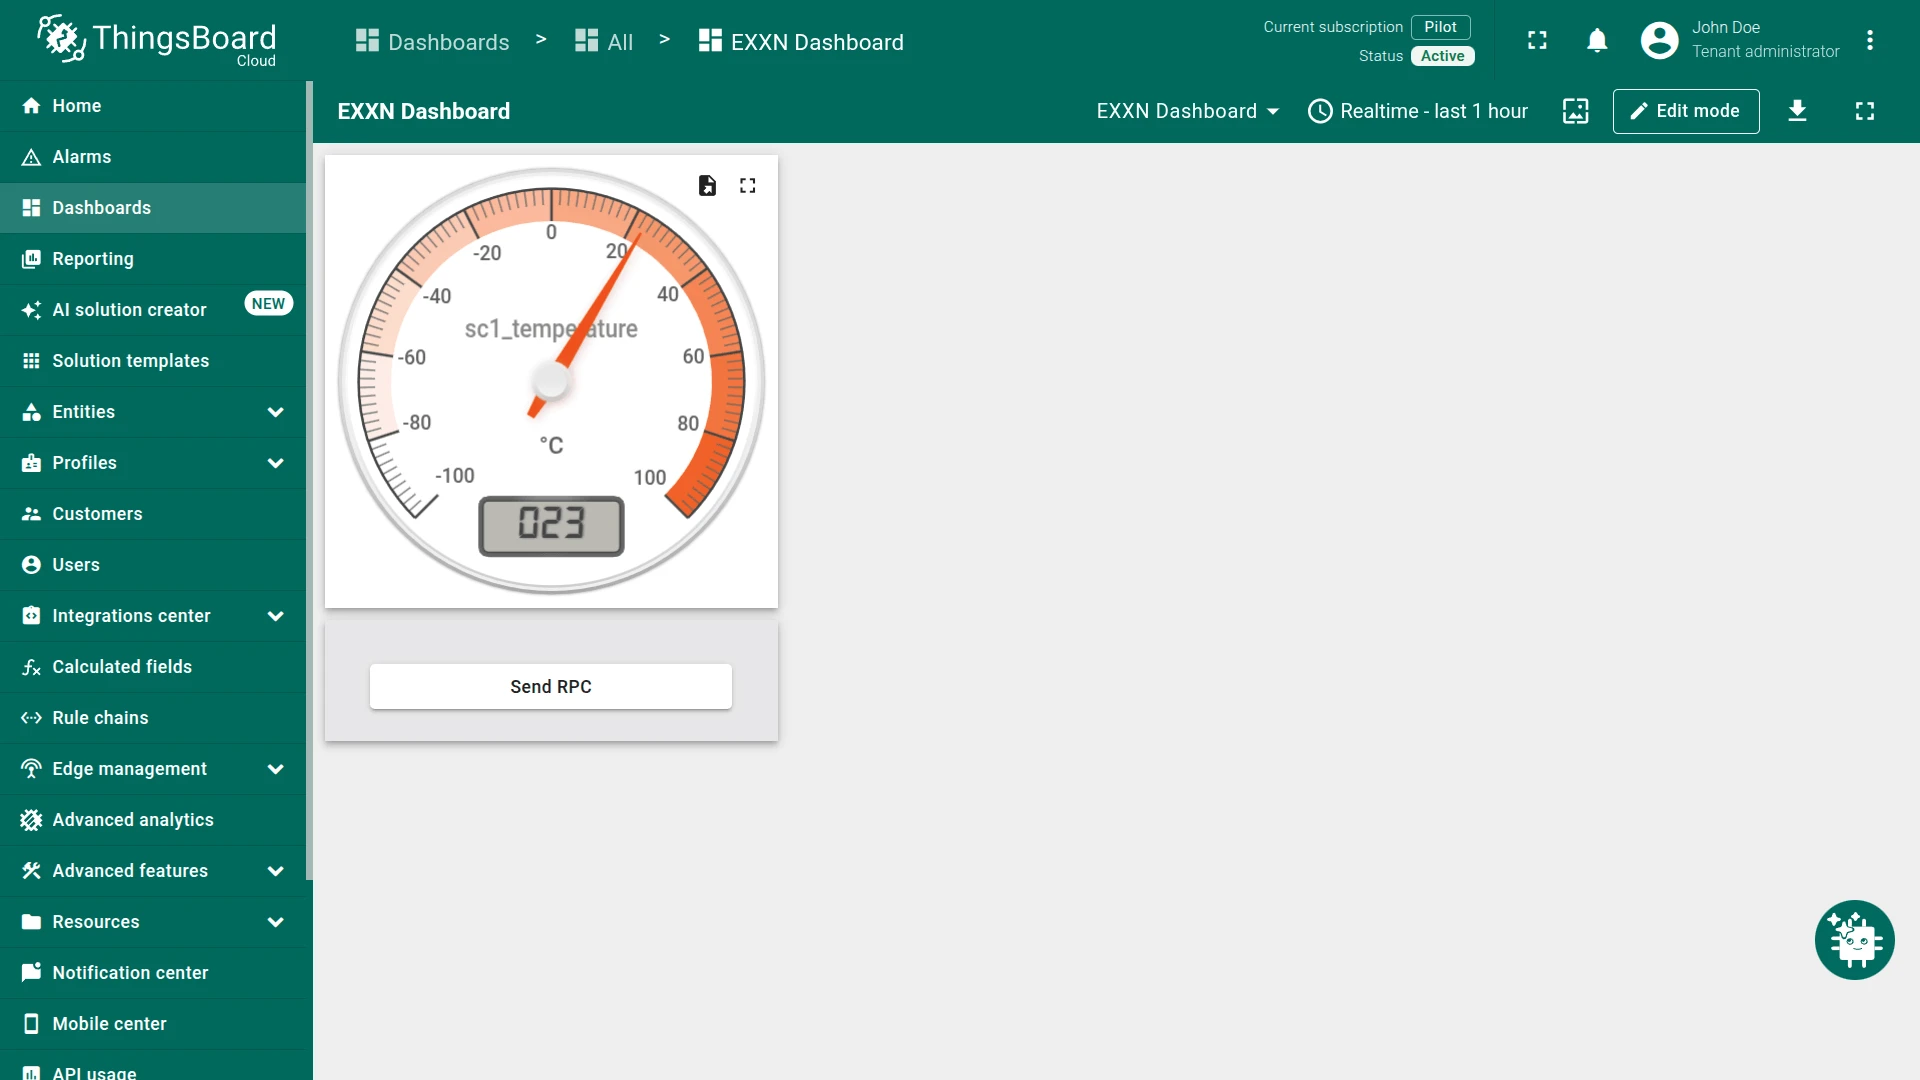
Create a dashboard to visualize telemetry values in widgets.
- Go to the Dashboards. Creat new dashboard by clicking the Add dashboard ⇾ Create new dashboard button in the upper right corner of the dashboards page. Enter dashboard name and click Add.
- Create Radial gauge widget from the Analog gauges bundle. We used sc0_temperature.
- The data will be shown on the selected widget.
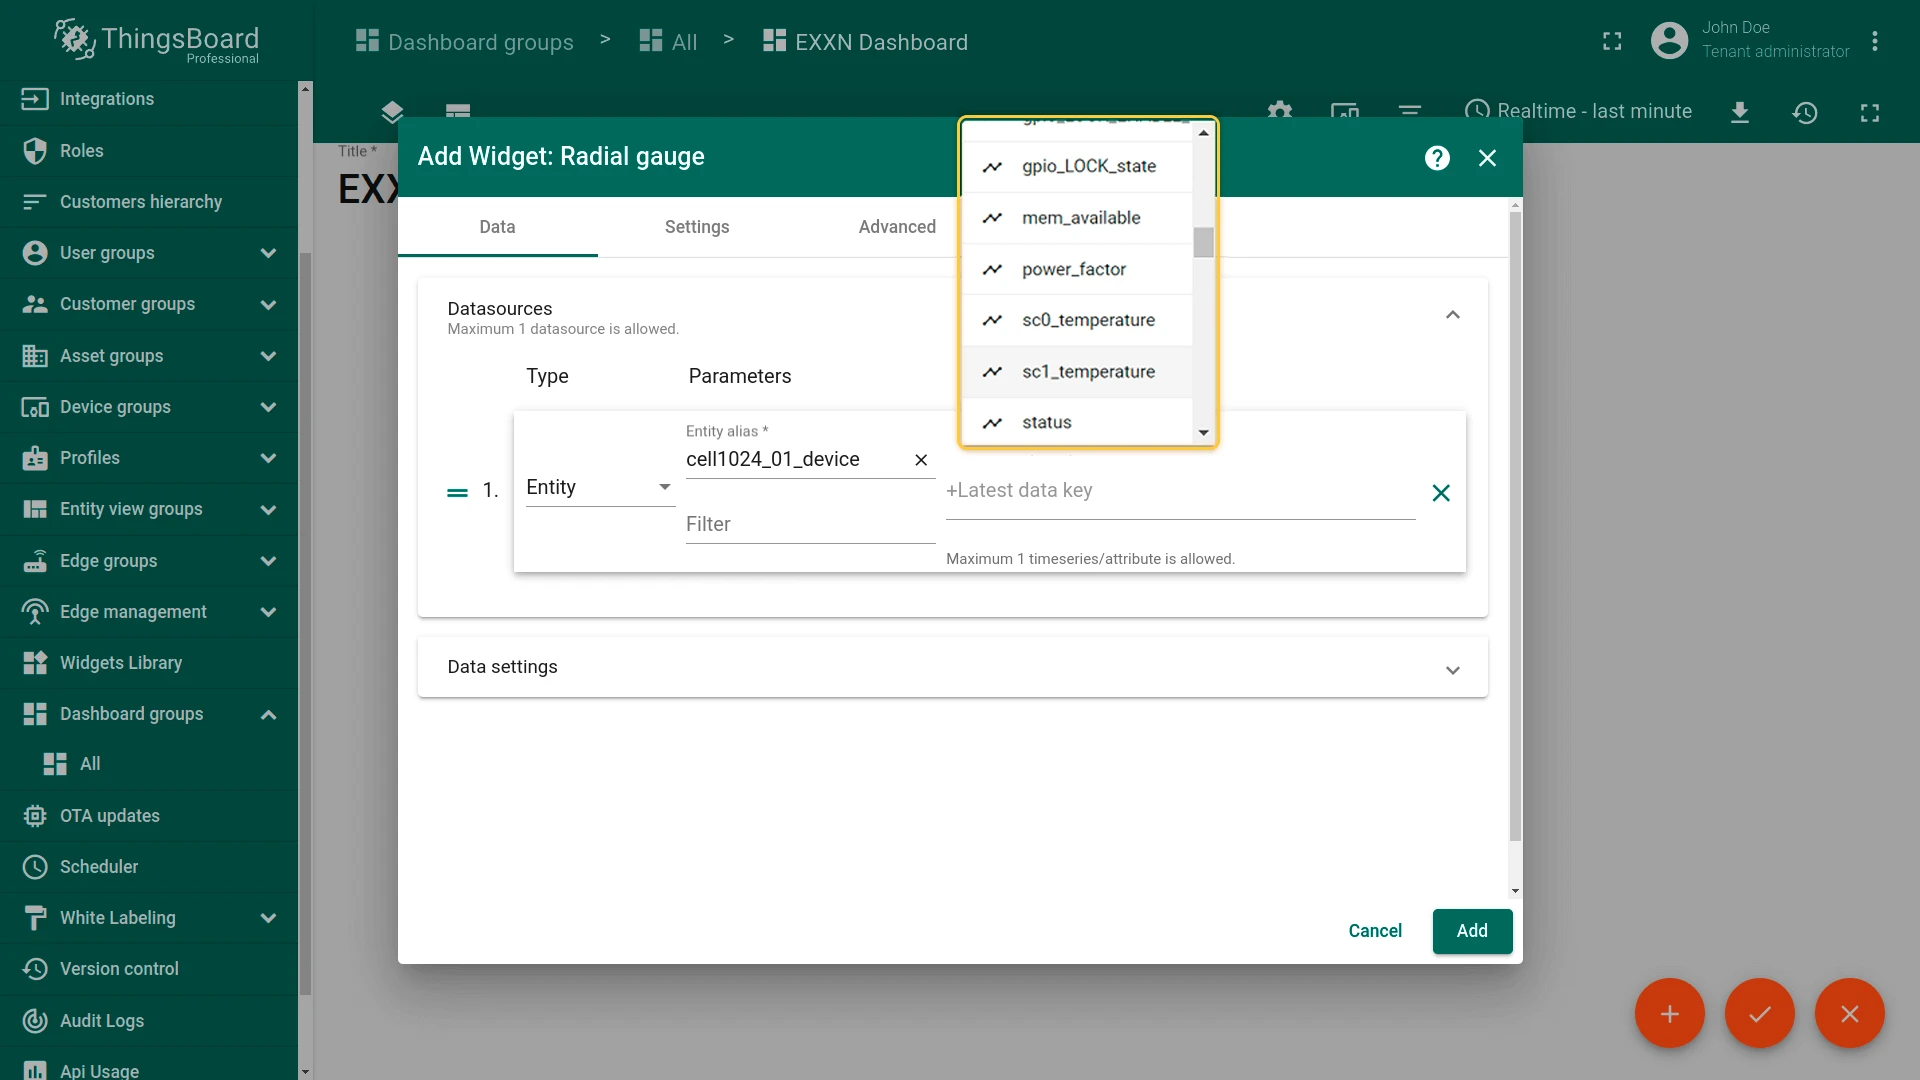
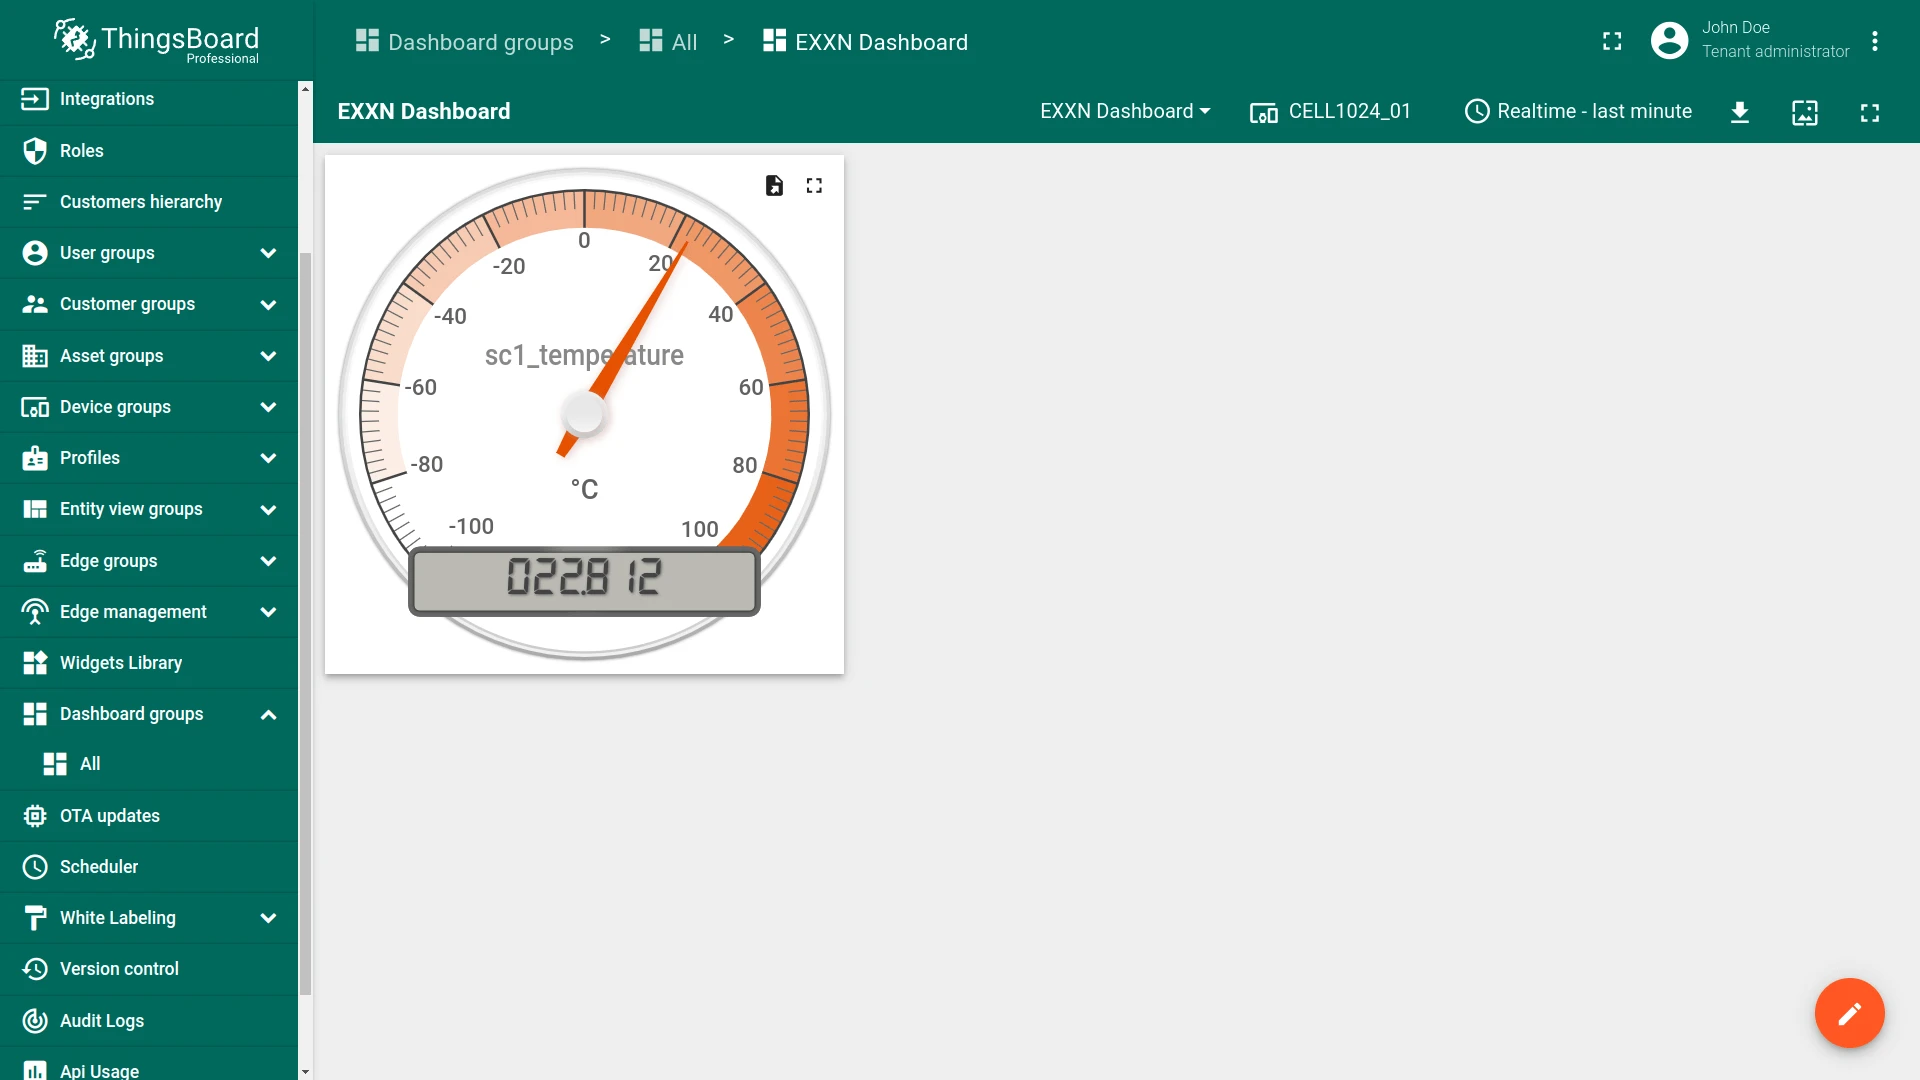
- All the measures that are “enabled” in the device’s JSON configuration file will be found as metrics with the name specified in the same file.
- You can read more about widgets and their creation in this guide.
Control device using RPC
ThingsBoard supports sending RPC commands to the device. Command parameters must be provided in JSON format.

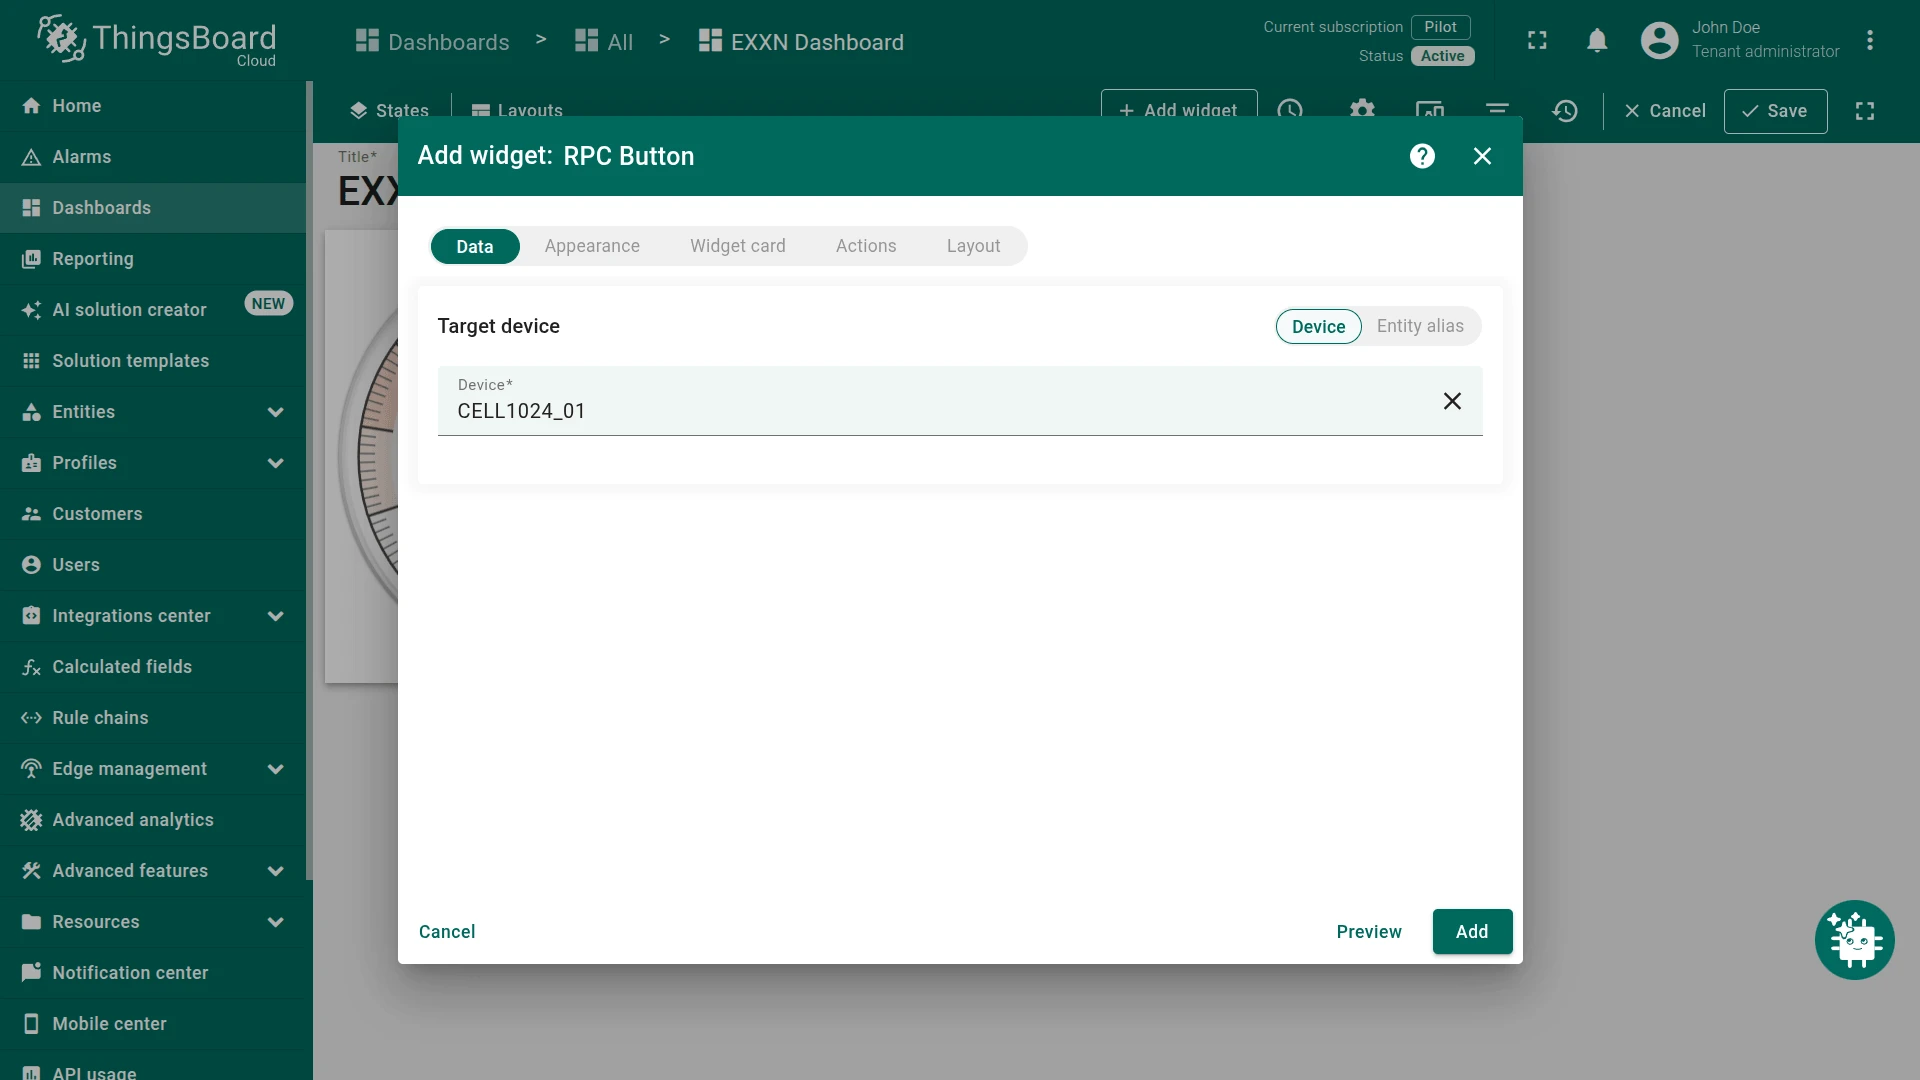
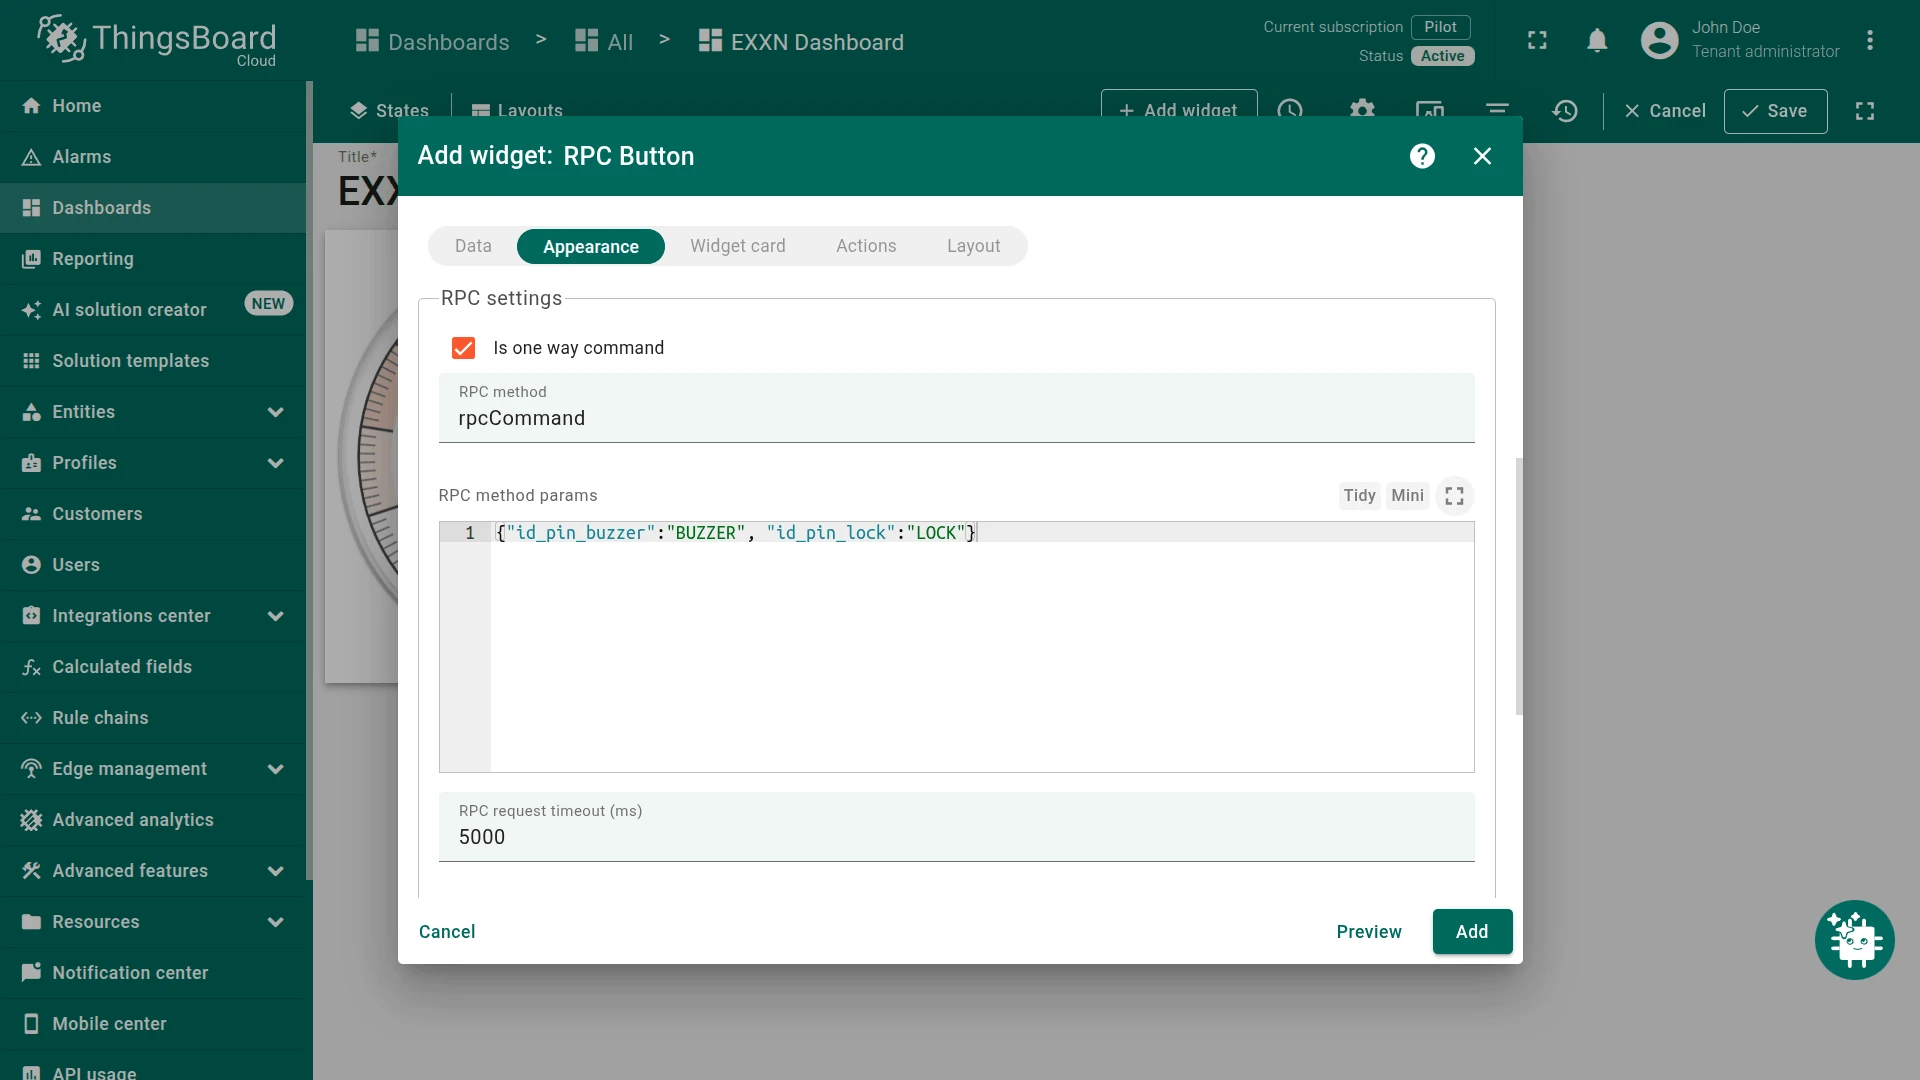
To read more about the RPC commands - you can read this article. All the commands that can be sent to the device are explained in the EXXN IoT Gateway manual.
Additional info
Here you can find some additional links, that can be useful.
Troubleshooting
- The most common problem in the integration process is not having a connection with the MQTT Broker. Make sure the device is connected to the internet and is able to communicate with the ThingsBoard Broker.
- Another common problem is not setting the correct Access Token. Check that the provided Access token is configured in ThingsBoard for the device.
Feedback & Help
For more information, visit the website at EXXN Engineering. If you have any problems or doubts, please do not hesitate in contact to EXXN support at: troubleshooting@exxn.es.
Conclusion
Now you can easily connect your IoT Gateway Cell 1024 and start sending data to ThingsBoard.
To go further, explore the ThingsBoard documentation to learn more about key features, such as creating dashboards to visualize your telemetry, or setting up alarm rules to monitor device behavior in real time.