RTU-X
RTU-X
Nettra
- Platform
- ThingsBoard
- Hardware Type
- Other devices
- Connectivity
- Wi-Fi, Ethernet, Bluetooth LE, GSM/GPRS, RS-485, RS-232
- Industry
- Smart Cities, Industrial Manufacturing, Transportation & Logistics, Energy Management
- Use Case
- Environment Monitoring, Smart Metering, Smart Farming, Smart Energy
Introduction
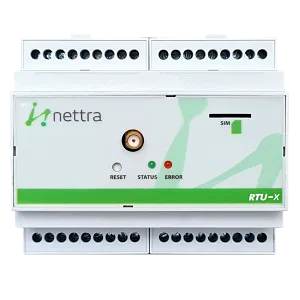
The Nettra RTU-X is an IoT controller with digital and analog inputs and outputs, and integrated communication interfaces: modem, Ethernet, Bluetooth, 802.15.4, RS-485, RS-232, and GPS. It is configurable via the RTU-X Configuration Interface and runs a fully customizable script written in the Nettra scripting language.
This guide describes how to connect an RTU-X to ThingsBoard over Wi-Fi using MQTT, and visualize device data on a dashboard.
Prerequisites
Hardware:
- Nettra RTU-X — 1×
- 12 VDC power supply — 1×
Software:
- RTU-X Configuration Interface
- ThingsBoard instance: use ThingsBoard Cloud or install a local server
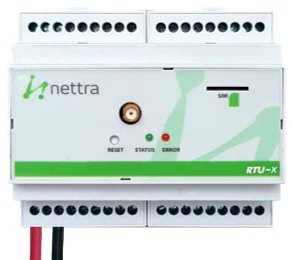
Connection diagram
Configure ThingsBoard
Create a device
-
Go to Entities > Devices and click + to add a new device. Enter
RTU-Xas the name, leave the device type as default, and click Add.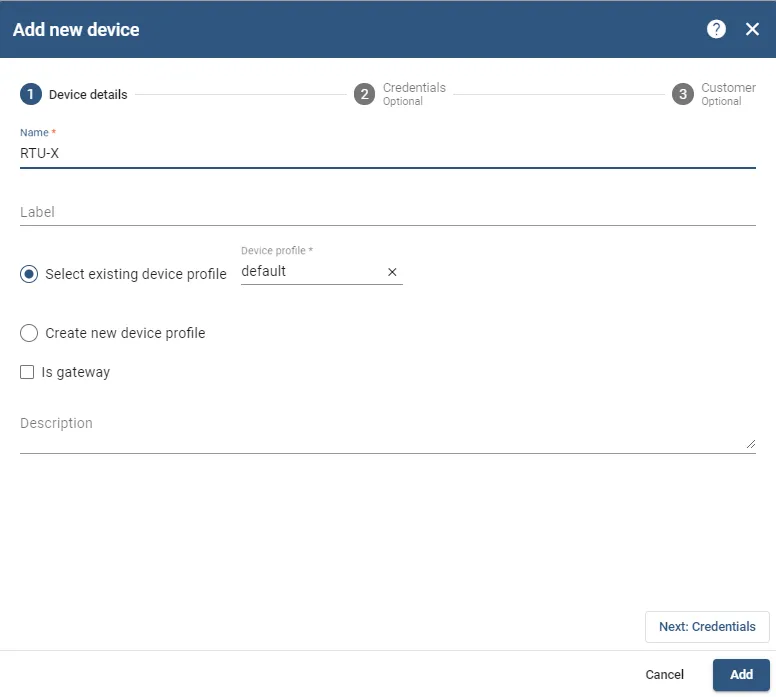
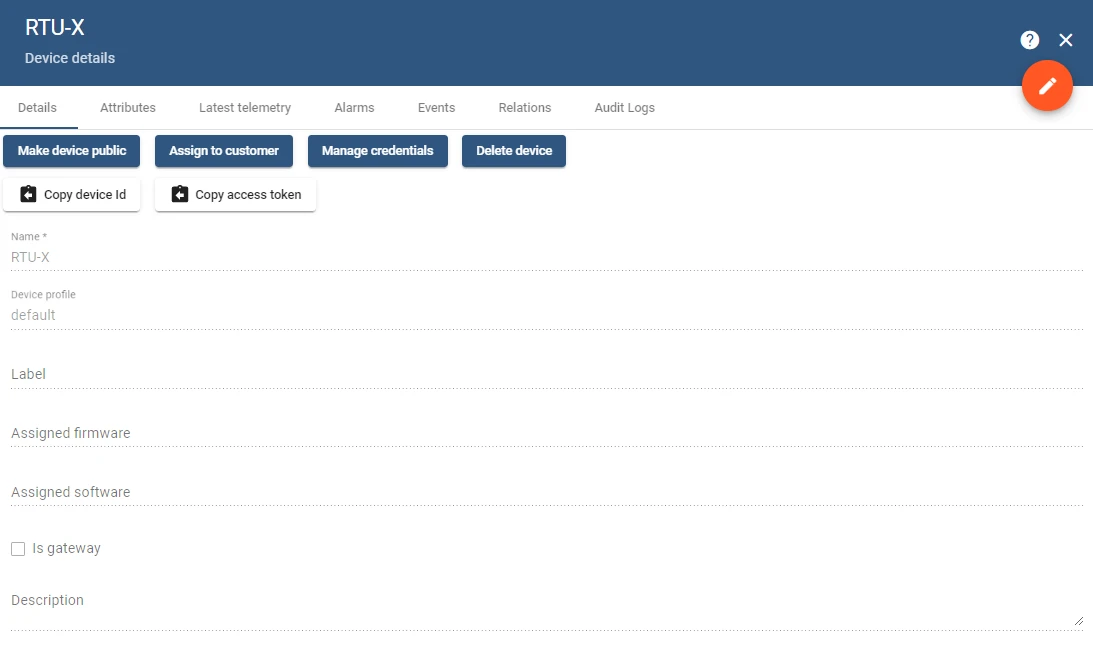
-
Open the device details and click Copy access token. Save this token — it will be used as
$RTU_DEMO_TOKENin the MQTT configuration.

Import the dashboard
Download the RTU-X dashboard JSON and import it into ThingsBoard. See the dashboard import instructions for details.
Connect RTU-X to PC
The RTU-X creates a Wi-Fi access point on first use. Connect to it to configure the device, then switch it to join your local network.
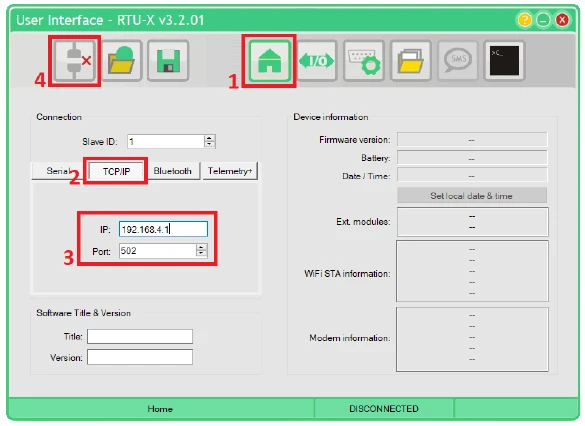
-
Power on the RTU-X and connect your PC to the
RTU-X-******Wi-Fi access point it broadcasts. -
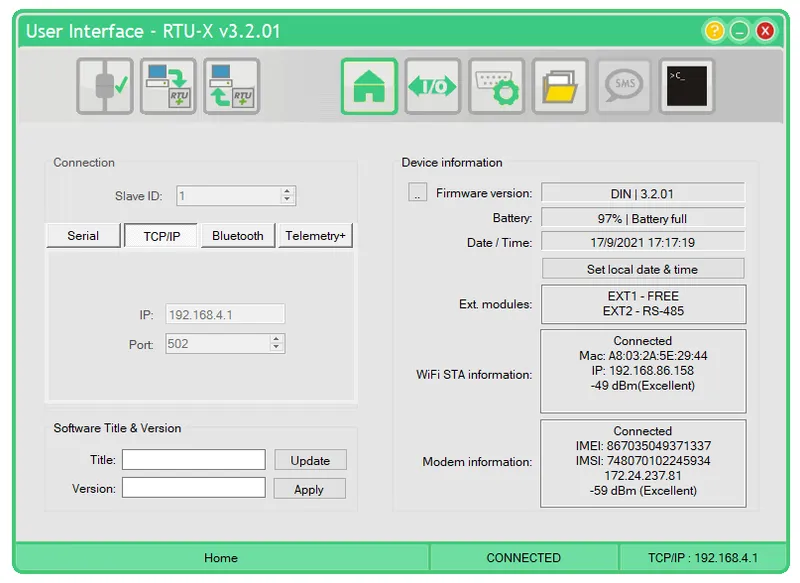
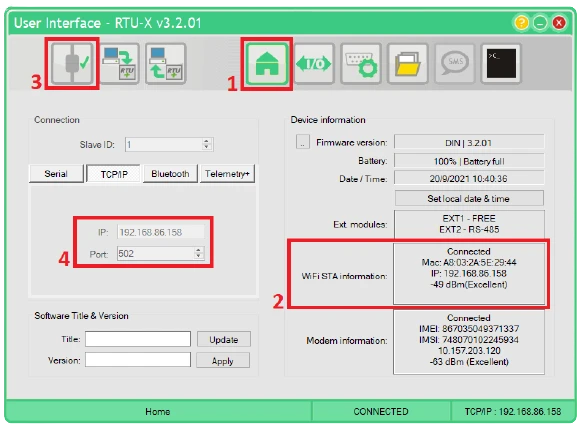
Open the RTU-X Configuration Interface. Go to Home, click TCP/IP, enter IP
192.168.4.1and port502, then click Connect.
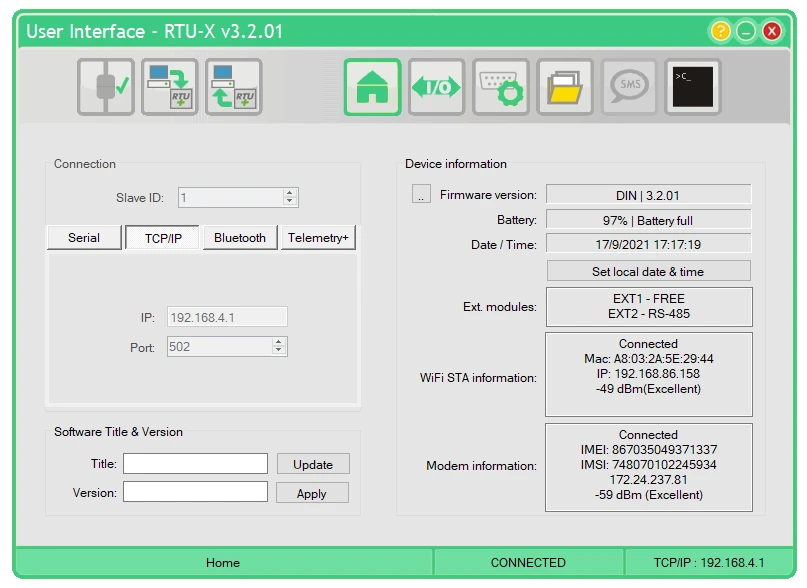
-
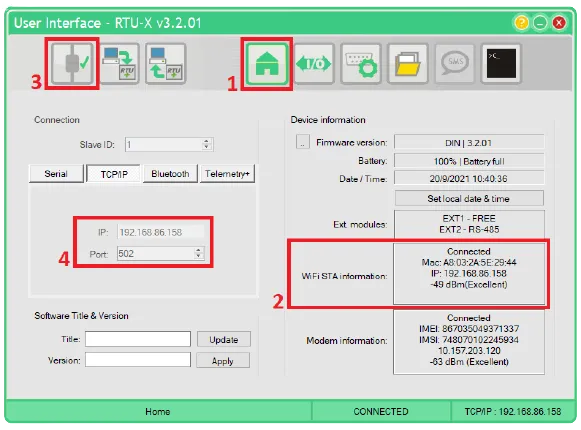
Once connected, the interface shows the device status.
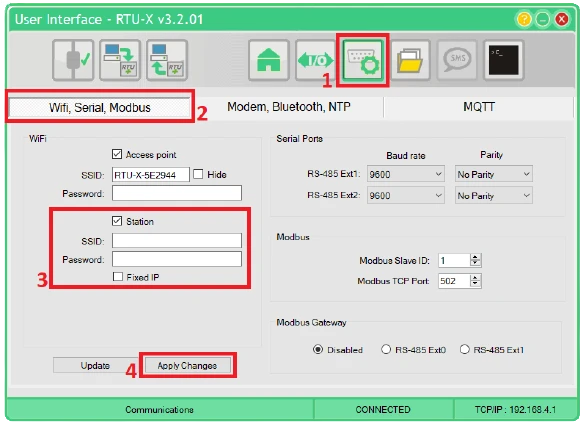
-
Go to Communications > Wifi, Serial, Modbus. Click Station and enter your Wi-Fi network credentials. Click Apply Changes.
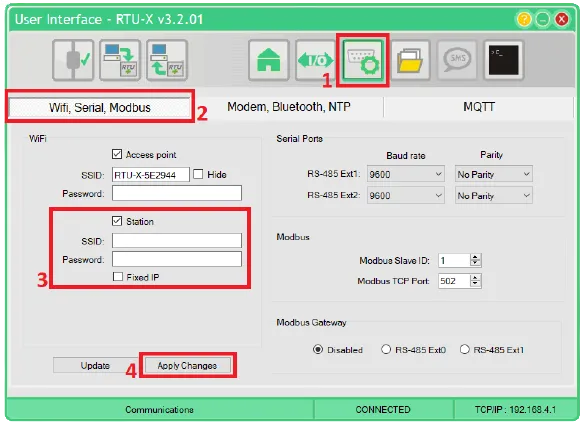
-
Go back to Home and note the IP address shown under WiFi STA information. Disconnect from the RTU-X access point, reconnect your PC to your local network, then reconnect the Configuration Interface using the new IP address.
Configure RTU-X
MQTT
-
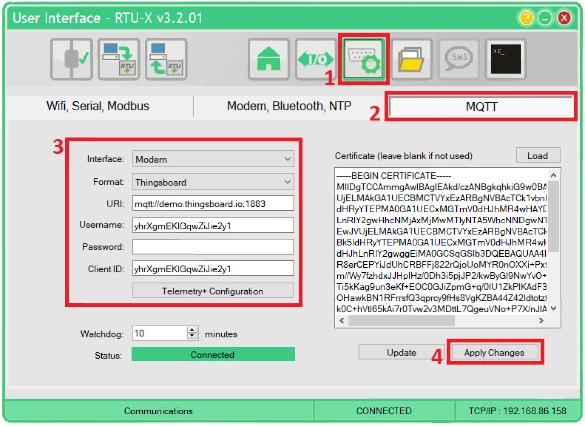
Go to Communications > MQTT.
-
Configure the MQTT connection:
Field Value Interface Modem Format ThingsBoard URI mqtt://mqtt.thingsboard.cloud:1883Password $RTU_DEMO_TOKEN(access token from the Create device step) -
Click Apply Changes.

Load the script
Download the RTU-X script JSON or use the code below.
/* * DESCRIPTION: * - Send a variable to a ThingsBoard dashboard every 10 seconds. */
// Attributesshared uint tLog = 10;
// Telemetrytelemetry float variable;
// Main loopwhile (1){ variable = 15; delay_loop(tLog * 1000); // 10 seconds log(variable);}-
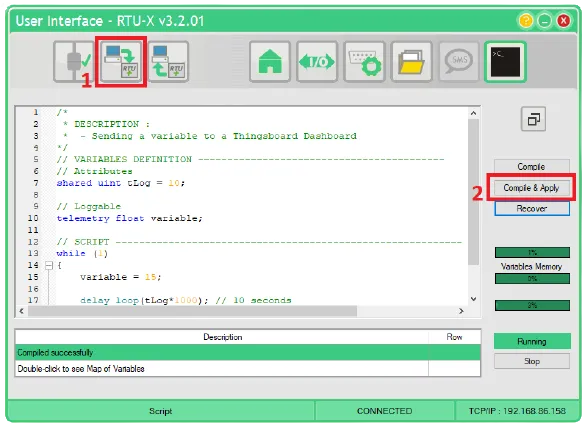
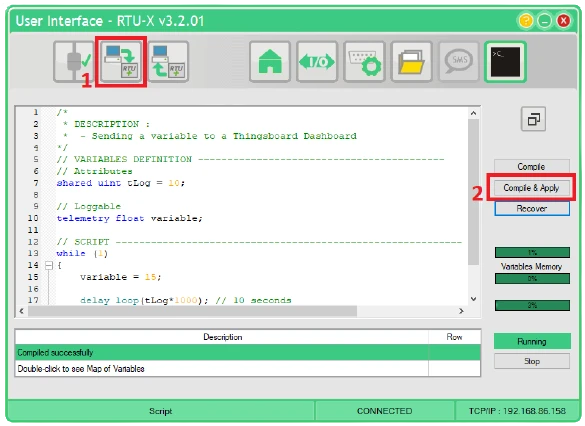
Go to User Interface and click Load to import the script file.
-
Click Compile & Apply to compile and deploy the script to the RTU-X.
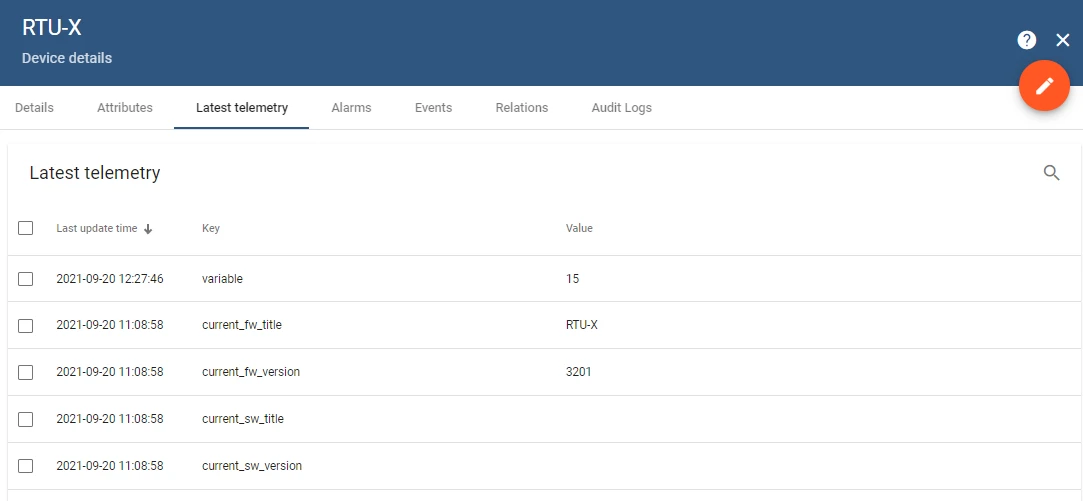
Verify data
-
In ThingsBoard, open Entities > Devices, click the RTU-X device, and go to the Latest telemetry tab. The
variablekey should appear with the value sent by the script.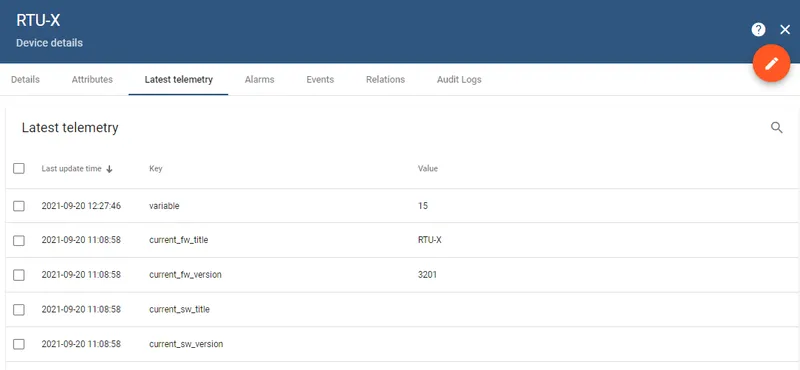
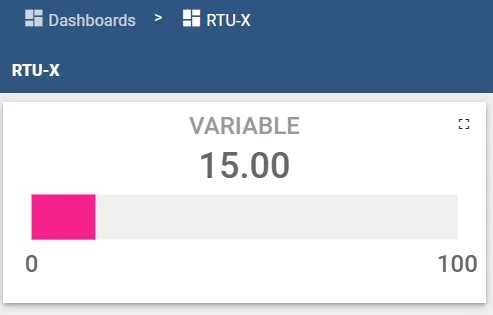
-
Open the imported RTU-X dashboard to see the analog gauge displaying the live value.