Installing ThingsBoard PE from AWS Marketplace
This guide walks you through installing ThingsBoard Professional Edition from AWS Marketplace using the BYOL (Bring Your Own License) model. You get the license directly from ThingsBoard, Inc, and purchase the server instances and infrastructure from AWS.
Prerequisites
Section titled “Prerequisites”- Active Amazon AWS account
Step 1. Subscribe to ThingsBoard PE BYOL
Section titled “Step 1. Subscribe to ThingsBoard PE BYOL”Navigate to the ThingsBoard Professional Edition BYOL product page on AWS Marketplace and click View purchase options.
Before completing your subscription, review:
- Product details — BYOL model means a valid ThingsBoard license must be purchased separately to activate the software.
- Pricing details — The software subscription cost is $0.00. AWS infrastructure usage charges apply separately.
- Terms and conditions — By subscribing, you agree to the End User License Agreement (EULA) and the AWS Customer Agreement.
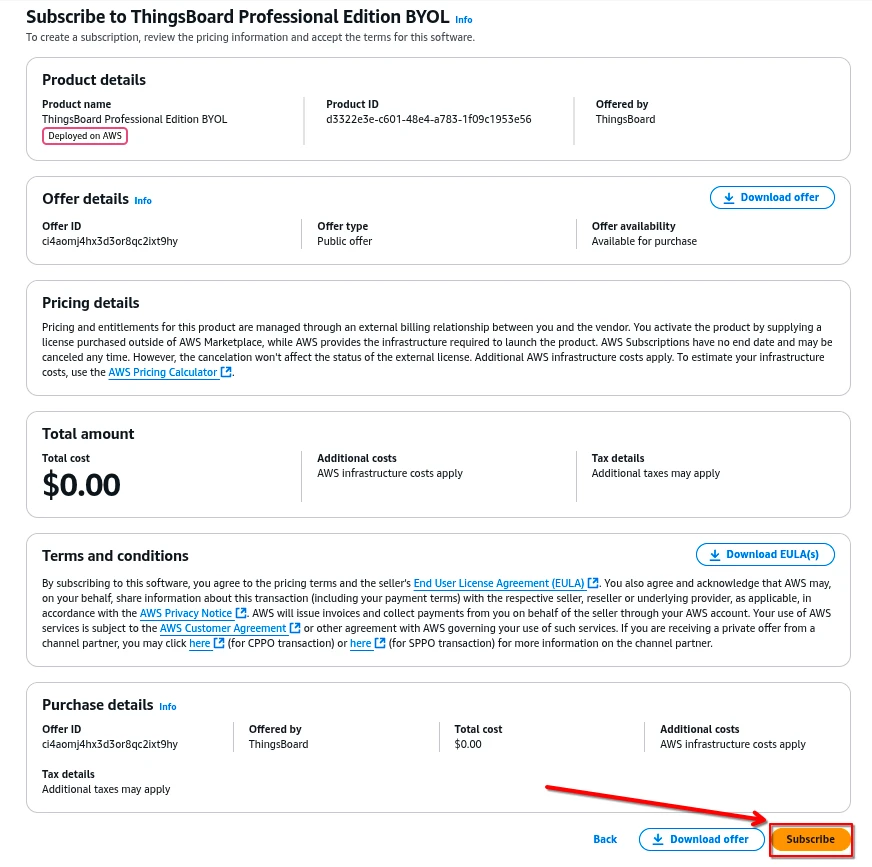
Click Subscribe to proceed.
Step 2. Launch ThingsBoard PE instance
Section titled “Step 2. Launch ThingsBoard PE instance”After subscribing, click Launch your software.
2.1 Setup configuration
Section titled “2.1 Setup configuration”Configure the deployment options:
- Service — Select Amazon EC2 for on-demand scalability and full control over your instance.
- Launch method — Select Launch from EC2 Console.
- Region — Choose your preferred AWS region.
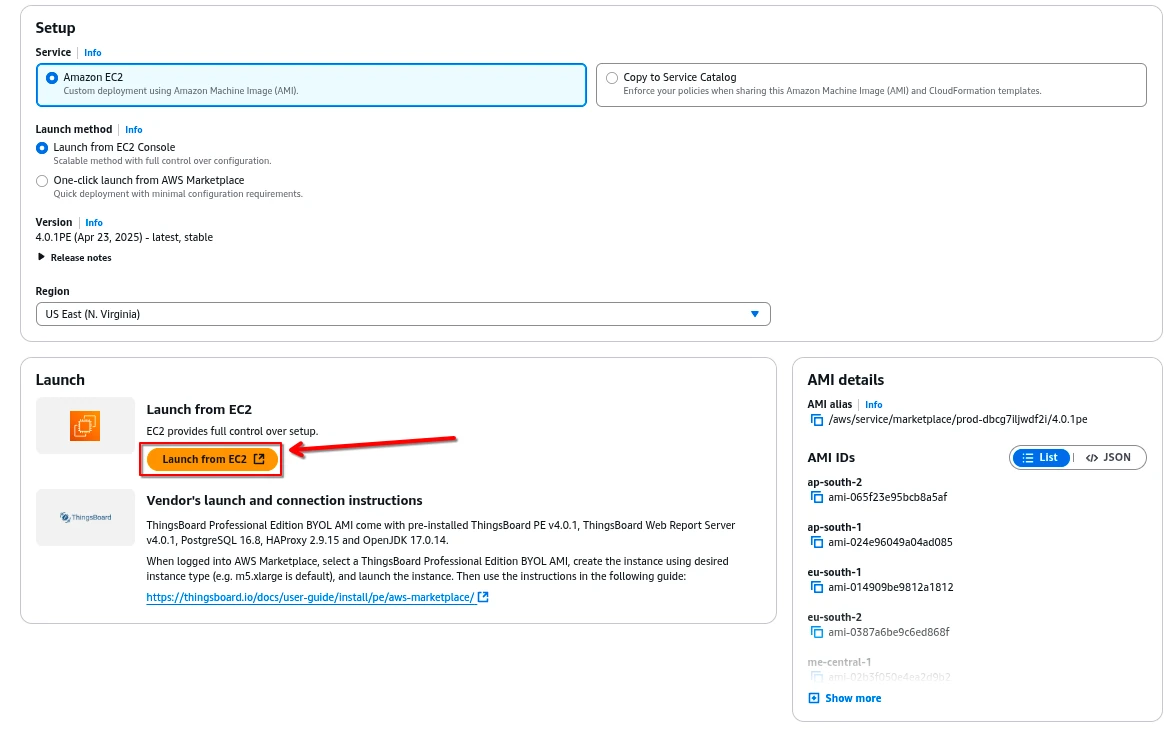
Click Launch from EC2 to continue.
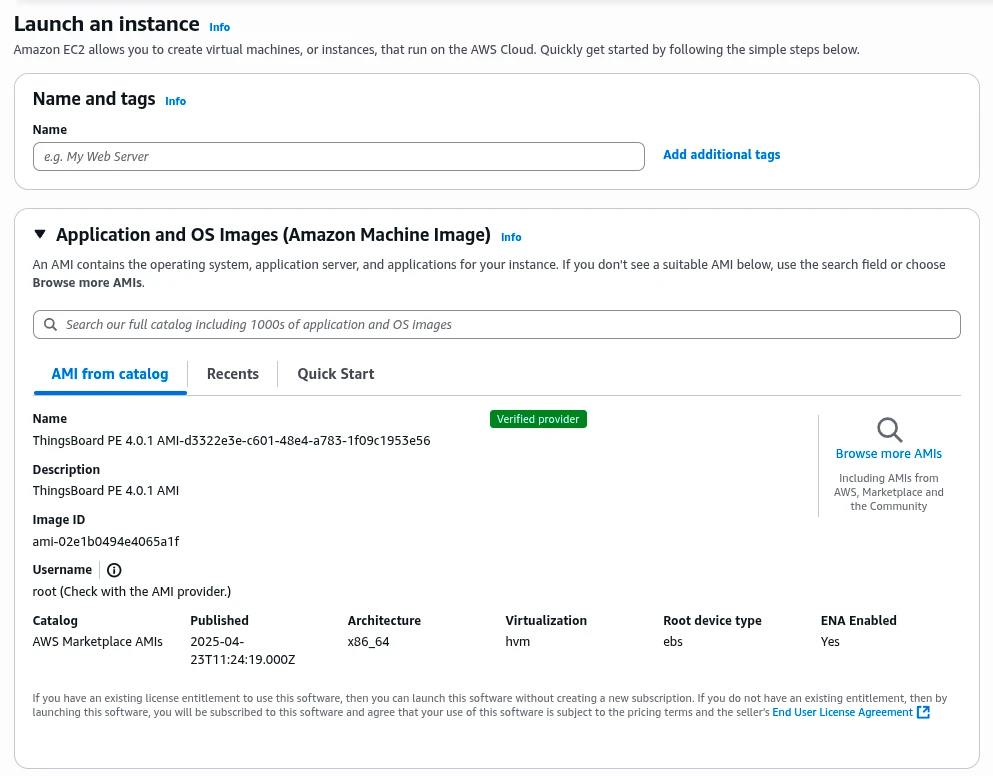
2.2 Name and AMI
Section titled “2.2 Name and AMI”Assign a name to your instance and verify the correct ThingsBoard Professional Edition (BYOL) AMI is selected.
2.3 Instance type and key pair
Section titled “2.3 Instance type and key pair”Select an EC2 instance type and key pair.
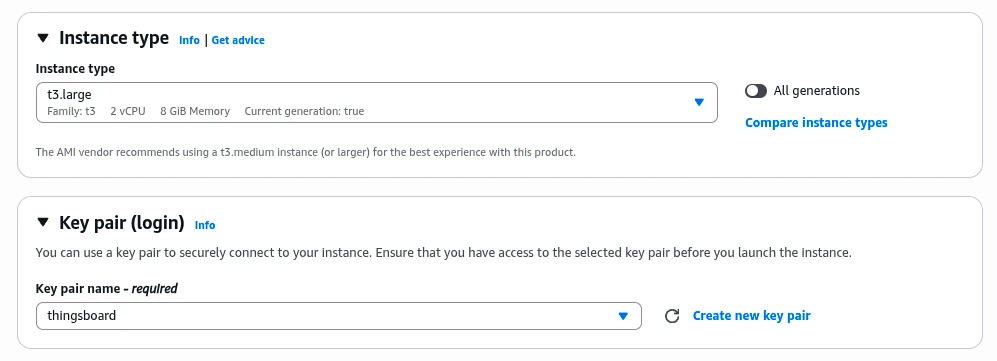
Select an existing Key Pair or create a new one. Make sure you have access to the key file — you will need it to connect via SSH.
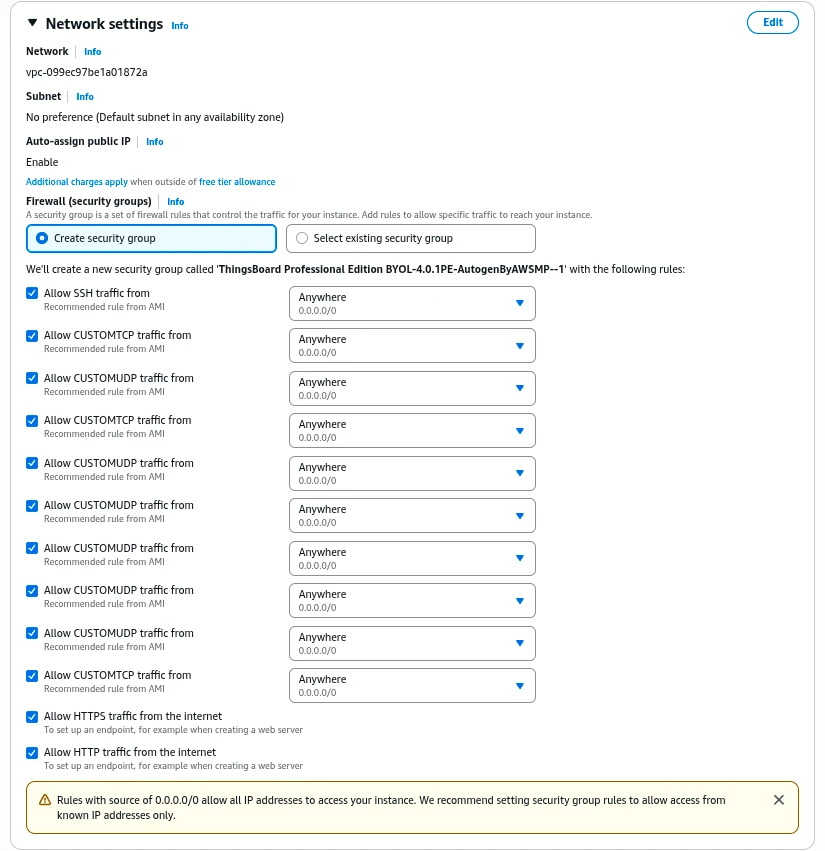
2.4 Configure security group
Section titled “2.4 Configure security group”We recommend using the Create security group option. If you use an existing security group, ensure it allows inbound traffic on these ports:
| Port | Protocol | Description |
|---|---|---|
| 8080 | TCP | HTTP access to ThingsBoard web interface |
| 1883 | TCP | MQTT protocol |
| 8883 | TCP | MQTT over SSL |
| 7070 | TCP | Edge RPC service |
| 9090 | TCP | Remote Integration service |
| 5683–5688 | UDP | CoAP and LwM2M protocols |
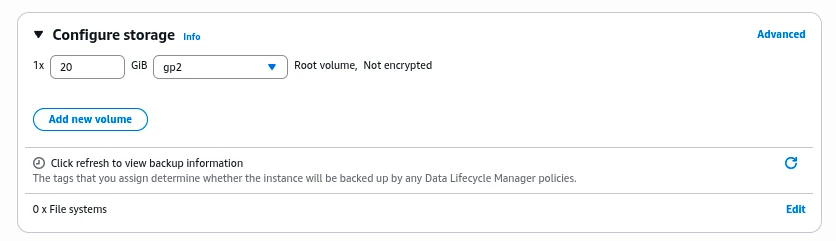
2.5 Storage configuration
Section titled “2.5 Storage configuration”Specify storage options for the instance. The default configuration uses 20 GiB of gp2 storage.
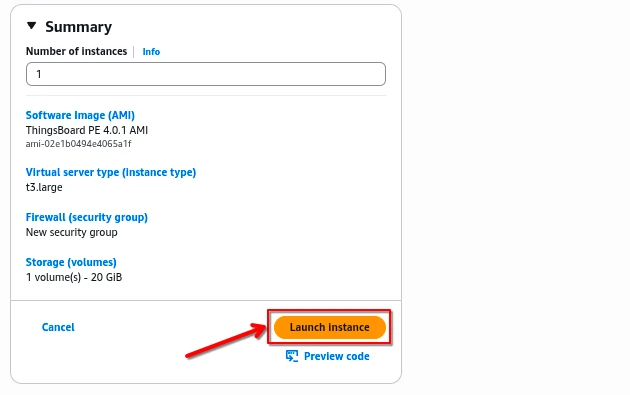
2.6 Launch instance
Section titled “2.6 Launch instance”Review the settings in the Summary panel and click Launch instance.
2.7 Obtain your Public IP and Instance ID
Section titled “2.7 Obtain your Public IP and Instance ID”Wait until the instance state changes to Running and all status checks pass. Go to the EC2 Instances page and click the Instance ID to view the Instance Summary.

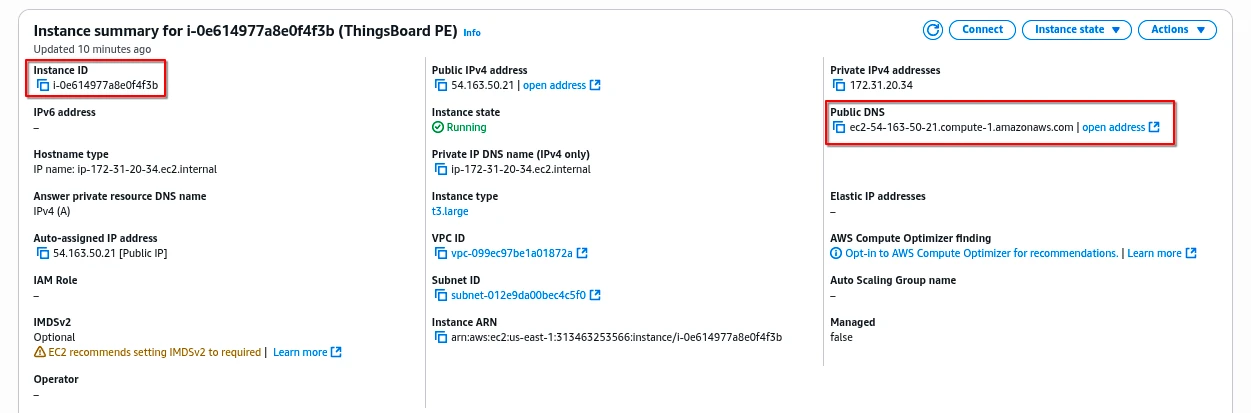
Save the Public DNS name (e.g. ec2-54-163-50-21.compute-1.amazonaws.com) and the Instance ID (e.g. i-0e614977a8e0f4f3b). You will need them in the next steps.
Step 3. Obtain your license secret
Section titled “Step 3. Obtain your license secret”Register on the ThingsBoard License Portal to get your license. See How to get a pay-as-you-go subscription or How to get a perpetual license for details.
Save your license secret — you will need it in the next step.
Step 4. Configure your license secret
Section titled “Step 4. Configure your license secret”4.1 Connect to your instance via SSH
Section titled “4.1 Connect to your instance via SSH”Use the official AWS guides:
You will need the instance Public DNS name from Step 2.7 and the key file from Step 2.3.
4.2 Add your license secret
Section titled “4.2 Add your license secret”Open the configuration file:
sudo nano /etc/thingsboard/conf/thingsboard.confLocate the license configuration block and uncomment the export statement. Replace YOUR_LICENSE_SECRET_HERE with your actual license secret:
# License secret obtained from ThingsBoard License Portal (https://license.thingsboard.io)# UNCOMMENT NEXT LINE AND PUT YOUR LICENSE SECRET:export TB_LICENSE_SECRET=YOUR_LICENSE_SECRET_HEREStep 5. Launch ThingsBoard service
Section titled “Step 5. Launch ThingsBoard service”sudo service thingsboard startStep 6. Connect to ThingsBoard UI
Section titled “Step 6. Connect to ThingsBoard UI”Open http://PUBLIC_DNS_NAME/login in your browser.
Use the following default credentials:
- Login: sysadmin@thingsboard.org
- Password: your Instance ID from Step 2.7 (e.g.
i-0e614977a8e0f4f3b)
Post-installation steps
Section titled “Post-installation steps”Configure HTTPS
Section titled “Configure HTTPS”-
Assign a valid DNS record to your instance’s external IP address.
-
Connect to your instance via SSH (see Step 4.1).
-
Run the following commands, replacing the domain and email with your own:
Terminal window sudo certbot-certonly --domain smth.yourcompany.com --email support@yourcompany.comsudo haproxy-refresh
What is the Total Cost of Ownership (TCO)?
| Cost Component | Description |
|---|---|
| ThingsBoard License fee | See pricing |
| AWS EC2 instance price | Compare at ec2instances.info |
| Additional EC2 costs | Network traffic, disk space, optional services (e.g. CloudWatch) |
Example A: Maker Subscription (t3.medium, 20 GB disk)
| Component | Monthly Cost (USD) |
|---|---|
| ThingsBoard PE Maker subscription | $10.00 |
| EC2 t3.medium (1 month) | $30.37 |
| 20 GB EBS volume | $2.00 |
| Total | ≈ $42.40 |
Example B: Prototype Subscription (m5.large, 100 GB disk)
| Component | Monthly Cost (USD) |
|---|---|
| ThingsBoard PE Prototype subscription | $99.00 |
| EC2 m5.large (1 month) | $70.08 |
| 100 GB EBS volume | $10.00 |
| Total | ≈ $179.00 |
How to enable HTTPS? See Post-installation steps.
How do I configure my ThingsBoard PE instance? See Configuration guide.
How do I get software updates? You will receive email notifications about new versions with a link to the Upgrade Instructions.
How do I backup my database? Refer to the PostgreSQL backup documentation.
How do I upgrade my instance type?
-
Stop the ThingsBoard service:
Terminal window sudo service thingsboard stop -
Stop the EC2 instance from the AWS Console: Instance state → Stop instance.
-
Change the instance type: Actions → Instance settings → Change instance type.
-
Start the instance from the AWS Console.
Where are the ThingsBoard logs? Logs are stored in /var/log/thingsboard.
How do I get professional support? Review ThingsBoard support plans.
Was this helpful?