Mail Server Settings
The mail server settings configure the outgoing SMTP server ThingsBoard uses to send emails — including notifications, user activation emails, password recovery messages, and scheduled reports.
The system administrator defines global mail server settings that apply to all tenants.
Configuration
Section titled “Configuration”- Navigate to Settings and open the Mail server tab.
- Fill in the Mail From field (the sender address that appears in outgoing emails).
- Select an SMTP provider (SendGrid, Google, Office 365, or Custom).
- Configure connection settings:
- SMTP protocol (SMTP or SMTPS)
- SMTP host and port
- Connection timeout
- Optionally enable TLS and Proxy
- Configure Authentication — either Basic (username + password) or OAuth 2.0 (available for Google and Office 365).
- Click Send test email to verify the configuration.
- Click Save.
Provider examples
Section titled “Provider examples”Since ThingsBoard 3.5.2, built-in templates are available for SendGrid, Gmail, and Office 365. These auto-fill connection settings (host, port, TLS). For other providers, select Custom.
SendGrid
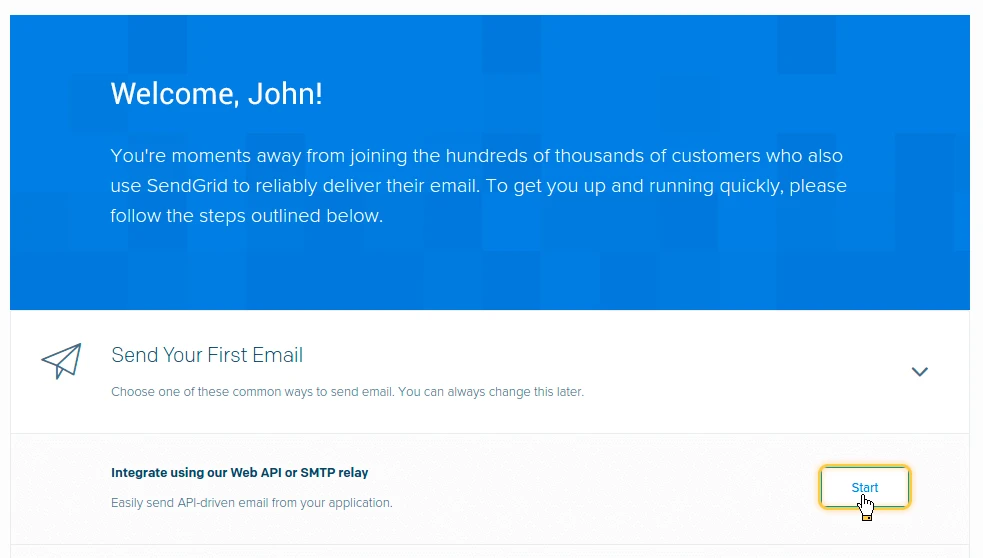
Section titled “SendGrid”1. Set up SendGrid
- Create a SendGrid account. On the welcome page, click Start.
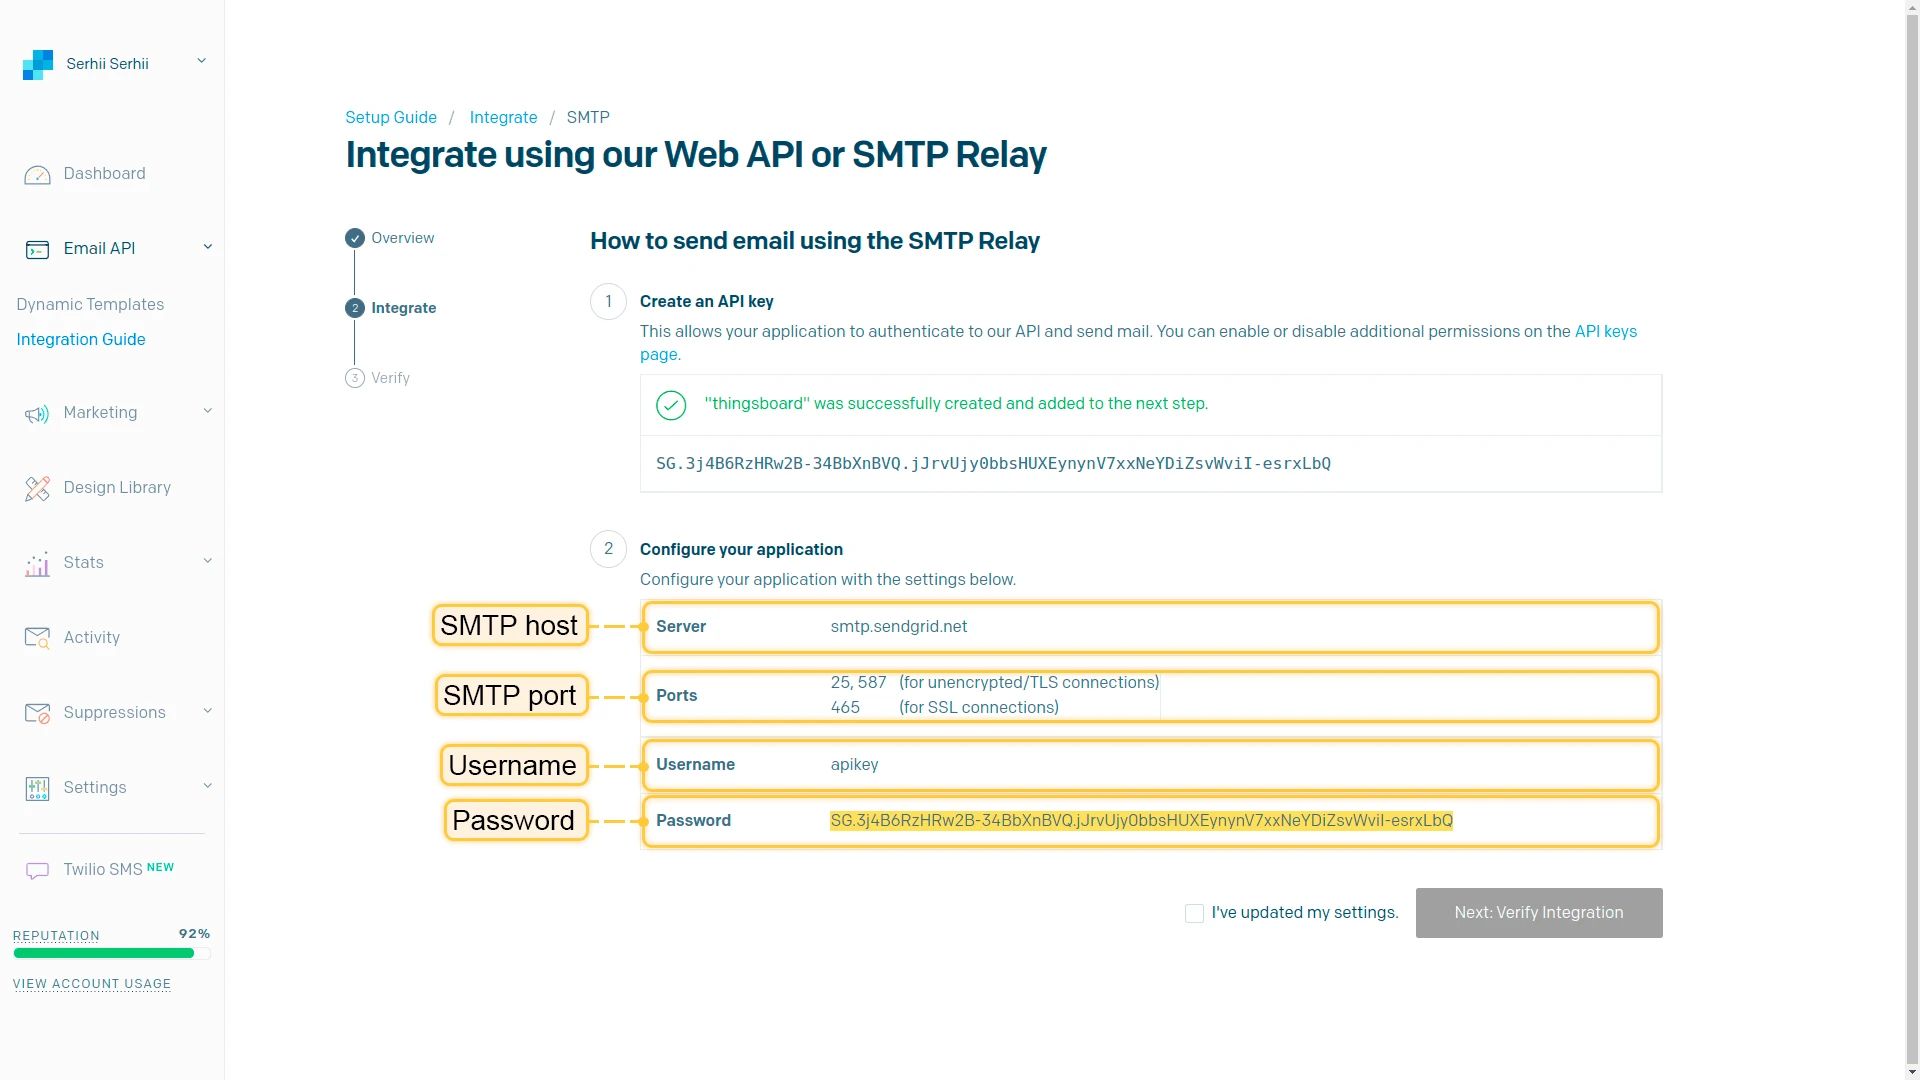
- Go to Email API > Integration Guide and choose SMTP Relay.
- Create an API key: enter a name and click Generate.

2. Configure ThingsBoard
In ThingsBoard, go to Settings > Mail server. Select SMTP provider SendGrid. Enter username apikey and paste the generated API key as the password. Click Send test email to verify, then Save.
Gmail with basic authentication
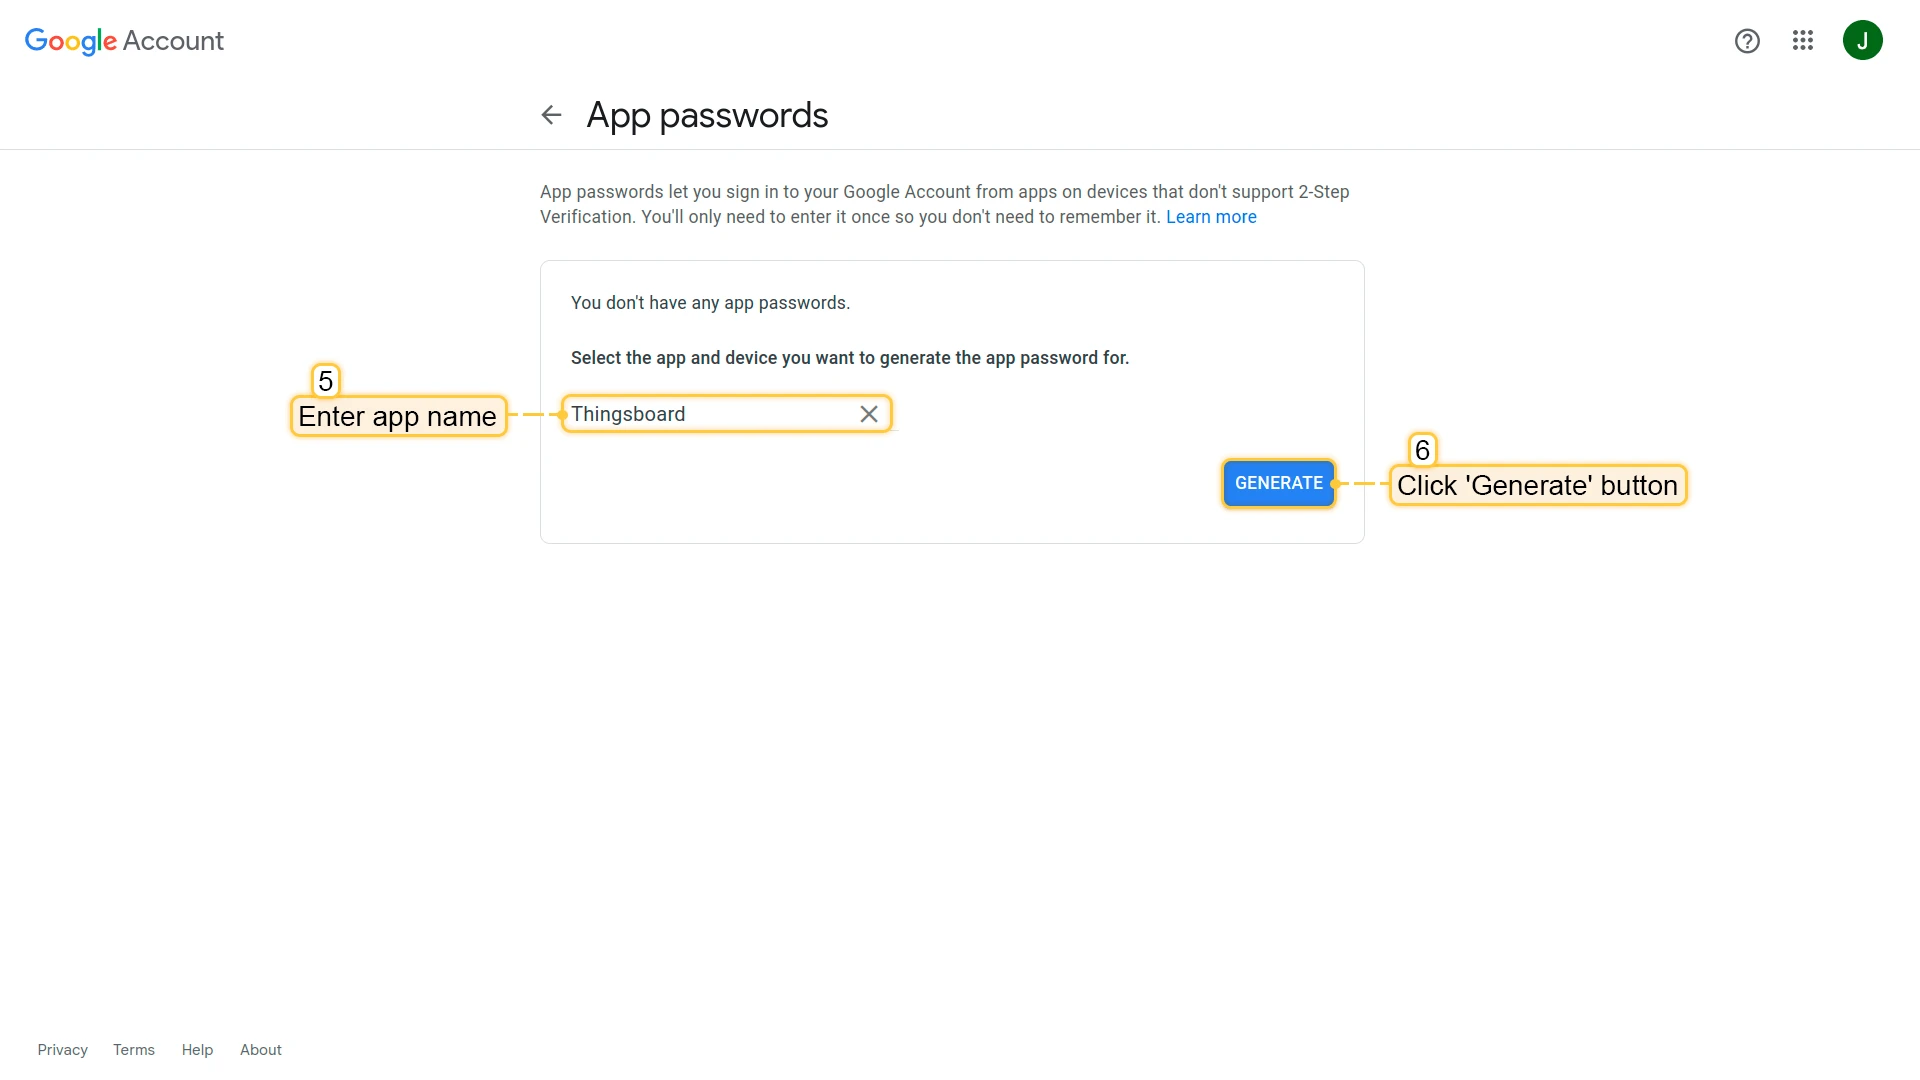
Section titled “Gmail with basic authentication”1. Generate a Google app password
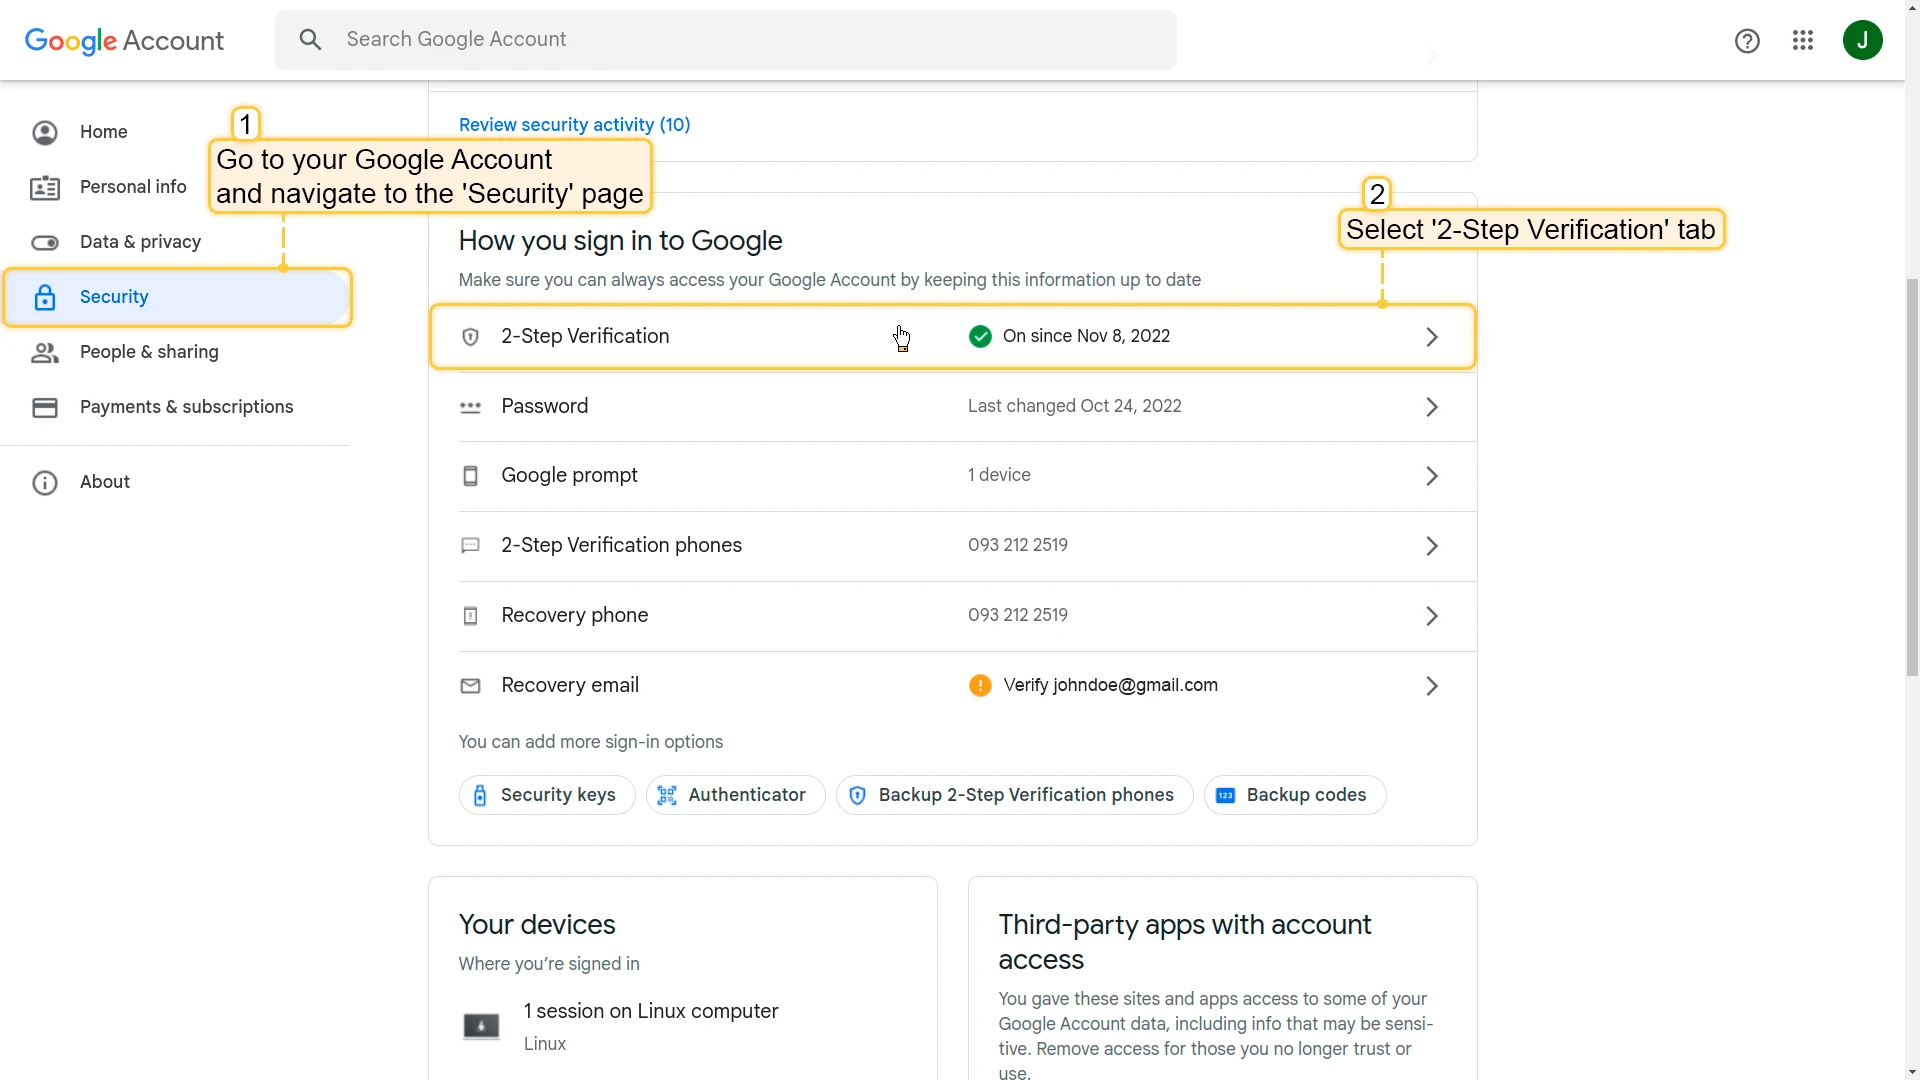
- Go to your Google Account Security page and select 2-Step Verification.
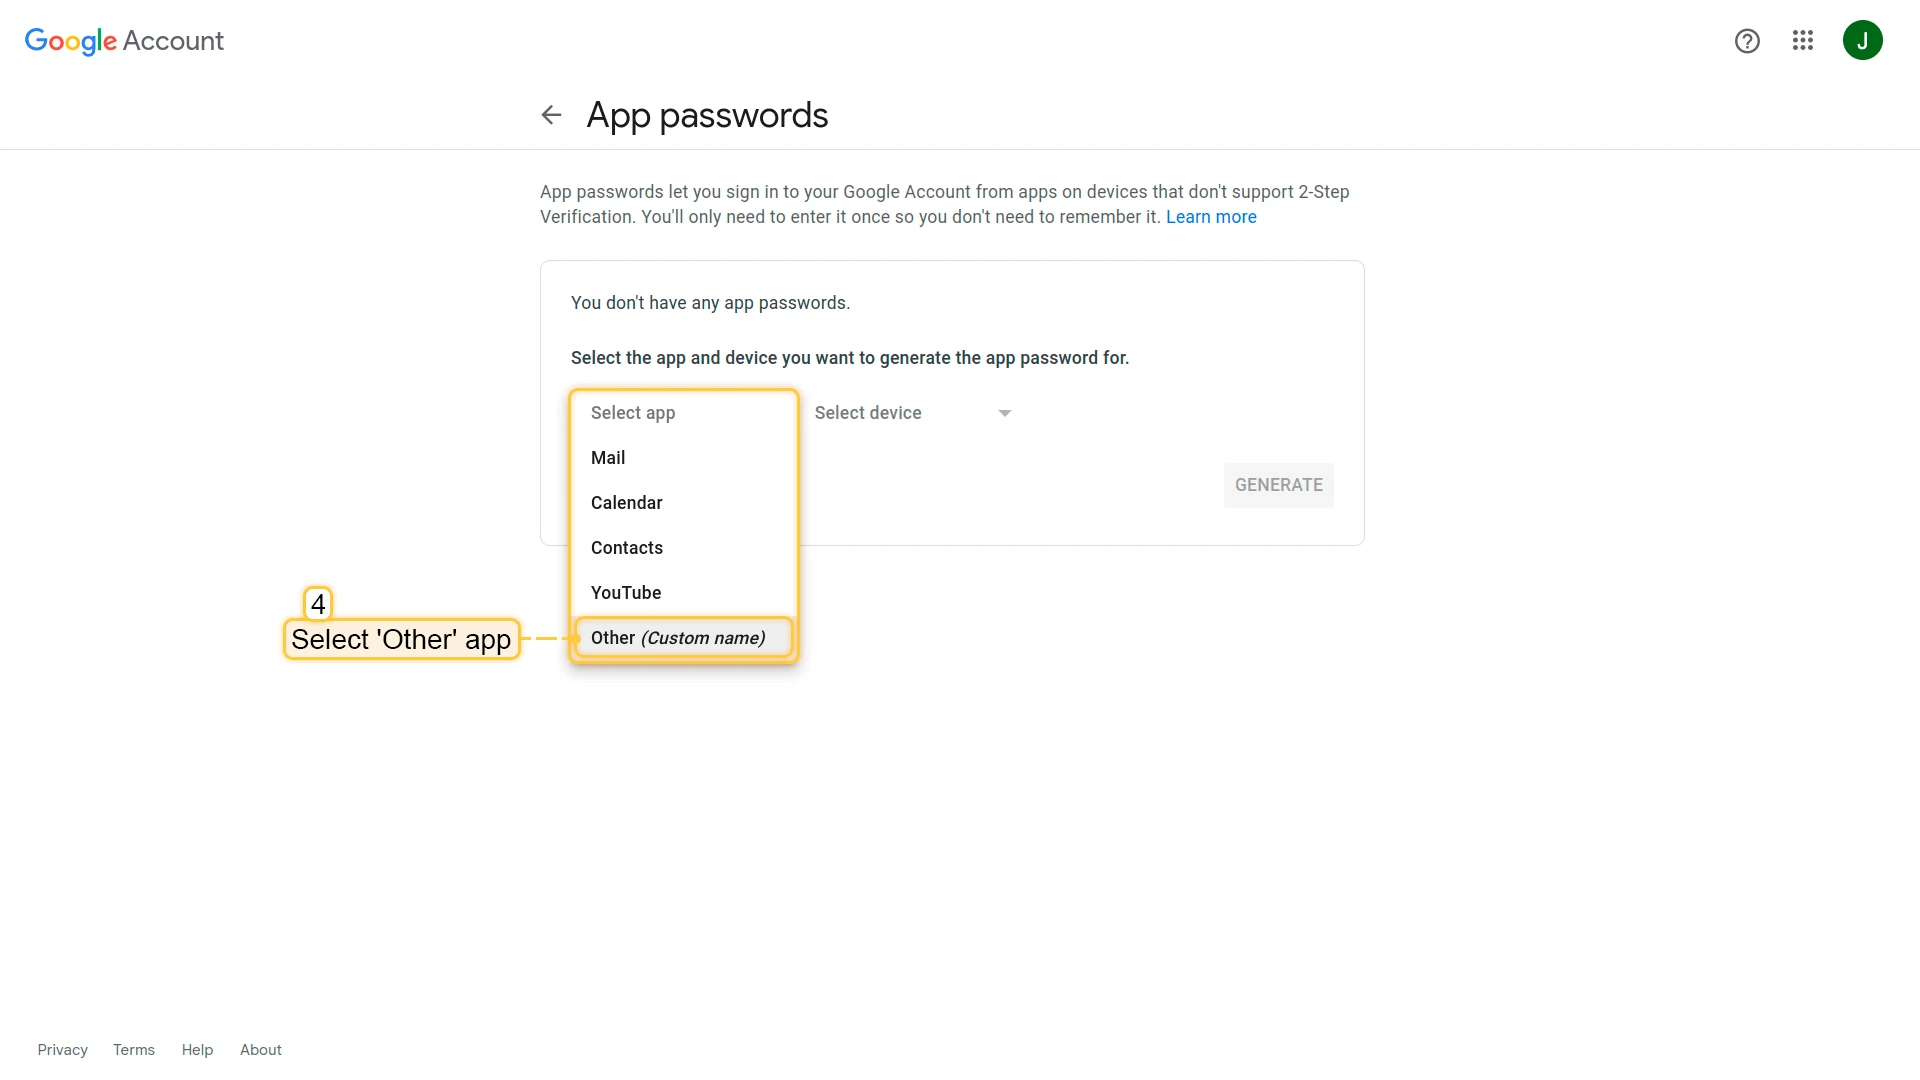
- At the bottom of the page, select App passwords.
- Select Other app from the dropdown.
- Enter an app name and click Generate.
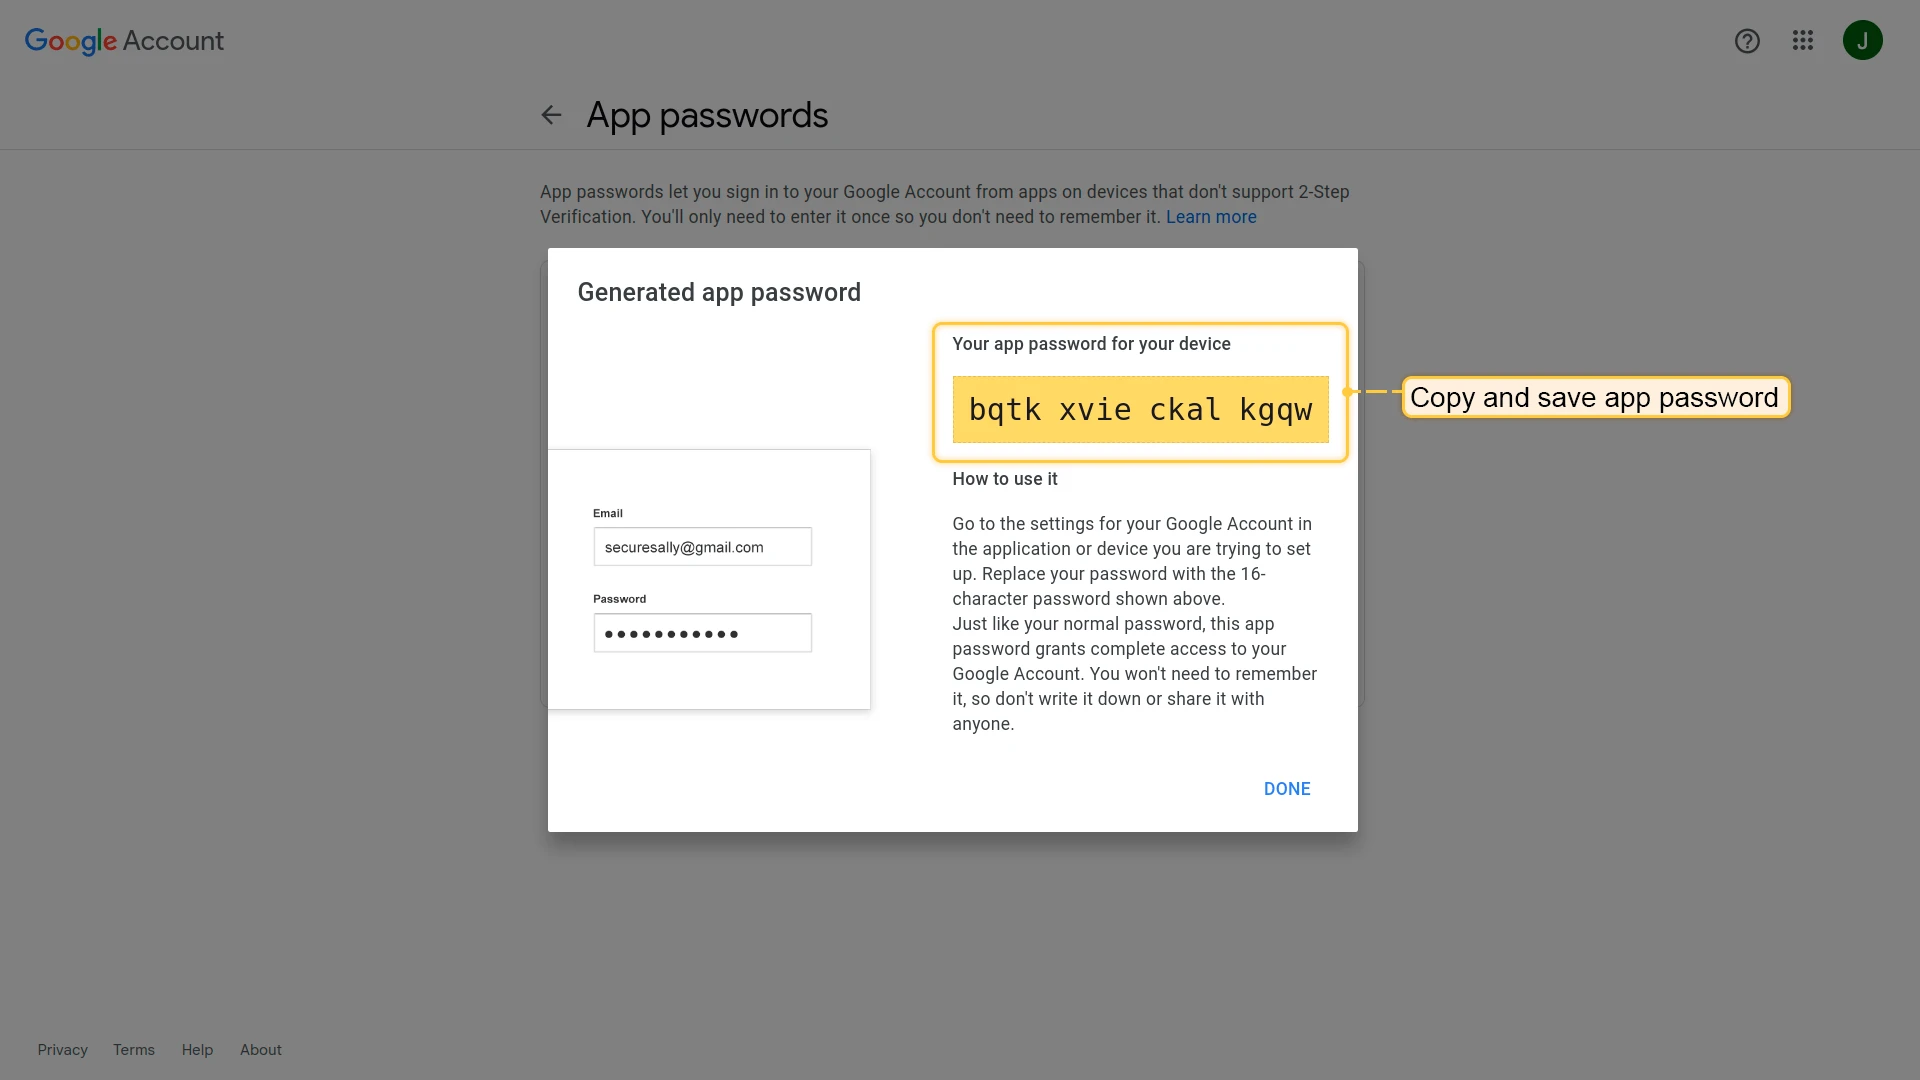
- Copy the generated app password.

2. Configure ThingsBoard
In ThingsBoard, select SMTP provider Google. Enter your Gmail address as the username, keep authentication type Basic, and enter the app password. Click Send test email to verify, then Save.
Gmail with OAuth 2.0
Section titled “Gmail with OAuth 2.0”1. Configure ThingsBoard (initial setup)
In ThingsBoard, select SMTP provider Google, enter your Gmail address as the username, and toggle authentication to OAuth2. Copy the Redirect URI template — you will need it when creating Google credentials.
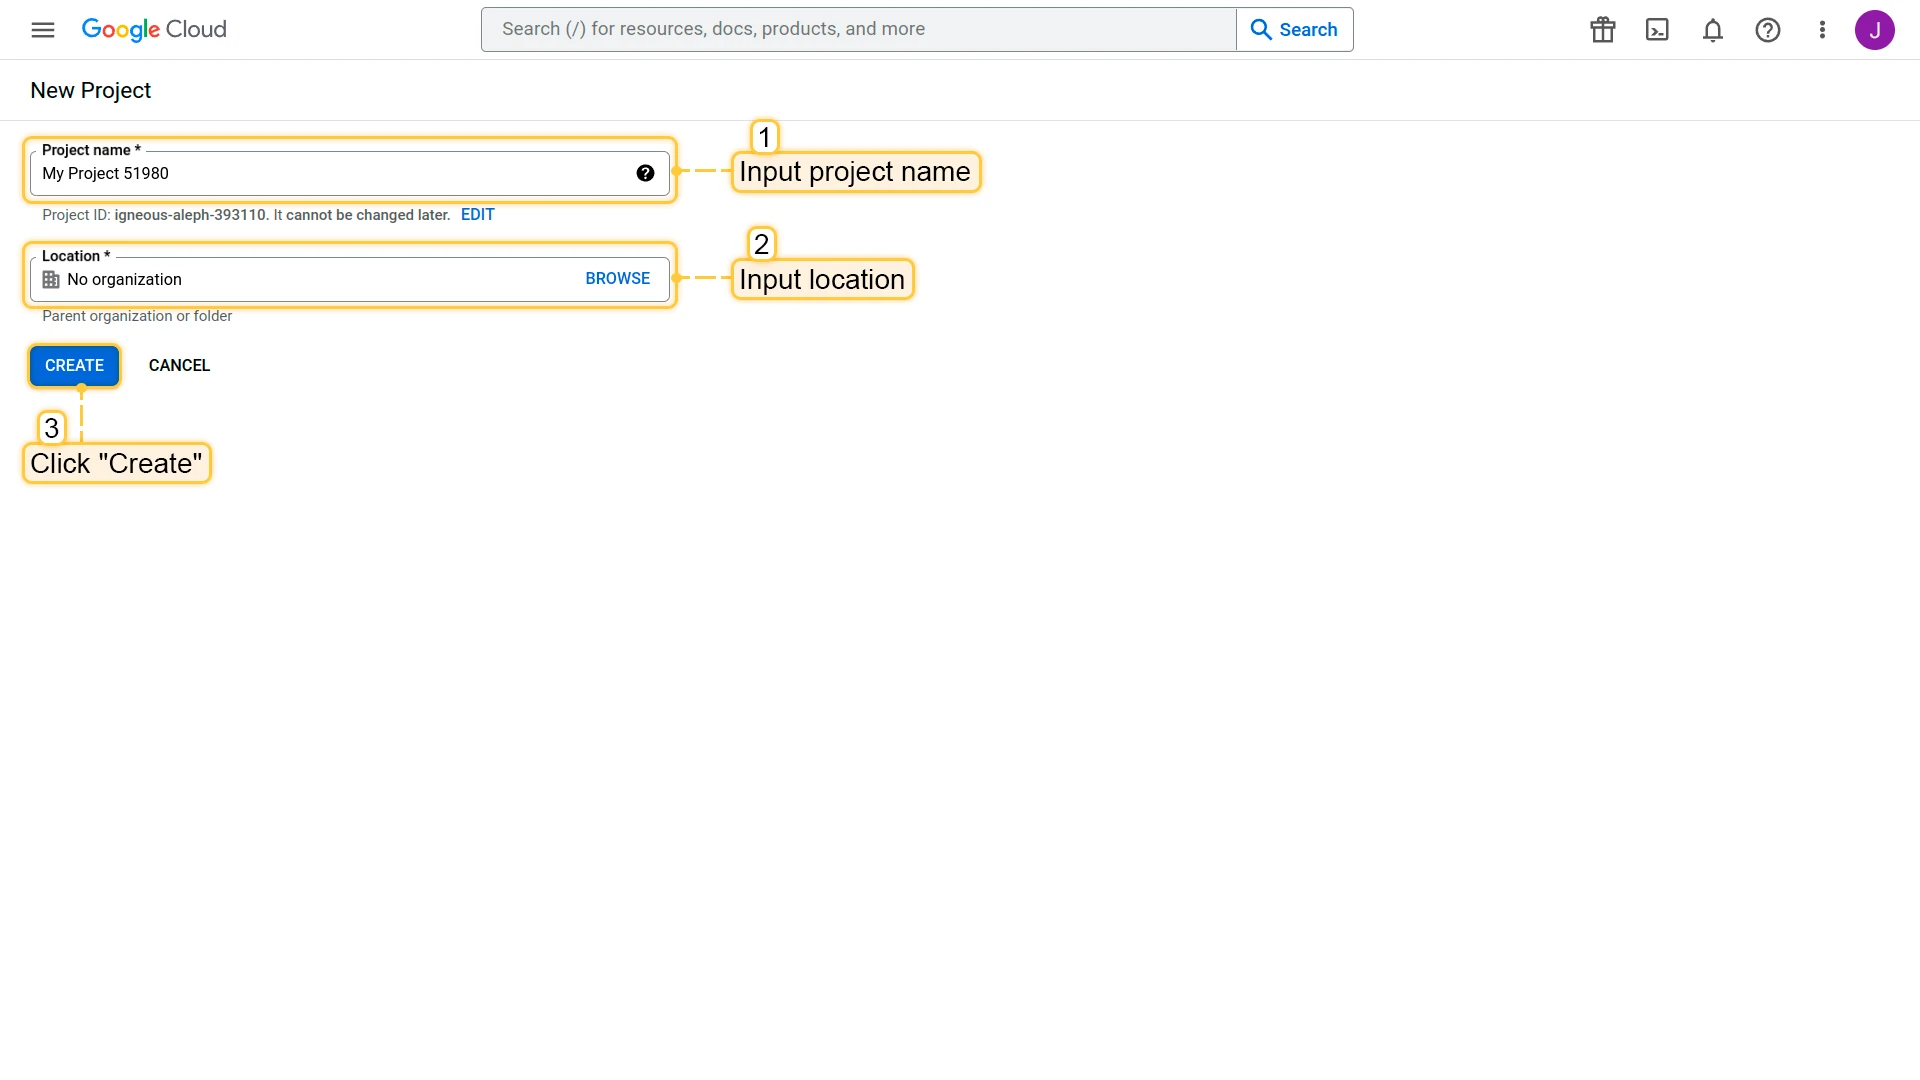
2. Create a Google Cloud project
- Go to the Google Developers Console. Enter a project name and click Create.
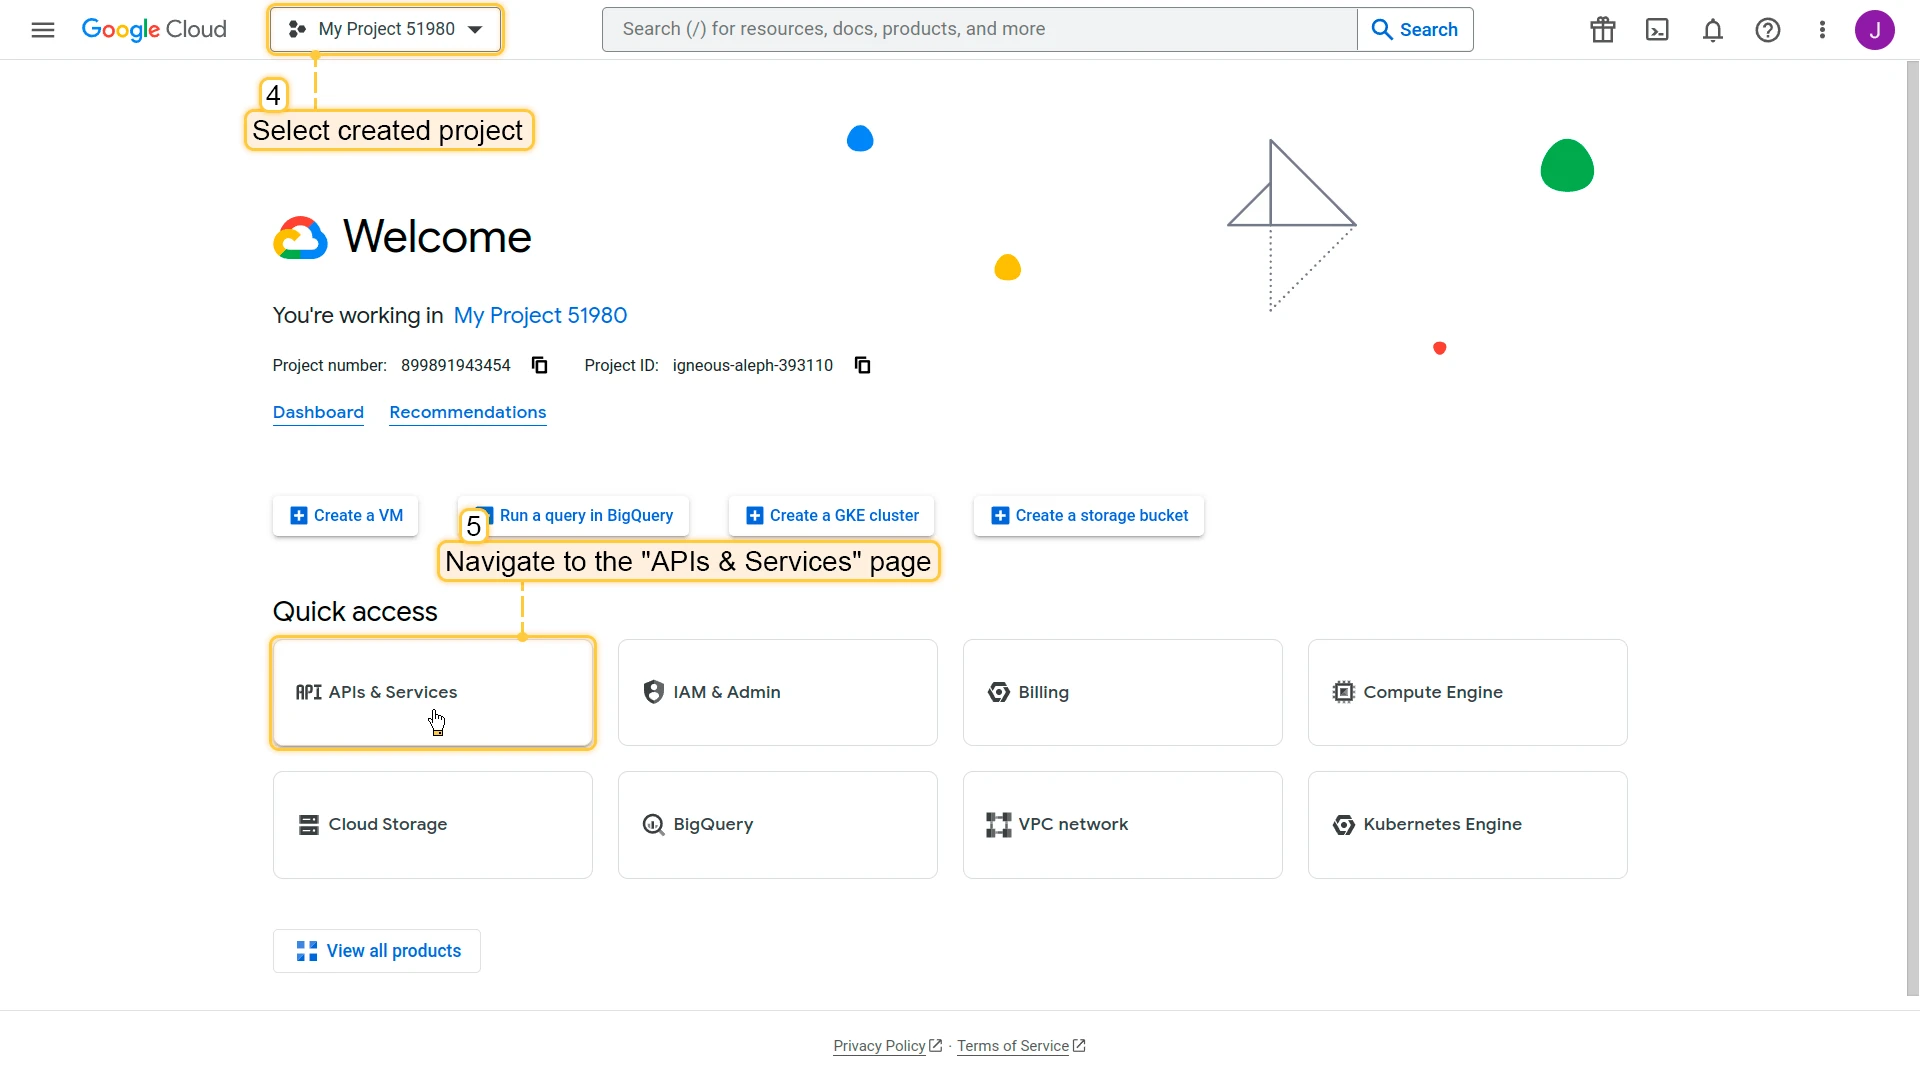
3. Create OAuth credentials
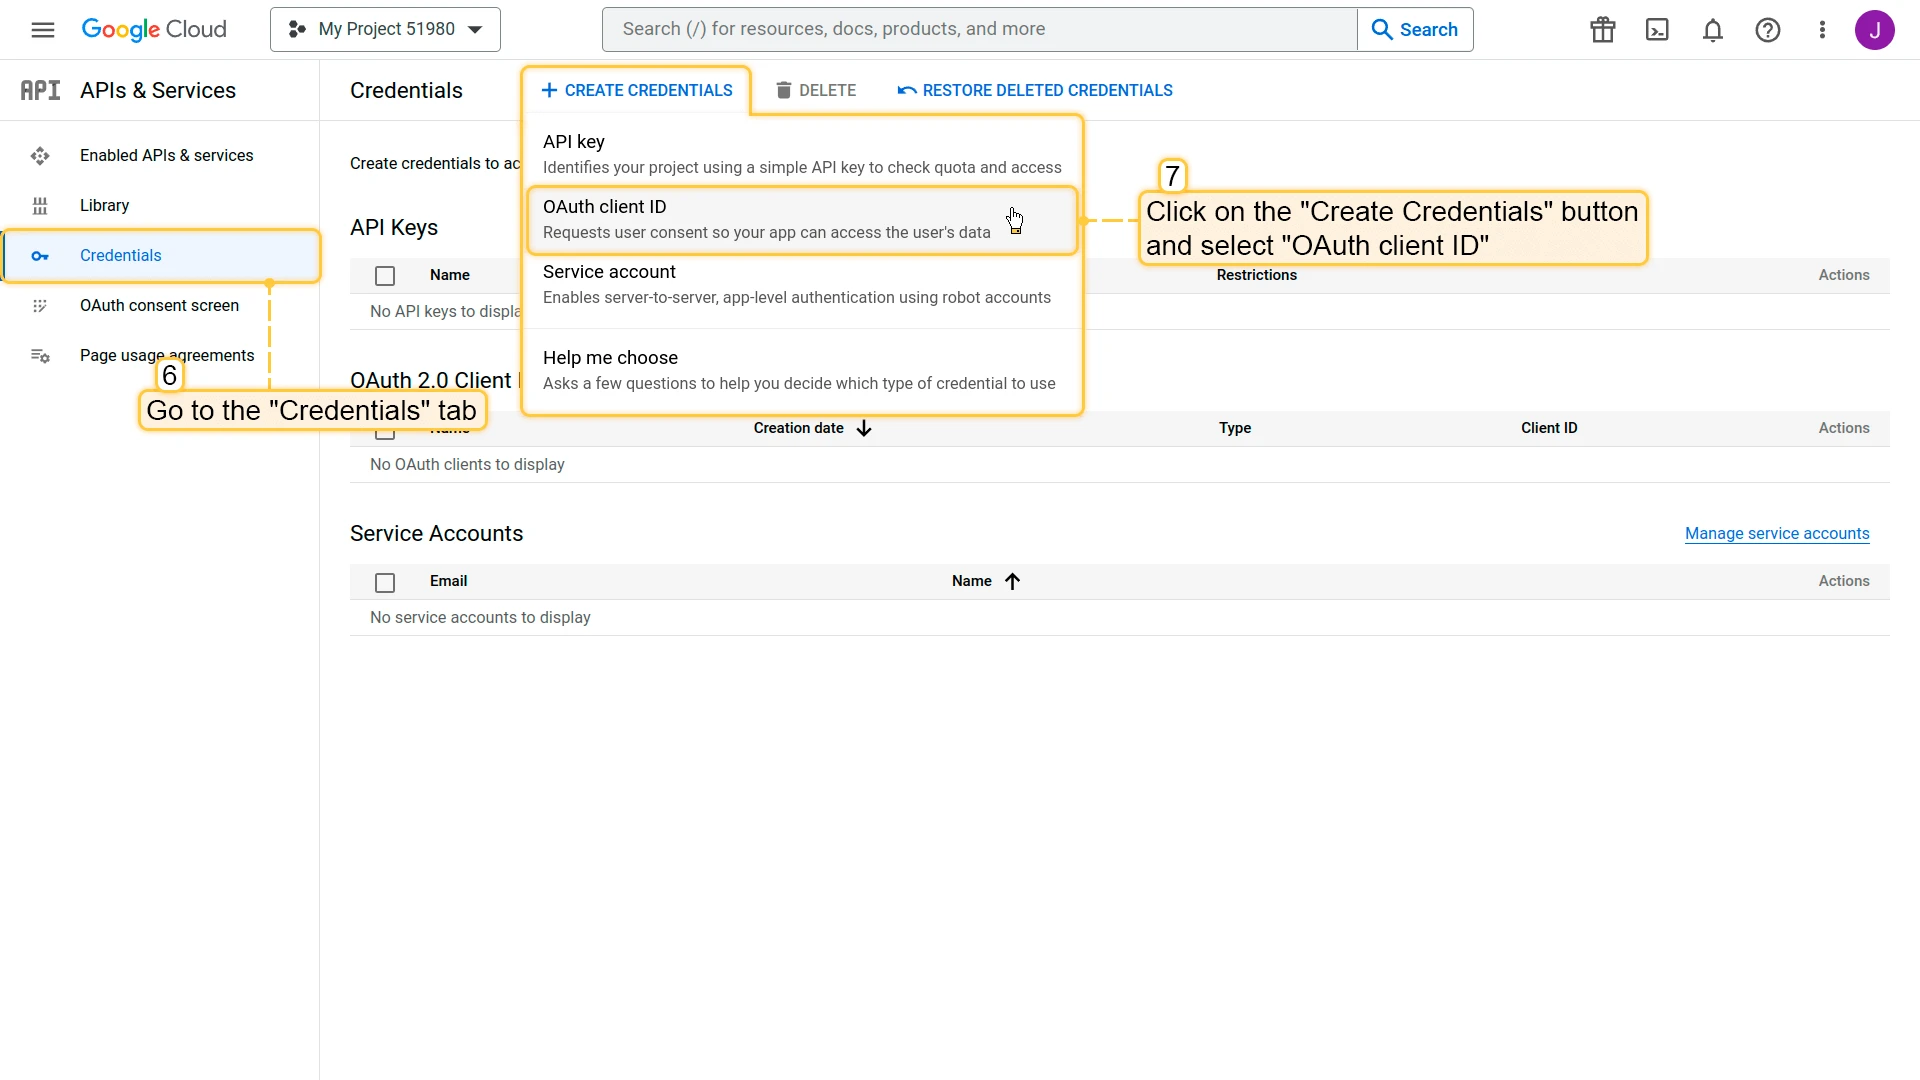
- Select the project and navigate to APIs & Services.
- Go to the Credentials tab, click Create Credentials, and select OAuth client ID.
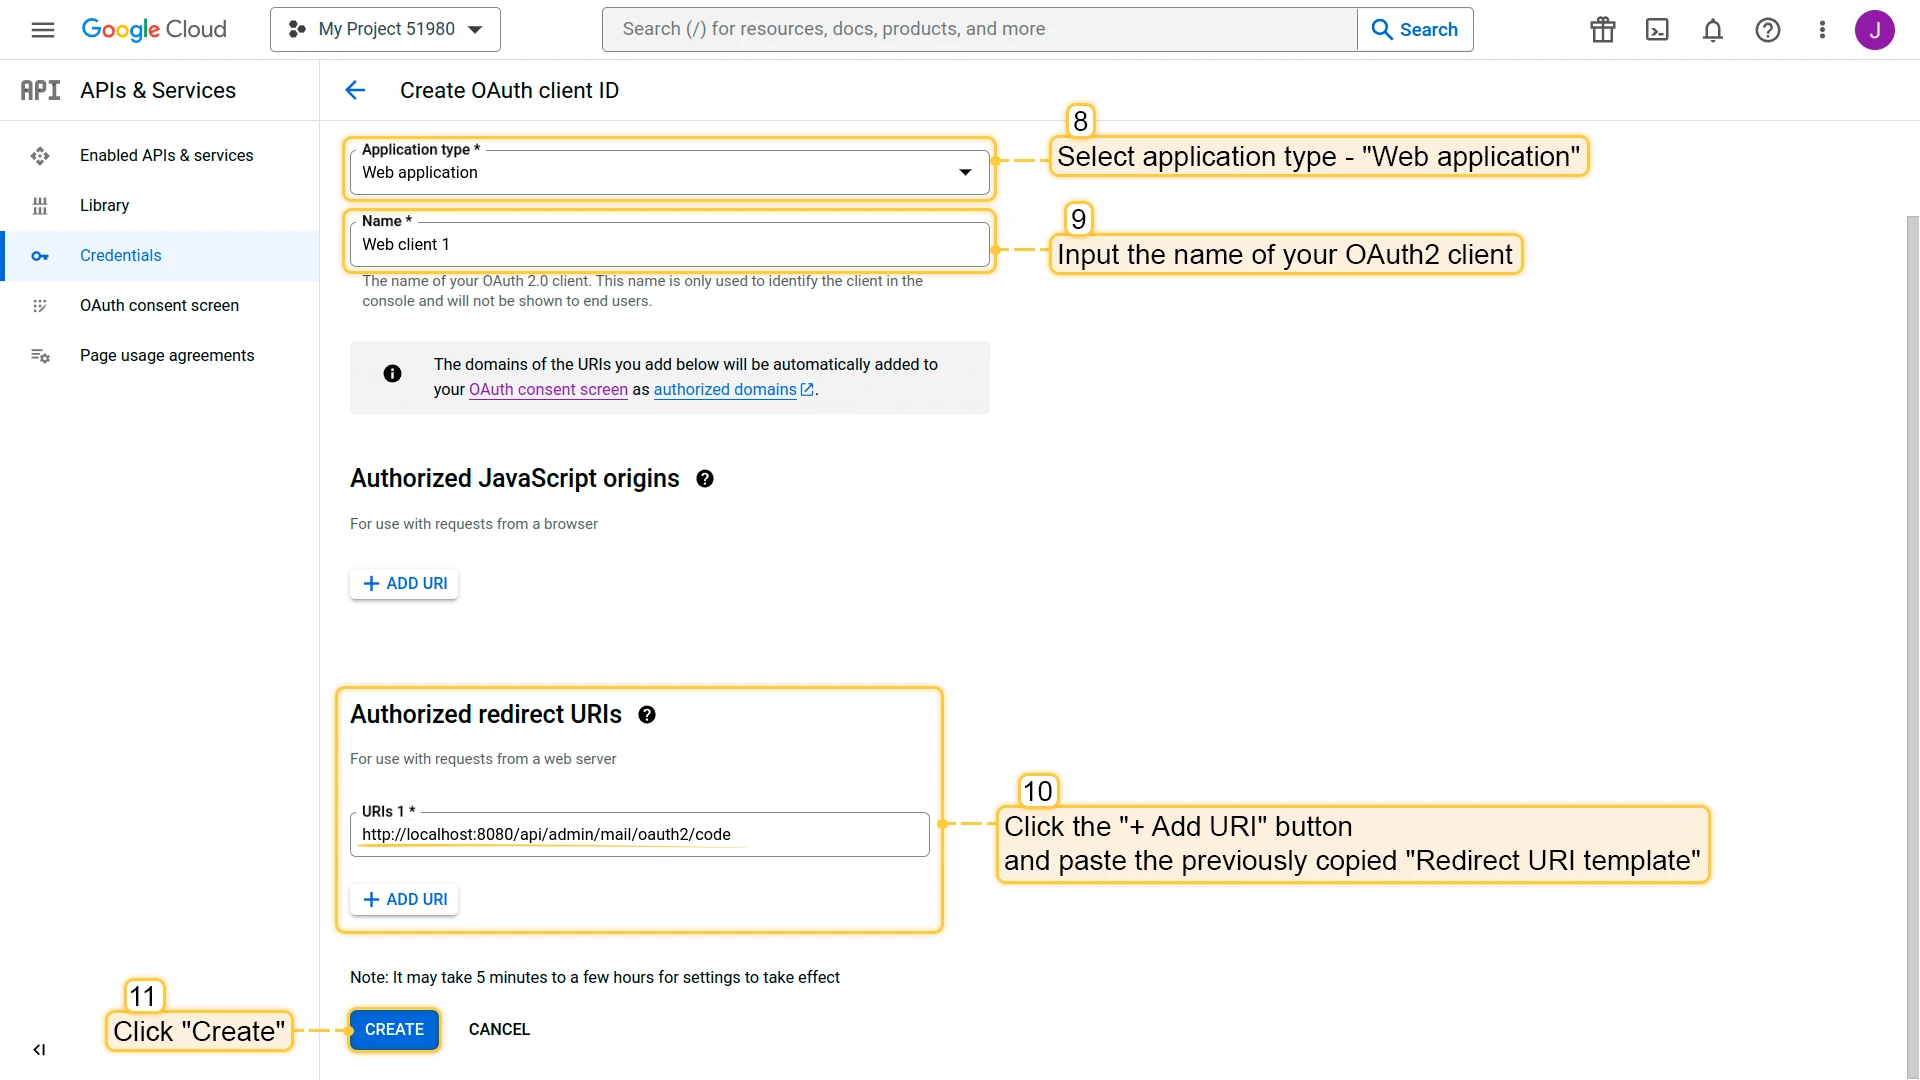
- Select application type Web application, enter a name, and in Authorized redirect URIs paste the redirect URI from step 1. Click Create.
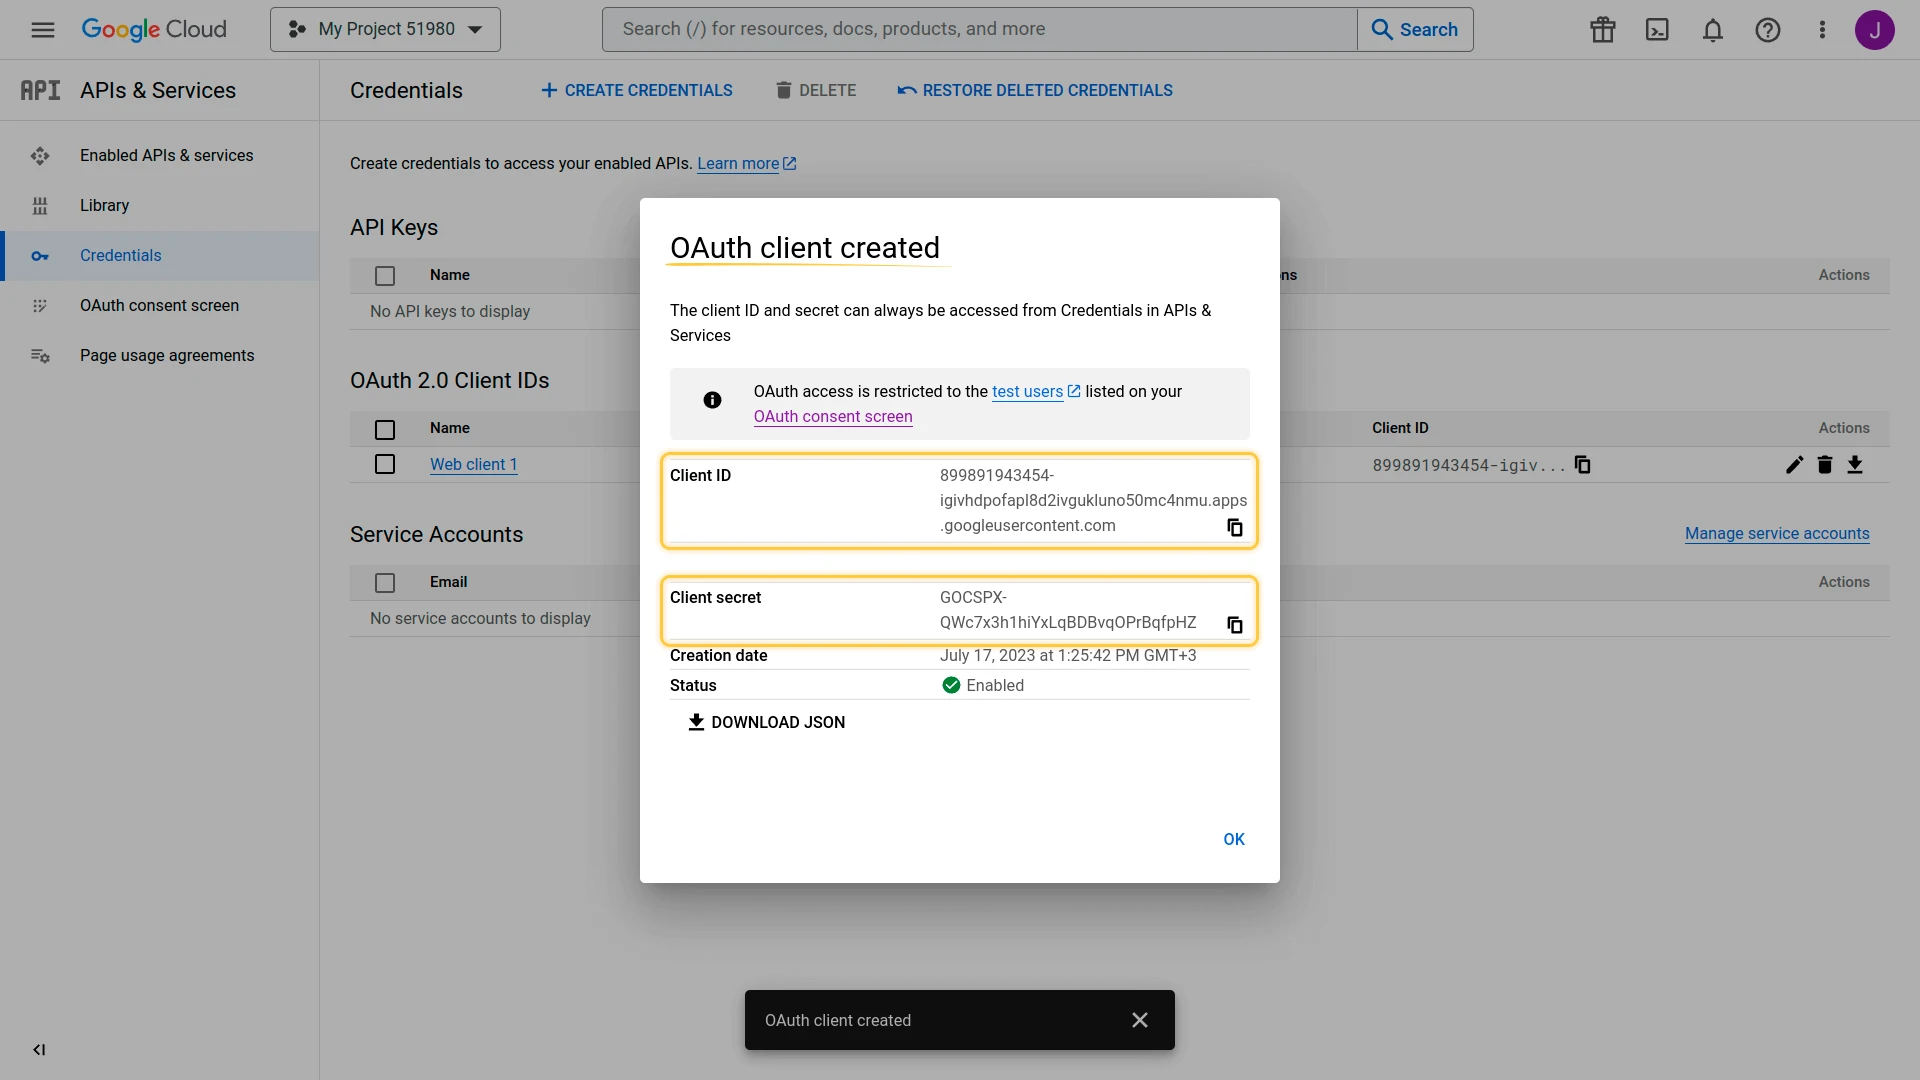
- Copy the Client ID and Client secret.
4. Complete ThingsBoard setup
Back in ThingsBoard, paste the Client ID and Client secret, then click Save. Click Generate access token — your browser will redirect to Google for authorization. After granting access, the tokens are saved automatically. Click Send test email to verify.
Office 365 with OAuth 2.0
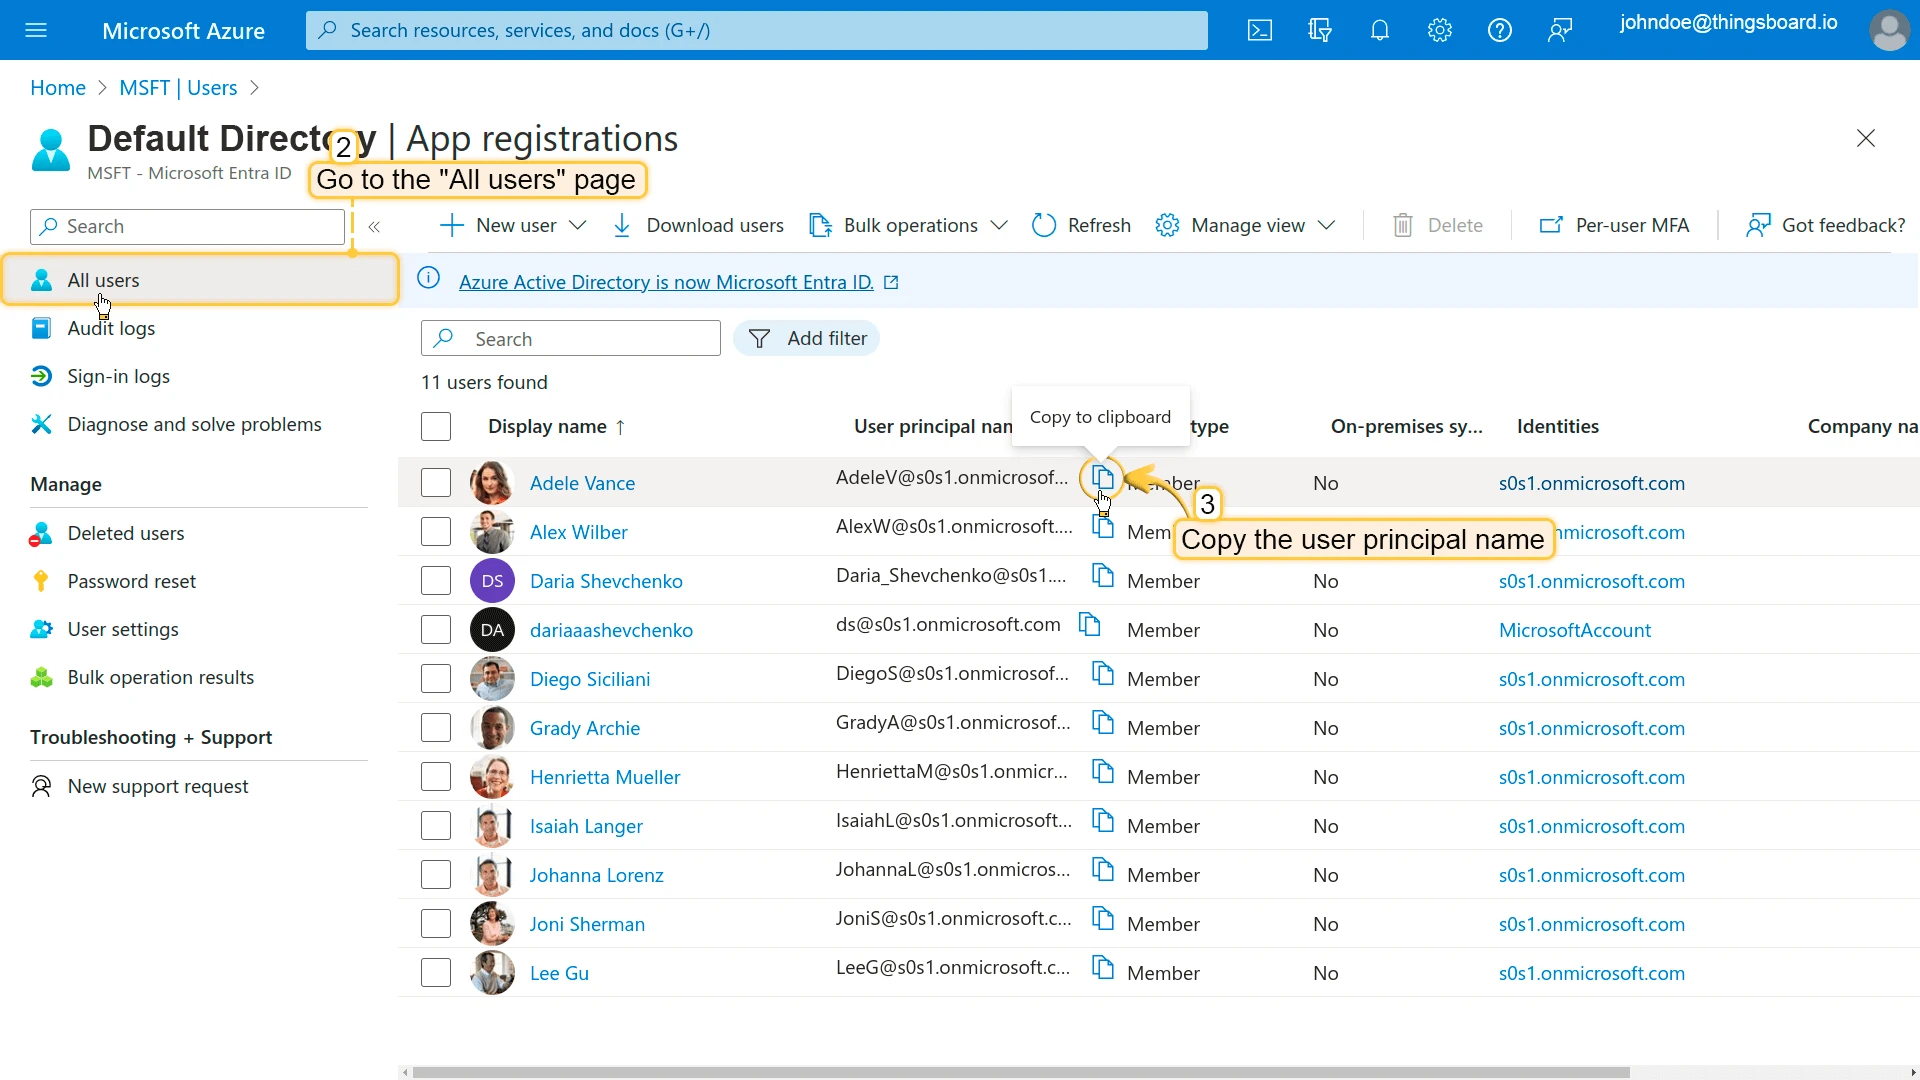
Section titled “Office 365 with OAuth 2.0”1. Copy the user principal name
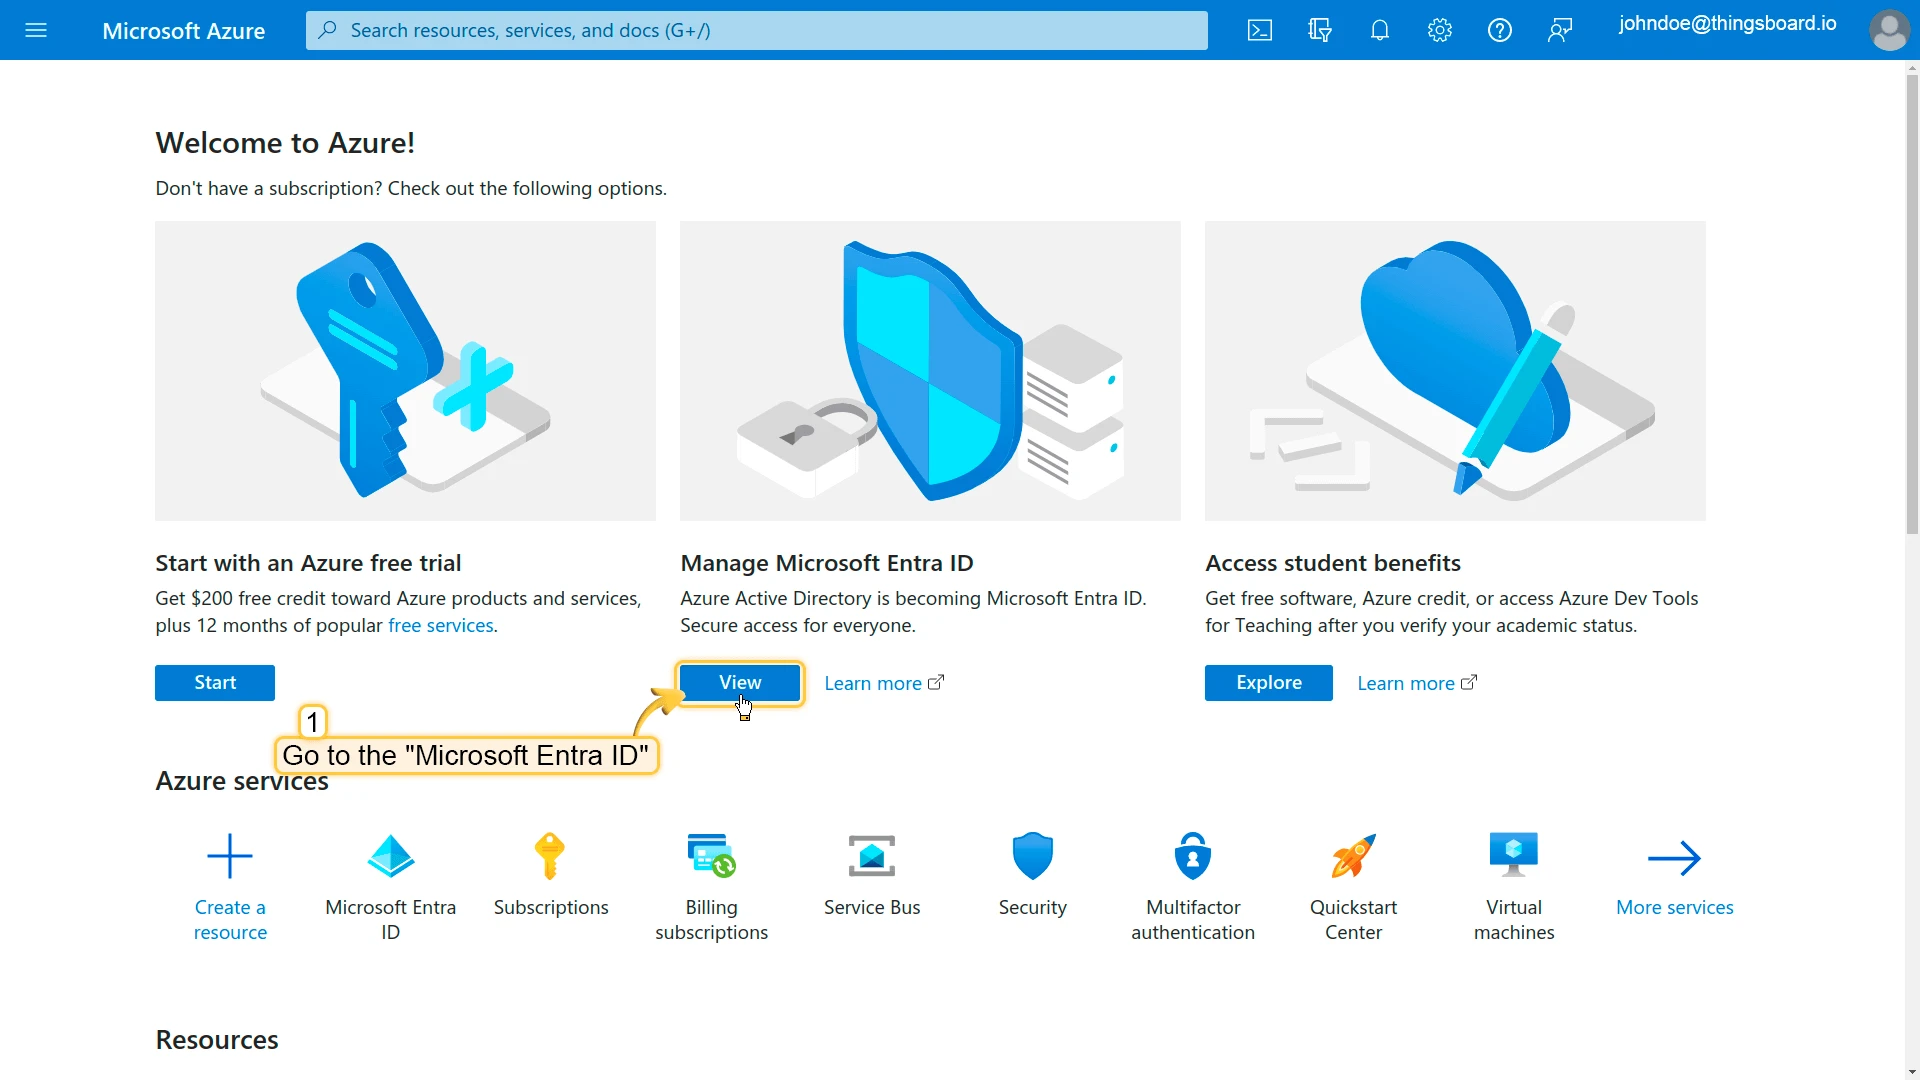
Sign in to the Azure portal, open Microsoft Entra ID, select a user, and copy the User Principal Name.
2. Configure ThingsBoard (initial setup)
In ThingsBoard, select SMTP provider Office 365. Enter the user principal name as both Mail From and Username. Toggle authentication to OAuth2. Copy the Redirect URI template.
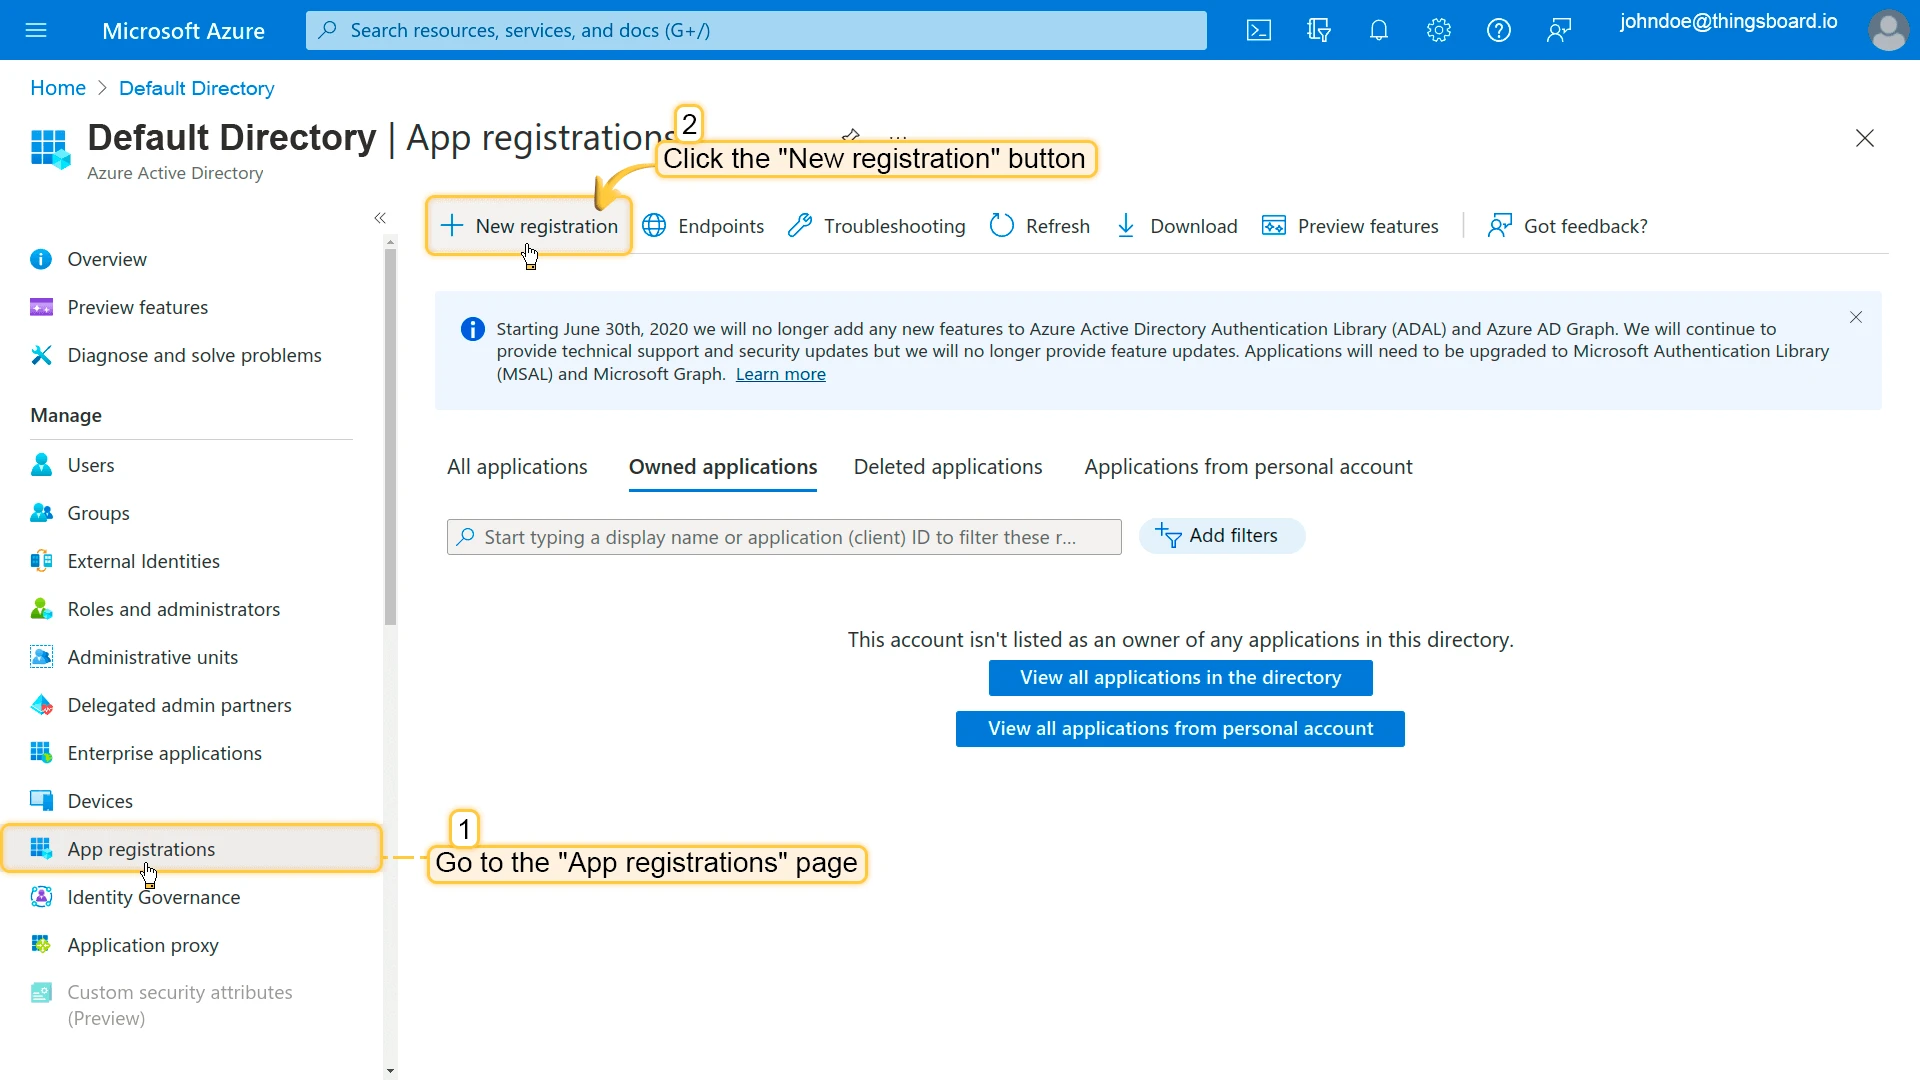
3. Register an application in Azure
- In the Azure portal, go to App registrations and click New registration.
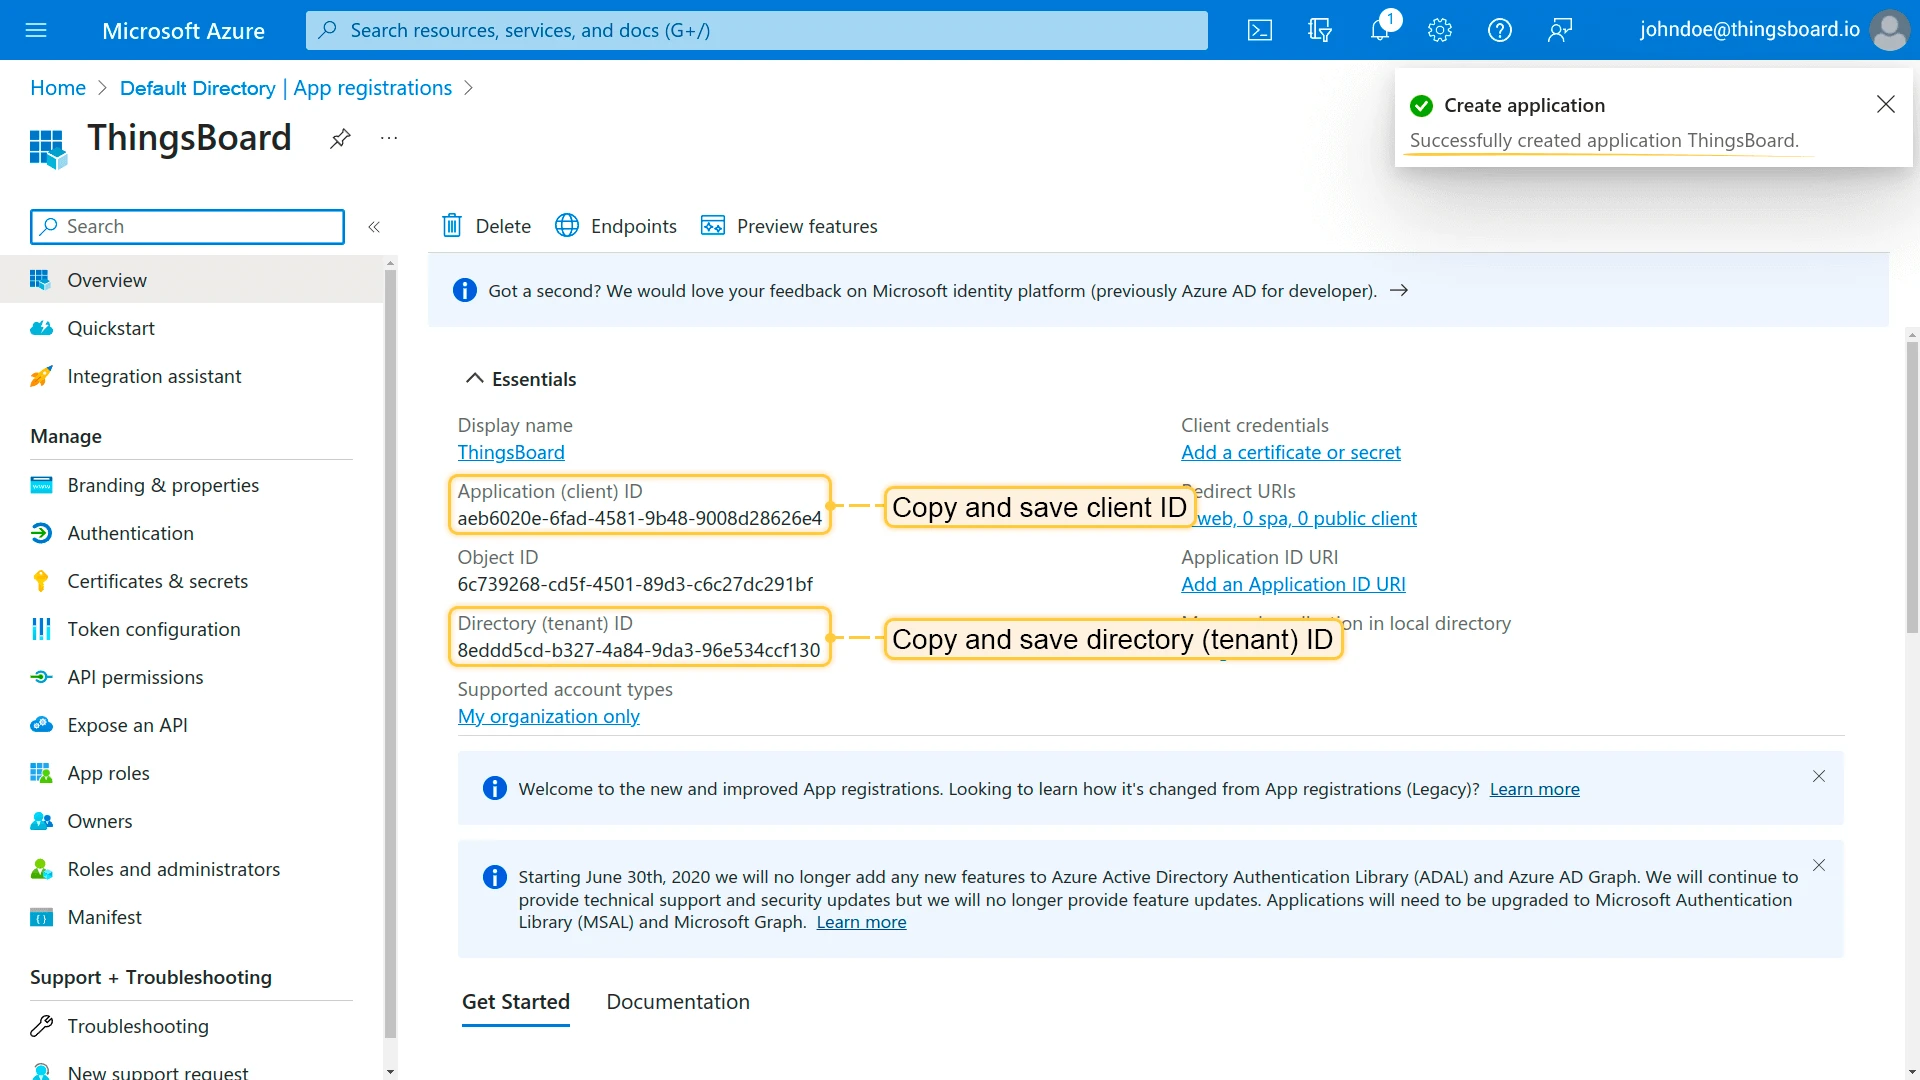
- Enter a name, paste the Redirect URI (Web type) from step 2, and click Register.
- On the Overview page, note the Client ID and Directory (tenant) ID.

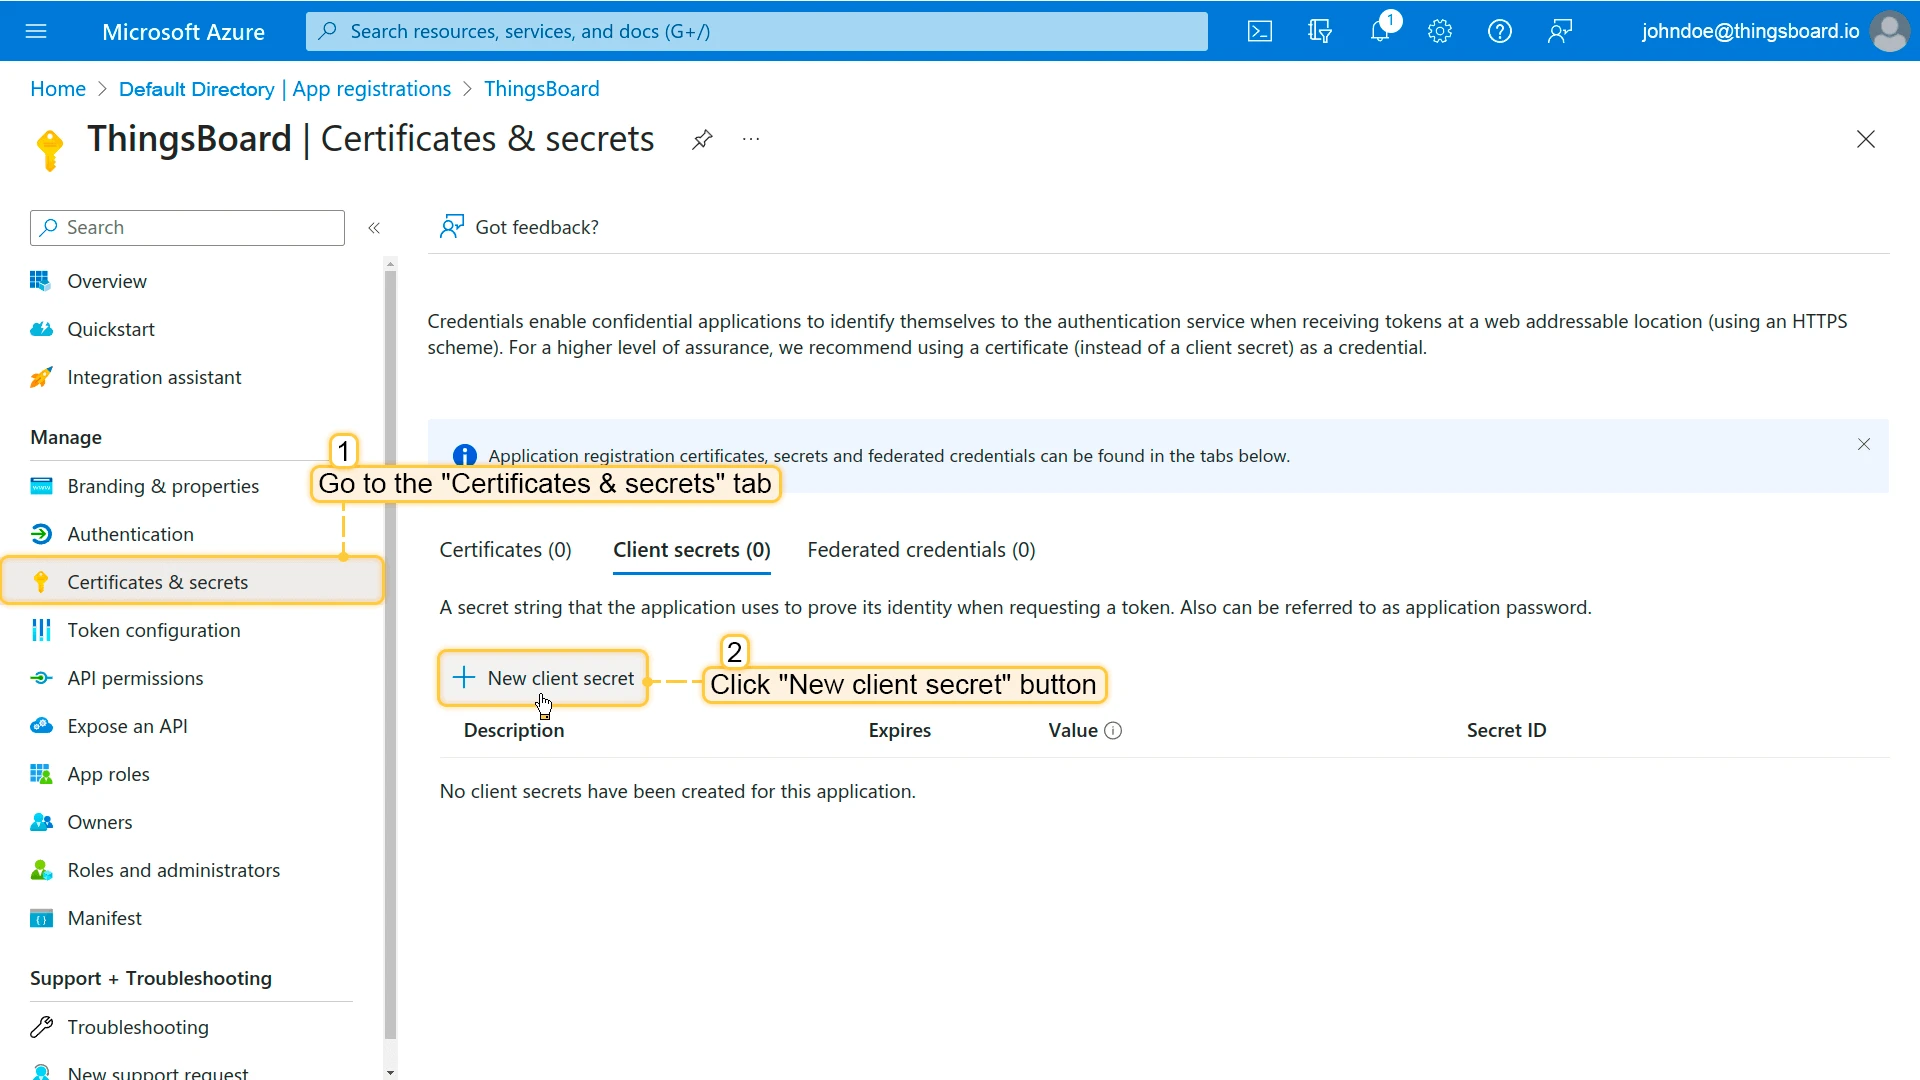
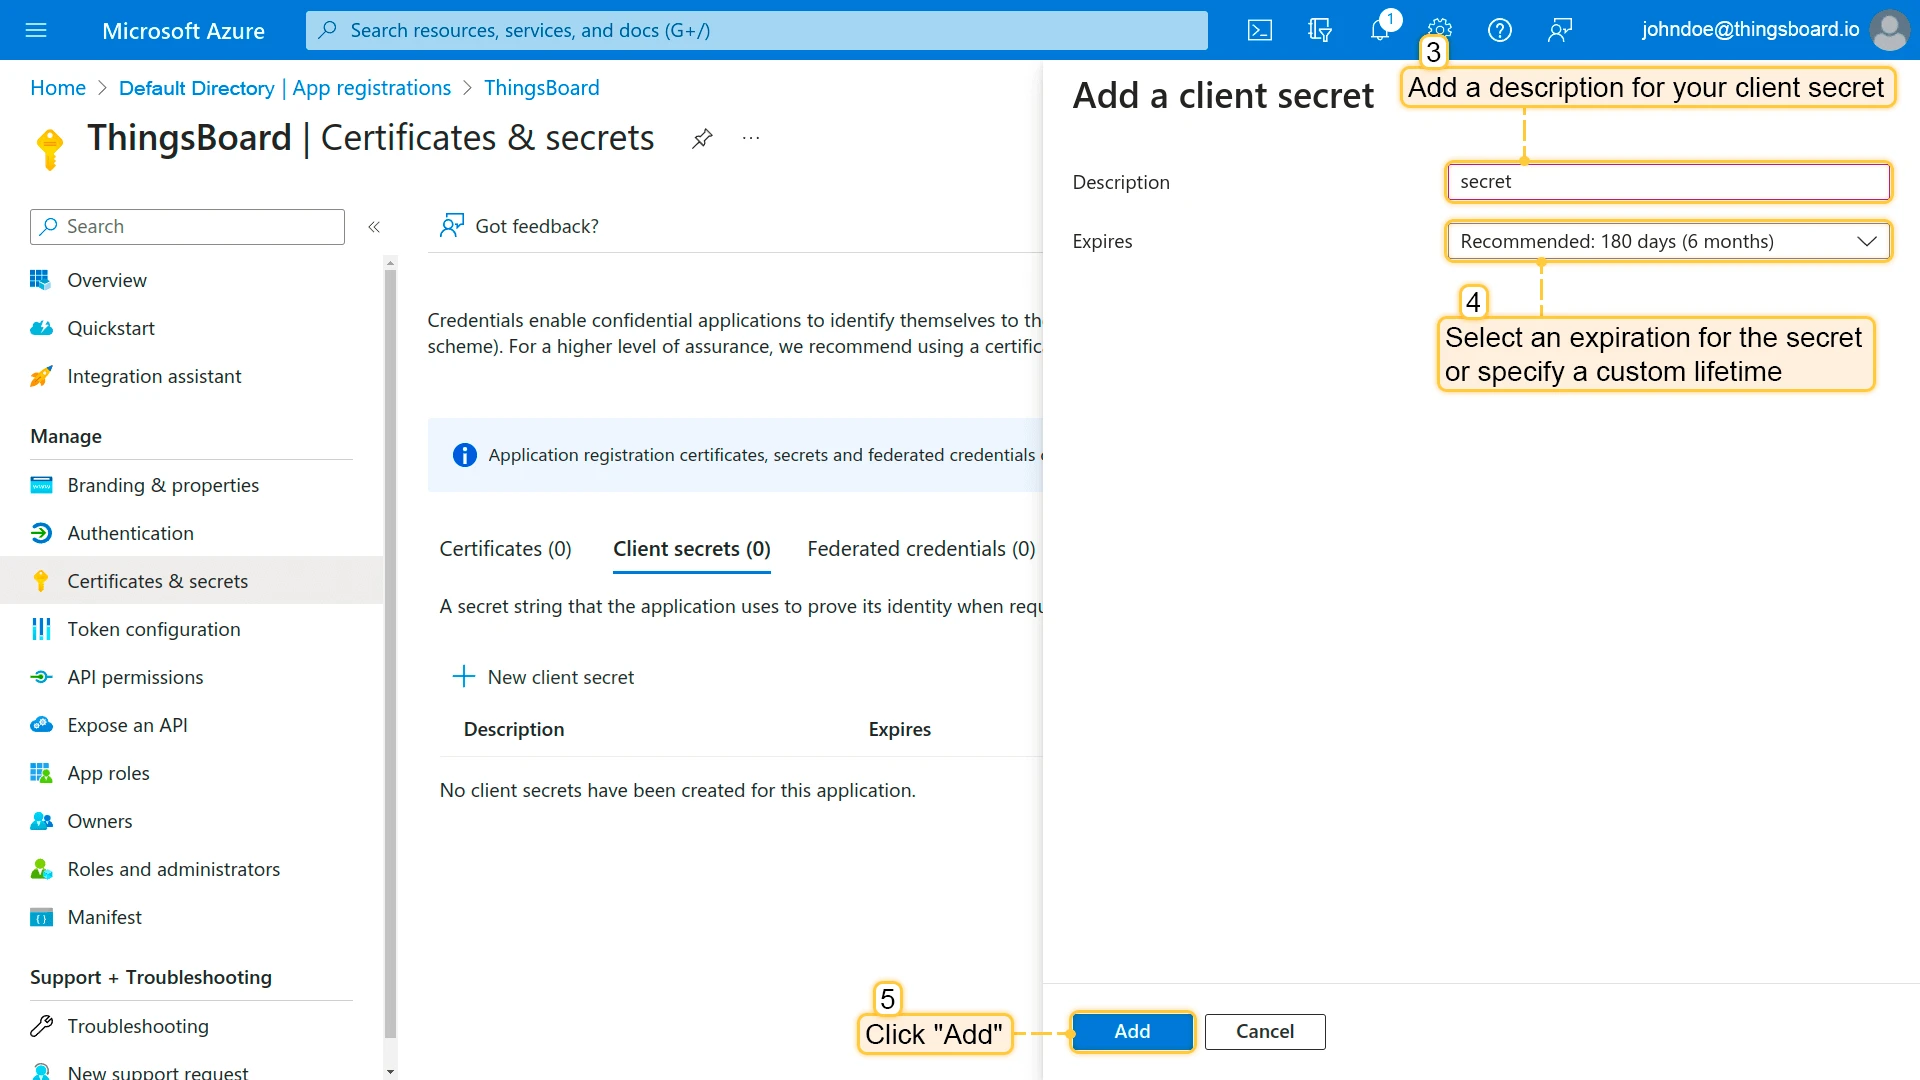
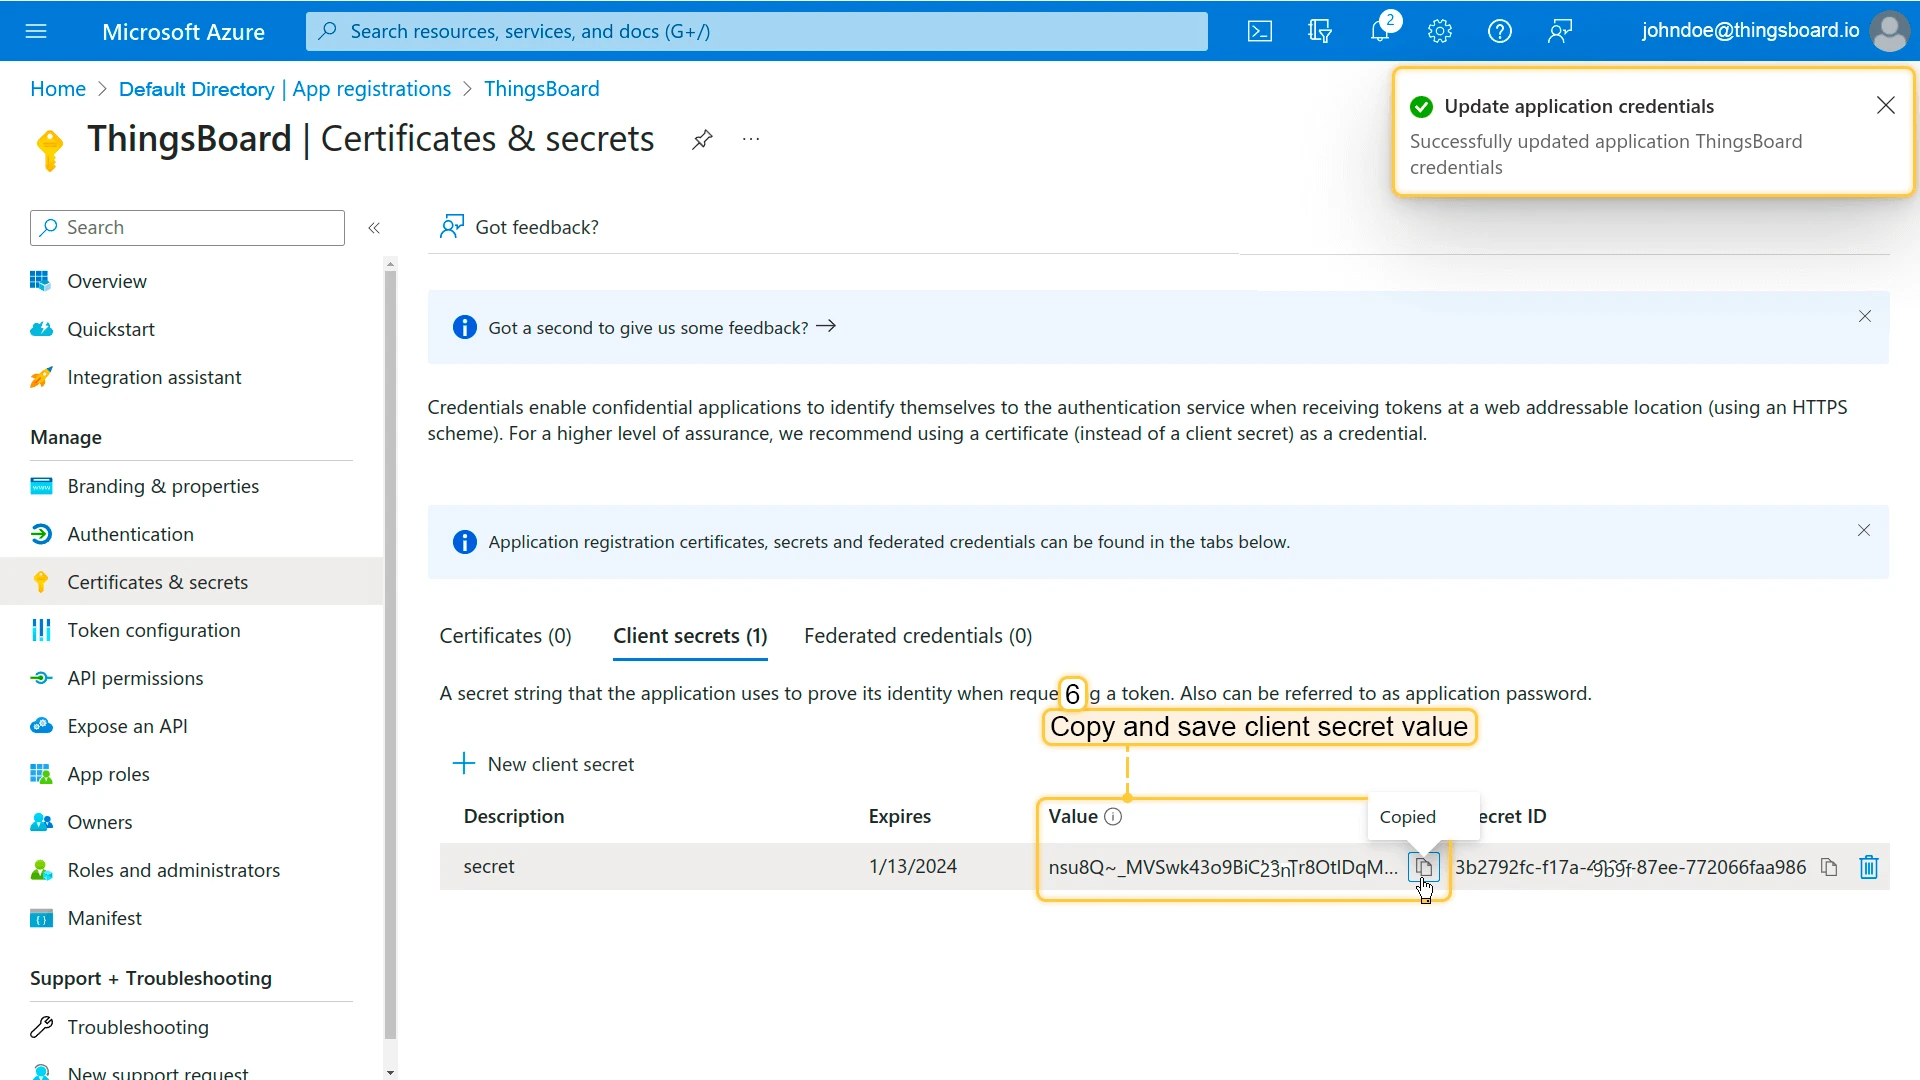
4. Create a client secret
- Go to Certificates & secrets > Client secrets and click New client secret.
- Add a description, select an expiration, and click Add.
- Copy the secret value.
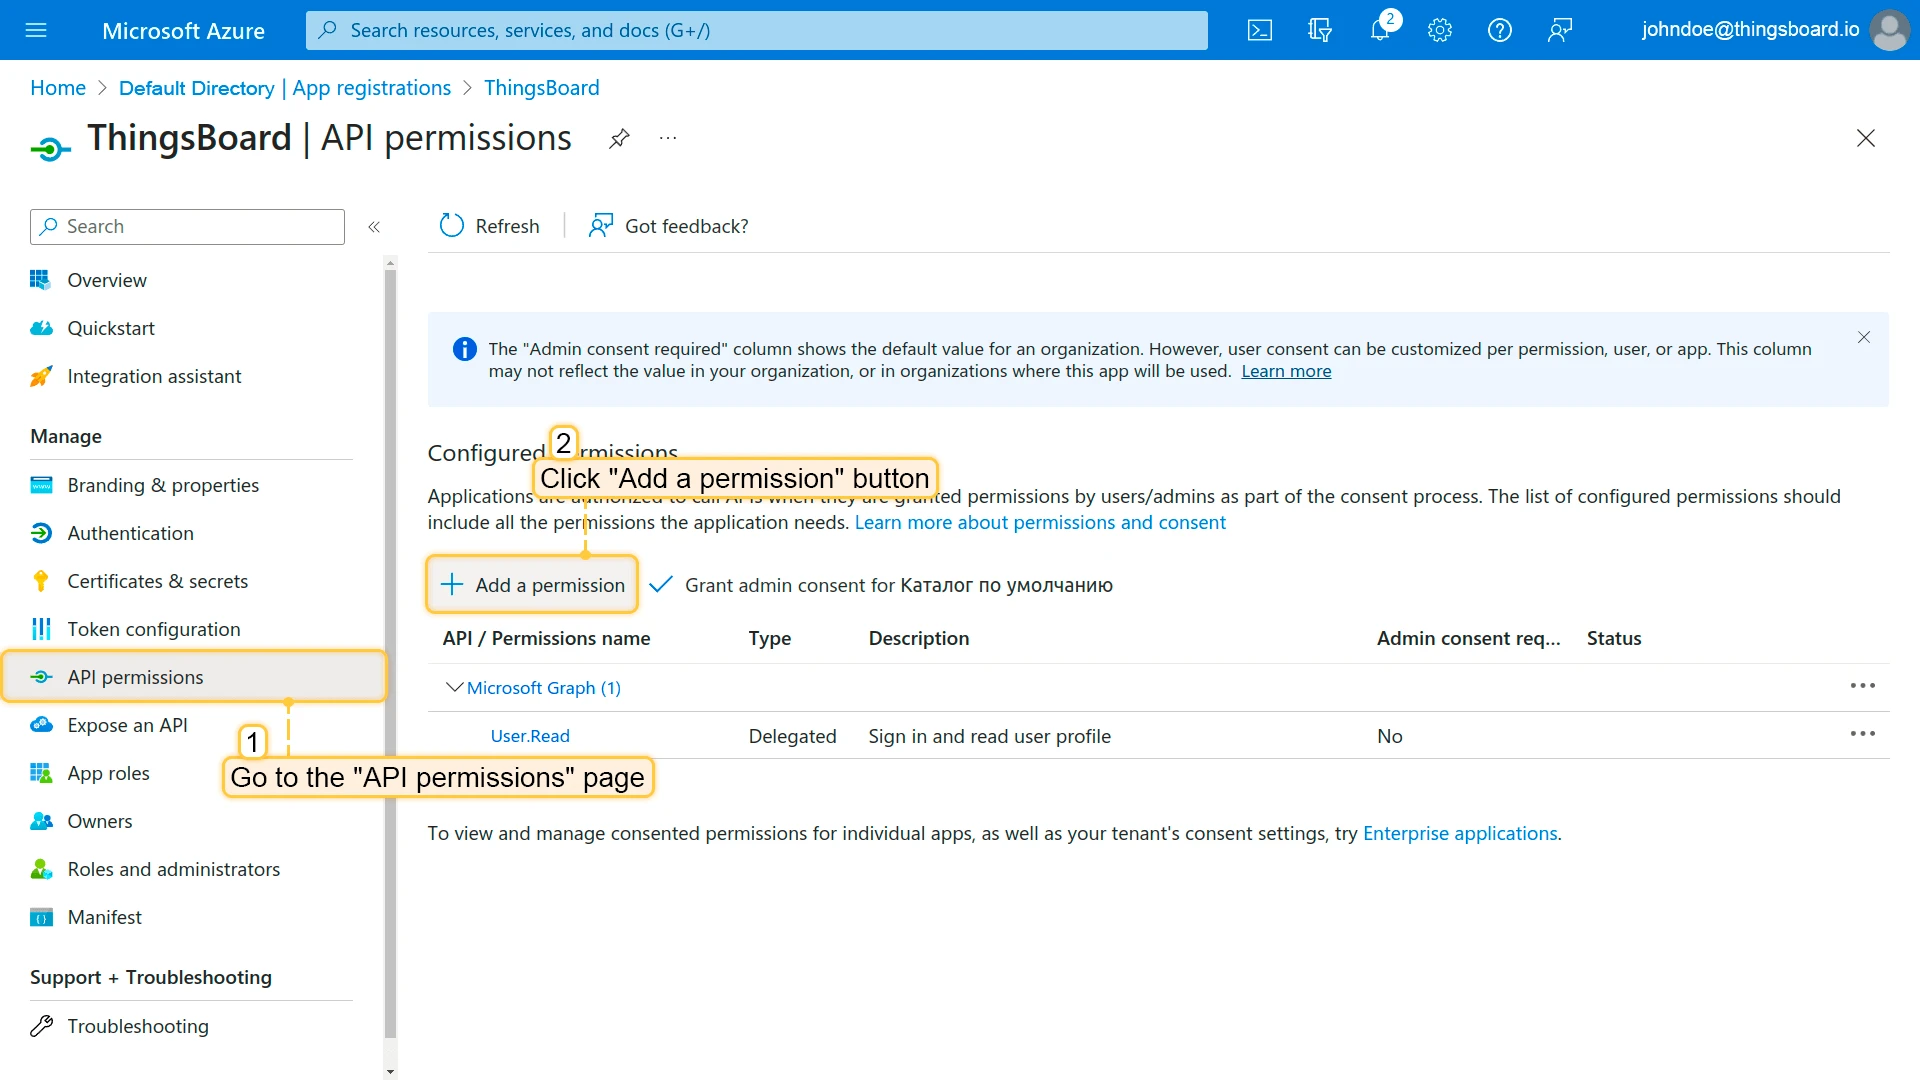
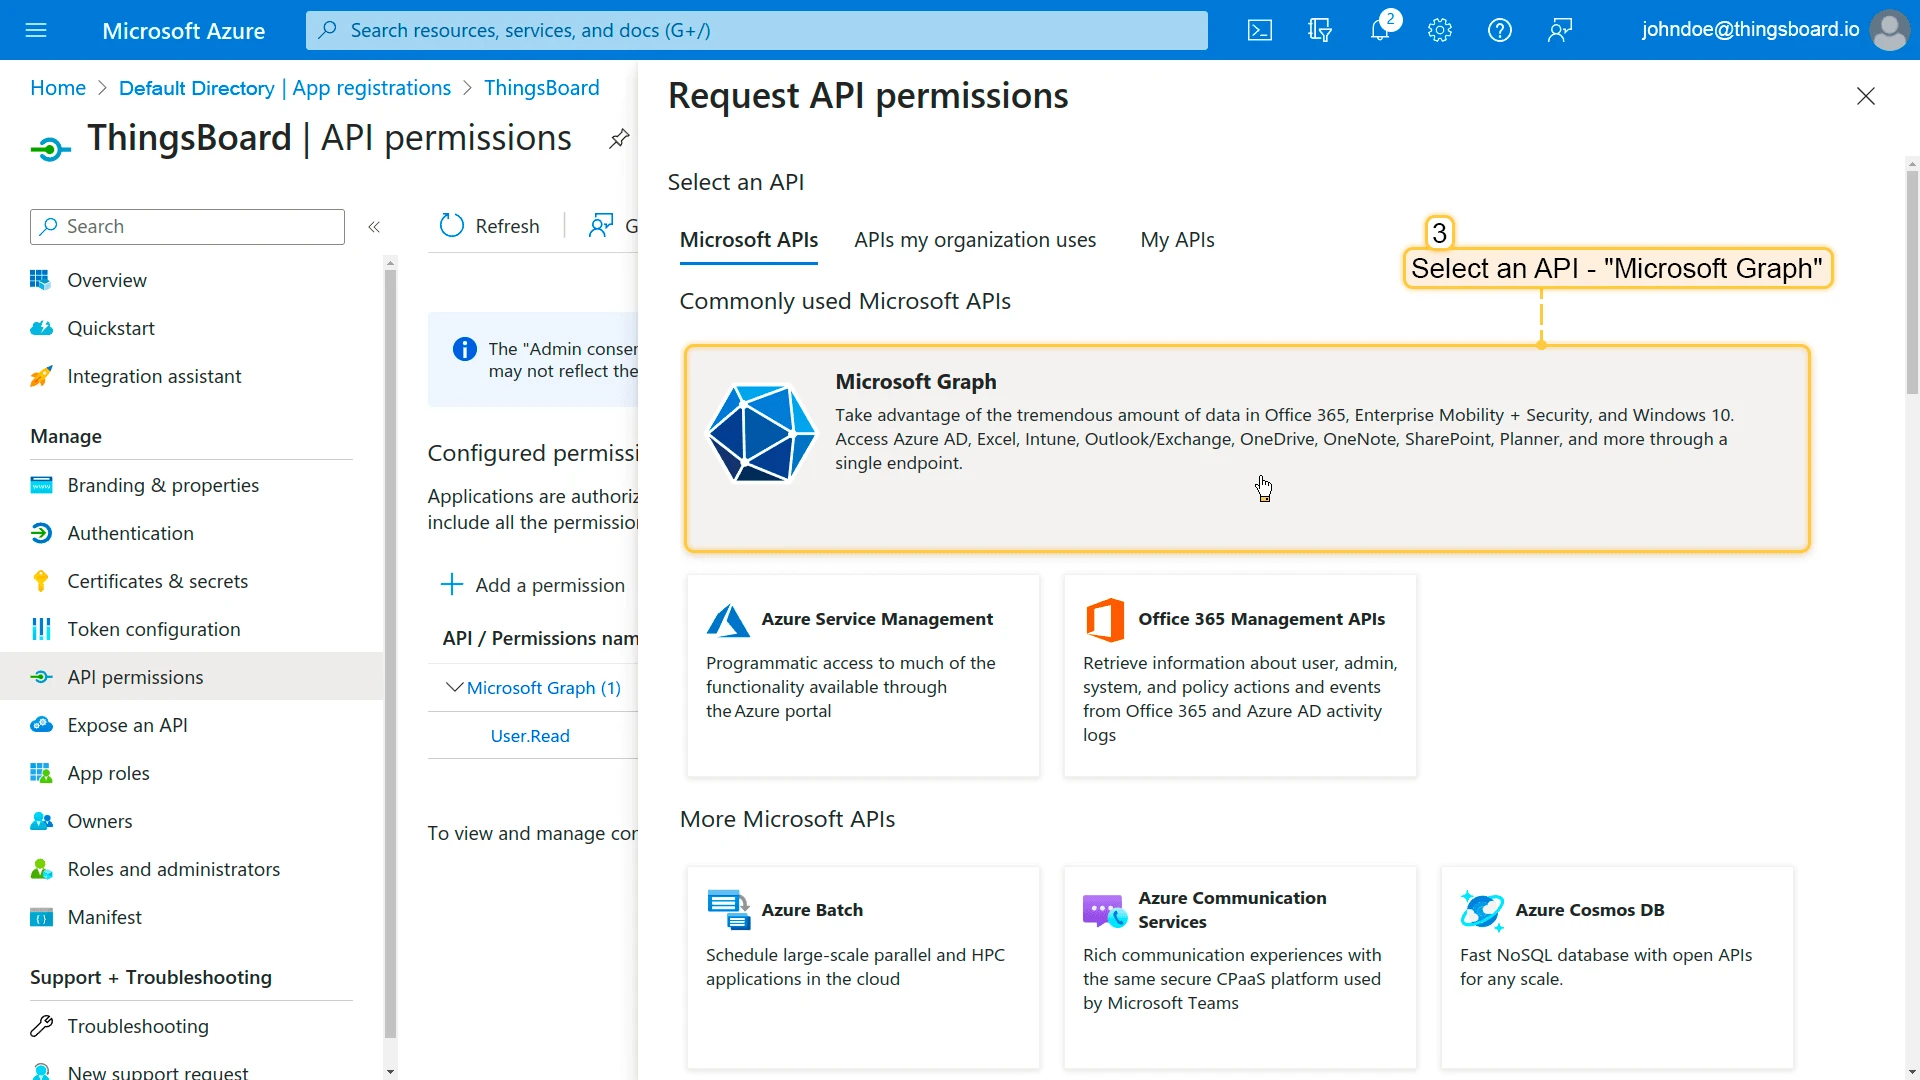
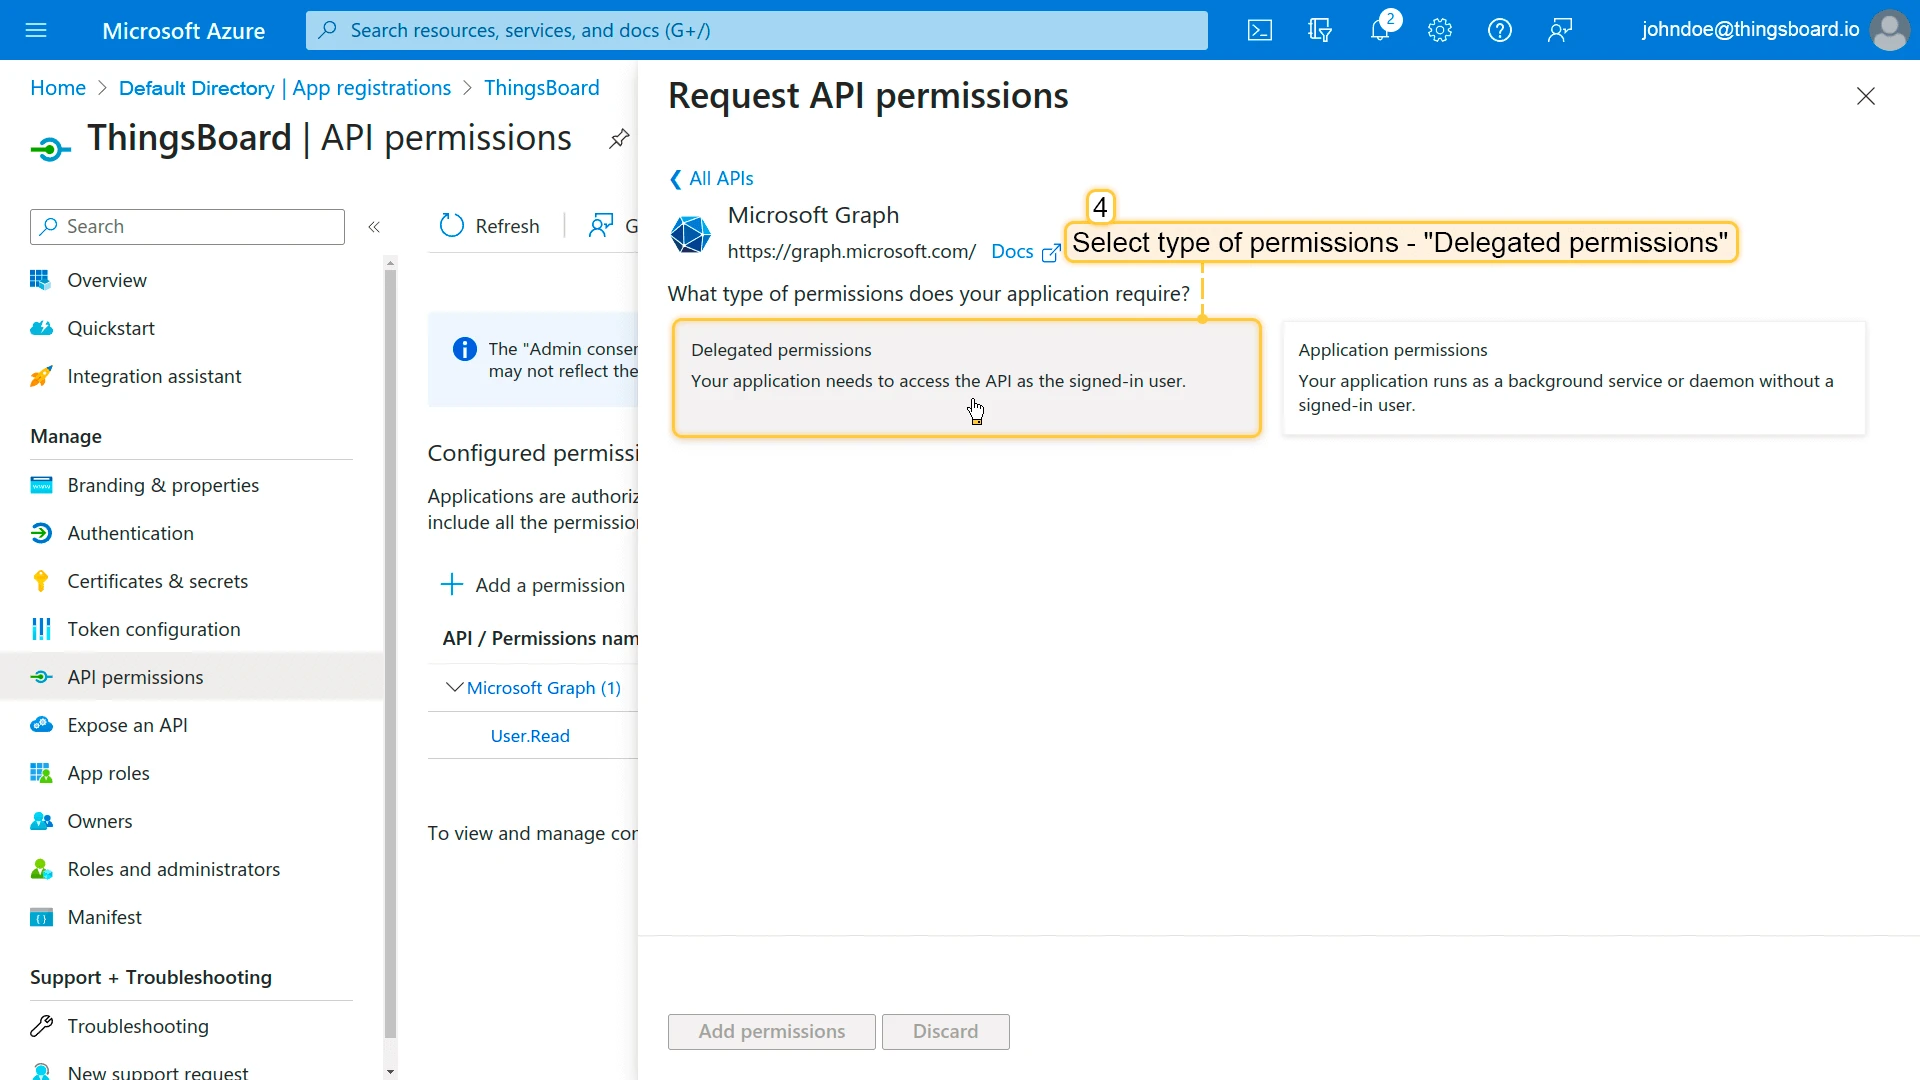
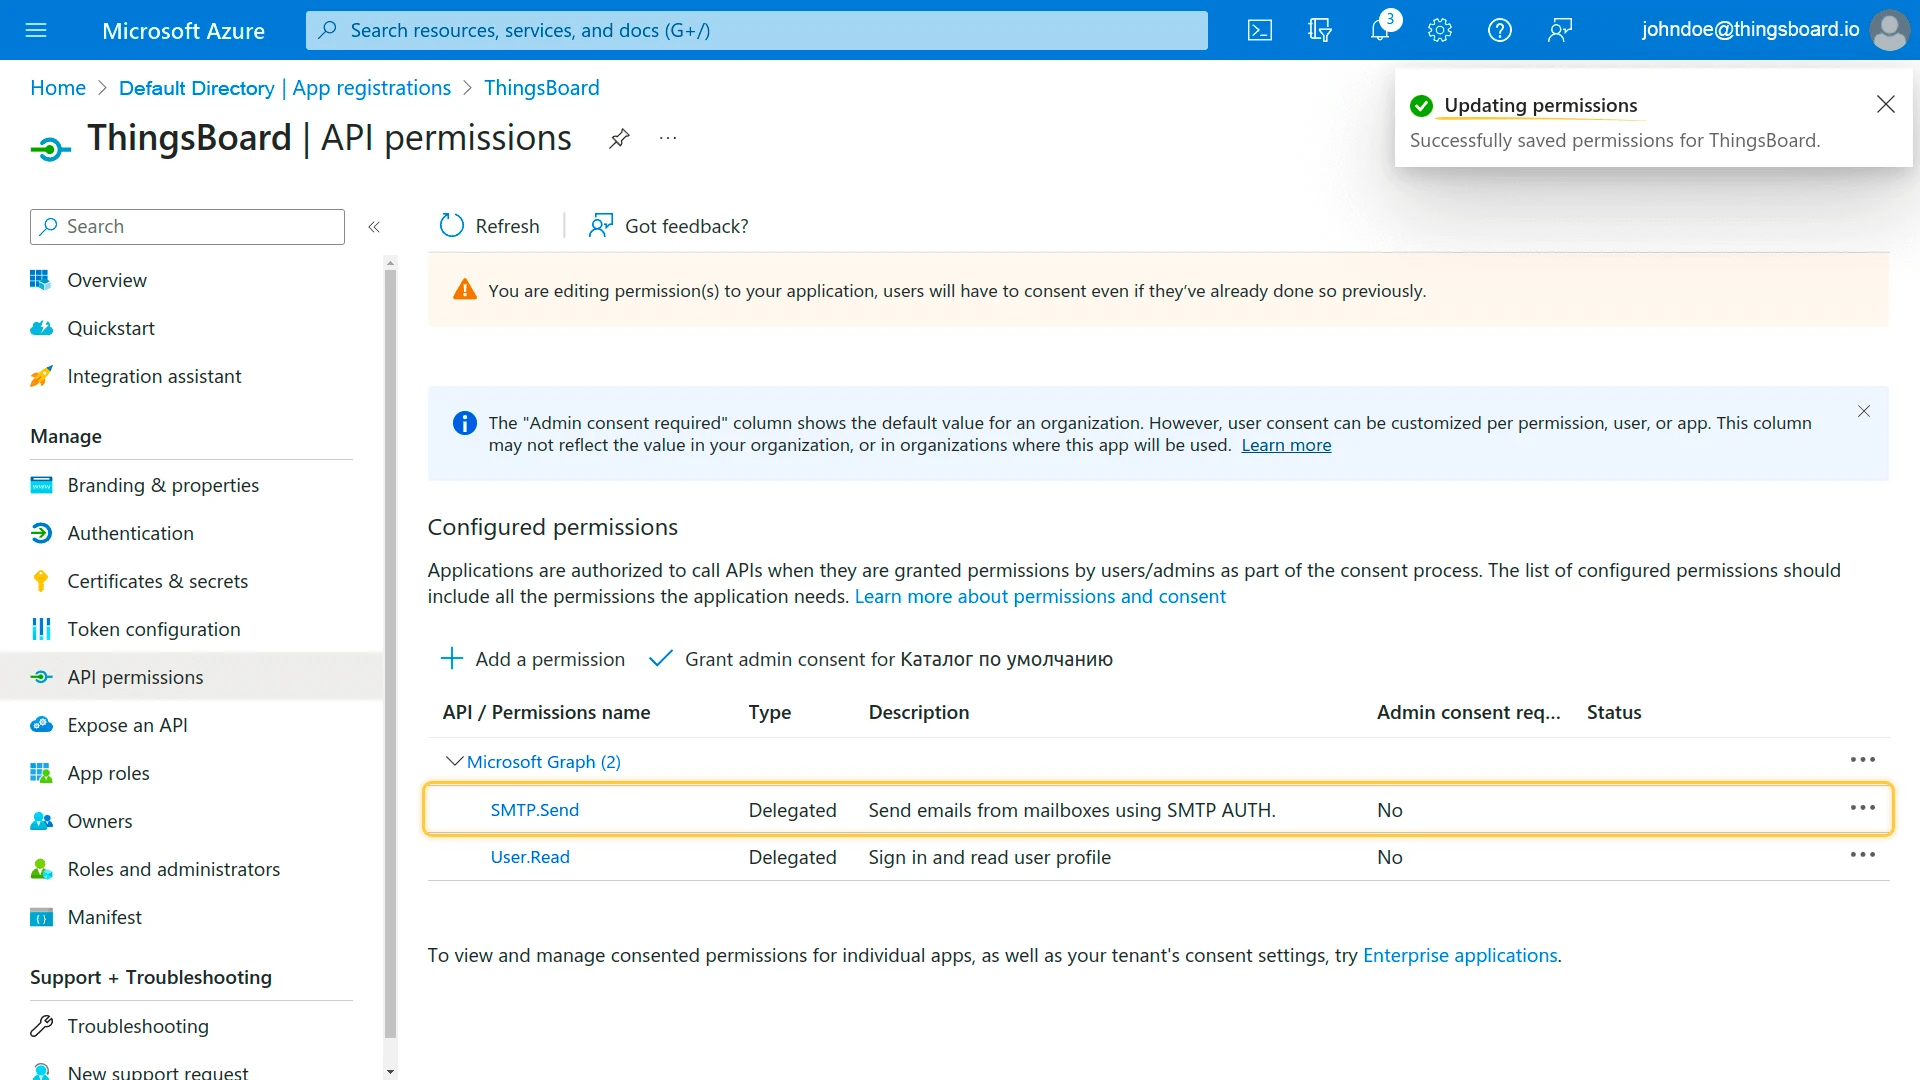
5. Add SMTP API permissions
- Go to API permissions and click Add a permission.
- Select Microsoft Graph > Delegated permissions.
- Search for and check SMTP.Send, then click Add permissions.
- Click Grant admin consent.

6. Complete ThingsBoard setup
Back in ThingsBoard, paste the Client ID, Client secret, and Directory (tenant) ID, then click Save. Click Generate access token — your browser will redirect to Microsoft for authorization. After granting access, the tokens are saved automatically. Click Send test email to verify.
Office 365 troubleshooting:
If you see authentication errors (e.g., 5.7.3):
- Ensure SMTP is enabled for the user: go to the Microsoft 365 admin center, select the user > Mail > Manage email apps > enable Authenticated SMTP (if already enabled, disable and re-enable).
- In the Azure portal, ensure Security defaults are disabled.
Example
Section titled “Example”The Send Email on Alarm recipe walks through the full setup: configuring notification recipients, creating an alarm notification template with email delivery, and setting up a rule that sends an email when an alarm is created.
Was this helpful?