Netvox LoRaWAN Devices and ThingsBoard
Introduction
Section titled “Introduction”Netvox has more than 400 LoRaWAN end devices that can be integrated into systems supporting the LoRaWAN protocol and are widely used in IoT solutions. By integrating data from Netvox devices into ThingsBoard, users can easily visualize and monitor data through the ThingsBoard dashboard.
Register Netvox devices on a third-party platform
Section titled “Register Netvox devices on a third-party platform”To register a Netvox device, we will use The Things Stack Cloud Discovery. This is a free plan of The Things Stack Cloud that allows you to connect up to 10 devices and 10 gateways with no time restrictions, making it ideal for testing your device.
Create application
Section titled “Create application”-
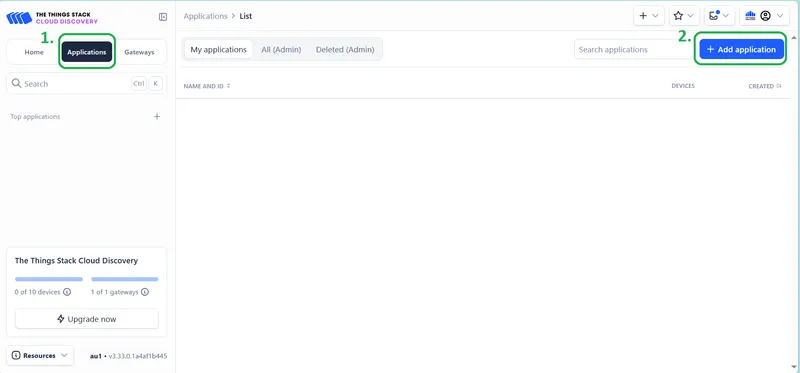
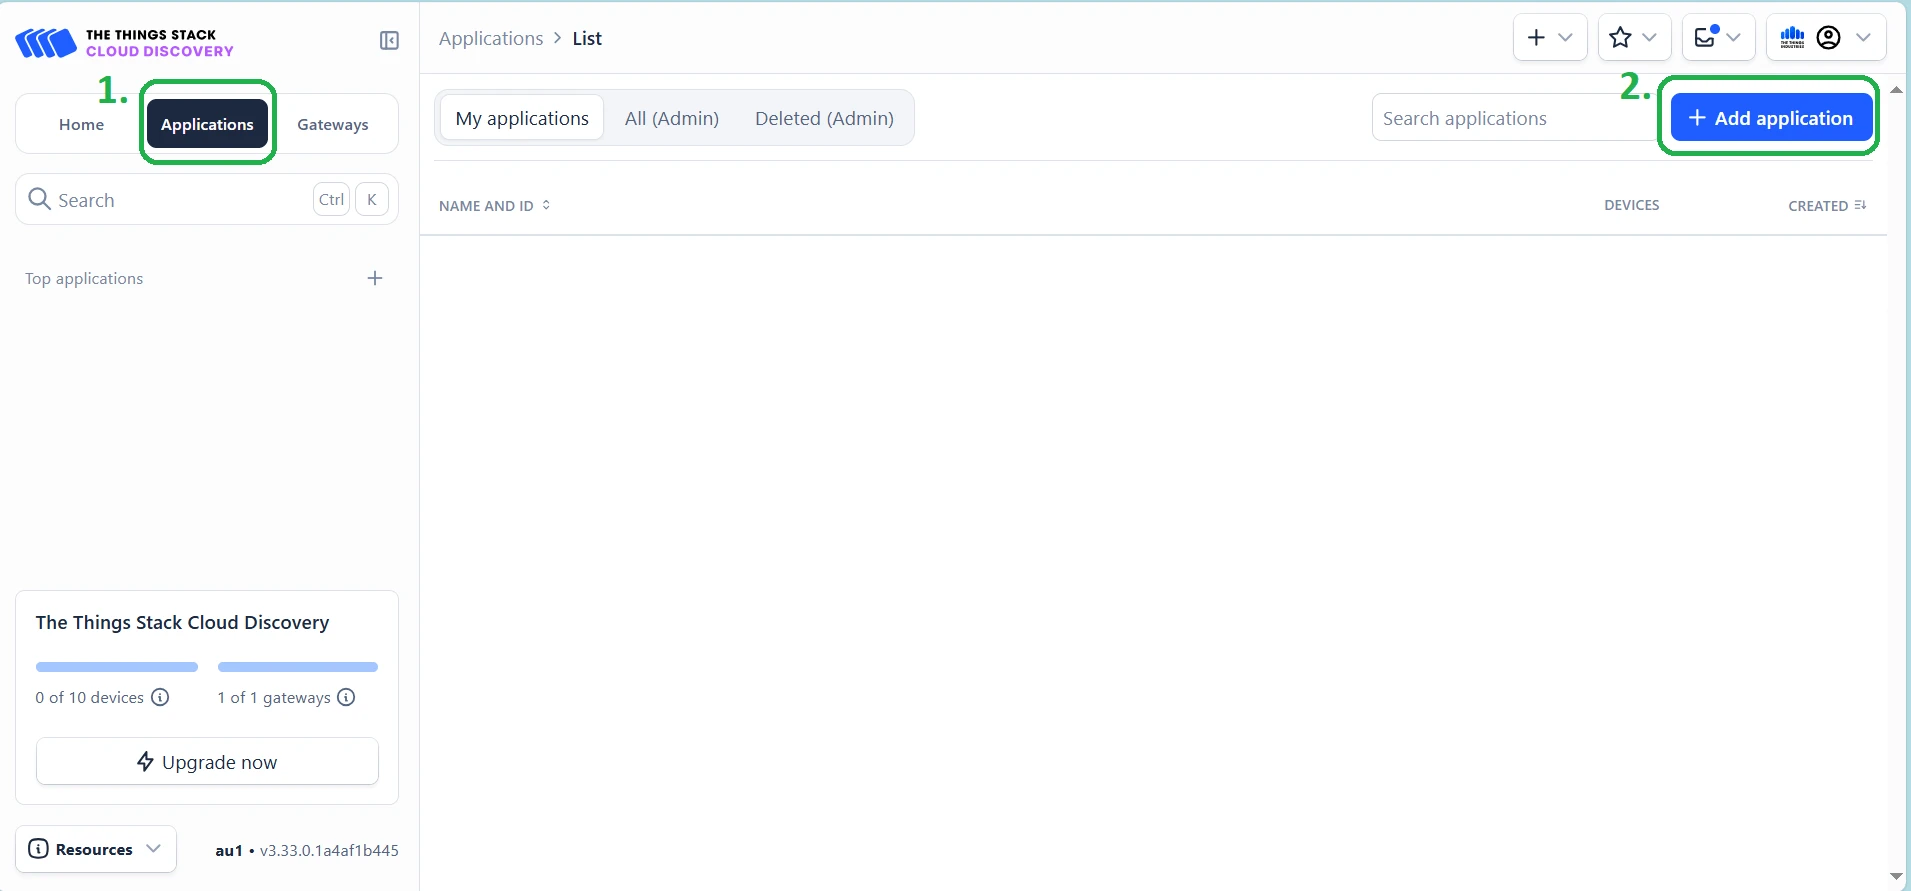
Log in to the Network Server and navigate to the Applications page. Click the + Add applications button.
-
Enter the Application ID and Application name, then click Create application.


Register end device
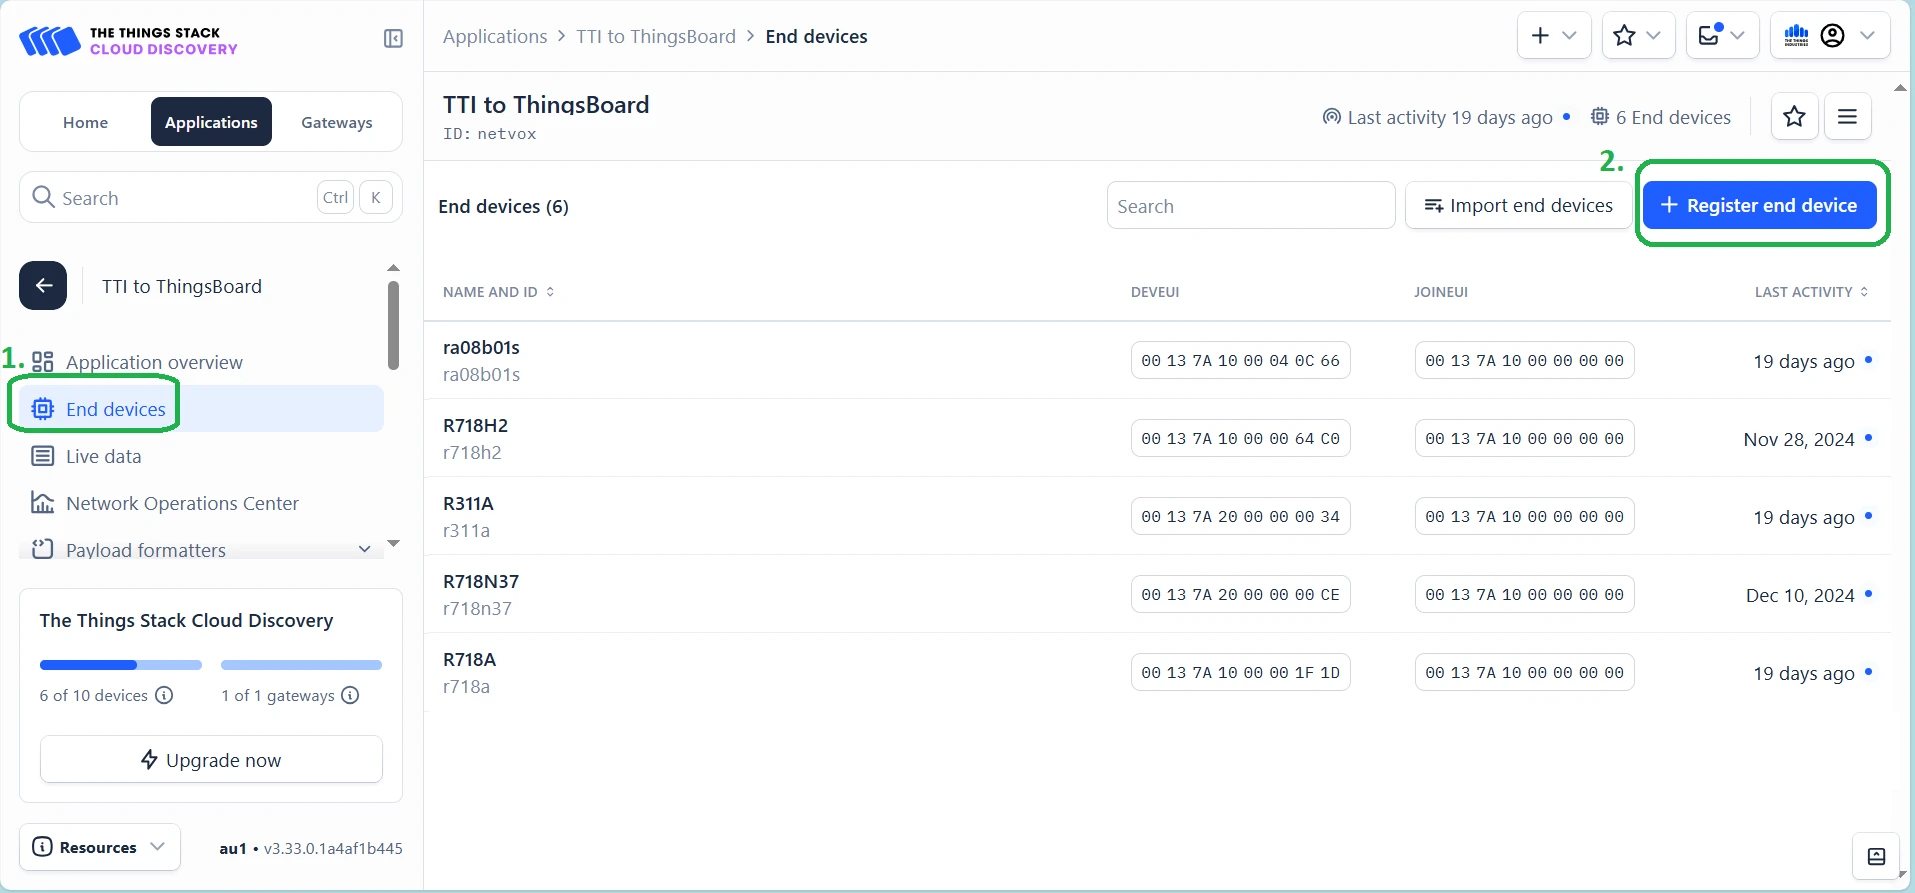
Section titled “Register end device”-
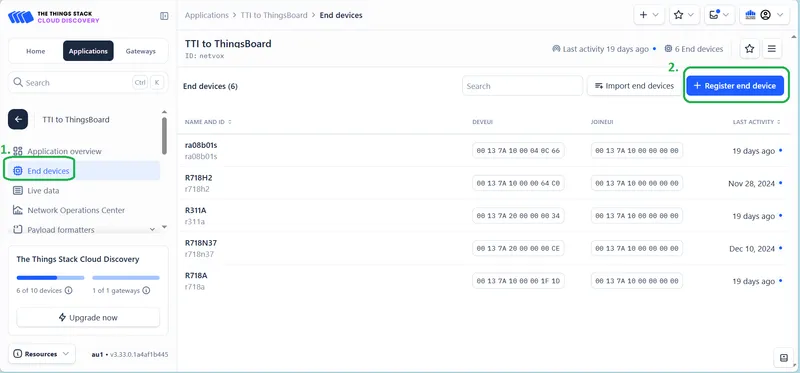
Go to the End devices page and click + Register end device.
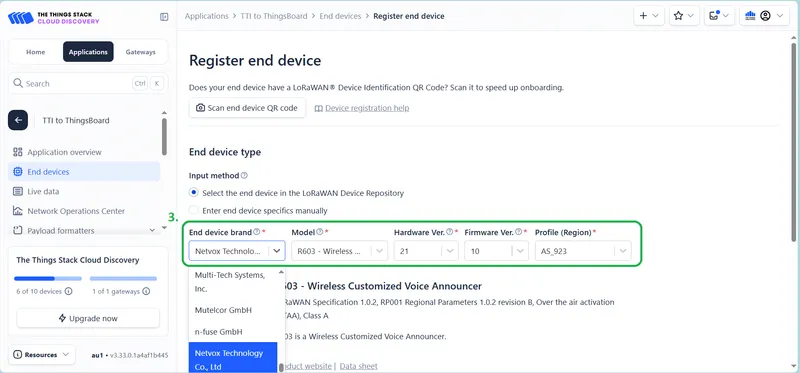
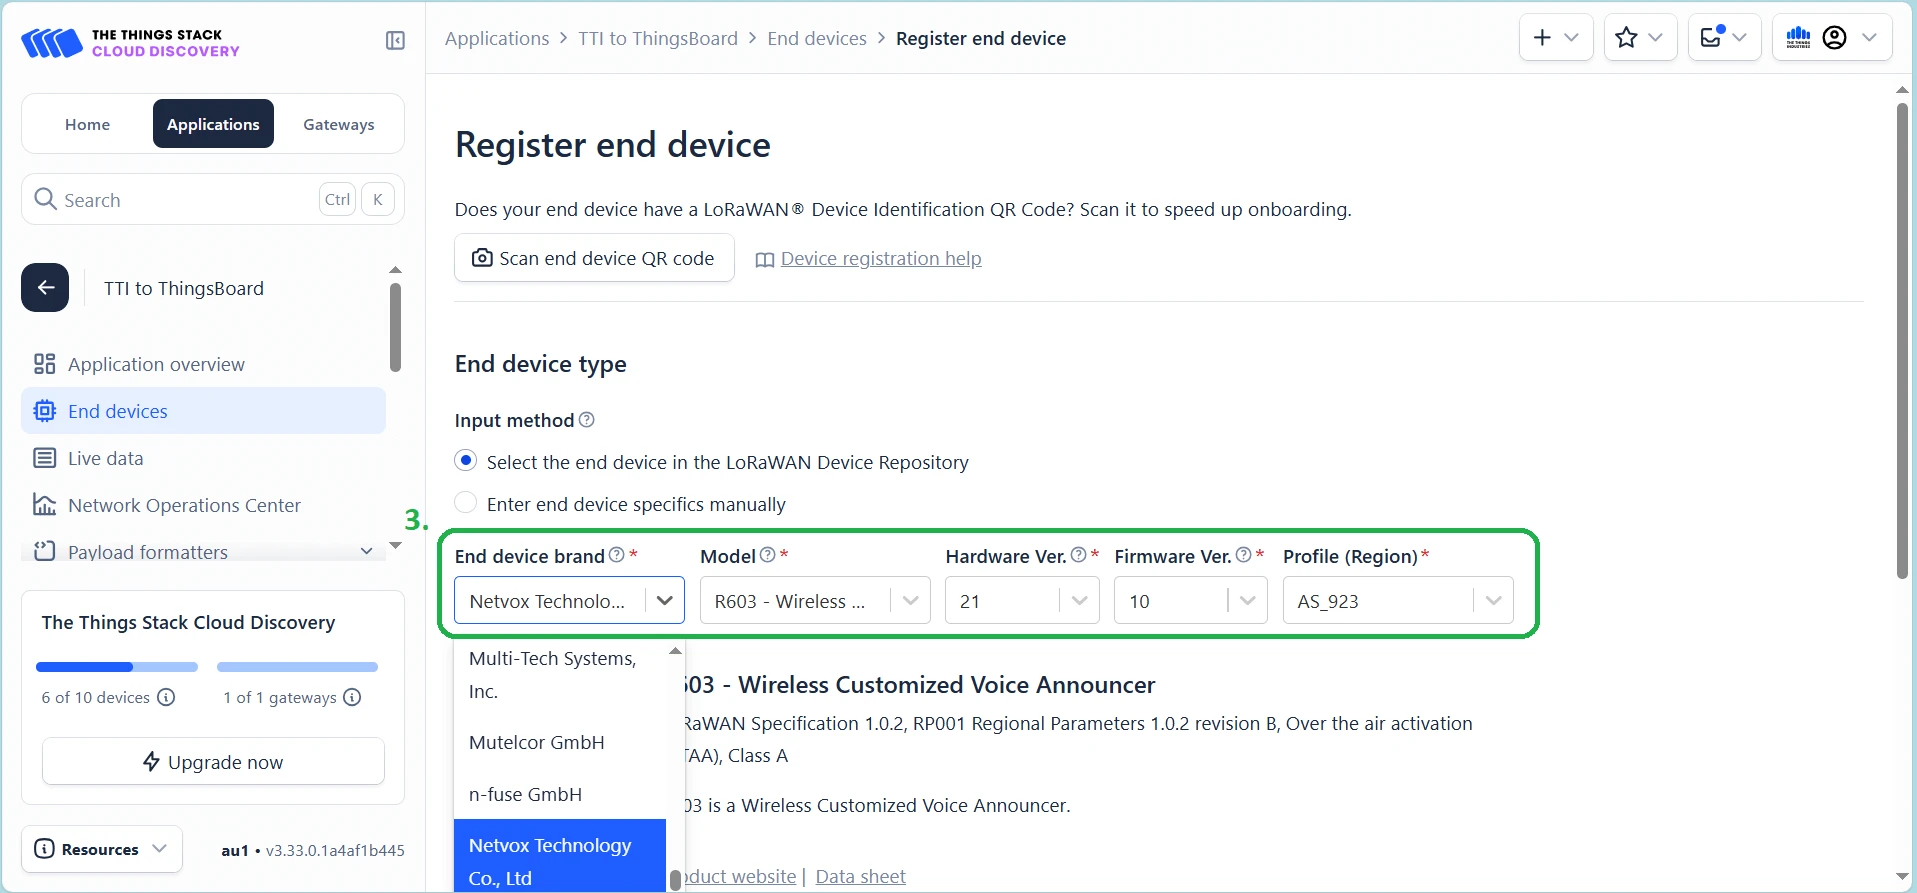
-
Fill in the Netvox device information: End device brand (Netvox Technology Co., Ltd.), Model, Hardware Ver, Firmware Ver, and Profile (Region) (select your device frequency, like AS923).
-
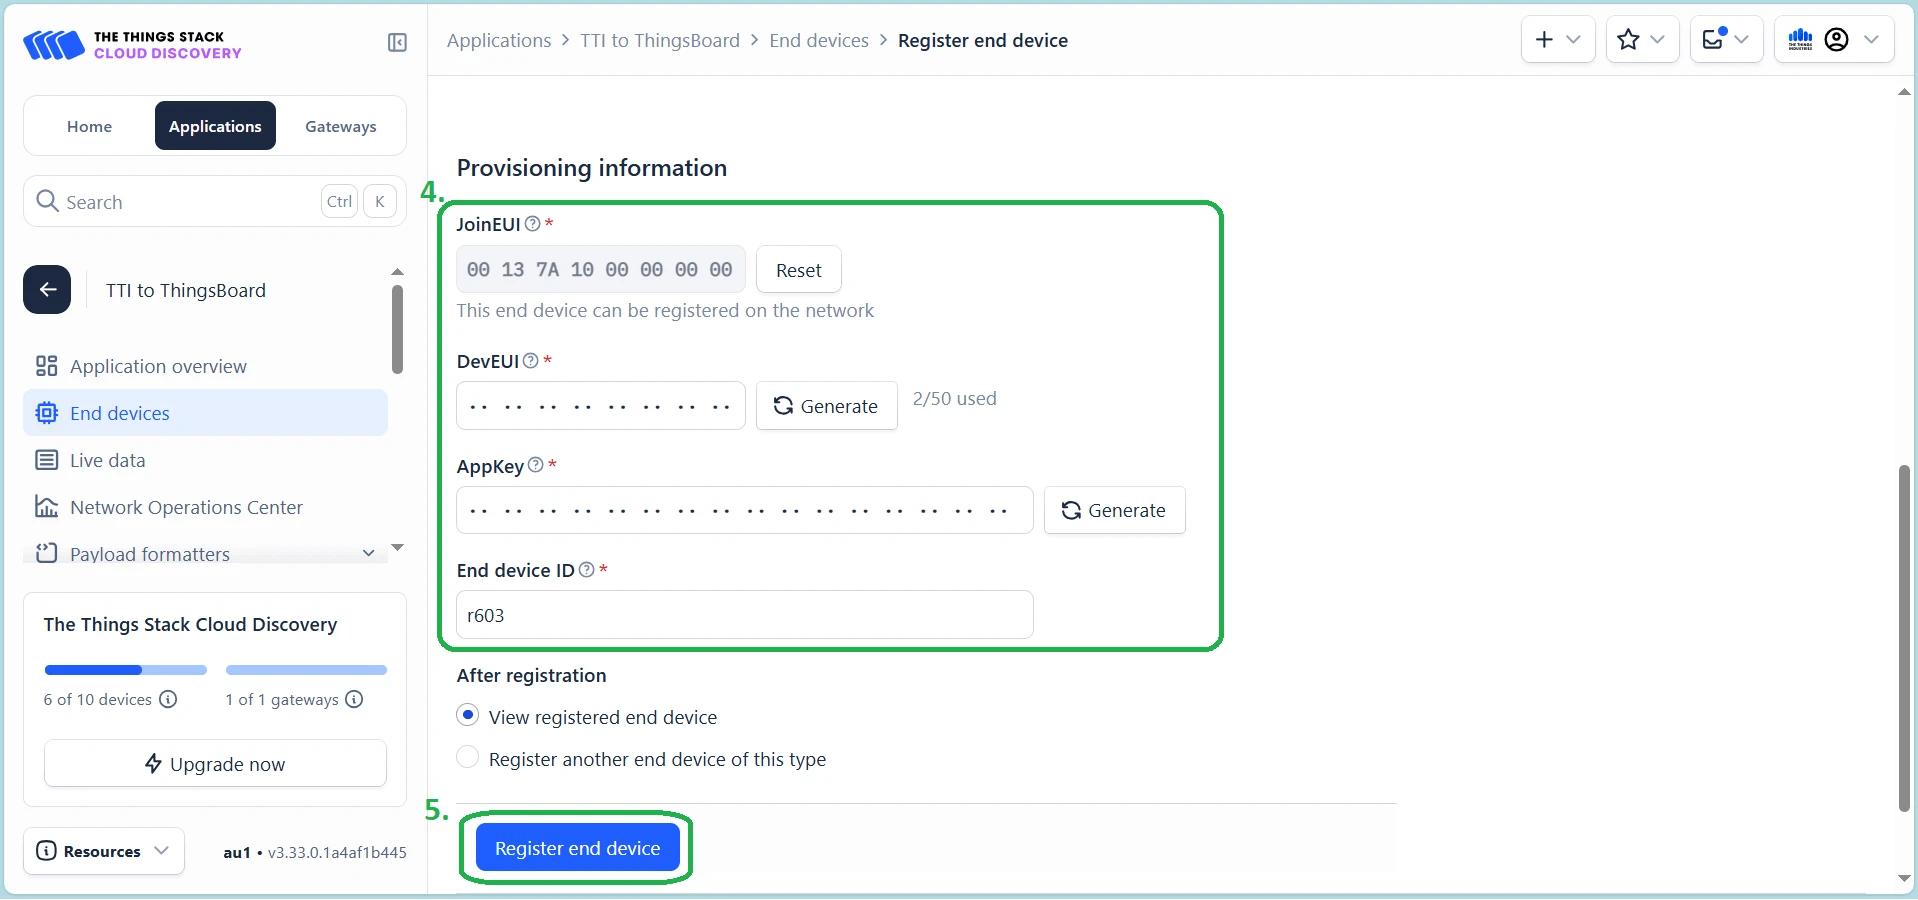
Enter the provisioning information for the device and click Register end device.
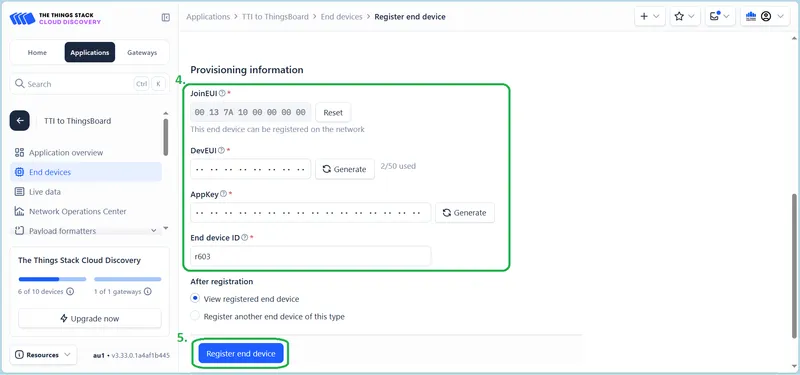
-
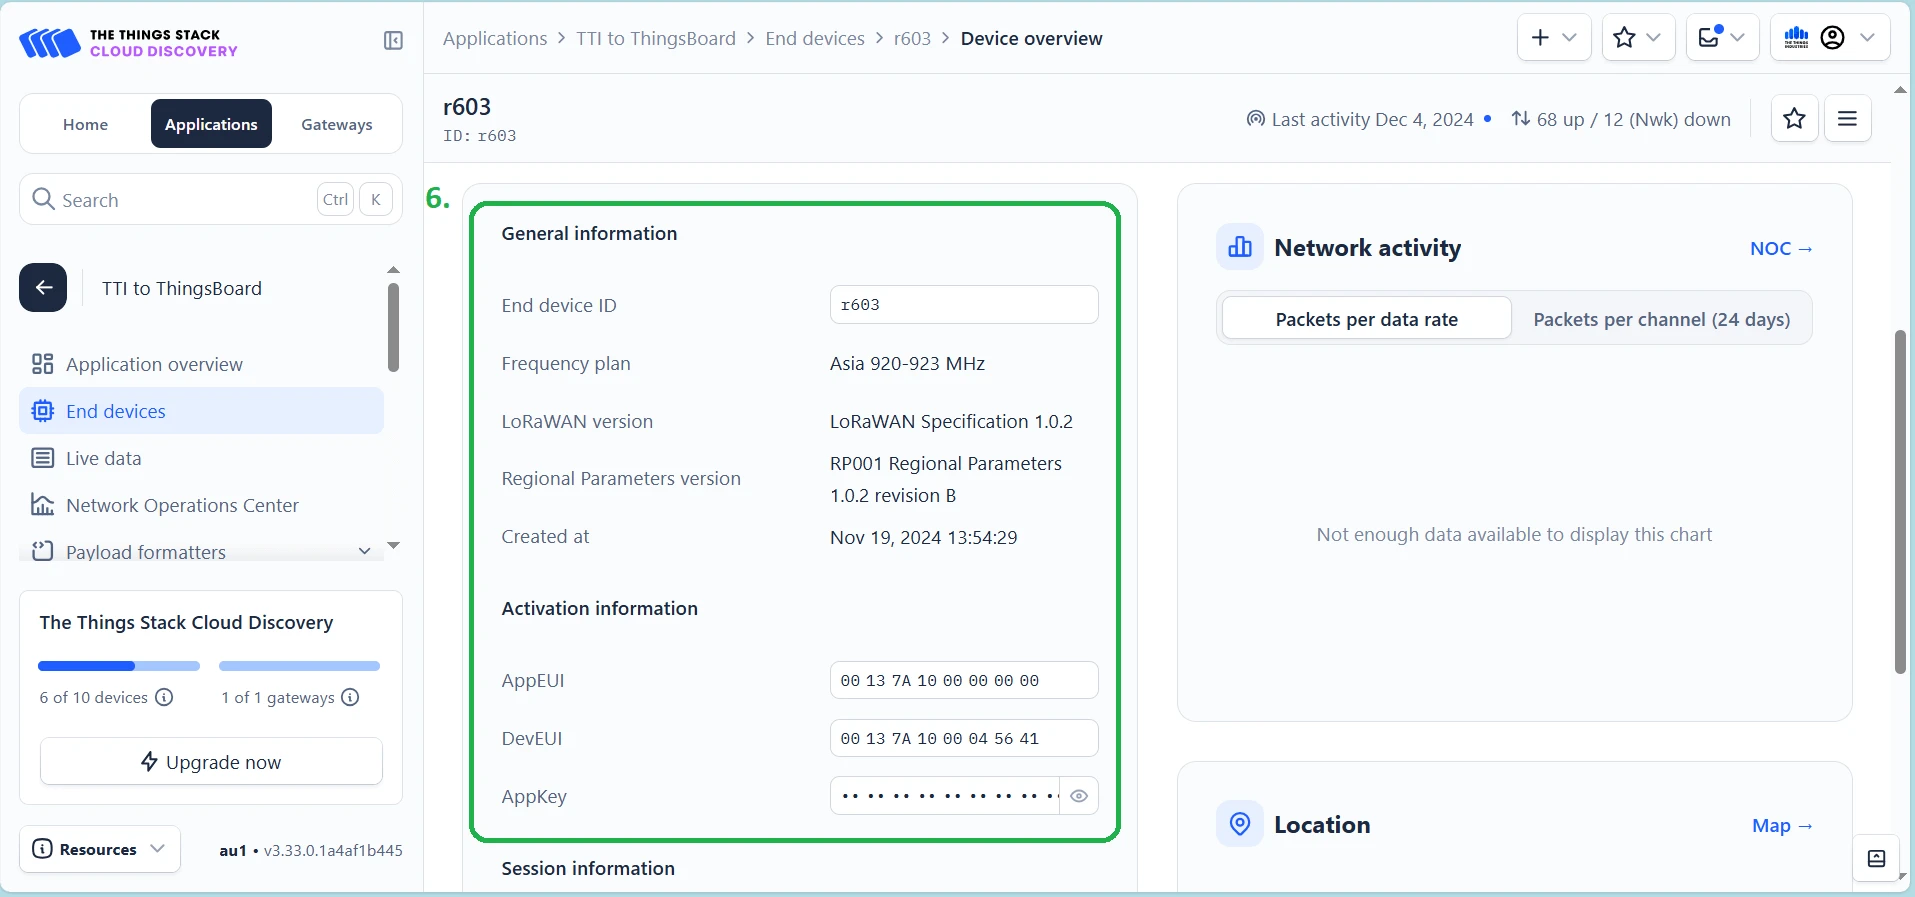
Verify the device information after successful registration.

Network joining
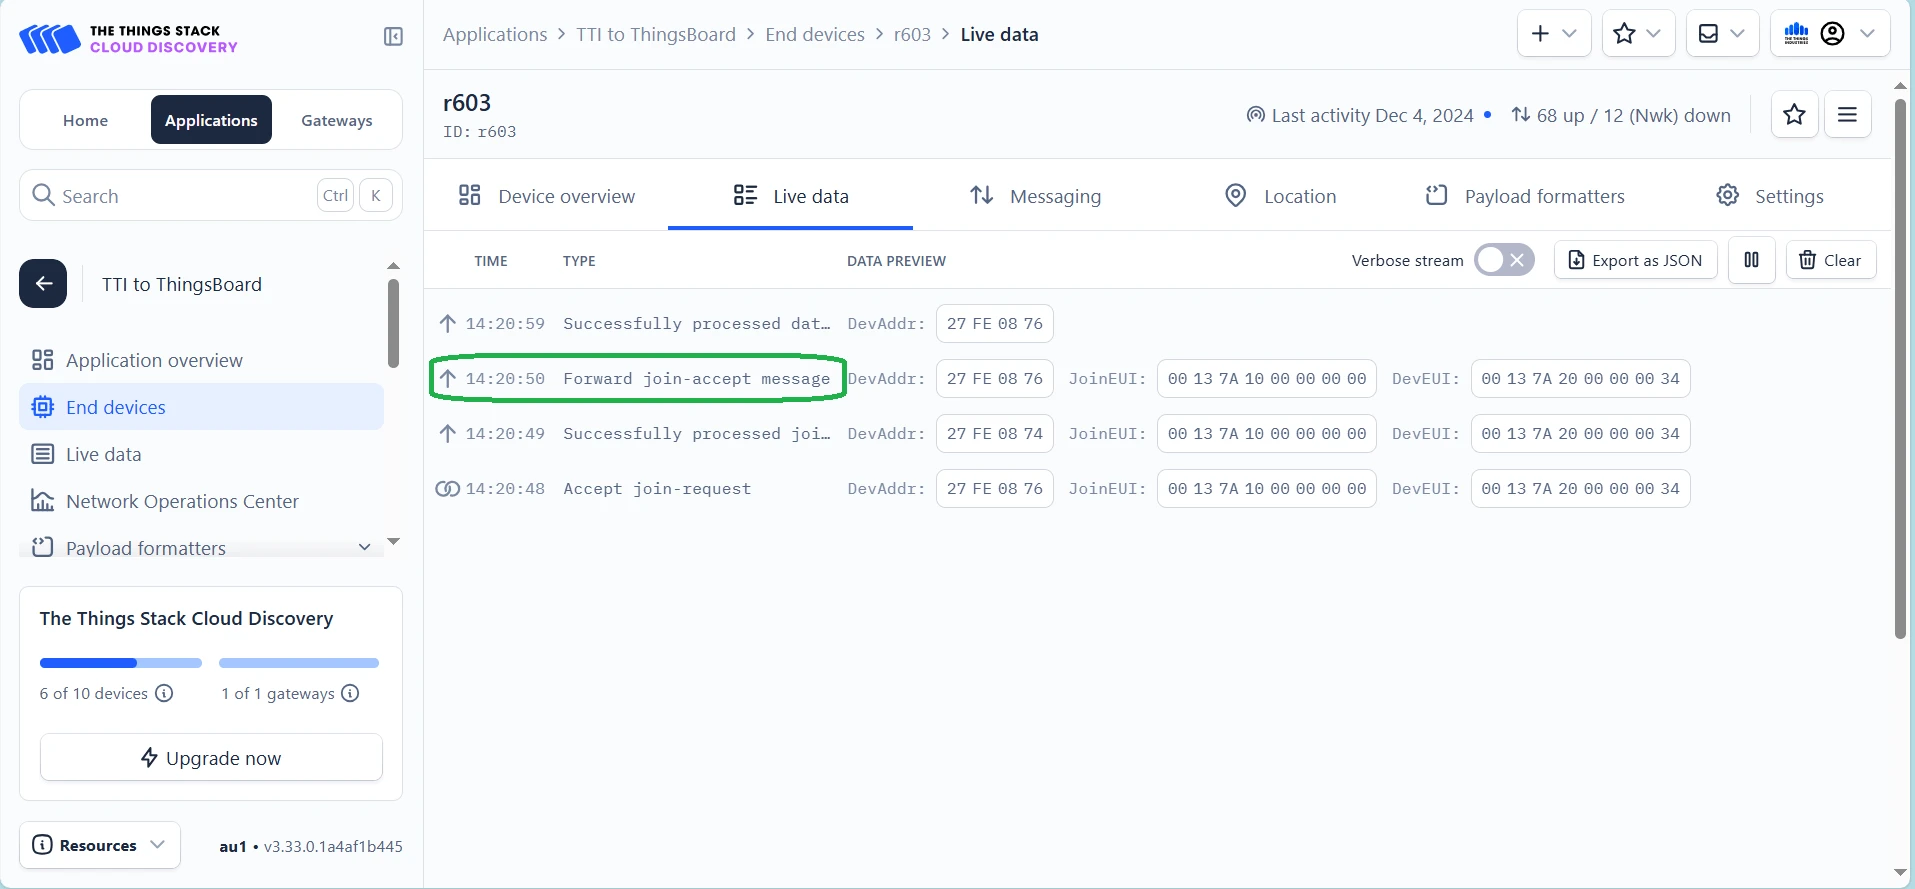
Section titled “Network joining”Turn on the device and make sure it is connected to the Network Server. See the Netvox devices section below or the official Netvox website for instructions on turning on your device.
Connect the device to ThingsBoard
Section titled “Connect the device to ThingsBoard”Integrations in ThingsBoard is a feature that enables connecting external devices, services, or platforms to ThingsBoard for processing, storing, and visualizing data.
Create integration in ThingsBoard
Section titled “Create integration in ThingsBoard”You need access to ThingsBoard Professional Edition. The easiest way is to use ThingsBoard Cloud. Alternatively, install ThingsBoard using the installation guide.
-
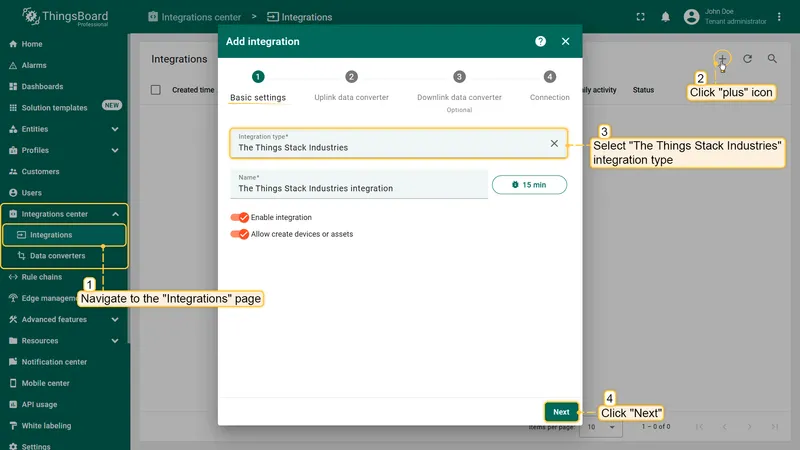
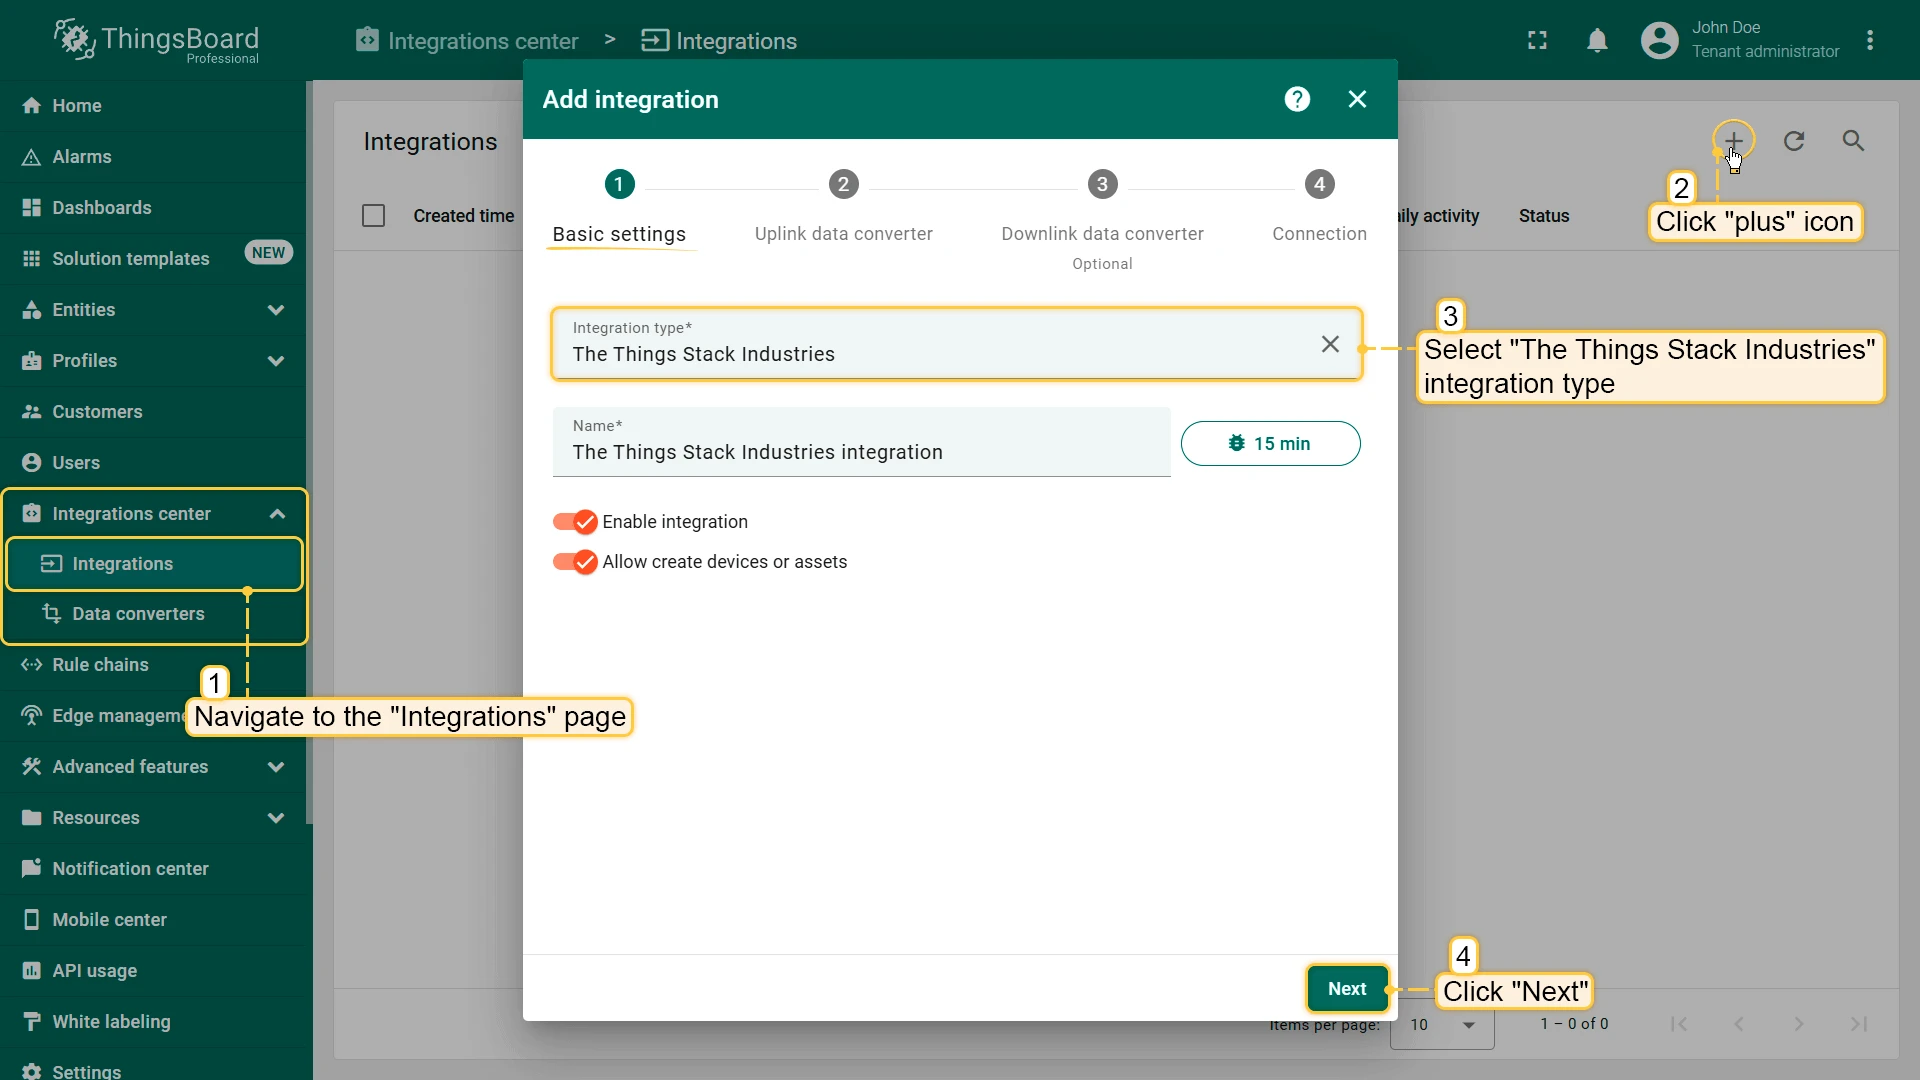
Sign in to ThingsBoard. Go to Integrations center > Integrations, click the + icon in the upper right corner to add a new integration, and select The Things Stack Community as the integration type. Click Next.
-
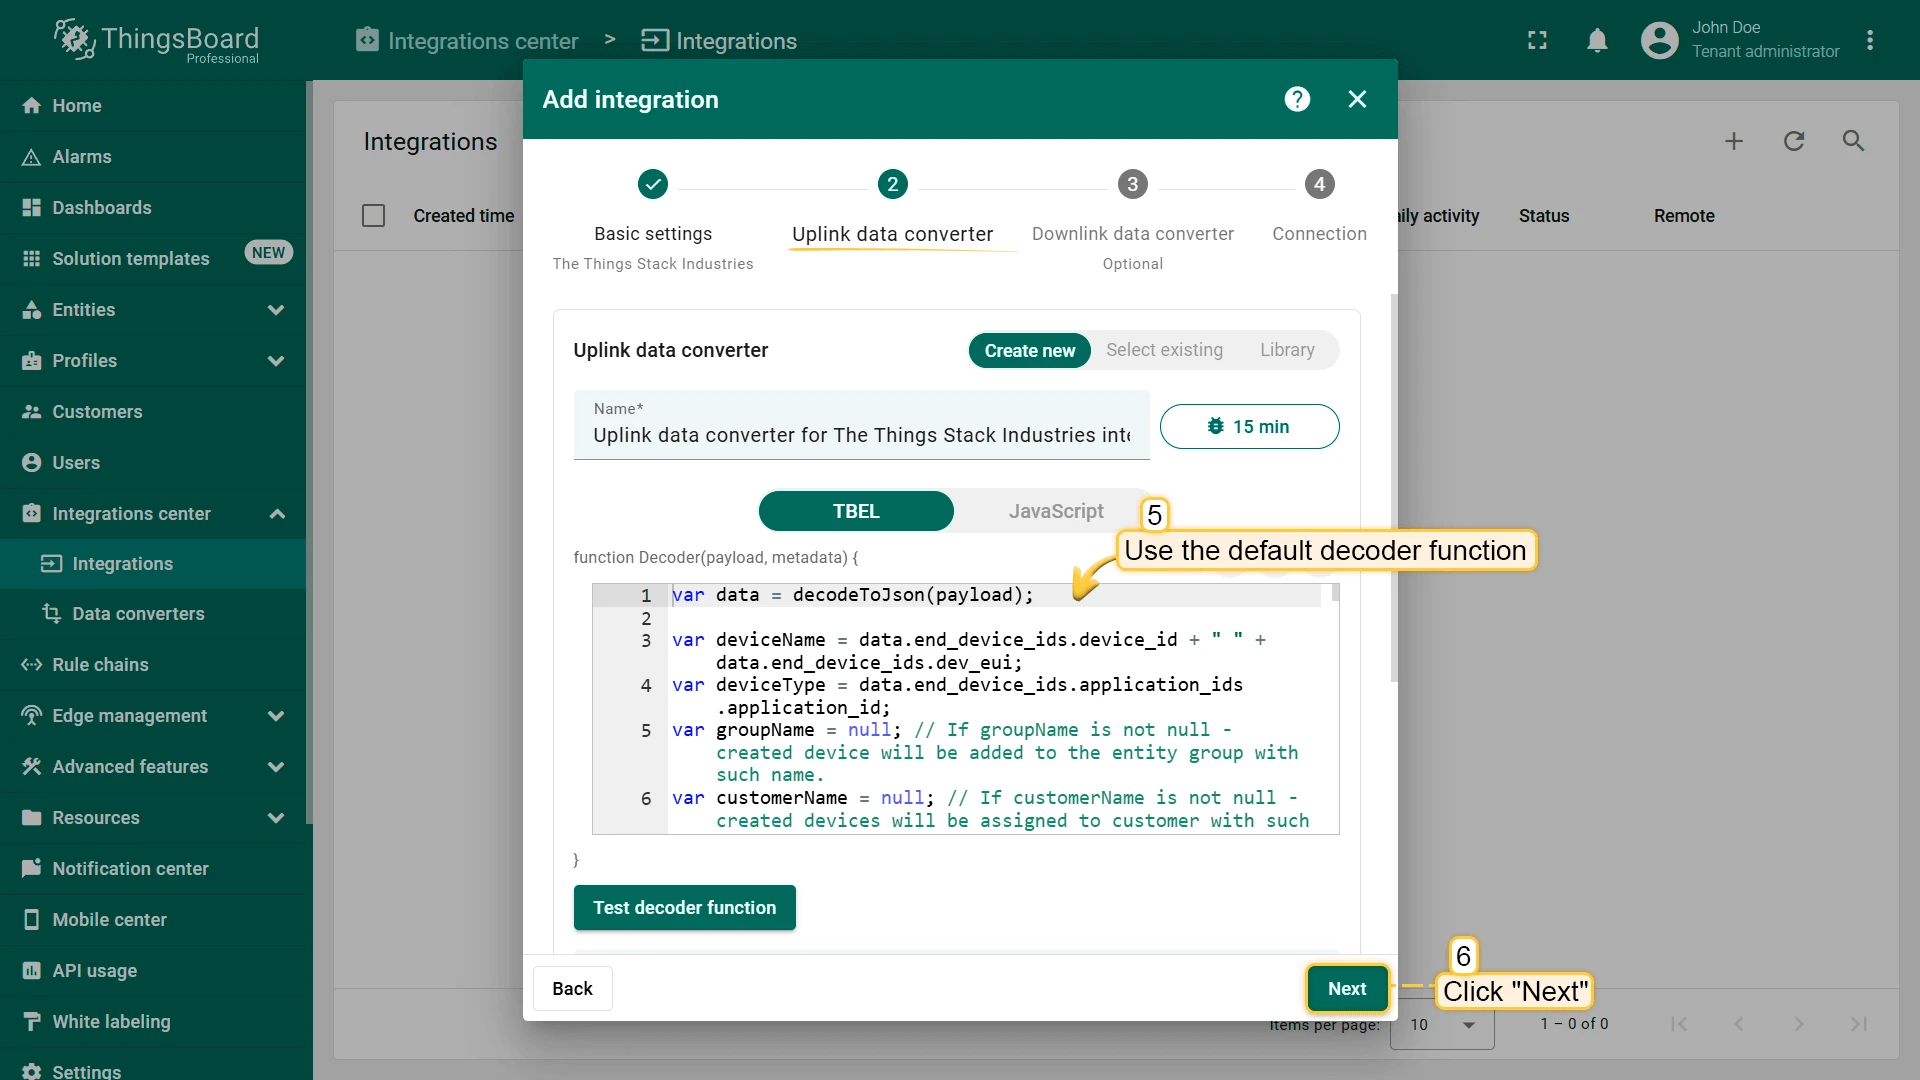
Use the default Decoder function and click Next.

-
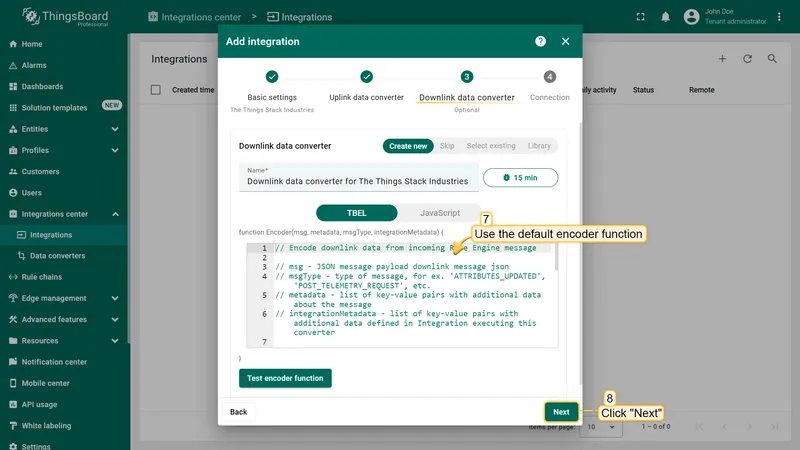
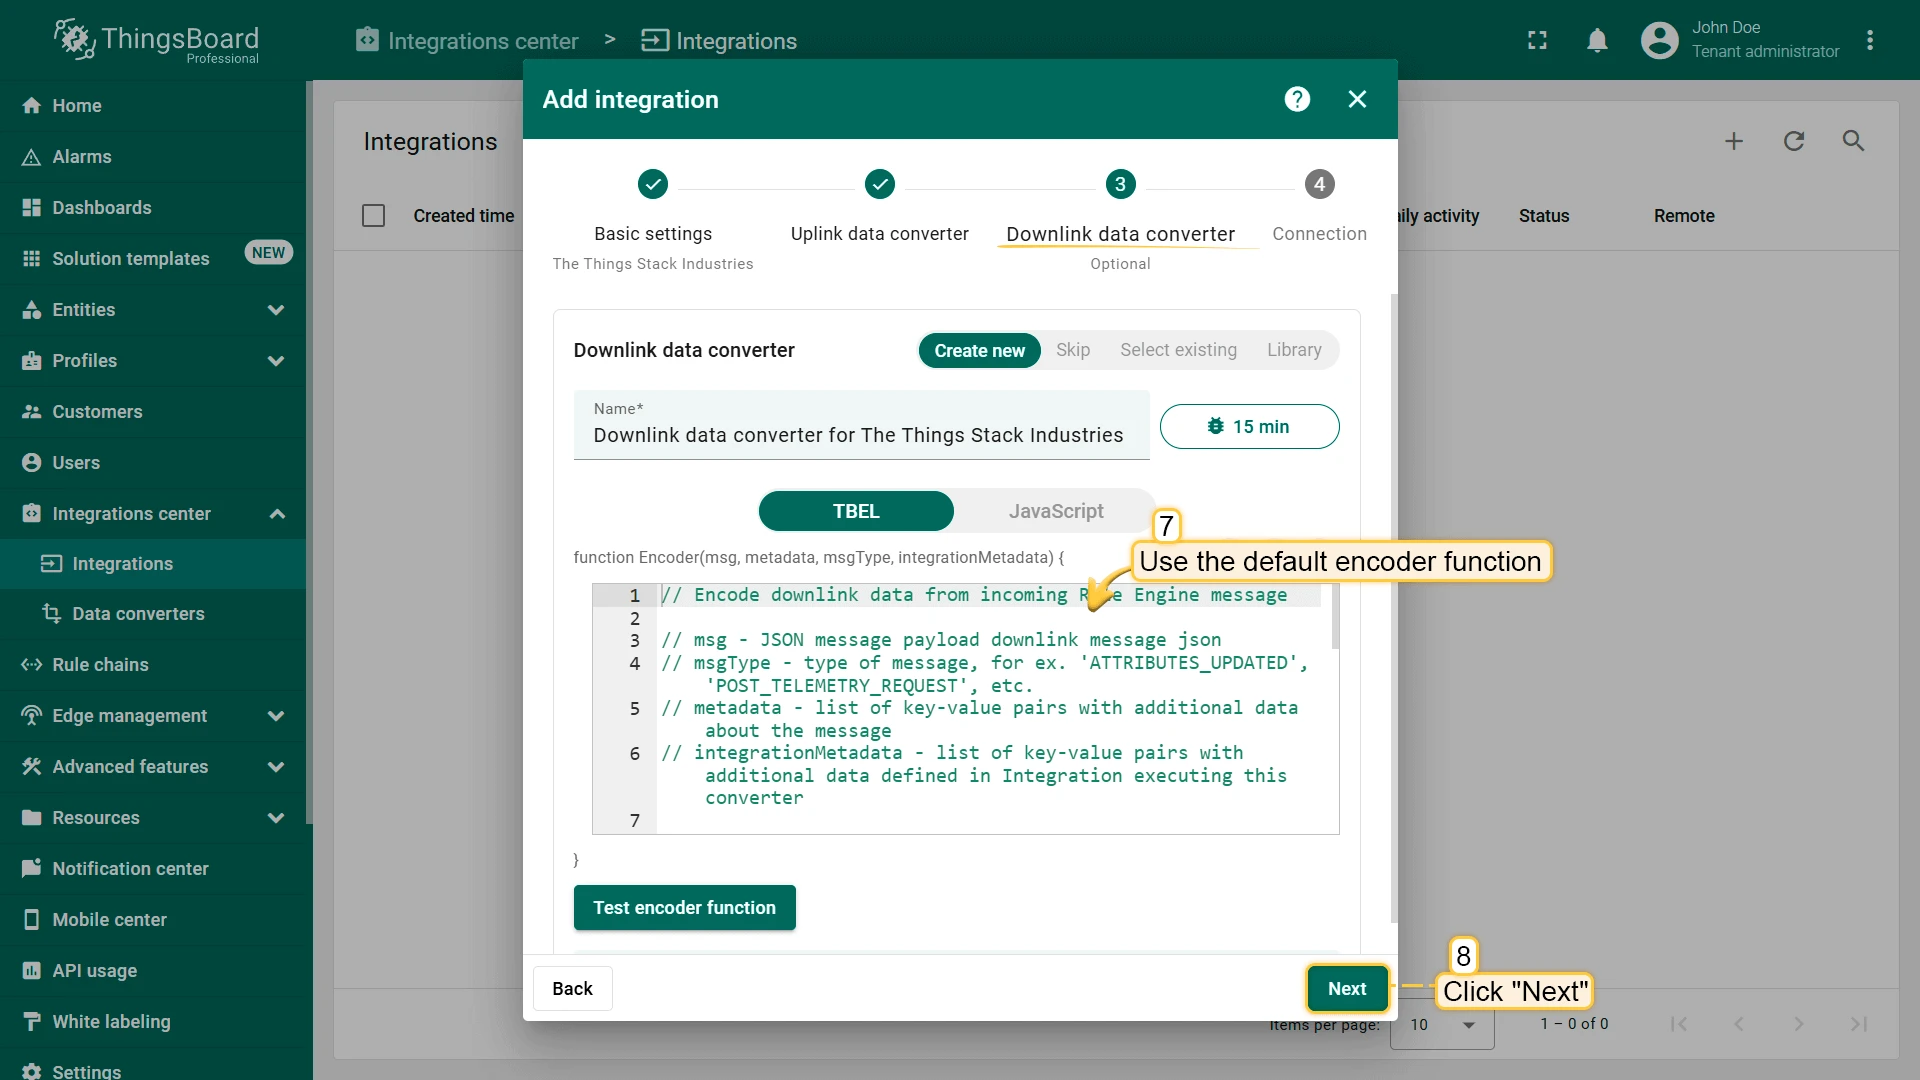
Use the default Encoder function and click Next.
-
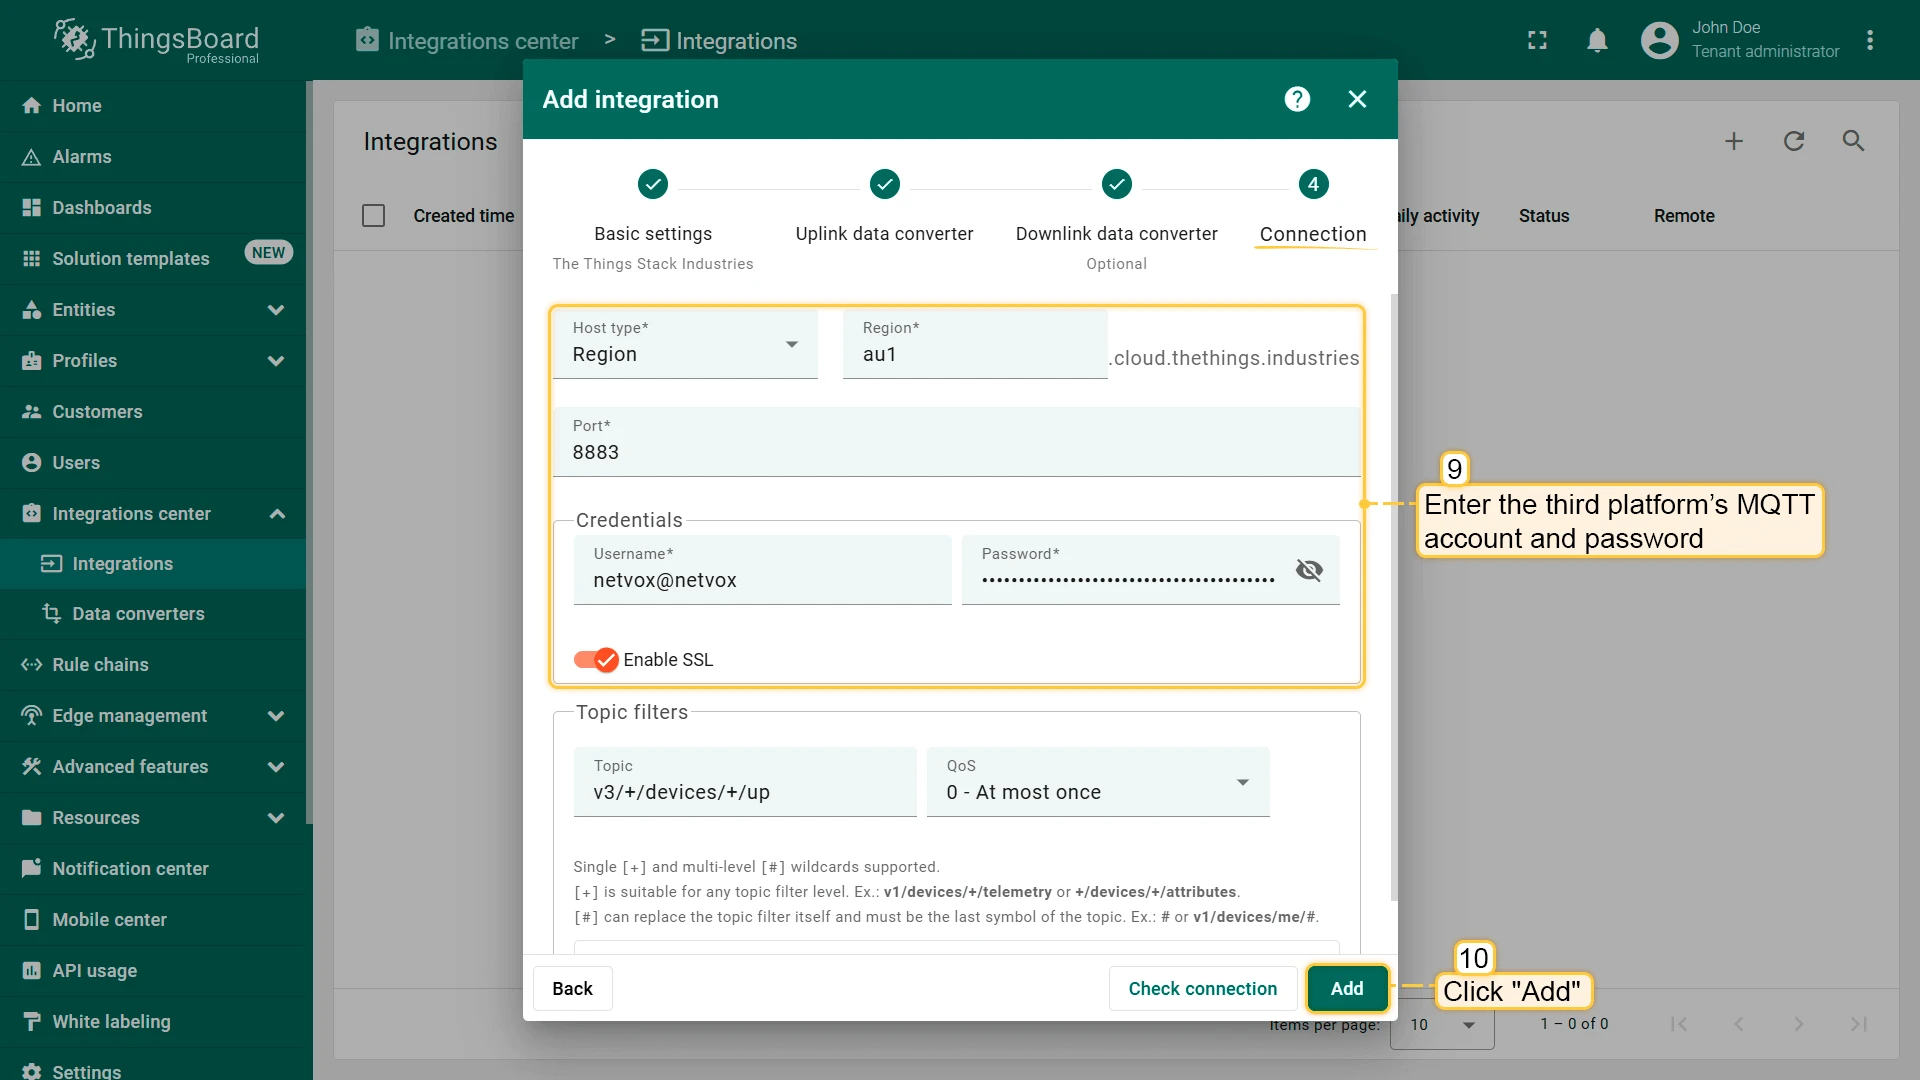
Fill in the connection fields with your parameters. Enter the third-party platform’s MQTT account and password, then click Add.

Check the device list
Section titled “Check the device list”Devices are basic IoT entities that may produce telemetry data and handle RPC commands, like sensors, actuators, and switches.
-
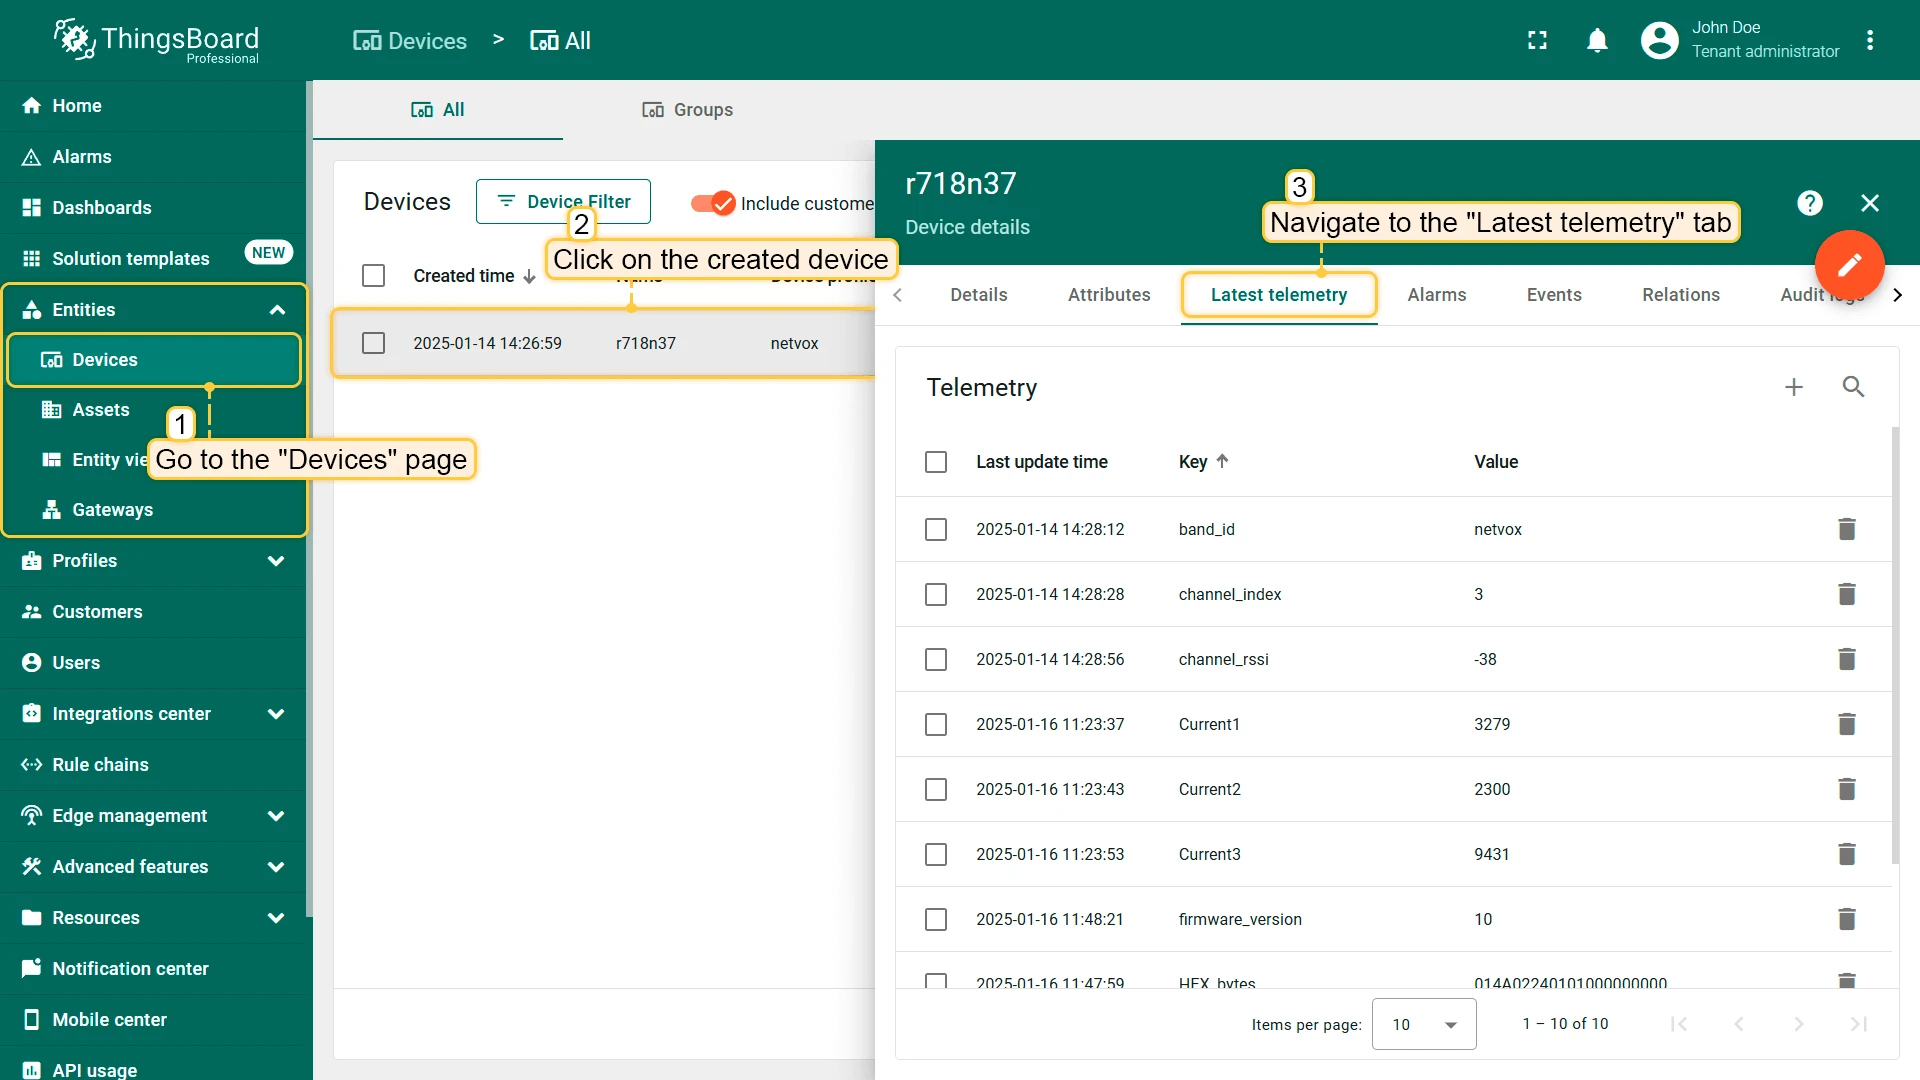
Go to Entities > Devices, click the created device (if the device does not appear in the list, reboot the device), and navigate to the Latest telemetry tab to verify the incoming data.

Create dashboard
Section titled “Create dashboard”A Dashboard in ThingsBoard allows users to visualize and monitor data collected from IoT devices.
-
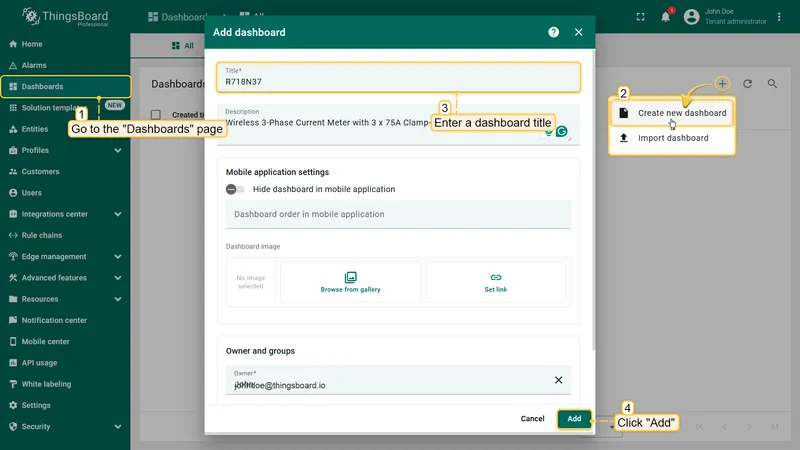
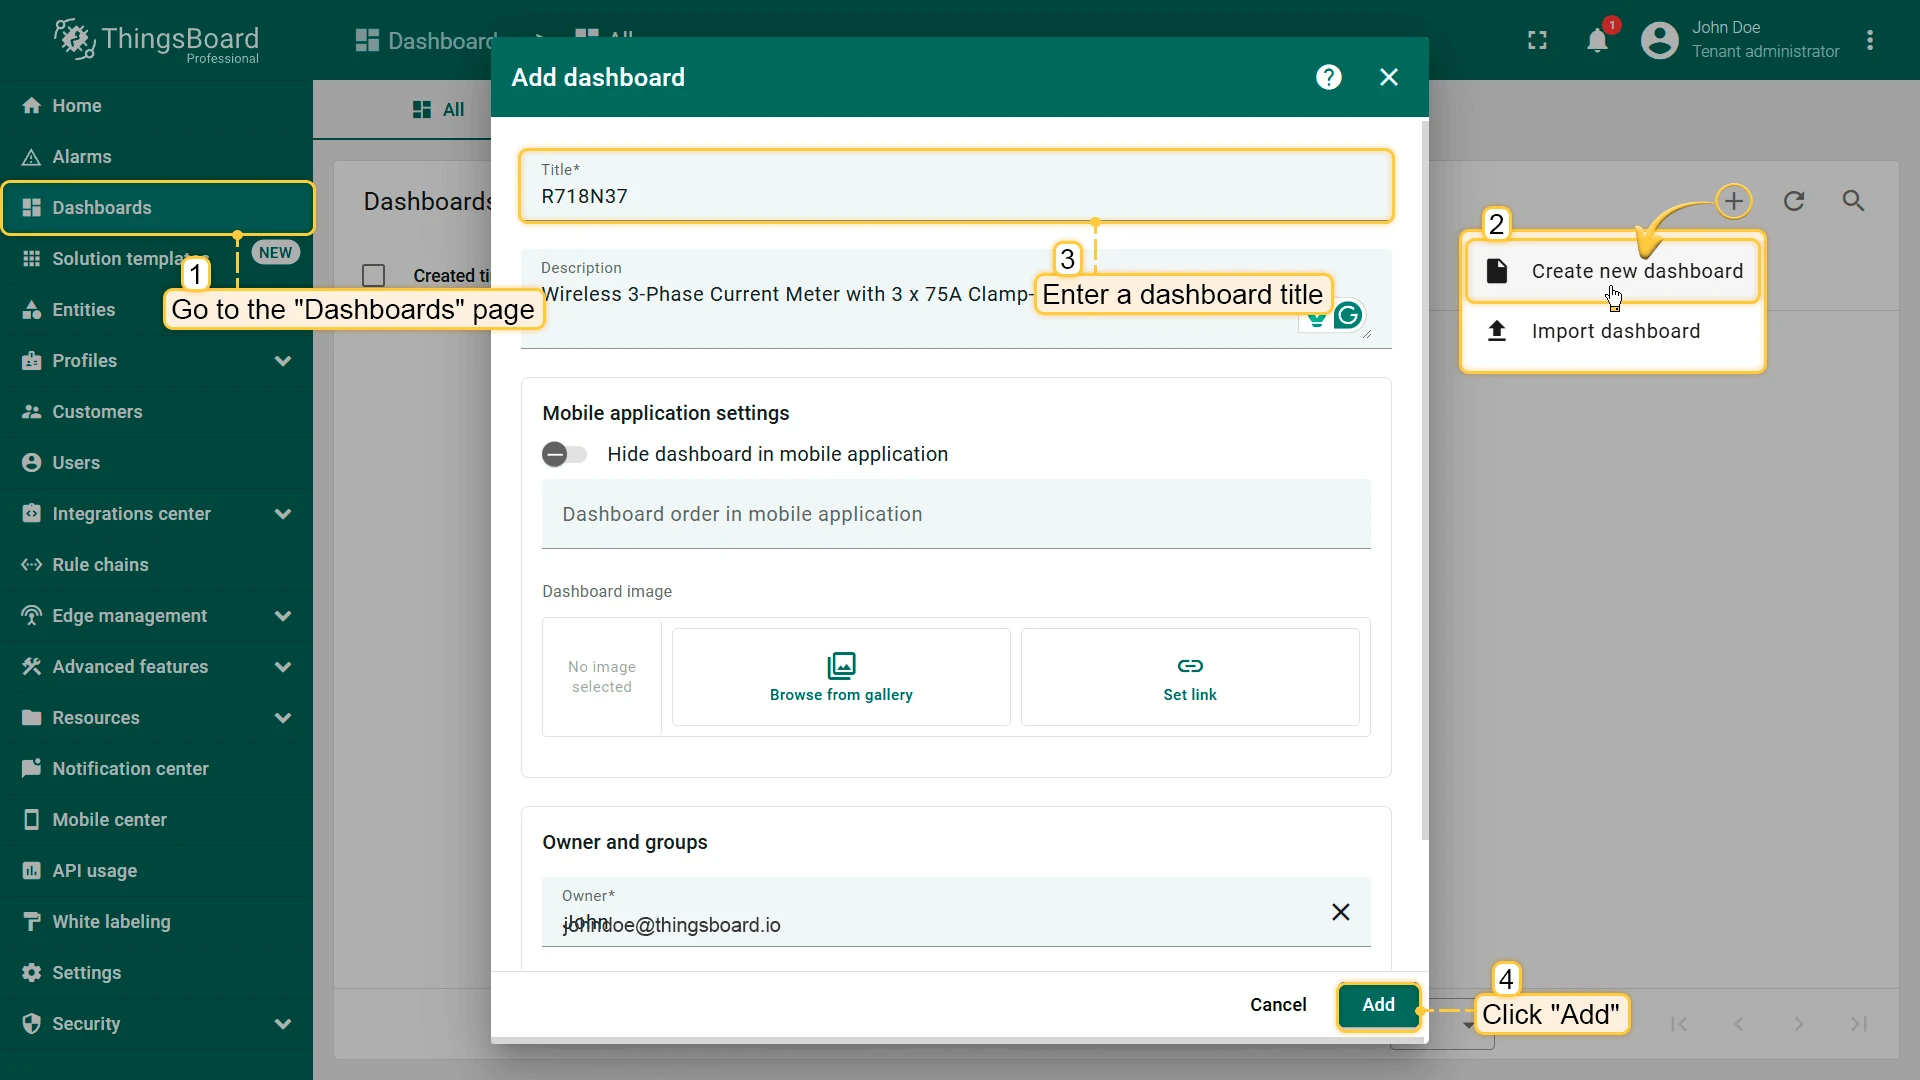
Go to Dashboards, click +, and select Create new dashboard from the drop-down menu. Enter the dashboard title and click Add.
-
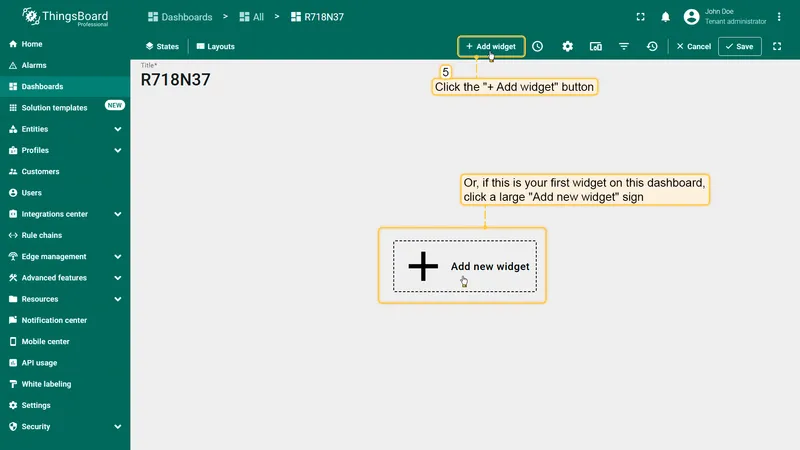
Click + Add widget at the top of the screen (or the large Add new widget icon if this is your first widget).
-
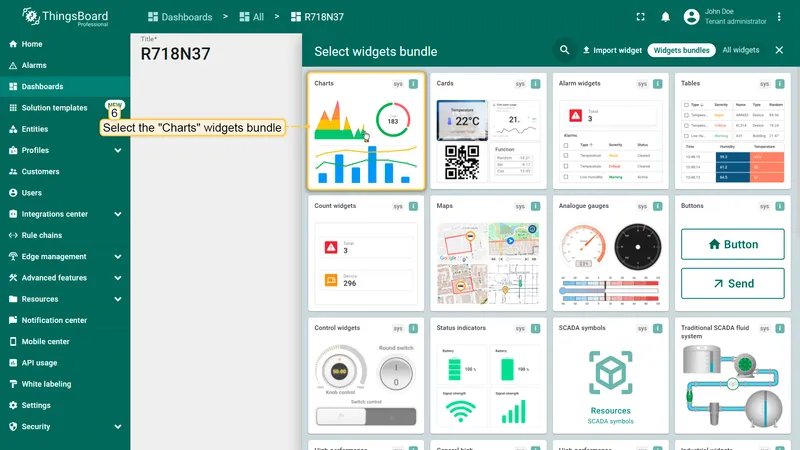
Find the Charts widget bundle and click on it.
-
Select the Bars widget.

-
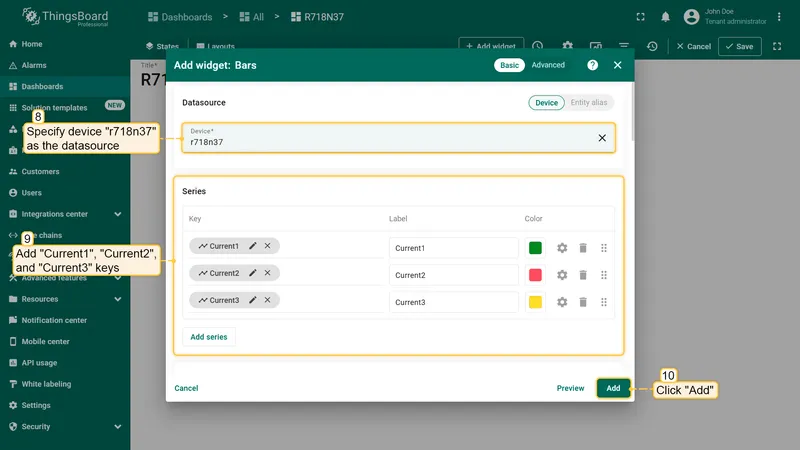
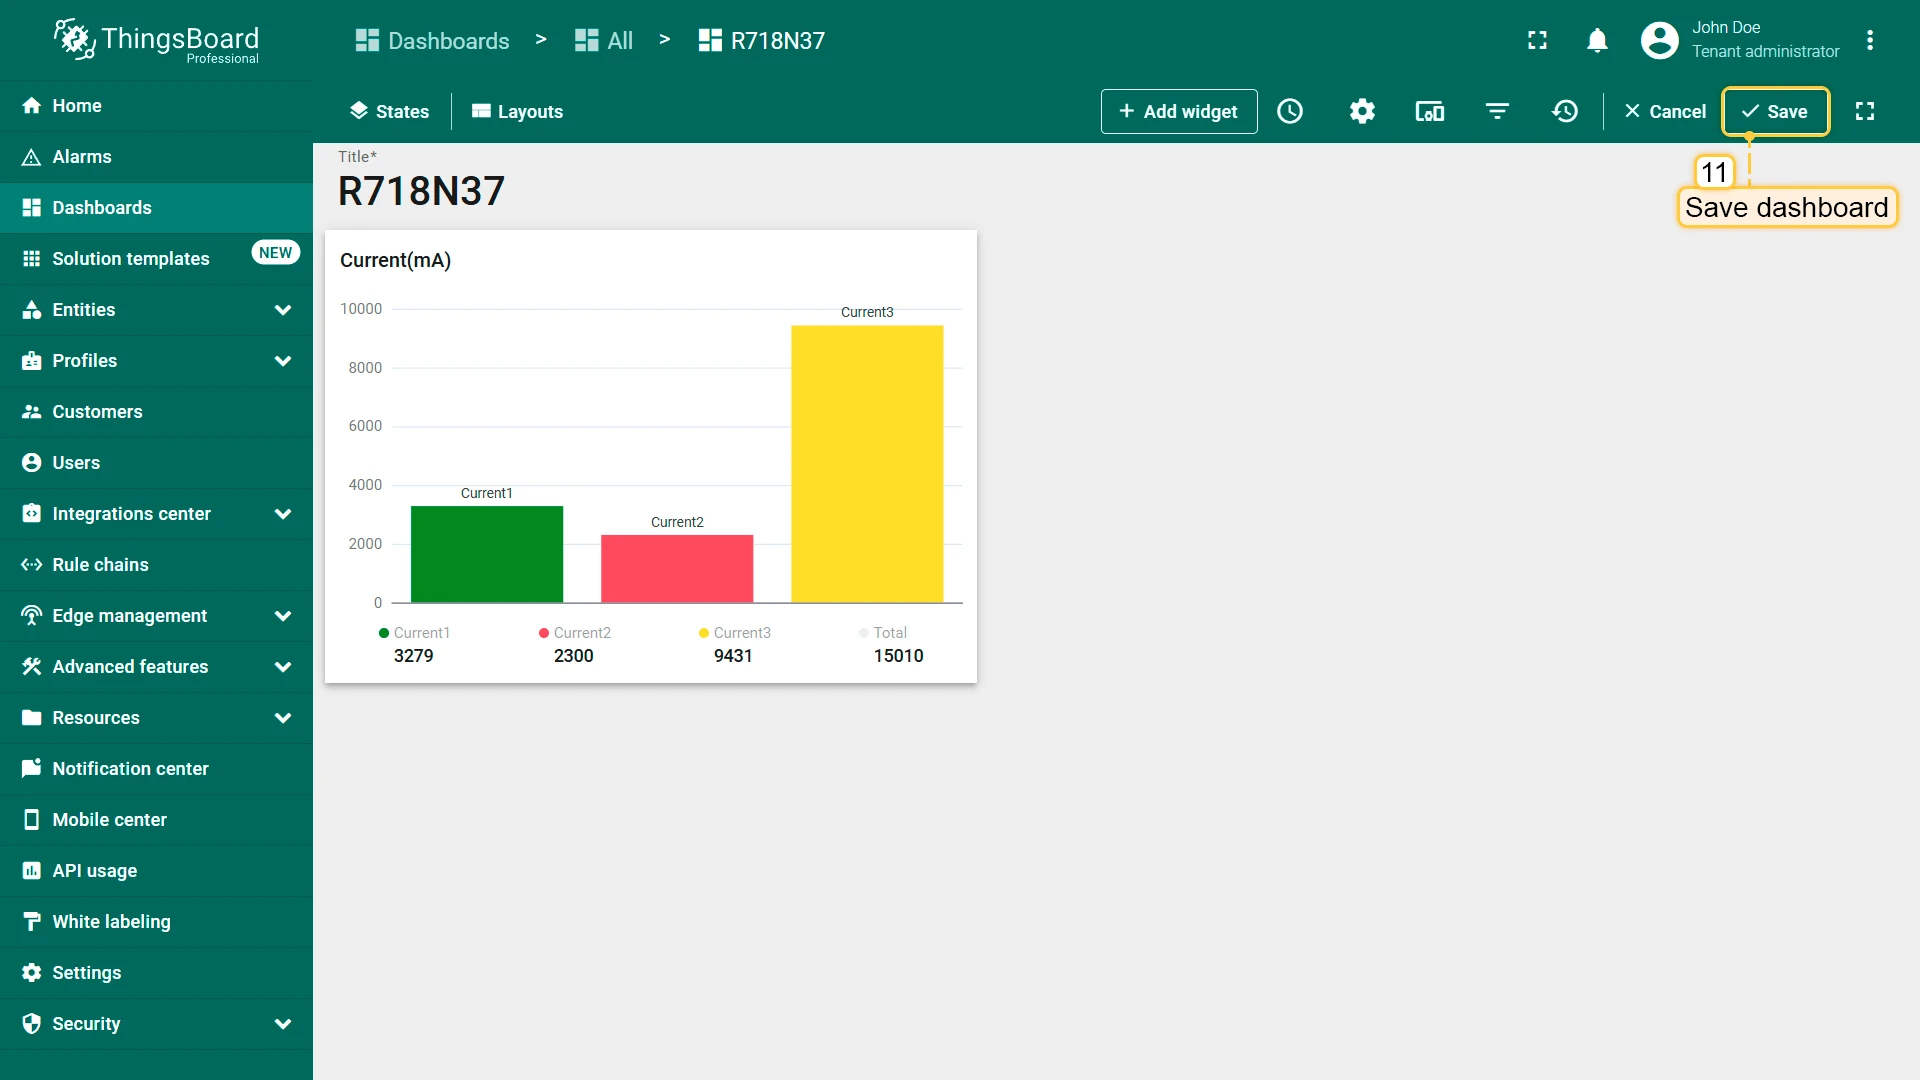
Specify the device r718n37 as the datasource, add Current1, Current2, and Current3 keys, then click Add.
-
Drag the bottom-right corner to resize the widget, then click Save to save your changes.

-
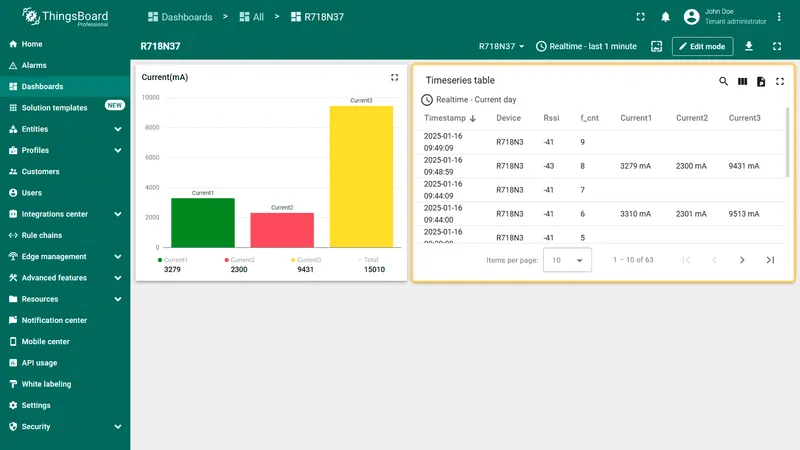
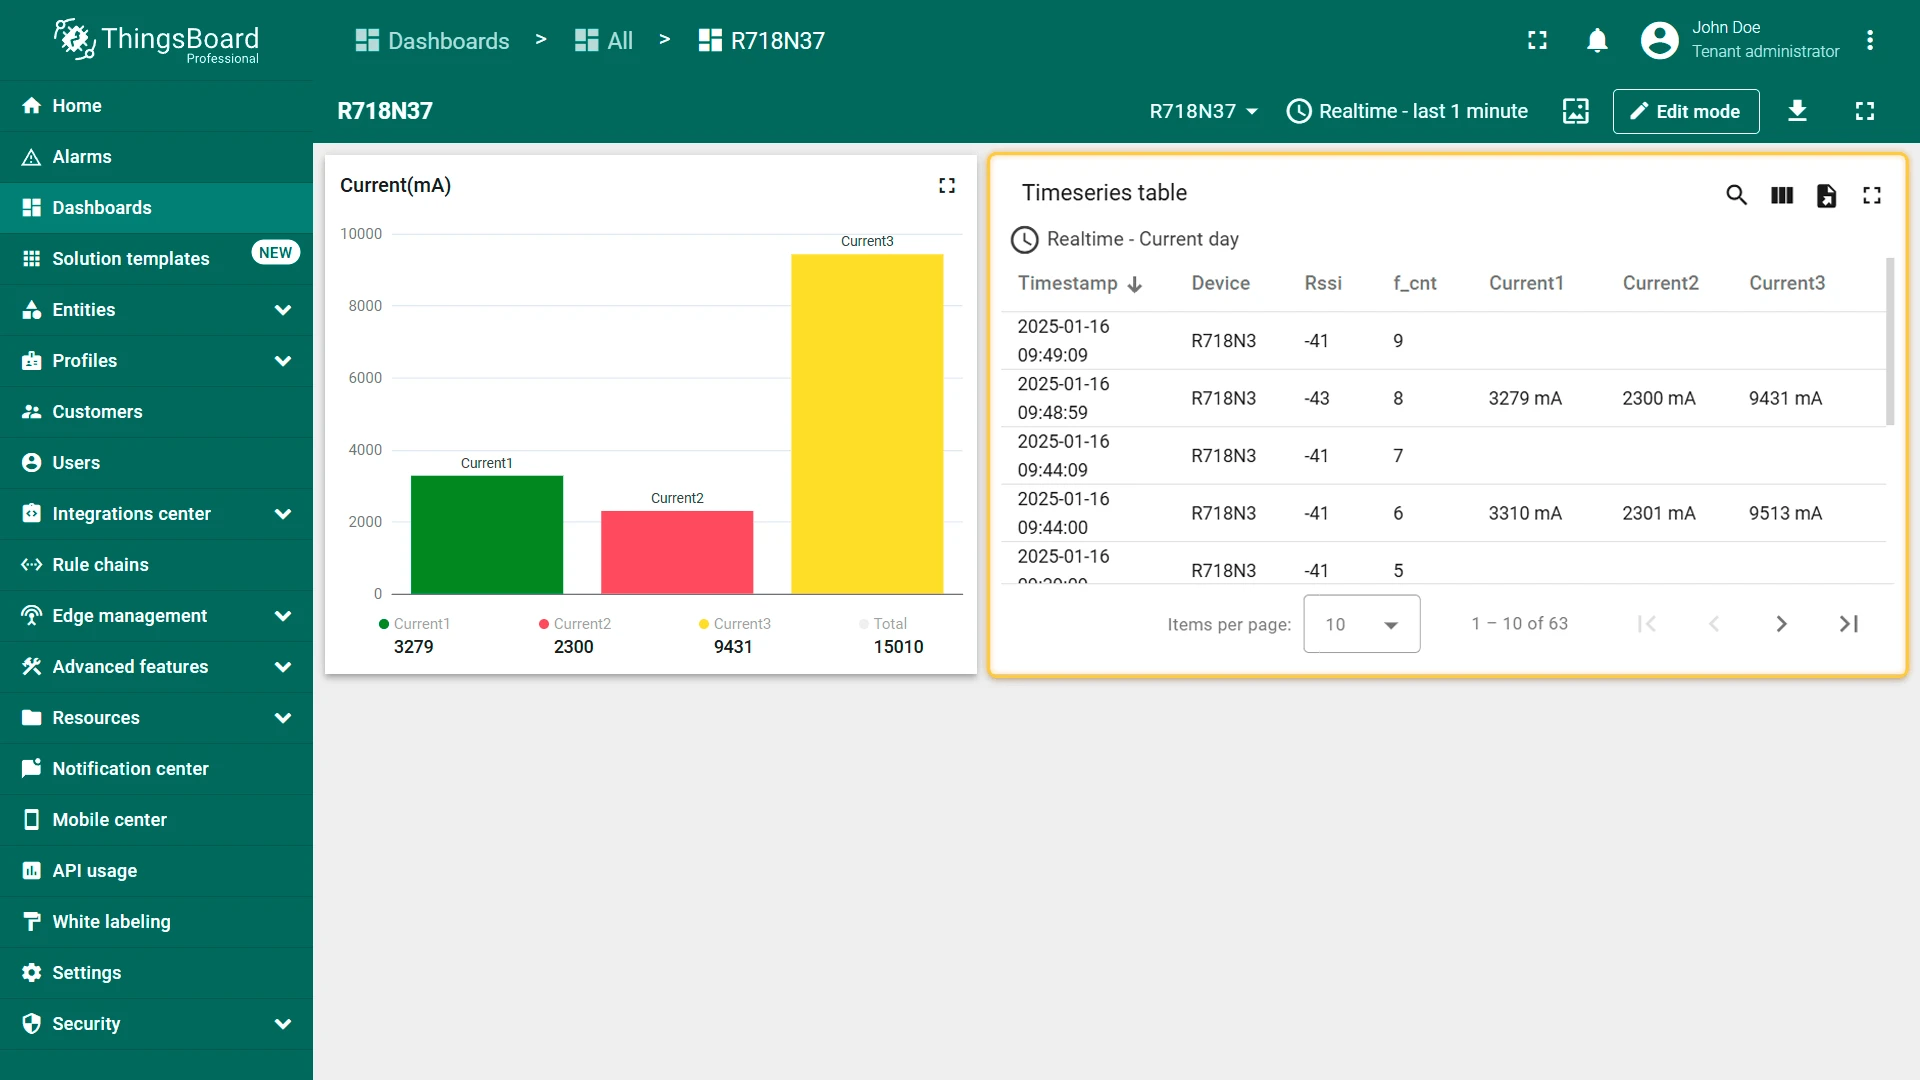
Add another widget. Select Timeseries table to display historical data alongside the chart. Learn more about widgets in the widgets documentation.


Netvox devices
Section titled “Netvox devices”| Model | Power supply | Turn on |
|---|---|---|
| R311 Series, R312 Series, R313 Series | Battery | Short press any function key until the green and red indicator flashes once. Like R311A, R311B, R313CB, R313DA, R312A |
| R711, R315 Series | Battery | Short press the function key until the green indicator flashes once. Like R711, R31501, R315LA |
| R718 Series, R720 Series, RA08B Series | Battery | Press and hold the function key for 3 seconds until the green indicator flashes once. Like R718N37, R718H, R720A, RA08B01S |
| R718 Series, R831 Series, RA08D Series, RA07 Series, RA07xxY Series, R211 | DC in | Plug in the power adapter. Like R718N37D, R718PC, RA08D09S, RA0715, RA0716Y, R831C |
| R726 Series | Solar and rechargeable lithium batteries | Connect a battery pack. Like R72601, R72610, R72630 |
| R60 Series | DC in | Plug in the power adapter. Like R602A, R602B, R603 |
| RA02 Series | Battery | Press any function key until the green indicator flashes once. Like RA02A, RA02C |
| RA02 Series | DC in | Plug in the power adapter. Like RA02G, RA02D1 |
| RB02 Series | Battery | Press the function key until one green indicator flash and one red indicator flash. Like RB02B, RB02C, RB02I |
| R309 | Battery | Press and hold the emergency button for 3 seconds until the green/red indicator flashes once. Like R30901, R30902 |
| R719A | Battery | Hold a magnet to the top cover for 3 seconds. |
| RP02 Series | DC in | Connect a power module. Like RP02RH3PN063 |
| R809 Series | AC 100–240 V | Connect to an AC 100–240 V power source. Like R809A, R809A01 |
| R816 Series | AC 100–240 V | Connect to an AC 100–240 V power source. Like R816A, R816A01 |
More detailed information on the Netvox website.
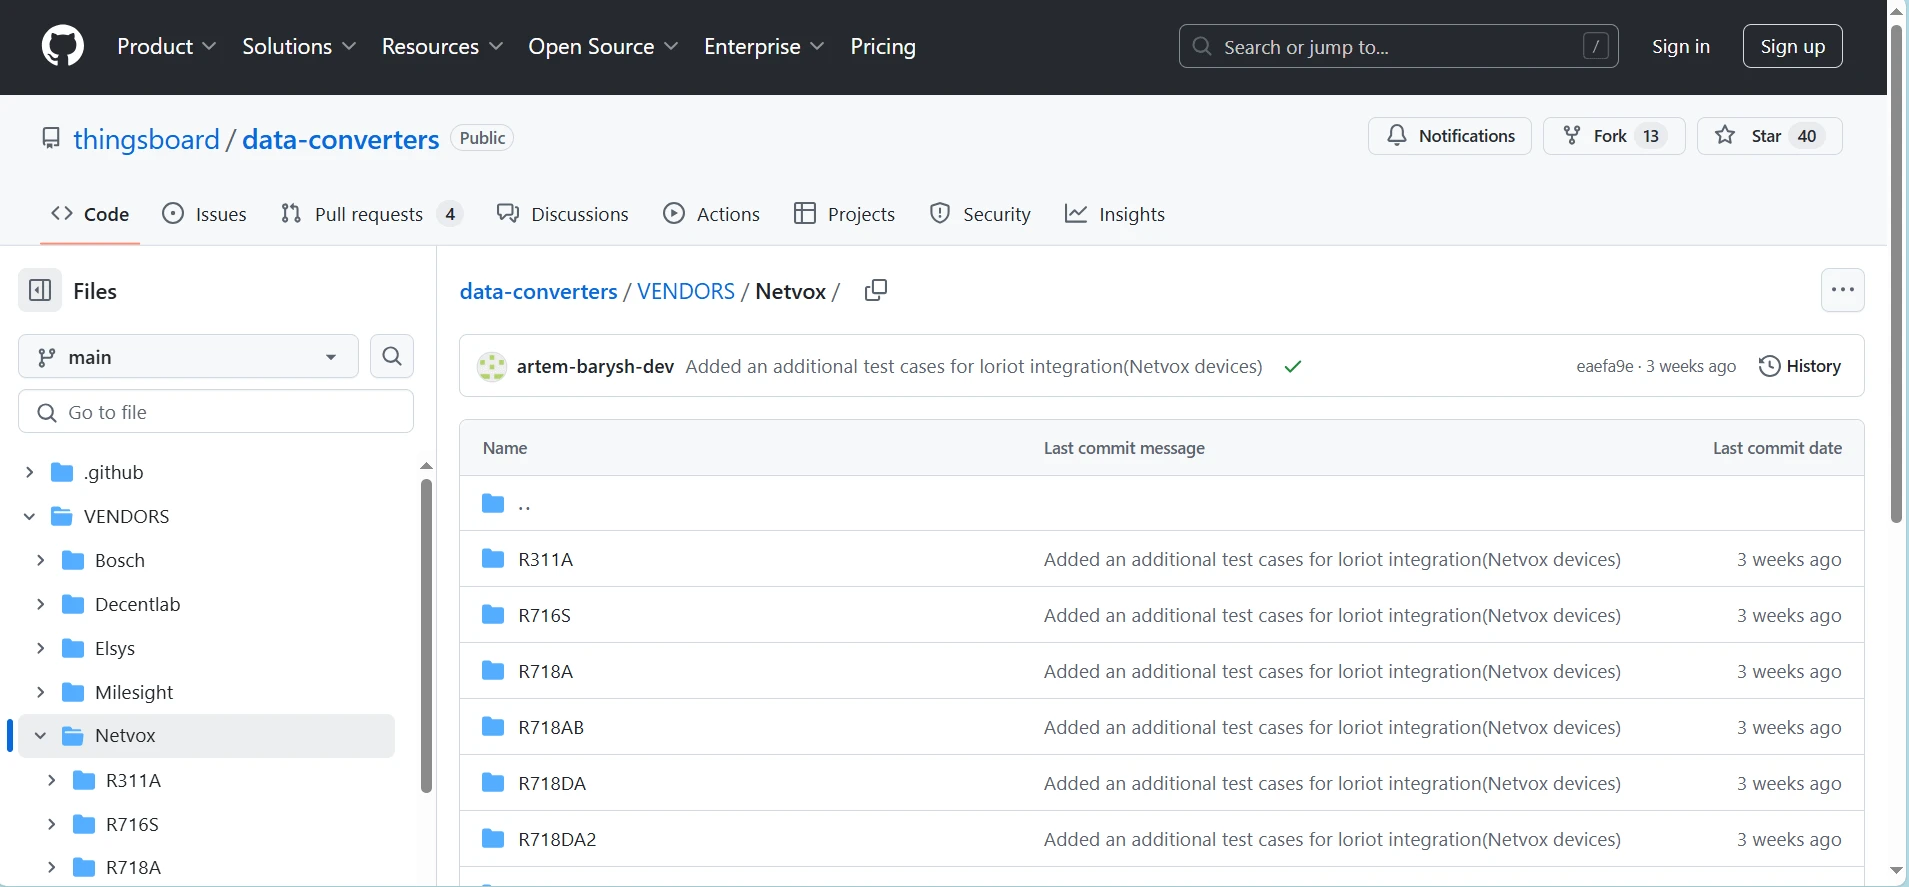
Data converters
Section titled “Data converters”Click to open the data converters library for Netvox devices on GitHub.