Installing ThingsBoard on DigitalOcean
This guide walks you through installing ThingsBoard on DigitalOcean.
Using this guide you will install the “Bring Your Own License” version. You get the license directly from ThingsBoard, Inc, but purchase the server instances and infrastructure from DigitalOcean.
Prerequisites
Section titled “Prerequisites”- Active DigitalOcean account
Step 1. Create a DigitalOcean Droplet
Section titled “Step 1. Create a DigitalOcean Droplet”1.1 Create Droplet
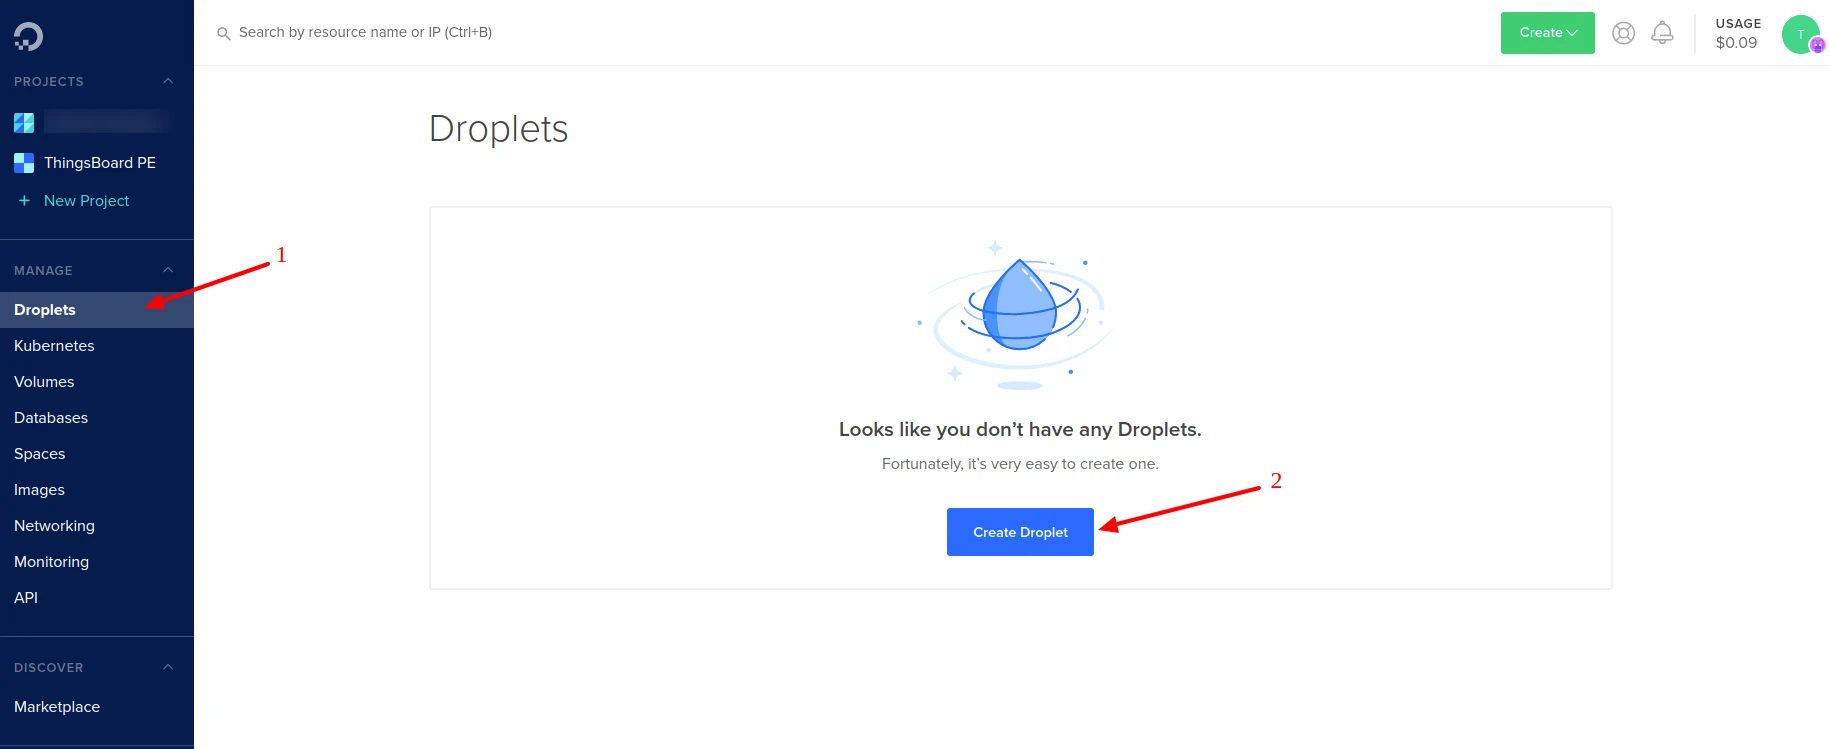
Section titled “1.1 Create Droplet”Log in to your DigitalOcean account. Click the Droplets menu item and then the Create Droplet button.
1.2 Select Your Plan
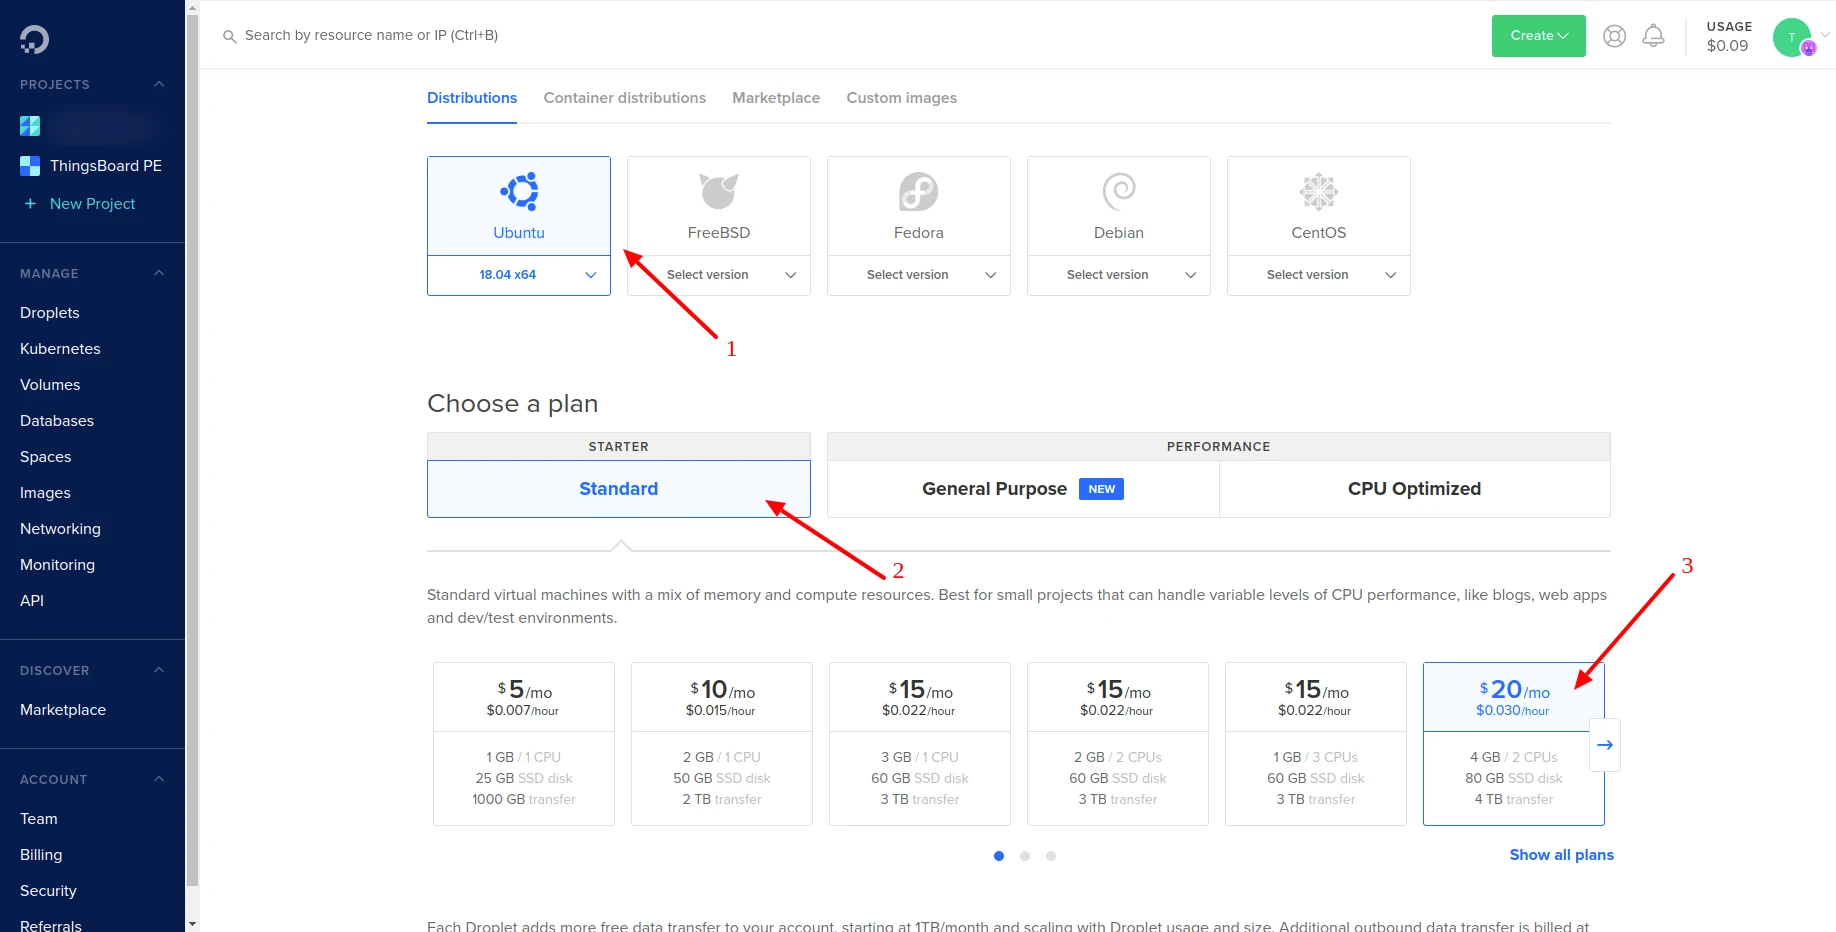
Section titled “1.2 Select Your Plan”Select Ubuntu 24.04 LTS as your image and choose your plan.
1.3 Choose Region
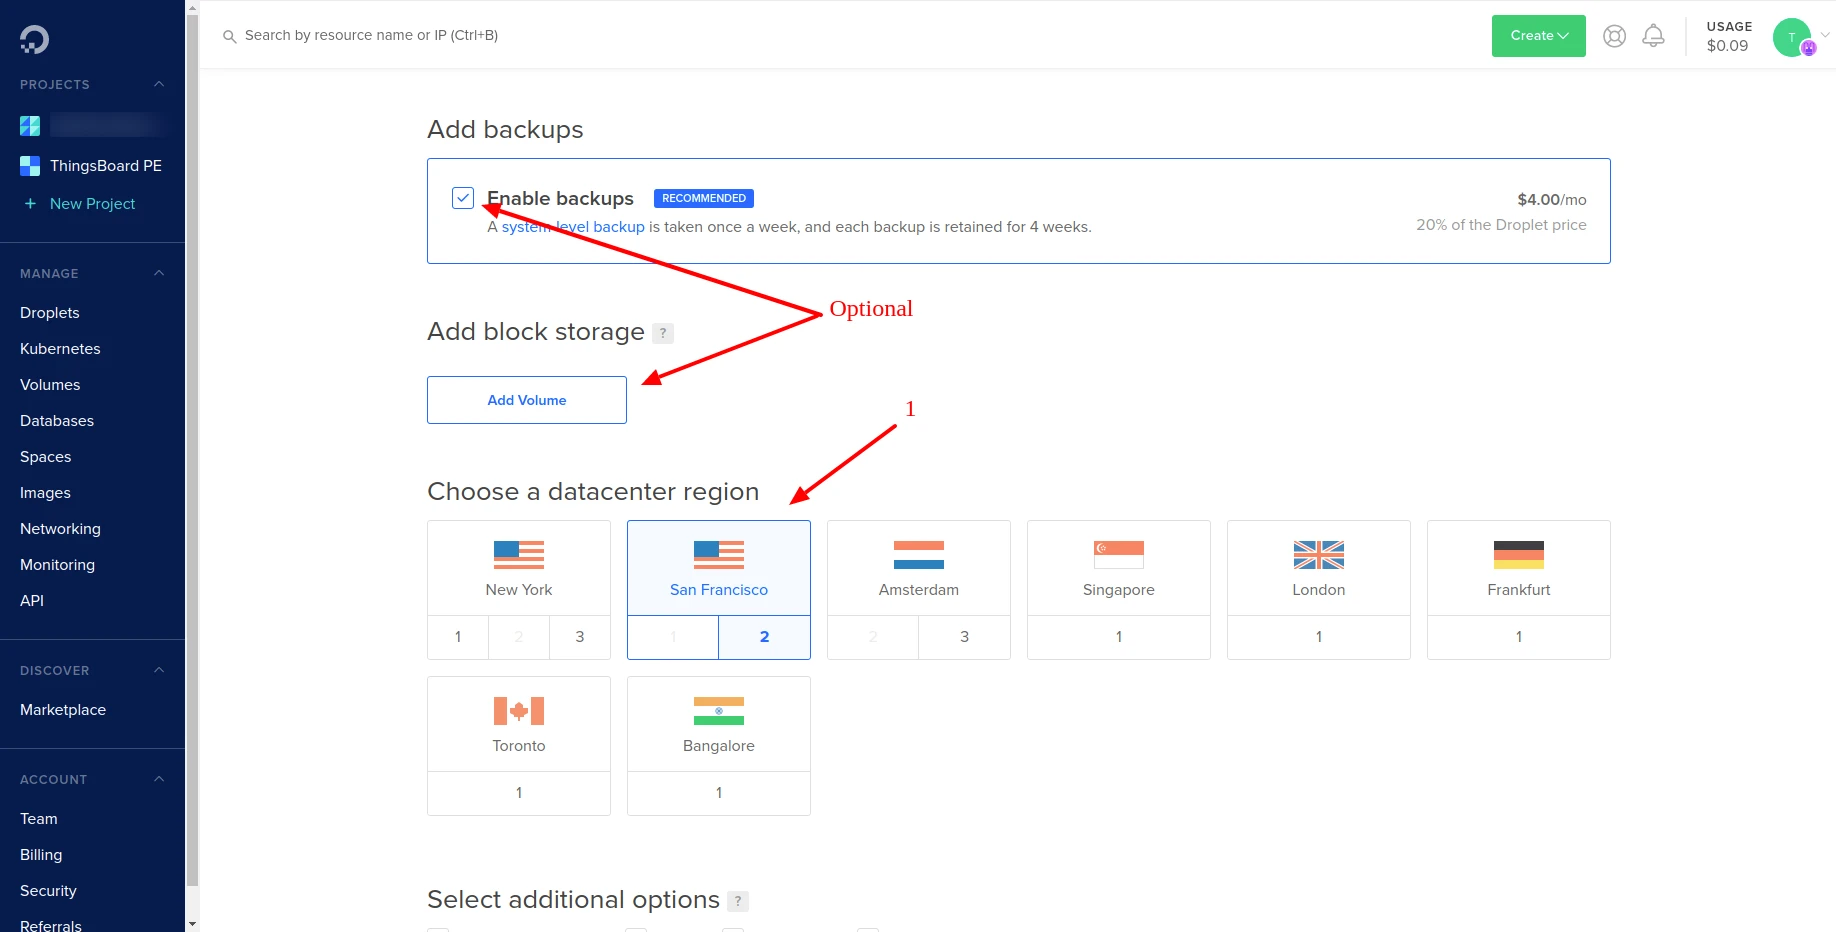
Section titled “1.3 Choose Region”Select a datacenter region from the available list.
- Optional: Enable backups. Although optional, we highly recommend this.
- Optional: Add block storage.
1.4 Authentication
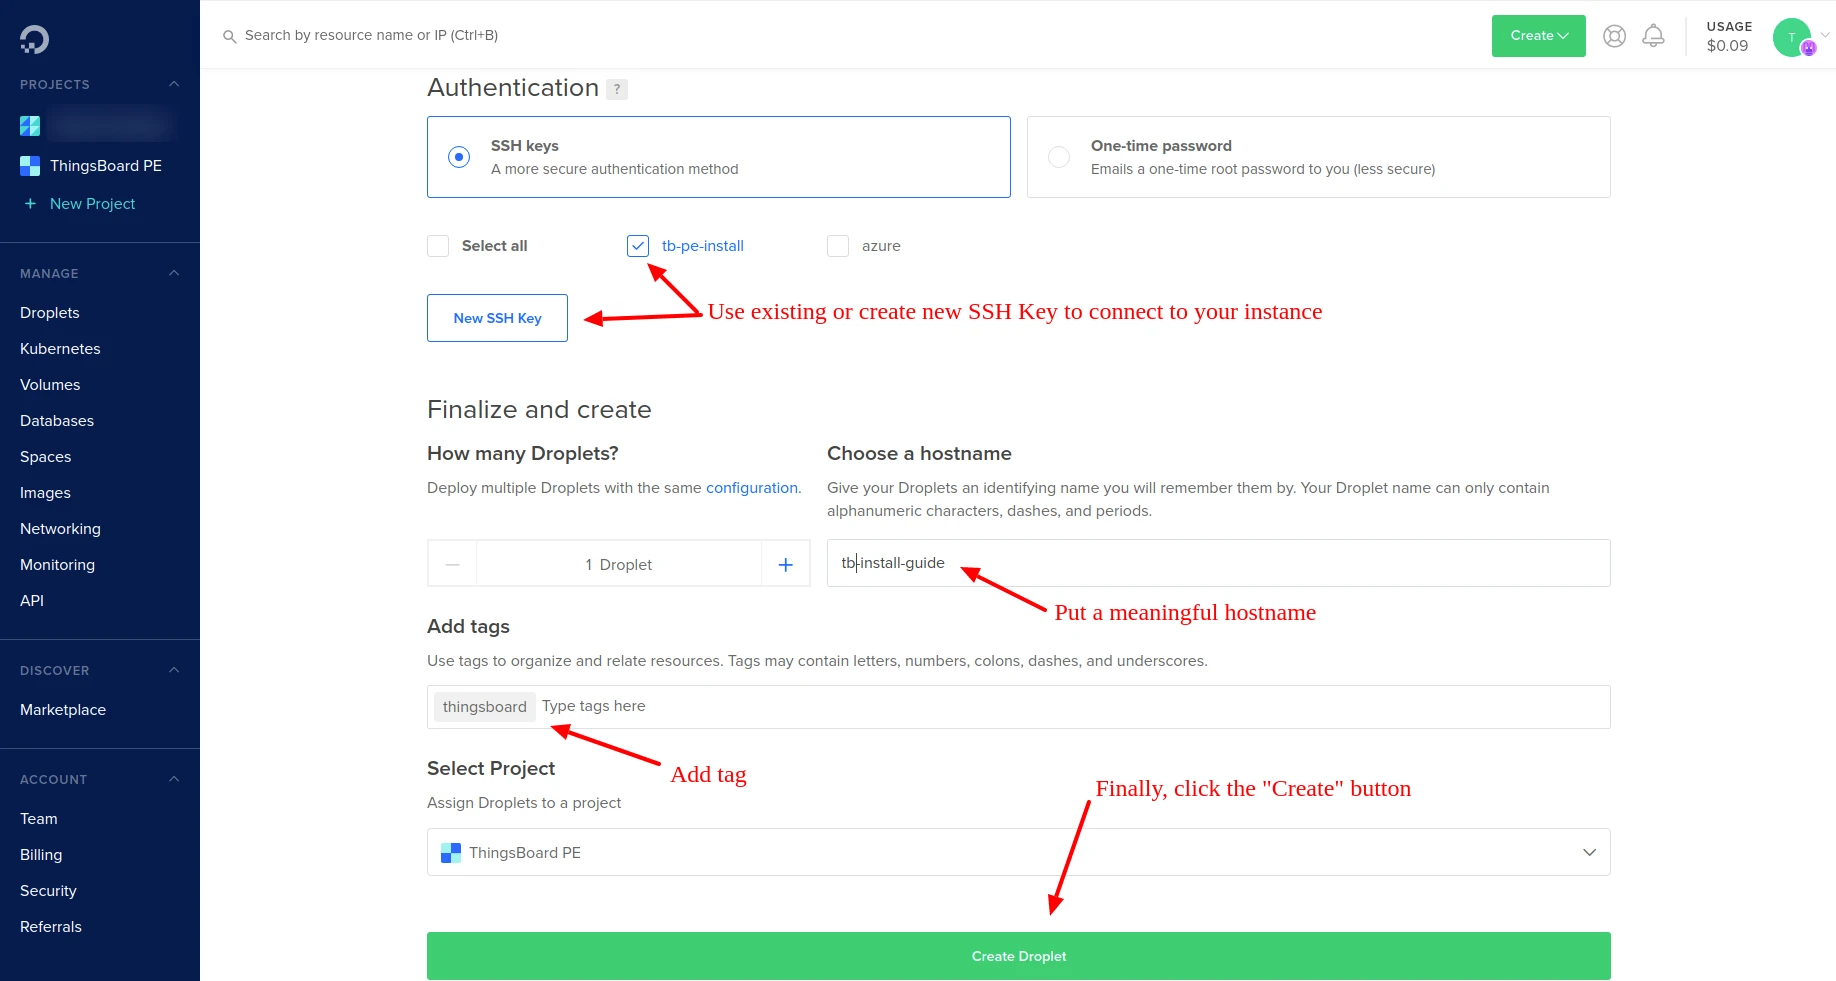
Section titled “1.4 Authentication”- Use an existing or create a new SSH key. Make sure you have access to the SSH key — you will need it later to connect via SSH.
- Enter a meaningful hostname.
- Click Create Droplet.
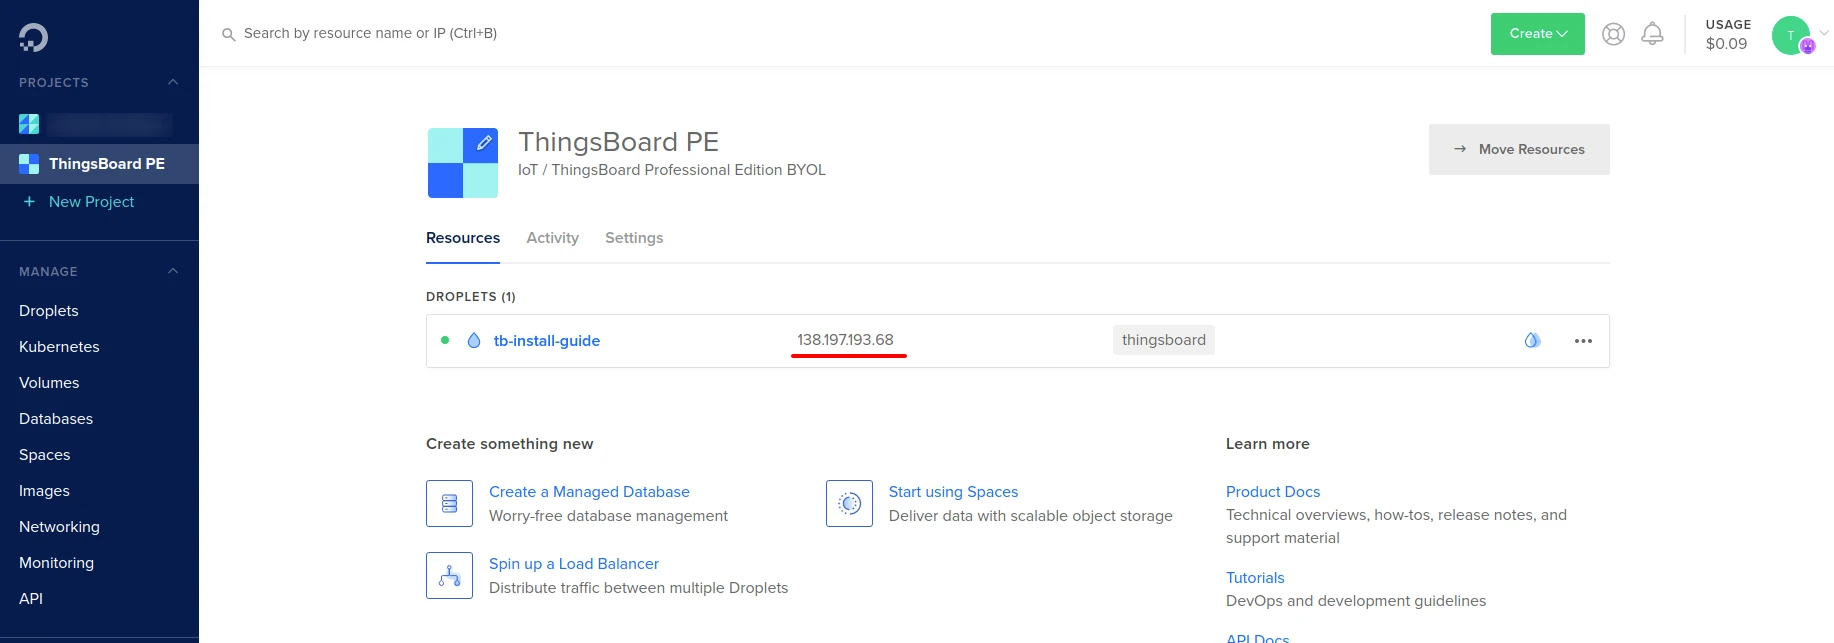
Once the droplet is created, copy the IP address to a safe place. You will use it later.
Step 2. Configure Firewall Rules
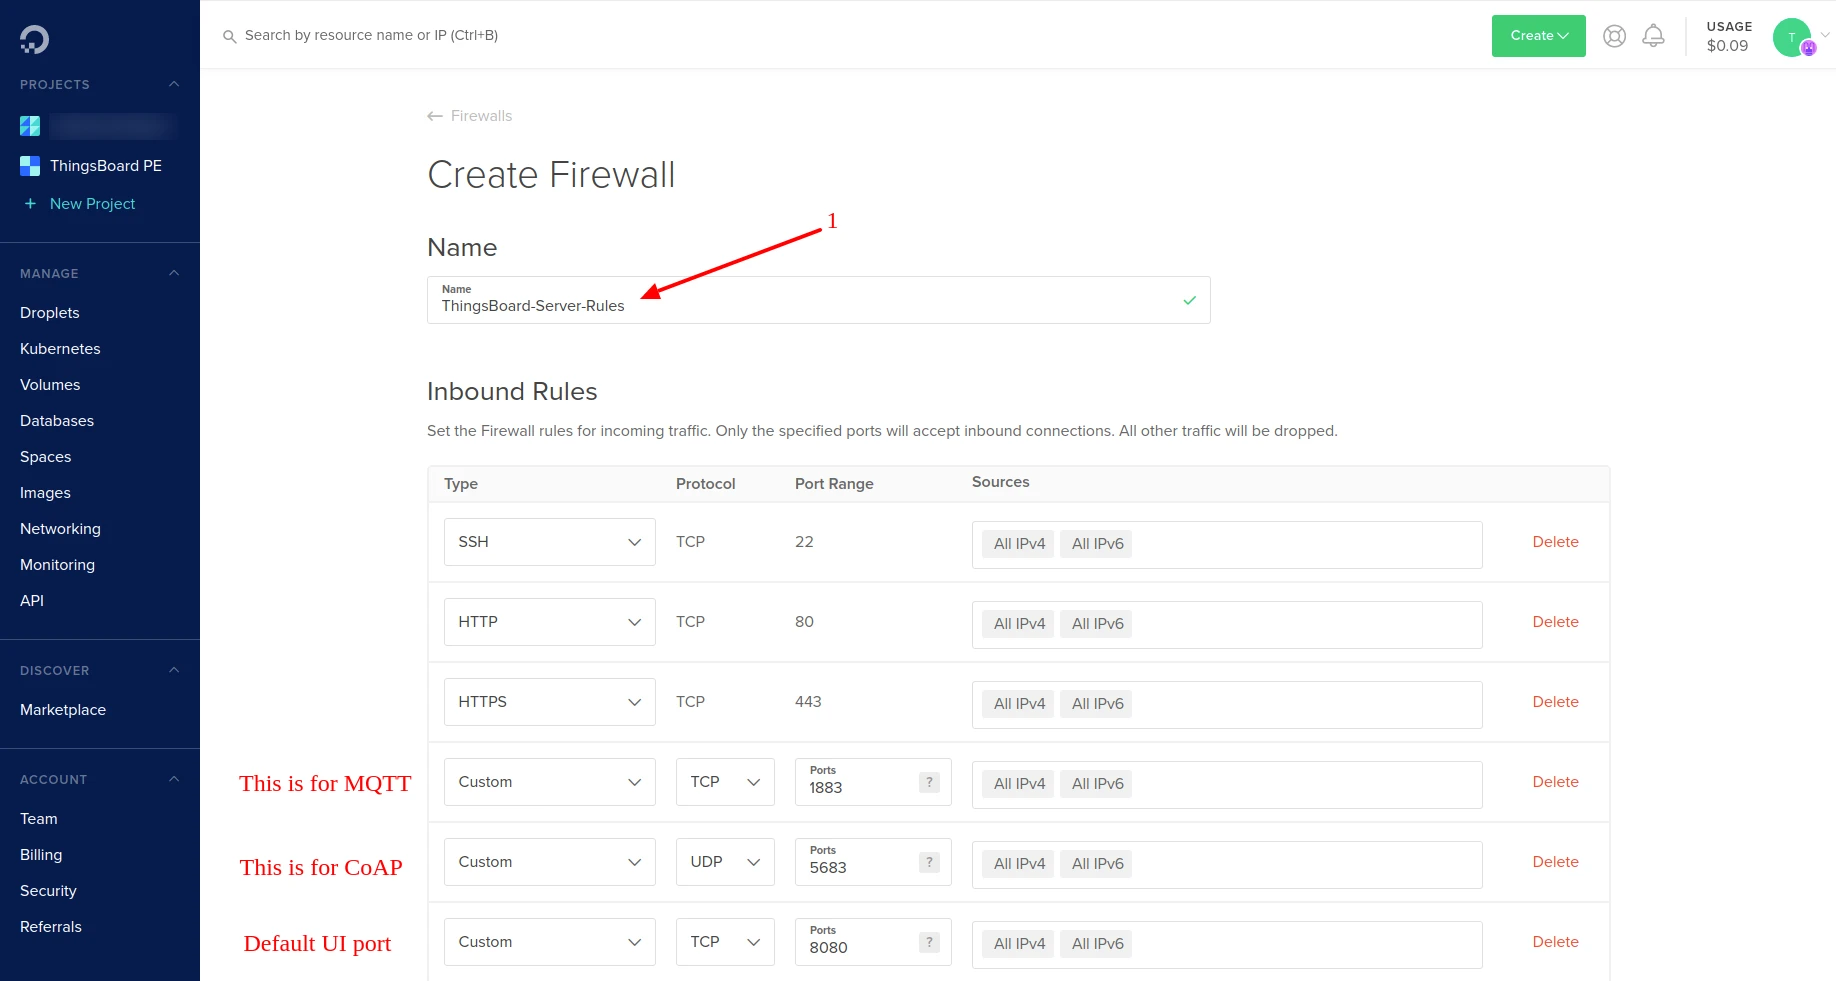
Section titled “Step 2. Configure Firewall Rules”Configure firewall rules to allow MQTT, CoAP, and HTTP traffic.
-
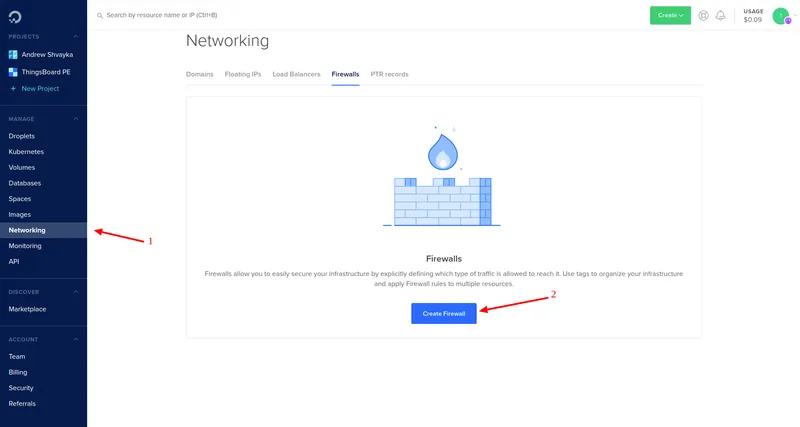
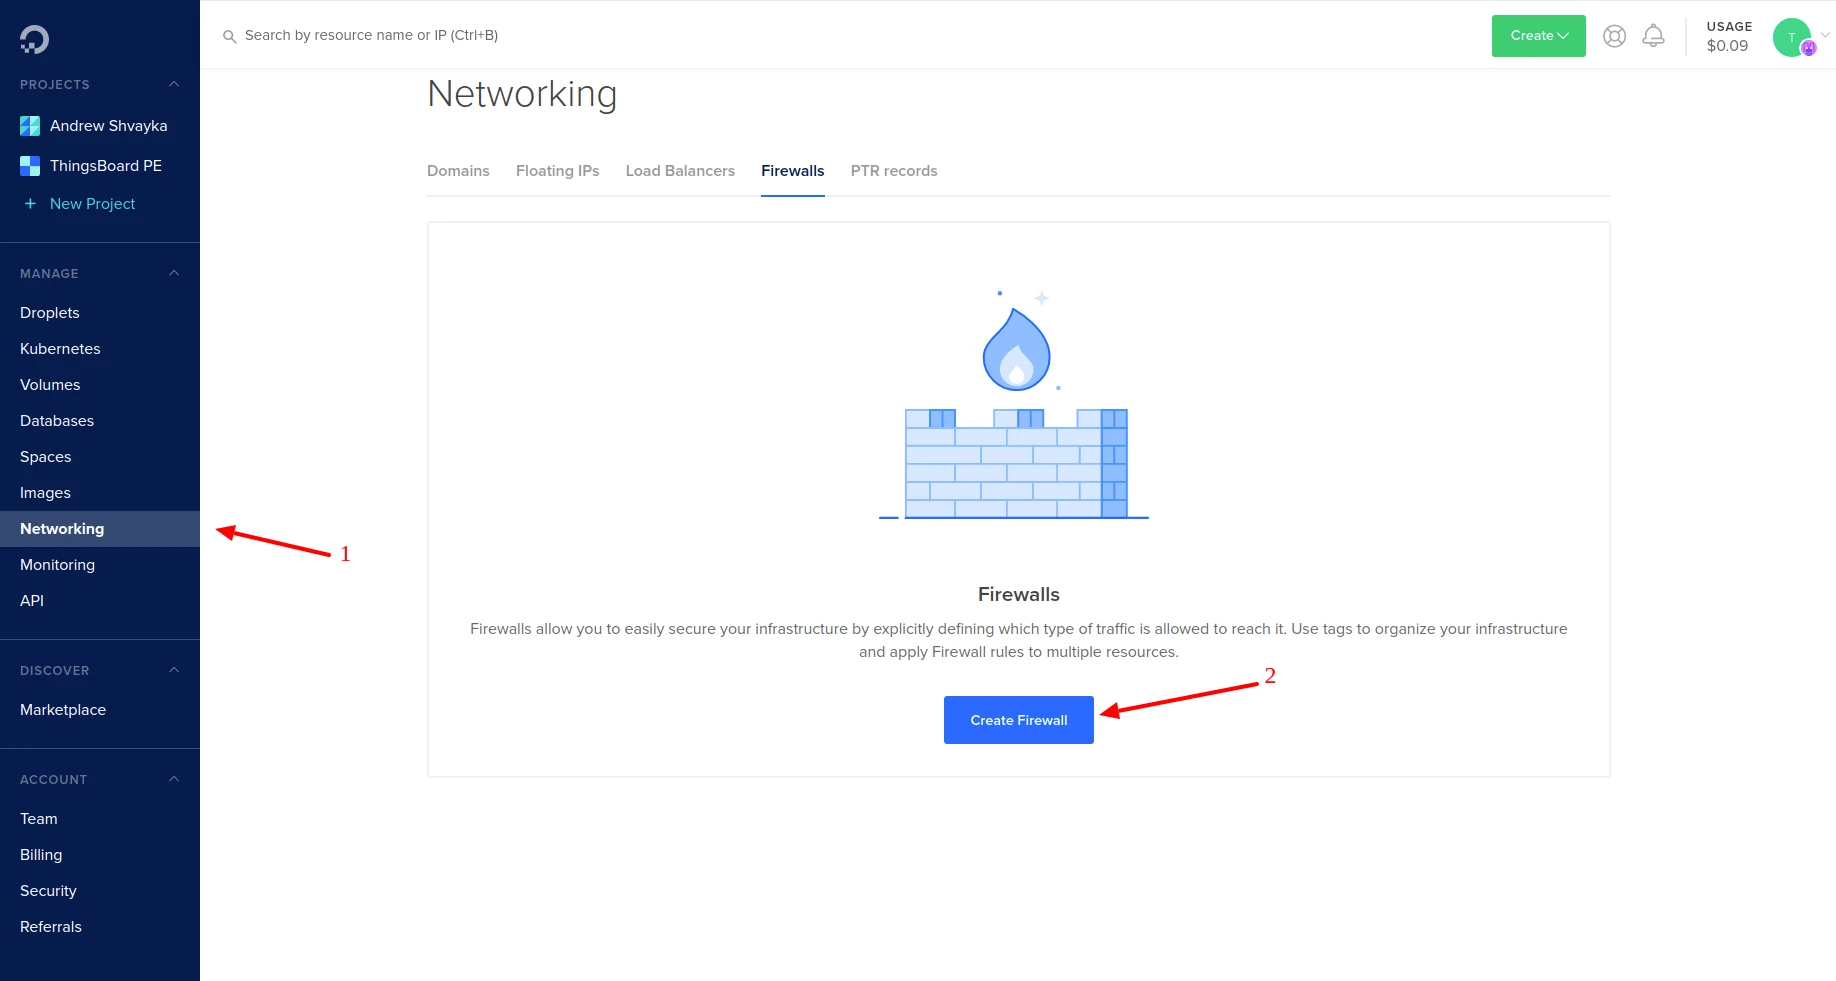
Navigate to Networking ⇾ Firewalls and click Create Firewall.
-
Give your firewall a meaningful name and configure inbound rules:
Port Protocol Description 22 TCP SSH access 80 TCP HTTP access 443 TCP HTTPS access 1883 TCP MQTT protocol 5683 UDP CoAP protocol 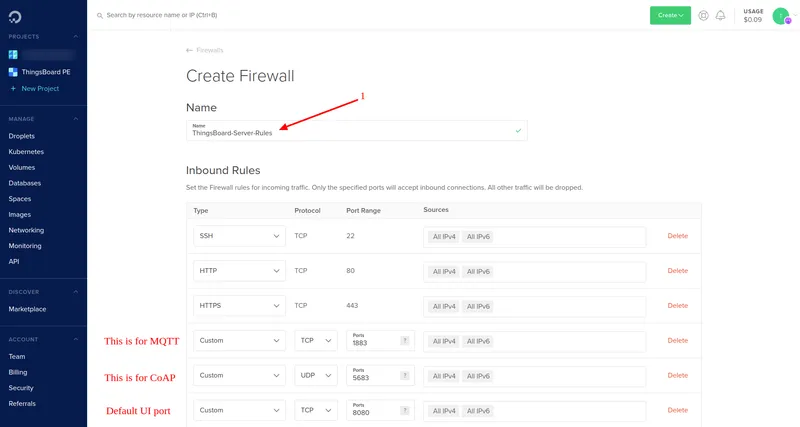
-
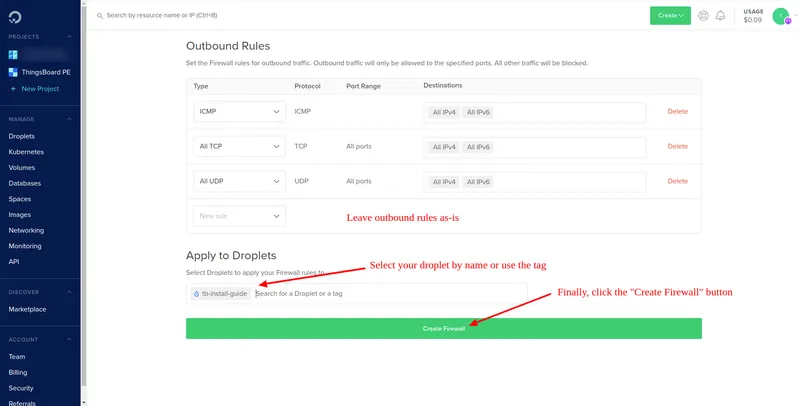
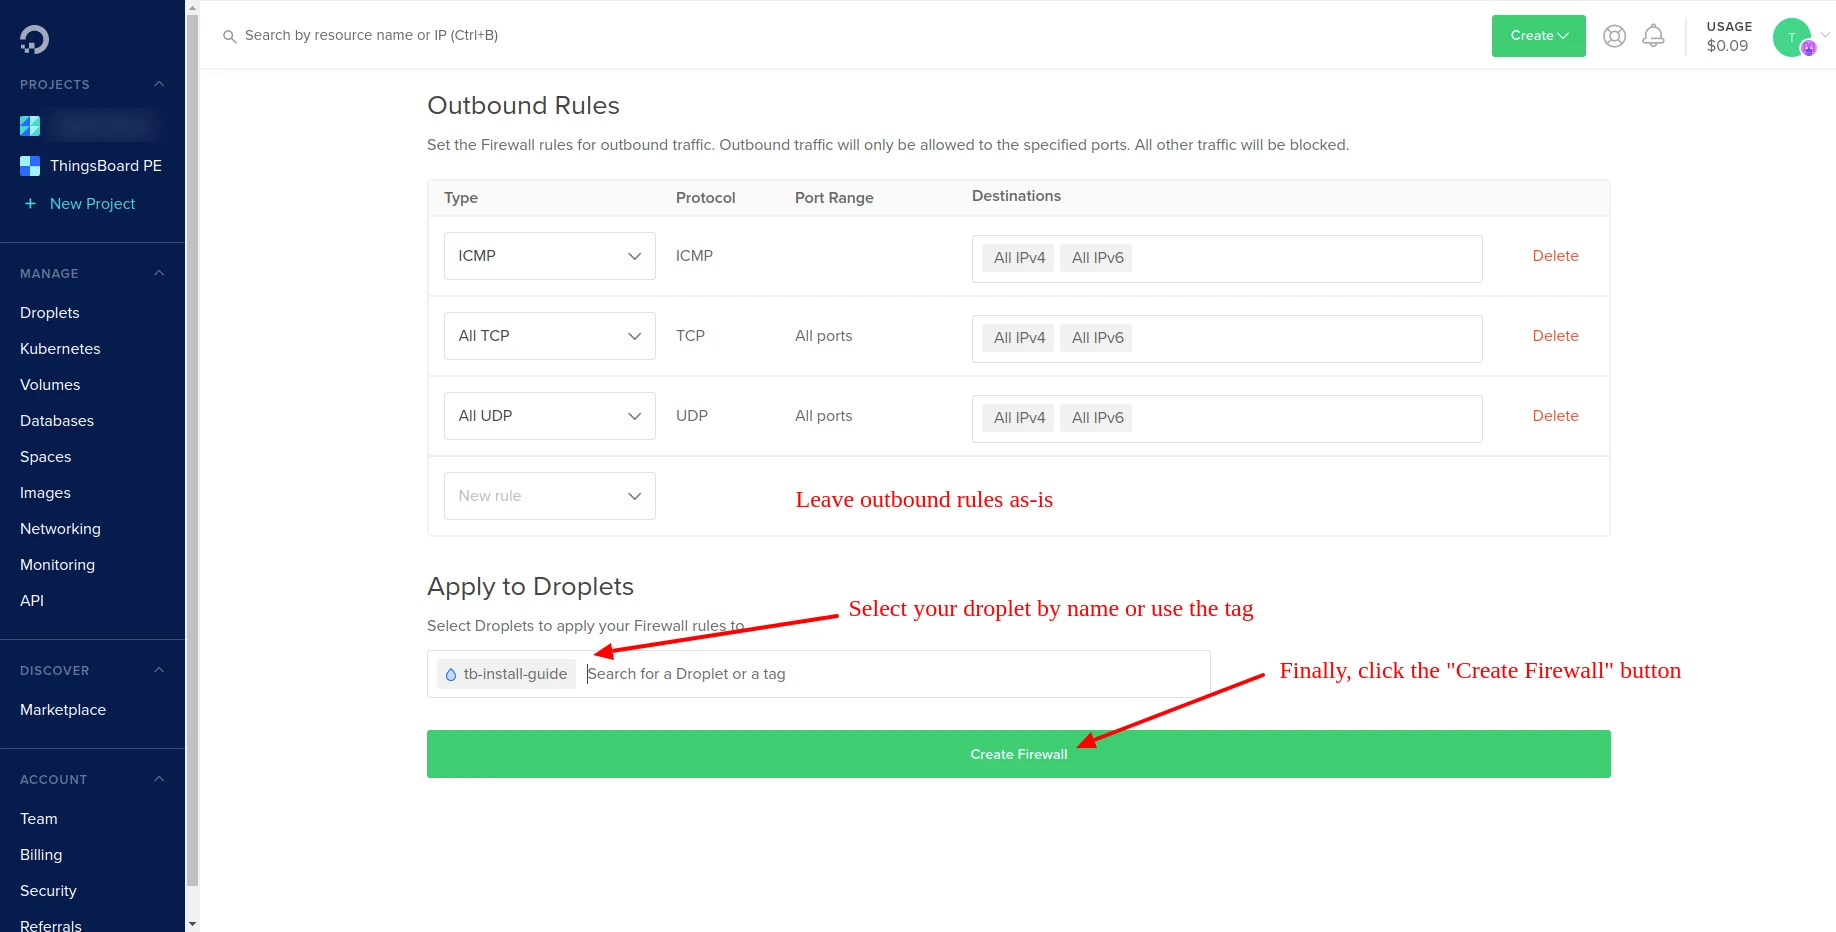
Leave outbound rules as-is. Select your droplet or tag to assign this firewall, then click Create Firewall.
Step 3. Connect to Your Instance Using SSH
Section titled “Step 3. Connect to Your Instance Using SSH”Use the official guide and the SSH key you created during Step 1.4.
Step 4. Install ThingsBoard
Section titled “Step 4. Install ThingsBoard”Follow the Docker installation guide to install and configure ThingsBoard.
[Optional] Configure HTTPS
Section titled “[Optional] Configure HTTPS”Serving ThingsBoard over HTTPS encrypts the traffic between browsers and the server and prevents browser security warnings. HTTPS is handled by HAProxy: it accepts incoming traffic on ports 80 (HTTP) and 443 (HTTPS), terminates TLS with a trusted certificate from Let’s Encrypt, and forwards requests to ThingsBoard.
Before you start, make sure that:
- a domain name is assigned to your server, and its DNS record points to the server’s IP address;
- ports 80 and 443 are reachable from the internet.
Follow the HAProxy setup guide to install HAProxy and generate the certificate.
Troubleshooting
Section titled “Troubleshooting”ThingsBoard logs are stored in /var/log/thingsboard. To check for errors:
cat /var/log/thingsboard/thingsboard.log | grep ERRORNext Steps
Section titled “Next Steps”With ThingsBoard running, these concept guides help you build your first solution:
- Getting Started — a guided walkthrough of the platform after installation.
- Multi-Tenancy & Hierarchy — how tenants, customers, and users are organized.
- Digital Twin Model — how devices and assets are modeled in the platform.
- Data Processing — how the Rule Engine transforms and routes incoming data.
- Alarms & Notifications — how to detect conditions and notify users.
- Data Visualization — how to build dashboards and widgets.
Was this helpful?