4G LTE Industrial Router and ThingsBoard
Introduction
Section titled “Introduction”This guide describes how to connect a KingPigeon 4G LTE Industrial Router to ThingsBoard PE using the MQTT Basic credential type.
Configure ThingsBoard
Section titled “Configure ThingsBoard”-
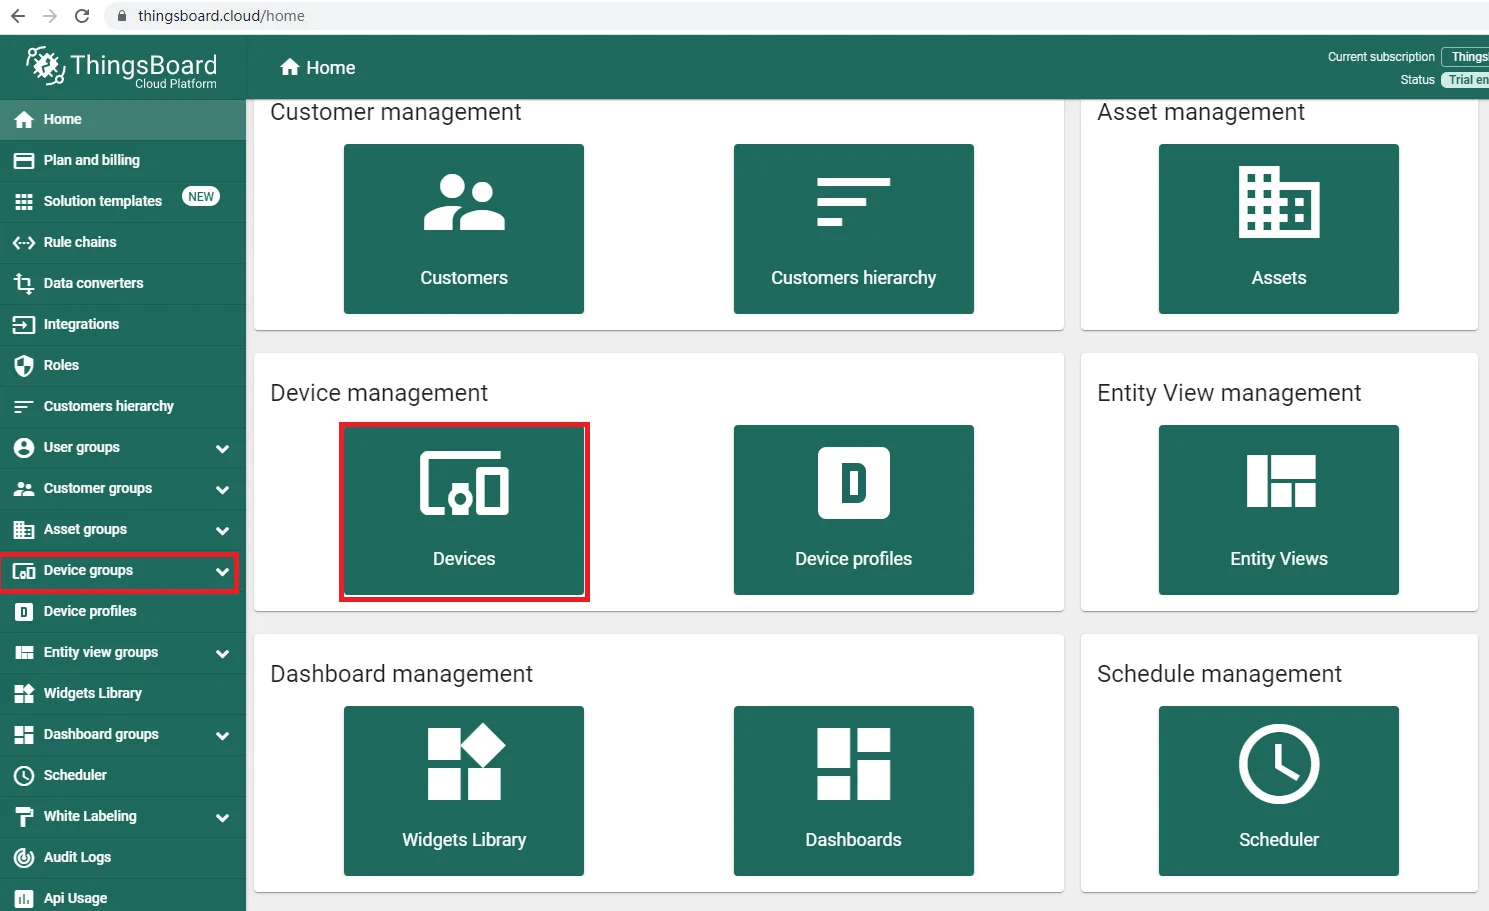
Log in to your ThingsBoard instance and go to Groups > Device Groups.
-
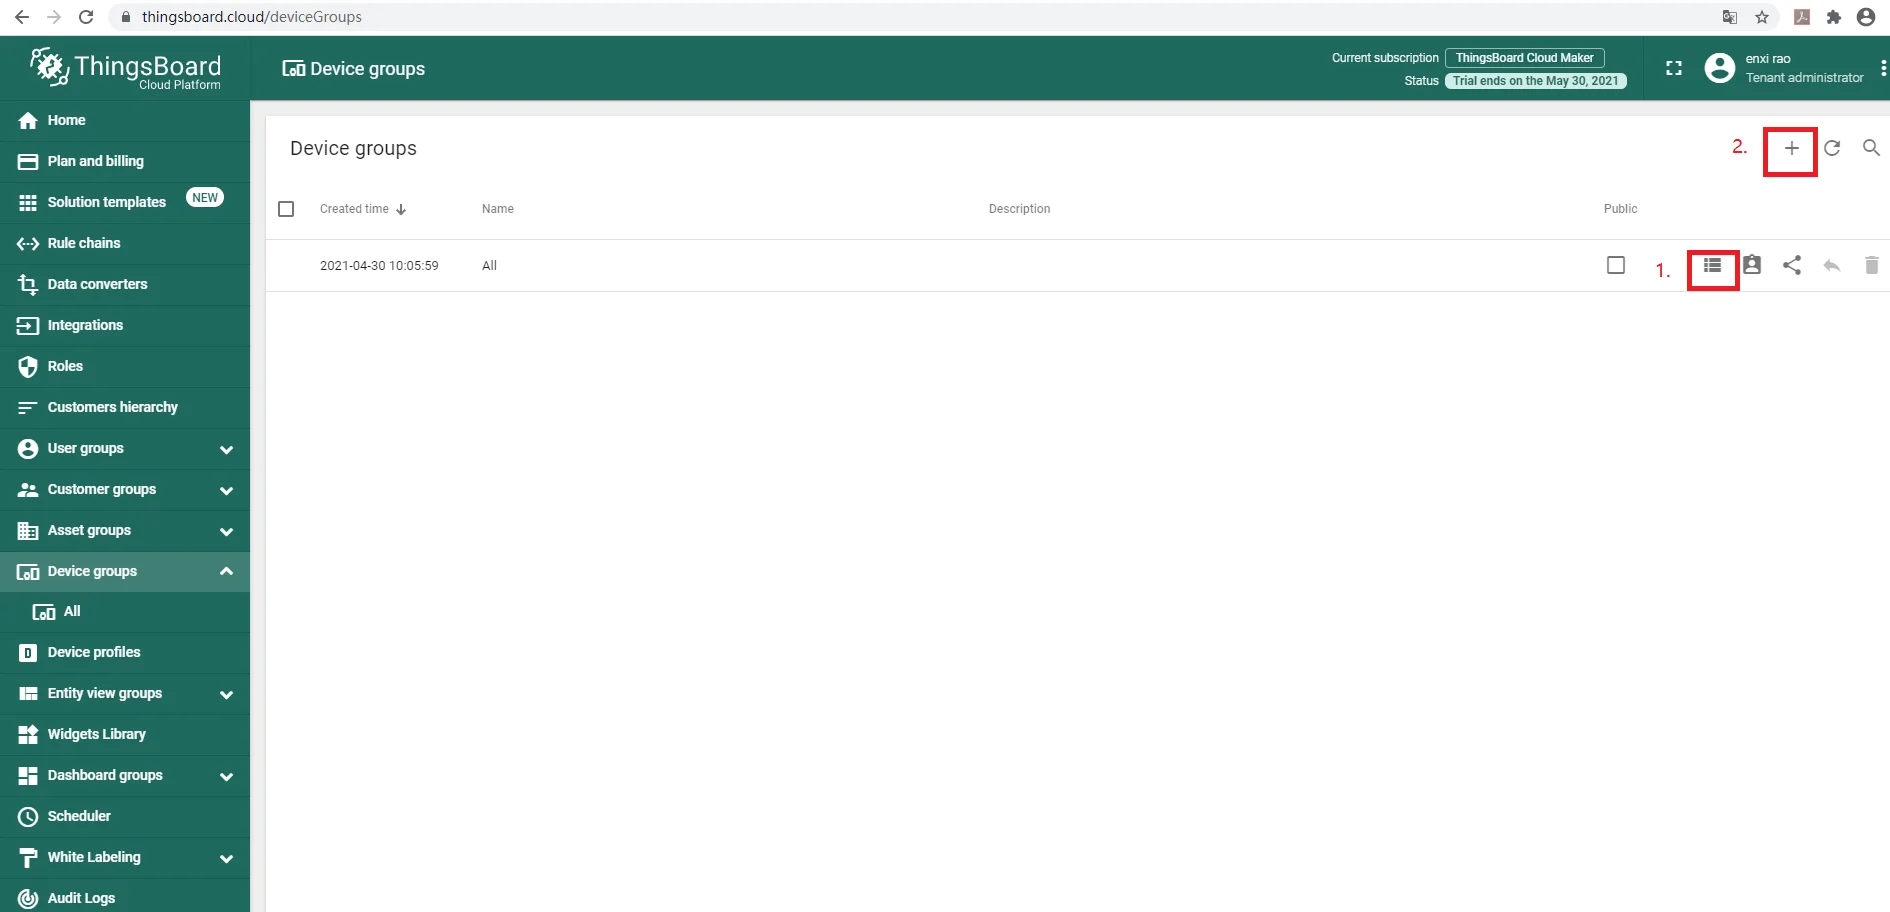
Open the All device group and click Add (+) to add a new device.
-
Enter the device name, for example
R40, and click Next: Credentials.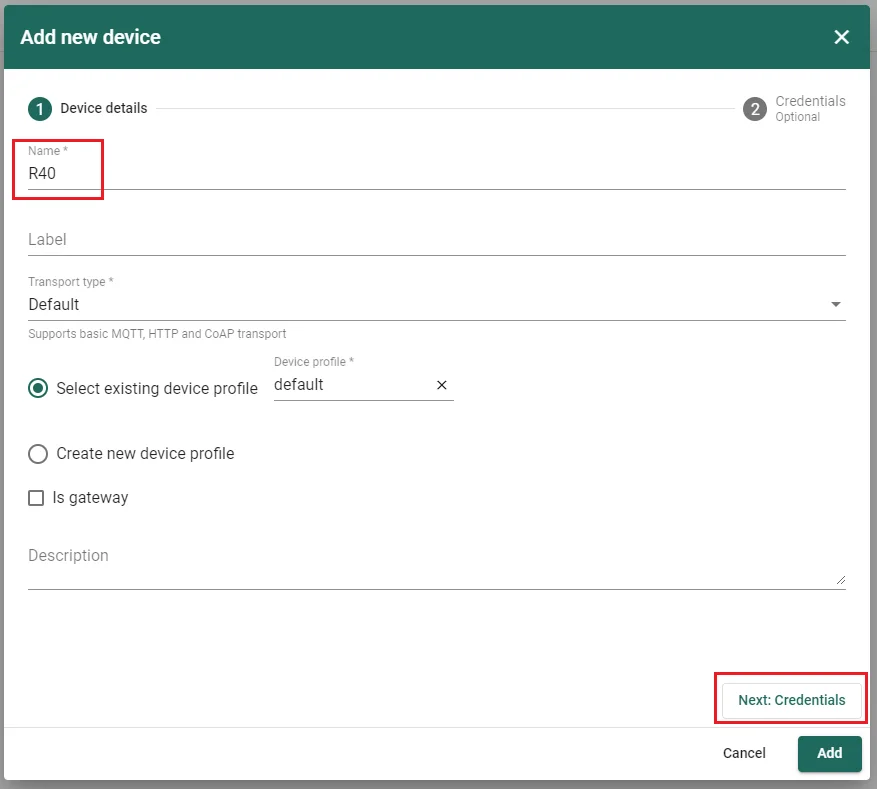
-
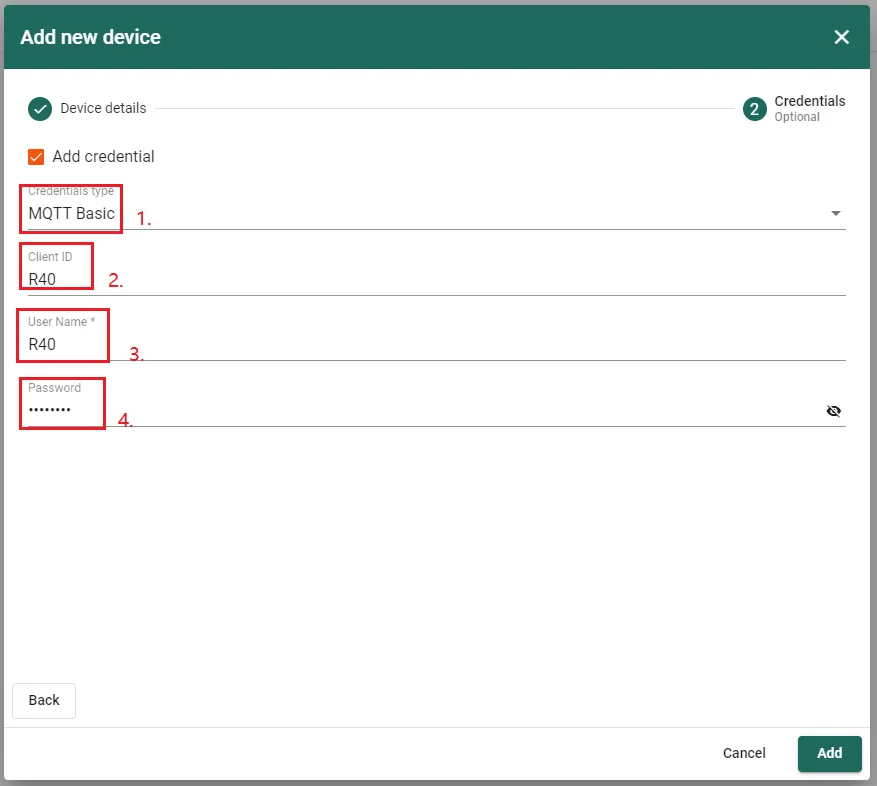
Set Credentials type to MQTT Basic. Enter a Client ID, username, and password, then click Add.
Configure the router
Section titled “Configure the router”-
Log in to the router. The default username is
adminwith no password.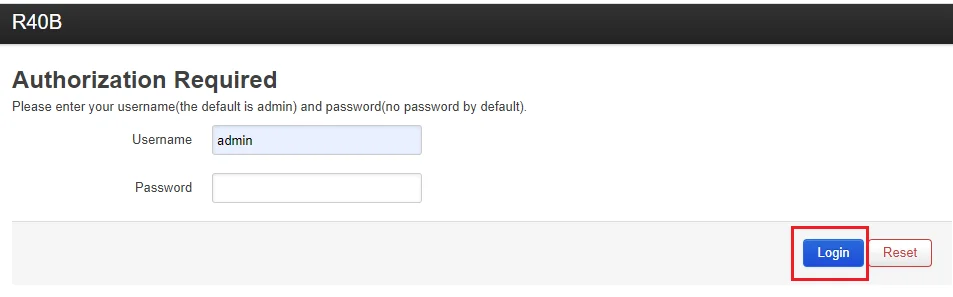
-
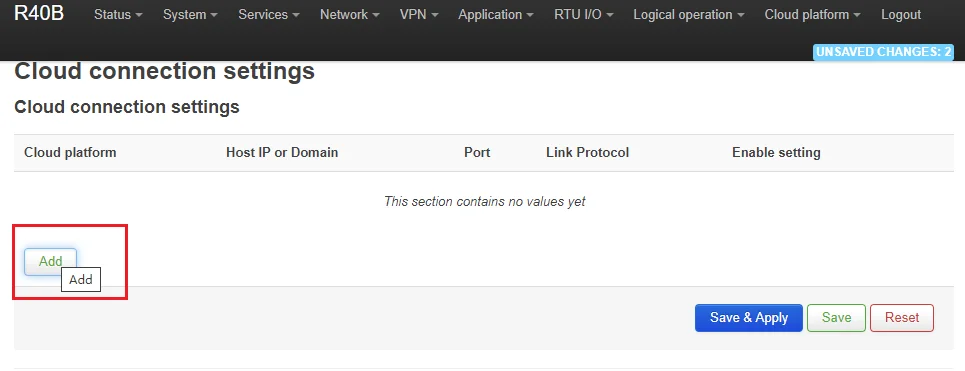
Go to Cloud platform, select Custom cloud, and click Add to create a cloud configuration.
-
Click Edit to edit the configuration.
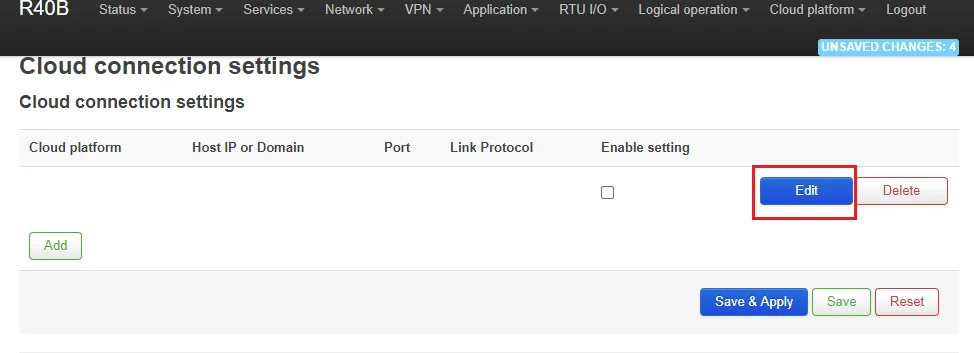
-
Configure the ThingsBoard connection:
- Select ThingsBoard as the platform.
- Set MQTT ID to the Client ID from step 4.
- Set Username and Password from step 4.
- Set the publishing period.
- Click Save, then Back to Overview.
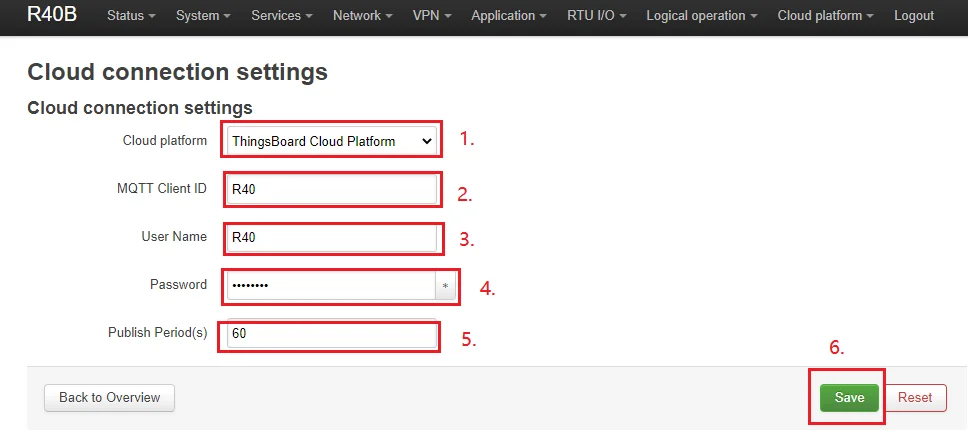
-
Check Enable setting and click Save & Apply.
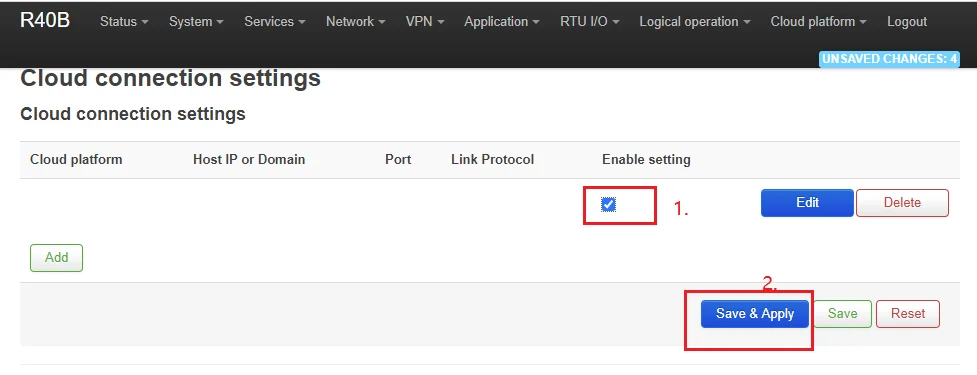
Verify telemetry
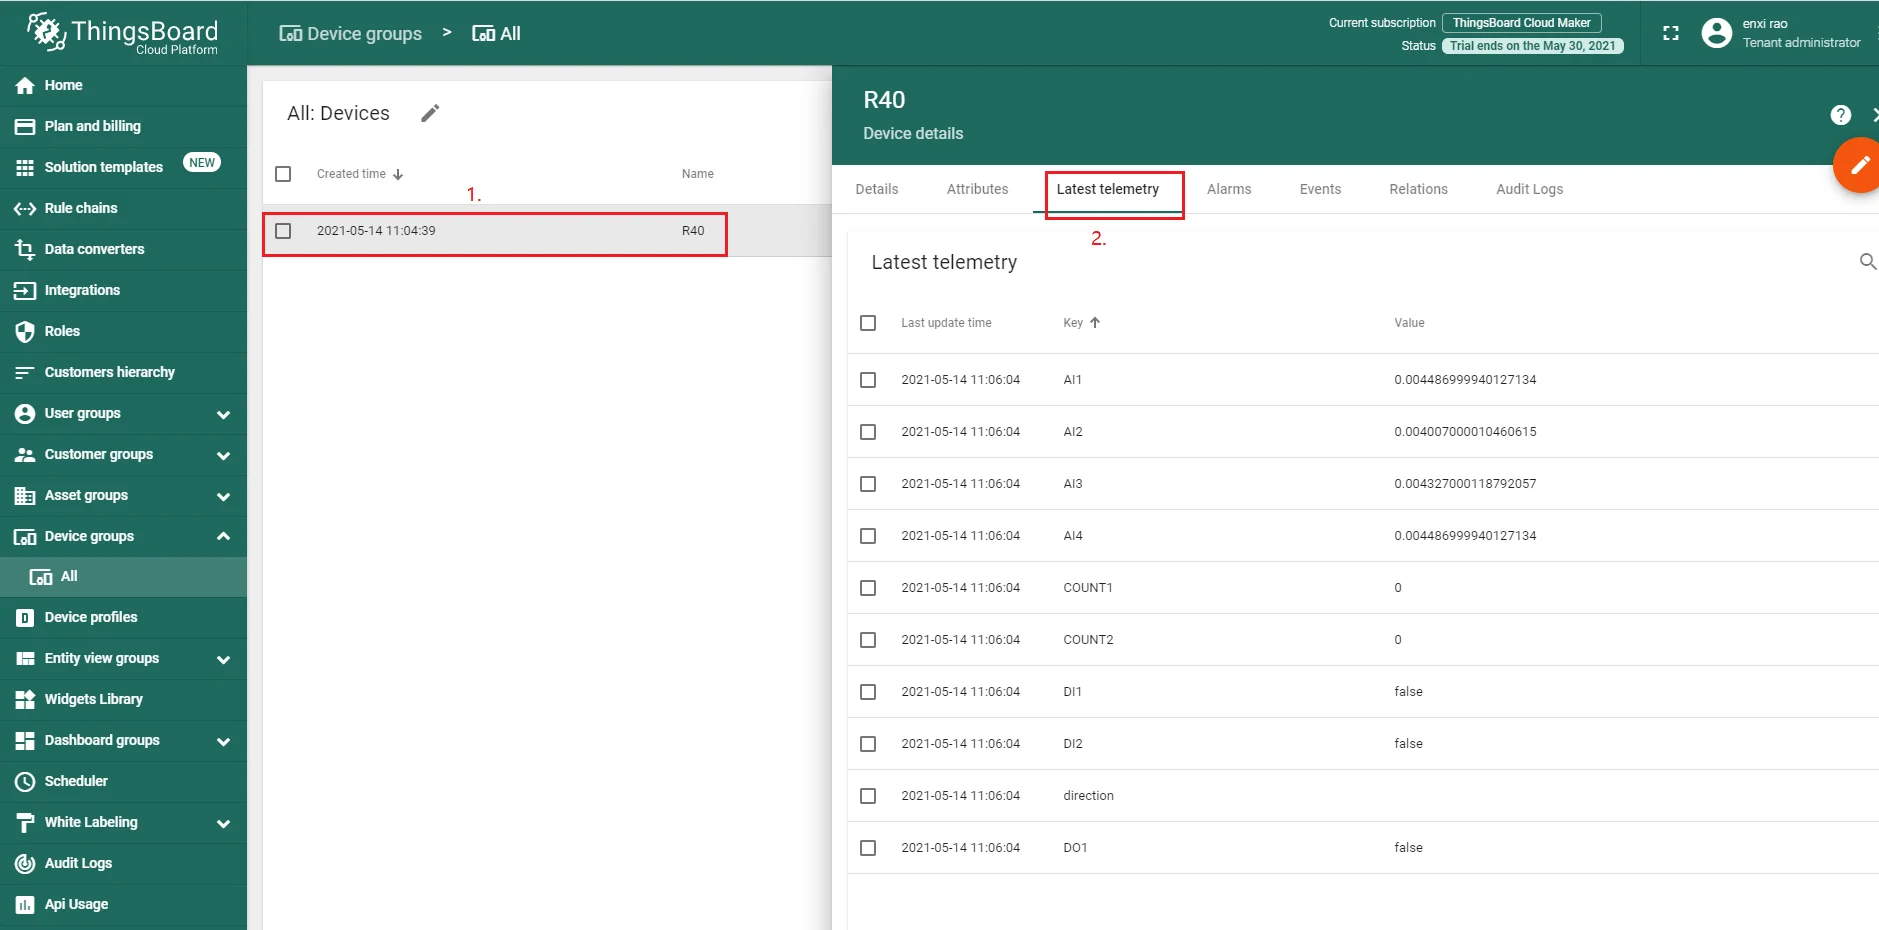
Section titled “Verify telemetry”After applying the router configuration, confirm that data is arriving in ThingsBoard. Click the device name to open its details, then select Latest telemetry.
Create a dashboard
Section titled “Create a dashboard”-
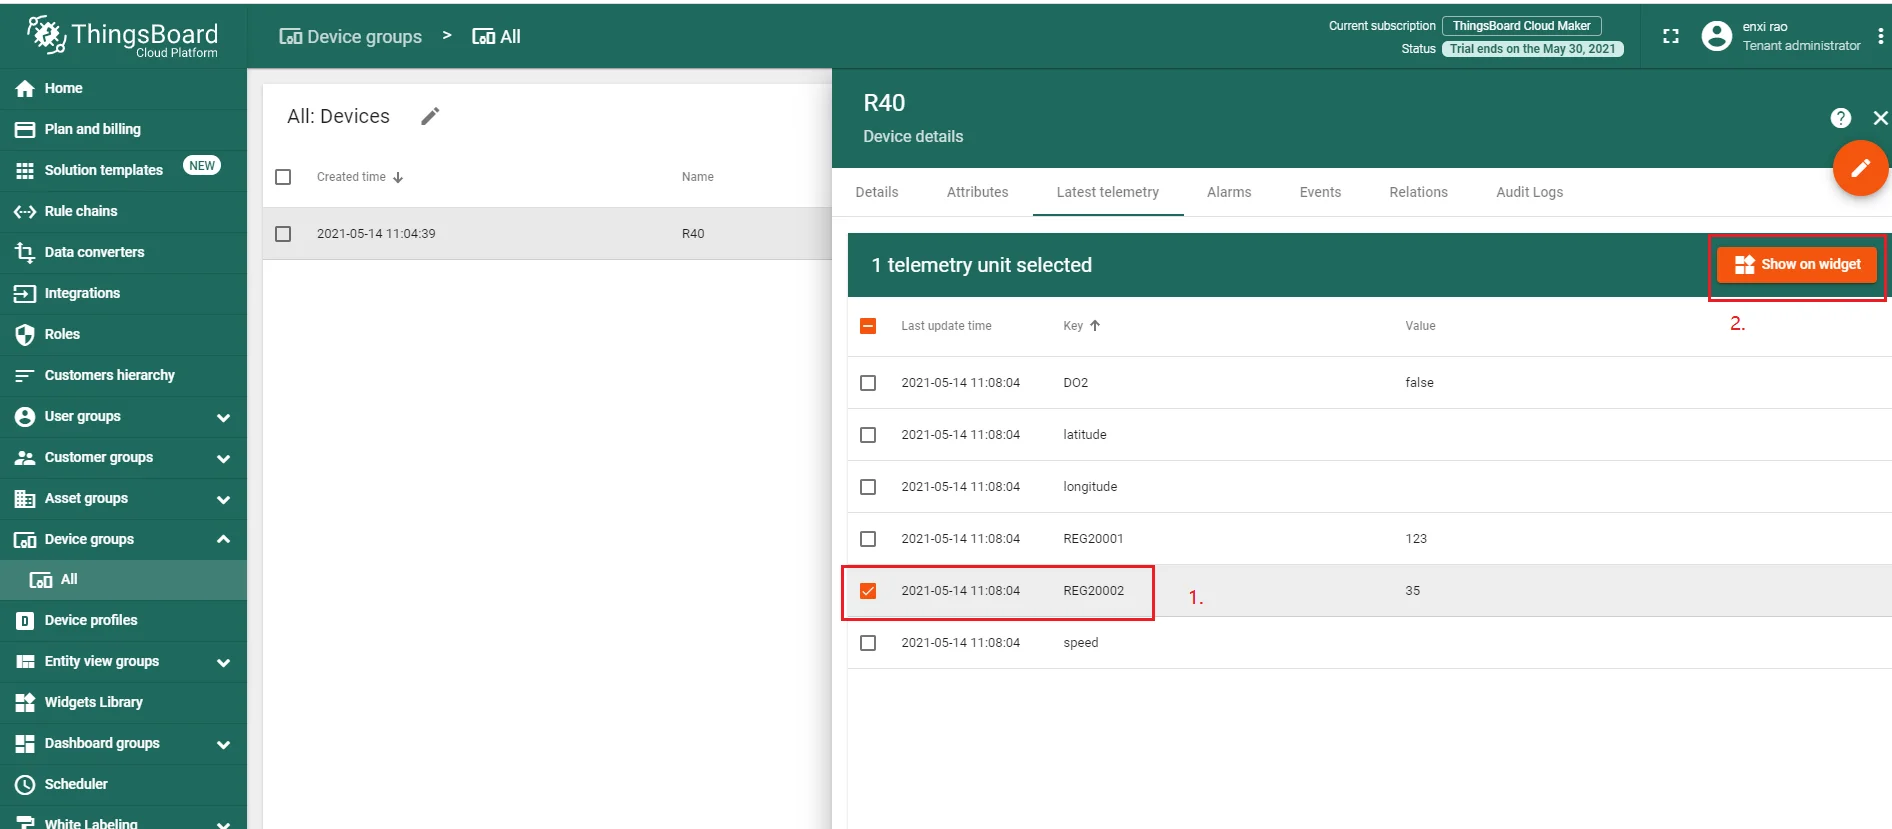
In Latest telemetry, click a data row and select Show on widget.
-
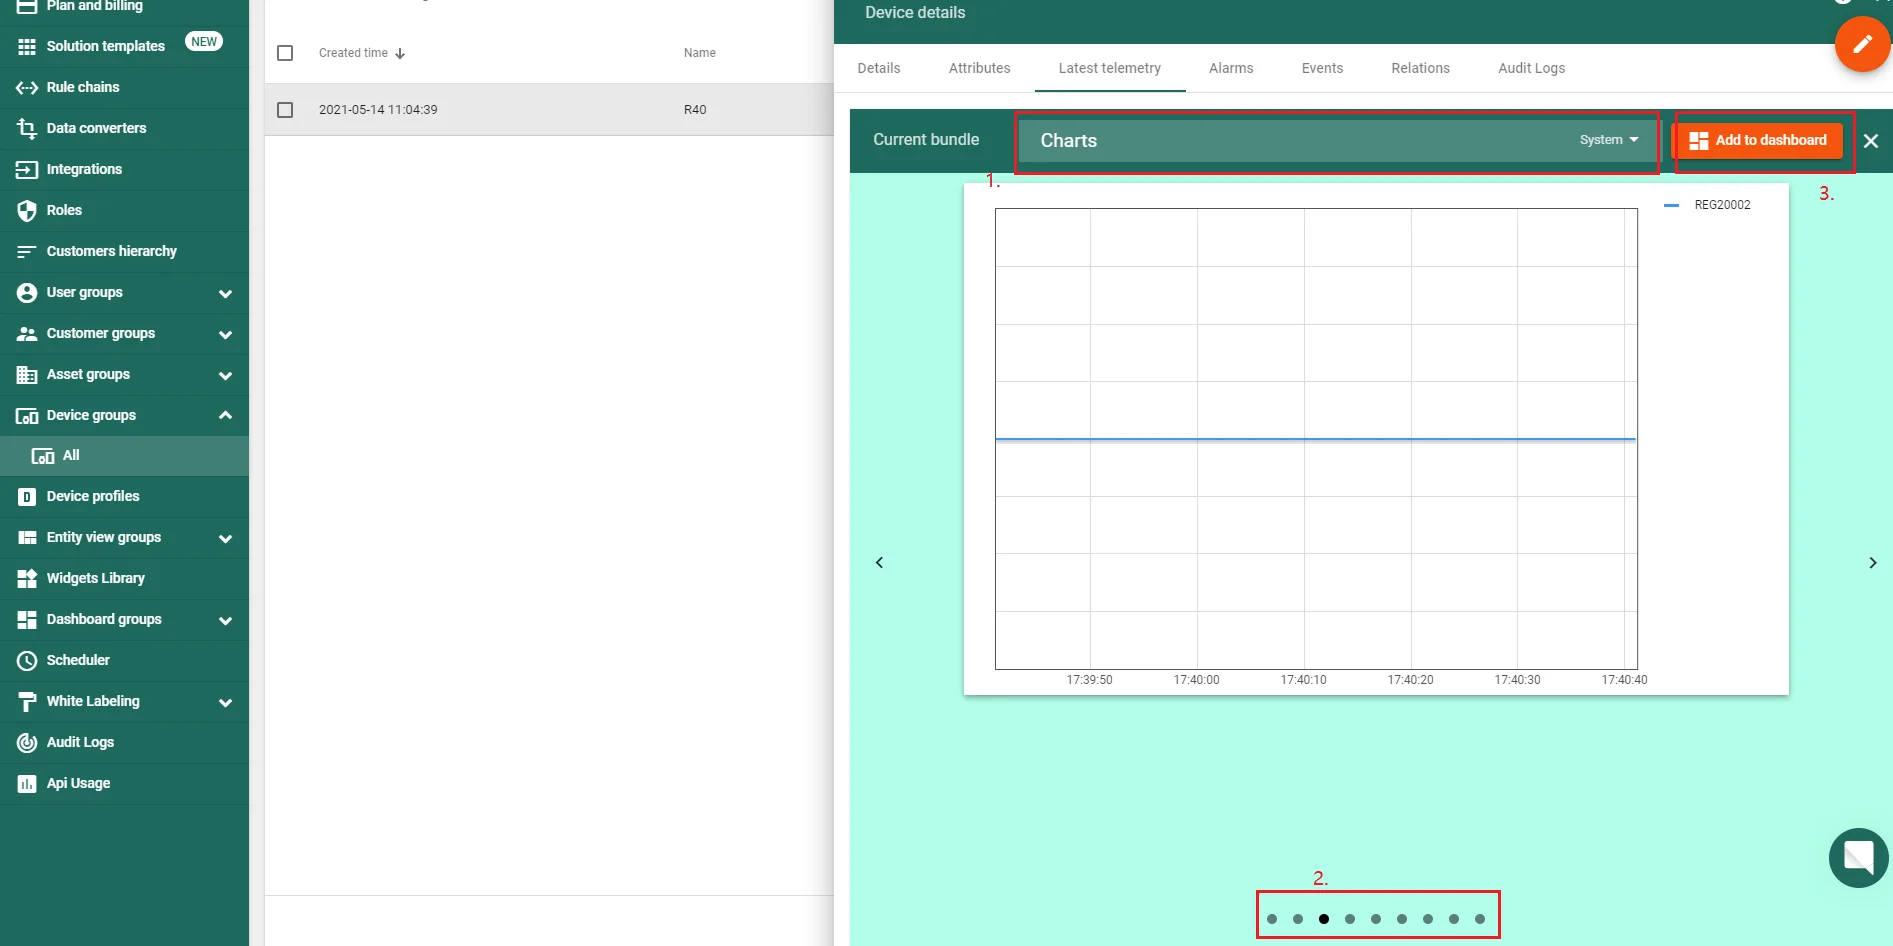
Choose a widget bundle and a chart type, then click Add to dashboard.
-
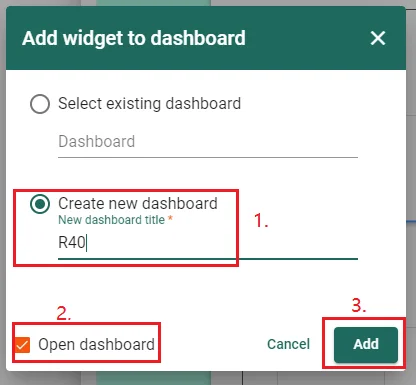
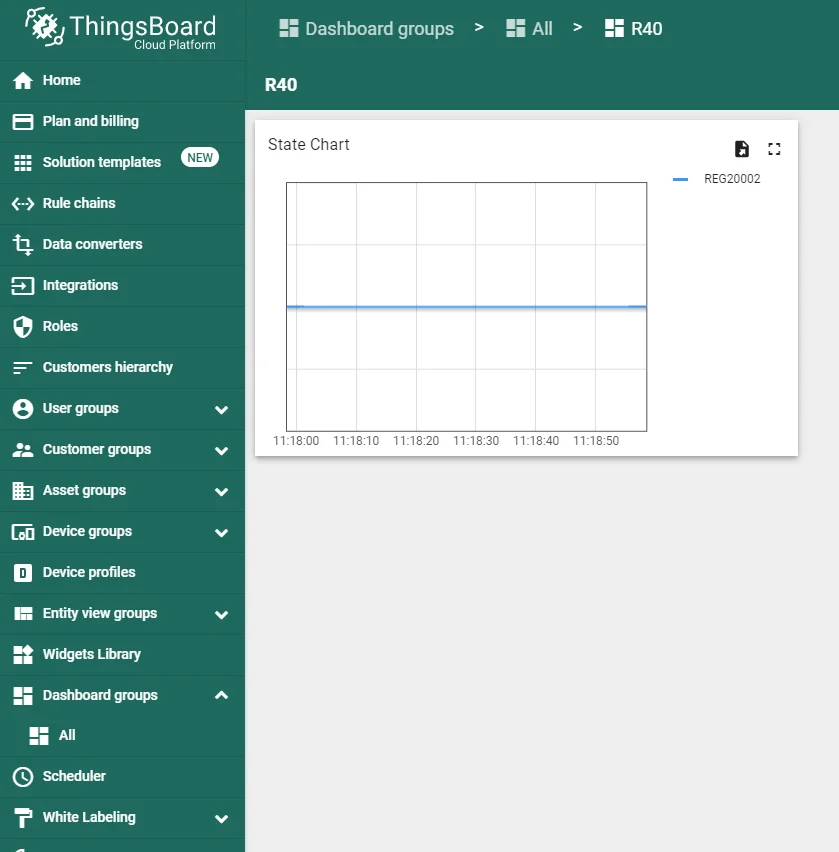
Create a new dashboard or select an existing one, then click Add.