Roltek DC620 Integration with ThingsBoard
Introduction
Section titled “Introduction”This guide describes how to connect a Roltek DC620 device to ThingsBoard, configure MQTT telemetry publishing, and visualize the collected data on a dashboard.
Create a device in ThingsBoard
Section titled “Create a device in ThingsBoard”-
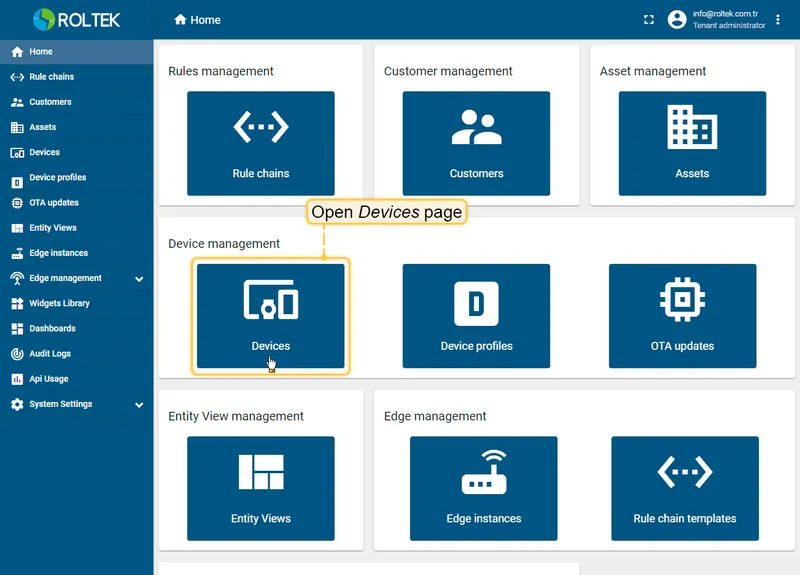
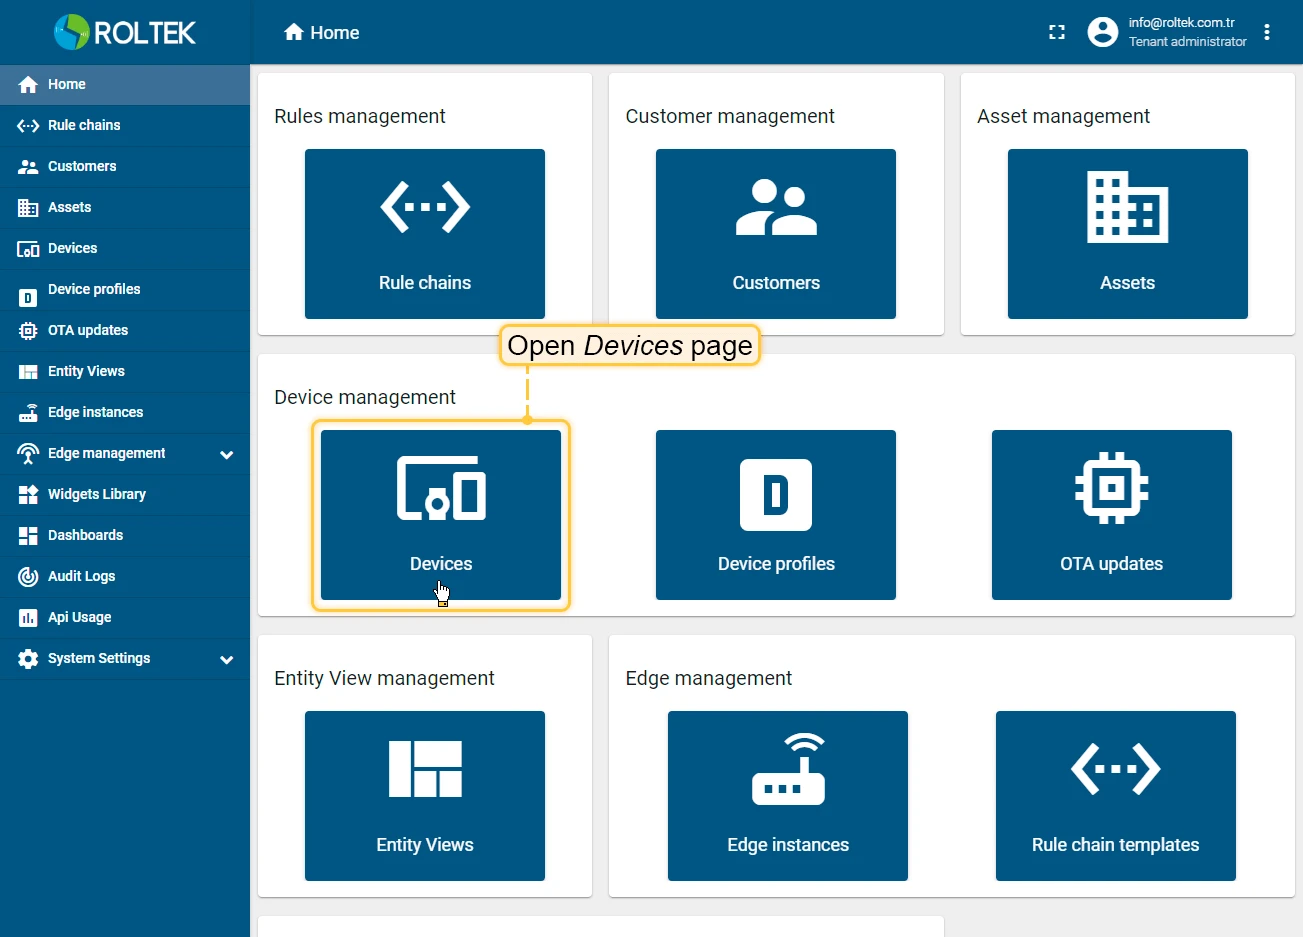
Go to Entities > Devices and click + to open the add device menu.
-
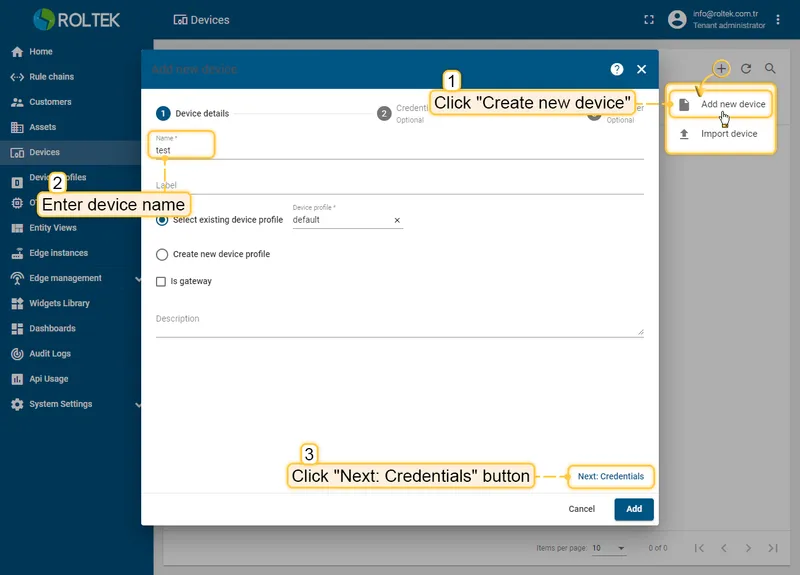
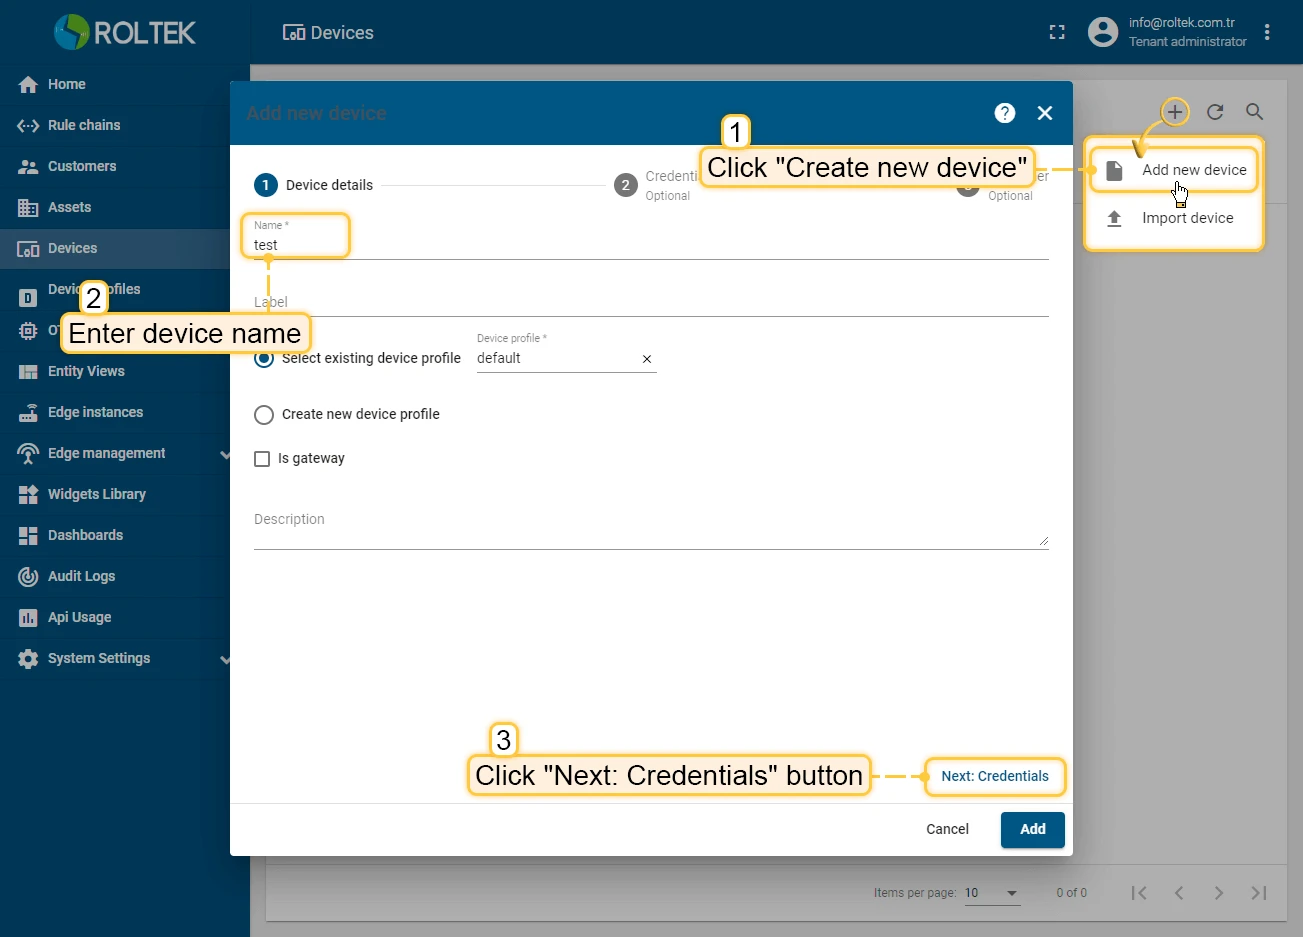
Click Add new device, enter a name for your device, and click Next: Credentials.
-
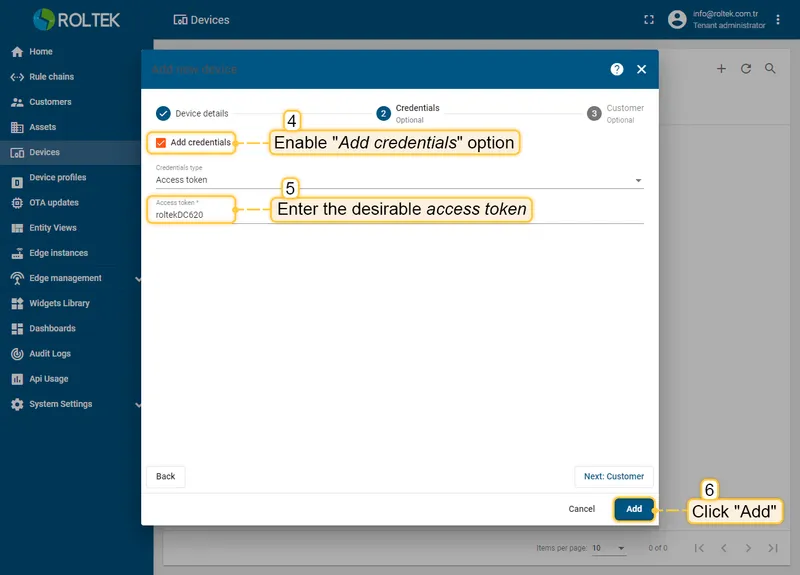
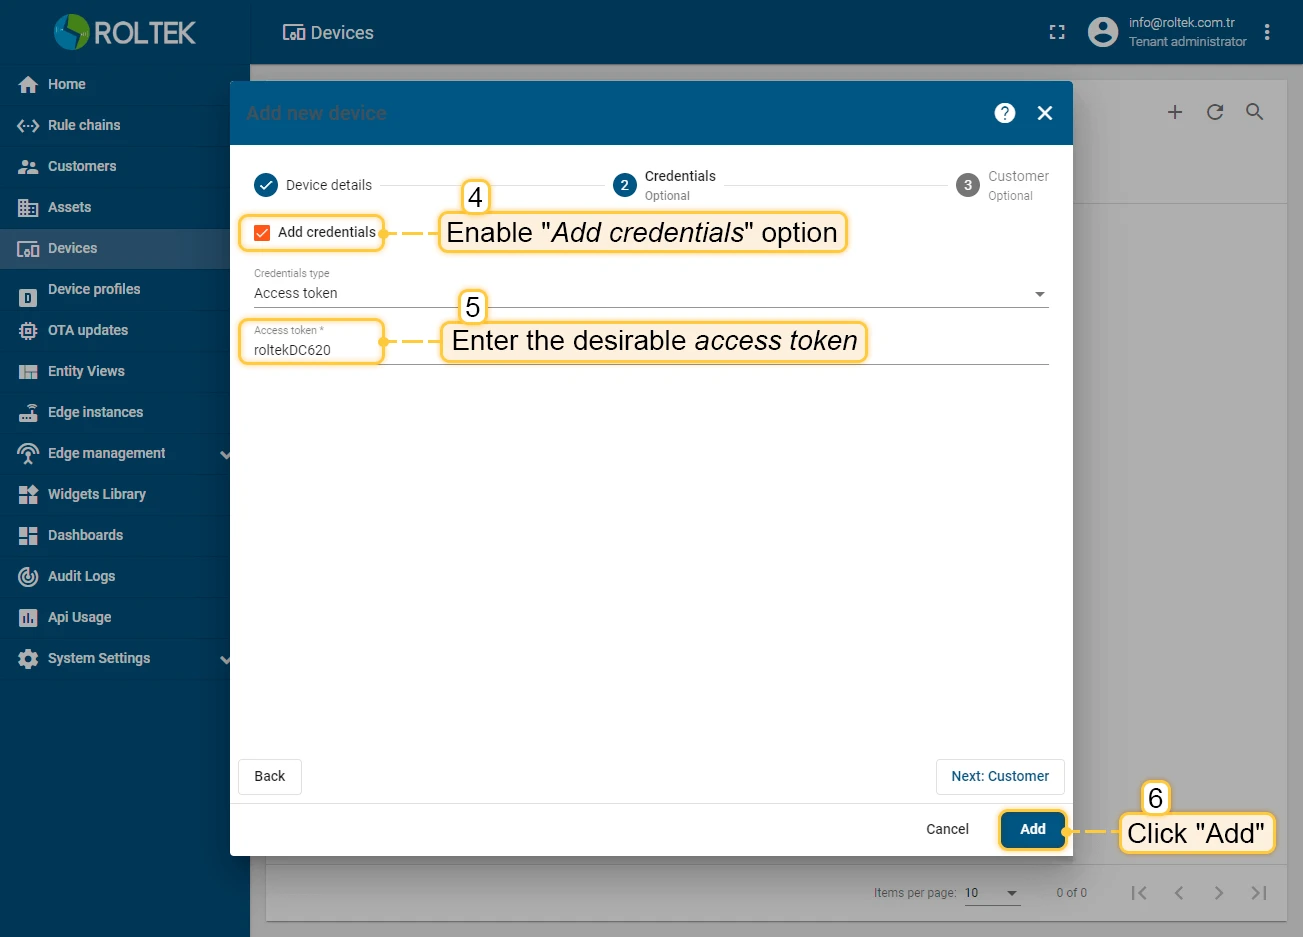
Enable Add credentials, enter the desired Access Token, and click Add to save.
Configure the DC620
Section titled “Configure the DC620”Connect the DC620 to the internet via Wi-Fi or Ethernet as described in the user manual.
MQTT settings
Section titled “MQTT settings”-
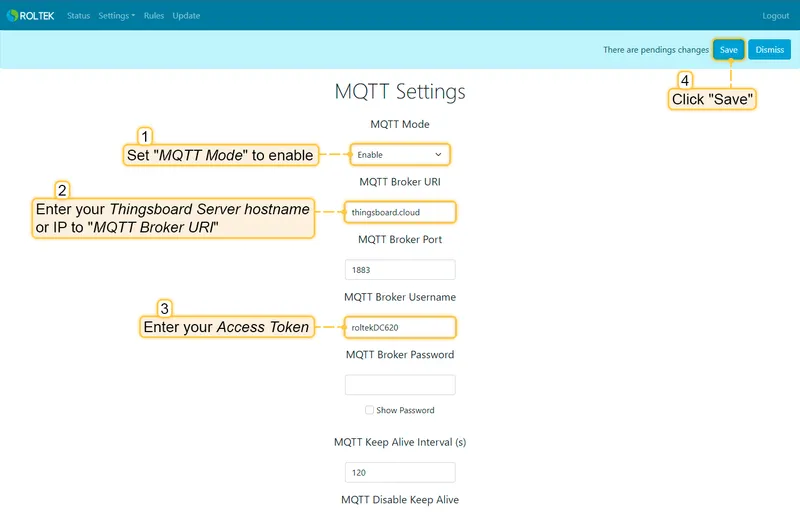
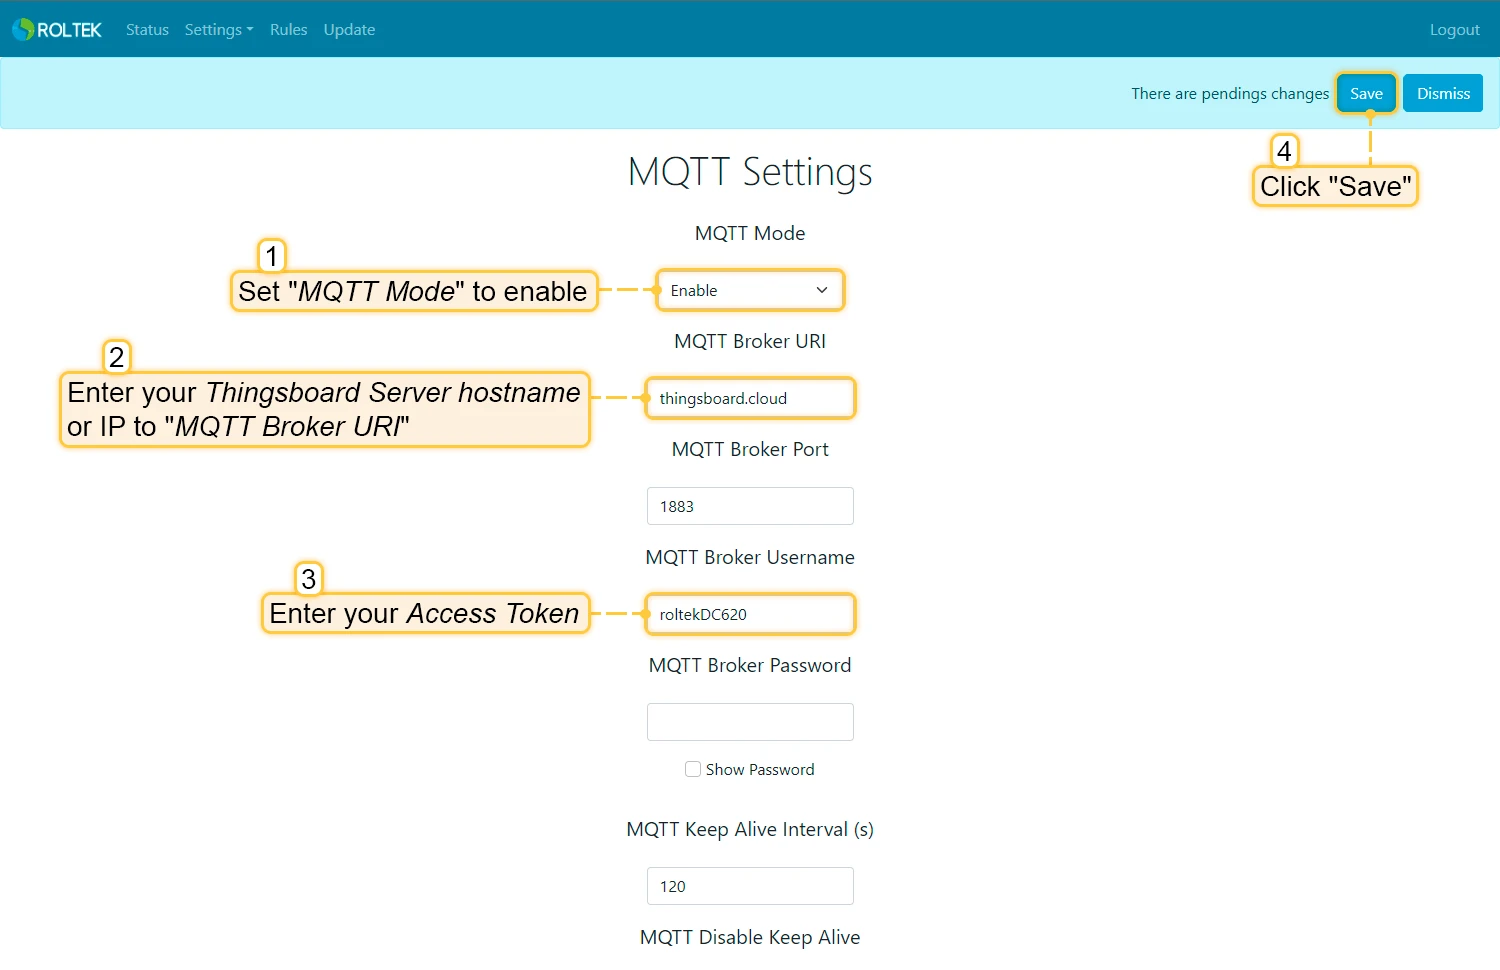
Open the MQTT Settings page on the DC620 and configure the following:
Field Value MQTT Mode Enable MQTT Broker URI Your ThingsBoard server hostname or IP address MQTT Broker Username The Access Token set in the previous step Click Save.
Configure MQTT payload
Section titled “Configure MQTT payload”-
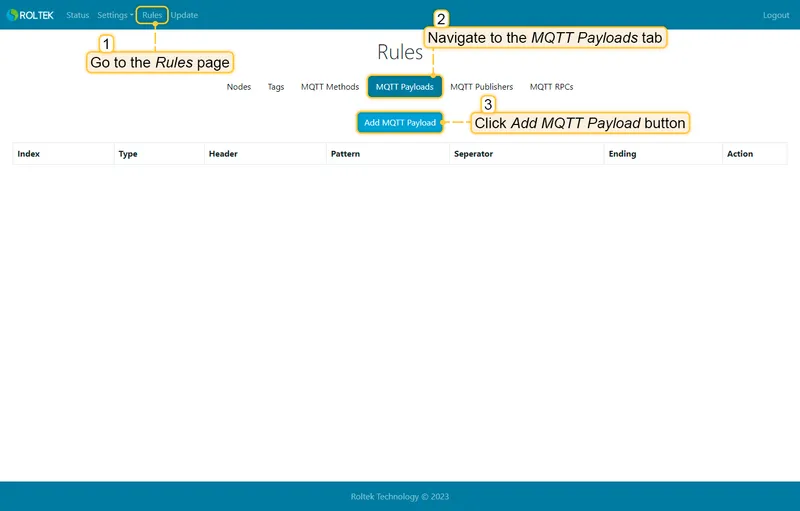
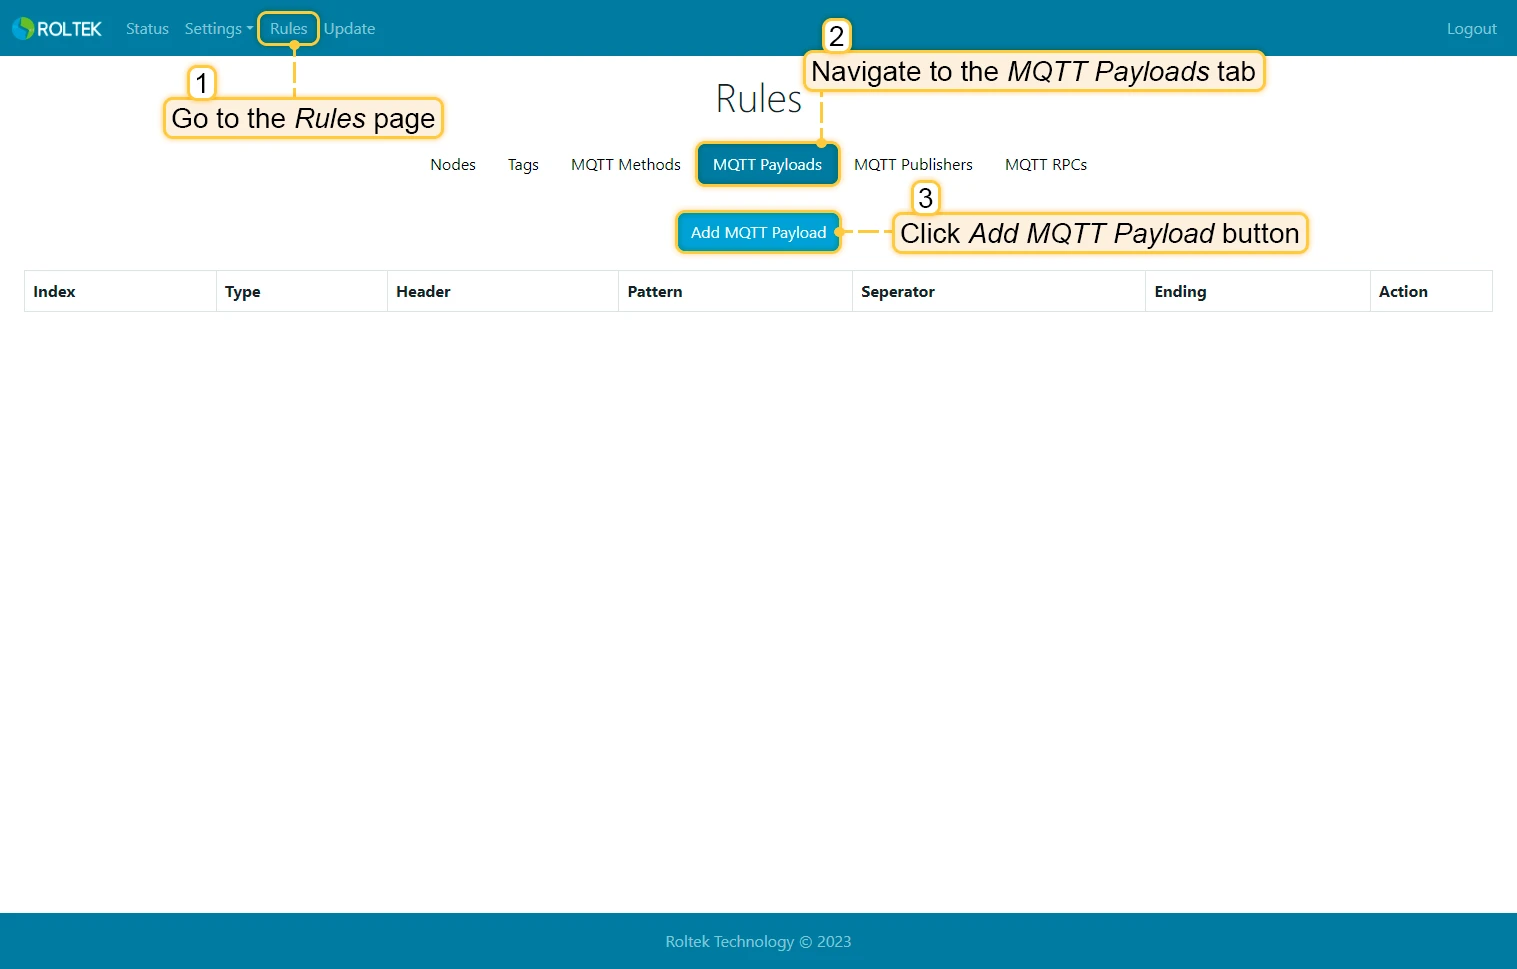
On the Rules page, navigate to the MQTT Payloads tab and click Add MQTT Payload.
-
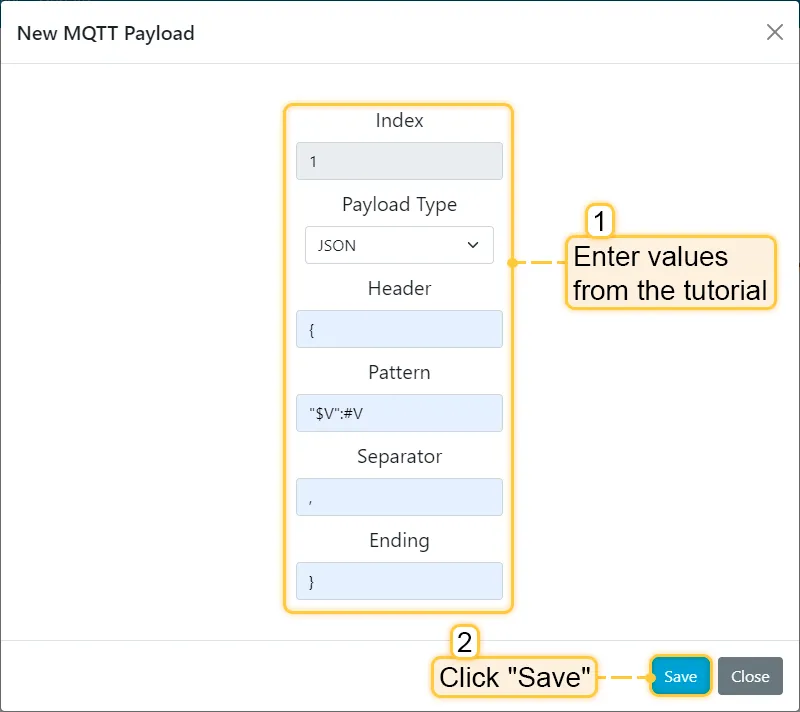
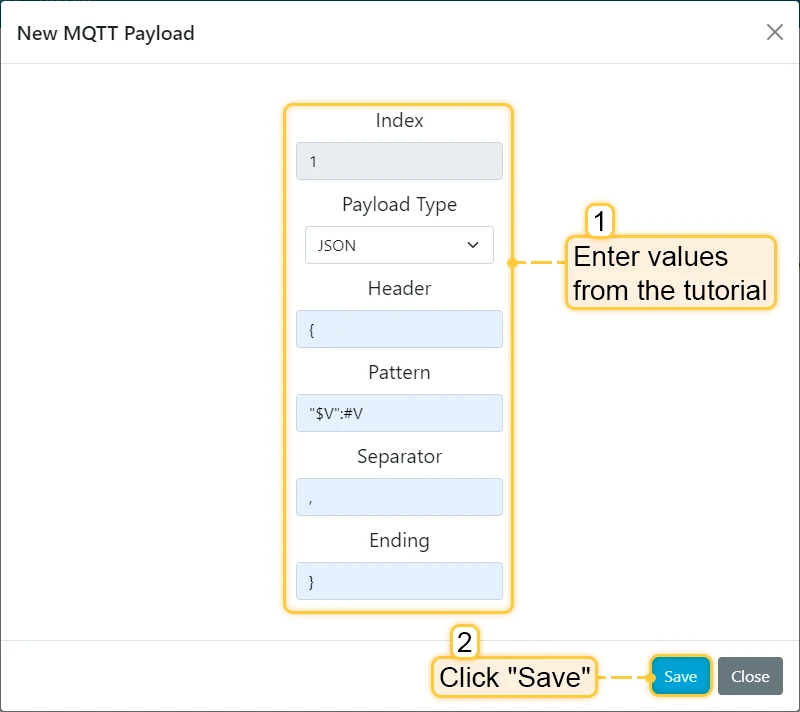
Configure the payload to produce JSON output compatible with ThingsBoard telemetry:
Field Value Payload Type JSON Header {Pattern "$V":#VSeparator ,Ending }Click Save.
Add MQTT publisher
Section titled “Add MQTT publisher”-
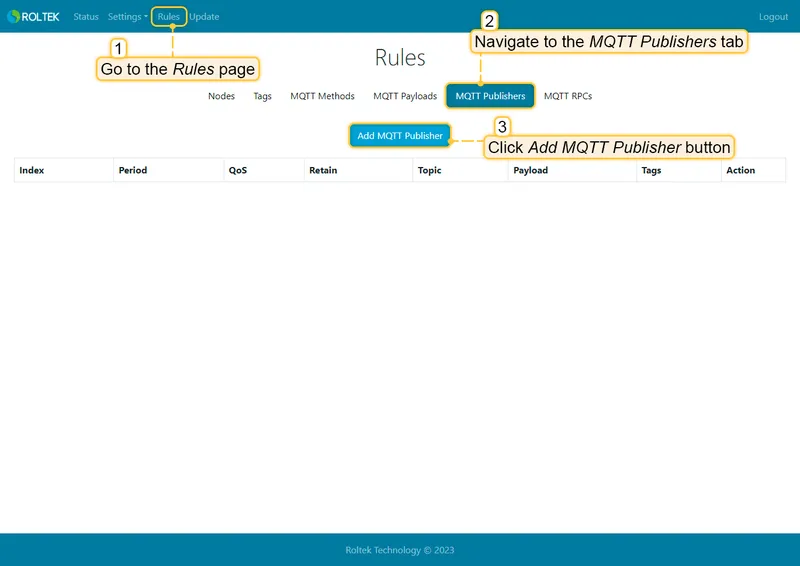
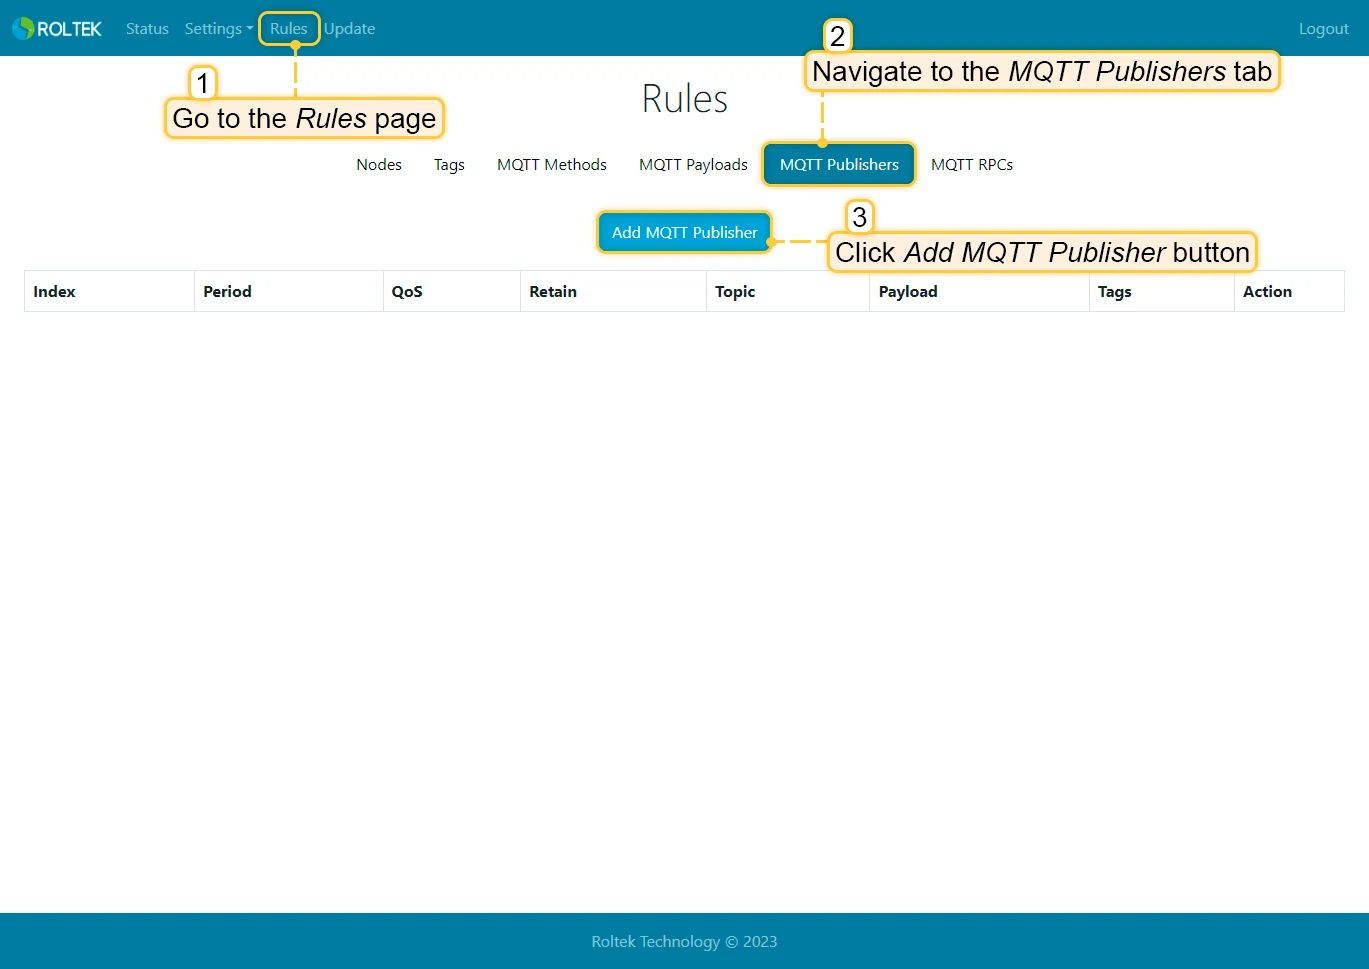
On the Rules page, navigate to the MQTT Publishers tab and click Add MQTT Publisher.
-
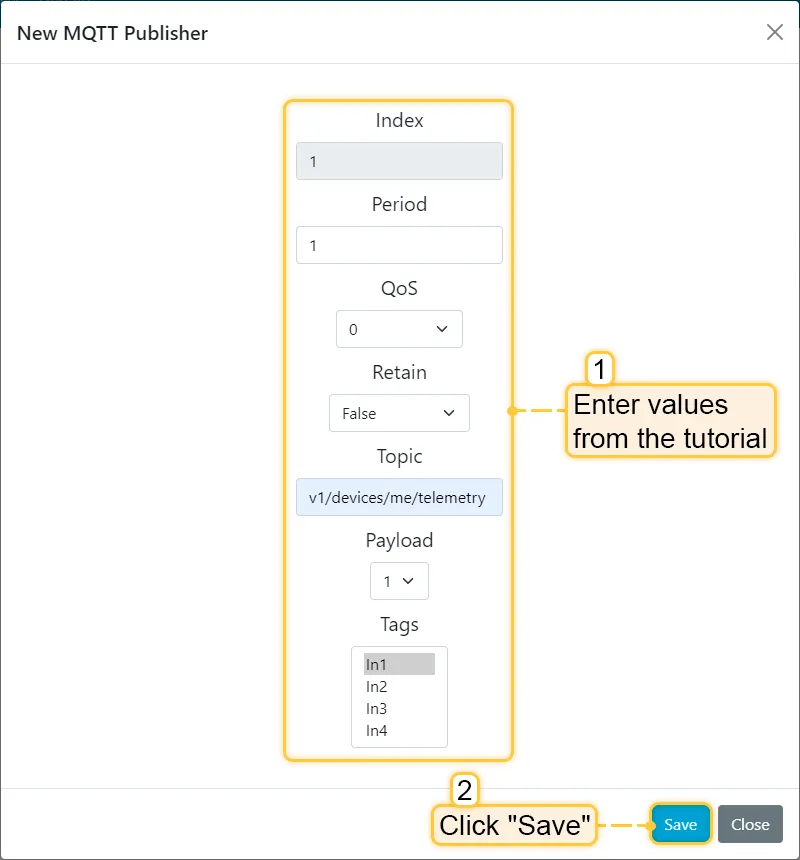
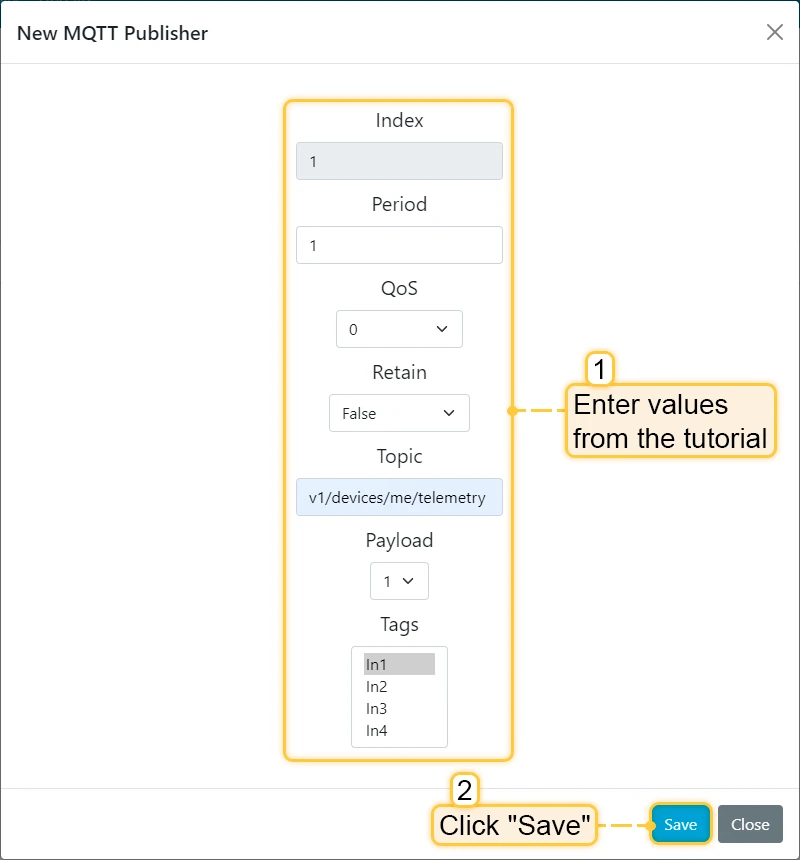
Configure the publisher:
Field Value Period Your desired publish interval QoS Your preferred QoS level Retain Your preferred retain value Topic v1/devices/me/telemetryPayload The payload created in the previous step Tags Select the tag or tags to publish Click Save.
Add data to a dashboard
Section titled “Add data to a dashboard”-
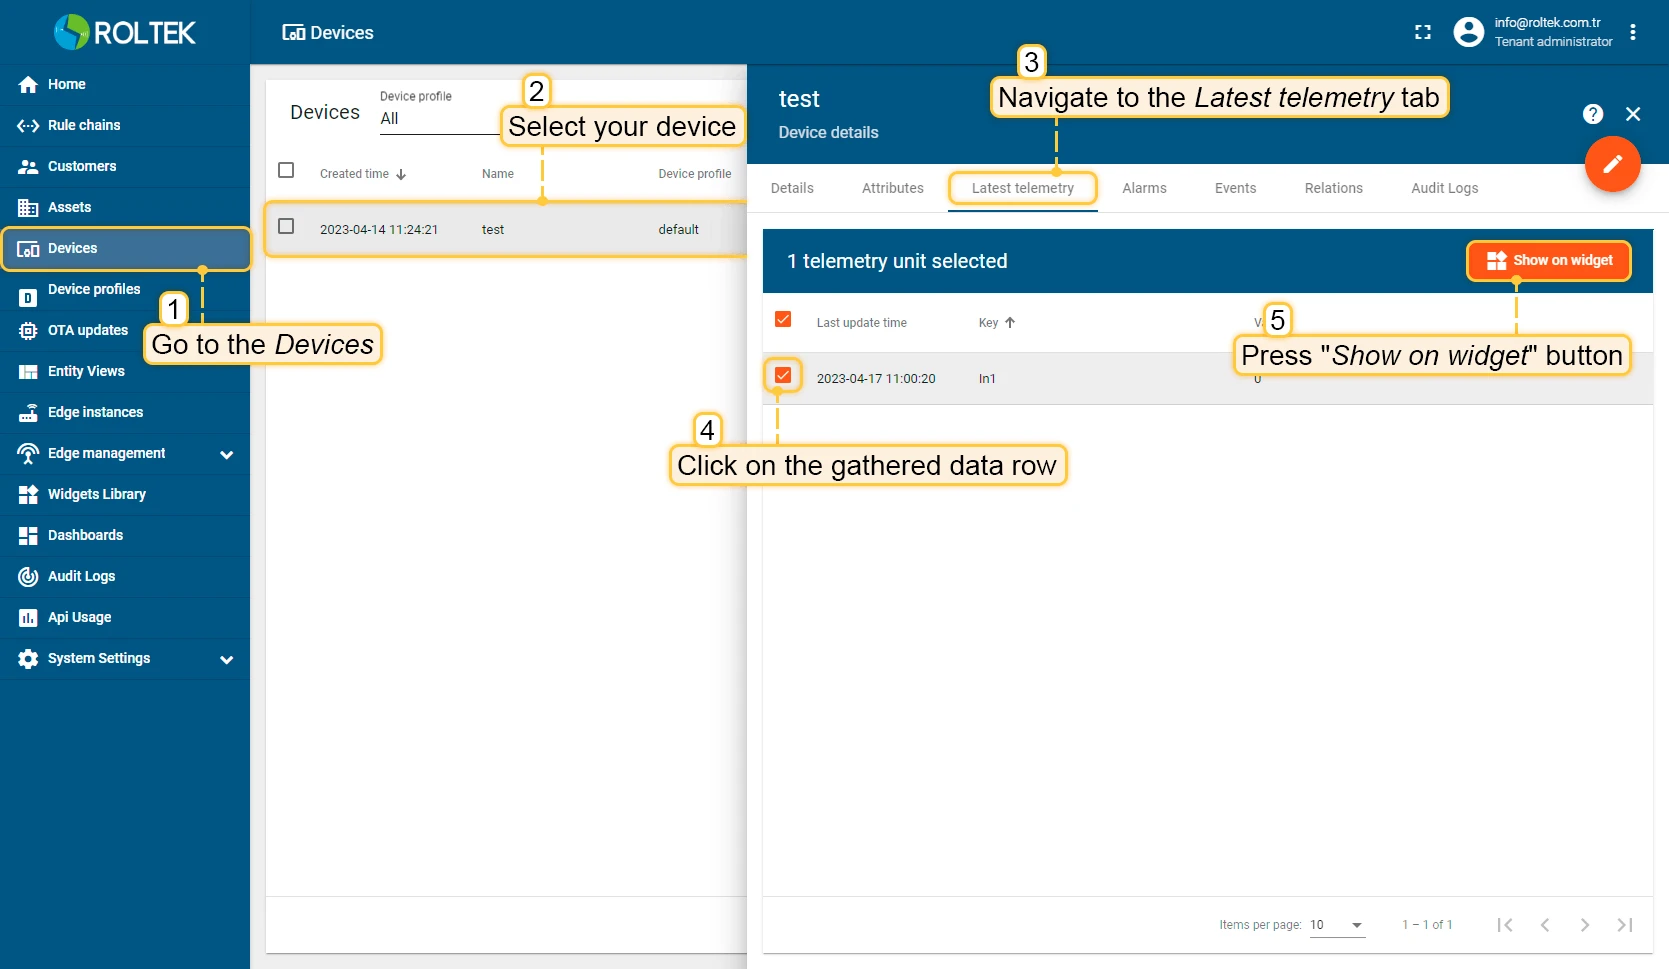
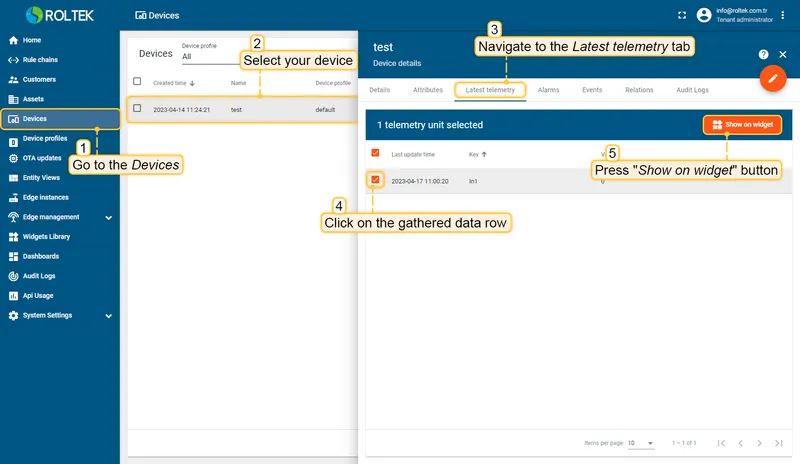
Go to Entities > Devices, open your device, and navigate to the Latest telemetry tab. Click on a data row and press Show on widget.
-
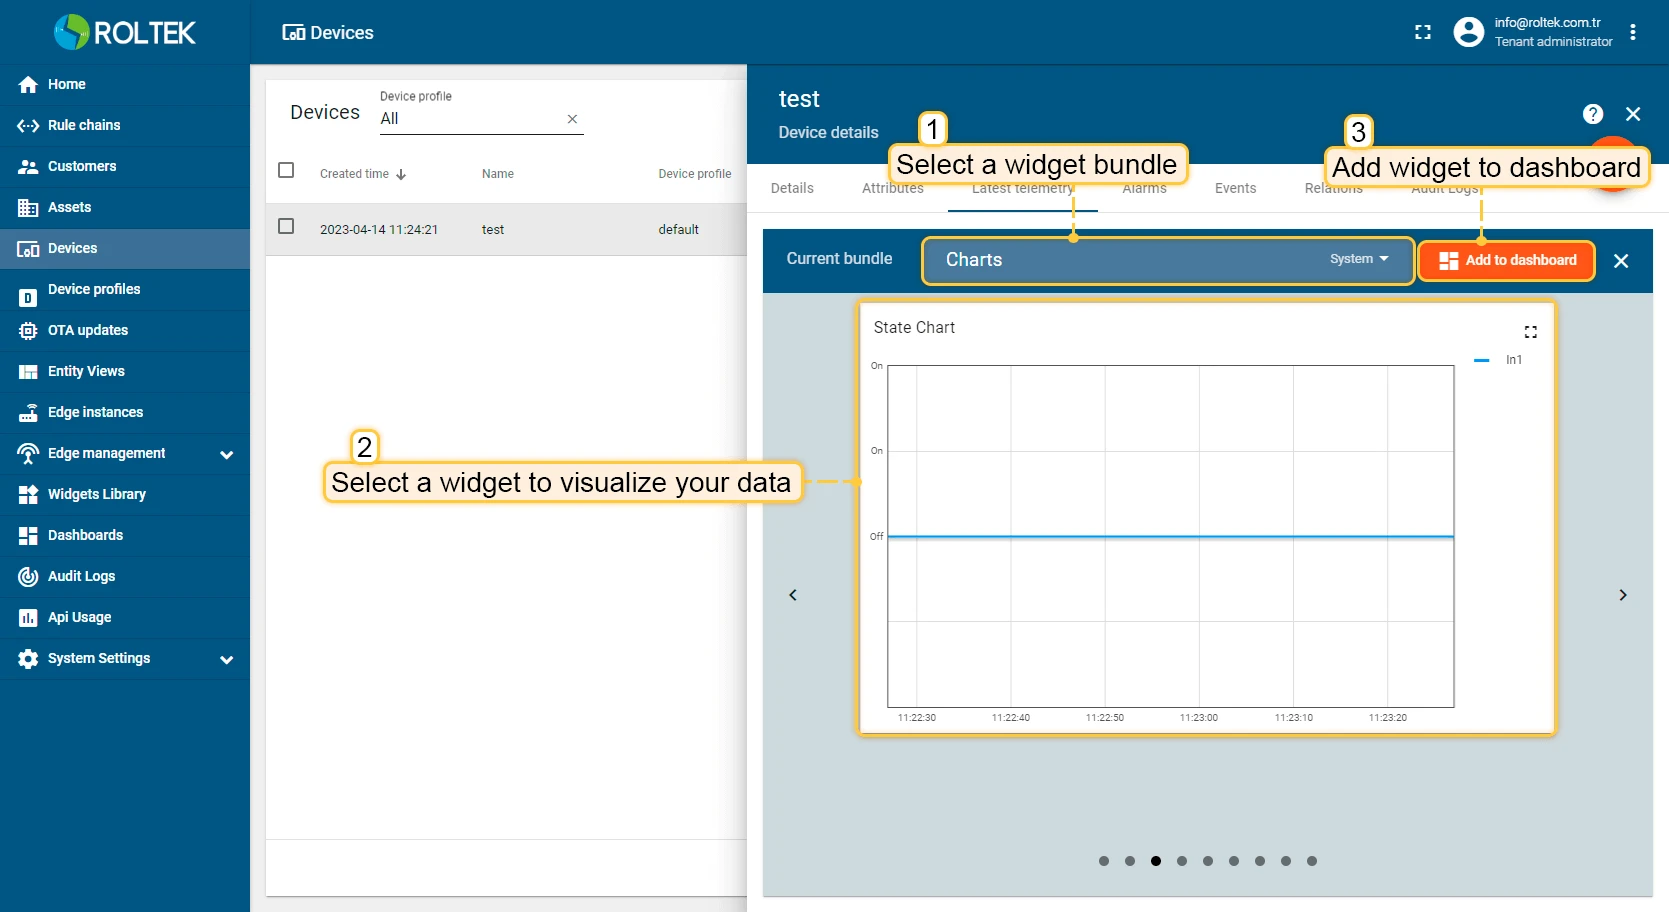
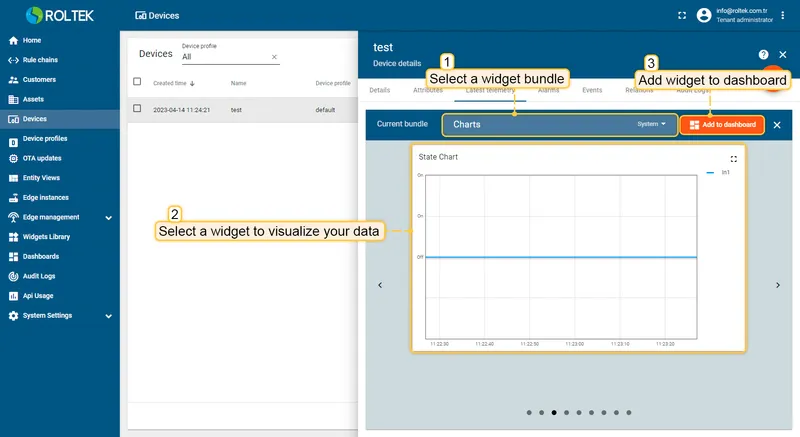
Choose a widget bundle matching your data type, select a chart, and click Add to dashboard.
-
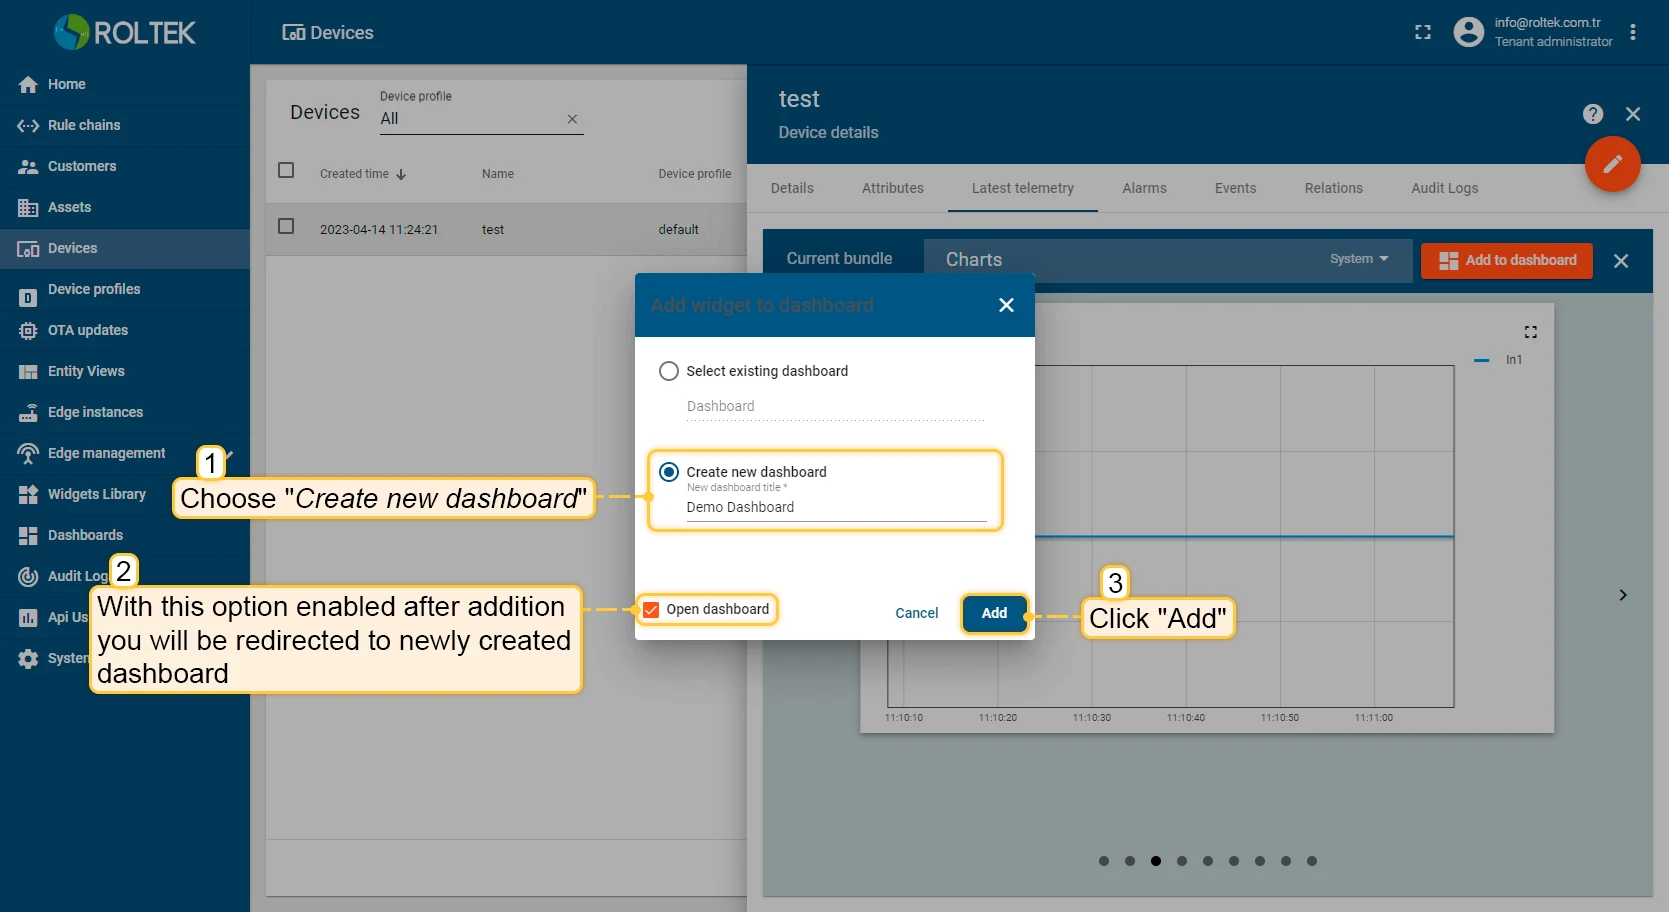
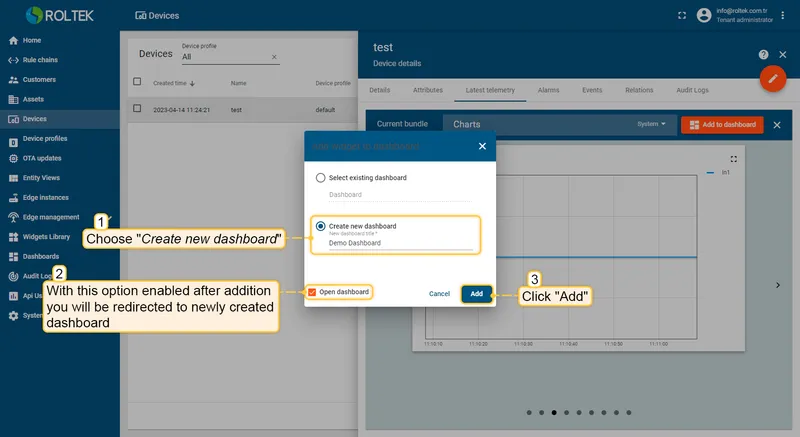
Select Create new dashboard, check Open dashboard, and click Add.
-
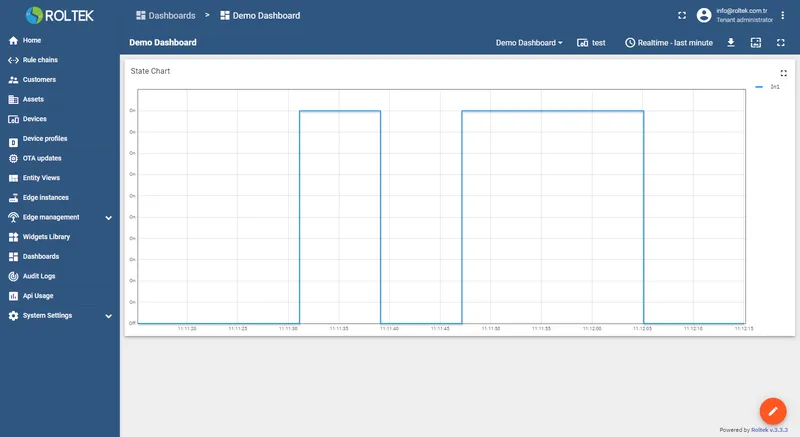
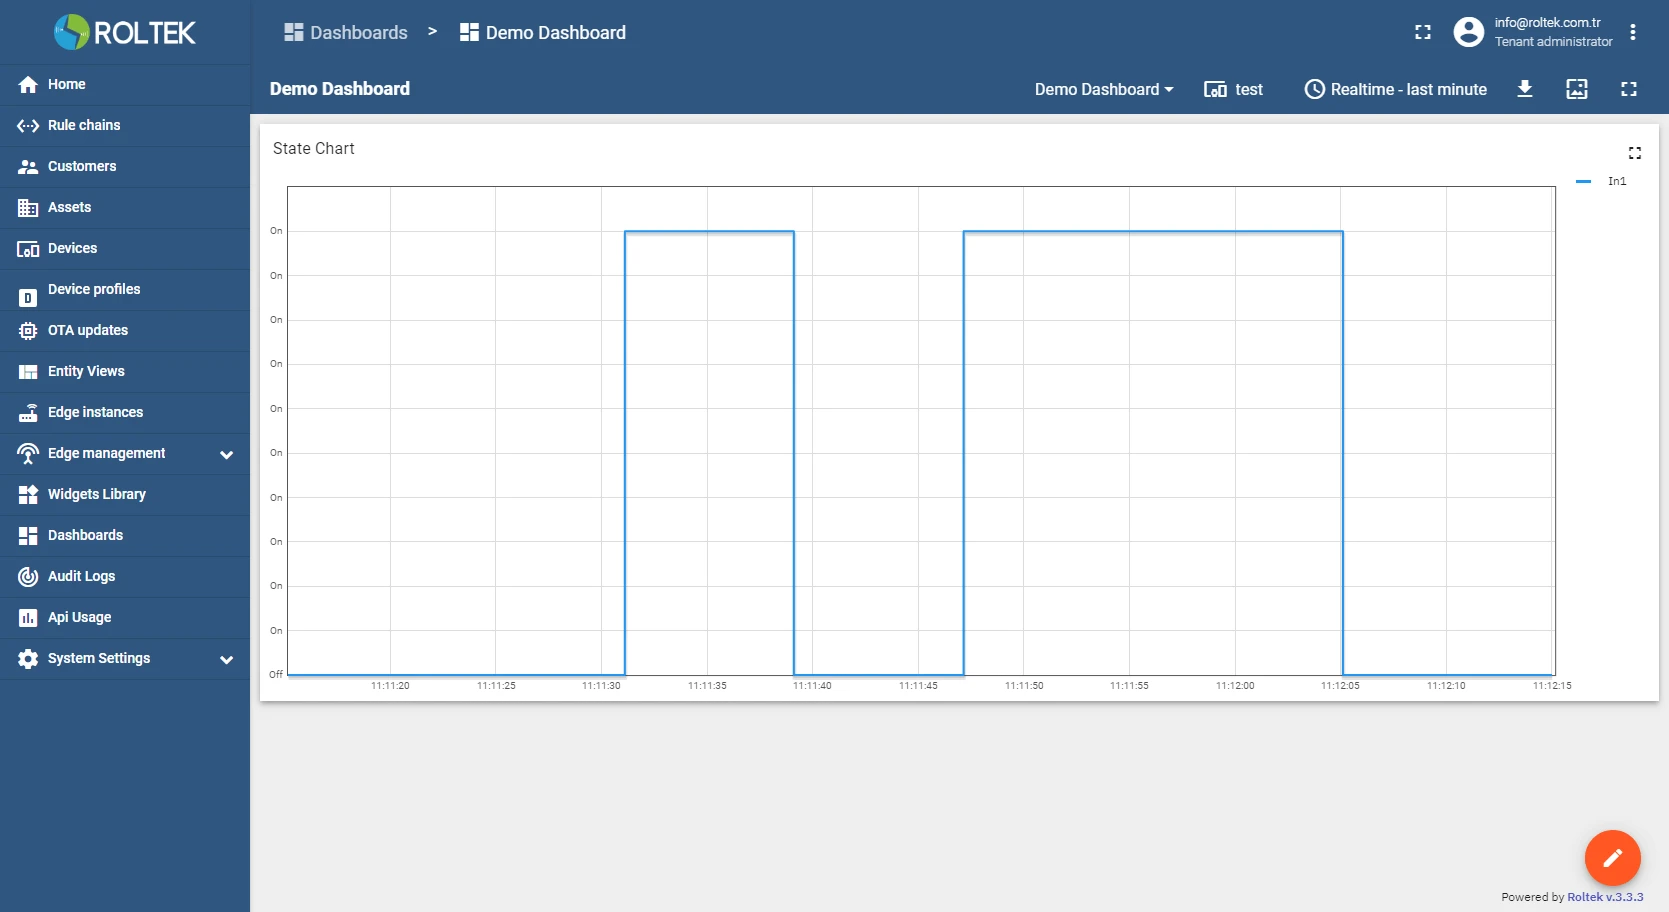
The dashboard opens with the widget displaying live telemetry from the DC620.