Abeeway Trackers with Actility ThingPark
Introduction
Section titled “Introduction”The Actility ThingPark integration connects ThingsBoard to the ThingPark LoRaWAN network server. ThingPark pushes uplink messages from LoRaWAN devices to a ThingsBoard HTTP endpoint, where they are decoded by an uplink converter and stored as device telemetry and attributes. ThingsBoard sends downlink commands back through Actility via an encoder converter and rule chain.
This guide demonstrates connecting Abeeway Micro Tracker and Abeeway Industrial Tracker devices to ThingsBoard through the ThingPark Wireless platform.
Prerequisites
Section titled “Prerequisites”- Active registration on the ThingPark Wireless OSS platform with at least one Abeeway tracker connected to the network.
- ThingsBoard PE instance or a free account on ThingsBoard Cloud.
- Review the ThingPark DX Dataflow API reference documentation.
Before creating the integration, verify that your device is active in ThingPark and attached to an application:
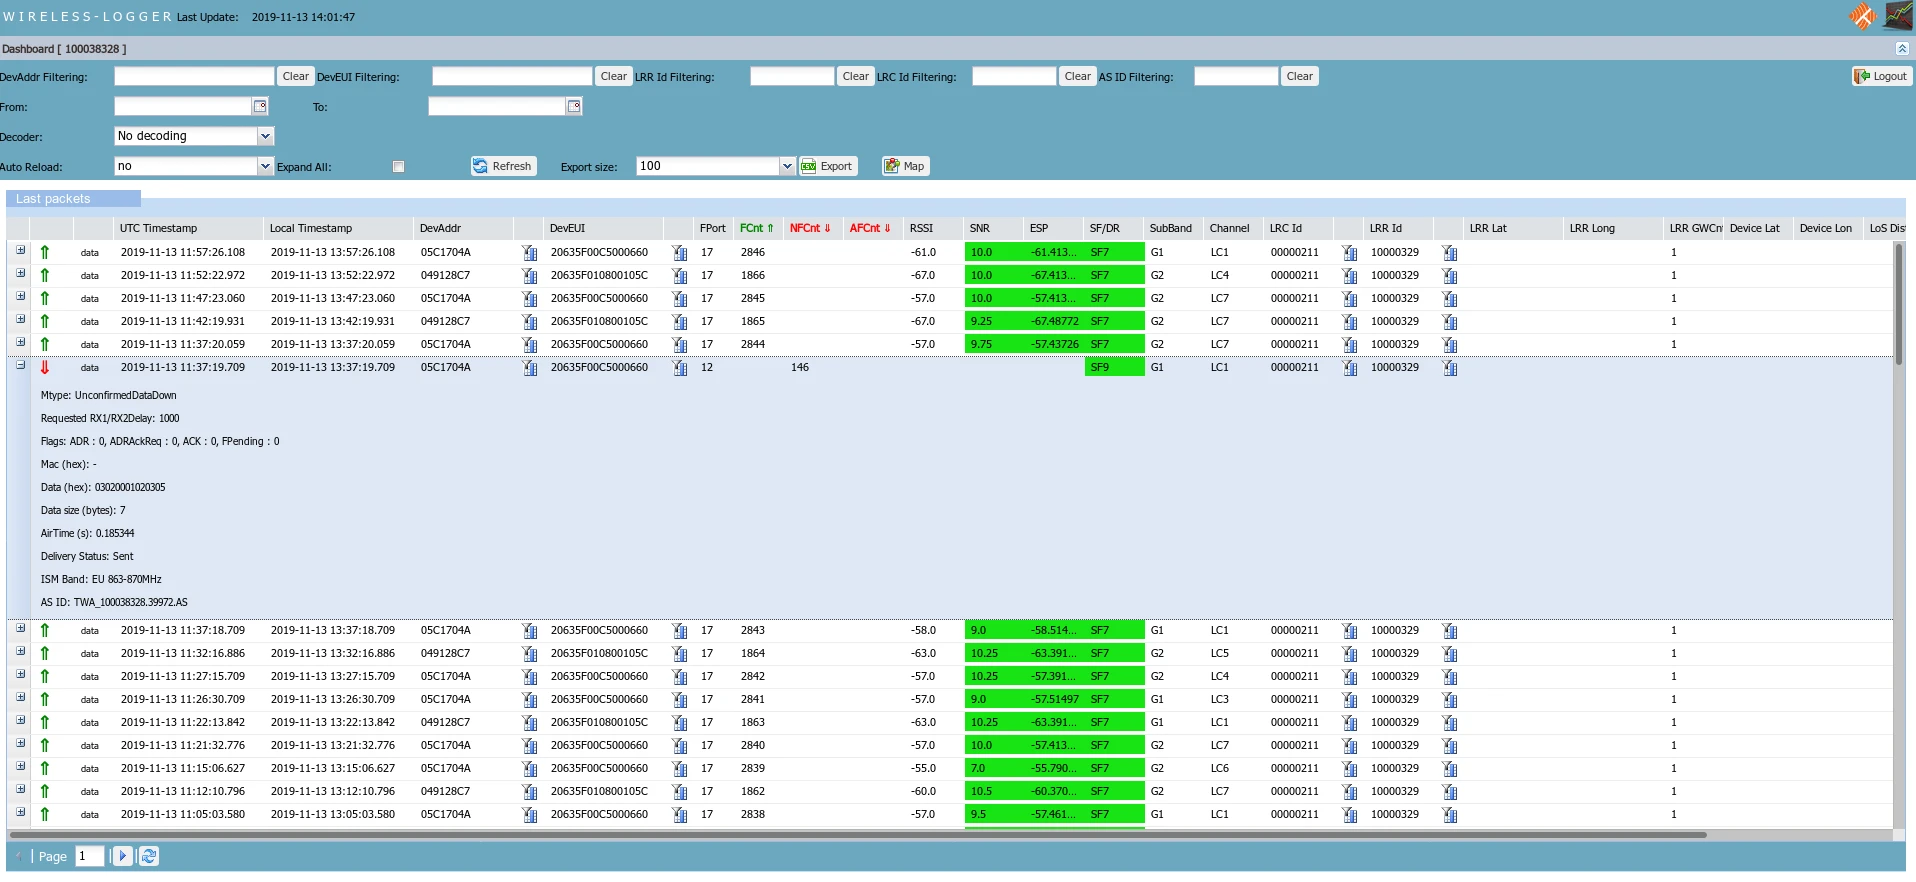
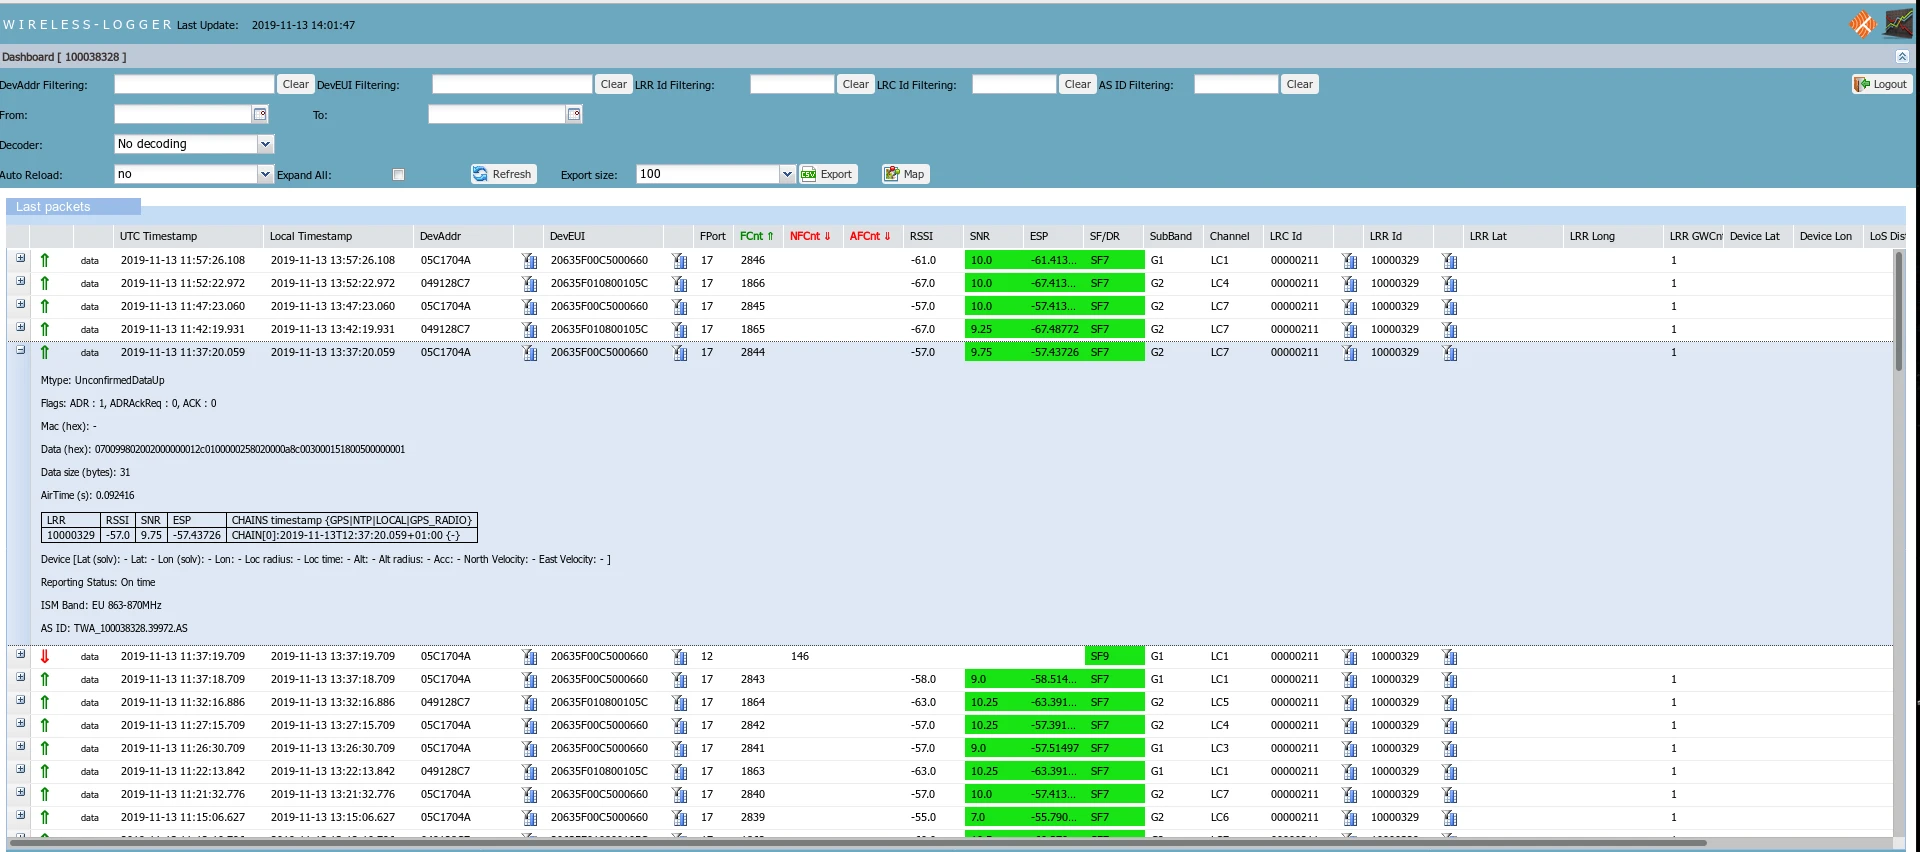
- Sign in to the ThingPark Wireless OSS intelligent logger and confirm the device is connected and transmitting data.
- Note the DevEUI of your device — it becomes the Device Name in ThingsBoard, and the device type is set to
trackerautomatically.
ThingsBoard Integration Setup
Section titled “ThingsBoard Integration Setup”Create an Uplink Converter
Section titled “Create an Uplink Converter”The decoder parses incoming ThingPark Wireless messages (JSON payload containing DevEUI_uplink or DevEUI_downlink_Sent) and extracts telemetry like battery voltage, temperature, GPS position, and device status. ThingPark supports all three converter types: Generic (script-based, shown below), Typed, and Library. The Library provides a built-in catalog of ready-to-use decoder functions for over 100 devices.
-
Download the uplink converter file:
-
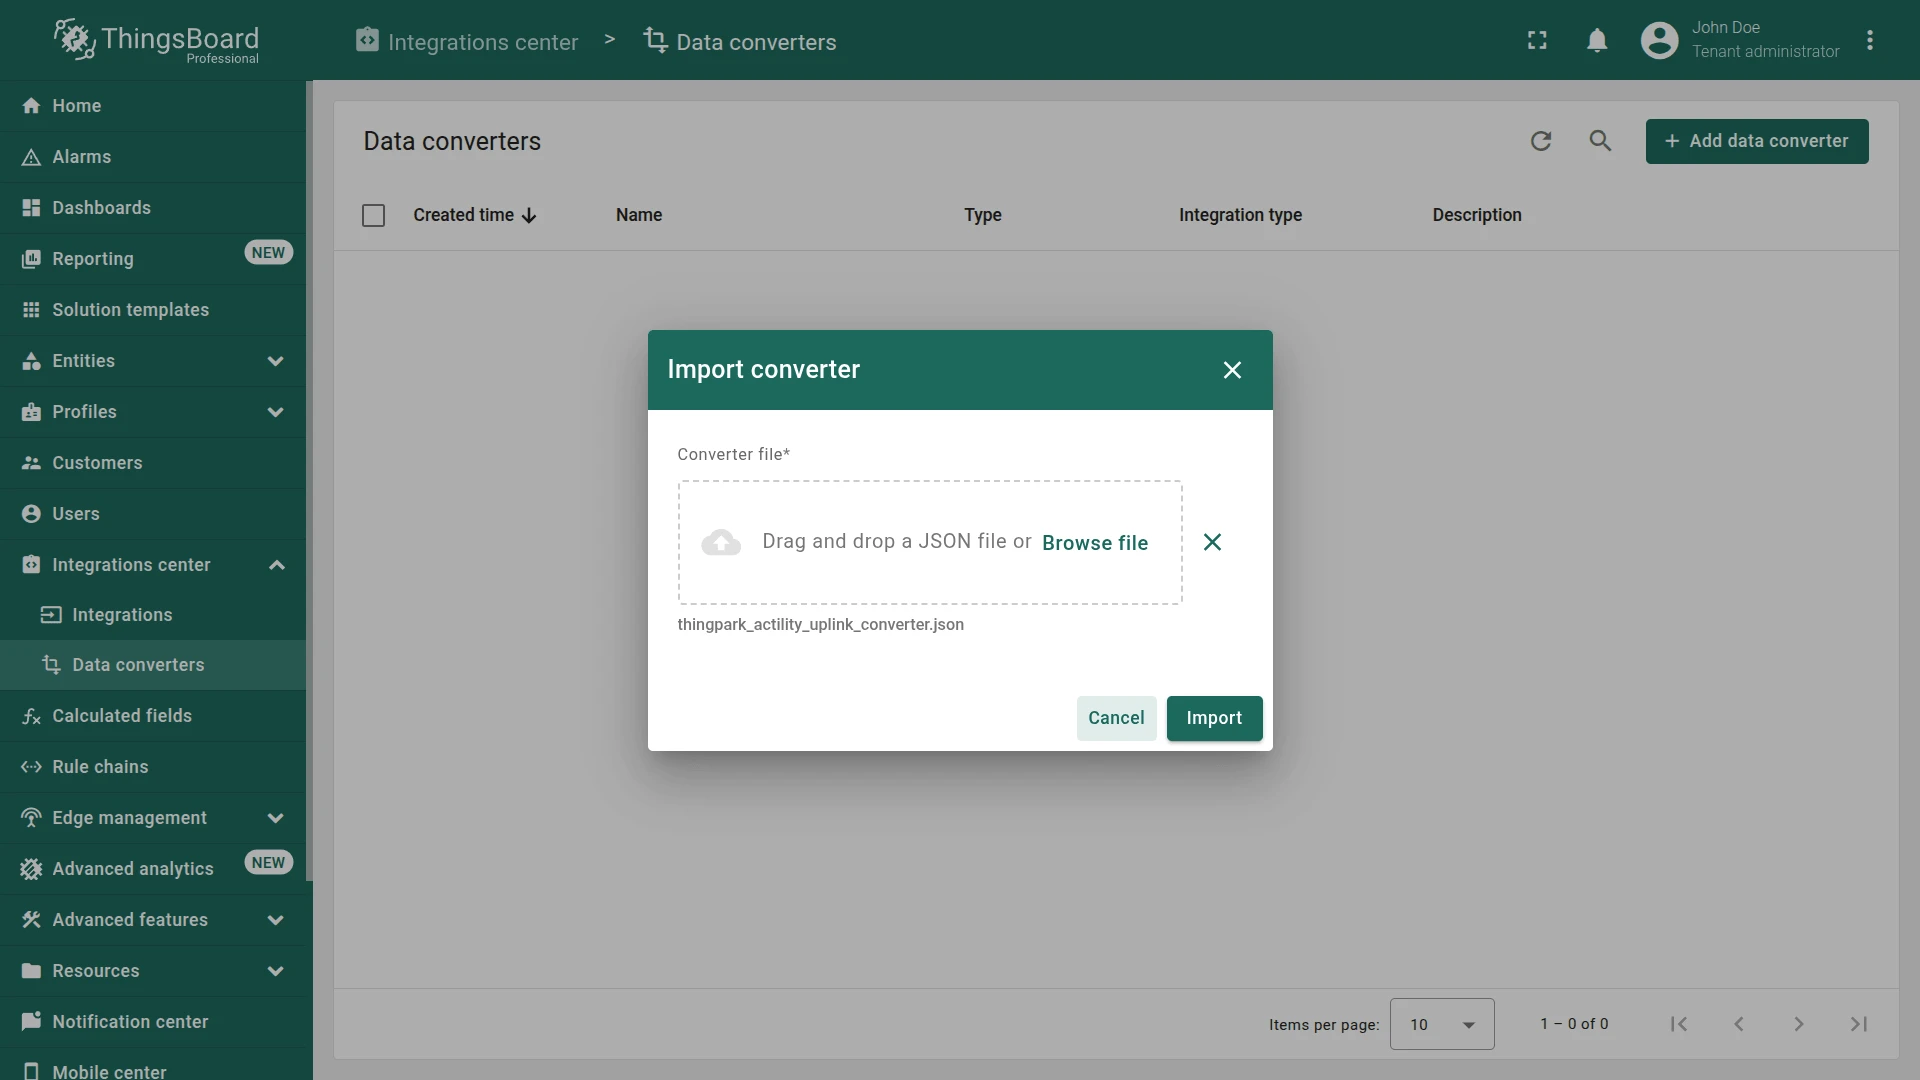
Go to Integrations center ⇾ Data converters and click + Add data converter ⇾ Import converter.
-
Drag and drop the downloaded JSON file and click Import.
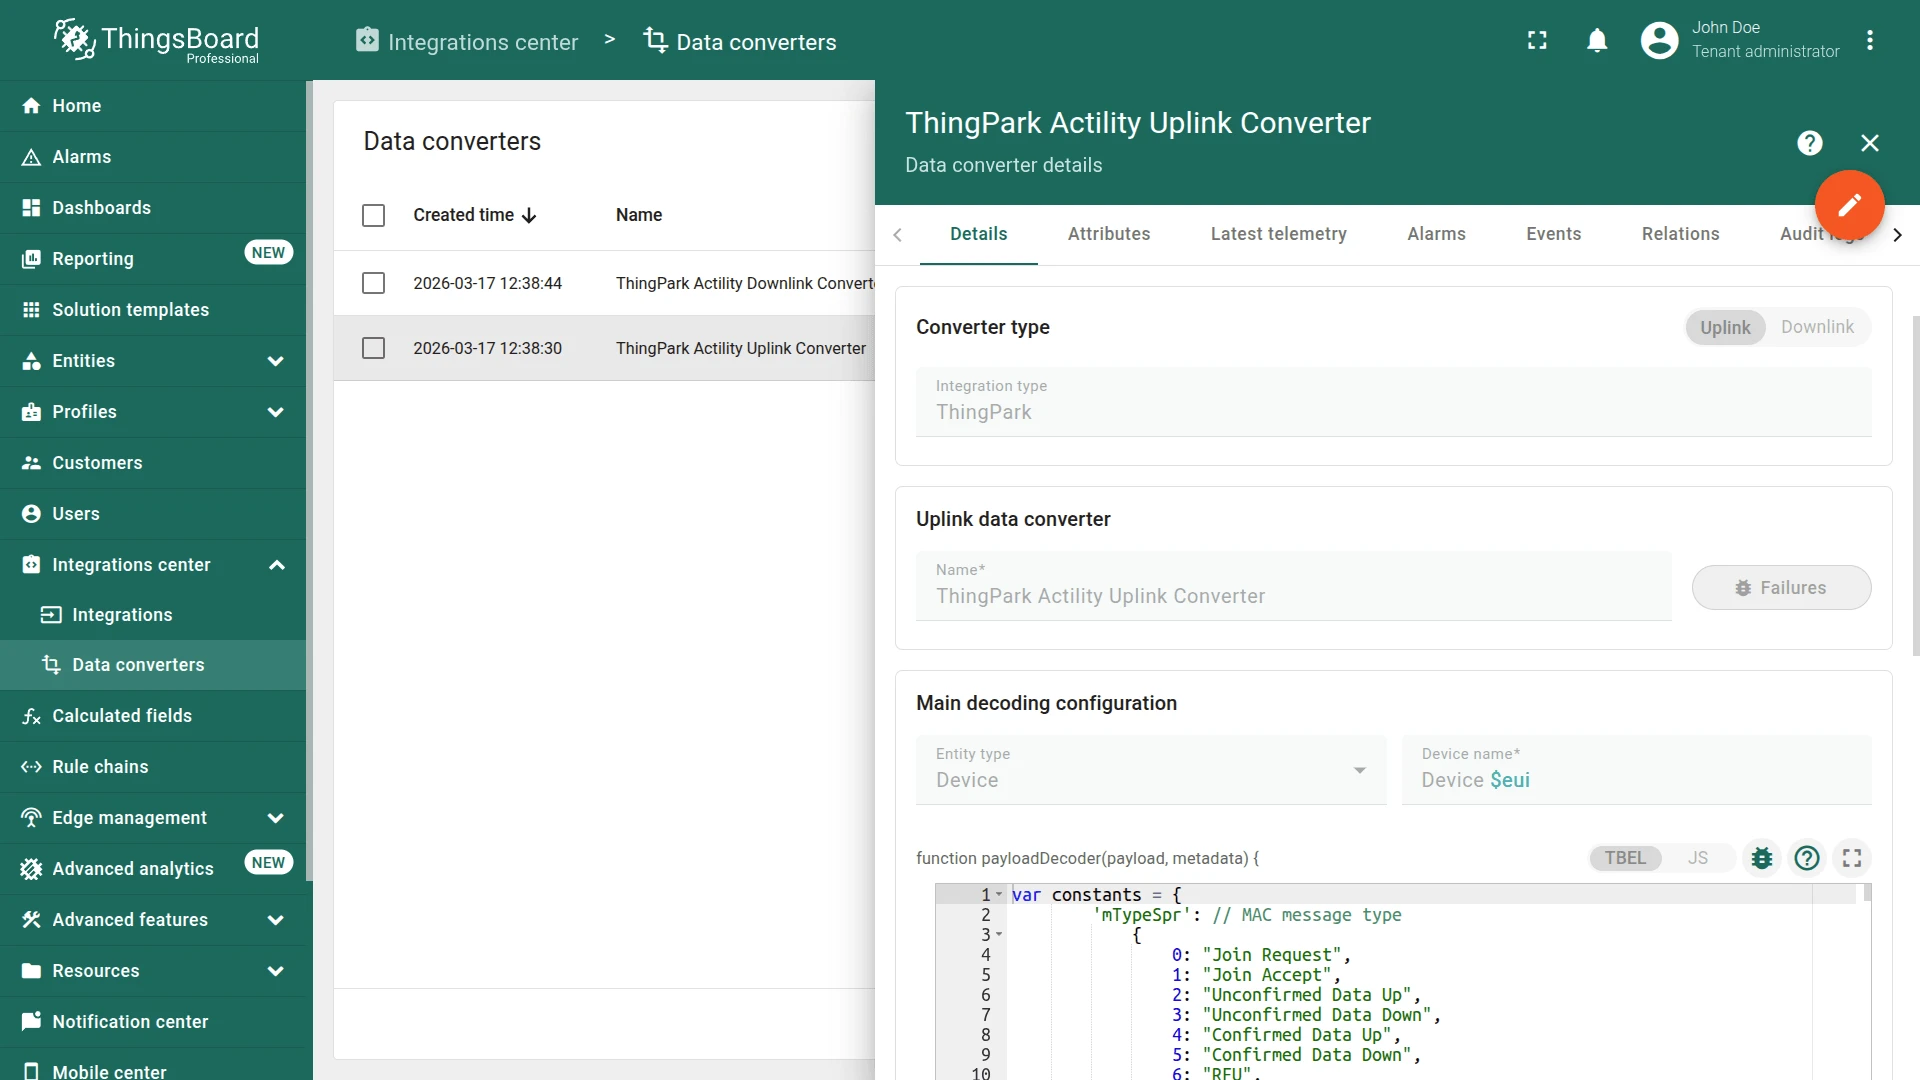
The decoder function used in this guide:
var constants = {  'mTypeSpr': // MAC message type  {    0: "Join Request",    1: "Join Accept",    2: "Unconfirmed Data Up",    3: "Unconfirmed Data Down",    4: "Confirmed Data Up",    5: "Confirmed Data Down",    6: "RFU",    7: "Proprietary"  },  'commonMessageHeaderSpr': {    'type': {      0: "Frame pending",      3: "Position message",      4: "Energy status message",      5: "Heartbeat message",      'h7': {        1: "Activity Status message",        2: "Configuration message"      },      9: "Shutdown message",      10: "Geolocation start message",      255: "Debug message"    },    'status7_5': {      0: "Standby",      1: "Motion tracking",      2: "Permanent tracking",      3: "Motion start/end tracking",      4: "Activity tracking",      5: "OFF"    },    'type_position_message': {      0: "GPS fix:",      1: "GPS timeout",      2: "No more used.",      3: "WIFI timeout",      4: "WIFI failure",      5: "LP-GPS data (encrypted, not described in this document)",      6: "LP-GPS data (encrypted, not described in this document)",      7: "BLE beacon scan",      8: "BLE beacon failure",      9: "WIFI BSSIDs"    }  },  'param': {    '00': "ul_period (sec: 60 - 86400 (min 30 for US))",    '01': "lora_period (sec: 300 - 86400)",    '02': "pw_stat_period (0, 300 - 604800)",    '03': "periodic_pos_period (sec: 0, 900 - 604800)",    '04': "rezerv04",    'geoloc_sensor': {      0: "WIFI only",      1: "GPS only",      2: "LP-GPS (AGPS/GPS)",      3: "Reserved (do not use)",      4: "Reserved (do not use)",      5: "Multimode (WIFI + low power-GPS + GPS) (with reset to WIFI on timeout). Superseded by mode 9.",      6: "WIFI-GPS only (WIFI then GPS if WIFI fails in one geolocation cycle)",      7: "WIFI-LPGPS only (WIFI then low power GPS if WIFI fails in one geolocation cycle)",      8: "Reserved (do not use)",      9: "WIFI-LPGPS first, the WIFI-GPS until timeout, then back to WIFI-LPGPS",      10: "BLE scan only"    },    'geoloc_method': {      0: "WIFI",      1: "GPS",      2: "LP-GPS (AGPS/GPS)",      3: "WIFI-GPS only (WIFI then GPS if WIFI fails in one geolocation cycle)",      4: "WIFI-LPGPS only (WIFI then low power GPS if WIFI fails in one geolocation cycle)",      5: "BLE scan only"    },    '07': "rezerv07",    '08': "motion_nb_pos (1-60)",    '09': "gps_timeout (sec: 30-300)",    '0a': "agps_timeout (sec: 30-250)",    '0b': "gps_ehpe (meter: 0-100 )",    '0c': "gps_convergence (sec: 0-300)",    'config_flags': {      0: "Frame pending mechanism",      1: "Activate long button press to switch to off mode",      2: "Double short press configuration: Alert (0) vs SOS (1)",      3: "Send a configuration uplink message in response to a configuration modification downlink.",      'h4': {        0: "WIFI payload with Cypher",        1: "WIFI payload without Cypher"      },      5: "Activate BLE advertising",      6: "First WIFI scan when geolocation starts.",      7: "Led blinks when a GPS fix is received.",    },    'transmit_strat': {      0: "Single fixed. Single TX. Use provisioned data rate.",      1: "Single random: Single TX. Rate in [SF7..SF12].",      2: "Dual random: First TX with rate in [SF7..SF8], next TX with rate in [SF9..SF12].",      3: "Dual fixed: First TX in [SF7..SF8]. Next Use provisioned data rate. (not recommended)",      4: "Network ADR. The LoRa network controls the number of transmissions."    },    '0f': "BLE_beacon_count (1-4)",    '10': "BLE_beacon_timeout (sec: 1-5)",    '11': "gps_standby_timeout (sec: 10-7200 pre V1.7-3, 0-28800 post V1.7-3)",    '12': "confirmed_ul_bitmap (0x0 - 0xFFFF)",    '13': "confirmed_ul_retry (0-8)",    'fd': "BLE version",    'fe': "Firmware version"  },  'wifi_err': {    0: "WIFI connection failure",    1: "Scan failure",    2: "Antenna unavailable",    3: "WIFI not supported on this device"  },  'ble_err': {    0: "BLE is not responding",    1: "Internal error",    2: "Shared antenna not available:",    3: "Scan already on going",    4: "BLE busy (should not occur)",    5: "No beacon detected",    6: "Hardware incompatibility"  },  'encoded': {    'battery': {      'lo': 2.8, 'hi': 4.2, 'nbits': 8, 'nresv': 2, 'step_size': 5.5    },    'temperature': {      'lo': -44, 'hi': 85, 'nbits': 8, 'nresv': 0, 'step_size': 0.5    },    'gps_satellite': {      'lo': 0, 'hi': 50, 'nbits': 8, 'nresv': 0, 'step_size': 0.2    },    'gps_age': {      'lo': 0, 'hi': 2040, 'nbits': 8, 'nresv': 0, 'step_size': 8    },    'gps_ehpe': {      'lo': 0, 'hi': 1000, 'nbits': 8, 'nresv': 0, 'step_size': 3.9    },    'gps_wifi': {      'lo': 2.8, 'hi': 4.2, 'nbits': 8, 'nresv': 2, 'step_size': 5.5    }  }};
var payLoadJson = decodeToJson(payload);var result = setPayload();var payload_hex;var payloadByte = [];var telemetryC;var devEuiLink;
function setPayload() {  if (payLoadJson !== null) {    if (payLoadJson !== null && payLoadJson.length !== 0) {      if (payLoadJson.hasOwnProperty('DevEUI_uplink')) {        devEuiLink = payLoadJson.DevEUI_uplink;      } else if (payLoadJson.hasOwnProperty('DevEUI_downlink_Sent')) {        devEuiLink = payLoadJson.DevEUI_downlink_Sent;      }      if (devEuiLink !== null && devEuiLink.length !== 0) {        var payloadResult = getPayload();        if (devEuiLink.hasOwnProperty('payload_hex')) {          payload_hex = devEuiLink['payload_hex'];          if (payload_hex !== null && payload_hex.length !== 0) {            payload_hex = payload_hex.trim();            payloadByte = hexStringToBytes(payload_hex);            payloadResult.telemetry = (payLoadJson.hasOwnProperty('DevEUI_uplink')) ? getTelemetryUp() : getTelemetryDown();          }        } else {          payloadResult.telemetry = getTelemetryDown();        }        payloadResult.deviceName = devEuiLink['DevEUI'];        telemetryC.values['sentPayloadHex'] = "00";        return payloadResult;      }    }  }  return null;}
function getTelemetryUp() {  var message_type = payloadByte[0];  if (message_type > 0) {    telemetryC = getTelemetryCommonUp();  }  switch (message_type) {    case 0: return getTelemetryFramePending();    case 3: return getTelemetryPositionMessage();    case 4: return getTelemetryEnergyStatusMessage();    case 5: return getTelemetryHeartbeat();    case 7: return getTelemetryActivityStatus_Configuration();    case 9: return telemetryC;    case 10: return telemetryC;    case 255: return telemetryC;    default: return null;  }}
function getTelemetryDown() {  telemetryC = getTelemetryCommonDown();  return telemetryC;}
function getTelemetryFramePending() {  var mSecUtc = convertDateTimeISO8601_toMsUtc(payLoadJson.DevEUI_uplink["Time"]);  return {    'ts': mSecUtc,    'values': {      'ph_type': constants.commonMessageHeaderSpr.type[0],      'acknowledge_token': payloadByte[1]    }  };}
function getTelemetryEnergyStatusMessage() {  var telemetryC = getTelemetryCommonUp();  telemetryC.values['GPS_ON (sec)'] = bytesToInt(payloadByte.subarray(5, 9));  telemetryC.values['GPS_Standby (sec)'] = bytesToInt(payloadByte.subarray(9, 13));  telemetryC.values['WIFI-SCAN (number)'] = bytesToInt(payloadByte.subarray(13, 17));  return telemetryC;}
function getTelemetryPositionMessage() {  var typePosMessageId = payloadByte[4] & 0xf;  telemetryC.values['ph_typePosMessage'] = constants.commonMessageHeaderSpr.type_position_message[typePosMessageId];  switch (typePosMessageId) {    case 0: getPosMesGPS_fix(); break;    case 1: getPosMesGPS_timeout(); break;    case 2: break;    case 3: getPosMesWIFI_timeout(); break;    case 4:      getPosMesWIFI_timeout();      telemetryC.values['pd_WIFI_err'] = constants.wifi_err[payloadByte[11]];      break;    case 5: break;    case 6: break;    case 7: getPosMesBLE_beacon_scan(); break;    case 8: telemetryC.values['pd_BLE_err'] = constants.ble_err[payloadByte[5]]; break;    case 9: getPosMesWIFI_BSSIDs(); break;  }  return telemetryC;}
function getPosMesGPS_fix() {  getAge_0_7_9();  var latitude = payloadByte.subarray(6, 9);  var longiture = payloadByte.subarray(9, 12);  var ehpe = encodedFunction(payloadByte[12], constants.encoded.gps_ehpe['nresv'], constants.encoded.gps_ehpe['step_size'], constants.encoded.gps_ehpe['lo'], 1);  var encrypted = payloadByte.subarray(13, 16);  telemetryC.values['pd_latitude'] = convertCoordinate(latitude);  telemetryC.values['pd_longiture'] = convertCoordinate(longiture);  telemetryC.values['pd_EHPE'] = ehpe;  telemetryC.values['pd_encrypted'] = bytesToInt(encrypted);}
function getPosMesGPS_timeout() {  telemetryC.values['timeout_cause'] = payloadByte[5] + '-User timeout cause';  telemetryC.values['C/N0'] = encodedFunction(payloadByte[6], constants.encoded.gps_satellite['nresv'], constants.encoded.gps_satellite['step_size'], constants.encoded.gps_satellite['lo'], 1);  telemetryC.values['C/N1'] = encodedFunction(payloadByte[7], constants.encoded.gps_satellite['nresv'], constants.encoded.gps_satellite['step_size'], constants.encoded.gps_satellite['lo'], 1);  telemetryC.values['C/N2'] = encodedFunction(payloadByte[8], constants.encoded.gps_satellite['nresv'], constants.encoded.gps_satellite['step_size'], constants.encoded.gps_satellite['lo'], 1);  telemetryC.values['C/N3'] = encodedFunction(payloadByte[9], constants.encoded.gps_satellite['nresv'], constants.encoded.gps_satellite['step_size'], constants.encoded.gps_satellite['lo'], 1);}
function getPosMesWIFI_timeout() {  telemetryC.values['start time (T0)'] = encodedFunction(payloadByte[5], constants.encoded.gps_wifi['nresv'], constants.encoded.gps_wifi['step_size'], constants.encoded.gps_wifi['lo'], 1);  telemetryC.values['T0 + 0.5 sec'] = encodedFunction(payloadByte[6], constants.encoded.gps_wifi['nresv'], constants.encoded.gps_wifi['step_size'], constants.encoded.gps_wifi['lo'], 1);  telemetryC.values['T0 + 1 sec'] = encodedFunction(payloadByte[7], constants.encoded.gps_wifi['nresv'], constants.encoded.gps_wifi['step_size'], constants.encoded.gps_wifi['lo'], 1);  telemetryC.values['T0 + 1.5 sec'] = encodedFunction(payloadByte[8], constants.encoded.gps_wifi['nresv'], constants.encoded.gps_wifi['step_size'], constants.encoded.gps_wifi['lo'], 1);  telemetryC.values['T0 + 2 sec'] = encodedFunction(payloadByte[9], constants.encoded.gps_wifi['nresv'], constants.encoded.gps_wifi['step_size'], constants.encoded.gps_wifi['lo'], 1);  telemetryC.values['T0 + 2.5 sec'] = encodedFunction(payloadByte[10], constants.encoded.gps_wifi['nresv'], constants.encoded.gps_wifi['step_size'], constants.encoded.gps_wifi['lo'], 1);}
function getPosMesBLE_beacon_scan() {  getAge_0_7_9();  var data = payload_hex.substr(6 * 2, payload_hex.length);  var array = data.match(/.{1,14}/g);  var i = 0;  array.forEach(function (e) {    var adrid = getIdRssi(e);    telemetryC['adr_' + i] = adrid["id"];    telemetryC['rssi_' + i] = adrid["rssi"];    i++;  });}
function getPosMesWIFI_BSSIDs() {  getAge_0_7_9();  var data = payload_hex.substr(6 * 2, payload_hex.length);  var array = data.match(/.{1,14}/g);  var i = 0;  array.forEach(function (e) {    var bssid = getIdRssi(e);    telemetryC['bssid_' + i] = bssid["id"];    telemetryC['rssi_' + i] = bssid["rssi"];    i++;  });}
function getIdRssi(e) {  var bssidStr = e.substr(0, 12);  var id = (bssidStr.match(/.{1,2}/g)).join(':');  var rssiInt = parseInt(e.substr(12, e.length), 16);  var rssi = (parseInt(rssiInt, 16) > 127) ? (128 - rssiInt) : rssiInt;  return { "id": id, "rssi": rssi };}
function getAge_0_7_9() {  telemetryC.values['pd_age'] = encodedFunction(payloadByte[5], constants.encoded.gps_age['nresv'], constants.encoded.gps_age['step_size'], constants.encoded.gps_age['lo'], 1);}
function getTelemetryHeartbeat() {  telemetryC['last_reset_cause'] = payloadByte[5];  if (payloadByte.length > 6) {    telemetryC['fW_version'] = getVersion(payloadByte[6], payloadByte[7], payloadByte[8]);  }  return telemetryC;}
function getTelemetryActivityStatus_Configuration() {  var tag = payloadByte[5];  if (tag === 1) {    telemetryC.values['Activity_counter'] = bytesToInt(payloadByte.subarray(6, 10));  } else if (tag === 2) {    var data = payload_hex.substr(6 * 2, payload_hex.length - 6 * 2);    var array = data.match(/.{1,10}/g);    array.forEach(function (element) {      var id = element.substr(0, 2);      var param = constants.param[id];      var valId = parseInt(element.substr(2, element.length), 16);      if (id === 'fe' || id === 'fd') {        valId = getVersion(parseInt(element.substr(2, 4), 16), parseInt(element.substr(6, 2), 16), parseInt(element.substr(8, 2), 16));      }      if (id === '05') {        telemetryC.values['geoloc_sensor'] = constants.param.geoloc_sensor[valId];      } else if (id === '06') {        telemetryC.values['geoloc_method'] = constants.param.geoloc_method[valId];      } else if (id === '0d') {        if (valId > 0) {          var byteStr = element.substr(element.length - 2, 2);          telemetryC = getConfigFlags(telemetryC, byteStr, 'config_flags_bit_');        }      } else if (id === '0e') {        telemetryC.values['transmit_strat'] = constants.param.transmit_strat[valId];      } else {        telemetryC.values[param] = valId;      }    });  }  return telemetryC;}
function getTelemetryCommonUp() {  if (payLoadJson.hasOwnProperty('DevEUI_uplink')) {    var byteStatus = payloadByte[1];    var battery = encodedFunction(payloadByte[2], constants.encoded.battery['nresv'], constants.encoded.battery['step_size'], constants.encoded.battery['lo'], 100);    var temperature = encodedFunction(payloadByte[3], constants.encoded.temperature['nresv'], constants.encoded.temperature['step_size'], constants.encoded.temperature['lo'], 1);    var mSecUtc = convertDateTimeISO8601_toMsUtc(devEuiLink["Time"]);    var phTypeId = payloadByte[0];    var phType = (phTypeId === 7) ? constants.commonMessageHeaderSpr.type.h7[payloadByte[5]] : constants.commonMessageHeaderSpr.type[phTypeId];    var ack = payloadByte[4] >> 4;  }  return {    "ts": mSecUtc,    "values": {      "batteryVoltage": battery,      "temperature": temperature,      "ph_type": phType,      "ph_status": constants.commonMessageHeaderSpr.status7_5[byteStatus >> 5],      "ph_alert_SOS_bit4": getBit(byteStatus, 4),      "ph_tracking/idle_state_bit3": getBit(byteStatus, 3),      "ph_tracker_is_moving_bit2": getBit(byteStatus, 2),      "ph_periodic_position_message_bit1": getBit(byteStatus, 1),      "ph_POD_message_bit0": getBit(byteStatus, 0),      "m_type": constants.mTypeSpr[devEuiLink['MType']],      "m_port": devEuiLink['FPort'],      "m_customerID": devEuiLink['CustomerID'],      "m_LrrRSSI": devEuiLink["LrrRSSI"],      "m_LrrSNR": devEuiLink["LrrSNR"],      "m_Lrrid": devEuiLink["Lrrid"],      "ack": ack    }  };}
function getTelemetryCommonDown() {  var mSecUtc = convertDateTimeISO8601_toMsUtc(devEuiLink["Time"]);  return {    "ts": mSecUtc,    "values": {      "m_type": constants.mTypeSpr[devEuiLink['MType']],      "m_port": devEuiLink['FPort'],      "m_customerID": devEuiLink['CustomerID'],      "m_LrrRSSI": devEuiLink["LrrRSSI"],      "m_LrrSNR": devEuiLink["LrrSNR"],      "m_Lrrid": devEuiLink["Lrrid"]    }  };}
function getPayload() {  return { 'deviceName': "", 'deviceType': "Abeeway Micro/Industrial Tracker", 'telemetry': "" };}
function encodedFunction(value, nresv, step_size, lo, divider) {  return (((value - nresv / 2) * (step_size * 10)) / 10 + lo) / divider;}
function convertCoordinate(bytes) {  bytes = bytesToInt(bytes);  bytes = bytes << 8;  if (bytes > 0x7FFFFFFF) { bytes = bytes - 0x100000000; }  return bytes / Math.pow(10, 7);}
function getConfigFlags(telemetryC, byteStr, param) {  var byte = parseInt(byteStr, 16);  for (var i = 0; i < 8; i++) {    if (i === 4) {      telemetryC.values[param + i] = constants.param.config_flags.h4[getBit(byte, i)];    } else {      if (getBit(byte, i) > 0) {        telemetryC.values[param + i] = constants.param.config_flags[i];      }    }  }  return telemetryC;}
function getVersion(v, v0, vsub) { return "V" + v + "." + v0 + "-" + vsub; }
function hexStringToBytes(str) {  var array = str.match(/.{1,2}/g);  var a = [];  array.forEach(function (element) { a.push(parseInt(element, 16)); });  return new Uint8Array(a);}
function convertDateTimeISO8601_toMsUtc(str) { return new Date(str).getTime(); }
function bytesToInt(bytes) {  var val = 0;  for (var j = 0; j < bytes.length; j++) {    val += bytes[j];    if (j < bytes.length - 1) { val = val << 8; }  }  return val;}
function decodeToJson(payload) {  try {    return JSON.parse(String.fromCharCode.apply(String, payload));  } catch (e) {    return JSON.parse(JSON.stringify(payload));  }}
function getBit(byte, bitNumber) { return ((byte & (1 << bitNumber)) != 0) ? 1 : 0; }
return result;Test Payload Decoder
Section titled “Test Payload Decoder”After importing the converter, test it using the sample input below to verify the output.
- Payload content type:
JSON - Sample input payload:
{"DevEUI_uplink": {"Time": "2019-11-06T09:54:46.342+01:00","DevEUI": "20635F00C5000660","FPort": 17,"payload_hex": "0500997d3040"}}
- Expected decoder output (heartbeat message, type
0x05):{"ts": 1573030486342,"values": {"batteryVoltage": 8.388,"temperature": 18.5,"ph_type": "Heartbeat message"}}
Create a Downlink Converter
Section titled “Create a Downlink Converter”The downlink converter prepares the payload to send from ThingsBoard to the device via Actility. For the full encoder function reference, see the Downlink data converter documentation.
-
Download the downlink converter file:
-
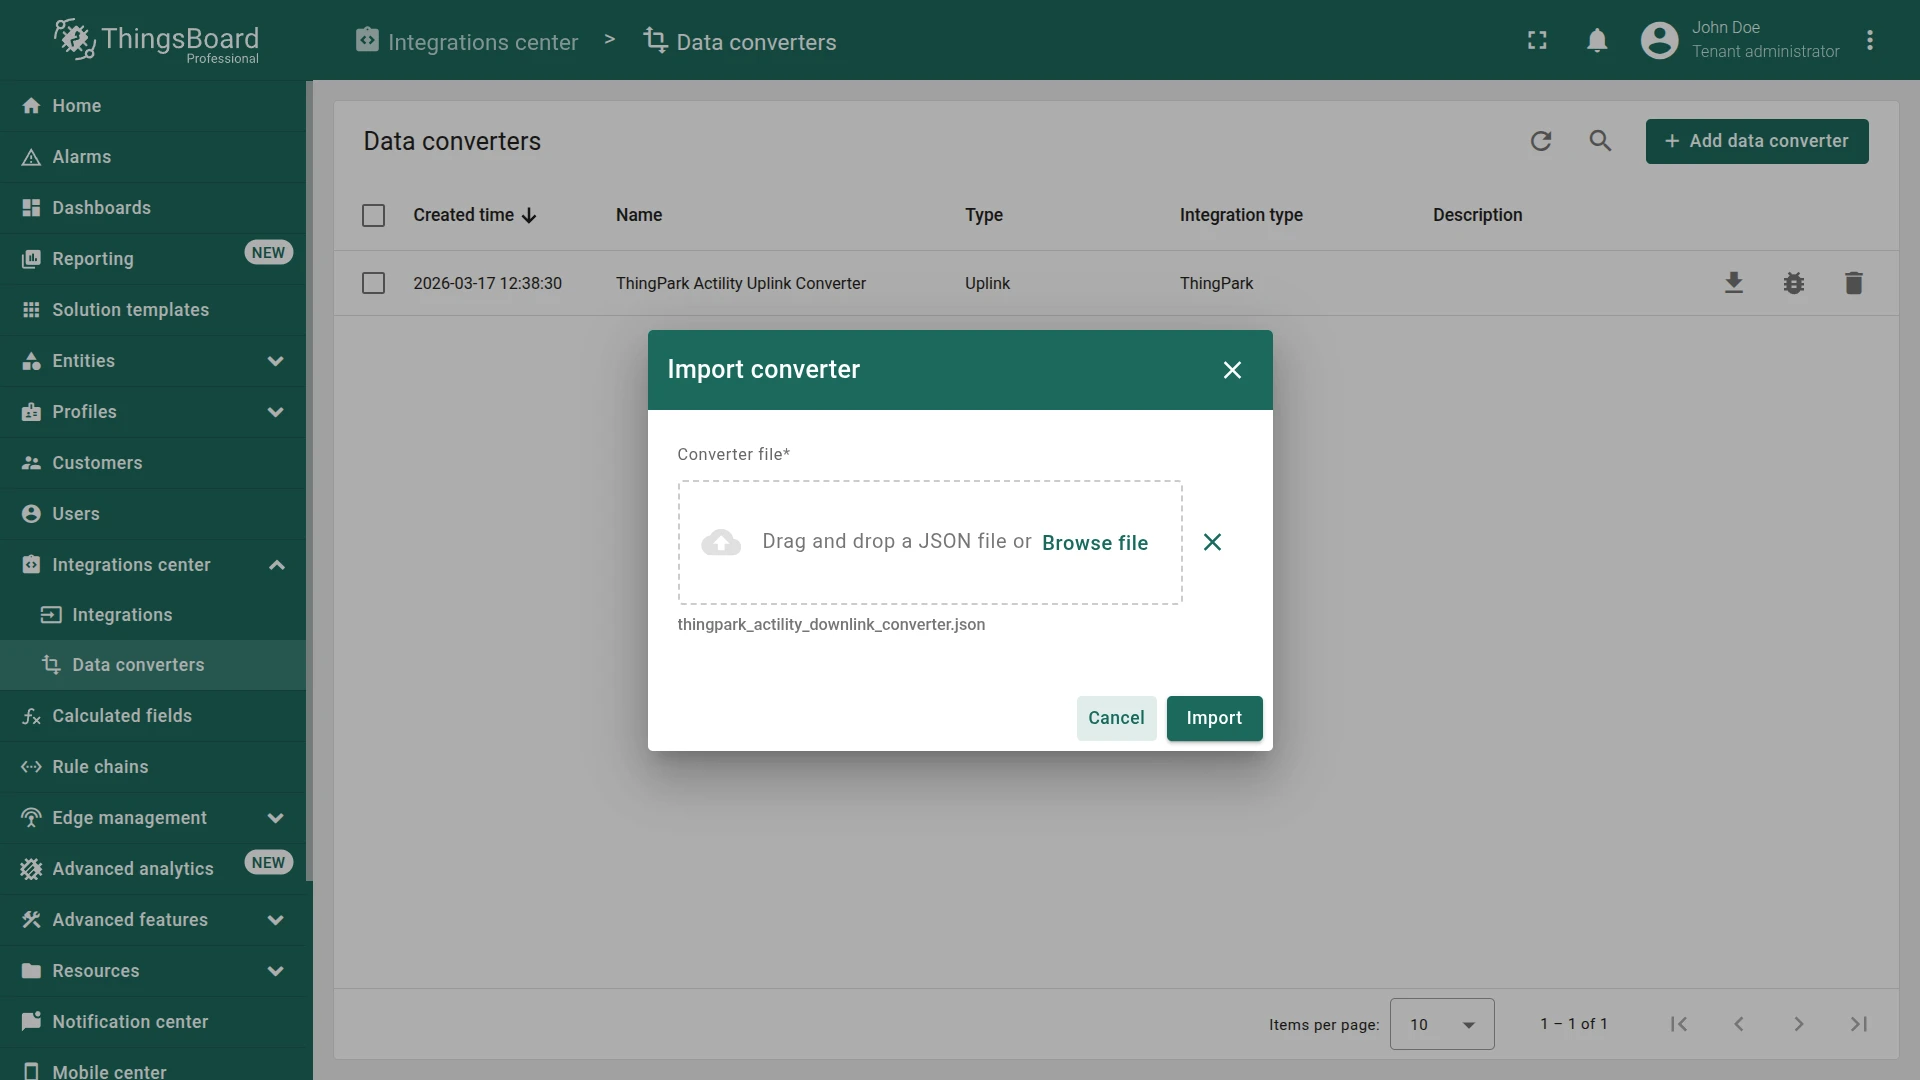
Go to Integrations center ⇾ Data converters and click + Add data converter ⇾ Import converter.
-
Drag and drop the downloaded JSON file and click Import.
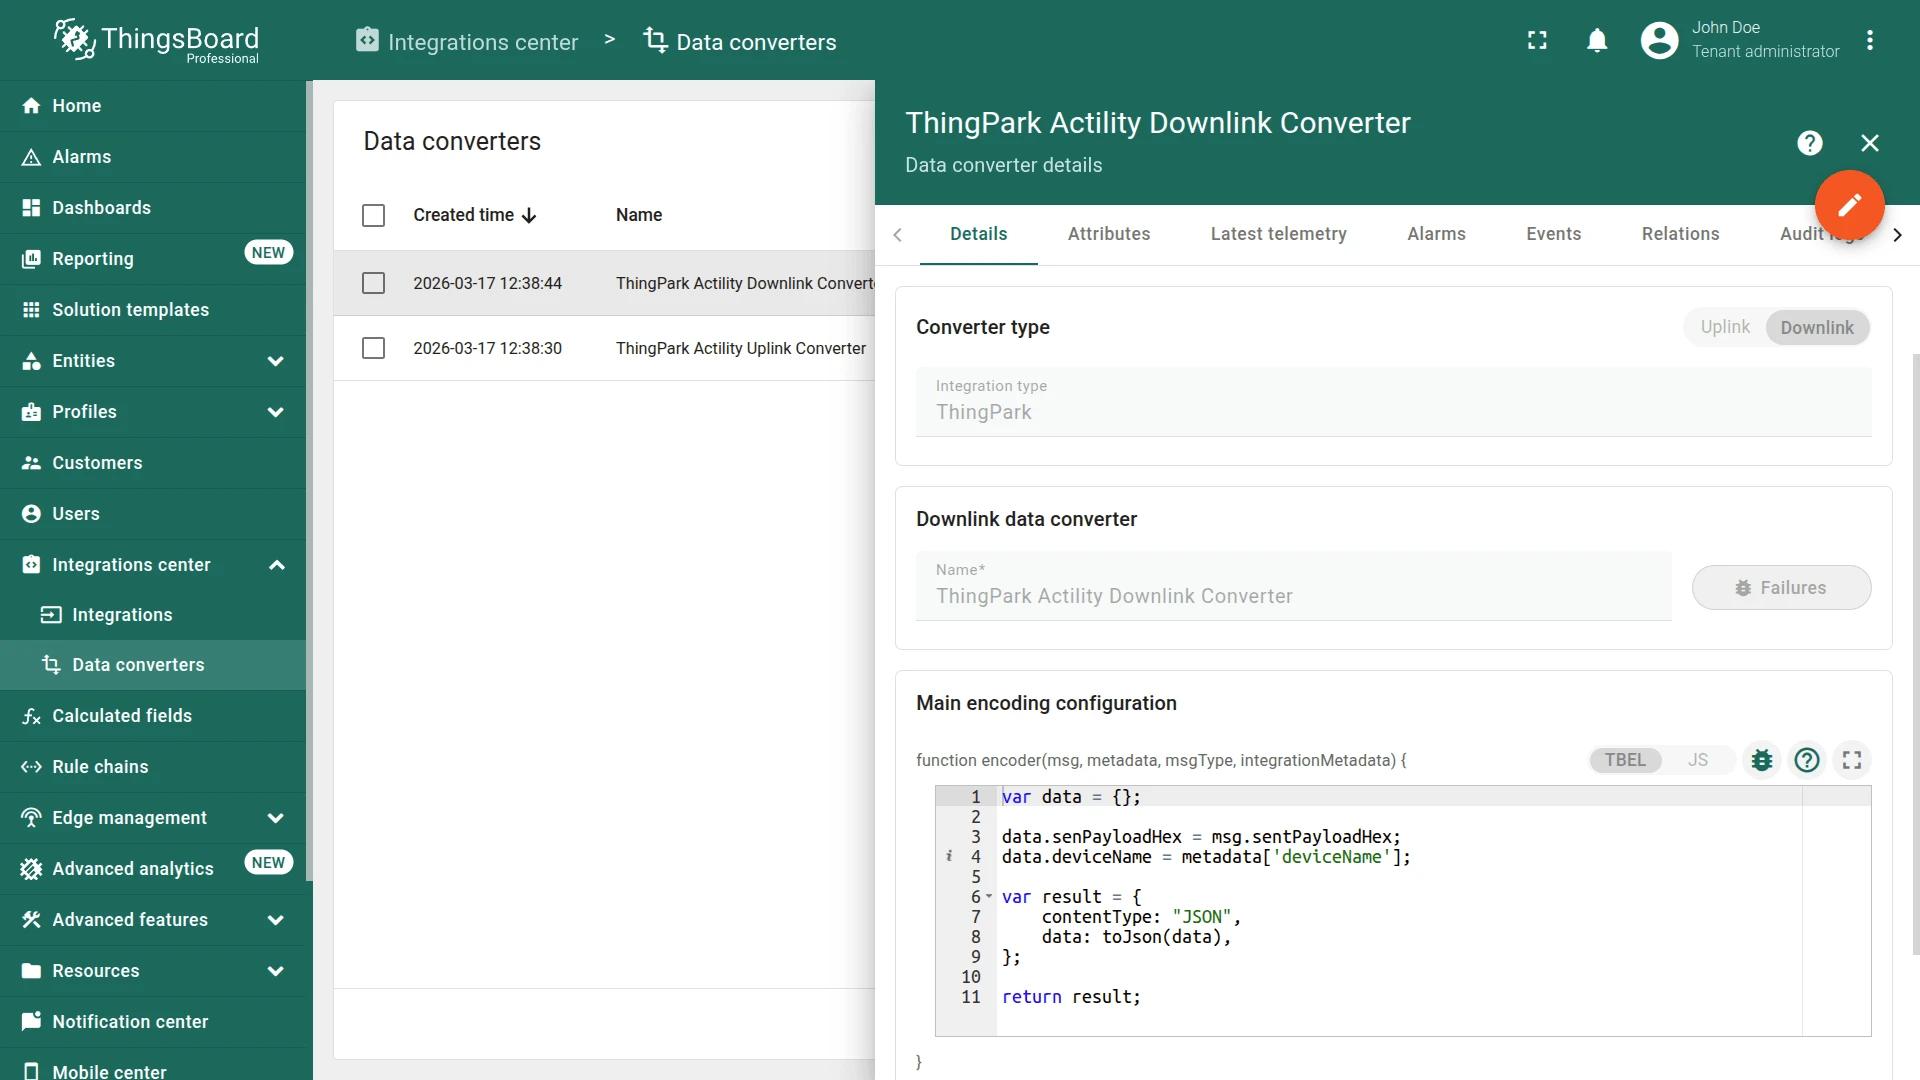
The encoder function used in this guide:
var data = {};
data.senPayloadHex = msg.sentPayloadHex;data.deviceName = metadata['deviceName'];
var result = {  contentType: "JSON",  data: JSON.stringify(data),};
return result;
Create the Integration
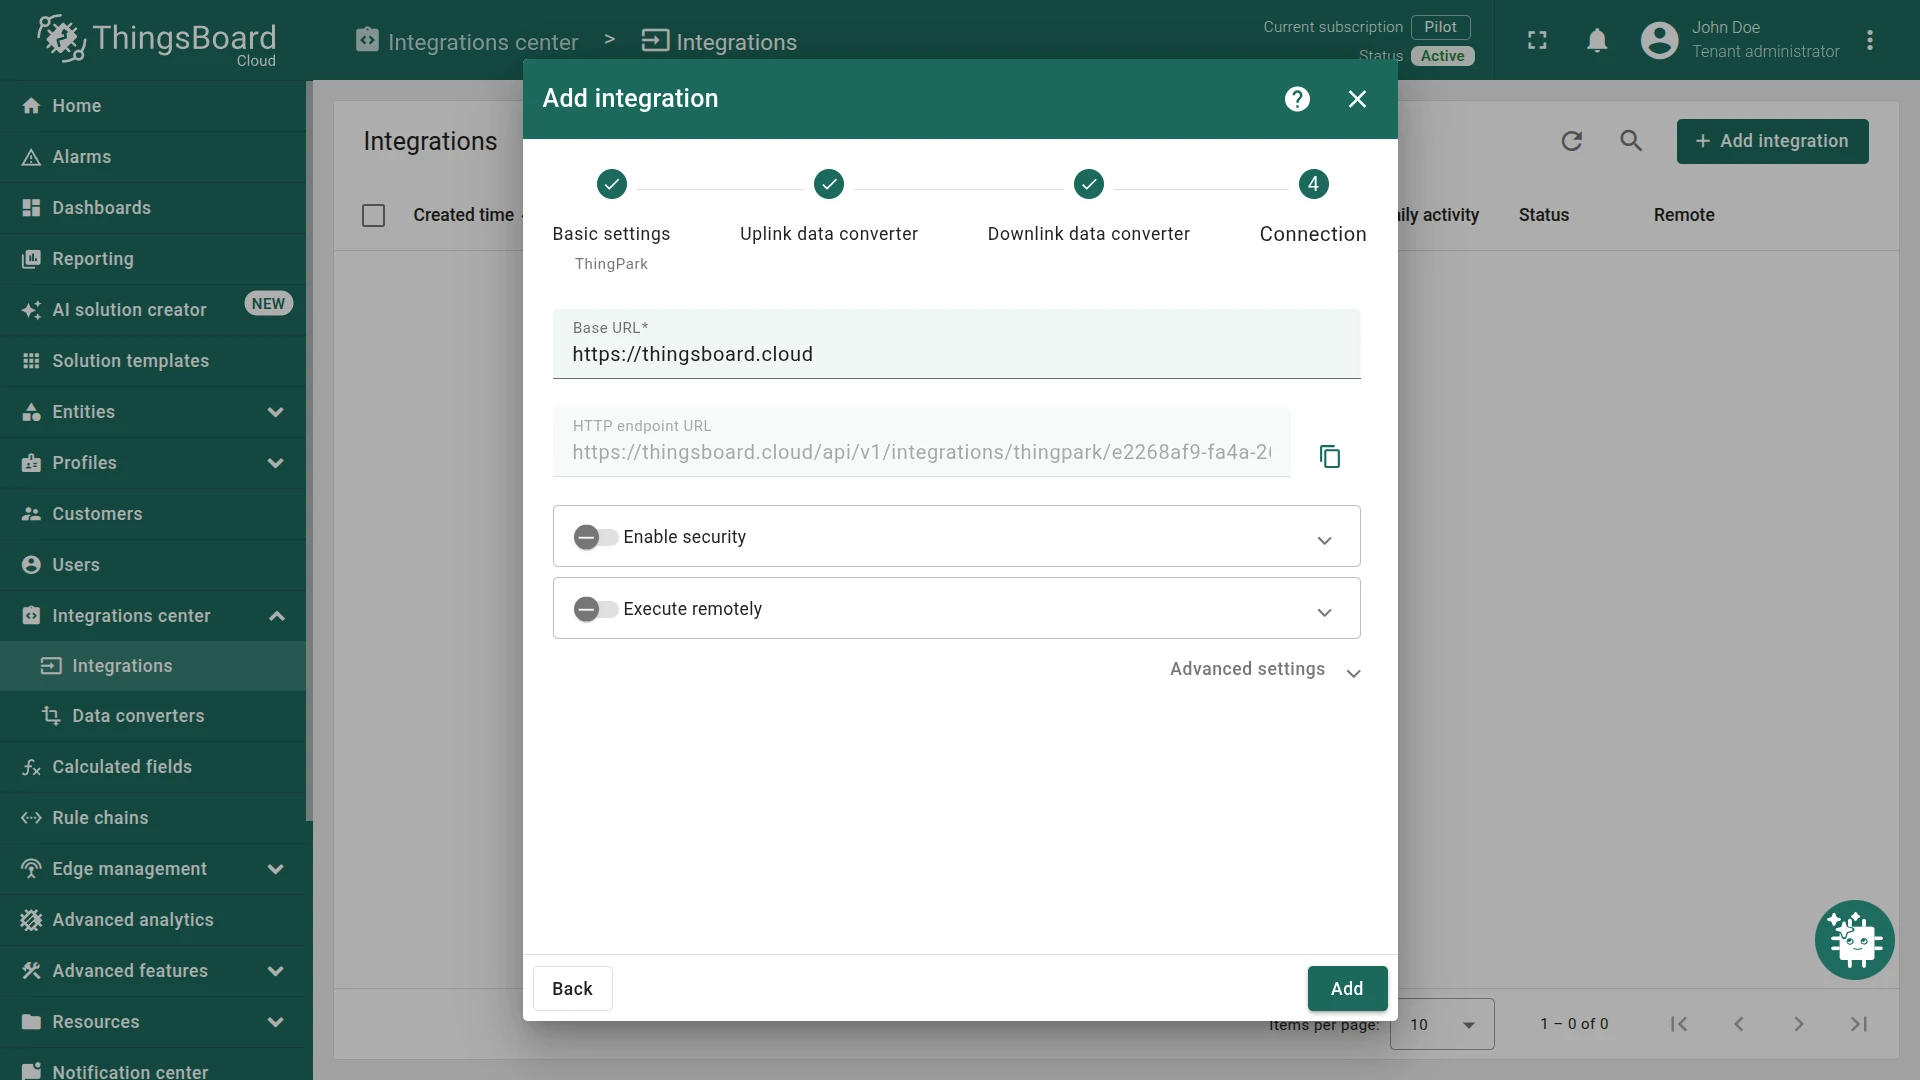
Section titled “Create the Integration”- Go to Integrations center ⇾ Integrations and click + Add integration.
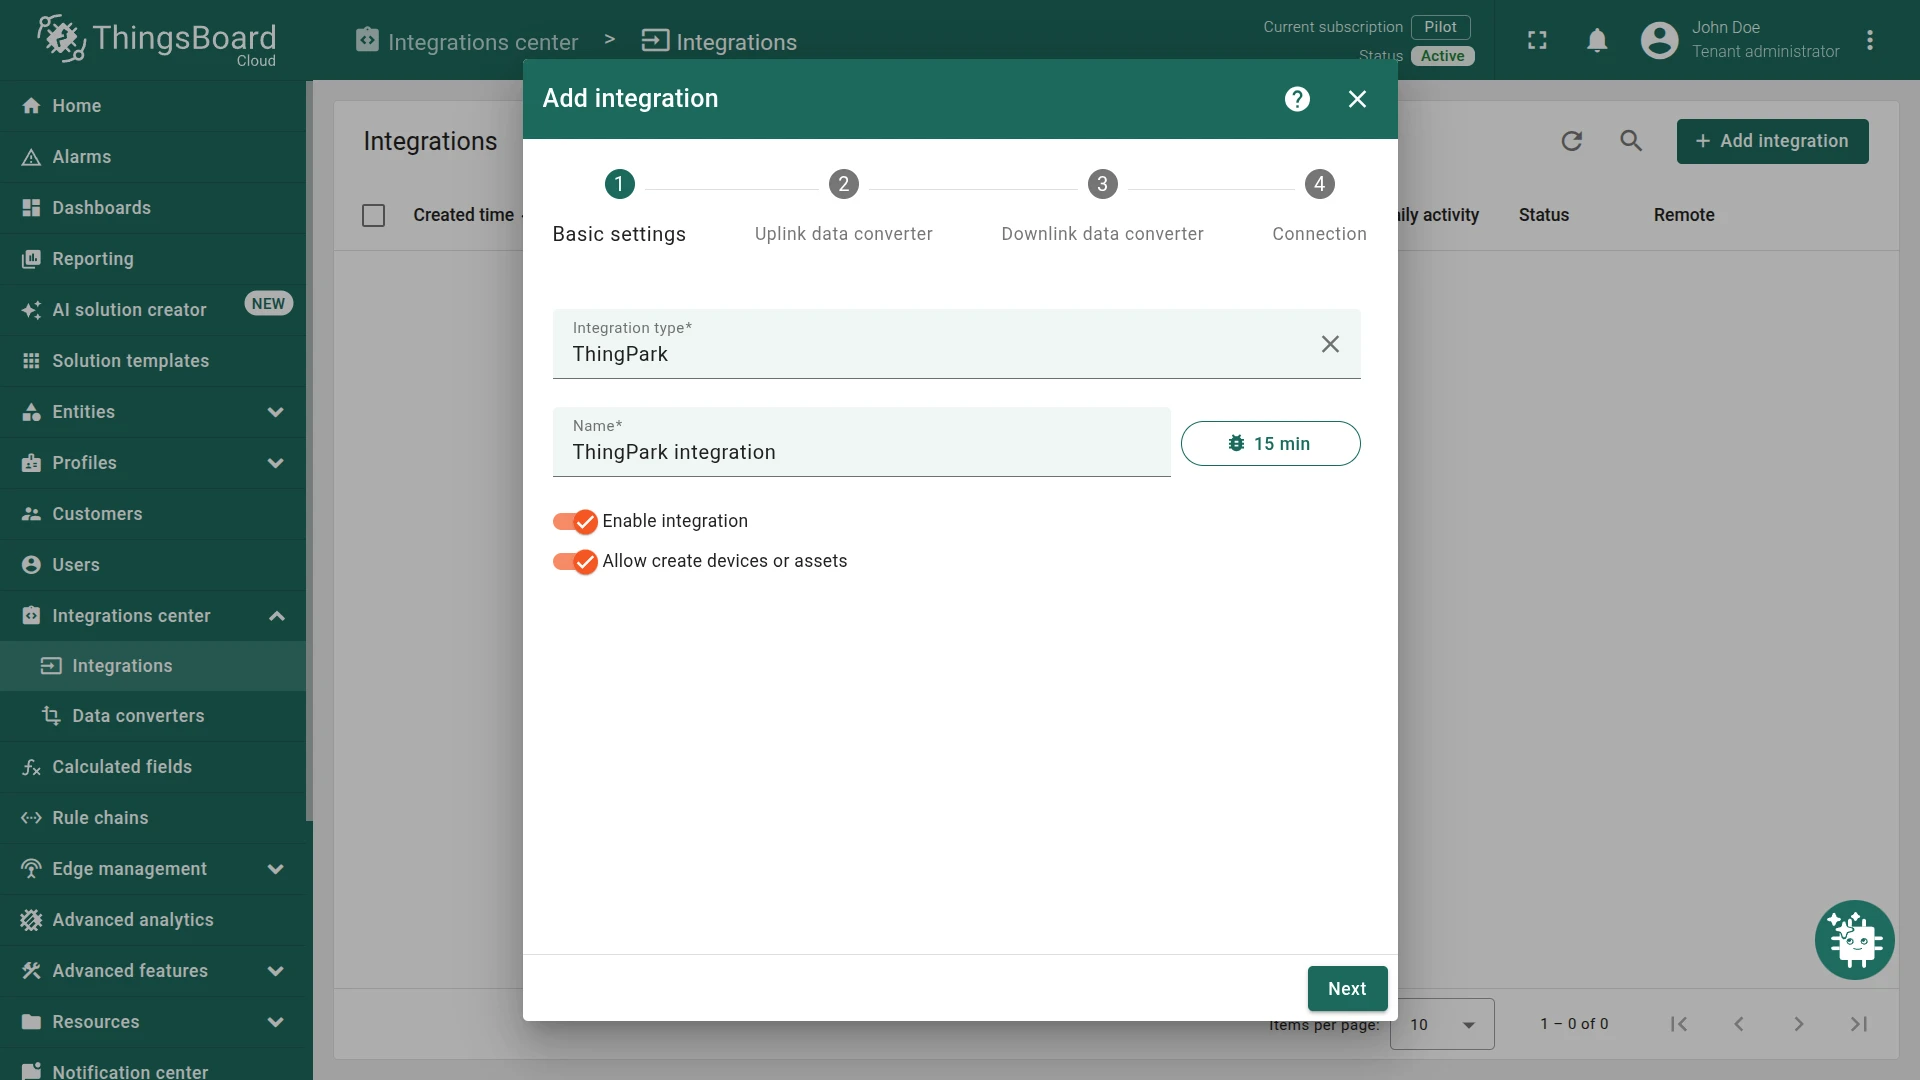
- Basic settings:
- Set Integration type to ThingPark.
- Enable integration and Allow create devices or assets are on by default.
- Click Next.
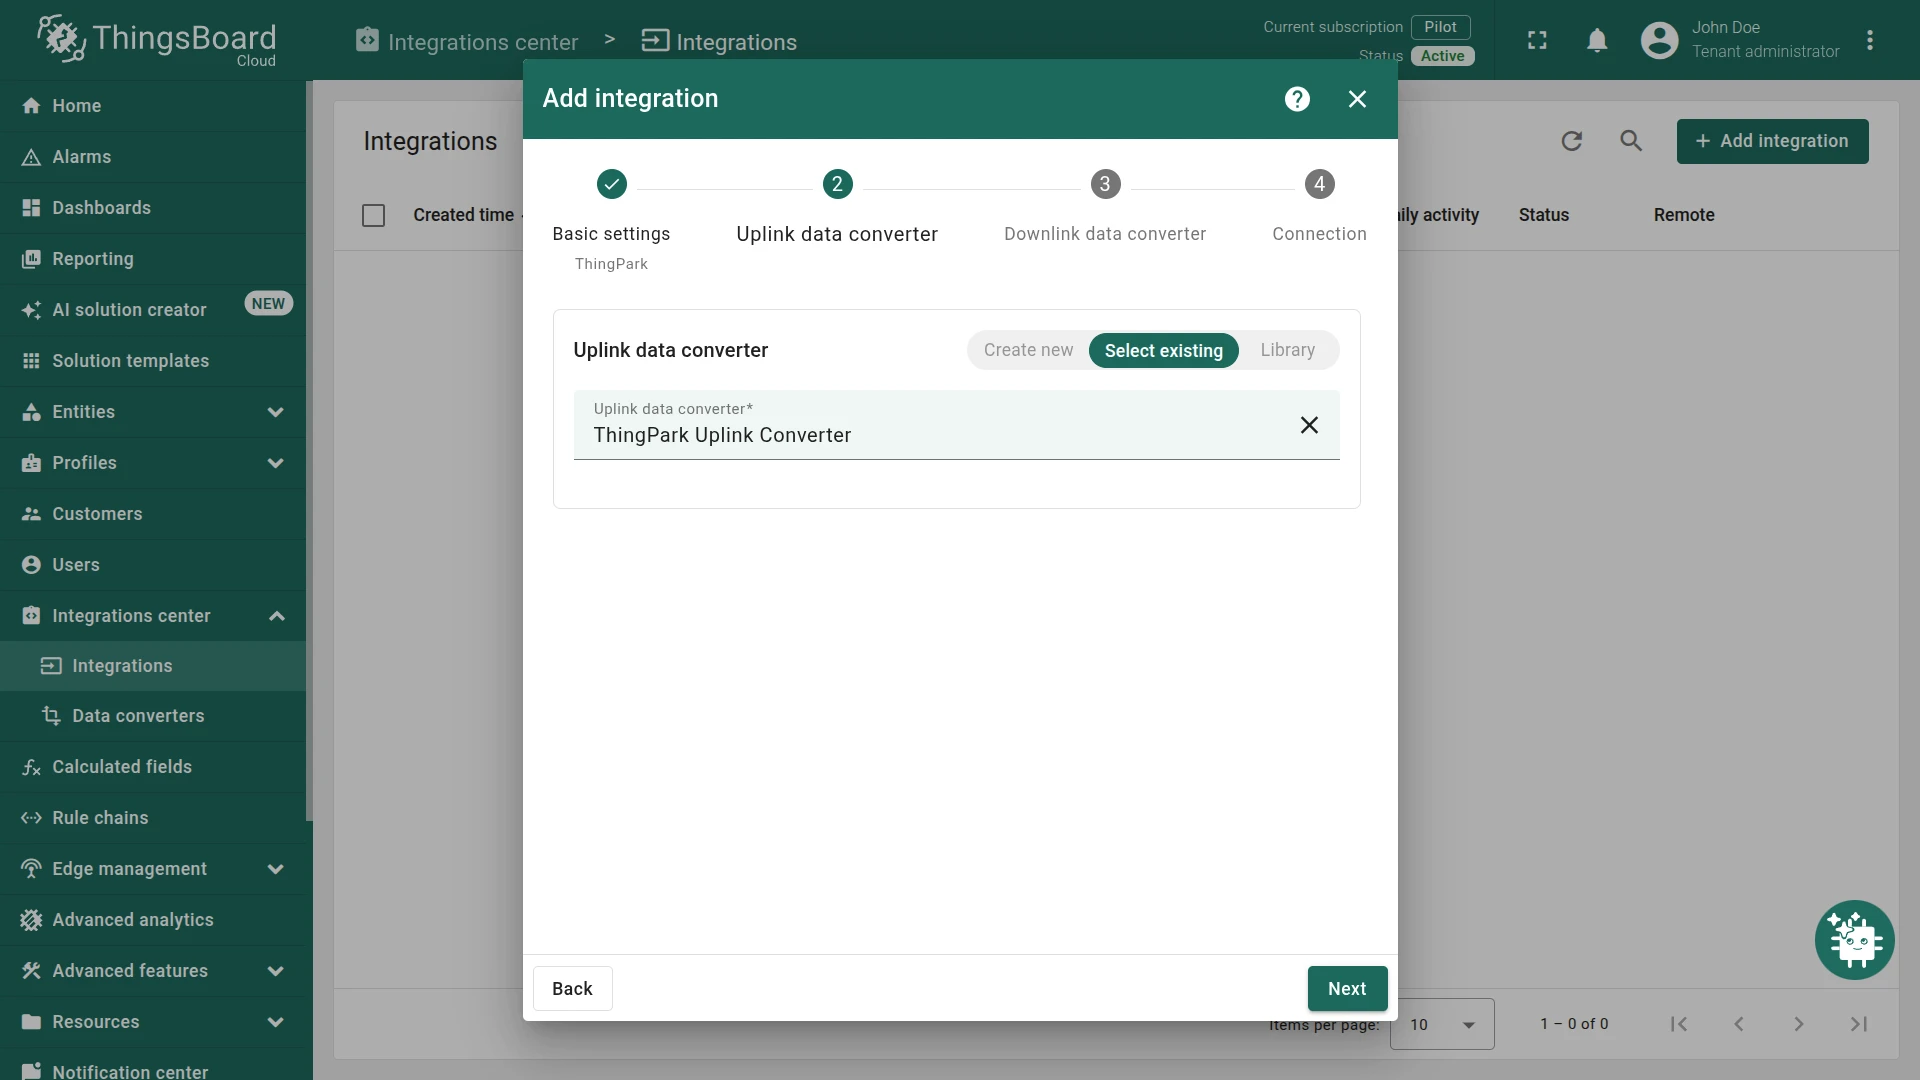
- Uplink data converter:
- Click Select existing and choose
ThingPark Actility Uplink Converterfrom the list. Click Next.
- Click Select existing and choose
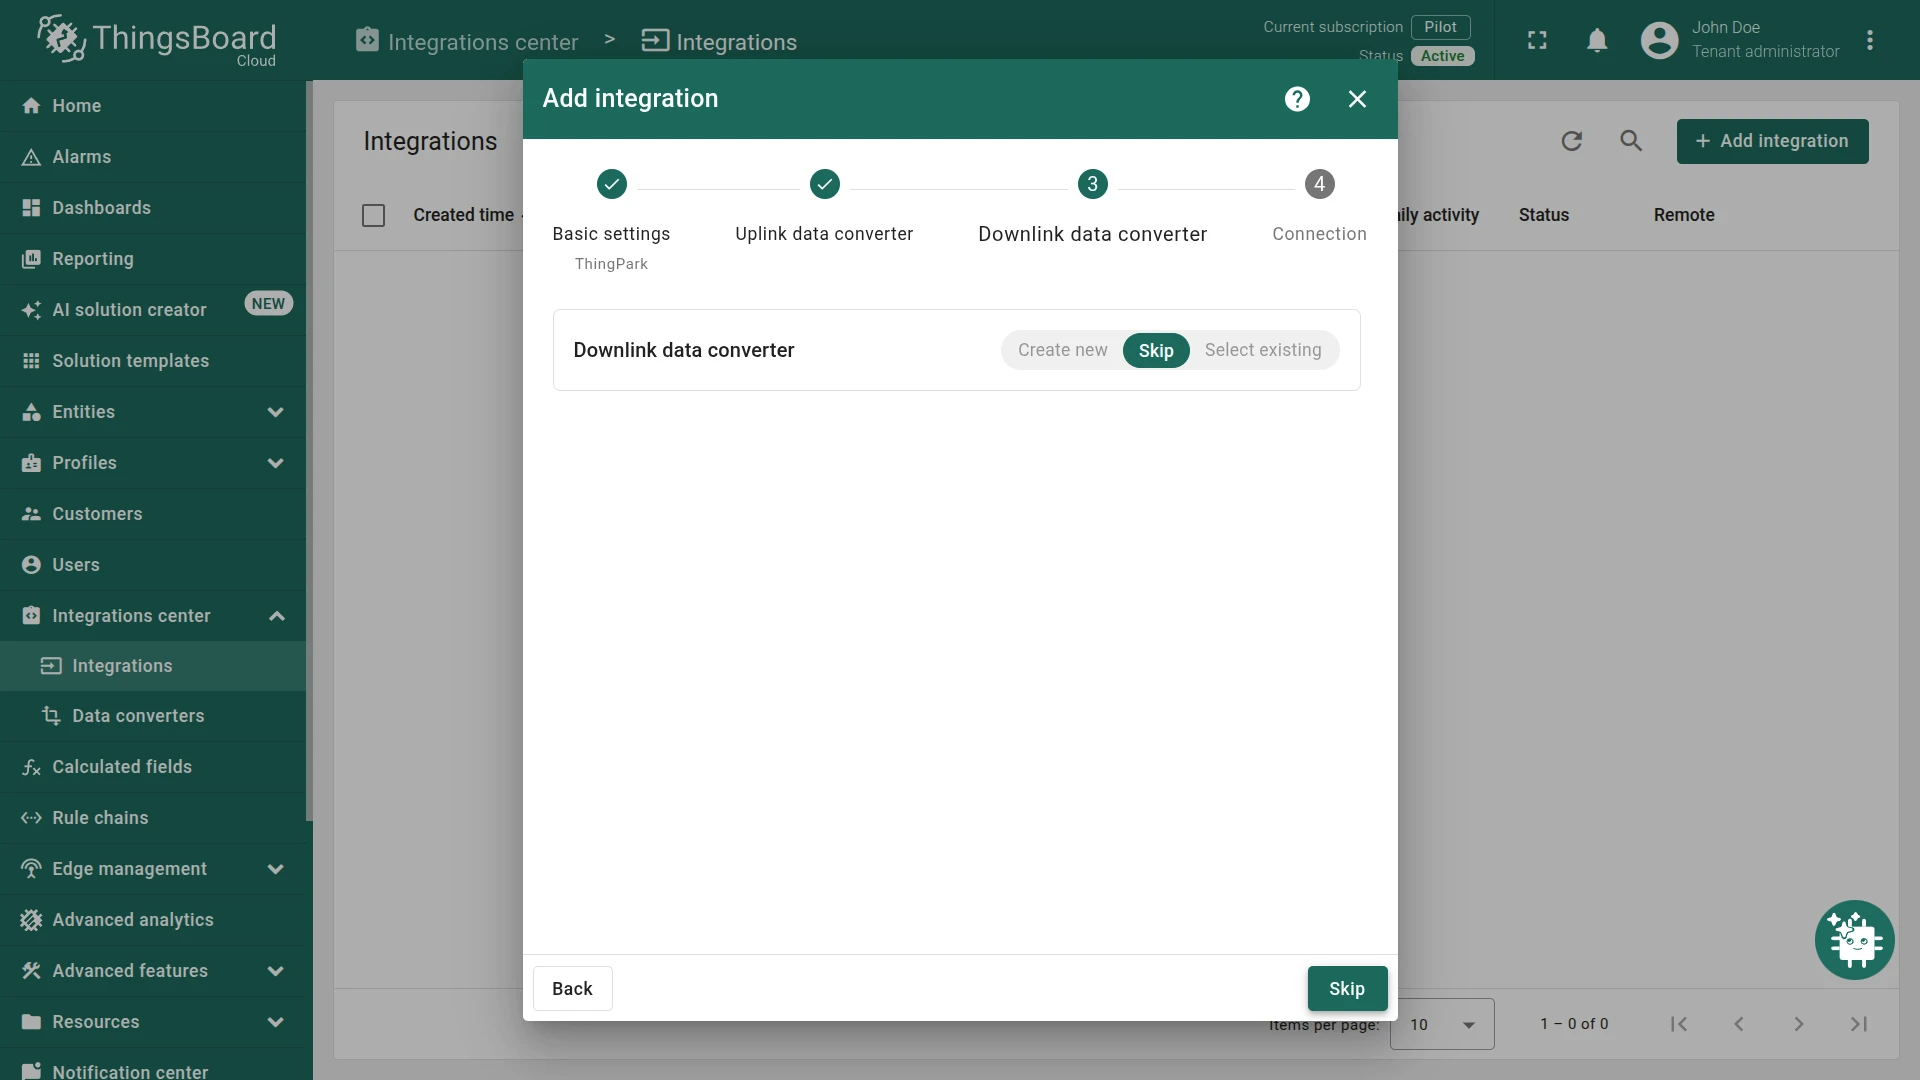
- Downlink data converter:
- Click Select existing and choose
ThingPark Actility Downlink Converterfrom the list. Click Next.
- Click Select existing and choose
- Connection:
- Copy the HTTP endpoint URL — paste it into your Actility application server routing profile as the destination URL.
- Click Add.
Verify Device Connectivity
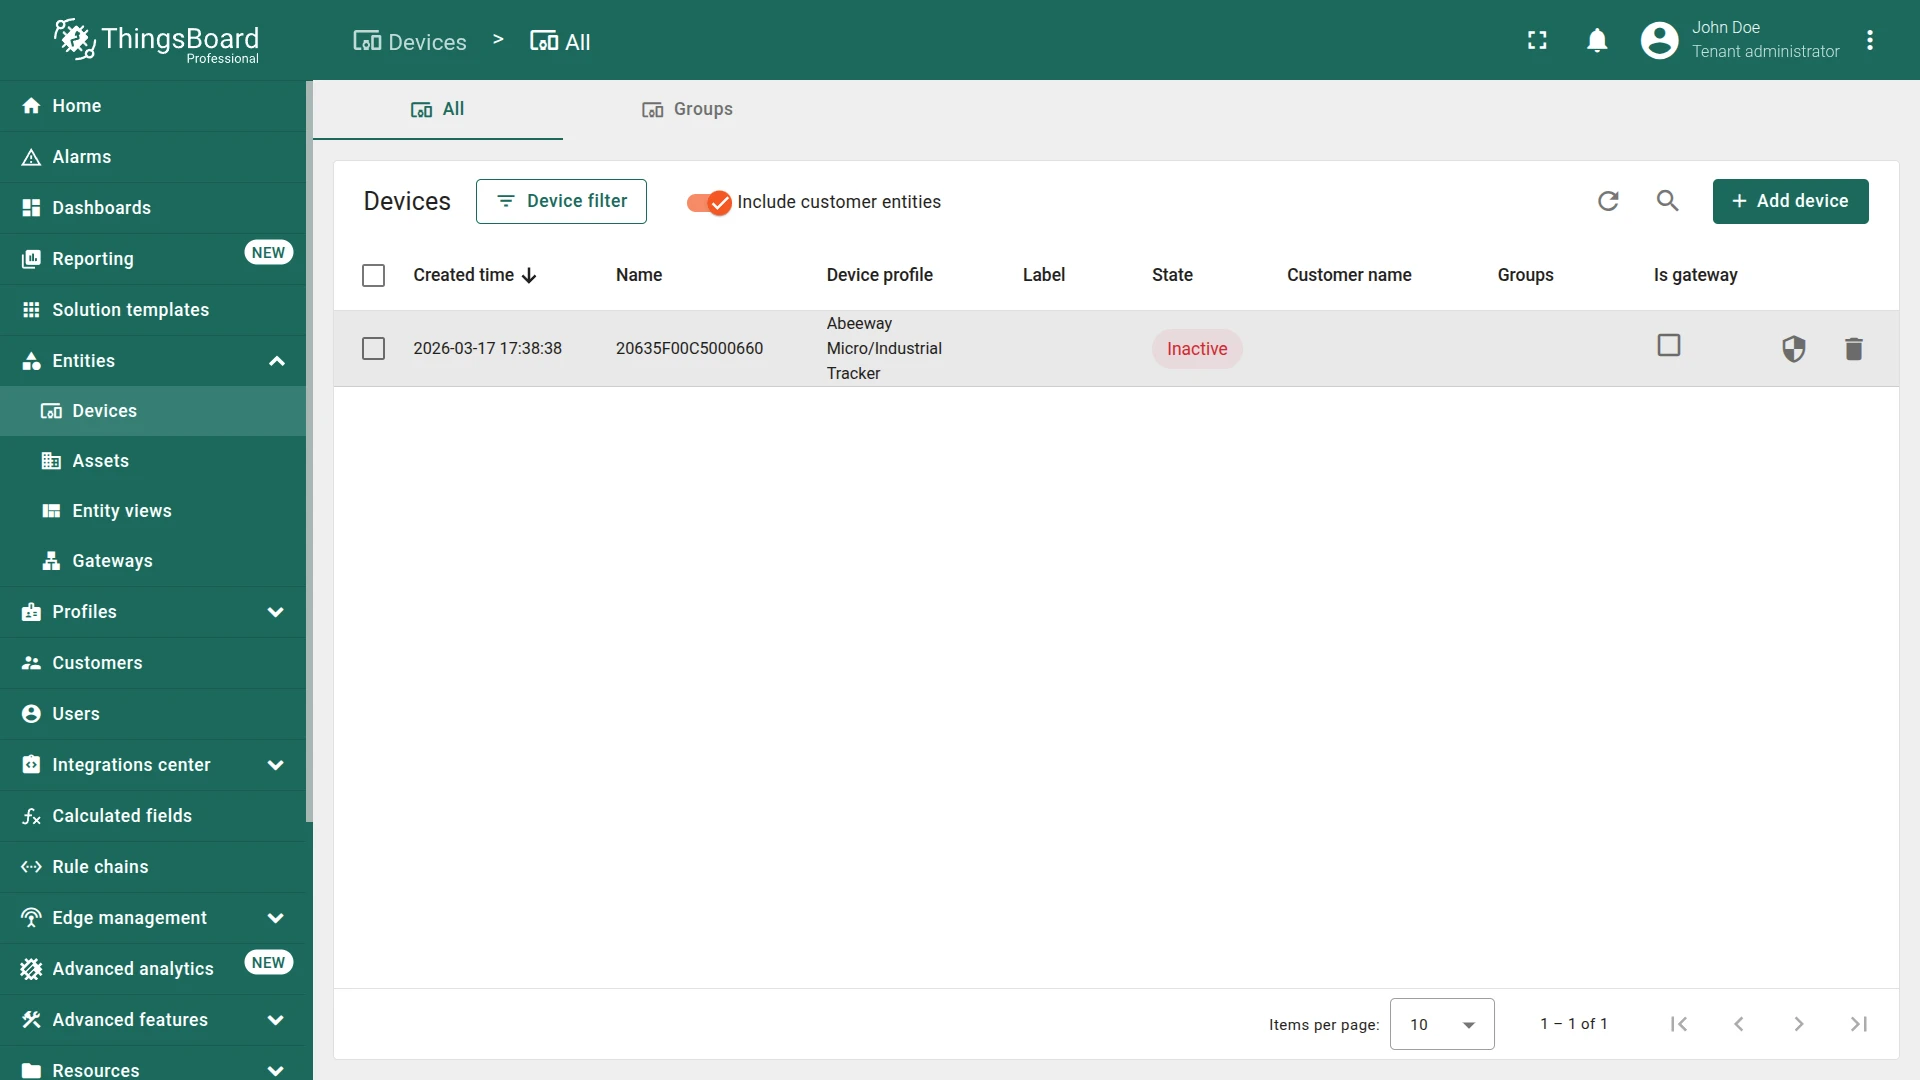
Section titled “Verify Device Connectivity”Once the integration is active, ThingsBoard automatically creates devices matching the DevEUI values registered in ThingPark. Check Entities ⇾ Devices to confirm the devices appear and are receiving telemetry.
Configure Rule Chain
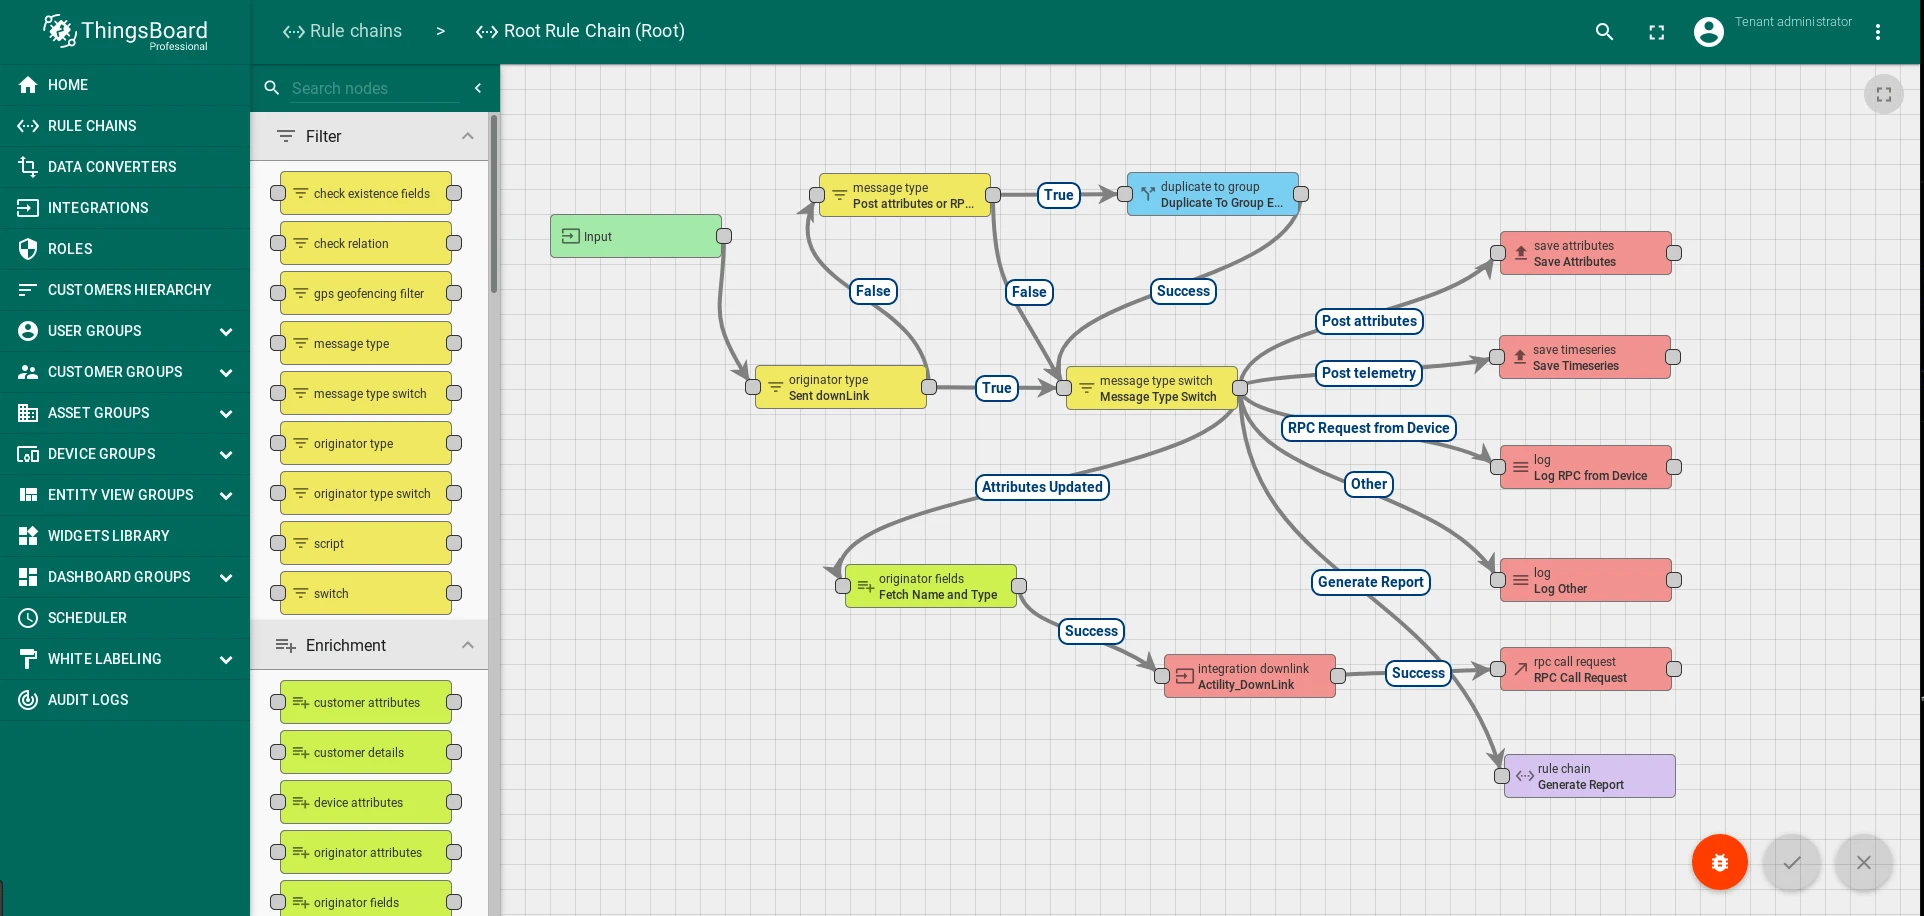
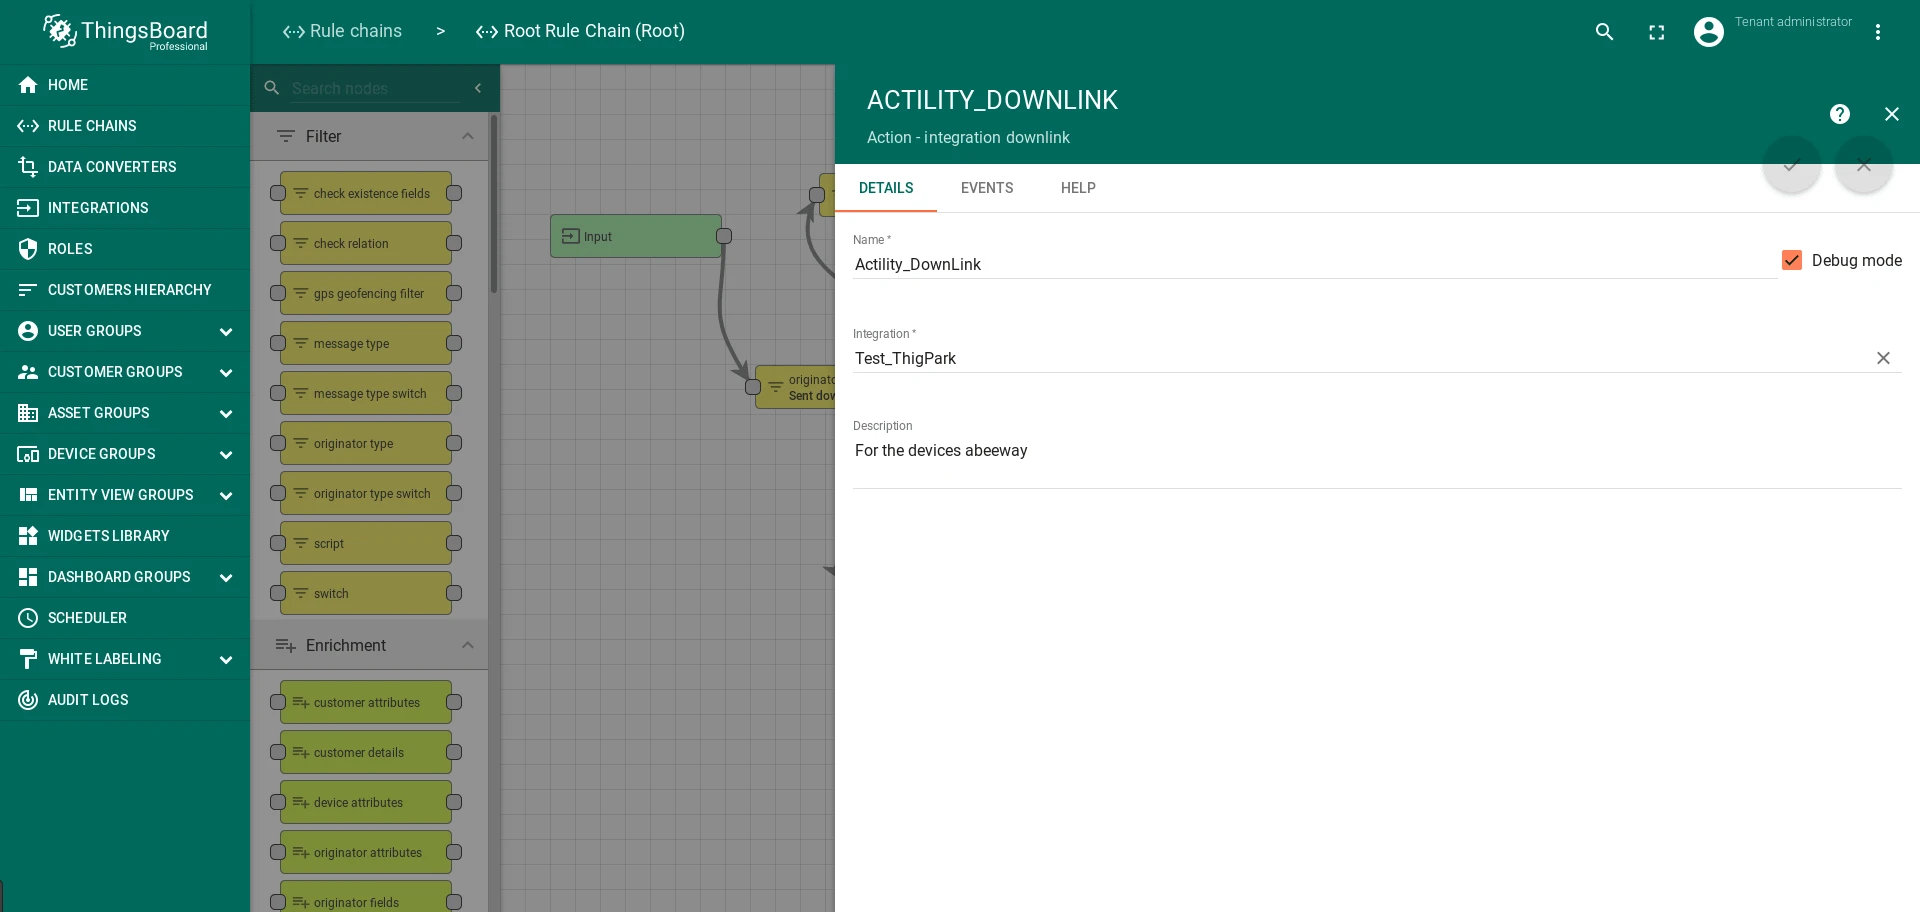
Section titled “Configure Rule Chain”To enable downlink messaging, configure the Root Rule Chain to route attribute updates to Actility:
- Open Rule Chains ⇾ Root Rule Chain and click the edit (pencil) icon.
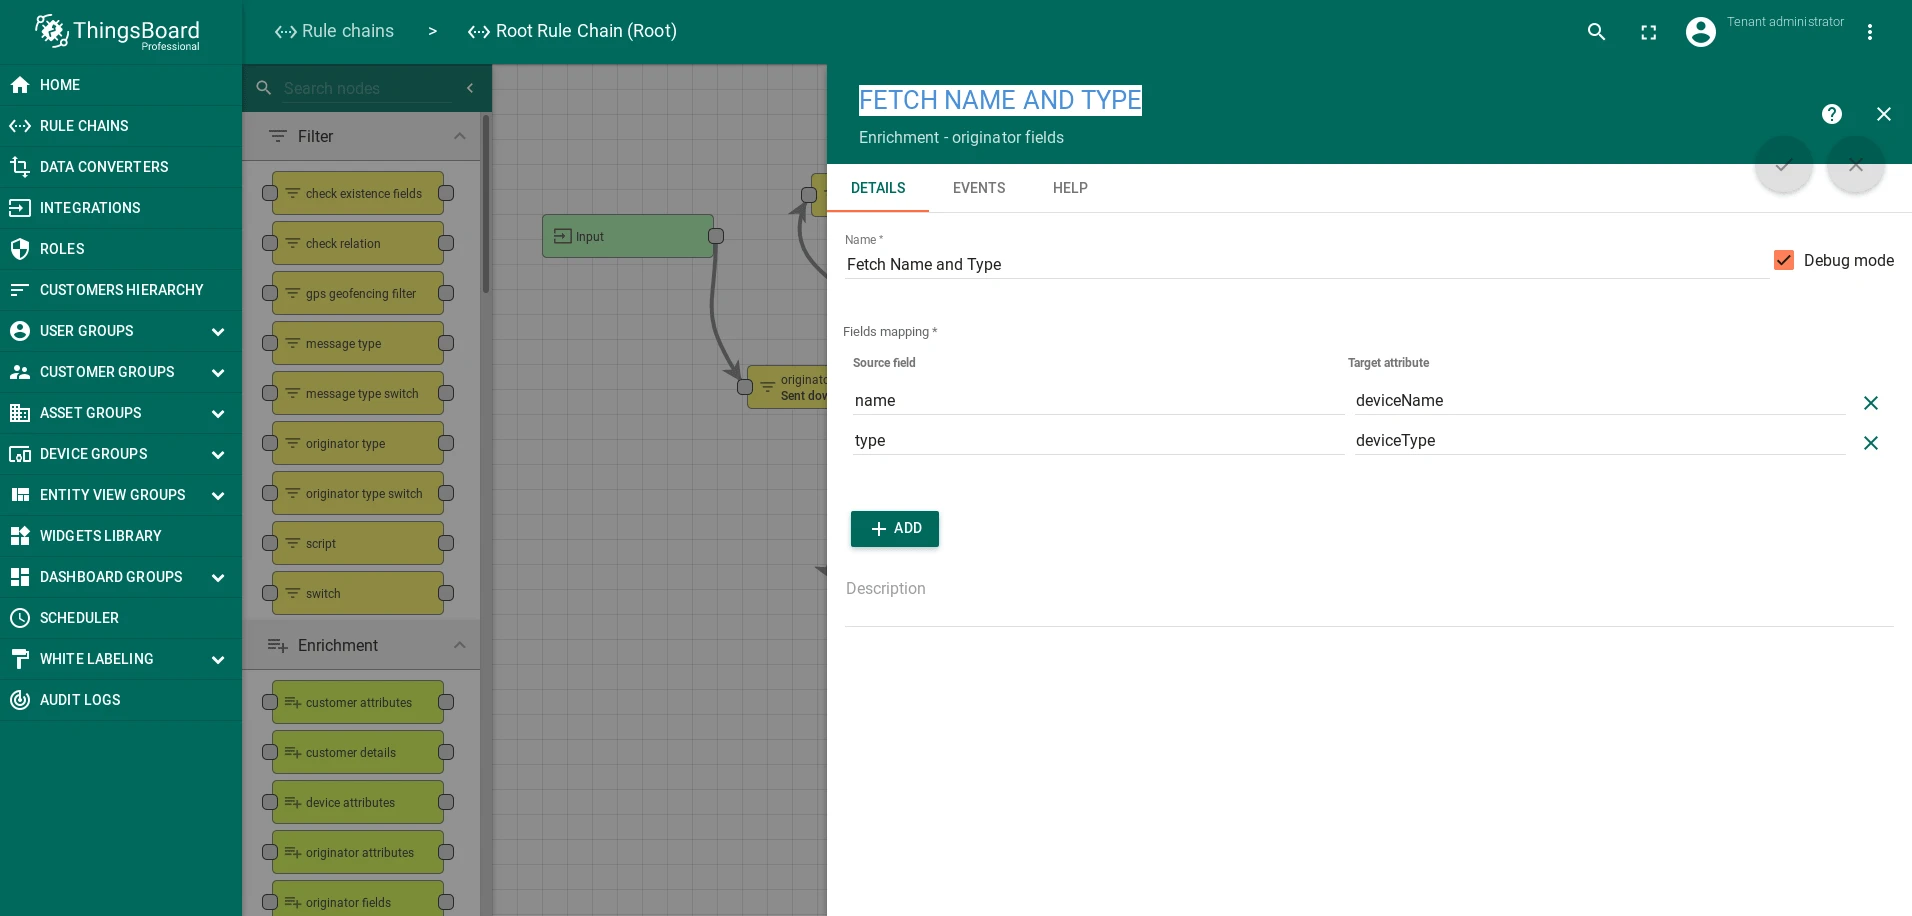
- Add an Enrichment node of type Originator fields. Configure it to extract
deviceNameanddeviceTypeinto metadata. - Add an Action node of type Integration downlink, selecting the ThingPark integration.
- Connect: Message Type Switch → Attributes Updated → Originator fields node.
- Connect: Originator fields → Success → Integration downlink node.
- Save the rule chain.
ThingPark Dashboard
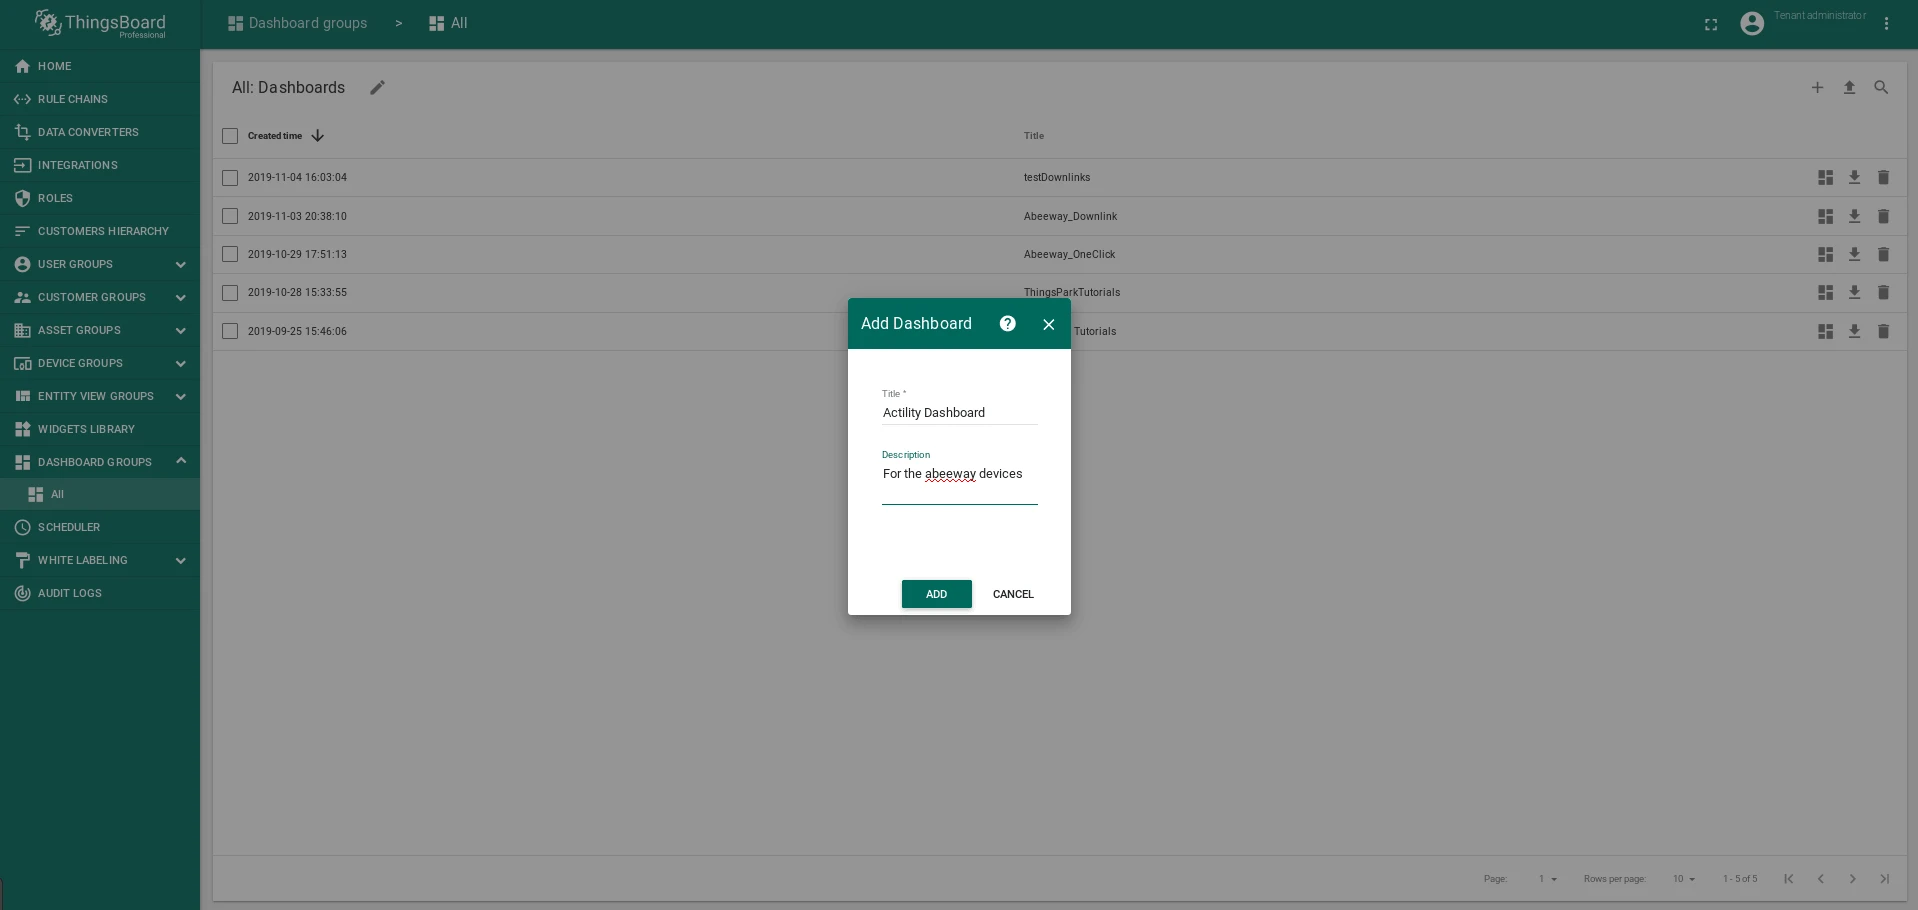
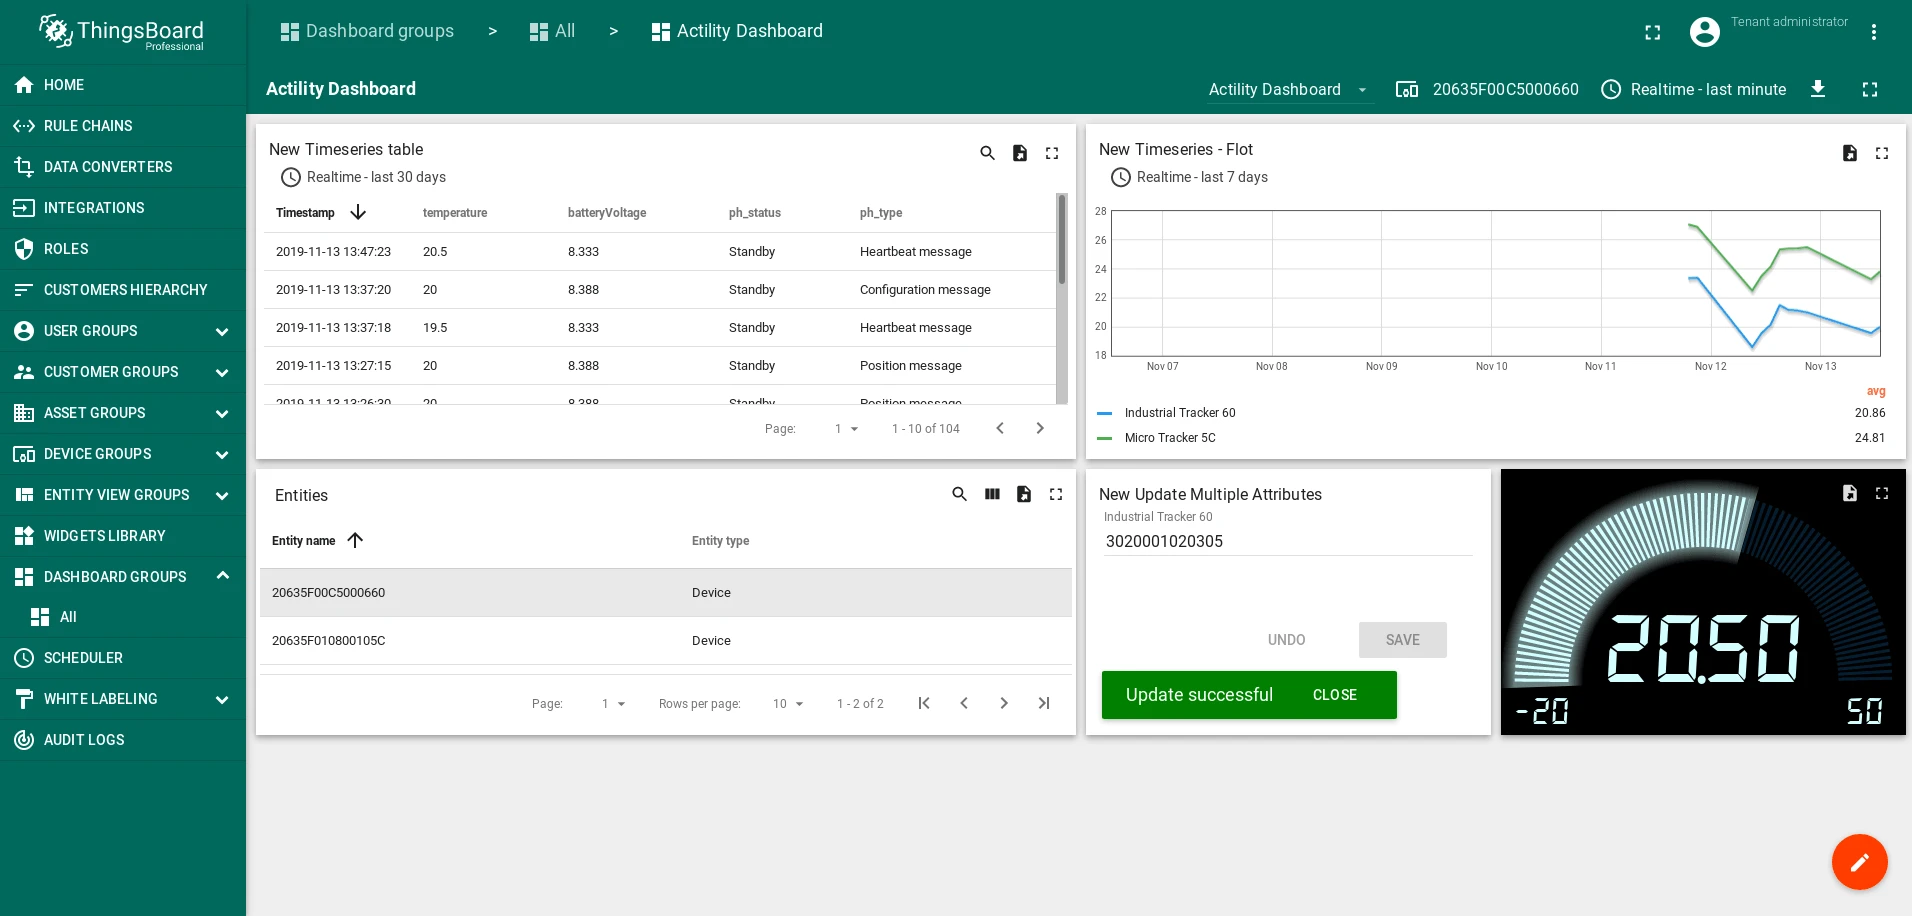
Section titled “ThingPark Dashboard”- Download actility_dashboard.json.
- Go to Dashboards, click +, and select Import dashboard.
- Drag and drop the file and click Import.
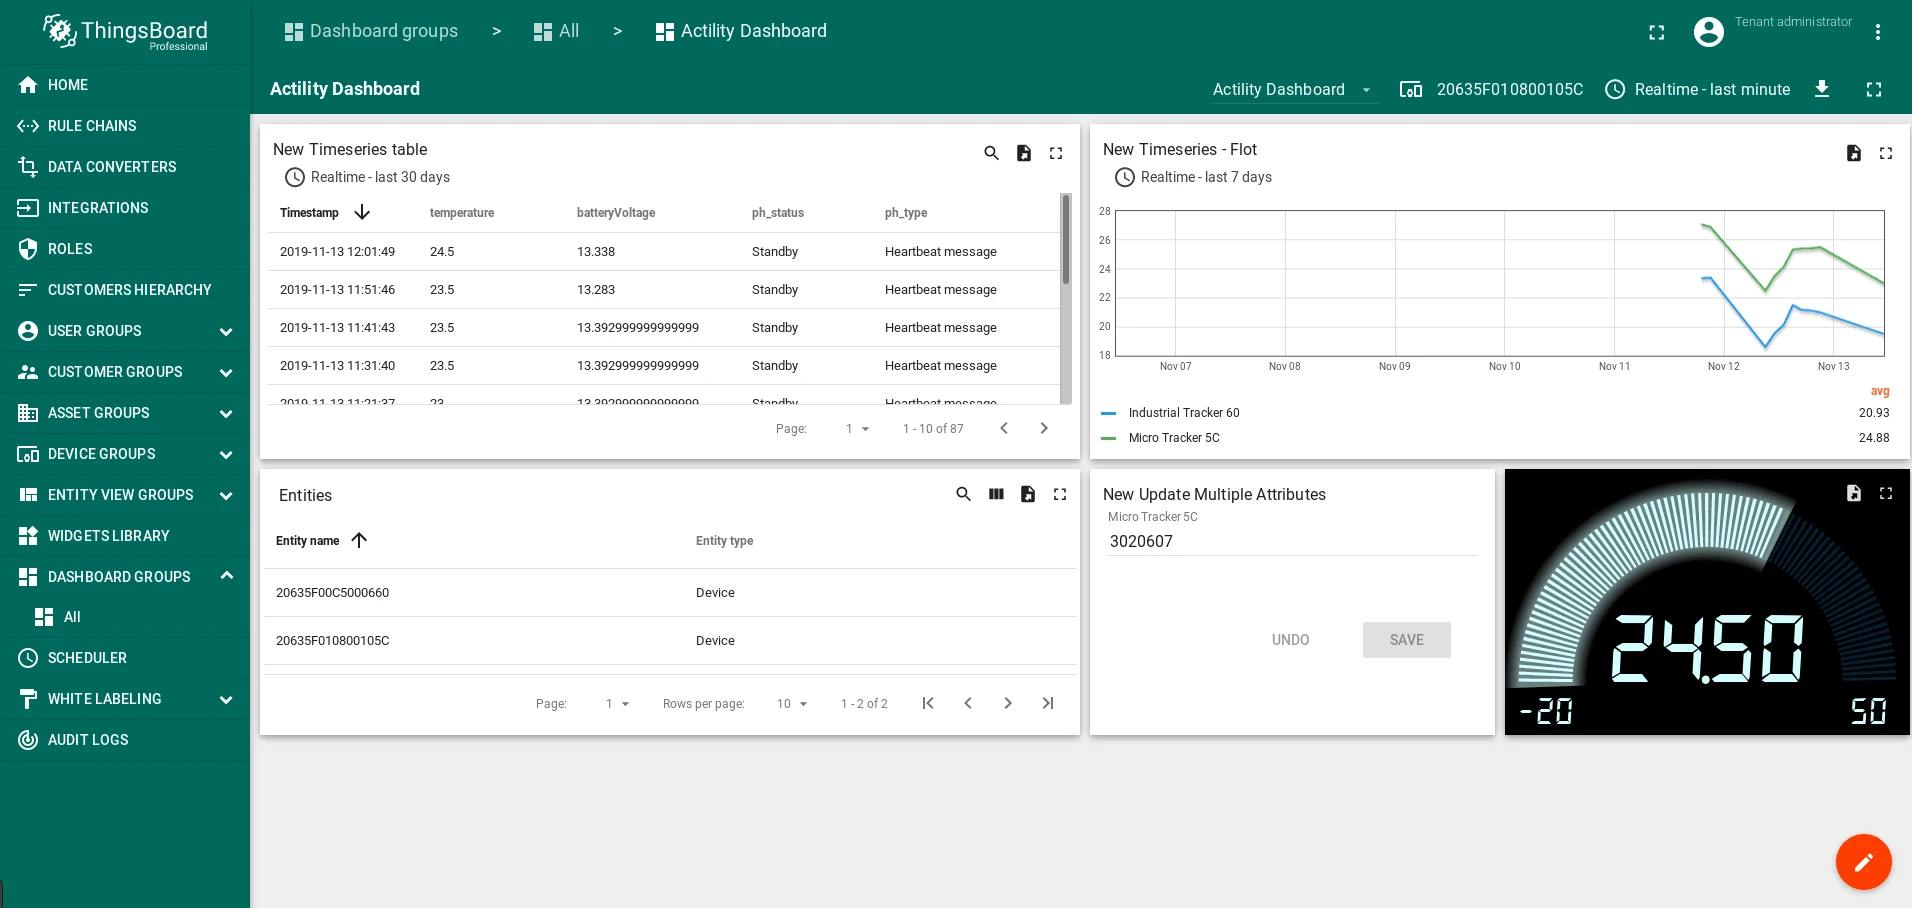
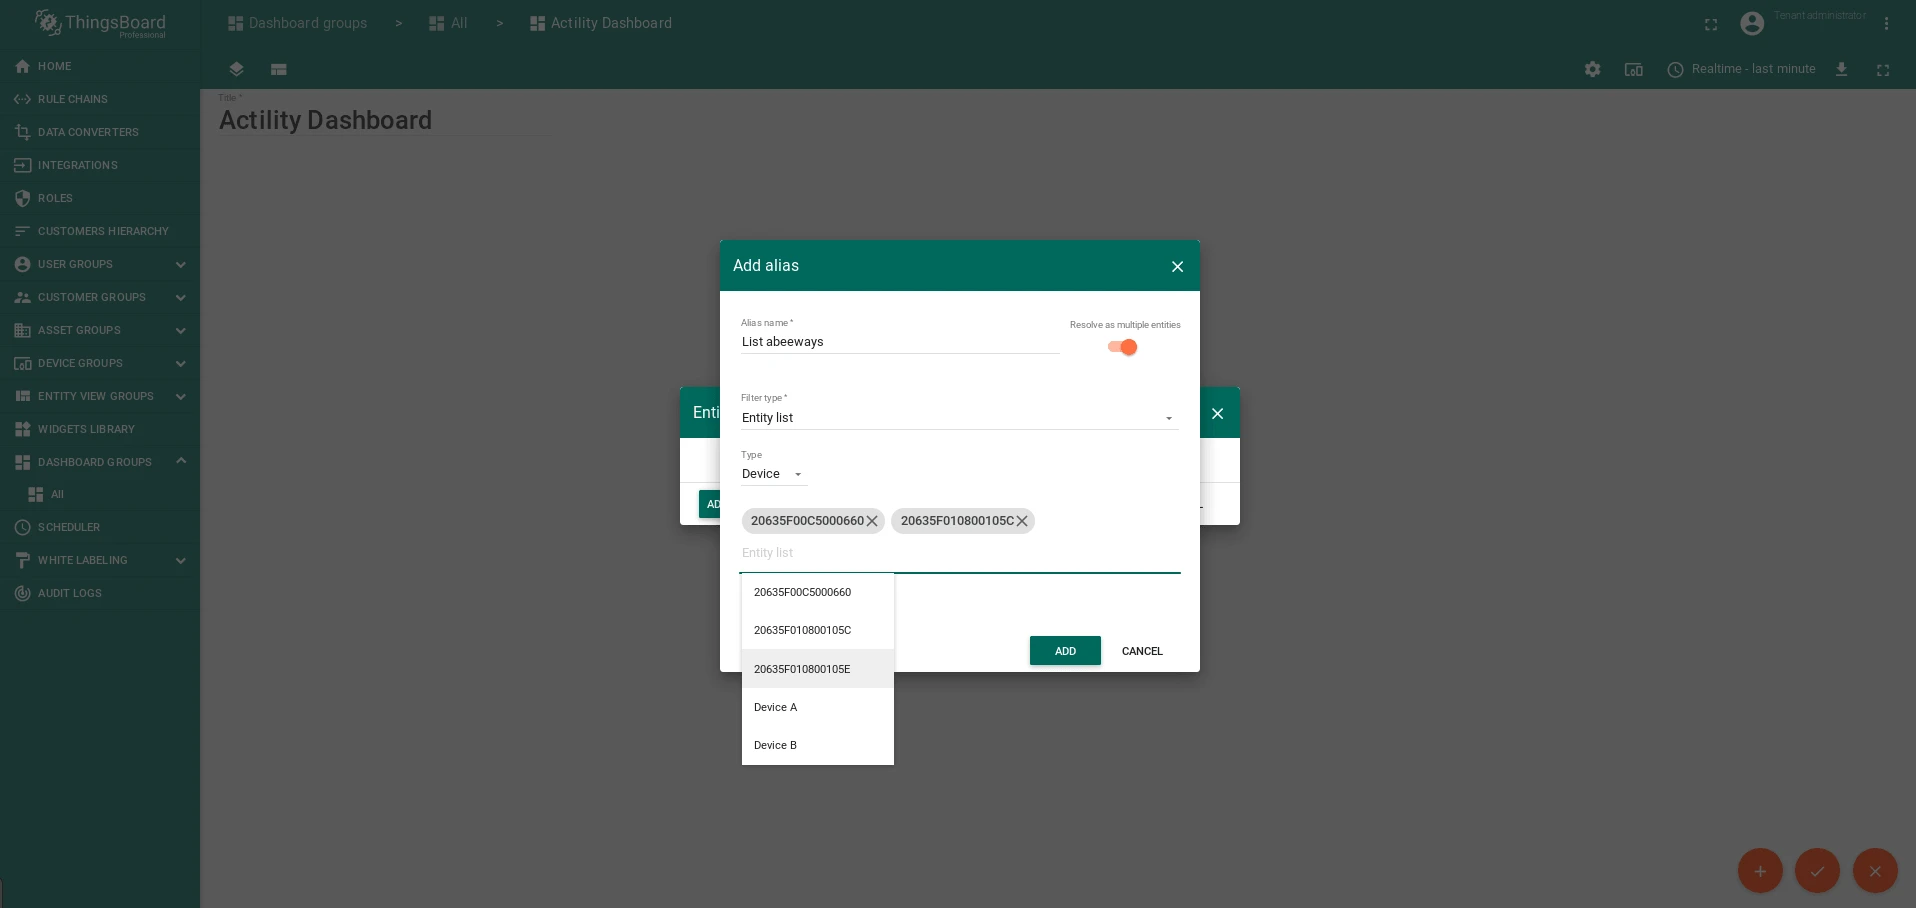
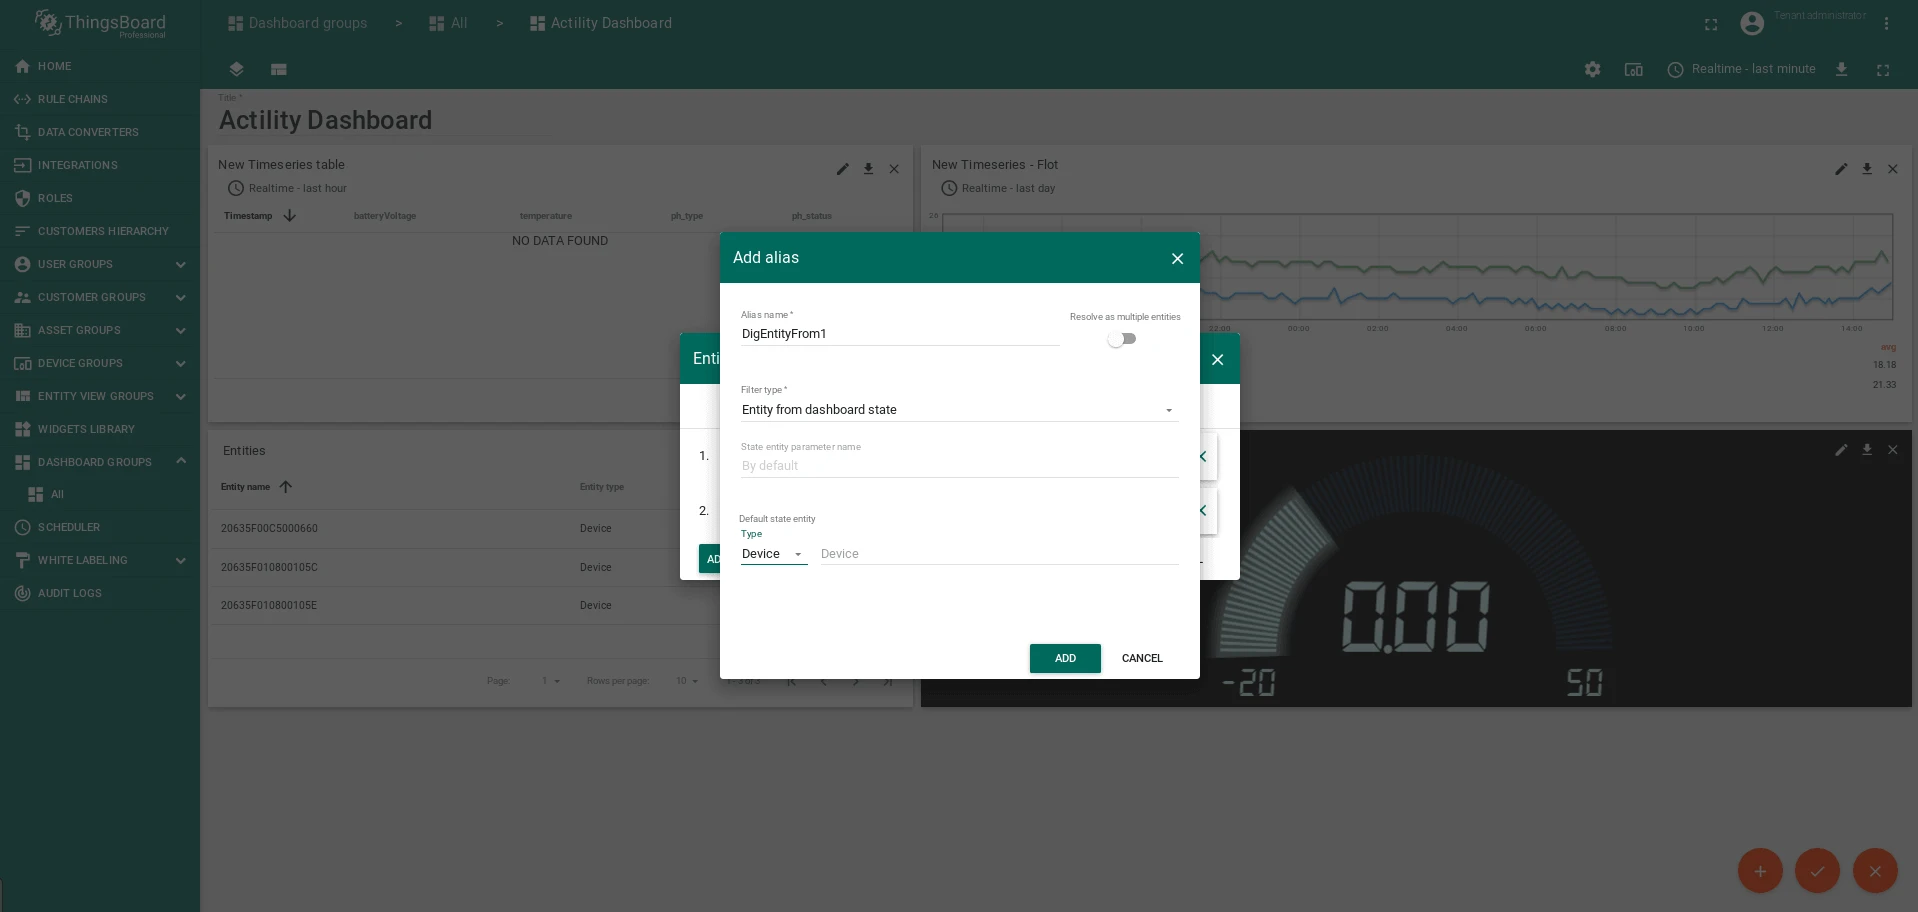
Alternatively, build the dashboard manually. The dashboard uses two aliases and five widgets:
Aliases
Section titled “Aliases”- List abeeways — entity list filter by device names
- DigEntityFrom — entity from the current dashboard state (used by detail widgets)
Widgets
Section titled “Widgets”Widget 1 — Device cards with navigation action
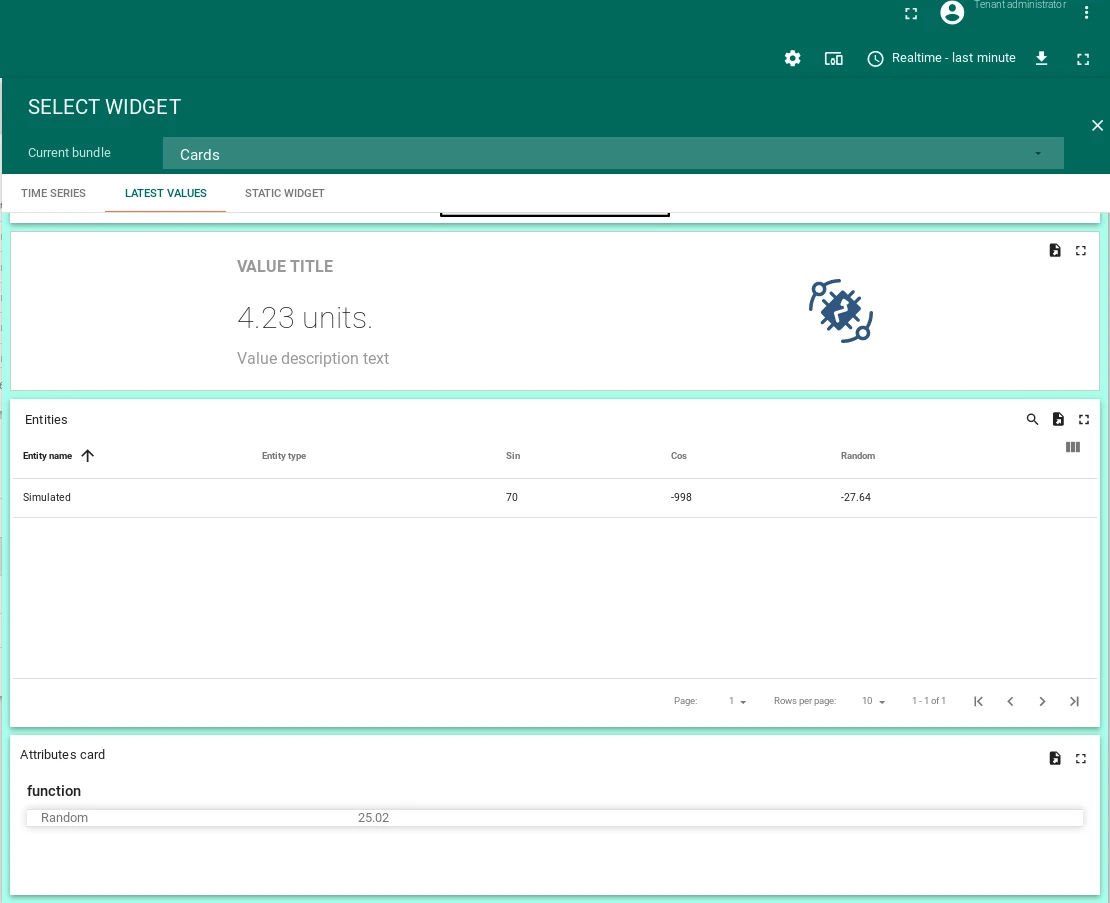
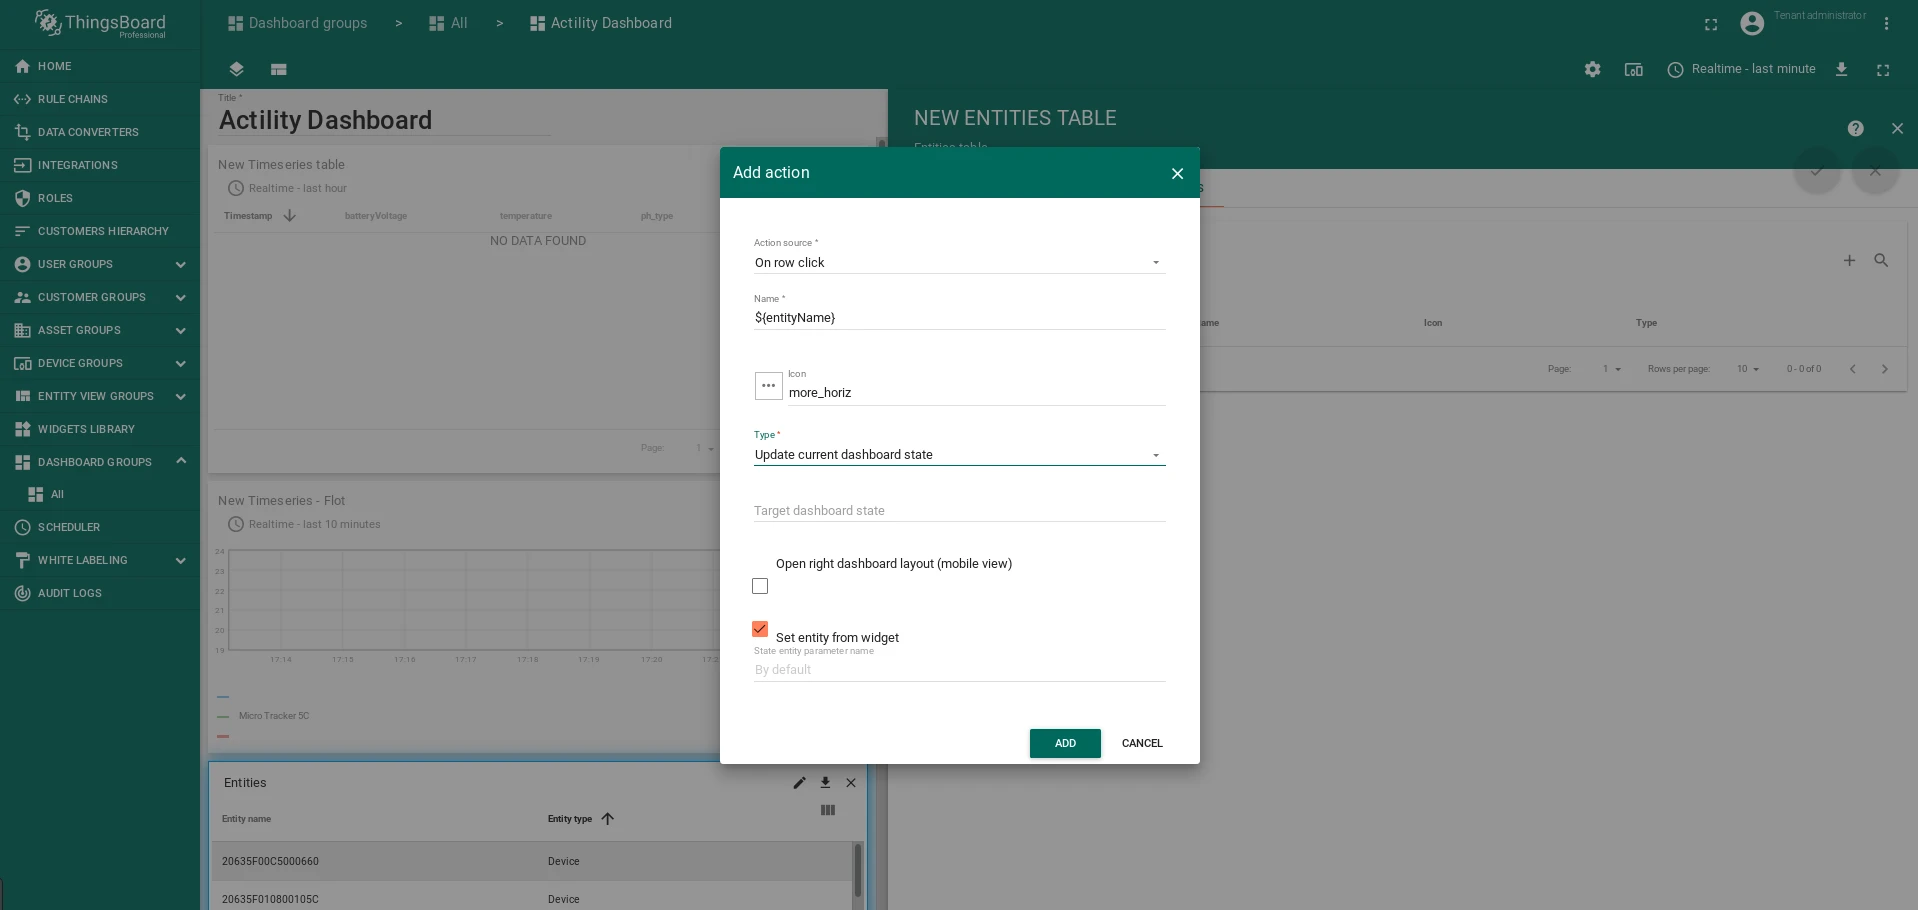
Add a Cards widget (Latest values type) bound to the List abeeways alias. Add an On row click action that navigates to a dashboard state, passing the selected entity to DigEntityFrom.
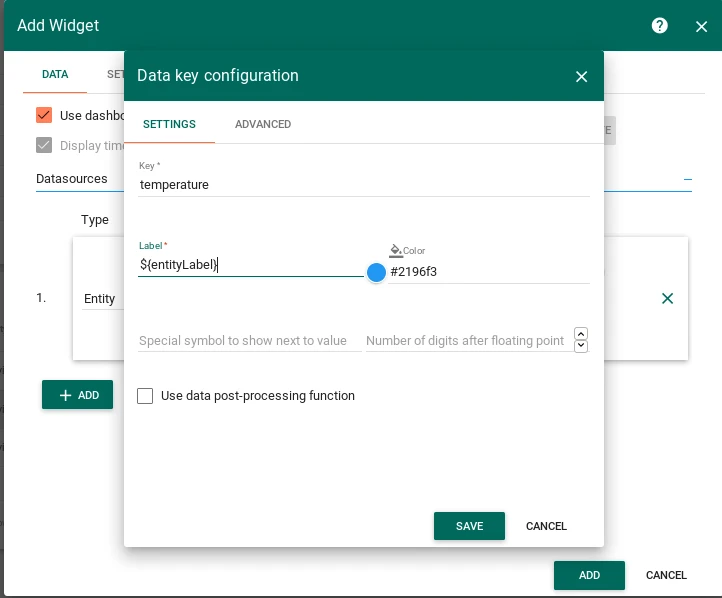
Widget 2 — Time-series temperature chart
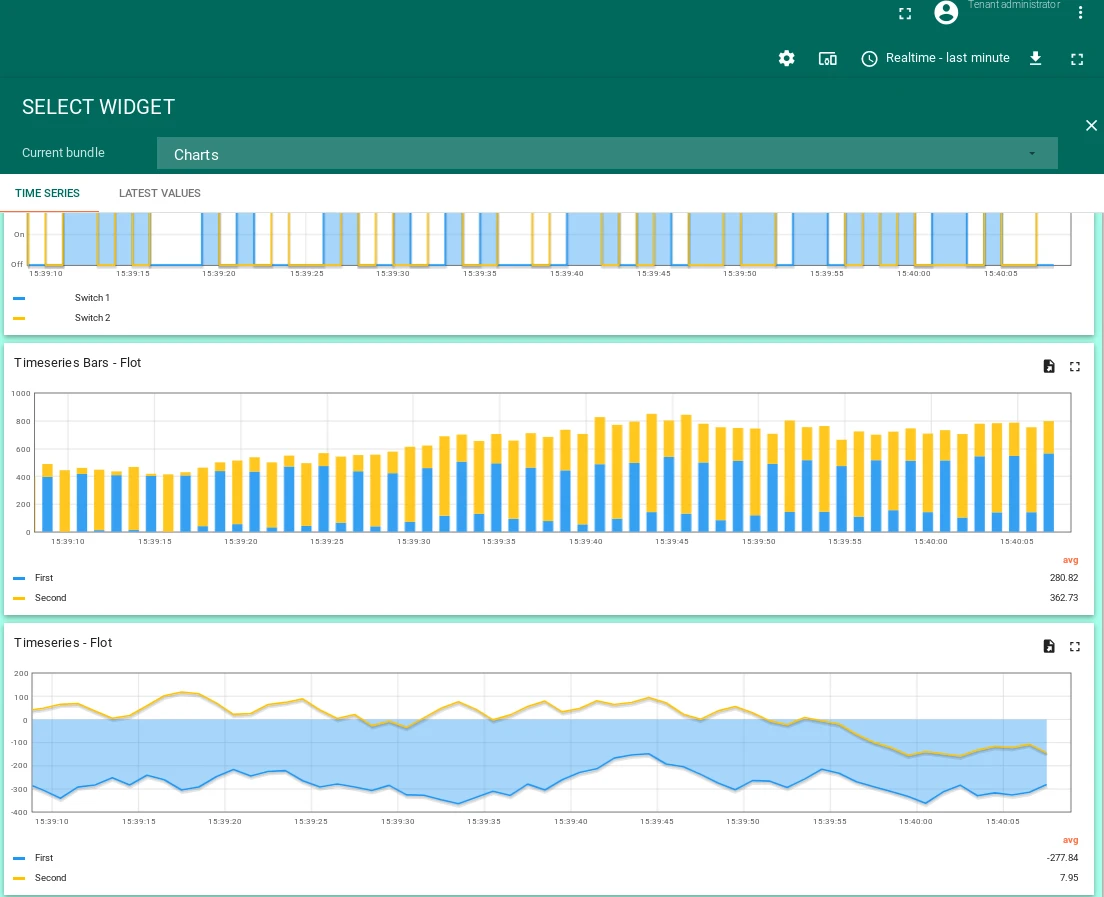
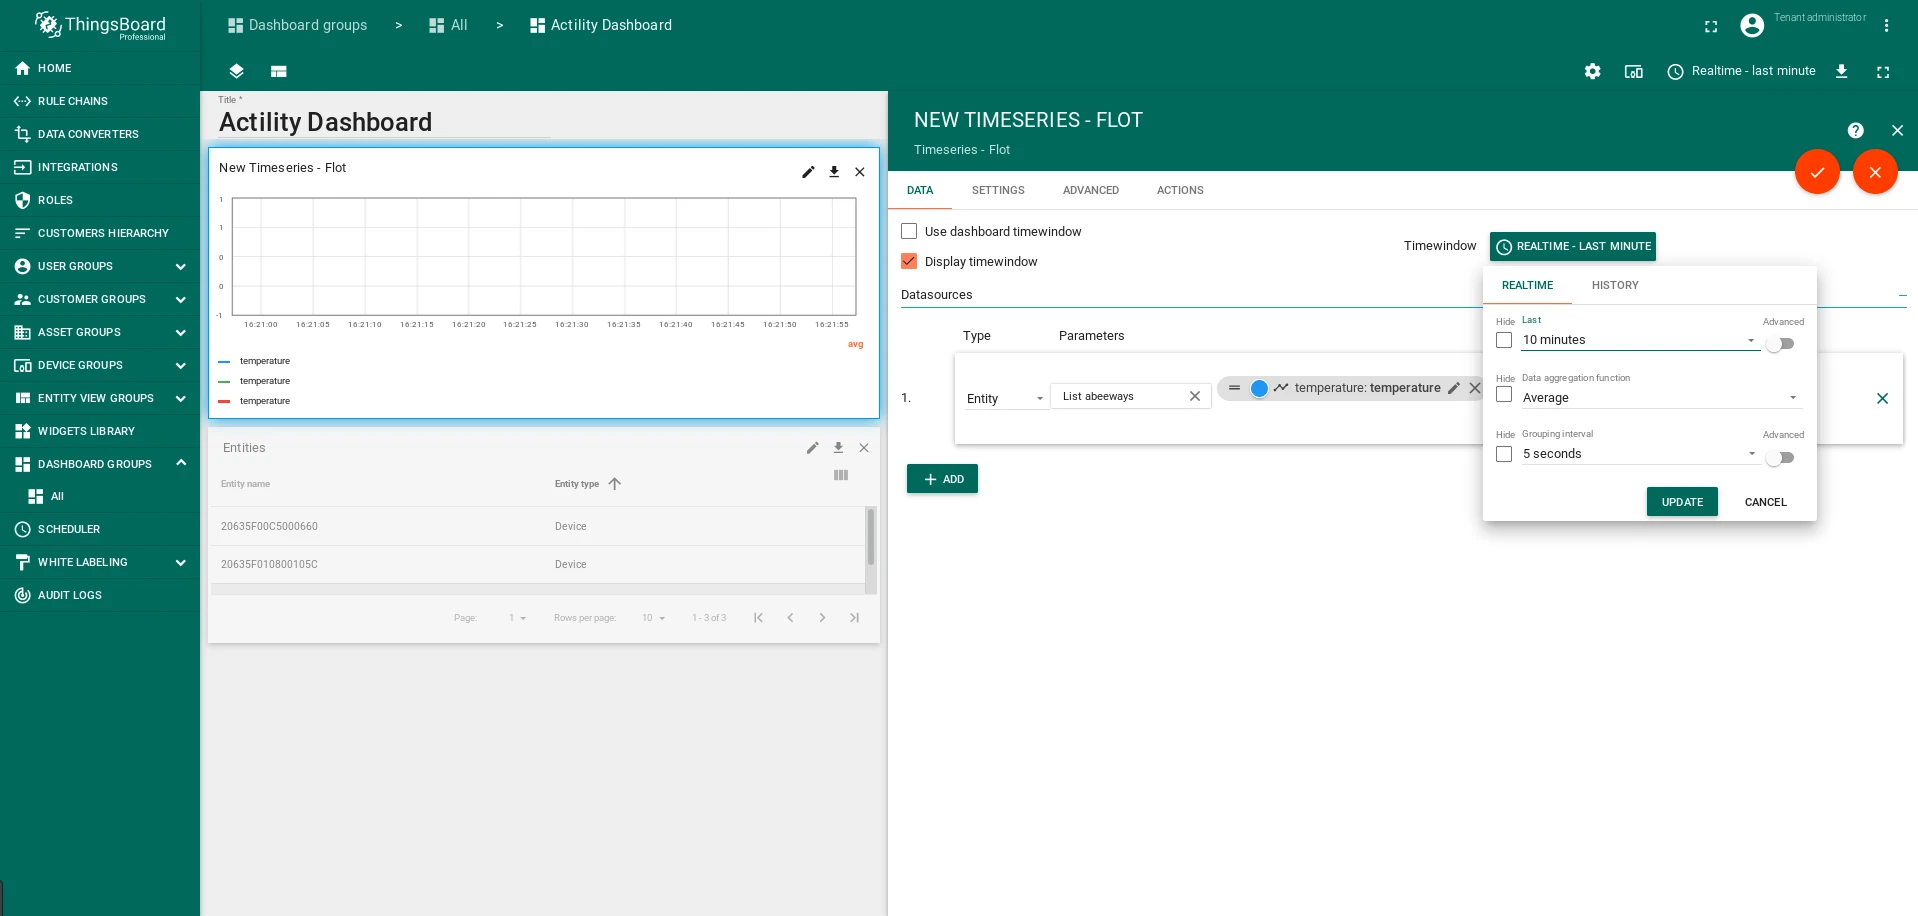
Add a Charts widget (Time-series type) bound to DigEntityFrom, showing the temperature key with the entity label.
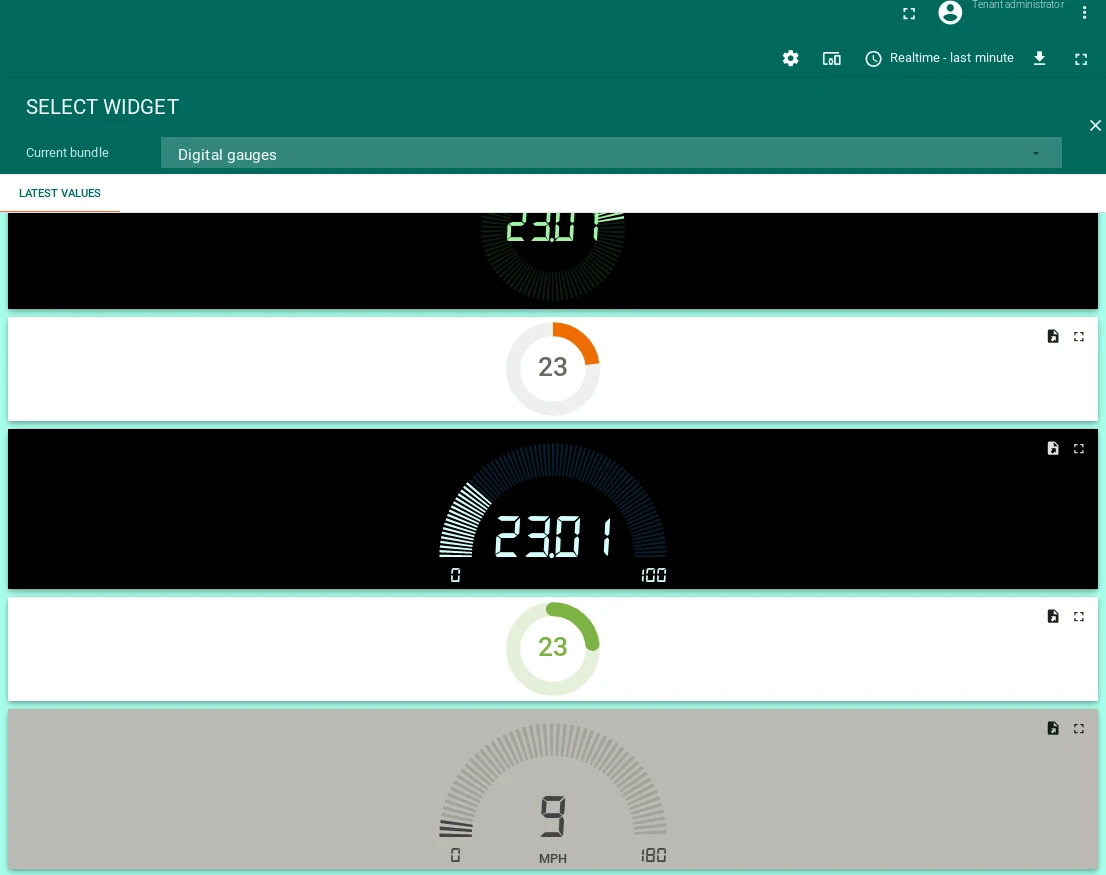
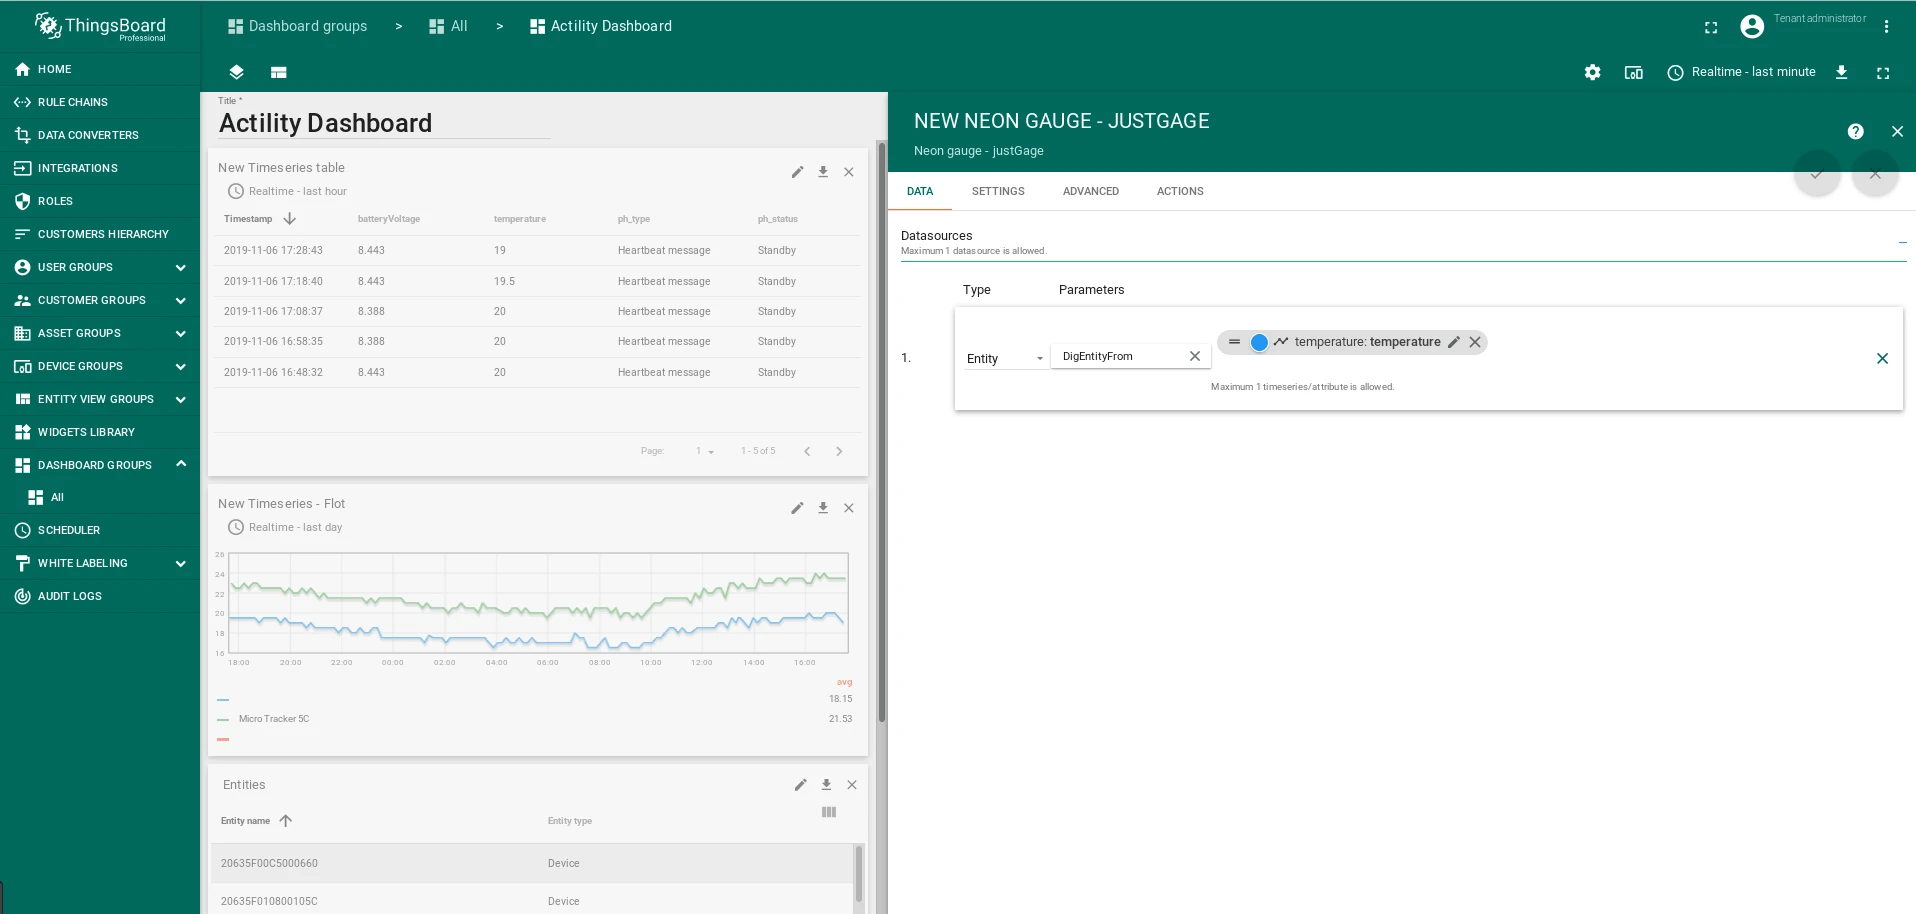
Widget 3 — Digital gauges
Add a Digital gauges widget bound to DigEntityFrom to visualize real-time telemetry values like battery voltage.
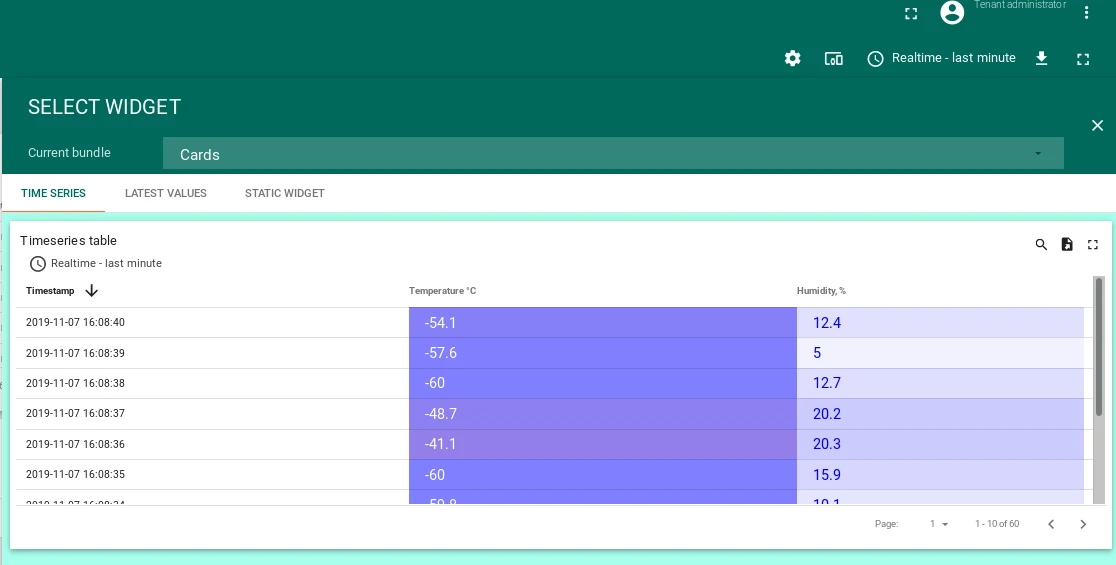
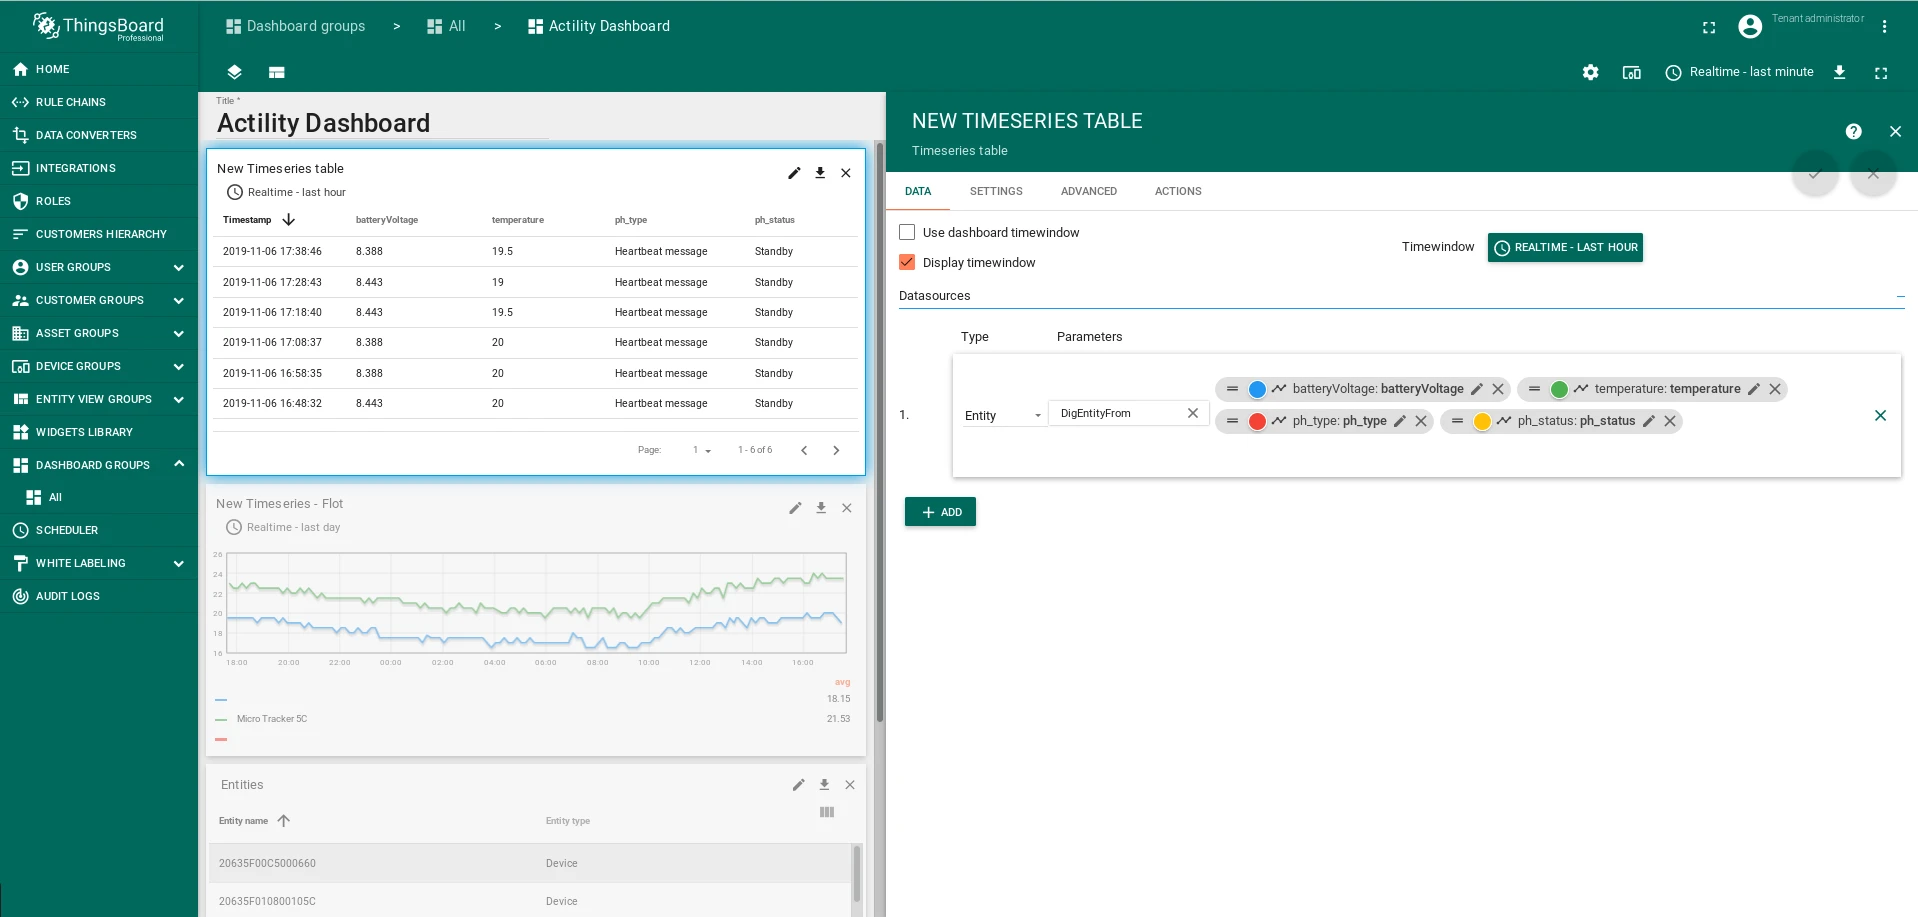
Widget 4 — Telemetry cards
Add a Cards widget (Time-series type) bound to DigEntityFrom showing multiple telemetry keys.
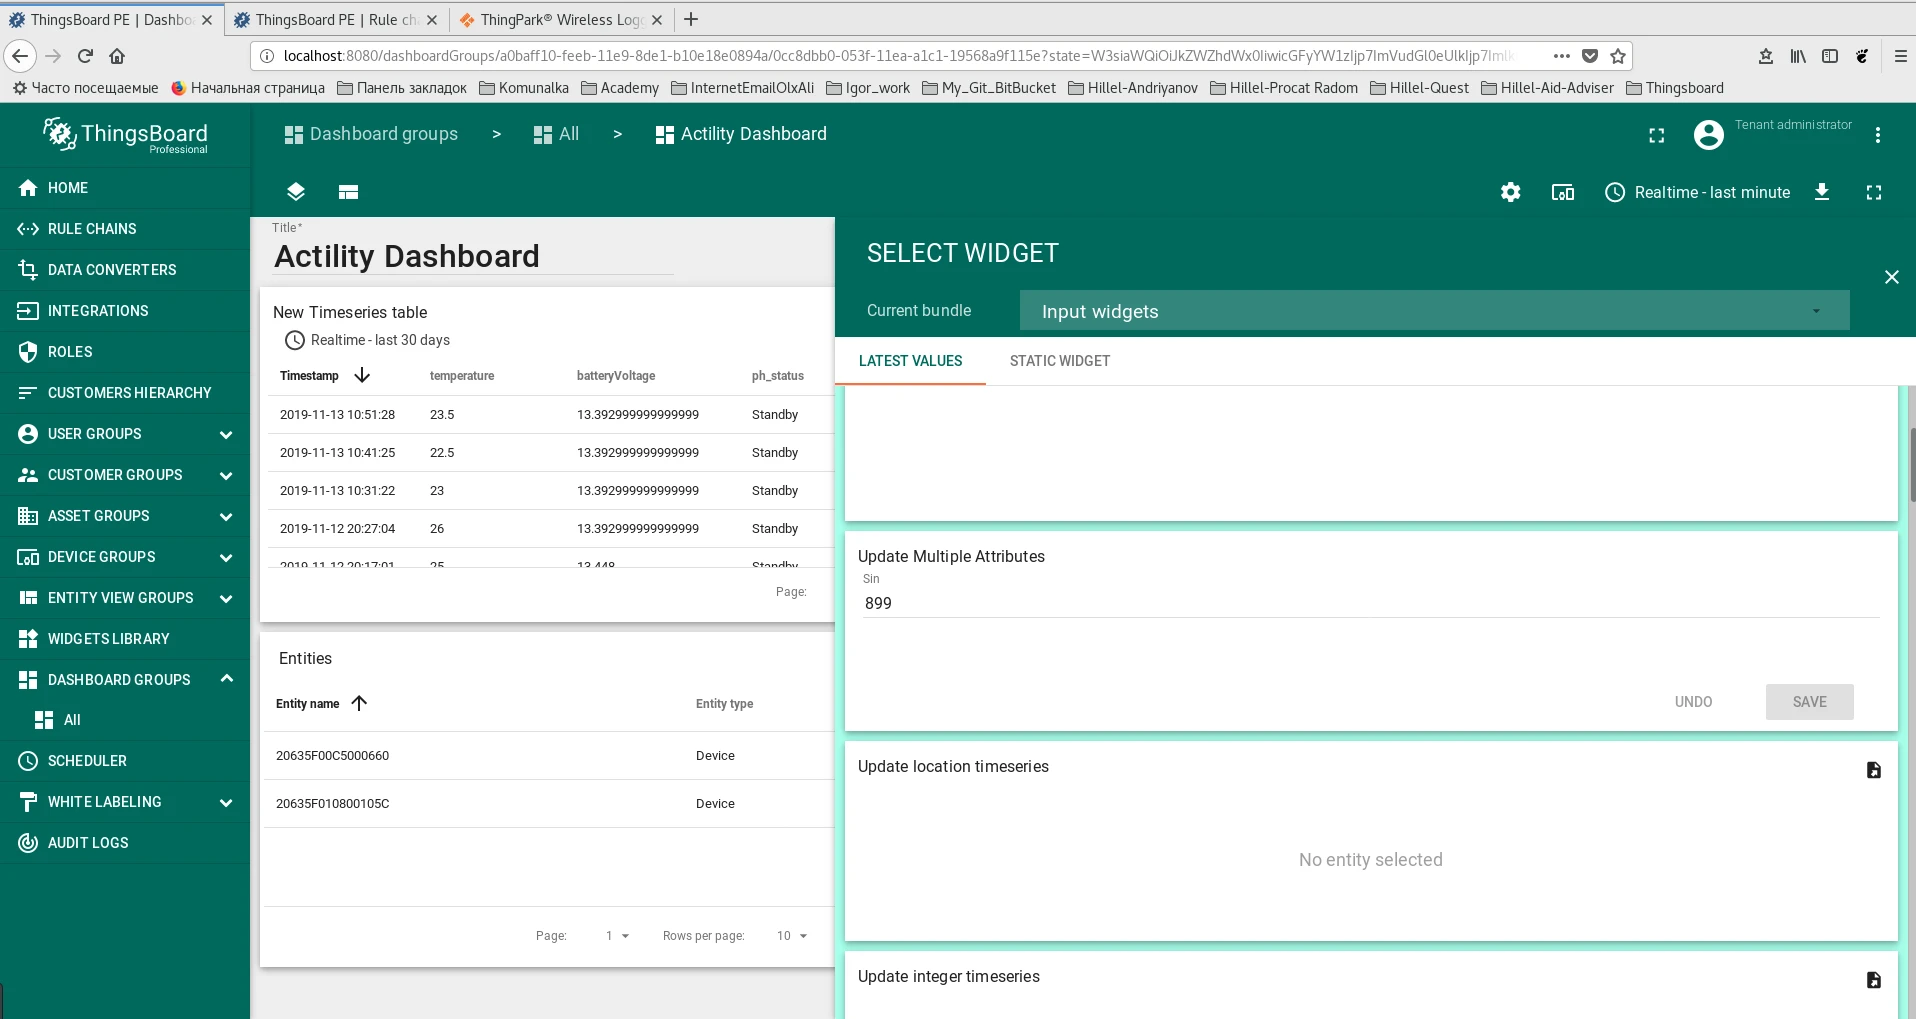
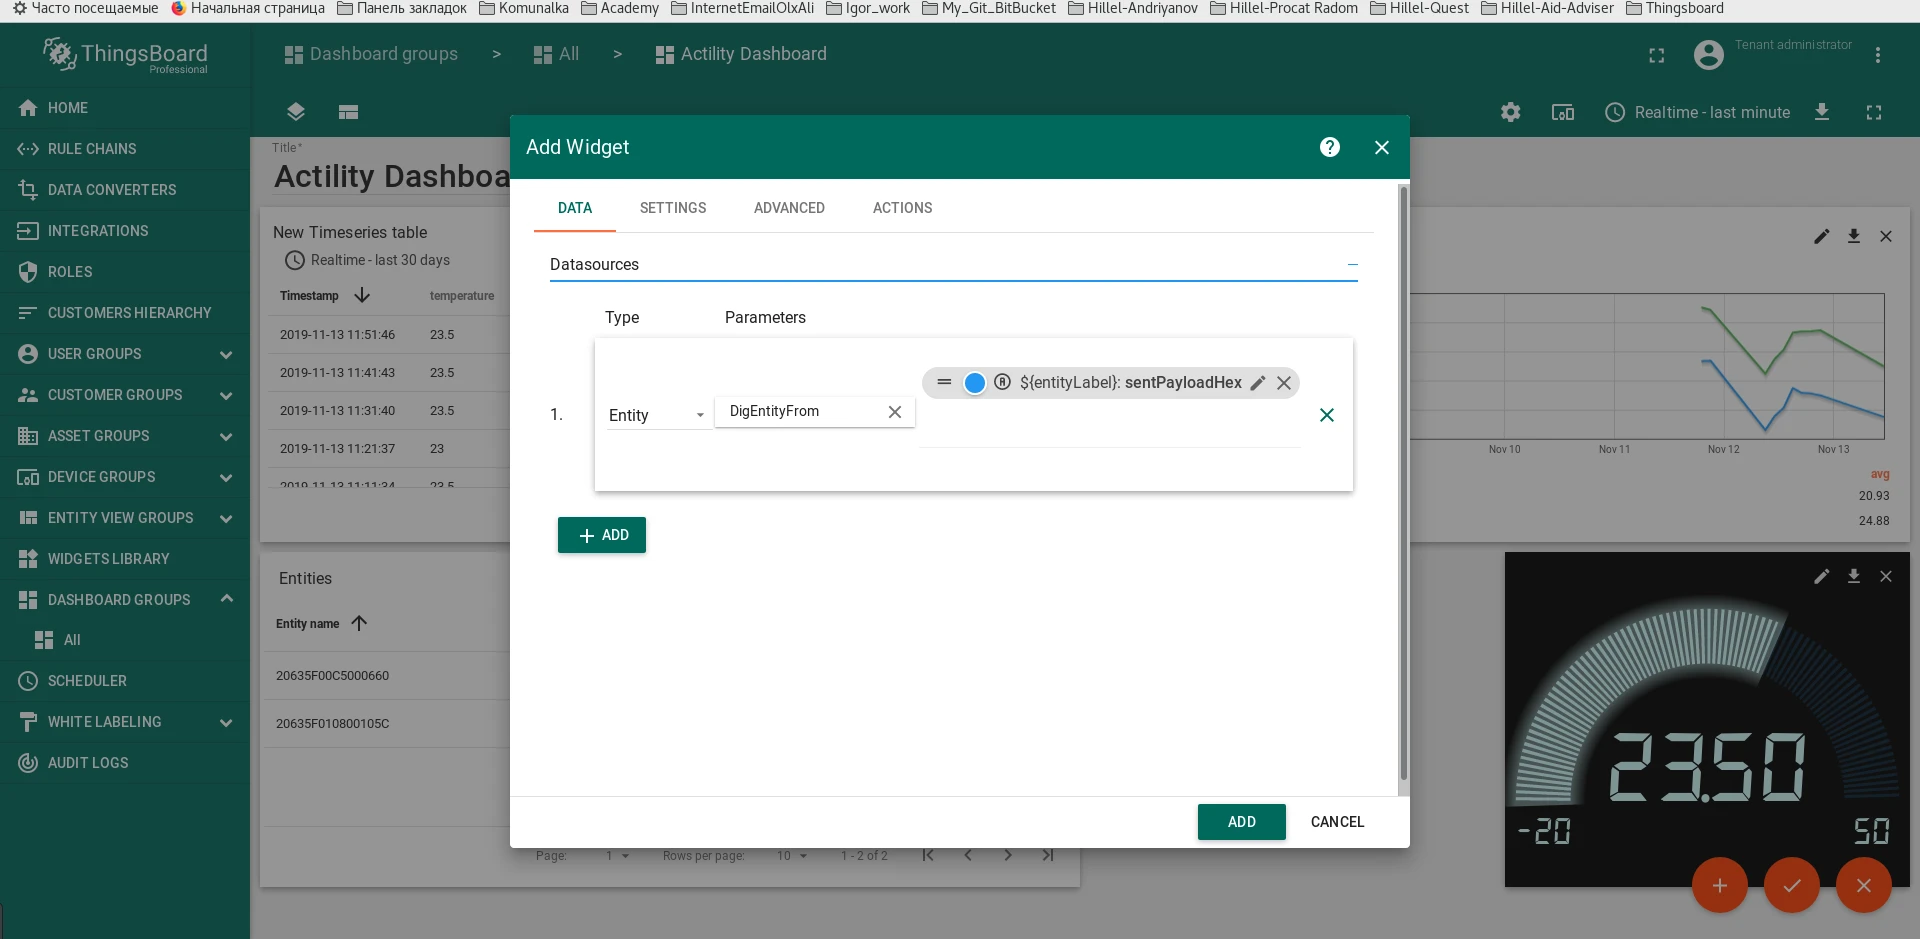
Widget 5 — Input widget for downlink messages
Add an Input widget bound to DigEntityFrom to send downlink commands to the device (see Send Downlink Messages for payload formats).
Verify Telemetry and Integration Events
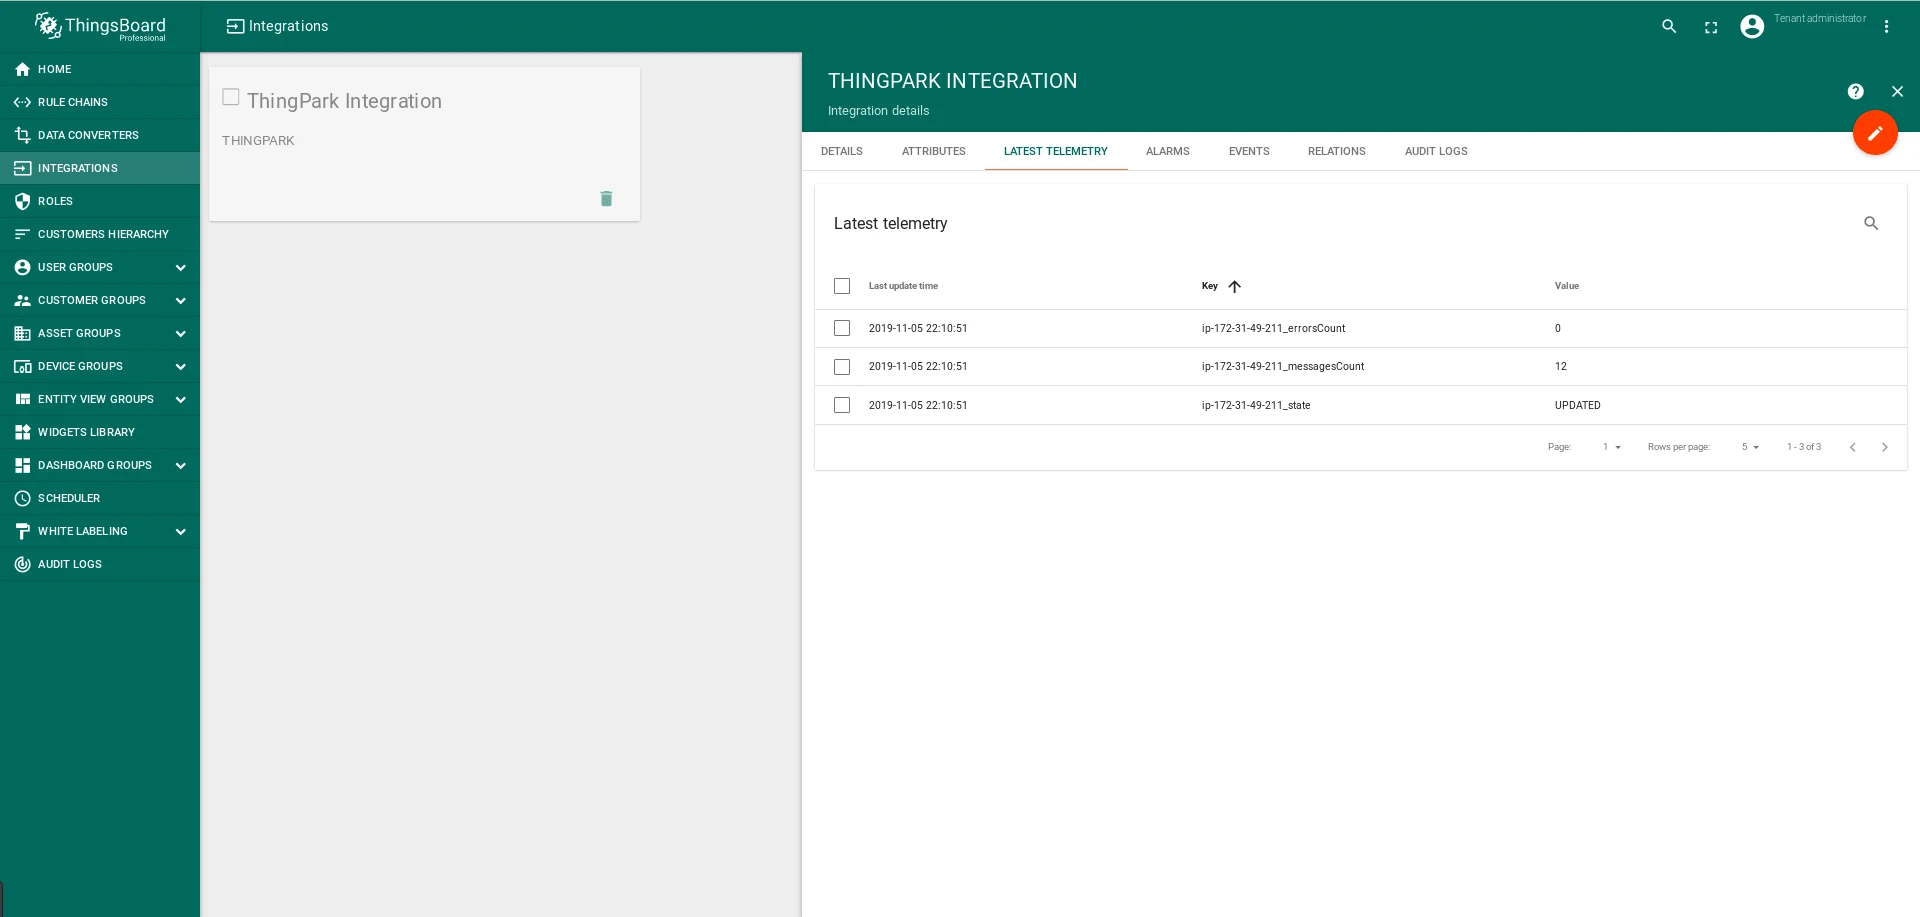
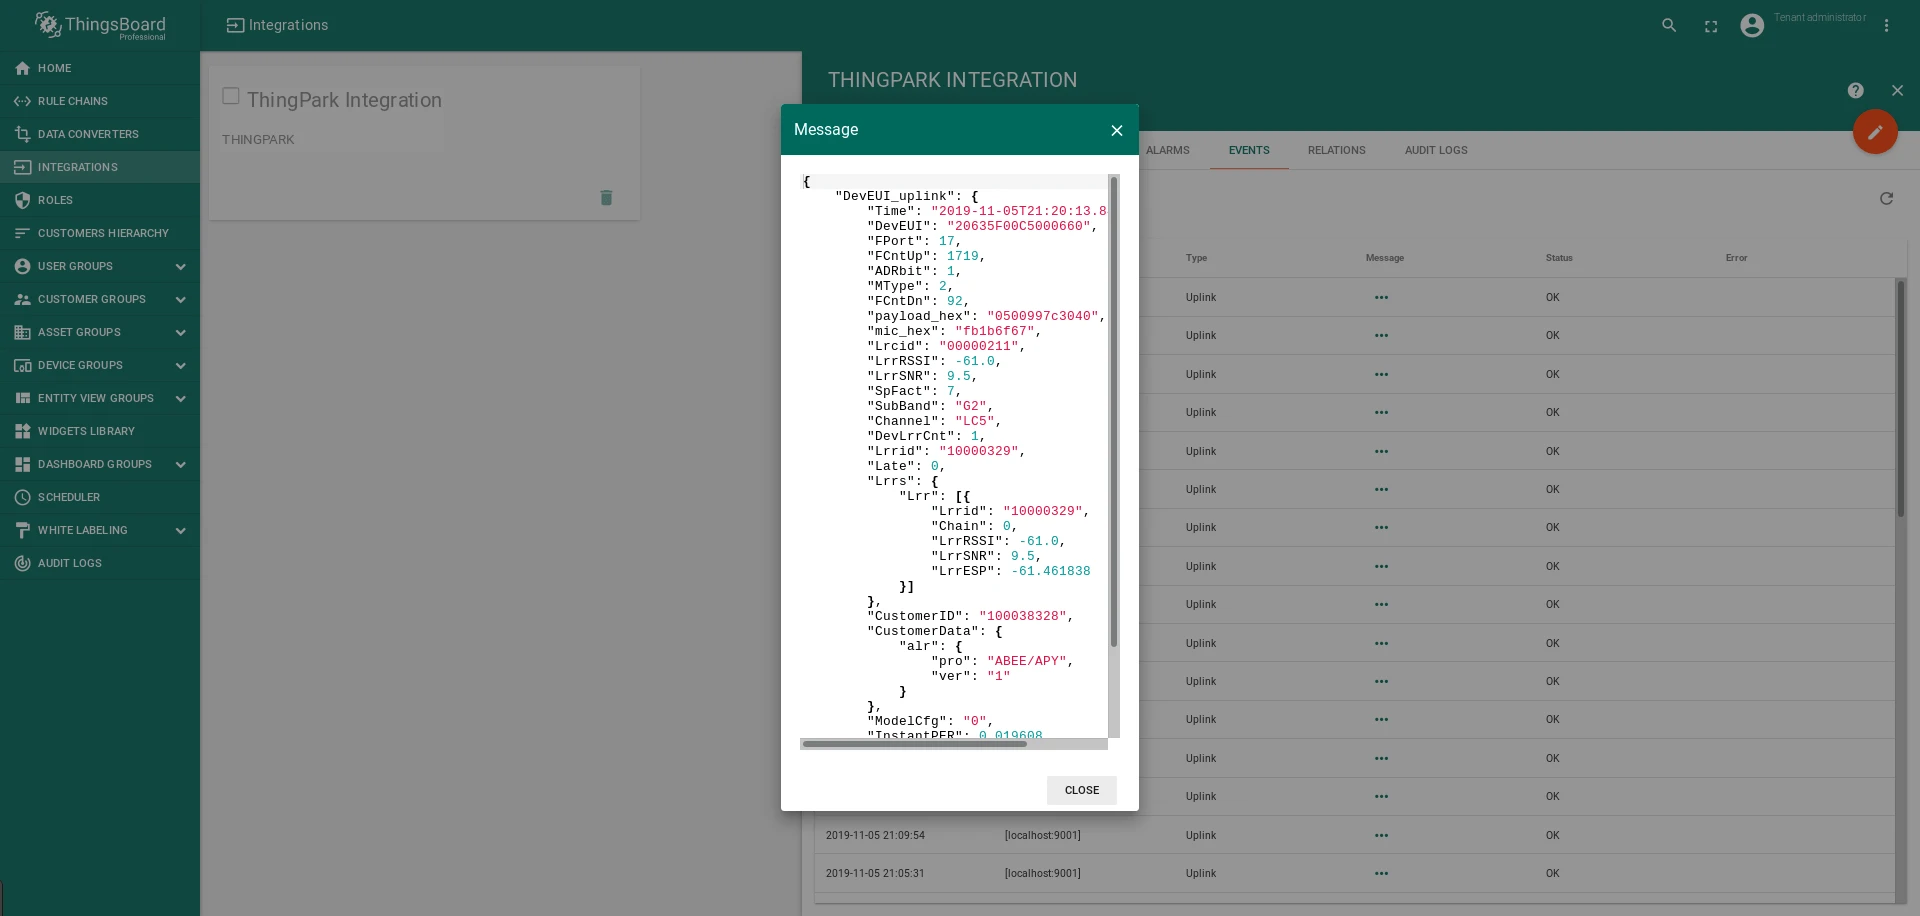
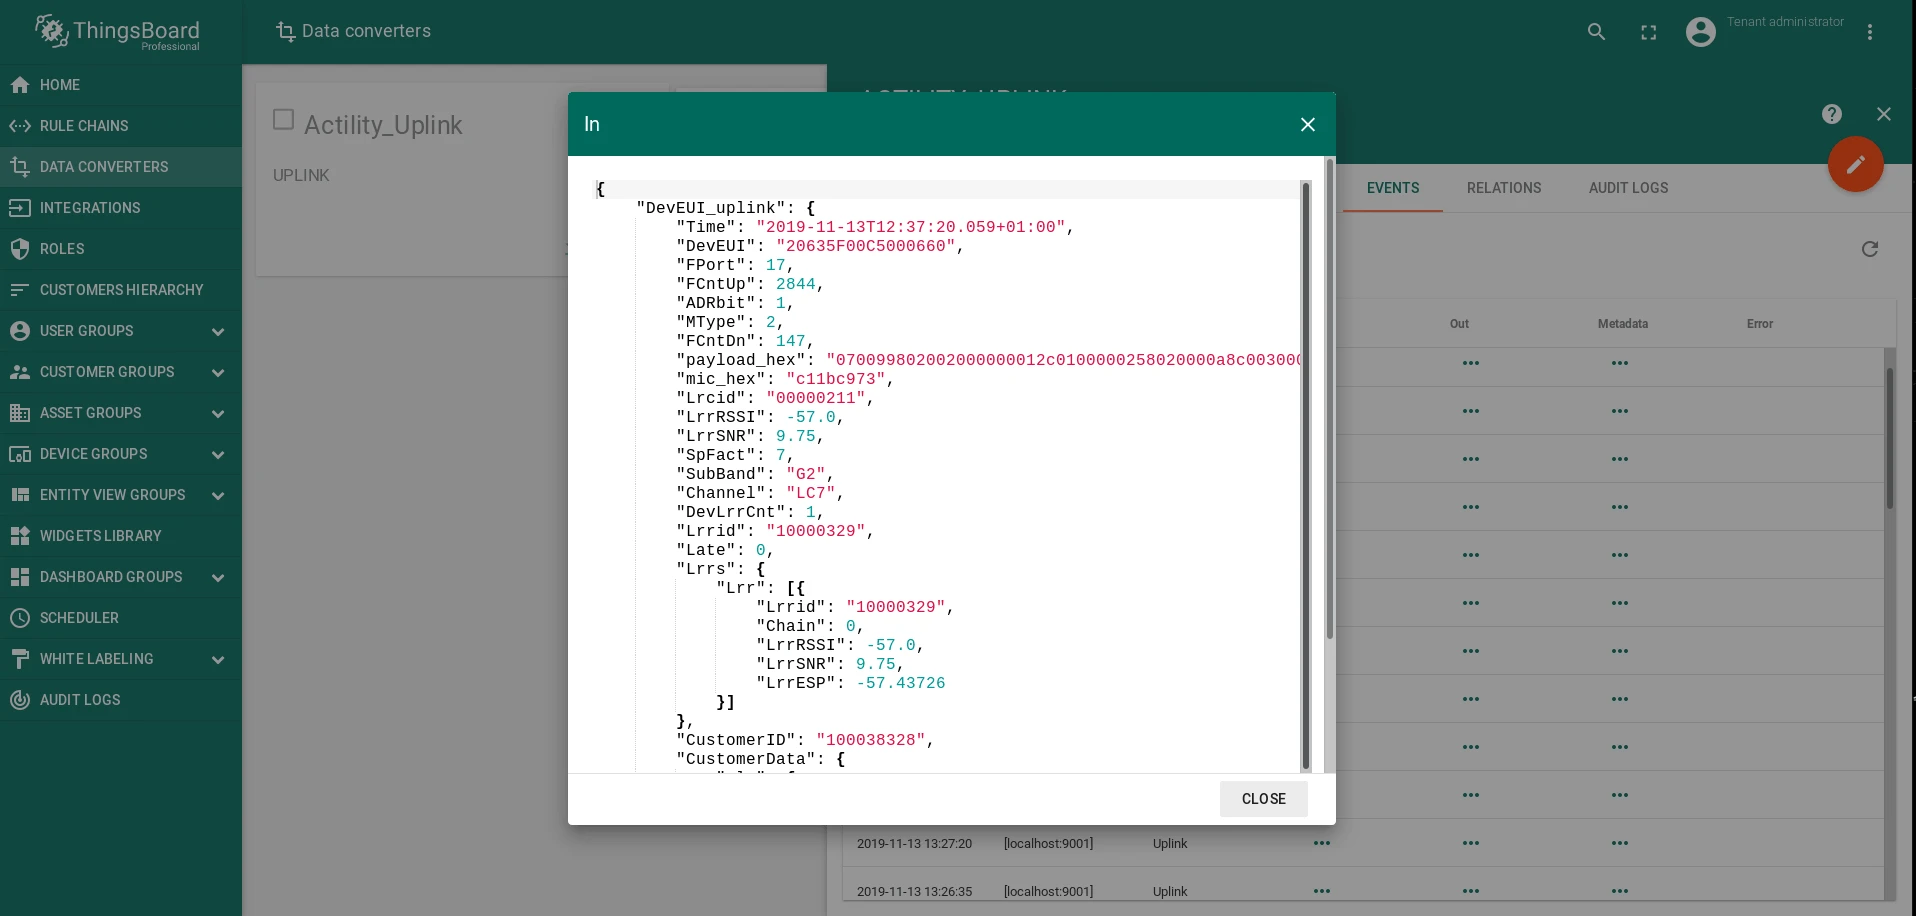
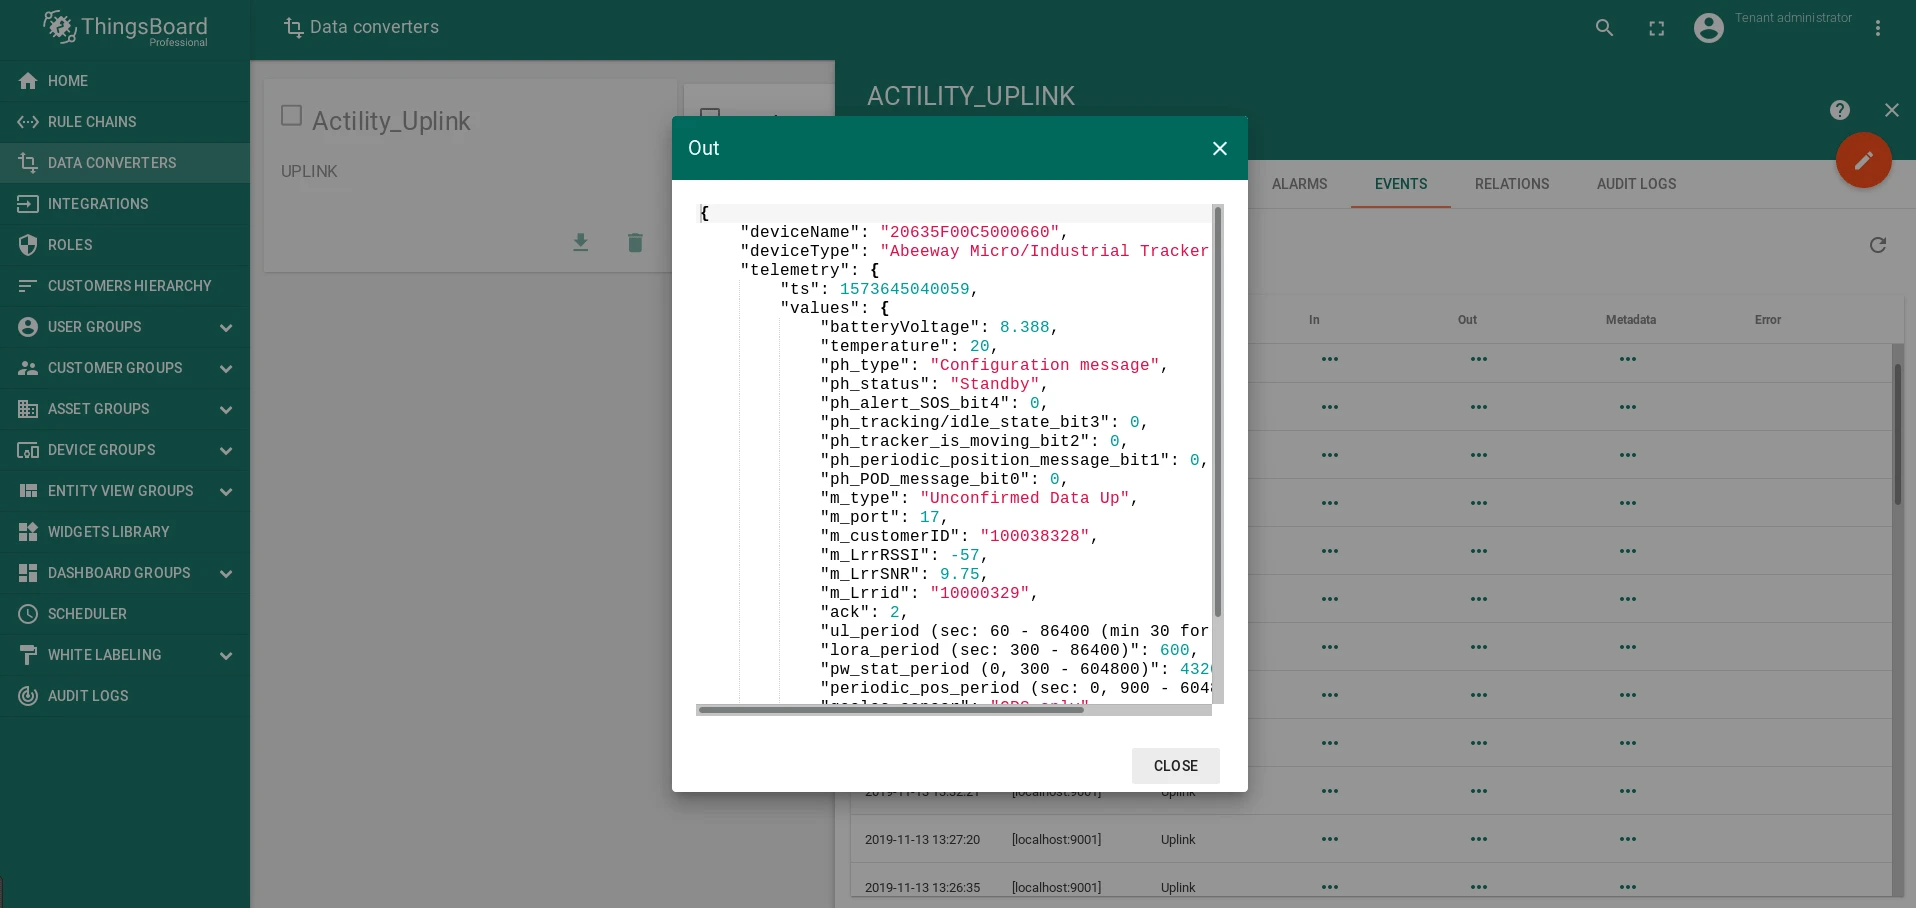
Section titled “Verify Telemetry and Integration Events”Check the Integration ⇾ Events tab to confirm uplink messages are being received and processed. The Latest telemetry tab of the device shows current values.
Send Downlink Messages
Section titled “Send Downlink Messages”Use the input widget (Widget 5 on the dashboard) to send downlink commands to the device. Enter a hex payload and submit — the message is routed through the rule chain to Actility and forwarded to the device over LoRaWAN.
Downlink Message Types
Section titled “Downlink Message Types”| Message type | ID | Example payload | Description |
|---|---|---|---|
| Position on demand | 0x01 |
01 |
Request current position immediately |
| Set Mode | 0x02 |
0203 |
Change operational mode (0=Standby … 5=Off) |
| Request Configuration | 0x03 |
030605090C01 |
Request parameters: geoloc_sensor, gps_timeout, gps_convergence, lora_period |
| Start SOS Mode | 0x04 |
04 |
Activate SOS/emergency mode |
| Stop SOS Mode | 0x05 |
05 |
Deactivate SOS mode |
| Set Param | 0x0B |
0B0A0C000000781100000E10 |
Set gps_convergence and gps_standby_timeout |
| Debug Command | 0xFF |
FF |
Reset the tracker |
See Also
Section titled “See Also”- Integrations Overview — how ThingsBoard connects to external platforms and how uplink/downlink flow works
- ThingPark Integration — full integration setup: uplink and downlink converters, connection settings, and troubleshooting
- Uplink Data Converter — full decoder function reference: input parameters, output fields, and scripting patterns
- Downlink Data Converter — full encoder function reference: input parameters, output fields, and scripting patterns
- Remote Integrations — run the integration outside the ThingsBoard server to reach ThingPark from a private network
- TBEL scripting reference — built-in functions and operators for writing converter scripts
- Rule Engine — how the Root Rule Chain routes downlink commands to the integration