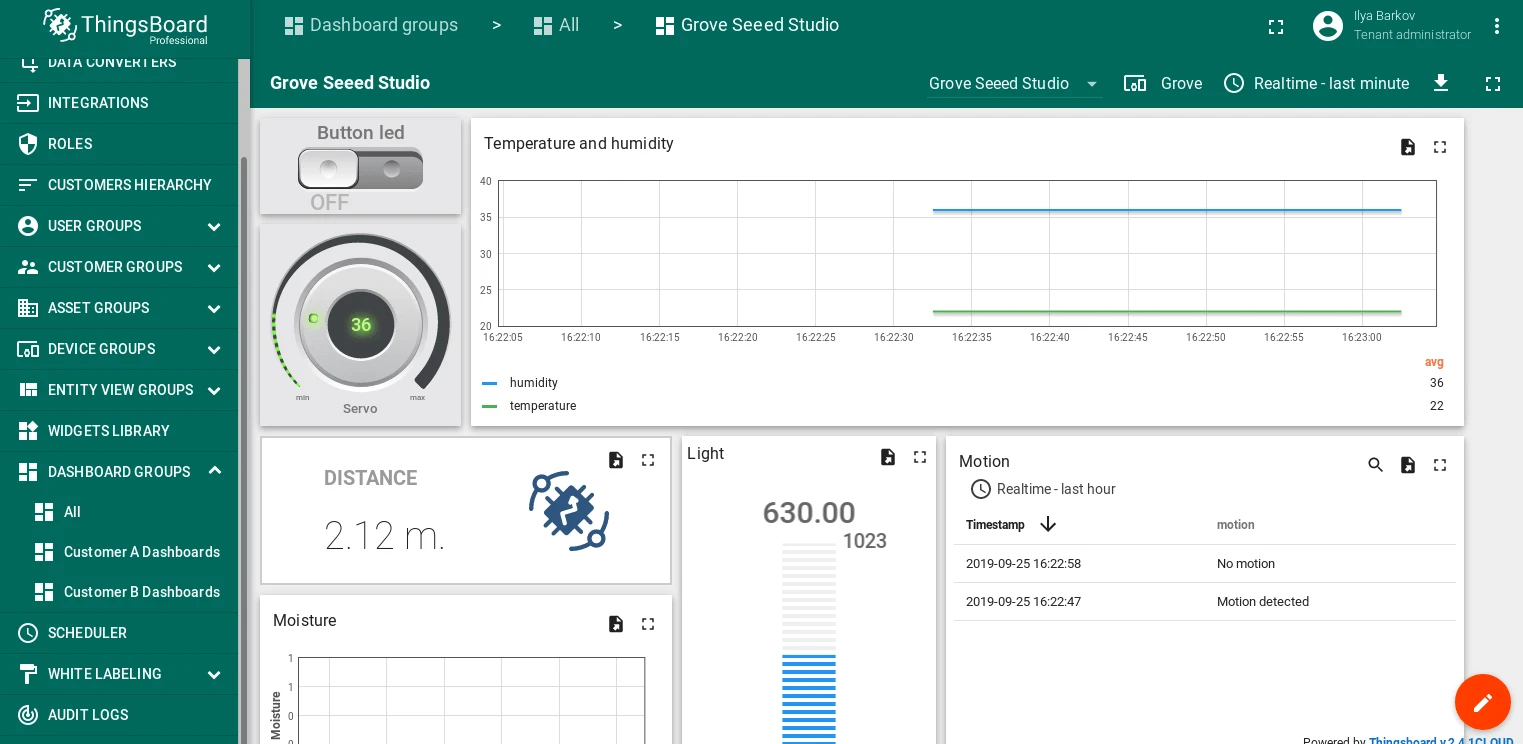
Raspberry Pi with Grove Base Hat and ThingsBoard
Introduction
Section titled “Introduction”This guide describes how to connect a Raspberry Pi with a Grove Base Hat to ThingsBoard over MQTT, collect data from Grove sensors, and control actuators from a ThingsBoard dashboard.
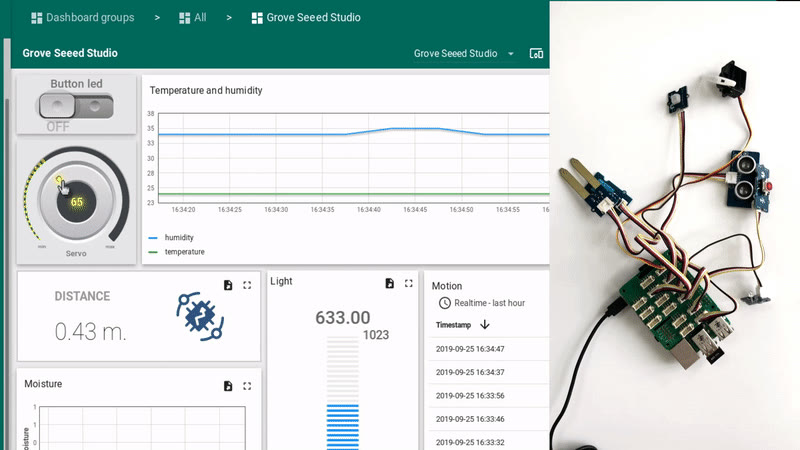
The Raspberry Pi runs a Python script that reads sensor data, sends telemetry to ThingsBoard, and responds to RPC commands for servo and LED control.
Prerequisites
Section titled “Prerequisites”Hardware:
- Raspberry Pi 3 Model B (or Raspberry Pi 4) — 1×
- Grove Base Hat for Raspberry Pi — 1×
- Grove modules used in this guide:
Software:
- ThingsBoard instance: use ThingsBoard Cloud or install a local server
- Python 3 on the Raspberry Pi
Wiring scheme
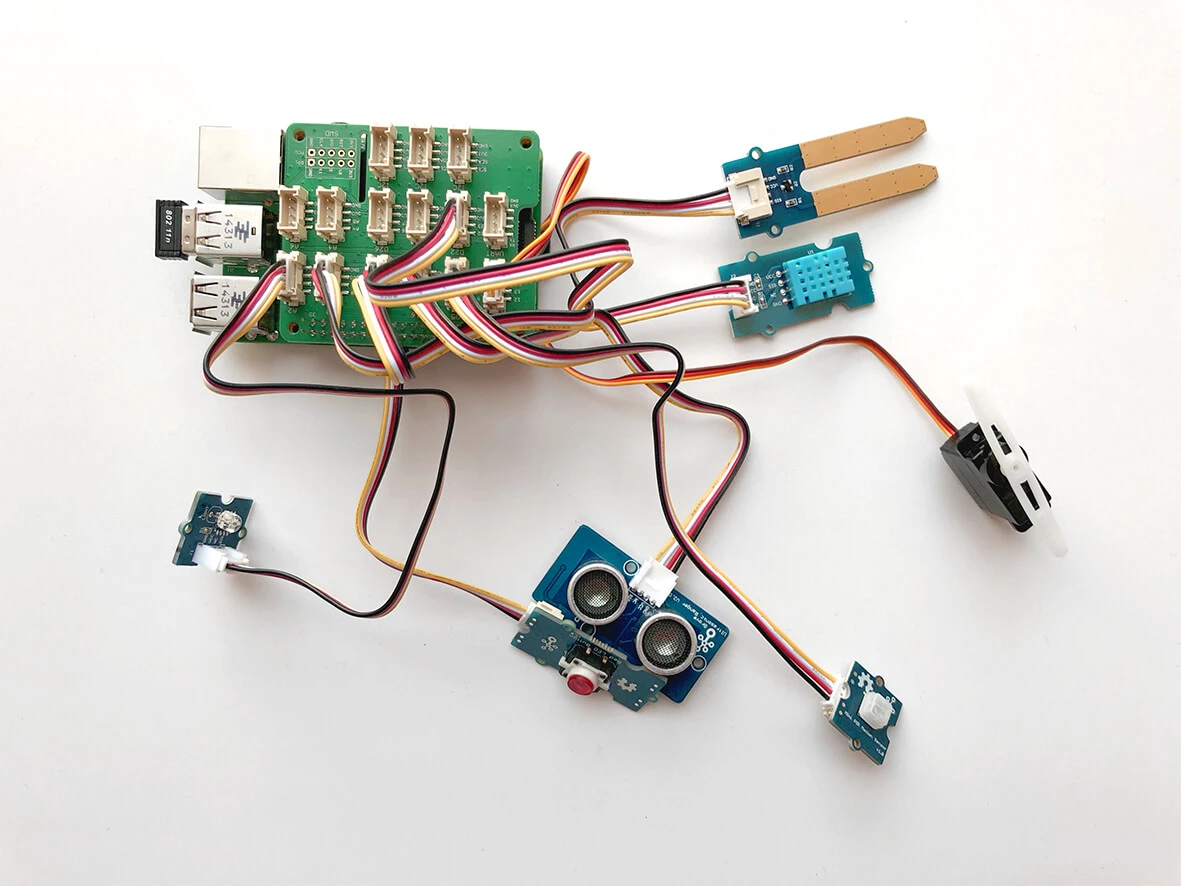
Section titled “Wiring scheme”Connect the Grove modules to the Grove Base Hat using the following ports:
| Module | Port on Grove Base Hat |
|---|---|
| Analog Servo | PWM (12) |
| Mini PIR Motion Sensor v1.0 | D5 |
| Ultrasonic Ranger v2.0 | D16 |
| Red LED Button v1.0 | D18 |
| Moisture Sensor v1.4 | A0 |
| Light Sensor v1.2 | A2 |
| Temperature & Humidity Sensor v1.2 | D22 |
Configure the Raspberry Pi
Section titled “Configure the Raspberry Pi”-
Follow the Grove Base HAT configuration guide to set up the Raspberry Pi.
-
Install the ThingsBoard Python client SDK:
Terminal window pip3 install tb-mqtt-client -
Clone and install the Seeed-Studio Grove library:
Terminal window git clone https://github.com/Seeed-Studio/grove.py.gitTerminal window pip3 install ./grove.py/ -
If you are using the Temperature & Humidity Sensor (DHT11/DHT22), install the Seeed DHT library:
Terminal window git clone https://github.com/Seeed-Studio/Seeed_Python_DHT.gitTerminal window sudo python3 ./Seeed_Python_DHT/setup.py install
Create a device in ThingsBoard
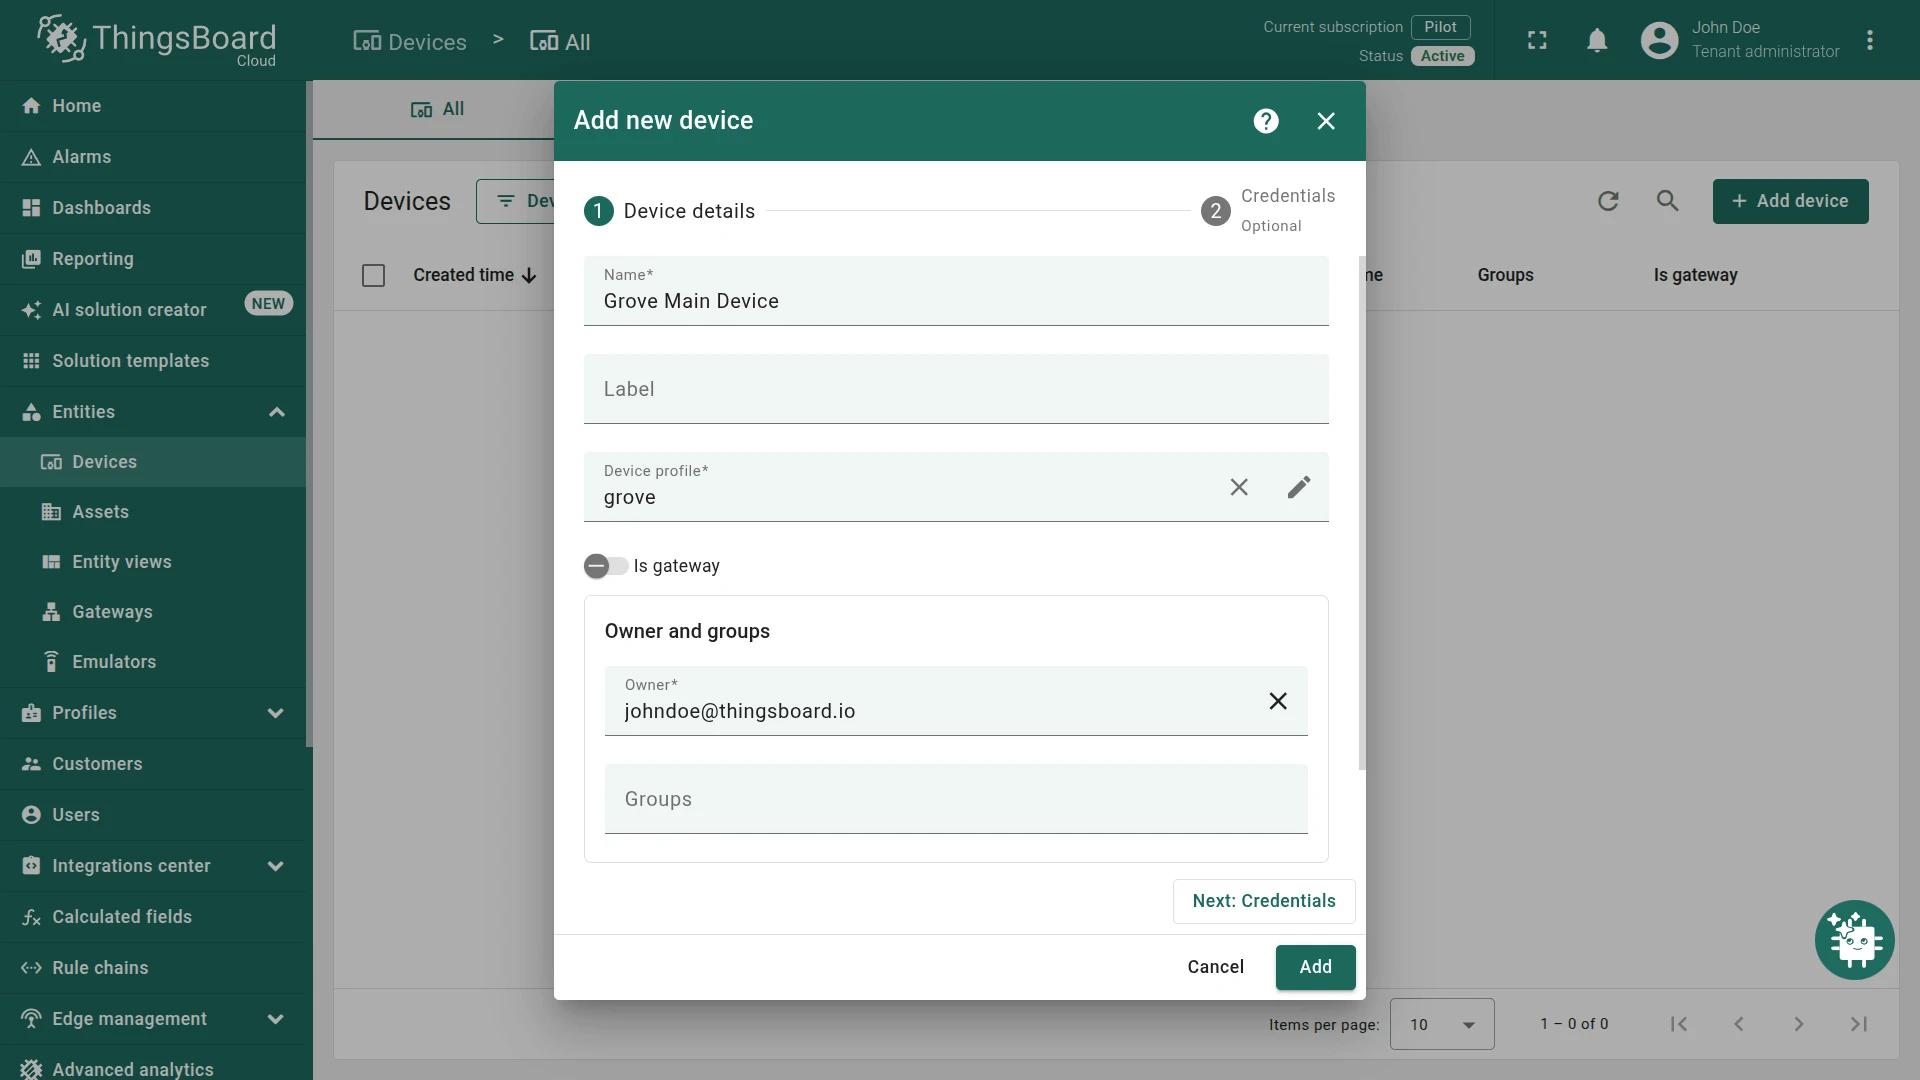
Section titled “Create a device in ThingsBoard”- Log in to ThingsBoard.
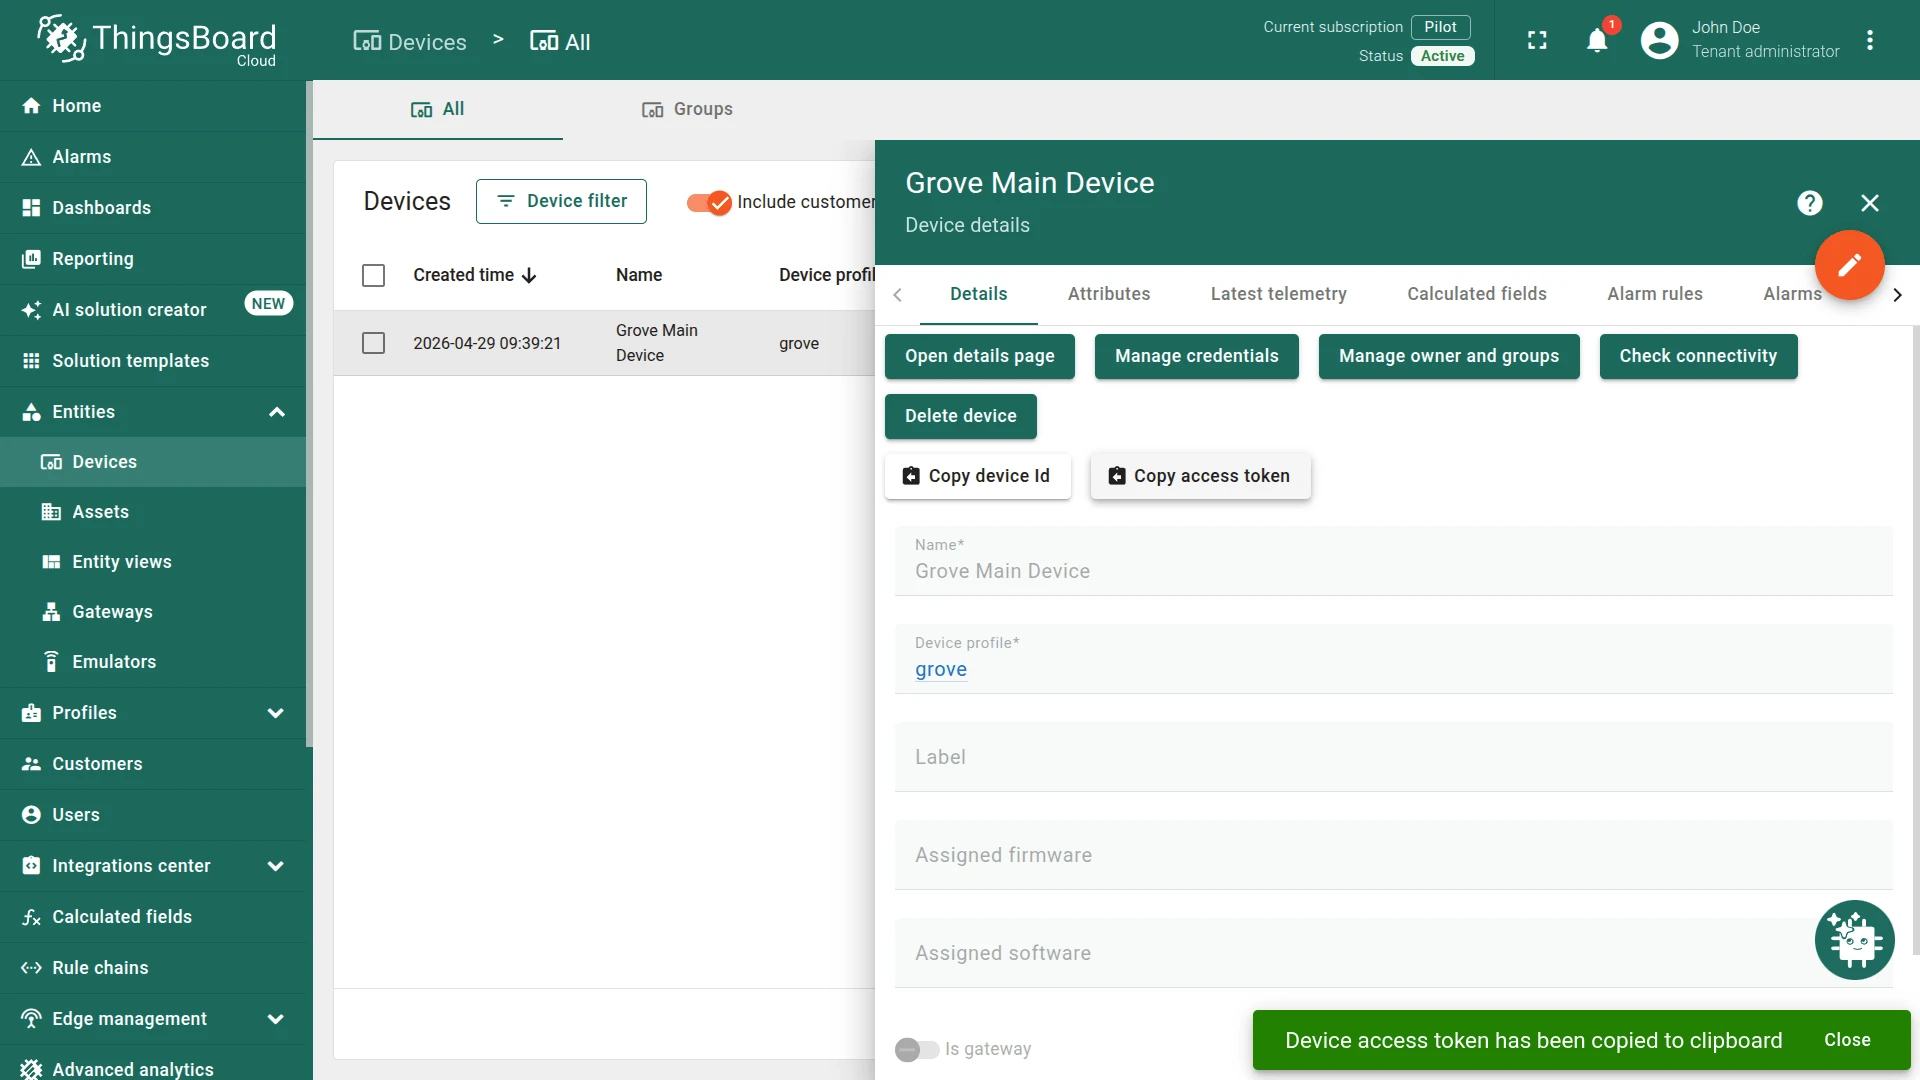
- Go to Entities ⇾ Devices and add a new device (e.g., name:
Grove Main Device, type:grove). - Open the device details and click Copy access token. Save this token — it will be used as
ACCESS_TOKENin the script.
Application source code
Section titled “Application source code”Download the tb_grove.py script or use the code below.
Replace THINGSBOARD_HOST with your ThingsBoard server address. For ThingsBoard Cloud, use mqtt.thingsboard.cloud (North America) or mqtt.eu.thingsboard.cloud (Europe). Replace ACCESS_TOKEN with the token copied in the previous step.
## Copyright © 2019-2024 The Thingsboard Authors## Licensed under the Apache License, Version 2.0 (the "License");# you may not use this file except in compliance with the License.# You may obtain a copy of the License at##     http://www.apache.org/licenses/LICENSE-2.0## Unless required by applicable law or agreed to in writing, software# distributed under the License is distributed on an "AS IS" BASIS,# WITHOUT WARRANTIES OR CONDITIONS OF ANY KIND, either express or implied.# See the License for the specific language governing permissions and# limitations under the License.#
import loggingimport timefrom tb_device_mqtt import TBDeviceMqttClient, TBPublishInfofrom grove.grove_mini_pir_motion_sensor import GroveMiniPIRMotionSensorfrom grove.grove_ultrasonic_ranger import GroveUltrasonicRangerfrom Seeed_Python_DHT.seeed_dht import DHTfrom grove.grove_moisture_sensor import GroveMoistureSensorfrom grove.button import Buttonfrom grove.grove_ryb_led_button import GroveLedButtonfrom grove.grove_light_sensor_v1_2 import GroveLightSensorfrom grove.grove_servo import GroveServo
# Configuration of logger, in this case it will send messages to consolelogging.basicConfig(level=logging.INFO,                    format='%(asctime)s - %(levelname)s - %(module)s - %(lineno)d - %(message)s',                    datefmt='%Y-%m-%d %H:%M:%S')
log = logging.getLogger(__name__)
THINGSBOARD_SERVER = 'THINGSBOARD_HOST'ACCESS_TOKEN = 'ACCESS_TOKEN'

def main():
    # Grove - Servo connected to PWM port    servo = GroveServo(12)    servo_angle = 90
    # Grove - mini PIR motion pir_sensor connected to port D5    pir_sensor = GroveMiniPIRMotionSensor(5)
    # Grove - Ultrasonic Ranger connected to port D16    ultrasonic_sensor = GroveUltrasonicRanger(16)
    # Grove - LED Button connected to port D18    button = GroveLedButton(18)
    # Grove - Moisture Sensor connected to port A0    moisture_sensor = GroveMoistureSensor(0)
    # Grove - Light Sensor connected to port A2    light_sensor = GroveLightSensor(2)    light_state = False
    # Grove - Temperature&Humidity Sensor connected to port D22    dht_sensor = DHT('11', 22)
    # Callback for server RPC requests (Used for control servo and led blink)    def on_server_side_rpc_request(client, request_id, request_body):        log.info('received rpc: {}, {}'.format(request_id, request_body))        if request_body['method'] == 'getLedState':            client.send_rpc_reply(request_id, light_state)        elif request_body['method'] == 'setLedState':            light_state = request_body['params']            button.led.light(light_state)        elif request_body['method'] == 'setServoAngle':            servo_angle = float(request_body['params'])            servo.setAngle(servo_angle)        elif request_body['method'] == 'getServoAngle':            client.send_rpc_reply(request_id, servo_angle)
    # Connecting to ThingsBoard    client = TBDeviceMqttClient(THINGSBOARD_SERVER, username=ACCESS_TOKEN)    client.set_server_side_rpc_request_handler(on_server_side_rpc_request)    client.connect()
    # Callback on detect the motion from motion sensor    def on_detect():        log.info('motion detected')        telemetry = {"motion": True}        client.send_telemetry(telemetry)        time.sleep(5)        # Deactivating the motion in Dashboard        client.send_telemetry({"motion": False})        log.info("Motion alert deactivated")
    # Callback from button if it was pressed or unpressed    def on_event(index, event, tm):        if button._GroveLedButton__btn.is_pressed():            log.debug('button: single click')            telemetry = {"button_press": True}            client.send_telemetry(telemetry)            log.info("Pressed")        else:            log.debug('button: single click')            telemetry = {"button_press": False}            client.send_telemetry(telemetry)            log.info("Unpressed")        if event & Button.EV_SINGLE_CLICK:            button.led.light(True)        elif event & Button.EV_DOUBLE_CLICK:            button.led.blink()        elif event & Button.EV_LONG_PRESS:            button.led.light(False)
    # Adding the callback to the motion sensor    pir_sensor.on_detect = on_detect    # Adding the callback to the button    button.on_event = on_event    try:        while True:            distance = ultrasonic_sensor.get_distance()            log.debug('distance: {} cm'.format(distance))
            humidity, temperature = dht_sensor.read()            log.debug('temperature: {}C, humidity: {}%'.format(temperature, humidity))
            moisture = moisture_sensor.moisture            log.debug('moisture: {}'.format(moisture))
            log.debug('light: {}'.format(light_sensor.light))
            # Formatting the data for sending to ThingsBoard            telemetry = {'distance': distance,                         'temperature': temperature,                         'humidity': humidity,                         'moisture': moisture,                         'light': light_sensor.light}
            # Sending the data            client.send_telemetry(telemetry).get()
            time.sleep(.1)    except Exception as e:        raise e    finally:        client.disconnect()

if __name__ == '__main__': main()Data visualization
Section titled “Data visualization”Import the dashboard
Section titled “Import the dashboard”Download the Grove dashboard JSON and import it into ThingsBoard.
See the dashboard import instructions for details.
After importing, open the dashboard and edit the alias of the Grove widget: set Filter type to Single entity, set Type to Device, and select your grove device from the list.
Run the application
Section titled “Run the application”Run the script on the Raspberry Pi:
python3 tb_grove.pyThe script starts sending sensor telemetry to ThingsBoard. Open the dashboard to see live data and use the Servo knob to rotate the servo or the Button Led toggle to control the LED.