This guide provides instructions on how to configure a custom mobile application to launch directly from a QR code scan using your phone’s camera.
In application version 1.7.0+, we have made QR code settings configuration much easier by using configuration file.
Important Notice: Please use this guide for pre 1.7.x qr code configuration
Platform Configuration
iOS Application Setup
Navigate to Mobile Center → Applications → Your custom iOS app in the ThingsBoard platform.
App Site Association ID
Provide the App Site Association ID in your app store info settings:
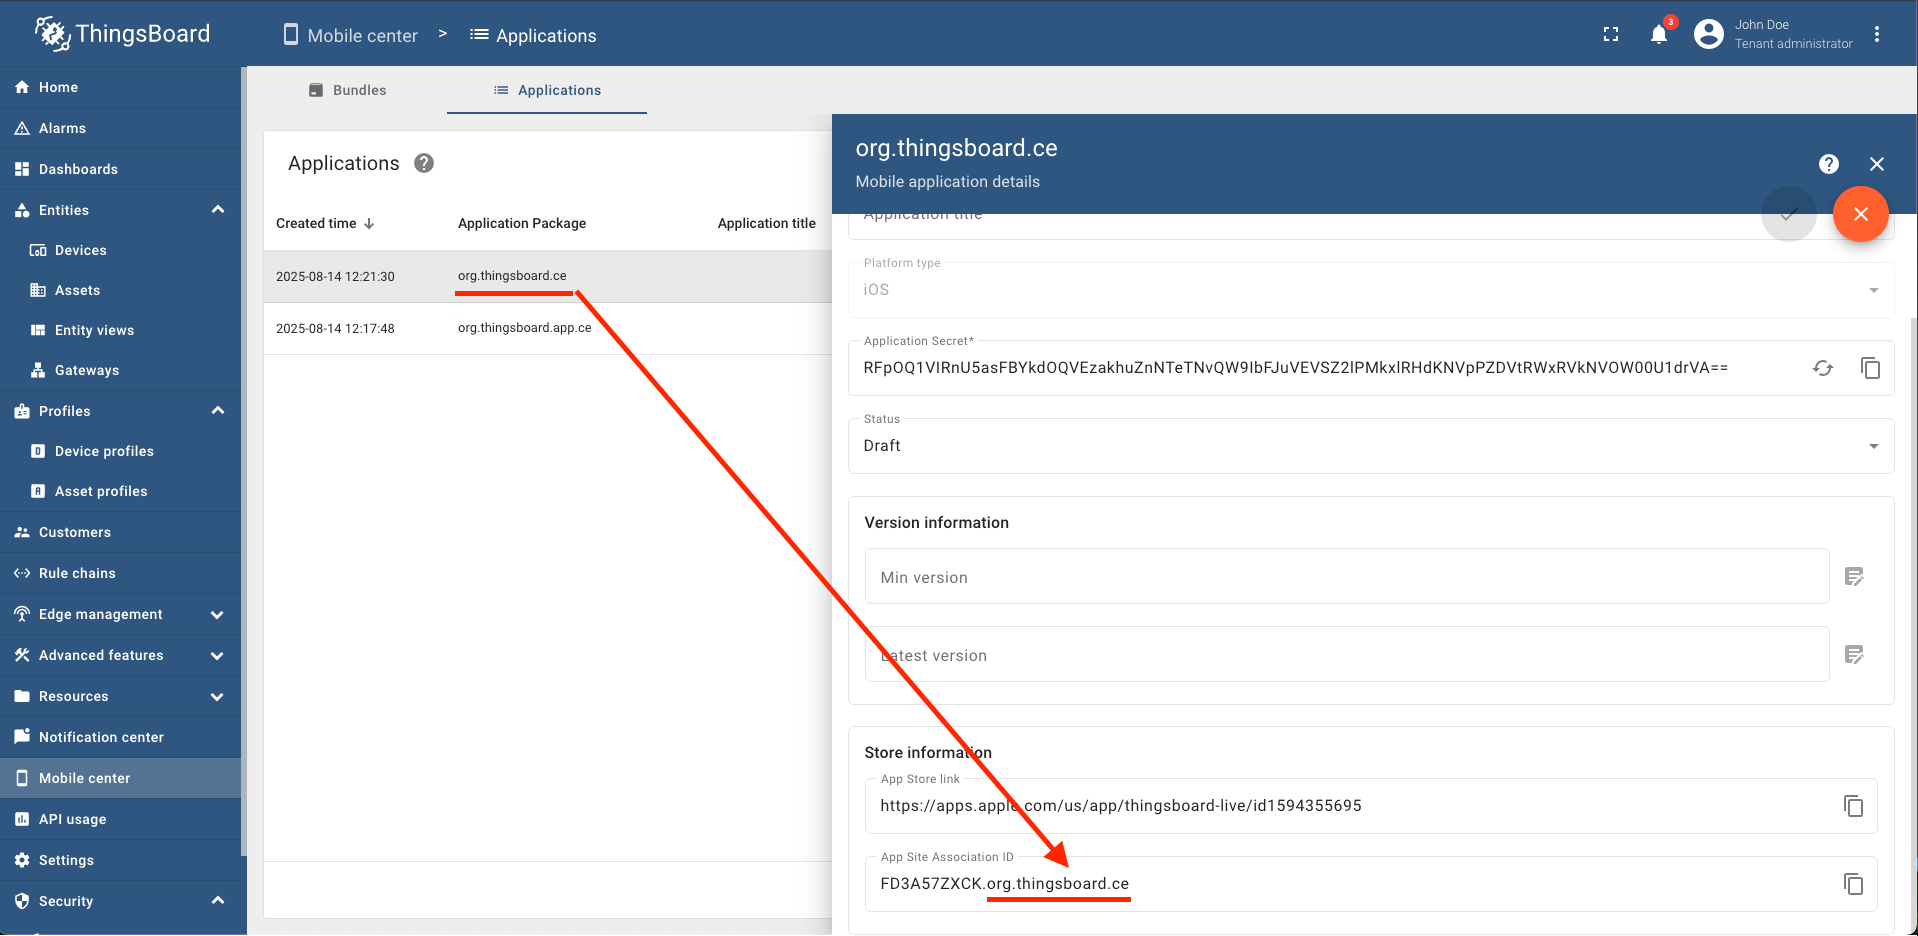
The App Site Association ID consists of two parts separated by a dot:
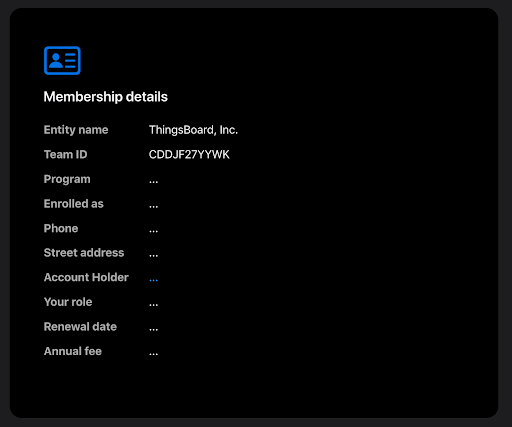
1. App Store Team ID
- Get your Team ID from Apple Developer Account
- Look for it in the “Membership details” block
2. App Bundle ID
- Must be the same as the Application package in your app settings
- This is your app’s unique identifier
Android Application Setup
Navigate to Mobile Center → Applications → Your custom Android app in the ThingsBoard platform.
SHA-256 Fingerprint
Provide the SHA-256 fingerprint of your app’s signing key:

For Google Play distributed apps: Use the SHA-256 certificate fingerprint located in your Google Play Console under: Release → Setup → App Integrity → App Signing tab

For locally distributed apps: Use the SHA-256 key that your APK is signed with.
For more detailed information, read the guide “Set up app links for Android” in the official Flutter documentation.