Getting Started with ThingsBoard Mobile Application
Welcome! This guide walks you through creating and configuring your own ThingsBoard mobile application from scratch for your ThingsBoard instance.
Before you begin, choose the mobile app version that matches your ThingsBoard platform using the compatibility matrix. Using incompatible versions is the most common cause of sign-in issues or unexpected behavior.
Prerequisites
Section titled “Prerequisites”- Access to a ThingsBoard instance. The easiest way is to use ThingsBoard Cloud. Alternatively, install ThingsBoard using the official installation guide.
- Prepare the environment for building the ThingsBoard mobile application:
- Install the Flutter SDK version that corresponds to your app version (see the compatibility matrix).
- (Recommended) Configure your IDE (e.g., Visual Studio Code) for Flutter development.
- If you’re new to Flutter, review the “Write your first Flutter app” tutorial.
Step 1. Create a bundle in the Mobile center
Section titled “Step 1. Create a bundle in the Mobile center”The Mobile center is your control hub to create, configure, and manage mobile apps. It lets you quickly launch a mobile app tailored to your ThingsBoard platform.
Create a new bundle
Section titled “Create a new bundle”A bundle contains both your Android and/or iOS app configurations — including OAuth 2.0 settings, layout preferences — all in one place for easier setup.
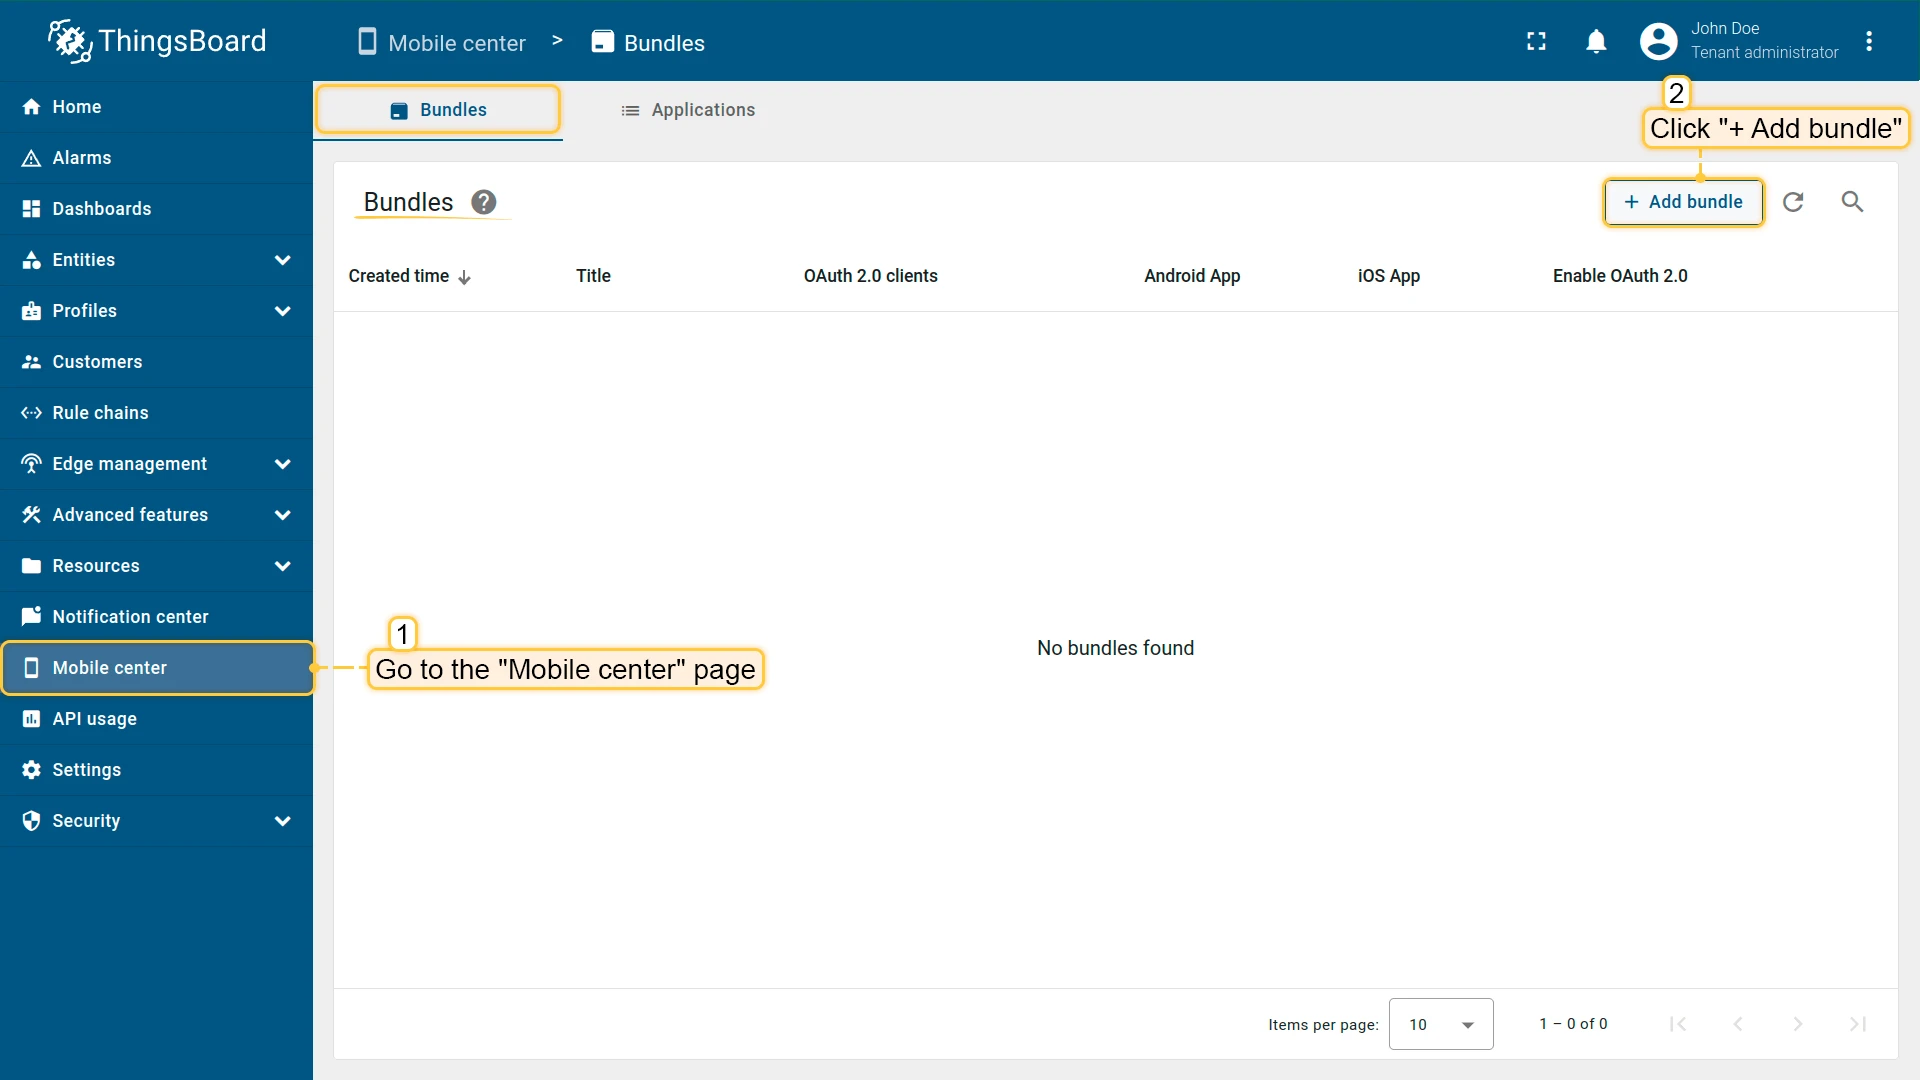
- Go to the Mobile center page.
- On the Bundle tab, click + Add bundle in the top-right corner.
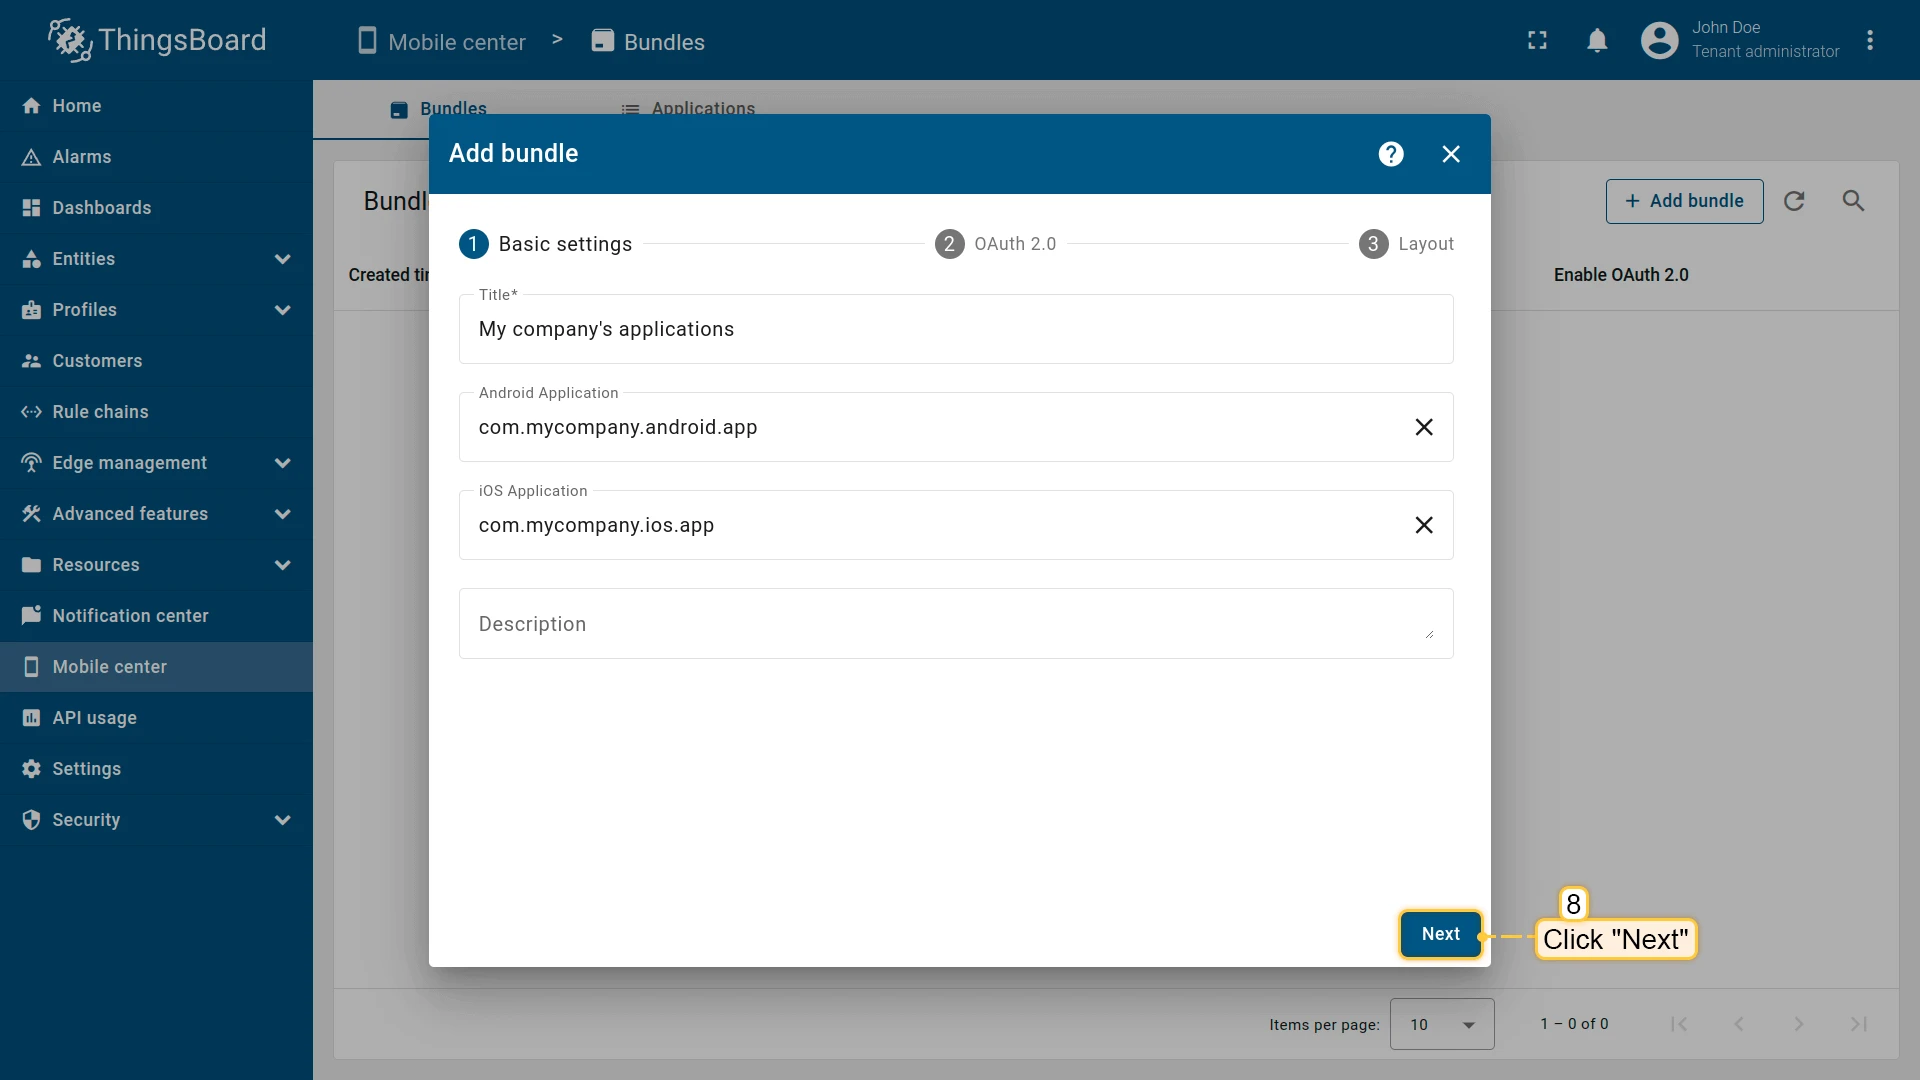
Basic settings
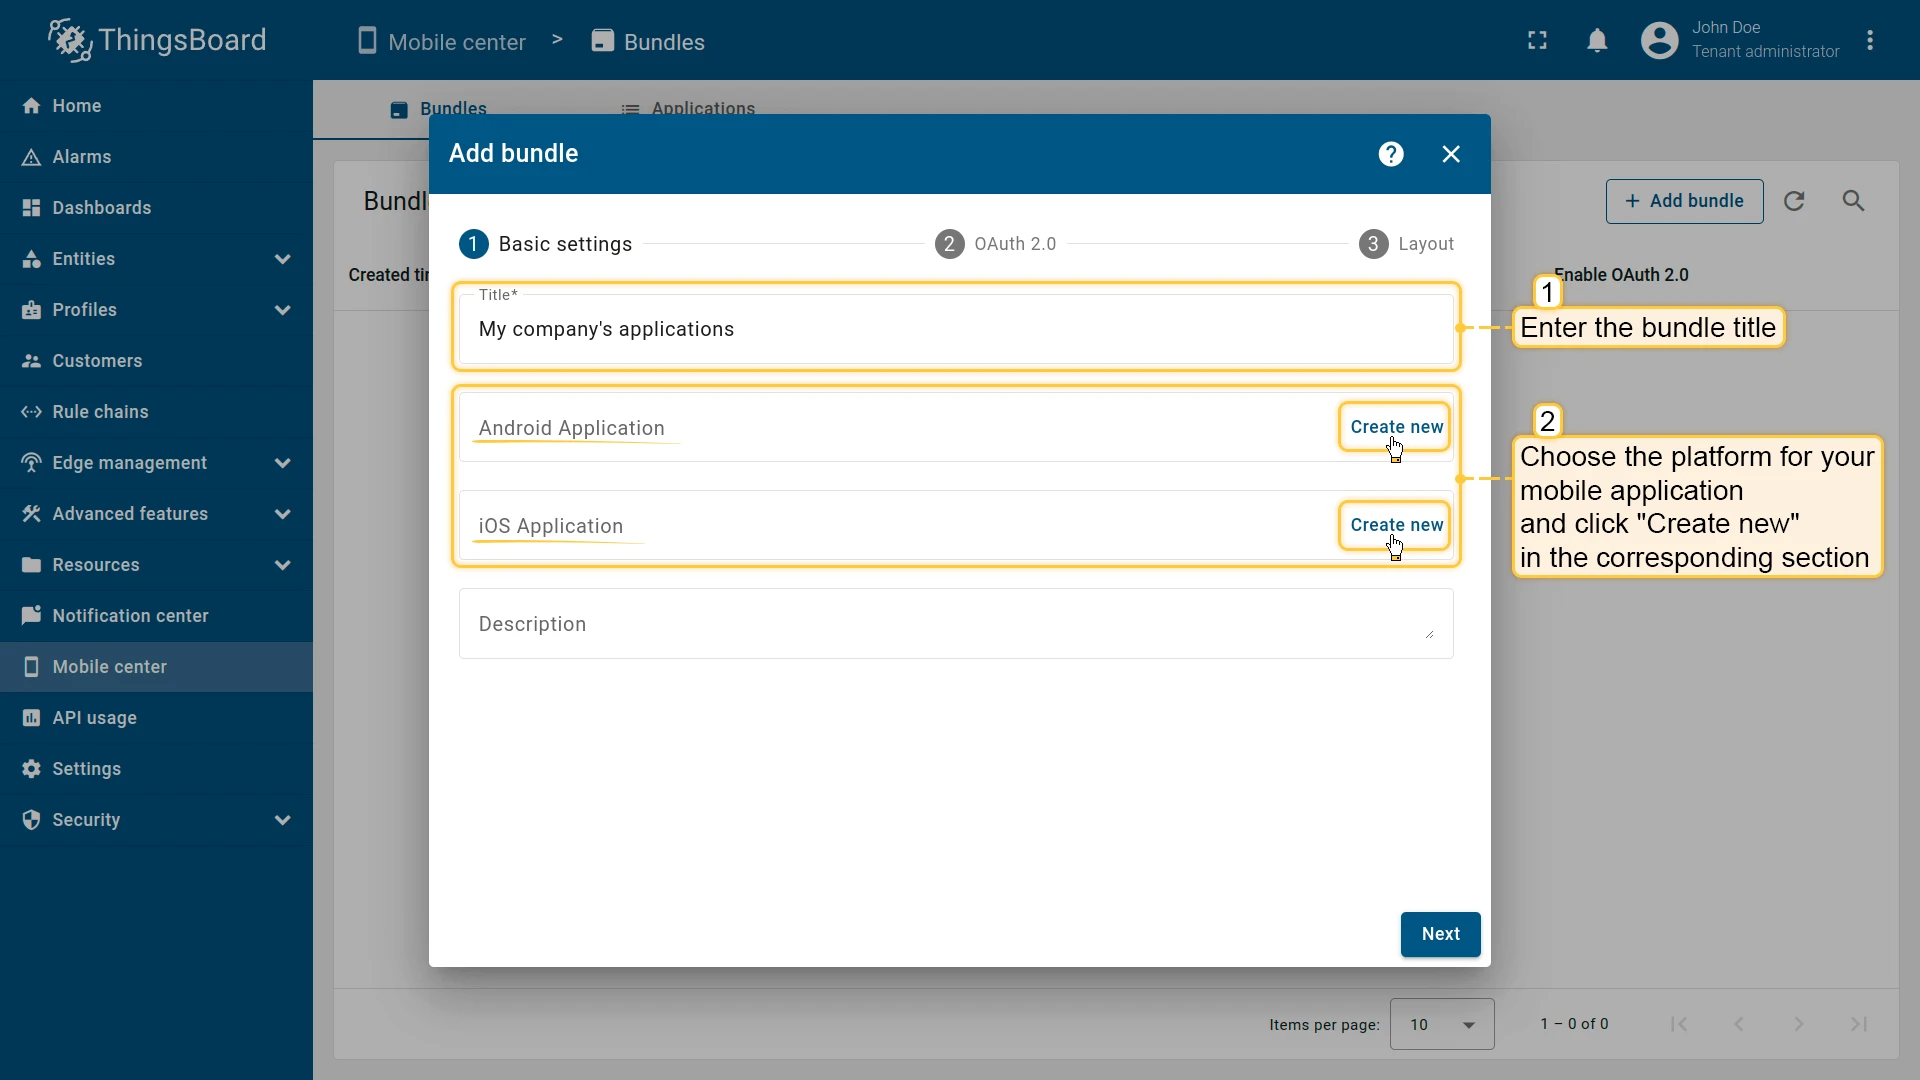
Section titled “Basic settings”- Enter a bundle title.
- Click Create new next to your target mobile platform (Android or iOS). This opens the Add application dialog:
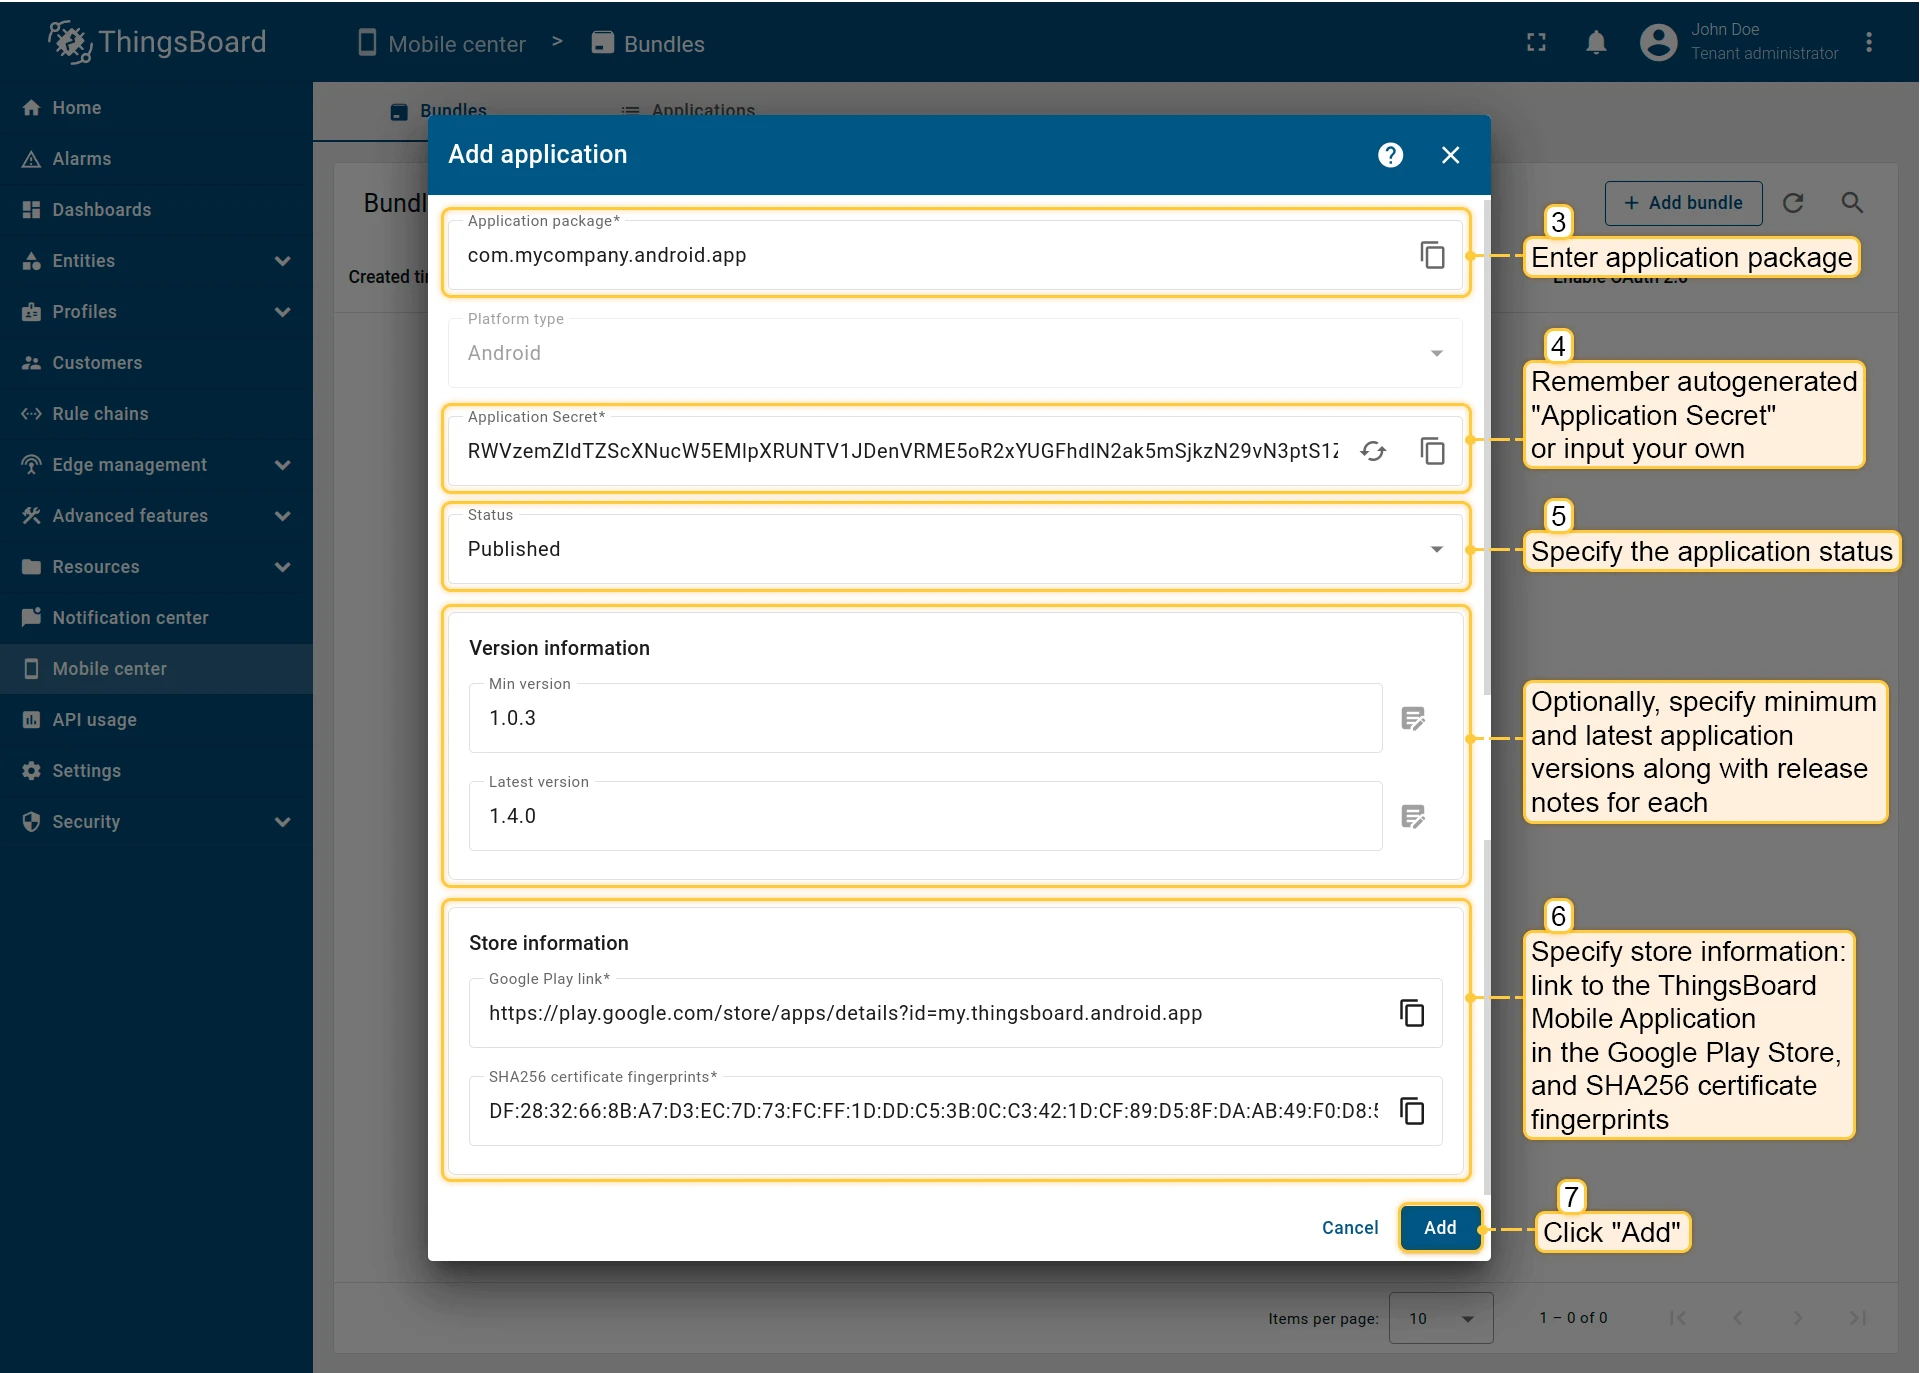
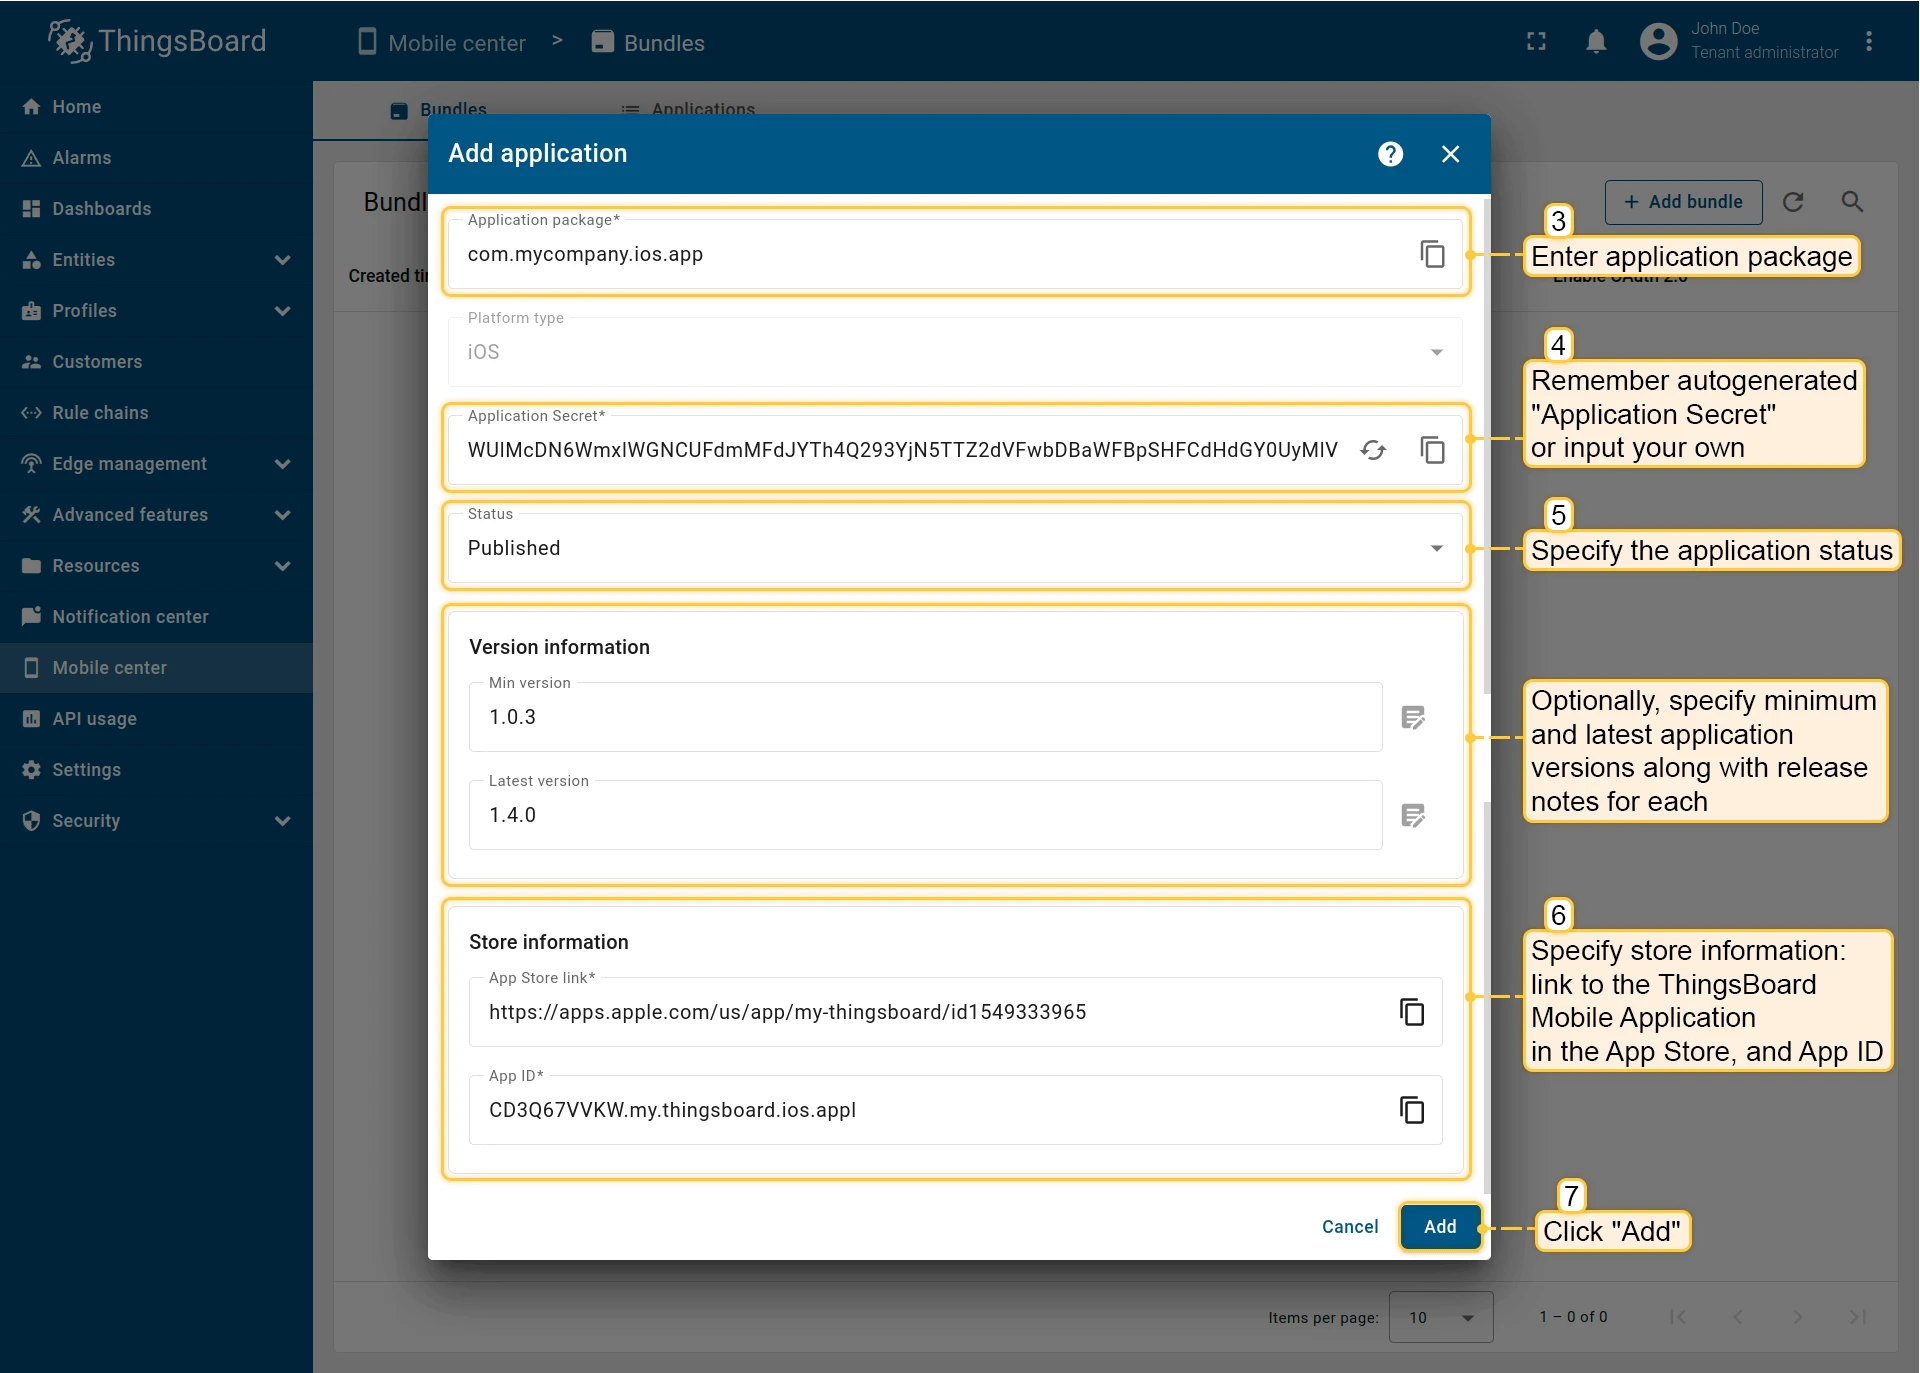
- Enter the application package name.
- An Application Secret is generated automatically (you can also set your own).
- Set the Published application status — application is ready for release.
- (Optional) Specify minimum and latest app versions along with release notes.
- Add store information:
- Android: Google Play Store link and SHA256 certificate fingerprints.
- iOS: App Store link and App ID.
- Click Add to save and continue.
- Click Next.
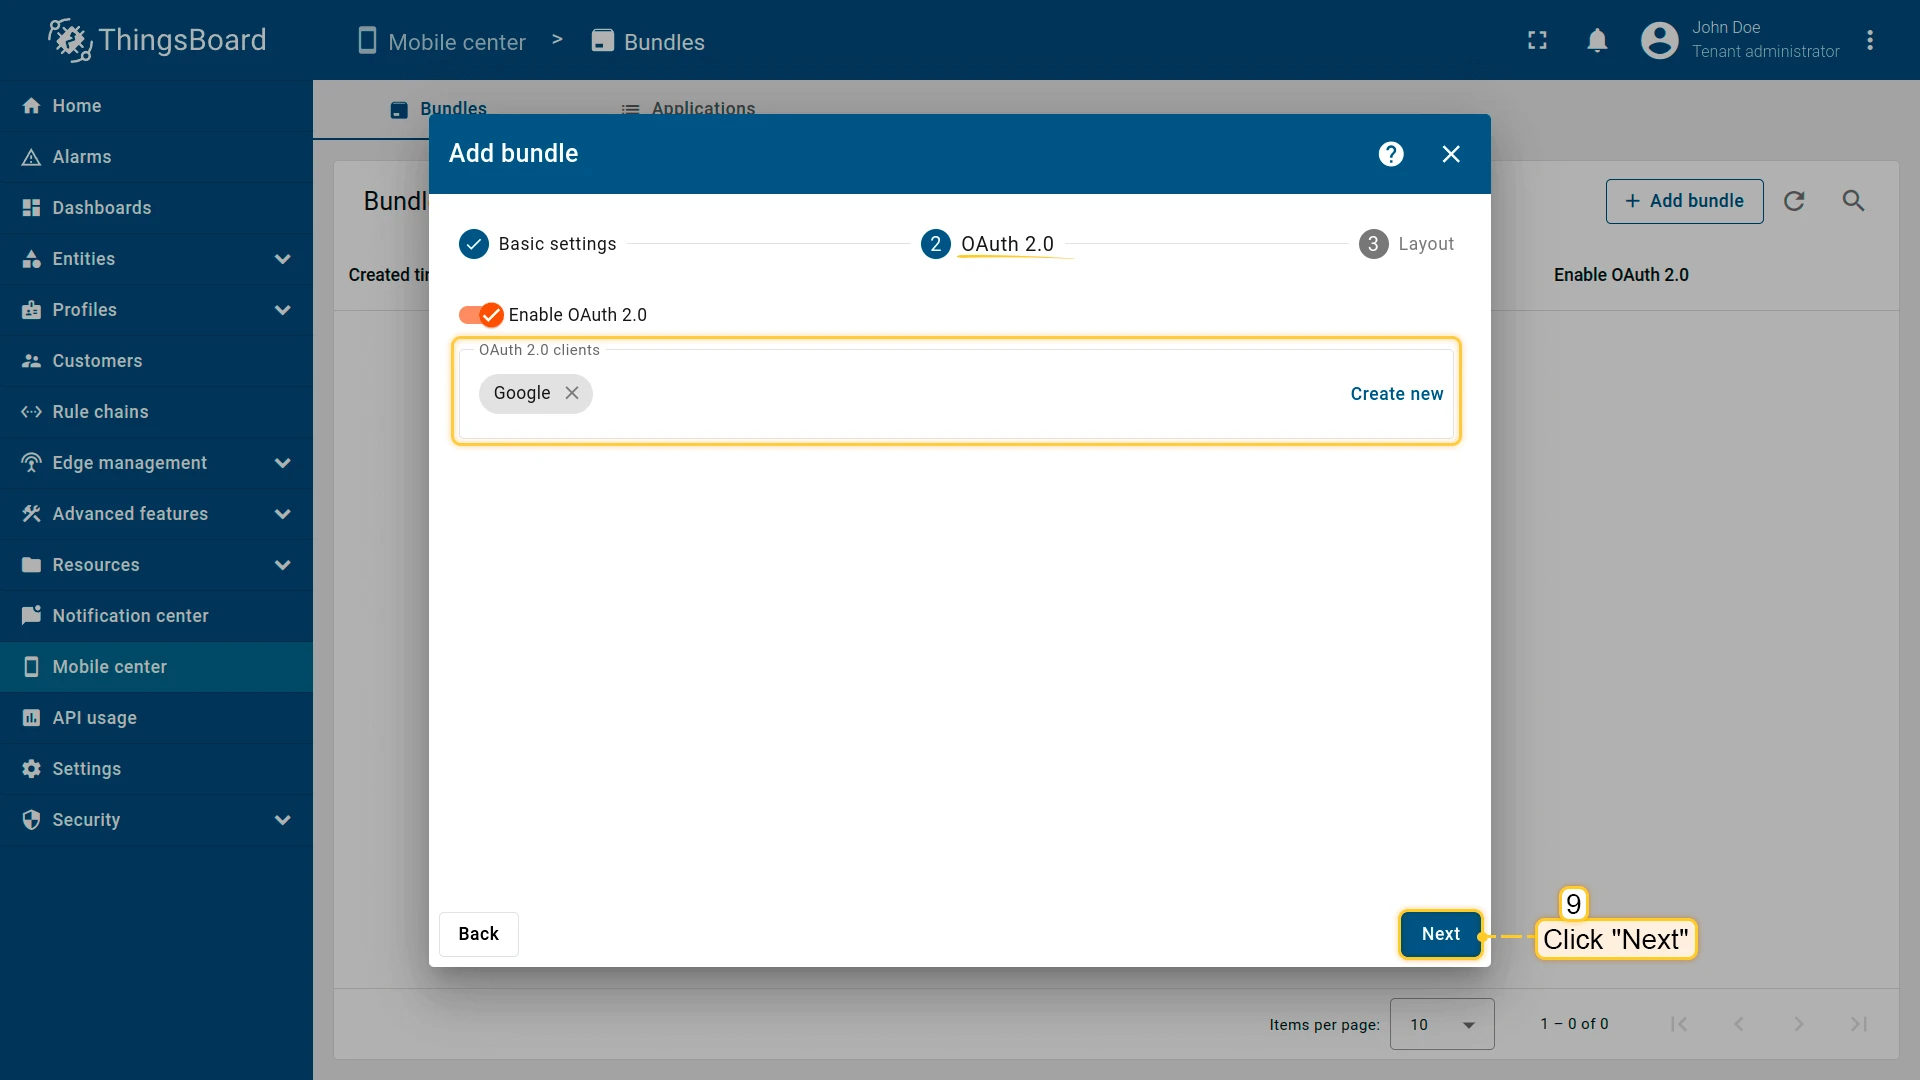
Optional: Authentication & layout
Section titled “Optional: Authentication & layout”- OAuth 2.0 providers — Configure external OAuth for the ThingsBoard mobile app if required. Click Next when done.
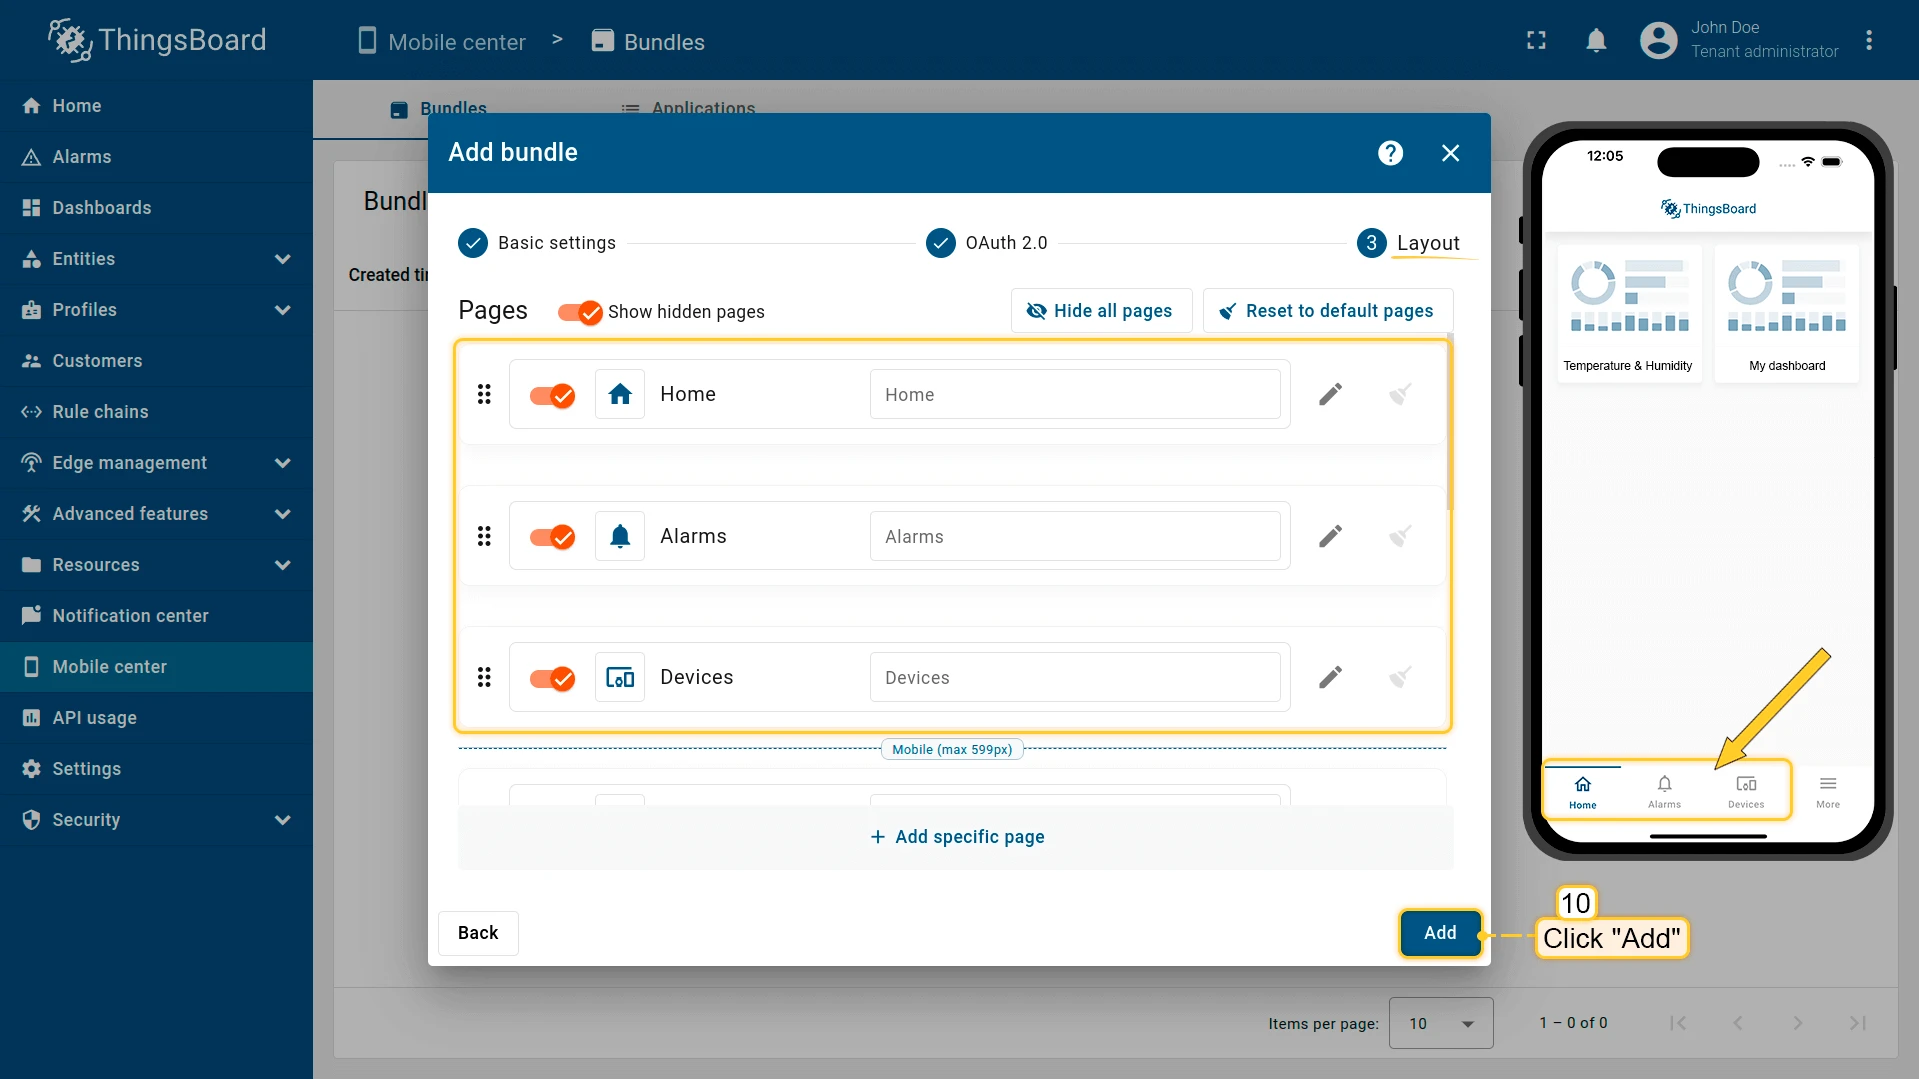
- Configure layout — Customize the navigation menu for quick access to features and dashboards. Add menu items, set icons/labels, and reorder entries.
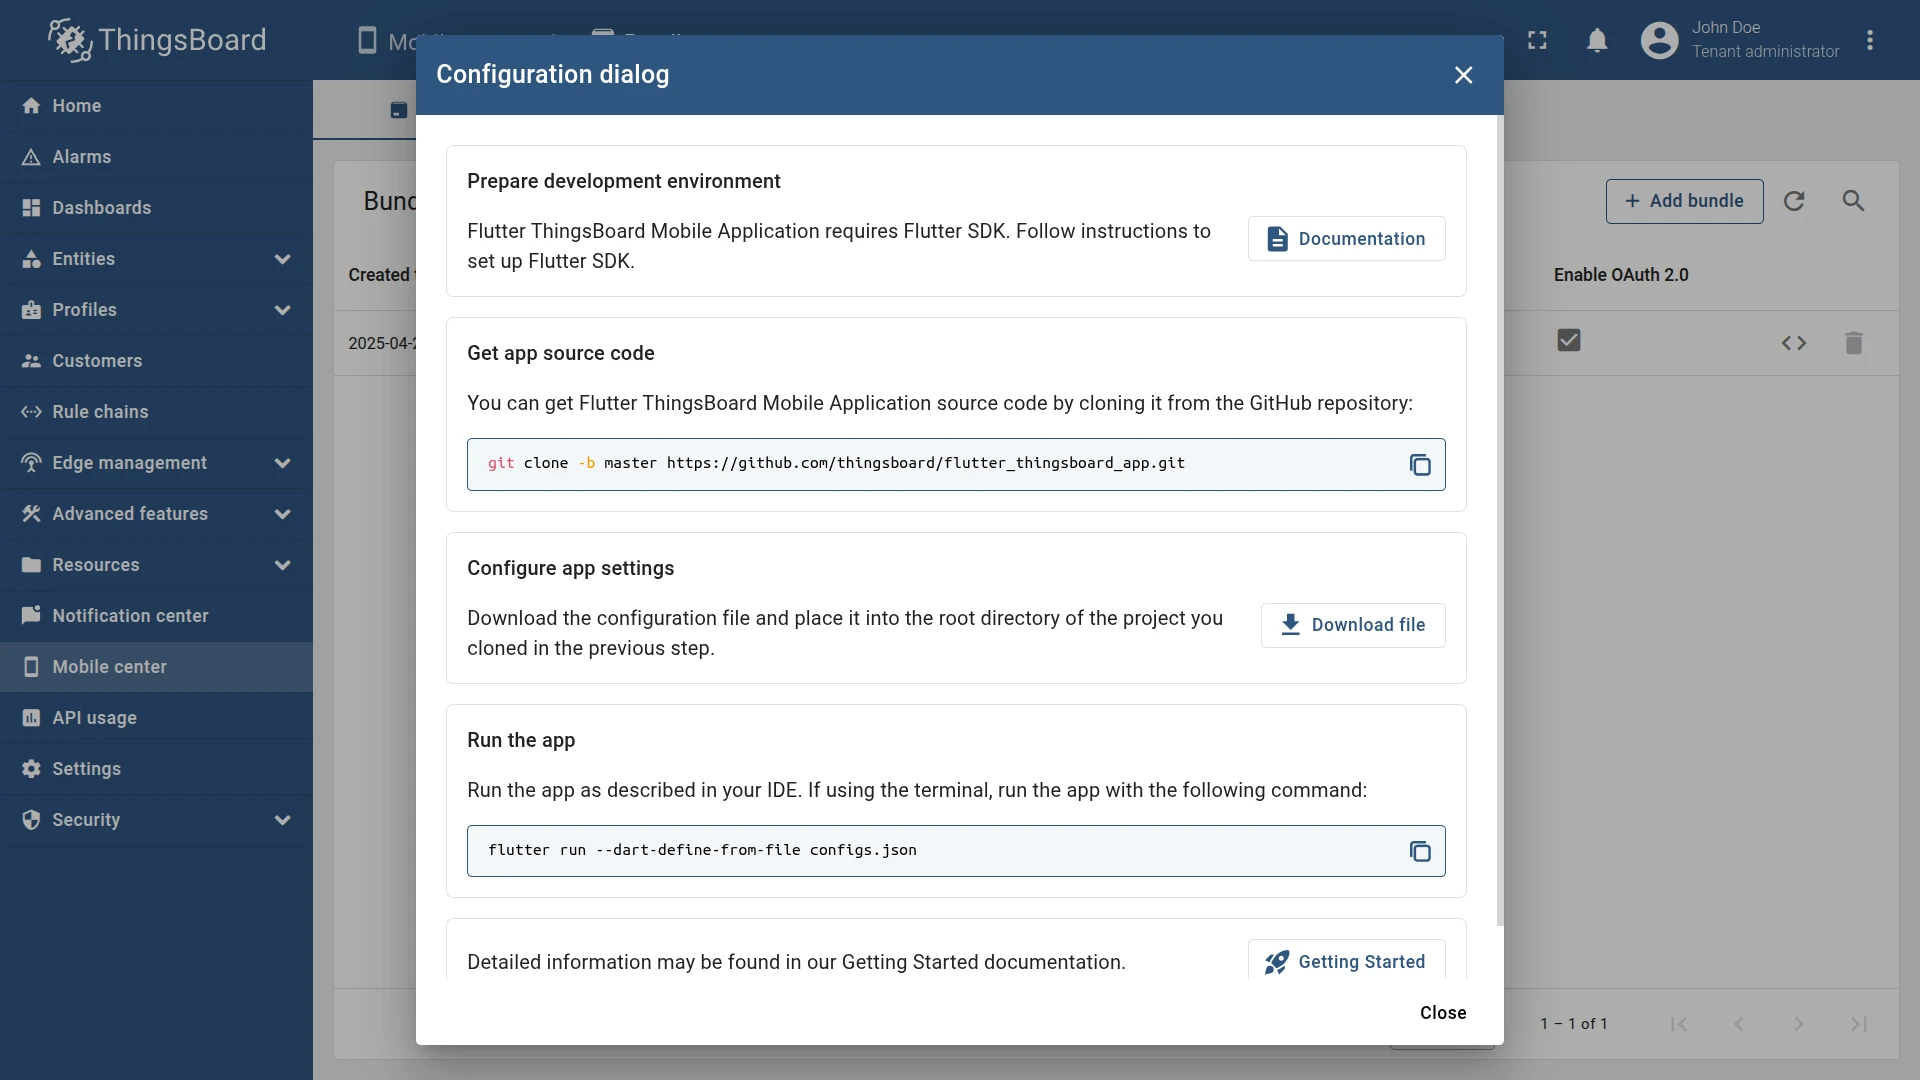
Configuration dialog
Section titled “Configuration dialog”After adding the bundle, a step-by-step dialog appears to guide you through the remaining setup and deployment steps. Follow it carefully to complete ThingsBoard mobile application configuration.
When building or running the app, include the Dart define flag:
flutter run --dart-define-from-file configs.jsonYou can maintain multiple configuration files by using different names and passing the appropriate filename to --dart-define-from-file.
Depending on your mobile platform (Android or iOS), you should see a result similar to the following:


Step 2. [Optional] Configure push notifications
Section titled “Step 2. [Optional] Configure push notifications”ThingsBoard uses Firebase to send notifications from your ThingsBoard instance directly to the mobile application. This setup requires each platform tenant to configure Firebase specifically for their account to begin distributing notifications to their mobile app.
Step 2.1: Create a Firebase project
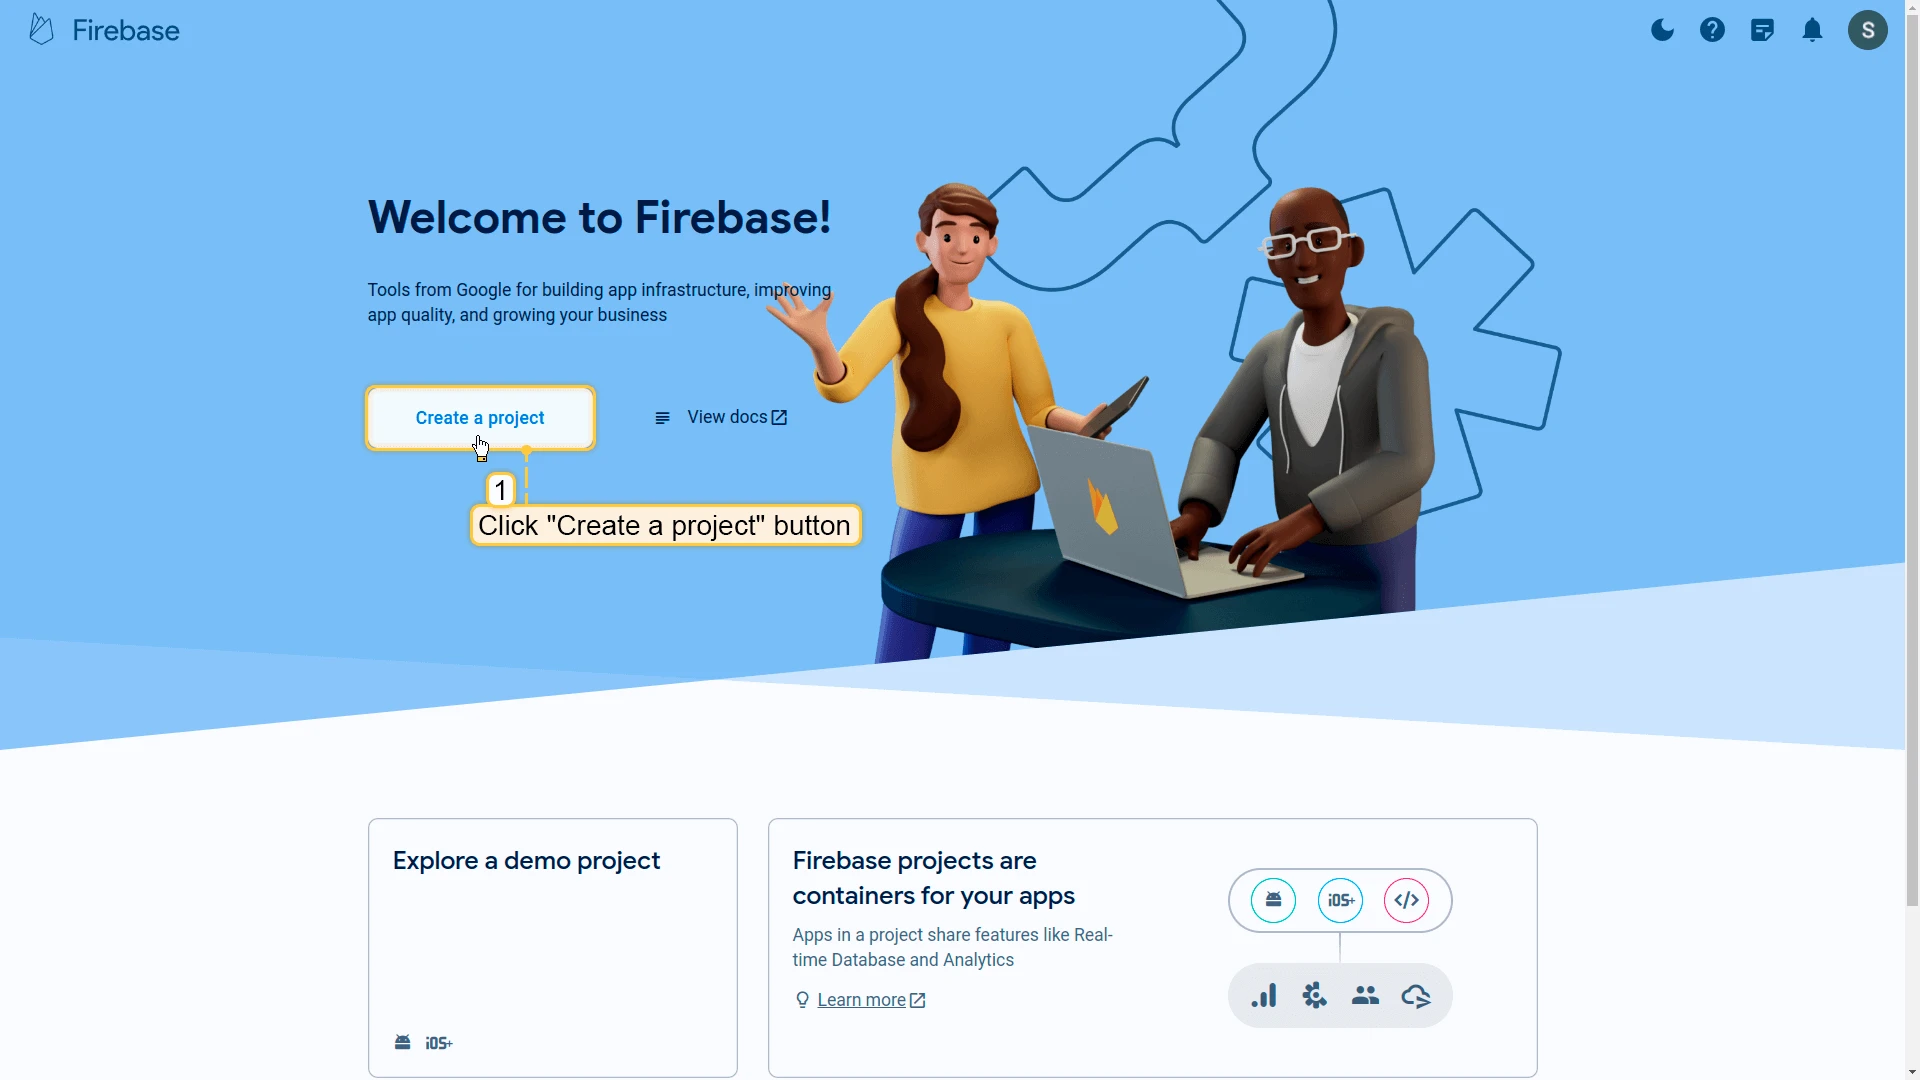
Section titled “Step 2.1: Create a Firebase project”- Sign in to your Firebase account and click Create a project.
- Enter your desired project name and click Continue.
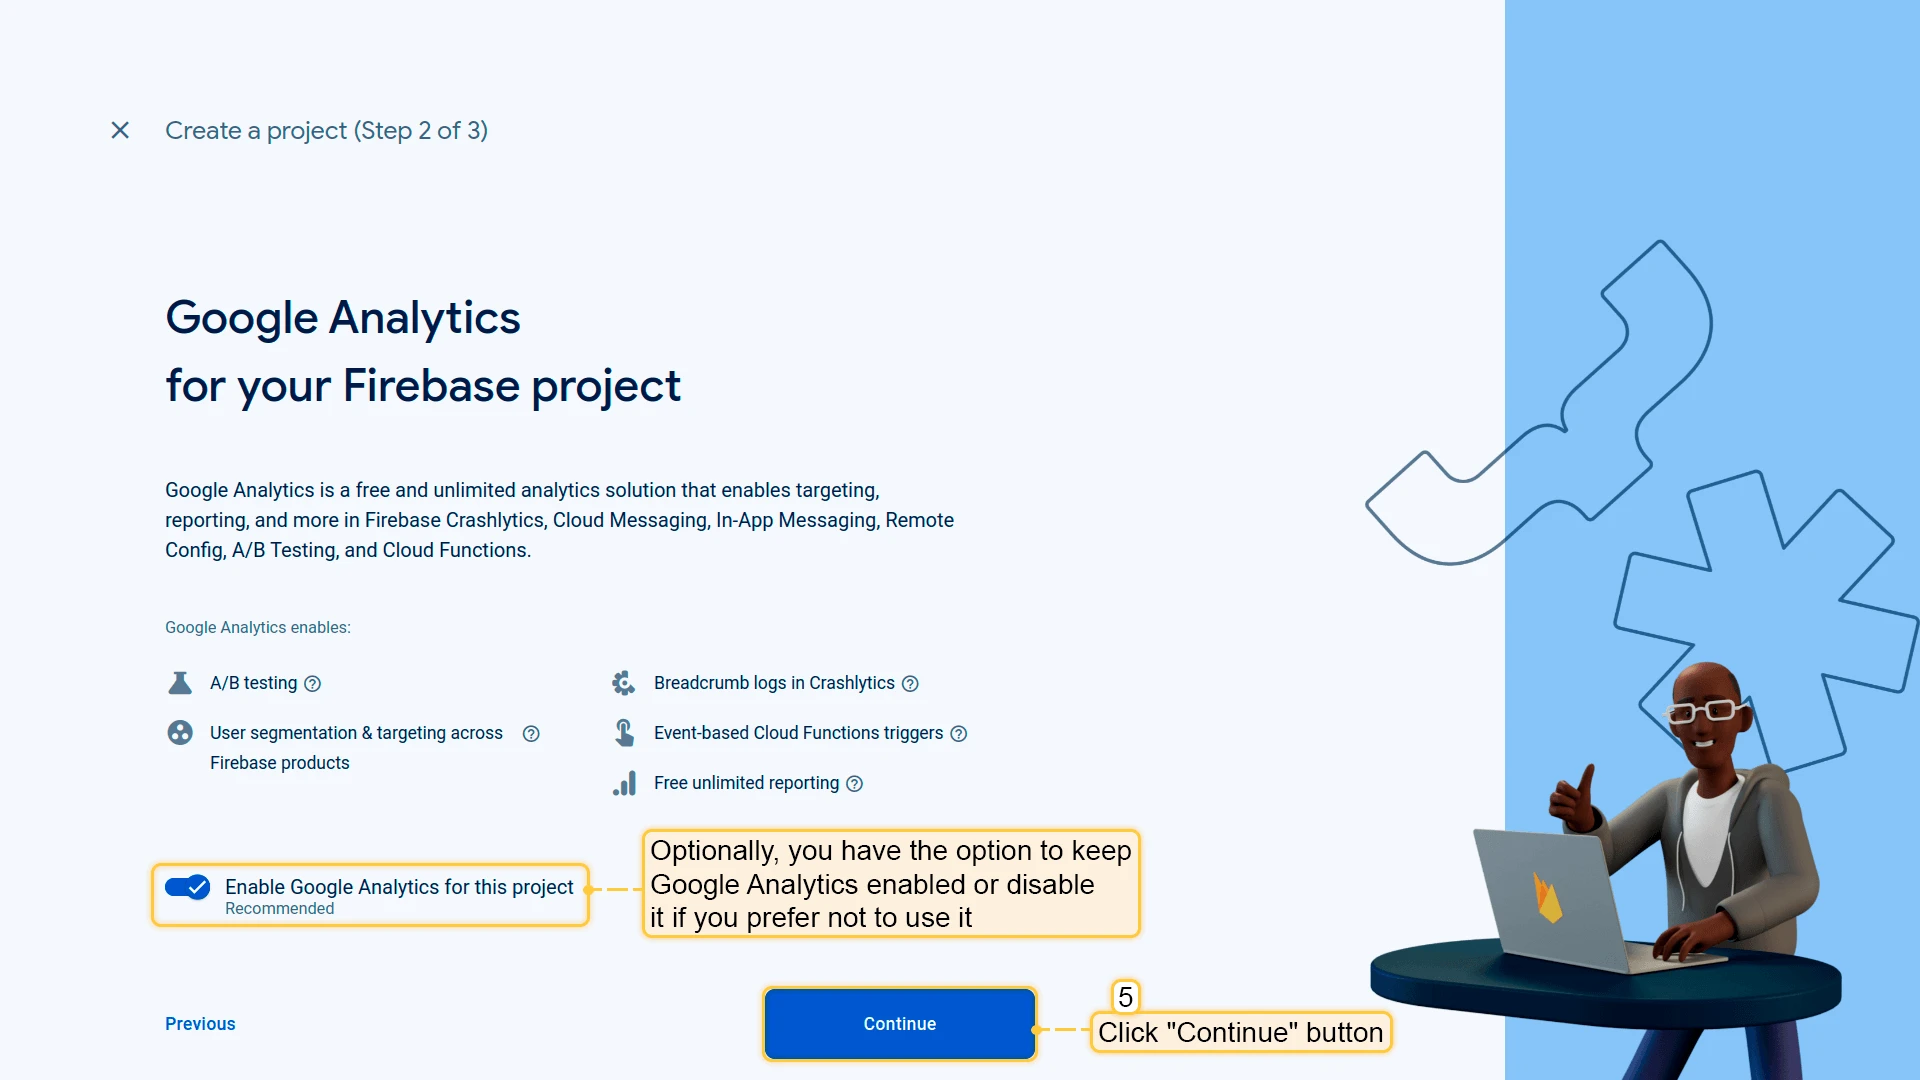
- Decide on Google Analytics for your project (you can keep it enabled or disable it). Click Continue.
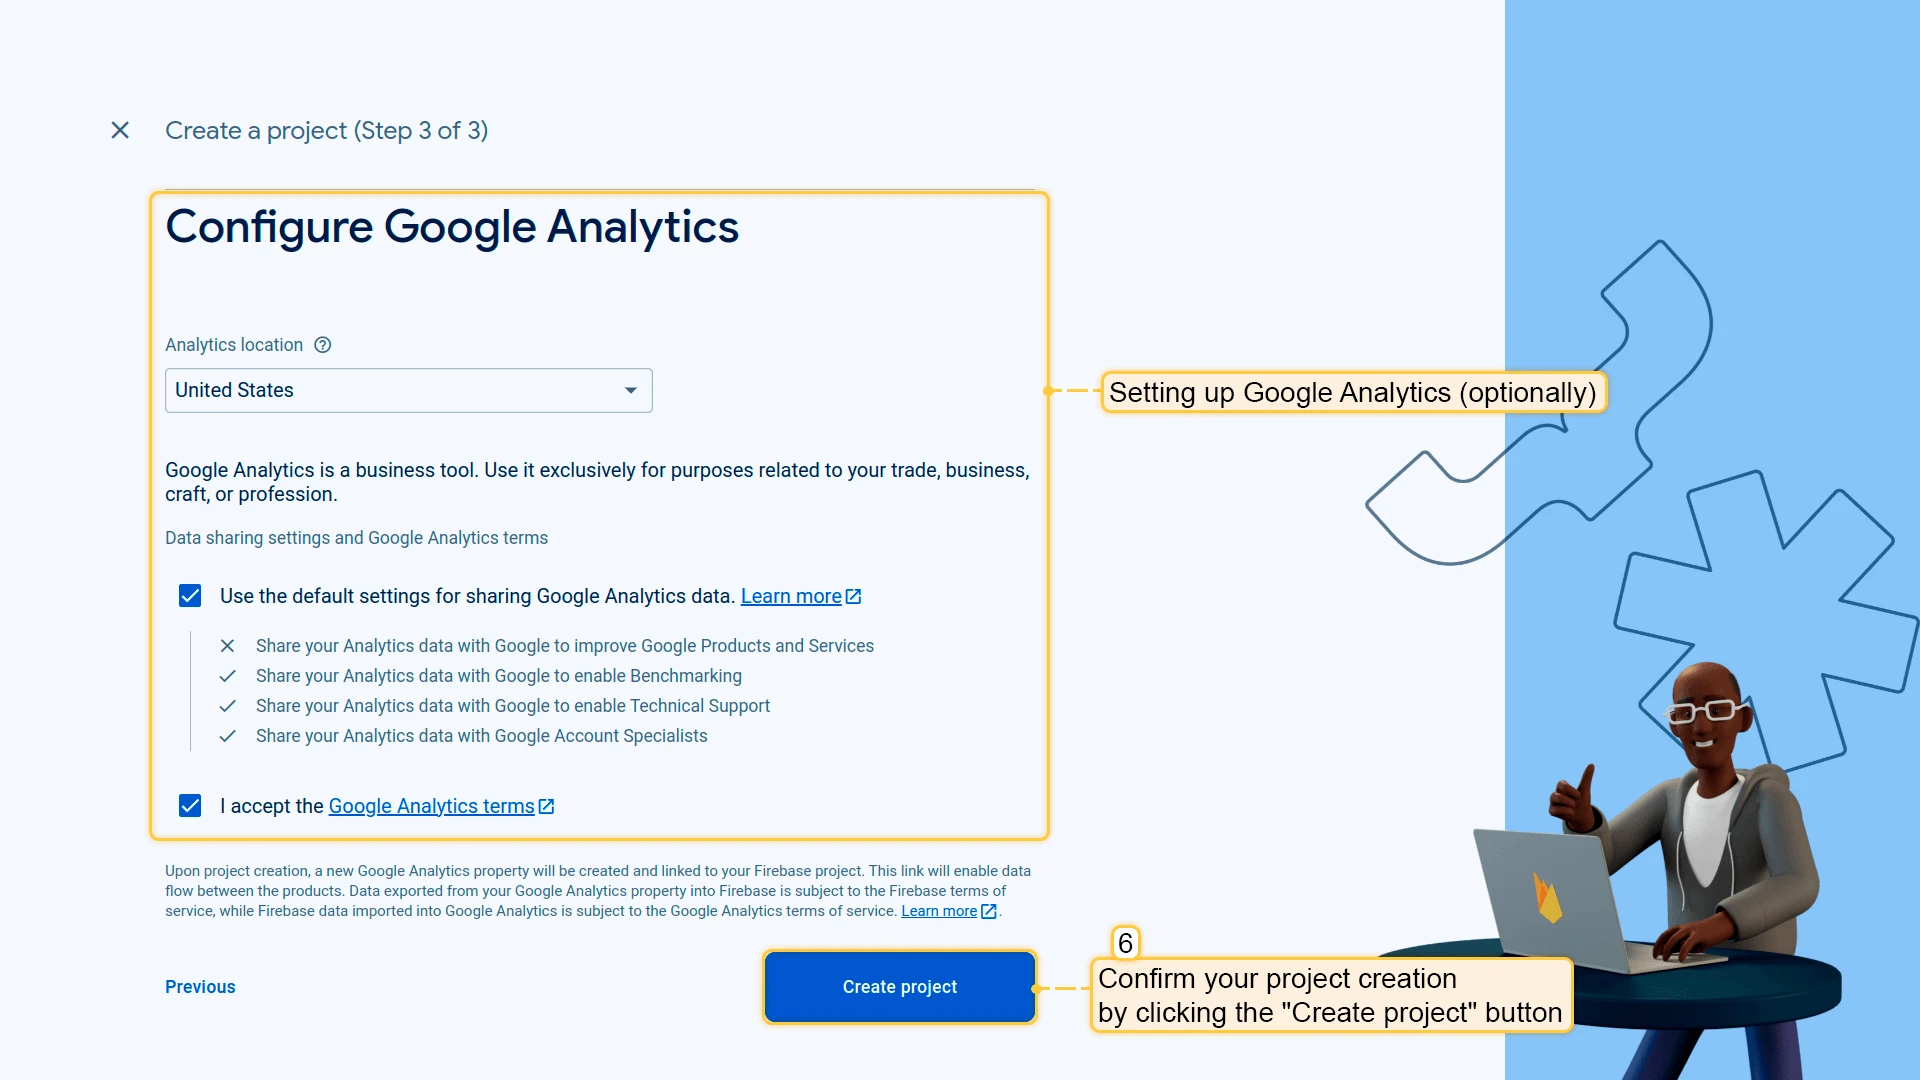
- Confirm project creation by clicking Create project.
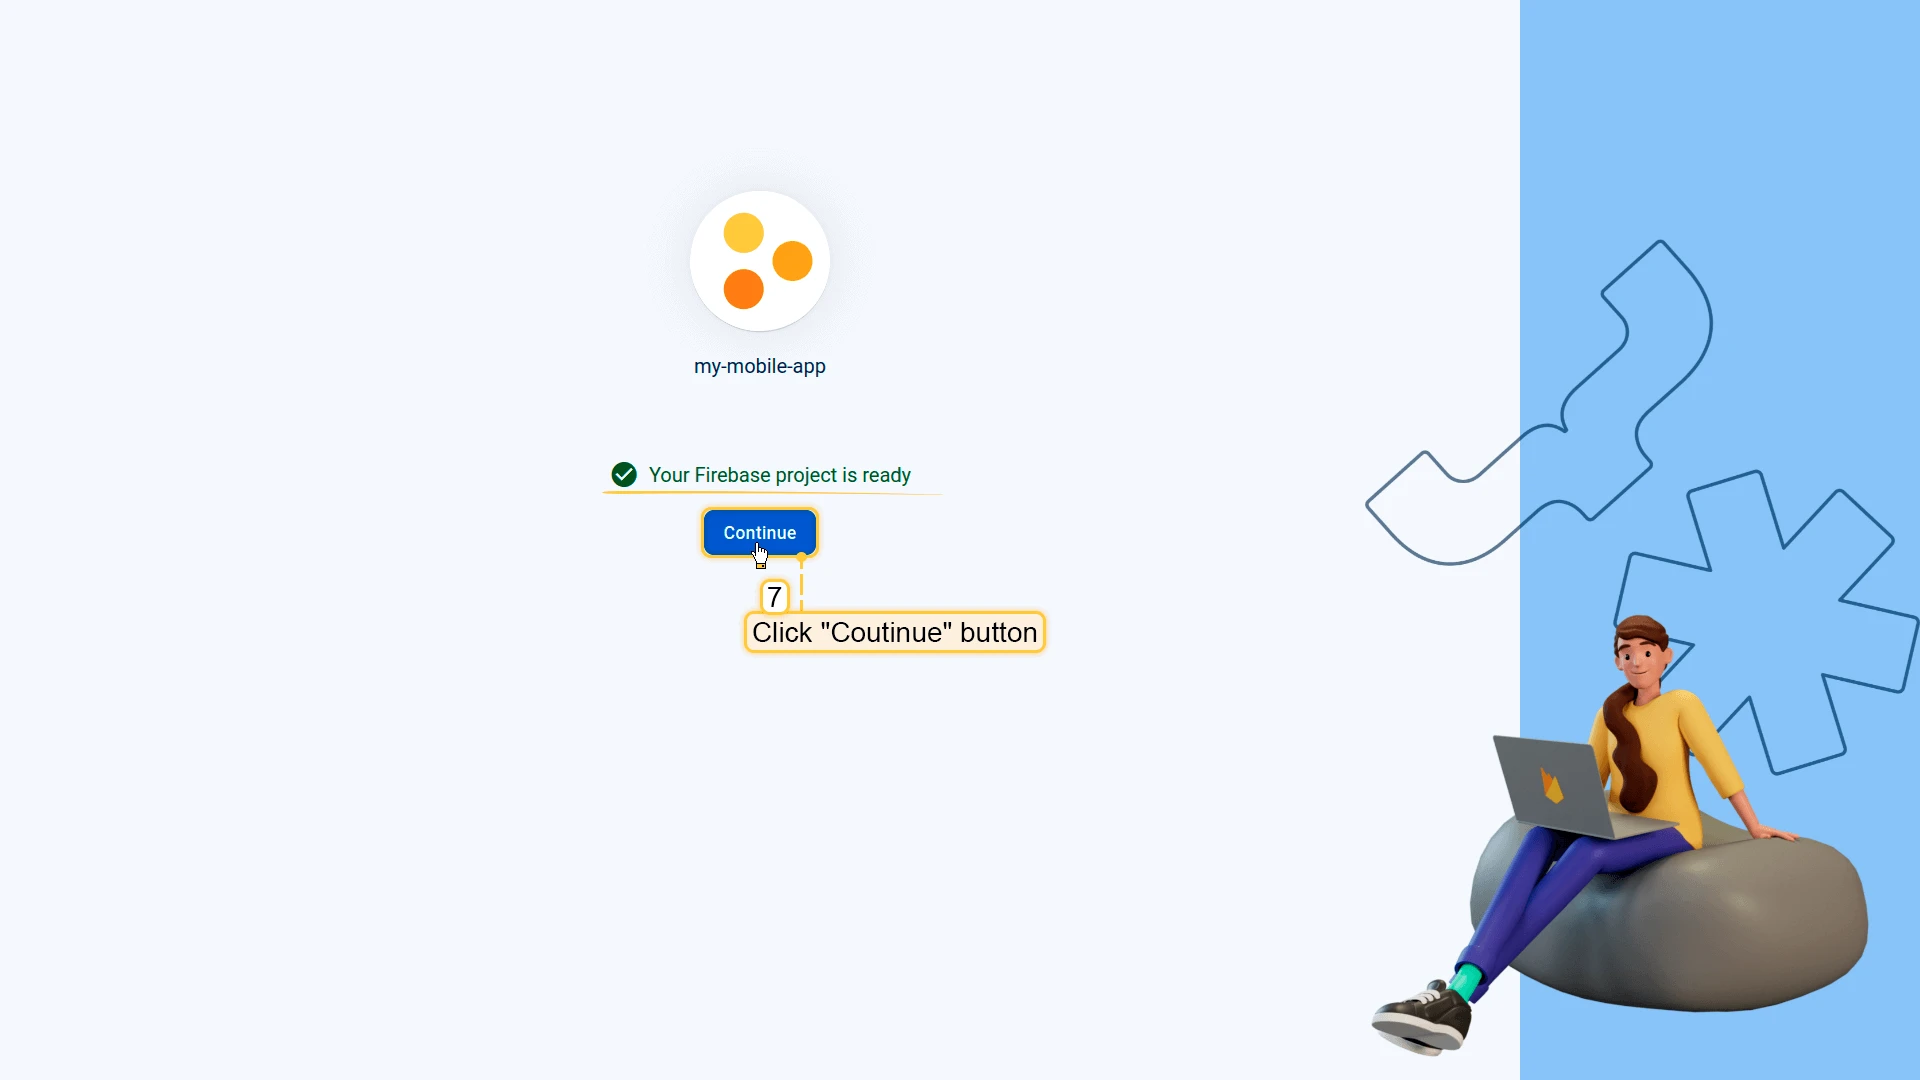
- Once ready, click Continue to open the Firebase project control panel.
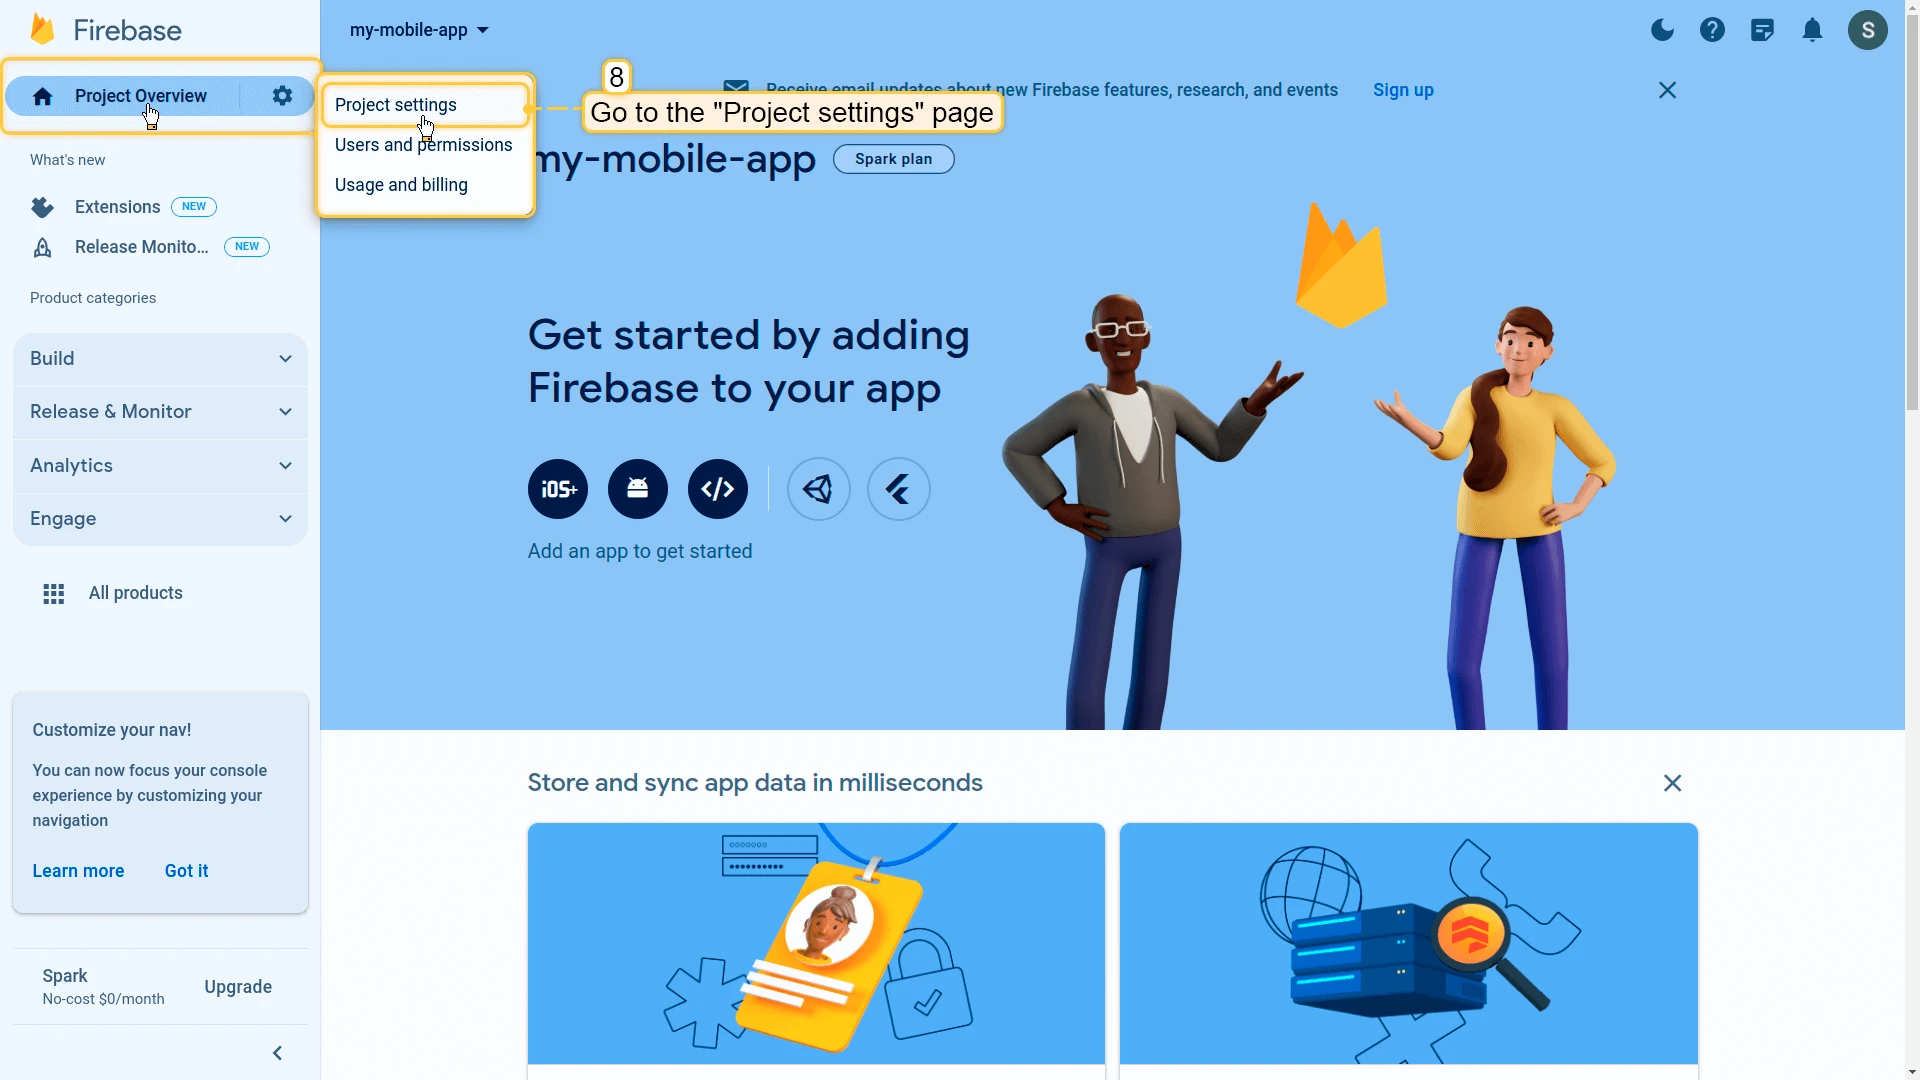
- In the left menu, go to Project Overview → Project settings.
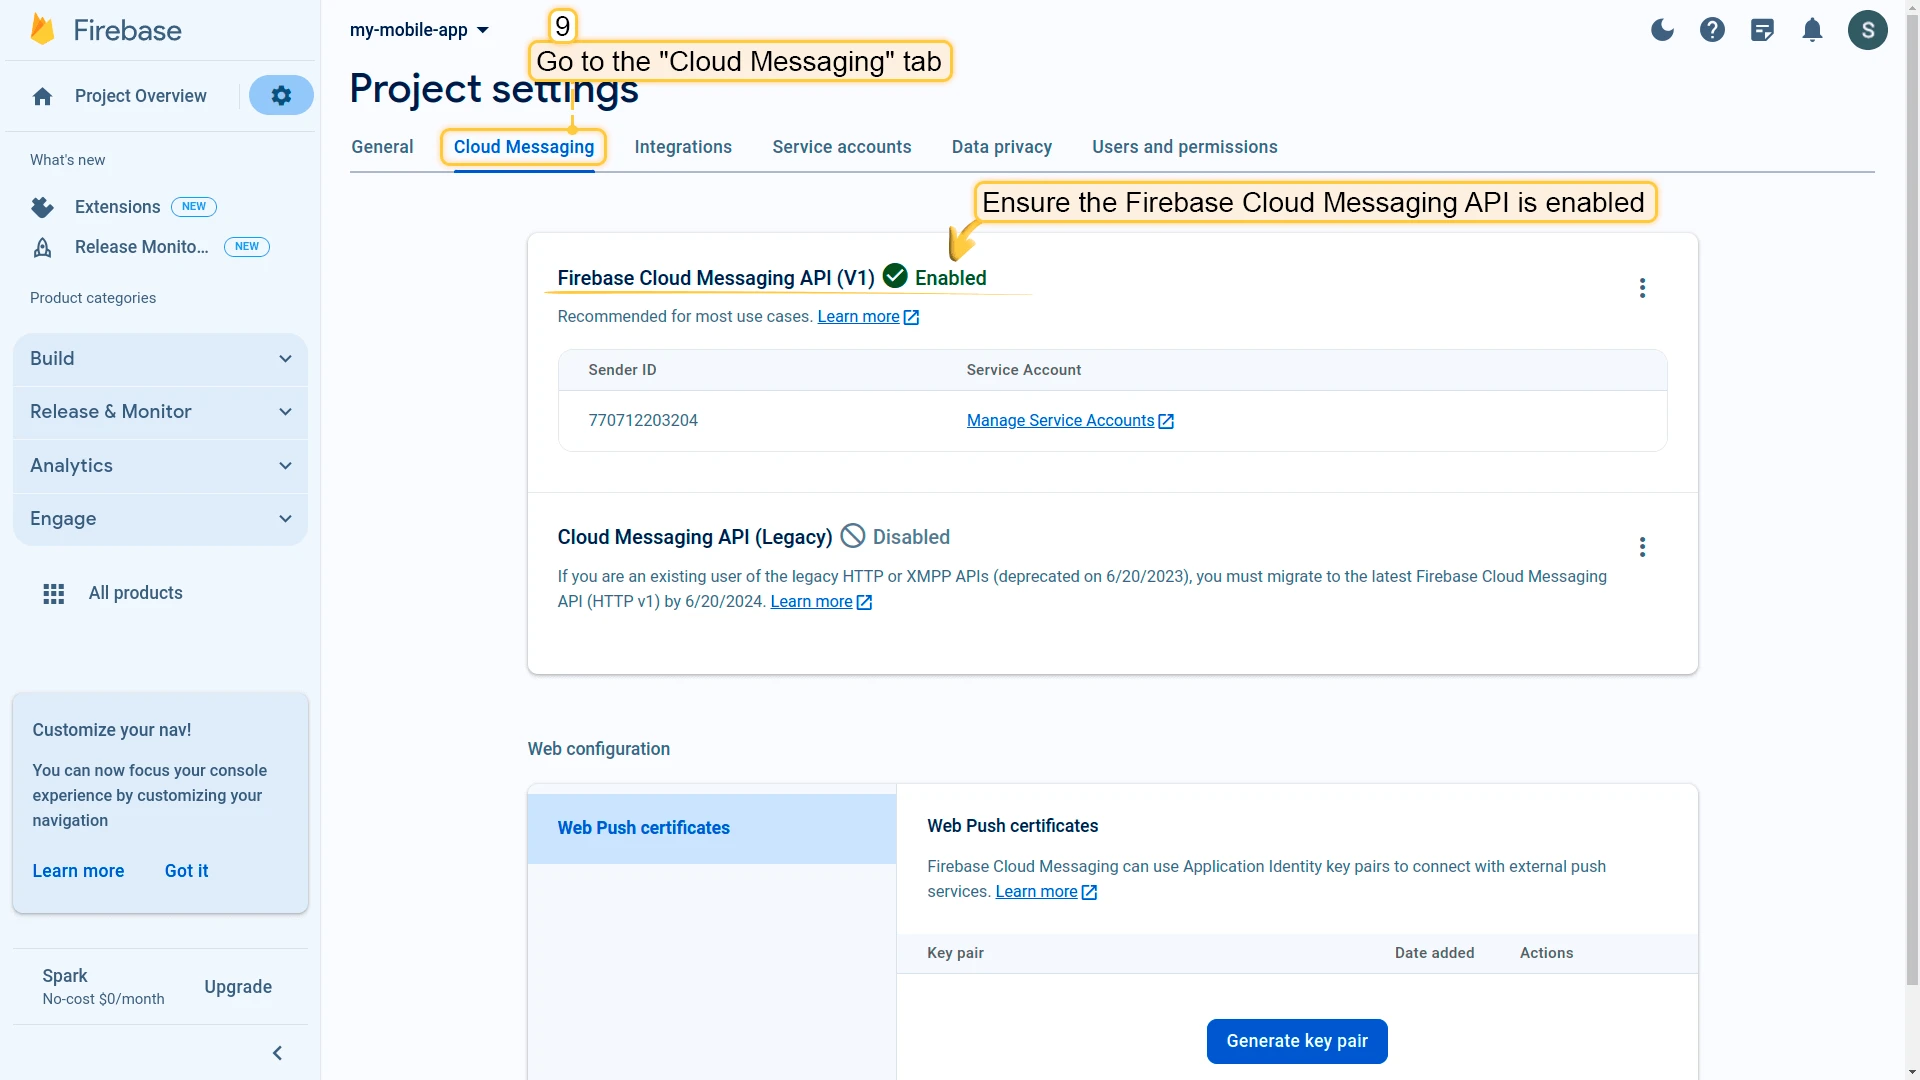
- In Project settings, switch to the Cloud Messaging tab. Ensure the Firebase Cloud Messaging API is enabled.
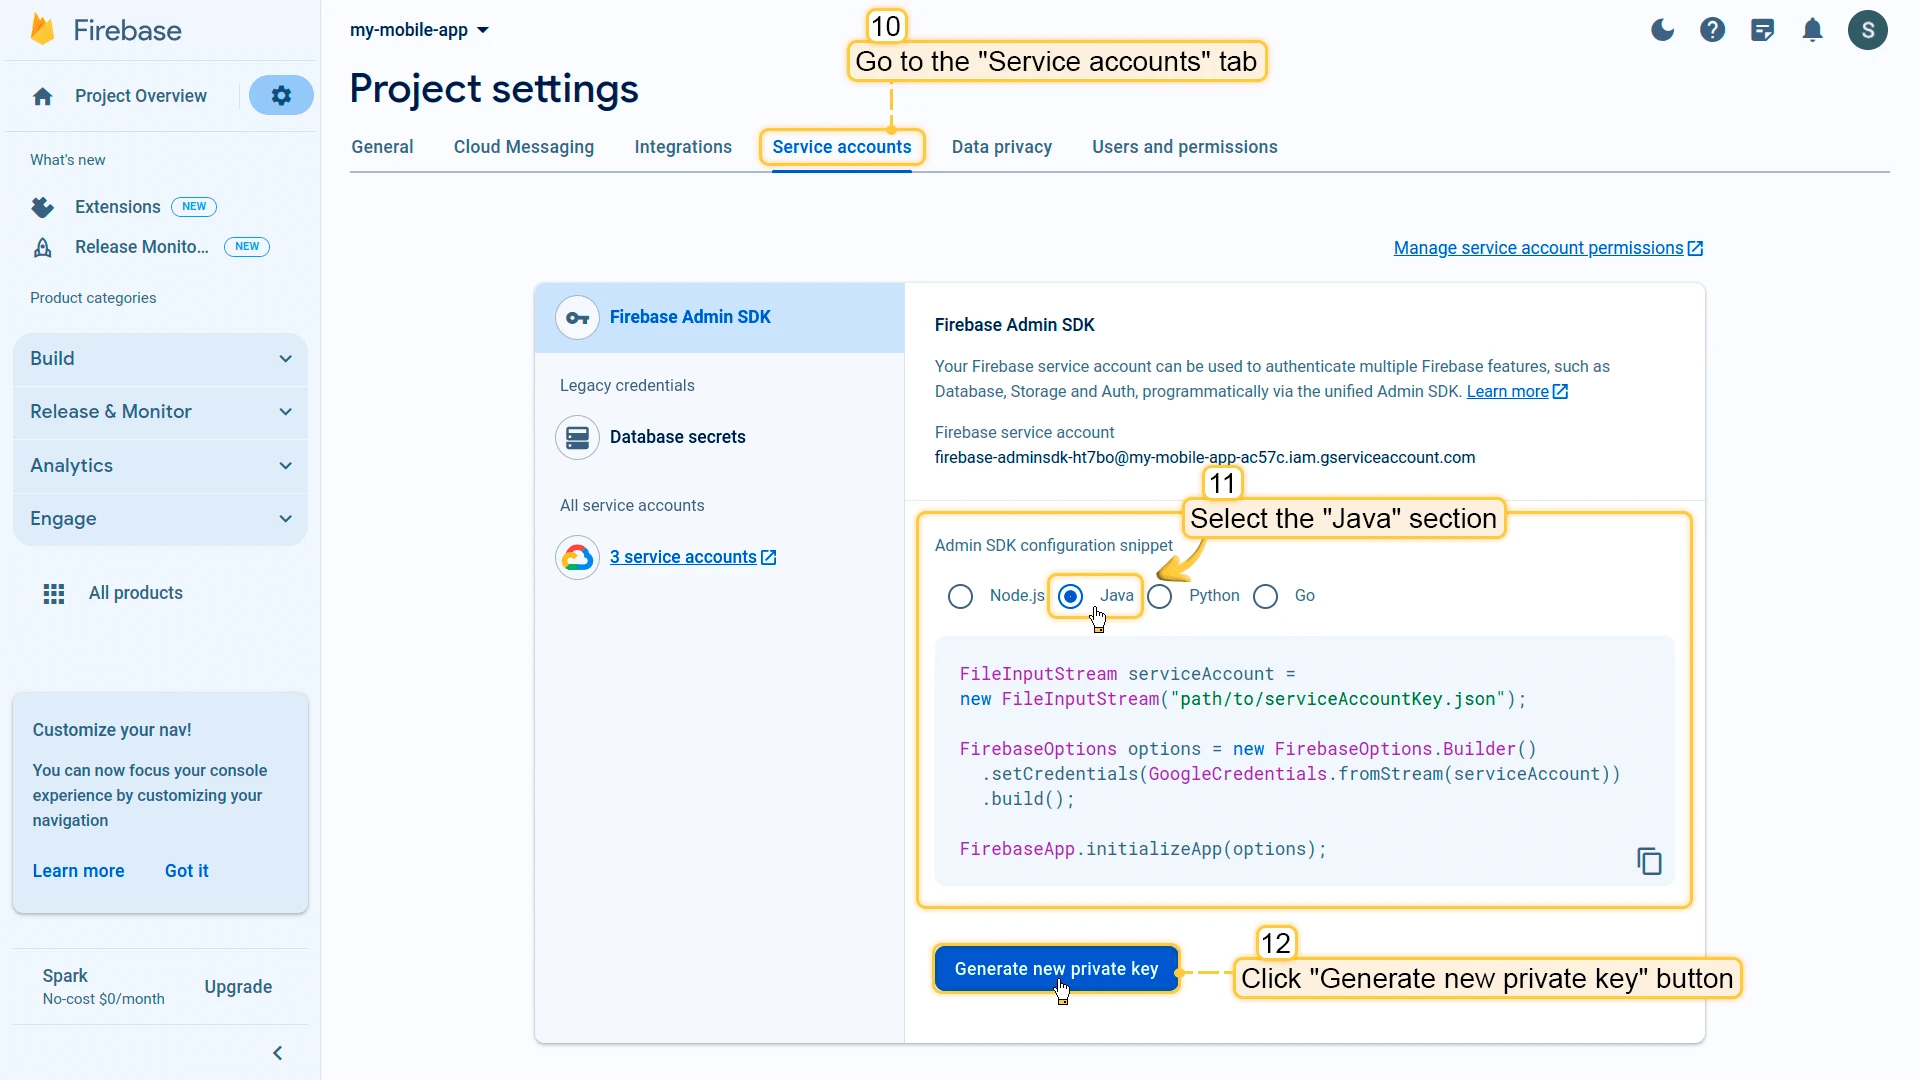
- Go to the Service accounts tab. Under Admin SDK configuration snippet, select the Java section. Click Generate new private key. Keep this key safe — you’ll need it for ThingsBoard server-side operations.
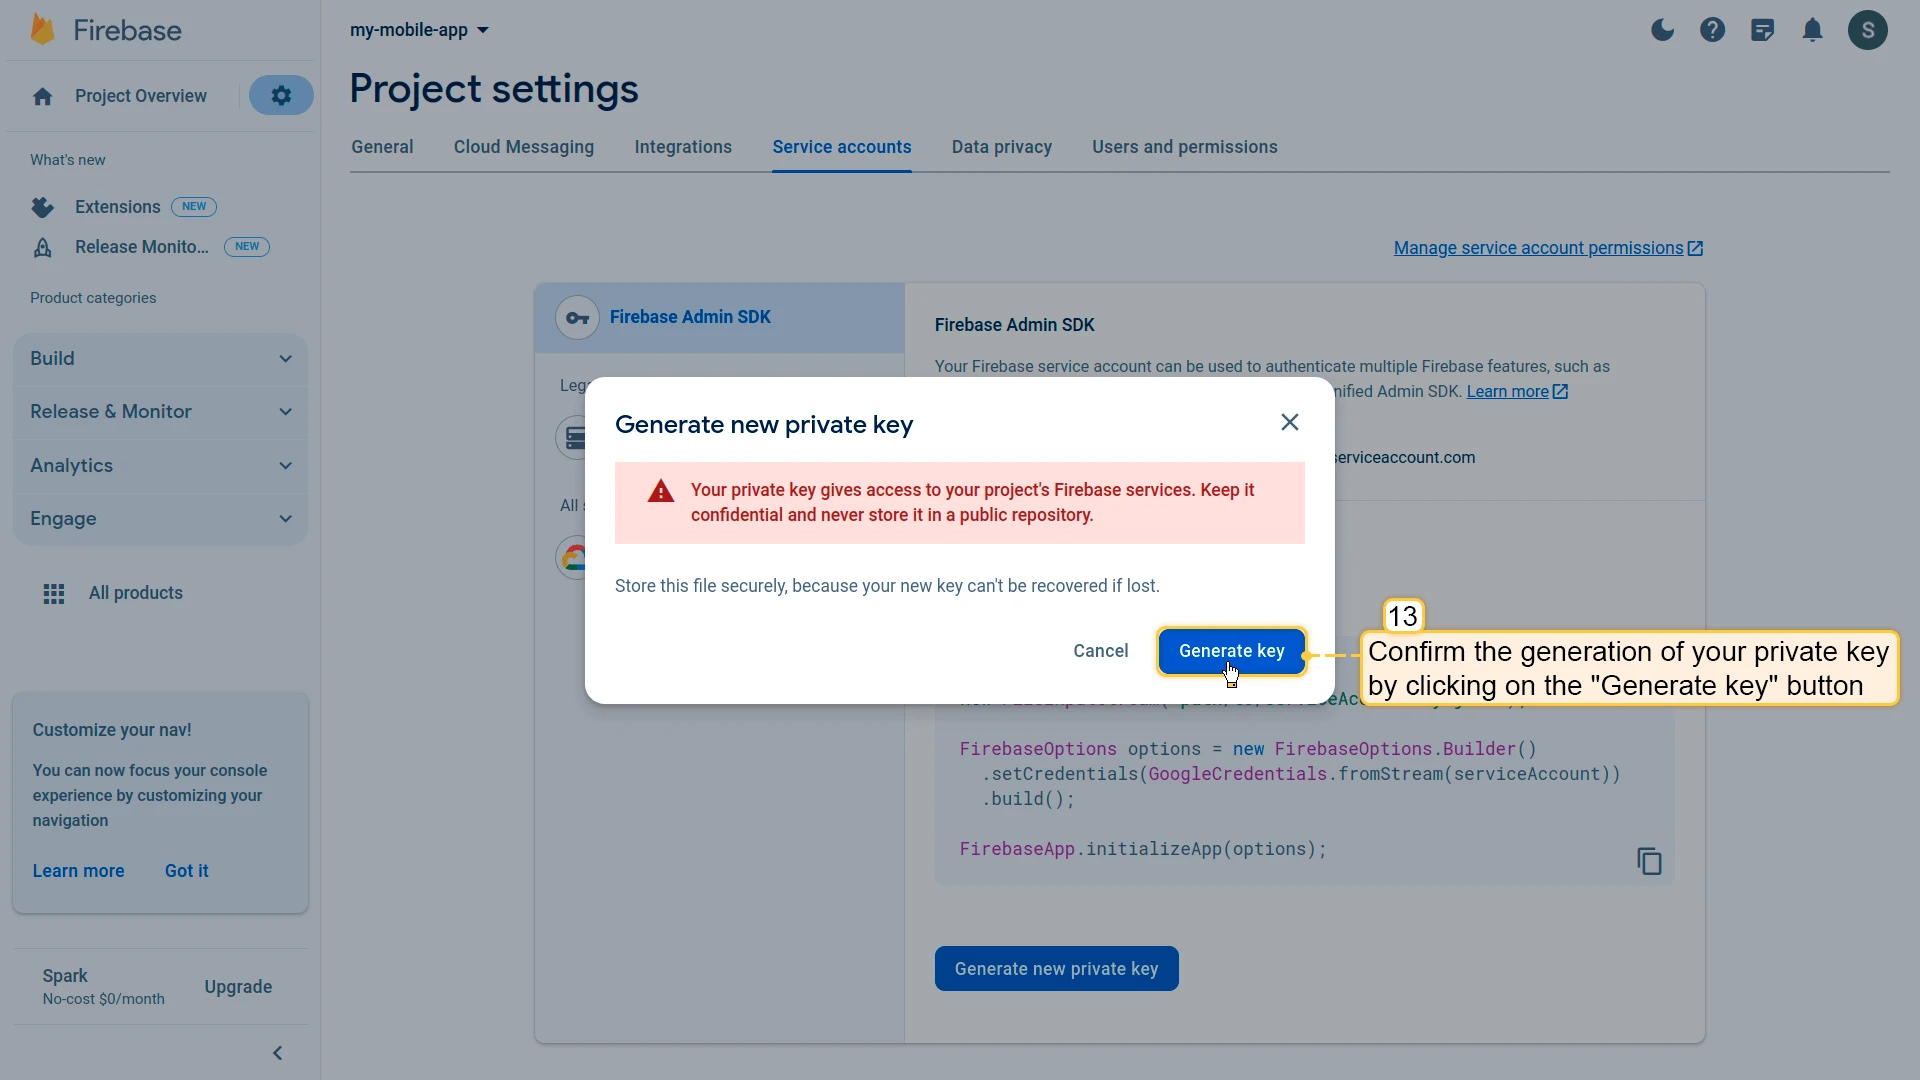
- Confirm by clicking Generate key.
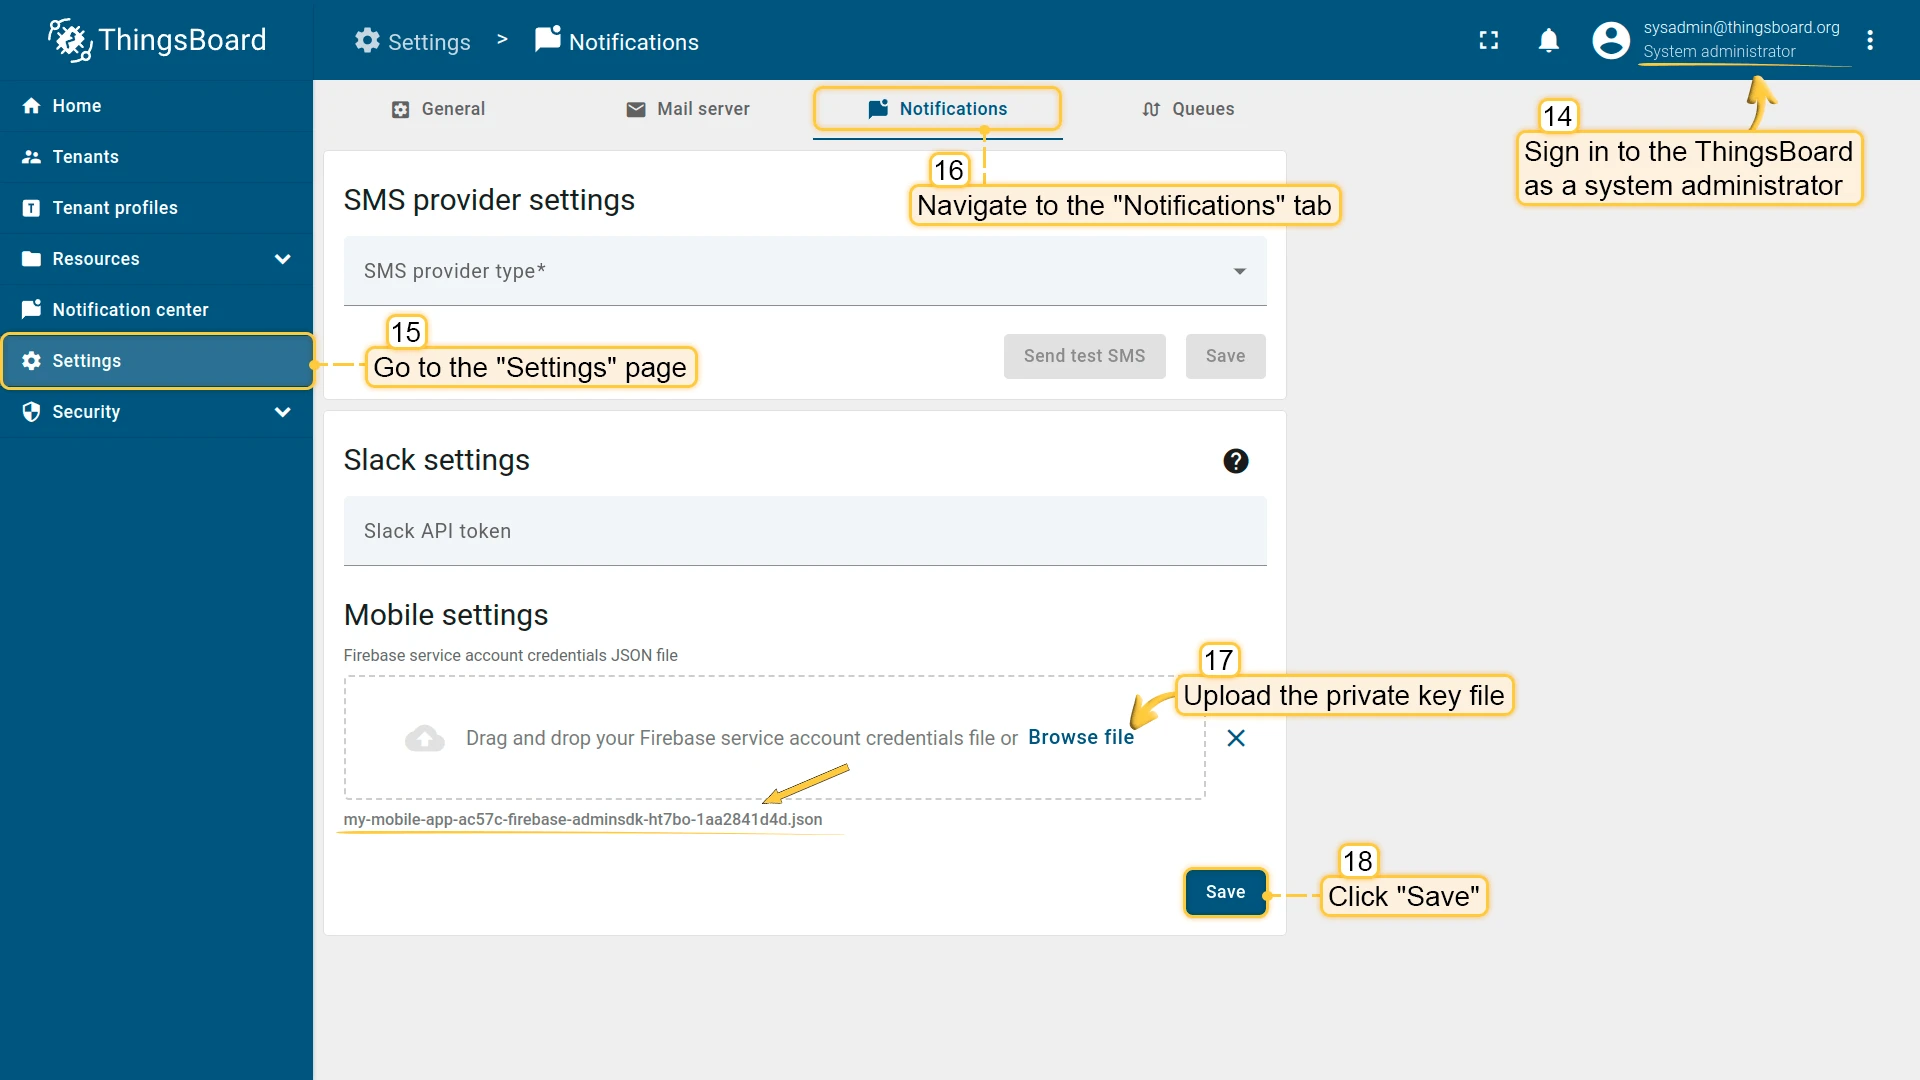
- Sign in to ThingsBoard as a system administrator, open Settings and navigate to the Notifications tab. In the Mobile settings section, upload the private key file and click Save.

Step 2.2: Add Firebase to your mobile application
Section titled “Step 2.2: Add Firebase to your mobile application”To integrate Firebase into the mobile application, complete the initial two steps outlined in the Add Firebase to your Flutter app guide.
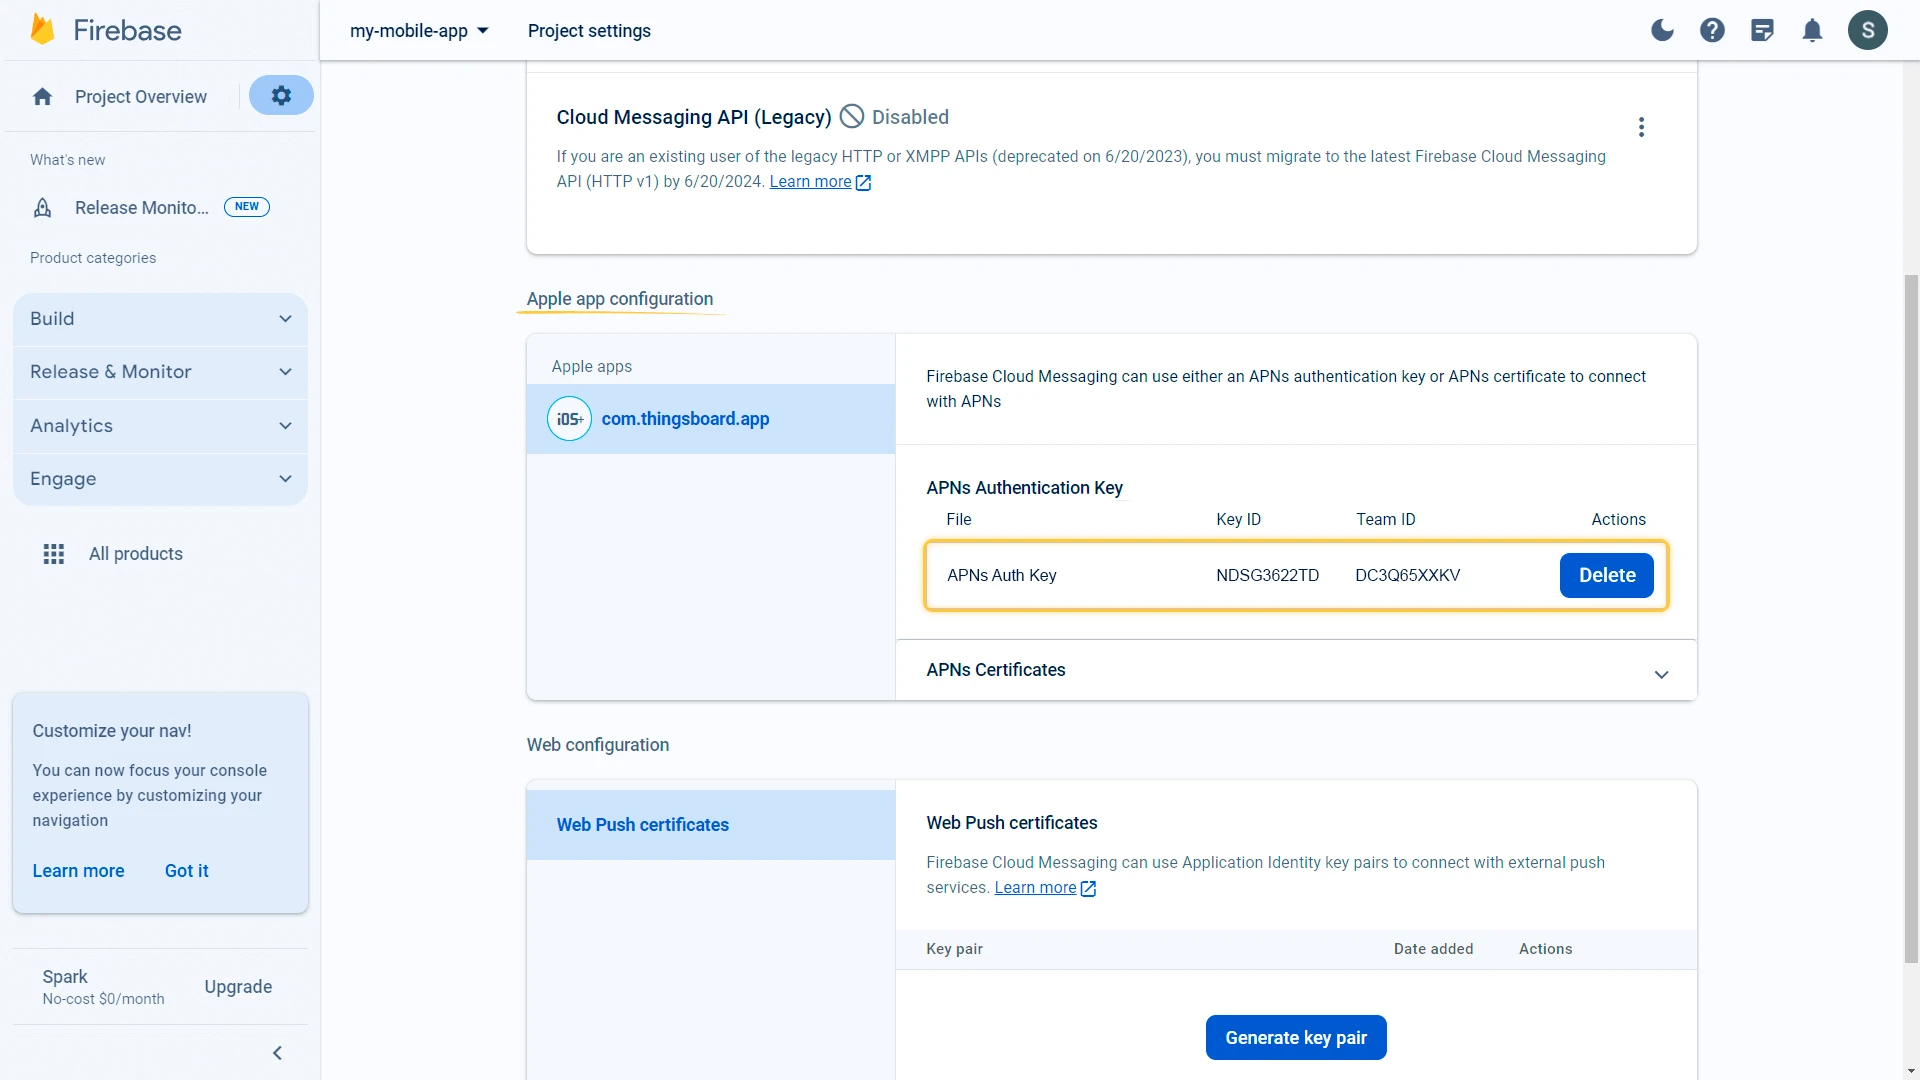
iOS only: Apple app configuration
Section titled “iOS only: Apple app configuration”Upload an APNs authentication key to Firebase.
- Create an APNs authentication key in the Apple Developer Member Center using Apple’s official documentation.
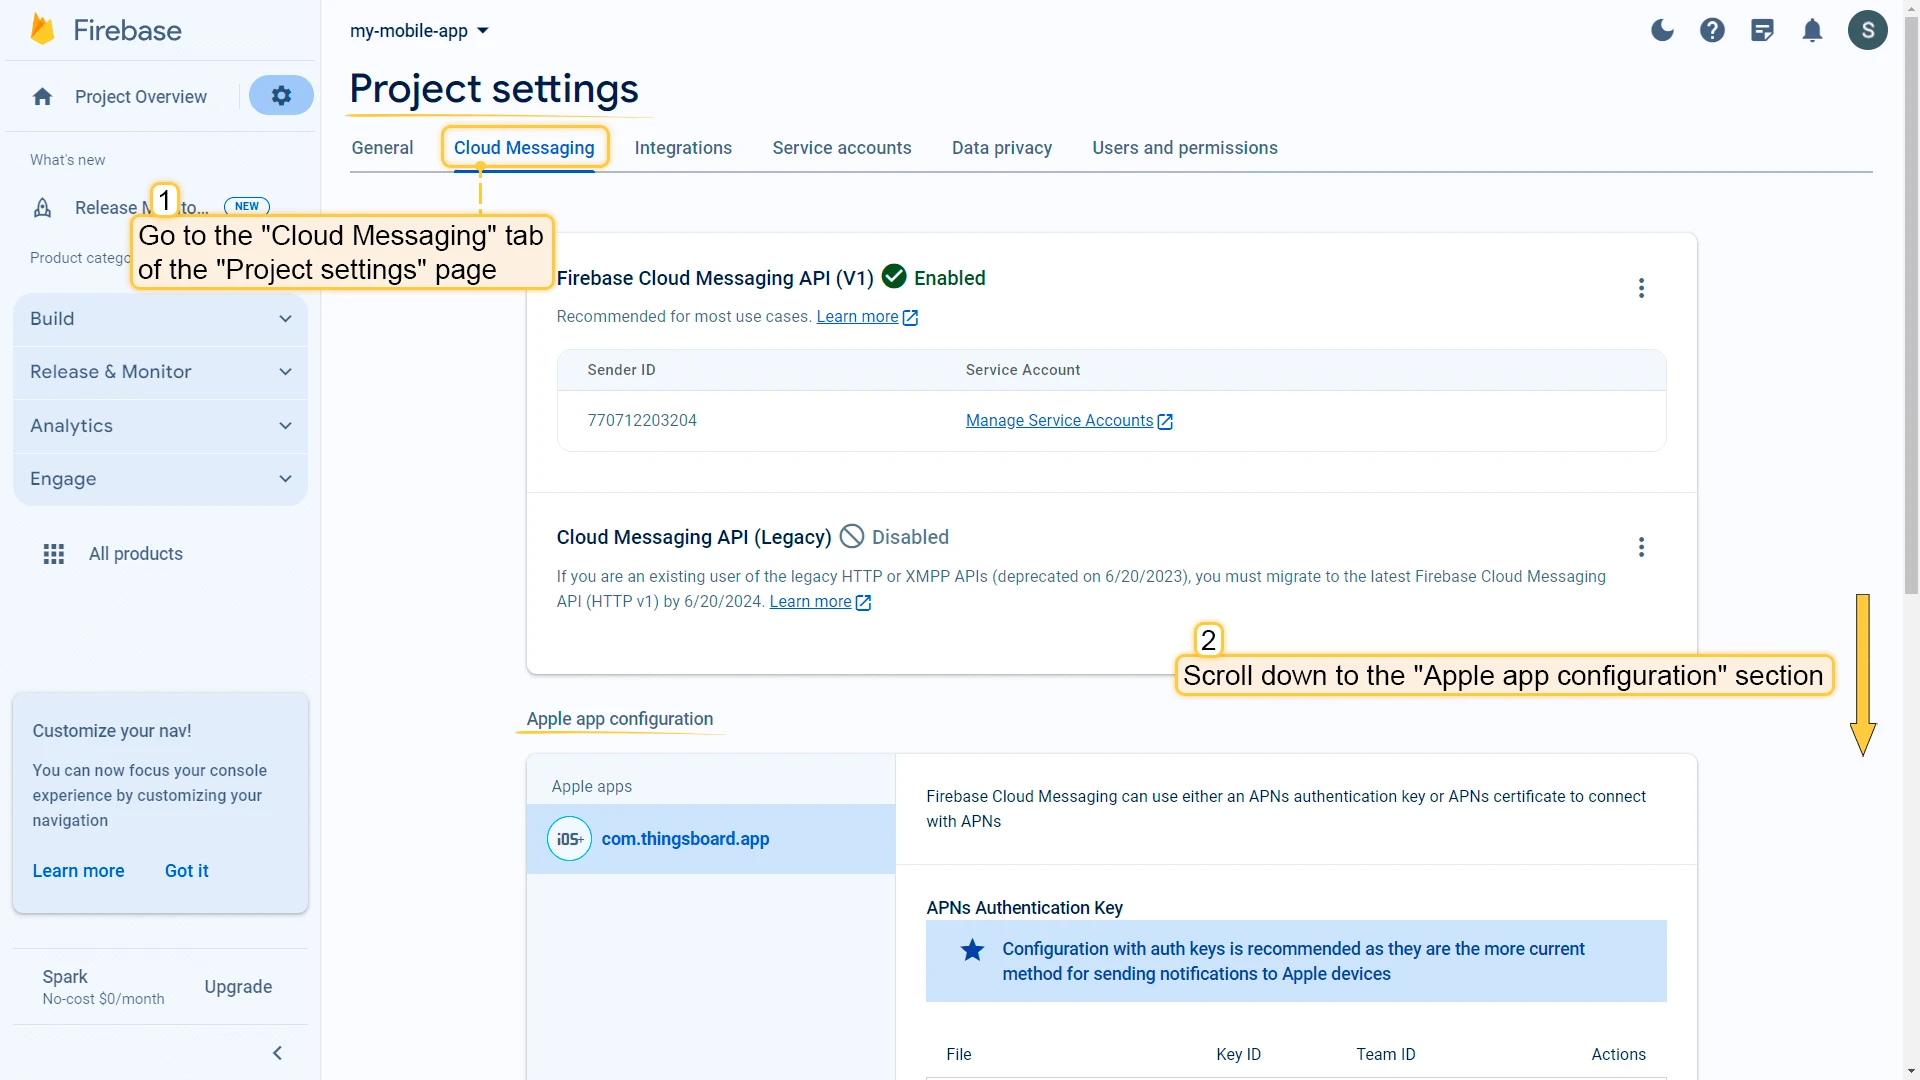
- Inside your Firebase project, go to the Cloud Messaging tab of Project Settings. Scroll down to the Apple app configuration section.
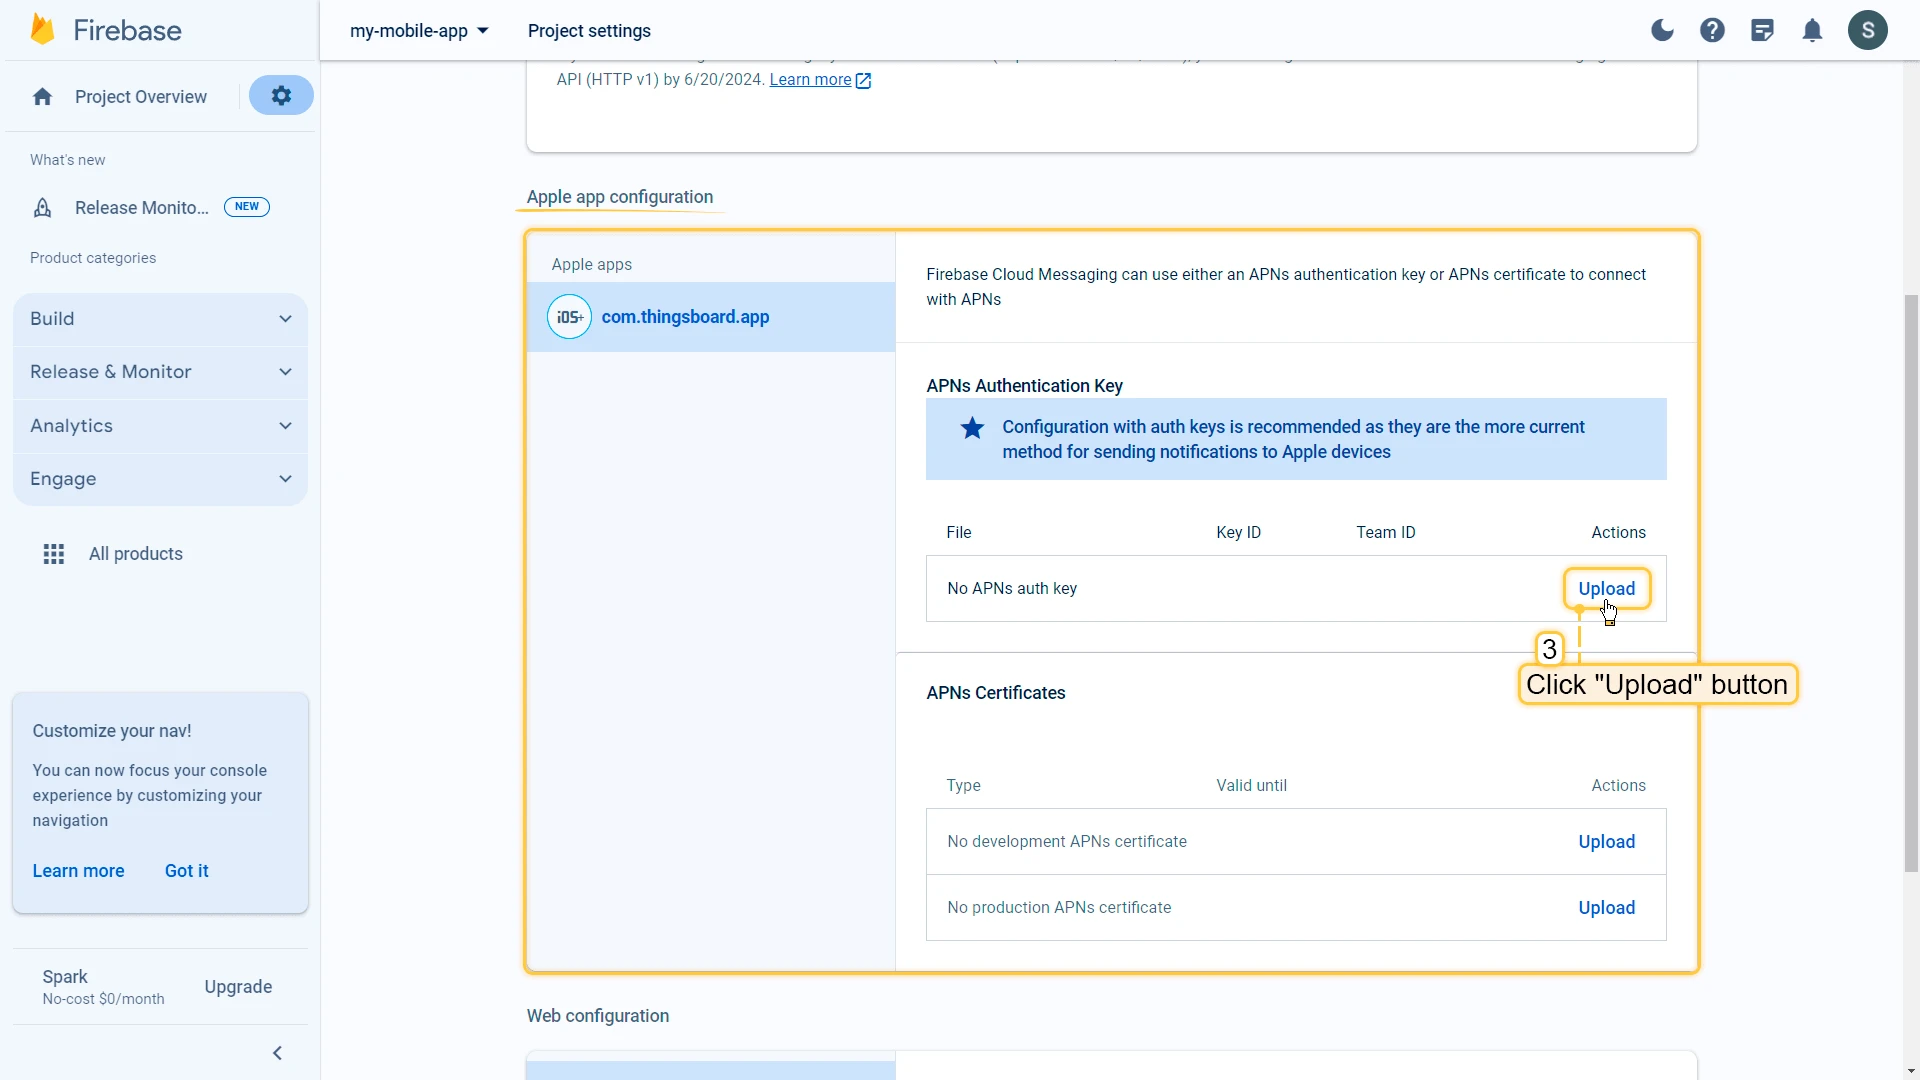
- In APNs authentication key, click Upload.
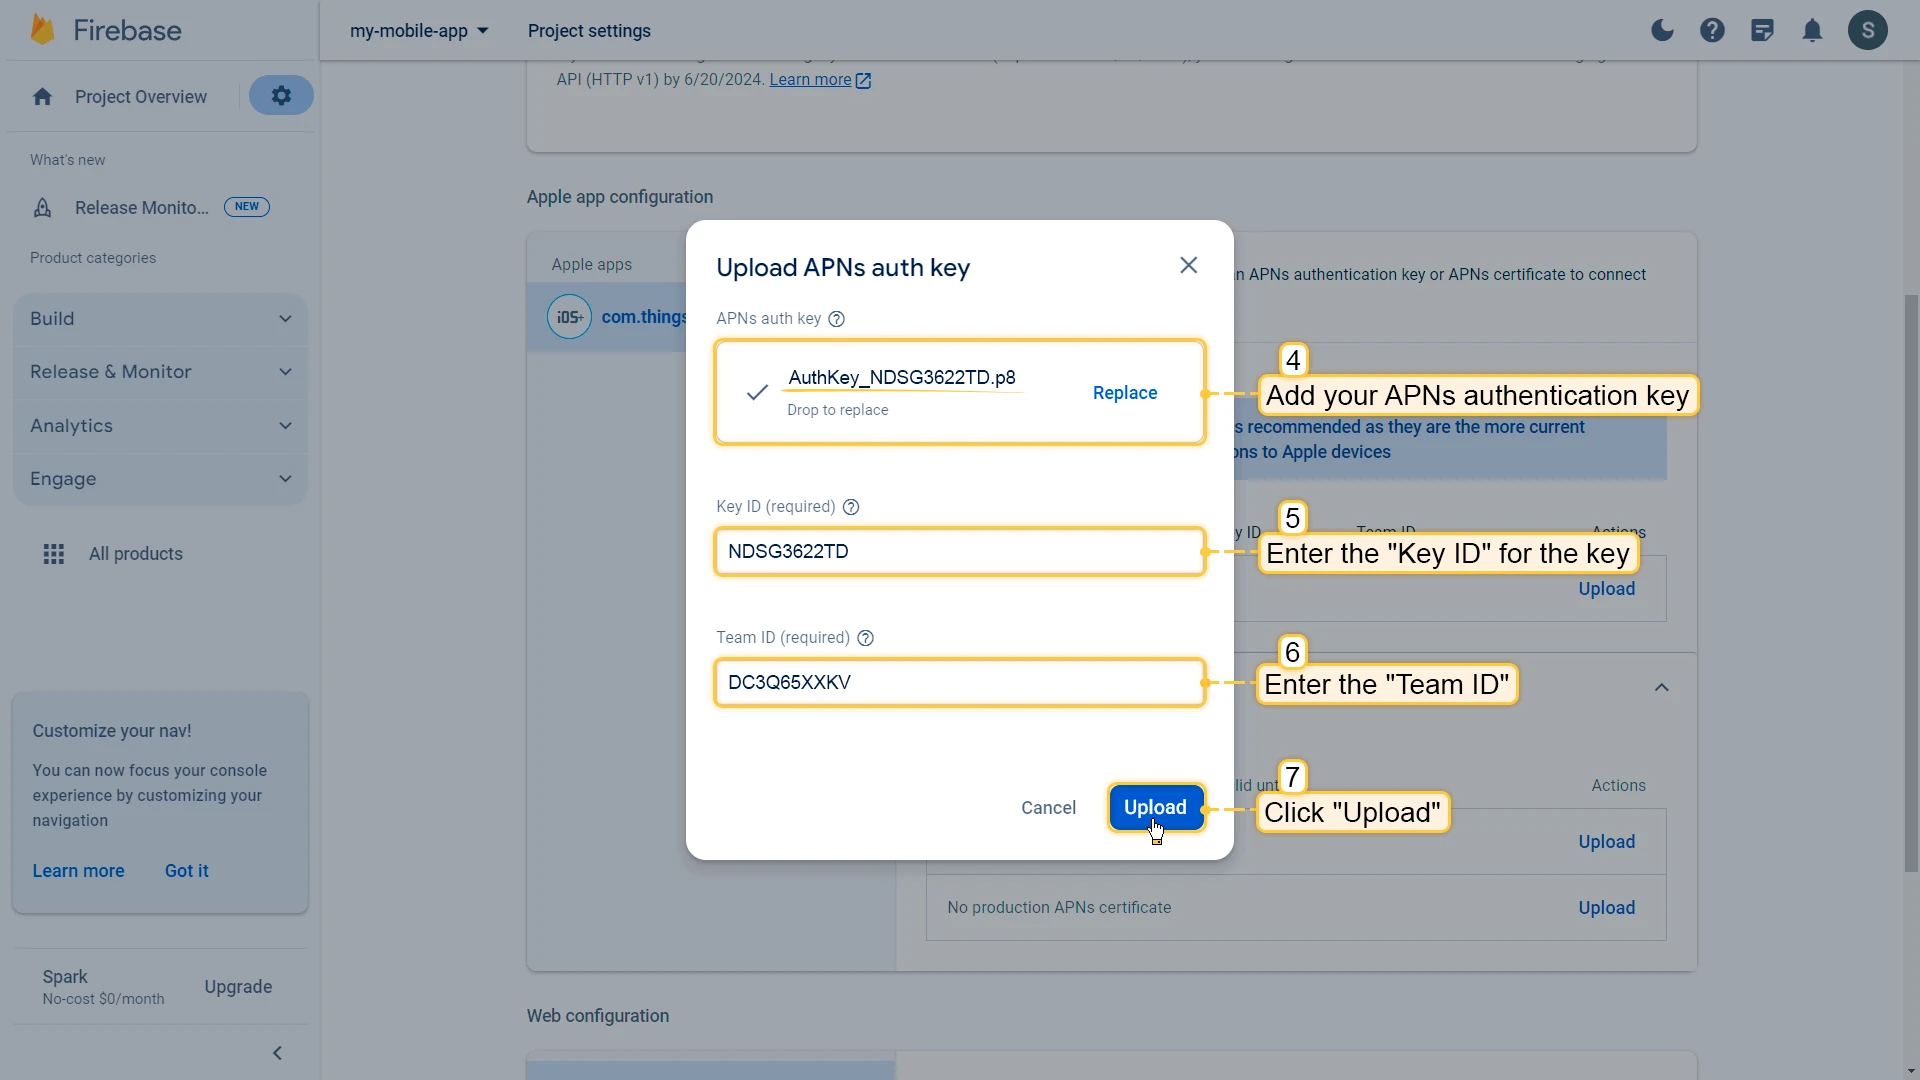
- Add the key and enter the Key ID and Team ID in the corresponding fields.
- Click Upload.
Step 2.3: Check project configuration
Section titled “Step 2.3: Check project configuration”After completing these steps, make sure your project contains the following files:
- iOS:
ios/Runner/GoogleService-Info.plist - Android:
android/app/google-services.json
To confirm Firebase has been integrated properly, run your application:
flutter run --dart-define-from-file configs.jsonIf everything is configured correctly, the notifications menu in your mobile application should be active:
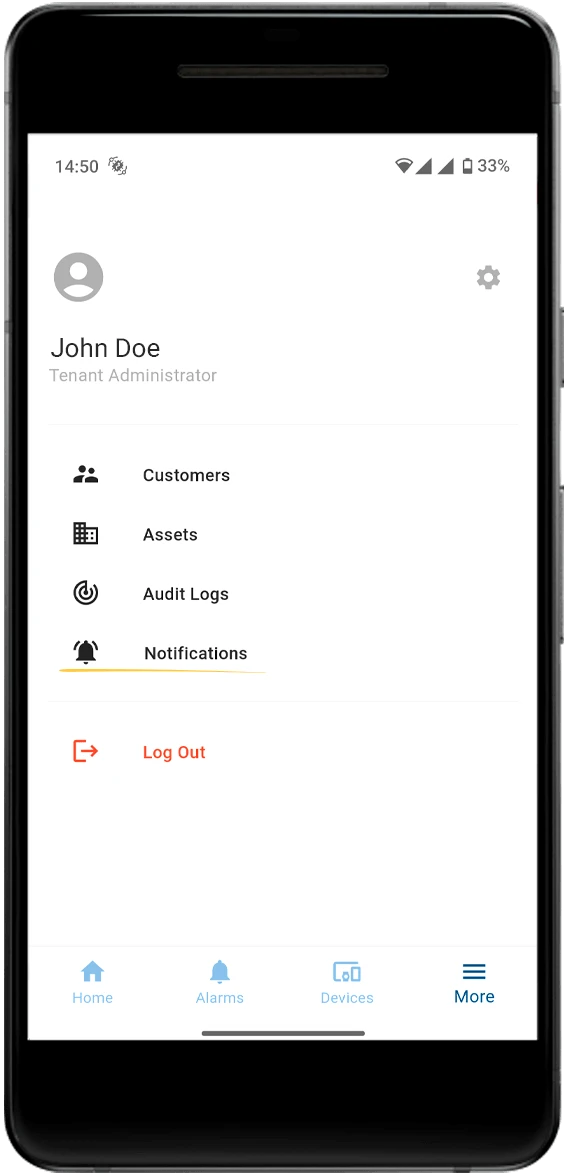
Learn more about notifications and how to configure them in the Notifications guide.
Step 3. [Optional] Build and release mobile application
Section titled “Step 3. [Optional] Build and release mobile application”If you need to build and release the ThingsBoard mobile application for iOS or Android, refer to the Build and release guide.
Troubleshooting
Section titled “Troubleshooting”App won’t build
Section titled “App won’t build”ThingsBoard mobile app supports specific Flutter versions. A newer Flutter version may not yet be compatible with the current release.
How to check the required Flutter version:
- Check the release notes on GitHub: flutter_thingsboard_app releases.
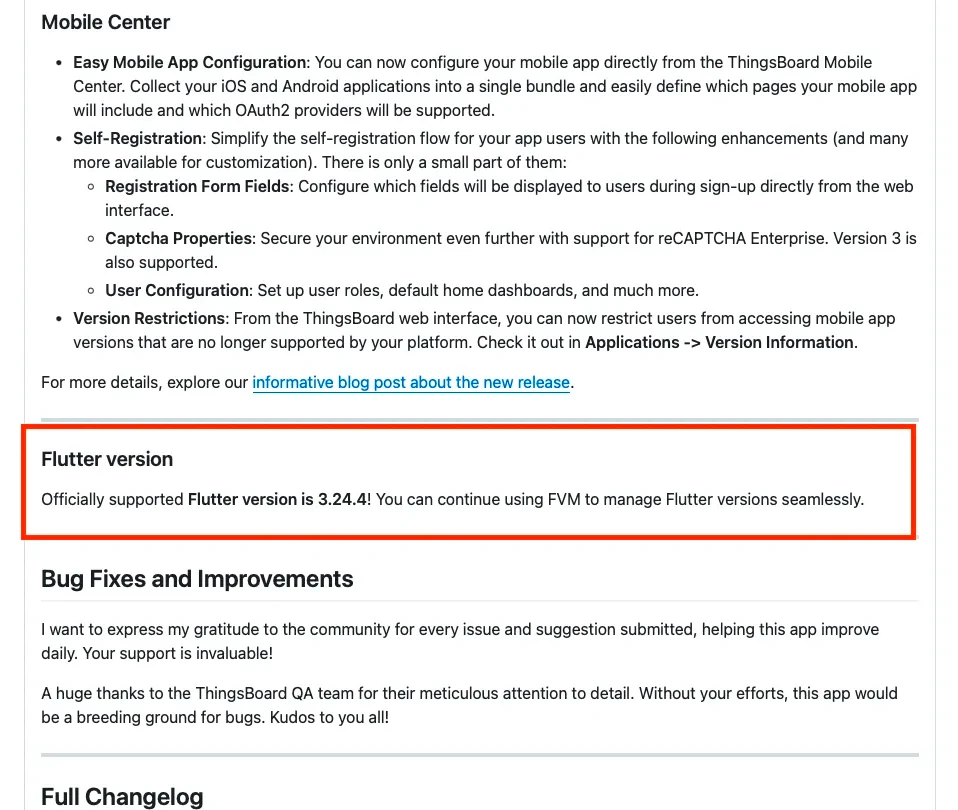
- Check the
.fvmrcfile in the project root:
{ "flutter": "3.24.4"}Installing the correct Flutter version:
Option 1 (Recommended): Use FVM — Flutter Version Manager
FVM lets you manage multiple Flutter versions across projects and switch between them per project.
Install it following the official guide, then prefix Flutter commands with fvm:
fvm flutter run --dart-define-from-file configs.jsonfvm flutter build apk --dart-define-from-file configs.jsonOption 2: Manually set the global Flutter version (not recommended if you work on multiple projects)
cd ~/dev/fluttergit checkout 3.24.4Warning “Push notifications are not configured”
Section titled “Warning “Push notifications are not configured””This usually means Firebase wasn’t set up correctly.
- Delete the file:
lib/firebase_options.dart - Re-run the FlutterFire CLI:
Terminal window flutterfire configure - Ensure
firebase_options.dartis regenerated and contains configuration for Android, iOS, or both.
Dashboard not loading
Section titled “Dashboard not loading”The mobile app opens the dashboard in a WebView — the ThingsBoard platform handles all actual loading. For the dashboard to work, the app and platform must be able to communicate.
Check the log for this message:
Invoked tbMobileReadyHandler- If missing: The platform isn’t signaling the app that it’s ready. Open an issue in the ThingsBoard platform repository.
- If the log appears but the dashboard still won’t load: Open an issue in the CE mobile repository.
Include credentials to your instance privately via ThingsBoard Support — never post them publicly.
Can’t sign in
Section titled “Can’t sign in”Check the compatibility matrix between your platform and mobile app versions. Mismatches are the most common cause of sign-in issues.
If versions are aligned and you’re still stuck, open an issue in the flutter_thingsboard_app repository and include:
- Platform version
- Mobile app version
- Logs and screenshots
- Device details (OS, version)
Anything else?
Section titled “Anything else?”Open an issue in the flutter_thingsboard_app repository with as much context as possible: screenshots, logs, versions, and platform setup.
Was this helpful?