- Overview
- Dashboard Provision to ThingsBoard Edge
- The Edge Dashboard Creation And Management
- Next Steps
Overview
The Edge Dashboards are robust and effective tools for local monitoring and management of IoT data. They can function and display data in real time, even when there is no connection to the Cloud. The data can be synchronized with the server when the connection is restored.
The Edge Dashboards are designed in the same way as the Platform (Cloud) Dashboards. Please read the Platform Dashboard documentation for a general understanding of its functionality.
Dashboard Provision to ThingsBoard Edge
The dashboards can be created and managed on the ThingsBoard server, and then provisioned to the Edge instance. This approach enables the simultaneous deployment of changes to all Edge instances.
You can verify that the Dashboard is provisioned:
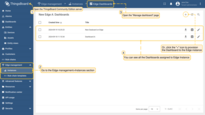
- Ensure that you have previously created and configured Dashboards on the ThingsBoard Server and then go to the Edge management > Instances section and open the "Manage dashboard" page. View all Dashboards already deployed, or click the "+" icon to deploy the Dashboard to the Edge instance.
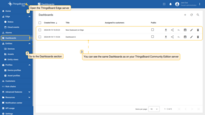
- To verify that the Dashboards are available, log in to your Edge instance and go to the Dashboards section.
The Edge Dashboard Creation And Management
You can also create and manage Dashboards right from the Edge itself. All changes are automatically propagated to the Platform when connected.
To create the Edge Dashboard on your ThingsBoard Edge instance, do the following:
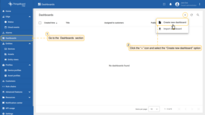
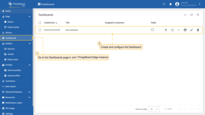
- Log in to your ThingsBoard Edge instance and navigate to the “Dashboards” section, then click the “+” icon and select the “Create new dashboard” option.
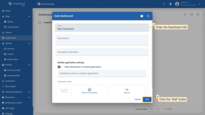
- In the pop-up window, enter a dashboard title. Other fields are optional. Click the "Add" button to proceed
- Once you have created the dashboard, it will be automatically opened. You can configure it by adding widgets. Click the "Save" button to save the changes.
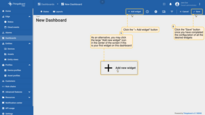
You can learn about Widgets here.
Read more about the Dashboard toolbar here.
To verify that the changes are successfully propagated:
- Create, configure or make any changes to the Dashboard on the Edge instance.
- Log in to your ThingsBoard Server and go to the Dashboards section to see that the changes have been applied to the ThingsBoard Server. Make sure you are connected to the internet.
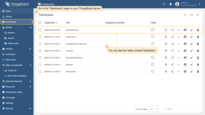
If you have multiple instances of ThingsBoard Edge, you can delete the Dashboard on one of them without affecting it on the other instances. To delete the Dashboard from all ThingsBoard Edge instances at once, delete it from your ThingsBoard platform.
Assign/Remove Customers
Before you assign customers to the Dashboard, make sure that you have assigned them to the ThingsBoard Edge instance first. You can read more about Customers here.
To assign/unassign customers to the Edge Dashboard, do the following:
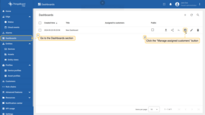
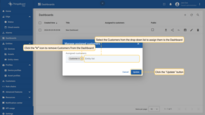
- Log in to your ThingsBoard Edge instance and go to the Dashboards section. Click the “Manage assigned customers” button for the dashboard you want to assign a customer to.
- Select the customers from the drop-down list to assign them or click the “x” icon to remove them from the dashboard. Click the "Update" button to confirm the assignment or removal.
Next Steps
-
Getting started guide - Provide quick overview of main ThingsBoard Edge features. Designed to be completed in 15-30 minutes:
-
Installation guides - Learn how to setup ThingsBoard Edge on various available operating systems and connect to ThingsBoard Server.
-
Edge Rule Engine:
-
Rule Chain Templates - Learn how to use ThingsBoard Edge Rule Chain Templates.
-
Provision Rule Chains from cloud to edge - Learn how to provision edge rule chains from cloud to edge.
-
- Security:
- gRPC over SSL/TLS - Learn how to configure gRPC over SSL/TLS for communication between edge and cloud.
-
Features:
-
Edge Status - Learn about Edge Status page on ThingsBoard Edge.
-
Cloud Events - Learn about Cloud Events page on ThingsBoard Edge.
-
-
Use cases:
-
Manage alarms and RPC requests on edge devices - This guide will show how to generate local alarms on the edge and send RPC requests to devices connected to edge:
-
Data filtering and traffic reduce - This guide will show how to send to cloud from edge only filterd amount of device data:
-
- Roadmap - ThingsBoard Edge roadmap.