OPC-UA Integration
OPC-UA Integration streams data from an OPC UA server to ThingsBoard Edge, converting device payloads into telemetry and attributes. It also supports downlink — sending RPC commands from ThingsBoard Edge back to OPC UA nodes.

This guide walks through integrating ThingsBoard Edge PE with the OPC UA C++ Demo Server to visualize air conditioner telemetry and control units via RPC.
Prerequisites
Section titled “Prerequisites”-
Download and install the OPC UA C++ Demo Server (Windows only).
-
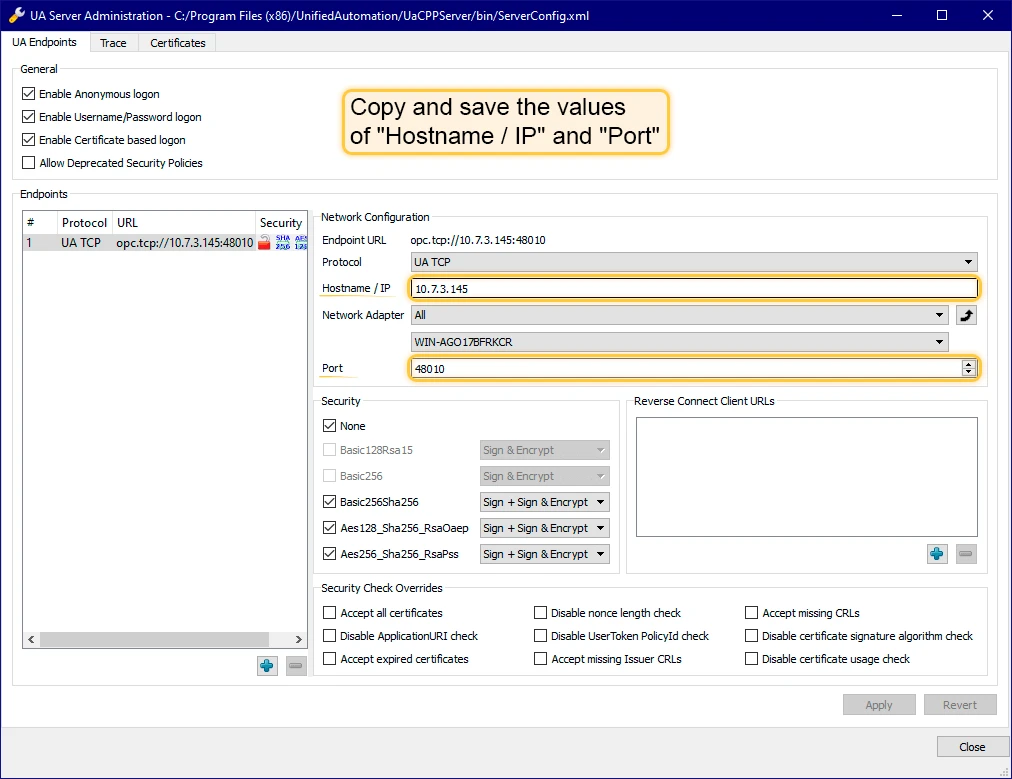
After installation, launch the UA Admin Dialog and verify the hostname/IP address and port are configured correctly — you will need these when setting up the integration.

-
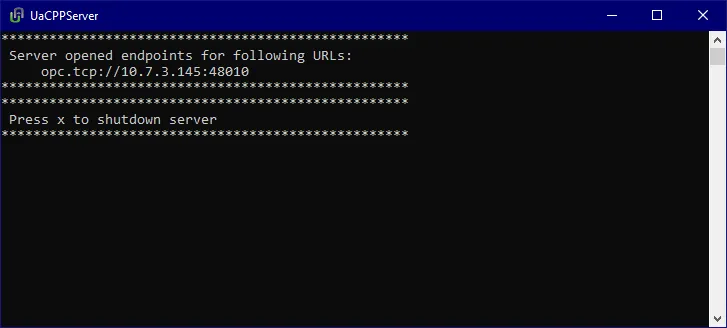
Launch UaCPPServer. A console window will show the server endpoint URLs.
Create converter templates
Section titled “Create converter templates”Converter and integration templates are created on the Cloud (ThingsBoard PE server). Log in as a Tenant administrator.
Uplink converter
Section titled “Uplink converter”The uplink converter parses the OPC UA node payload and maps it to ThingsBoard telemetry and attributes. For each scanned node, the integration sends a payload and metadata like this:
Payload:
{ "temperature": "72.15819999999641"}Metadata:
{ "opcUaNode_namespaceIndex": "3", "opcUaNode_name": "AirConditioner_1", "integrationName": "OPC-UA Airconditioners", "opcUaNode_identifier": "AirConditioner_1", "opcUaNode_fqn": "Objects.BuildingAutomation.AirConditioner_1"}The converter takes opcUaNode_name as the device name and maps temperature, humidity, powerConsumption, and state to telemetry and attributes.
-
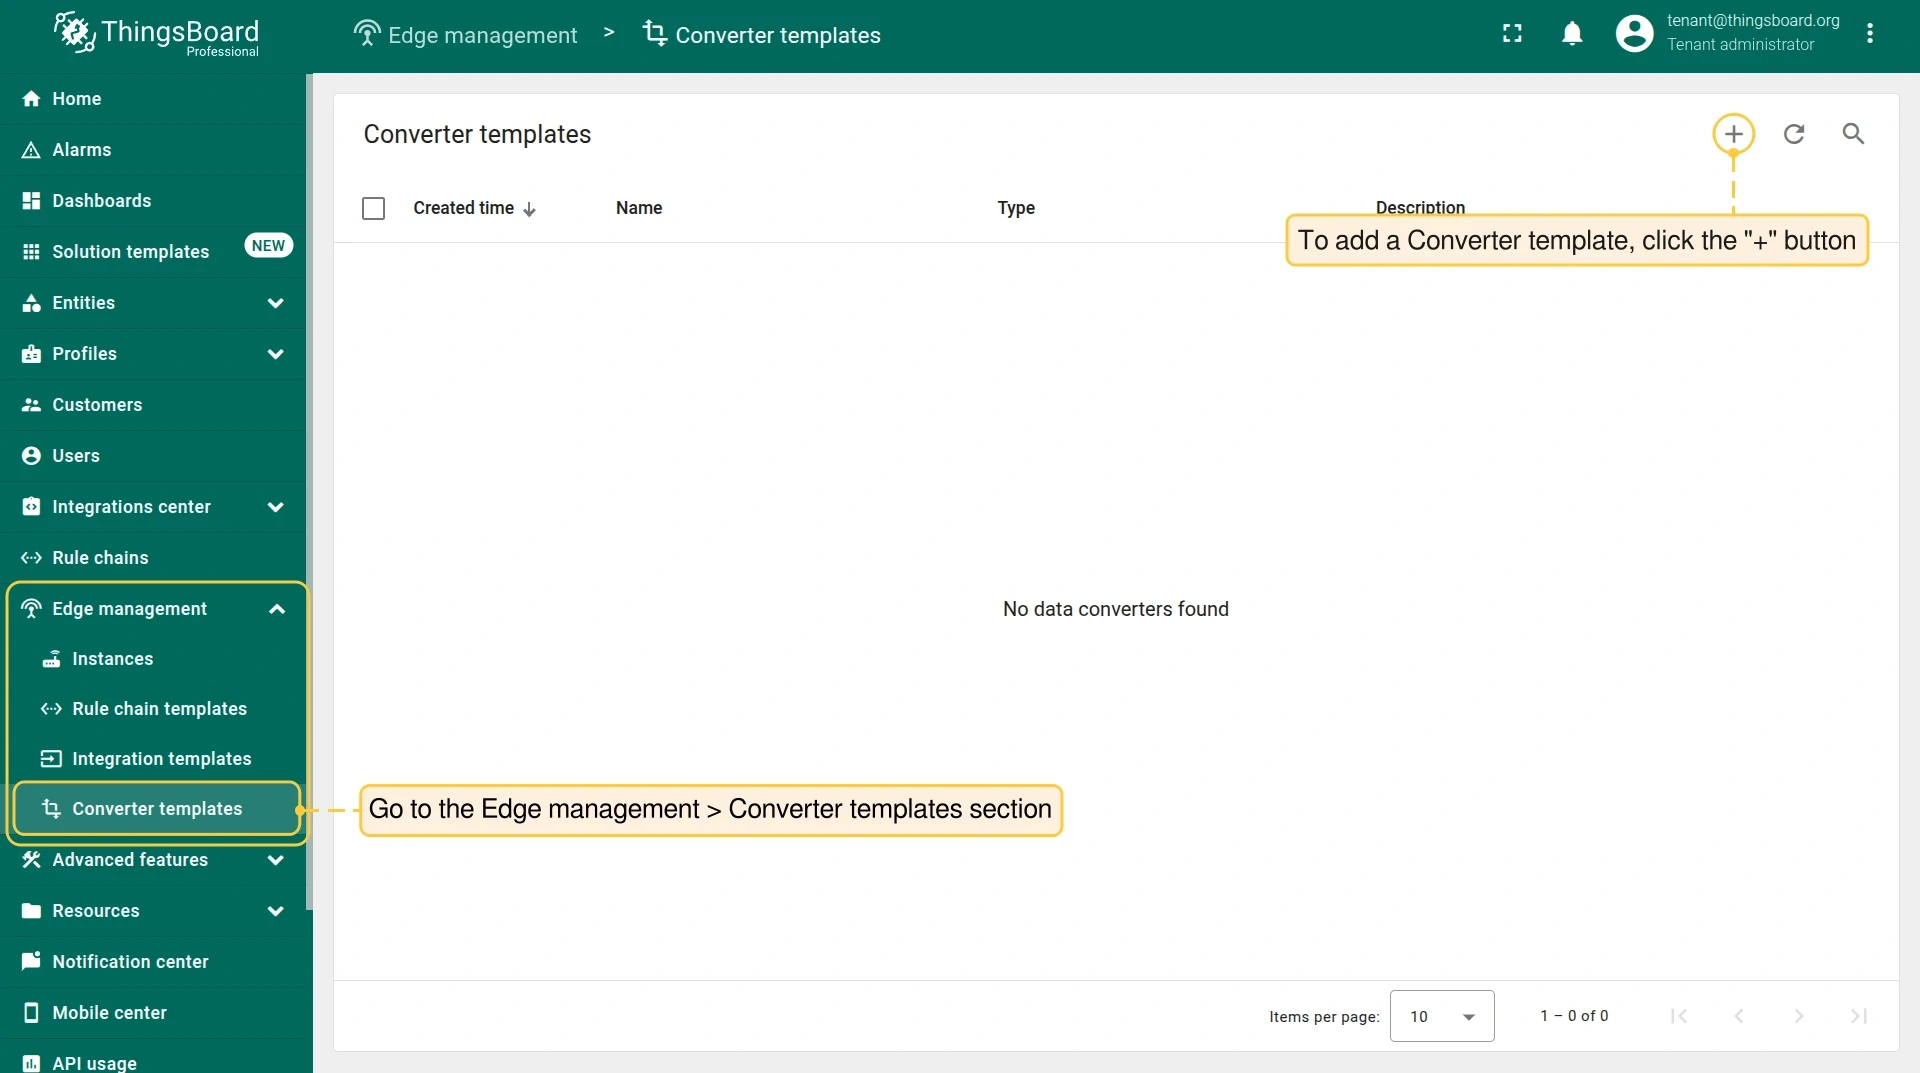
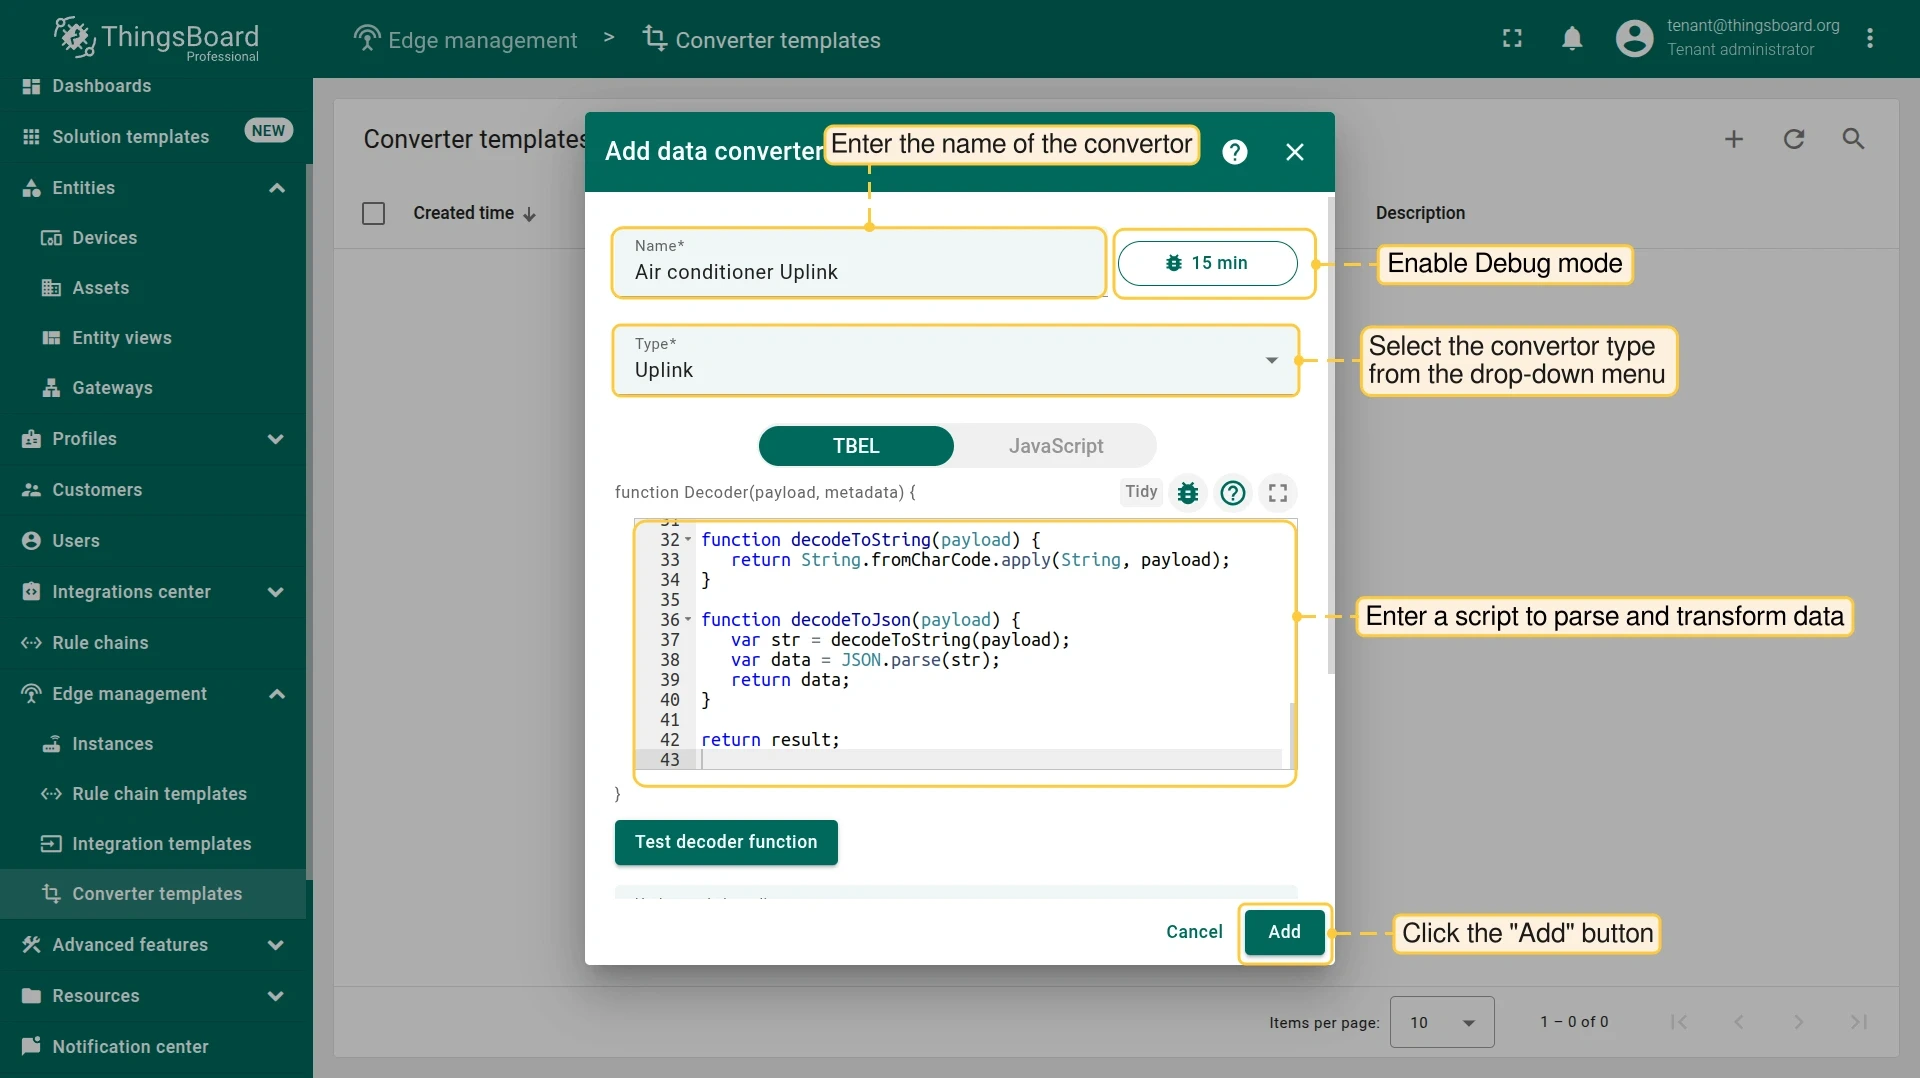
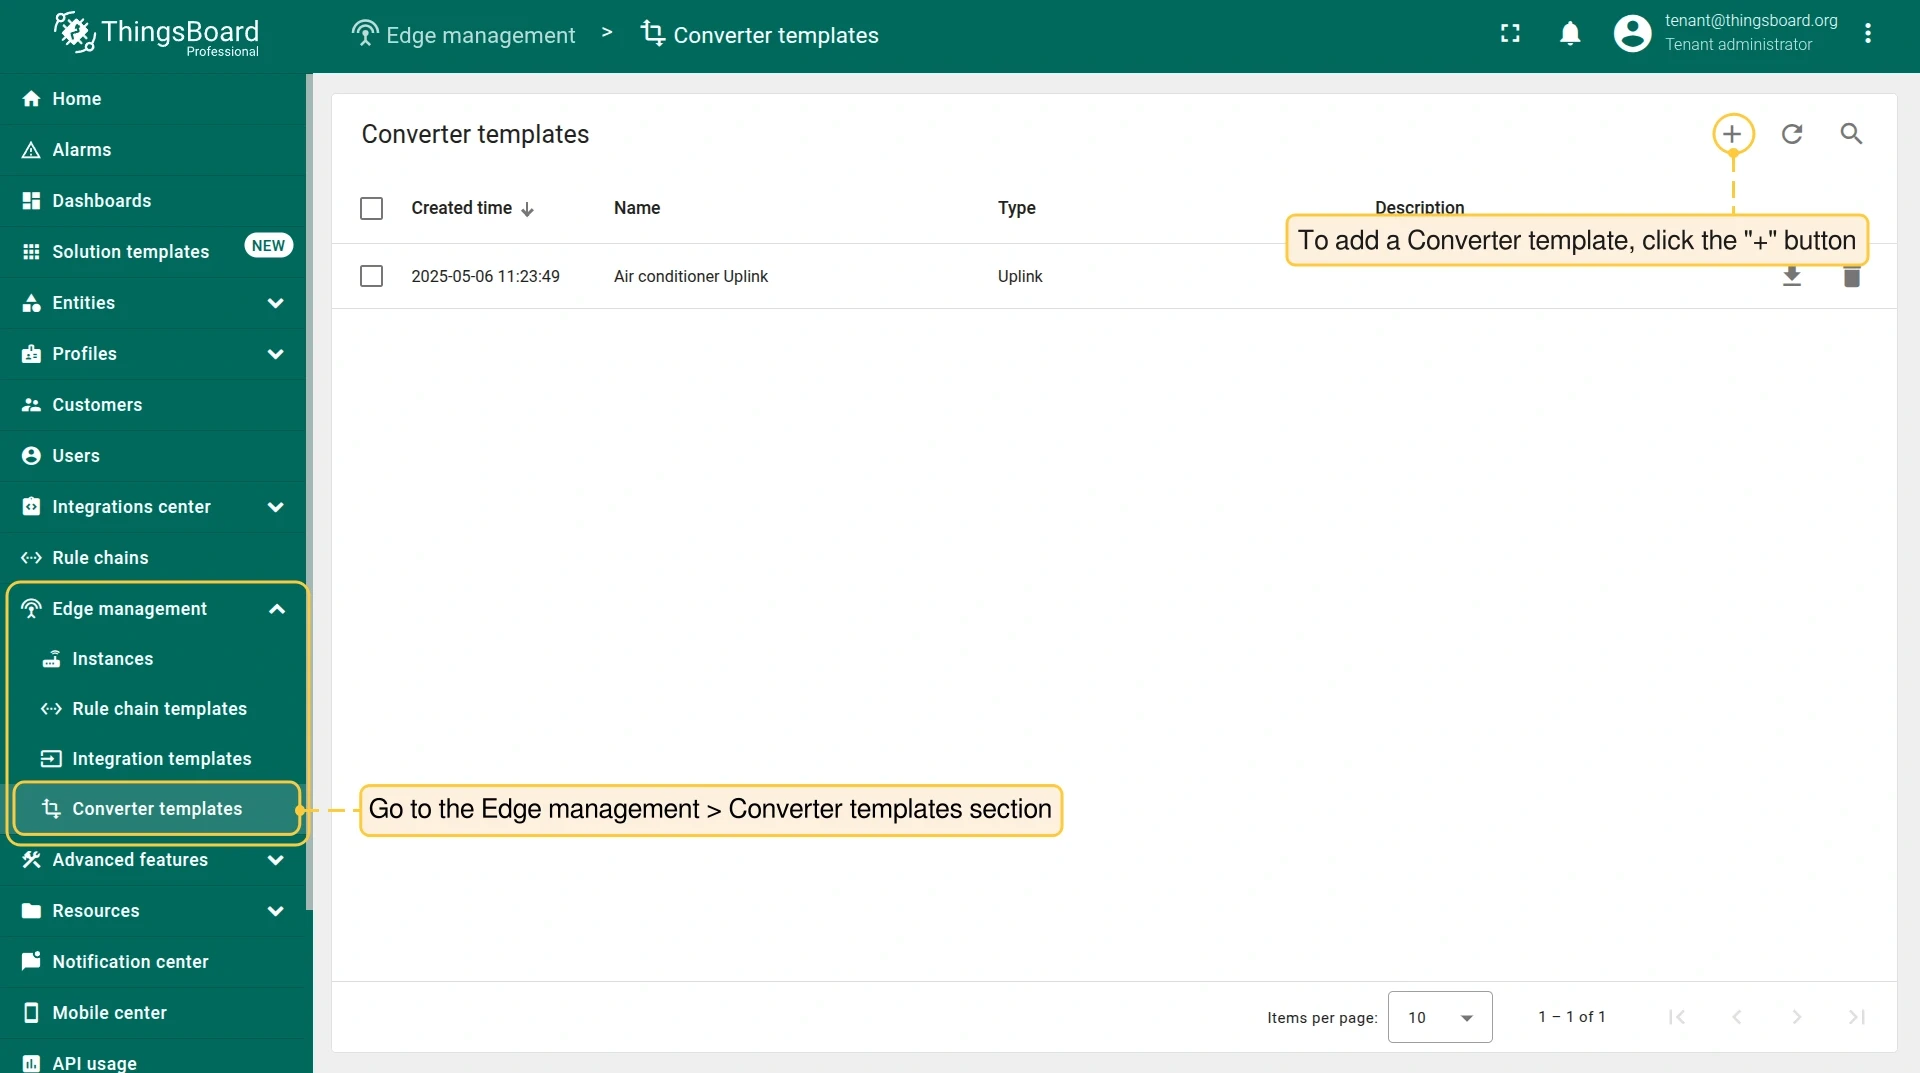
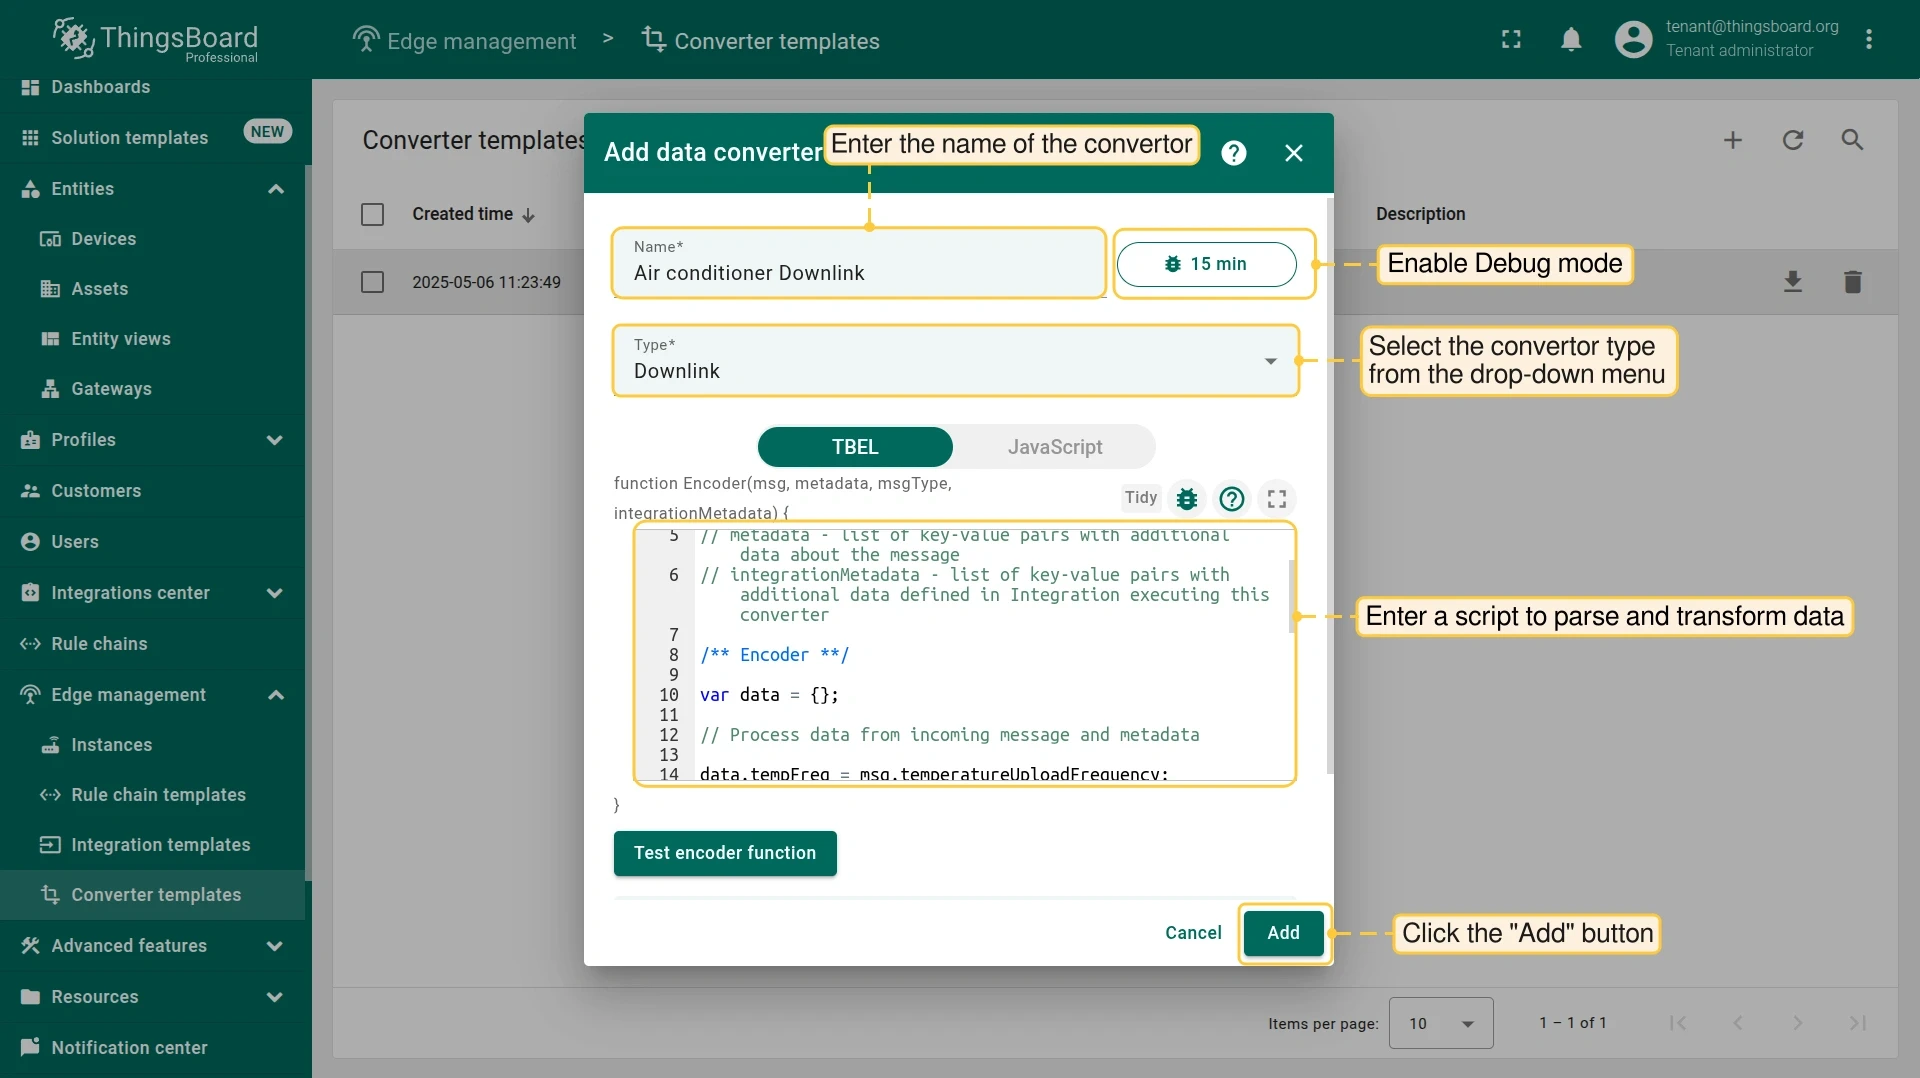
Go to Integration templates > Converter templates and click +, then Create new converter. Enable Debug mode to inspect events.
-
Paste the following script into the Decoder function field and save:
/** Decoder **/var data = decodeToJson(payload);var deviceName = metadata['opcUaNode_name'];var namespaceIndex = metadata['opcUaNode_namespaceIndex'];var deviceType = 'airconditioner';var result = {deviceName: deviceName,deviceType: deviceType,telemetry: {},attributes: {namespaceIndex: namespaceIndex}};if (data.temperature != null) {result.telemetry.temperature = toFixed(data.temperature, 2);}if (data.humidity != null) {result.telemetry.humidity = toFixed(data.humidity, 2);}if (data.powerConsumption != null) {result.telemetry.powerConsumption = toFixed(data.powerConsumption, 2);}if (data.state != null) {result.attributes.state = data.state == '1' ? true : false;}/** Helper functions 'decodeToString' and 'decodeToJson' are already built-in **/return result;
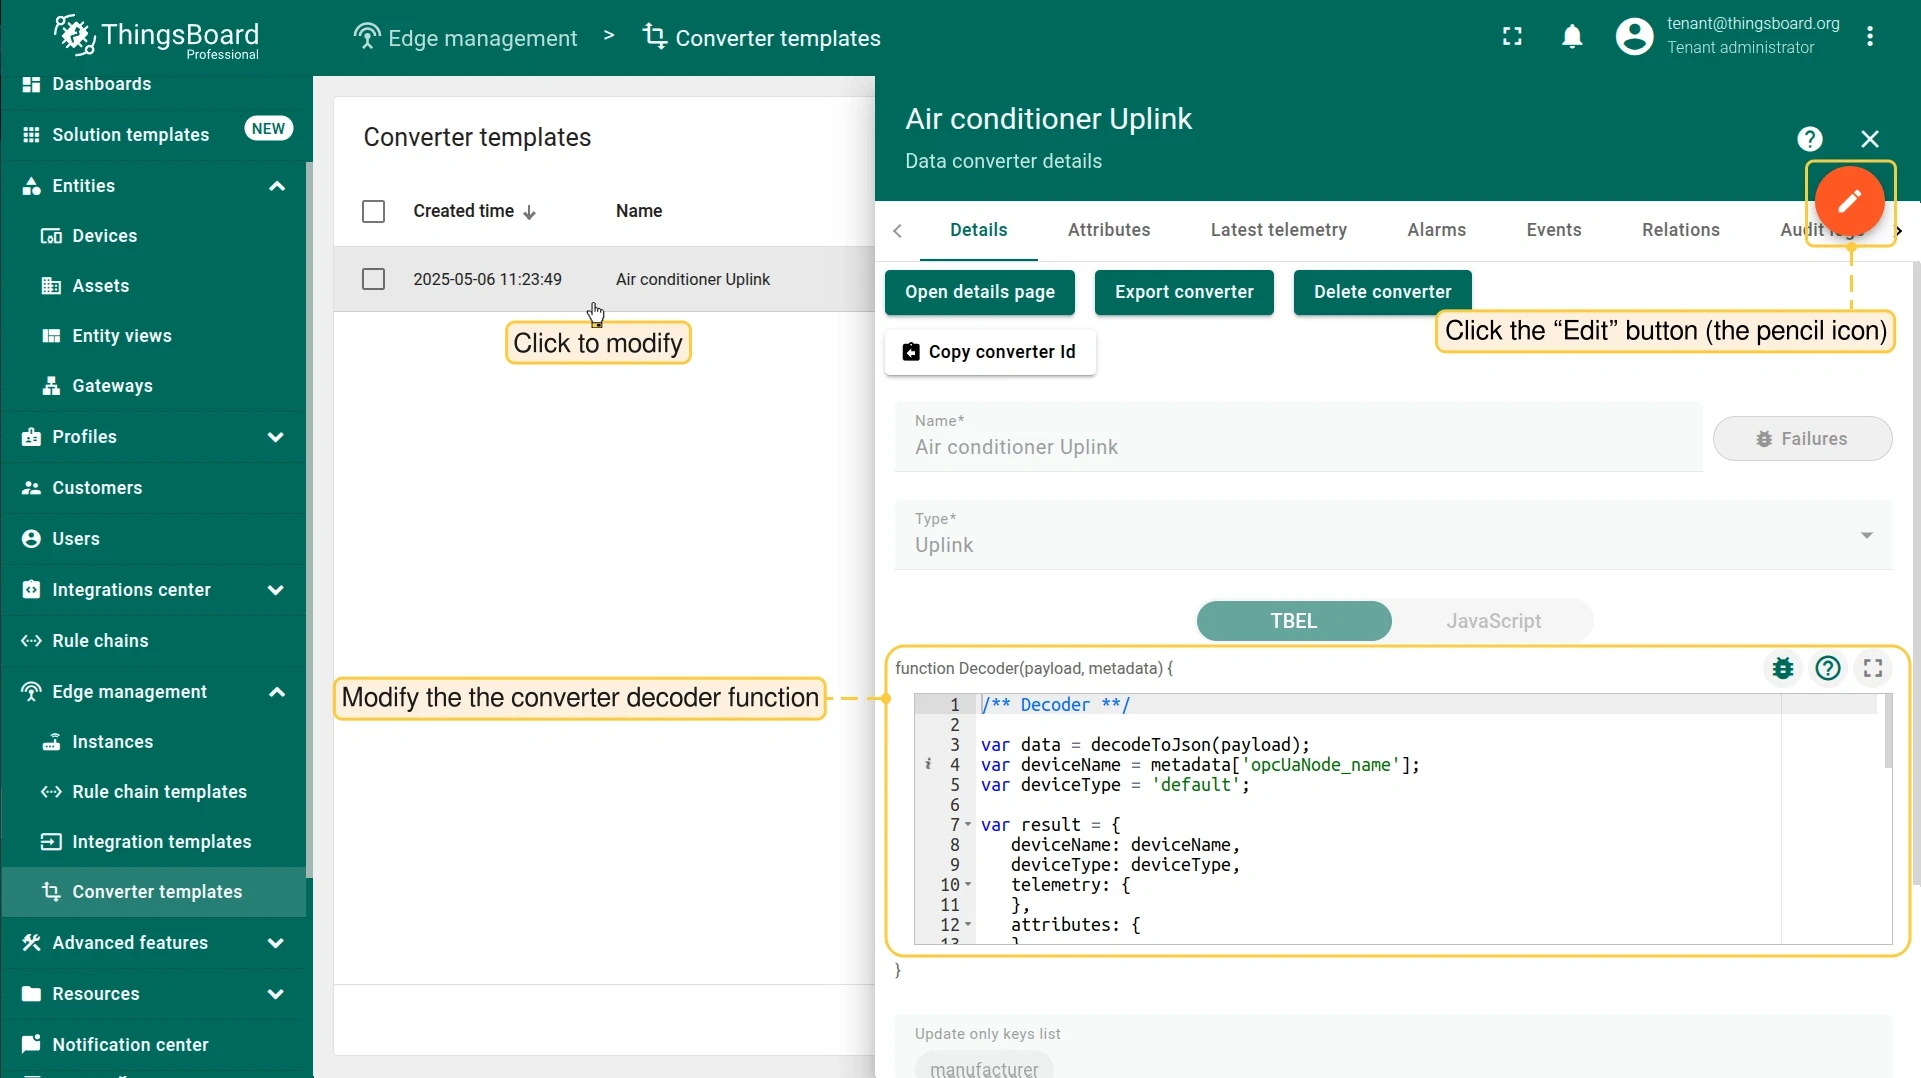
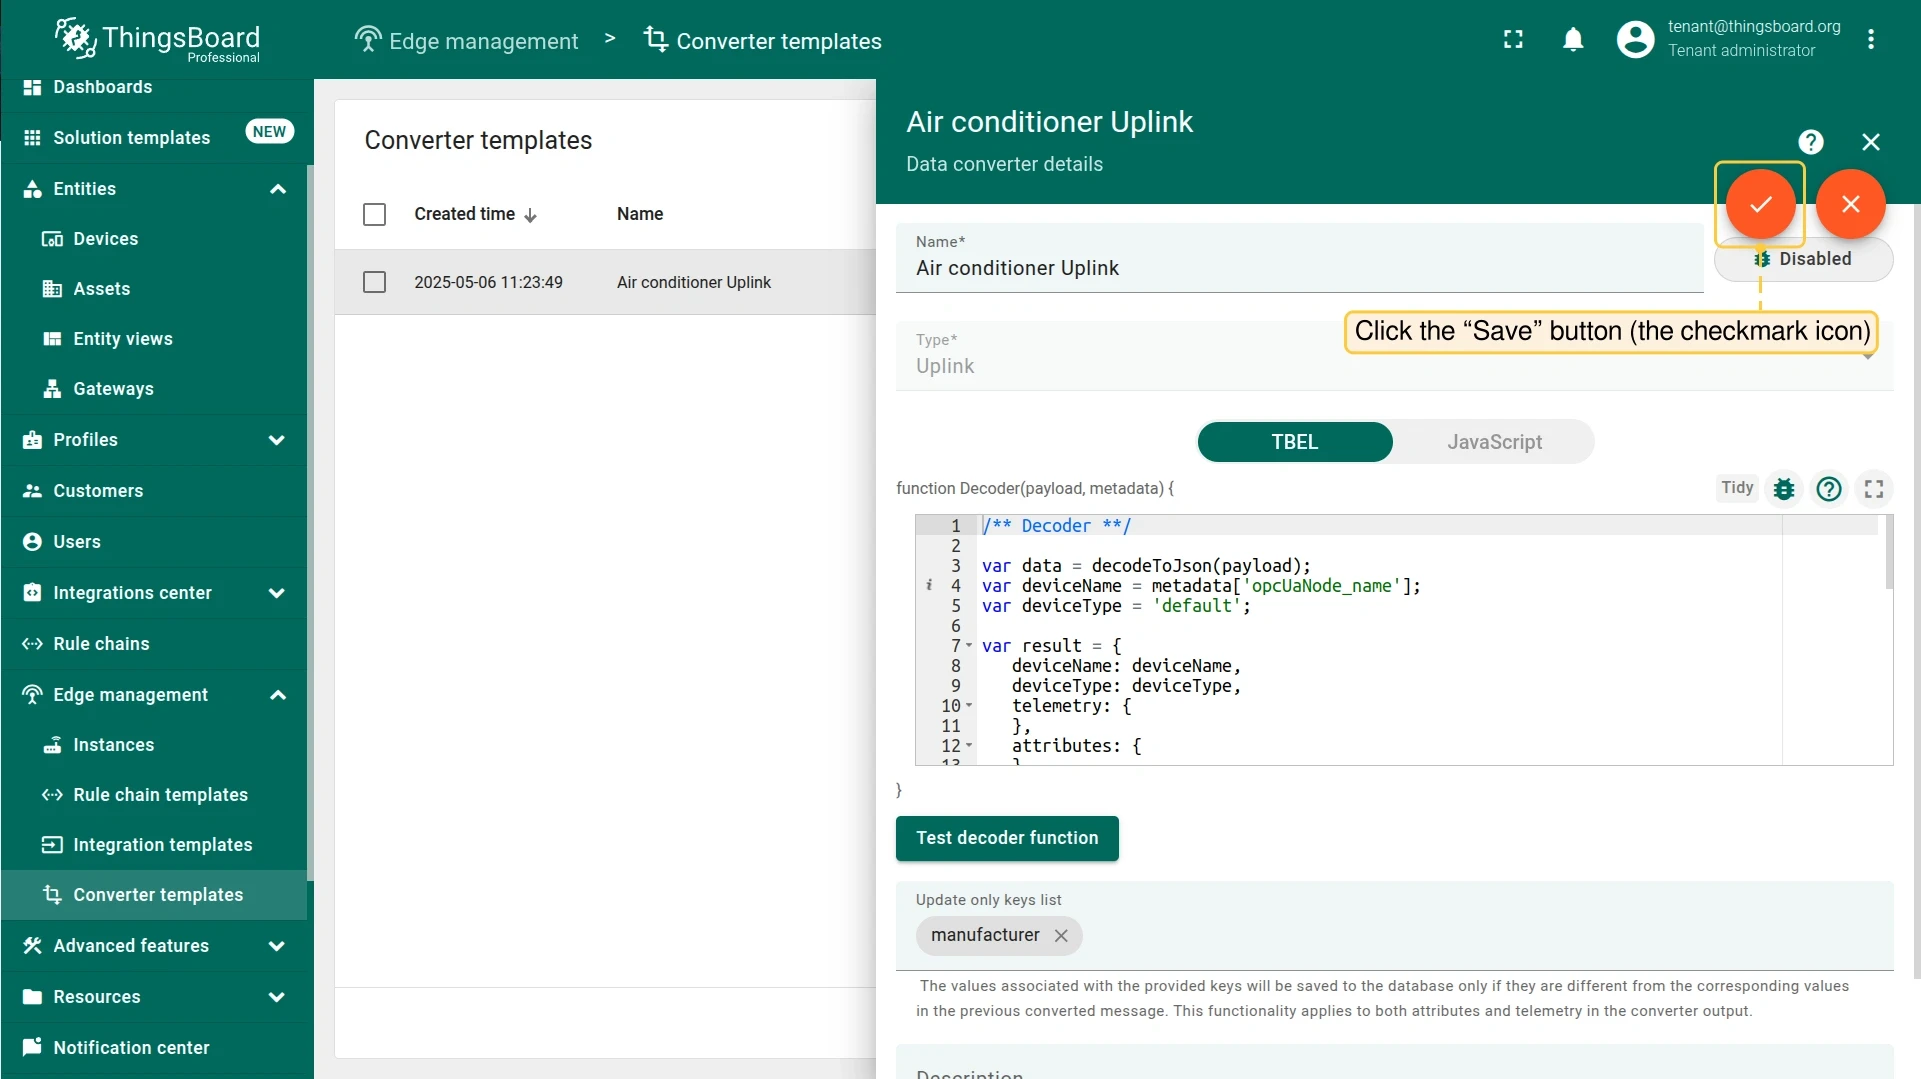
To edit the converter later, open it from the Converter templates page, click the pencil icon, update the decoder, and click the checkmark to save.
Downlink converter
Section titled “Downlink converter”The downlink converter transforms RPC commands from ThingsBoard Edge into OPC UA write values or call methods. The output must have this structure:
[{ "contentType": "JSON", "data": "{\"writeValues\":[],\"callMethods\":[{\"objectId\":\"ns=3;s=AirConditioner_1\",\"methodId\":\"ns=3;s=AirConditioner_1.Stop\",\"args\":[]}]}", "metadata": {}}]| Field | Description |
|---|---|
contentType | Encoding: JSON, TEXT, or BINARY. OPC-UA uses JSON. |
data.writeValues | Array of OPC UA write operations — each has nodeId (ns=<idx>;<type>=<id>) and value. |
data.callMethods | Array of OPC UA method calls — each has objectId, methodId, and args. |
metadata | Not used by OPC-UA integration; leave empty. |
-
Create another converter on the Converter templates page. Enable Debug mode.
-
Paste the following script into the Encoder function field and save:
/** Encoder **/var data = {writeValues: [],callMethods: []};if (msgType === 'RPC_CALL_FROM_SERVER_TO_DEVICE') {if (msg.method === 'setState') {var targetMethod = msg.params === 'true' ? 'Start' : 'Stop';var writeValue = {nodeId: 'ns=' + metadata['cs_namespaceIndex'] + ';s=' + metadata['deviceName'],value: msg.params};data.writeValues.push(writeValue);var callMethod = {objectId: 'ns=' + metadata['cs_namespaceIndex'] + ';s=' + metadata['deviceName'],methodId: 'ns=' + metadata['cs_namespaceIndex'] + ';s=' + metadata['deviceName'] + '.' + targetMethod,args: []};data.callMethods.push(callMethod);}}var result = {contentType: "JSON",data: JSON.stringify(data),metadata: {}};return result;
Create integration template
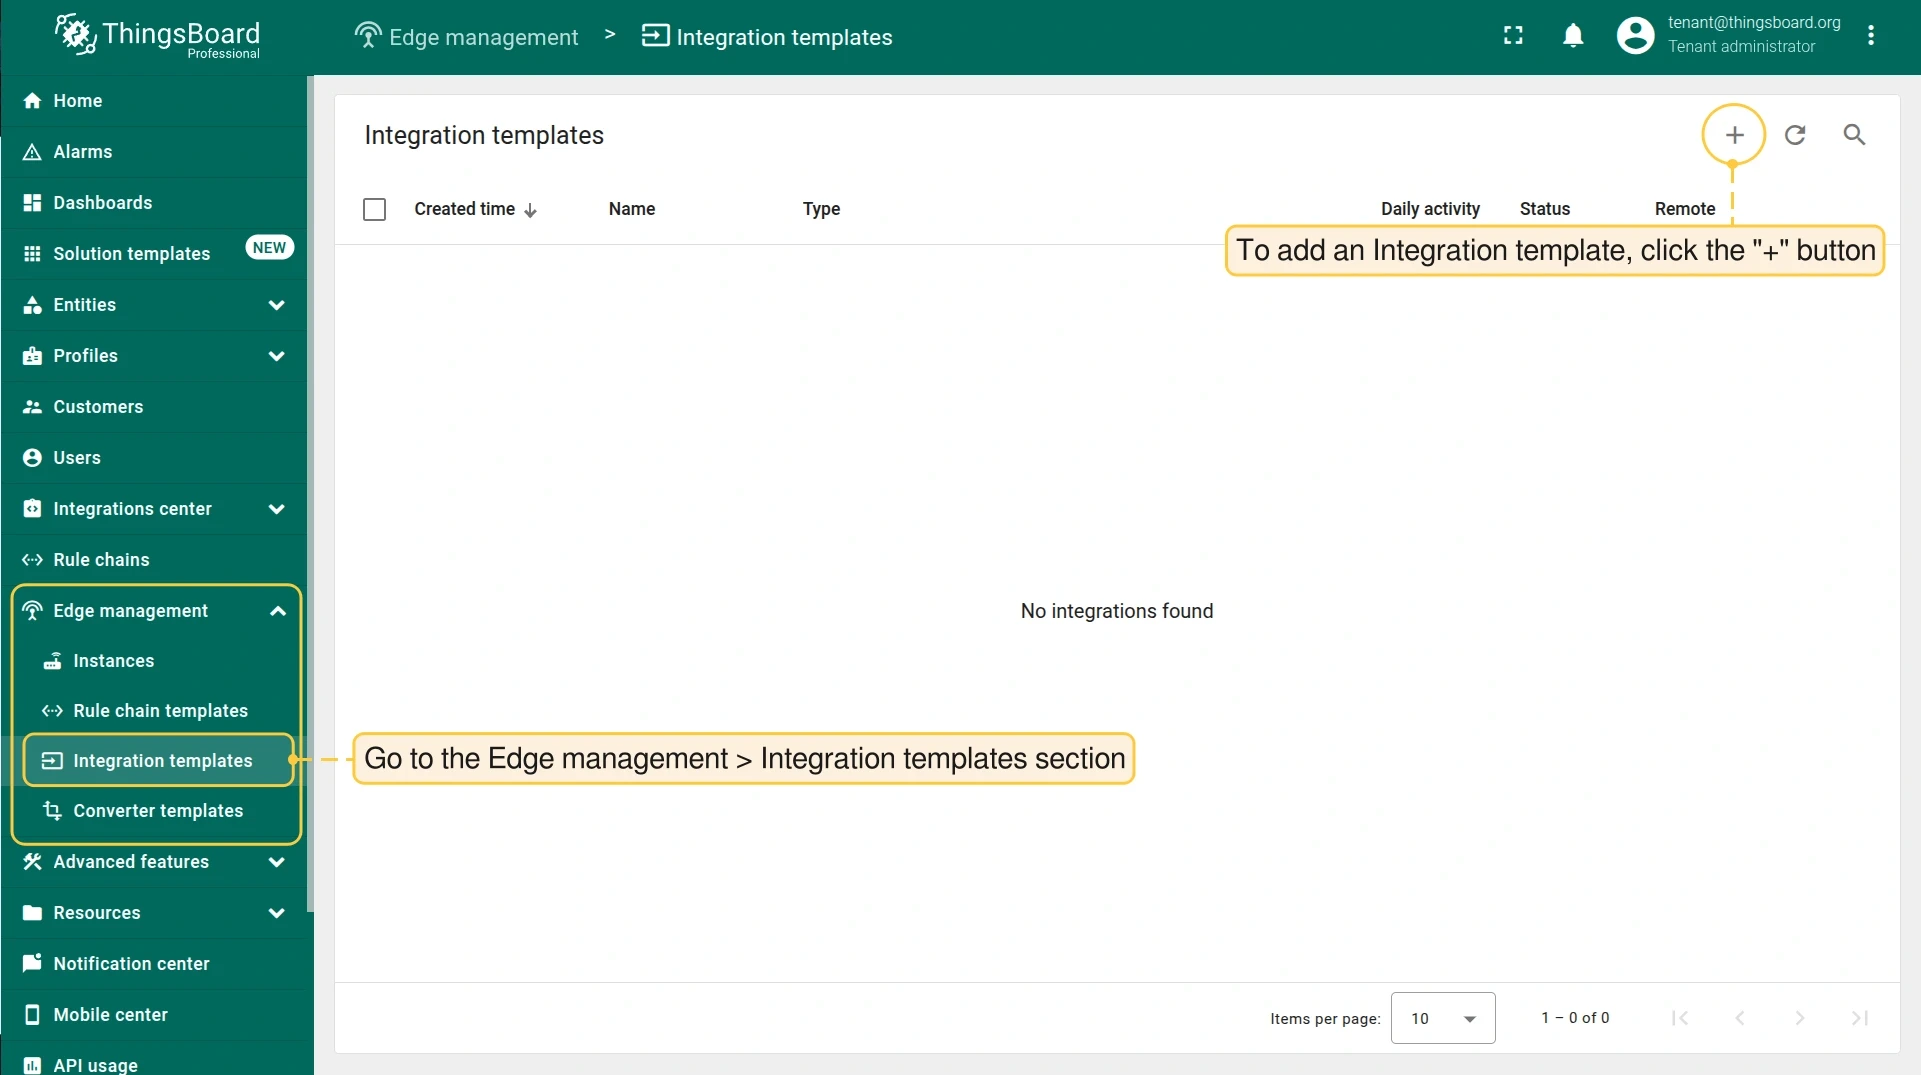
Section titled “Create integration template”-
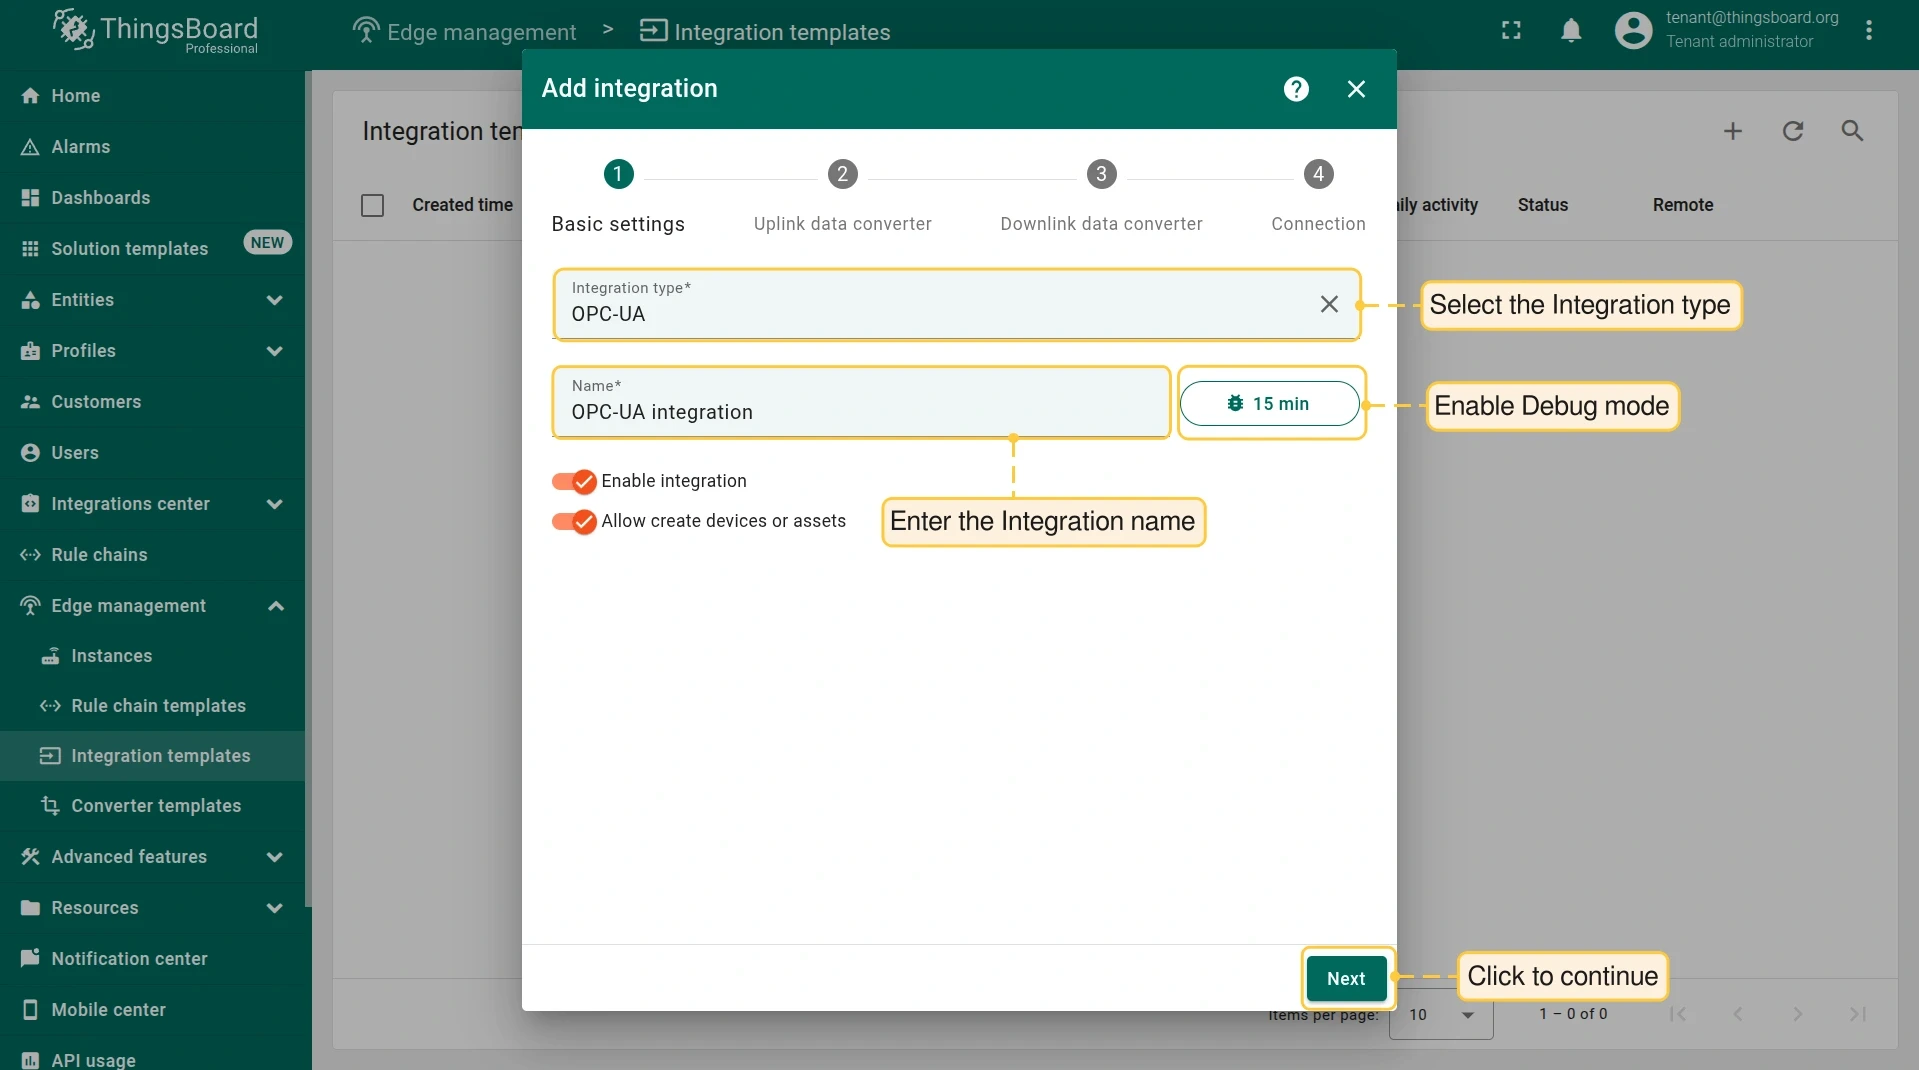
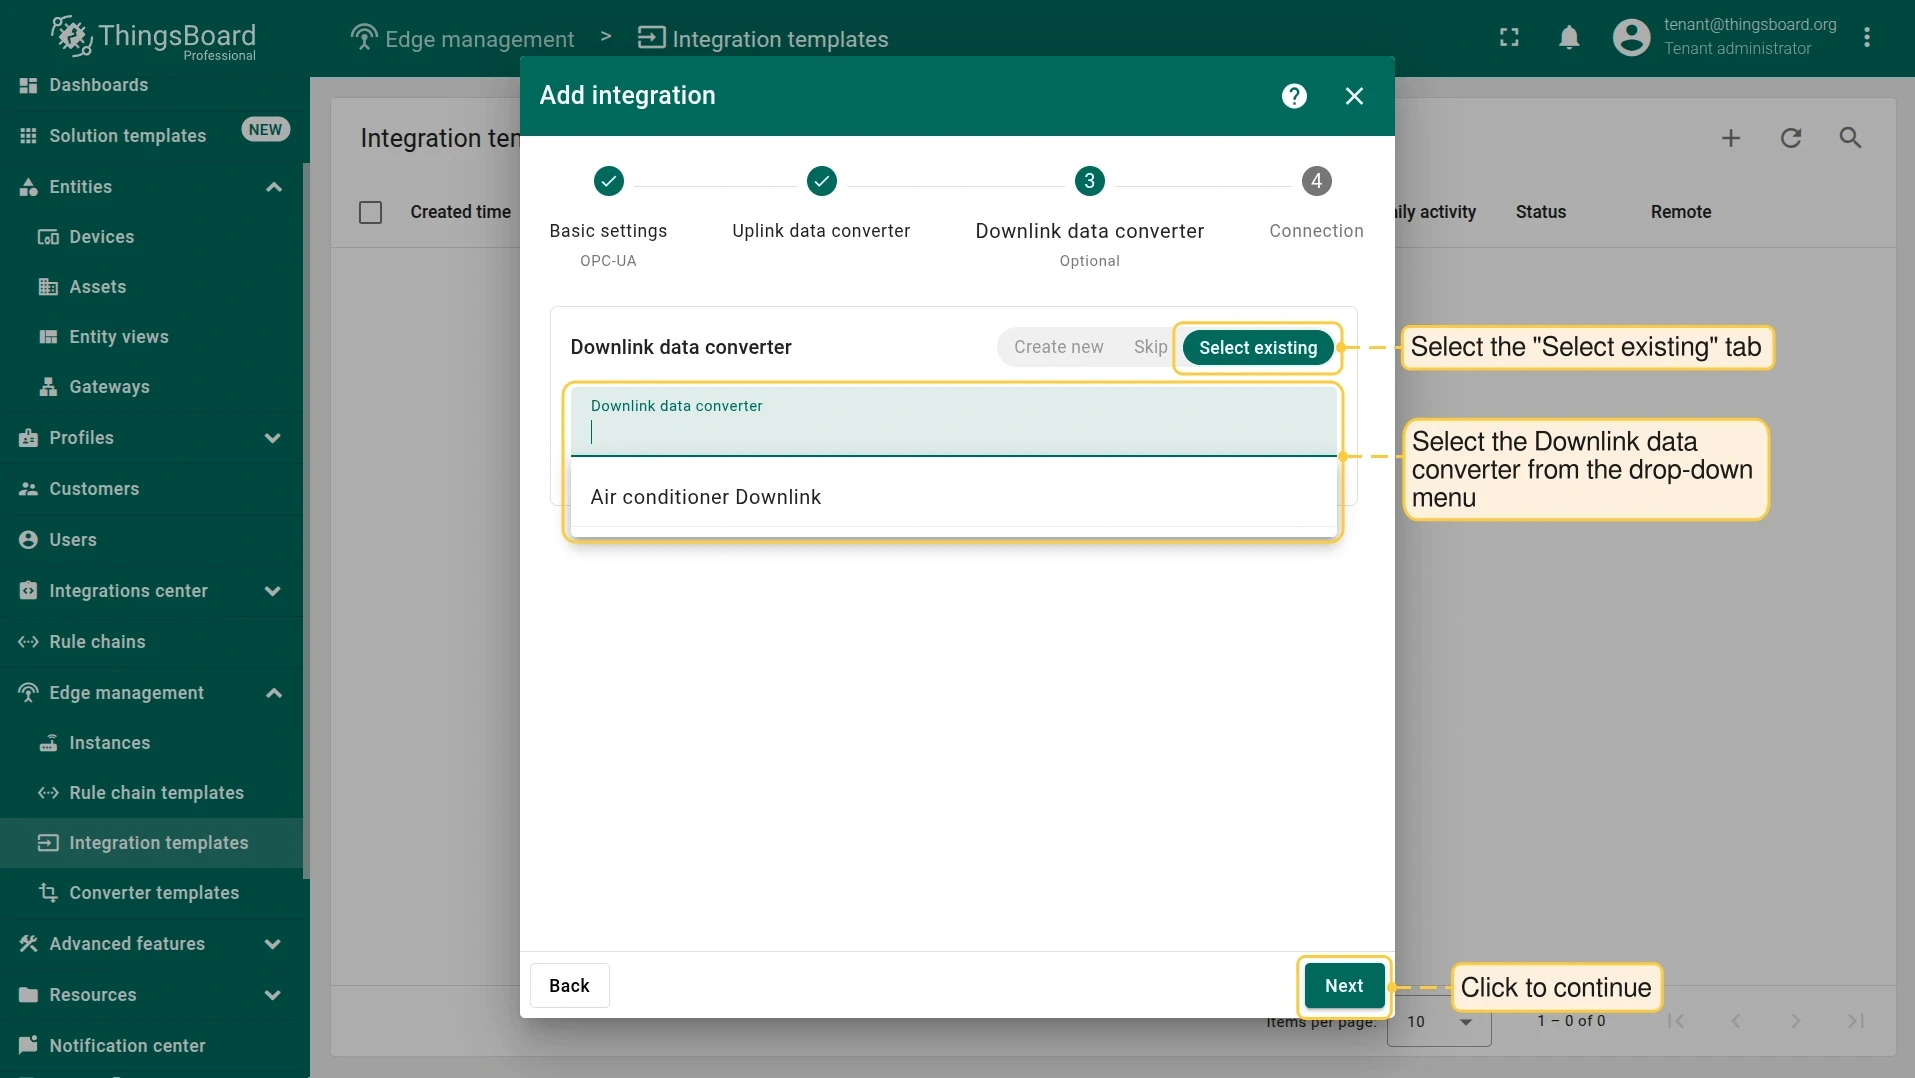
Go to Edge management > Integration templates and click +. Select OPC-UA, name it OPC-UA air conditioners, enable Debug mode, and attach the uplink and downlink converters created above.
-
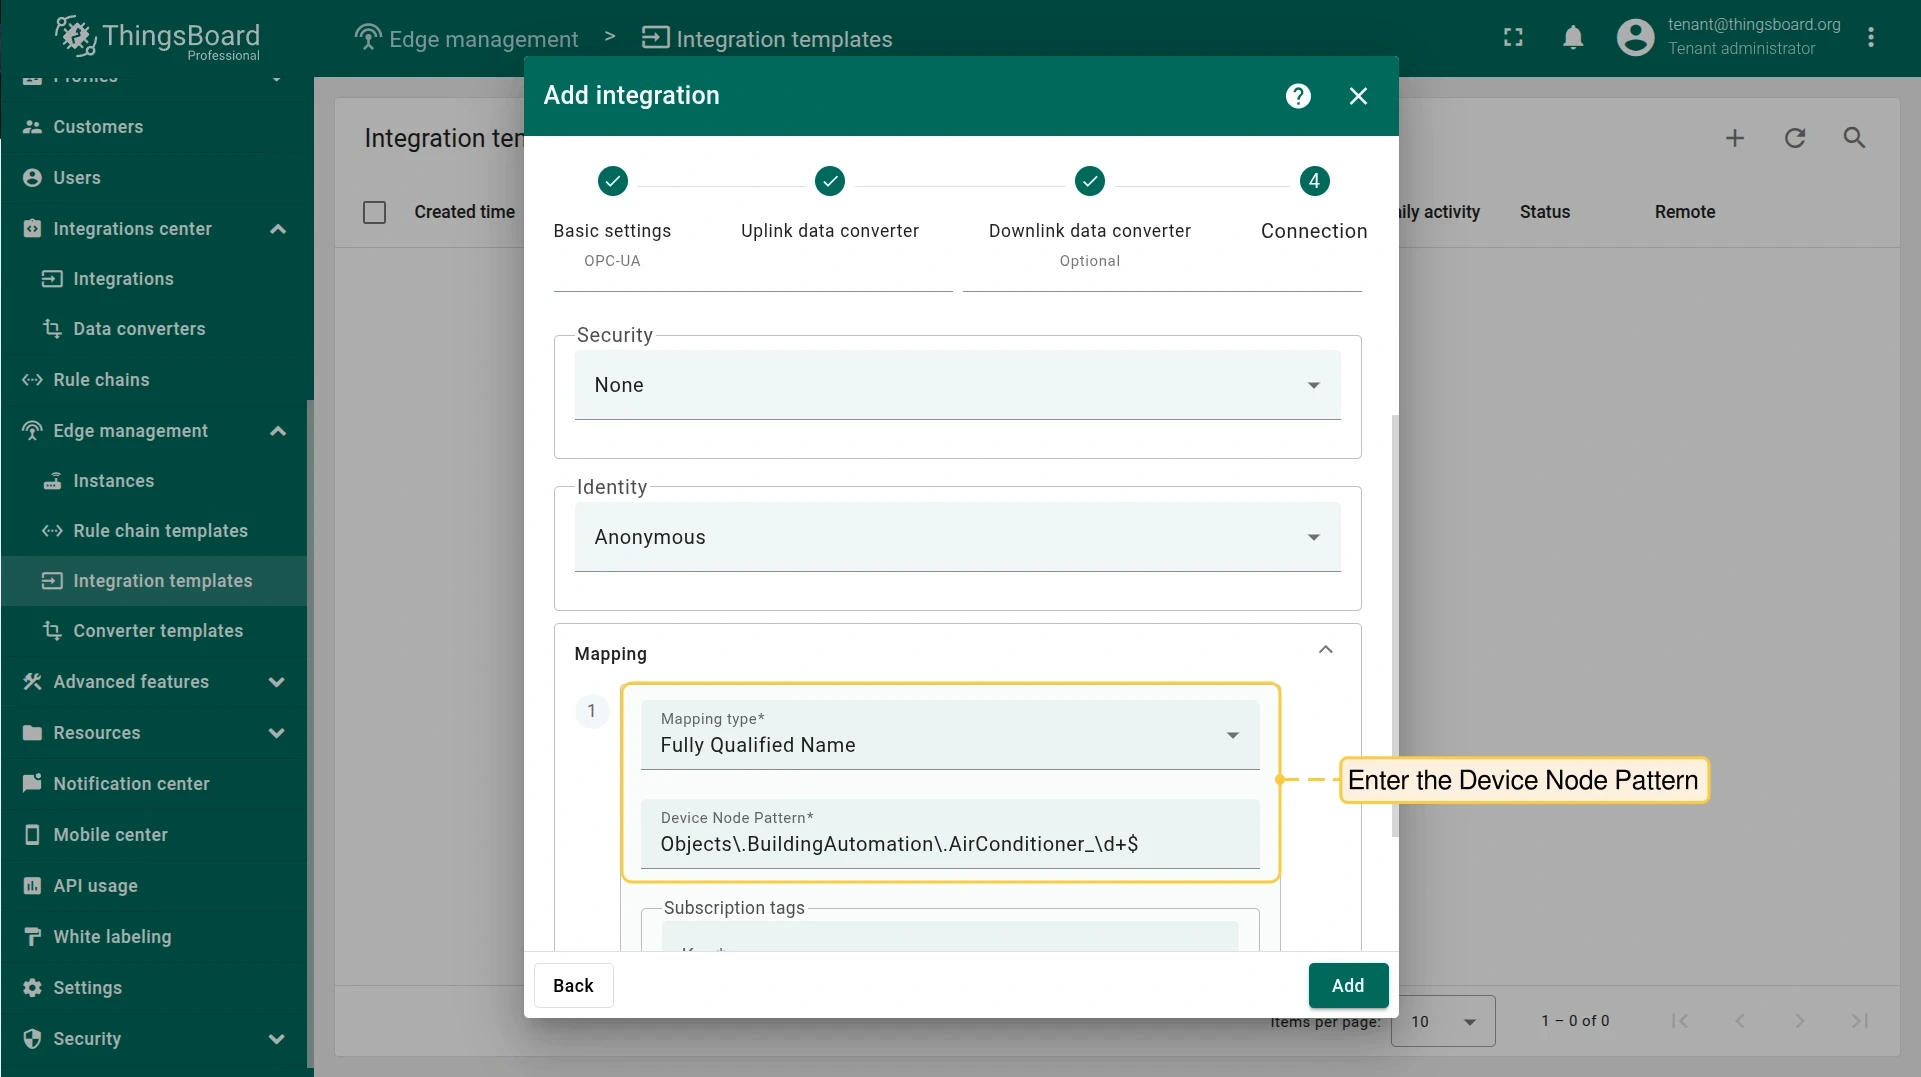
Fill in the connection and mapping fields:
Field Value Application name (leave empty) Application URI (leave empty) Host ${{endpointHost}}Port Your OPC UA server endpoint port Scan period (seconds) 10Timeout (milliseconds) 5000Security NoneIdentity AnonymousMapping type Fully Qualified NameDevice node pattern Objects\.BuildingAutomation\.AirConditioner_\d+$The device node pattern is a regular expression that matches node FQNs to device names.
Objects\.BuildingAutomation\.AirConditioner_\d+$matches nodesAirConditioner_1throughAirConditioner_N. -
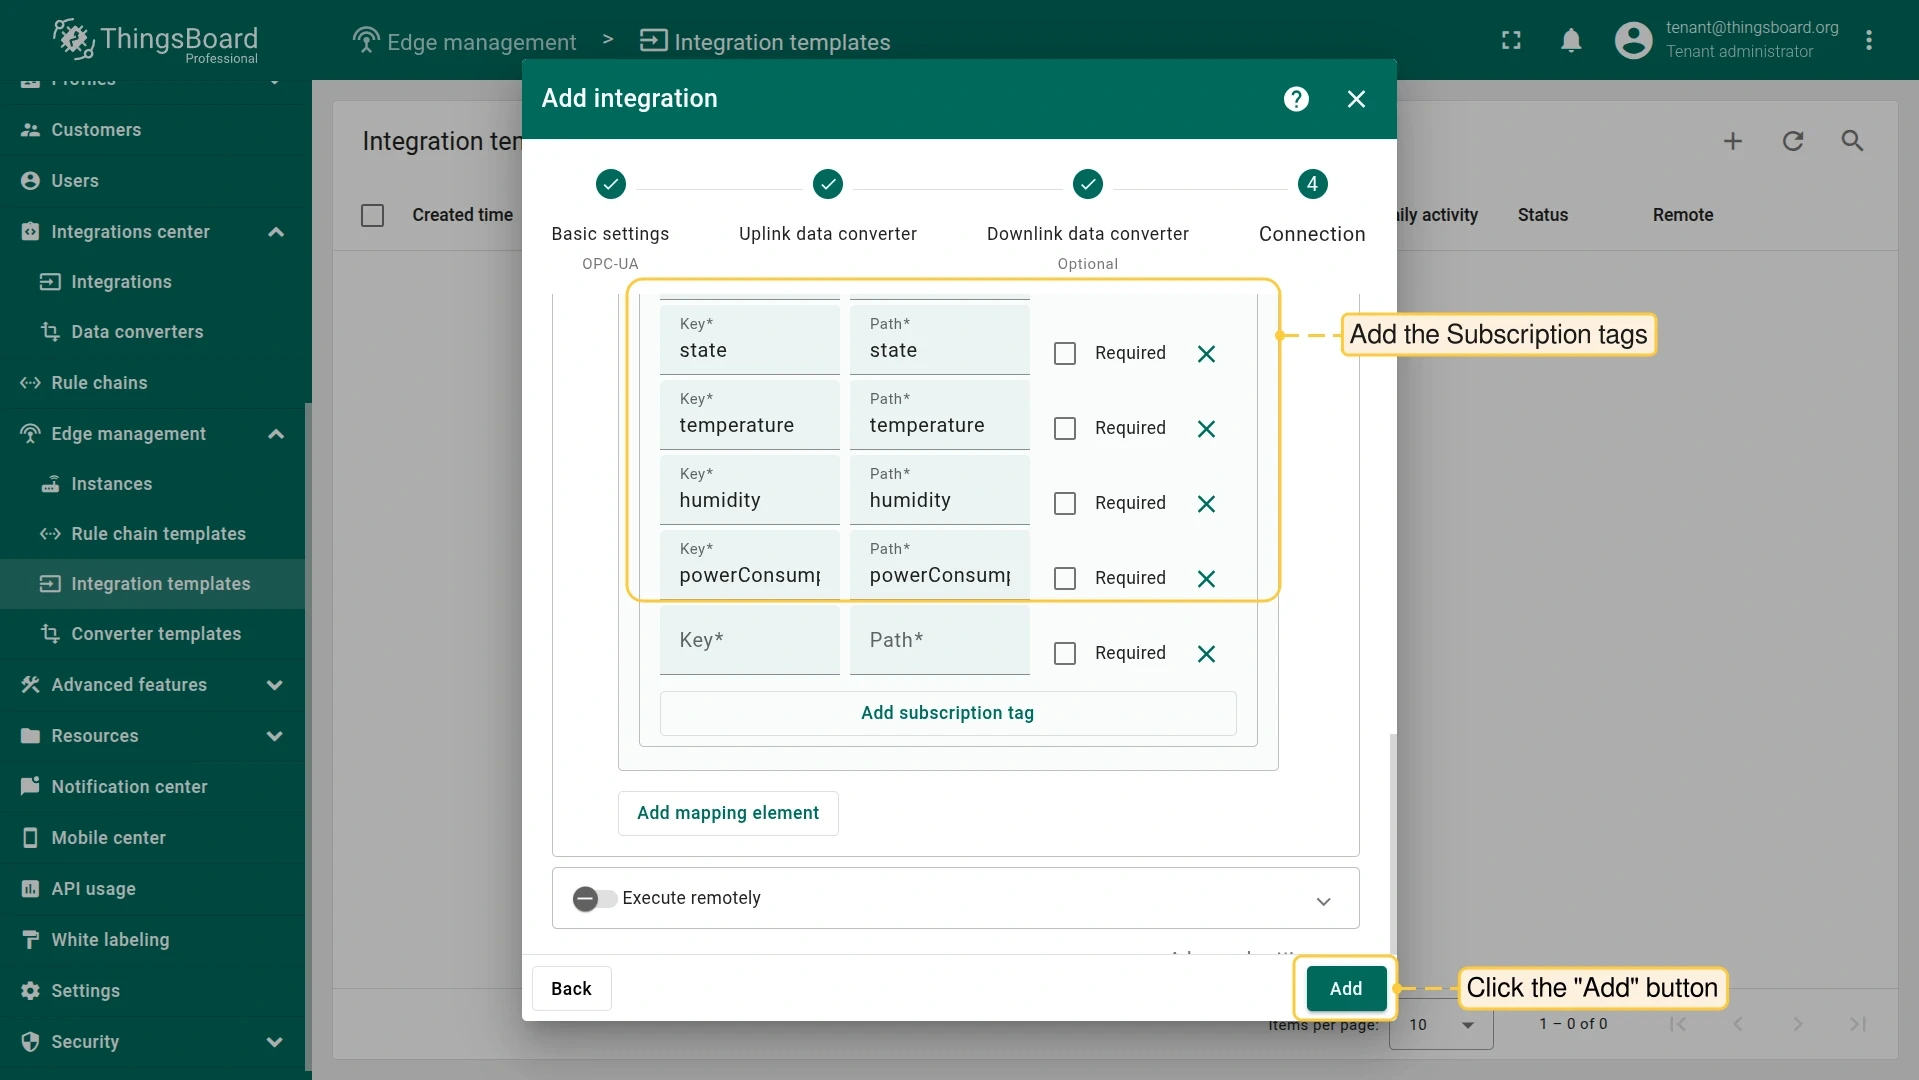
Add the following Subscription tags (node paths to subscribe to, with their key names in the output):
Path Key stateStatetemperatureTemperaturehumidityHumiditypowerConsumptionPowerConsumption -
Click Add to save the integration template.

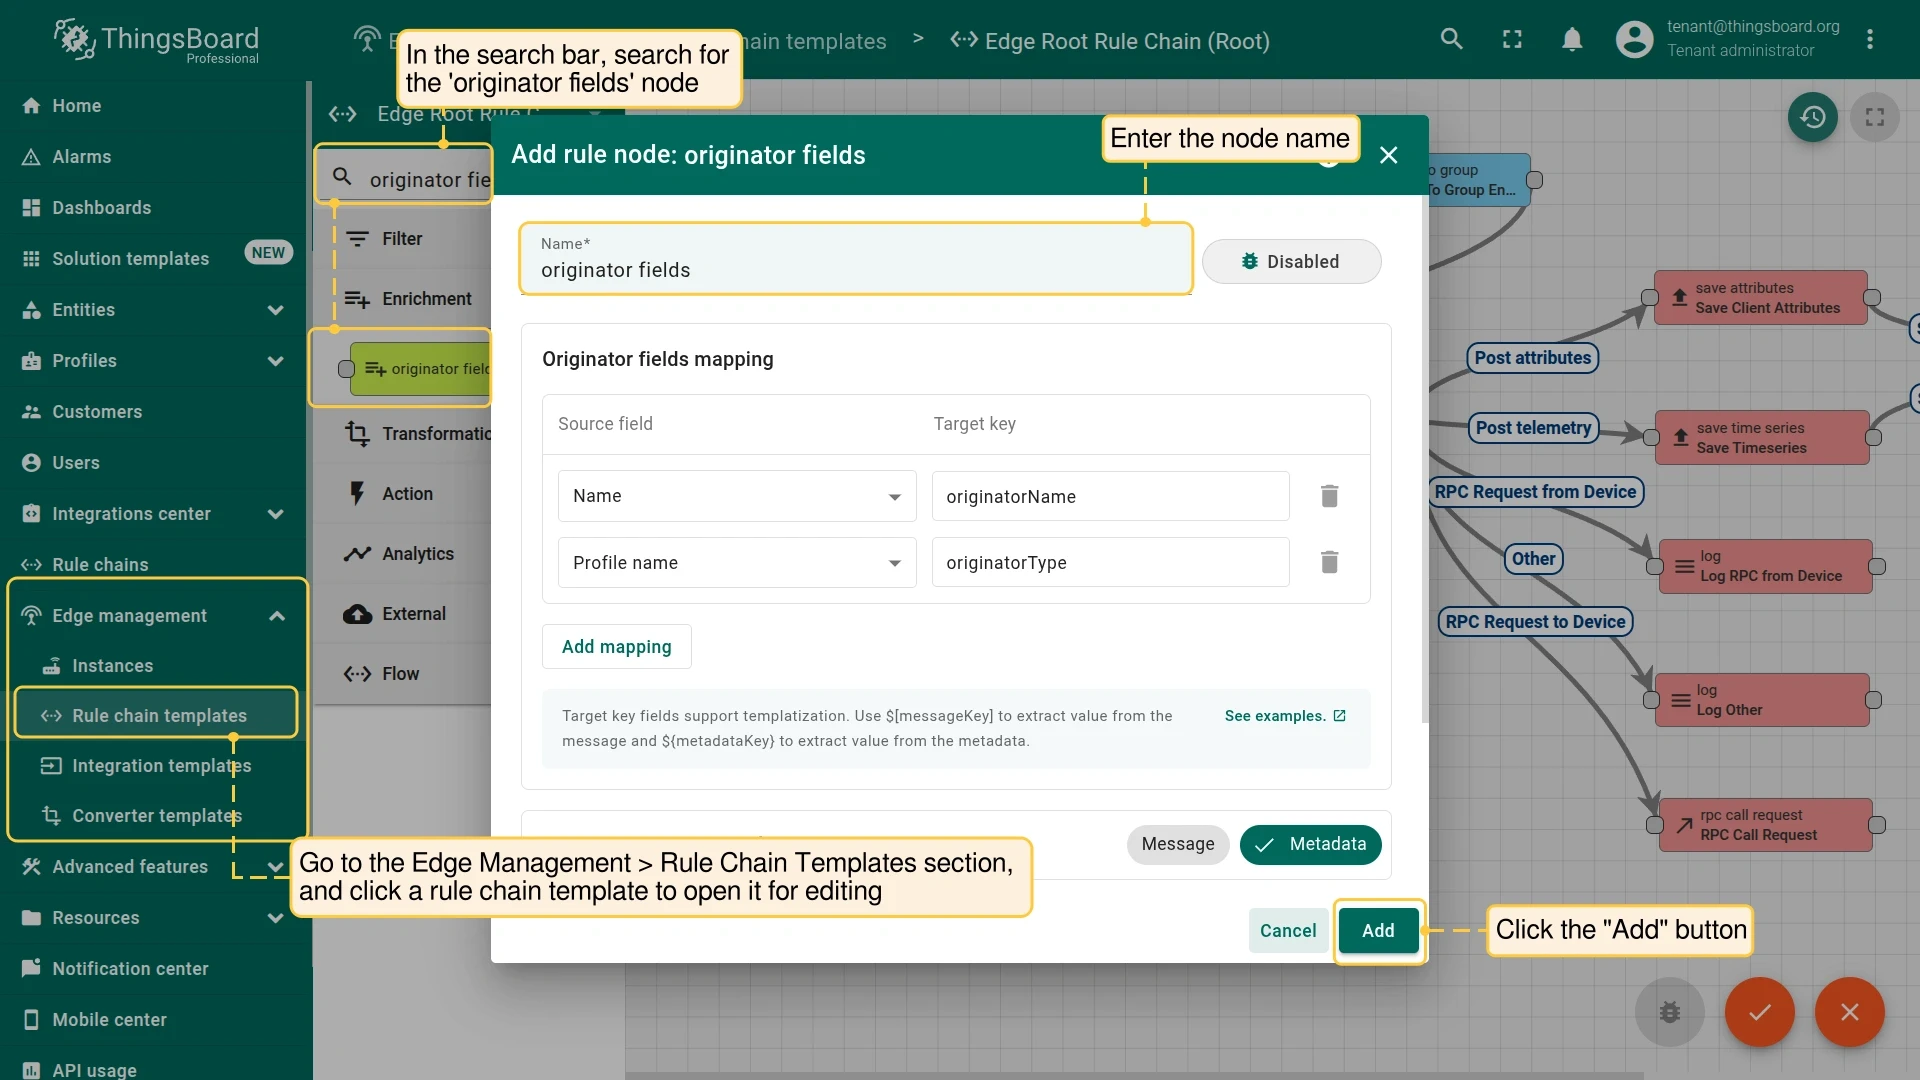
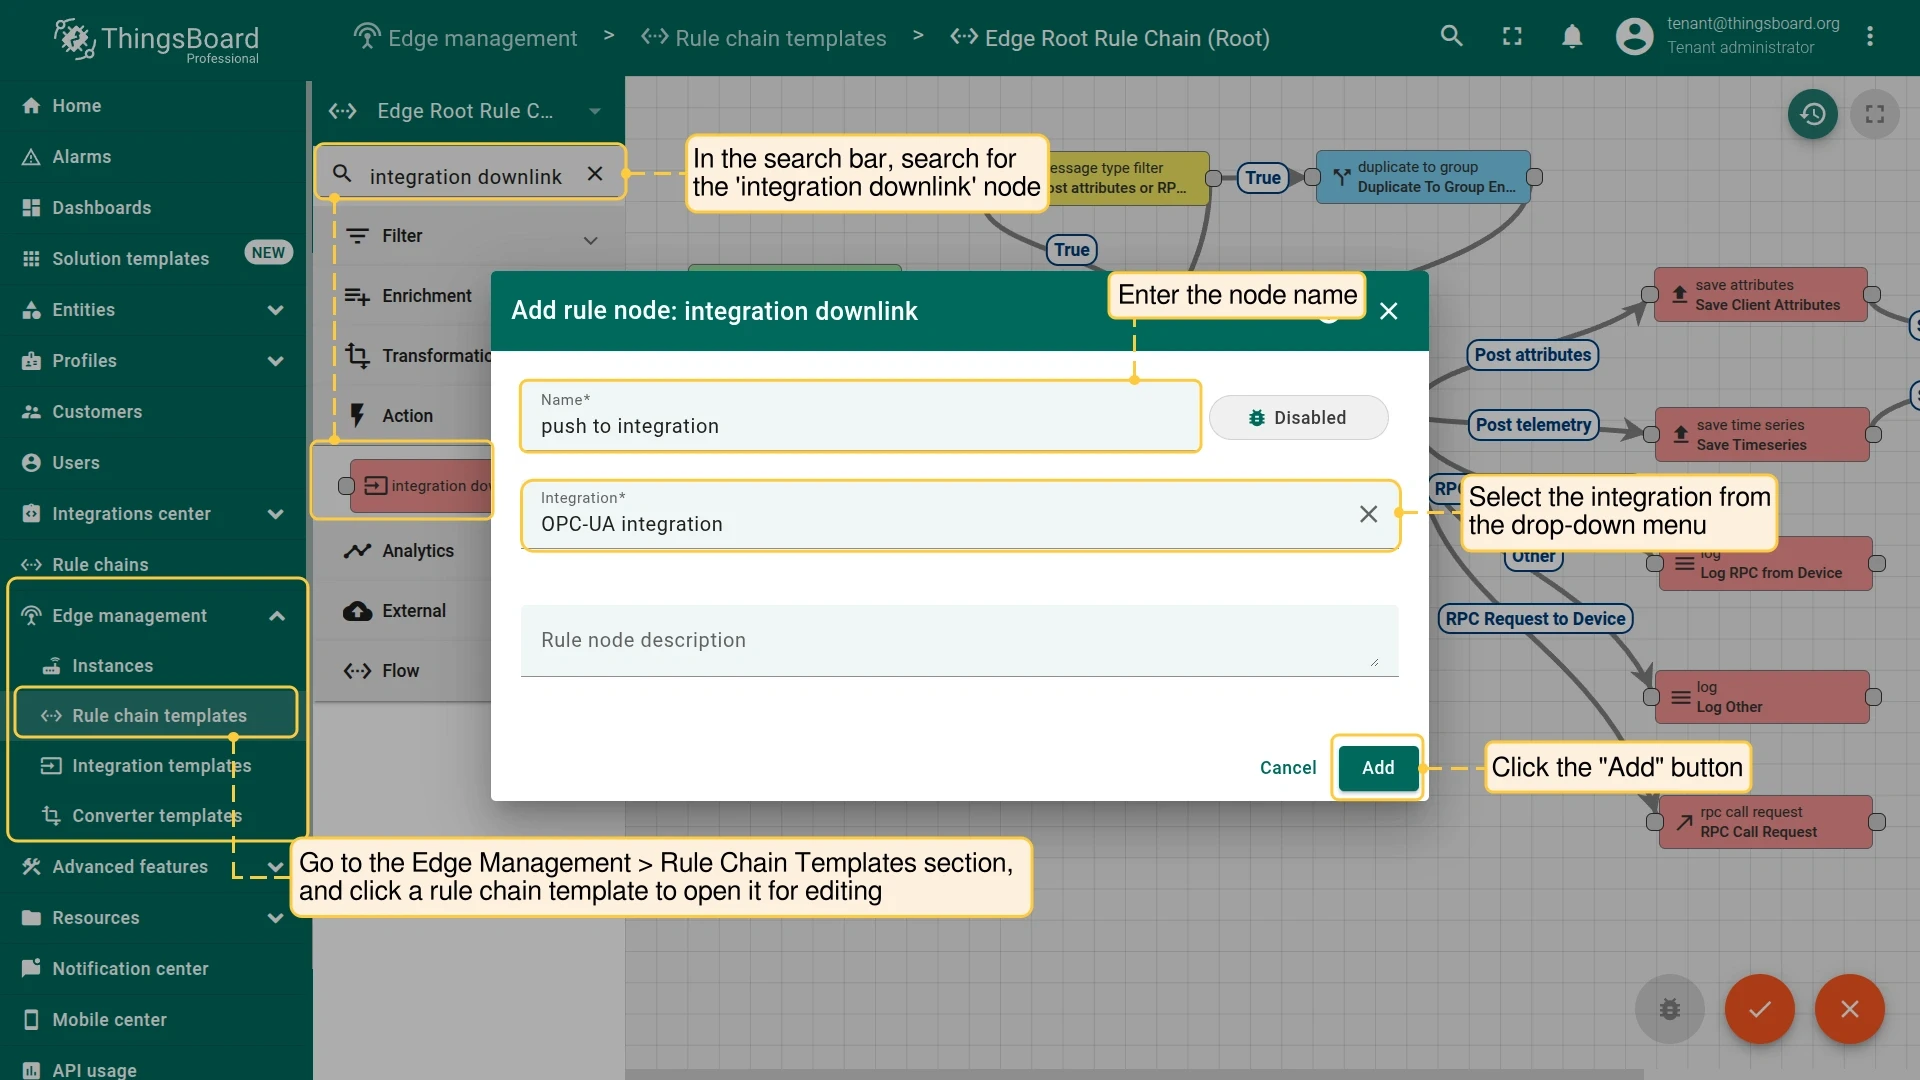
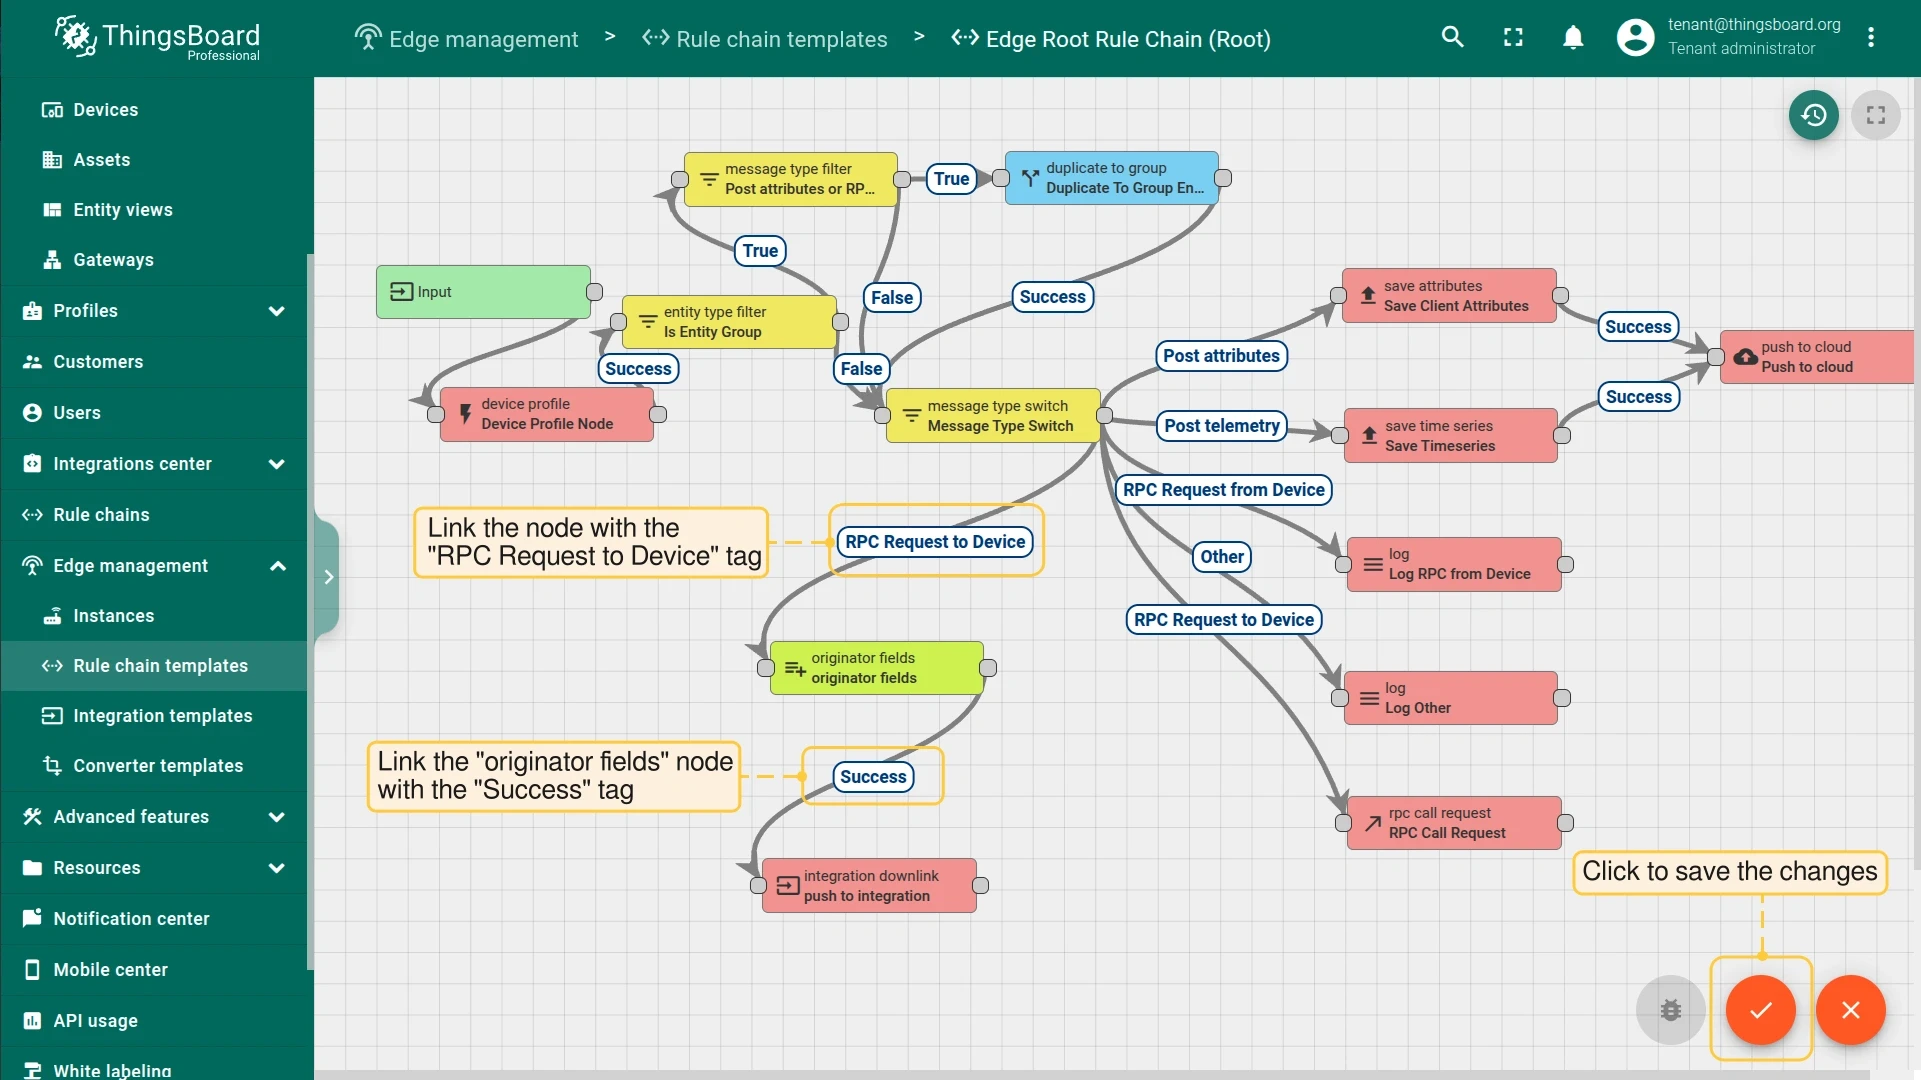
Modify Edge Root Rule Chain for downlinks
Section titled “Modify Edge Root Rule Chain for downlinks”To send RPC commands from ThingsBoard Edge to OPC UA nodes, add two rule nodes to the Edge Root Rule Chain.
Air conditioners dashboard
Section titled “Air conditioners dashboard”To visualize air conditioner data and test RPC commands, import the air conditioners dashboard and assign it to the Edge.
-
Download the airconditioners_dashboard.json file.
-
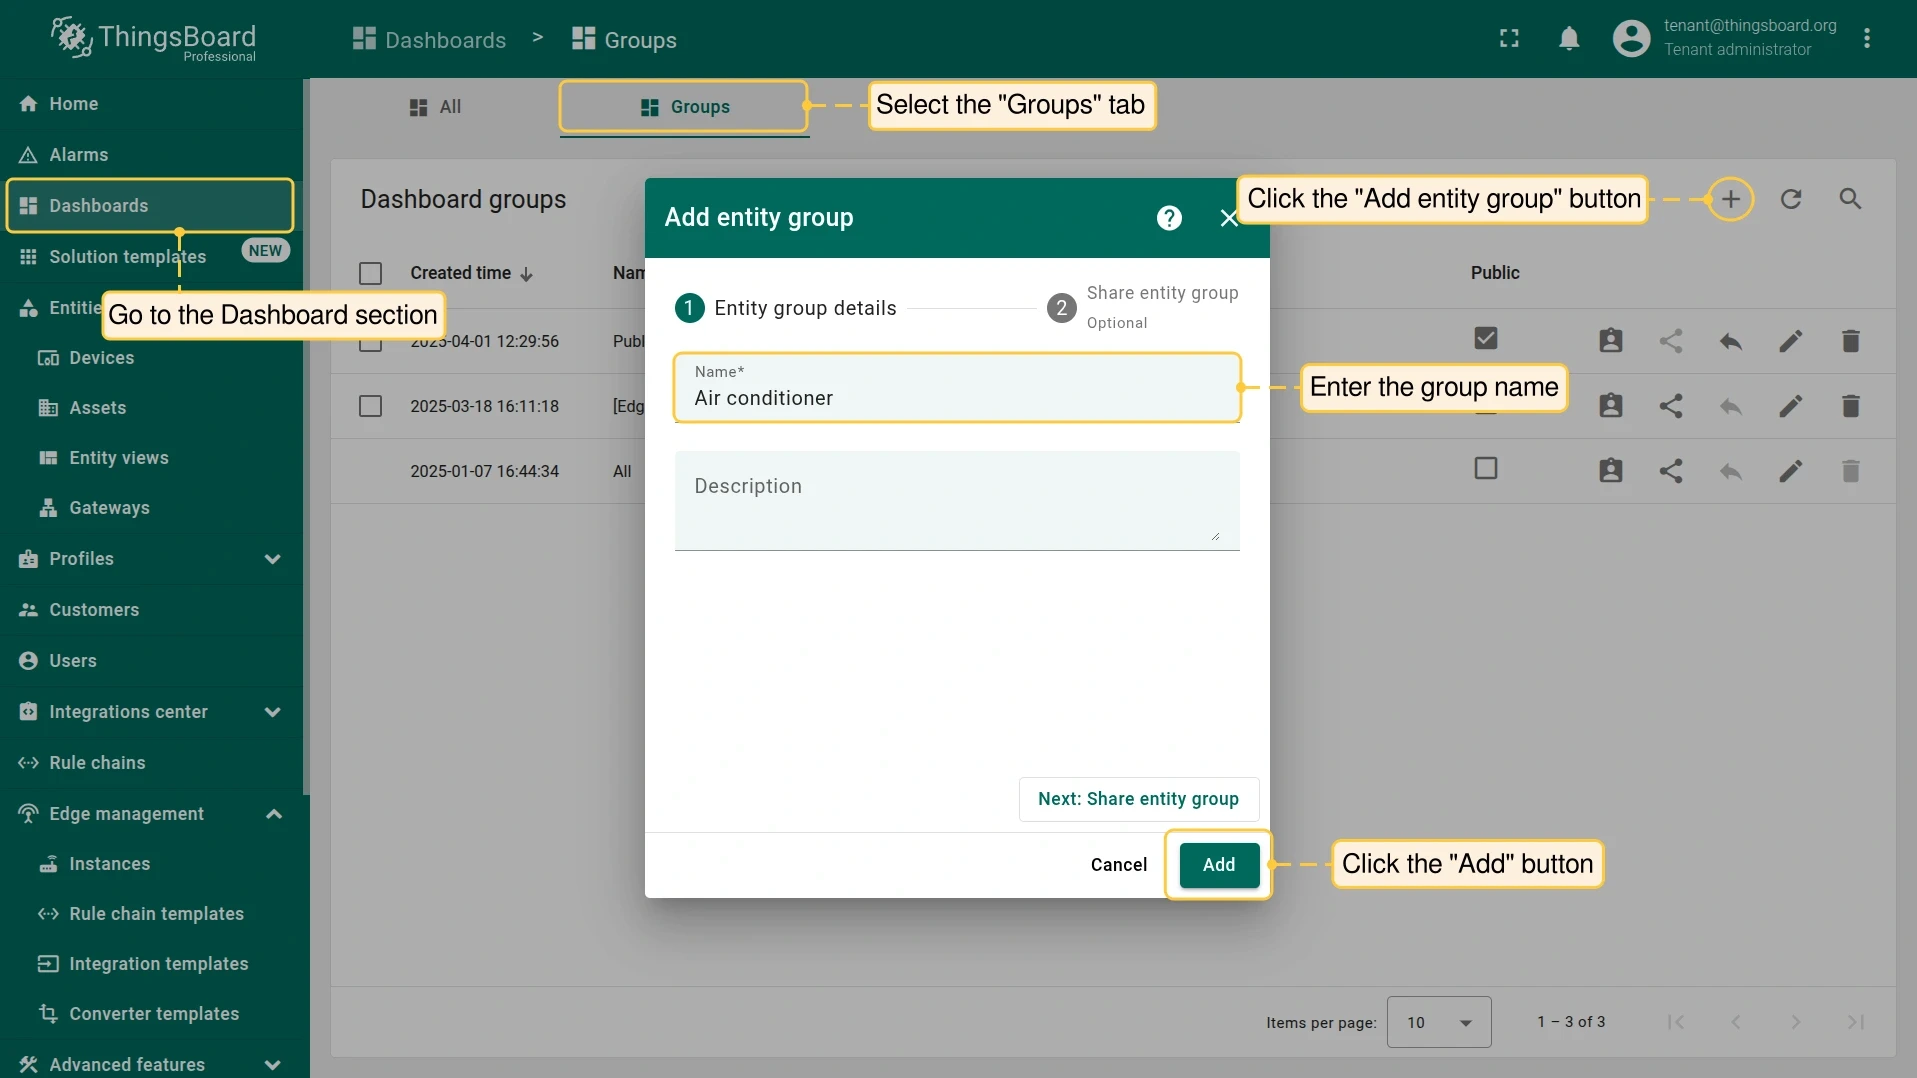
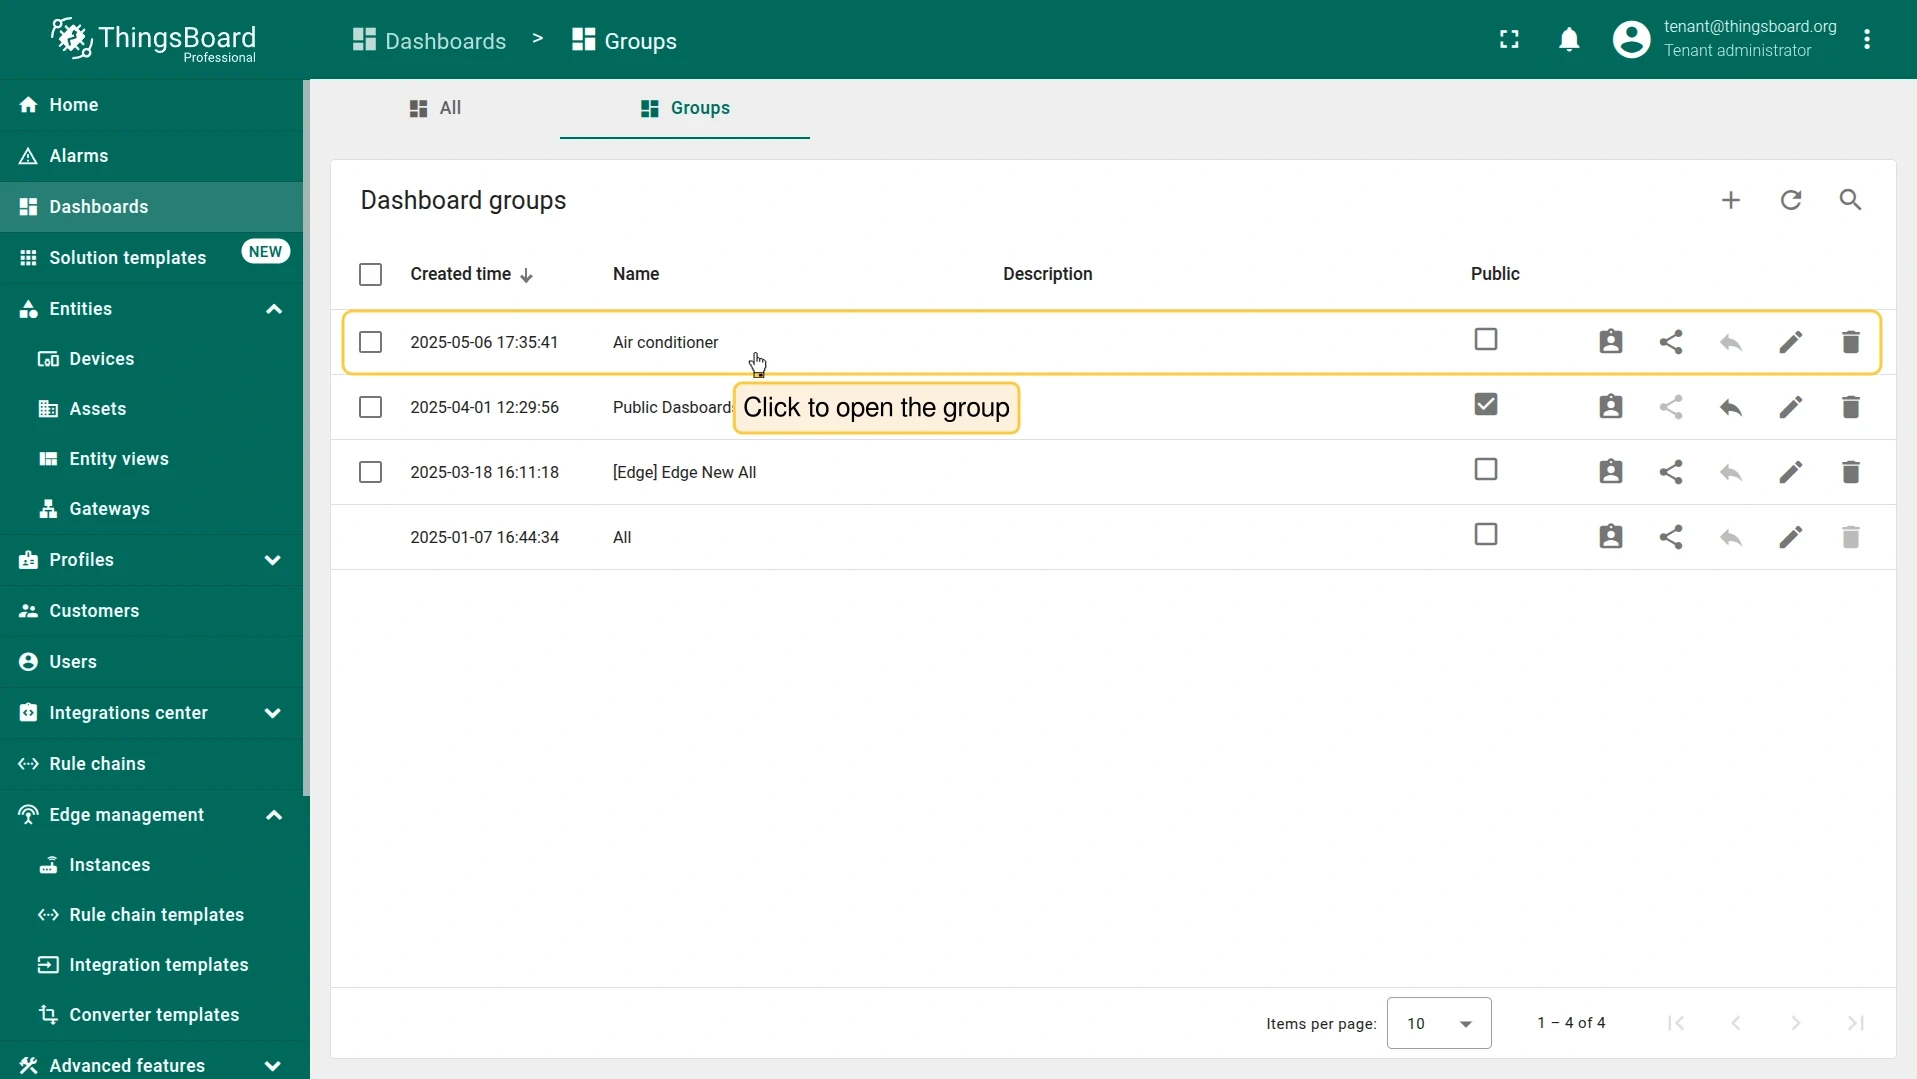
In the Cloud, go to Dashboards, open the Groups tab, and create a new group named Air conditioner.
-
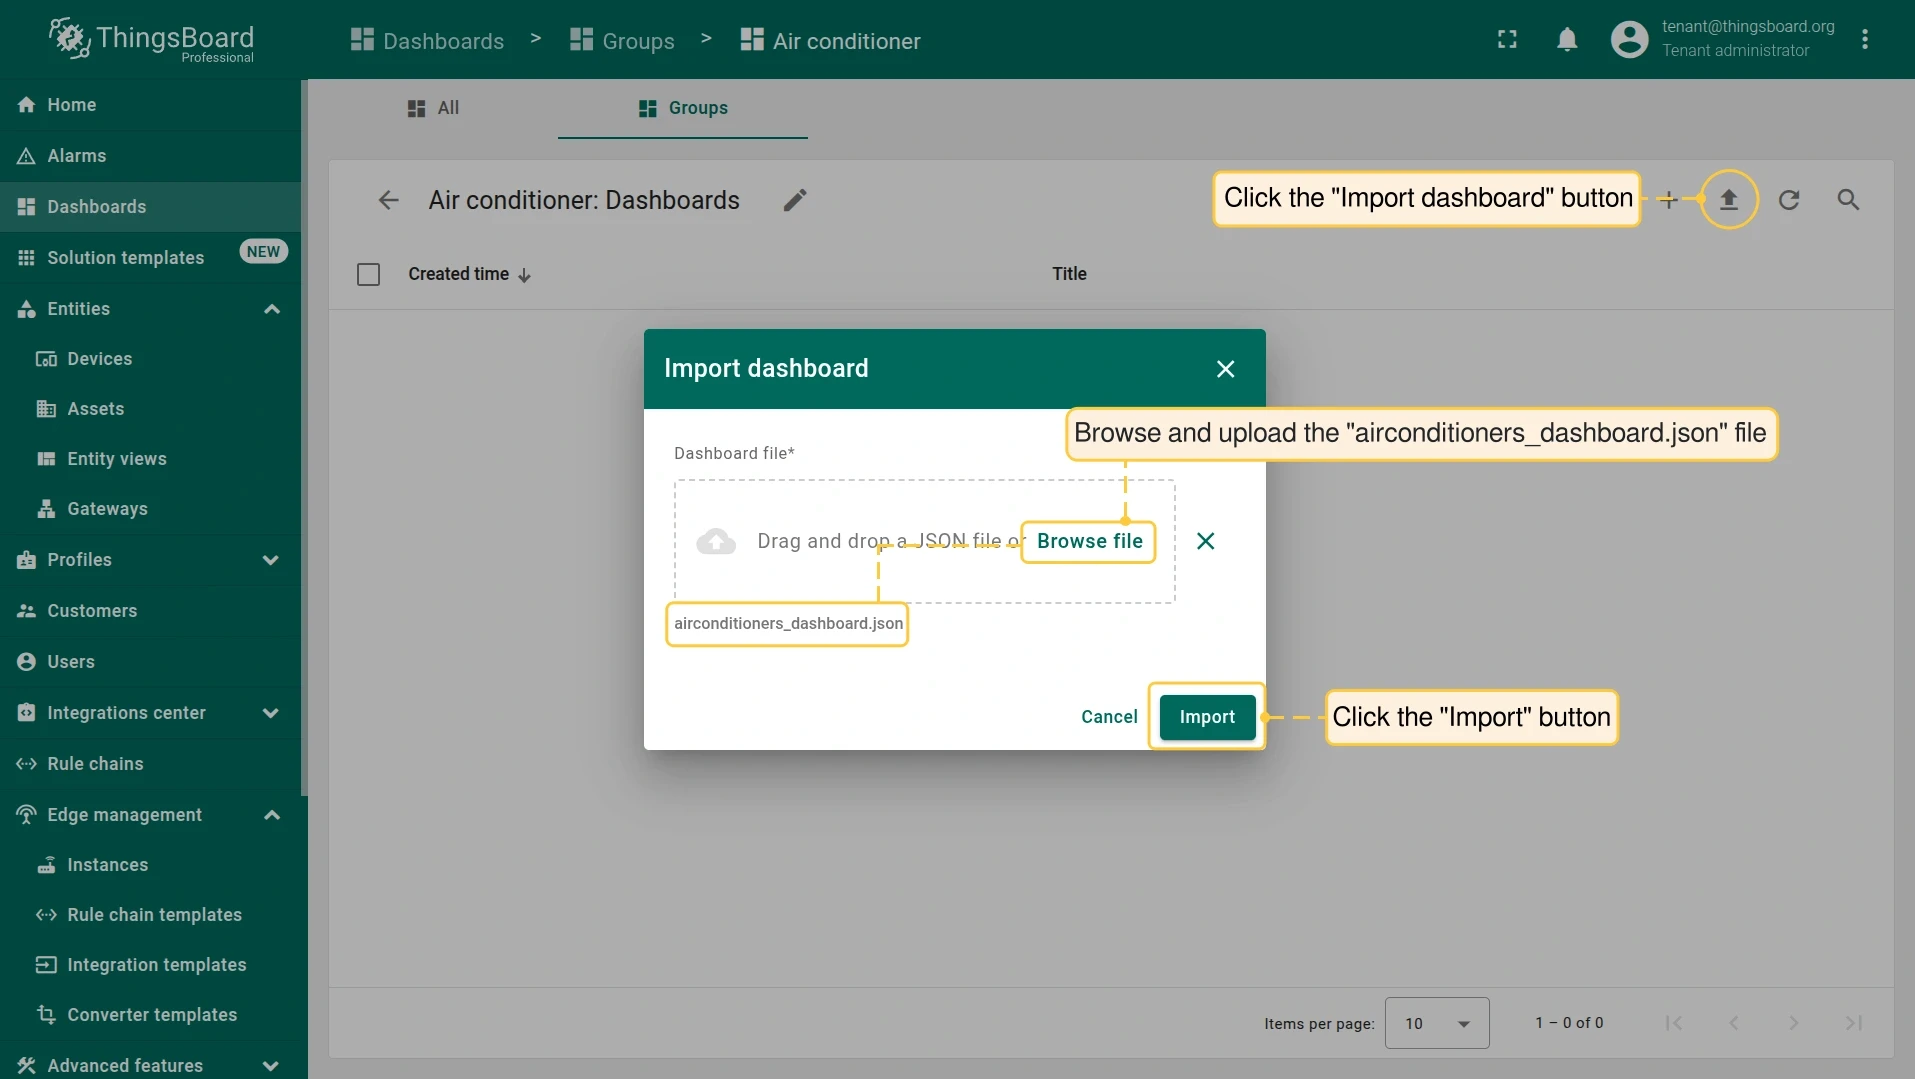
Click Import dashboard, browse to the
airconditioners_dashboard.jsonfile, and click Import. -
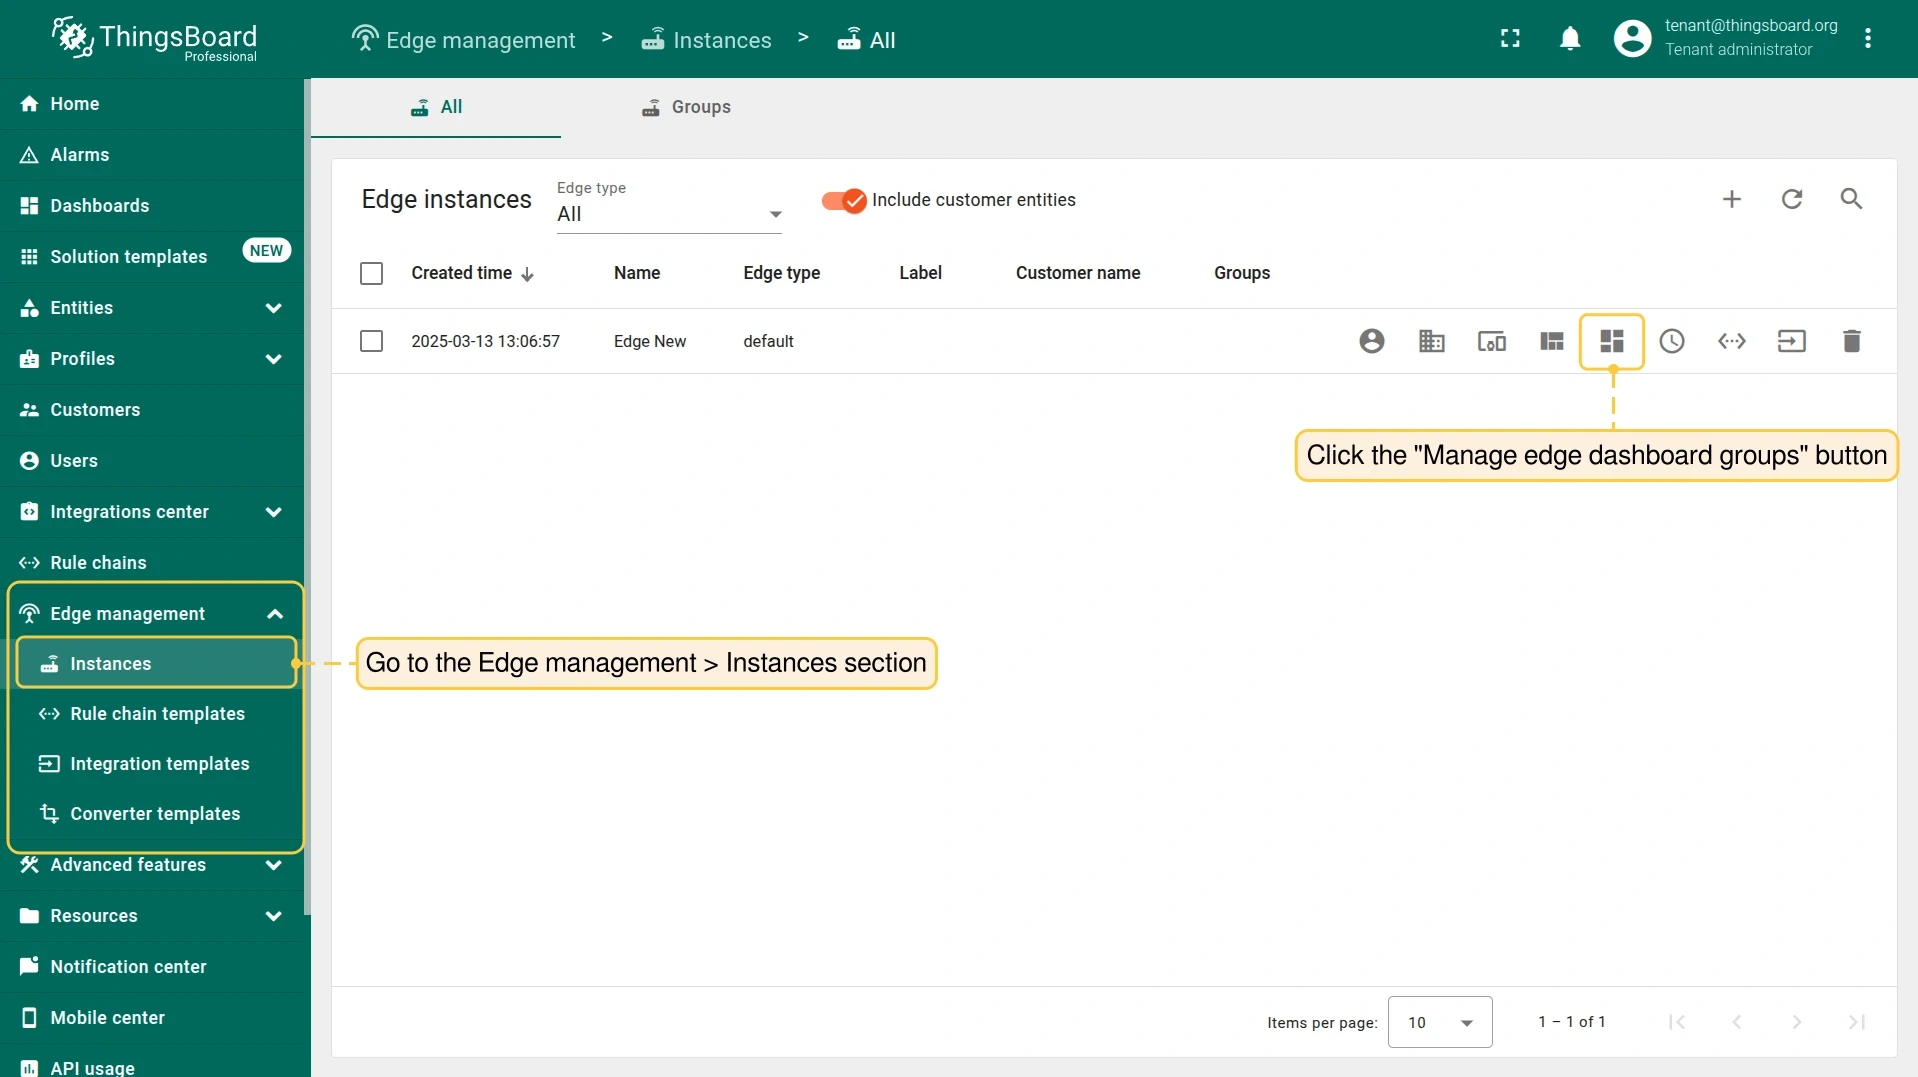
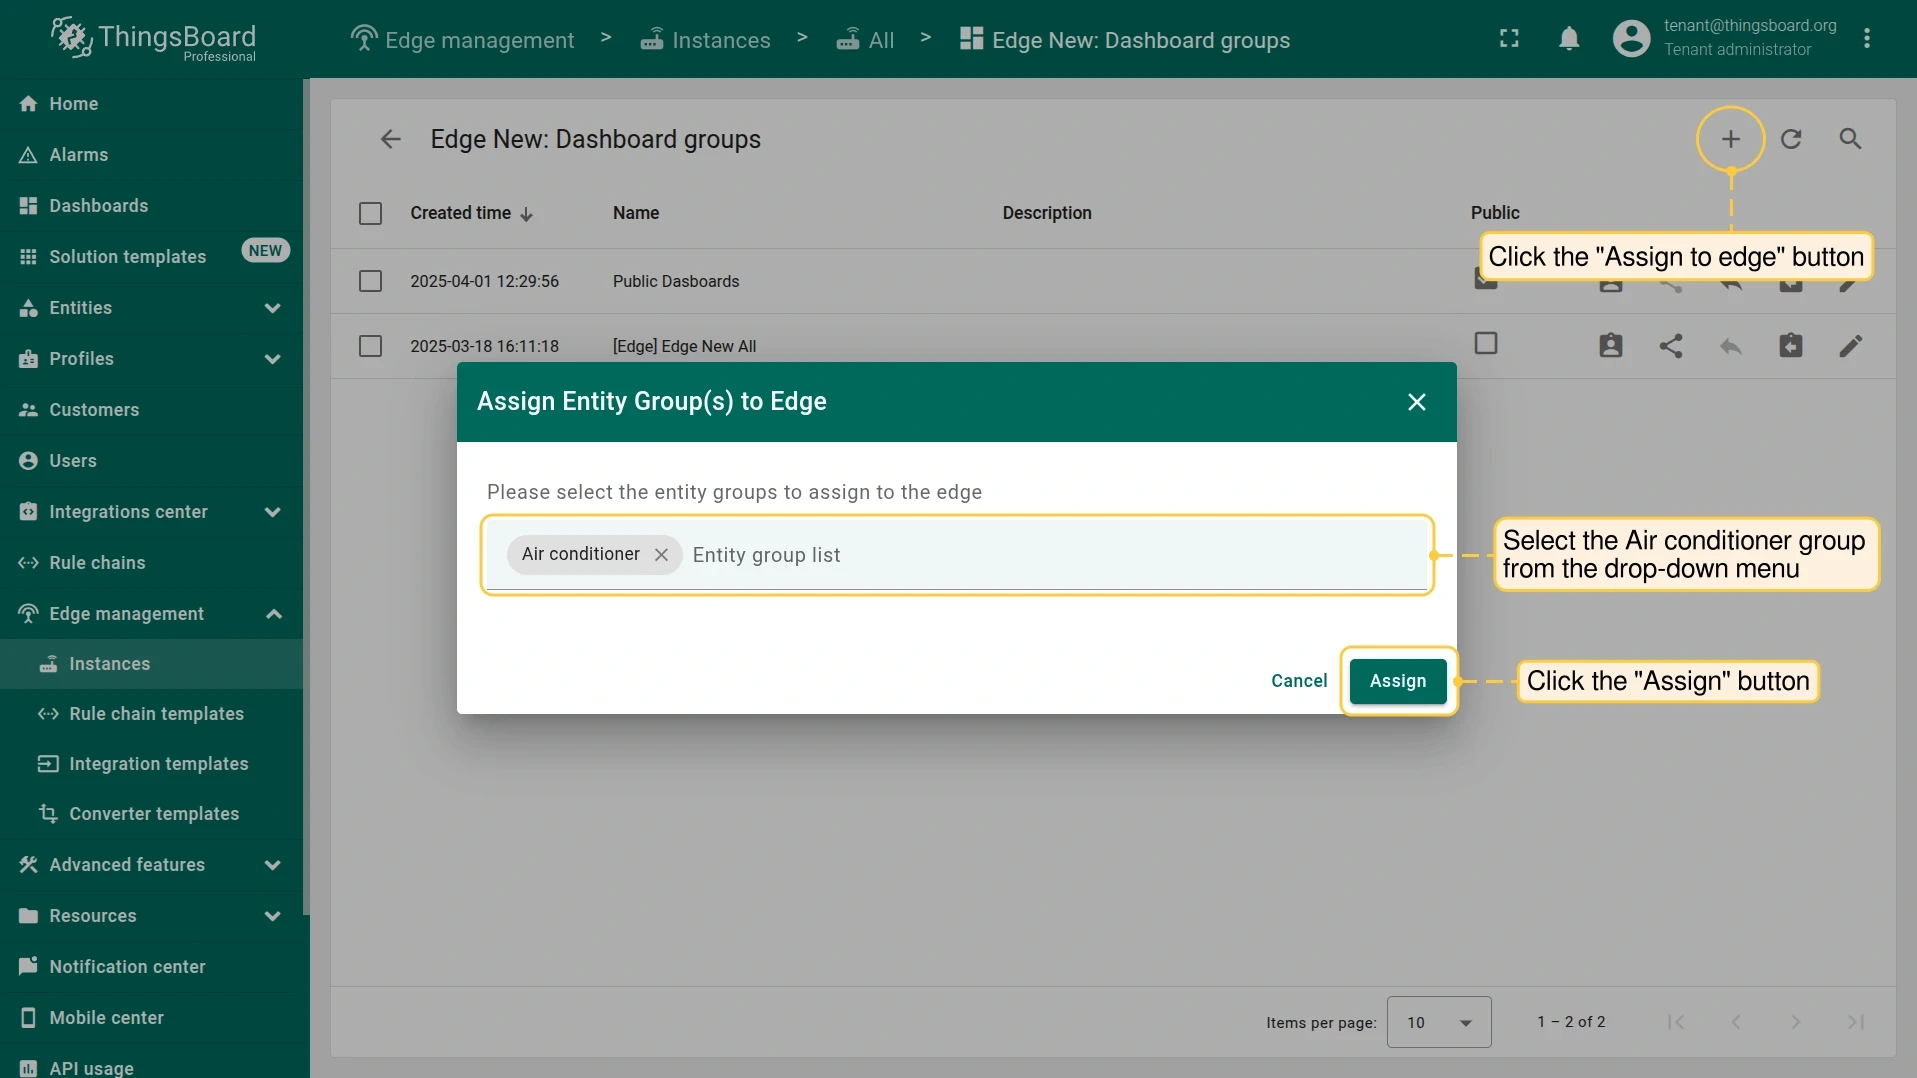
Go to Edge management > Instances and click Manage edge dashboard groups. Assign the Air conditioner group to the Edge.
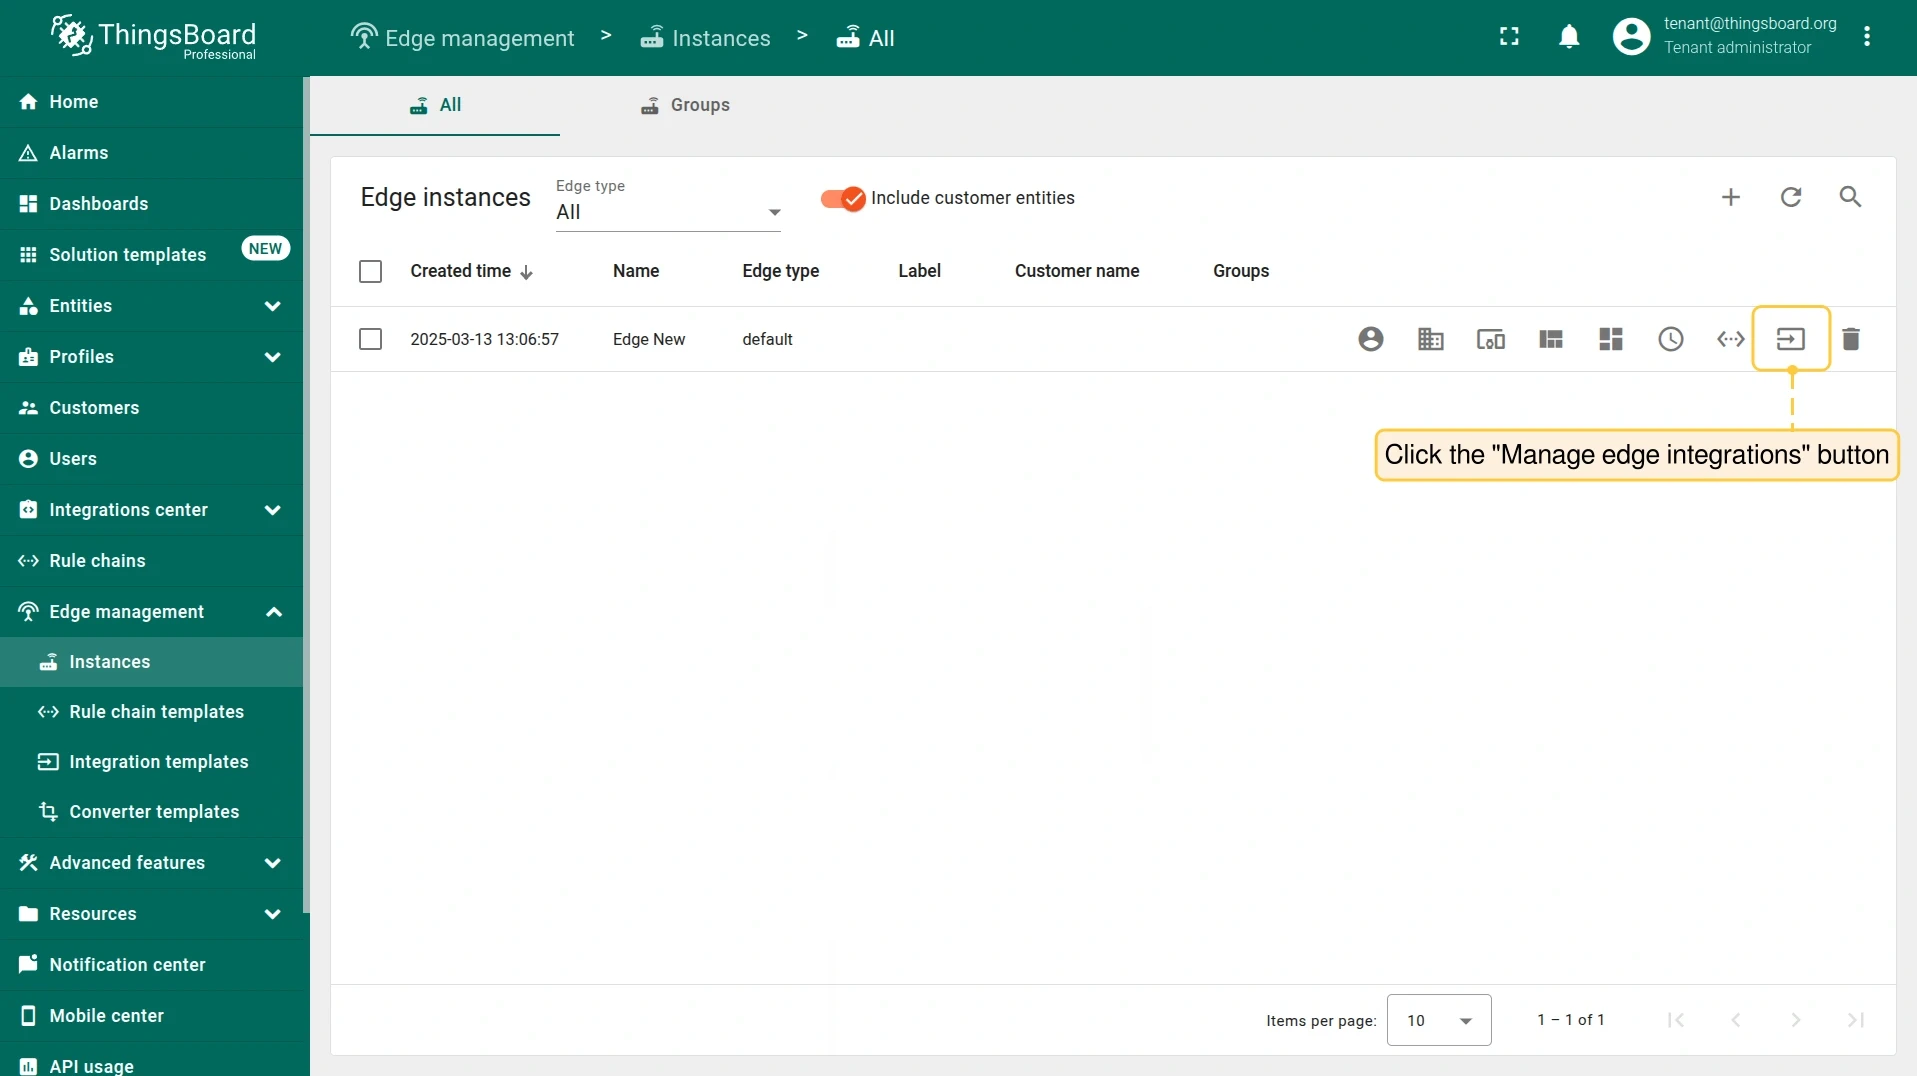
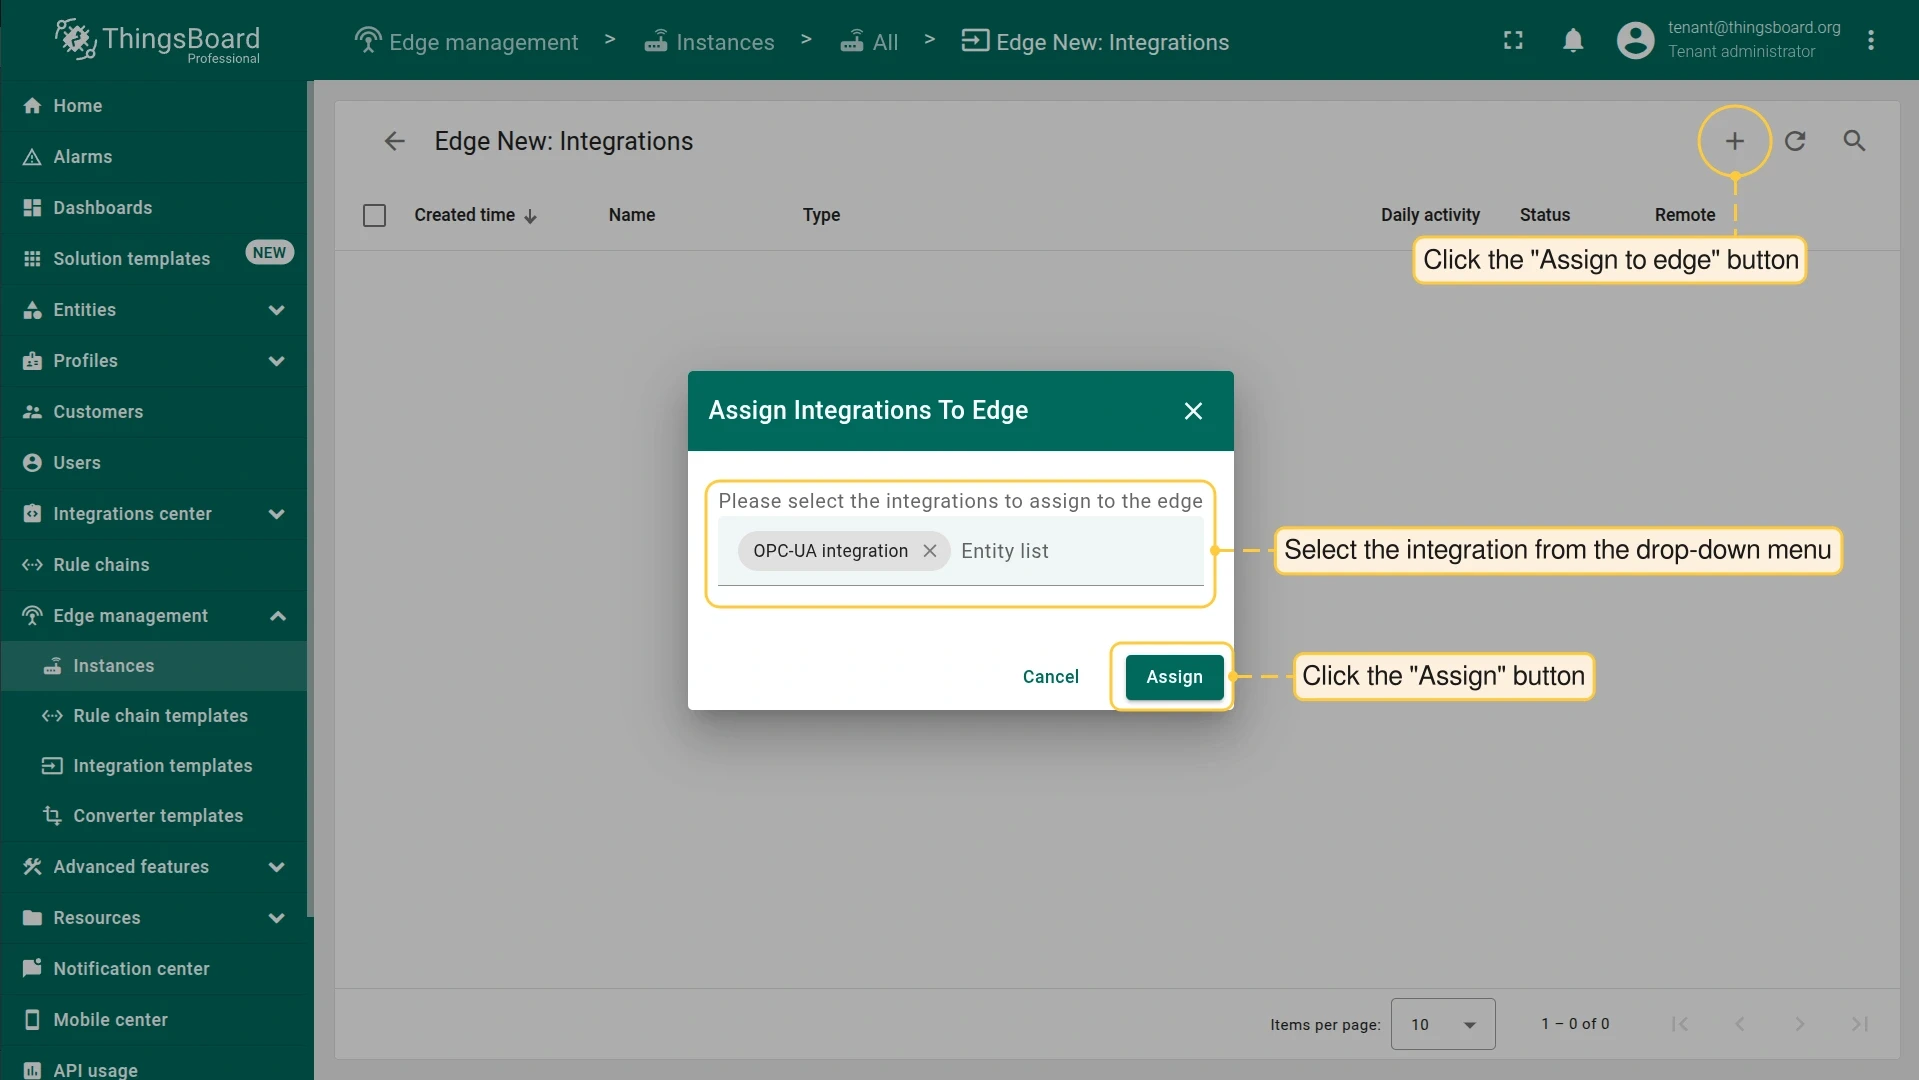
Assign integration to Edge
Section titled “Assign integration to Edge”Before assigning, add the endpointHost attribute to the Edge instance to provide the value for the ${{endpointHost}} placeholder.


Validation
Section titled “Validation”After the integration starts on the Edge and connects to the OPC UA server, data flows automatically.
-
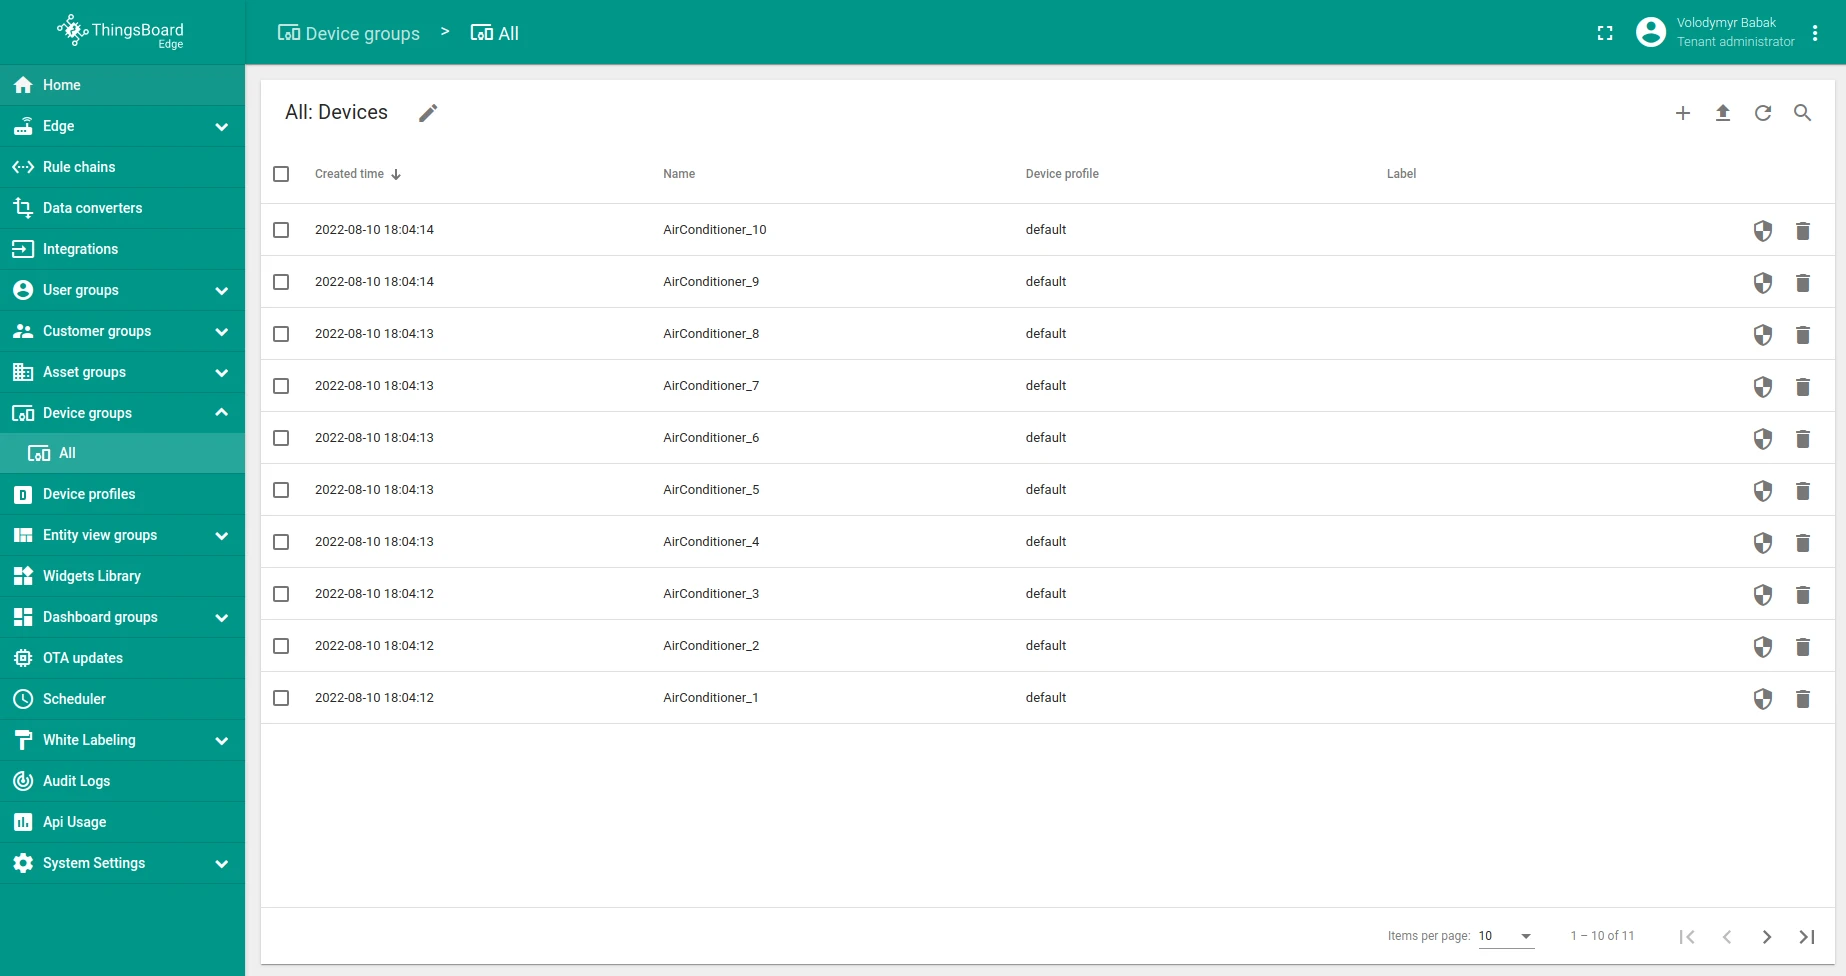
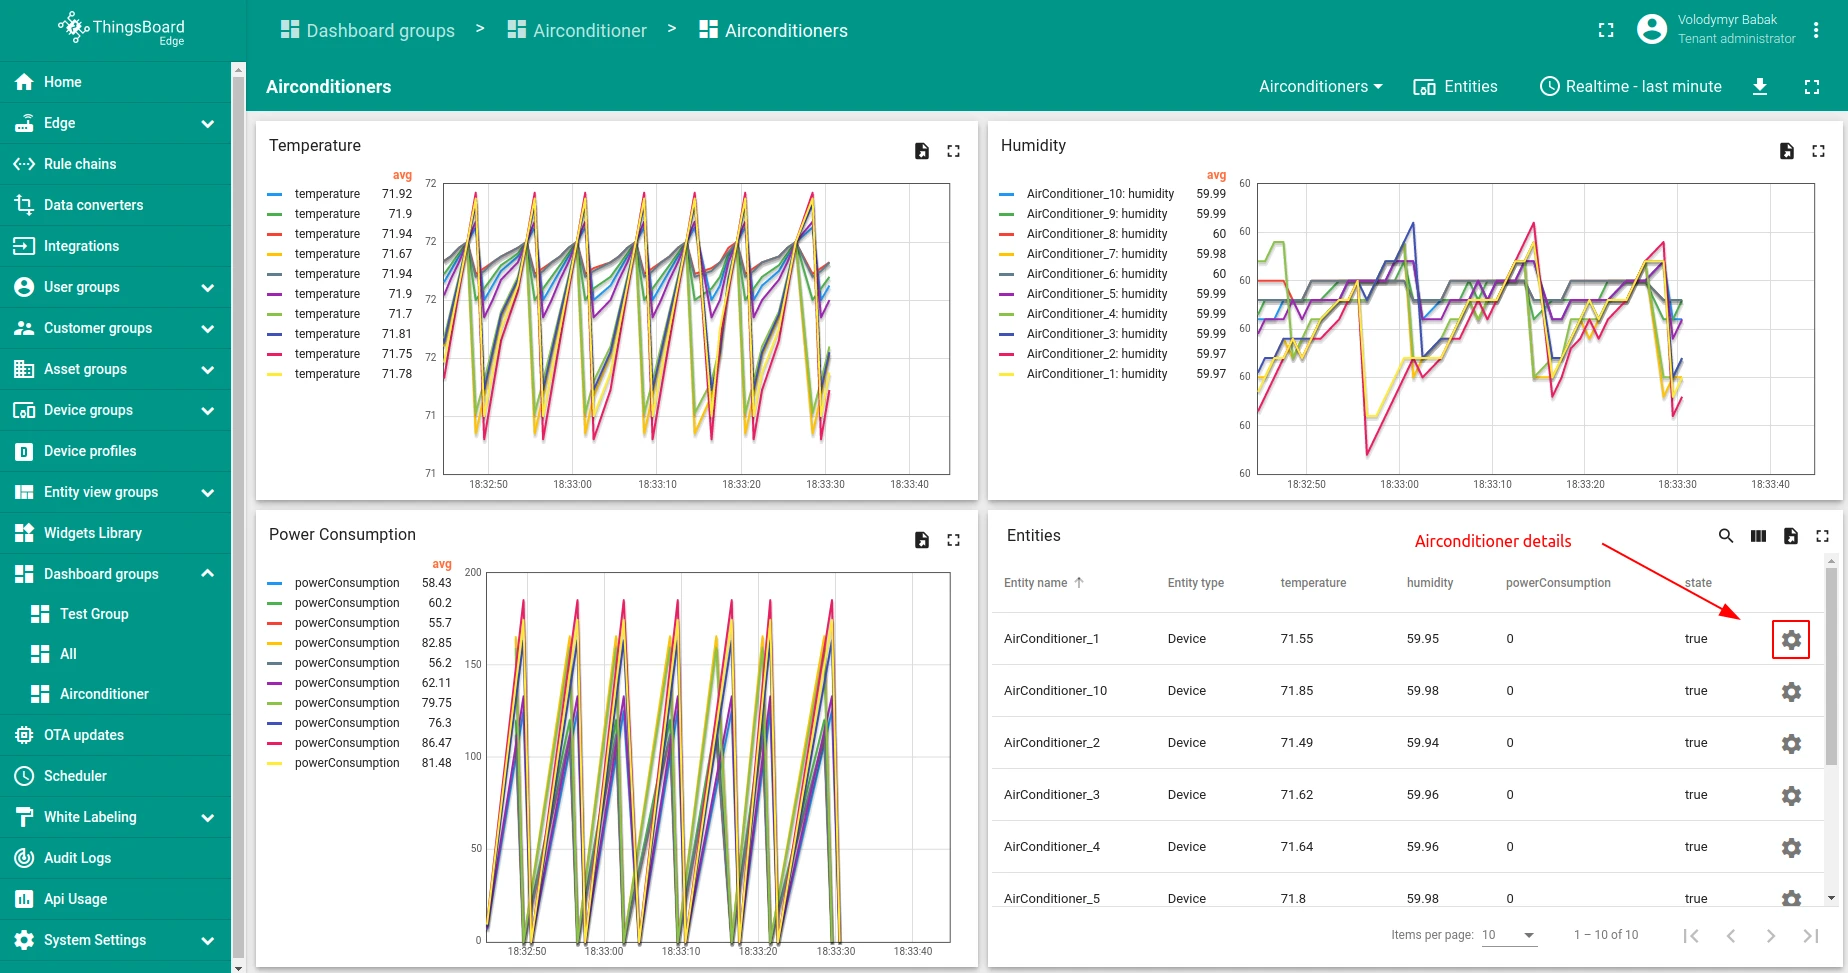
Go to Entities > Device groups. The Air conditioners group appears with all 10 devices.
-
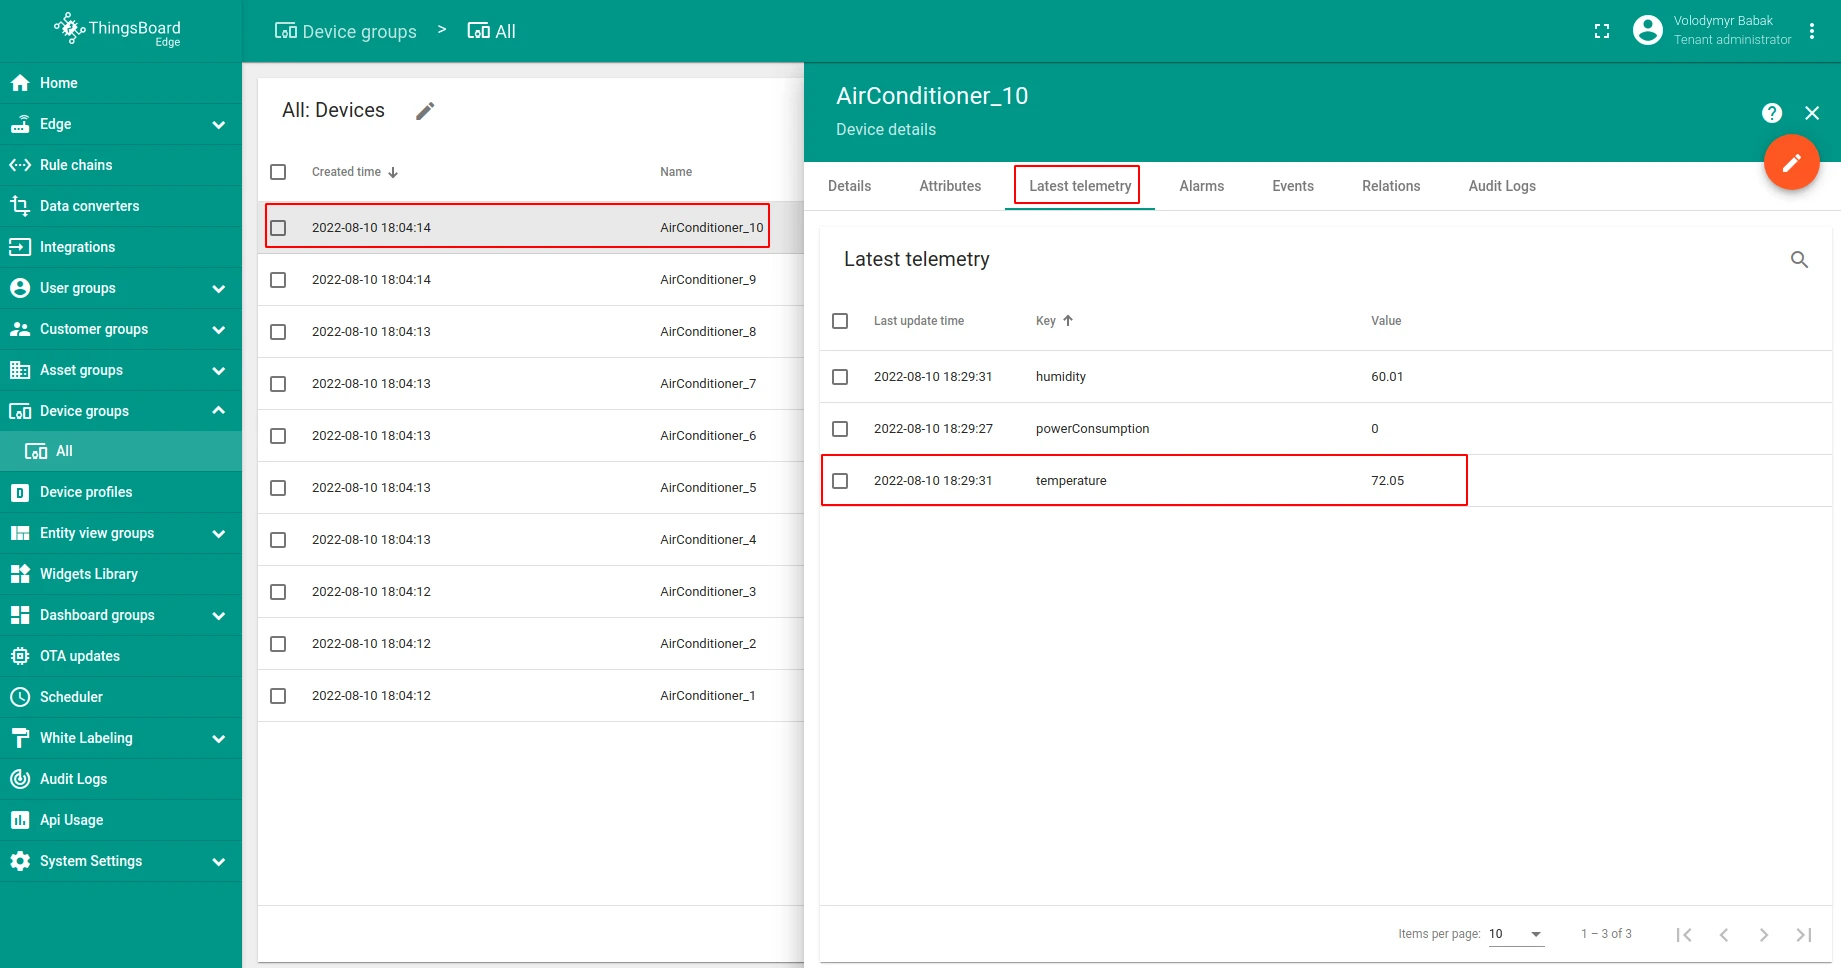
Open any device and select the Latest Telemetry tab to see live readings.
-
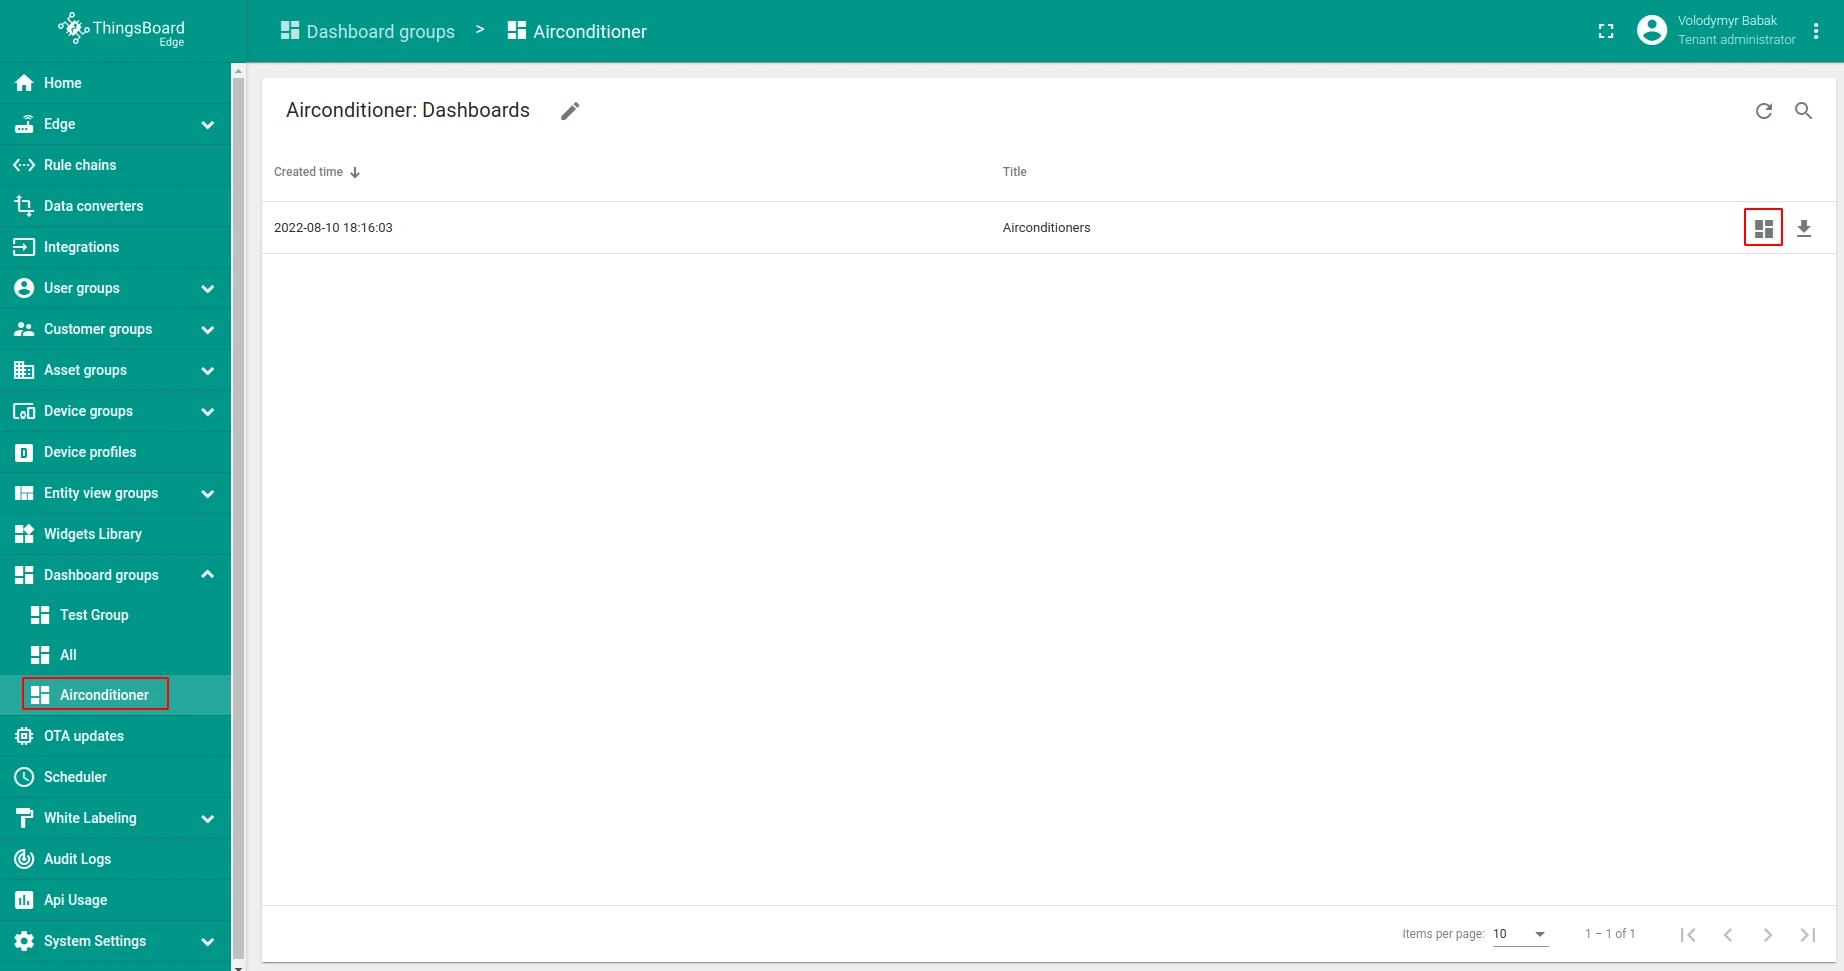
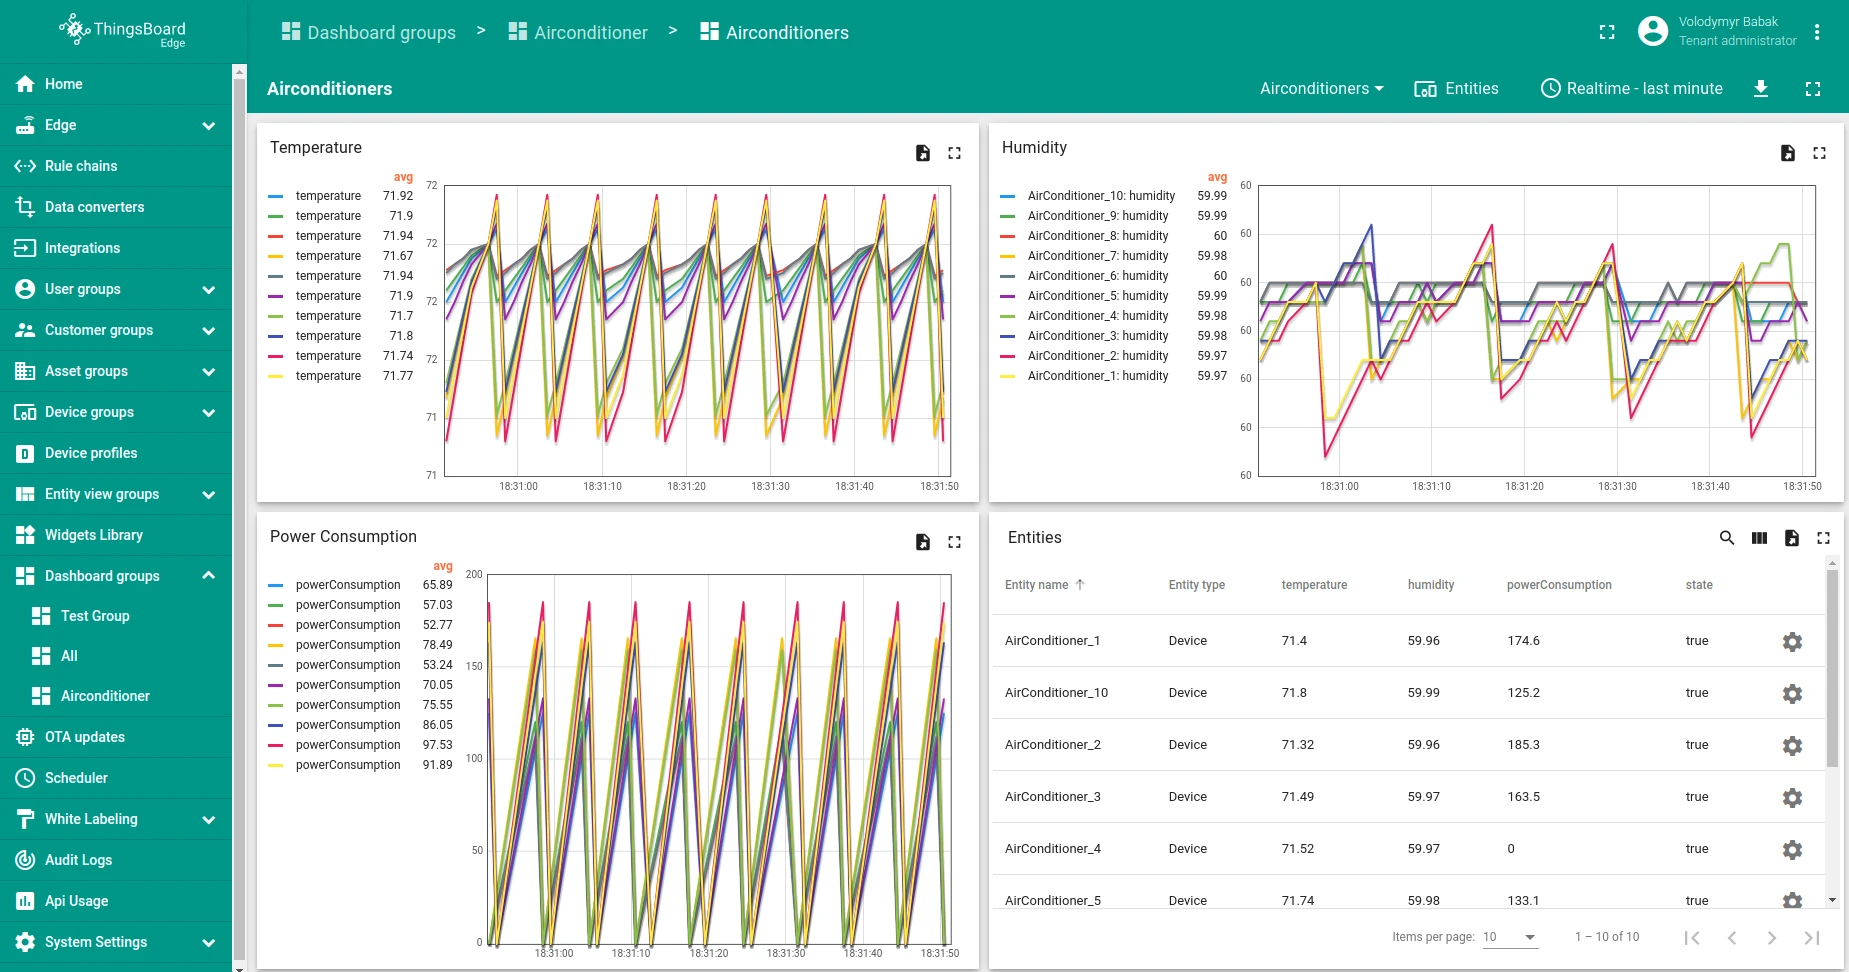
Open the Air conditioners dashboard on the Edge to see all units at a glance.
-
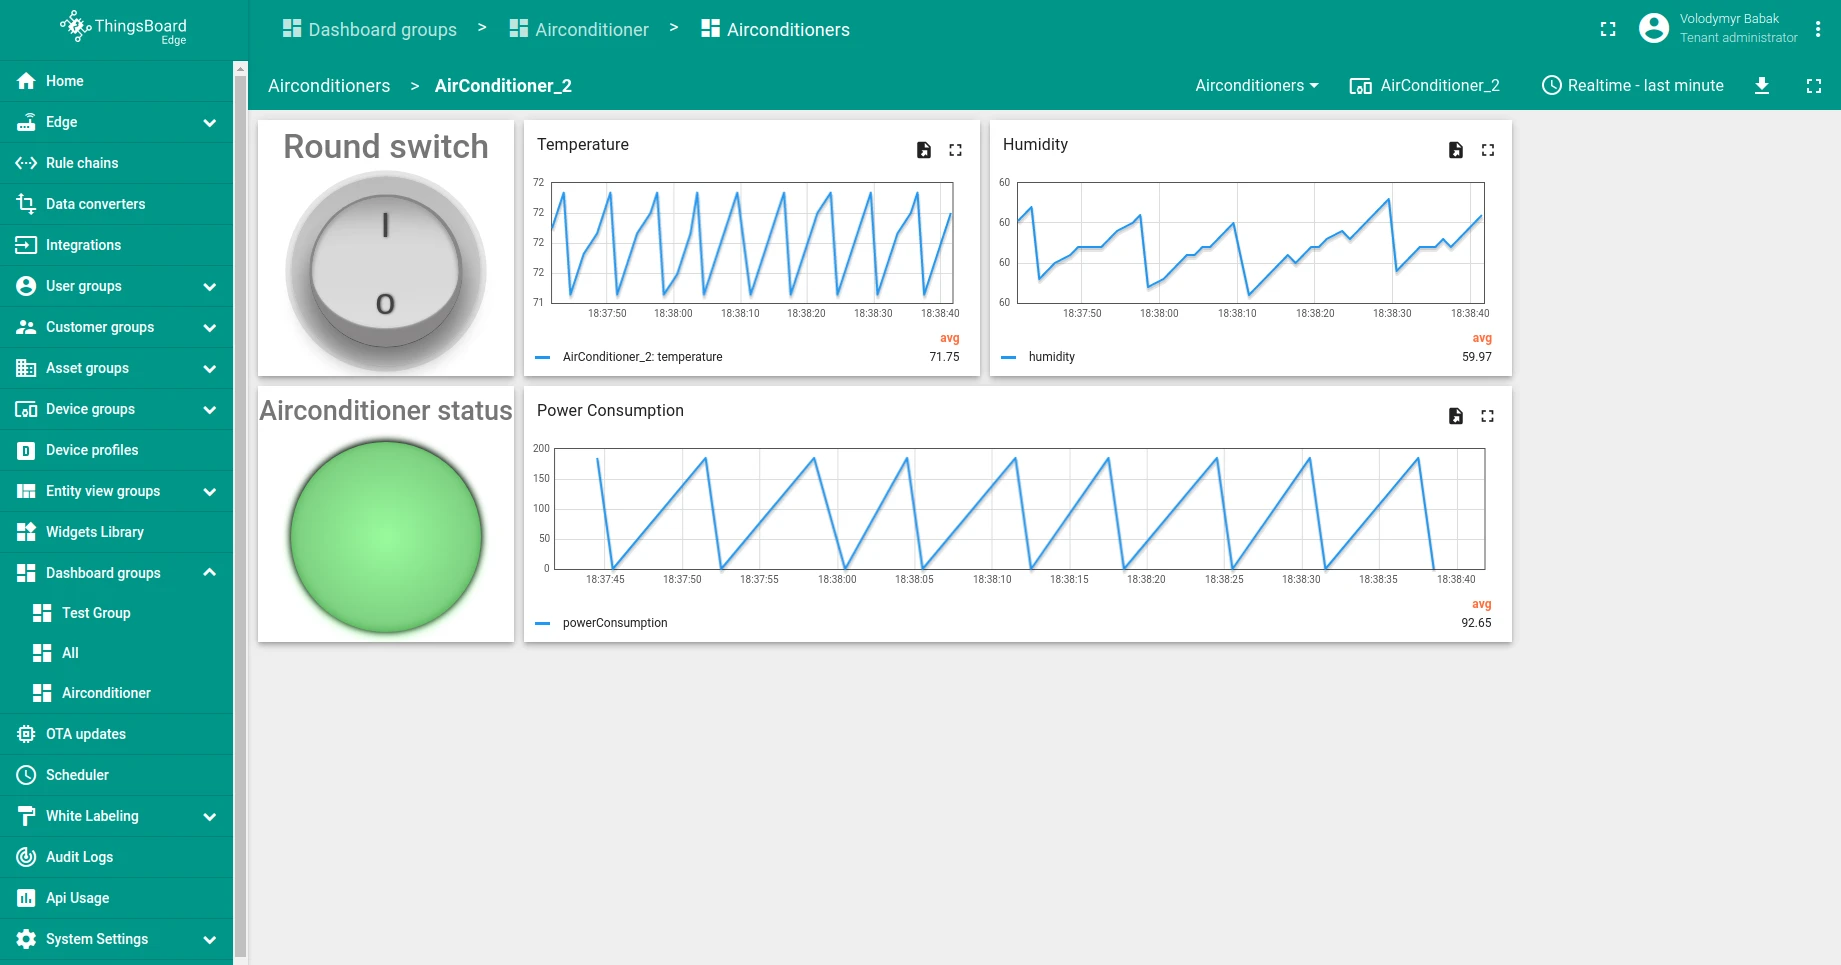
Click Details on any unit to open the Air conditioner details page.
-
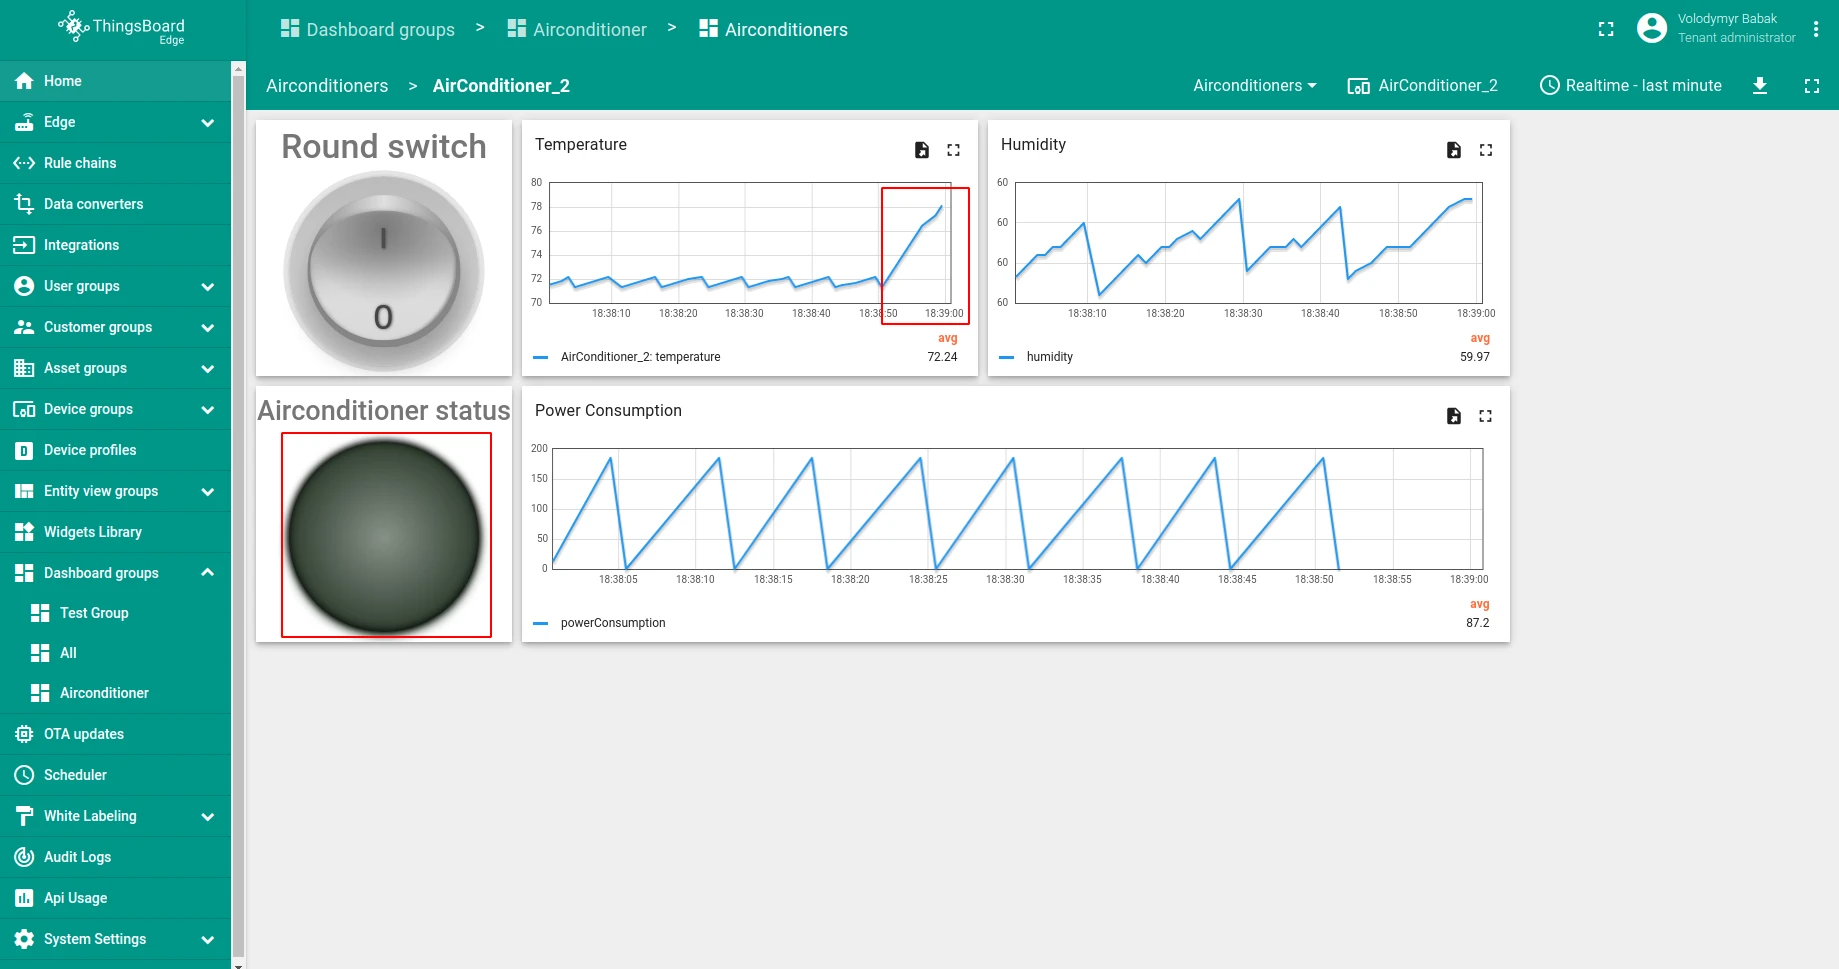
Click the On/Off Round switch to send a downlink RPC command. The unit turns off — the status light turns gray, temperature and humidity begin to rise, and power consumption stops.
Was this helpful?