MQTT Integration
MQTT Integration connects ThingsBoard Edge to an external MQTT broker as an MQTT client. It subscribes to topics, converts incoming payloads into telemetry and attribute updates, and can send downlink messages back to devices via the same broker.

Prerequisites
Section titled “Prerequisites”- A ThingsBoard Professional Edition (Cloud) account or a self-hosted ThingsBoard PE server — used to create integration templates.
- A locally installed ThingsBoard PE Edge instance.
- An accessible MQTT broker. This guide uses
broker.hivemq.comon port 1883. mosquitto_pubandmosquitto_subMQTT clients installed locally.- A sensor device SN-001 that:
- publishes temperature readings to
tb-edge/mqtt-integration-tutorial/sensors/SN-001/temperatureas{"value":25.1} - subscribes to
tb-edge/mqtt-integration-tutorial/sensors/SN-001/rxto receive RPC commands.
- publishes temperature readings to
Create converter and integration templates
Section titled “Create converter and integration templates”Integration and converter templates are created on the Cloud (ThingsBoard PE server) and assigned to Edge instances.
-
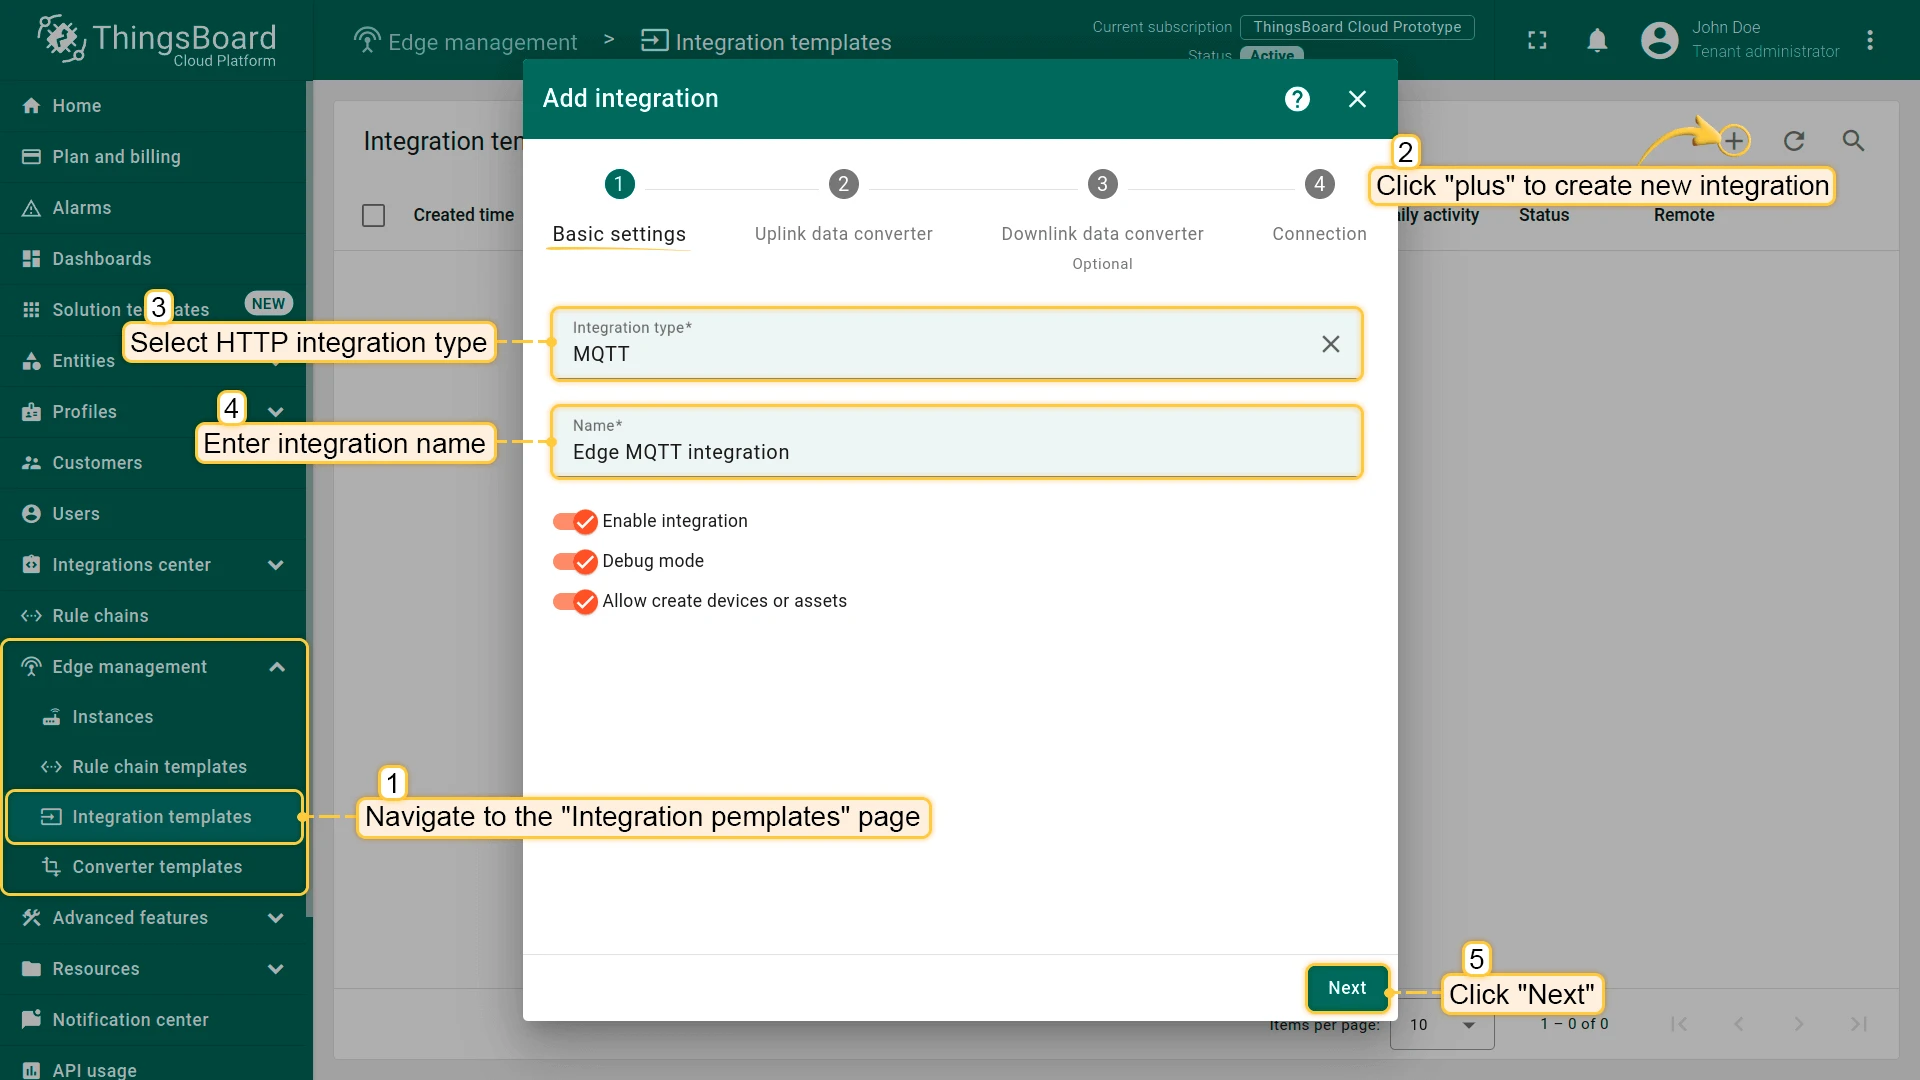
In the Cloud, go to Edge management > Integration templates and click +. Select MQTT as the type, name it Edge MQTT Integration, then click Next.
-
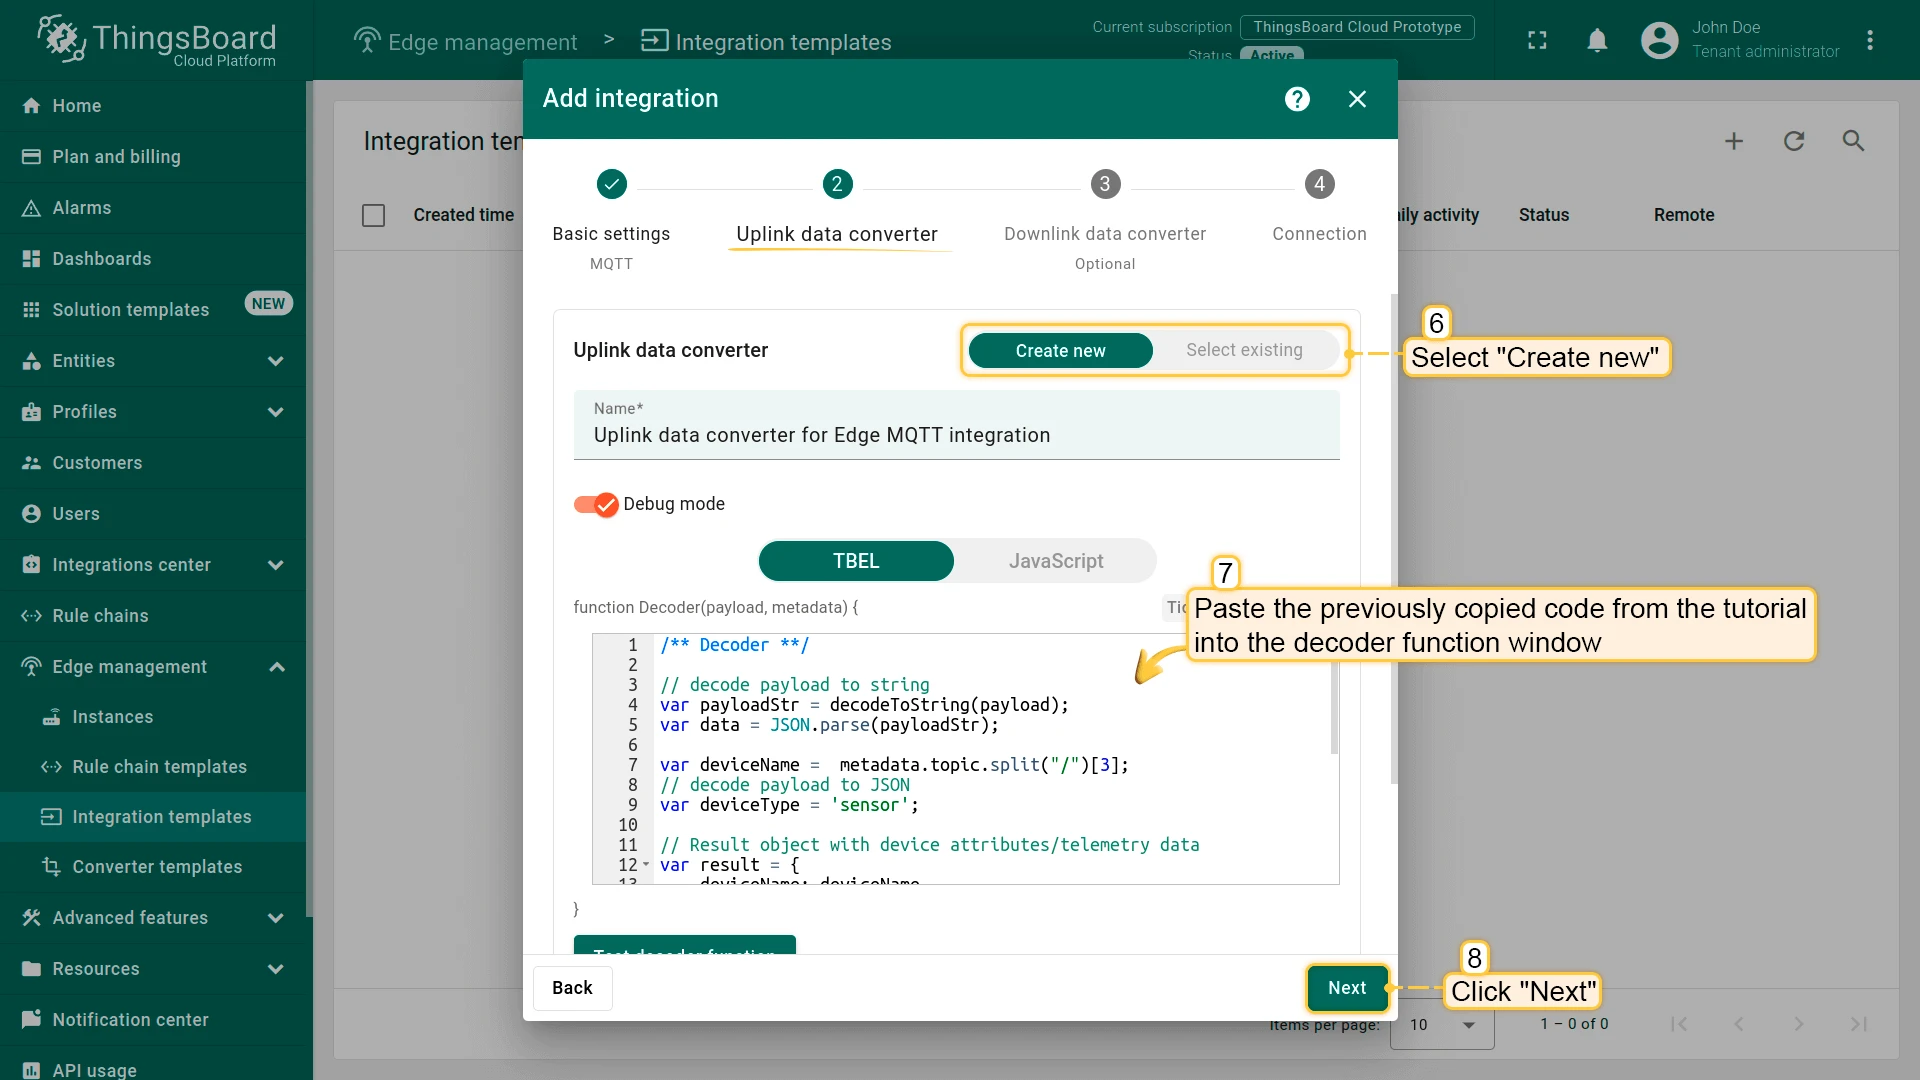
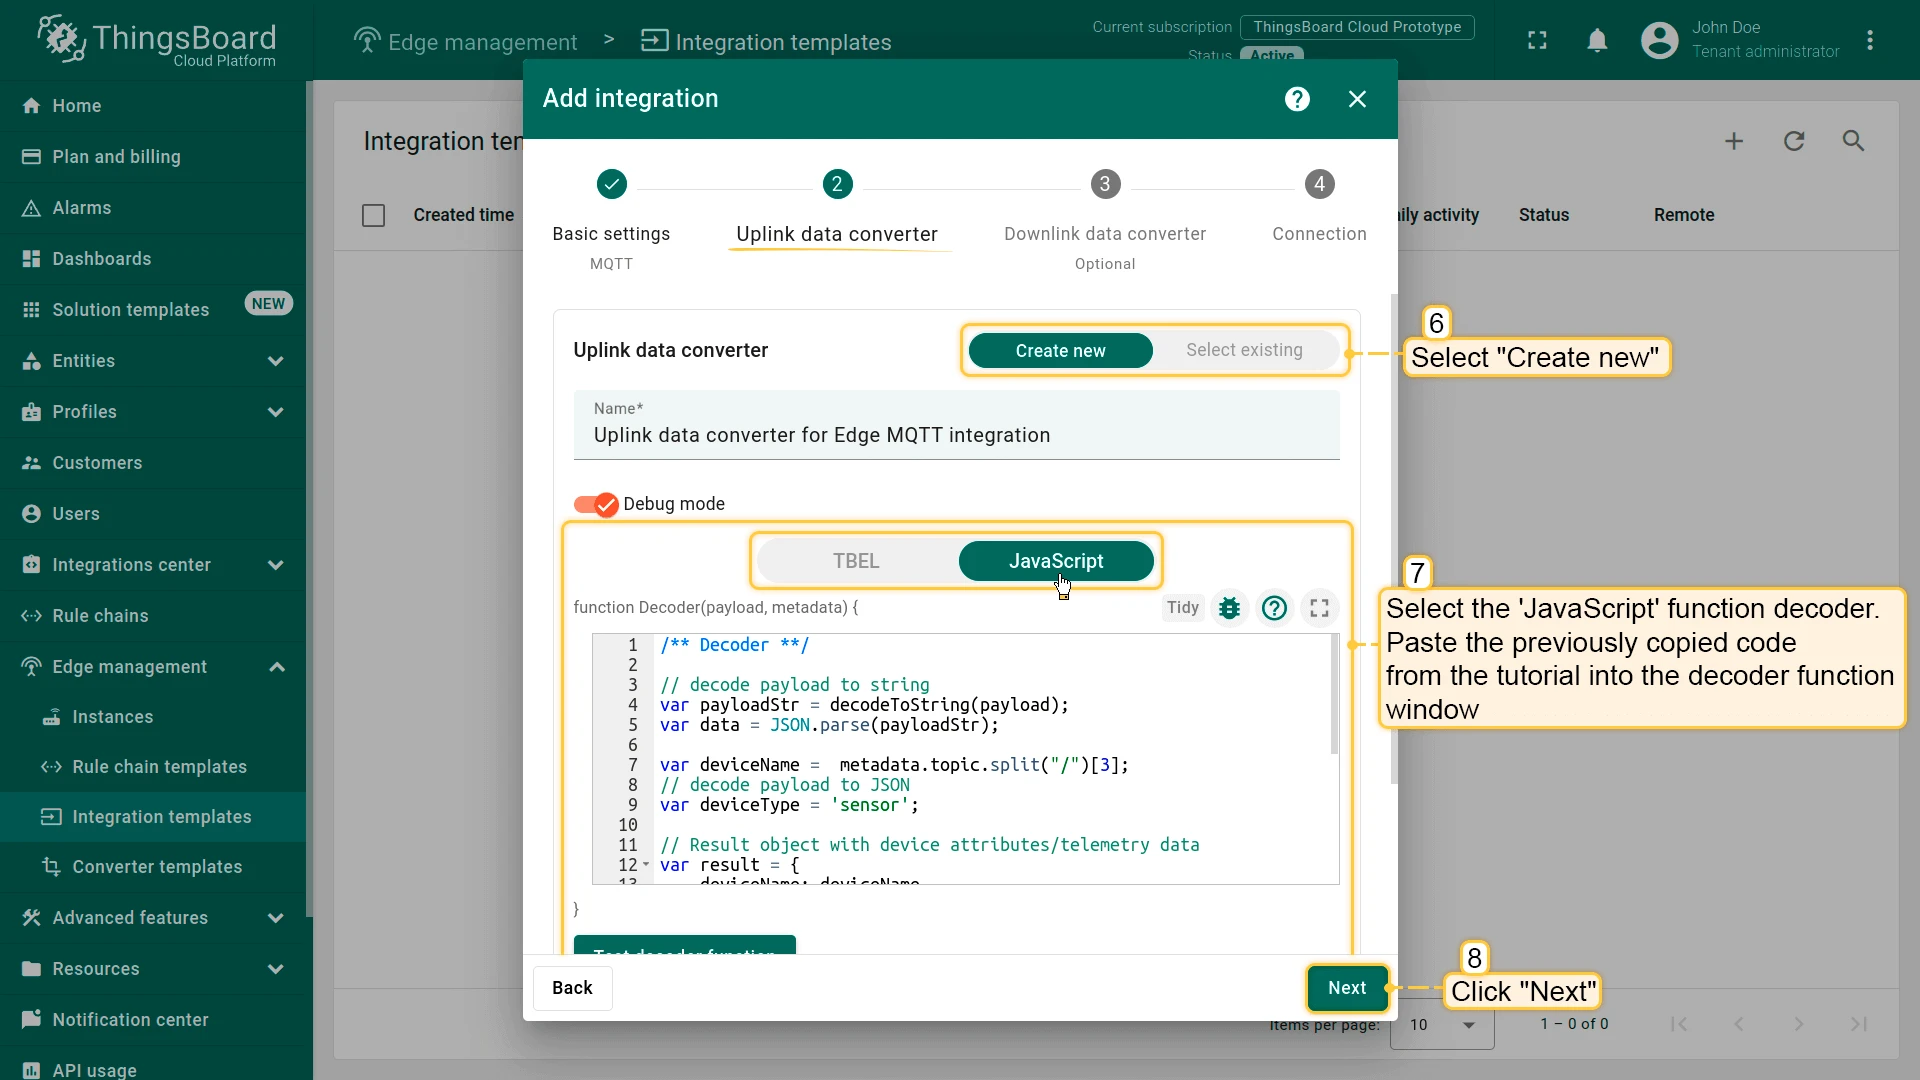
Create the Uplink converter. The uplink converter decodes the raw MQTT payload into ThingsBoard telemetry and attributes. The device name is extracted from the MQTT topic (segment index 3).
/** Decoder **/// decode payload to stringvar payloadStr = decodeToString(payload);var data = JSON.parse(payloadStr);var deviceName = metadata.topic.split("/")[3];var deviceType = 'sensor';// Result object with device attributes/telemetry datavar result = {deviceName: deviceName,deviceType: deviceType,attributes: {integrationName: metadata['integrationName'],},telemetry: {temperature: data.value,}};/** Helper functions 'decodeToString' and 'decodeToJson' are already built-in **/return result;/** Decoder **/// decode payload to stringvar payloadStr = decodeToString(payload);var data = JSON.parse(payloadStr);var deviceName = metadata.topic.split("/")[3];var deviceType = 'sensor';// Result object with device attributes/telemetry datavar result = {deviceName: deviceName,deviceType: deviceType,attributes: {integrationName: metadata['integrationName'],},telemetry: {temperature: data.value,}};/** Helper functions **/function decodeToString(payload) {return String.fromCharCode.apply(String, payload);}function decodeToJson(payload) {var str = decodeToString(payload);return JSON.parse(str);}return result;Select Create new, paste the script into the Decoder function field, and click Next.
-
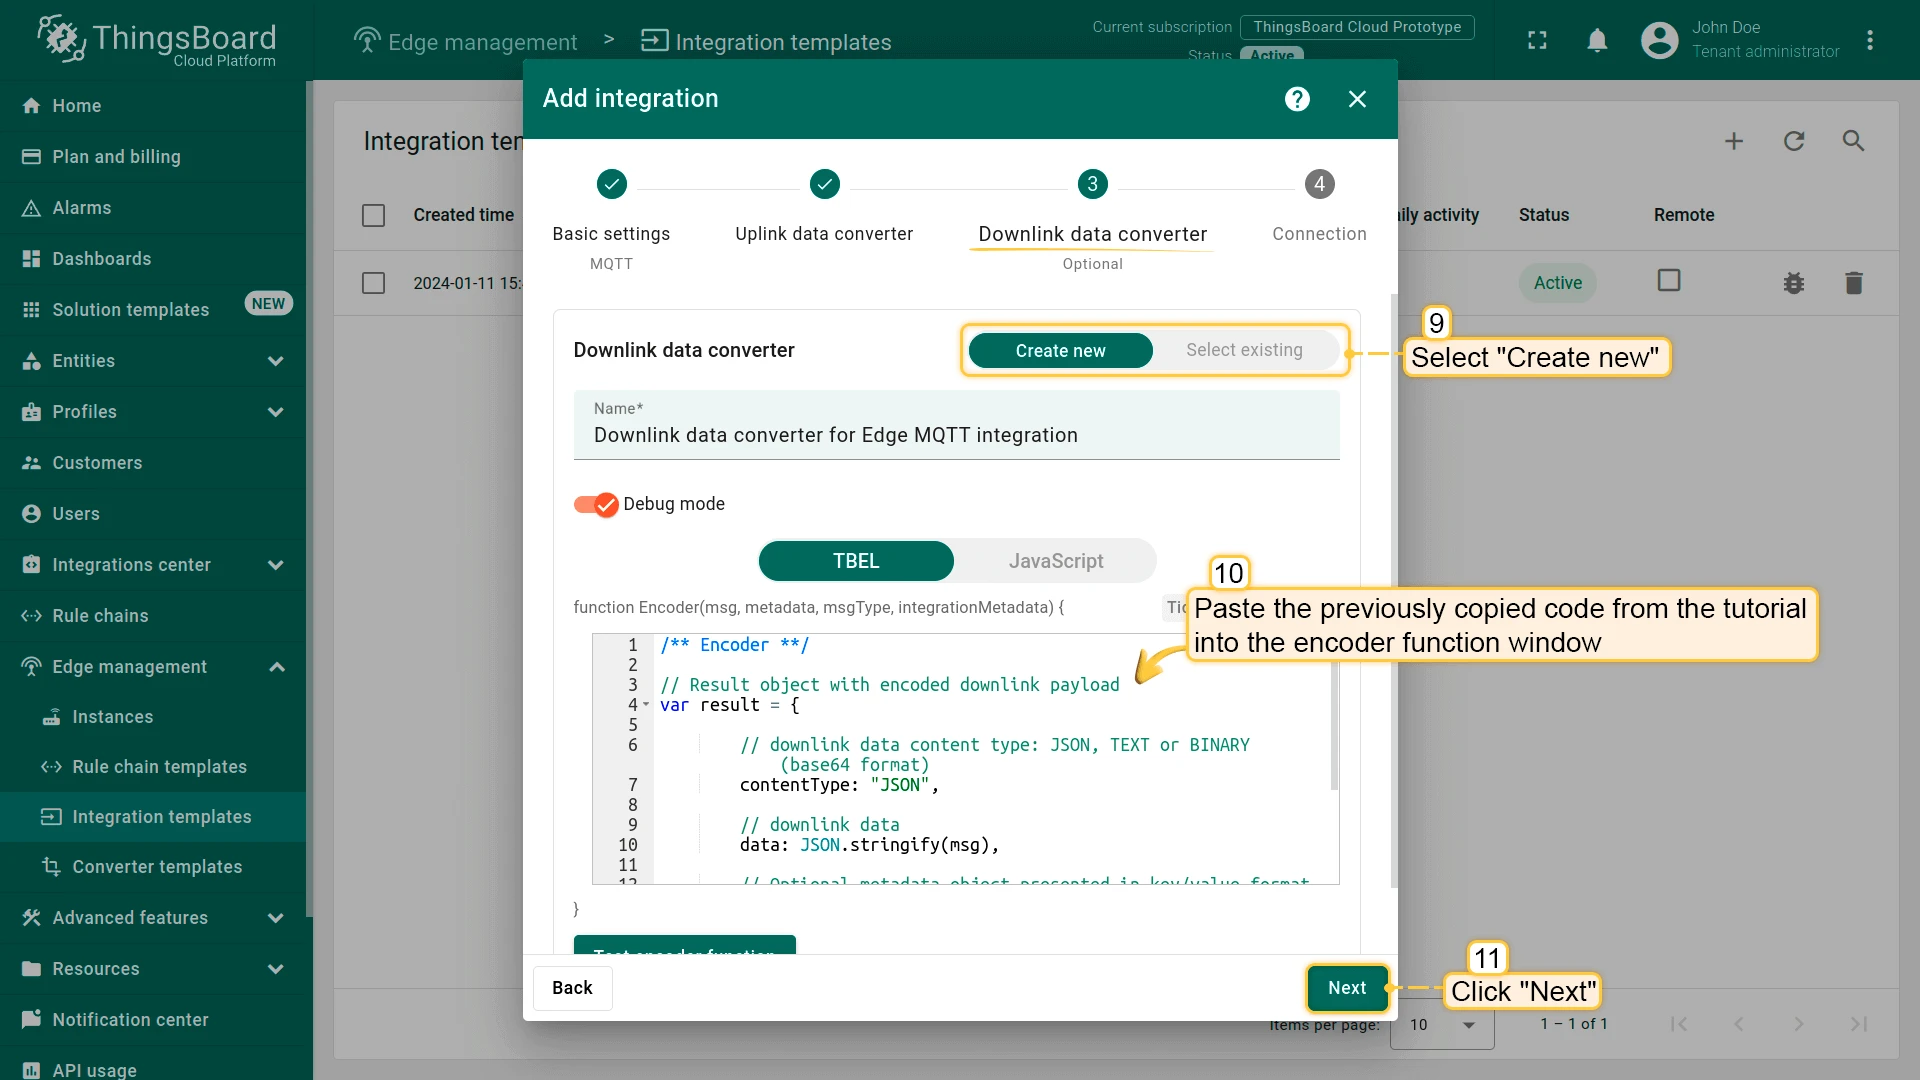
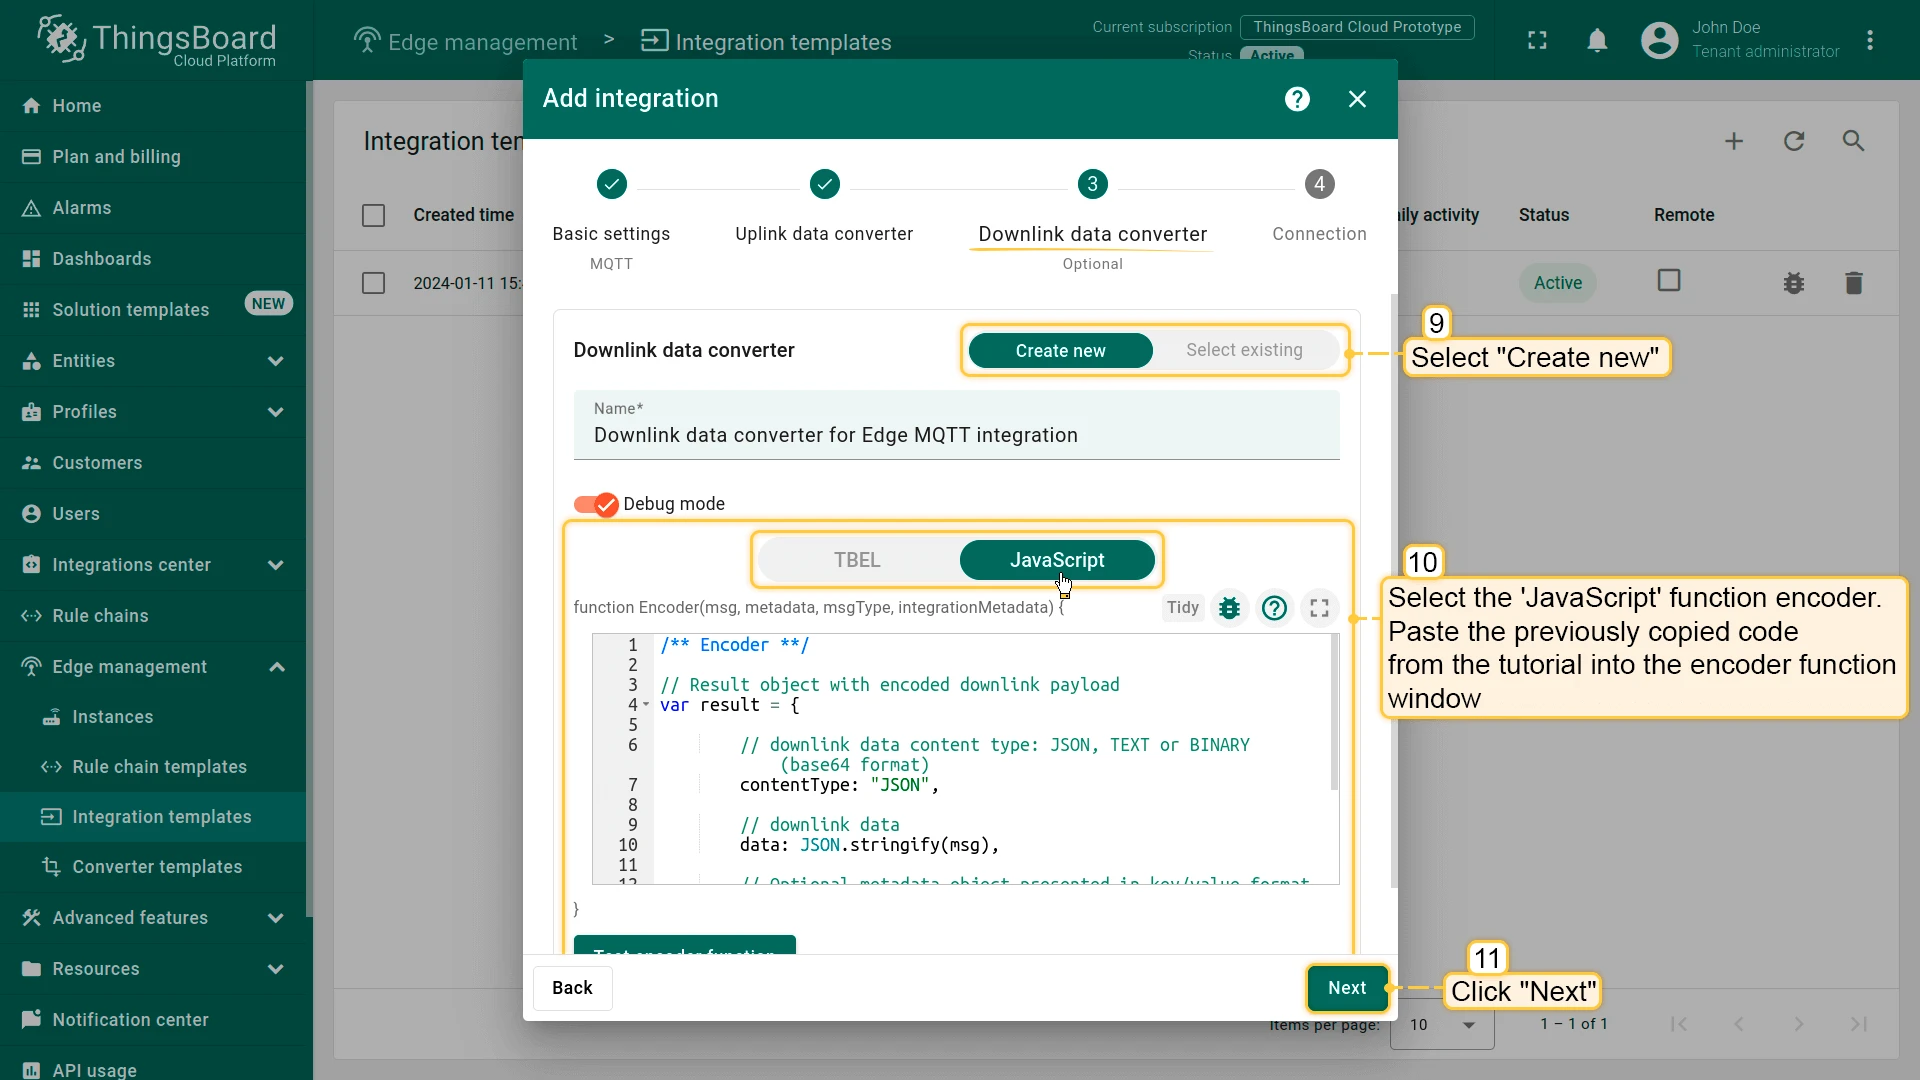
Create the Downlink converter. The downlink converter encodes outbound messages (e.g. attribute updates) into the MQTT payload and sets the target topic using the device name from metadata.
/** Encoder **/// Result object with encoded downlink payloadvar result = {// downlink data content type: JSON, TEXT or BINARY (base64 format)contentType: "JSON",// downlink datadata: JSON.stringify(msg),// Optional metadata object presented in key/value formatmetadata: {topic: 'tb-edge/mqtt-integration-tutorial/sensors/' + metadata['originatorName'] + '/rx'}};return result;/** Encoder **/// Result object with encoded downlink payloadvar result = {// downlink data content type: JSON, TEXT or BINARY (base64 format)contentType: "JSON",// downlink datadata: JSON.stringify(msg),// Optional metadata object presented in key/value formatmetadata: {topic: 'tb-edge/mqtt-integration-tutorial/sensors/' + metadata['originatorName'] + '/rx'}};return result;Select Create new, paste the script into the Encoder function field, and click Next.
-
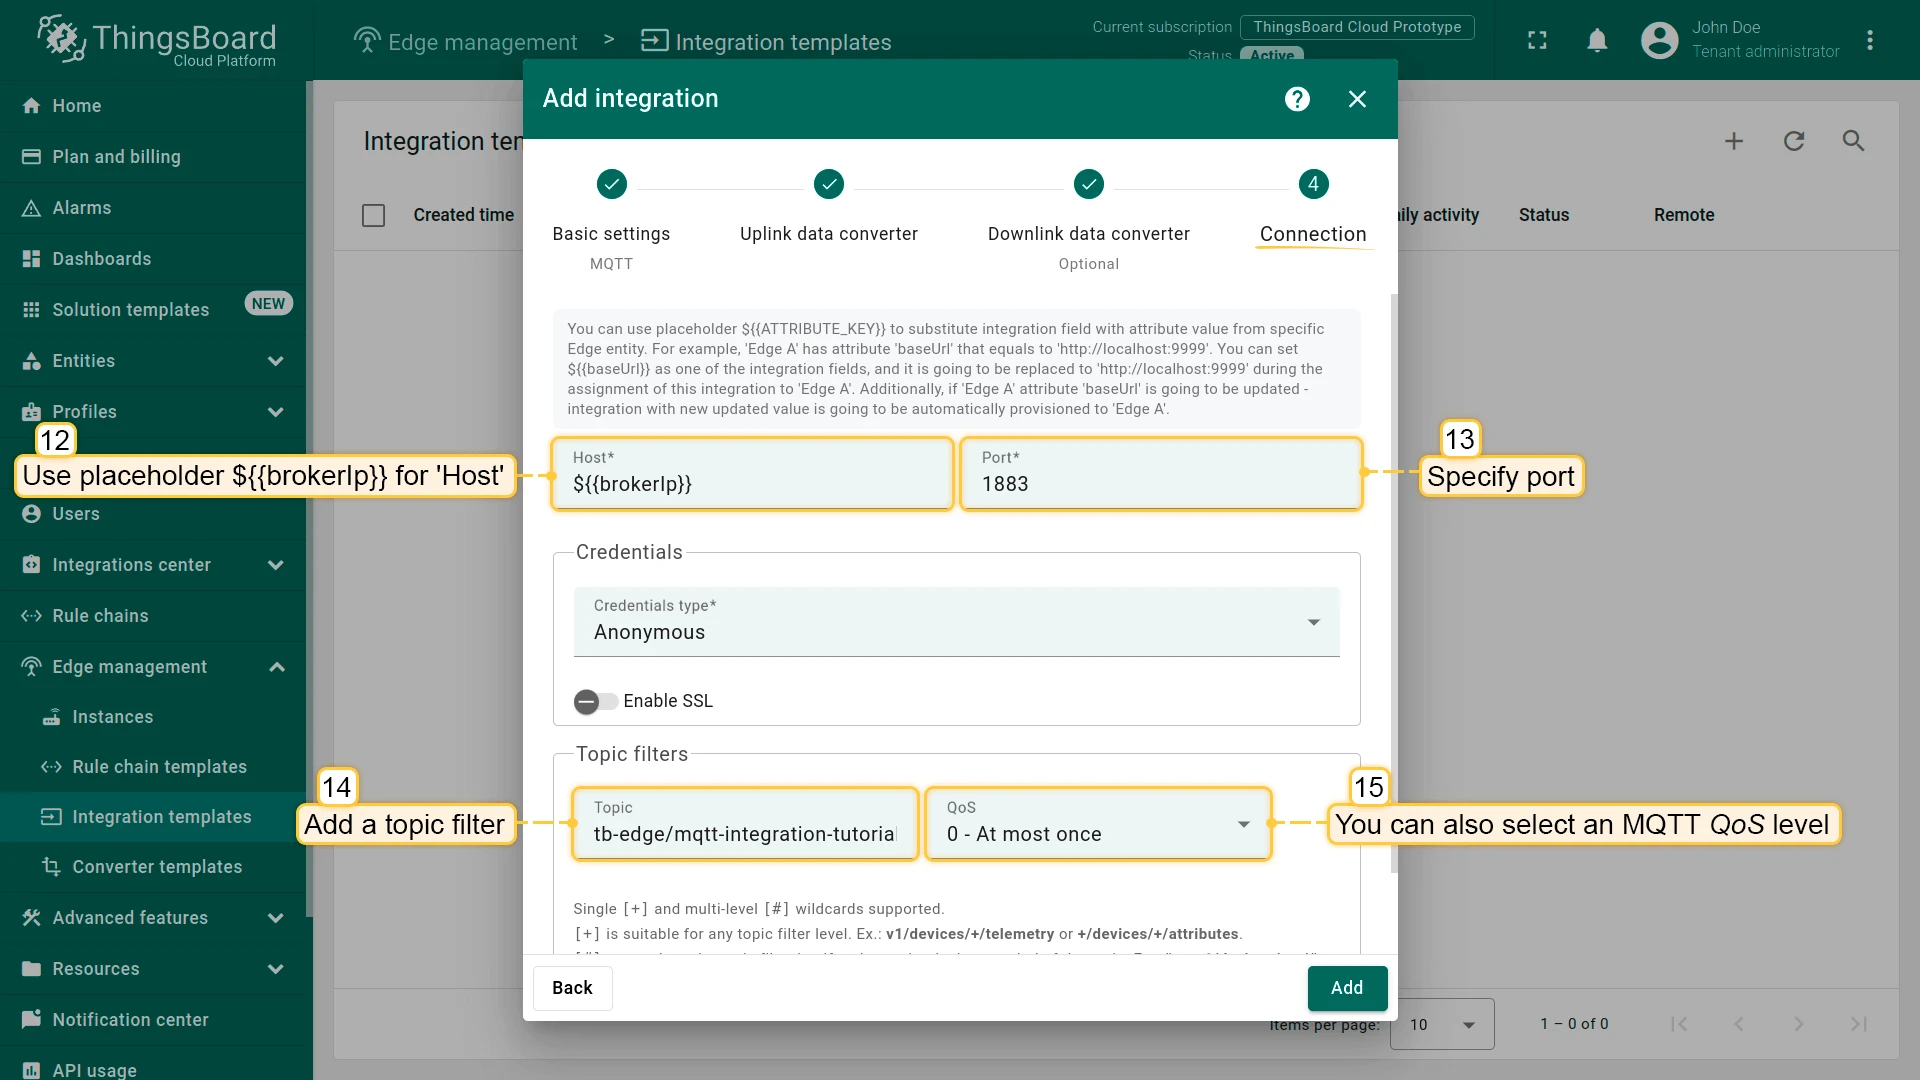
On the Connection page, configure the broker connection:
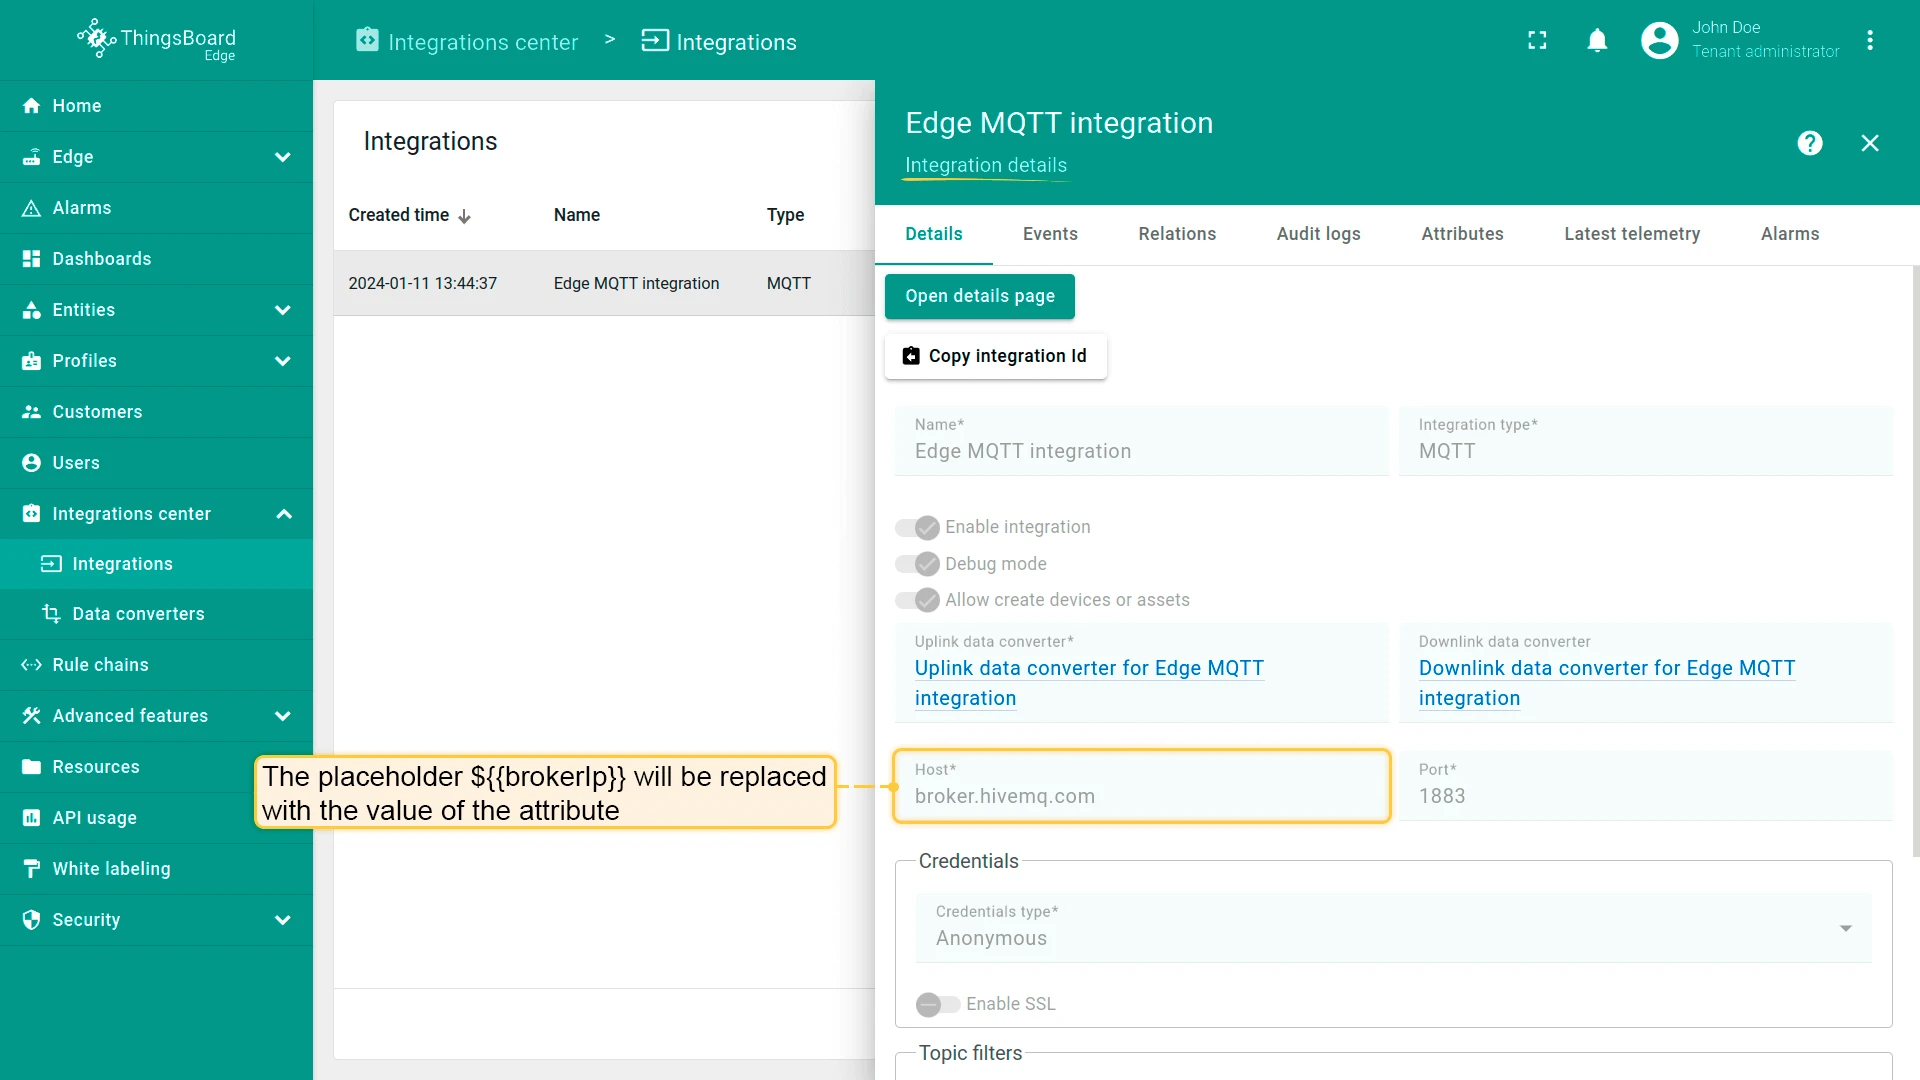
- Set Host to
${{brokerIp}}— this placeholder will be replaced by thebrokerIpattribute value on each Edge instance. - Set Port to
1883. - Add a topic filter:
tb-edge/mqtt-integration-tutorial/sensors/+/temperature - Set the QoS level as needed (default is 0 — at most once).
- Set Host to
-
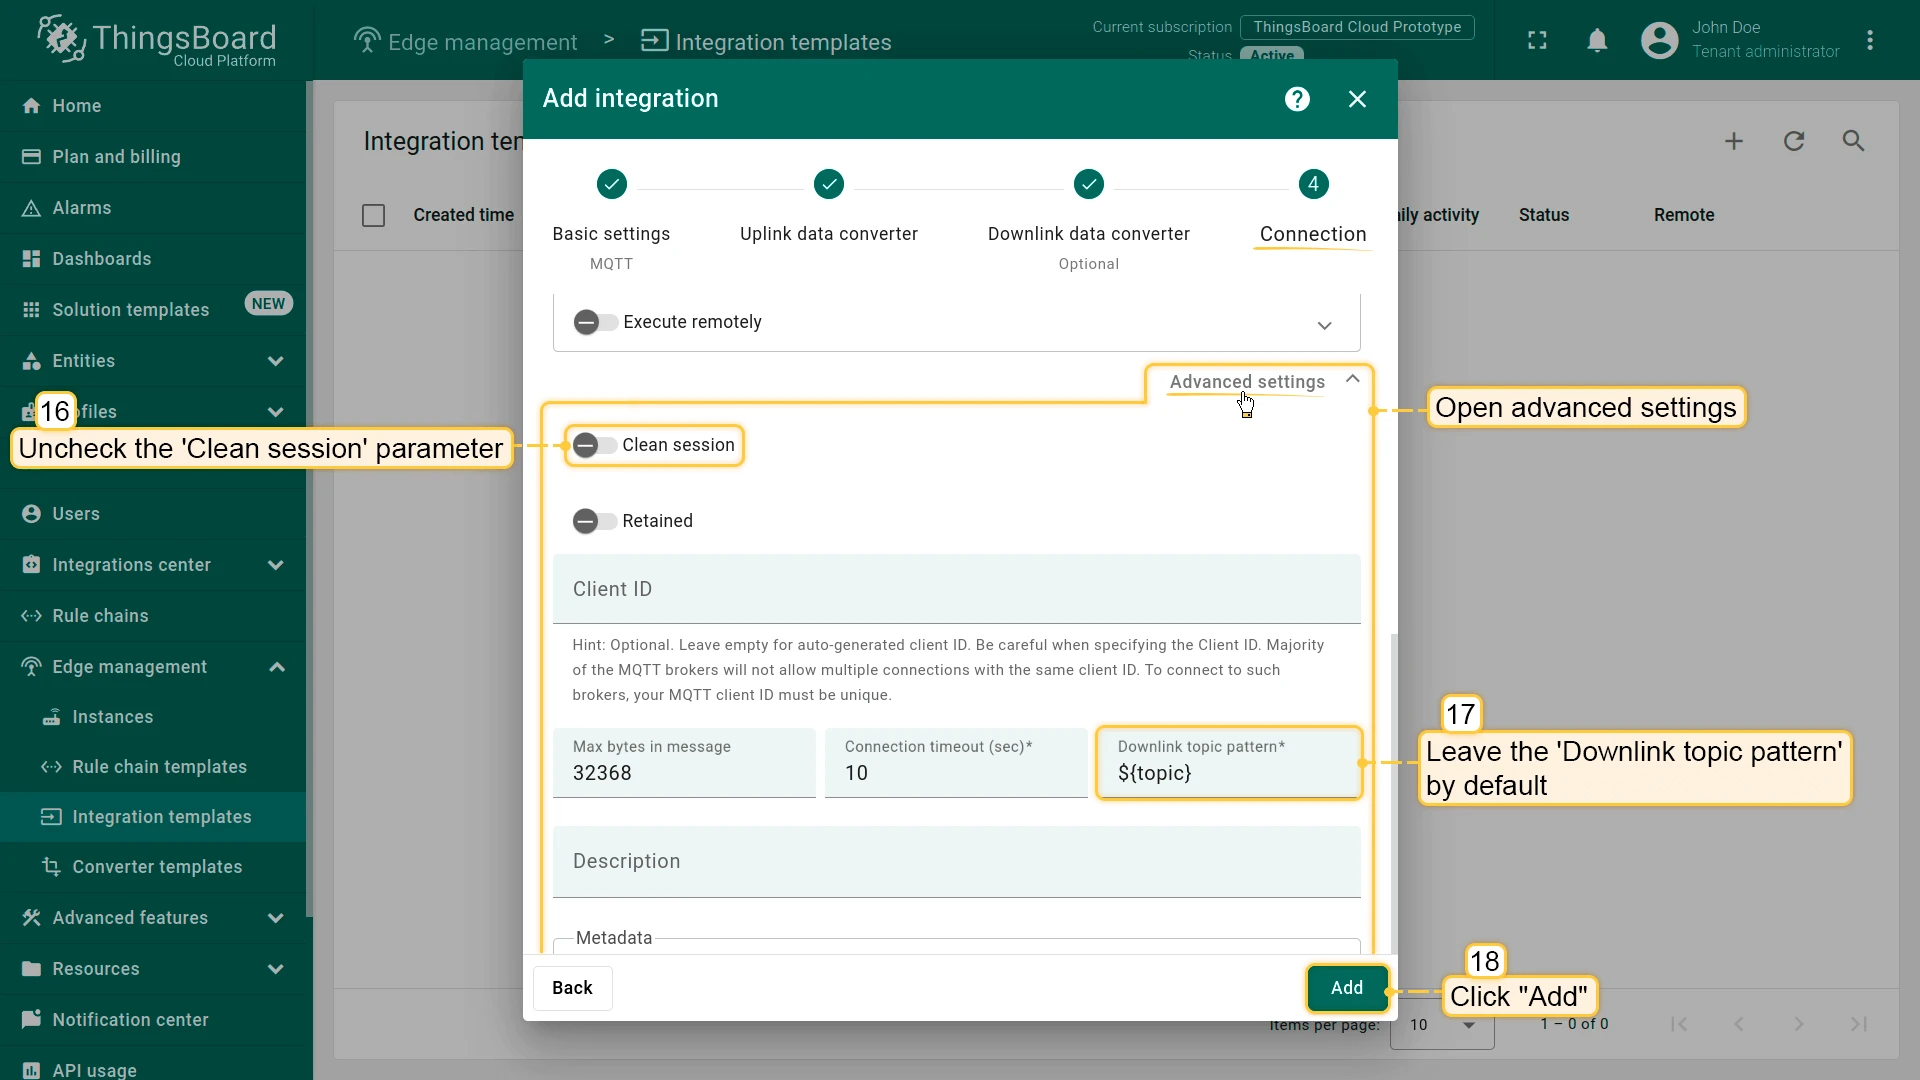
Open Advanced settings:
- Uncheck Clean session — many brokers silently close connections when this option is enabled.
- Leave Downlink topic pattern at the default so the integration uses
metadata.topicas the downlink topic.
Click Add to save the integration template.
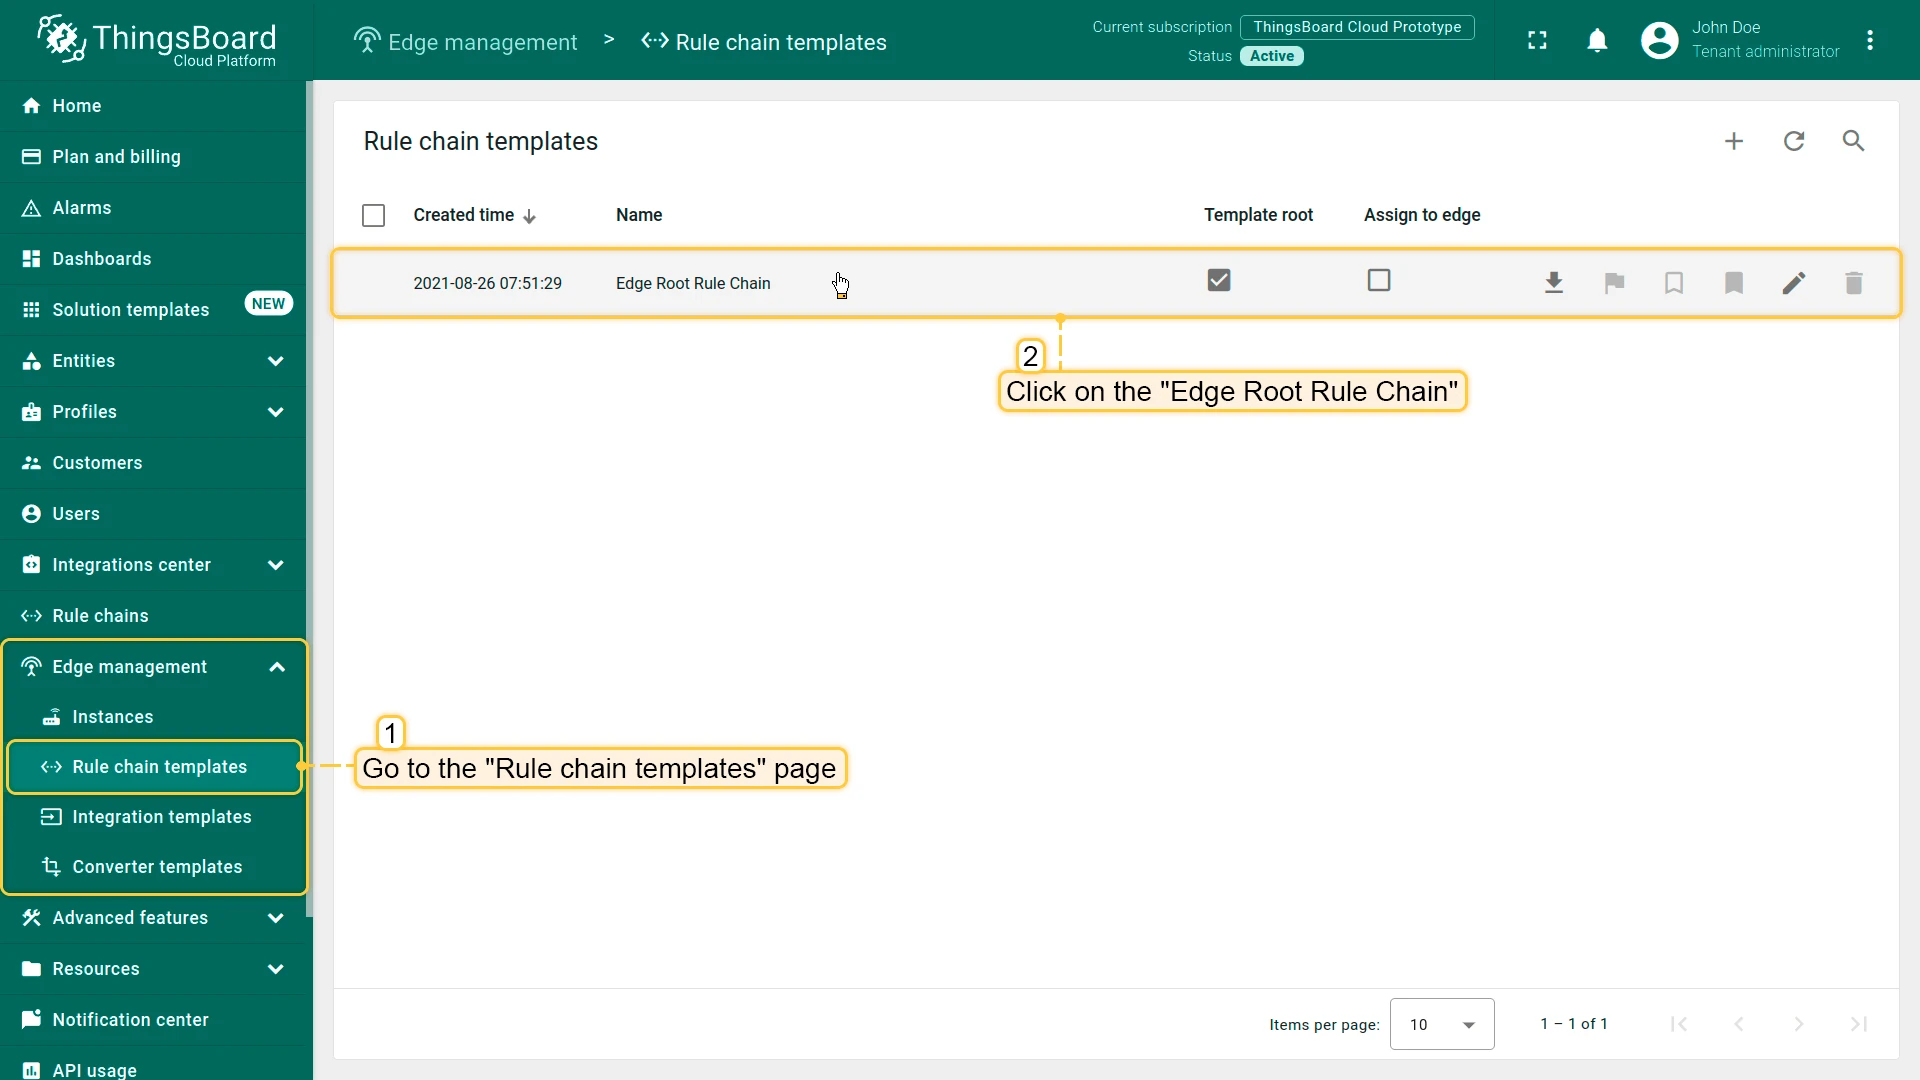
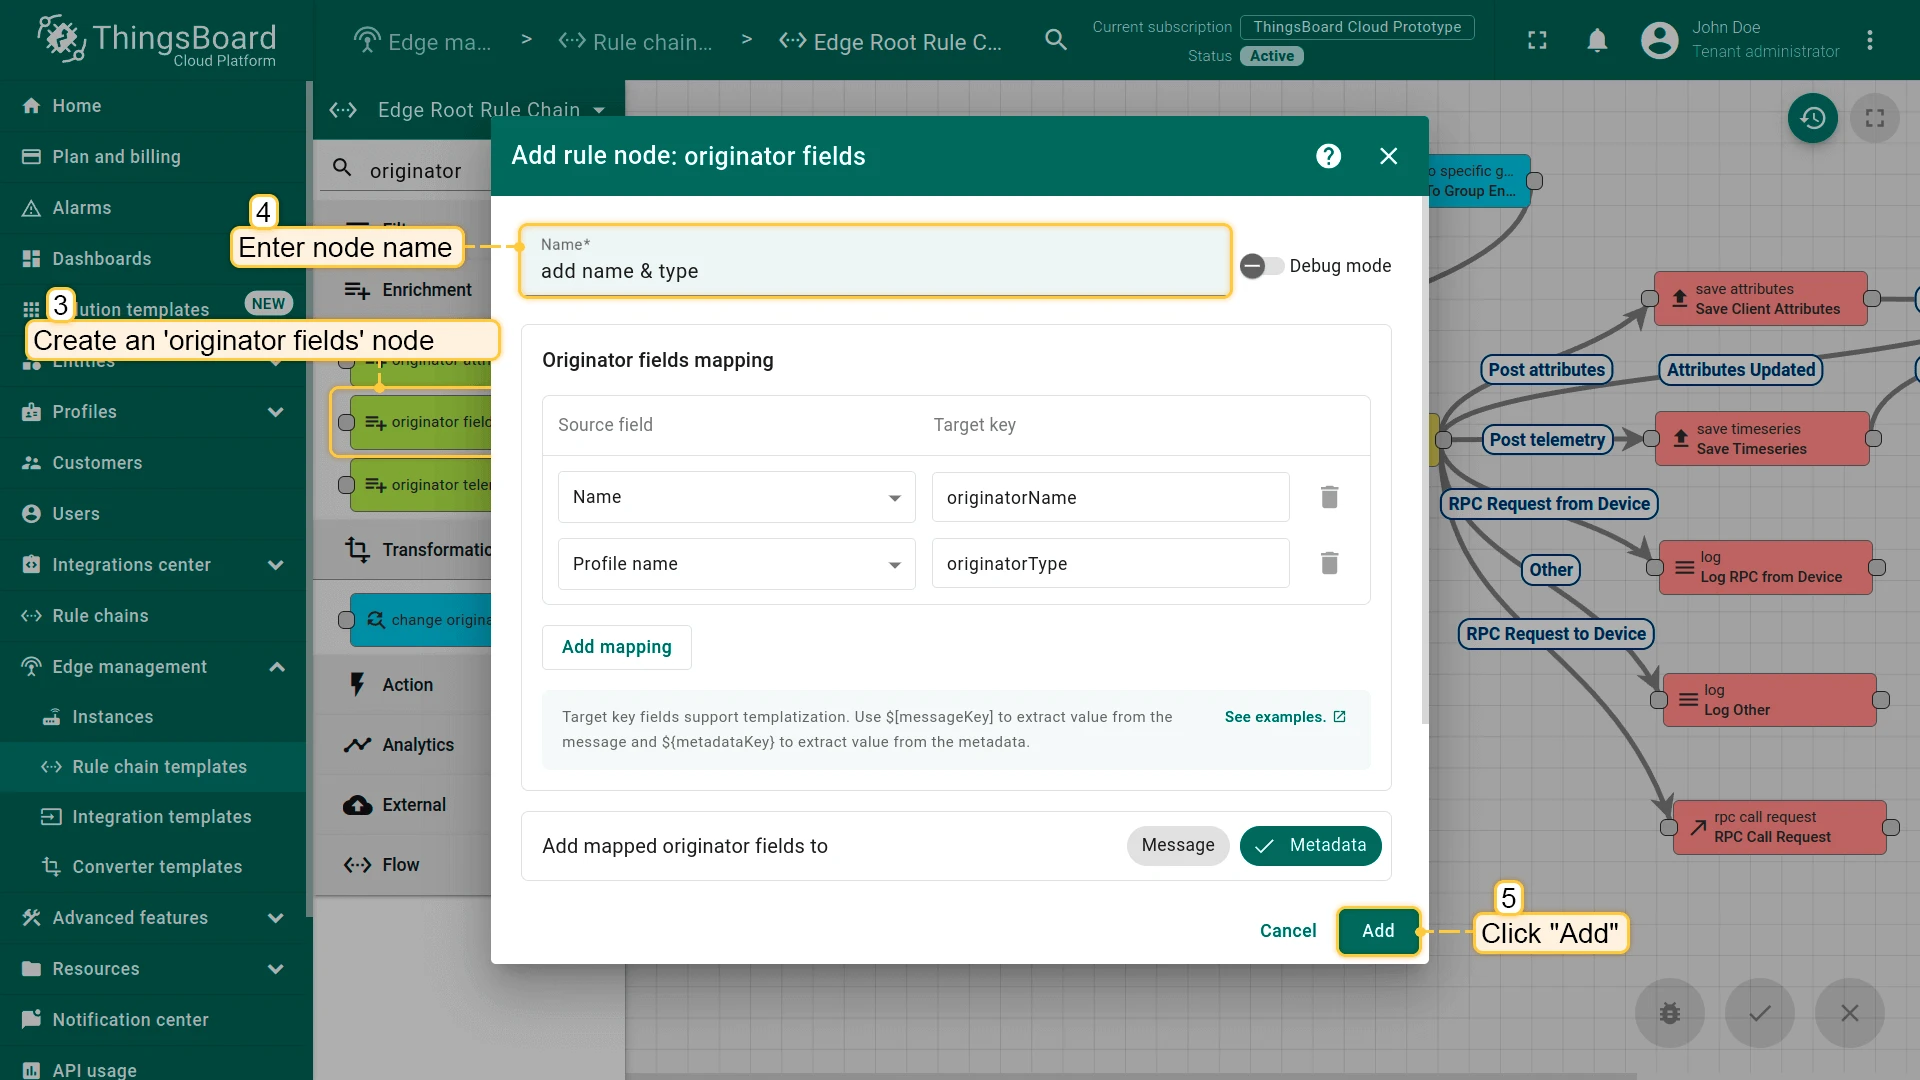
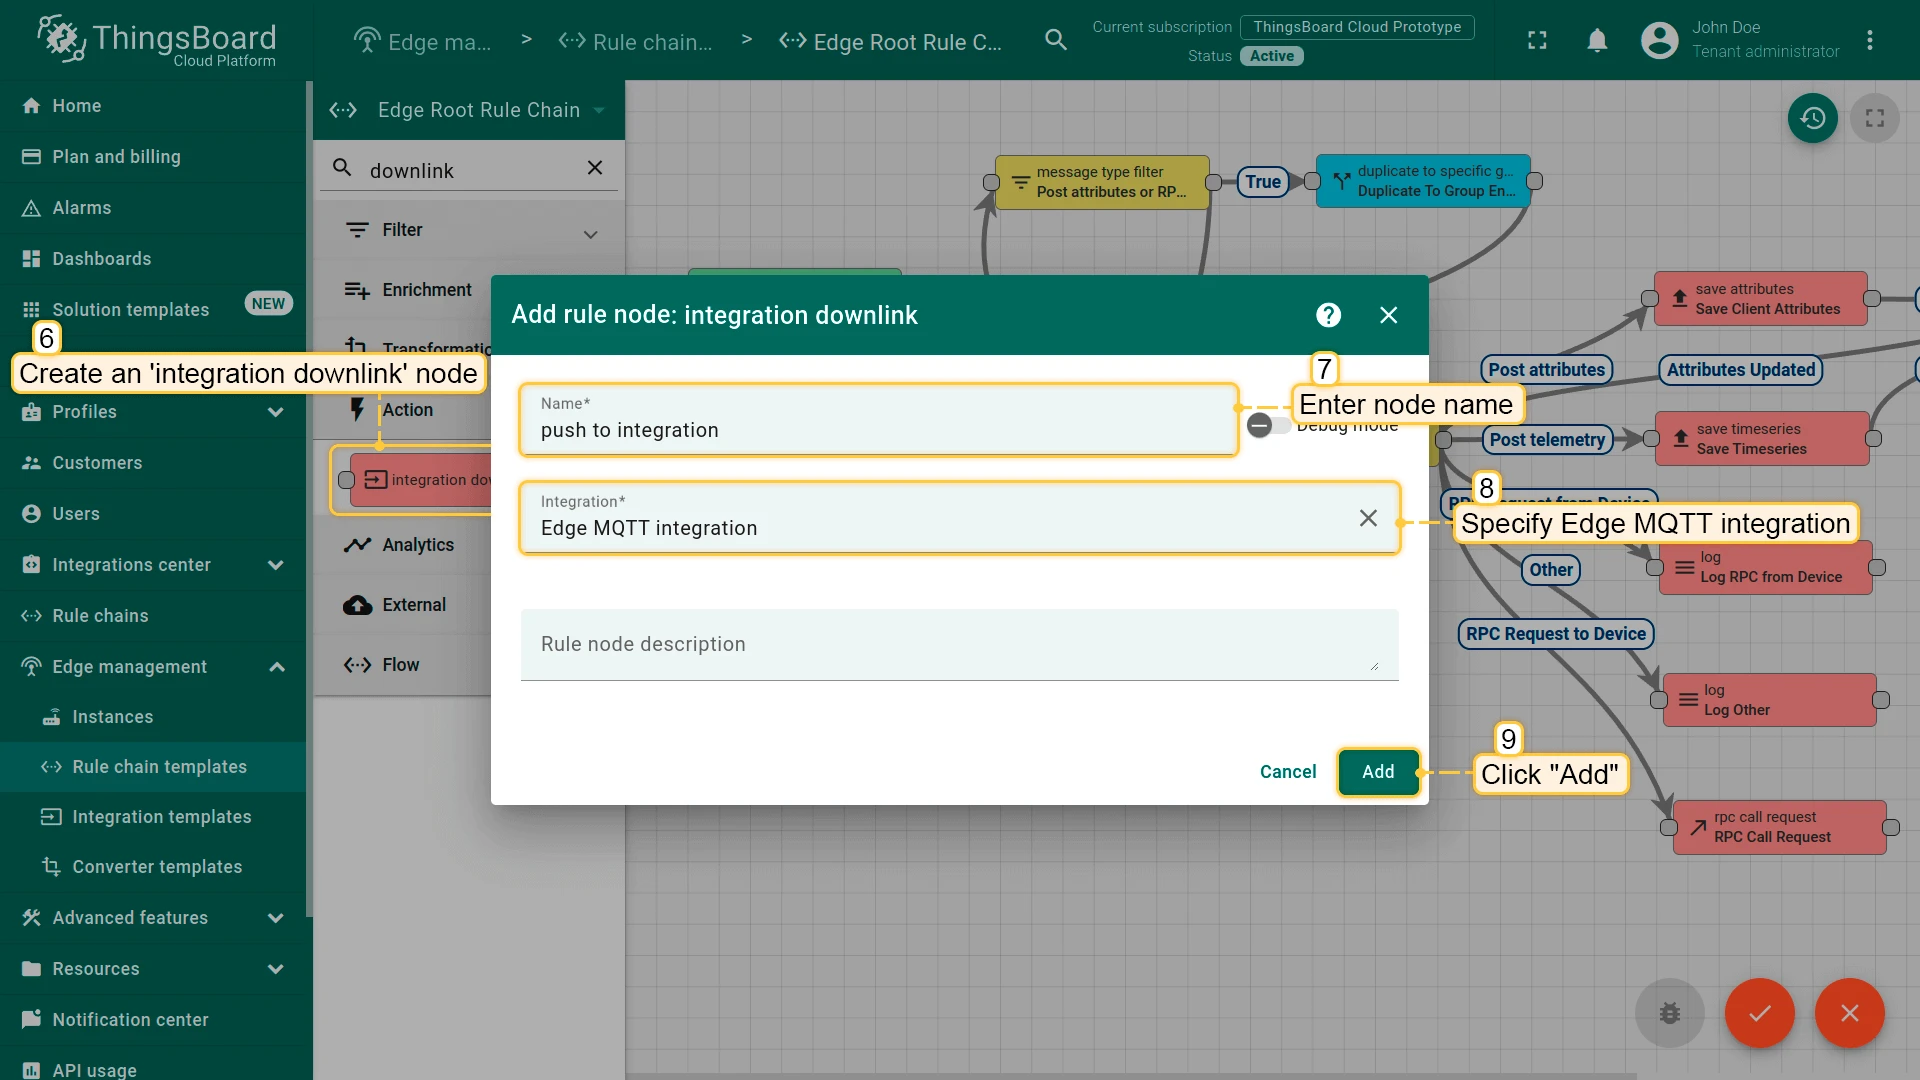
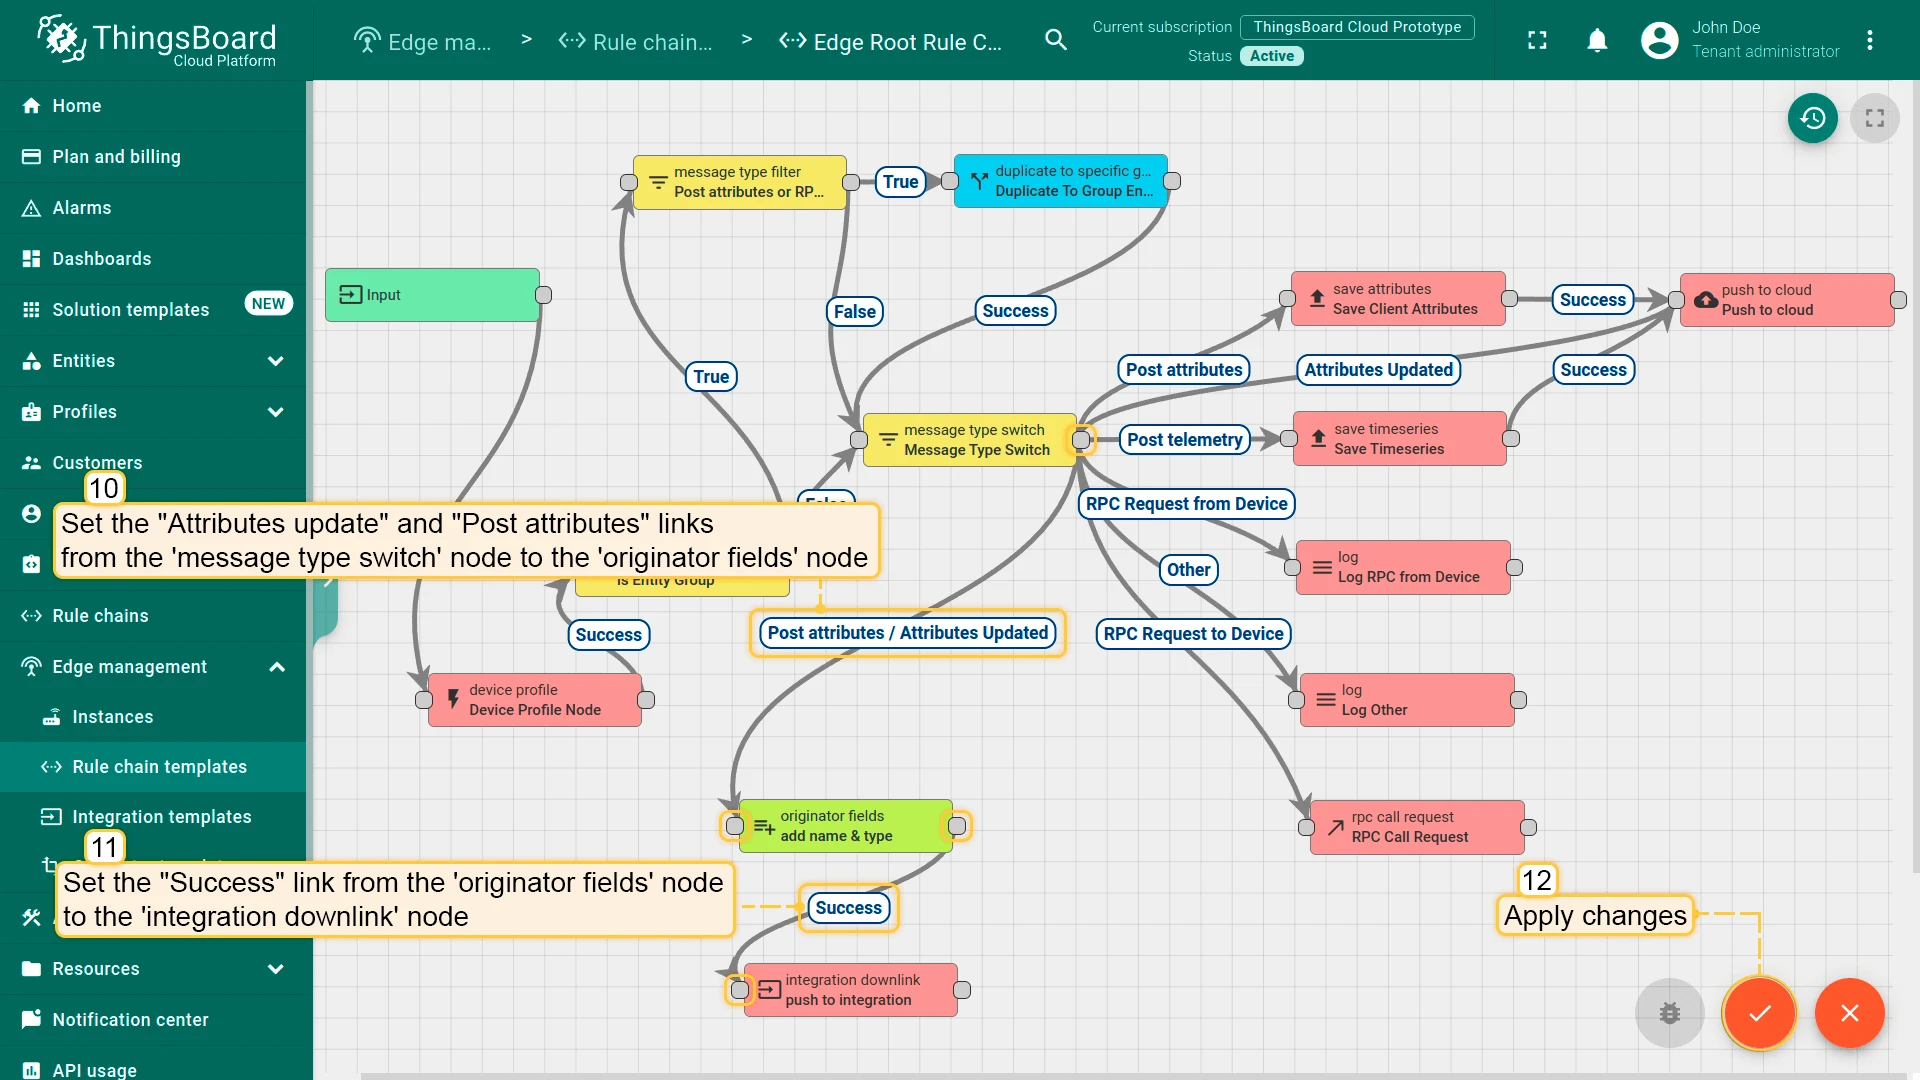
Modify Edge Root Rule Chain for downlinks
Section titled “Modify Edge Root Rule Chain for downlinks”To send downlink messages from the Rule Engine to the MQTT integration, add two rule nodes to the Edge Root Rule Chain: originator fields and integration downlink.
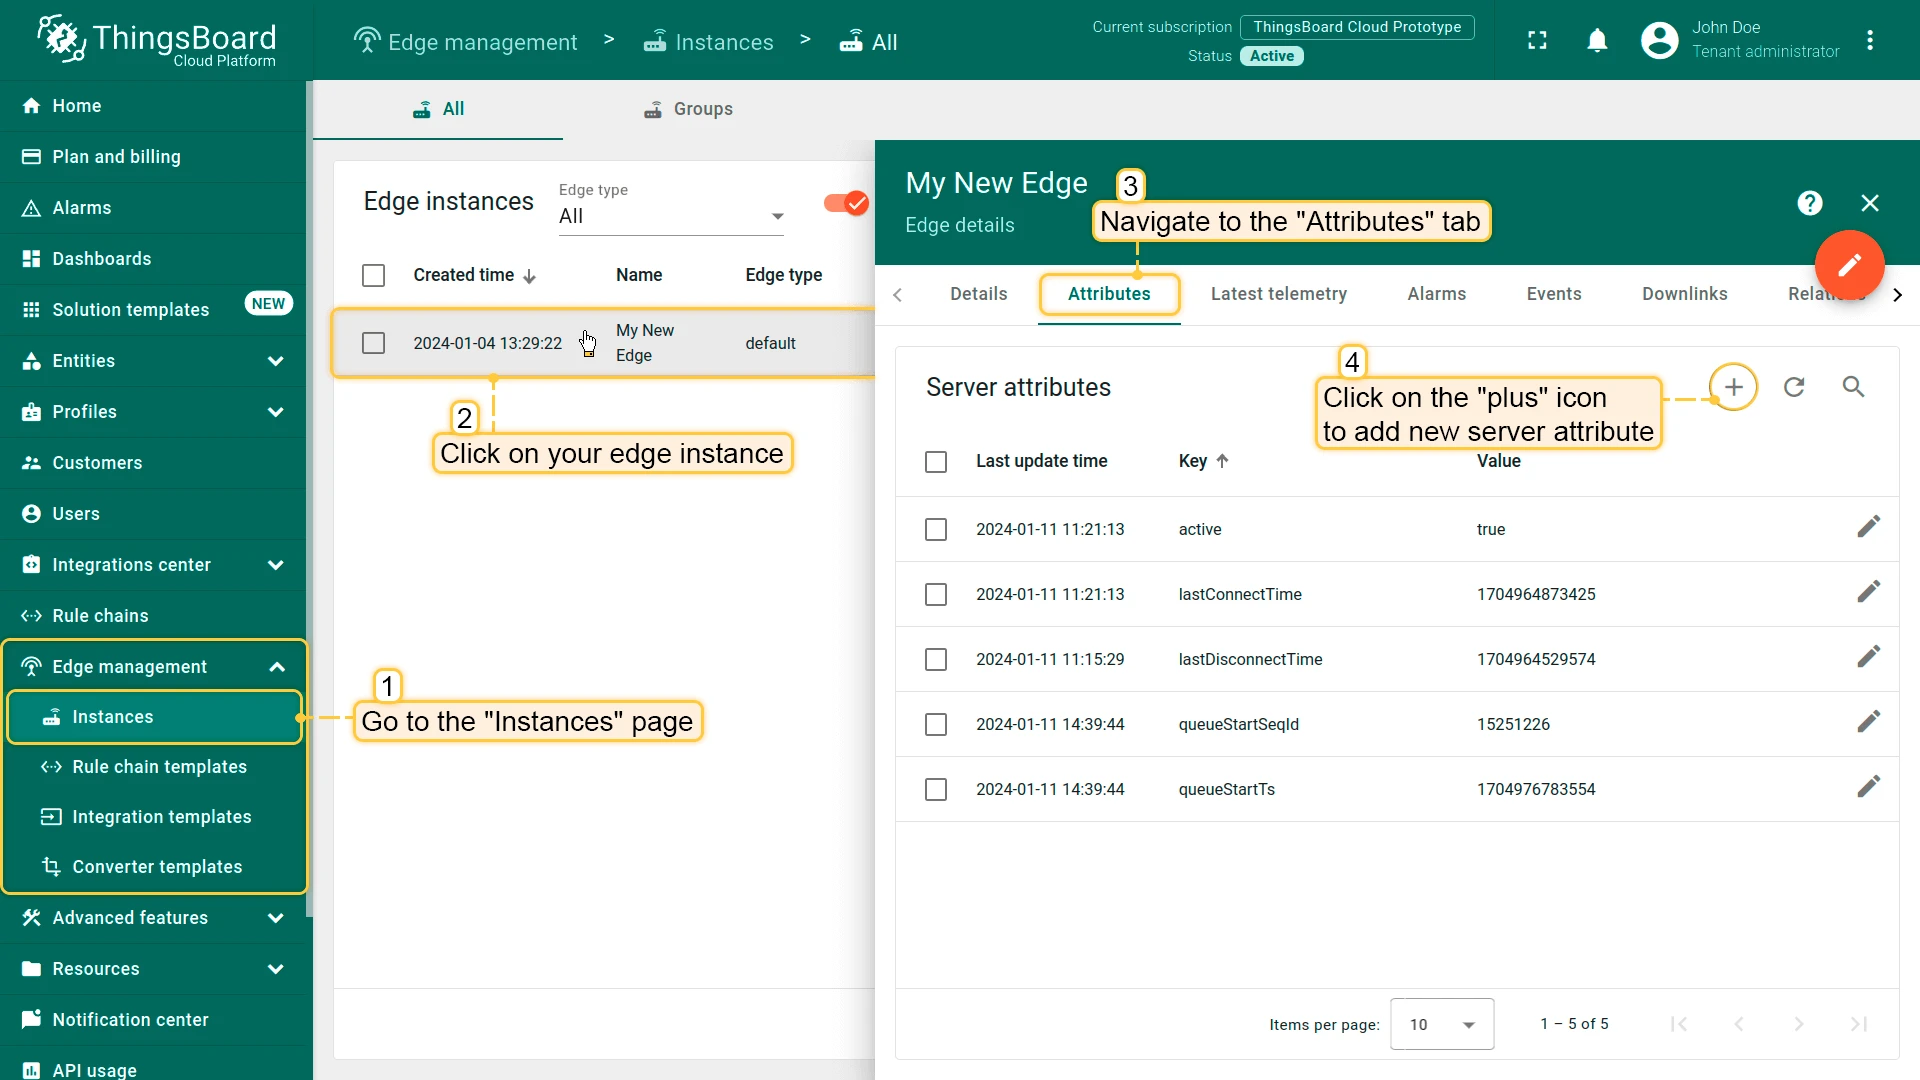
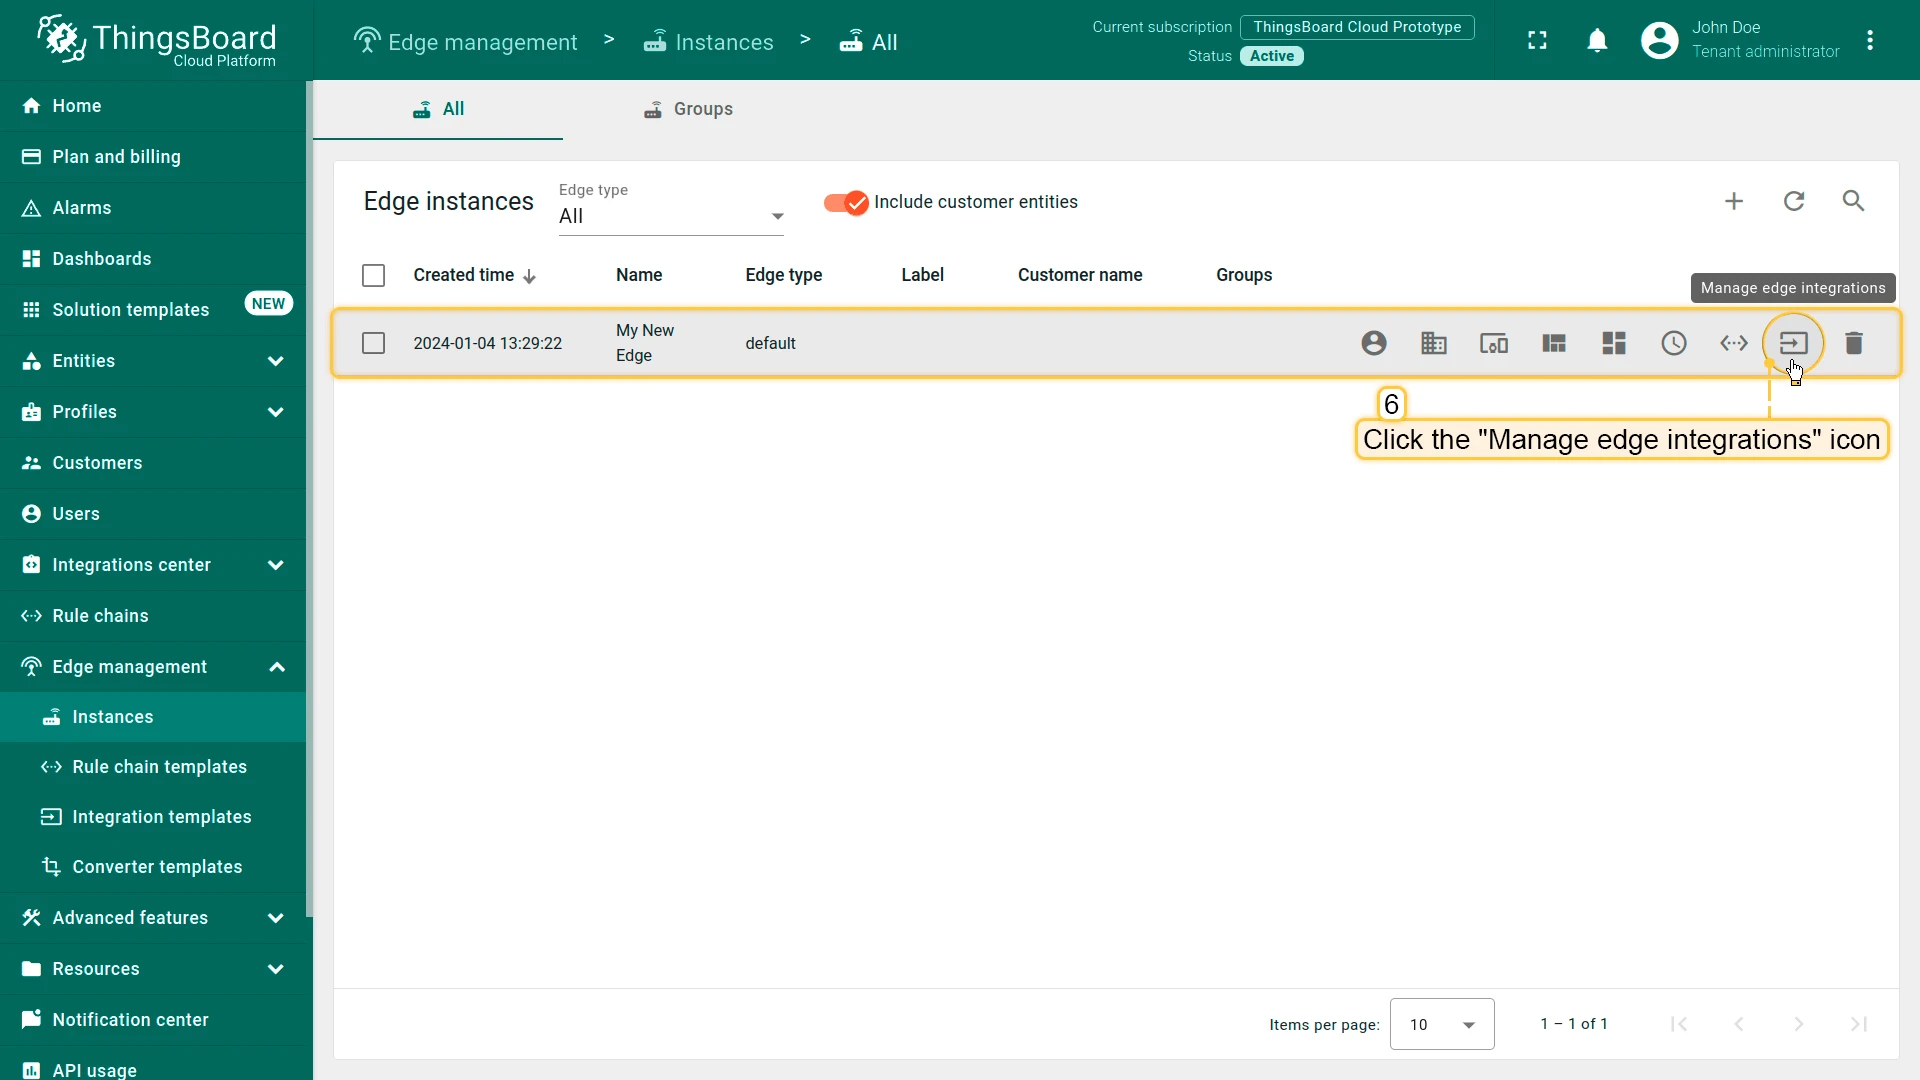
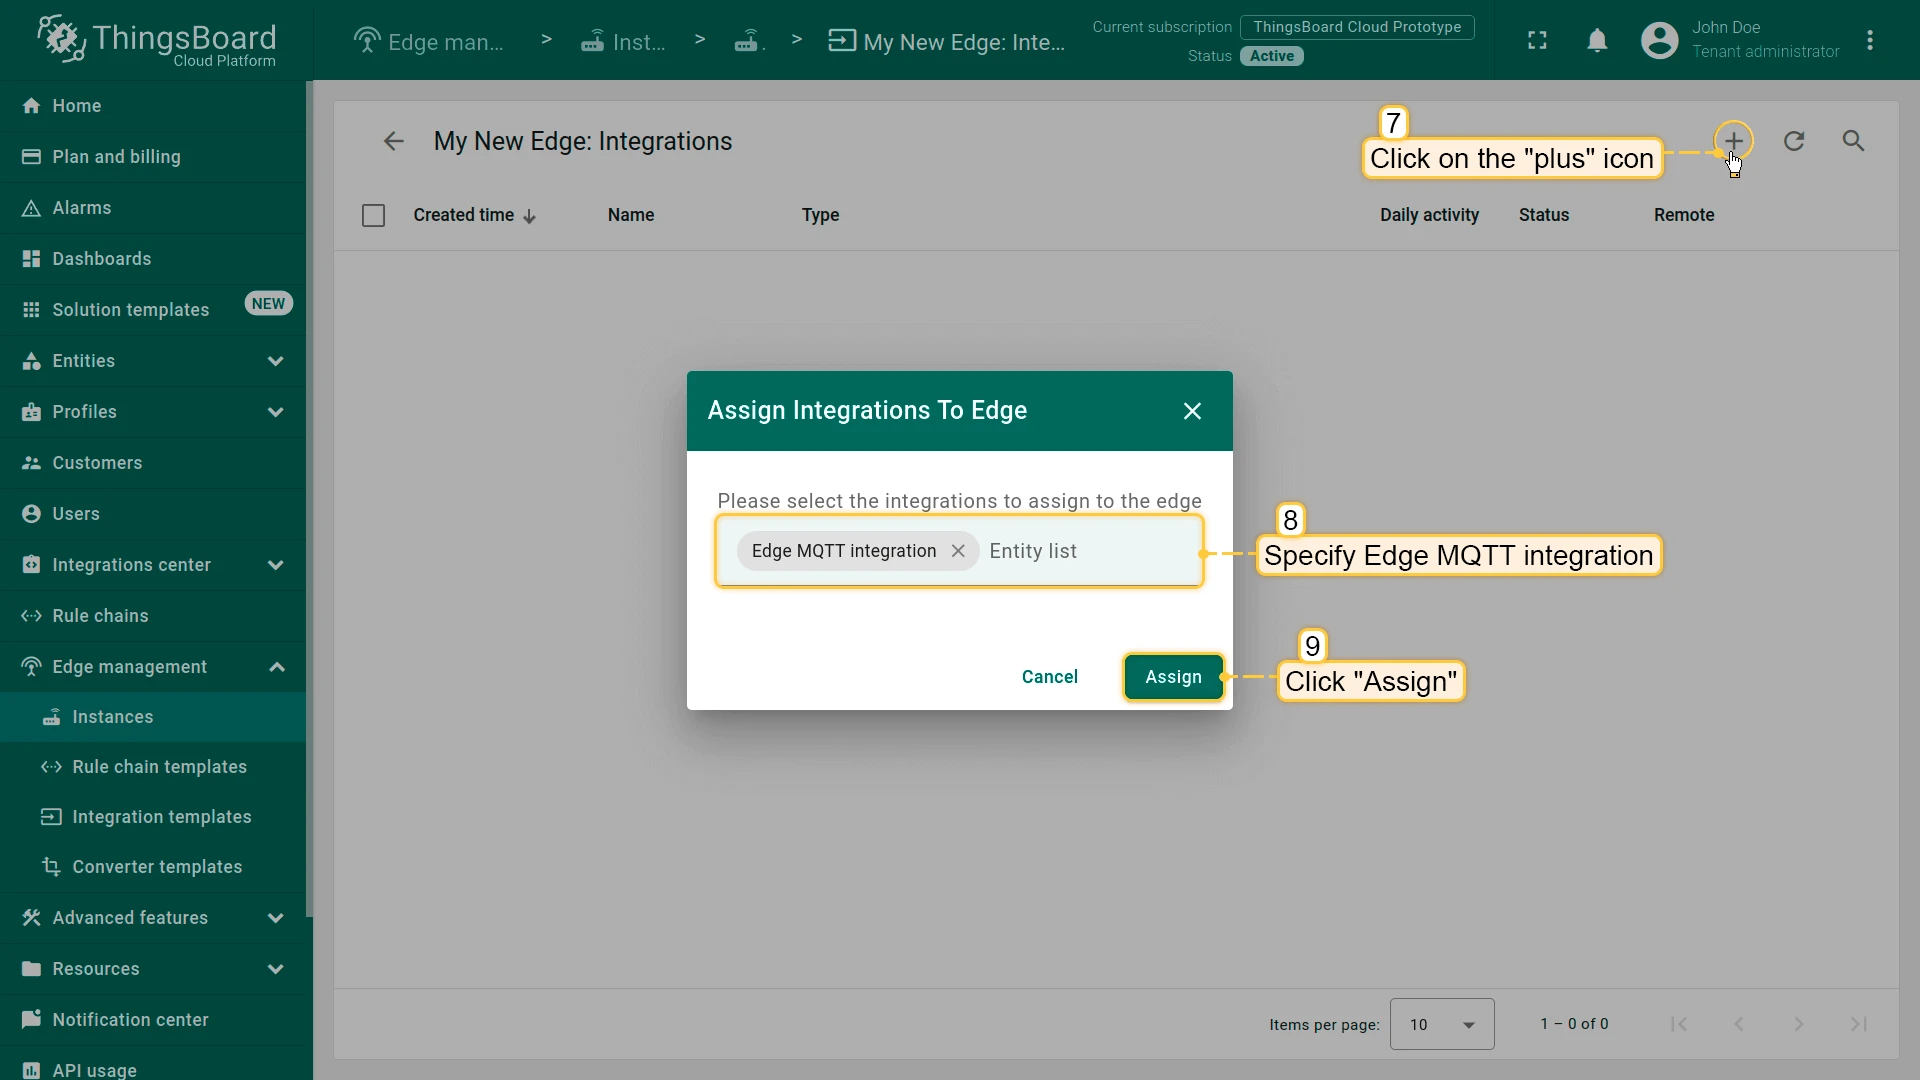
Assign integration to Edge
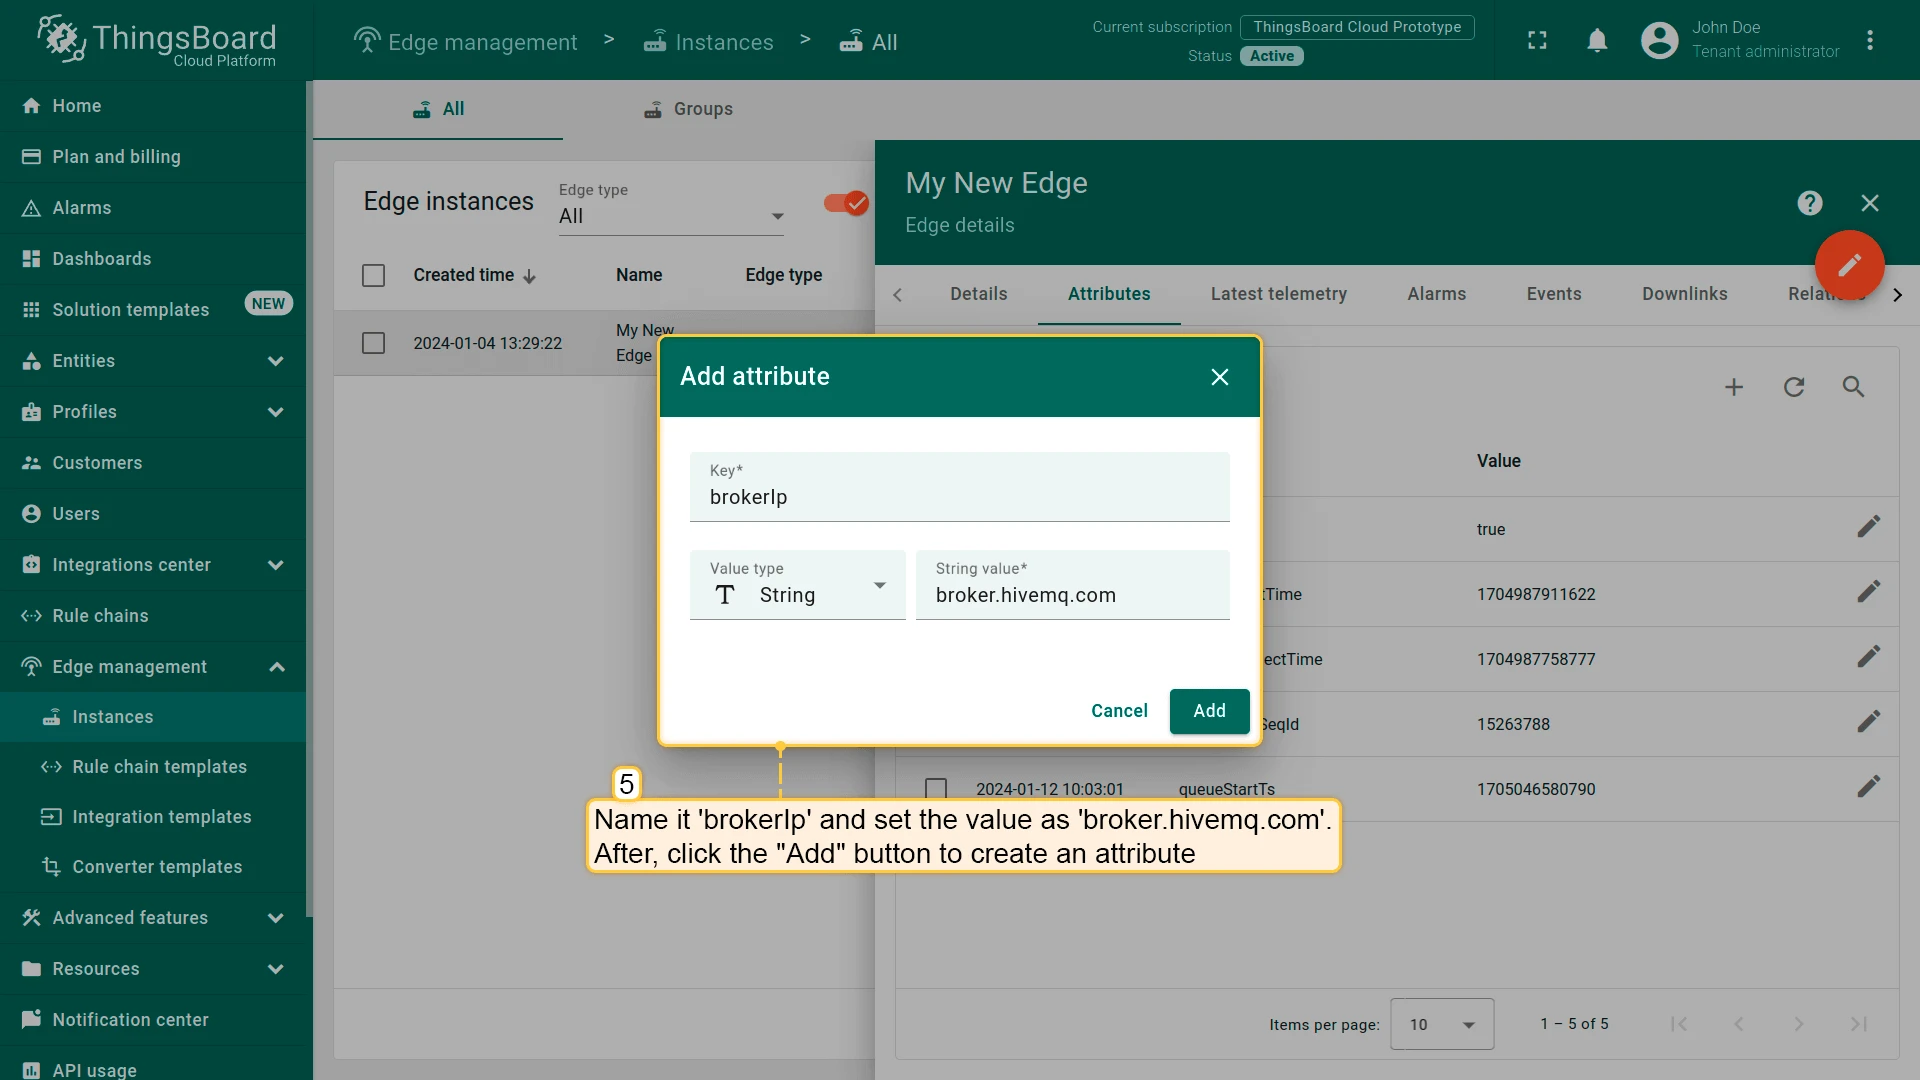
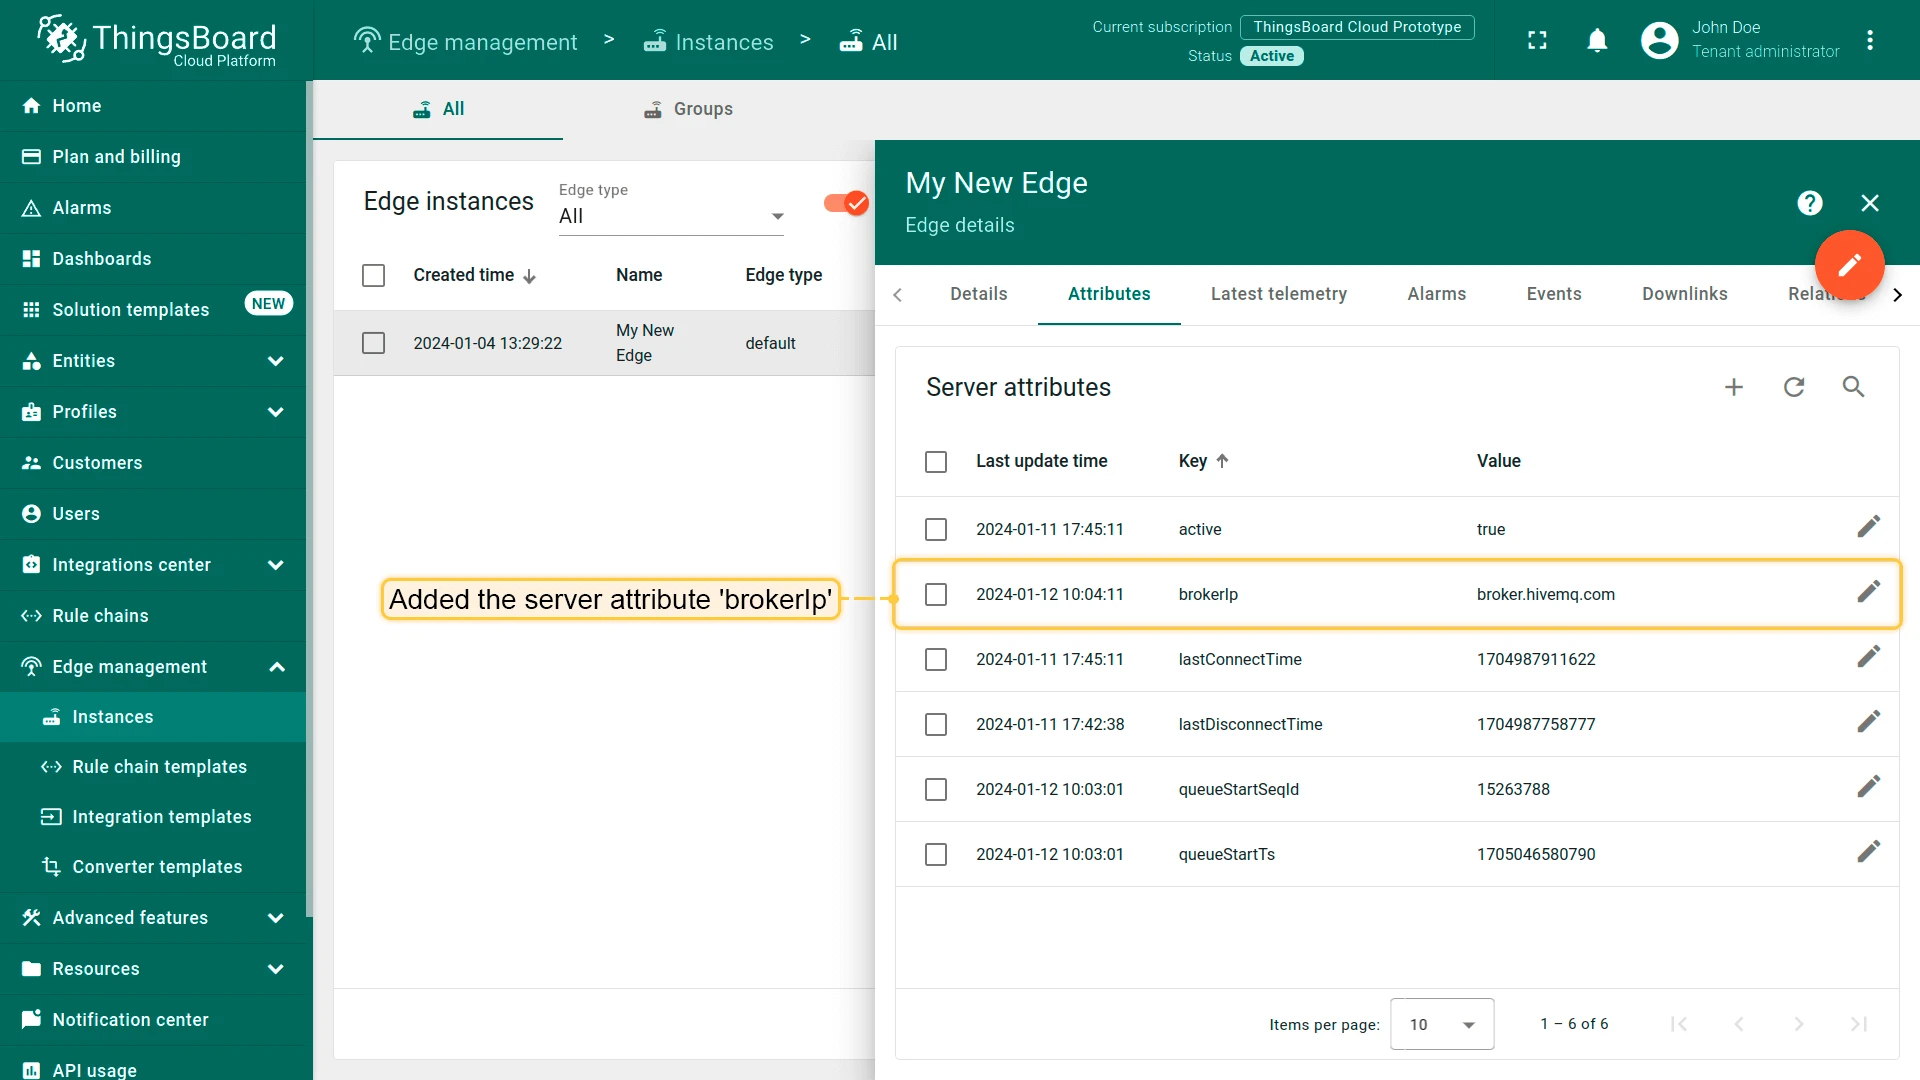
Section titled “Assign integration to Edge”Before assigning the integration template, add the brokerIp attribute to the Edge instance. This provides the value for the ${{brokerIp}} placeholder used in the integration configuration.
Send uplink message
Section titled “Send uplink message”-
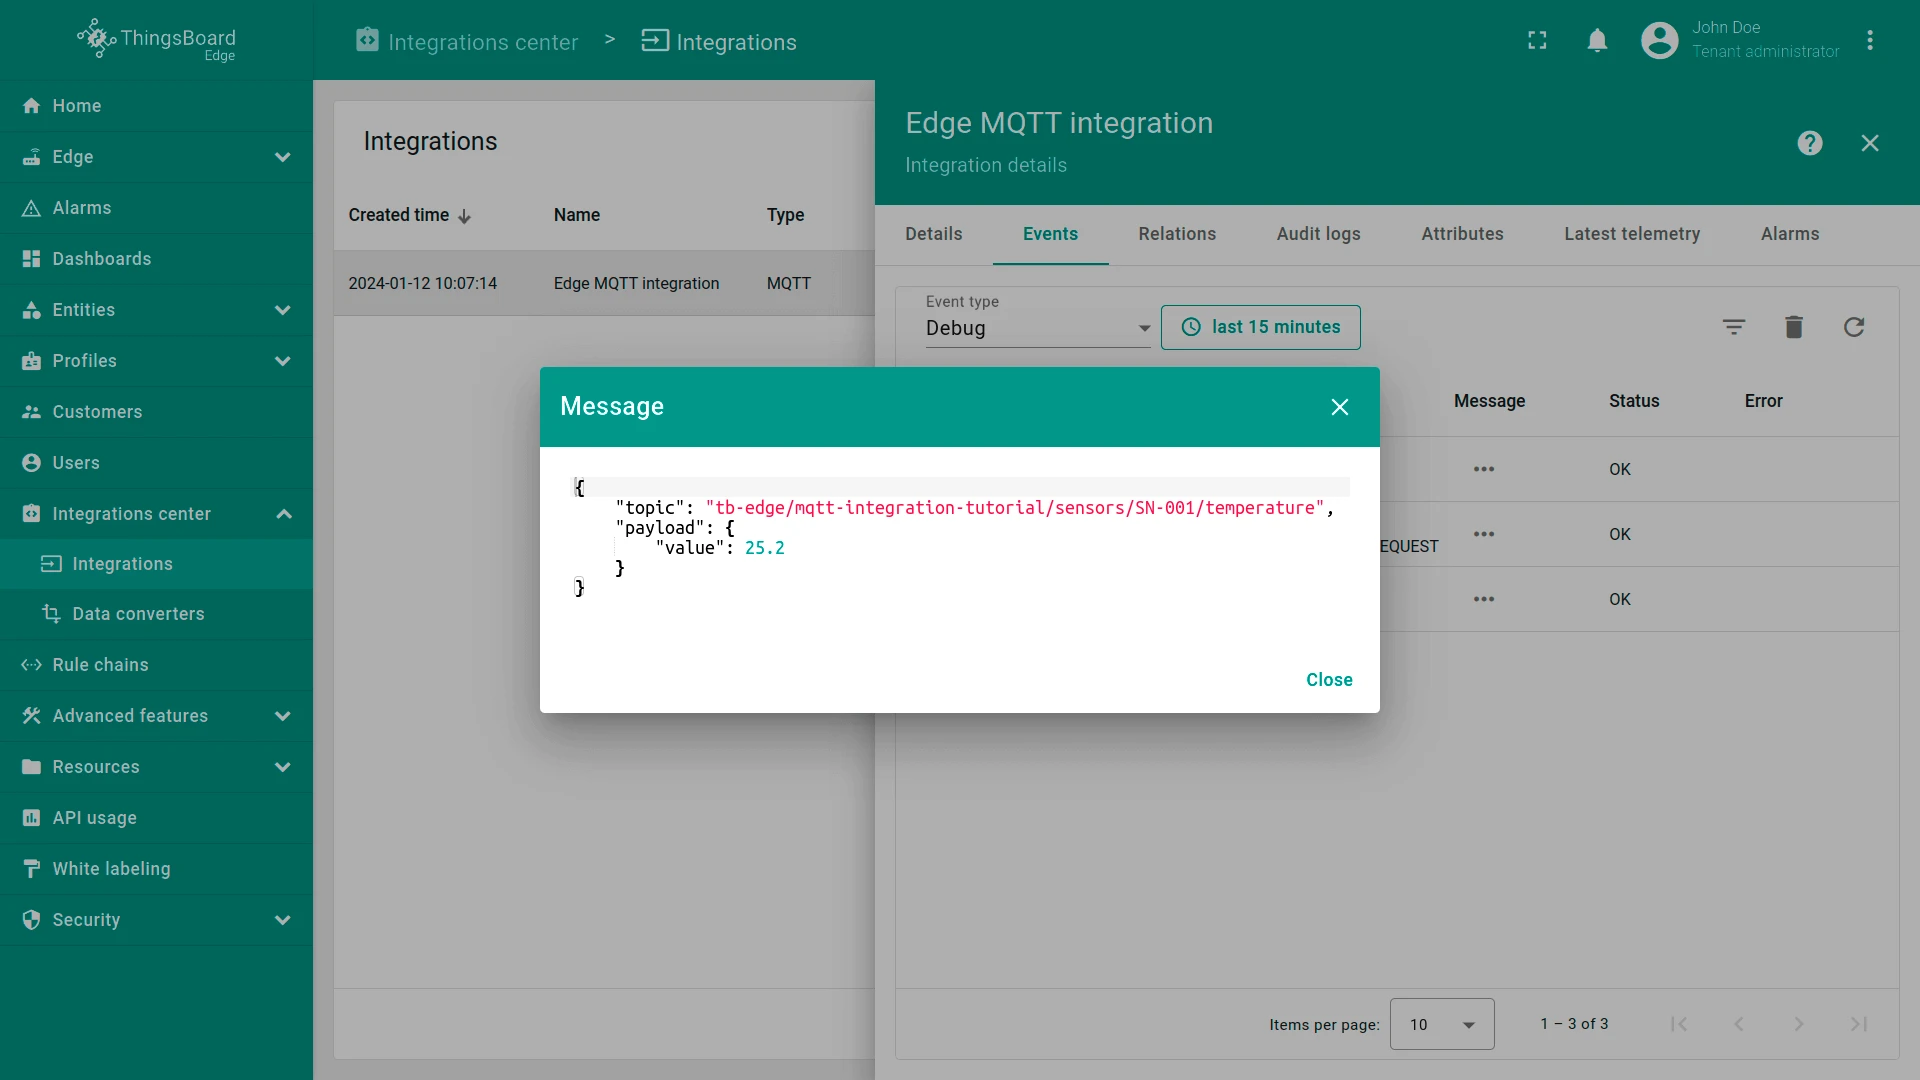
Send a test uplink message using
mosquitto_pub. This simulates a device publishing a temperature reading:Terminal window mosquitto_pub -h broker.hivemq.com -p 1883 \-t "tb-edge/mqtt-integration-tutorial/sensors/SN-001/temperature" \-m '{"value":25.2}' -
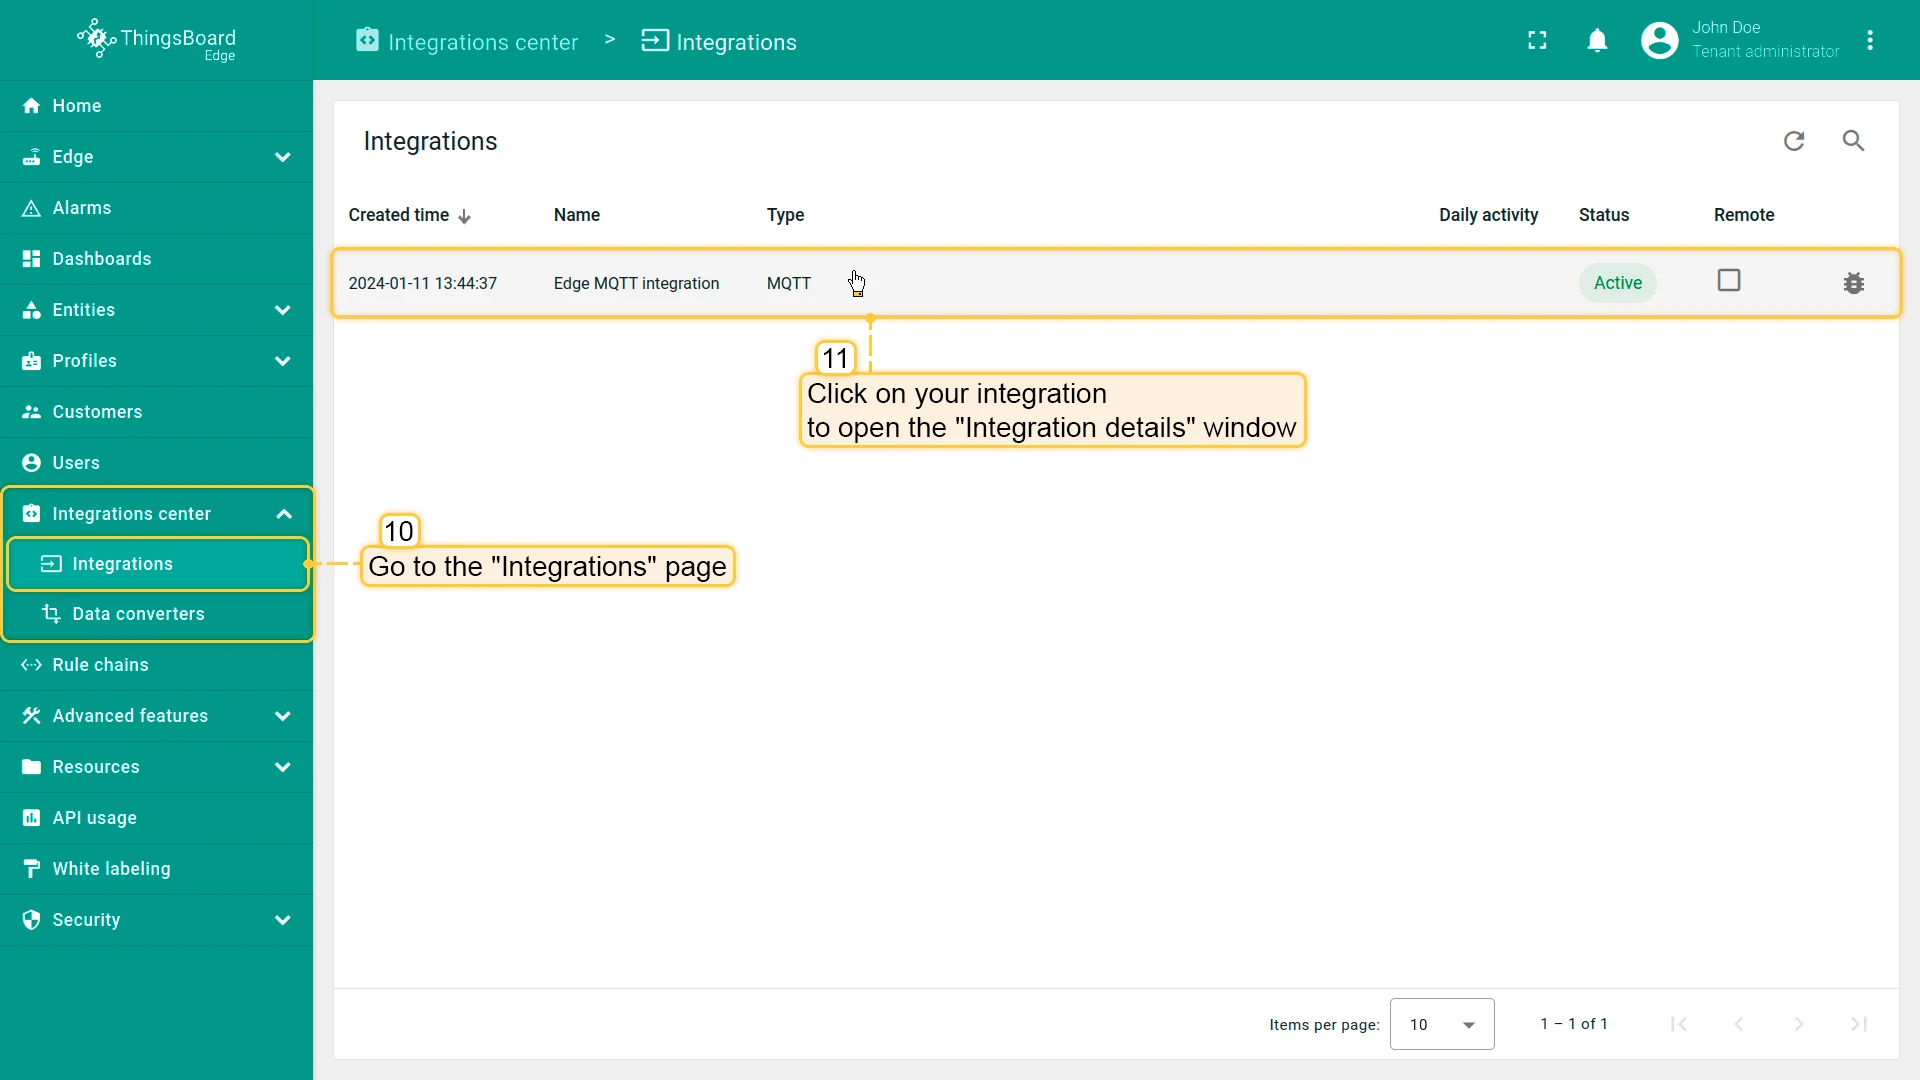
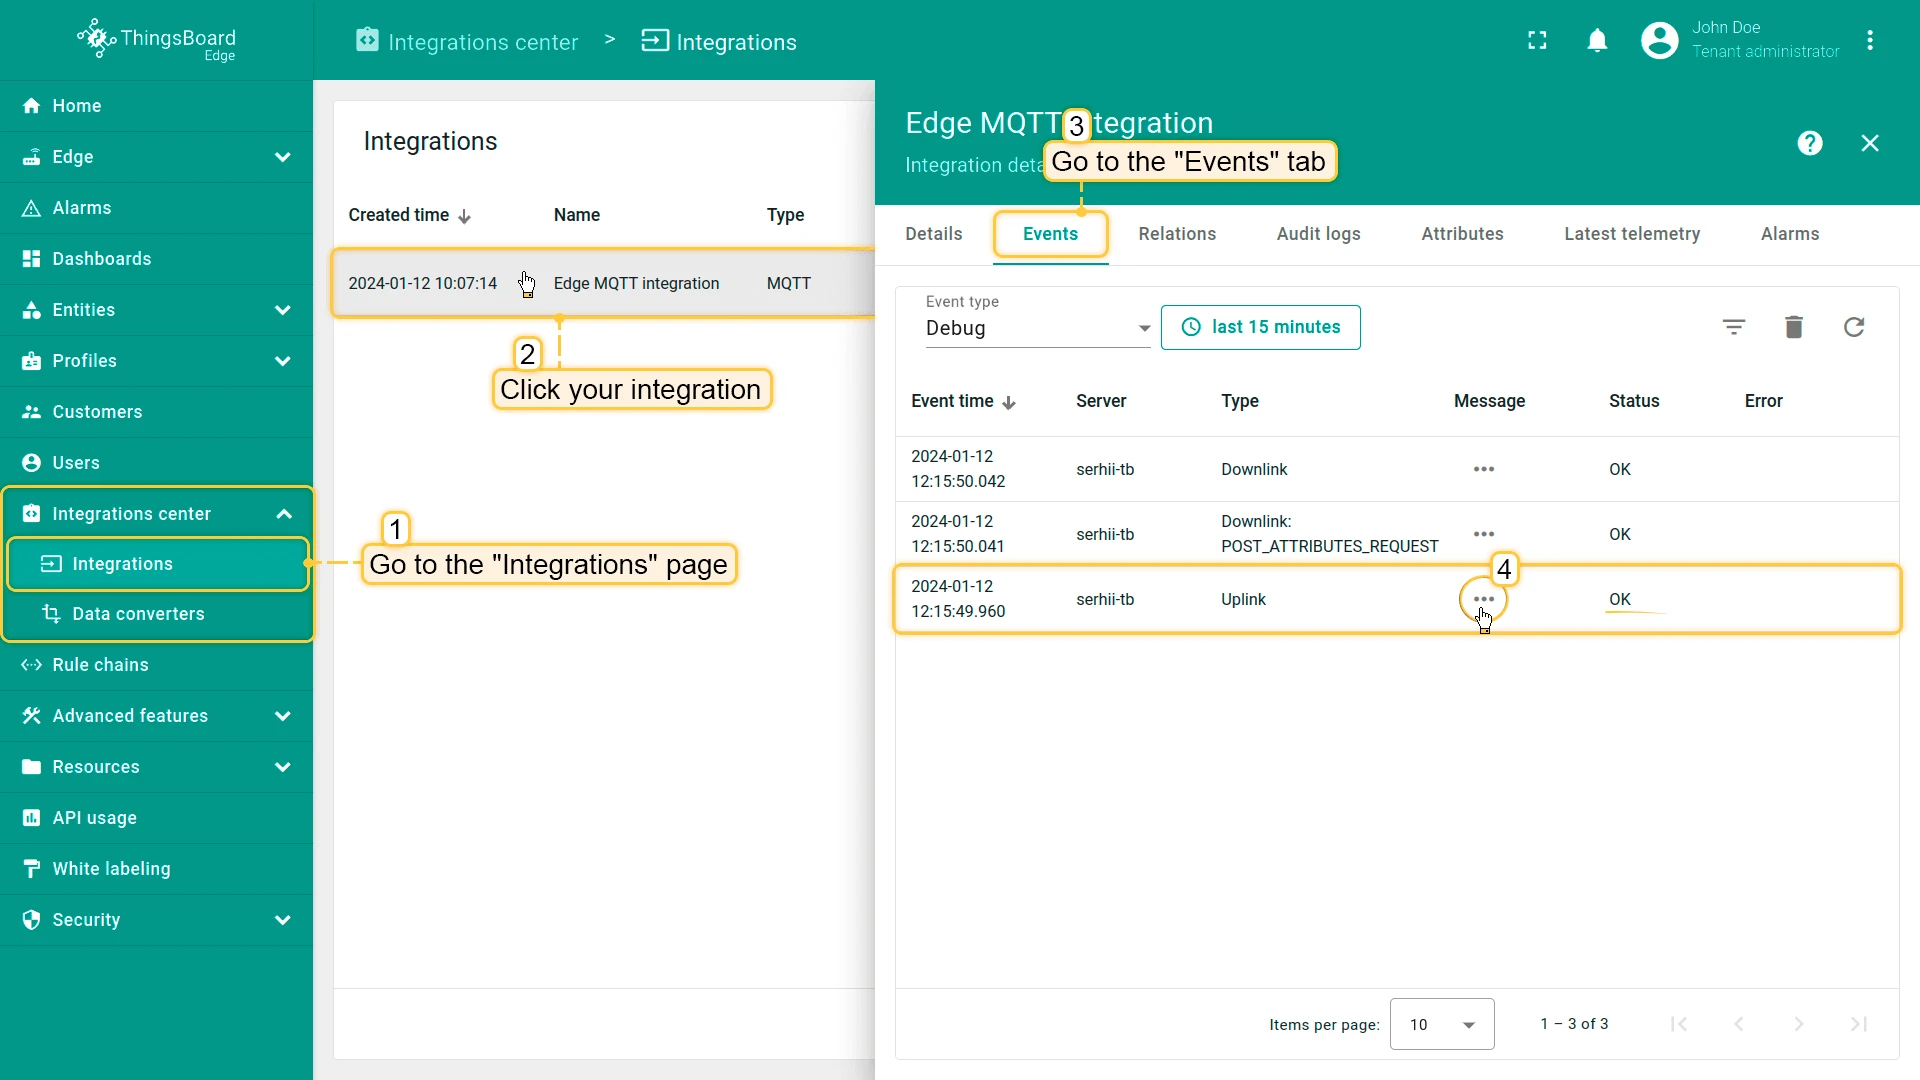
On the Edge, go to Integration center > Integrations and open the Events tab on your MQTT integration. A message with status OK should appear. Click the three dots in the Message column to inspect the payload.
-
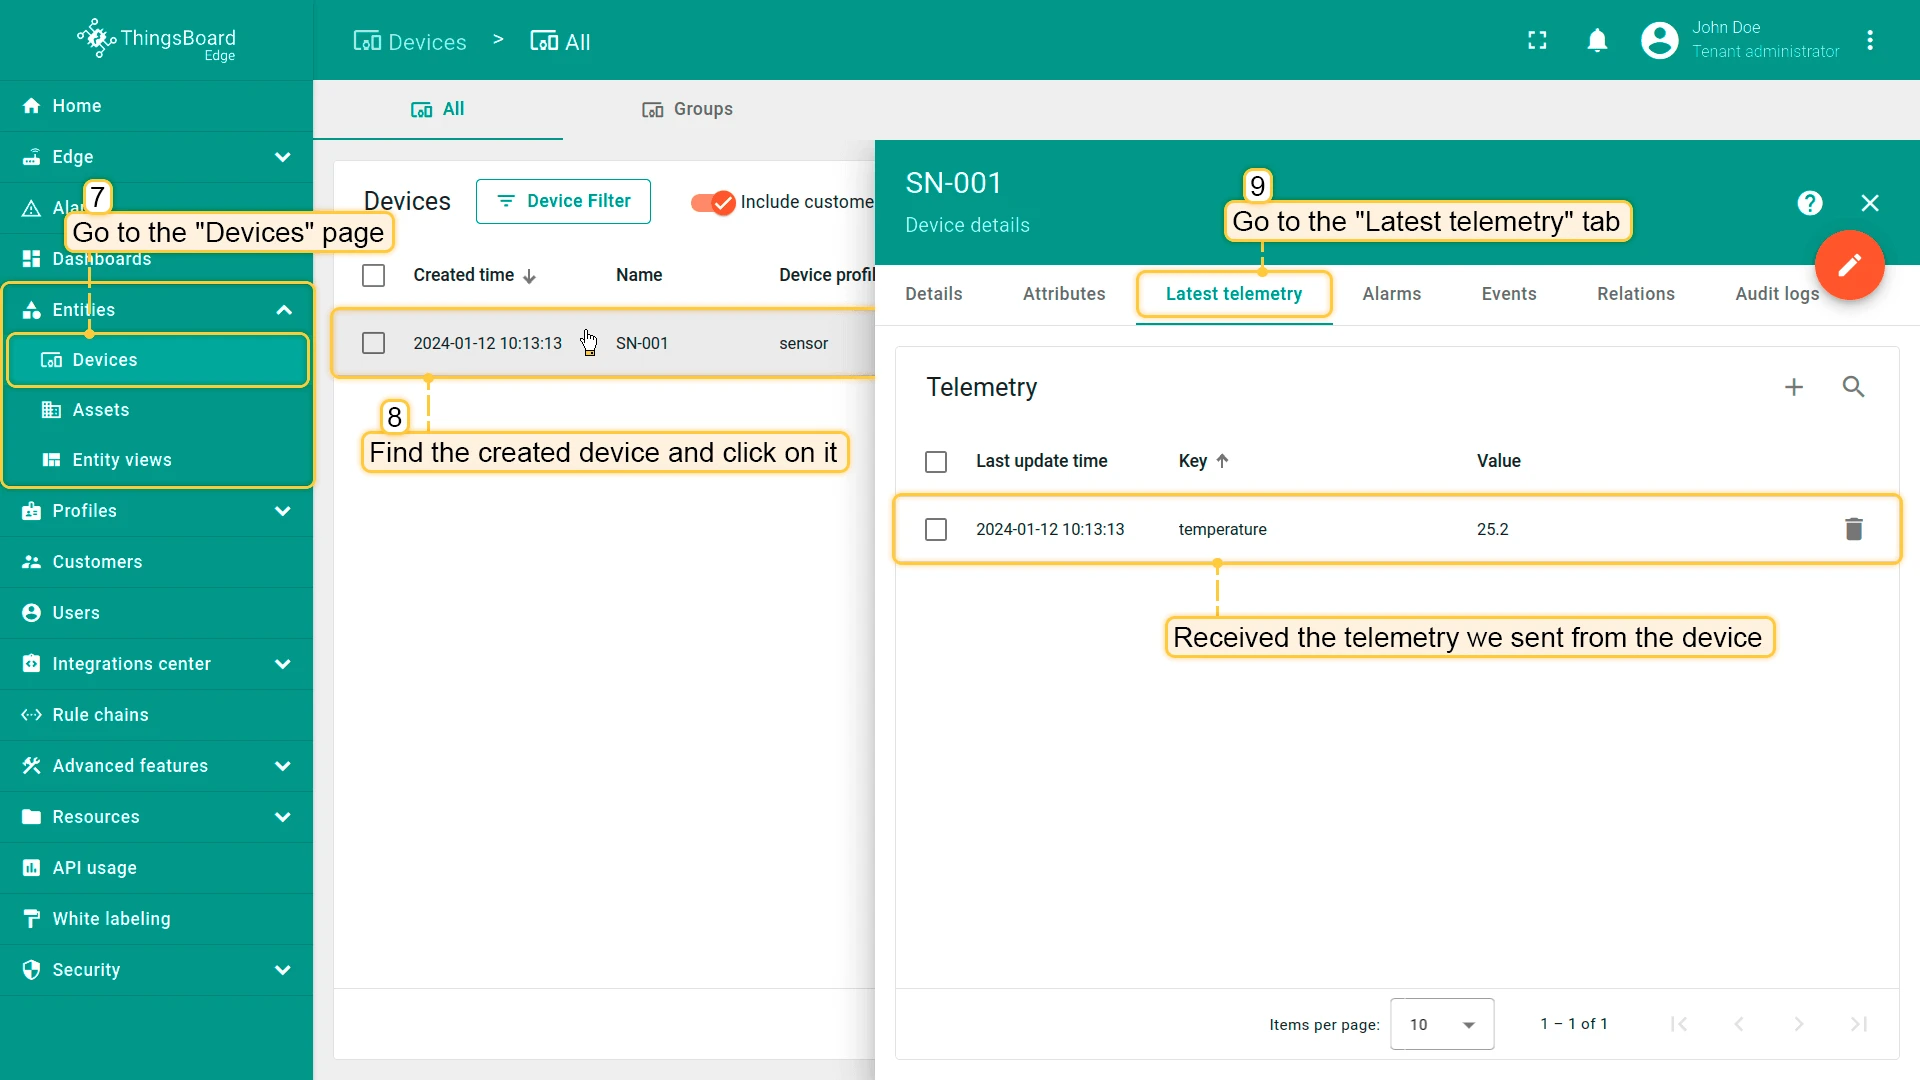
A new device is created automatically. Go to Entities > Devices on the Edge to see it.
-
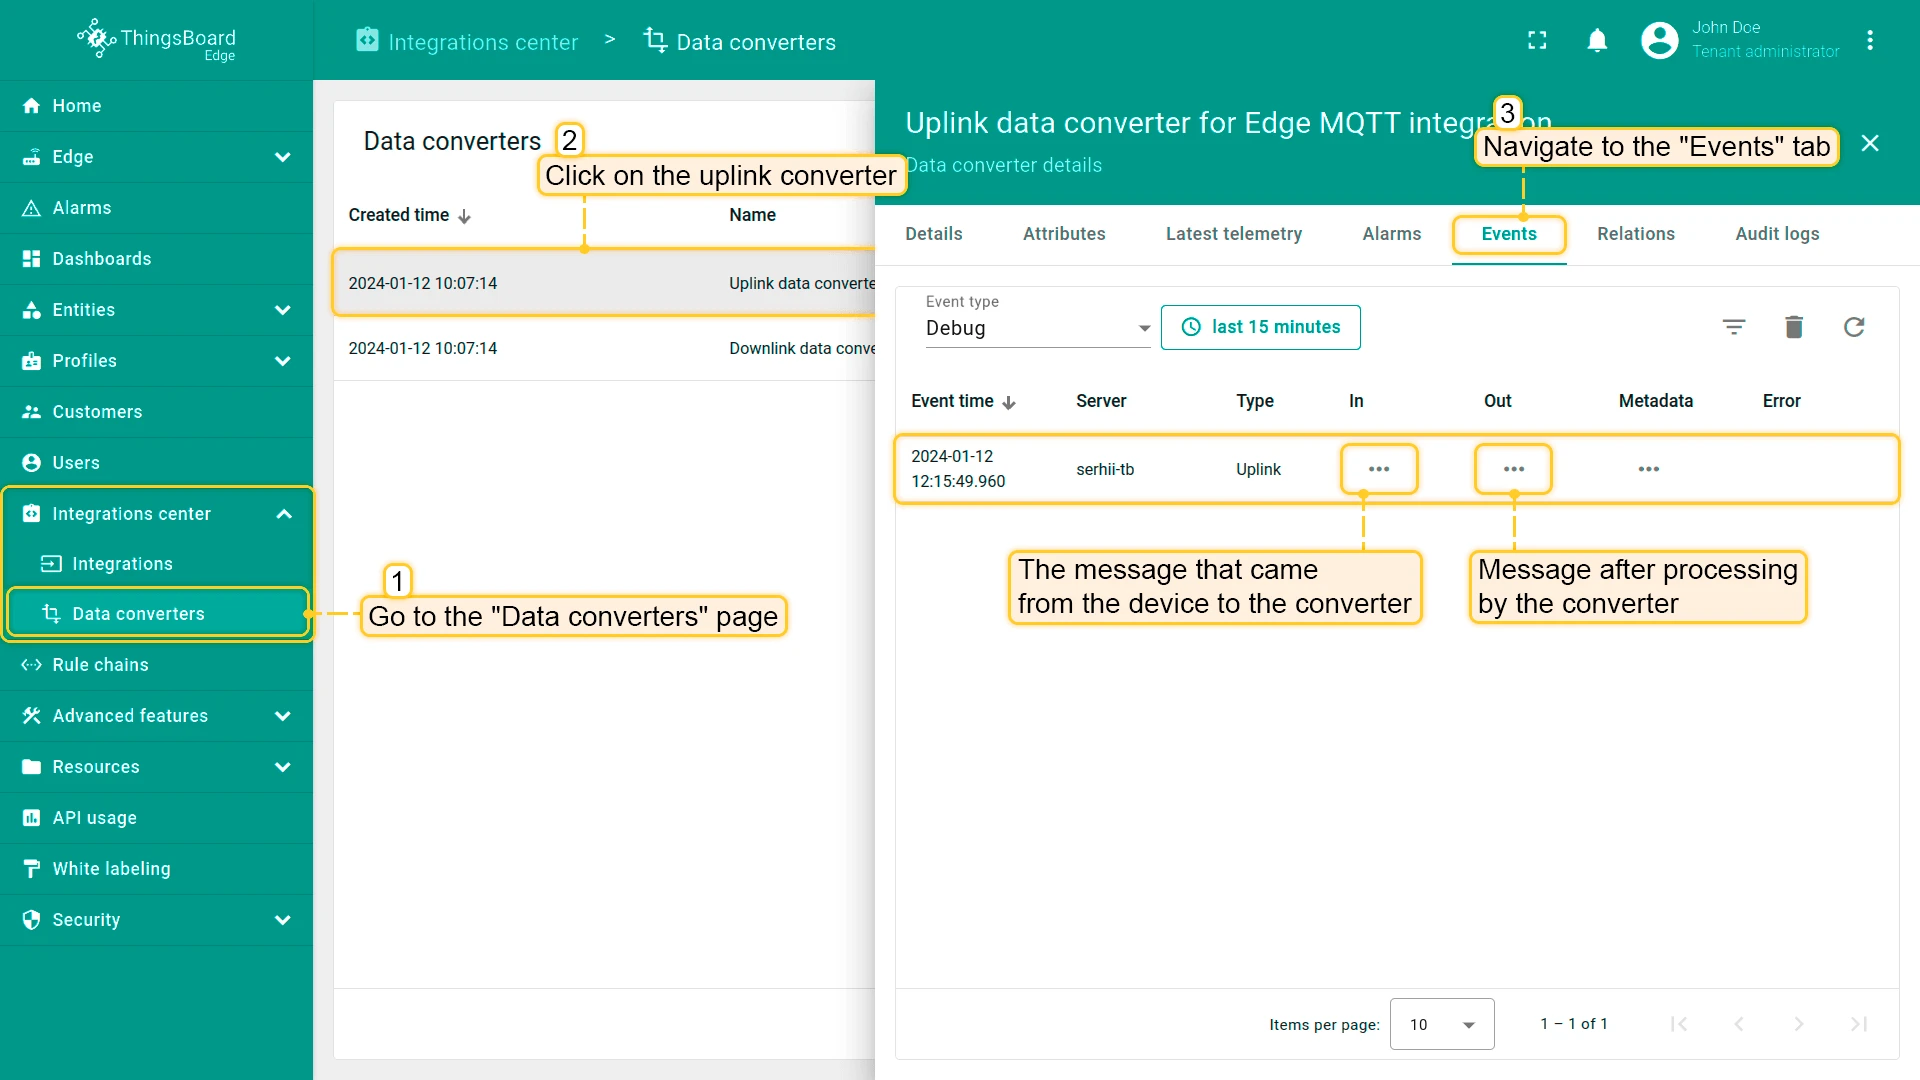
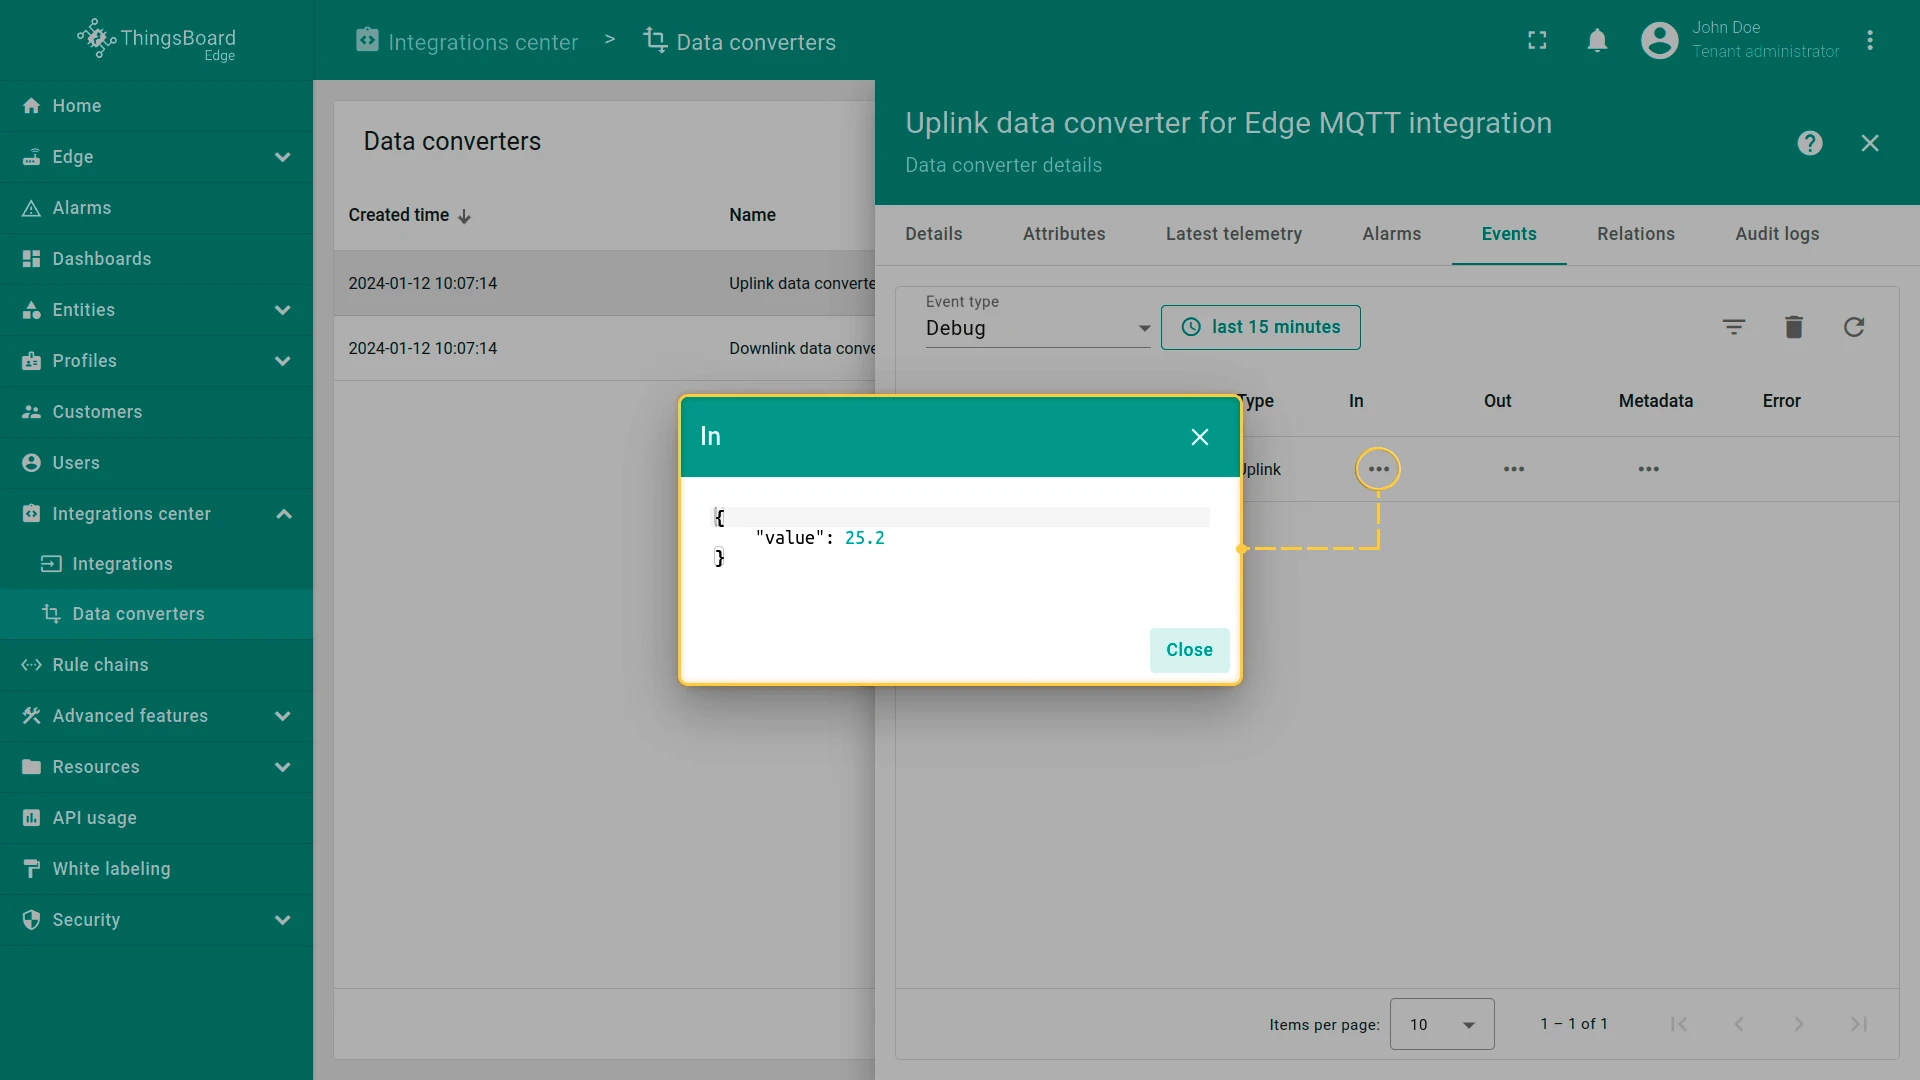
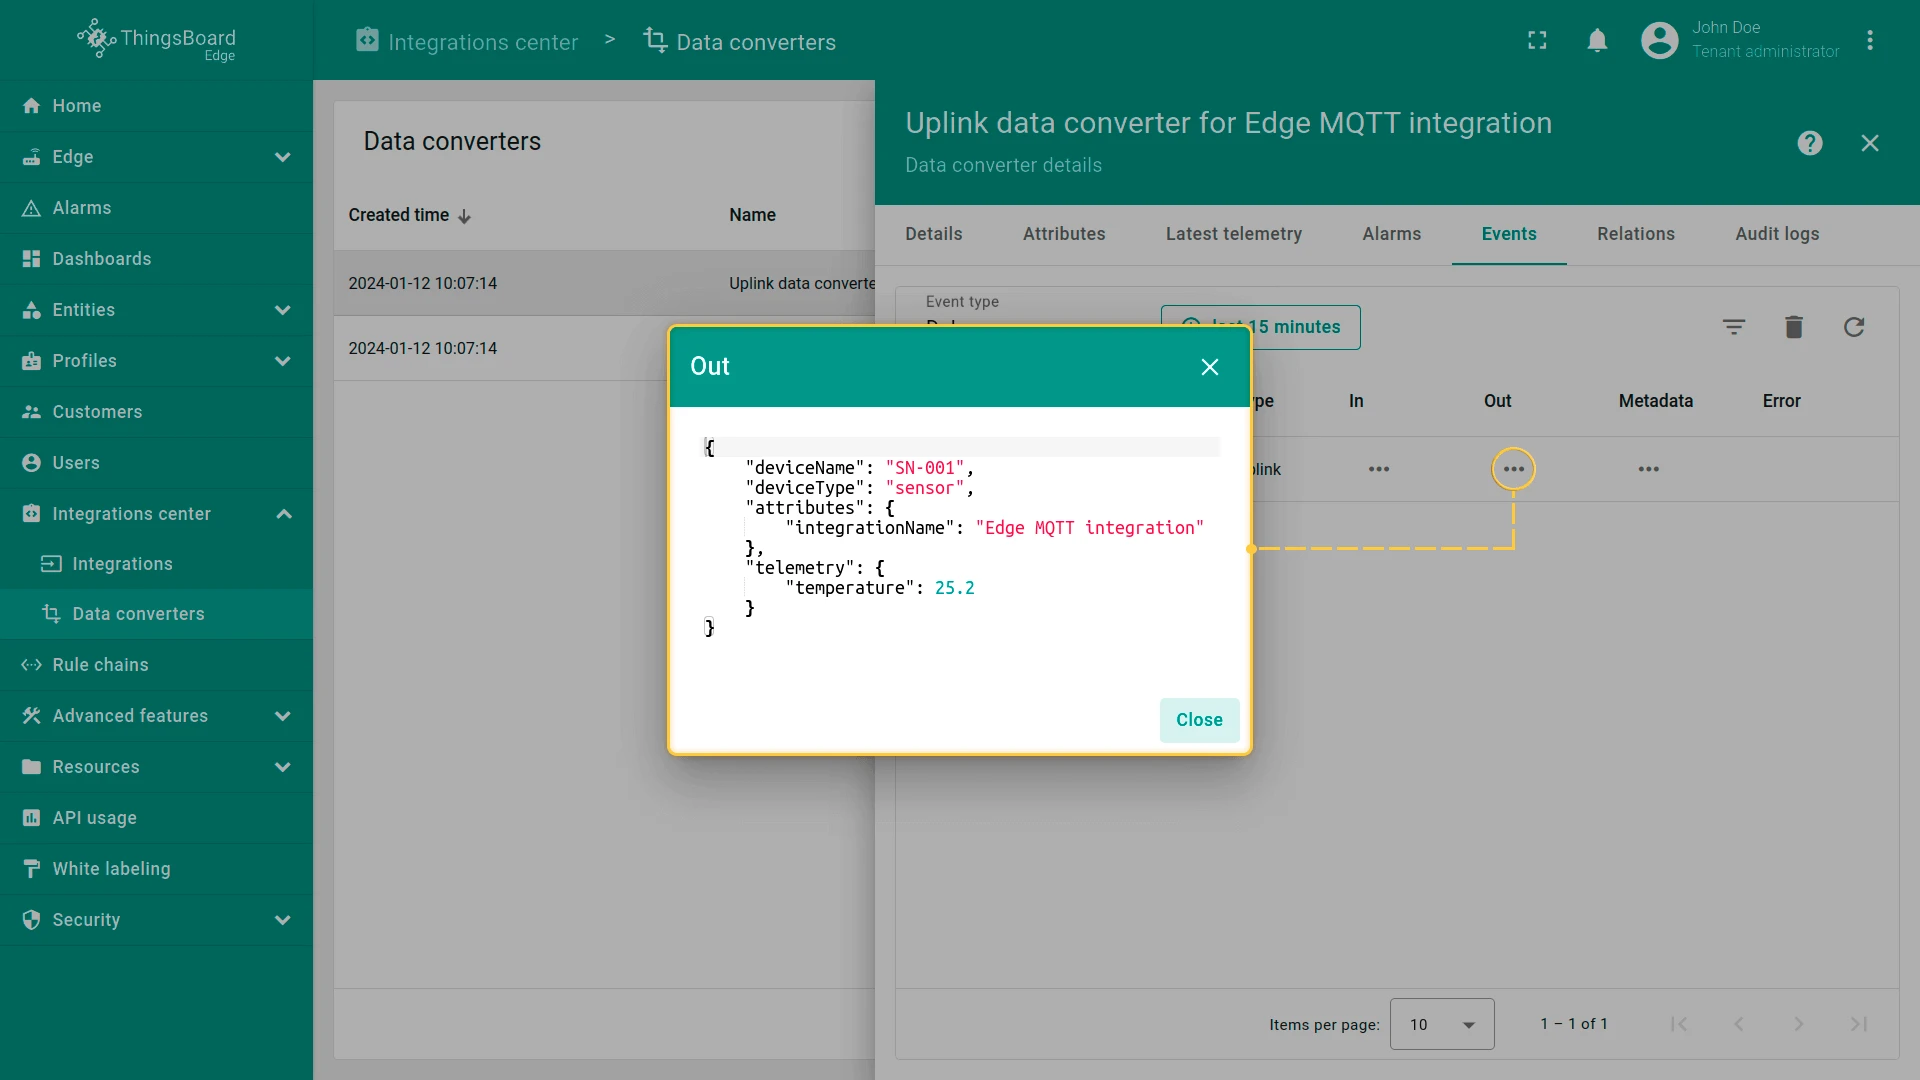
To inspect how the Uplink Converter processed the message, go to Integration center > Data converters, open the uplink converter, and select the Events tab.
Send downlink message
Section titled “Send downlink message”-
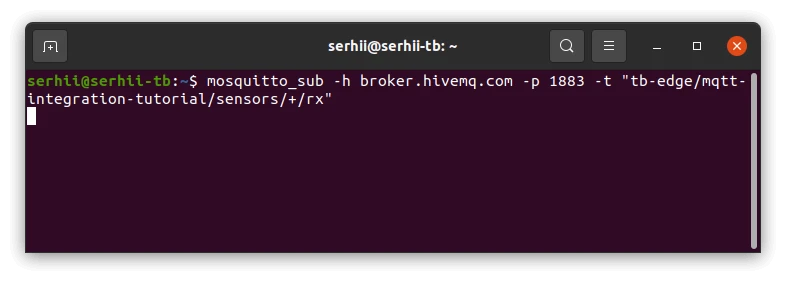
In a terminal, subscribe to the device’s RX topic. Keep this window open — incoming downlink messages will appear here.
Terminal window mosquitto_sub -h broker.hivemq.com -p 1883 \-t "tb-edge/mqtt-integration-tutorial/sensors/+/rx" -
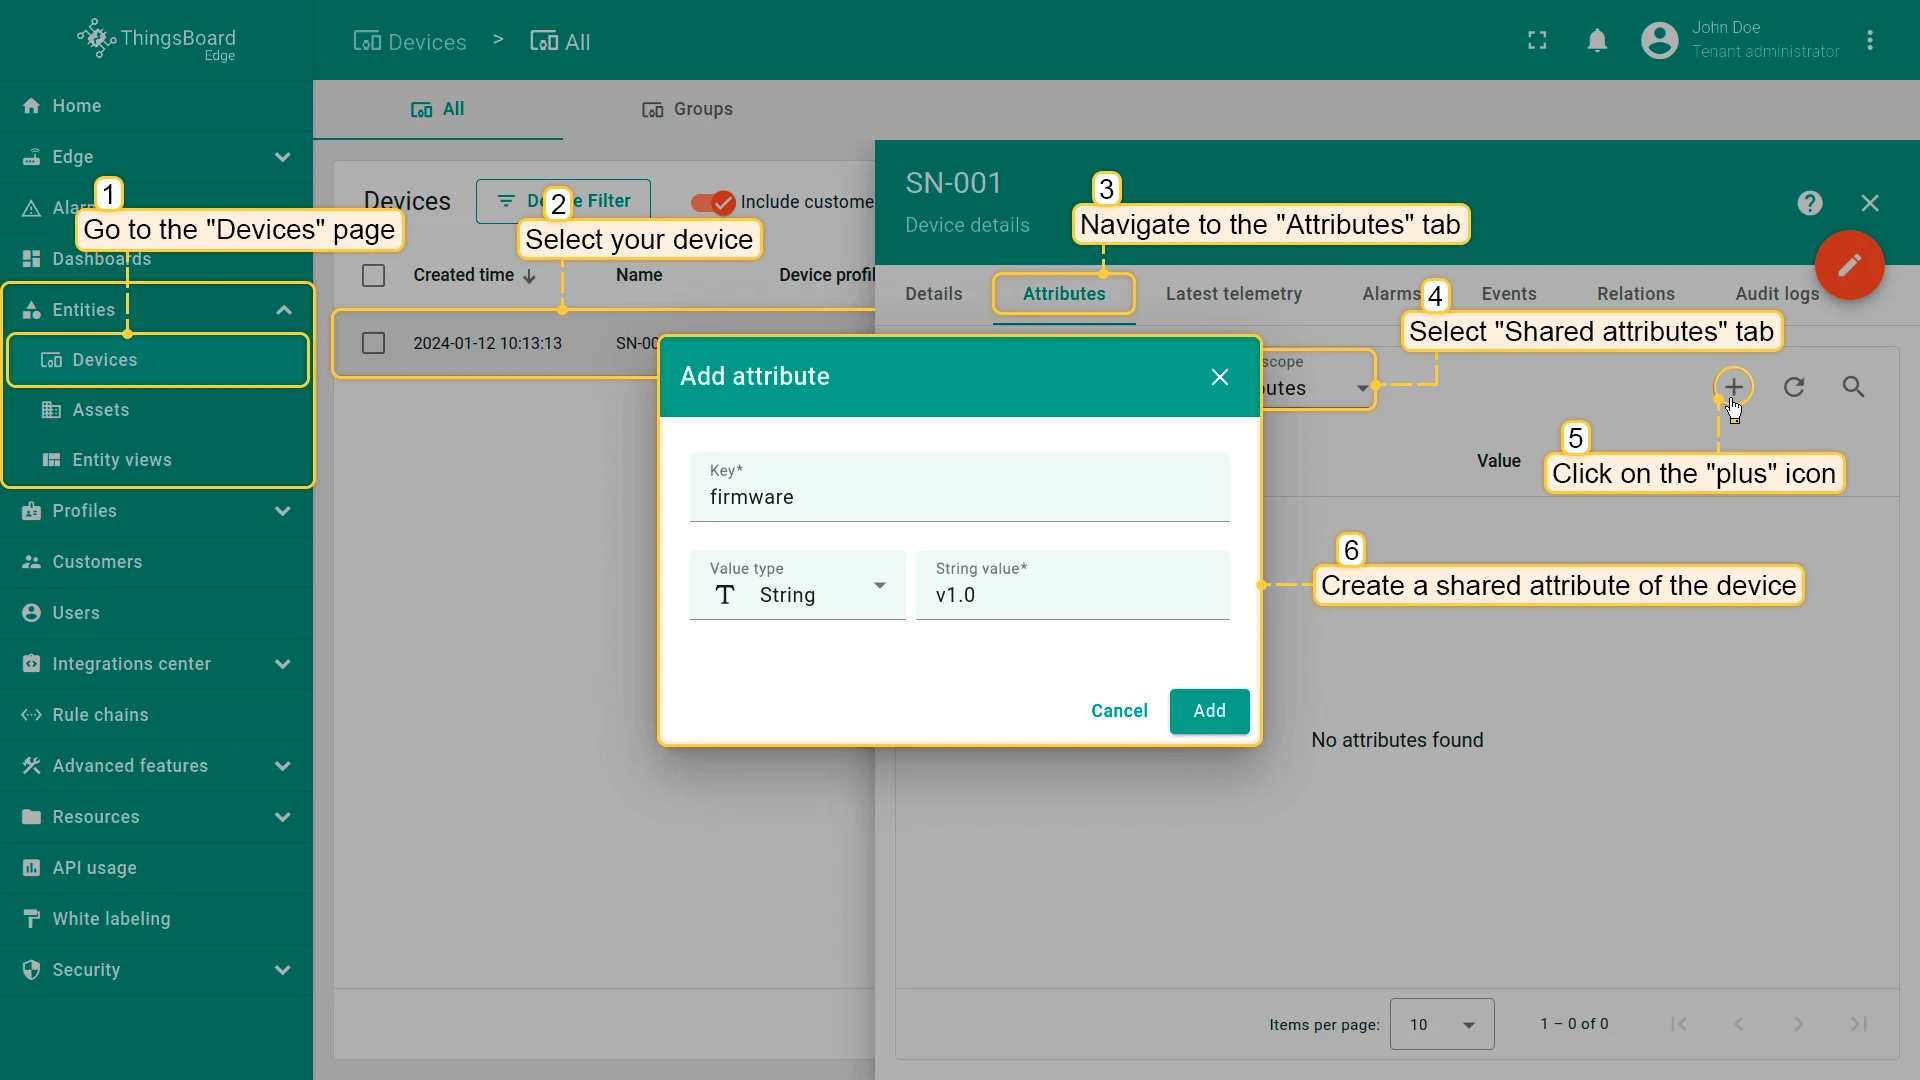
On the Edge, go to Entities > Devices, select device SN-001, and open the Attributes tab. Under Shared attributes, click + and add a new attribute — for example, key
firmware, valuev1.0. Save. -
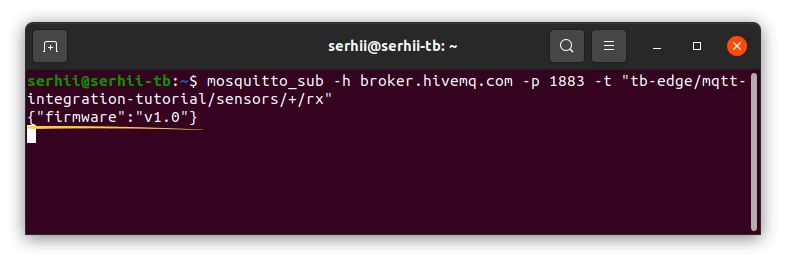
The subscriber terminal should receive the downlink message.
-
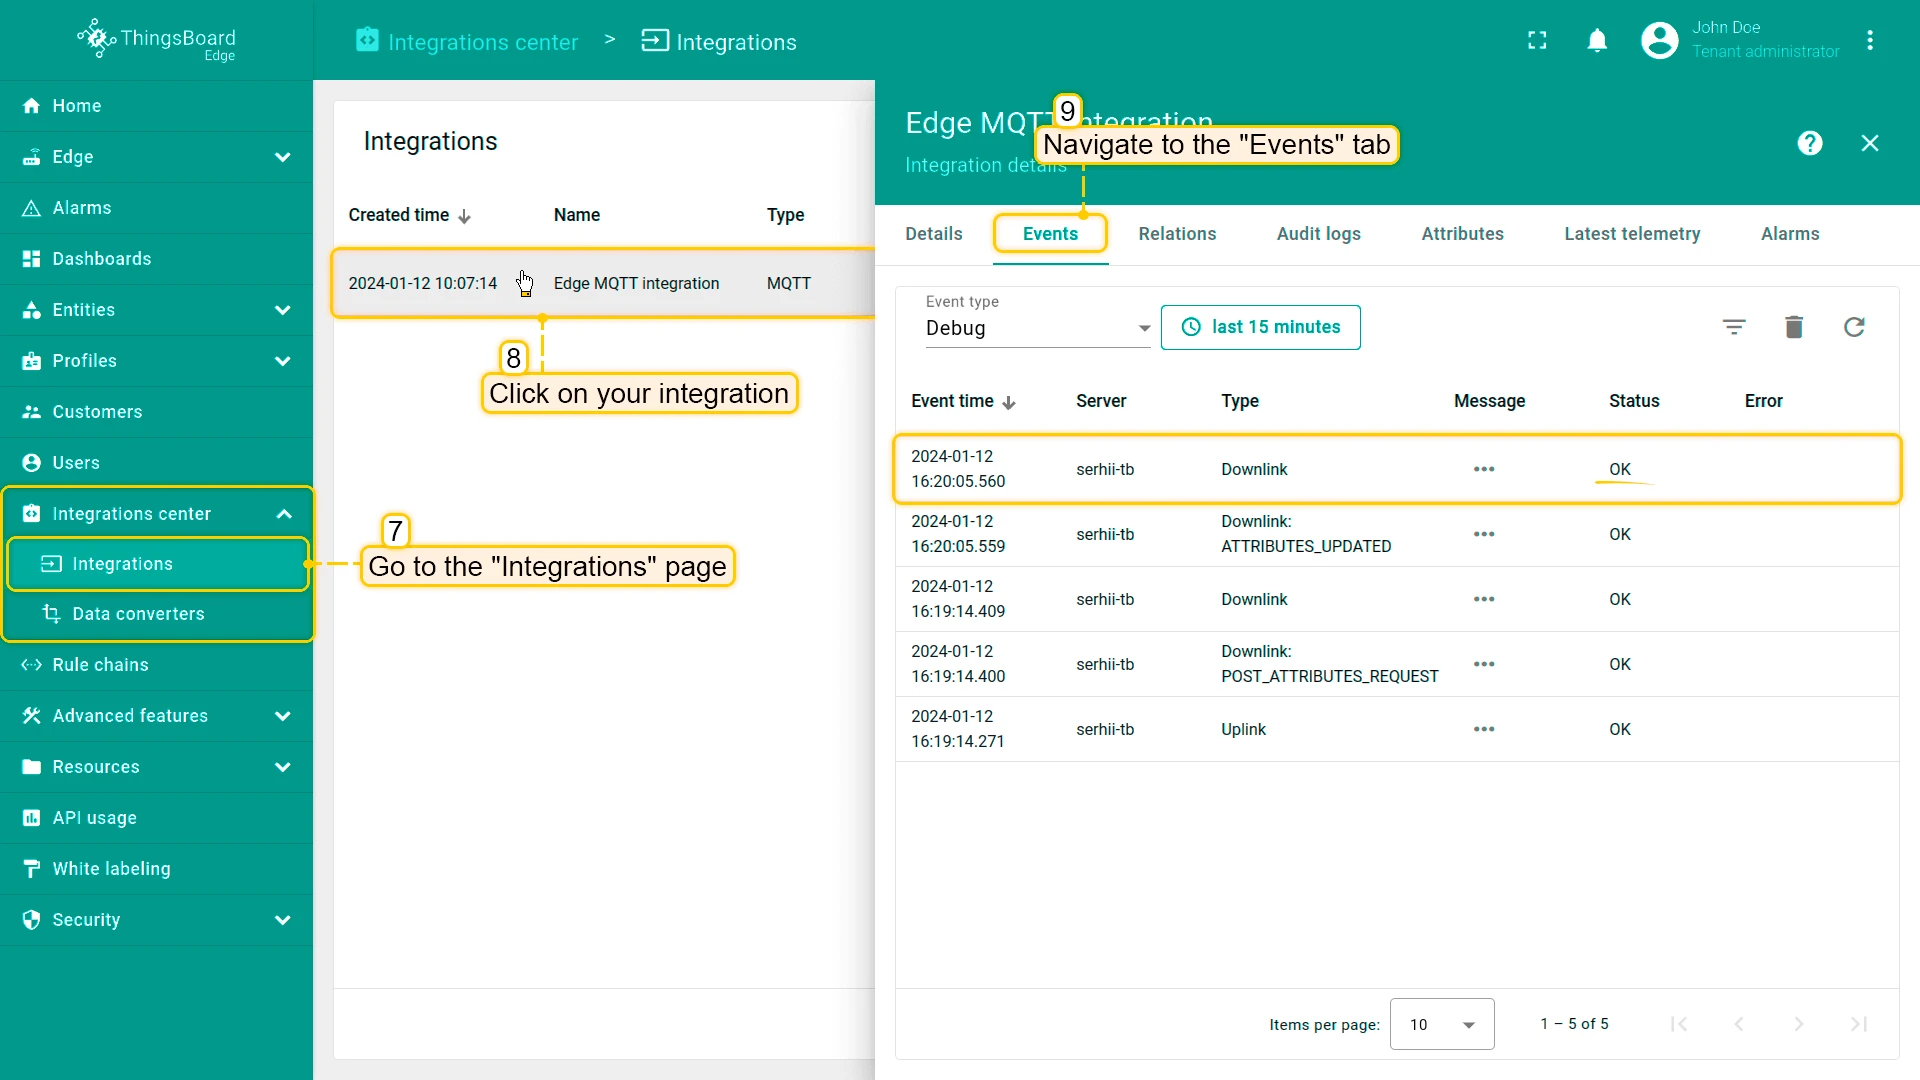
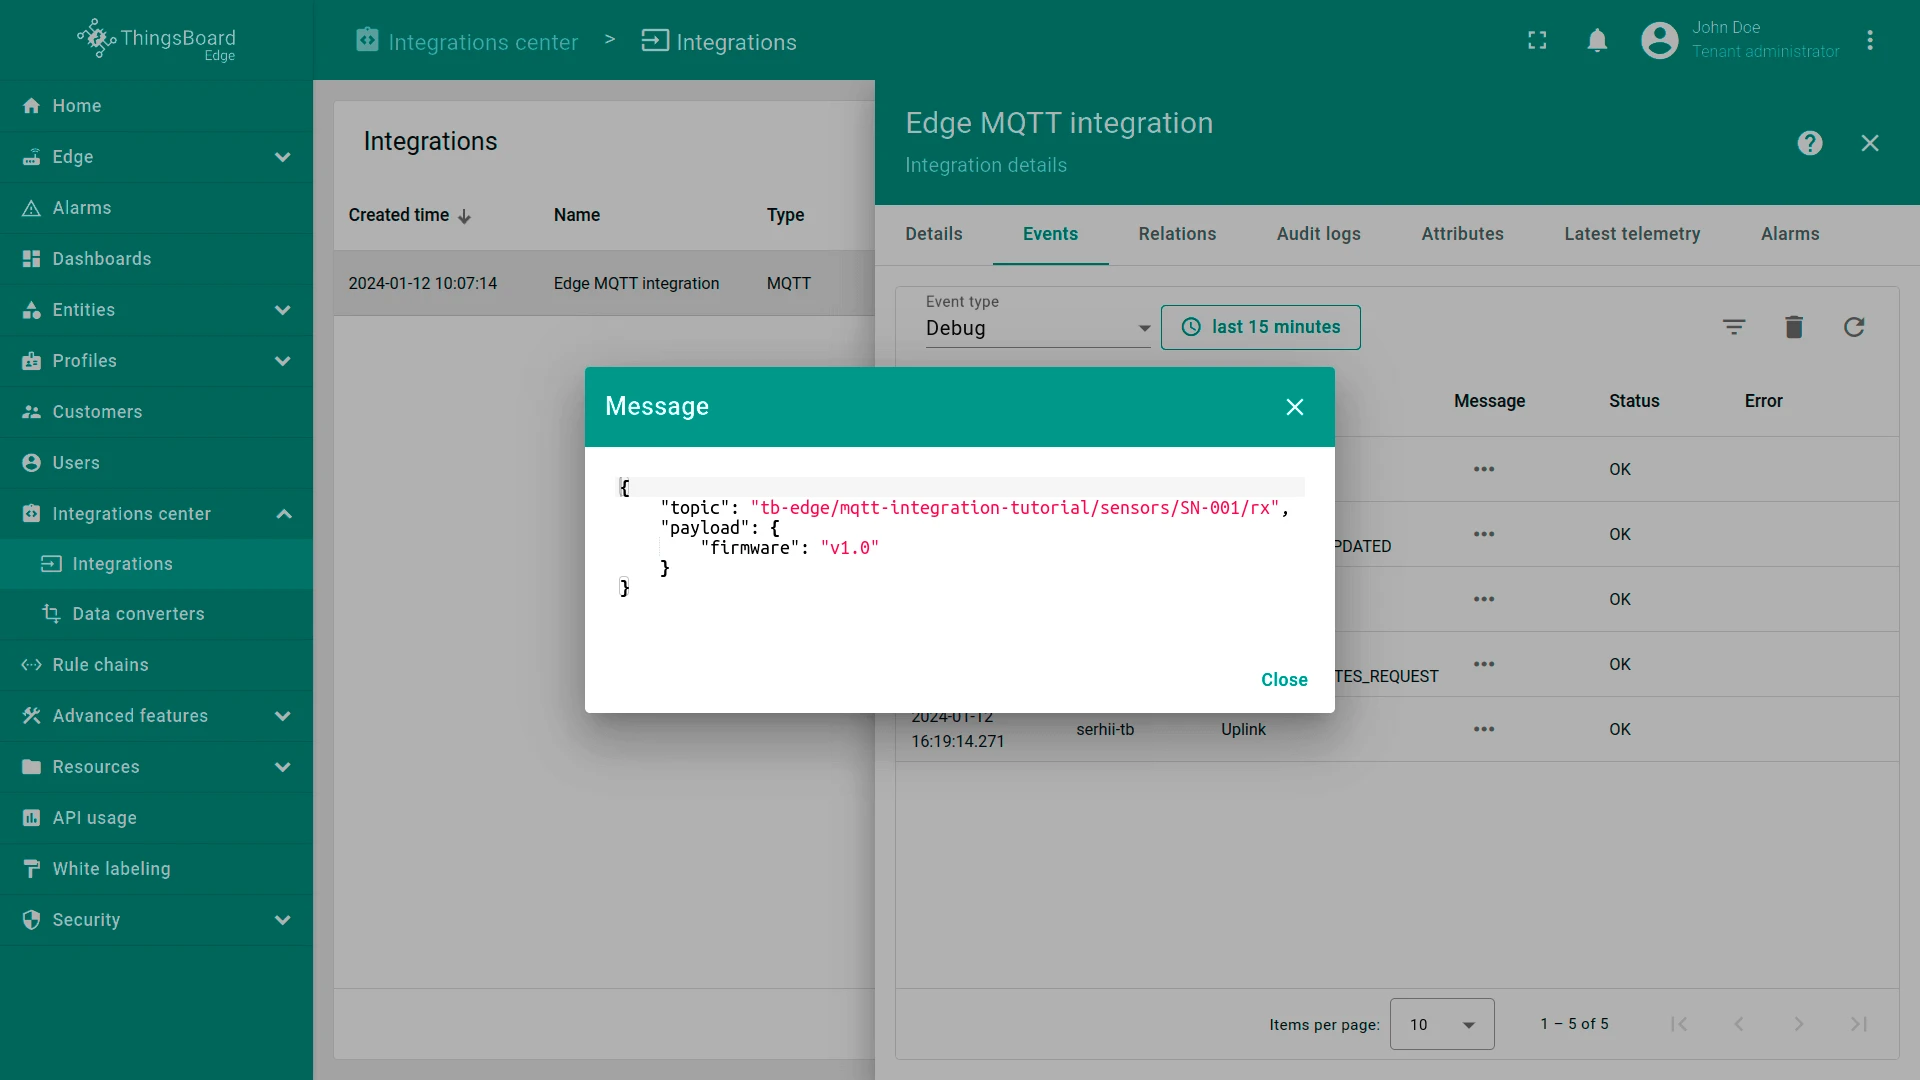
Verify the downlink was sent by opening the integration’s Events tab.
-
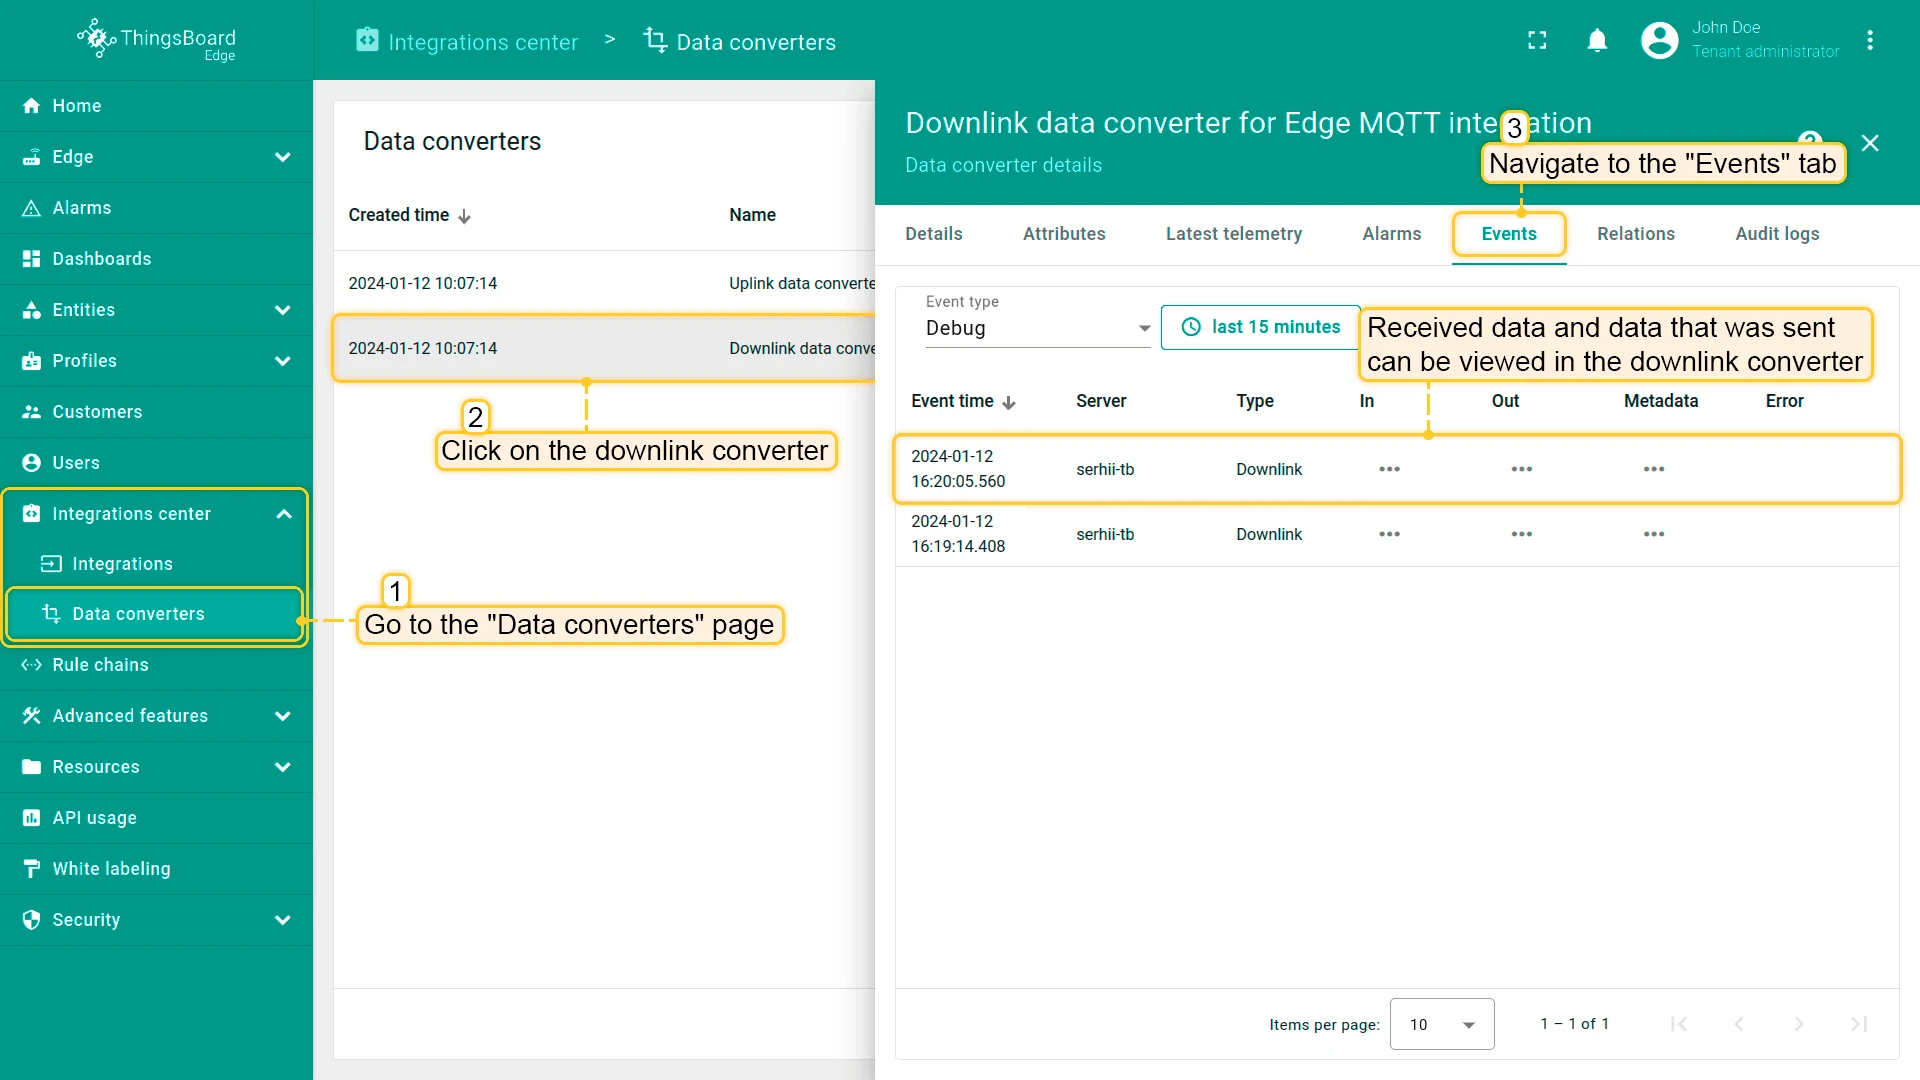
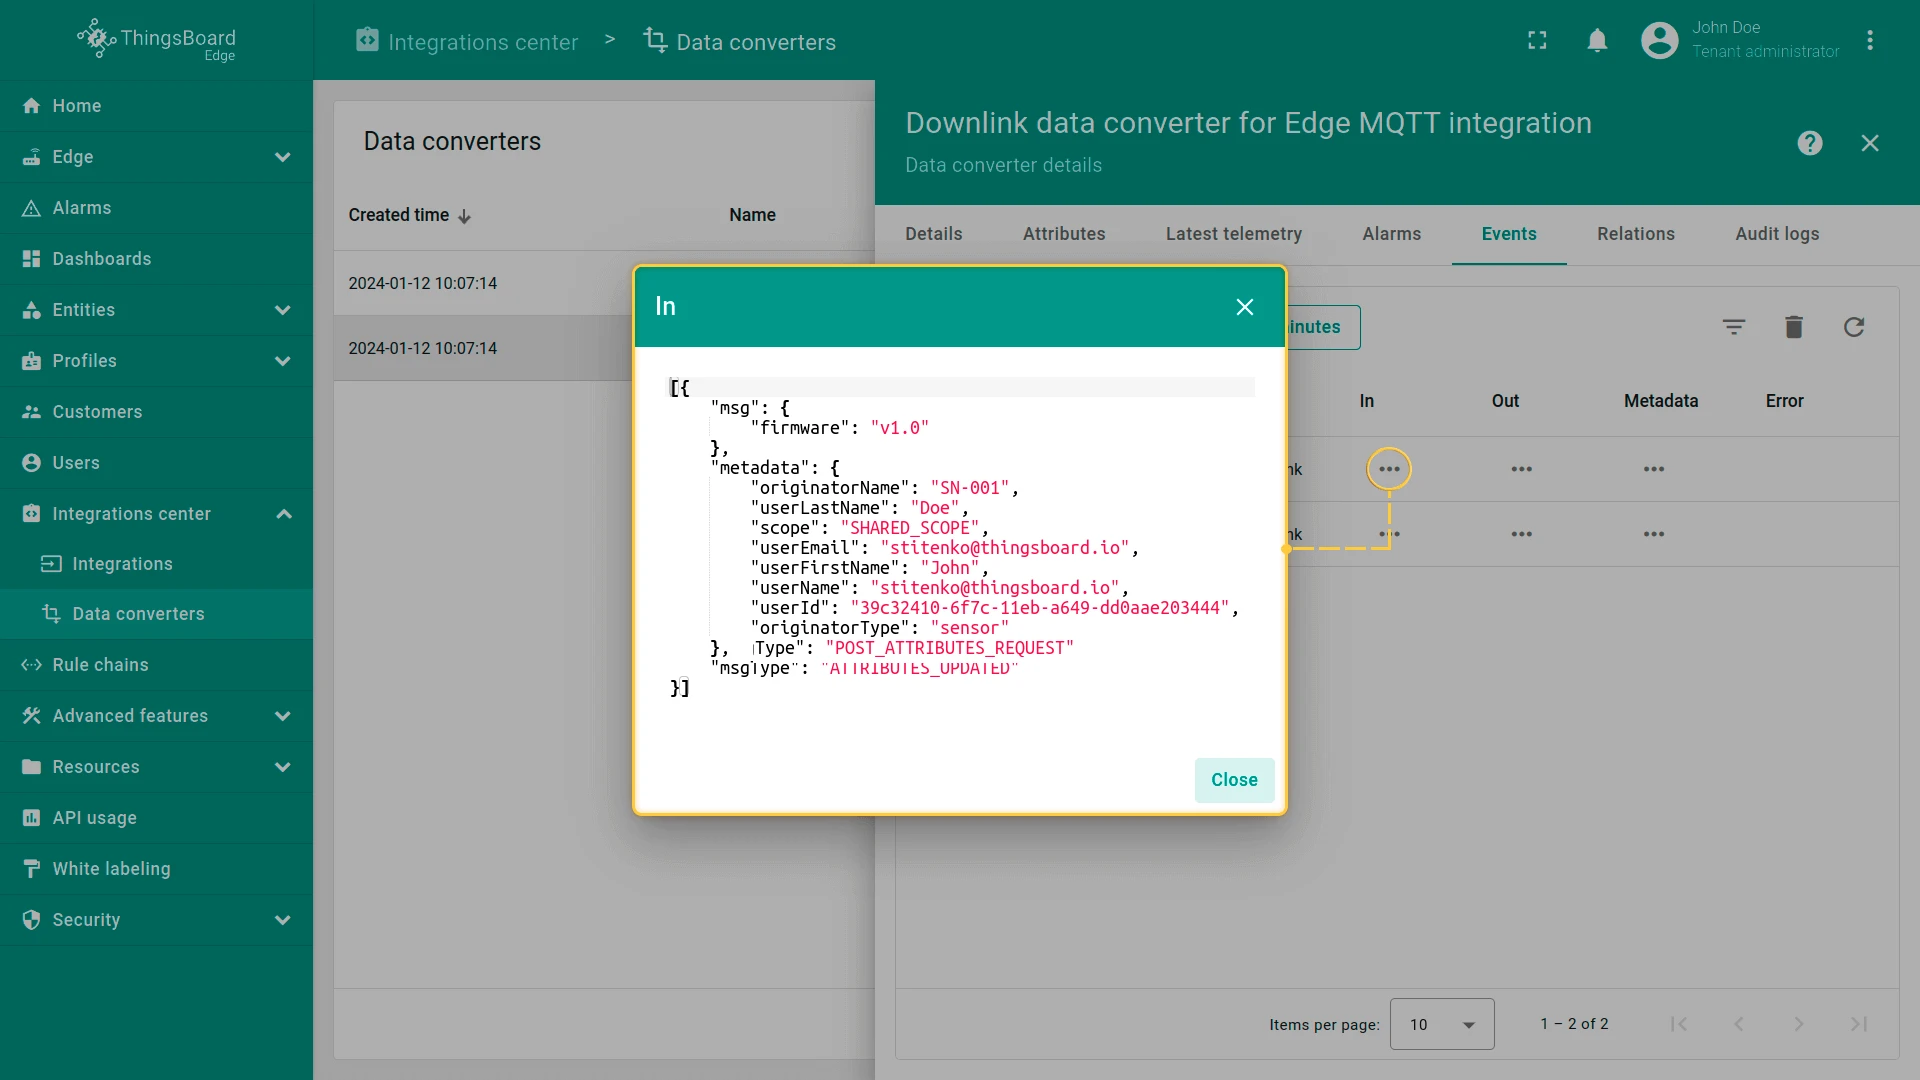
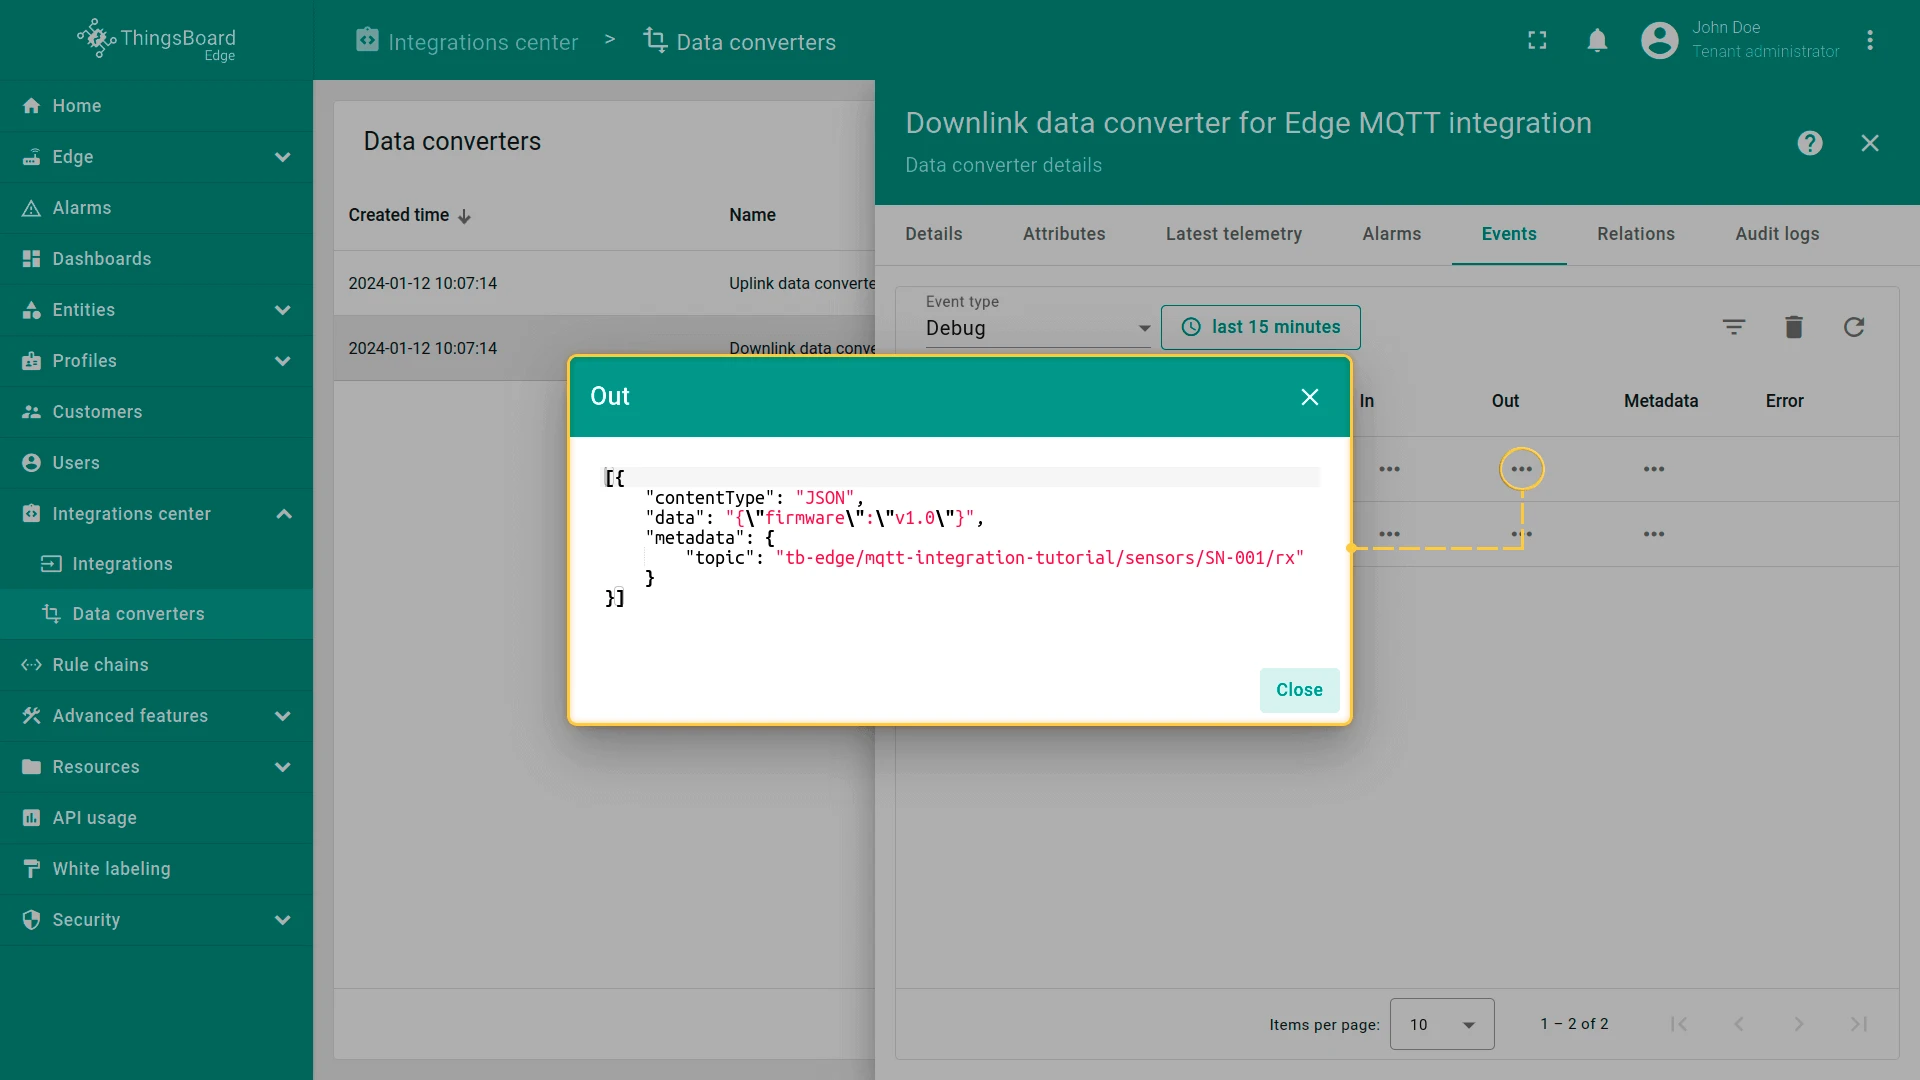
Inspect the downlink in the Downlink Converter. Go to Integration center > Data converters, open the downlink converter, and select the Events tab.
Was this helpful?