- How it works
- Environment variables
- Provisioning process
- Resetting provisioned credentials
- Example: Using device provisioning
The ThingsBoard IoT Gateway supports the device provisioning feature, allowing it to automatically register itself on the ThingsBoard platform and obtain credentials without manual setup.
This is especially useful for:
- Device manufacturers — enabling mass deployment with minimal configuration.
- System integrators — simplifying field installation and avoiding per‑device manual setup.
Once provisioned, the gateway uses the received credentials to connect to the platform and operate as a standard ThingsBoard device.
How it works
When the gateway starts:
- It checks if device credentials are already stored locally.
- If credentials are missing, it uses provisioning credentials (key & secret) to request registration from the platform.
- The platform:
- Creates a device or use existing, depending on chosen in device profile device provisioning strategy.
- Assigns it the requested or default name.
- Generates device credentials.
- The gateway stores these credentials locally and uses them for all future connections.
If credentials need to be changed or regenerated, they can be removed, and the gateway will re-provision itself on the next start.
Environment variables
Provisioning parameters are configured via environment variables.
You can define them in your docker-compose.yml or set them manually in your environment.
| Variable Name | Required | Description |
|---|---|---|
TB_GW_PROVISIONING_DEVICE_KEY |
Yes | Provisioning device key (provided by platform administrator). |
TB_GW_PROVISIONING_DEVICE_SECRET |
Yes | Provisioning device secret (provided by platform administrator). |
TB_GW_PROVISIONING_DEVICE_NAME |
No | Name of the provisioned device in ThingsBoard. If not set, a random name will be generated. |
TB_GW_PROVISIONING_DEVICE_ACCESS_TOKEN |
No | If set, the platform will assign this token to the device and use Access Token authentication. |
TB_GW_PROVISIONING_DEVICE_USERNAME |
No | MQTT Basic authentication username. Must be used together with password/client ID (credentials type will be MQTT Basic). |
TB_GW_PROVISIONING_DEVICE_PASSWORD |
No | MQTT Basic authentication password. Used together with username/client ID. |
TB_GW_PROVISIONING_DEVICE_CLIENT_ID |
No | MQTT Basic authentication client ID. |
TB_GW_PROVISIONING_DEVICE_CA_CERT_FILENAME |
No | Name of CA certificate file in the config/ folder. If set, the gateway will generate a client certificate and use X.509 Certificate authentication. |
Note:
The credentials type is determined by which optional parameters you provide.
For example:
ACCESS_TOKEN→ Access Token authenticationUSERNAME/PASSWORD/CLIENT_ID→ MQTT Basic authenticationCA_CERT_FILENAME→ X.509 authentication
Provisioning process
- Start the gateway with the provisioning variables configured.
- The gateway sends a provision request with the device key and secret.
- The platform responds with generated credentials according to the provided configuration.
- Credentials are saved locally in the gateway’s config directory.
- The gateway connects to ThingsBoard using these credentials.
Resetting provisioned credentials
If you want the gateway to re-provision itself (for example, to change authentication type or rotate credentials), you can remove the stored credentials via a service RPC:
RPC Method: remove_provisioned_credentials
When executed:
- The gateway deletes the stored credentials from its config folder.
- On the next restart, it will perform the provisioning process again.
Example: Using device provisioning
To use the provisioning feature you need to follow next steps:
1. Create a Device profile
- Go to the “Devices profile” page, click the “plus” button and select “Create new device profile” from drop-down menu.
- Enter a device profile name and open the Device provisioning tab.
- Enable provisioning by selecting “Allow to create new devices” option.
- Copy/save the Provisioning device key and Provisioning device secret.
- Click “Add” to create the device profile.
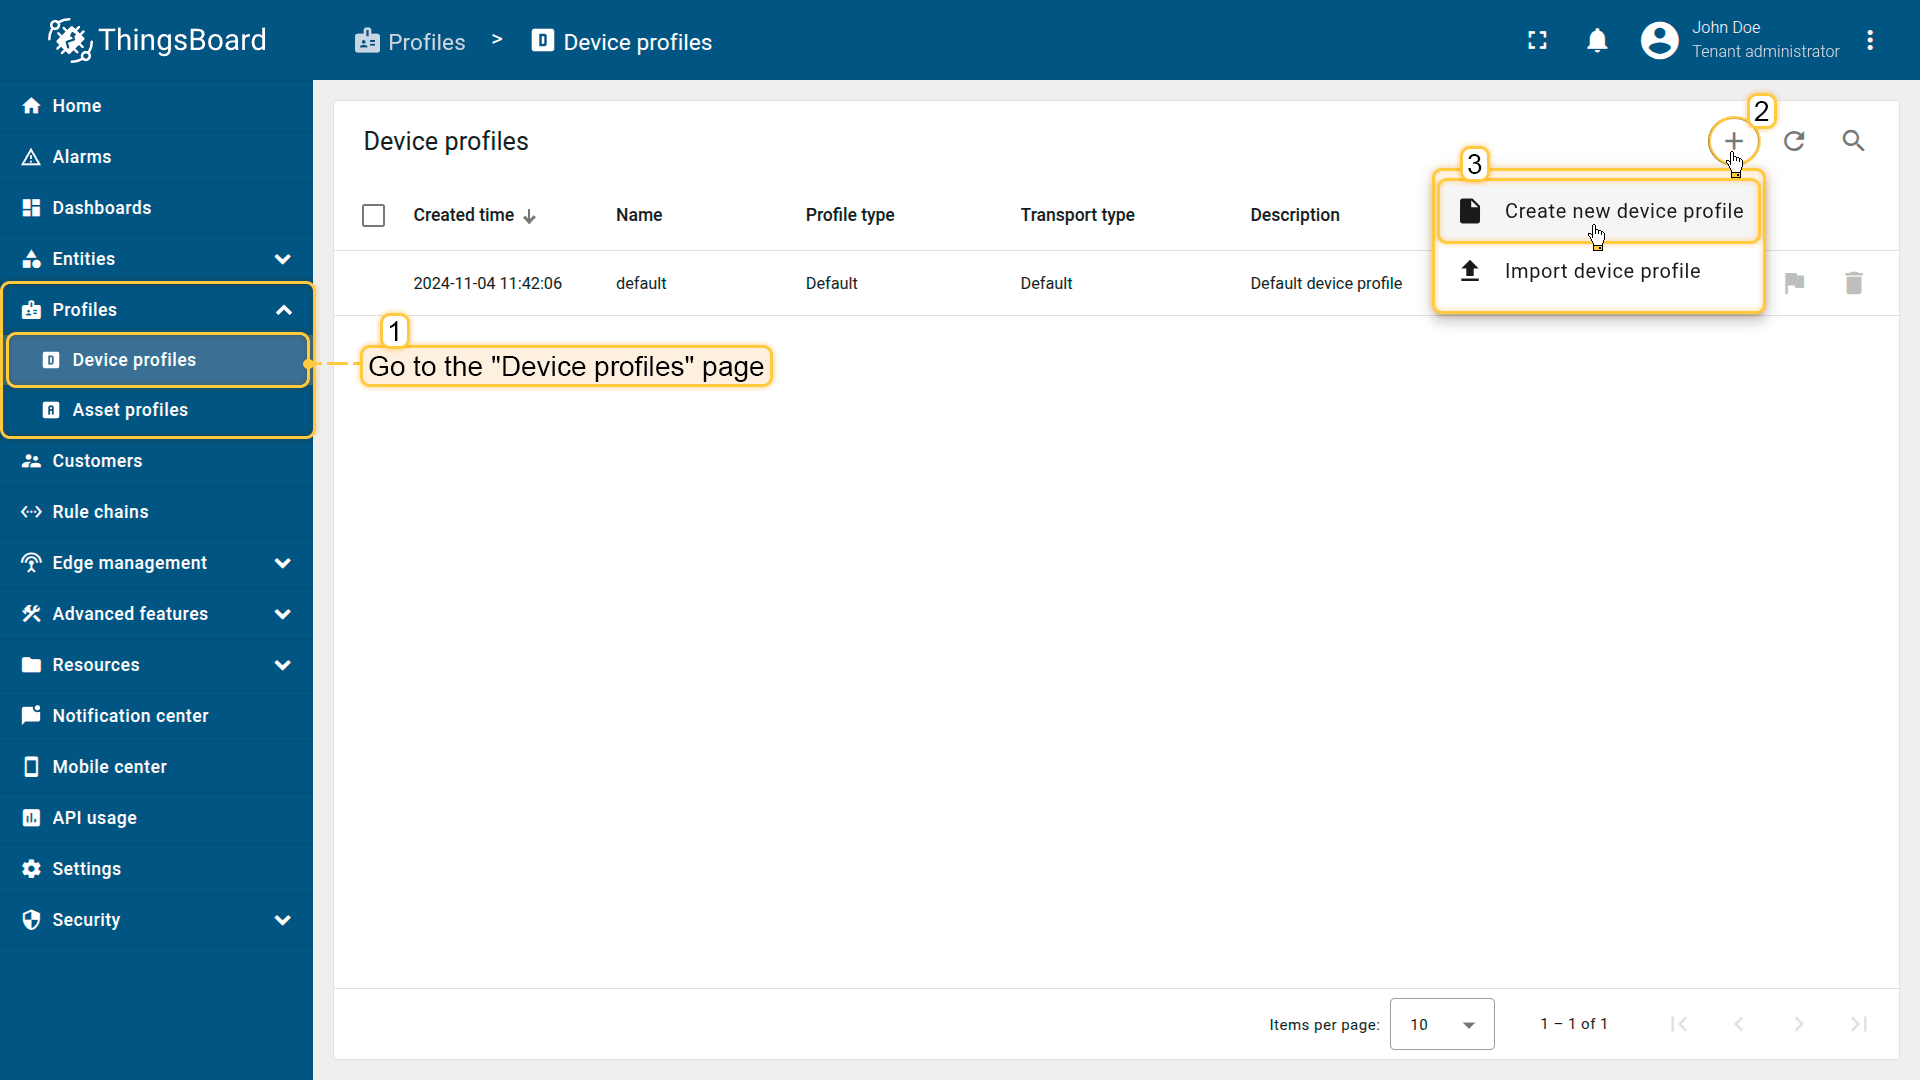
Go to the “Devices profile” page, click the “plus” button and select “Create new device profile” from drop-down menu.
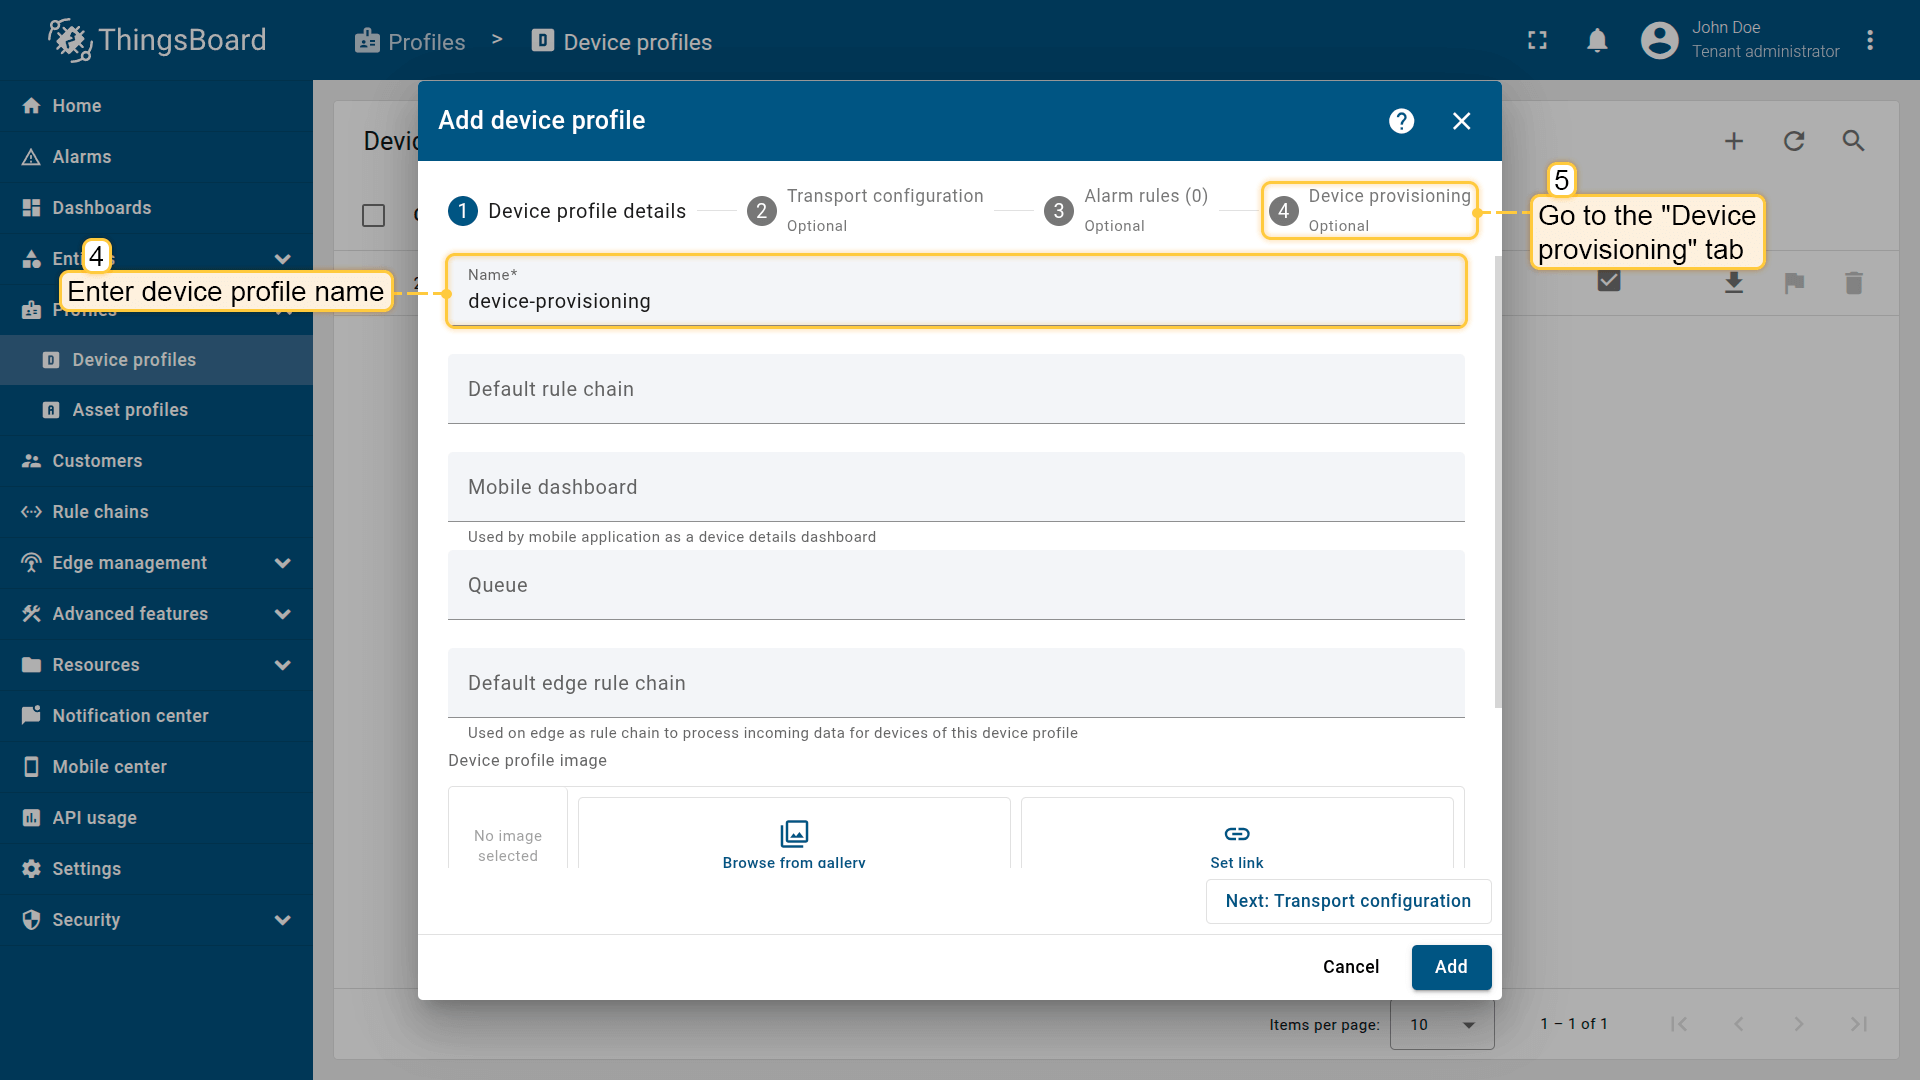
Enter a device profile name and open the Device provisioning tab.
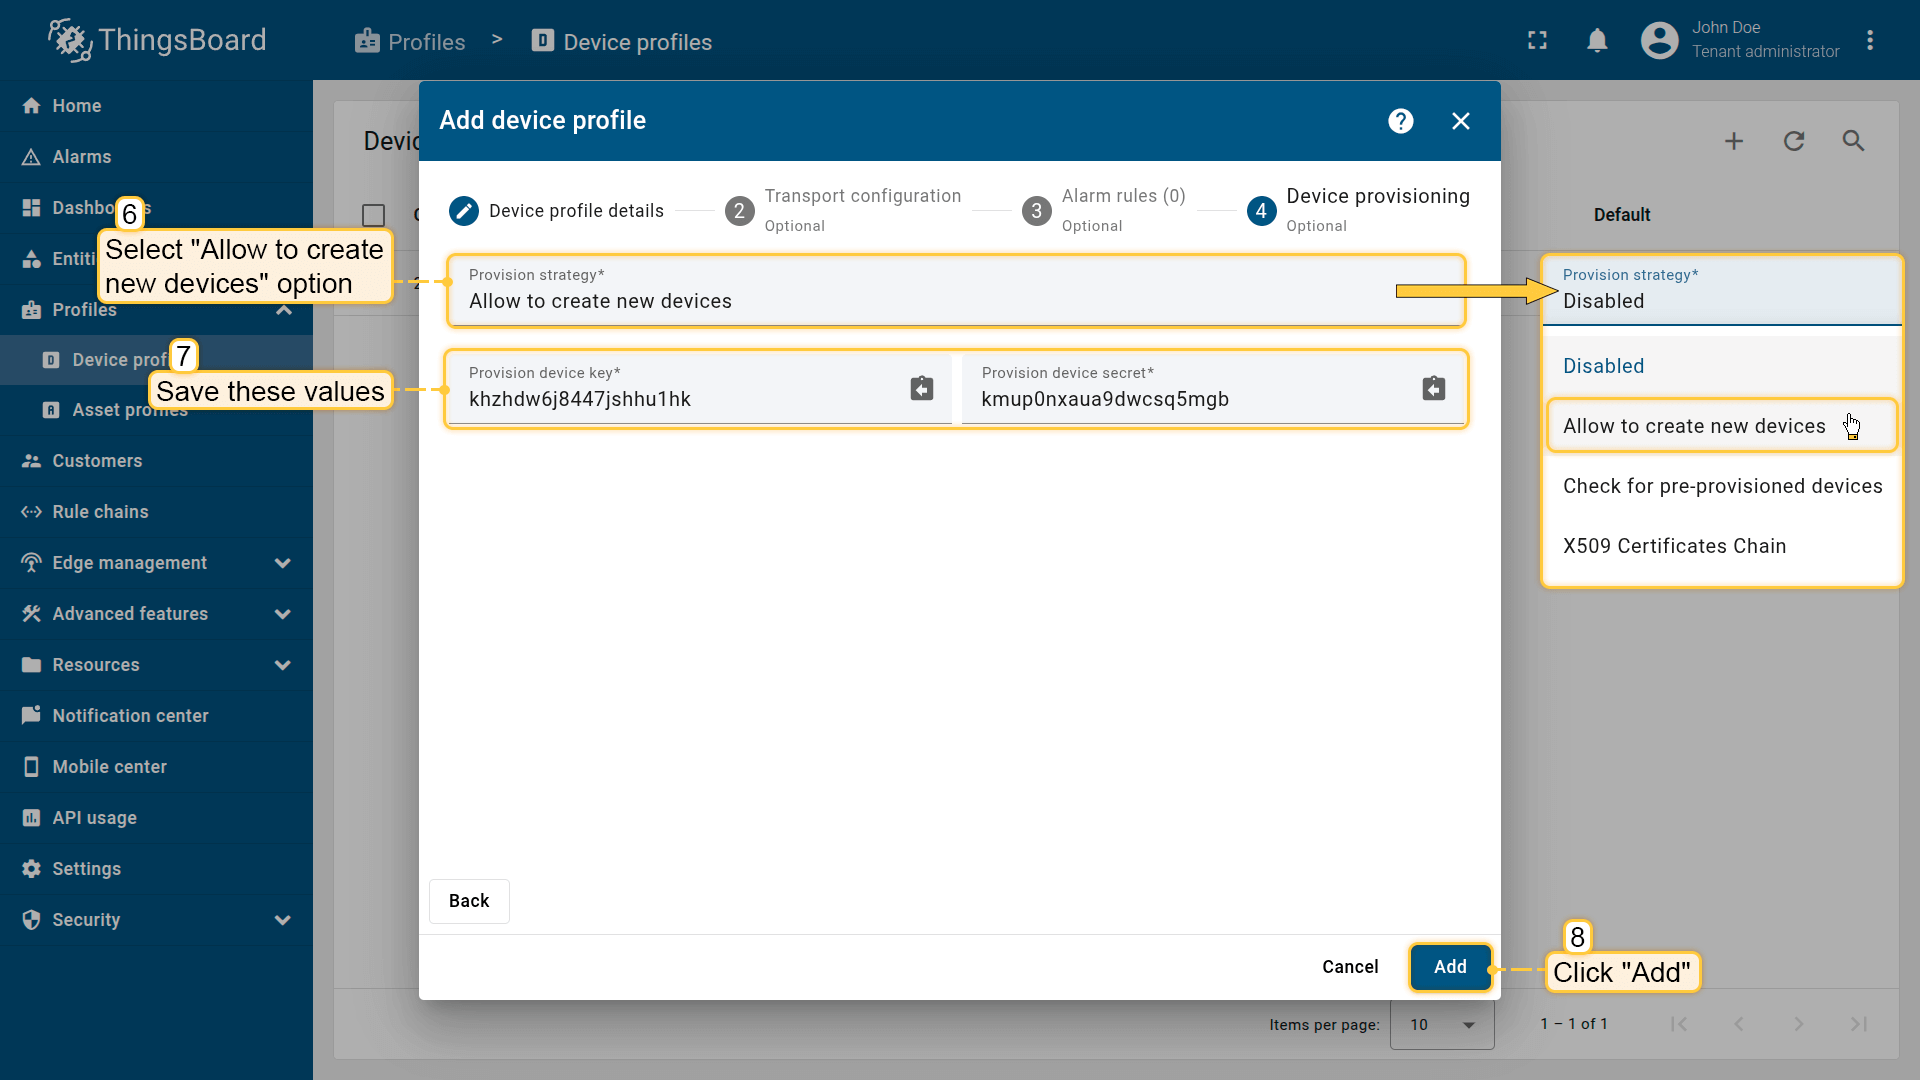
Enable provisioning by selecting “Allow to create new devices” option.
Copy/save the Provisioning device key and Provisioning device secret.
Click “Add” to create the device profile.
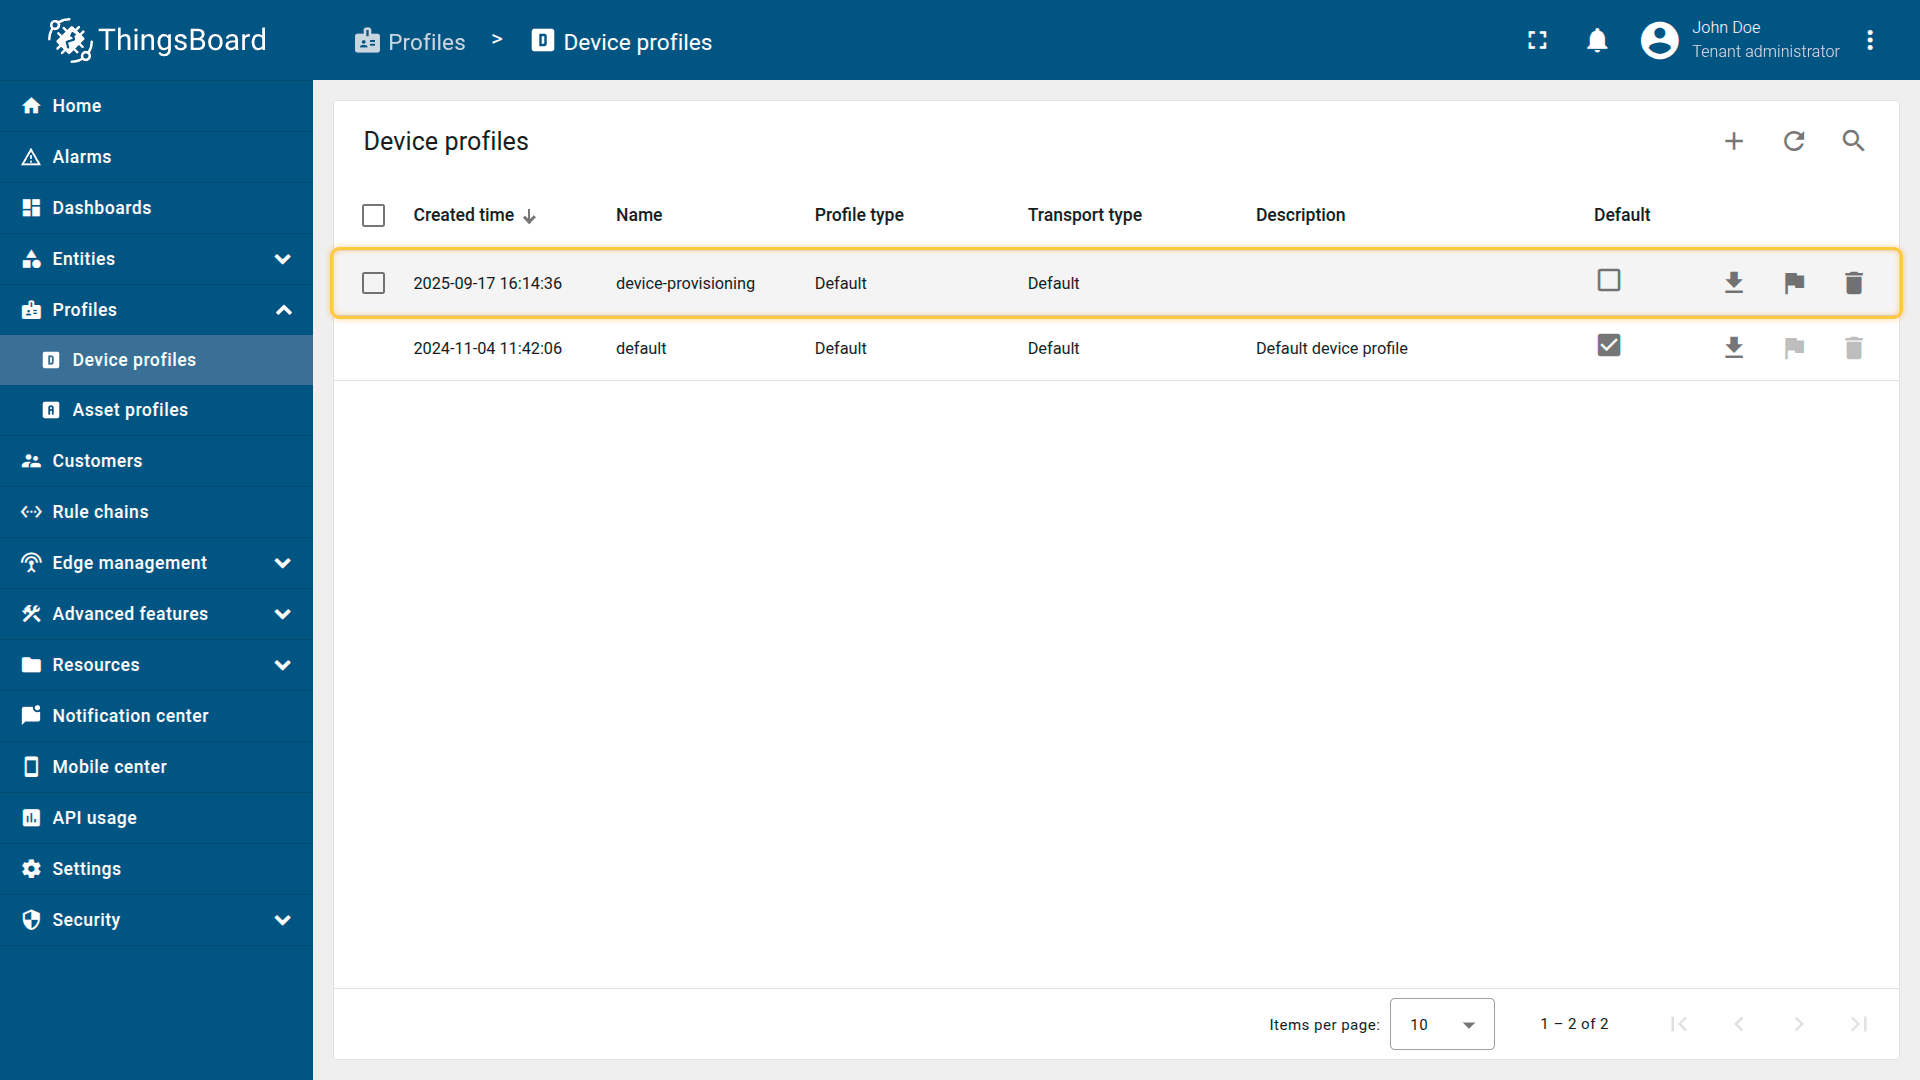
Device profile created.
2. Download the Gateway configuration file
3. Edit the configuration file
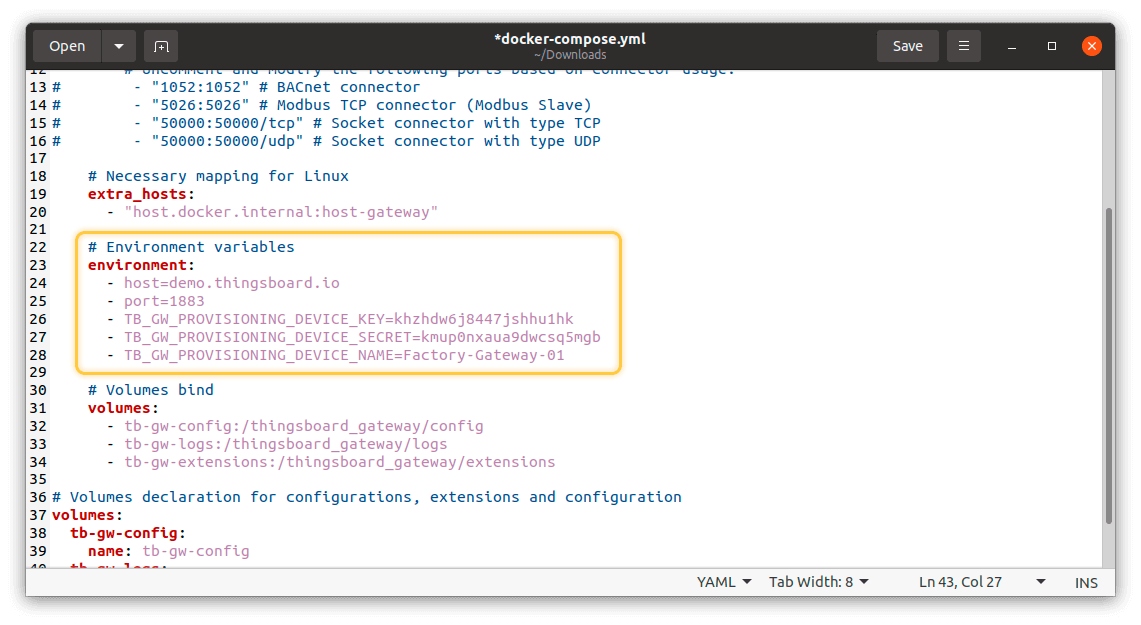
- Open the downloaded
docker-compose.ymland set the provisioning variables:
1
2
3
4
5
6
7
8
...
  environment:
    - host=THINGSBOARD_HOST
    - port=THINGSBOARD_PORT
    - TB_GW_PROVISIONING_DEVICE_KEY=YOUR_PROVISION_KEY
    - TB_GW_PROVISIONING_DEVICE_SECRET=YOUR_PROVISION_SECRET
    - TB_GW_PROVISIONING_DEVICE_NAME=Factory-Gateway-01
...
* Replace THINGSBOARD_HOST and THINGSBOARD_PORT with the host and port of your ThingsBoard instance.
* Replace YOUR_PROVISION_KEY and YOUR_PROVISION_SECRET with the ** values from the device profile**.

Open the downloaded docker-compose.yml and set the provisioning variables.
Replace THINGSBOARD_HOST and THINGSBOARD_PORT with the host and port of your ThingsBoard instance.
Replace YOUR_PROVISION_KEY and YOUR_PROVISION_SECRET with the values from the device profile.
4. Start the Gateway
- Execute the following command to run the Gateway:
1
docker compose up
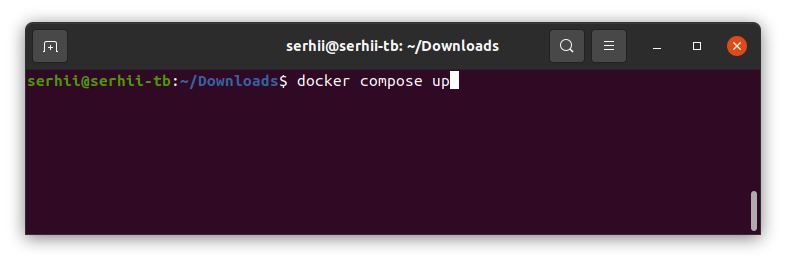
Execute docker compose up command to run the Gateway.
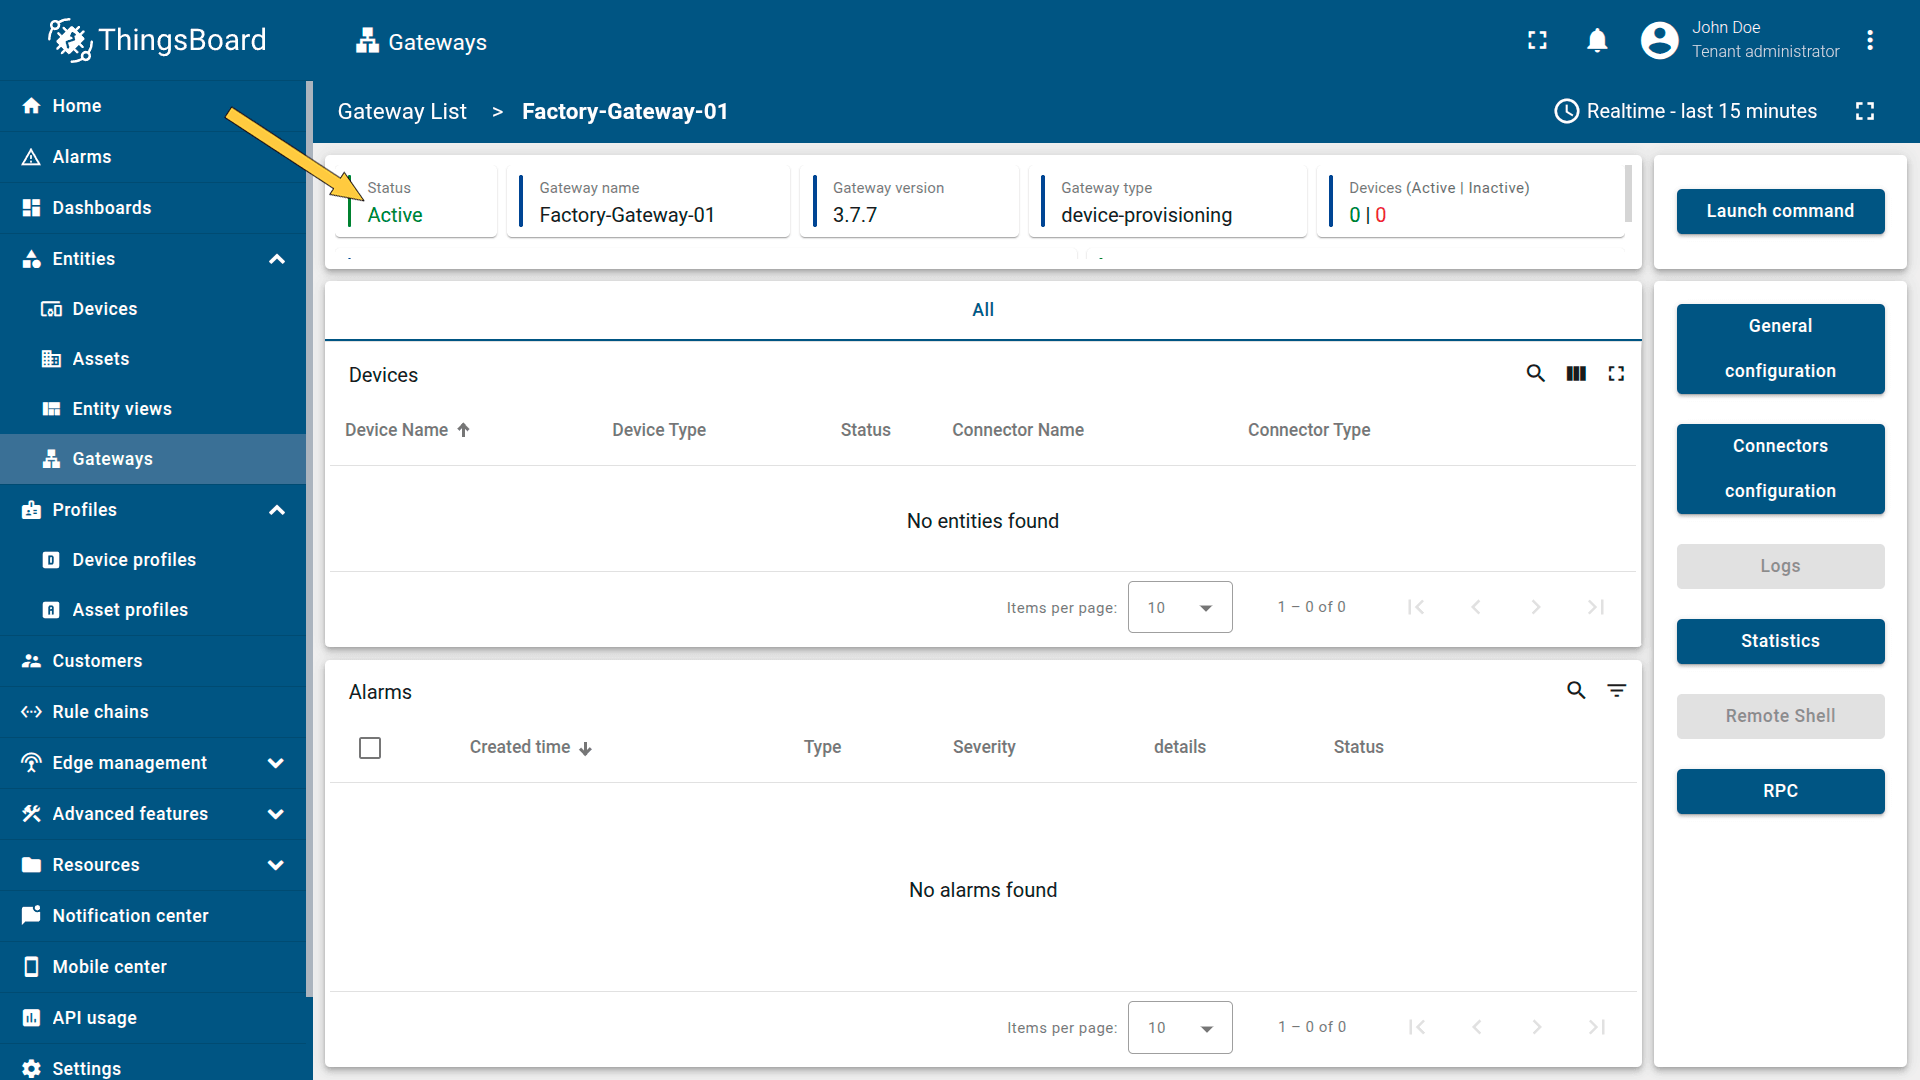
5. Verify the connection
The Gateway auto‑registers, obtains credentials, and connects using them.

The Gateway auto‑registers, obtains credentials, and connects using them.
In the ThingsBoard UI, check status on the “Gateways” page or in the device details.
In the ThingsBoard UI, check status on the “Gateways” page or in the device details.