This guide will help you to install and start ThingsBoard Gateway using Docker on Windows.
Prerequisites
- Install Docker Compose for Windows;
- You will need to have access to ThingsBoard. The easiest way is to use ThingsBoard Cloud. The alternative option is to install the ThingsBoard locally using the installation guide.
Download a docker-compose file
-
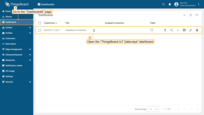
Go to the “Entities” > “Gateways” page and click the “plus” icon in the upper right corner to add a new gateway.
-
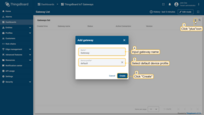
In the opened modal window input the gateway name, specify the “default” device profile, and click “Create”.
-
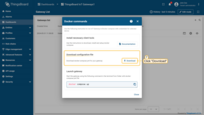
The “Launch command” window will open. Click the “Download” button to download a docker-compose file for your gateway.

Go to the “Entities” > “Gateways” page and click the “plus” icon in the upper right corner to add a new gateway.

In the opened modal window input the gateway name, specify the “default” device profile, and click “Create”.

The “Launch command” window will open. Click the “Download” button to download a docker-compose file for your gateway.
Running
Click the Docker QuickStart icon to launch a pre-configured Docker Toolbox terminal.
Make sure your have logged in to docker hub. Start the Gateway by executing the following command from the folder containing the docker-compose.yml file in the command line as administrator:
1
docker compose up
Detaching commands
To detach from session (the container will keep running in the background) execute the following command:
1
docker compose up -d
To reattach to the command line (to look at Gateway logs) execute the following command:
1
docker attach tb-gateway
Upgrading
In order to update to the latest image, execute the following commands:
1
2
3
docker compose down
docker pull thingsboard/tb-gateway
docker compose up
Next steps
Explore guides related to main ThingsBoard features:
- Getting Started with ThingsBoard IoT Gateway.
- Data Visualization - how to visualize collected data.
- Device attributes - how to use device attributes.
- Telemetry data collection - how to collect telemetry data.
- Using RPC capabilities - how to send commands to/from devices.
- Rule Engine - how to use rule engine to analyze data from devices.
