Getting Started
Introduction
Section titled “Introduction”This guide covers the basics of TBMQ:
- Connecting MQTT clients to the broker.
- Publishing and subscribing to messages.
- Configuring client authentication and authorization.
For details on the TBMQ architecture, see Architecture.
Try live demo
Section titled “Try live demo”The fastest way to get started with TBMQ is to use the free public MQTT broker at demo.tbmq.io. This sandbox environment allows you to explore TBMQ features without any installation.
MQTT connection details:
| Parameter | Value |
|---|---|
| Host | demo.tbmq.io |
| TCP Port | 1883 |
| TLS Port | 8883 |
| Username | demo |
| Password | (leave empty) |
You can start publishing and subscribing to topics immediately using these credentials. Sign up for a free account to access the TBMQ UI and explore sessions, subscriptions, and other features.
Install TBMQ locally
Section titled “Install TBMQ locally”For full control over your TBMQ instance, you can install it locally. For detailed instructions on different platforms, see Installation options.
Follow the instructions below for a quick local installation.
If you have Docker installed on Linux or macOS, run the following commands:
wget https://raw.githubusercontent.com/thingsboard/tbmq/release-2.3.0/msa/tbmq/configs/tbmq-install-and-run.sh &&sudo chmod +x tbmq-install-and-run.sh && ./tbmq-install-and-run.shIf you have Docker Desktop installed on Windows, follow the instructions below.
- Open PowerShell (Run as Administrator).
- (Optional) Get the current execution policy.
It determines the level of security for running scripts on a system. For example, if
Restrictedis returned, it means PowerShell doesn’t execute any scripts.
Get-ExecutionPolicy- (Optional) Change the current execution policy if required.
Set it to the one that will allow you to run PowerShell scripts and the one that suits your security requirements.
For example,
Unrestrictedis the least restrictive setting that allows all scripts to be executed.
Set-ExecutionPolicy Unrestricted- Install TBMQ
Invoke-WebRequest -Uri "https://raw.githubusercontent.com/thingsboard/tbmq/release-2.3.0/msa/tbmq/configs/windows/tbmq-install-and-run.ps1" `-OutFile ".\tbmq-install-and-run.ps1"; .\tbmq-install-and-run.ps1Once the installation process is complete for local deployment, you can access TBMQ UI by visiting the following URL: http://localhost:8083. Wait until the services are up and running. To log in, use the following default credentials.
Username:
sysadmin@thingsboard.orgPassword:
sysadminConfigure client authentication and authorization
Section titled “Configure client authentication and authorization”To secure the connection to the broker, enable Basic authentication.
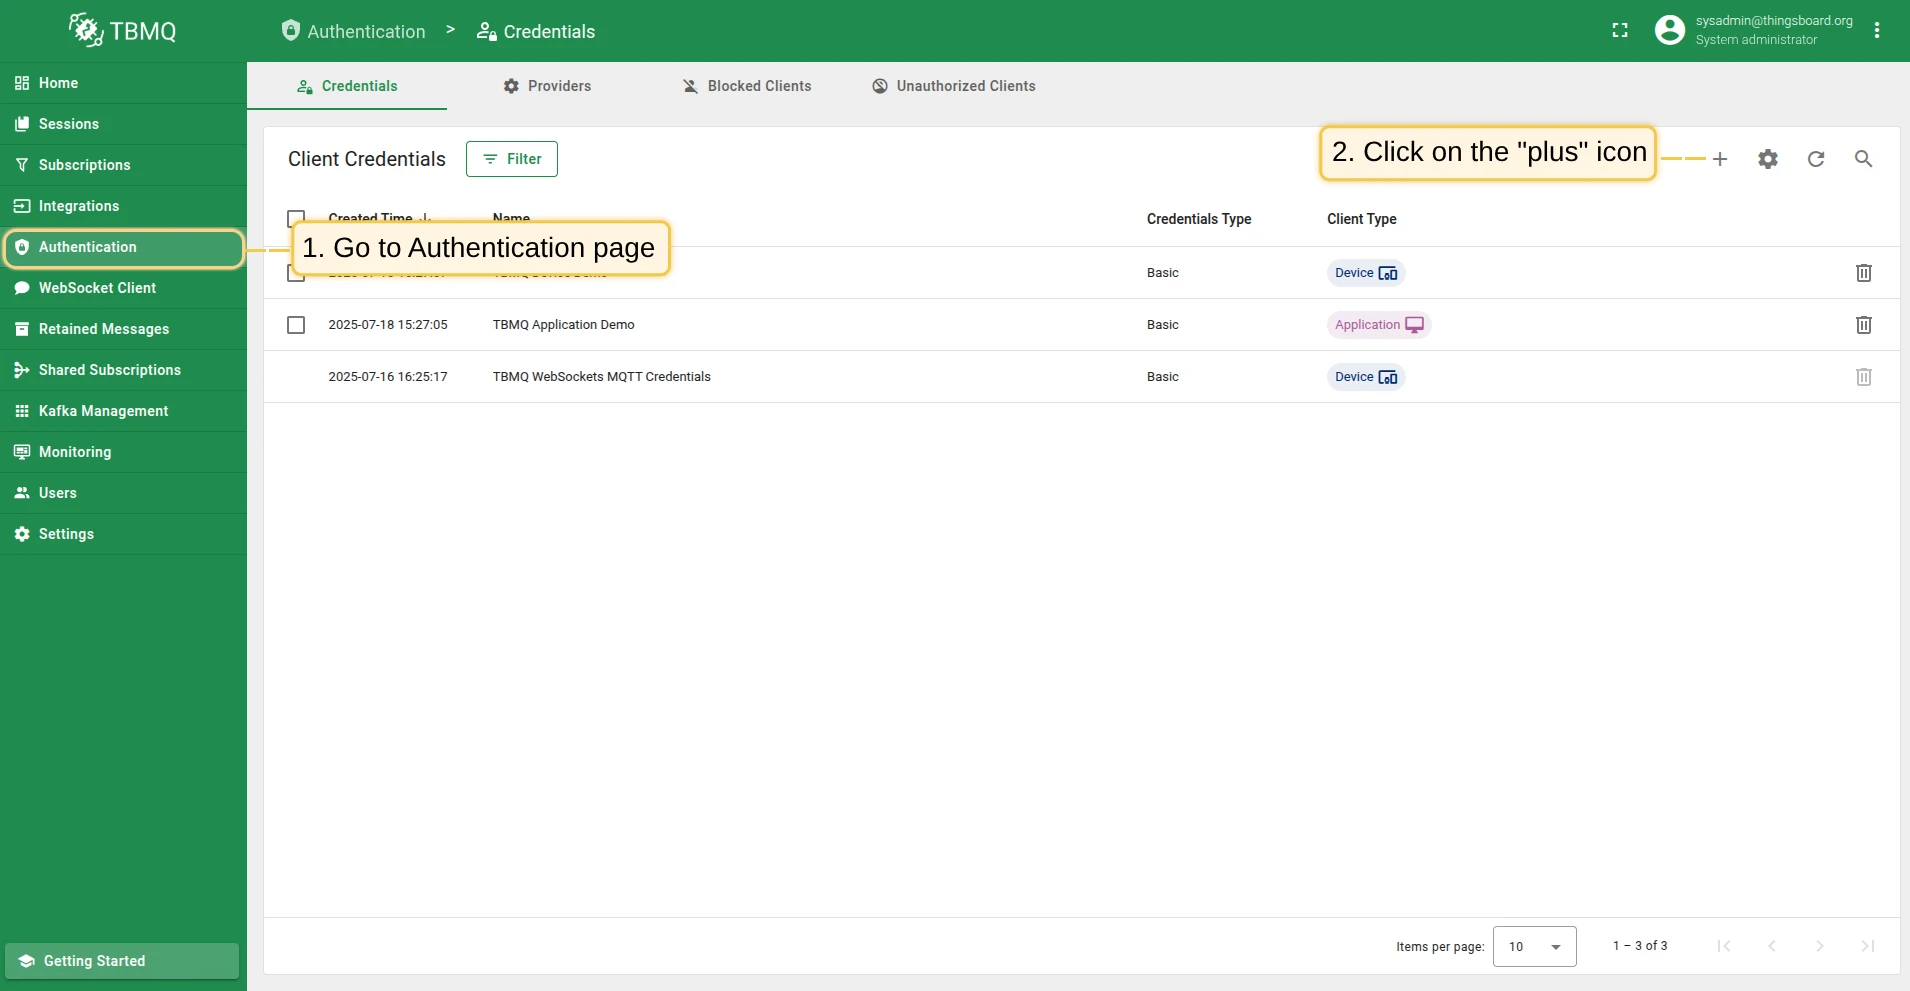
After you enable Basic authentication, create MQTT Client Credentials of type Basic to authenticate connecting clients:
- Go to Authentication → Credentials and click Add (+).
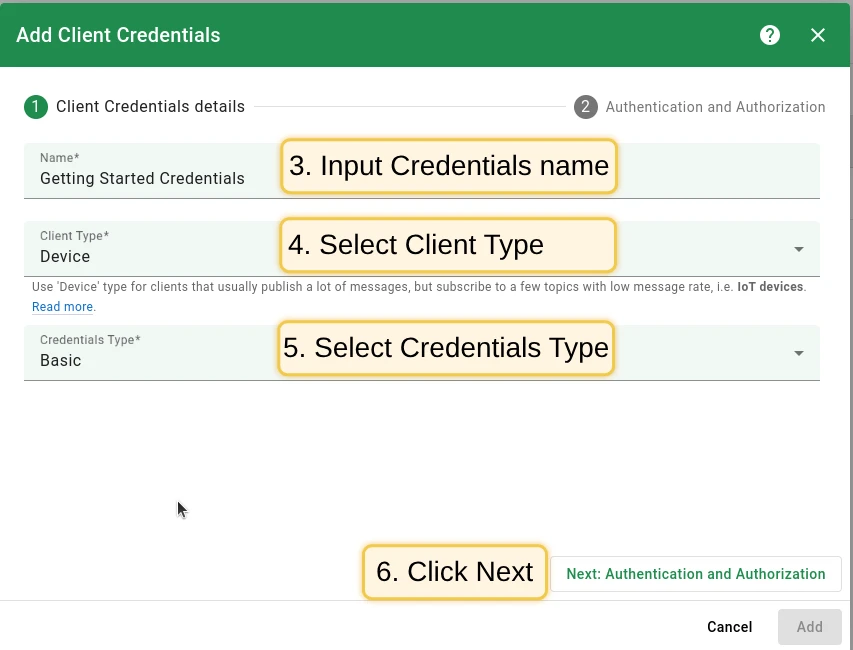
- Enter a credentials name, for example, “Getting Started Credentials”.
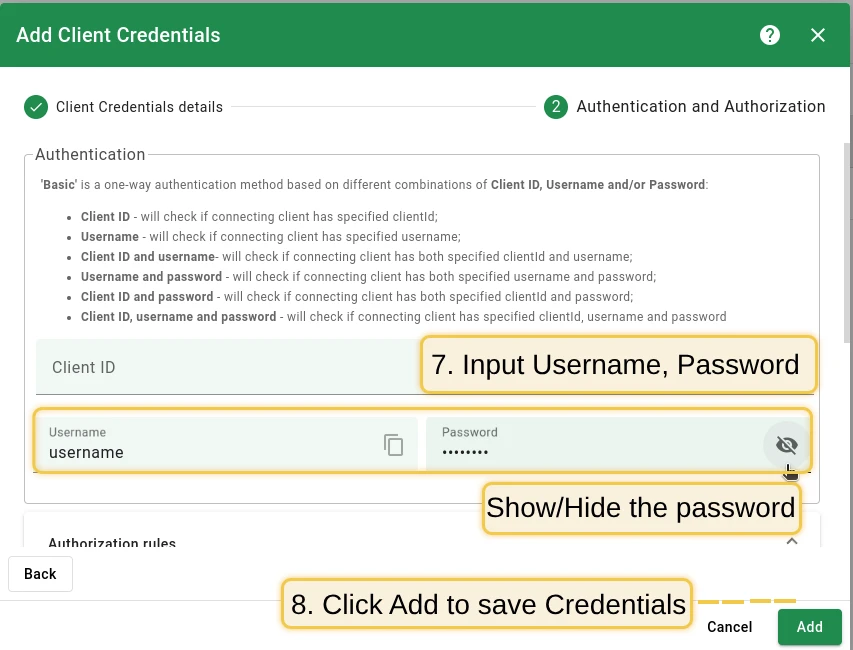
- Enter “username” and “password” values of your choice, for example,
usernameandpassword. - Click Add.
By default, authorization rules allow publishing and subscribing to any topic.
For additional authentication methods, see Security overview.
Publishing and subscribing to topics
Section titled “Publishing and subscribing to topics”Publish messages and subscribe to topics to observe the flow of messages. This tutorial uses Mosquitto clients. For details, see the mosquitto_pub and mosquitto_sub documentation.
Subscribe to a topic
Section titled “Subscribe to a topic”To subscribe to the sensors/temperature topic and start receiving messages, use the following command:
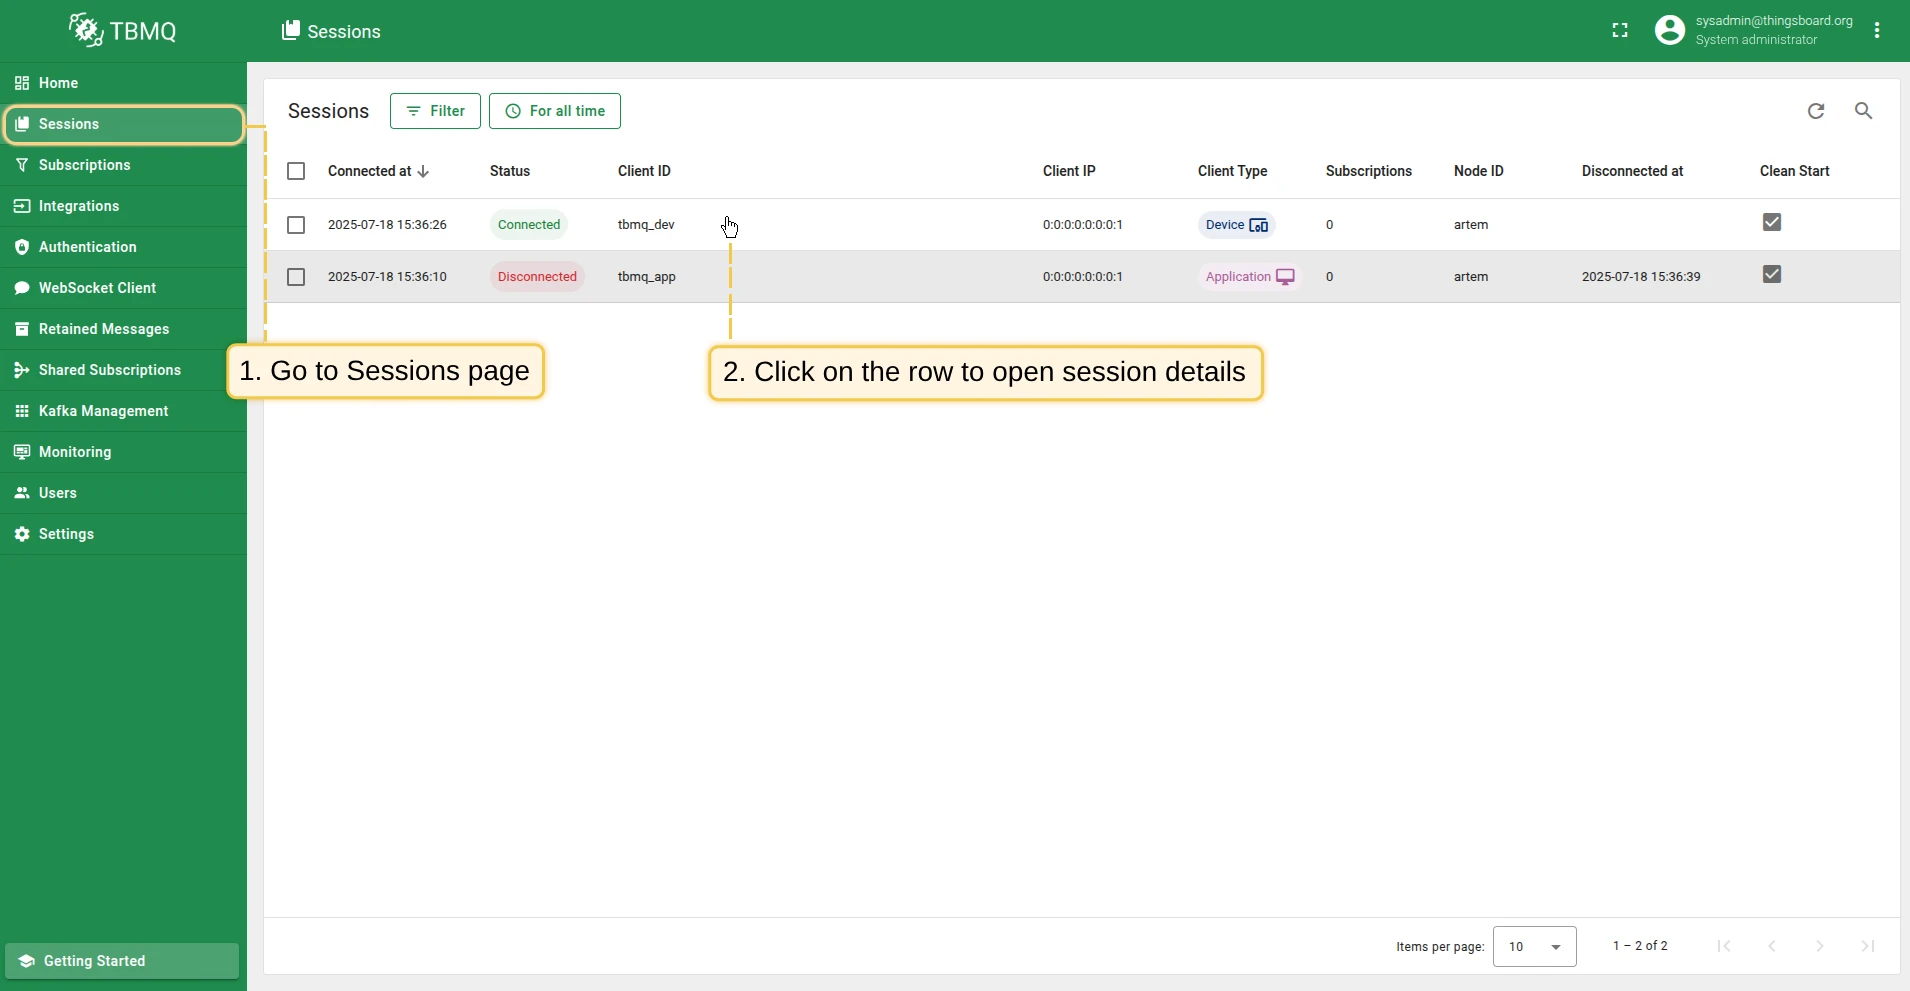
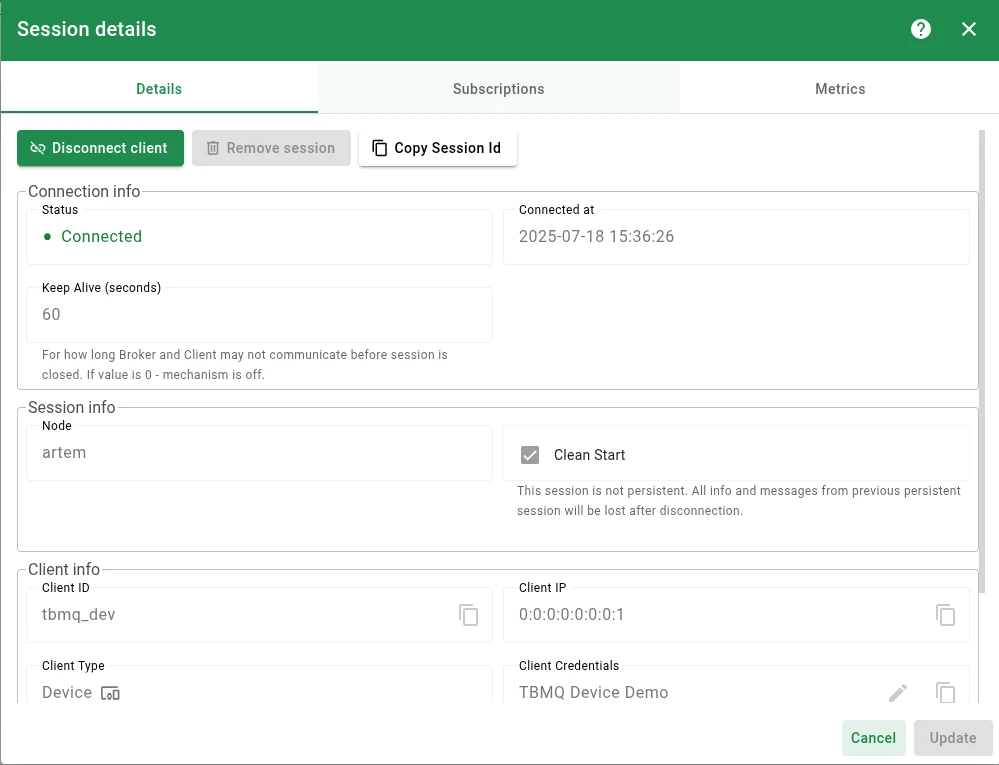
mosquitto_sub -d -h demo.tbmq.io -p 1883 -t sensors/temperature -q 1 -u demoAfter connecting, go to the Sessions page to view the session details.
If you signed up for a demo account, log in to demo.tbmq.io and go to the Sessions page to see all active sessions, including your new session.
Publish a message
Section titled “Publish a message”To publish a message to the sensors/temperature topic, use the following command:
mosquitto_pub -d -h demo.tbmq.io -p 1883 -t sensors/temperature -m 32 -q 1 -u demoSubscribe to a topic
Section titled “Subscribe to a topic”To subscribe to the sensors/temperature topic and start receiving messages, use the following command:
mosquitto_sub -d -h localhost -p 1883 -t sensors/temperature -q 1 -u username -P passwordAfter connecting, go to the Sessions page to view the session details.
Publish a message
Section titled “Publish a message”To publish a message to the sensors/temperature topic, use the following command:
mosquitto_pub -d -h localhost -p 1883 -t sensors/temperature -m 32 -q 1 -u username -P passwordResult
Section titled “Result”You should see the published message received by the subscribed client:

Was this helpful?