AWS
This guide covers setting up TBMQ in cluster mode on AWS EKS.
Prerequisites
Section titled “Prerequisites”Install kubectl, eksctl, and awscli.
Then configure your AWS credentials and default region. To get Access and Secret keys, follow this guide. The default region should be the ID of the region where you’d like to deploy the cluster:
aws configureClone TBMQ repository
Section titled Clone TBMQ repositorygit clone -b release-2.3.0 https://github.com/thingsboard/tbmq.gitcd tbmq/k8s/awsConfigure and create EKS cluster
Section titled “Configure and create EKS cluster”In the cluster.yml file you will find a sample cluster configuration.
You can adjust the following fields according to your requirements:
region: AWS region where the cluster will be created. Default:us-east-1.availabilityZones: Availability zones within the chosen region. Default:[us-east-1a, us-east-1b, us-east-1c].managedNodeGroups: Node groups used by the cluster. By default, there are two groups: one for TBMQ core services and another for TBMQ Integration Executors. You can co-locate both workloads in the same node group.instanceType: EC2 instance type for TBMQ and TBMQ IE nodes. Default:m7a.large.
The cluster configuration also enables the IAM OIDC provider, pre-provisions the aws-load-balancer-controller Kubernetes service account, and installs the AWS EBS CSI Driver, VPC CNI, CoreDNS, and kube-proxy managed add-ons.
Create the AWS cluster:
eksctl create cluster -f cluster.ymlInstall the AWS Load Balancer Controller
Section titled “Install the AWS Load Balancer Controller”The cluster configuration pre-provisions the IAM OIDC provider and the aws-load-balancer-controller Kubernetes service account in the kube-system namespace, so the IAM prerequisites are already in place. You only need to install the controller itself by following the Install with Helm steps in
the AWS guide,
skipping the IAM policy and service account creation steps.
The cluster provisioning scripts create two load balancers:
tbmq-http-loadbalancer: AWS ALB for the web UI and REST API.tbmq-mqtt-loadbalancer: AWS NLB for MQTT communication.
Installing the AWS Load Balancer Controller is a required step for these load balancers to work properly.
Amazon PostgreSQL DB configuration
Section titled “Amazon PostgreSQL DB configuration”Provision a PostgreSQL database on Amazon RDS. One recommended way is to follow the official AWS RDS setup guide.
Recommendations:
- PostgreSQL version: Use 17.x.
- Template: Use Production for real workloads. It enables important resilience settings by default.
- Availability: Enable Multi-AZ deployment for automatic failover.
- Credentials: Change the default
usernameand set a securepassword. Store it safely. - Instance: Use a general-purpose Graviton instance like
db.m7g.large. Right-size first, optimize later. - Scaling: Scale vertically (instance class/size) if sustained CPU exceeds 80% or active connections near limits. Change type during a maintenance window.
- Storage: Choose gp3 or io1 for production.
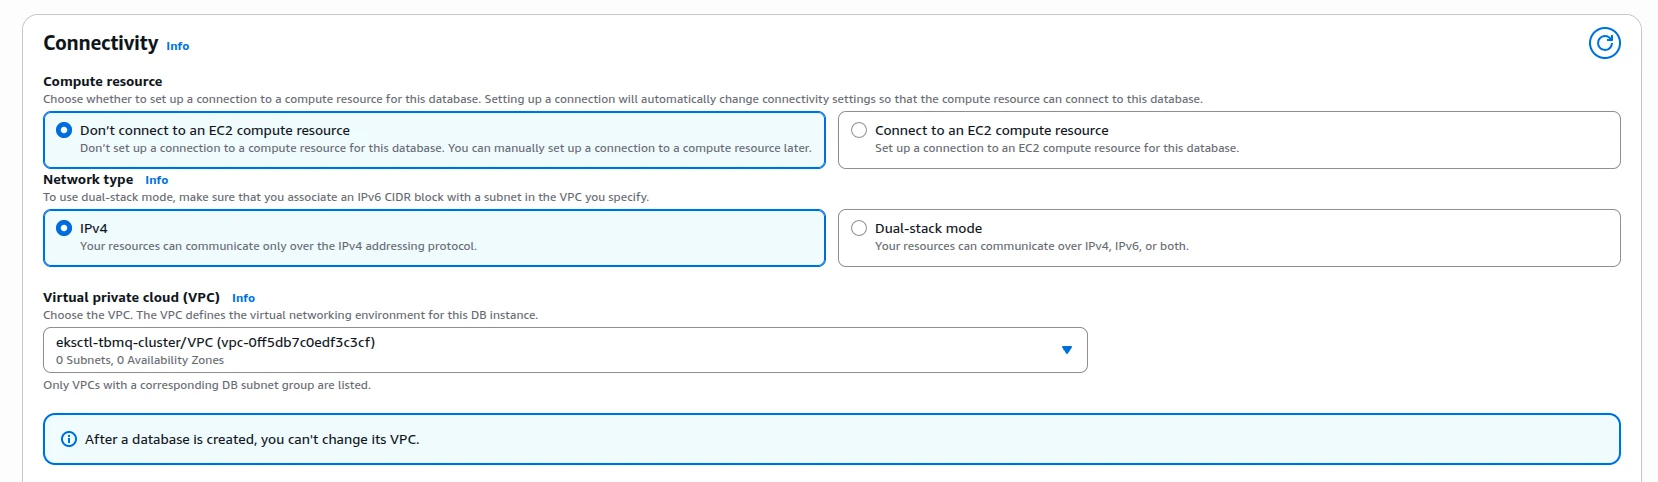
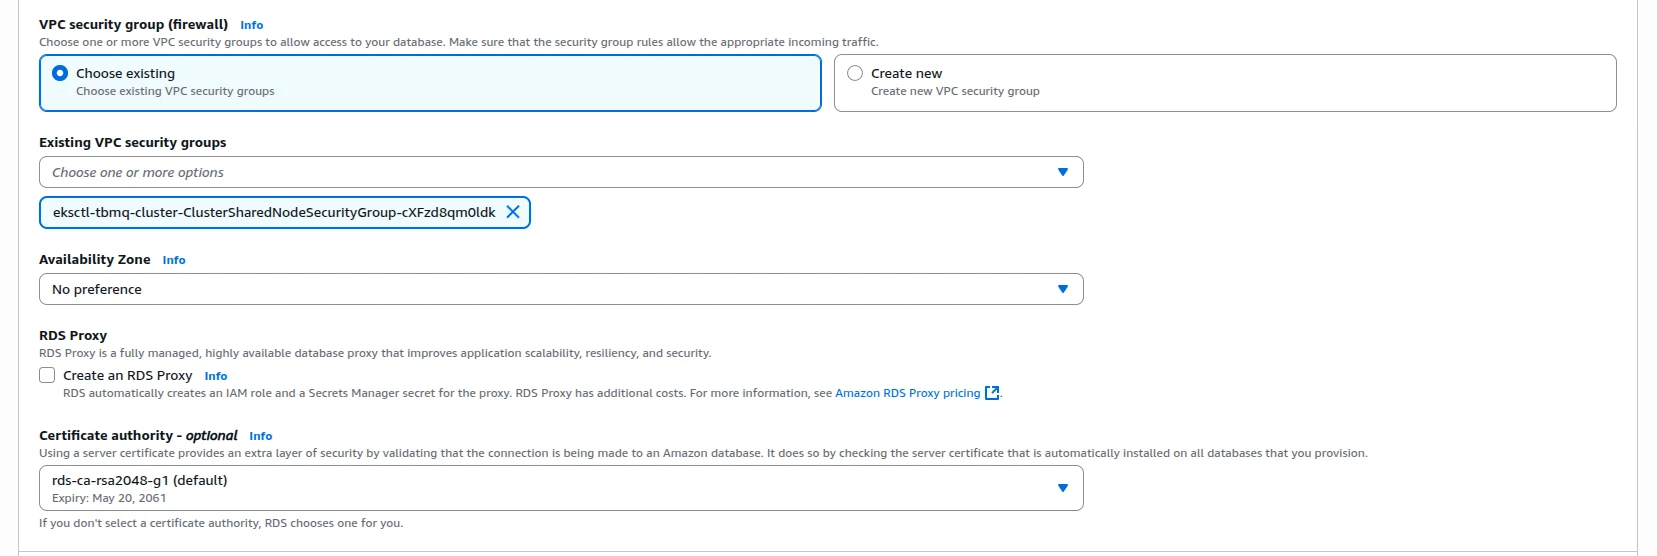
- Connectivity: Create the database in the same VPC and subnets as your TBMQ cluster and assign the
eksctl-tbmq-cluster-ClusterSharedNodeSecurityGroup-*security group. - Parameter group: Create a custom parameter group for easier future adjustments.
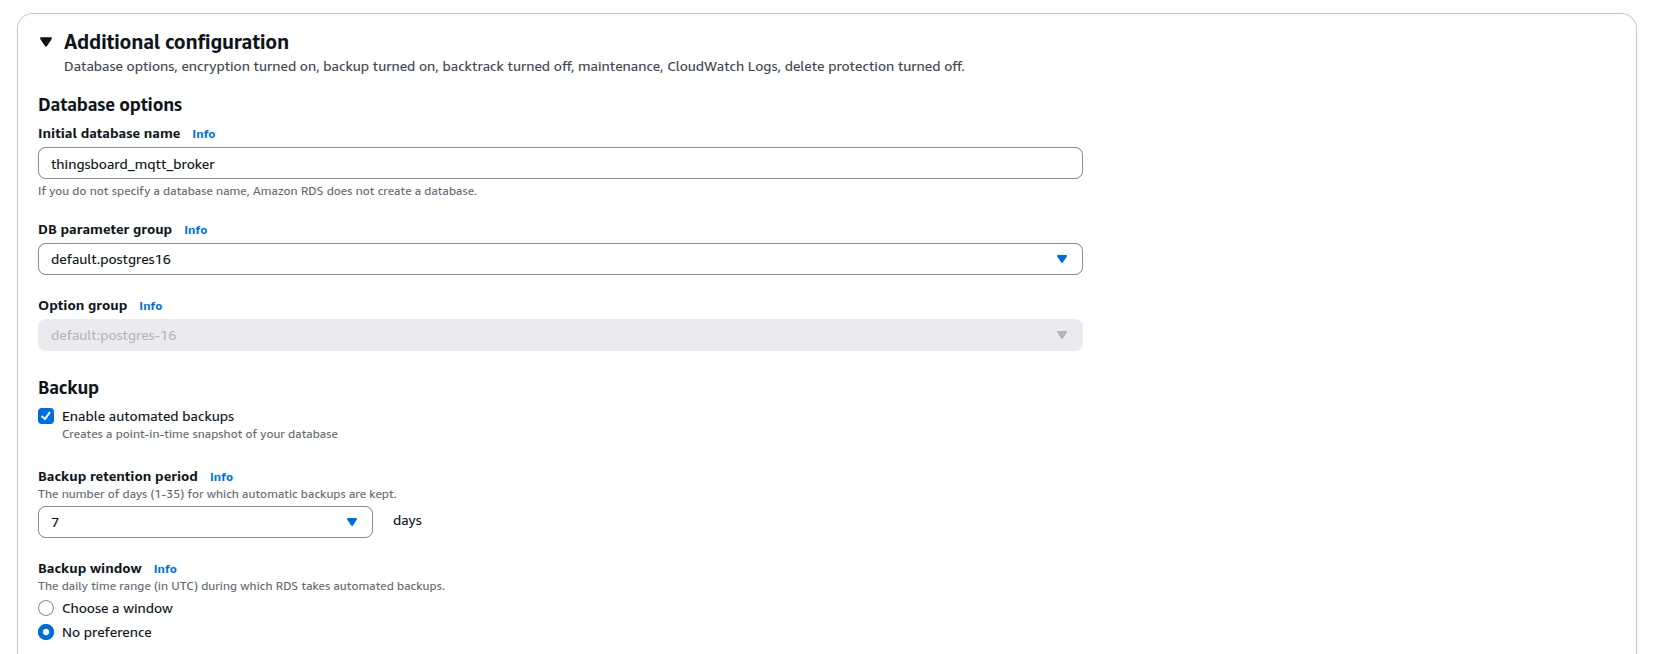
- Initial database name: Set to
thingsboard_mqtt_brokerunder Additional configuration. - Monitoring: Enable enhanced monitoring and CloudWatch alarms for key metrics.
Amazon MSK configuration
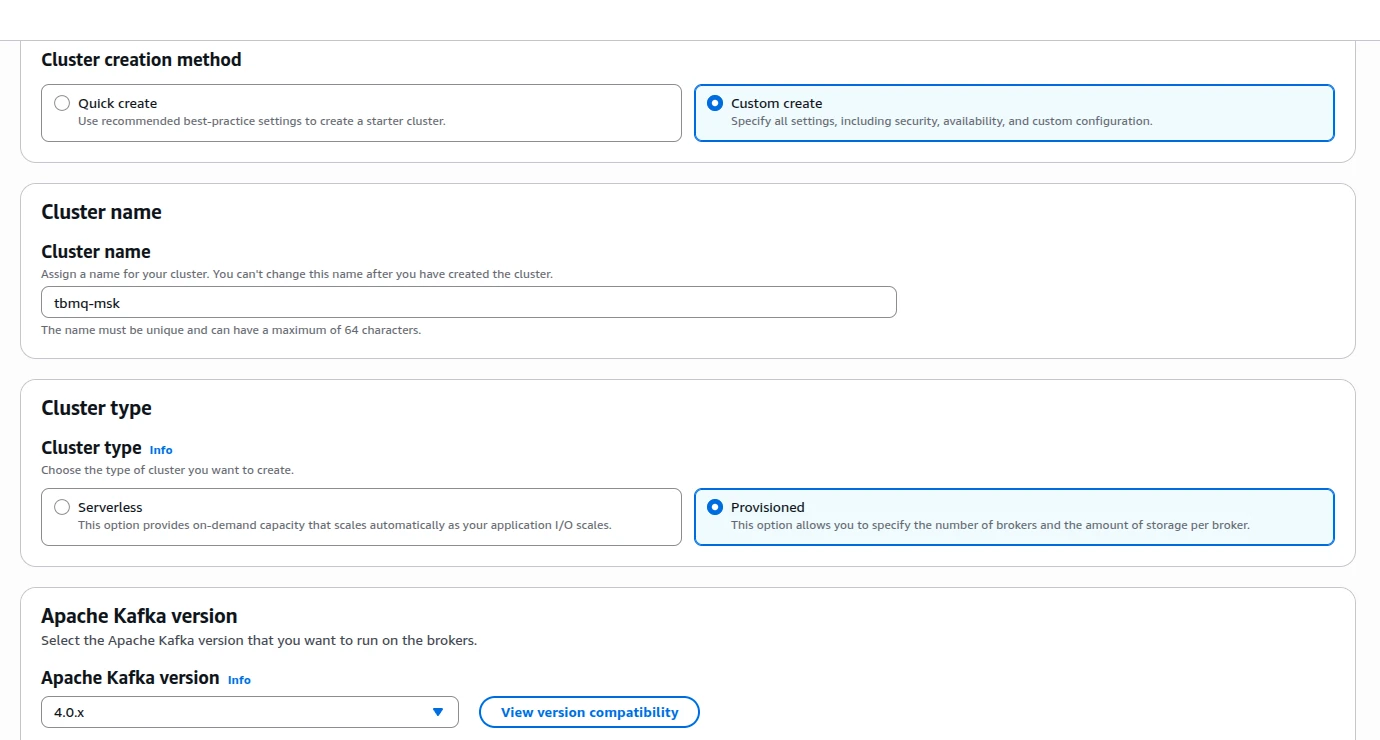
Section titled “Amazon MSK configuration”Provision an Amazon MSK cluster. Open the AWS Console → MSK → Create cluster → Custom create mode.
Recommendations:
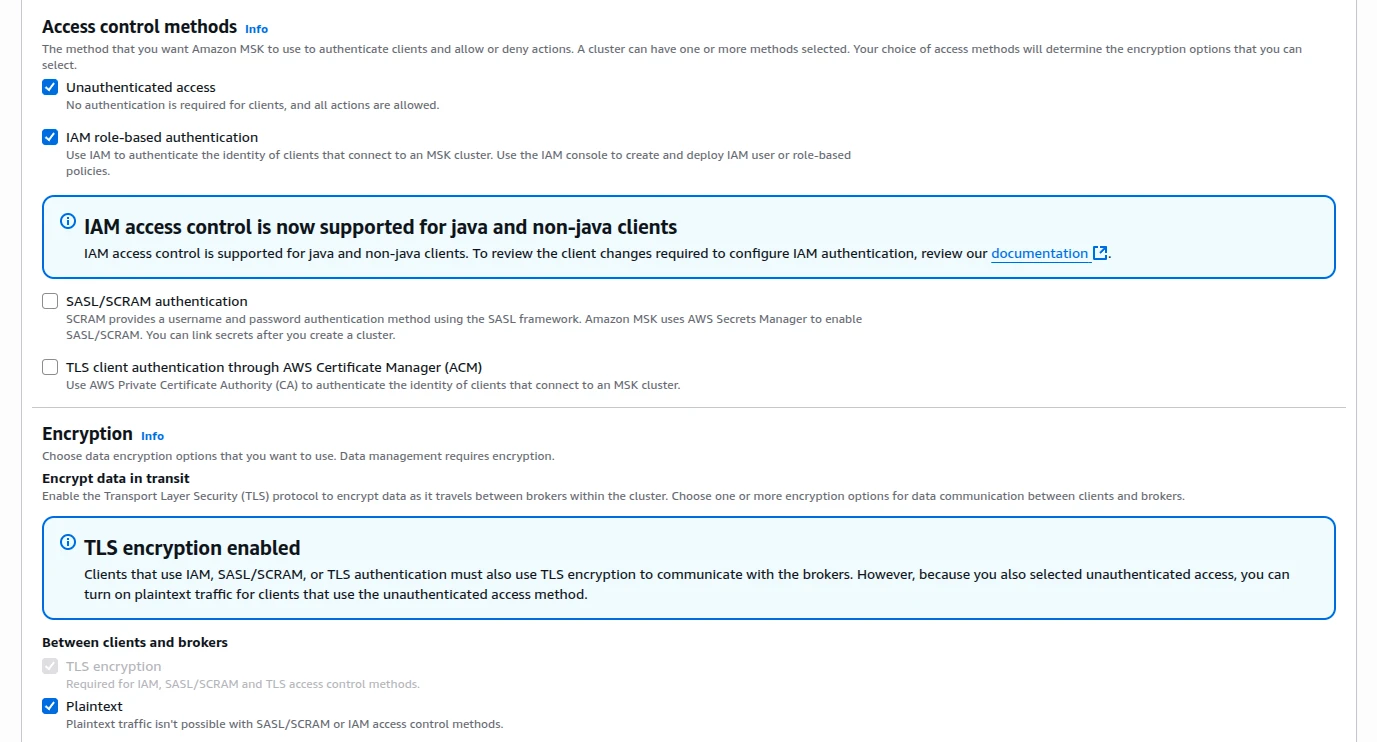
- Cluster type: Select Provisioned for full control over capacity and configuration.
- Kafka version: Use Apache Kafka 4.0.x, fully validated with TBMQ.
- Metadata mode: Choose KRaft for simplified operations and improved resiliency.
- Instance type: Start with
m7g.largebrokers. Scale up later if needed. - Cluster configuration: Create a custom configuration for easier future parameter changes.
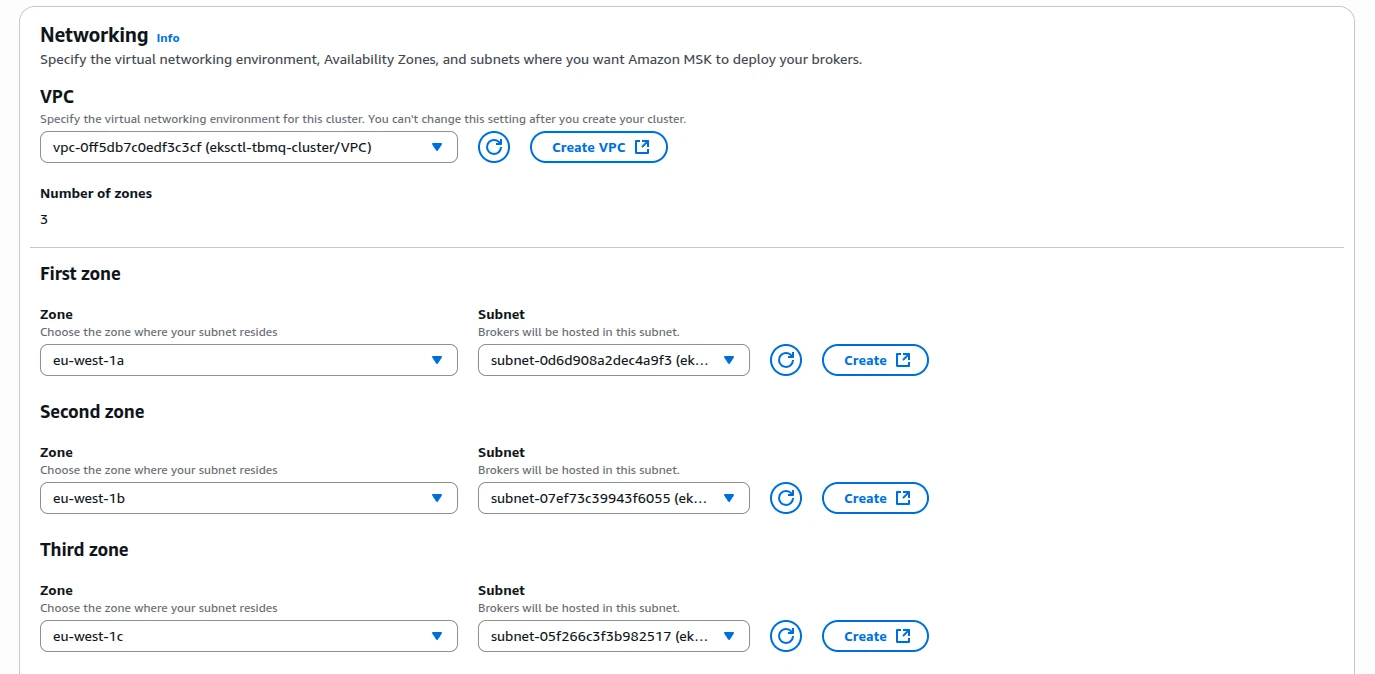
- Networking: Deploy in the same VPC as your TBMQ cluster using private subnets. Attach the
eksctl-tbmq-cluster-ClusterSharedNodeSecurityGroup-*security group. - Security: Allow Unauthenticated access and Plaintext communication.
- Monitoring: Use default monitoring or enable enhanced topic-level monitoring.

Carefully review the full cluster configuration, then proceed with cluster creation.
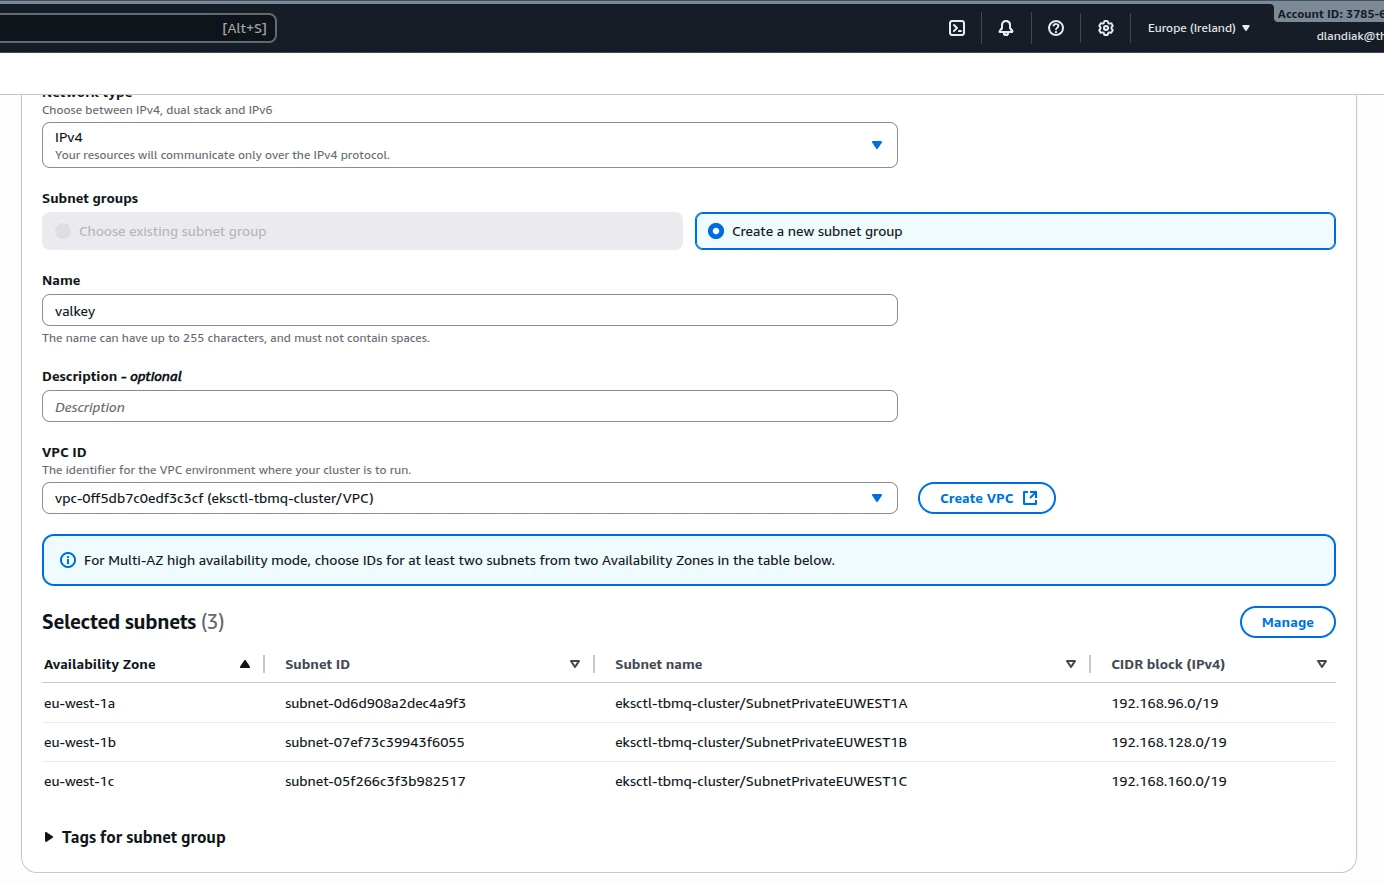
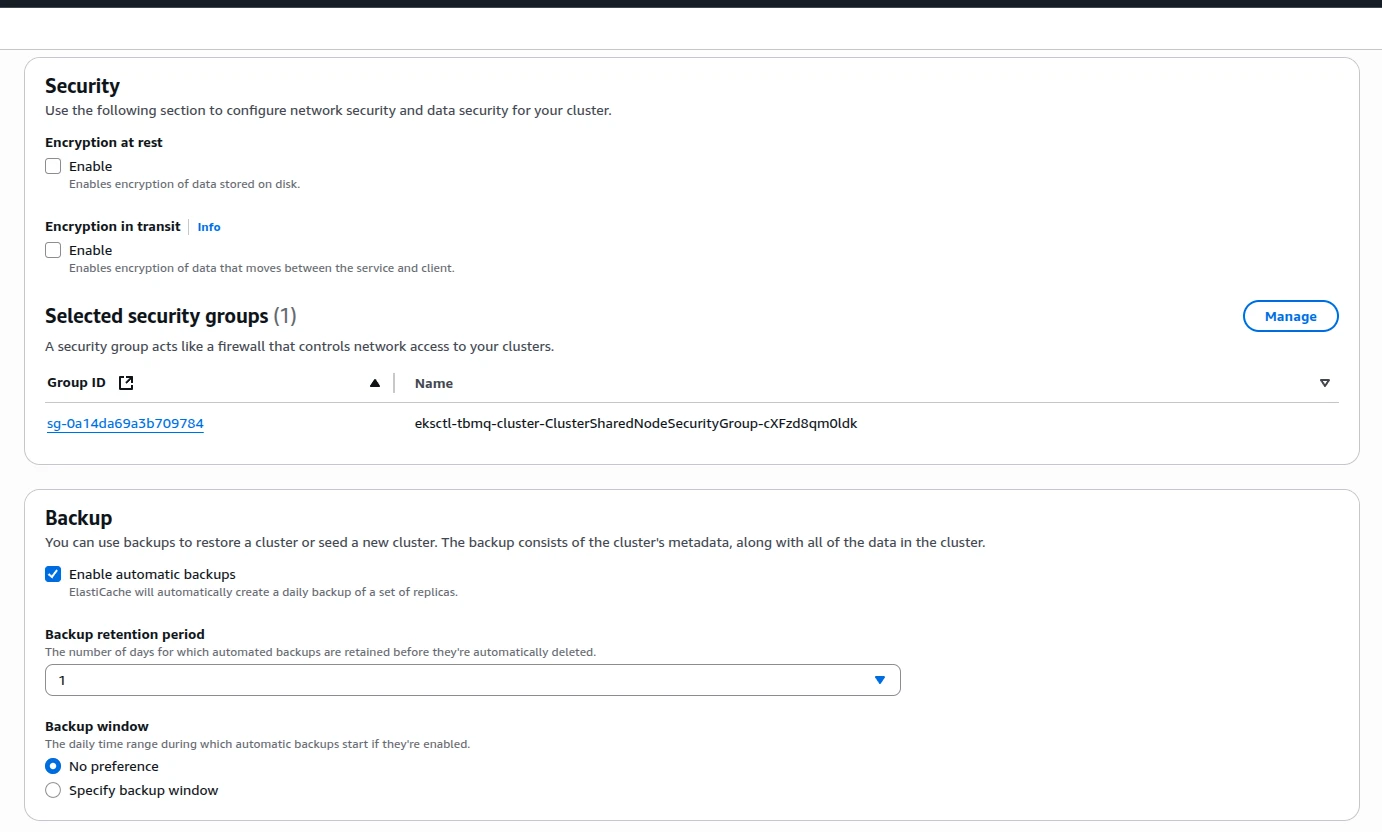
Amazon ElastiCache (Valkey) configuration
Section titled “Amazon ElastiCache (Valkey) configuration”TBMQ relies on Valkey to store messages for DEVICE persistent clients and to reduce database load during authentication. Without caching, every new connection triggers a database query to validate MQTT client credentials, which can overload the database under high connection rates.
Open the AWS Console → ElastiCache → Valkey caches → Create cache.
Recommendations:
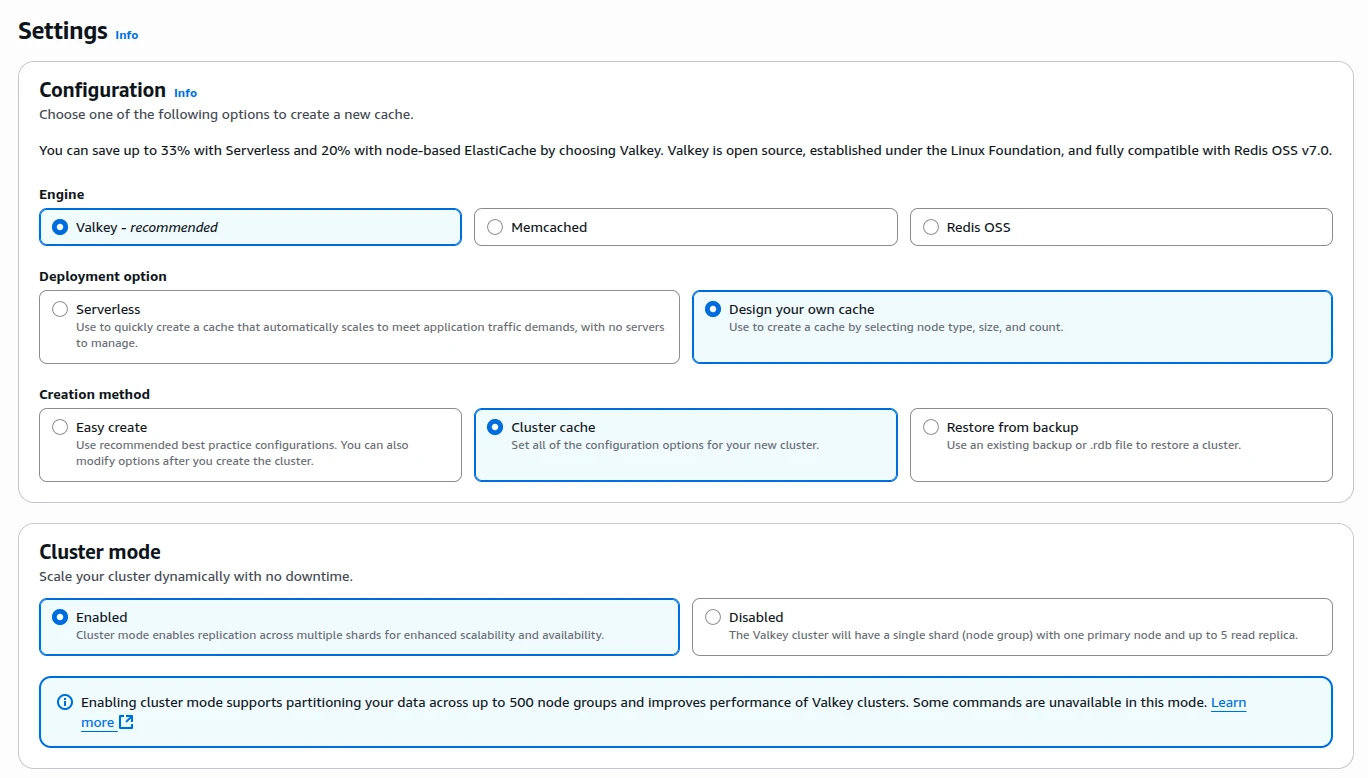
- Engine: Select Valkey.
- Deployment: Choose Design your own cache → Cluster cache.
- Cluster mode: Set to Enabled if you configure TBMQ with
REDIS_CONNECTION_TYPE=cluster(used in this guide). Set to Disabled if you configure TBMQ withREDIS_CONNECTION_TYPE=standalone. - Engine version: Use 8.x.
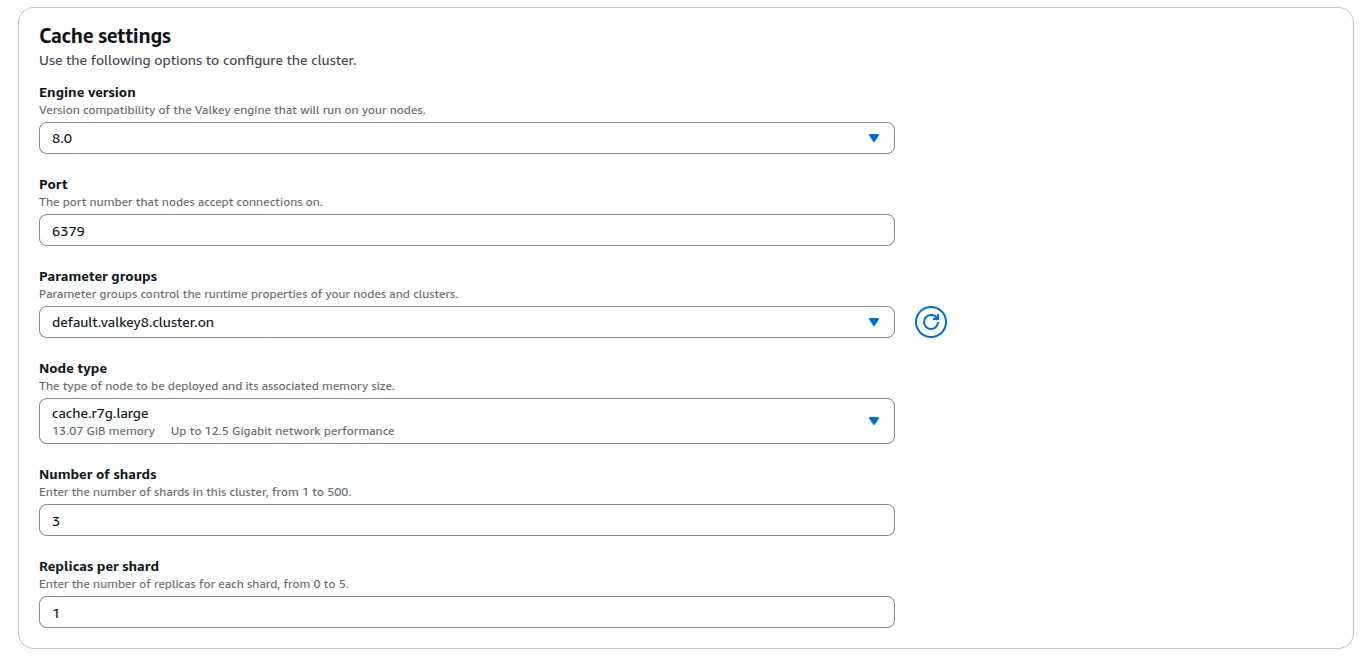
- Node type: Start with
cache.r7g.large; at least 1 GB RAM for dev/test. - Shards: For production, configure 3 shards with 1 replica per shard.
- Parameter groups: Use the default Valkey 8.x group or create a custom parameter group for easier tuning later.
- Networking: Deploy in the same VPC as TBMQ, using private subnets. Assign the
eksctl-tbmq-cluster-ClusterSharedNodeSecurityGroup-*security group. - Security: Disable encryption at rest and in transit if you plan to use plaintext/unauthenticated connections. Enable them if stricter security is required.
- Backups: Enable automatic backups with a 1–7 day retention period.
Configure links to Kafka/PostgreSQL/Valkey
Section titled “Configure links to Kafka/PostgreSQL/Valkey”Amazon RDS (PostgreSQL)
Section titled “Amazon RDS (PostgreSQL)”Once the RDS instance becomes Available, copy its Endpoint from the AWS Console.
Update SPRING_DATASOURCE_URL in tbmq-db-configmap.yml by replacing RDS_URL_HERE with the endpoint.
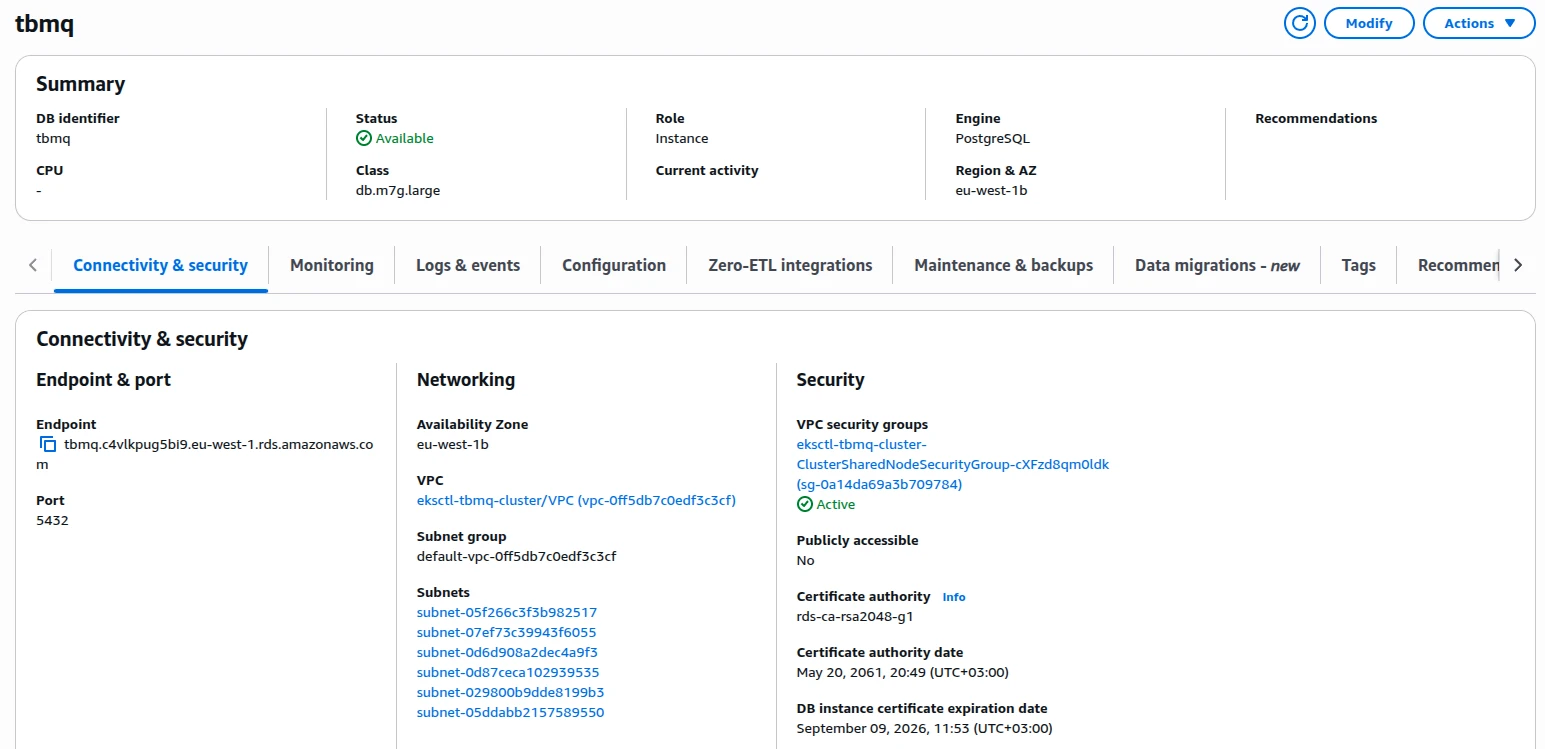
Also set:
SPRING_DATASOURCE_USERNAME→ your PostgreSQL usernameSPRING_DATASOURCE_PASSWORD→ your PostgreSQL password
Amazon MSK (Kafka)
Section titled “Amazon MSK (Kafka)”Once the MSK cluster becomes Active, retrieve the bootstrap brokers:
aws kafka get-bootstrap-brokers --region us-east-1 --cluster-arn $CLUSTER_ARNWhere $CLUSTER_ARN is the Amazon Resource Name of your MSK cluster:
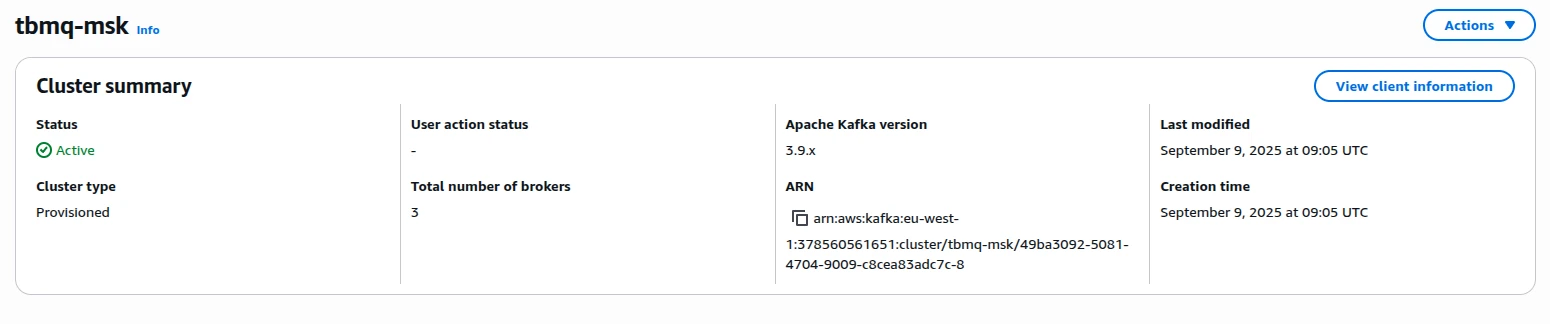
Copy the value from BootstrapBrokerString and set it as TB_KAFKA_SERVERS in tbmq.yml and tbmq-ie.yml.
Alternatively, click View client information in the MSK Console and copy the plaintext bootstrap servers.
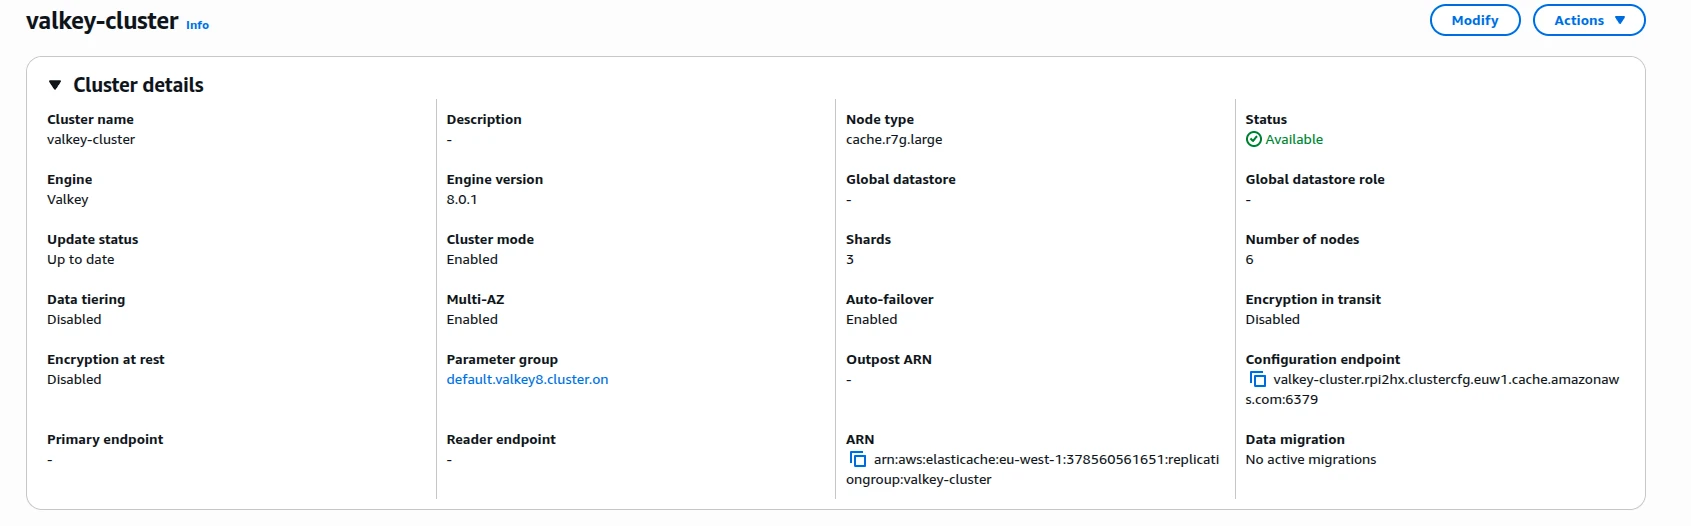
Amazon ElastiCache (Valkey)
Section titled “Amazon ElastiCache (Valkey)”Once the Valkey cluster becomes Available, open Cluster details and copy the connection endpoint:
- Standalone mode: copy the Primary endpoint (without the
:6379port suffix). - Cluster mode: copy the Cluster configuration endpoint.
Edit tbmq-cache-configmap.yml:
For standalone mode:
REDIS_CONNECTION_TYPE: "standalone"REDIS_HOST: "YOUR_VALKEY_ENDPOINT_URL_WITHOUT_PORT"#REDIS_PASSWORD: "YOUR_REDIS_PASSWORD"For cluster mode:
REDIS_CONNECTION_TYPE: "cluster"REDIS_NODES: "YOUR_VALKEY_CLUSTER_ENDPOINT_URL"#REDIS_PASSWORD: "YOUR_REDIS_PASSWORD"# Recommended for Kubernetes to handle dynamic IP changes and failover:#REDIS_LETTUCE_CLUSTER_TOPOLOGY_REFRESH_ENABLED: "true"#REDIS_JEDIS_CLUSTER_TOPOLOGY_REFRESH_ENABLED: "true"Installation
Section titled “Installation”Run the installation script:
./k8s-install-tbmq.shAfter completion, you should see:
INFO o.t.m.b.i.ThingsboardMqttBrokerInstallService - Installation finished successfully!Configure gp3 as the default storage class
Section titled “Configure gp3 as the default storage class”The gp3 EBS volume type is the recommended default for Amazon EKS, offering better performance and cost efficiency compared to gp2.
The cluster configuration installs the AWS EBS CSI Driver as a managed add-on, so no additional installation is required.
Download and apply the gp3 StorageClass manifest:
curl -o gp3-def-sc.yml https://raw.githubusercontent.com/thingsboard/tbmq/release-2.3.0/k8s/helm/aws/gp3-def-sc.ymlkubectl apply -f gp3-def-sc.ymlIf a gp2 StorageClass exists, either make it non-default:
kubectl patch storageclass gp2 -p '{"metadata": {"annotations":{"storageclass.kubernetes.io/is-default-class":"false"}}}'Or delete it if unused:
kubectl delete storageclass gp2Verify gp3 is the default:
kubectl get scExpected output:
NAME PROVISIONER RECLAIMPOLICY VOLUMEBINDINGMODE ALLOWVOLUMEEXPANSION AGEgp3 (default) ebs.csi.aws.com Delete WaitForFirstConsumer true 30sStart TBMQ
Section titled “Start TBMQ”Deploy TBMQ:
./k8s-deploy-tbmq.shAfter a few minutes, check the pod status:
kubectl get podsYou should see tbmq-0 and tbmq-1 pods, each in the READY state.
Configure load balancers
Section titled “Configure load balancers”The cluster needs two load balancers: an ALB for the web UI and REST API (HTTP or HTTPS), and an NLB for MQTT communication (plain or TLS).
HTTP load balancer
Section titled “HTTP load balancer”kubectl apply -f receipts/http-load-balancer.ymlCheck provisioning status:
kubectl get ingressOnce ready, output will look like:
NAME CLASS HOSTS ADDRESS PORTS AGEtbmq-http-loadbalancer <none> * k8s-thingsbo-tbmq-000aba1305-222186756.eu-west-1.elb.amazonaws.com 80 3d1hHTTPS load balancer
Section titled “HTTPS load balancer”Recommended for production. The ALB terminates SSL and automatically redirects HTTP to HTTPS.
Use AWS Certificate Manager to create or import an SSL certificate. Note the certificate ARN.
Replace YOUR_HTTPS_CERTIFICATE_ARN in the config:
nano receipts/https-load-balancer.ymlDeploy:
kubectl apply -f receipts/https-load-balancer.ymlMQTT load balancer
Section titled “MQTT load balancer”Create a TCP load balancer that forwards traffic on ports 1883 and 8883:
kubectl apply -f receipts/mqtt-load-balancer.ymlFor encrypted MQTT traffic, deploy one of the TLS variants described below instead.
MQTT load balancer with one-way TLS
Section titled “MQTT load balancer with one-way TLS”The most common MQTTS setup is to configure the AWS NLB as a TLS termination point. Traffic between devices and the load balancer is encrypted, while traffic between the load balancer and TBMQ is not. This is acceptable since the NLB runs within your VPC.
Use AWS Certificate Manager to obtain a certificate. Note the ARN.
Replace YOUR_MQTTS_CERTIFICATE_ARN in the config:
nano receipts/mqtts-load-balancer.ymlDeploy:
kubectl apply -f receipts/mqtts-load-balancer.ymlMQTT load balancer with two-way TLS
Section titled “MQTT load balancer with two-way TLS”Two-way TLS allows use of X.509 certificate MQTT client credentials.
Follow this guide to create a .pem certificate file.
Save it as server.pem in the working directory.
Create a ConfigMap from your PEM files:
kubectl create configmap tbmq-mqtts-config \ --from-file=server.pem=YOUR_PEM_FILENAME \ --from-file=mqttserver_key.pem=YOUR_PEM_KEY_FILENAME \ -o yaml --dry-run=client | kubectl apply -f -Where:
YOUR_PEM_FILENAME: Path to your server certificate file.YOUR_PEM_KEY_FILENAME: Path to your server certificate private key file.
Uncomment all sections marked with “Uncomment the following lines to enable two-way MQTTS” in tbmq.yml:
kubectl apply -f tbmq.ymlDeploy the transparent load balancer:
kubectl apply -f receipts/mqtt-load-balancer.ymlValidate the setup
Section titled “Validate the setup”Open the TBMQ web interface using the DNS name of the HTTP load balancer:
kubectl get ingressNAME CLASS HOSTS ADDRESS PORTS AGEtbmq-http-loadbalancer <none> * k8s-thingsbo-tbmq-000aba1305-222186756.eu-west-1.elb.amazonaws.com 80 3d1hUse the ADDRESS of tbmq-http-loadbalancer — or the DNS record you pointed at it for HTTPS — to access the UI.
You should see the TBMQ login page. Use the default System Administrator credentials:
Username:
sysadmin@thingsboard.orgPassword:
sysadminOn first login, you are prompted to change the default password and re-login with the new credentials.
Validate MQTT access
Section titled “Validate MQTT access”The Service name to inspect depends on the variant you deployed:
- Plain MQTT or two-way TLS —
tbmq-mqtt-loadbalancer(port 1883 for plain, 8883 for two-way TLS). - One-way TLS —
tbmq-mqtts-loadbalancer(port 8883).
Retrieve its EXTERNAL-IP with:
kubectl get servicesNAME TYPE CLUSTER-IP EXTERNAL-IP PORT(S) AGEtbmq-mqtt-loadbalancer LoadBalancer 10.100.119.170 k8s-thingsbo-tbmq-b9f99d1ab6-1049a98ba4e28403.elb.eu-west-1.amazonaws.com 1883:30308/TCP,8883:31609/TCP 6m58sUse the EXTERNAL-IP of the matching Service — or the DNS record you pointed at it for TLS — to connect to the cluster.
Troubleshooting
Section titled “Troubleshooting”View TBMQ pod logs:
kubectl logs -f tbmq-0Check the state of all StatefulSets:
kubectl get statefulsetsSee the kubectl Cheat Sheet for more details.
Upgrading
Section titled “Upgrading”- Check the version-specific notes below for any preparation your target version requires.
- Back up your database (optional but recommended).
- Run the upgrade commands.
For full version history and supported upgrade paths, see the upgrade instructions page. If the documentation does not cover your specific upgrade path, contact us for guidance.
If there are no version-specific notes for your upgrade path, skip directly to Run upgrade.
Backup and restore (optional)
Section titled “Backup and restore (optional)”Backing up your PostgreSQL database before upgrading is highly recommended but optional. For guidance, follow the AWS RDS backup and restore instructions.
Upgrade to 2.3.0
Section titled Upgrade to 2.3.0This release migrates all third-party components from Bitnami images to official open-source alternatives. Review the third-party component updates for full details.
Then proceed with the upgrade.
Upgrade to 2.2.0
Section titled Upgrade to 2.2.0This release migrates MQTT authentication from YAML/env configuration into the database.
The upgrade script reads from database-setup.yml. Variables from tbmq.yml are not applied during the upgrade — only the values in database-setup.yml are used. Ensure this file reflects your active configuration.
Supported variables in database-setup.yml
SECURITY_MQTT_BASIC_ENABLED(true|false)SECURITY_MQTT_SSL_ENABLED(true|false)SECURITY_MQTT_SSL_SKIP_VALIDITY_CHECK_FOR_CLIENT_CERT(true|false) — usuallyfalse
Once the file is verified, proceed with the upgrade.
Run upgrade
Section titled “Run upgrade”Pull the latest changes from the release branch:
git pull origin release-2.3.0Note: Make sure any custom changes are not lost during the merge.
After pulling, run the upgrade script:
./k8s-upgrade-tbmq.shCluster deletion
Section titled “Cluster deletion”Delete TBMQ nodes:
./k8s-delete-tbmq.shDelete all TBMQ nodes and ConfigMaps:
./k8s-delete-all.shDelete the EKS cluster (update the cluster name and region if different):
eksctl delete cluster -r us-east-1 -n tbmq -wWas this helpful?