Integration with ThingsBoard
This guide shows how to integrate TBMQ with ThingsBoard using the ThingsBoard MQTT Integration. This guide uses TBMQ client credentials with type APPLICATION so that ThingsBoard connects as an APPLICATION client, enabling persistent subscriptions with offline message delivery. Read more about client types in the Client types guide.
ThingsBoard MQTT Integration acts as an MQTT client: it subscribes to topics, converts the received data into telemetry and attribute updates, and converts downlink messages to a device-suitable format before pushing them back to TBMQ.
Prerequisites
Section titled “Prerequisites”- A running ThingsBoard PE instance
- A running TBMQ instance accessible by the ThingsBoard PE instance
mosquitto_pubMQTT client to send test messages.
TBMQ setup
Section titled “TBMQ setup”Create TBMQ client credentials to use for connecting the ThingsBoard MQTT Integration to TBMQ.
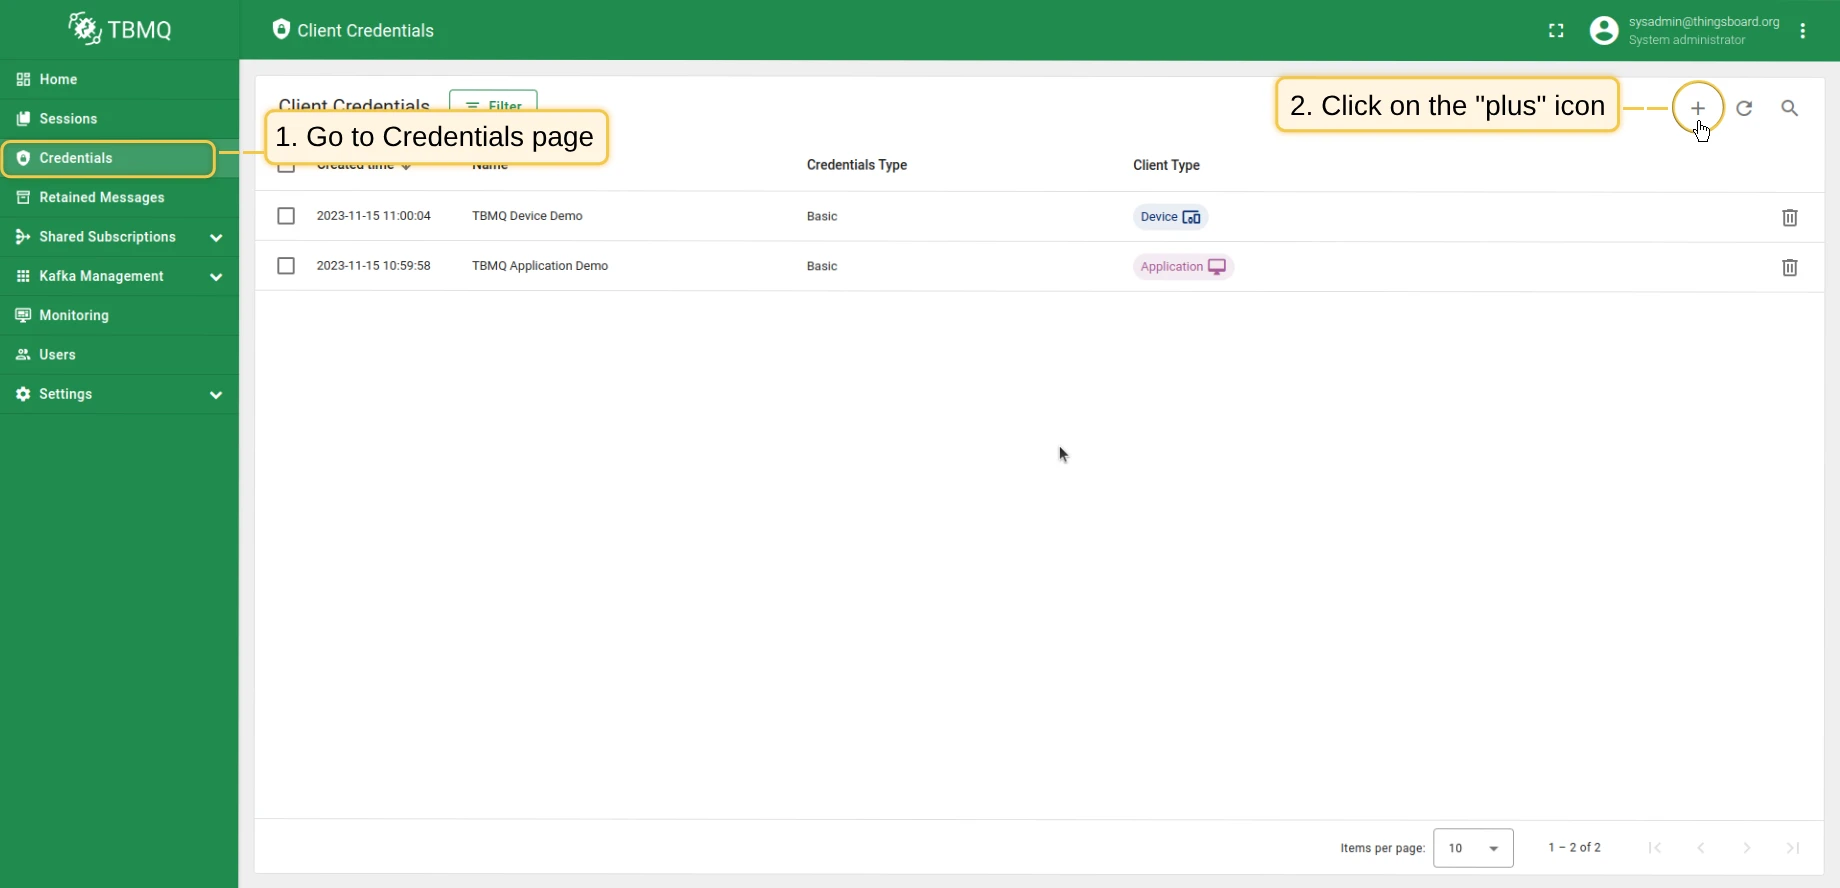
- In the TBMQ UI, go to Authentication → Credentials and click Add (+).
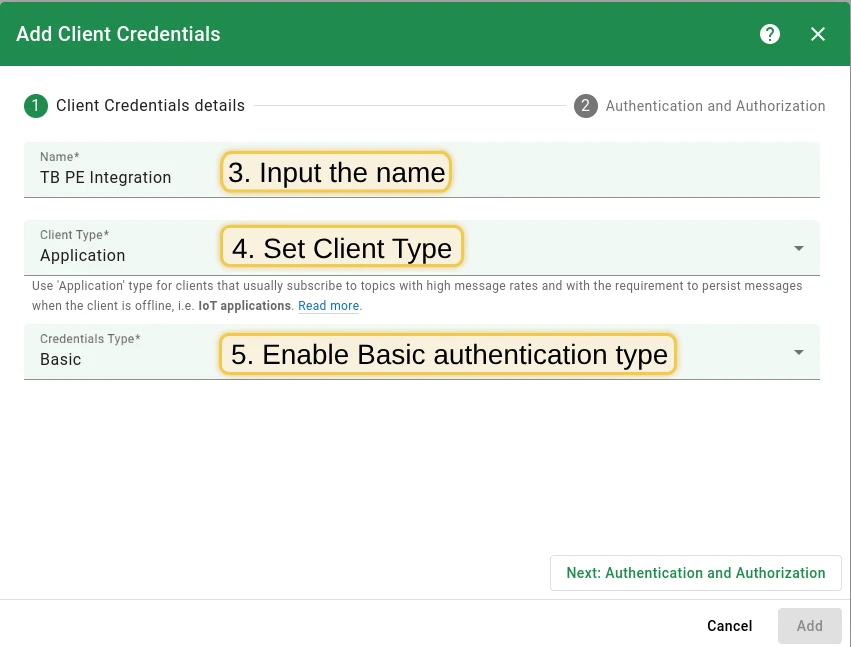
- Enter a credential name and select Application as the client type.
- Select Basic as the credentials type.
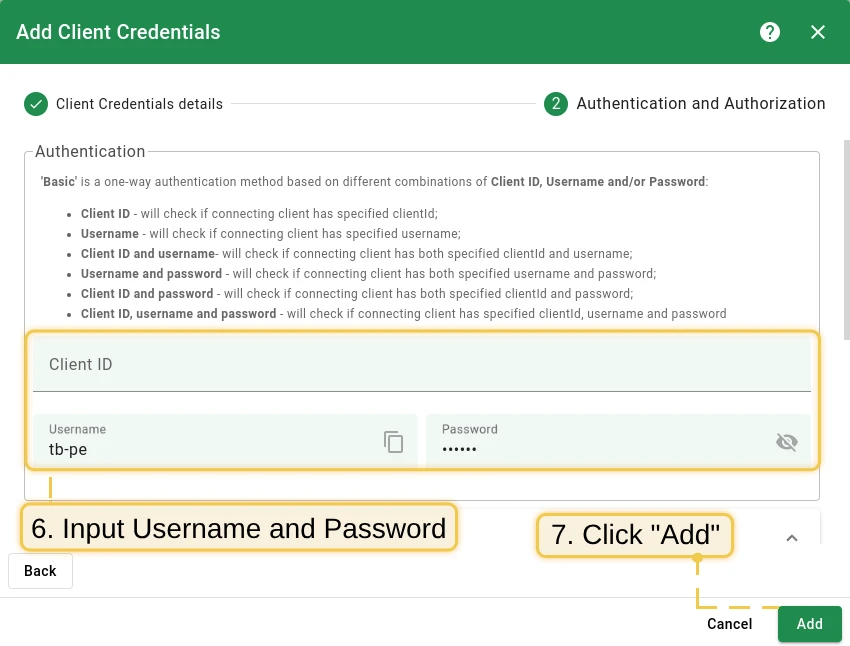
- Enter a Username and Password (e.g.,
tb-pe/secret). - Click Add.
ThingsBoard setup
Section titled “ThingsBoard setup”Create an uplink converter
Section titled “Create an uplink converter”The uplink converter parses incoming MQTT data and metadata into a format ThingsBoard can consume.
In ThingsBoard, go to Integrations center → Data converters and click Add (+). Name it TBMQ Uplink Converter, select type Uplink, and paste the decoder script below. Click Add.
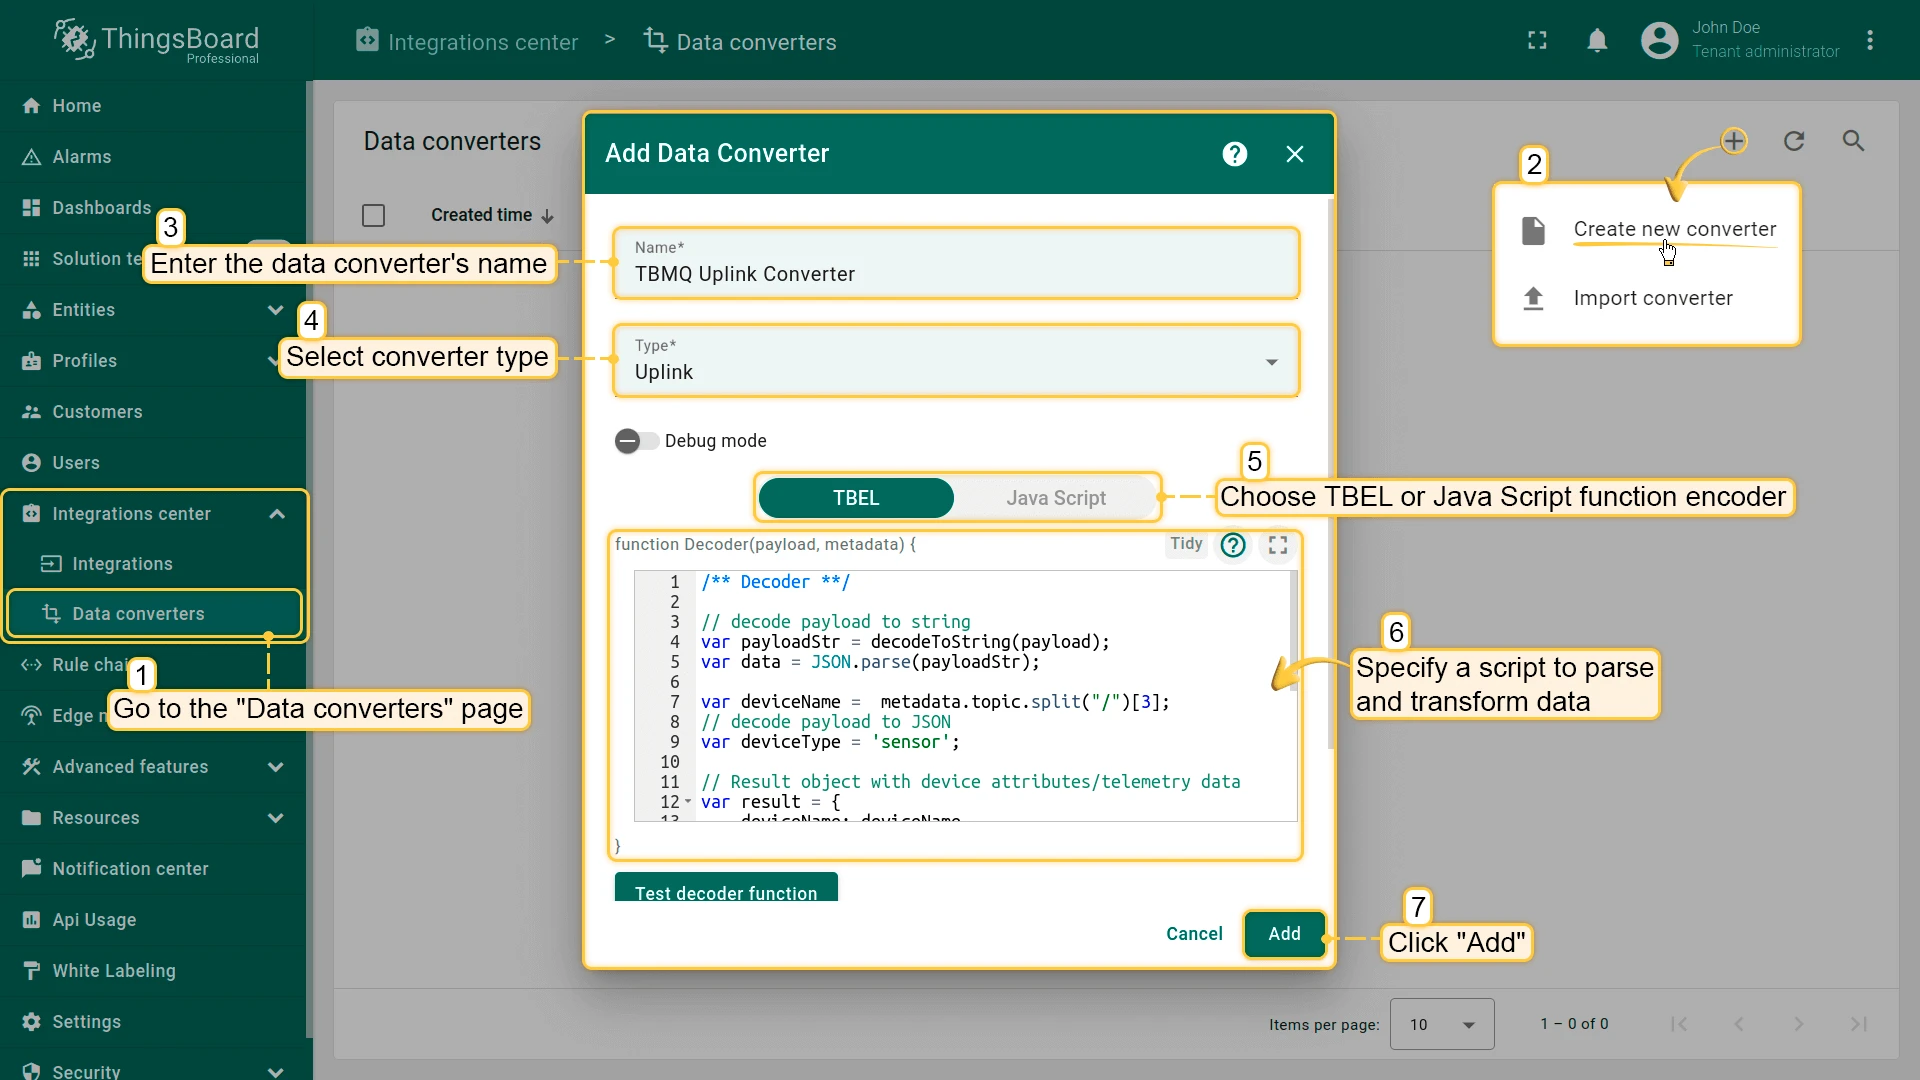
/** Decoder **/
// decode payload to stringvar payloadStr = decodeToString(payload);var data = JSON.parse(payloadStr);
var deviceName = metadata.topic.split("/")[3];var deviceType = 'sensor';
// Result object with device attributes/telemetry datavar result = {    deviceName: deviceName,    deviceType: deviceType,    attributes: {        integrationName: metadata['integrationName'],    },    telemetry: {        temperature: data.value,    }};
/** Helper functions 'decodeToString' and 'decodeToJson' are already built-in **/
return result;
/** Decoder **/
// decode payload to stringvar payloadStr = decodeToString(payload);var data = JSON.parse(payloadStr);
var deviceName = metadata.topic.split("/")[3];var deviceType = 'sensor';
// Result object with device attributes/telemetry datavar result = { deviceName: deviceName, deviceType: deviceType, attributes: { integrationName: metadata['integrationName'], }, telemetry: { temperature: data.value, }};
/** Helper functions **/
function decodeToString(payload) { return String.fromCharCode.apply(String, payload);}
function decodeToJson(payload) { var str = decodeToString(payload); var data = JSON.parse(str); return data;}
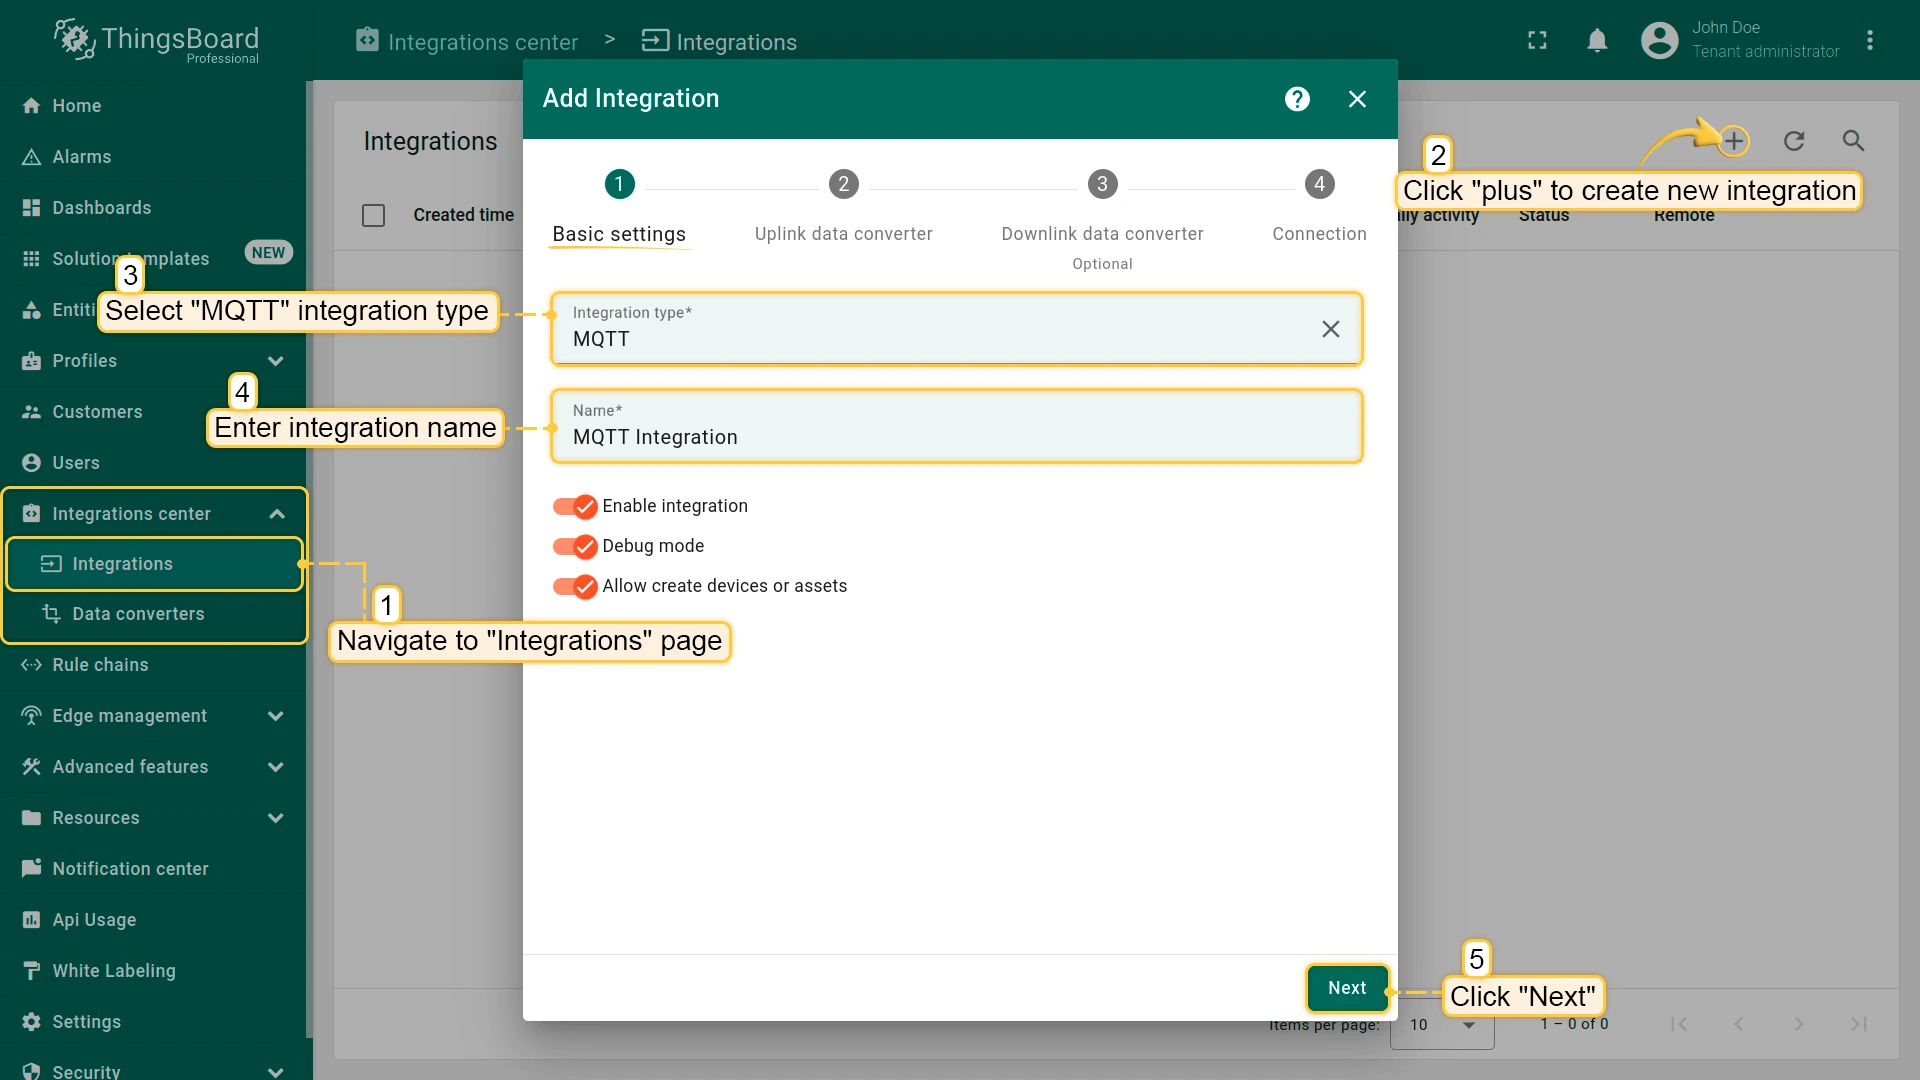
return result;Create an MQTT Integration
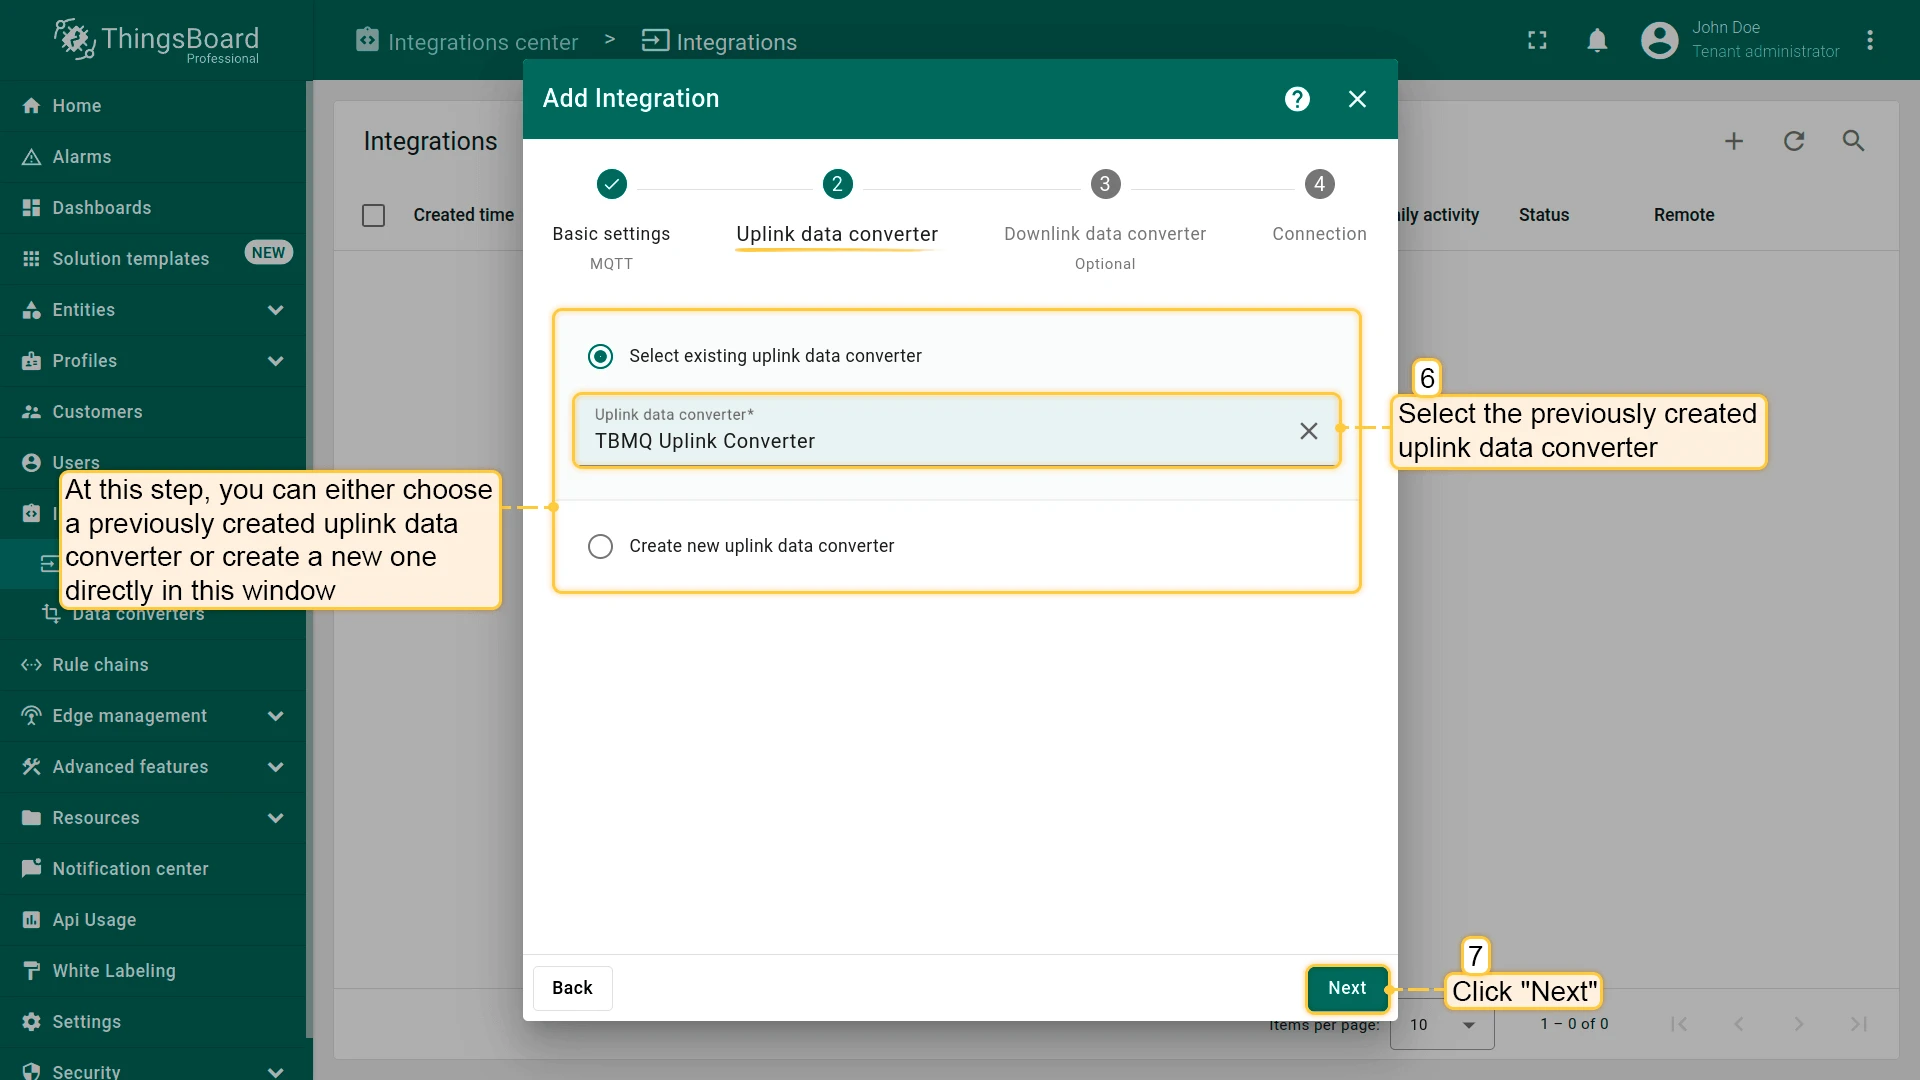
Section titled “Create an MQTT Integration”- Go to Integrations center → Integrations and click Add (+). Name it
MQTT Integrationand select type MQTT. - Select the uplink converter you just created.
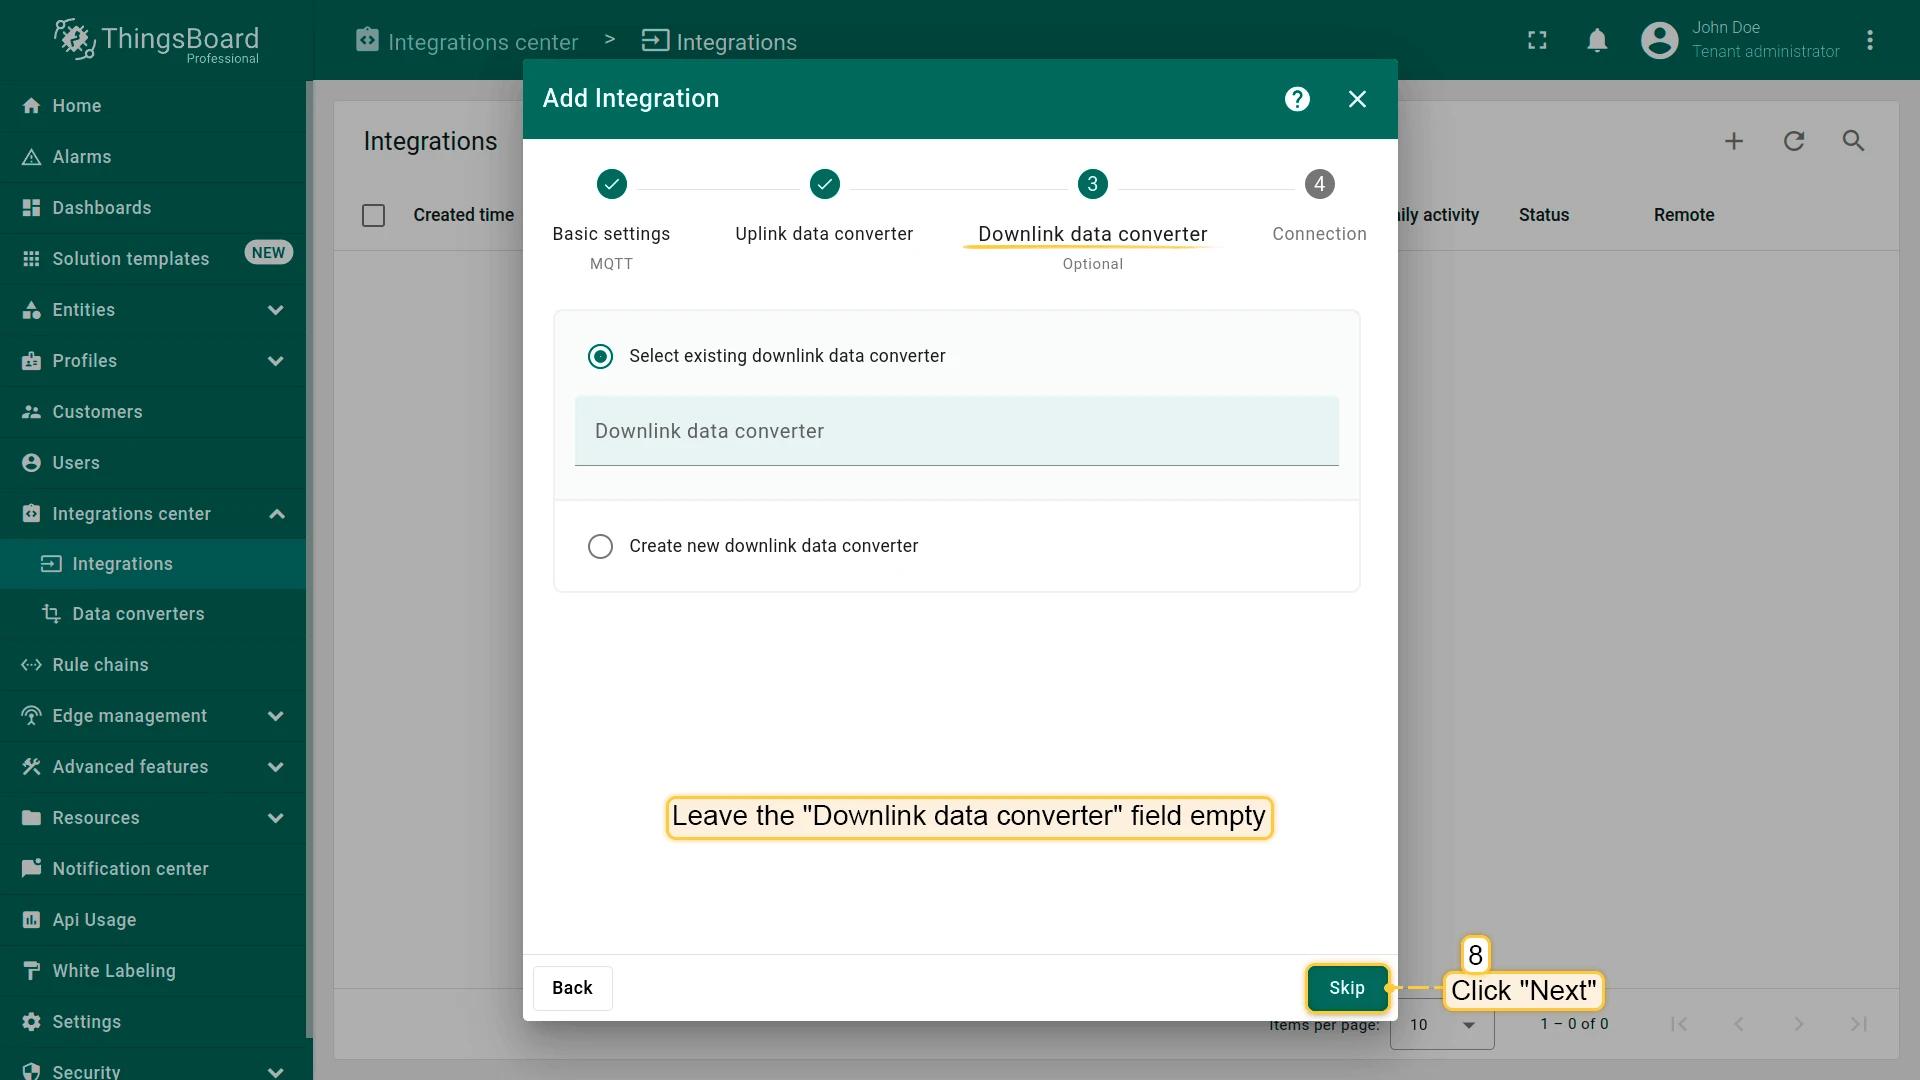
- Leave the Downlink data converter field empty and click Skip.
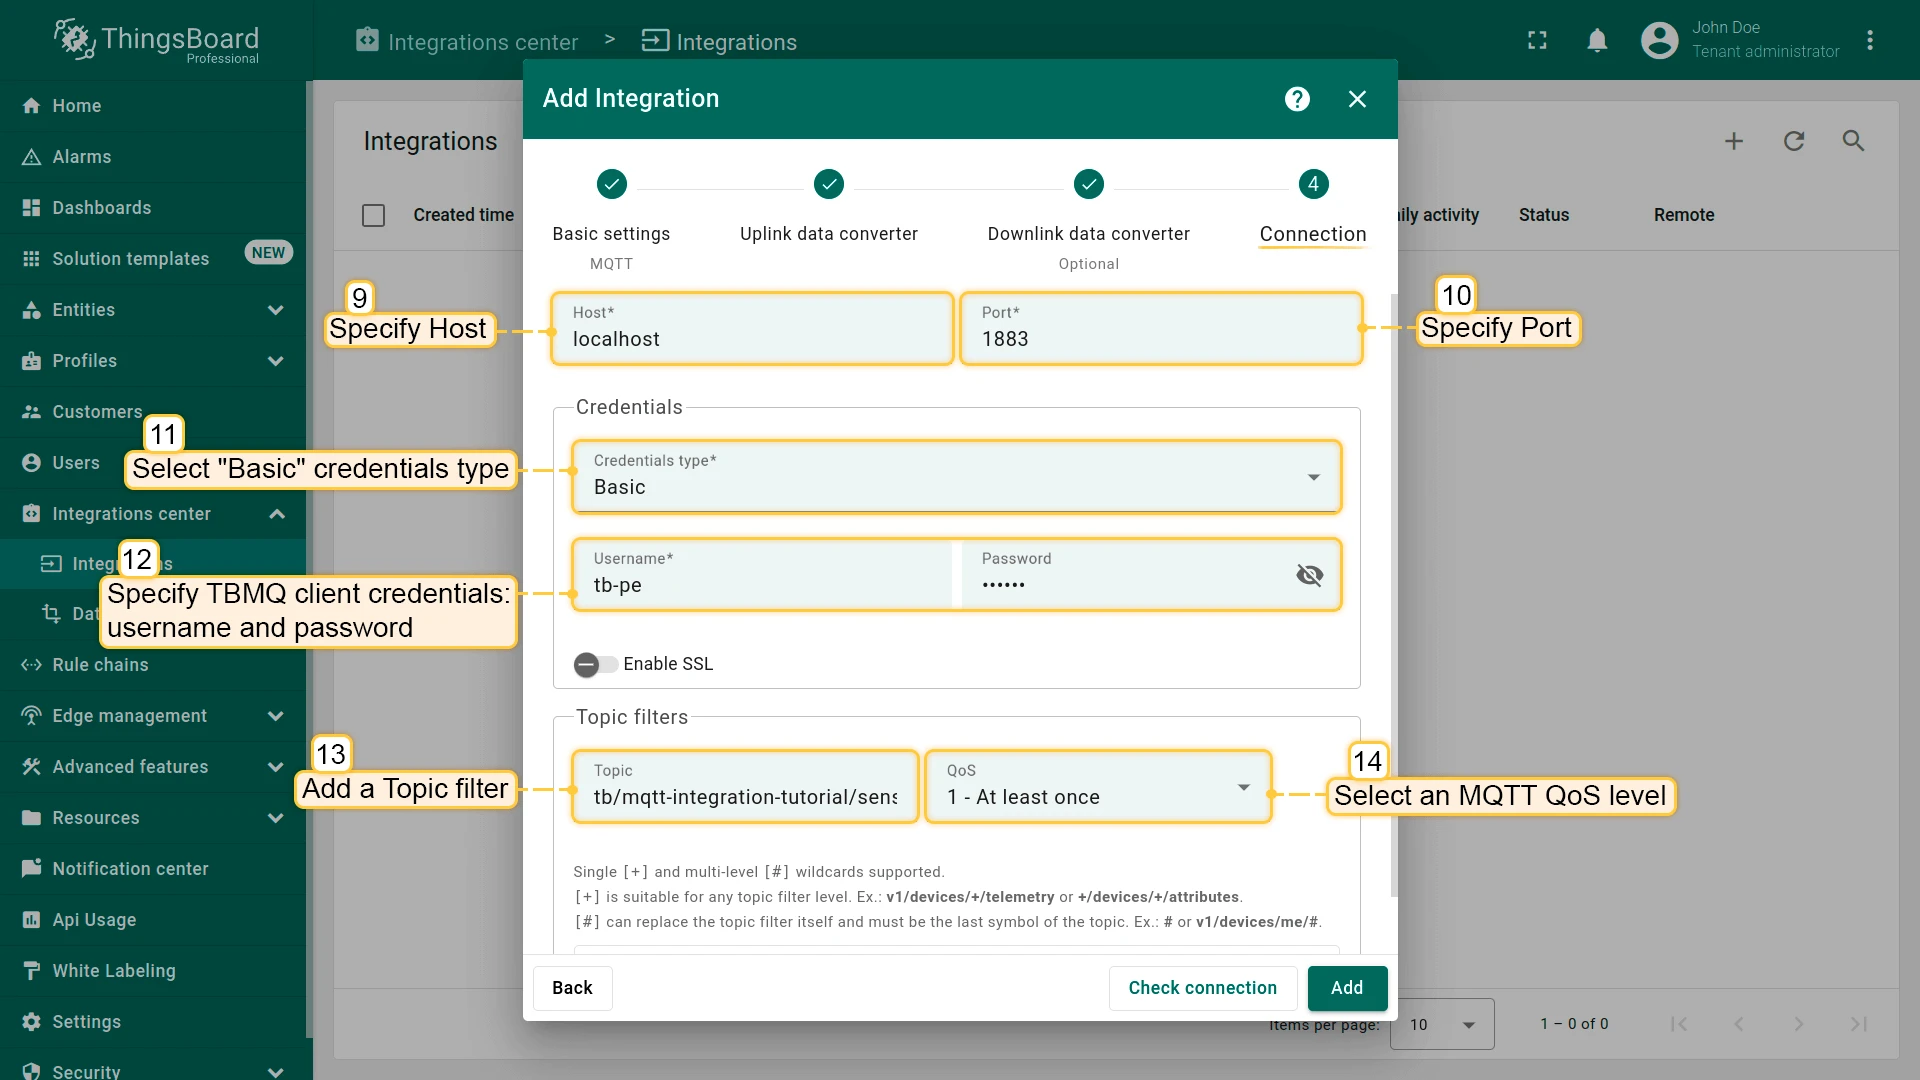
- Specify the TBMQ Host and Port. Select Basic credentials and enter the TBMQ client credentials.
Add topic filter:
tb/mqtt-integration-tutorial/sensors/+/temperatureand select QoS level1or higher. - Open Advanced settings. Uncheck Clean session and set Client ID to
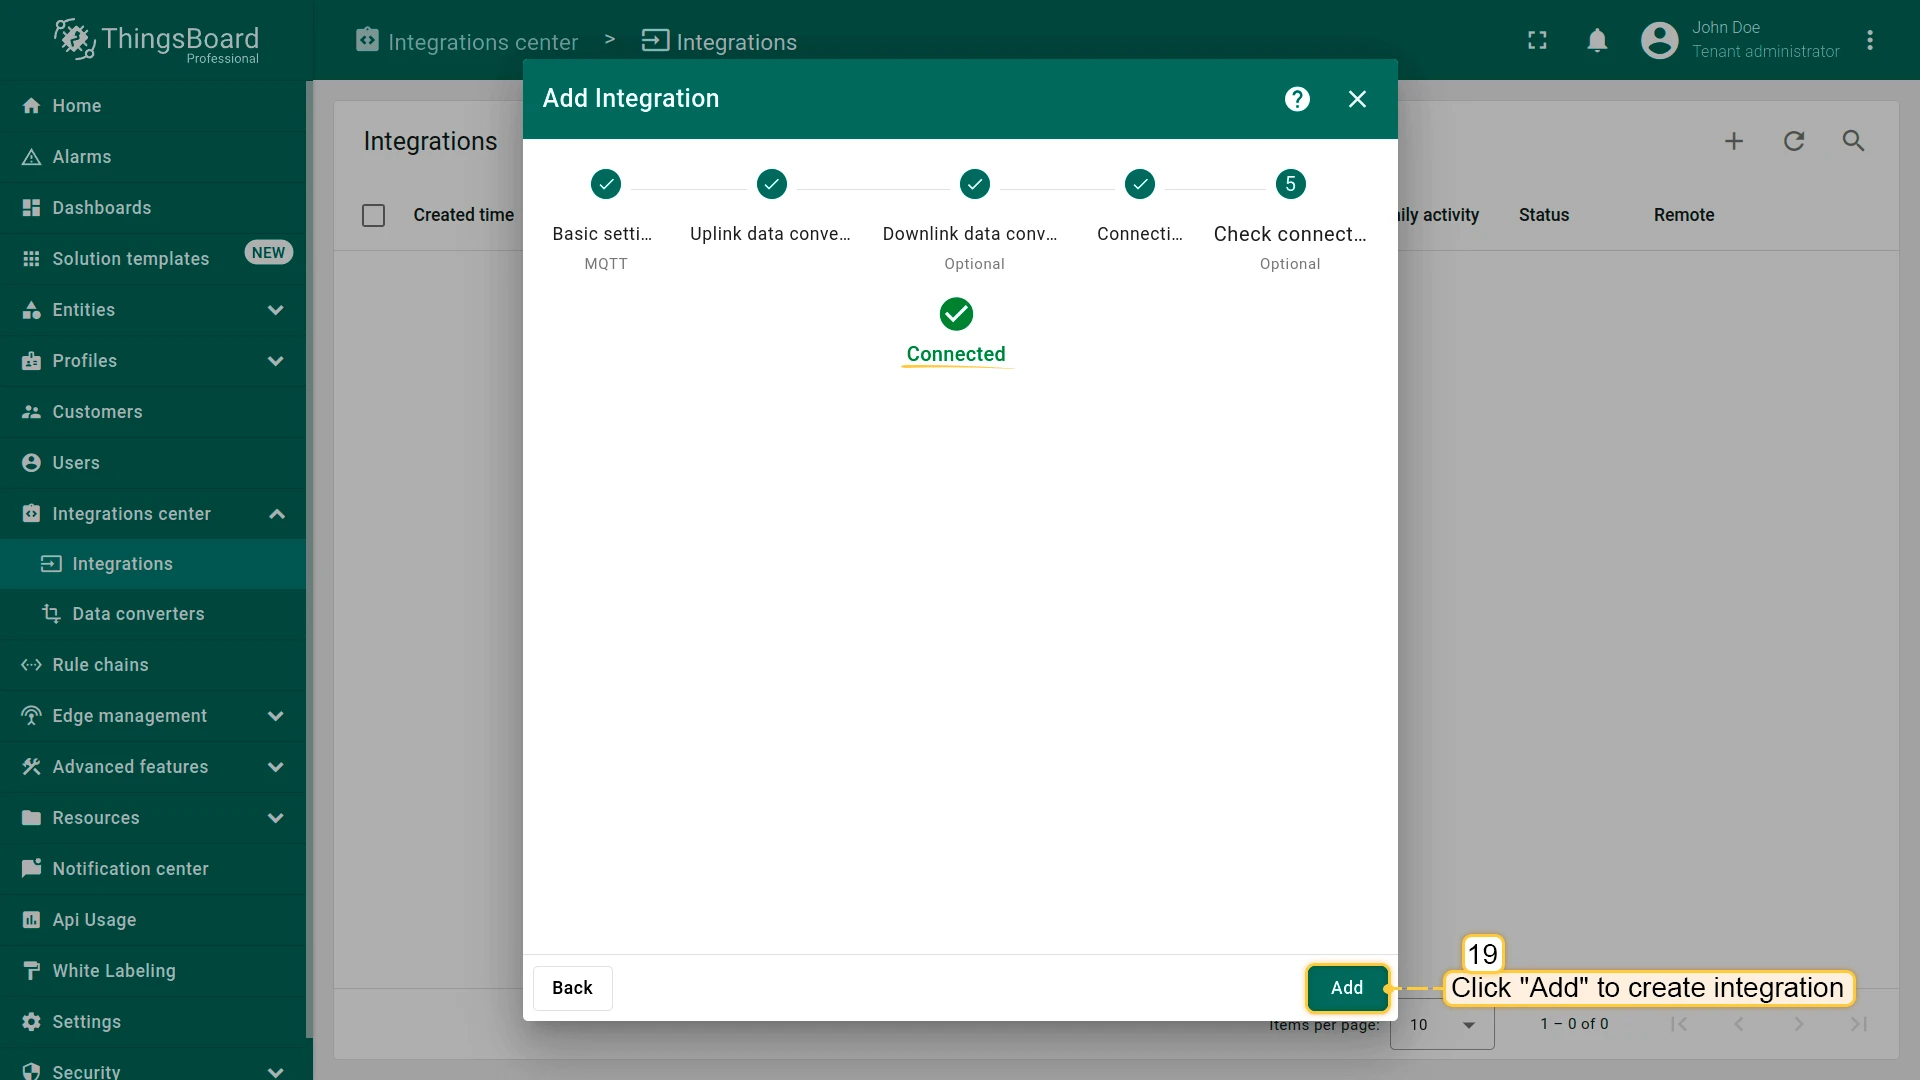
tbpeintegration. - (Optional) Click Check connection to verify connectivity. Click Add to create the integration.

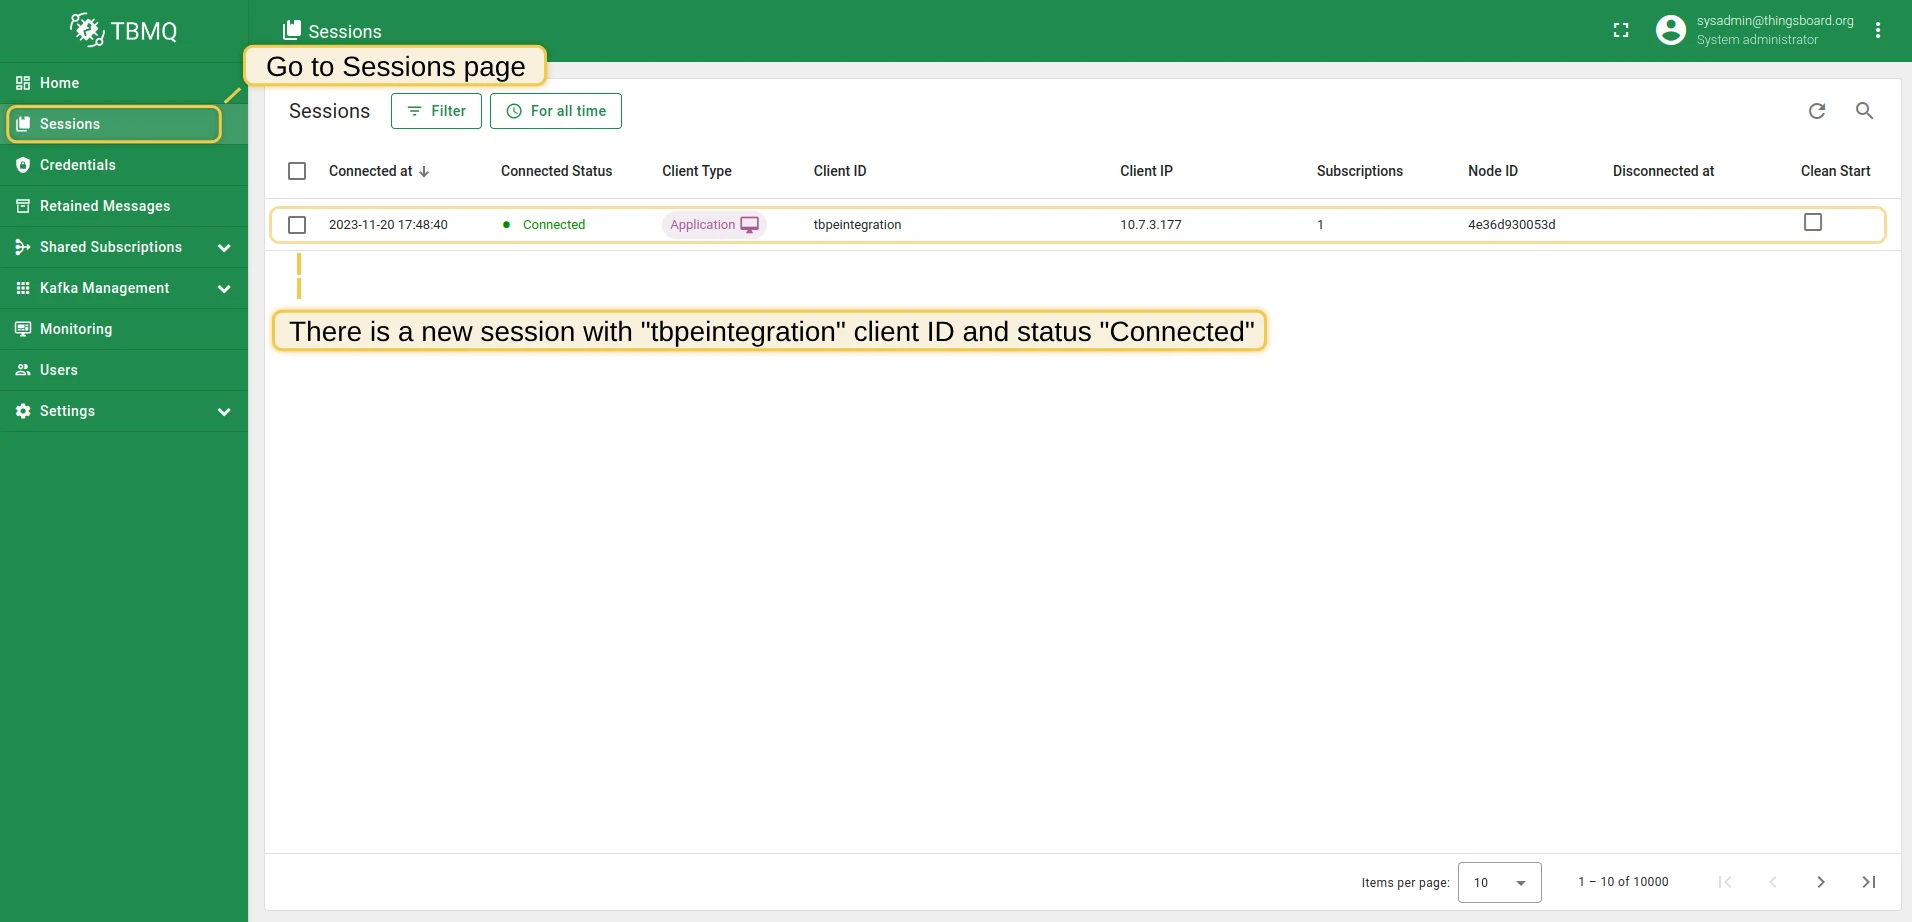
Once the integration is created and the connection is established, go to the Sessions page in the TBMQ UI. You should see a new session with status Connected.
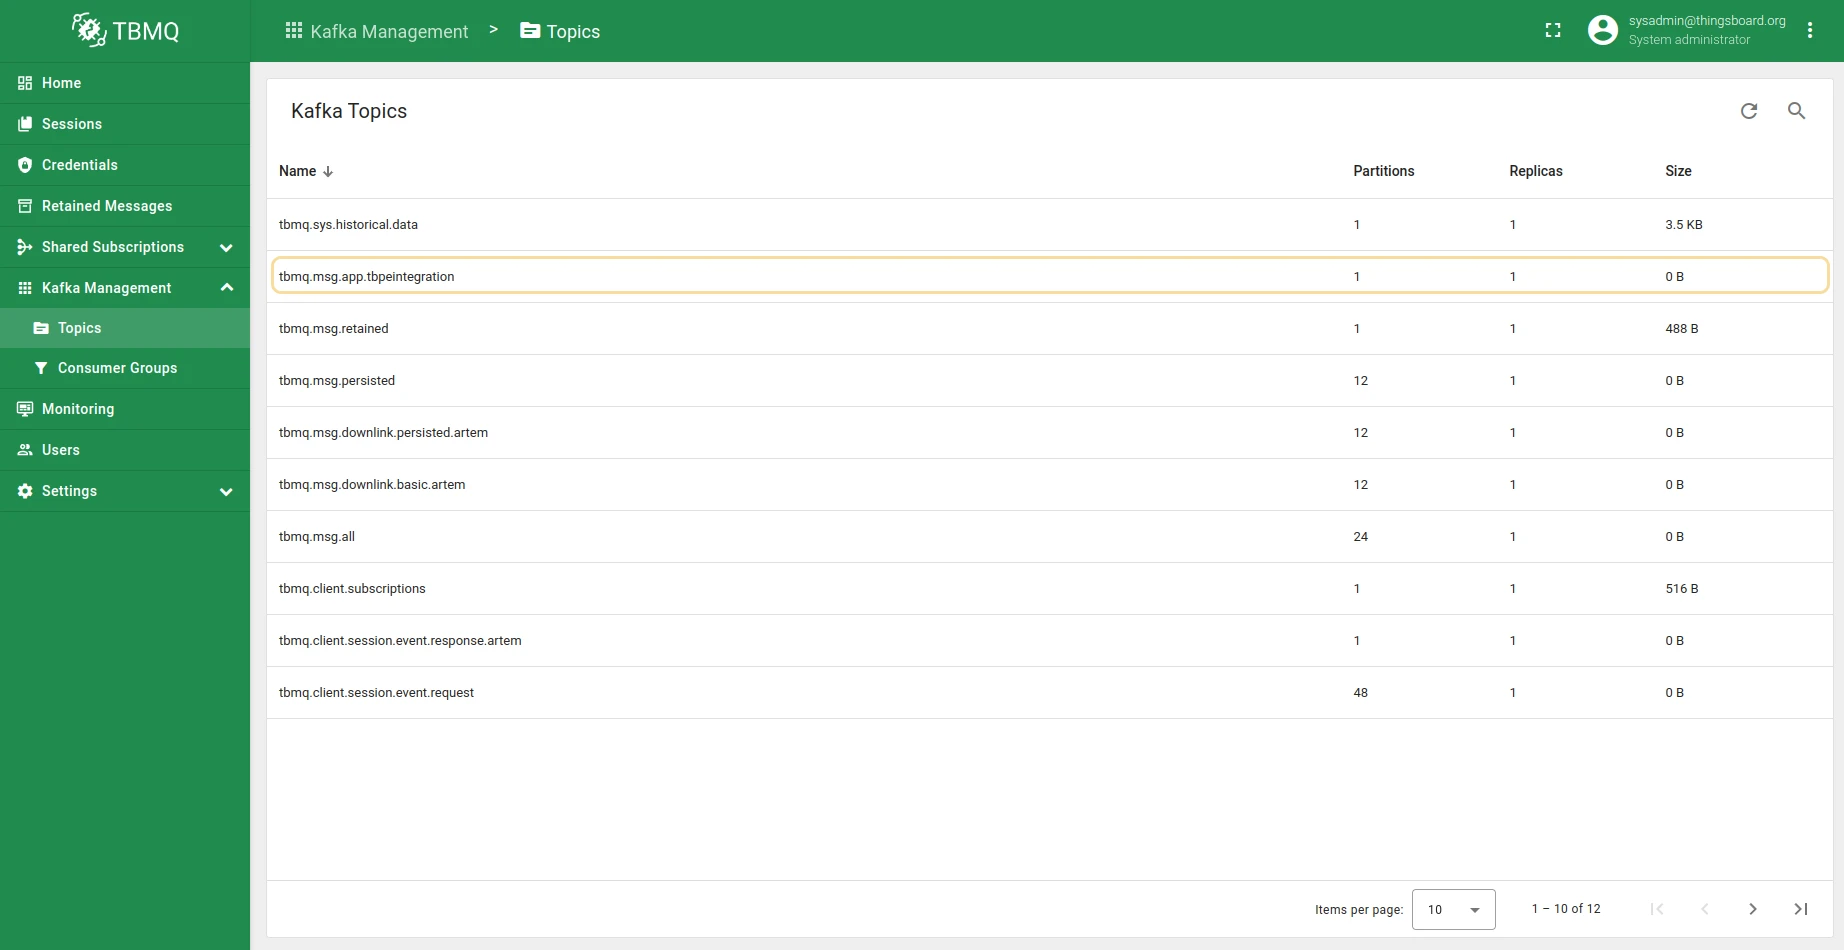
On the Topics page (Kafka Management section), you will see the Kafka topic corresponding to the client ID (tbpeintegration), along with partition count, replication factor, and topic size.
Send an uplink message
Section titled “Send an uplink message”Simulate a device sending a temperature reading to TBMQ. Run the following command, replacing $THINGSBOARD_MQTT_BROKER_HOST_NAME, username, and password with your broker address and credentials:
mosquitto_pub -h $THINGSBOARD_MQTT_BROKER_HOST_NAME -p 1883 -q 1 \ -t "tb/mqtt-integration-tutorial/sensors/SN-001/temperature" \ -m '{"value":25.1}' -u "username" -P "password"For this tutorial example:
mosquitto_pub -h localhost -p 1883 -q 1 \ -t "tb/mqtt-integration-tutorial/sensors/SN-001/temperature" \ -m '{"value":25.1}' -u "tb-pe" -P "secret"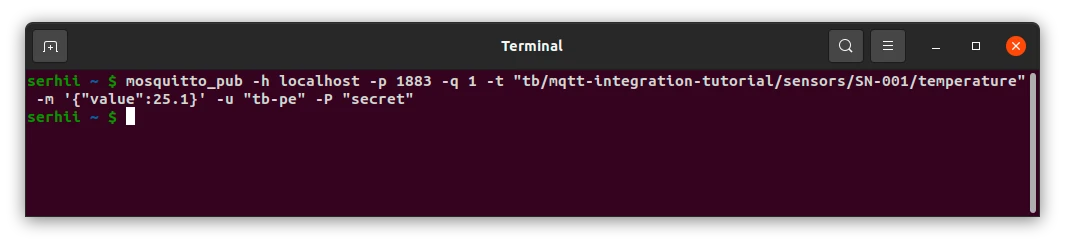
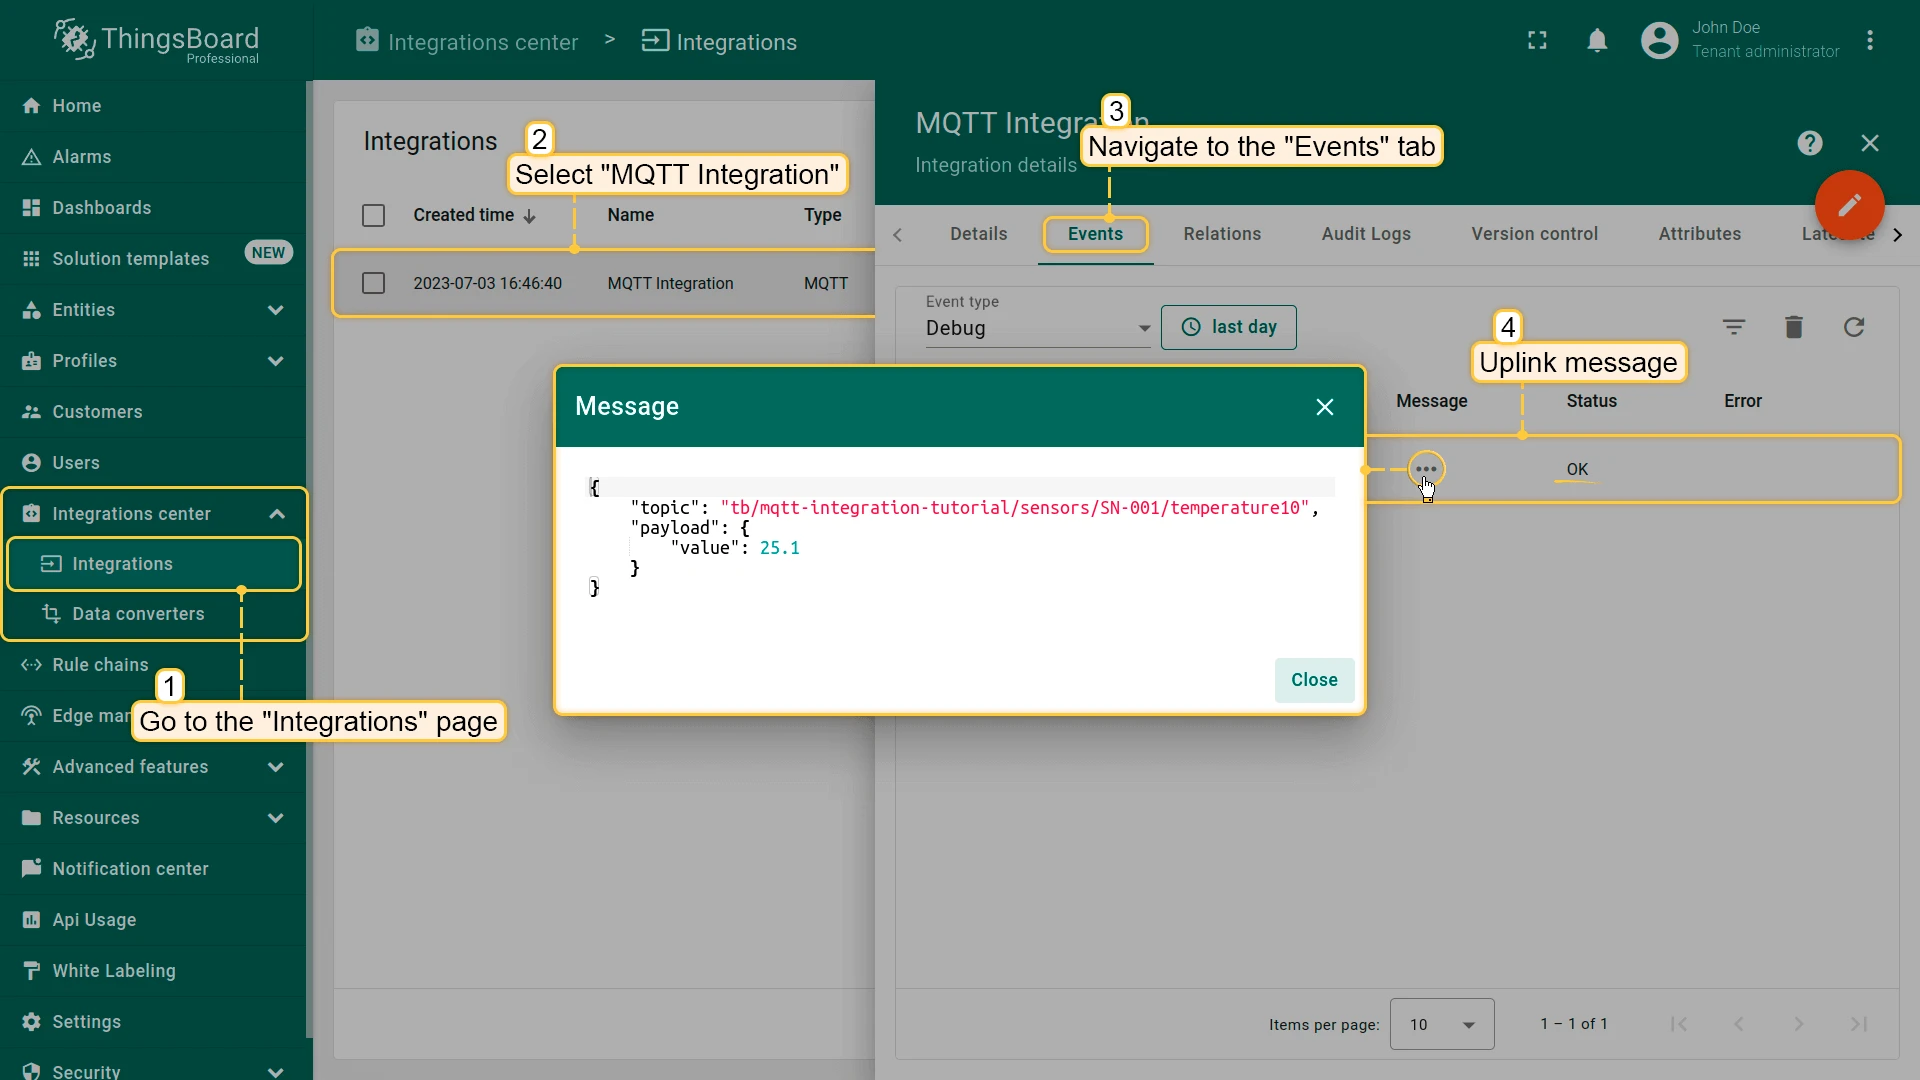
After publishing, open the MQTT Integration in ThingsBoard UI and go to the Events tab. You should see the message consumed by the integration.
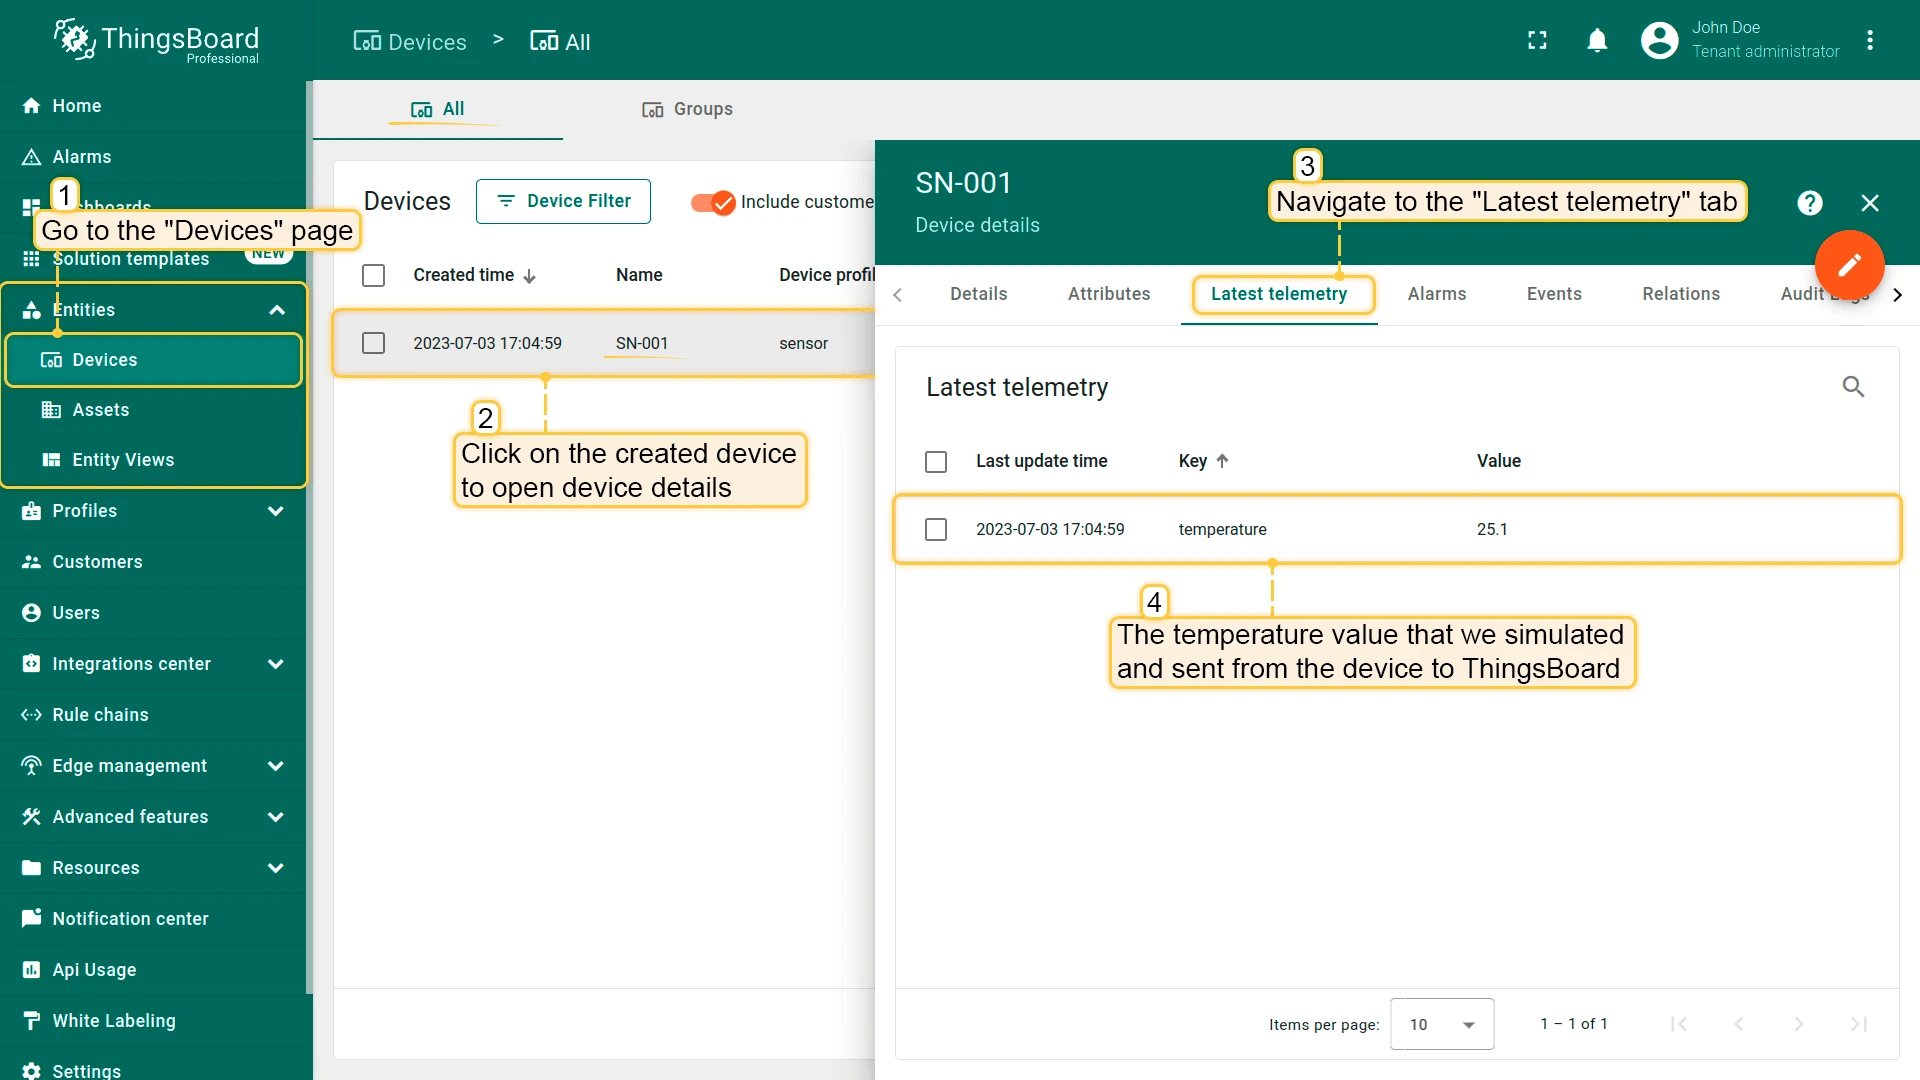
Go to Entities → Devices. You should find a SN-001 device provisioned by the integration. Click the device and open the Latest Telemetry tab — you should see the temperature key with value 25.1.
Was this helpful?