It is possible to run any ThingsBoard Integration remotely from the main ThingsBoard Edge instance.
This guide provides step-by-step instructions for launching ThingsBoard integration remotely.
We’ll demonstrate how to set up a remote HTTP integration to push data to ThingsBoard Edge.
A running ThingsBoard Edge instance, already connected to the Server, with access as a Tenant administrator.
ThingsBoard Server configuration steps
To create Converter and Integration templates, log in to the Cloud instance as Tenant administrator.
Before creating the Integration template, create an Uplink converter template in the Converters templates section.
Step 1. Create Uplink Converter
The uplink data converter is needed to convert the incoming data from the device into the format required for display on ThingsBoard Edge.
Log in to the Cloud and go to the Edge management > Converter templates section. To create a Converter template, click the “Add data converter” button (the + icon) and select the “Create new converter” option.
In the “Add data converter” pop-up window:
Name: Enter the name of the data converter.
Type: Select the “Uplink” converter type from the drop-down menu.
To view the events, enable Debug mode.
function Decoder: Enter a script to parse and transform data.
Click the “Add” button.
While Debug mode is very useful for development and troubleshooting, keeping it enabled in production can significantly increase database storage requirements, since all debug data is stored there.
We strongly recommend disabling Debug mode once debugging activities are complete.
Once the Uplink converter template is created, you can proceed to create the Integration:
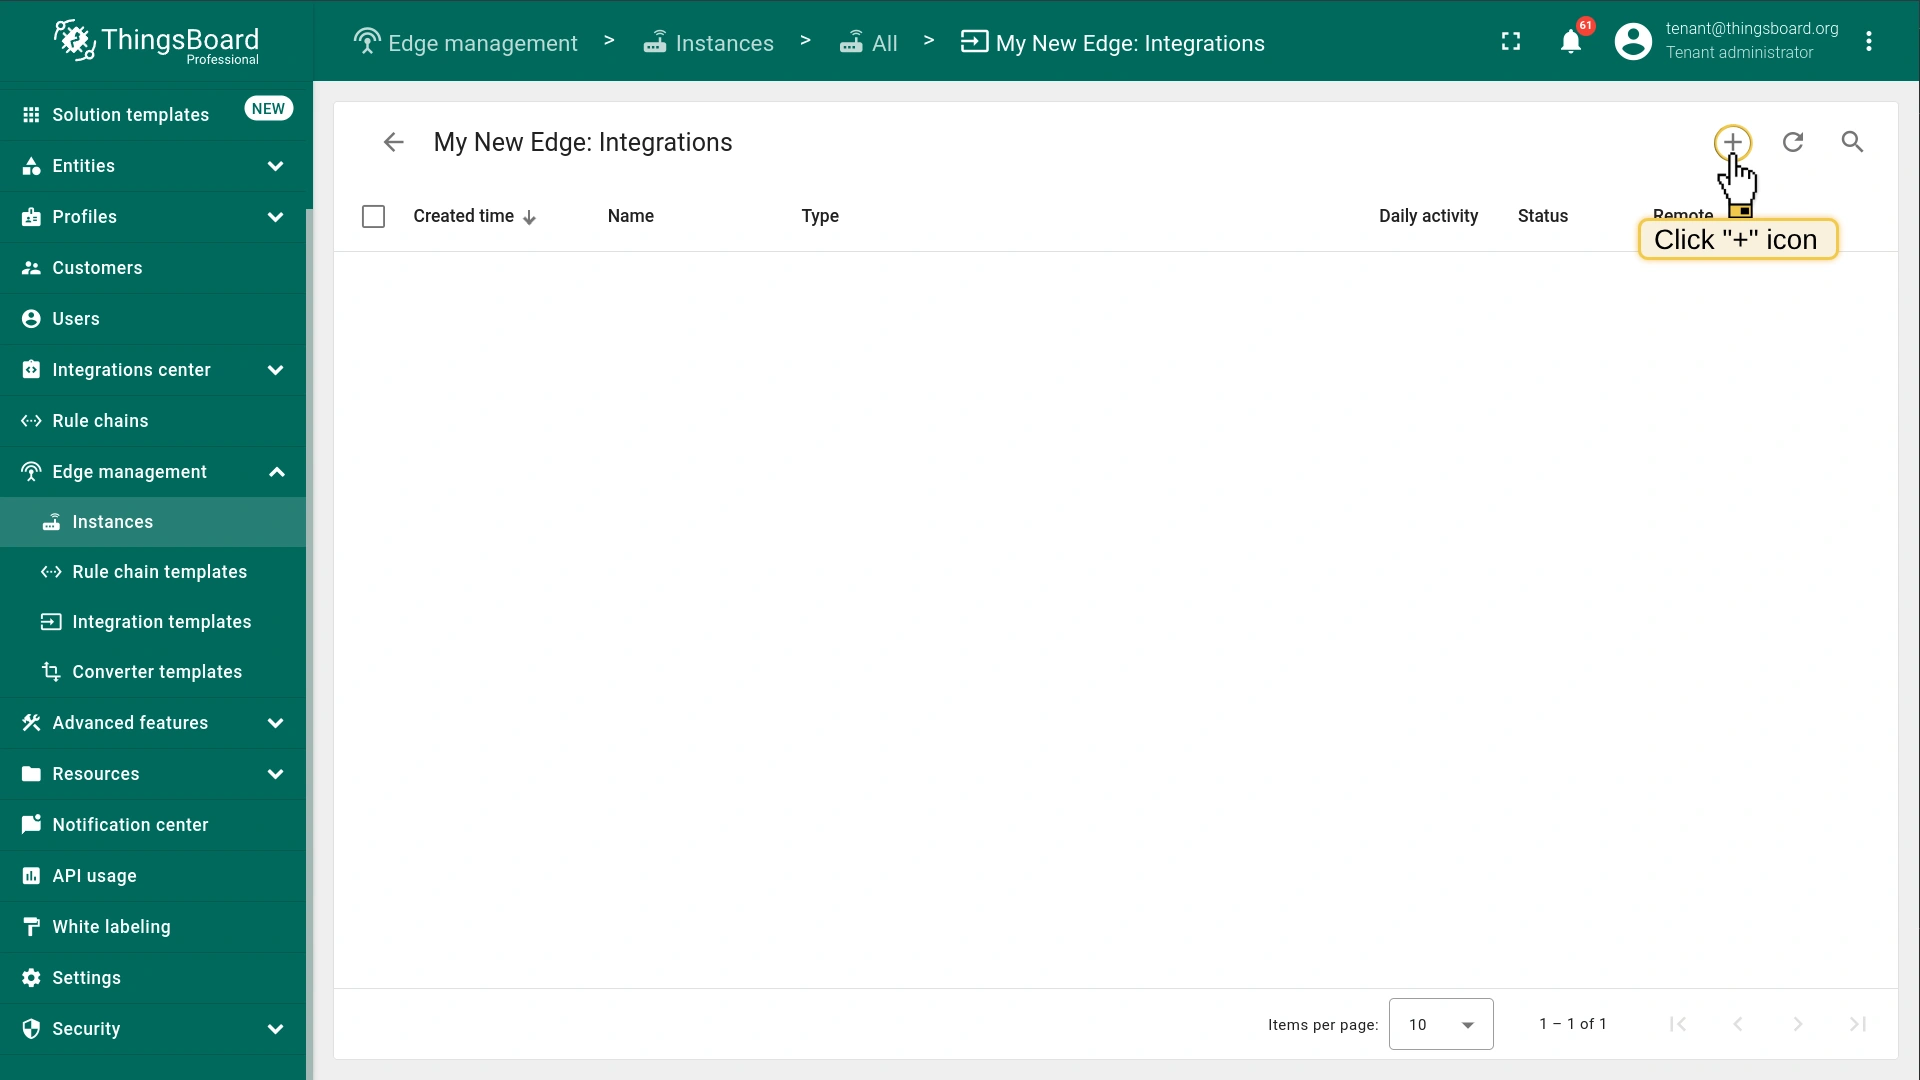
Go to the Edge management > Integration templates section, click the “Add new integration” button (the + icon) and select the “Create new integration” option.
In the “Add integration” pop-up window and fill out the “Basic settings” block:
Integration type: Select the “HTTP” integration type from the drop-down menu.
Name: Enter the name of the integration.
In the “Uplink data converter” block:
Select the “Select existing” tab.
Uplink data converter: Select the uplink data converter from the drop-down menu.
The “Downlink data converter” block is optional and can be skipped.
In the “Connection” block:
Base URL: Set ${{remoteHttpIntegrationUrl}} as the base URL.
Execute remotely: Toggle this option to enable remote execution of the integration.
To save the Integration, click the Add button.
1. Open Integration templates menu page. 2. Click the ("+") icon to add a new integration.
1. Select integration type: HTTP. 2. Input integration name, e.g., HTTP Demo Remote. 3. Click Next button.
1. Click Select existing button. 2. Select uplink data converter: Temperature Converter. 3. Click Next button.
Enter the converter name, e.g., Temperature converter. 2. Select converter type: Uplink. 3. Insert the code snippet from the example. 4. Click the Add button.
Verify that our HTTP Demo Remote integration template was created successfully.
Step 3. Save Remote Integration credentials.
Later during the Remote integration installation steps, we’ll use integration credentials.
To view and copy the credentials, go to the Edge management > Integration templates section and click the integration.
On the “Integration details” page, in the “Execute remotely” block copy the Integration key and Secret by clicking the corresponding button.
Step 4. Assign Integration to Edge.
Once the converter and integration templates are created, we can assign the Integration template to the Edge.
Since we are using the ${{remoteHttpIntegrationUrl}} placeholder in the integration configuration, we must first add the remoteHttpIntegrationUrl attribute to the Edge.
Provide the IP address and port of your remote HTTP integration as the remoteHttpIntegrationUrl attribute.
By default, the HTTP remote integration uses port 8082.
We will use the same port in the demo, and the IP address will be set as the IP of the machine where the remote integration service will be launched.
Once the attribute is added, we are ready to assign the integration and verify that it has been added.
Go to the Edge management > Instances section and click on the corresponding Edge instance.
On the Edge details page, select the Attributes tab and add click the "Add" button to add a new attribute.
In the "Add attribute" pop-up window, enter the remoteHttpIntegrationUrl attribute. Set http://IP:port as the remote URL for your HTTP integration and click the Add button.
Once you added the new attribute, close the Edge details page and stay on the Instances section.
To assign the integration to the Edge, click the "Manage edge integrations" button.
Click the Assign to edge button.
In the "Assign Integrations To Edge" pop-up window, select the target integration from the "Entity list" drop-down menu and click the Assign button.
Open the Edge instance and go to the Integrations center > Integrations section. Click on HTTP Demo Remote integration to check that placeholder is substituted with the value of the attribute.
Remote integration installation steps
Choose your platform and install
You can install the ThingsBoard integration via Docker, Debian or RPM packages. Please use one of the following steps.
mytbedge: The host name of the ThingsBoard Edge service.
9090: The integration port. It is configured by the INTEGRATIONS_RPC_PORT environment variable in the tb-edge.yml file.
YOUR_ROUTING_KEY: Replace it with the actual integration routing key obtained in Step 3.
YOUR_SECRET: Replace it with the actual integration secret obtained in Step 3.
docker run: The command to run this container.
-it: Attaches a terminal session with current ThingsBoard remote integration process output.
-v ~/.tb-pe-http-integration-logs:/var/log/tb-http-integration: Mounts the host’s dir ~/.tb-pe-http-integration-logs to ThingsBoard remote integration logs directory.
–name my-tb-pe-http-integration: The friendly local name of this machine.
–network edge_docker_default: The network name in which the mytbedge service operates.
–restart always: The command automatically starts ThingsBoard Integration if the system reboots and restarts in case of failure.
thingsboard/tb-pe-http-integration:4.3.1PE: The docker image.
After executing this command, you can open the logs located here: ~/.tb-pe-http-integration-logs.
You should be able to see INFO log messages containing your latest integration configuration that arrived from the server.
To keep the container running in the background but detach from the session terminal, press the key sequence Ctrl+p followed by Ctrl+q.
Reattaching, stop and start commands
To reattach to the terminal (to see ThingsBoard remote integration logs), run:
mytbedge: The host name of the ThingsBoard Edge service.
9090: The integration port. It is configured by the INTEGRATIONS_RPC_PORT environment variable in the tb-edge.yml file.
YOUR_ROUTING_KEY: Replace it with the actual integration routing key obtained in Step 3.
YOUR_SECRET: Replace it with the actual integration secret obtained in Step 3.
docker run: The command to run this container.
-it: Attaches a terminal session with current ThingsBoard remote integration process output.
-v ~/.tb-pe-mqtt-integration-logs:/var/log/tb-mqtt-integration: Mounts the host’s dir ~/.tb-pe-mqtt-integration-logs to ThingsBoard remote integration logs directory.
–name my-tb-pe-mqtt-integration: The friendly local name of this machine.
–network edge_docker_default: The network name in which the mytbedge service operates.
–restart always: The command automatically starts ThingsBoard Integration if the system reboots and restarts in case of failure.
thingsboard/tb-pe-mqtt-integration:4.3.1PE: The docker image.
After executing this command, you can open the logs located here: ~/.tb-pe-mqtt-integration-logs.
You should be able to see INFO log messages containing your latest integration configuration that arrived from the server.
To keep the container running in the background but detach from the session terminal, press the key sequence Ctrl+p followed by Ctrl+q.
Reattaching, stop and start commands
To reattach to the terminal (to see ThingsBoard remote integration logs), run:
mytbedge: The host name of the ThingsBoard Edge service.
9090: The integration port. It is configured by the INTEGRATIONS_RPC_PORT environment variable in the tb-edge.yml file.
YOUR_ROUTING_KEY: Replace it with the actual integration routing key obtained in Step 3.
YOUR_SECRET: Replace it with the actual integration secret obtained in Step 3.
docker run: The command to run this container.
-it: Attaches a terminal session with current ThingsBoard remote integration process output.
-v ~/.tb-pe-opc-ua-integration-logs:/var/log/tb-opc-ua-integration: Mounts the host’s dir ~/.tb-pe-opc-ua-integration-logs to ThingsBoard remote integration logs directory.
–name tb-pe-opc-ua-integration: The friendly local name of this machine.
–network edge_docker_default: The network name in which the mytbedge service operates.
–restart always: The command automatically starts ThingsBoard Integration if the system reboots and restarts in case of failure.
thingsboard/tb-pe-opc-ua-integration:4.3.1PE: The docker image.
After executing this command, you can open the logs located here: ~/.tb-pe-opc-ua-integration-logs.
You should be able to see INFO log messages containing your latest integration configuration that arrived from the server.
To keep the container running in the background but detach from the session terminal, press the key sequence Ctrl+p followed by Ctrl+q.
Reattaching, stop and start commands
To reattach to the terminal (to see ThingsBoard remote integration logs), run:
mytbedge: The host name of the ThingsBoard Edge service.
9090: The integration port. It is configured by the INTEGRATIONS_RPC_PORT environment variable in the tb-edge.yml file.
-p 11560:11560/udp: Use if the exposed port is UDP.
-p 10560:10560: Connect a local port 10560 to exposed internal port 10560 for the TCP integration.
YOUR_ROUTING_KEY: Replace it with the actual integration routing key obtained in Step 3.
YOUR_SECRET: Replace it with the actual integration secret obtained in Step 3.
docker run: The command to run this container.
-it: Attaches a terminal session with current ThingsBoard remote integration process output.
-v ~/.tb-pe-tcp-udp-integration-logs:/var/log/tb-tcp-udp-integration: Mounts the host’s dir ~/.tb-pe-tcp-udp-integration-logs to ThingsBoard remote integration logs directory.
–name tb-pe-tcp-udp-integration: Set the local name for the integration.
–network NETWORK_NAME: The network name in which the mytbedge service operates. Replace the NETWORK_NAME value with the actual network name.
To check the network name, run the following command:
1
docker network ls
–restart always: The command automatically starts ThingsBoard Integration if the system reboots and restarts in case of failure.
thingsboard/tb-pe-tcp-udp-integration:4.3.1PE: The docker image.
After executing this command, you can open the logs located here: ~/.tb-pe-tcp-udp-integration-logs.
You should be able to see INFO log messages containing your latest integration configuration that arrived from the server.
To keep the container running in the background but detach from the session terminal, press the key sequence Ctrl+p followed by Ctrl+q.
Reattaching, stop and start commands
To reattach to the terminal (to see ThingsBoard remote integration logs), run:
mytbedge: The host name of the ThingsBoard Edge service.
9090: The integration port. It is configured by the INTEGRATIONS_RPC_PORT environment variable in the tb-edge.yml file.
YOUR_ROUTING_KEY: Replace it with the actual integration routing key obtained in Step 3.
YOUR_SECRET: Replace it with the actual integration secret obtained in Step 3.
docker run: The command to run this container.
-it: Attaches a terminal session with current ThingsBoard remote integration process output.
-p 5683:5683/udp: Connect a local udp port 5683 to exposed internal 5683 udp port for the integration.
-v ~/.tb-pe-coap-integration-logs:/var/log/tb-coap-integration: Mounts the host’s dir ~/.tb-pe-coap-integration-logs to ThingsBoard remote integration logs directory.
–name tb-pe-coap-integration: The friendly local name of this machine.
–network edge_docker_default: The network name in which the mytbedge service operates.
–restart always: The command automatically starts ThingsBoard Integration if the system reboots and restarts in case of failure.
thingsboard/tb-pe-coap-integration:4.3.1PE: The docker image.
After executing this command, you can open the logs located here: ~/.tb-pe-coap-integration-logs.
Look for INFO log messages that show the latest integration configuration received from the server.
To keep the container running in the background but detach from the session terminal, press the key sequence Ctrl+p followed by Ctrl+q.
Reattaching, stop and start commands
To reattach to the terminal (to see ThingsBoard remote integration logs), run:
1
docker attach tb-pe-coap-integration
To stop the container:
1
docker stop tb-pe-coap-integration
To start the container:
1
docker start tb-pe-coap-integration
Advanced configuration
The configuration yml file below lists possible configuration parameters, corresponding environment variables and their default values.
For example, the default client ID of the integration that is used in integration debug messages is “remote”
and can be changed by the setting “RPC_CLIENT_ID” environment variable.
server:
# Server bind address
address: "${HTTP_BIND_ADDRESS:0.0.0.0}"# Server bind port
port: "${HTTP_BIND_PORT:8082}"
integration:
routingKey: "${INTEGRATION_ROUTING_KEY:PUT_YOUR_ROUTING_KEY_HERE}"
secret: "${INTEGRATION_SECRET:PUT_YOUR_SECRET_HERE}"# Allows connection to the localhost resources. For example, local MQTT broker, etc.
allow_local_network_hosts: "${INTEGRATION_ALLOW_LOCAL_NETWORK_HOSTS:true}"
statistics:
# Enable/disable integration statistics
enabled: "${INTEGRATION_STATISTICS_ENABLED:true}"# Send statistics interval. Dfault value is once per hour
persist_frequency: "${INTEGRATION_STATISTICS_PERSIST_FREQUENCY:3600000}"
storage:
# Location of the folder to store data files
data_folder_path: "${INTEGRATION_STORAGE_DATA_FOLDER_PATH:./}"# Max amount of data files to maintain
max_file_count: "${INTEGRATION_STORAGE_MAX_FILE_COUNT:100}"# Max records per data file
max_records_per_file: "${INTEGRATION_STORAGE_MAX_RECORDS_PER_FILE:30}"# Max records between persistence of data file
max_records_between_fsync: "${INTEGRATION_STORAGE_MAX_RECORDS_BETWEEN_FSYNC:100}"# Size of the upload chunk
max_read_records_count: "${INTEGRATION_STORAGE_MAX_READ_RECORDS_COUNT:50}"# Sleep interval while no new records
no_read_records_sleep: "${INTEGRATION_STORAGE_NO_READ_RECORDS_SLEEP:1000}"
executors:
# Size of the thread pool to handle incoming messages and tasks
thread_pool_size: "${EXECUTORS_SIZE:1}"# Timeout to reconnect to ThingsBoard
reconnect_timeout: "${EXECUTORS_RECONNECT_TIMEOUT:3000}"# in milliseconds
rpc:
# Host of the ThingsBoard server
host: "${RPC_HOST:thingsboard.cloud}"# Port of the ThingsBoard server
port: "${RPC_PORT:9090}"# No reply timeouttimeout: "${RPC_TIMEOUT:5}"# Timeout in seconds for channel termination# ID of the RPC client
client_id: "${RPC_CLIENT_ID:remote}"
ssl:
# SSL enabled/disabled
enabled: "${RPC_SSL_ENABLED:false}"# SSL certificate
cert: "${RPC_SSL_CERT:roots.pem}"
js:
evaluator: "${JS_EVALUATOR:local}"# Built-in JVM JavaScript environment propertieslocal:
# Use Sandboxed (secured) JVM JavaScript environment
use_js_sandbox: "${USE_LOCAL_JS_SANDBOX:true}"# Specify thread pool size for JavaScript sandbox resource monitor
monitor_thread_pool_size: "${LOCAL_JS_SANDBOX_MONITOR_THREAD_POOL_SIZE:4}"# Maximum CPU time in milliseconds allowed for script execution
max_cpu_time: "${LOCAL_JS_SANDBOX_MAX_CPU_TIME:5000}"# Maximum allowed JavaScript execution errors before JavaScript will be blacklisted
max_errors: "${LOCAL_JS_SANDBOX_MAX_ERRORS:3}"
service:
type: "${TB_SERVICE_TYPE:tb-integration}"
Troubleshooting
NOTE If you observe errors related to DNS issues, for example
1
127.0.1.1:53: cannot unmarshal DNS message
You may configure your system to use Google public DNS servers.
See corresponding Linux and Mac OS instructions.
Windows users should use a docker-managed volume for the remote integration logs.
Before executing docker, create the docker volume (for ex. tb-http-integration-logs).
Open the Docker Quickstart Terminal and run the following command:
mytbedge: The host name of the ThingsBoard Edge service.
9090: The integration port. It is configured by the INTEGRATIONS_RPC_PORT environment variable in the tb-edge.yml file.
YOUR_ROUTING_KEY: Replace it with the actual integration routing key obtained in Step 3.
YOUR_SECRET: Replace it with the actual integration secret obtained in Step 3.
docker run: The command to run this container.
-it: Attaches a terminal session with current ThingsBoard remote integration process output.
-v tb-pe-http-integration-logs:/var/log/tb-http-integration: Mounts the host’s dir ~/.tb-pe-http-integration-logs to ThingsBoard remote integration logs directory;
–name tb-pe-http-integration: The friendly local name of this machine;
–network edge_docker_default: The network name in which the mytbedge service operates.
–restart always: The command automatically starts ThingsBoard Integration if the system reboots and restarts in case of failure.
thingsboard/tb-pe-http-integration:4.3.1PE: The docker image.
After executing this command, you can open the logs located here: ~/.tb-pe-http-integration-logs.
You should be able to see INFO log messages containing your latest integration configuration that arrived from the server.
To keep the container running in the background but detach from the session terminal, press the key sequence Ctrl+p followed by Ctrl+q.
Reattaching, stop and start commands
To reattach to the terminal (to see ThingsBoard remote integration logs), run:
1
docker attach tb-pe-http-integration
To stop the container:
1
docker stop tb-pe-http-integration
To start the container:
1
docker start tb-pe-http-integration
Windows users should use a docker-managed volume for the remote integration logs.
Before executing docker, create the docker volume (for ex. tb-mqtt-integration-logs).
Open the **Docker Quickstart Terminal and run the following command:
mytbedge: The host name of the ThingsBoard Edge service.
9090: The integration port. It is configured by the INTEGRATIONS_RPC_PORT environment variable in the tb-edge.yml file.
YOUR_ROUTING_KEY: Replace it with the actual integration routing key obtained in Step 3.
YOUR_SECRET: Replace it with the actual integration secret obtained in Step 3.
docker run: The command to run this container.
-it: Attaches a terminal session with current ThingsBoard remote integration process output.
-v tb-pe-mqtt-integration-logs:/var/log/tb-mqtt-integration: Mounts the host’s dir ~/.tb-pe-mqtt-integration-logs to ThingsBoard remote integration logs directory;
–name tb-pe-mqtt-integration: The friendly local name of this machine;
–network edge_docker_default: The network name in which the mytbedge service operates.
–restart always: The command automatically starts ThingsBoard Integration if the system reboots and restarts in case of failure.
thingsboard/tb-pe-mqtt-integration:4.3.1PE: The docker image.
After executing this command, you can open the logs located here: ~/.tb-pe-mqtt-integration-logs.
You should be able to see INFO log messages containing your latest integration configuration that arrived from the server.
To keep the container running in the background but detach from the session terminal, press the key sequence Ctrl+p followed by Ctrl+q.
Reattaching, stop and start commands
To reattach to the terminal (to see ThingsBoard remote integration logs), run:
1
docker attach tb-pe-mqtt-integration
To stop the container:
1
docker stop tb-pe-mqtt-integration
To start the container:
1
docker start tb-pe-mqtt-integration
Windows users should use a docker-managed volume for the remote integration logs.
Before executing docker, create the docker volume (for ex. tb-opc-ua-integration-logs).
Open the Docker Quickstart Terminal and run the following command:
mytbedge: The host name of the ThingsBoard Edge service.
9090: The integration port. It is configured by the INTEGRATIONS_RPC_PORT environment variable in the tb-edge.yml file.
YOUR_ROUTING_KEY: Replace it with the actual integration routing key obtained in Step 3.
YOUR_SECRET: Replace it with the actual integration secret obtained in Step 3.
docker run: The command to run this container.
-it: Attaches a terminal session with current ThingsBoard remote integration process output.
-v tb-pe-opc-ua-integration-logs:/var/log/tb-opc-ua-integration: Mounts the host’s dir ~/.tb-pe-opc-ua-integration-logs to ThingsBoard remote integration logs directory.
–name tb-pe-opc-ua-integration: The friendly local name of this machine.
–network edge_docker_default: The network name in which the mytbedge service operates.
–restart always: The command automatically starts ThingsBoard Integration if the system reboots and restarts in case of failure.
thingsboard/tb-pe-opc-ua-integration:4.3.1PE: The docker image.
After executing this command, you can open the logs located here: ~/.tb-pe-opc-ua-integration-logs.
You should be able to see INFO log messages containing your latest integration configuration that arrived from the server.
To keep the container running in the background but detach from the session terminal, press the key sequence Ctrl+p followed by Ctrl+q.
Reattaching, stop and start commands
To reattach to the terminal (to see ThingsBoard remote integration logs), run:
1
docker attach tb-pe-opc-ua-integration
To stop the container:
1
docker stop tb-pe-opc-ua-integration
To start the container:
1
docker start tb-pe-opc-ua-integration
Windows users should use a docker-managed volume for the remote integration logs.
Before executing docker, create the docker volume (for ex. tb-tcp-udp-integration-logs).
Open the Docker Quickstart Terminal and run the following command:
mytbedge: The host name of the ThingsBoard Edge service.
9090: The integration port. It is configured by the INTEGRATIONS_RPC_PORT environment variable in the tb-edge.yml file.
-p 11560:11560/udp: Use if the exposed port is UDP.
-p 10560:10560: Connect a local port 10560 to exposed internal port 10560 for the TCP integration.
YOUR_ROUTING_KEY: Replace it with the actual integration routing key obtained in Step 3.
YOUR_SECRET: Replace it with the actual integration secret obtained in Step 3.
docker run: The command to run this container.
-it: Attaches a terminal session with current ThingsBoard remote integration process output.
-v tb-pe-tcp-udp-integration-logs:/var/log/tb-tcp-udp-integration: Mounts the host’s dir ~/.tb-pe-tcp-udp-integration-logs to ThingsBoard remote integration logs directory.
–name tb-pe-tcp-udp-integration: Set the local name for the integration.
–network edge_docker_default: The network name in which the mytbedge service operates.
–restart always: The command automatically starts ThingsBoard Integration if the system reboots and restarts in case of failure.
thingsboard/tb-pe-tcp-udp-integration:4.3.1PE The docker image.
After executing this command, you can open the logs located here: ~/.tb-pe-tcp-udp-integration-logs.
You should be able to see INFO log messages containing your latest integration configuration that arrived from the server.
To keep the container running in the background but detach from the session terminal, press the key sequence Ctrl+p followed by Ctrl+q.
Reattaching, stop and start commands
To reattach to the terminal (to see ThingsBoard remote integration logs), run:
1
docker attach my-tb-pe-tcp-udp-integration
To stop the container:
1
docker stop my-tb-pe-tcp-udp-integration
To start the container:
1
docker start my-tb-pe-tcp-udp-integration
Windows users should use a Docker-managed volume for remote integration logs.
Create a Docker volume (e.g., tb-coap-integration-logs) before executing the docker run command:
Open Docker Quickstart Terminal and execute the following command to create the Docker volume:
mytbedge: The host name of the ThingsBoard Edge service.
9090: The integration port. It is configured by the INTEGRATIONS_RPC_PORT environment variable in the tb-edge.yml file.
YOUR_ROUTING_KEY: Replace it with the actual integration routing key obtained in Step 3.
YOUR_SECRET: Replace it with the actual integration secret obtained in Step 3.
docker run: The command to run this container.
-it: Attaches a terminal session with current ThingsBoard remote integration process output.
-p 5683:5683/udp: Connect a local udp port 5683 to exposed internal 5683 udp port for the integration.
-v tb-pe-coap-integration-logs:/var/log/tb-coap-integration: Mounts the host’s dir ~/.tb-pe-coap-integration-logs to ThingsBoard remote integration logs directory.
–name tb-pe-coap-integration: The friendly local name of this machine.
–network edge_docker_default: The network name in which the mytbedge service operates.
–restart always: The command automatically starts ThingsBoard Integration if the system reboots and restarts in case of failure.
thingsboard/tb-pe-coap-integration:4.3.1PE: The docker image.
After executing this command, you can open the logs located here: ~/.tb-pe-coap-integration-logs.
You should be able to see INFO log messages containing your latest integration configuration that arrived from the server.
To keep the container running in the background but detach from the session terminal, press the key sequence Ctrl+p followed by Ctrl+q.
Reattaching, stop and start commands
To reattach to the terminal (to see ThingsBoard remote integration logs), run:
1
docker attach tb-pe-coap-integration
To stop the container:
1
docker stop tb-pe-coap-integration
To start the container:
1
docker start tb-pe-coap-integration
Advanced configuration
The configuration yml file below lists possible configuration parameters, corresponding environment variables and their default values.
For example, the default client ID of the integration that is used in integration debug messages is “remote”
and can be changed by the setting “RPC_CLIENT_ID” environment variable.
server:
# Server bind address
address: "${HTTP_BIND_ADDRESS:0.0.0.0}"# Server bind port
port: "${HTTP_BIND_PORT:8082}"
integration:
routingKey: "${INTEGRATION_ROUTING_KEY:PUT_YOUR_ROUTING_KEY_HERE}"
secret: "${INTEGRATION_SECRET:PUT_YOUR_SECRET_HERE}"# Allows connection to the localhost resources. For example, local MQTT broker, etc.
allow_local_network_hosts: "${INTEGRATION_ALLOW_LOCAL_NETWORK_HOSTS:true}"
statistics:
# Enable/disable integration statistics
enabled: "${INTEGRATION_STATISTICS_ENABLED:true}"# Send statistics interval. Dfault value is once per hour
persist_frequency: "${INTEGRATION_STATISTICS_PERSIST_FREQUENCY:3600000}"
storage:
# Location of the folder to store data files
data_folder_path: "${INTEGRATION_STORAGE_DATA_FOLDER_PATH:./}"# Max amount of data files to maintain
max_file_count: "${INTEGRATION_STORAGE_MAX_FILE_COUNT:100}"# Max records per data file
max_records_per_file: "${INTEGRATION_STORAGE_MAX_RECORDS_PER_FILE:30}"# Max records between persistence of data file
max_records_between_fsync: "${INTEGRATION_STORAGE_MAX_RECORDS_BETWEEN_FSYNC:100}"# Size of the upload chunk
max_read_records_count: "${INTEGRATION_STORAGE_MAX_READ_RECORDS_COUNT:50}"# Sleep interval while no new records
no_read_records_sleep: "${INTEGRATION_STORAGE_NO_READ_RECORDS_SLEEP:1000}"
executors:
# Size of the thread pool to handle incoming messages and tasks
thread_pool_size: "${EXECUTORS_SIZE:1}"# Timeout to reconnect to ThingsBoard
reconnect_timeout: "${EXECUTORS_RECONNECT_TIMEOUT:3000}"# in milliseconds
rpc:
# Host of the ThingsBoard server
host: "${RPC_HOST:thingsboard.cloud}"# Port of the ThingsBoard server
port: "${RPC_PORT:9090}"# No reply timeouttimeout: "${RPC_TIMEOUT:5}"# Timeout in seconds for channel termination# ID of the RPC client
client_id: "${RPC_CLIENT_ID:remote}"
ssl:
# SSL enabled/disabled
enabled: "${RPC_SSL_ENABLED:false}"# SSL certificate
cert: "${RPC_SSL_CERT:roots.pem}"
js:
evaluator: "${JS_EVALUATOR:local}"# Built-in JVM JavaScript environment propertieslocal:
# Use Sandboxed (secured) JVM JavaScript environment
use_js_sandbox: "${USE_LOCAL_JS_SANDBOX:true}"# Specify thread pool size for JavaScript sandbox resource monitor
monitor_thread_pool_size: "${LOCAL_JS_SANDBOX_MONITOR_THREAD_POOL_SIZE:4}"# Maximum CPU time in milliseconds allowed for script execution
max_cpu_time: "${LOCAL_JS_SANDBOX_MAX_CPU_TIME:5000}"# Maximum allowed JavaScript execution errors before JavaScript will be blacklisted
max_errors: "${LOCAL_JS_SANDBOX_MAX_ERRORS:3}"
service:
type: "${TB_SERVICE_TYPE:tb-integration}"
Troubleshooting
NOTE If you observe errors related to DNS issues, for example
# UNCOMMENT NEXT LINES AND PUT YOUR CONNECTION PARAMETERS:# export RPC_HOST=thingsboard.cloud# export RPC_PORT=9090# export INTEGRATION_ROUTING_KEY=YOUR_INTEGRATION_KEY# export INTEGRATION_SECRET=YOUR_INTEGRATION_SECRET
Enter your configuration parameters:
RPC_HOST: Use the Edge instance’s IP address, or localhost if it’s running on the same machine.
9090: The integration port. It is configured by the INTEGRATIONS_RPC_PORT environment variable in the tb-edge.yml file.
YOUR_ROUTING_KEY: Replace it with the actual integration routing key obtained in Step 3.
YOUR_SECRET: Replace it with the actual integration secret obtained in Step 3.
Make sure to uncomment the export statement. See the example below:
1
2
3
4
5
# UNCOMMENT NEXT LINES AND PUT YOUR CONNECTION PARAMETERS:export RPC_HOST=127.0.0.1 # THE IP ADDRESS OF YOUR EDGE INSTANCEexport RPC_PORT=9090
export INTEGRATION_ROUTING_KEY=b75**************************34d
export INTEGRATION_SECRET=vna**************mik
Start the ThingsBoard integration:
1
sudo service tb-http-integration start
Advanced configuration
You can find and update additional configuration parameters in the tb-http-integration.conf file.
To open the file for editing, use the following command:
After updating the configuration, you can check the logs in /var/log/tb-http-integration/ to verify that the integration is running correctly.
Look for INFO log messages that show the latest integration configuration received from the server.
# UNCOMMENT NEXT LINES AND PUT YOUR CONNECTION PARAMETERS:# export RPC_HOST=thingsboard.cloud# export RPC_PORT=9090# export INTEGRATION_ROUTING_KEY=YOUR_INTEGRATION_KEY# export INTEGRATION_SECRET=YOUR_INTEGRATION_SECRET
Enter your configuration parameters:
RPC_HOST: Use the Edge instance’s IP address, or localhost if it’s running on the same machine.
9090: The integration port. It is configured by the INTEGRATIONS_RPC_PORT environment variable in the tb-edge.yml file.
YOUR_ROUTING_KEY: Replace it with the actual integration routing key obtained in Step 3.
YOUR_SECRET: Replace it with the actual integration secret obtained in Step 3.
Make sure to uncomment the export statement. See the example below:
1
2
3
4
5
# UNCOMMENT NEXT LINES AND PUT YOUR CONNECTION PARAMETERS:export RPC_HOST=127.0.0.1 # THE IP ADDRESS OF YOUR EDGE INSTANCEexport RPC_PORT=9090
export INTEGRATION_ROUTING_KEY=b75**************************34d
export INTEGRATION_SECRET=vna**************mik
Start the ThingsBoard integration:
1
sudo service tb-mqtt-integration start
Advanced configuration
You can find and update additional configuration parameters in the tb-mqtt-integration.conf file.
To open the file for editing, use the following command:
After updating the configuration, you can check the logs in /var/log/tb-mqtt-integration/ to verify that the integration is running correctly.
Look for INFO log messages that show the latest integration configuration received from the server.
# UNCOMMENT NEXT LINES AND PUT YOUR CONNECTION PARAMETERS:# export RPC_HOST=thingsboard.cloud# export RPC_PORT=9090# export INTEGRATION_ROUTING_KEY=YOUR_INTEGRATION_KEY# export INTEGRATION_SECRET=YOUR_INTEGRATION_SECRET
Enter your configuration parameters:
RPC_HOST: Use the Edge instance’s IP address, or localhost if it’s running on the same machine.
9090: The integration port. It is configured by the INTEGRATIONS_RPC_PORT environment variable in the tb-edge.yml file.
YOUR_ROUTING_KEY: Replace it with the actual integration routing key obtained in Step 3.
YOUR_SECRET: Replace it with the actual integration secret obtained in Step 3.
Make sure to uncomment the export statement. See the example below:
1
2
3
4
5
# UNCOMMENT NEXT LINES AND PUT YOUR CONNECTION PARAMETERS:export RPC_HOST=127.0.0.1 # THE IP ADDRESS OF YOUR EDGE INSTANCEexport RPC_PORT=9090
export INTEGRATION_ROUTING_KEY=b75**************************34d
export INTEGRATION_SECRET=vna**************mik
Start the ThingsBoard integration:
1
sudo service tb-opc-ua-integration start
Advanced configuration
You can find and update additional configuration parameters in the tb-opc-ua-integration.conf file.
To open the file for editing, use the following command:
After updating the configuration, you can check the logs in /var/log/tb-opc-ua-integration/ to verify that the integration is running correctly.
Look for INFO log messages that show the latest integration configuration received from the server.
# UNCOMMENT NEXT LINES AND PUT YOUR CONNECTION PARAMETERS:# export RPC_HOST=thingsboard.cloud# export RPC_PORT=9090# export INTEGRATION_ROUTING_KEY=YOUR_INTEGRATION_KEY# export INTEGRATION_SECRET=YOUR_INTEGRATION_SECRET
Enter your configuration parameters:
RPC_HOST: Use the Edge instance’s IP address, or localhost if it’s running on the same machine.
9090: The integration port. It is configured by the INTEGRATIONS_RPC_PORT environment variable in the tb-edge.yml file.
YOUR_ROUTING_KEY: Replace it with the actual integration routing key obtained in Step 3.
YOUR_SECRET: Replace it with the actual integration secret obtained in Step 3.
Make sure to uncomment the export statement. See the example below:
1
2
3
4
5
# UNCOMMENT NEXT LINES AND PUT YOUR CONNECTION PARAMETERS:export RPC_HOST=127.0.0.1 # THE IP ADDRESS OF YOUR EDGE INSTANCEexport RPC_PORT=9090
export INTEGRATION_ROUTING_KEY=b75**************************34d
export INTEGRATION_SECRET=vna**************mik
Start the ThingsBoard integration:
1
sudo service tb-tcp-udp-integration start
Advanced configuration
You can find and update additional configuration parameters in the tb-tcp-udp-integration.conf file.
To open the file for editing, use the following command:
After updating the configuration, you can check the logs in /var/log/tb-tcp-udp-integration/ to verify that the integration is running correctly.
Look for INFO log messages that show the latest integration configuration received from the server.
# UNCOMMENT NEXT LINES AND PUT YOUR CONNECTION PARAMETERS:# export RPC_HOST=thingsboard.cloud# export RPC_PORT=9090# export INTEGRATION_ROUTING_KEY=YOUR_INTEGRATION_KEY# export INTEGRATION_SECRET=YOUR_INTEGRATION_SECRET
Enter your configuration parameters:
RPC_HOST: Use the Edge instance’s IP address, or localhost if it’s running on the same machine.
9090: The integration port. It is configured by the INTEGRATIONS_RPC_PORT environment variable in the tb-edge.yml file.
YOUR_ROUTING_KEY: Replace it with the actual integration routing key obtained in Step 3.
YOUR_SECRET: Replace it with the actual integration secret obtained in Step 3.
Make sure to uncomment the export statement.
See the example below:
1
2
3
4
5
# UNCOMMENT NEXT LINES AND PUT YOUR CONNECTION PARAMETERS:export RPC_HOST=127.0.0.1 # THE IP ADDRESS OF YOUR EDGE INSTANCEexport RPC_PORT=9090
export INTEGRATION_ROUTING_KEY=b75**************************34d
export INTEGRATION_SECRET=vna**************mik
Execute the following command to start ThingsBoard integration:
1
sudo service tb-coap-integration start
Advanced configuration
You can find and update additional configuration parameters in the tb-coap-integration.conf file.
To open the file for editing, use the following command:
After updating the configuration, you can check the logs in /var/log/tb-coap-integration/ to verify that the integration is running correctly.
Look for INFO log messages that show the latest integration configuration received from the server.
Install Java 17 (OpenJDK)
ThingsBoard service is running on Java 17. Follow this instructions to install OpenJDK 17:
1
sudo dnf install java-17-openjdk-headless
Please don’t forget to configure your operating system to use OpenJDK 17 by default.
You can configure which version is the default using the following command:
1
sudo update-alternatives --config java
You can check the installation using the following command:
1
java -version
Expected command output is:
1
2
3
openjdk version "17.x.xx"
OpenJDK Runtime Environment (...)
OpenJDK 64-Bit Server VM (build ...)
# UNCOMMENT NEXT LINES AND PUT YOUR CONNECTION PARAMETERS:# export RPC_HOST=thingsboard.cloud# export RPC_PORT=9090# export INTEGRATION_ROUTING_KEY=YOUR_INTEGRATION_KEY# export INTEGRATION_SECRET=YOUR_INTEGRATION_SECRET
Enter your configuration parameters:
RPC_HOST: Use the Edge instance’s IP address, or localhost if it’s running on the same machine.
9090: The integration port. It is configured by the INTEGRATIONS_RPC_PORT environment variable in the tb-edge.yml file.
YOUR_ROUTING_KEY: Replace it with the actual integration routing key obtained in Step 3.
YOUR_SECRET: Replace it with the actual integration secret obtained in Step 3.
Make sure to uncomment the export statement. See the example below:
1
2
3
4
5
# UNCOMMENT NEXT LINES AND PUT YOUR CONNECTION PARAMETERS:export RPC_HOST=127.0.0.1 # THE IP ADDRESS OF YOUR EDGE INSTANCEexport RPC_PORT=9090
export INTEGRATION_ROUTING_KEY=b75**************************34d
export INTEGRATION_SECRET=vna**************mik
Start the ThingsBoard integration:
1
sudo service tb-http-integration start
Advanced configuration
You can find and update additional configuration parameters in the tb-http-integration.conf file.
To open the file for editing, use the following command:
After updating the configuration, you can check the logs in /var/log/tb-http-integration/ to verify that the integration is running correctly.
Look for INFO log messages that show the latest integration configuration received from the server.
# UNCOMMENT NEXT LINES AND PUT YOUR CONNECTION PARAMETERS:# export RPC_HOST=thingsboard.cloud# export RPC_PORT=9090# export INTEGRATION_ROUTING_KEY=YOUR_INTEGRATION_KEY# export INTEGRATION_SECRET=YOUR_INTEGRATION_SECRET
Enter your configuration parameters:
RPC_HOST: Use the Edge instance’s IP address, or localhost if it’s running on the same machine.
9090: The integration port. It is configured by the INTEGRATIONS_RPC_PORT environment variable in the tb-edge.yml file.
YOUR_ROUTING_KEY: Replace it with the actual integration routing key obtained in Step 3.
YOUR_SECRET: Replace it with the actual integration secret obtained in Step 3.
Make sure to uncomment the export statement. See the example below:
1
2
3
4
5
# UNCOMMENT NEXT LINES AND PUT YOUR CONNECTION PARAMETERS:export RPC_HOST=127.0.0.1 # THE IP ADDRESS OF YOUR EDGE INSTANCEexport RPC_PORT=9090
export INTEGRATION_ROUTING_KEY=b75**************************34d
export INTEGRATION_SECRET=vna**************mik
Start the ThingsBoard integration:
1
sudo service tb-mqtt-integration start
Advanced configuration
You can find and update additional configuration parameters in the tb-mqtt-integration.conf file.
To open the file for editing, use the following command:
After updating the configuration, you can check the logs in /var/log/tb-mqtt-integration/ to verify that the integration is running correctly.
Look for INFO log messages that show the latest integration configuration received from the server.
# UNCOMMENT NEXT LINES AND PUT YOUR CONNECTION PARAMETERS:# export RPC_HOST=thingsboard.cloud# export RPC_PORT=9090# export INTEGRATION_ROUTING_KEY=YOUR_INTEGRATION_KEY# export INTEGRATION_SECRET=YOUR_INTEGRATION_SECRET
Enter your configuration parameters:
RPC_HOST: Use the Edge instance’s IP address, or localhost if it’s running on the same machine.
9090: The integration port. It is configured by the INTEGRATIONS_RPC_PORT environment variable in the tb-edge.yml file.
YOUR_ROUTING_KEY: Replace it with the actual integration routing key obtained in Step 3.
YOUR_SECRET: Replace it with the actual integration secret obtained in Step 3.
Make sure to uncomment the export statement. See the example below:
1
2
3
4
5
# UNCOMMENT NEXT LINES AND PUT YOUR CONNECTION PARAMETERS:export RPC_HOST=127.0.0.1 # THE IP ADDRESS OF YOUR EDGE INSTANCEexport RPC_PORT=9090
export INTEGRATION_ROUTING_KEY=b75**************************34d
export INTEGRATION_SECRET=vna**************mik
Start the ThingsBoard integration:
1
sudo service tb-opc-ua-integration start
Advanced configuration
You can find and update additional configuration parameters in the tb-opc-ua-integration.conf file.
To open the file for editing, use the following command:
After updating the configuration, you can check the logs in /var/log/tb-opc-ua-integration/ to verify that the integration is running correctly.
Look for INFO log messages that show the latest integration configuration received from the server.
# UNCOMMENT NEXT LINES AND PUT YOUR CONNECTION PARAMETERS:# export RPC_HOST=thingsboard.cloud# export RPC_PORT=9090# export INTEGRATION_ROUTING_KEY=YOUR_INTEGRATION_KEY# export INTEGRATION_SECRET=YOUR_INTEGRATION_SECRET
Enter your configuration parameters:
RPC_HOST: Use the Edge instance’s IP address, or localhost if it’s running on the same machine.
9090: The integration port. It is configured by the INTEGRATIONS_RPC_PORT environment variable in the tb-edge.yml file.
YOUR_ROUTING_KEY: Replace it with the actual integration routing key obtained in Step 3.
YOUR_SECRET: Replace it with the actual integration secret obtained in Step 3.
Make sure to uncomment the export statement. See the example below:
1
2
3
4
5
# UNCOMMENT NEXT LINES AND PUT YOUR CONNECTION PARAMETERS:export RPC_HOST=127.0.0.1 # THE IP ADDRESS OF YOUR EDGE INSTANCEexport RPC_PORT=9090
export INTEGRATION_ROUTING_KEY=b75**************************34d
export INTEGRATION_SECRET=vna**************mik
Start the ThingsBoard integration:
1
sudo service tb-tcp-udp-integration start
Advanced configuration
You can find and update additional configuration parameters in the tb-tcp-udp-integration.conf file.
To open the file for editing, use the following command:
After updating the configuration, you can check the logs in /var/log/tb-tcp-udp-integration/ to verify that the integration is running correctly.
Look for INFO log messages that show the latest integration configuration received from the server.
# UNCOMMENT NEXT LINES AND PUT YOUR CONNECTION PARAMETERS:# export RPC_HOST=thingsboard.cloud# export RPC_PORT=9090# export INTEGRATION_ROUTING_KEY=YOUR_INTEGRATION_KEY# export INTEGRATION_SECRET=YOUR_INTEGRATION_SECRET
Enter your configuration parameters:
RPC_HOST: Use the Edge instance’s IP address, or localhost if it’s running on the same machine.
9090: The integration port. It is configured by the INTEGRATIONS_RPC_PORT environment variable in the tb-edge.yml file.
YOUR_ROUTING_KEY: Replace it with the actual integration routing key obtained in Step 3.
YOUR_SECRET: Replace it with the actual integration secret obtained in Step 3.
Make sure to uncomment the export statement.
See the example below:
1
2
3
4
5
# UNCOMMENT NEXT LINES AND PUT YOUR CONNECTION PARAMETERS:export RPC_HOST=127.0.0.1 # THE IP ADDRESS OF YOUR EDGE INSTANCEexport RPC_PORT=9090
export INTEGRATION_ROUTING_KEY=b75**************************34d
export INTEGRATION_SECRET=vna**************mik
Start the ThingsBoard integration:
1
sudo service tb-coap-integration start
Advanced configuration
You can find and update additional configuration parameters in the tb-coap-integration.conf file.
To open the file for editing, use the following command:
After updating the configuration, you can check the logs in /var/log/tb-coap-integration/ to verify that the integration is running correctly.
Look for INFO log messages that show the latest integration configuration received from the server.
Remote HTTP integration validation
To send an uplink message, you need an HTTP endpoint URL from the integration.
Let’s log in to the ThingsBoard Edge and go to the Integrations section.
Find the HTTP integration and click it. There you can find the HTTP endpoint URL. Click the icon to copy the URL.
Important!
Please make sure that your machine is able to access the machine on which the remote HTTP integration is running, and the port 8082 is not blocked by any firewall rules.
To send the message, use the following command. Replace $DEVICE_NAME and $YOUR_HTTP_ENDPOINT_URL with the corresponding values.
The created device with data can be viewed in the Device groups > All on the Edge section:
Go to the "Entities" section -> "Devices" page on the Edge to see the created device with data.
Remote integration configuration
Configuring remote integrations is done through the ThingsBoard interface, with no special steps required.
Explore the following guides and video tutorials related to the specific integrations:
Our website uses cookies to ensure site security and optimize your experience on our website. By continuing to browse this site, you agree to the use of these cookies, in accordance with our Cookie Policy. For details on managing cookies, please adjust your browser settings.