Installing Trendz Analytics on CentOS/RHEL
This guide explains how to install Trendz Analytics on RHEL/CentOS 7, 8, or 9.
Prerequisites
Section titled “Prerequisites”Hardware: Minimum 4 GB of RAM and 2 CPU cores. In small and medium deployments, Trendz can be installed on the same server as ThingsBoard.
Software:
- ThingsBoard 4.3.0 or newer. For older versions see Connecting to ThingsBoard 4.2 and Older.
- Active Trendz Analytics add-on. See the Self-Managed Activation guide.
- Docker CE and Docker Compose (required for the Python Executor)
CentOS 7 only — install wget, nano, and the EPEL repository before proceeding:
sudo yum install -y nano wgetsudo yum install -y https://dl.fedoraproject.org/pub/epel/epel-release-latest-7.noarch.rpmInstallation steps
Section titled “Installation steps”Step 1. Install Java 17 (OpenJDK)
Section titled “Step 1. Install Java 17 (OpenJDK)”sudo dnf install java-17-openjdk-headlesssudo yum install java-17-openjdk-headlessSet Java 17 as the default version:
sudo update-alternatives --config javaVerify the installation:
java -versionExpected output:
openjdk version "17.x.xx"OpenJDK Runtime Environment (...)OpenJDK 64-Bit Server VM (build ...)Step 2. Install Trendz package
Section titled “Step 2. Install Trendz package”Download the installation package:
wget https://dist.thingsboard.io/trendz-1.15.2.1.rpmInstall Trendz Analytics as a service:
sudo rpm -Uvh trendz-1.15.2.1.rpmStep 3. Configure database
Section titled “Step 3. Configure database”Trendz uses PostgreSQL. You can install it on the same server or use a managed PostgreSQL service.
Install PostgreSQL 16:
sudo dnf updatesudo dnf -y install https://download.postgresql.org/pub/repos/yum/reporpms/EL-8-x86_64/pgdg-redhat-repo-latest.noarch.rpmsudo dnf -qy module disable postgresqlsudo dnf -y install postgresql16 postgresql16-server postgresql16-contribsudo dnf updatesudo dnf -y install https://download.postgresql.org/pub/repos/yum/reporpms/EL-9-x86_64/pgdg-redhat-repo-latest.noarch.rpmsudo dnf -qy module disable postgresqlsudo dnf -y install postgresql16 postgresql16-server postgresql16-contribsudo yum updatesudo yum -y install https://download.postgresql.org/pub/repos/yum/reporpms/EL-7-x86_64/pgdg-redhat-repo-latest.noarch.rpmsudo yum -y install postgresql16 postgresql16-server postgresql16-contribsudo /usr/pgsql-16/bin/postgresql-16-setup initdbsudo systemctl start postgresql-16sudo systemctl enable --now postgresql-16Set a password for the postgres user:
sudo -u postgres psql -c "\password"Enter and confirm the password when prompted.
Configure MD5 authentication:
Edit pg_hba.conf:
sudo nano /var/lib/pgsql/16/data/pg_hba.confLocate the IPv4 local connections line and replace ident with md5:
# IPv4 local connections:host all all 127.0.0.1/32 md5Restart PostgreSQL to apply the change:
sudo systemctl restart postgresql-16.serviceCreate the Trendz database:
psql -U postgres -d postgres -h 127.0.0.1 -WCREATE DATABASE trendz;Press Ctrl+D to exit.
Configure the database connection:
sudo nano /etc/trendz/conf/trendz.confAdd the following lines. Replace PUT_YOUR_POSTGRESQL_PASSWORD_HERE with your actual password:
# DB Configurationexport SPRING_DATASOURCE_URL=jdbc:postgresql://localhost:5432/trendzexport SPRING_DATASOURCE_USERNAME=postgresexport SPRING_DATASOURCE_PASSWORD=PUT_YOUR_POSTGRESQL_PASSWORD_HEREStep 4. Run the installation script
Section titled “Step 4. Run the installation script”sudo /usr/share/trendz/bin/install/install.shStep 5. Start Trendz service
Section titled “Step 5. Start Trendz service”sudo service trendz startStep 6. Sync ThingsBoard with Trendz
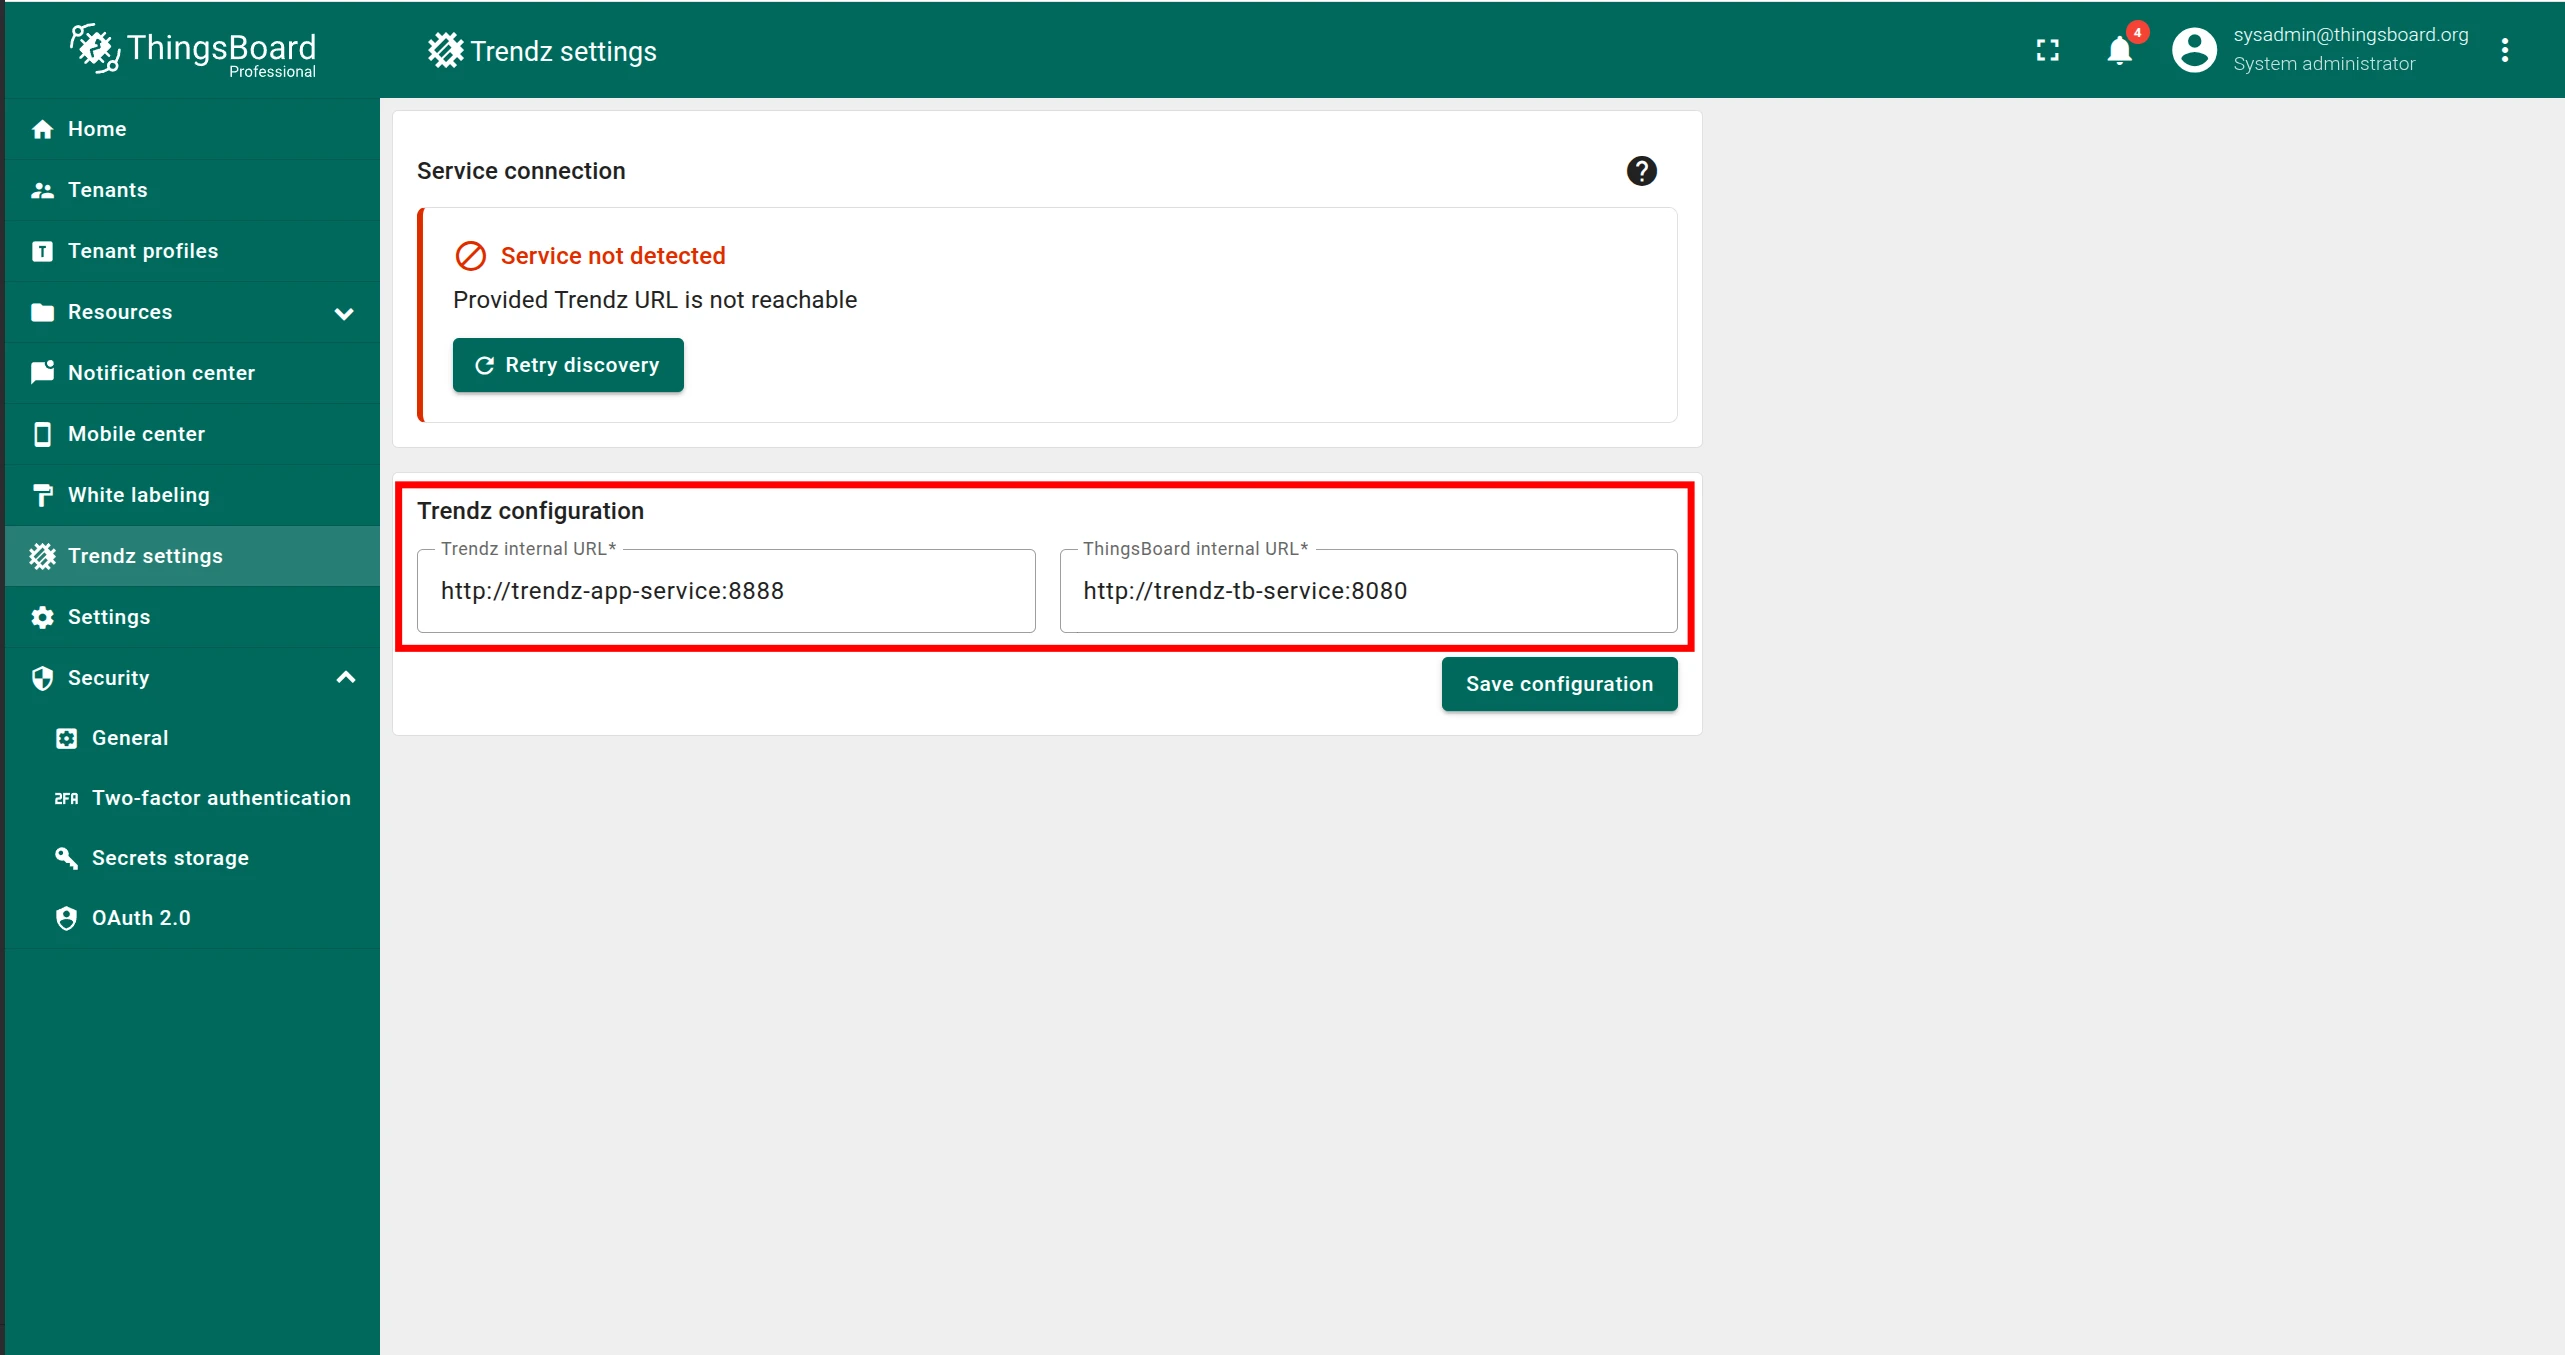
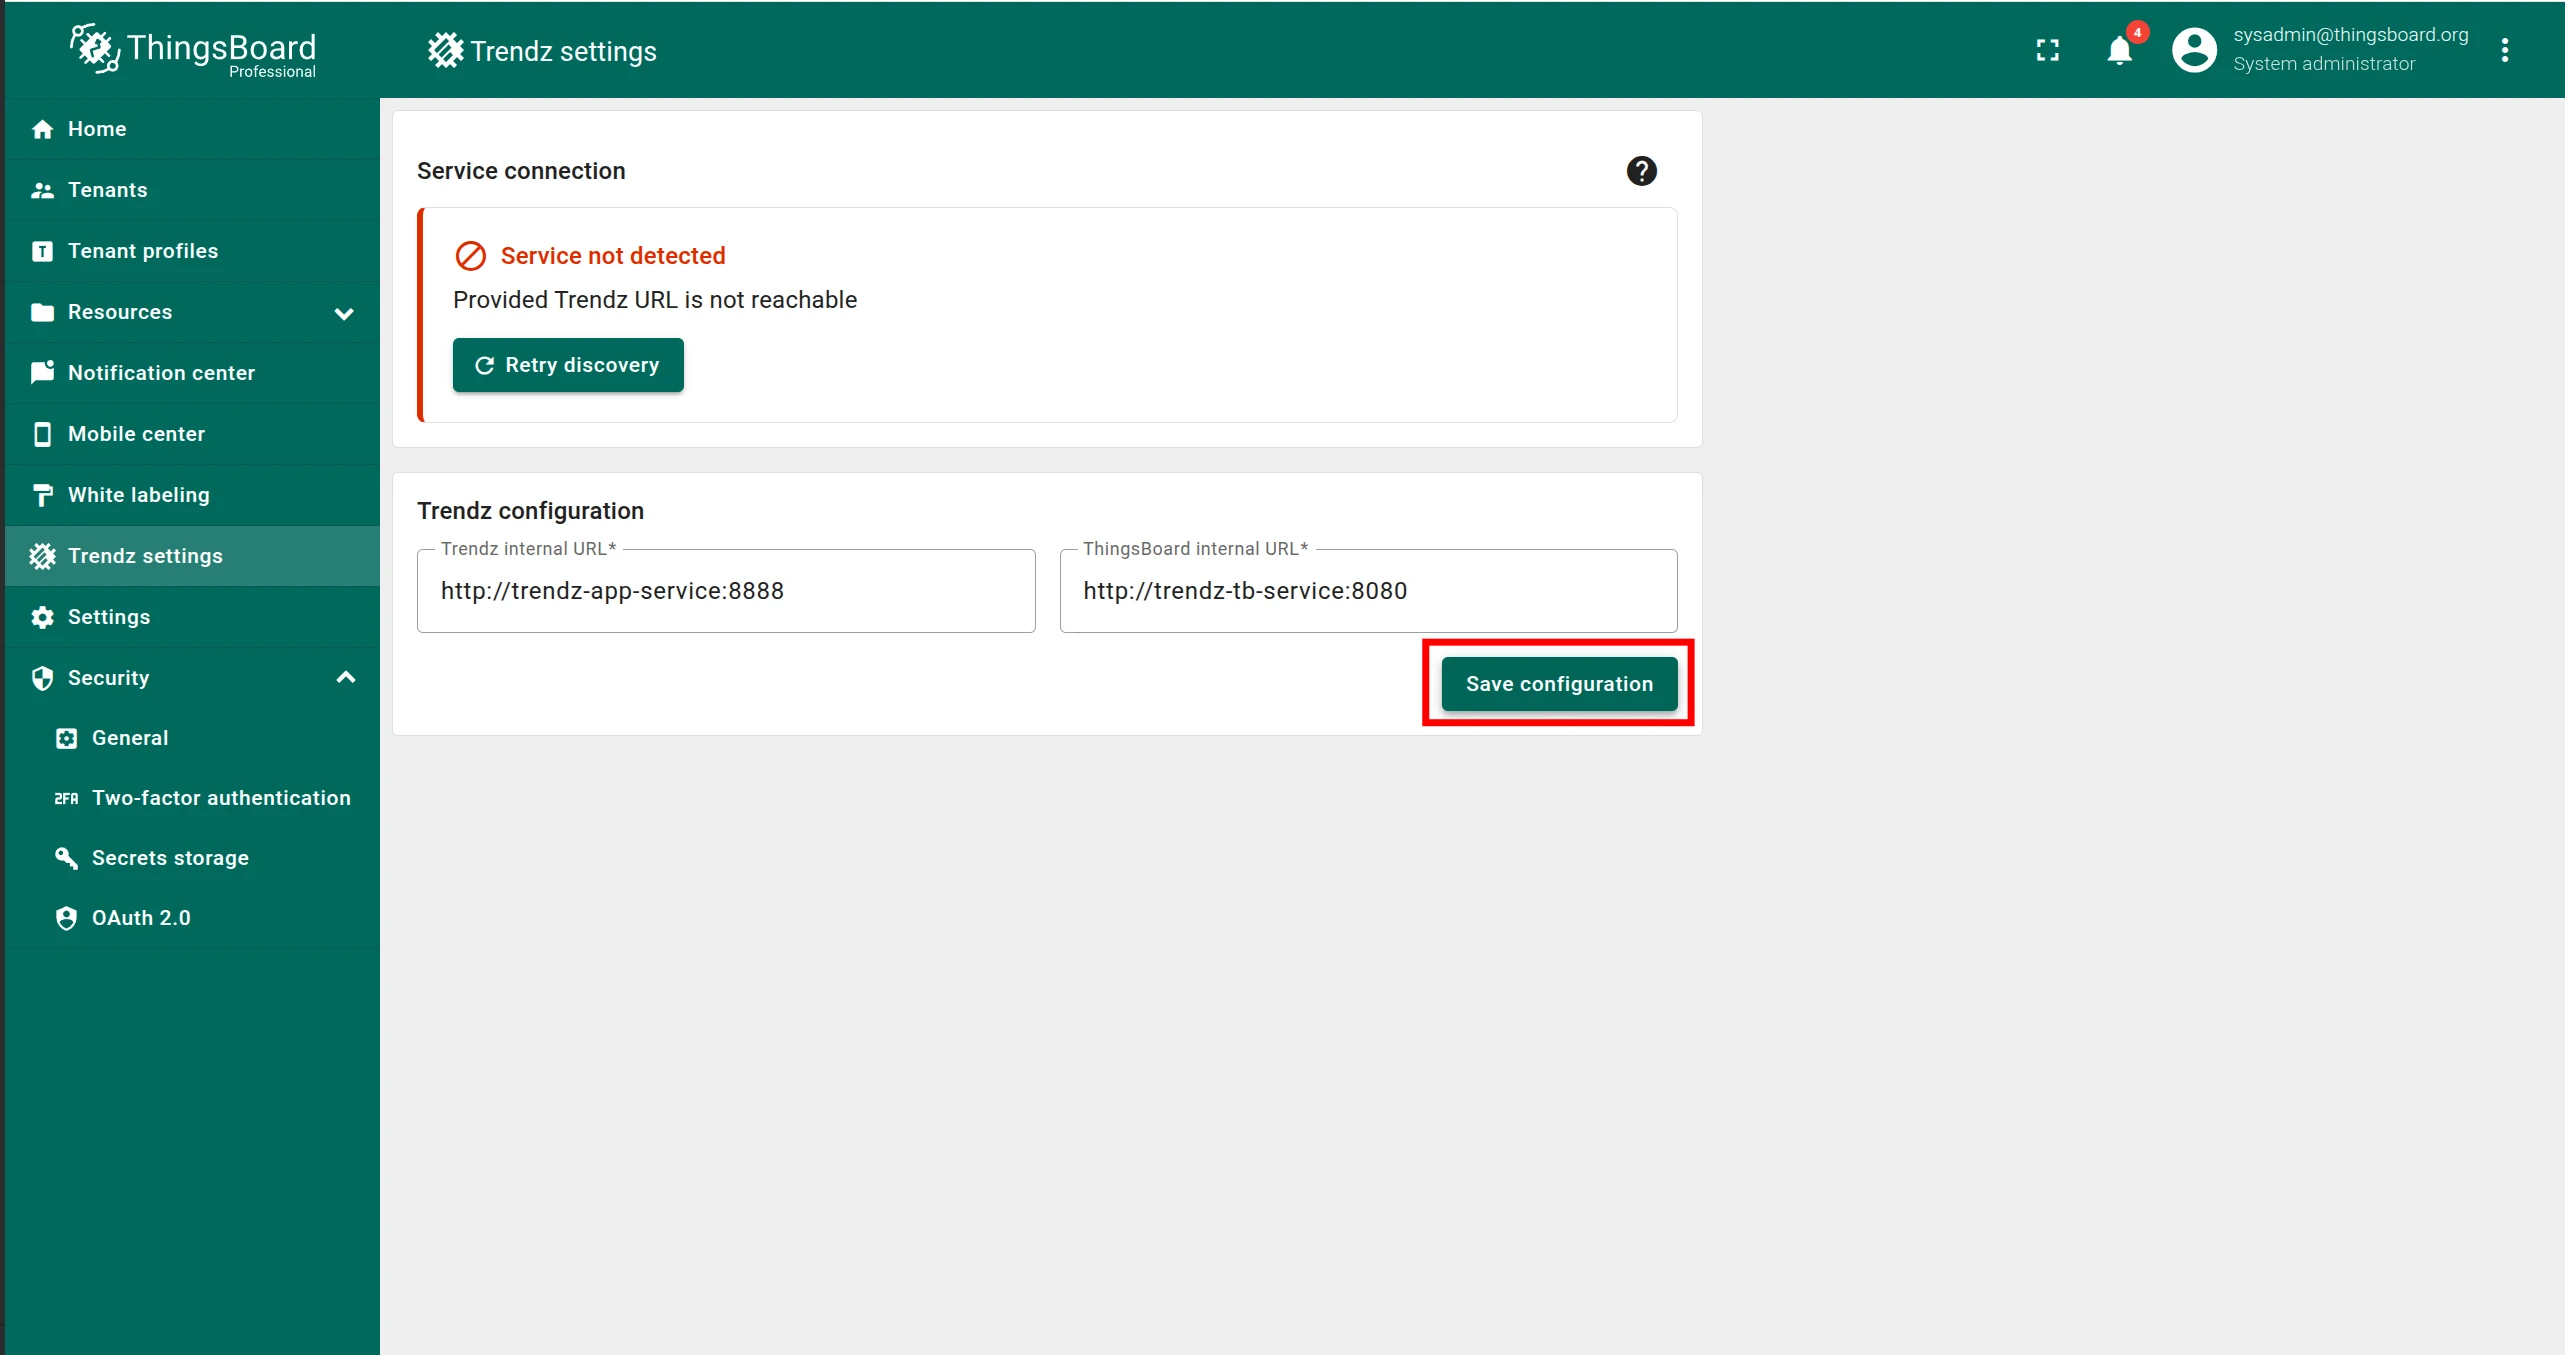
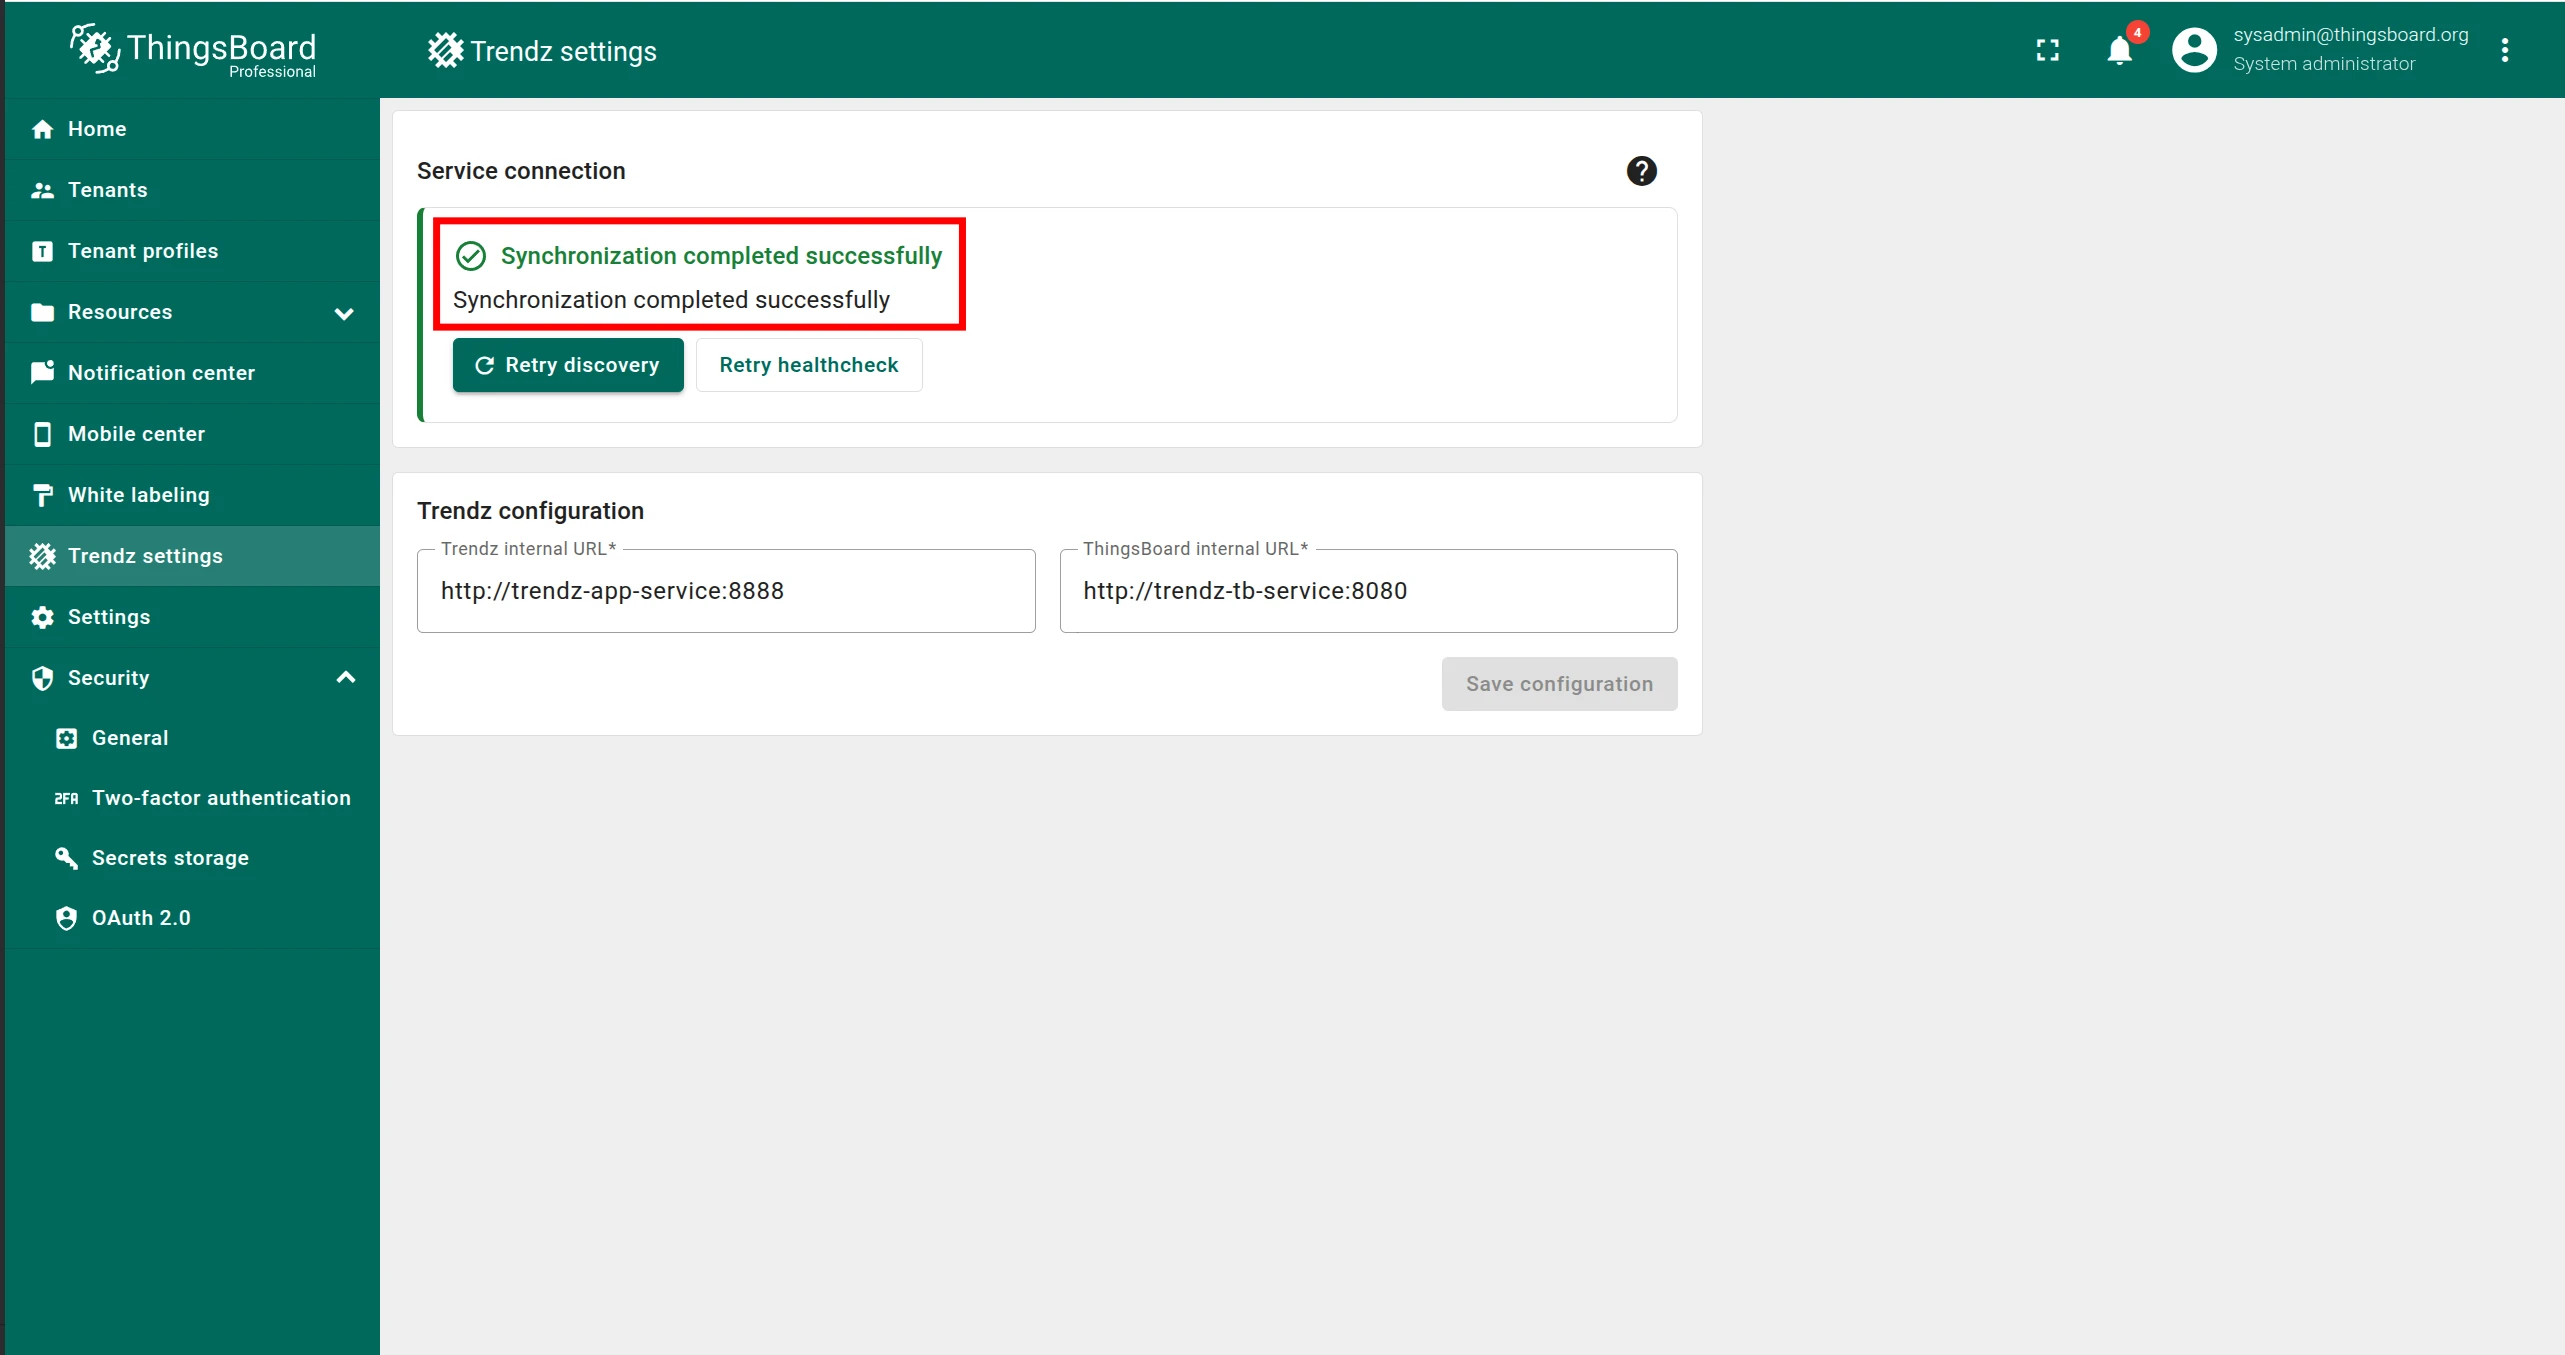
Section titled “Step 6. Sync ThingsBoard with Trendz”Log in to ThingsBoard as a Sysadmin and open the Trendz Settings page.
If you see “Synchronization completed successfully”, no further action is needed.


If you see an error message:
- Make sure Trendz is running.
- Enter the correct Trendz internal URL (must be reachable from ThingsBoard).
- Enter the correct ThingsBoard internal URL (must be reachable from Trendz).
- Click Save configuration.
- Click Retry discovery.


Step 7. Install the Python Executor
Section titled “Step 7. Install the Python Executor”To use Python Calculation Fields and Prediction Models, install the Trendz Python Executor.
See the Python Executor Setup guide for instructions.
Authentication
Section titled “Authentication”Access Trendz UI at http://localhost:8888.
Trendz uses ThingsBoard as its authentication provider — log in with your Tenant Administrator credentials from ThingsBoard.
Topology discovery
Section titled “Topology discovery”After the first login, discover the topology so Trendz can learn about your assets, devices, profiles, and relations:
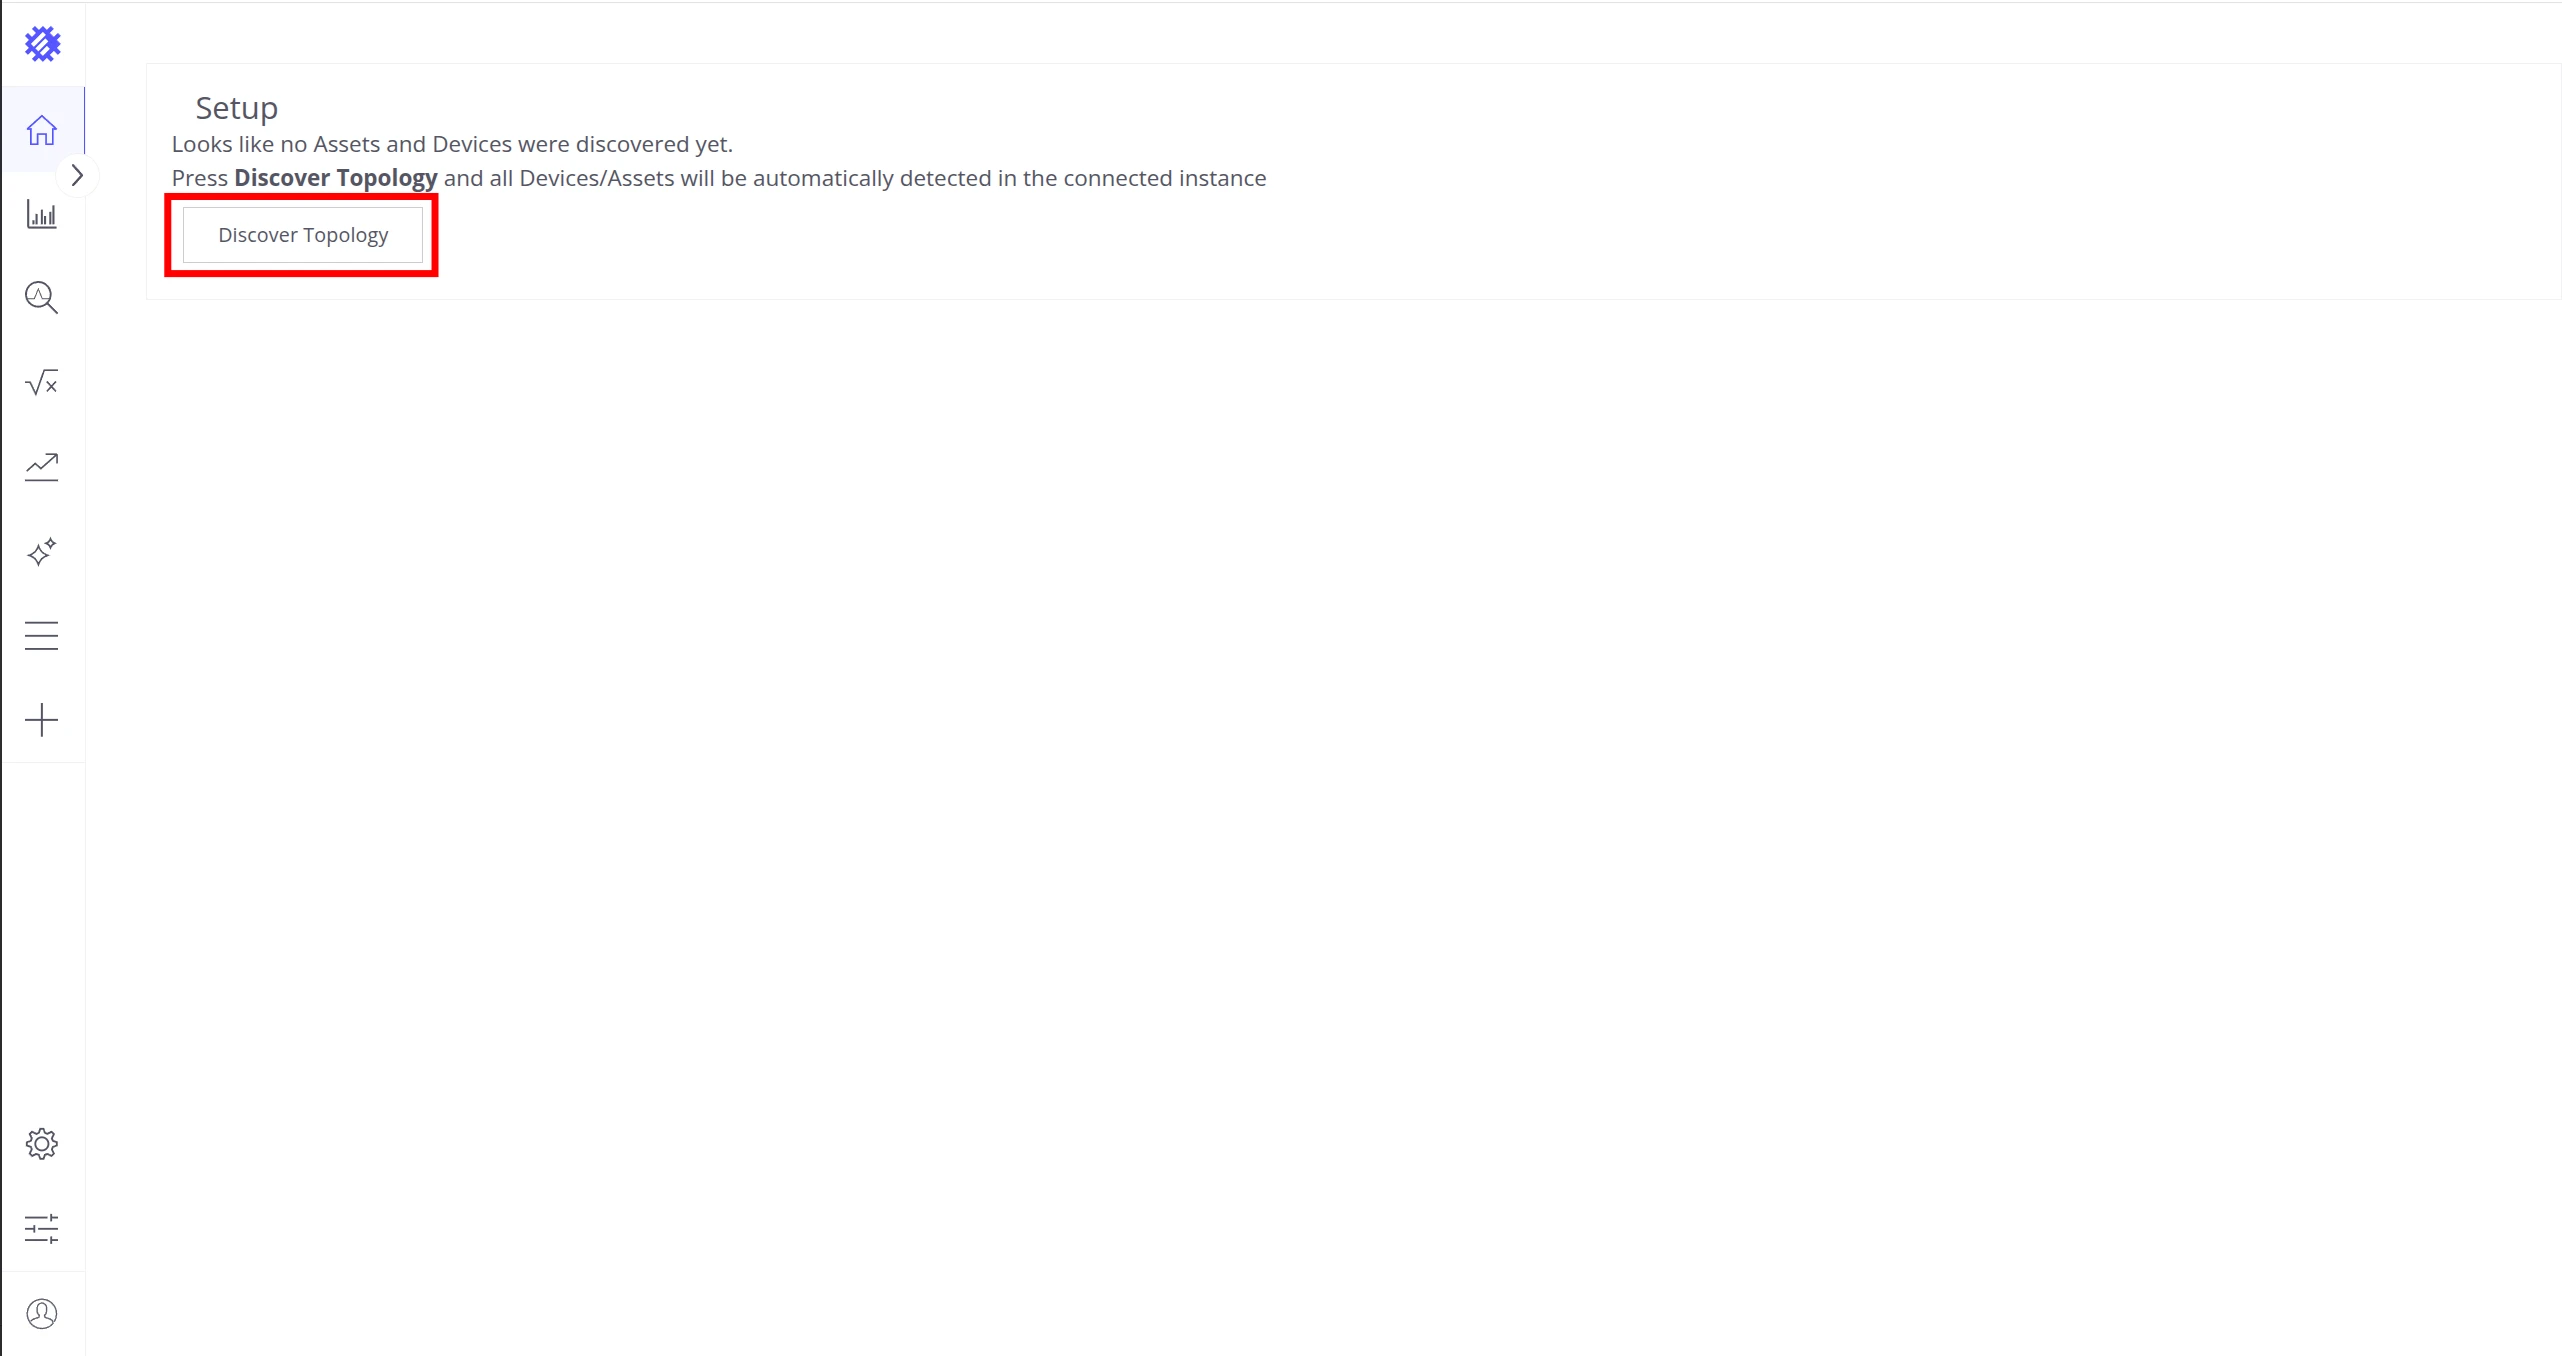
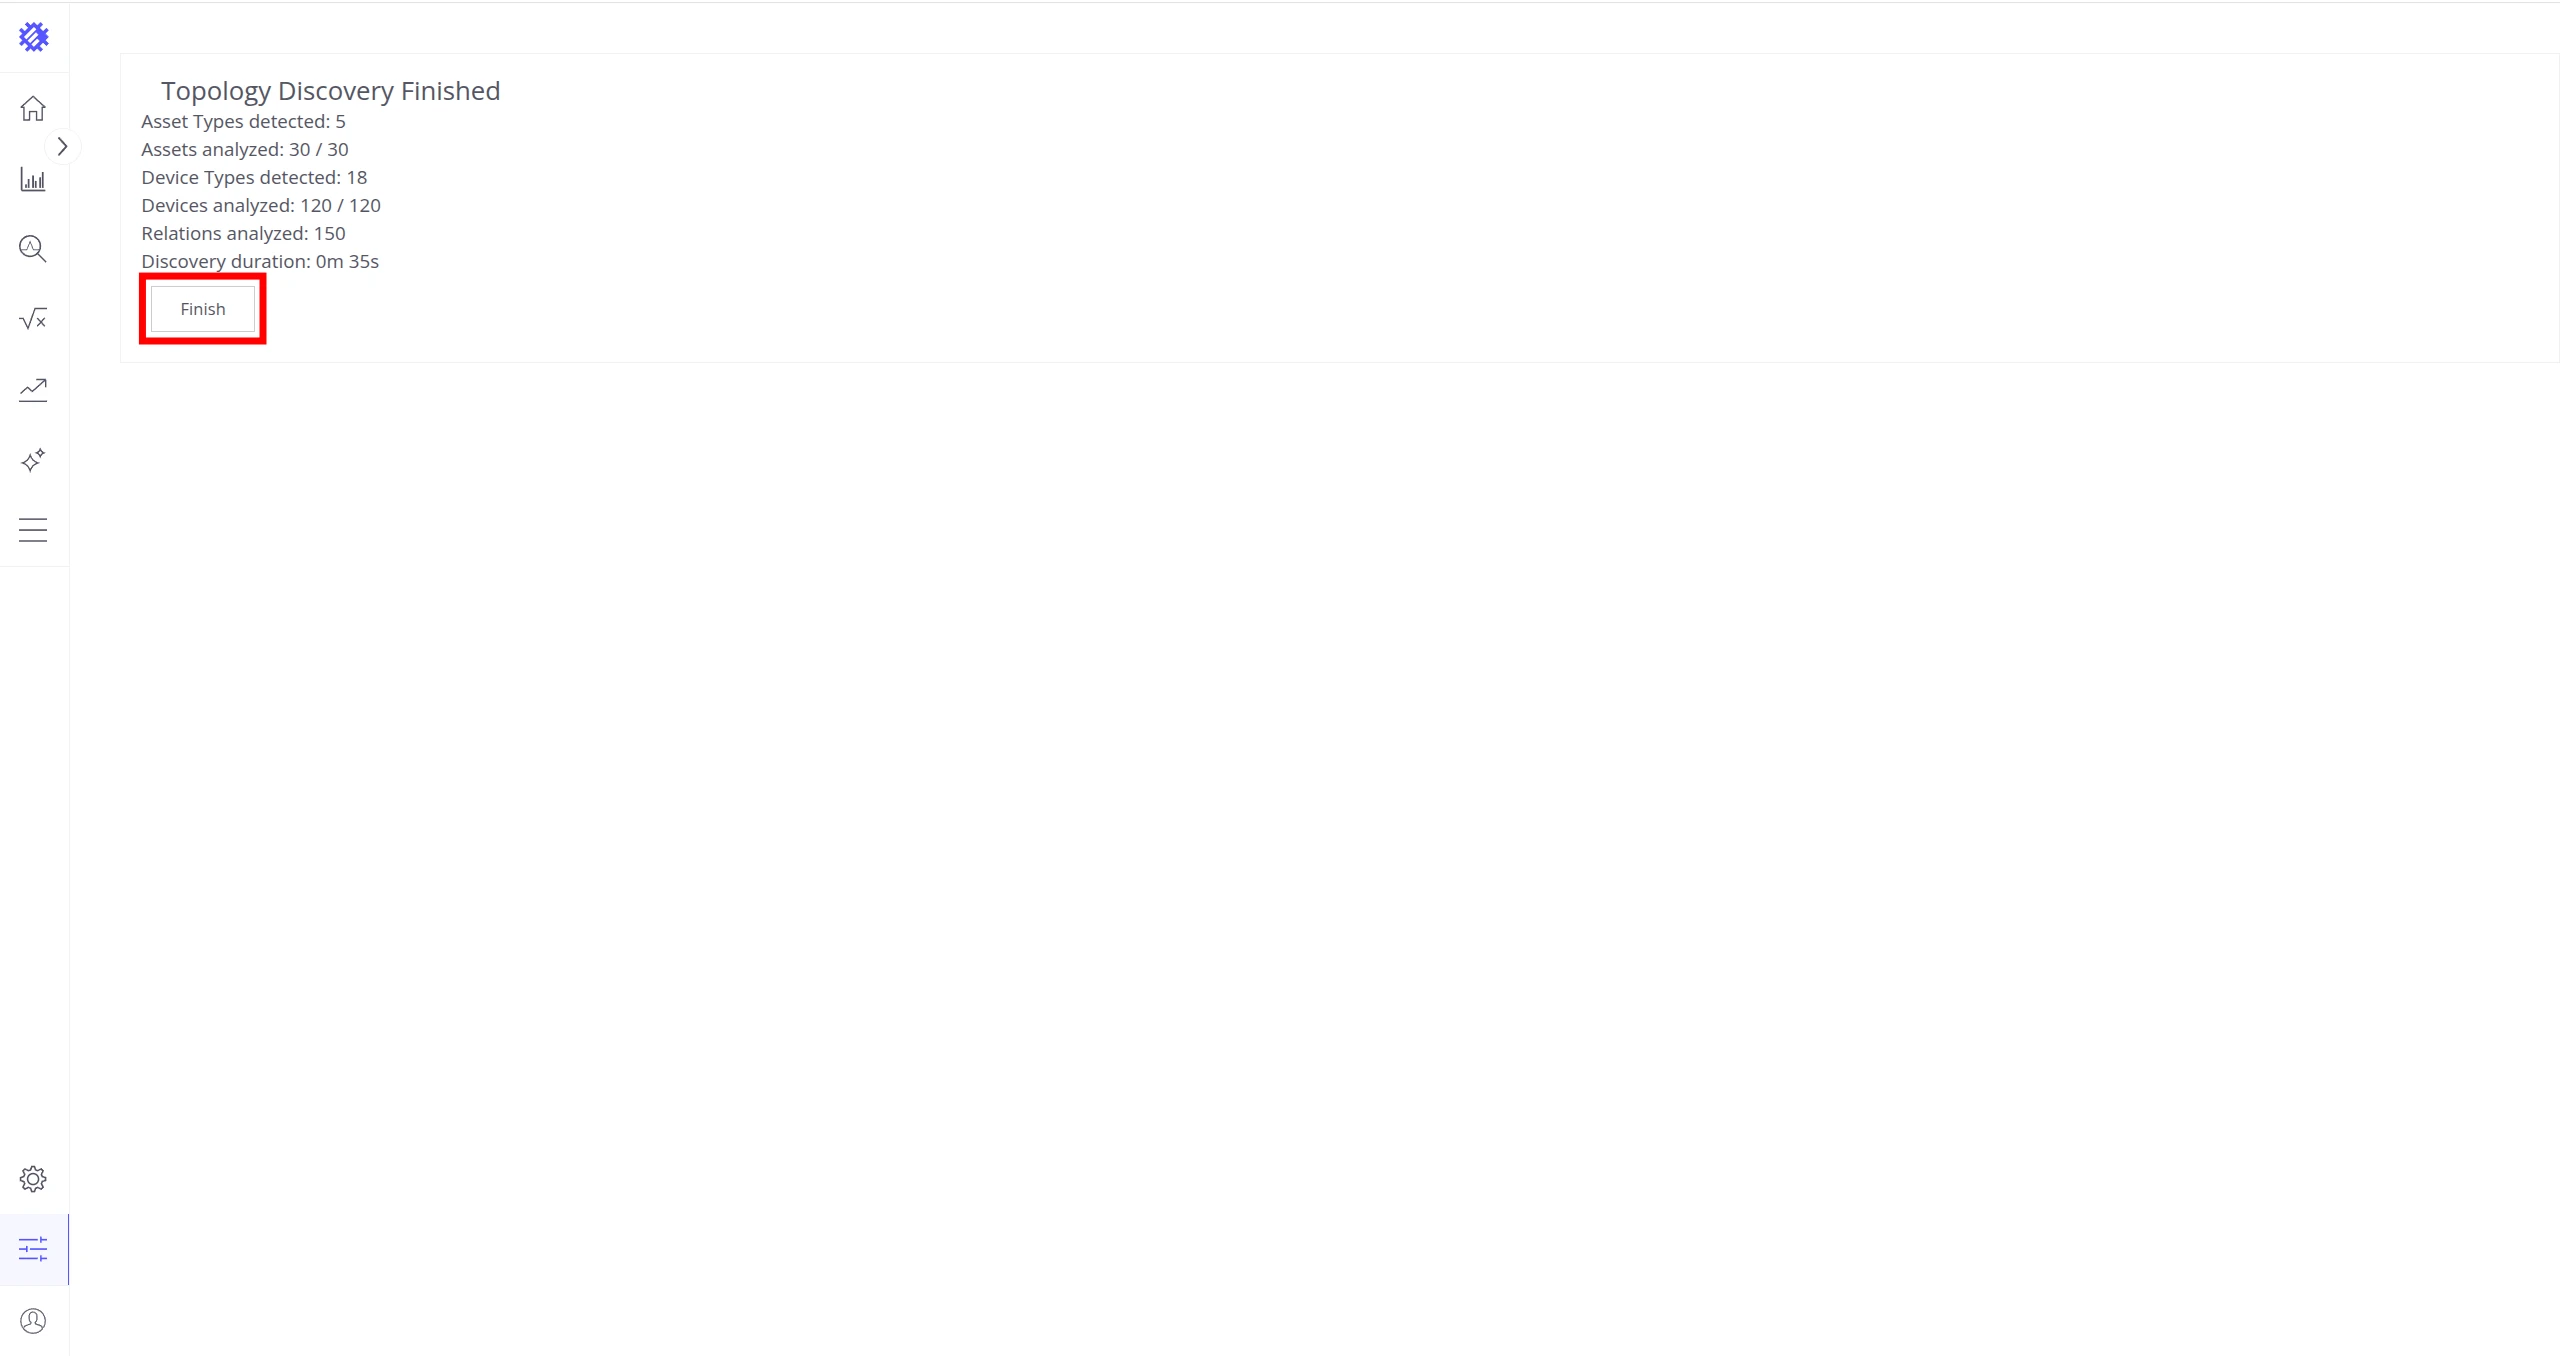
See Business Entities for more on how Trendz uses this topology.
HTTPS configuration (HAProxy)
Section titled “HTTPS configuration (HAProxy)”You can configure HTTPS access using HAProxy when Trendz is hosted in the cloud with a valid DNS name.
Trendz and ThingsBoard on the same server
Section titled “Trendz and ThingsBoard on the same server”If HAProxy and Let’s Encrypt are already set up for ThingsBoard, open the HAProxy configuration file:
sudo nano /etc/haproxy/haproxy.cfgIn the frontend https_in section, add an ACL rule and backend reference:
acl trendz_http hdr(host) -i new-trendz-domain.comuse_backend tb-trendz if trendz_httpRegister the Trendz backend:
backend tb-trendz balance leastconn option tcp-check option log-health-checks server tbTrendz1 127.0.0.1:8888 check inter 5s http-request set-header X-Forwarded-Port %[dst_port]Generate an SSL certificate:
sudo certbot-certonly --domain new-trendz-domain.com --email some@email.ioReload HAProxy:
sudo haproxy-refreshTrendz is now available at https://new-trendz-domain.com.
Fresh server setup
Section titled “Fresh server setup”See the HAProxy on Ubuntu guide to install HAProxy and generate an SSL certificate using Let’s Encrypt.
ThingsBoard and Trendz on the same domain
Section titled “ThingsBoard and Trendz on the same domain”ThingsBoard and Trendz can share a single domain — ThingsBoard at https://{my-domain}/ and Trendz at https://{my-domain}/trendz/.
In the frontend https_in section, add:
acl trendz_acl path_beg /trendz/ path_beg /apiTrendz/use_backend tb-trendz if trendz_aclUpgrading
Section titled “Upgrading”See the Upgrade Instructions for detailed steps.
Troubleshooting
Section titled “Troubleshooting”Trendz logs are stored in /var/log/trendz. Check for errors with:
cat /var/log/trendz/trendz.log | grep ERRORWas this helpful?