AI Assistant Overview
The AI Assistant lets you generate visualizations by describing what you want in plain language. Instead of manually configuring charts, specify the question, date range, grouping, aggregation, and filters in a natural conversation — the assistant builds the view for you.
Getting Started
Section titled “Getting Started”To start a conversation with the AI Assistant:
- Click the Assistant icon on the left side of the Trendz workspace, then press New Chat.
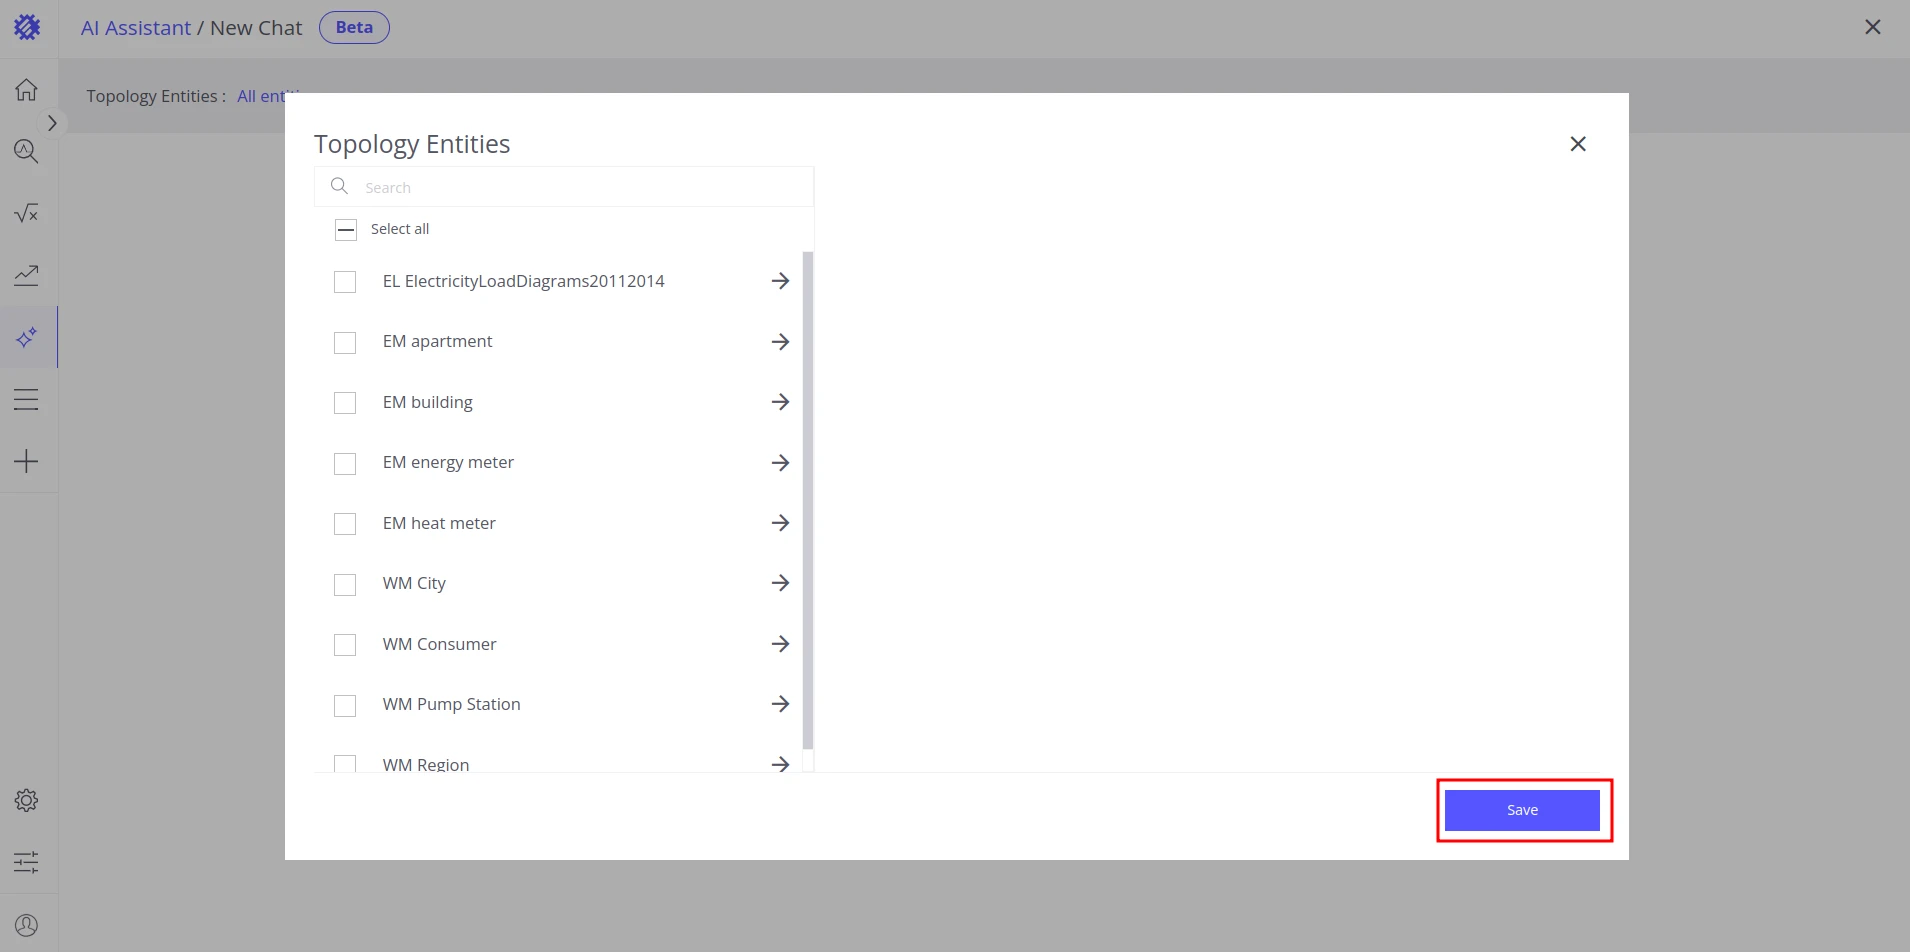
- In the popup, select the business entities the assistant should consider for this conversation. You can modify the selection at any time. Click Save to apply.
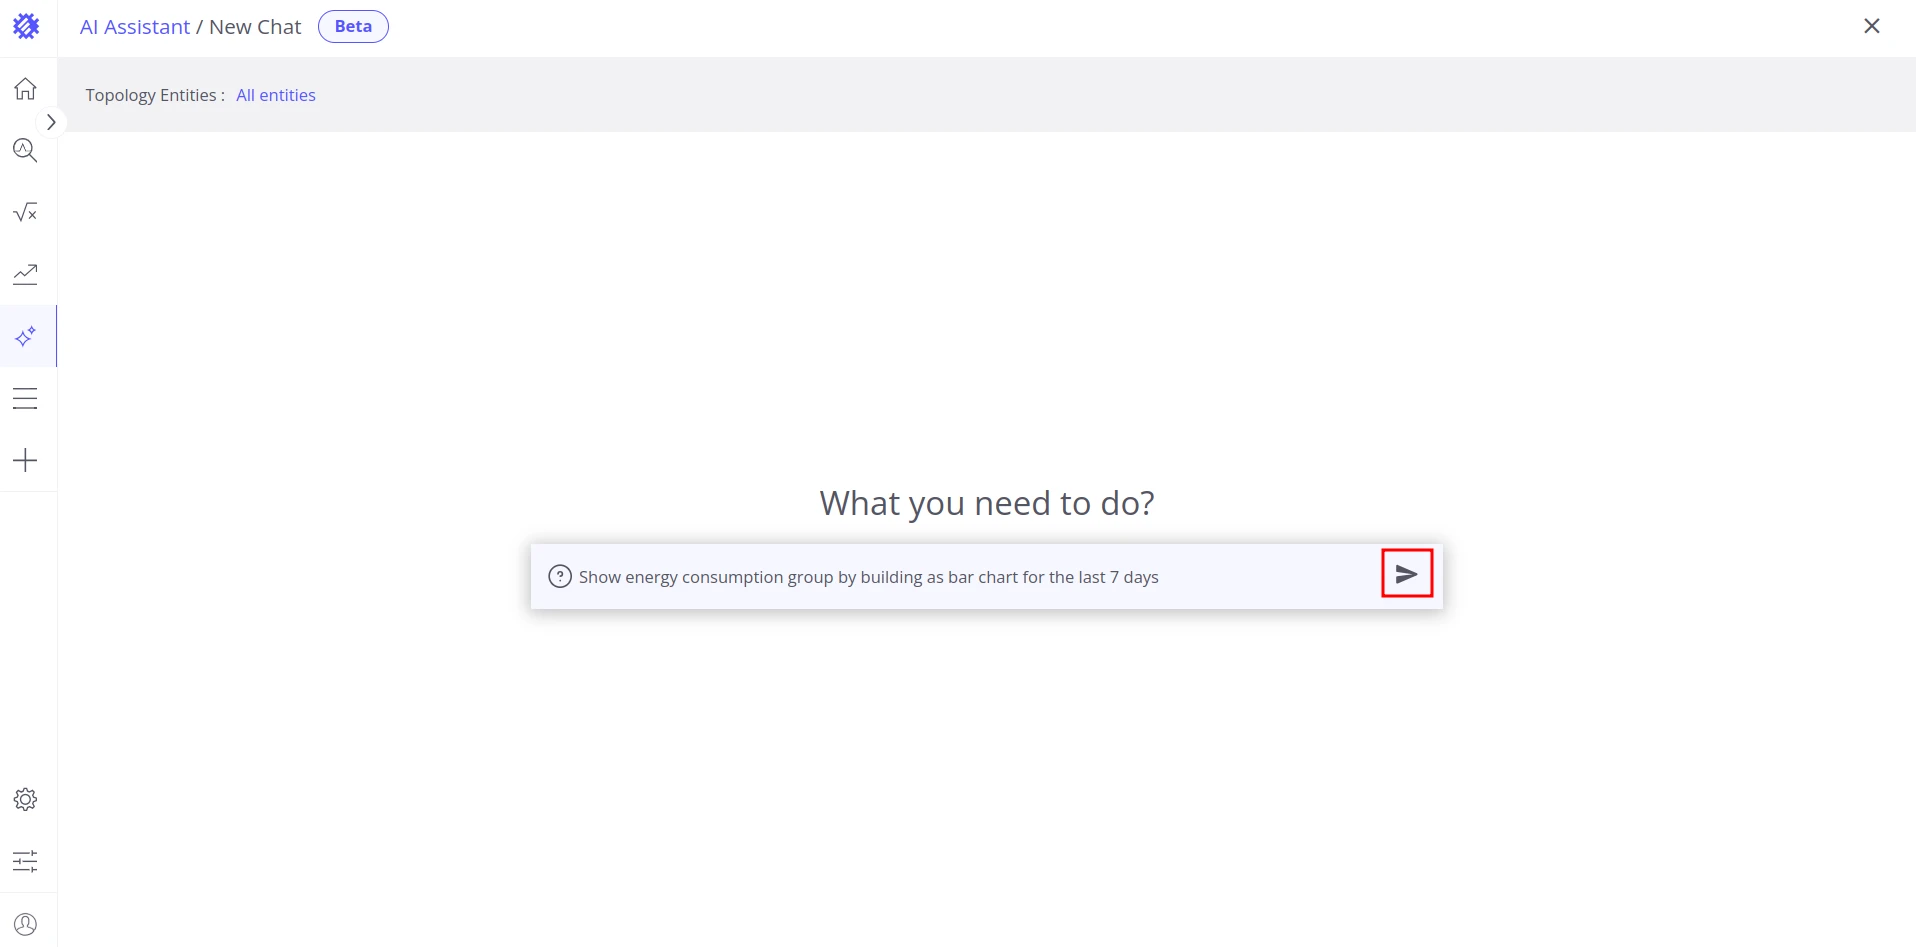
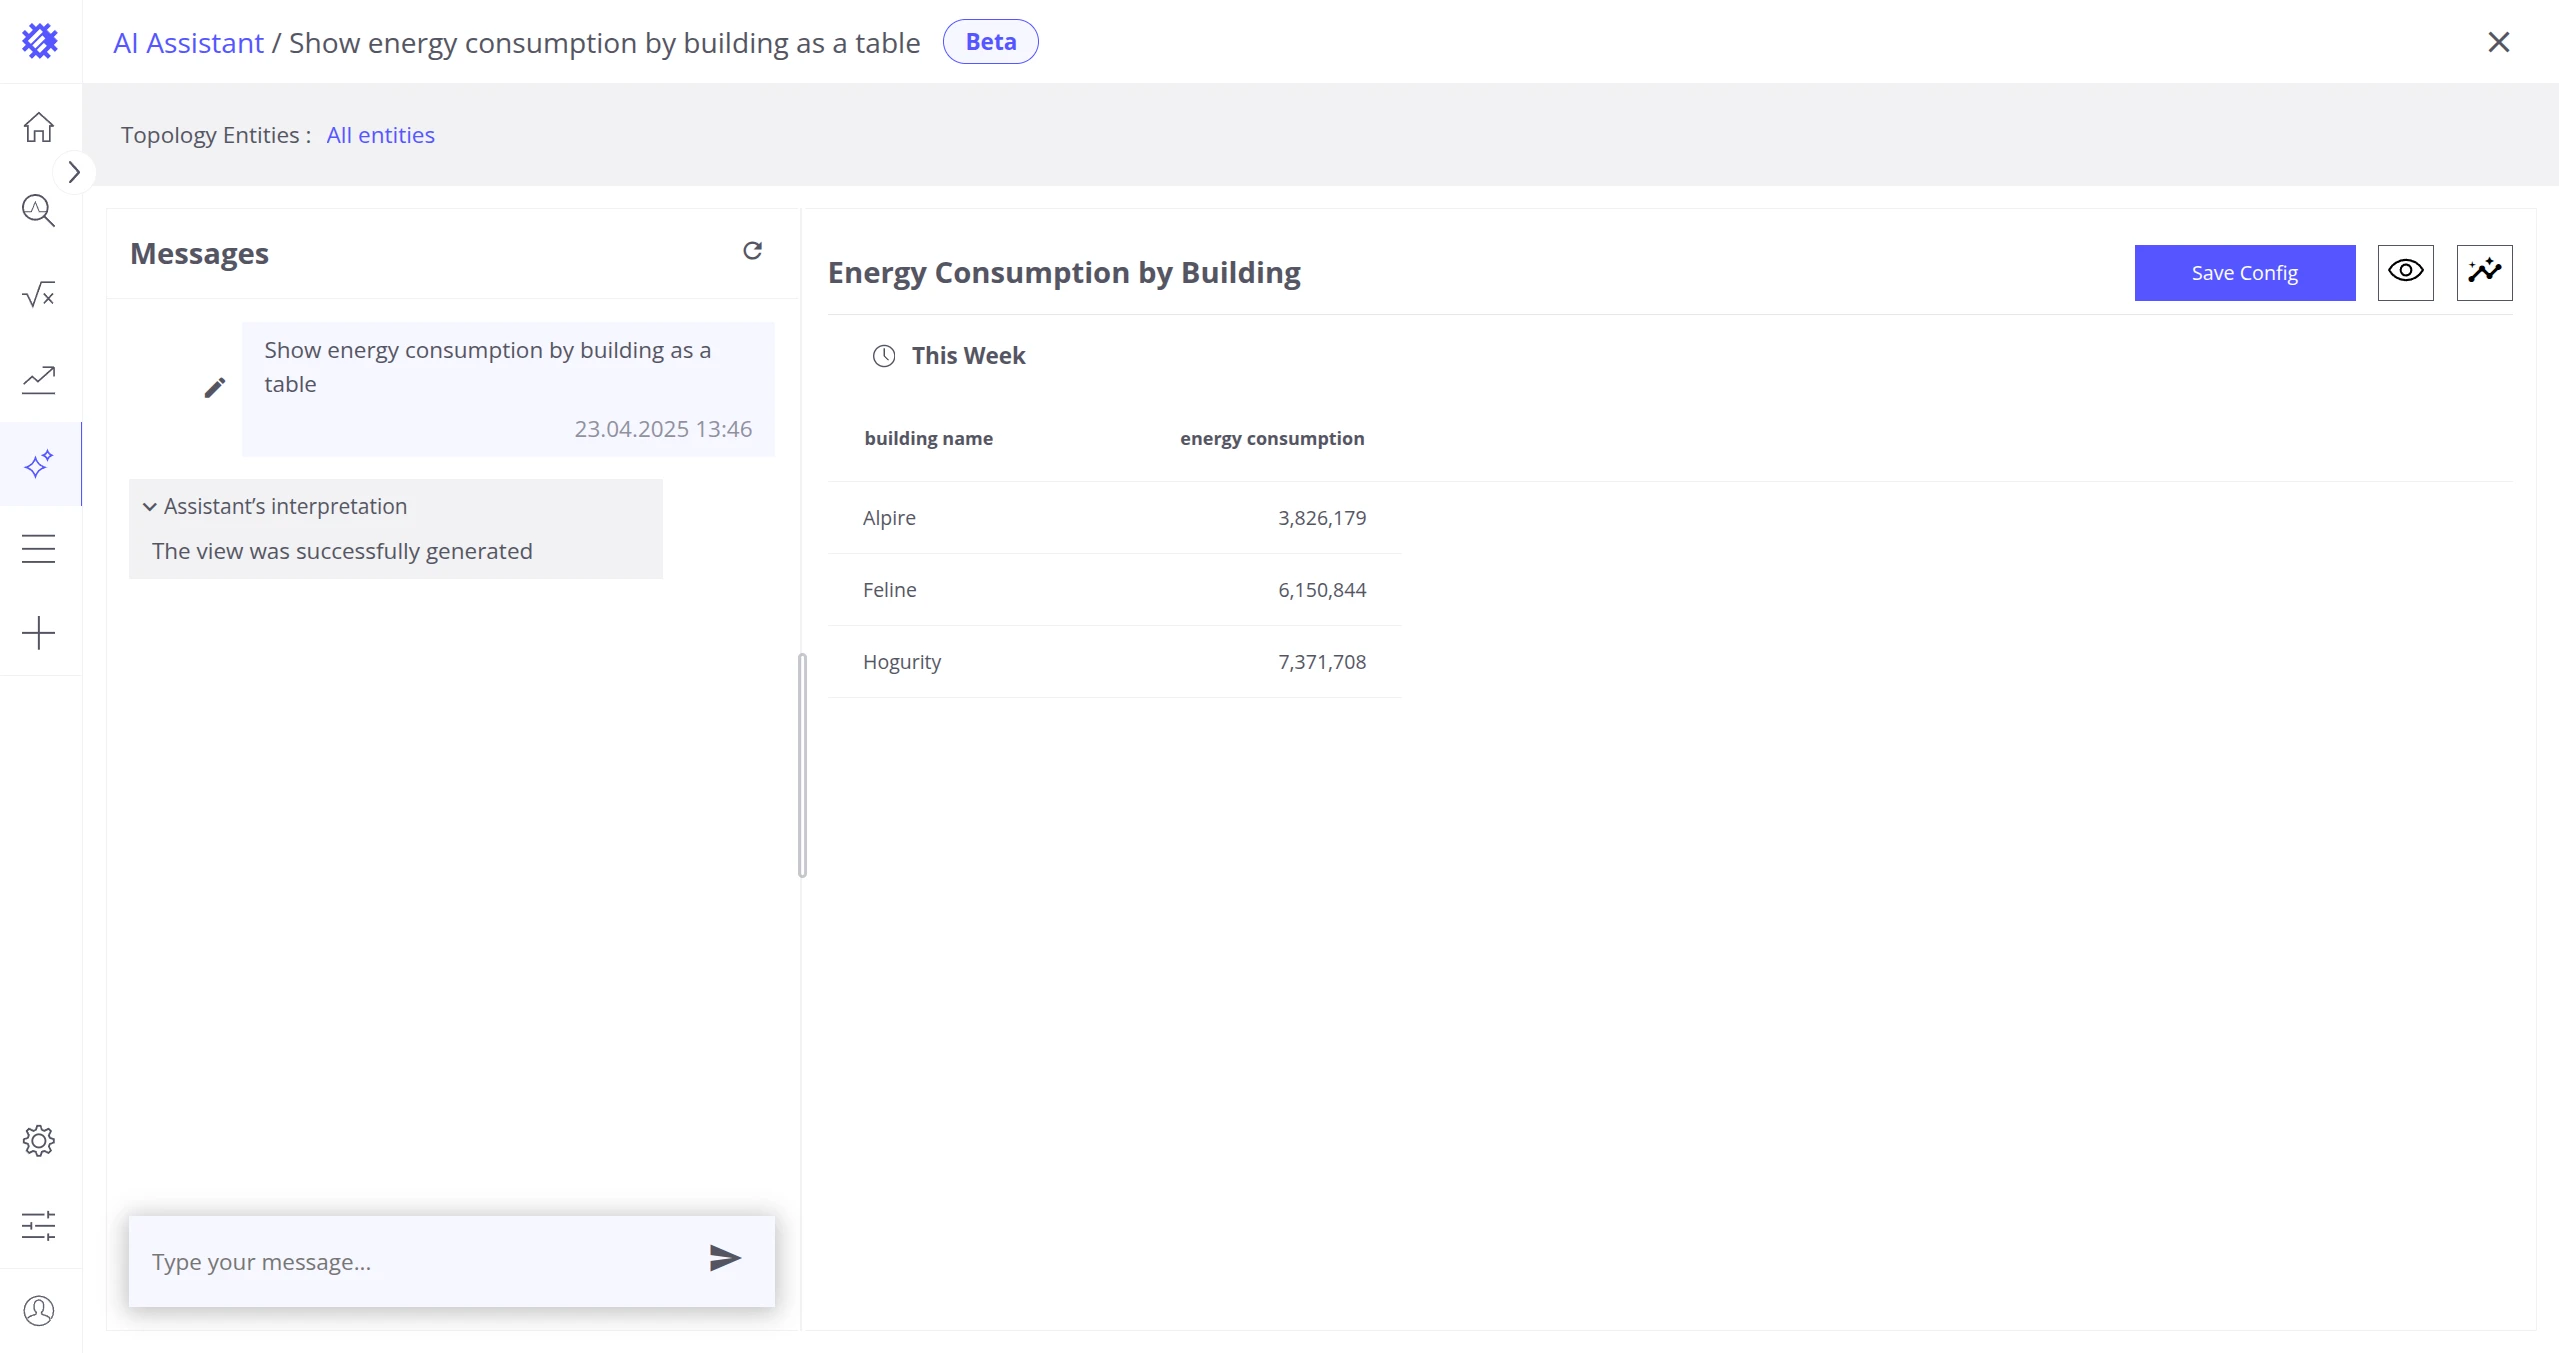
- Type your question and send it.
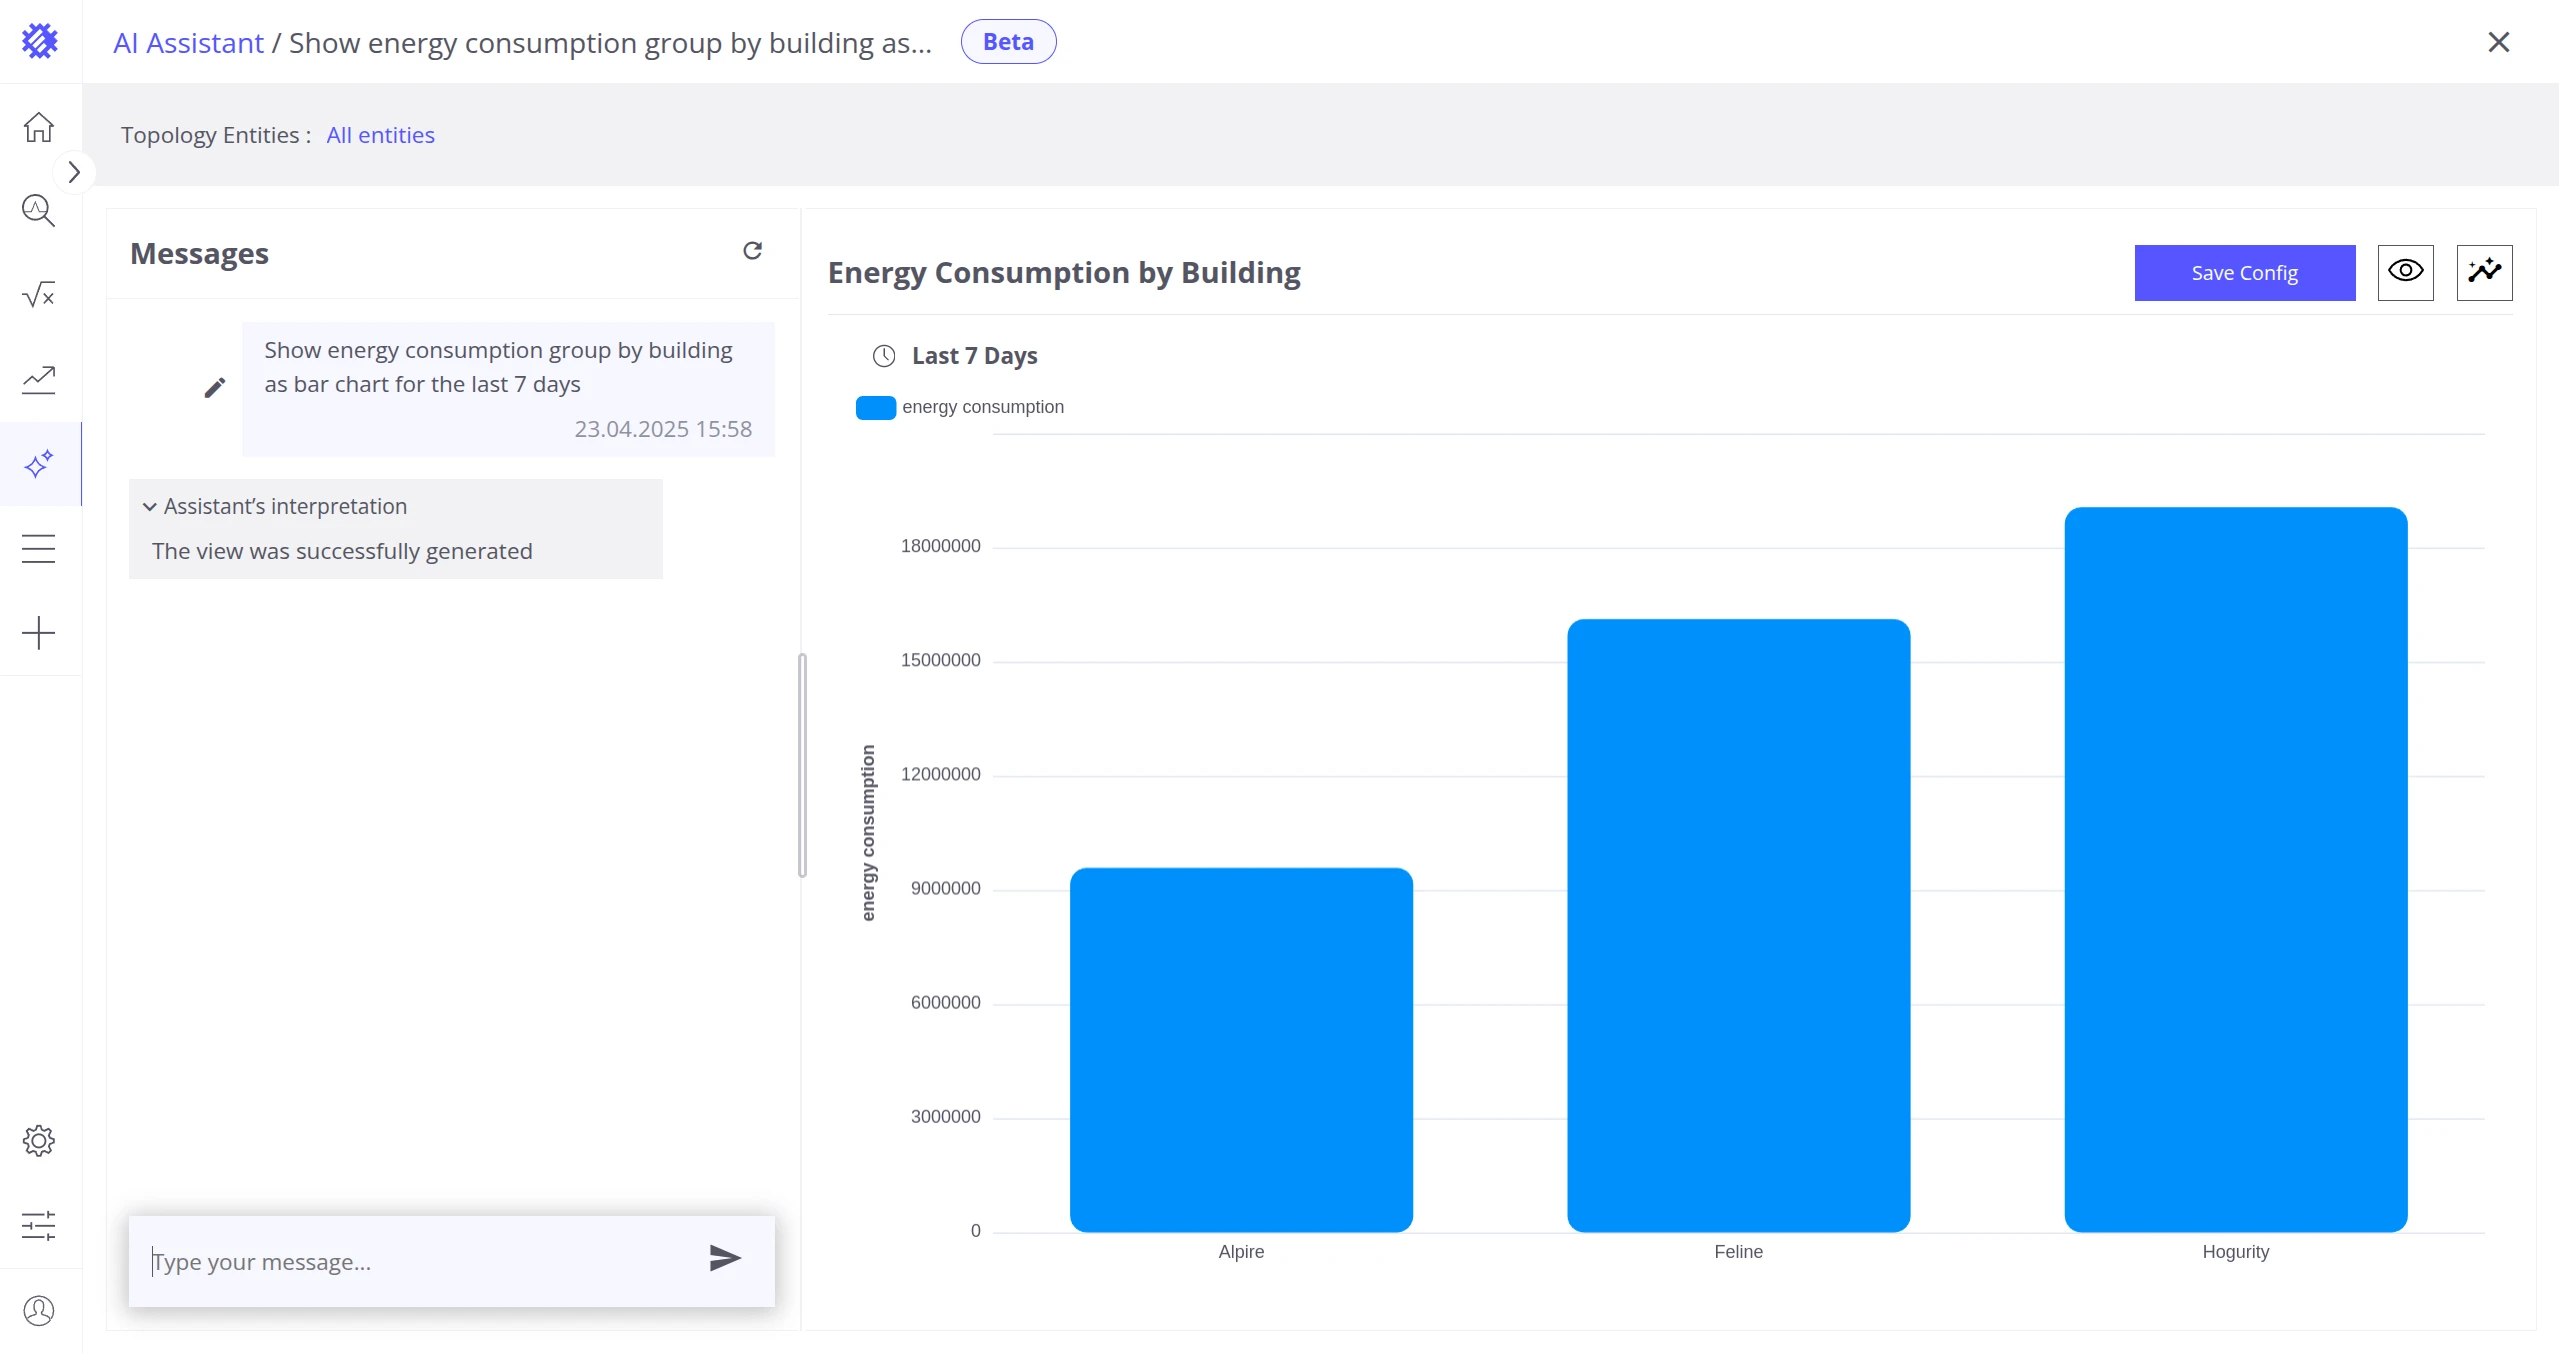
- Review the generated visualization.
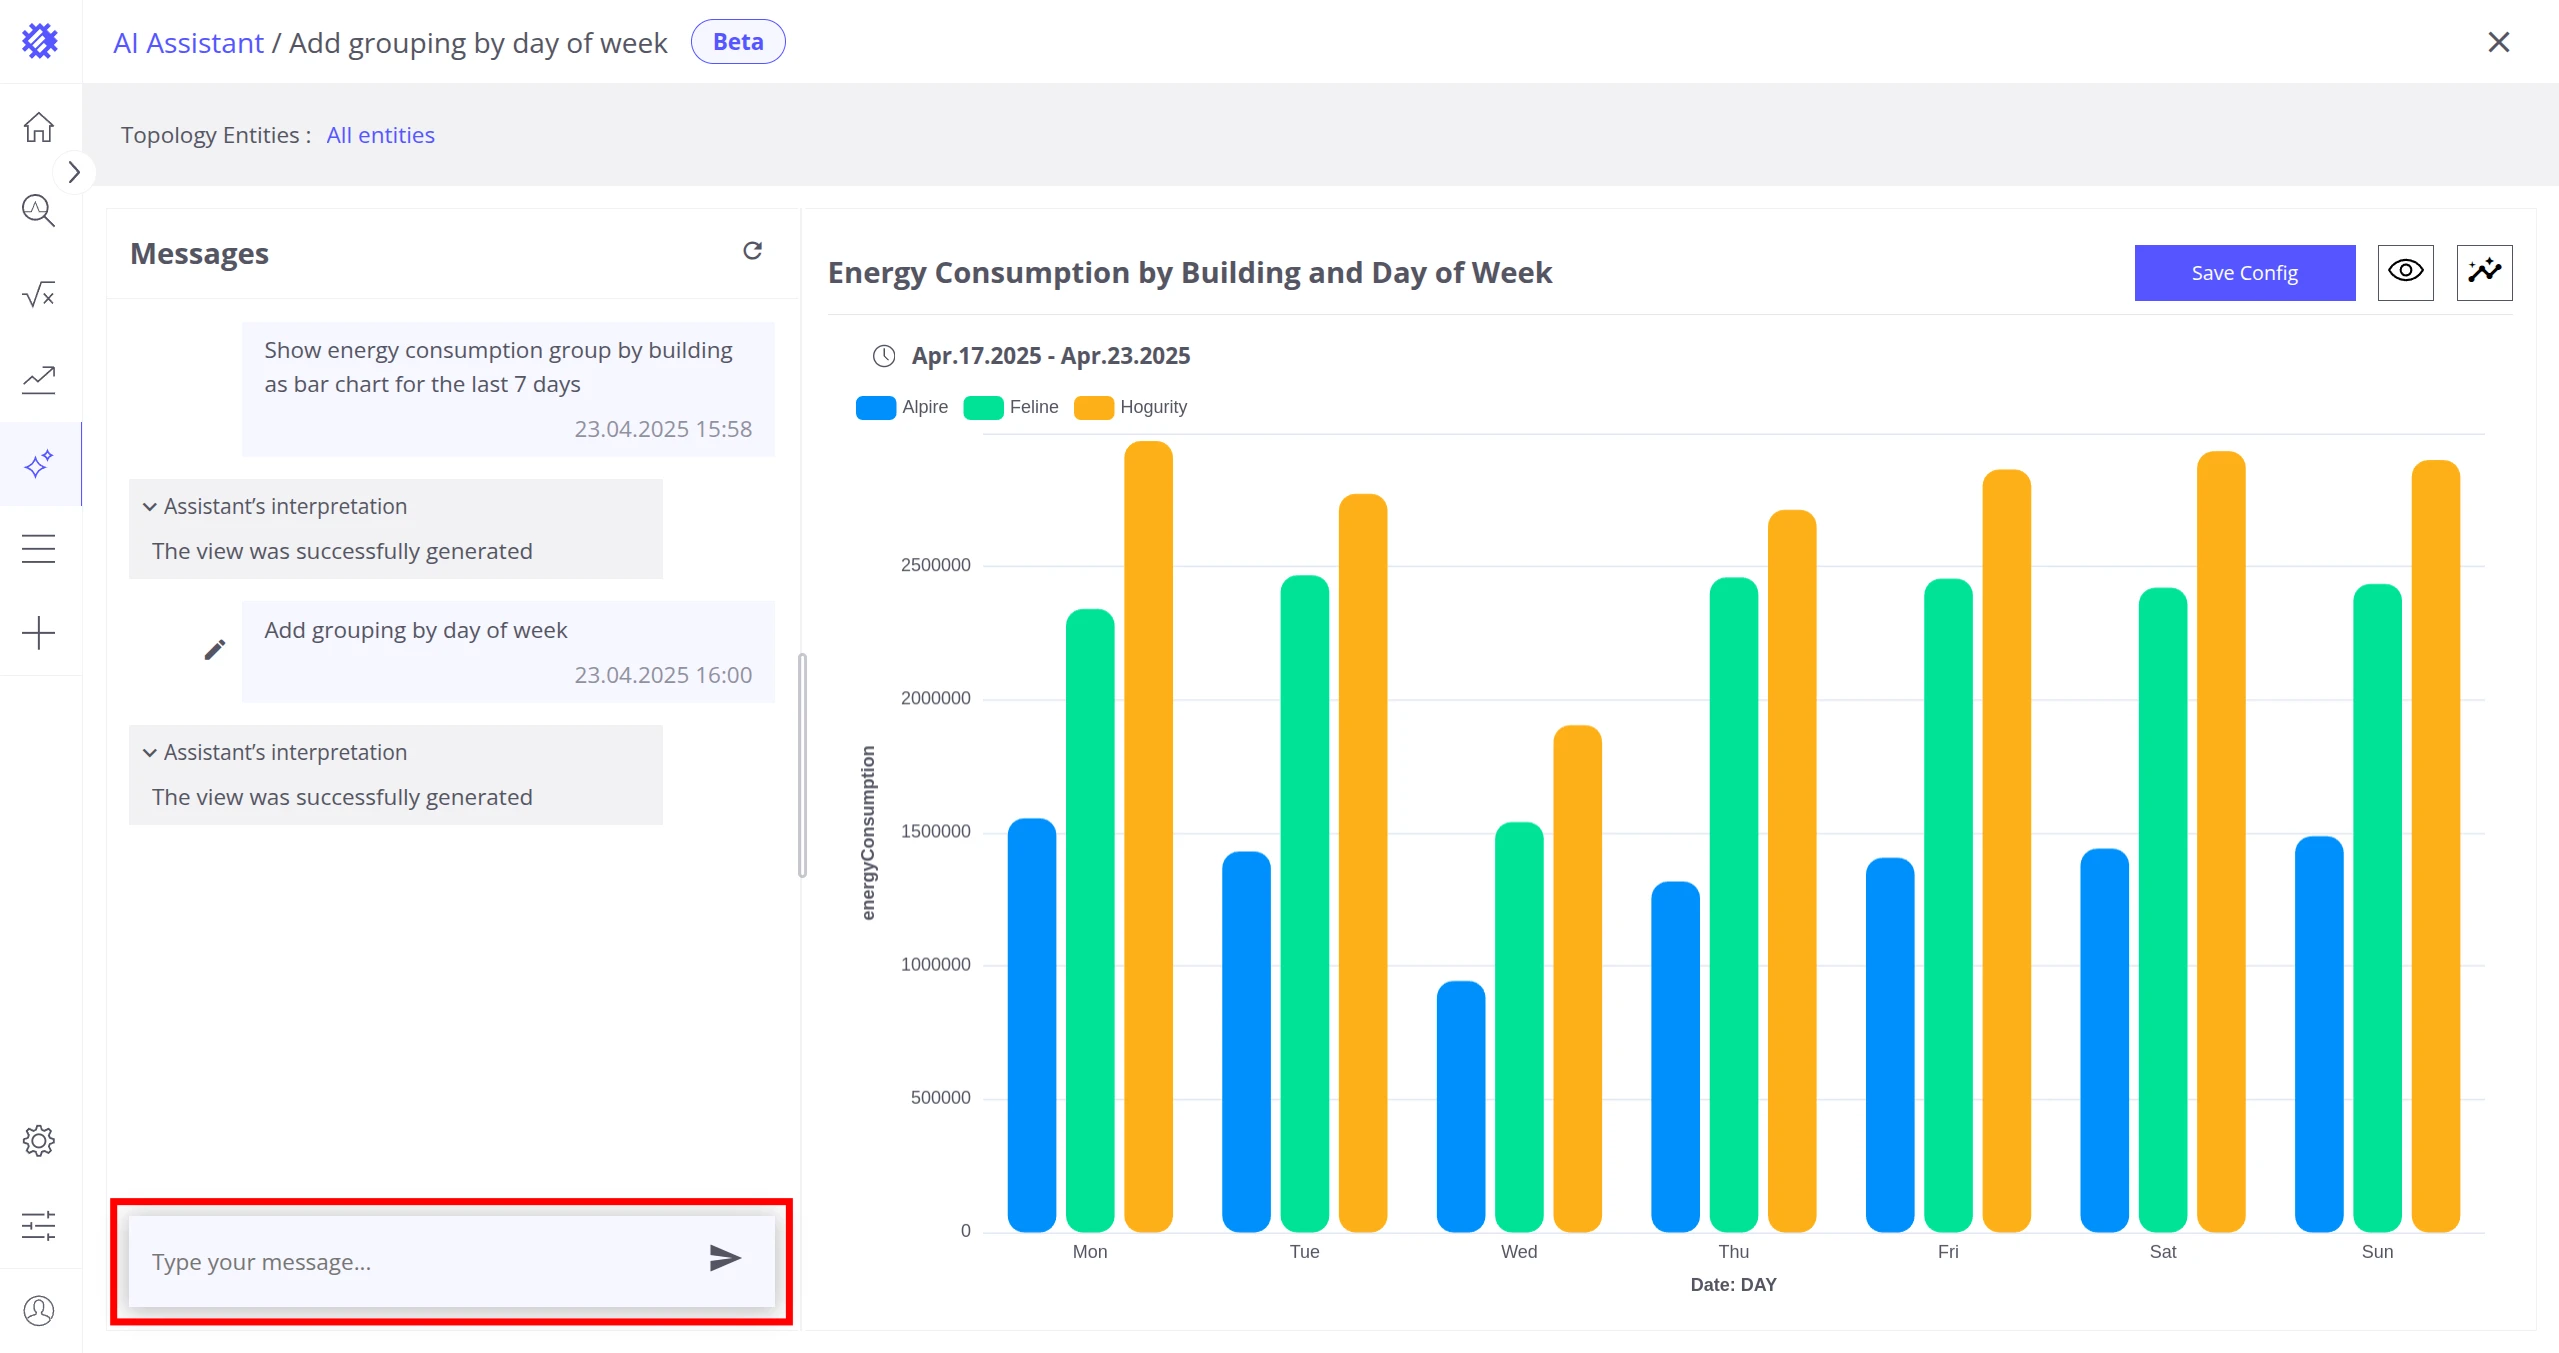
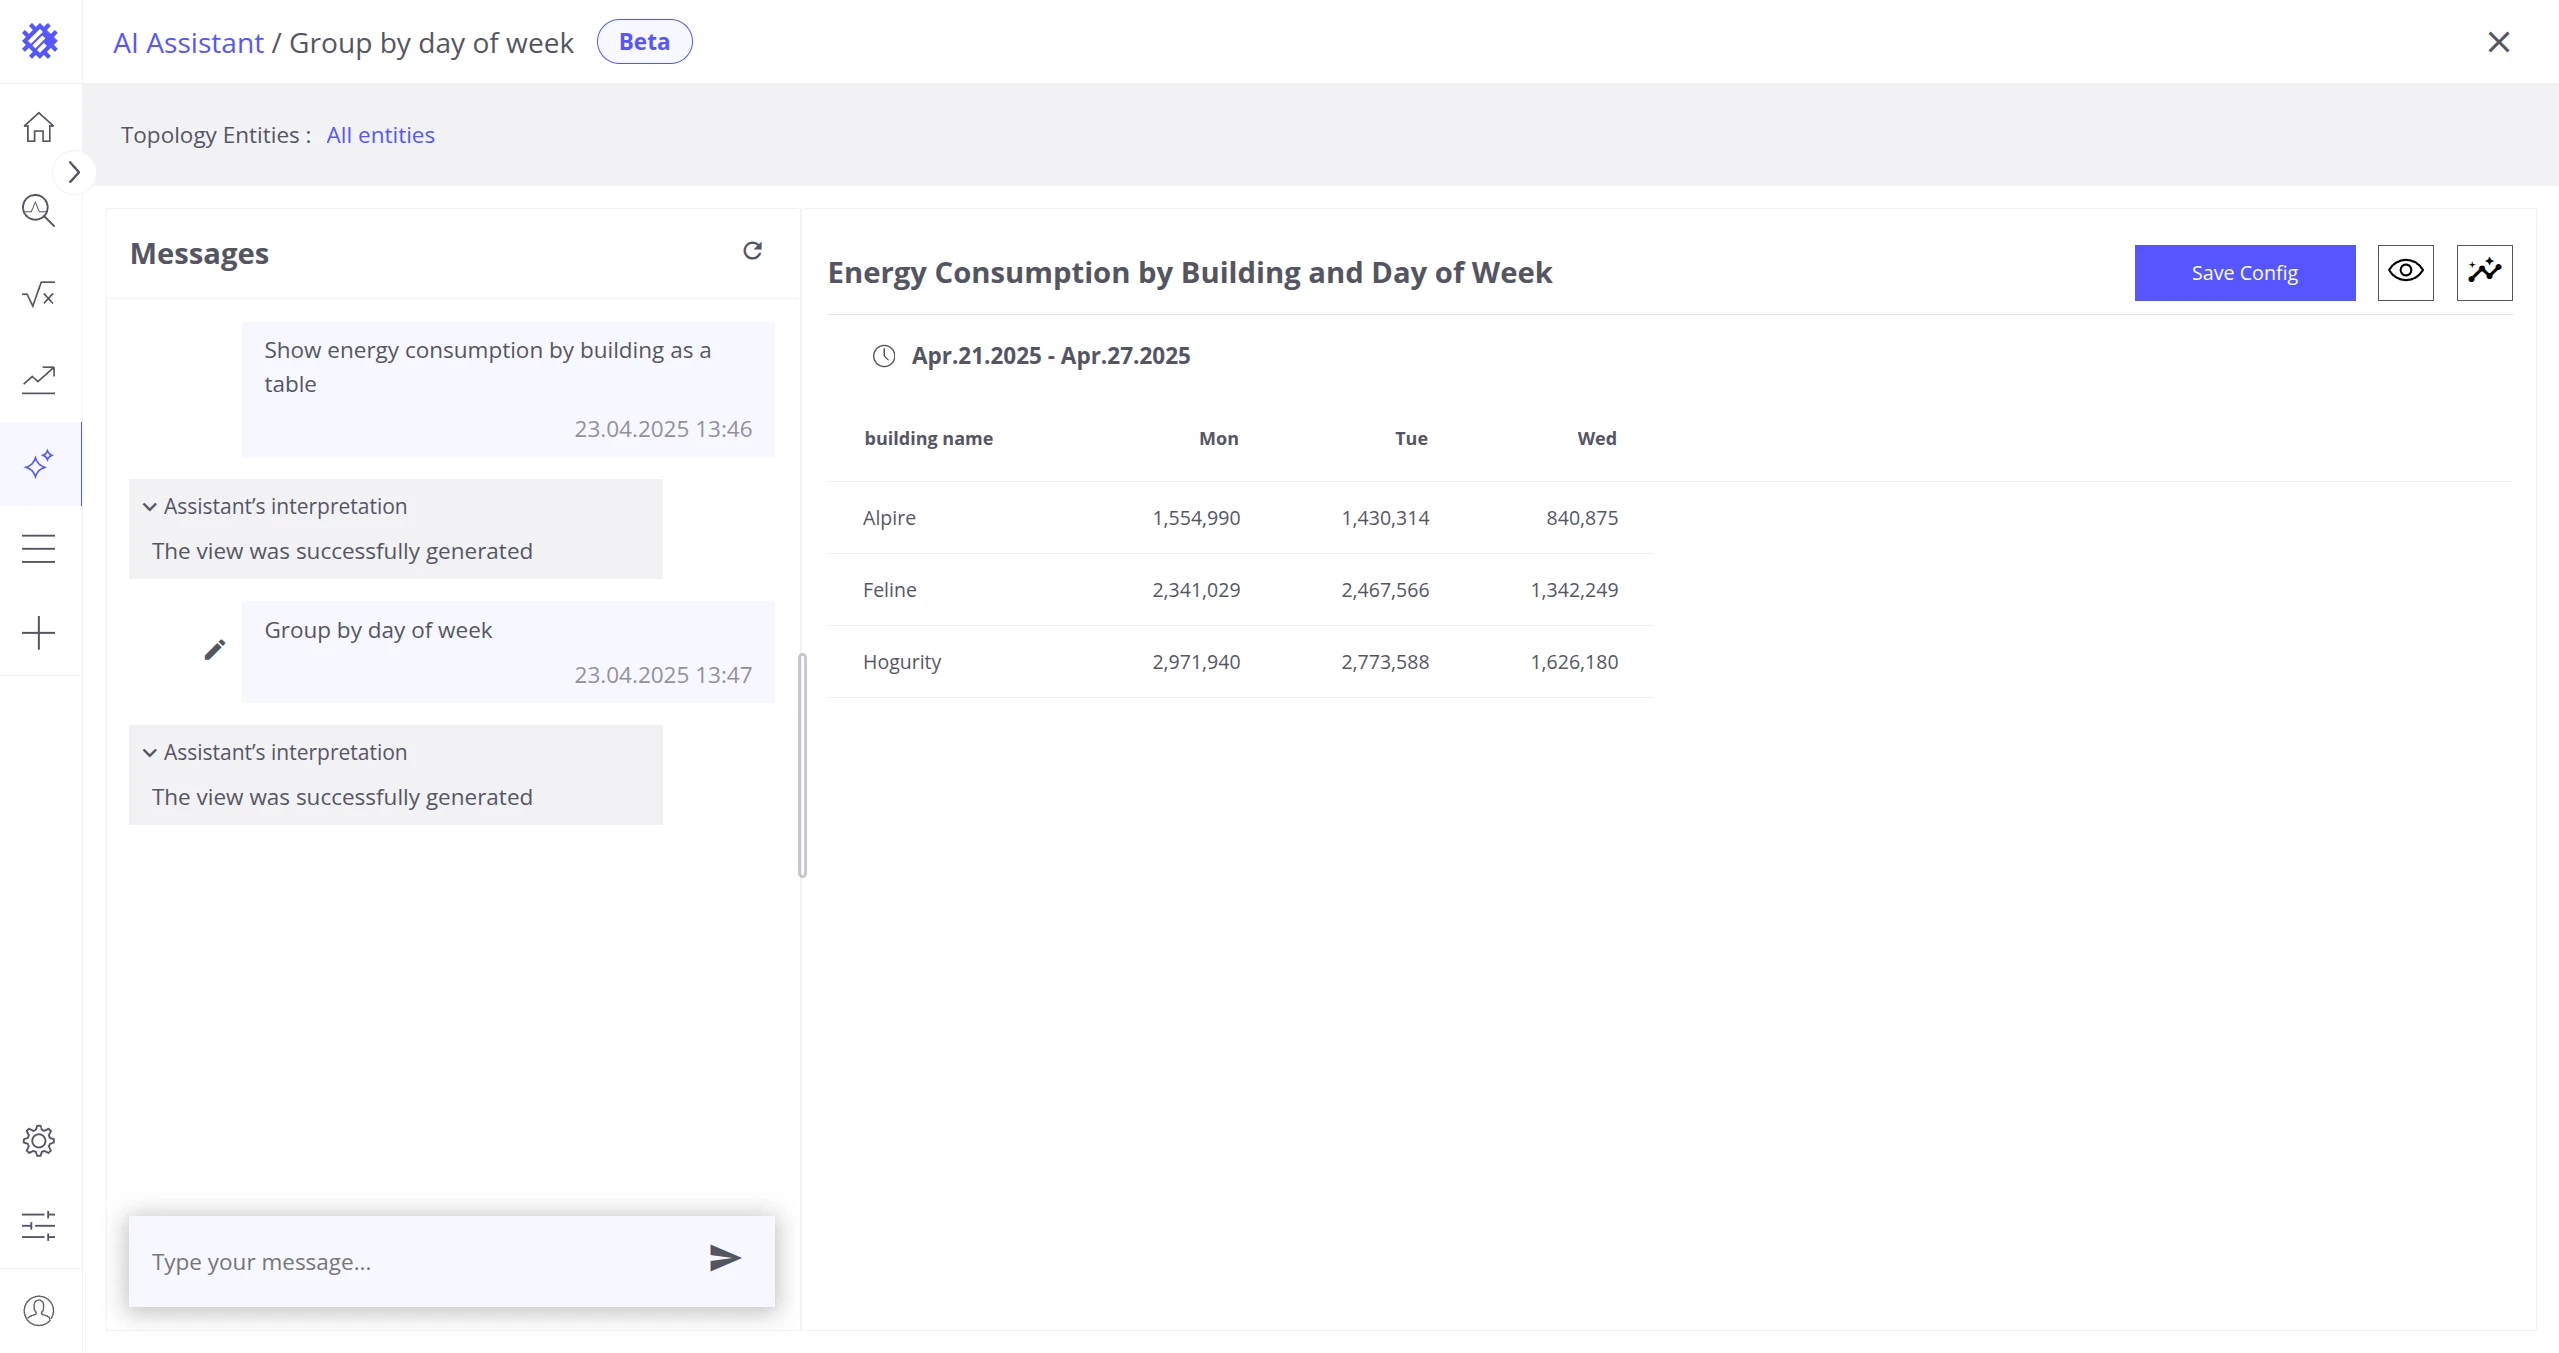
- If needed, send follow-up messages to refine the result.

Capabilities
Section titled “Capabilities”Visualization Types
Section titled “Visualization Types”The assistant works with both telemetry and attributes from your business entities.
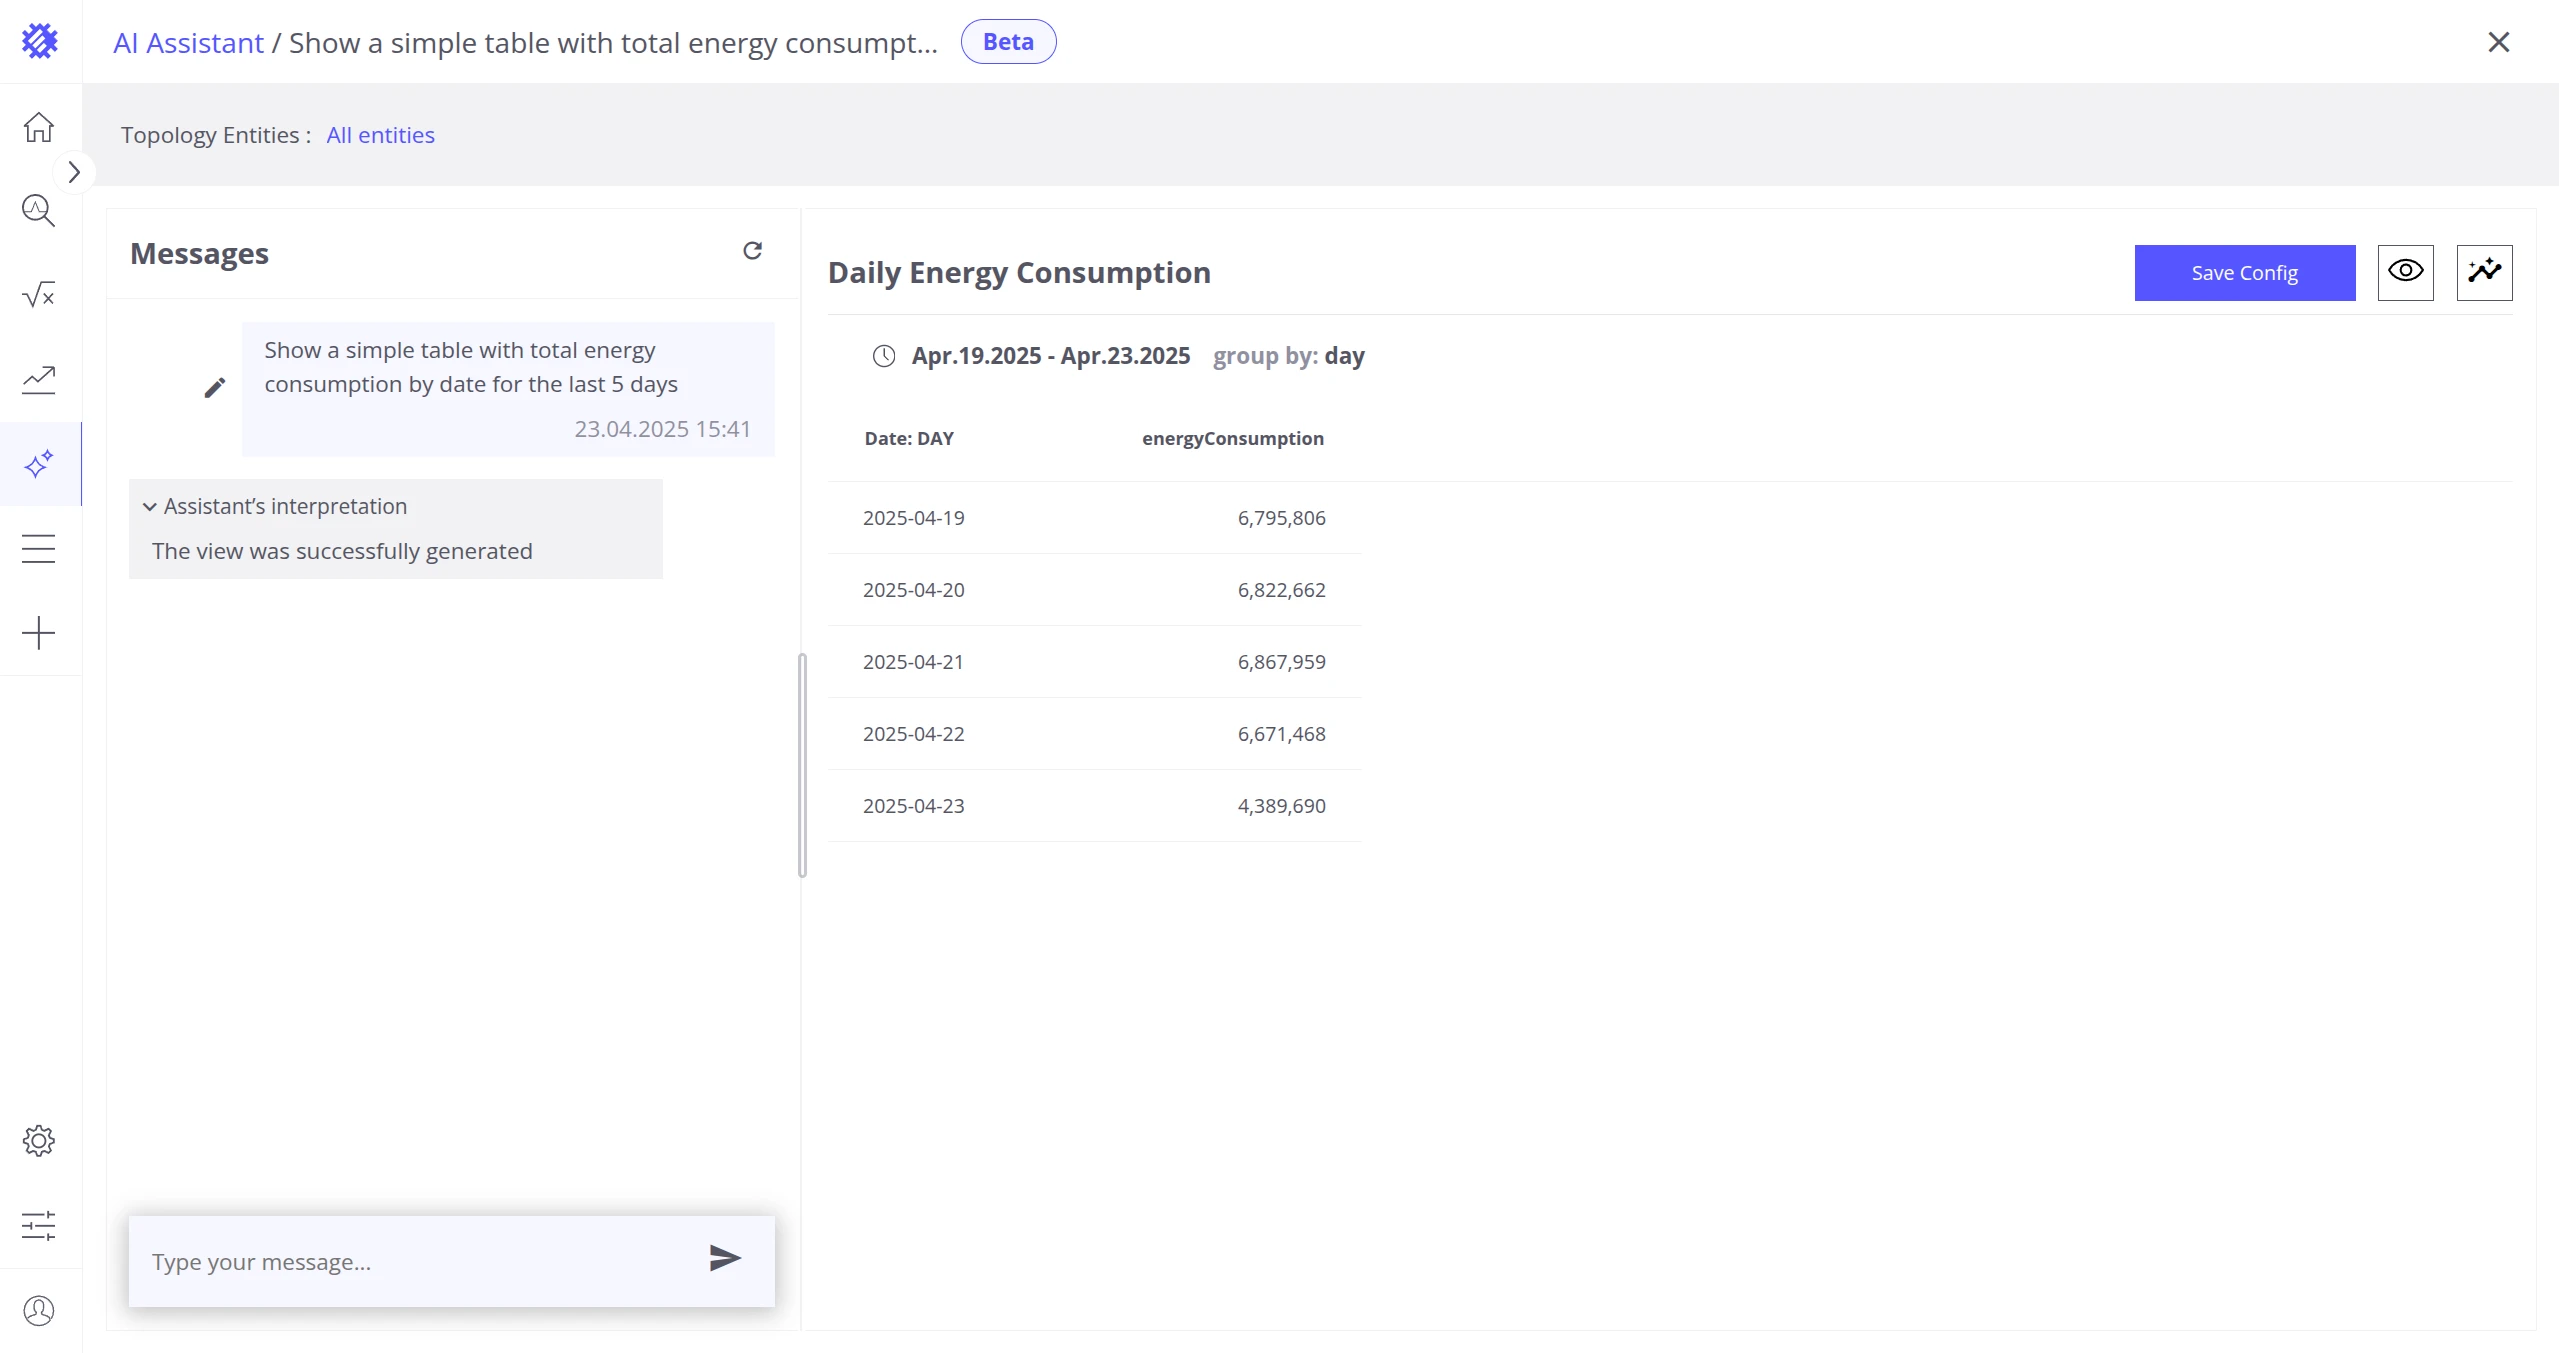
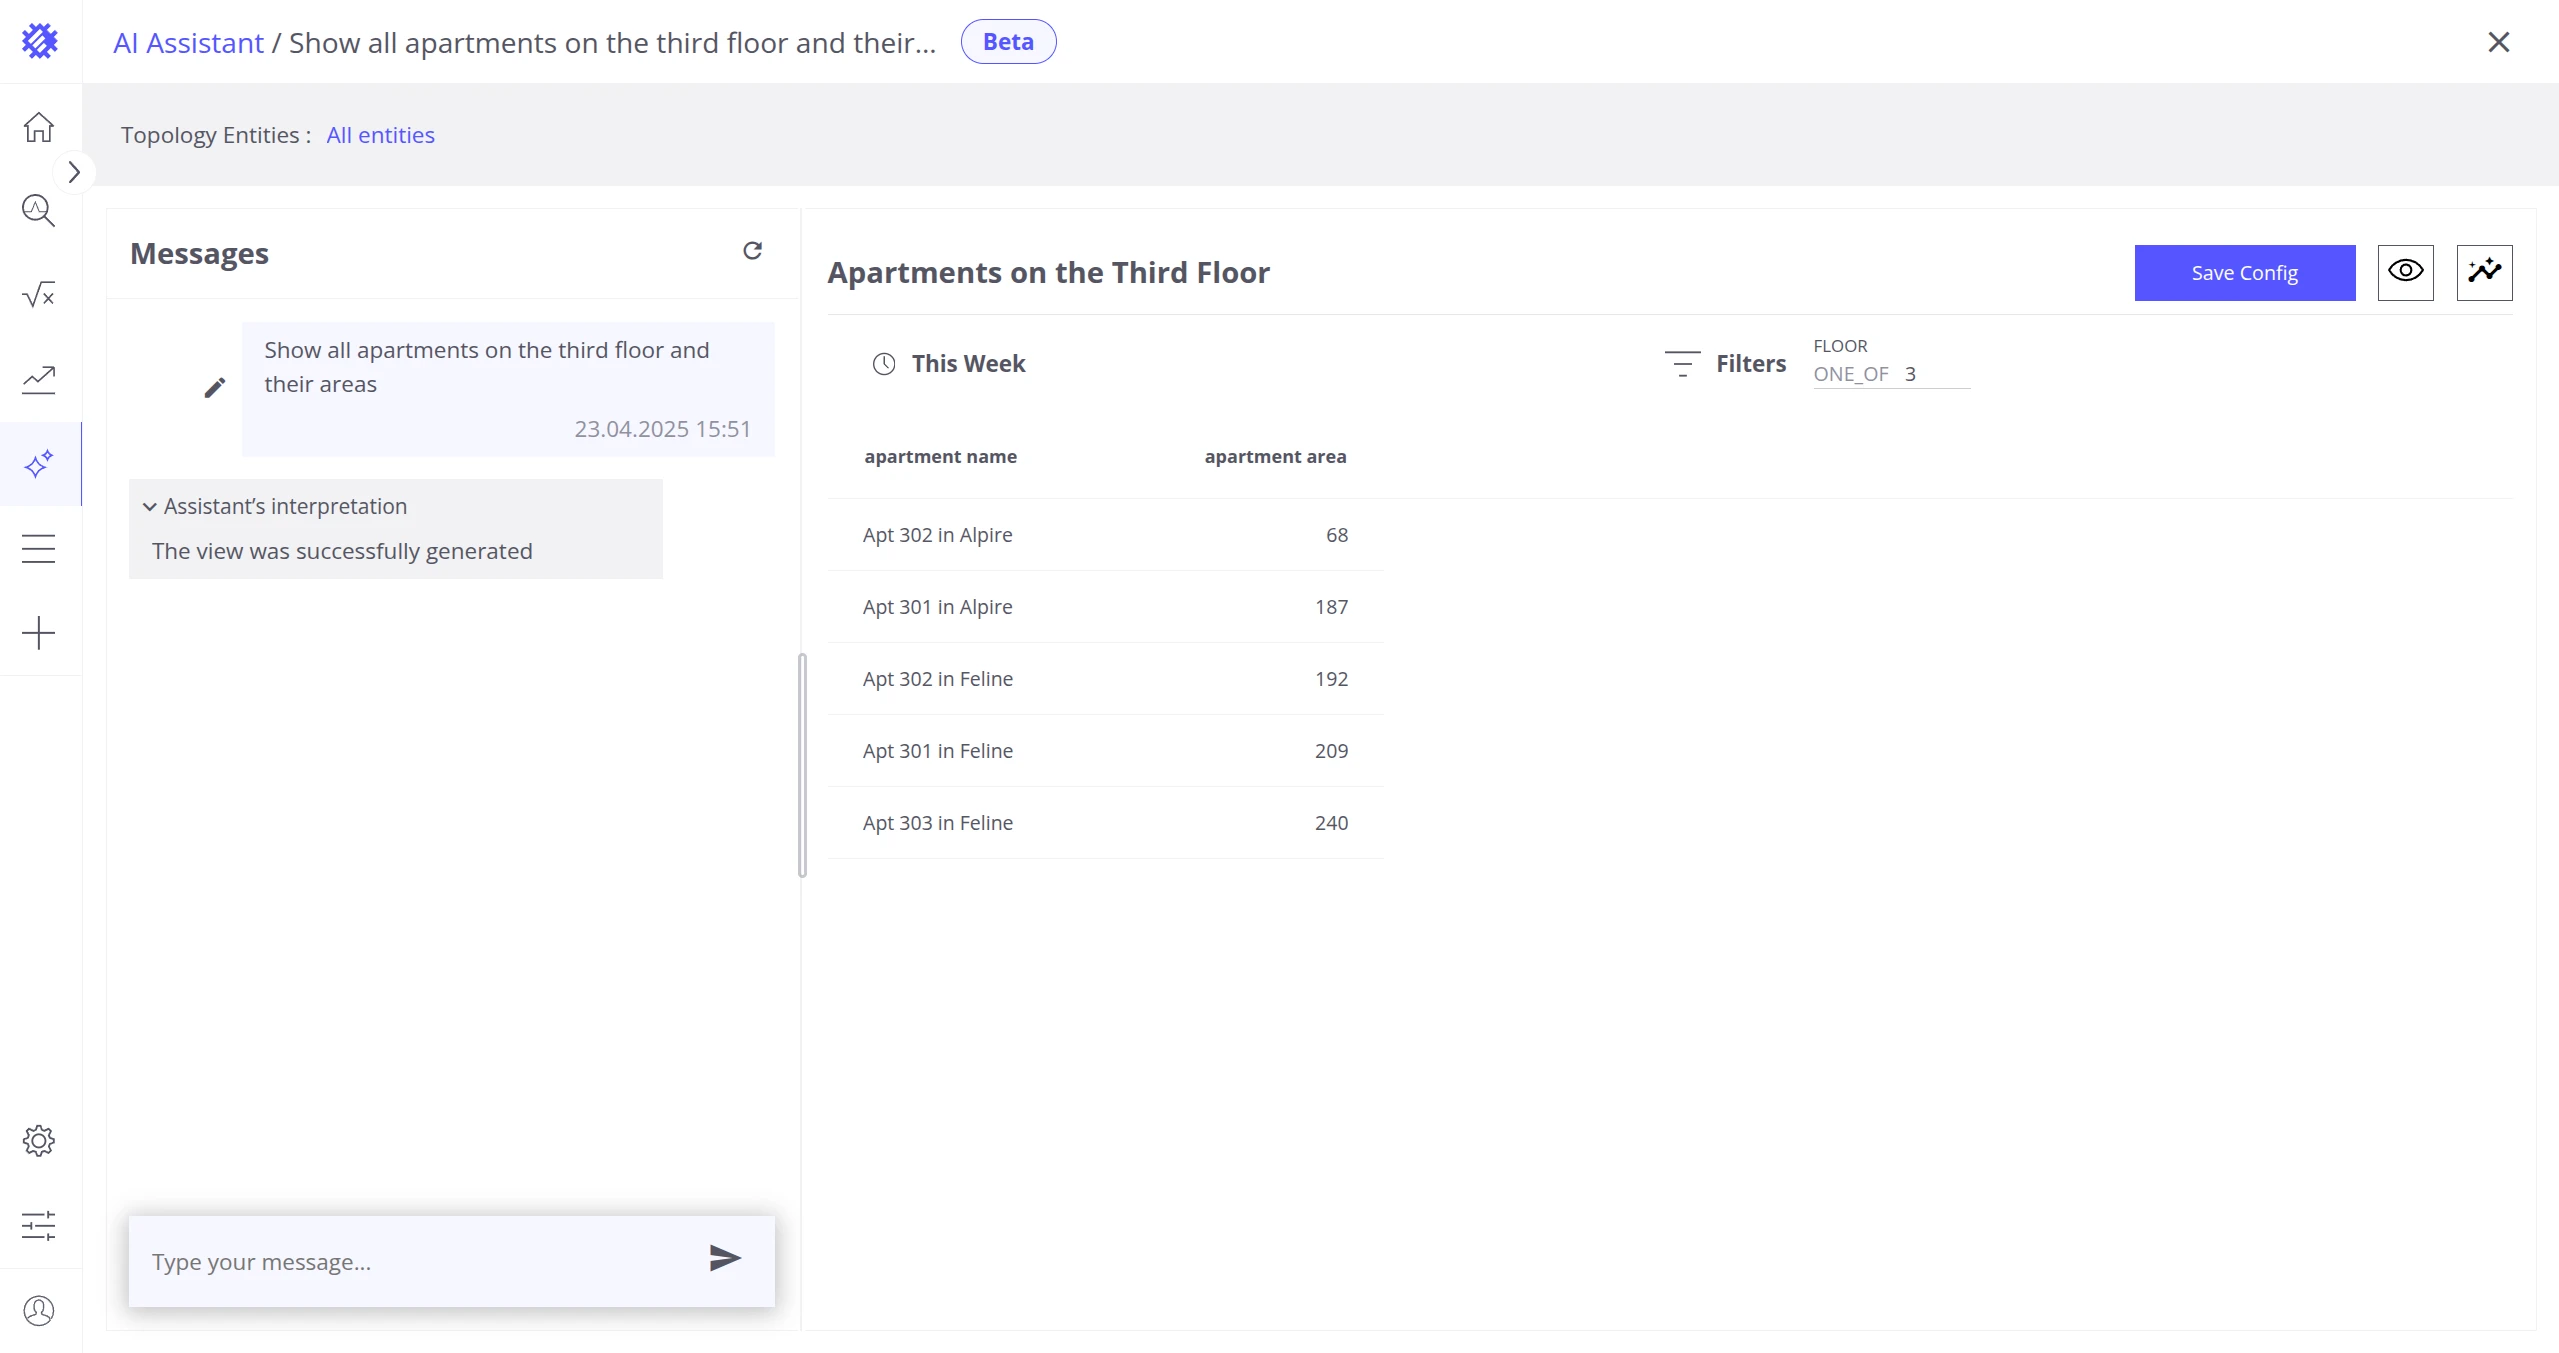
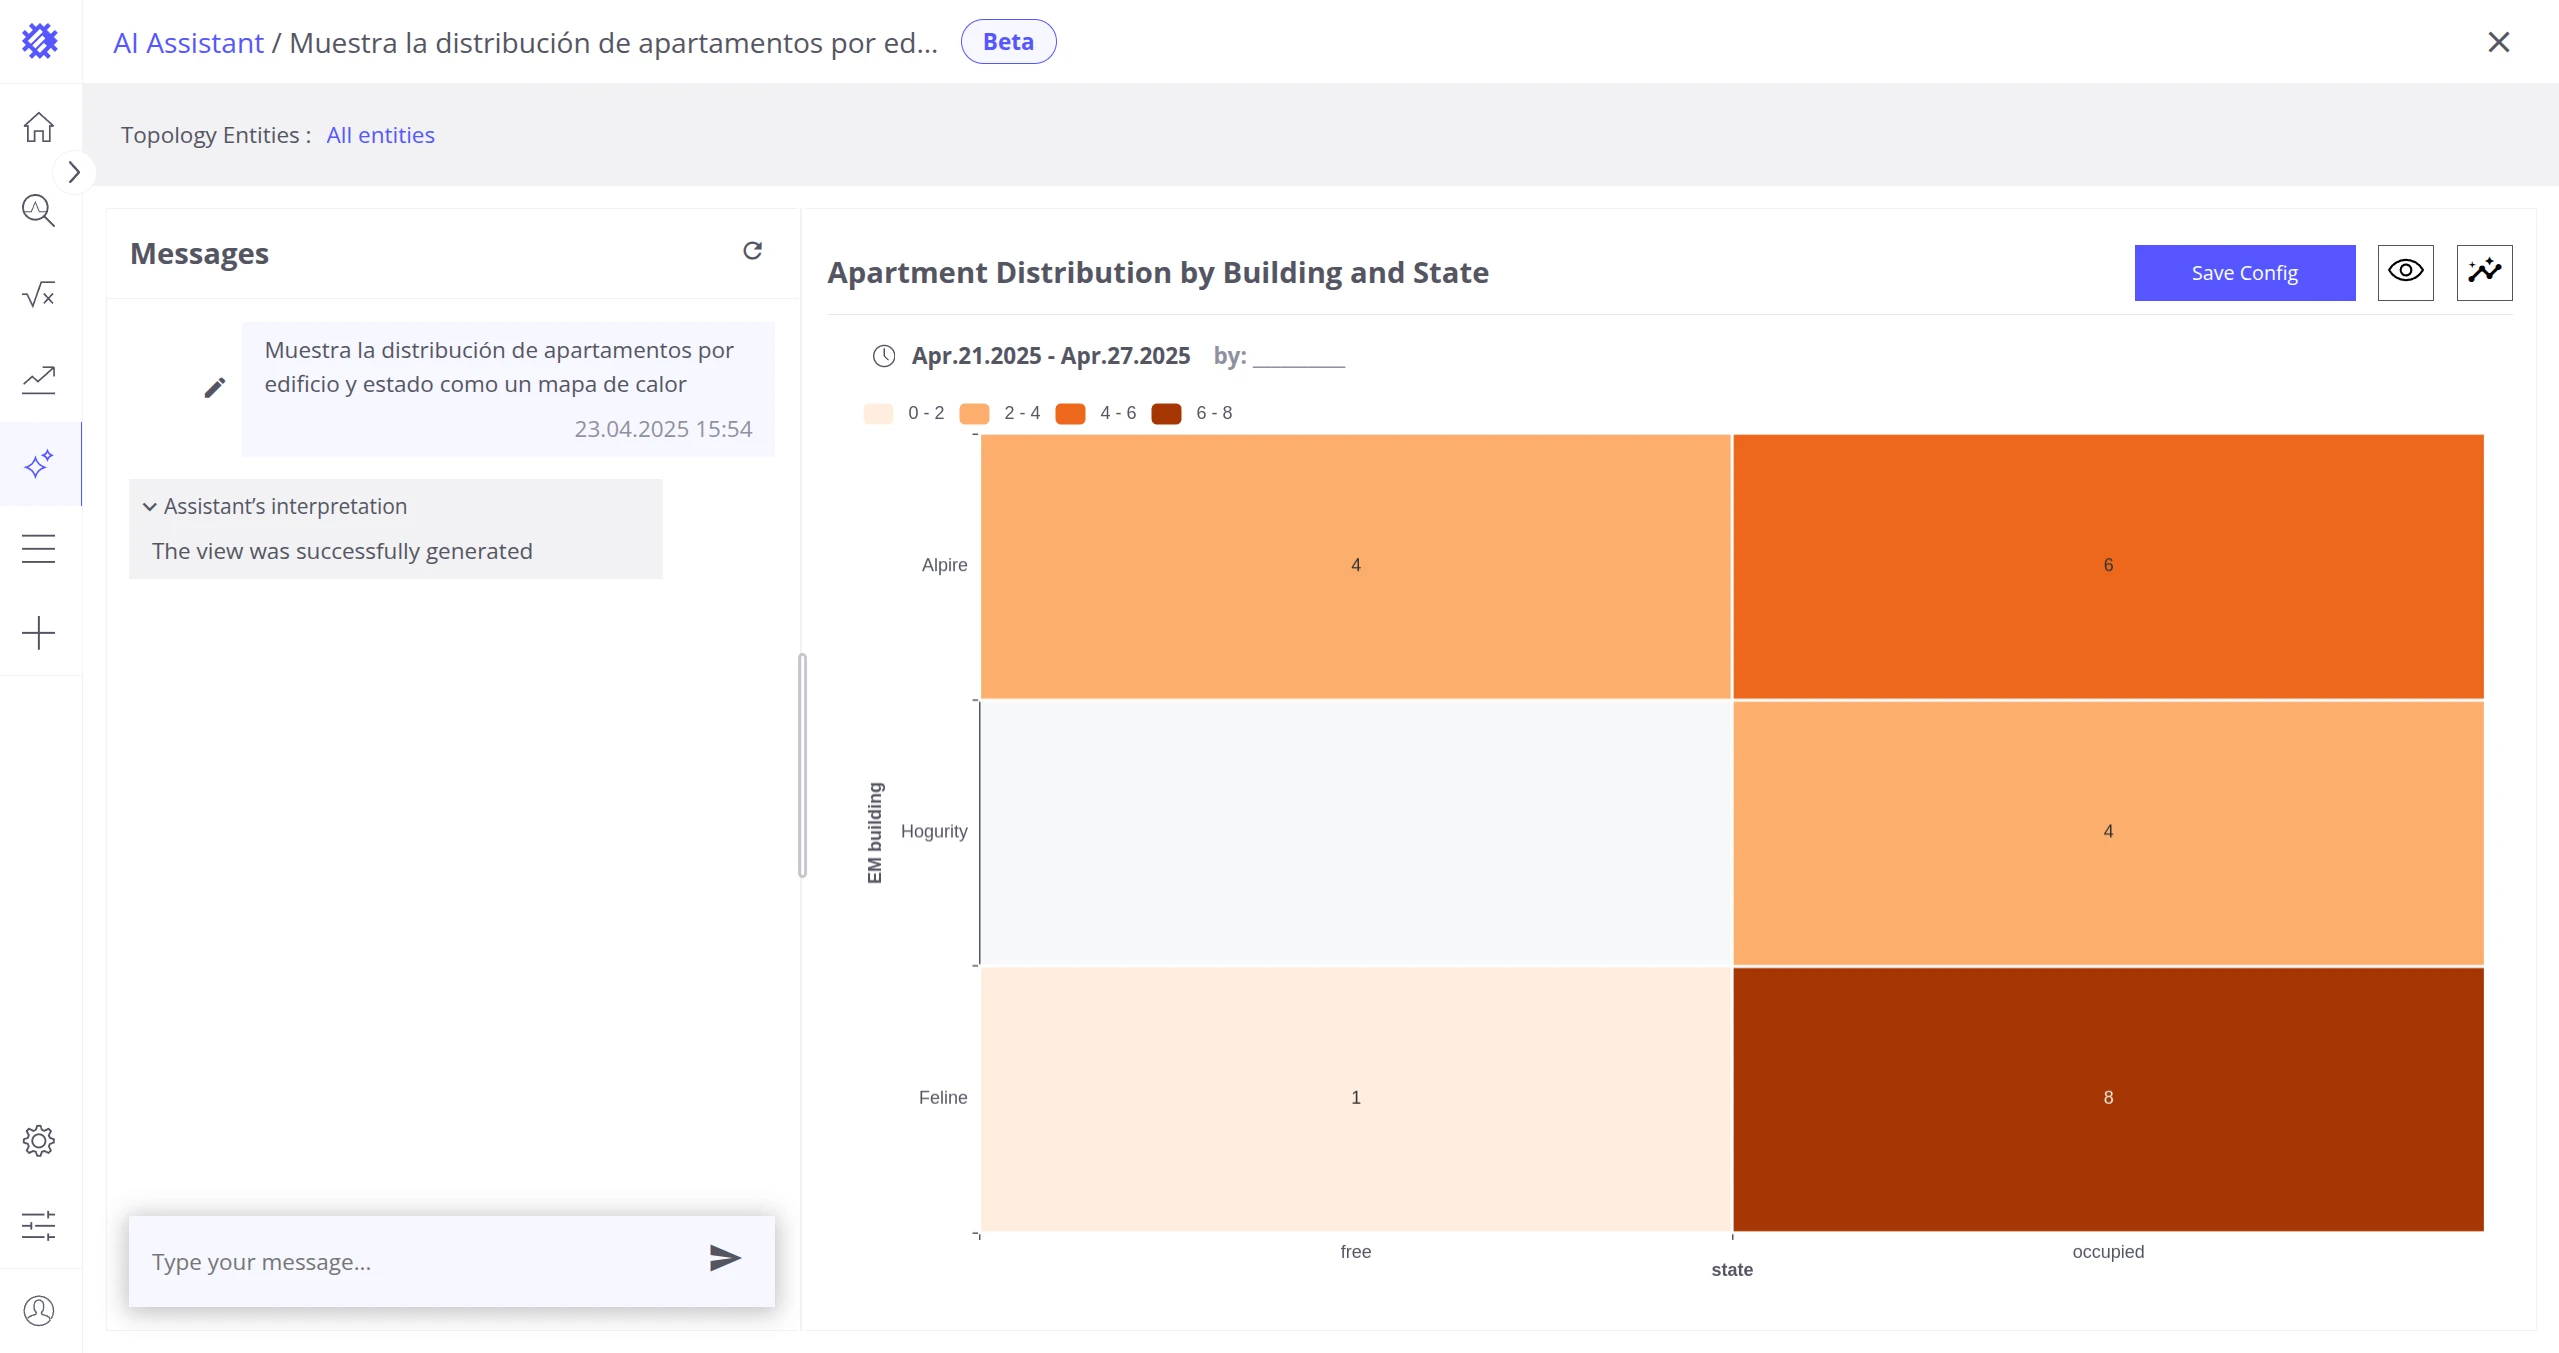
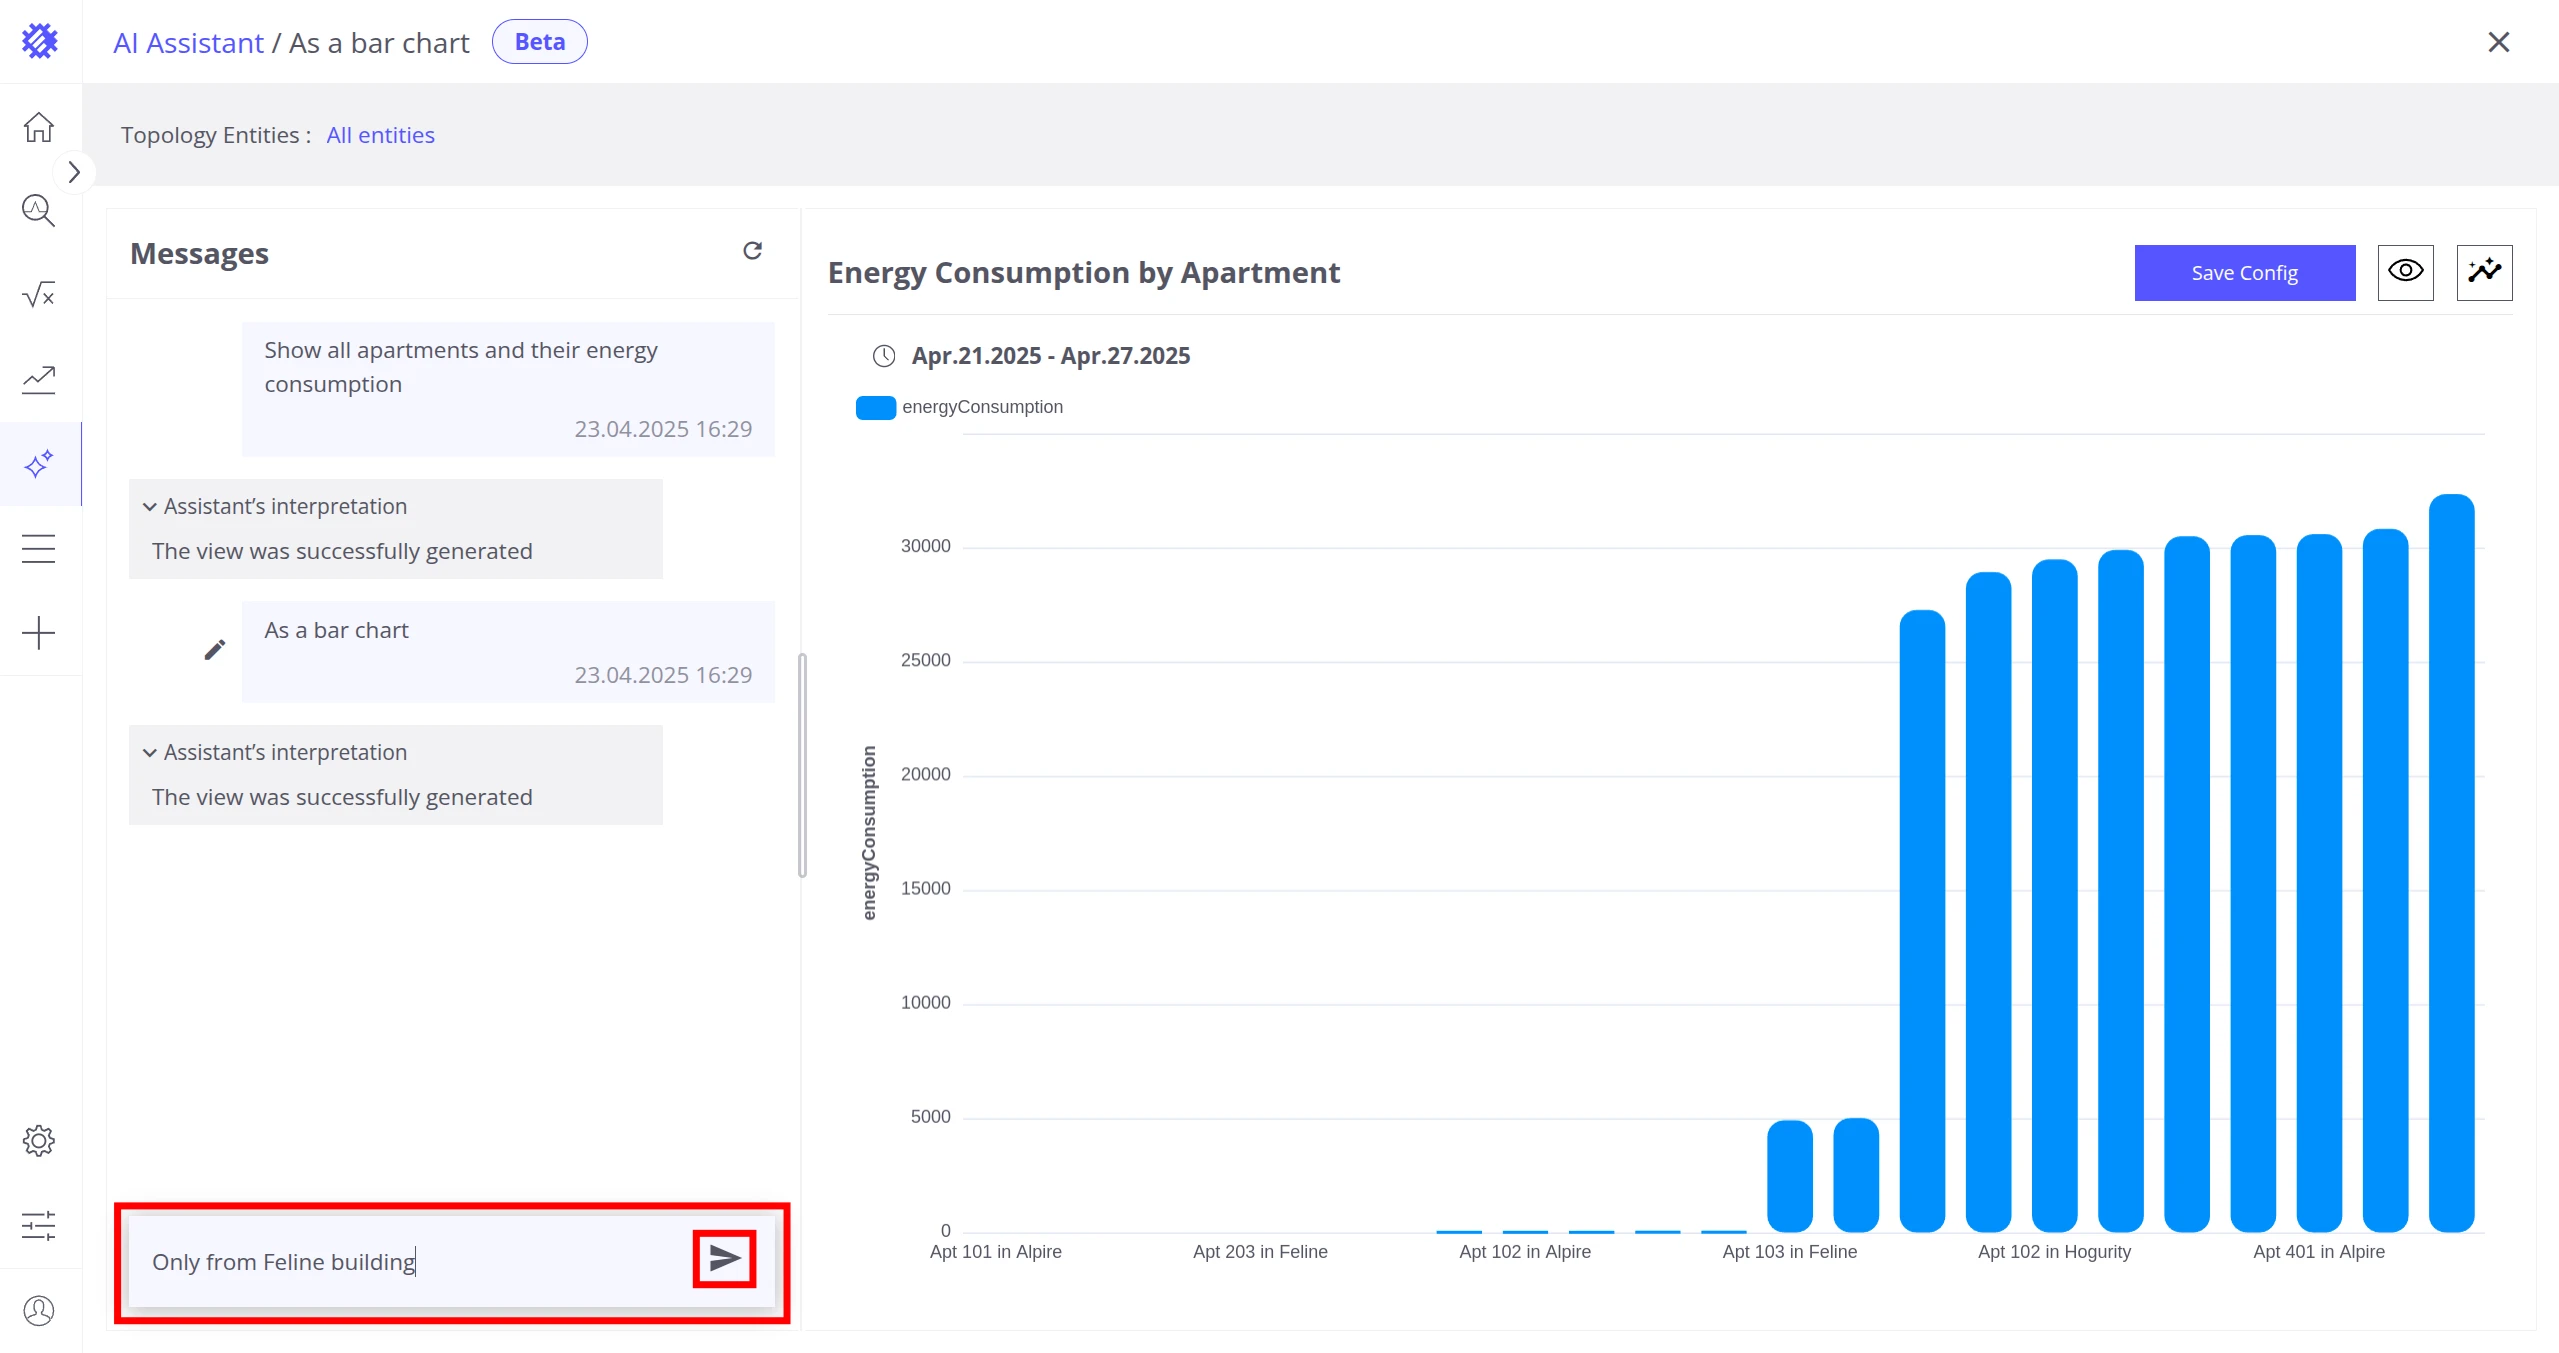
The assistant can generate the following visualization types:
| Visualization | Notes |
|---|---|
| Table | Standard table without dynamic columns |
| Dynamic Table | Table with dynamic columns |
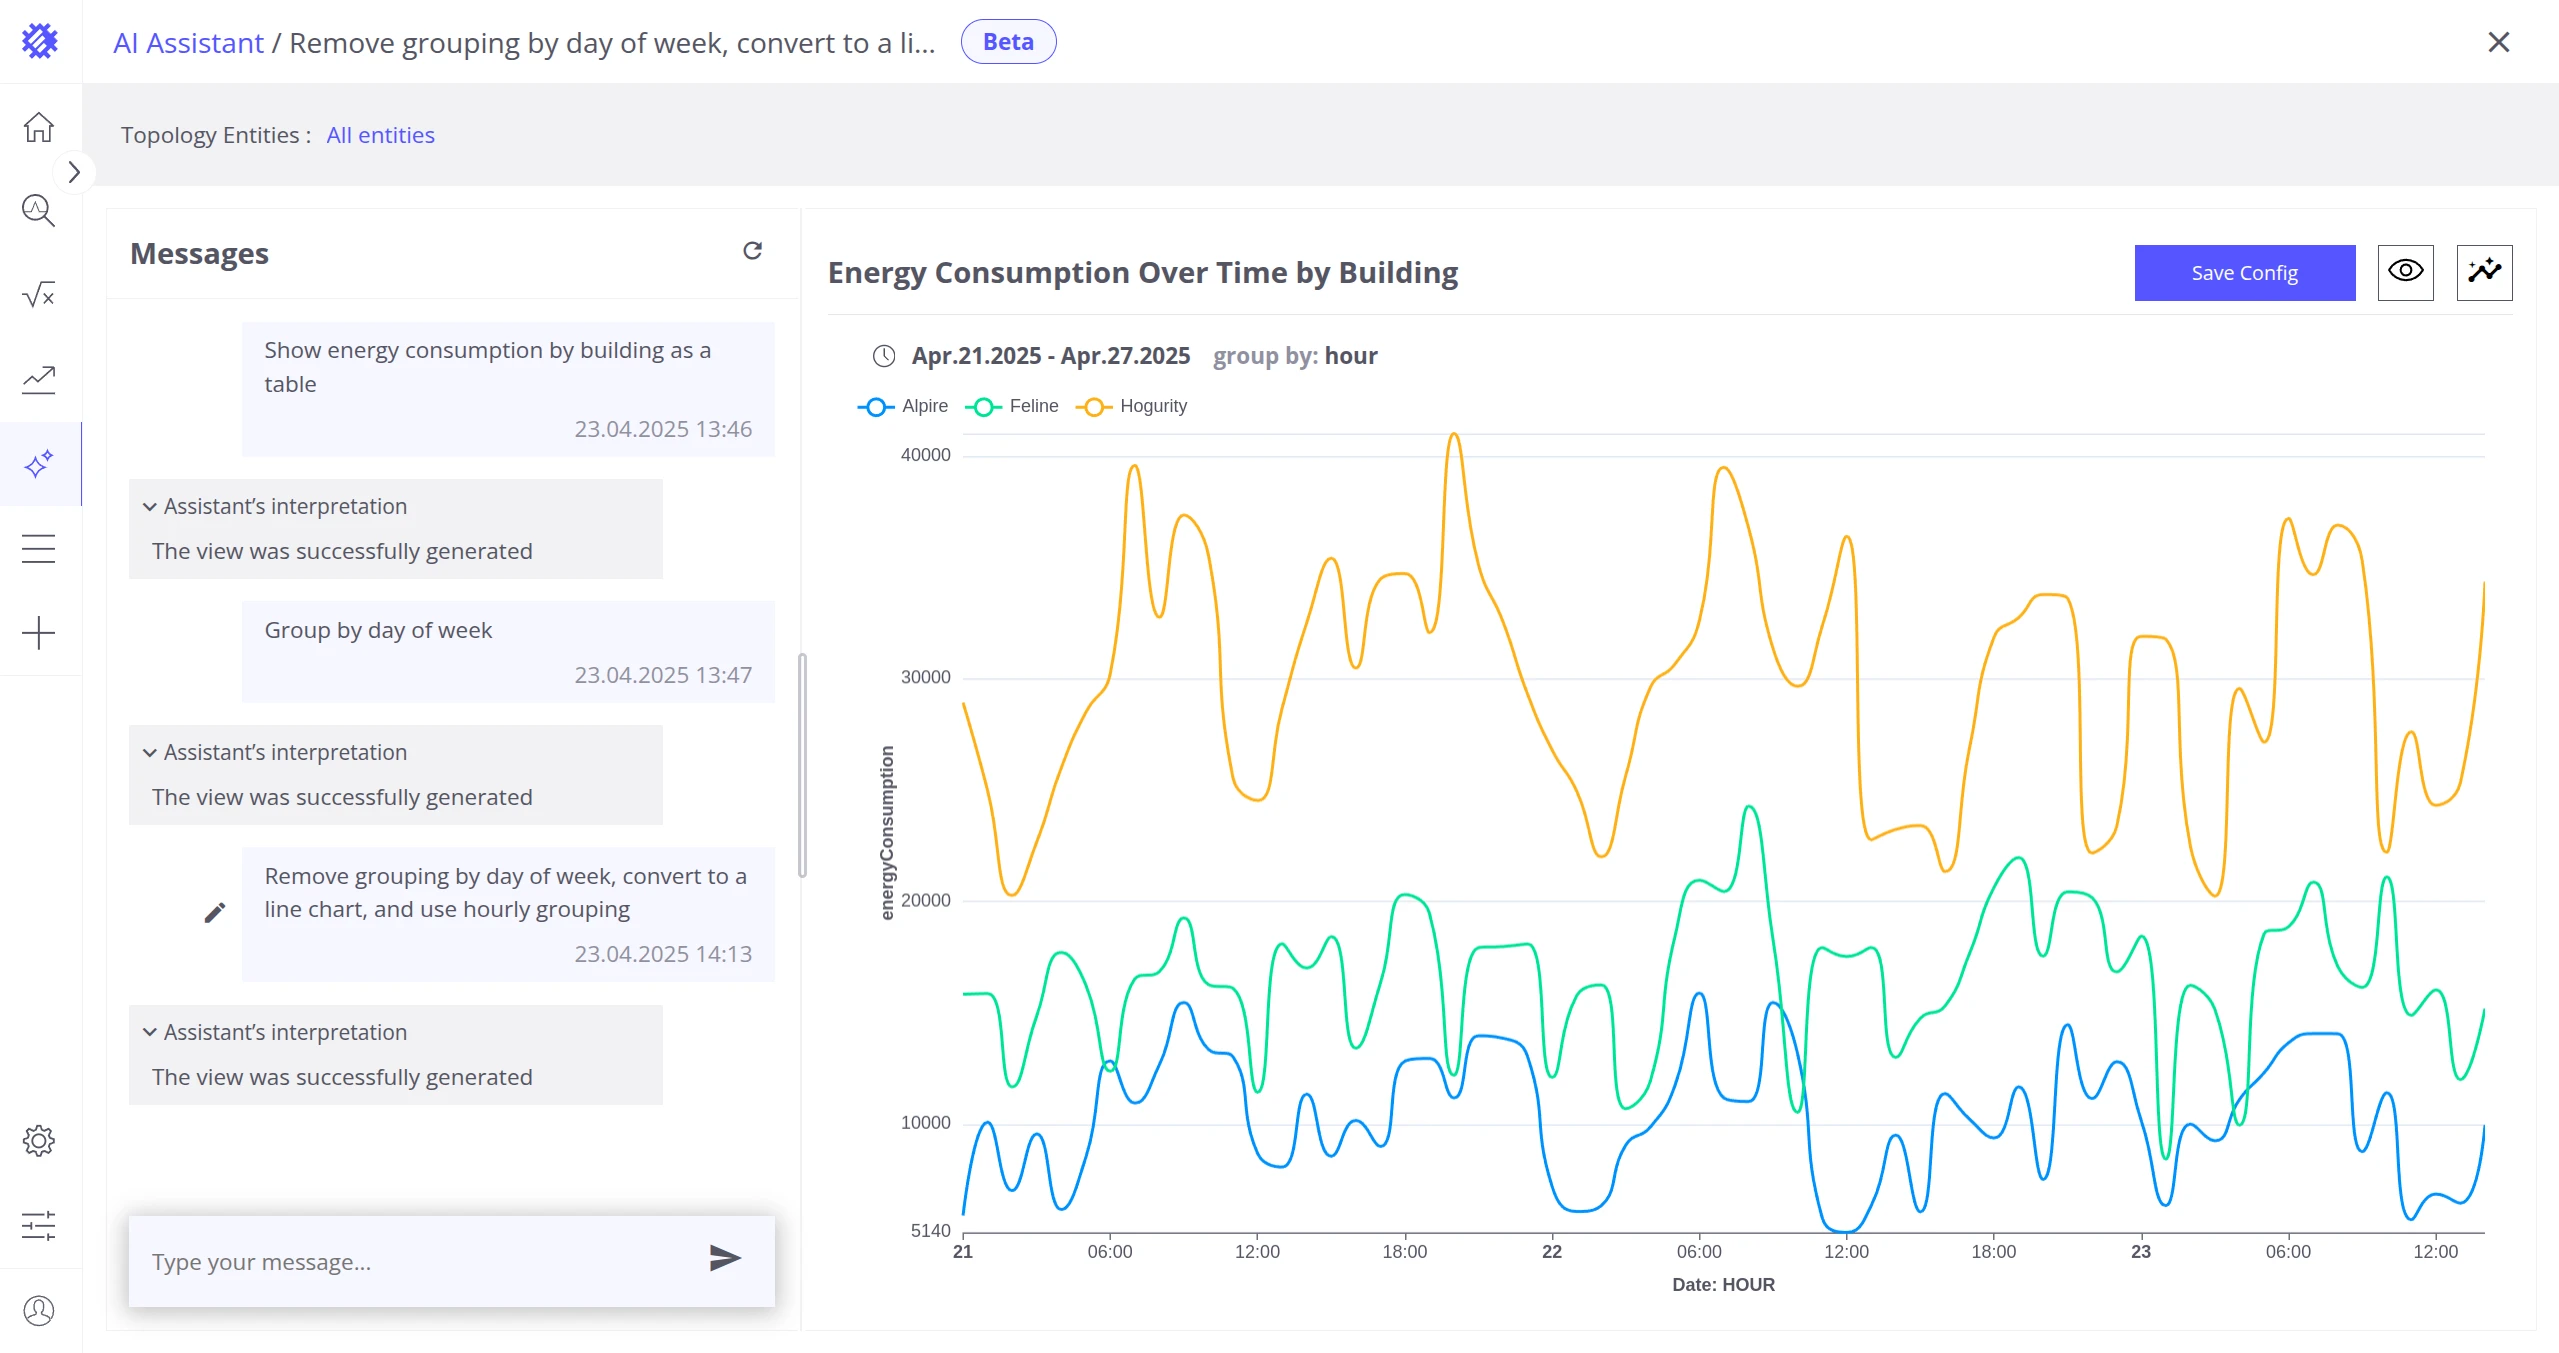
| Line Chart | |
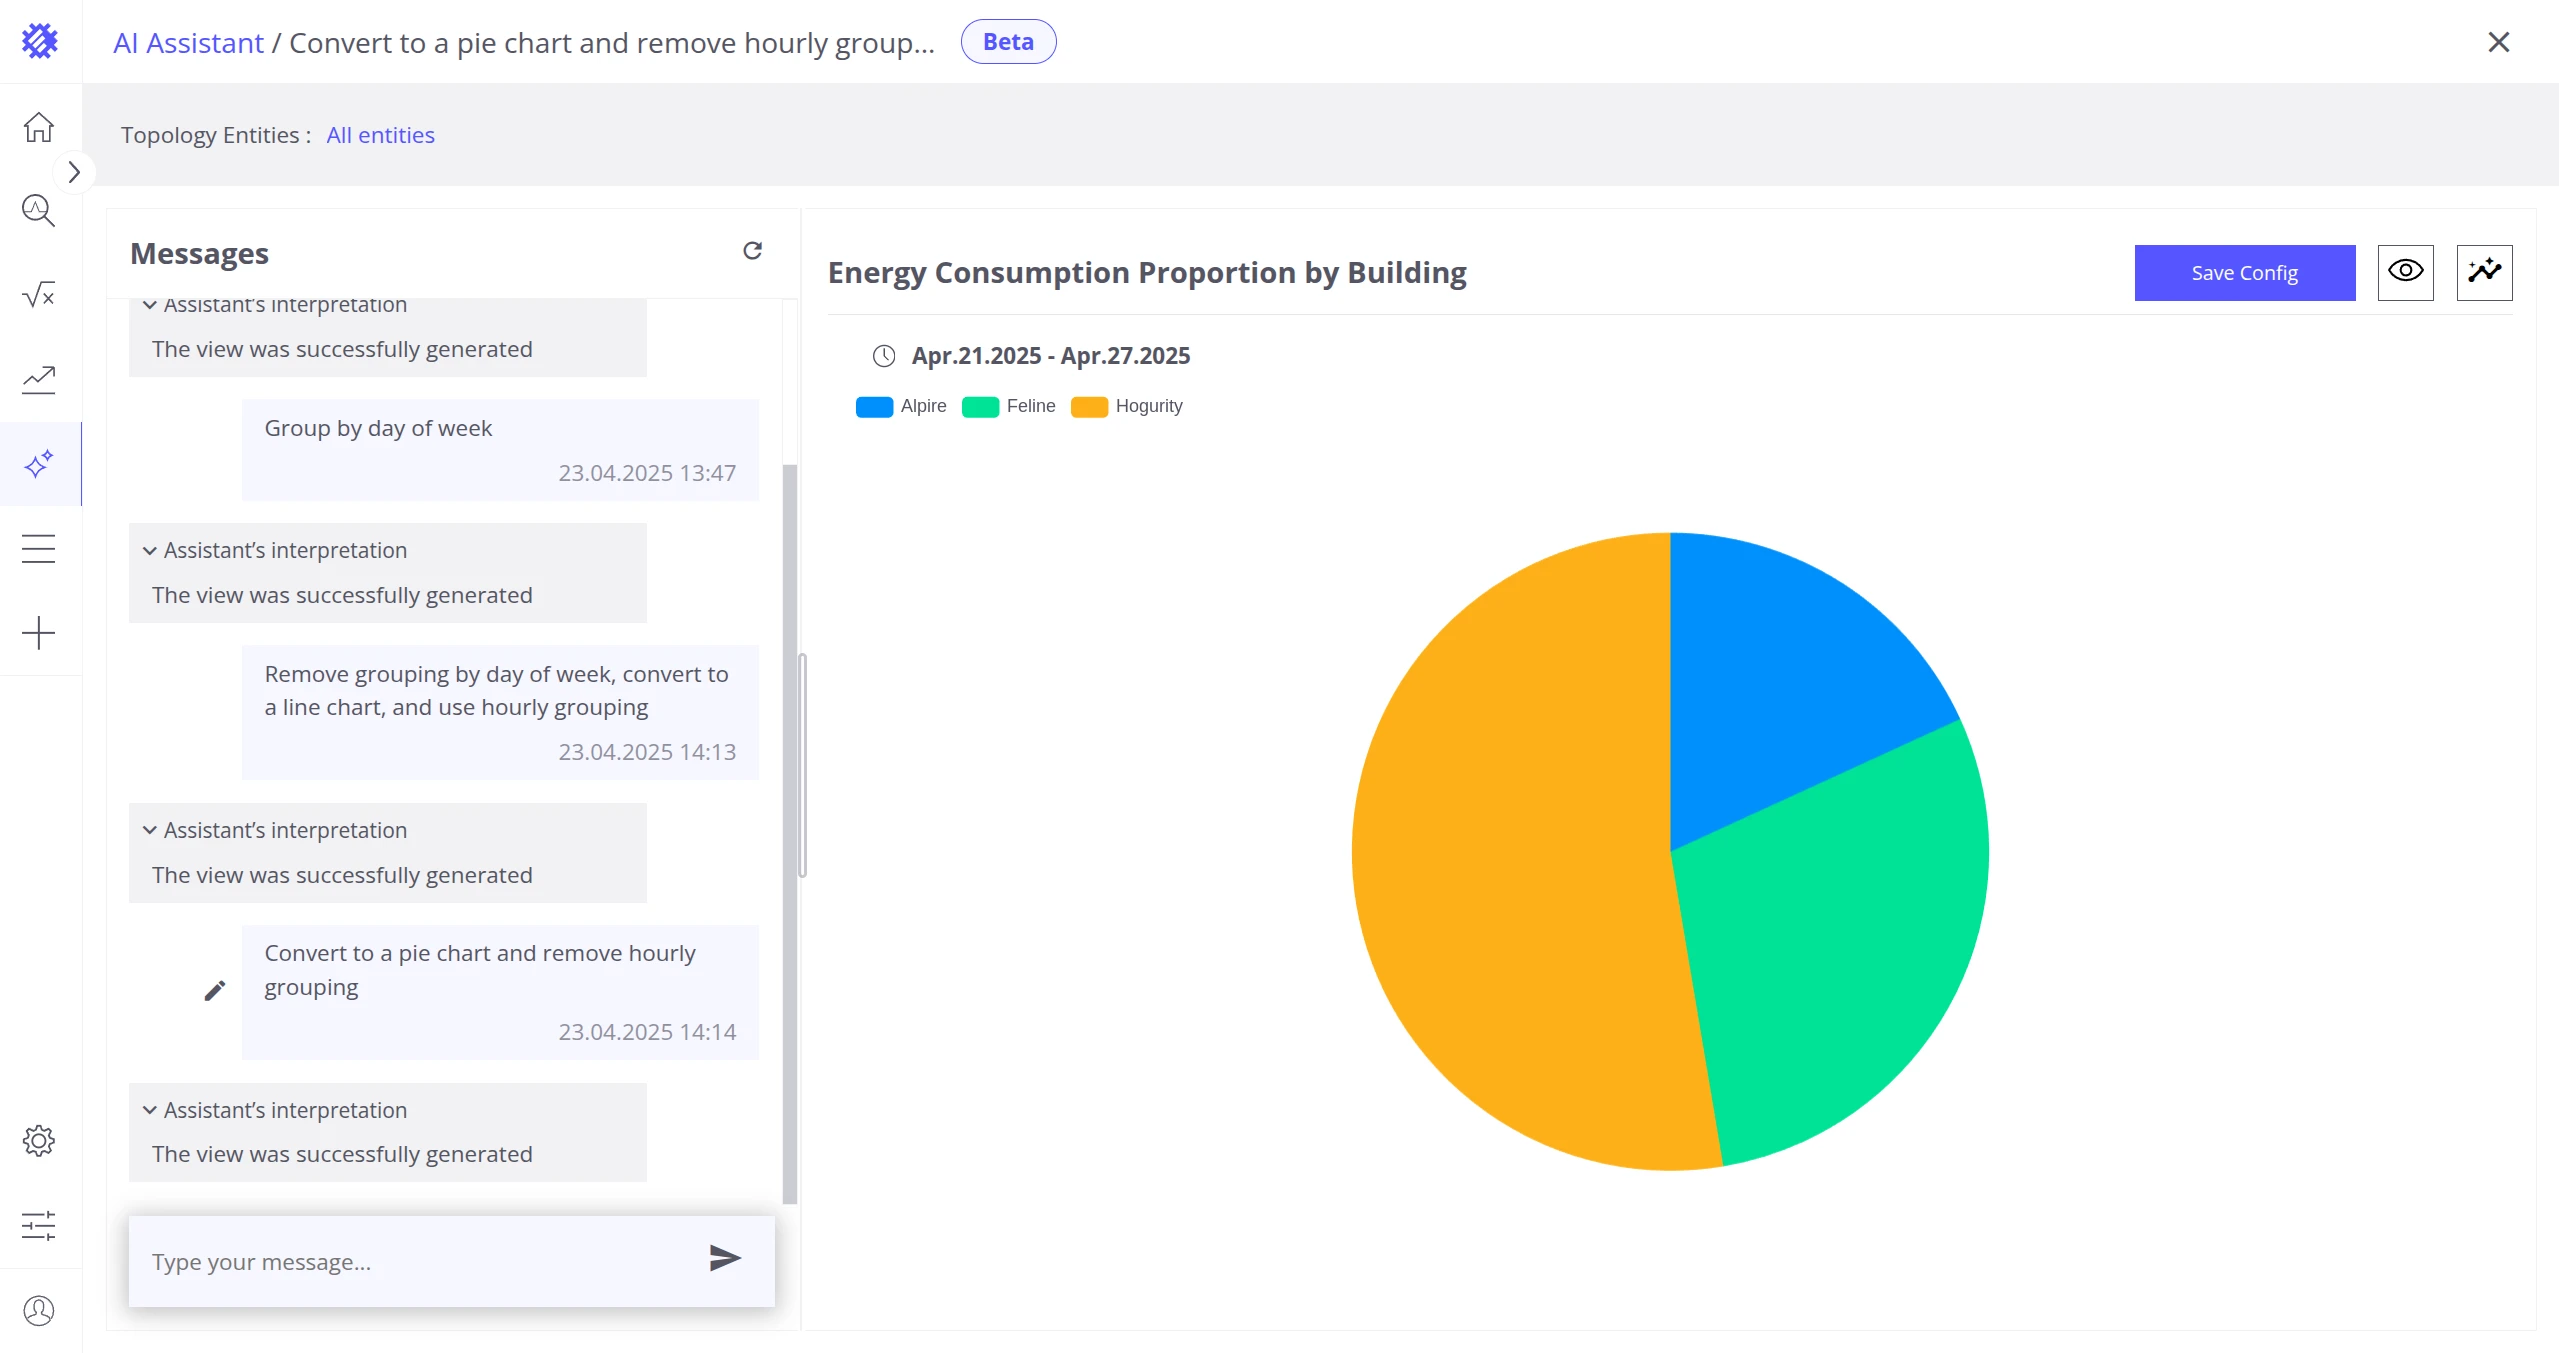
| Pie Chart | |
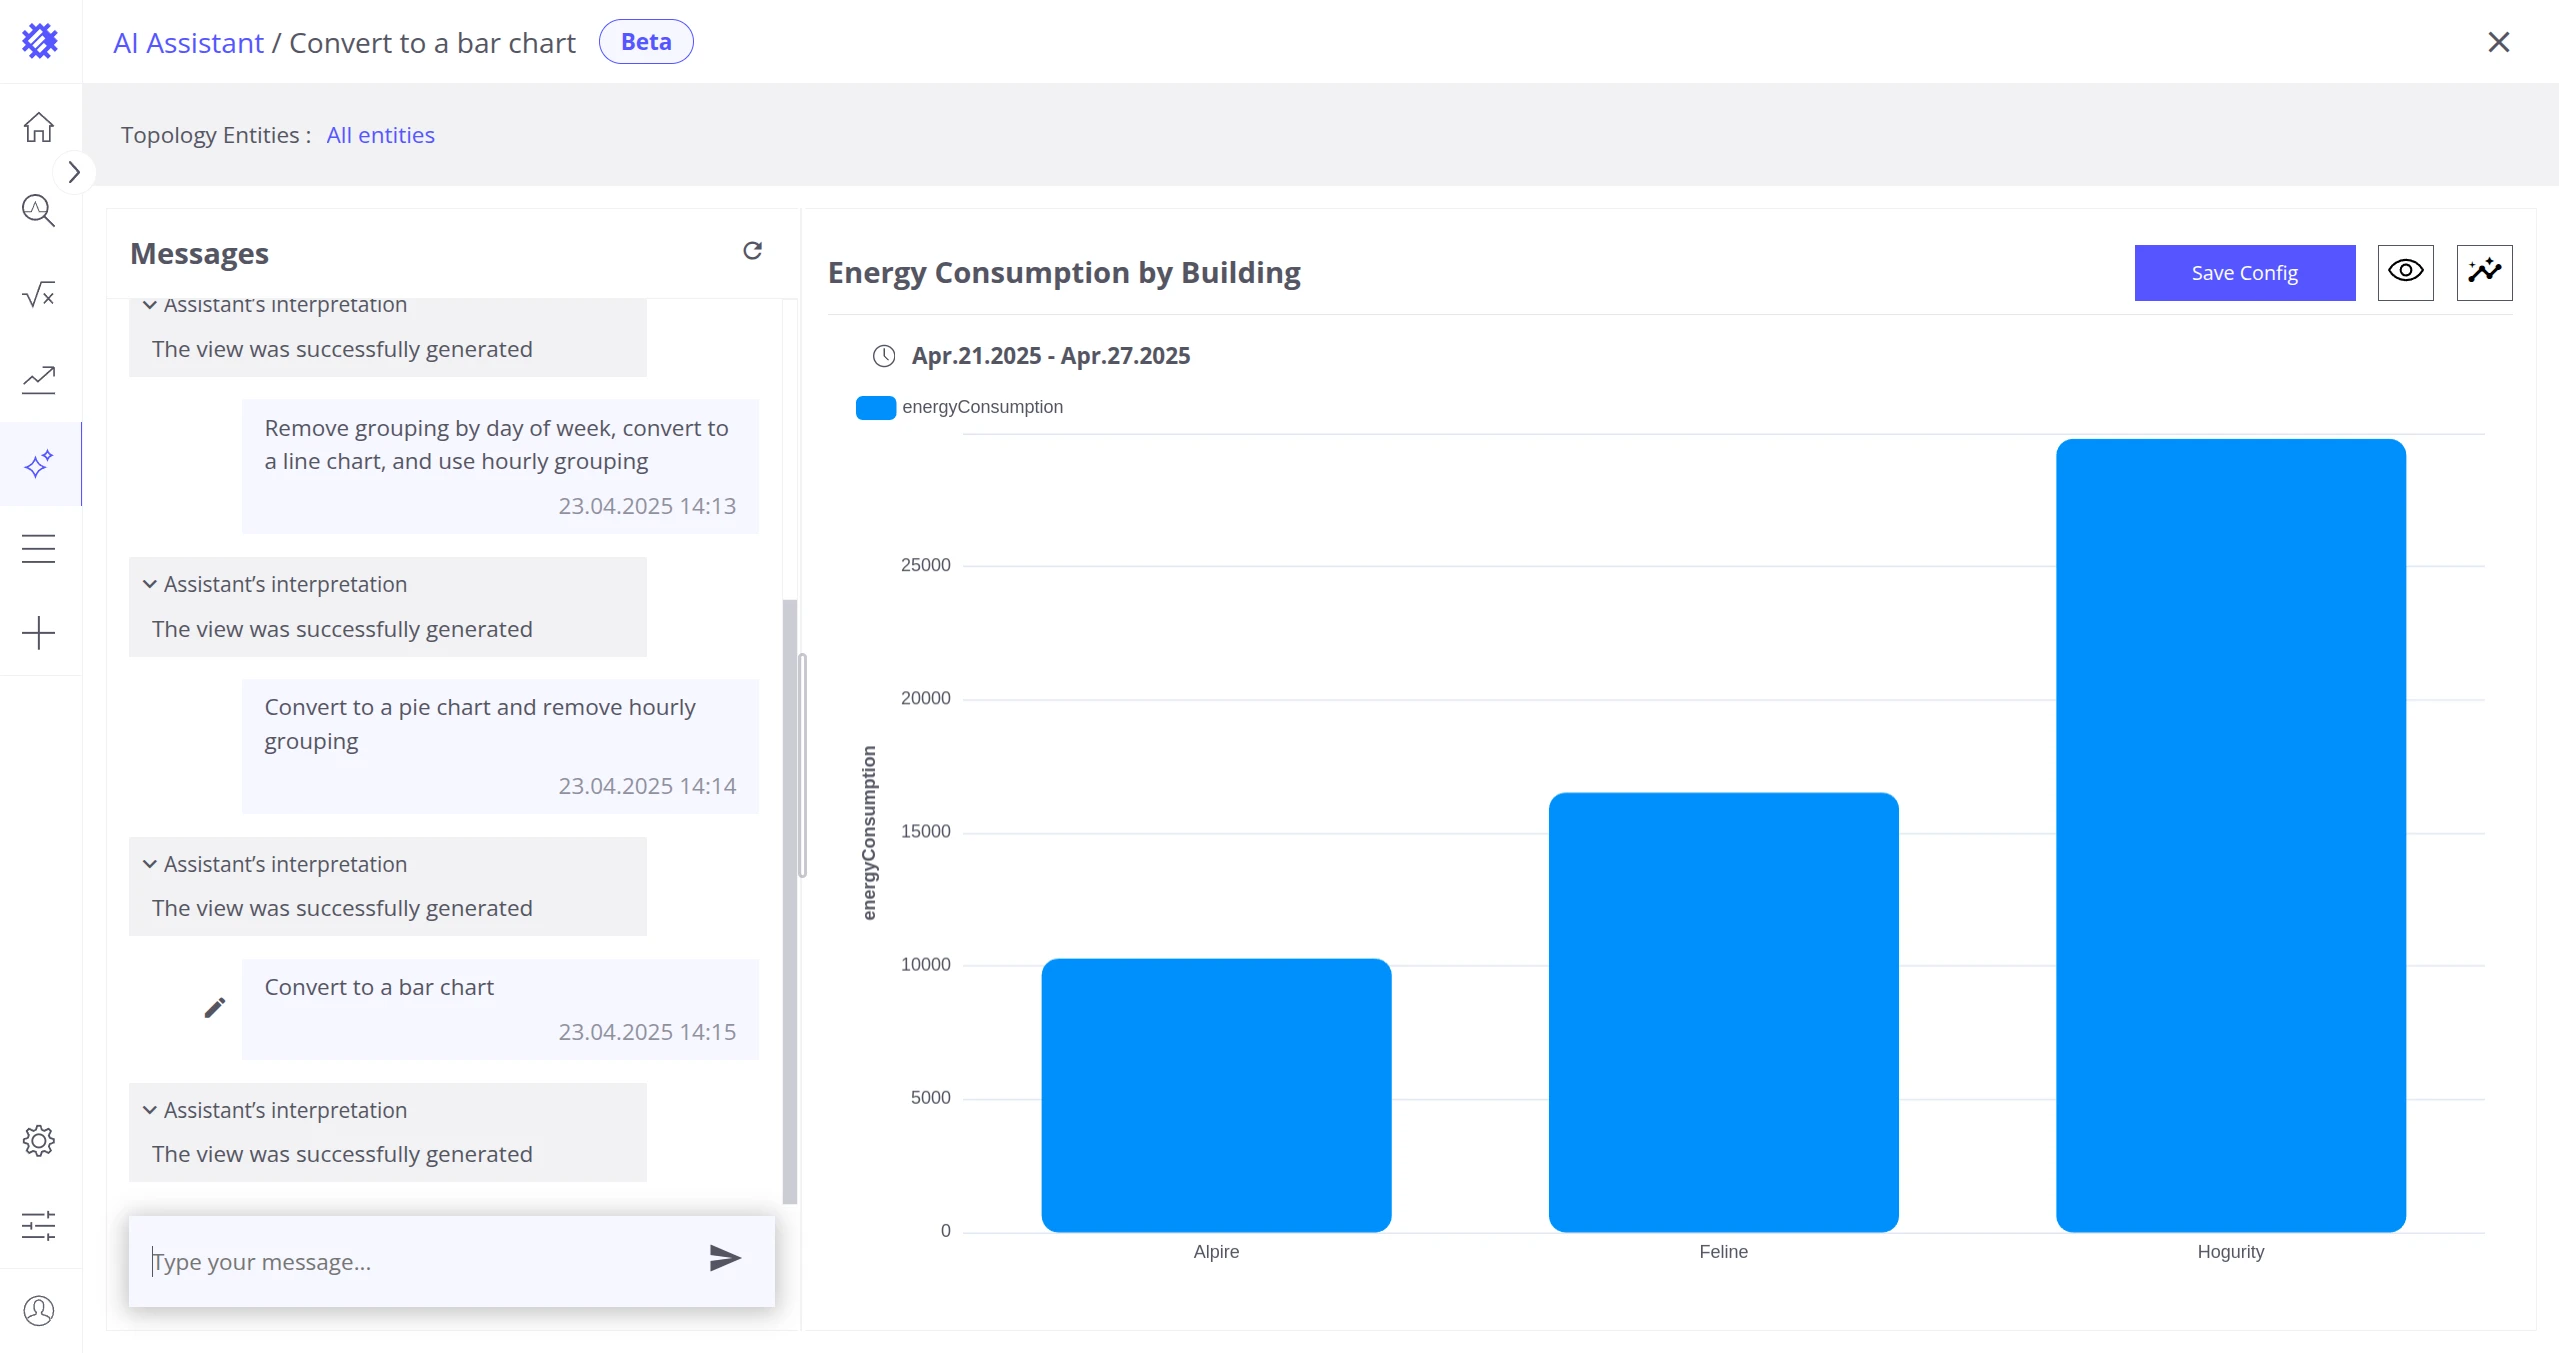
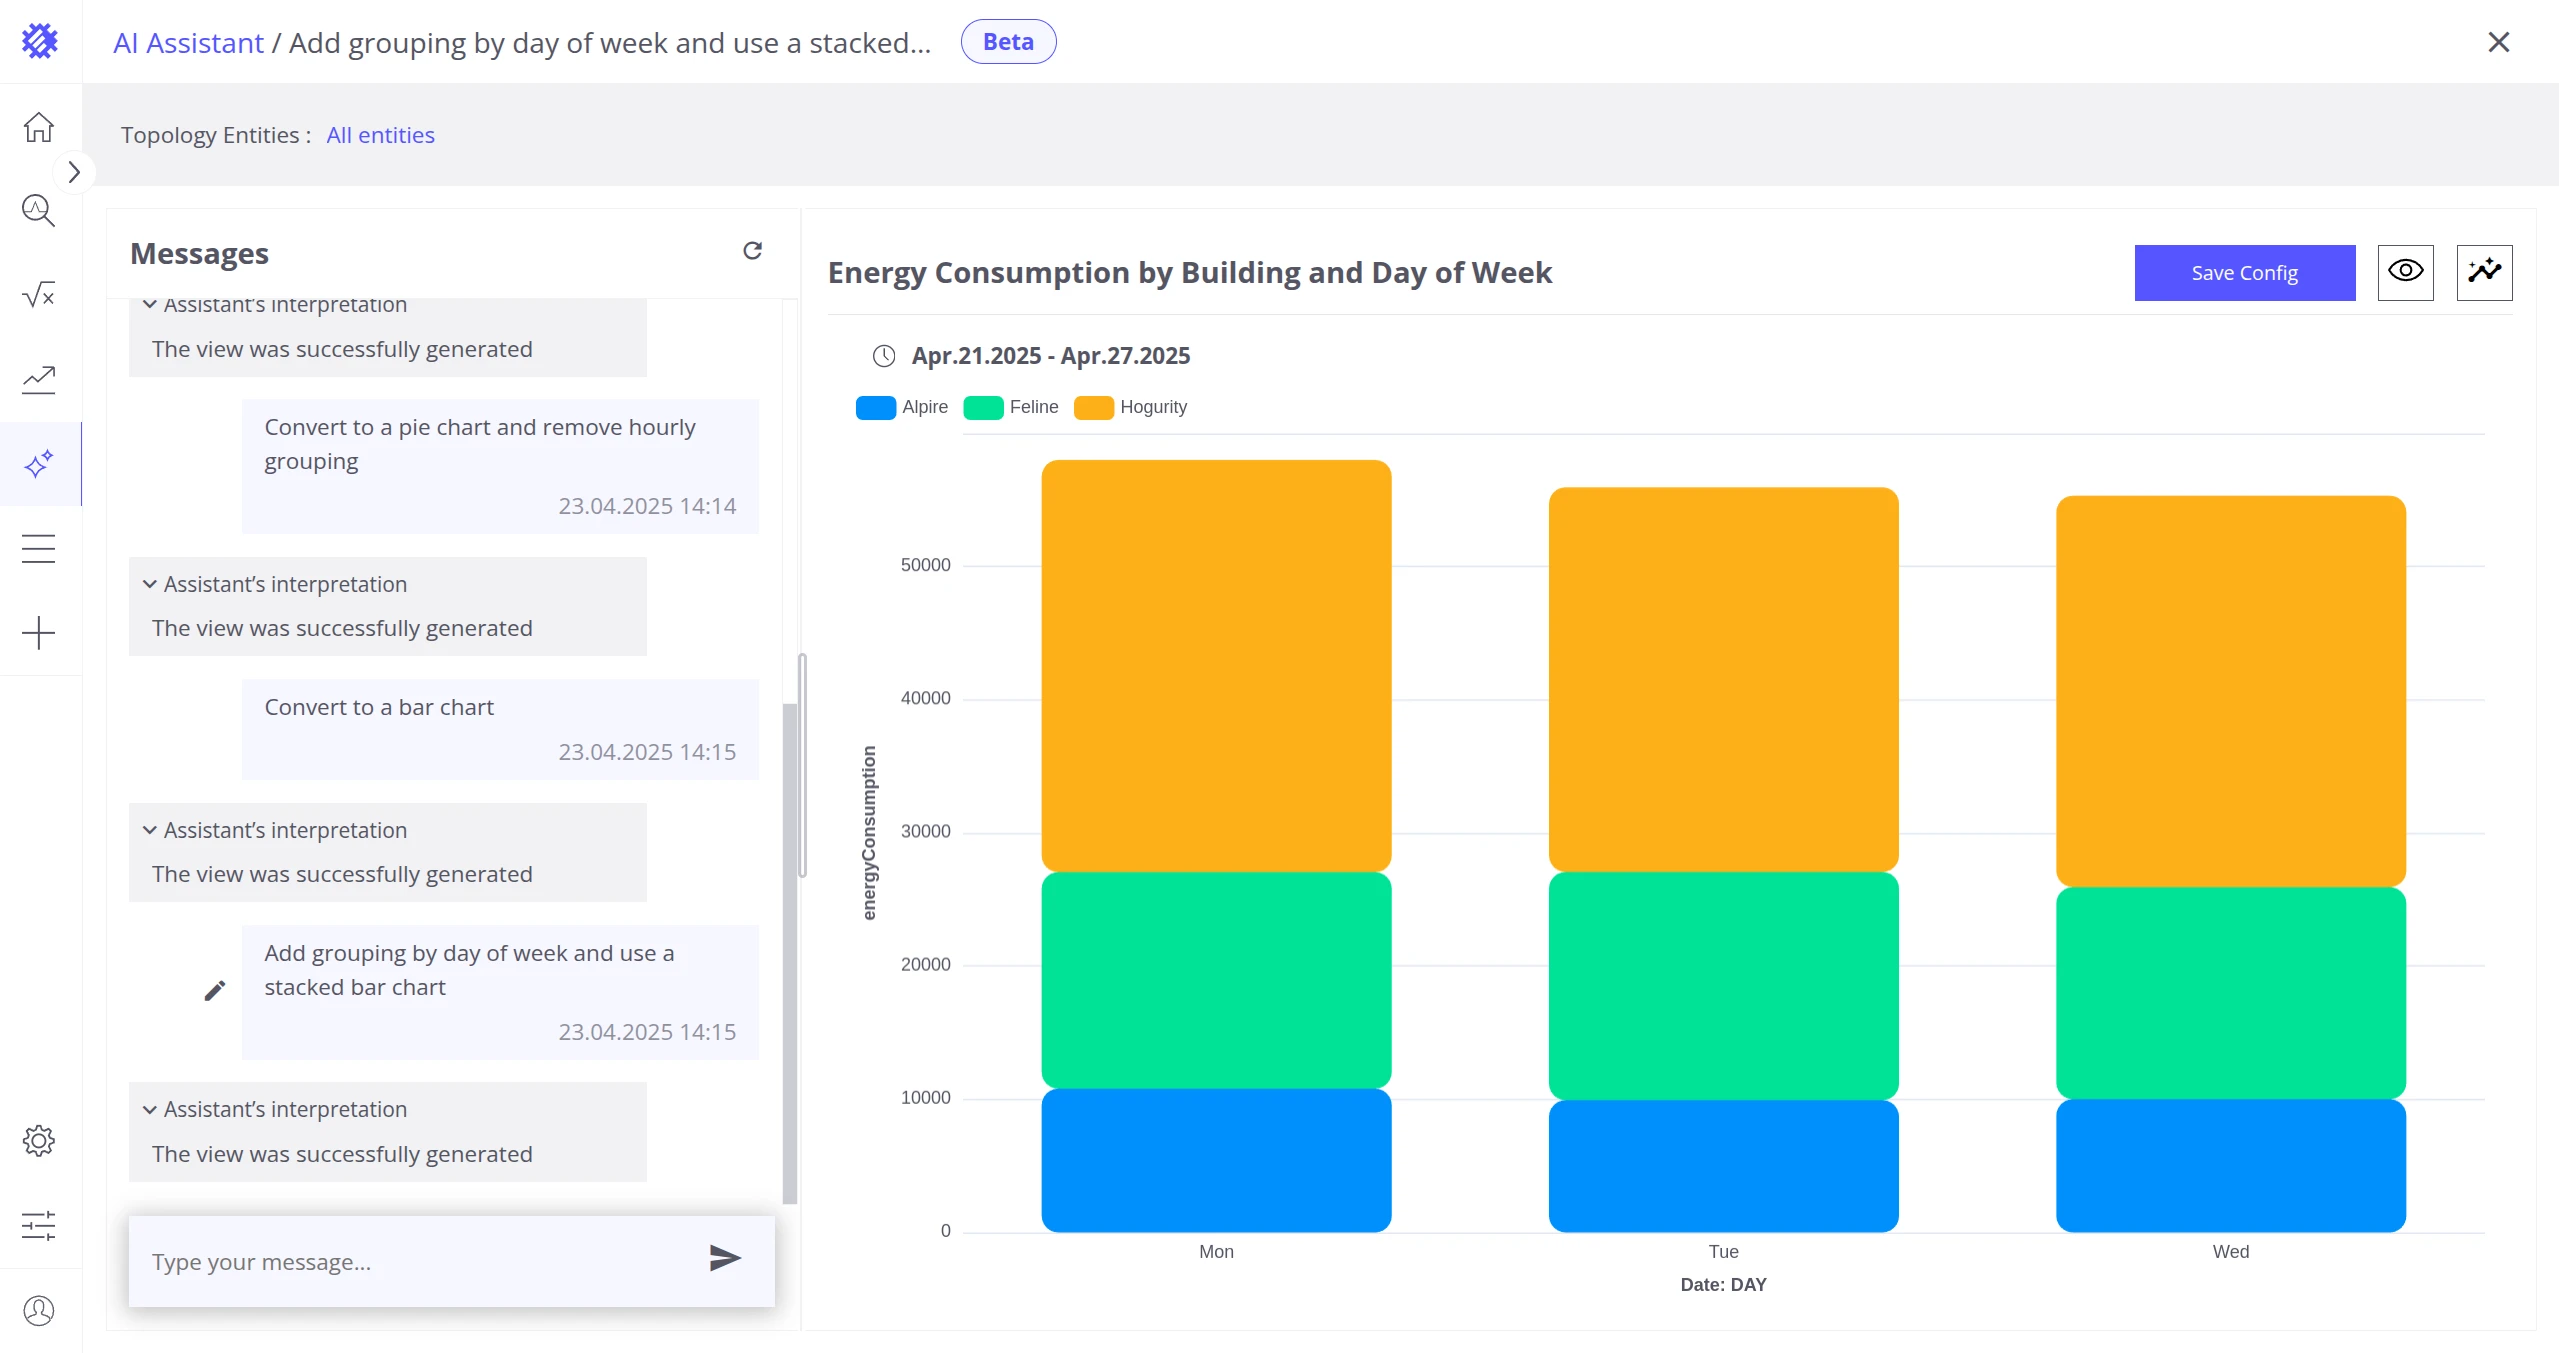
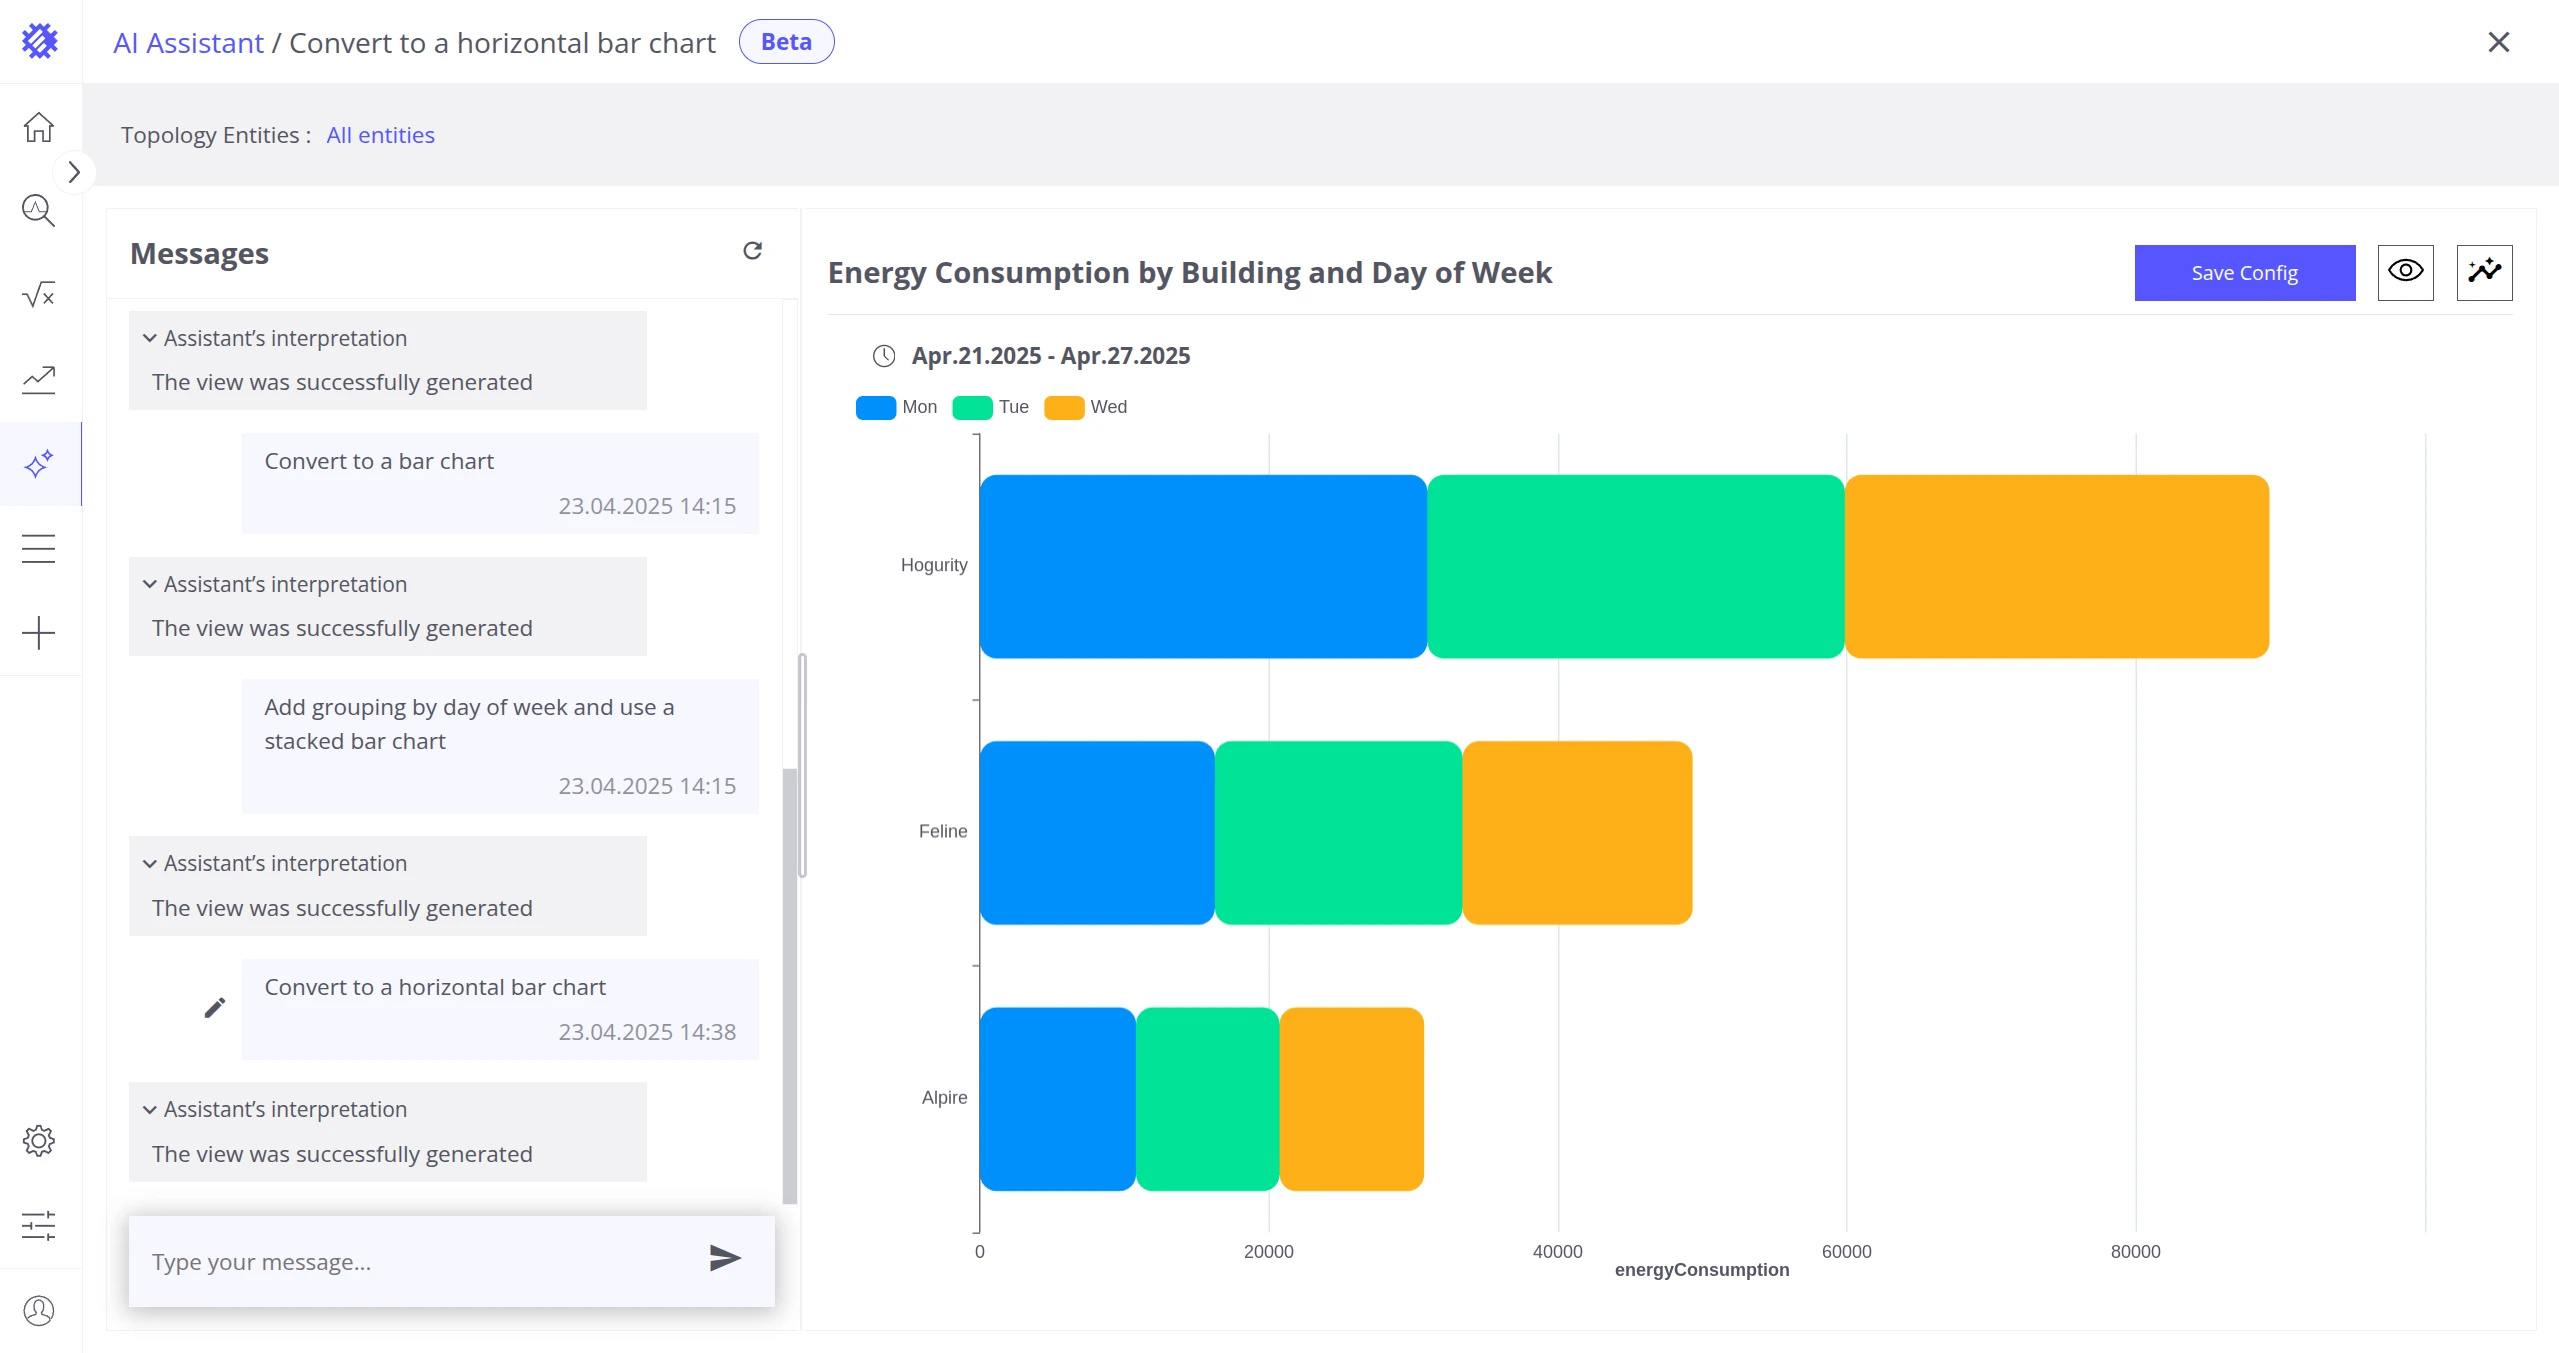
| Bar Chart | Vertical, Horizontal, and Stacked variants |
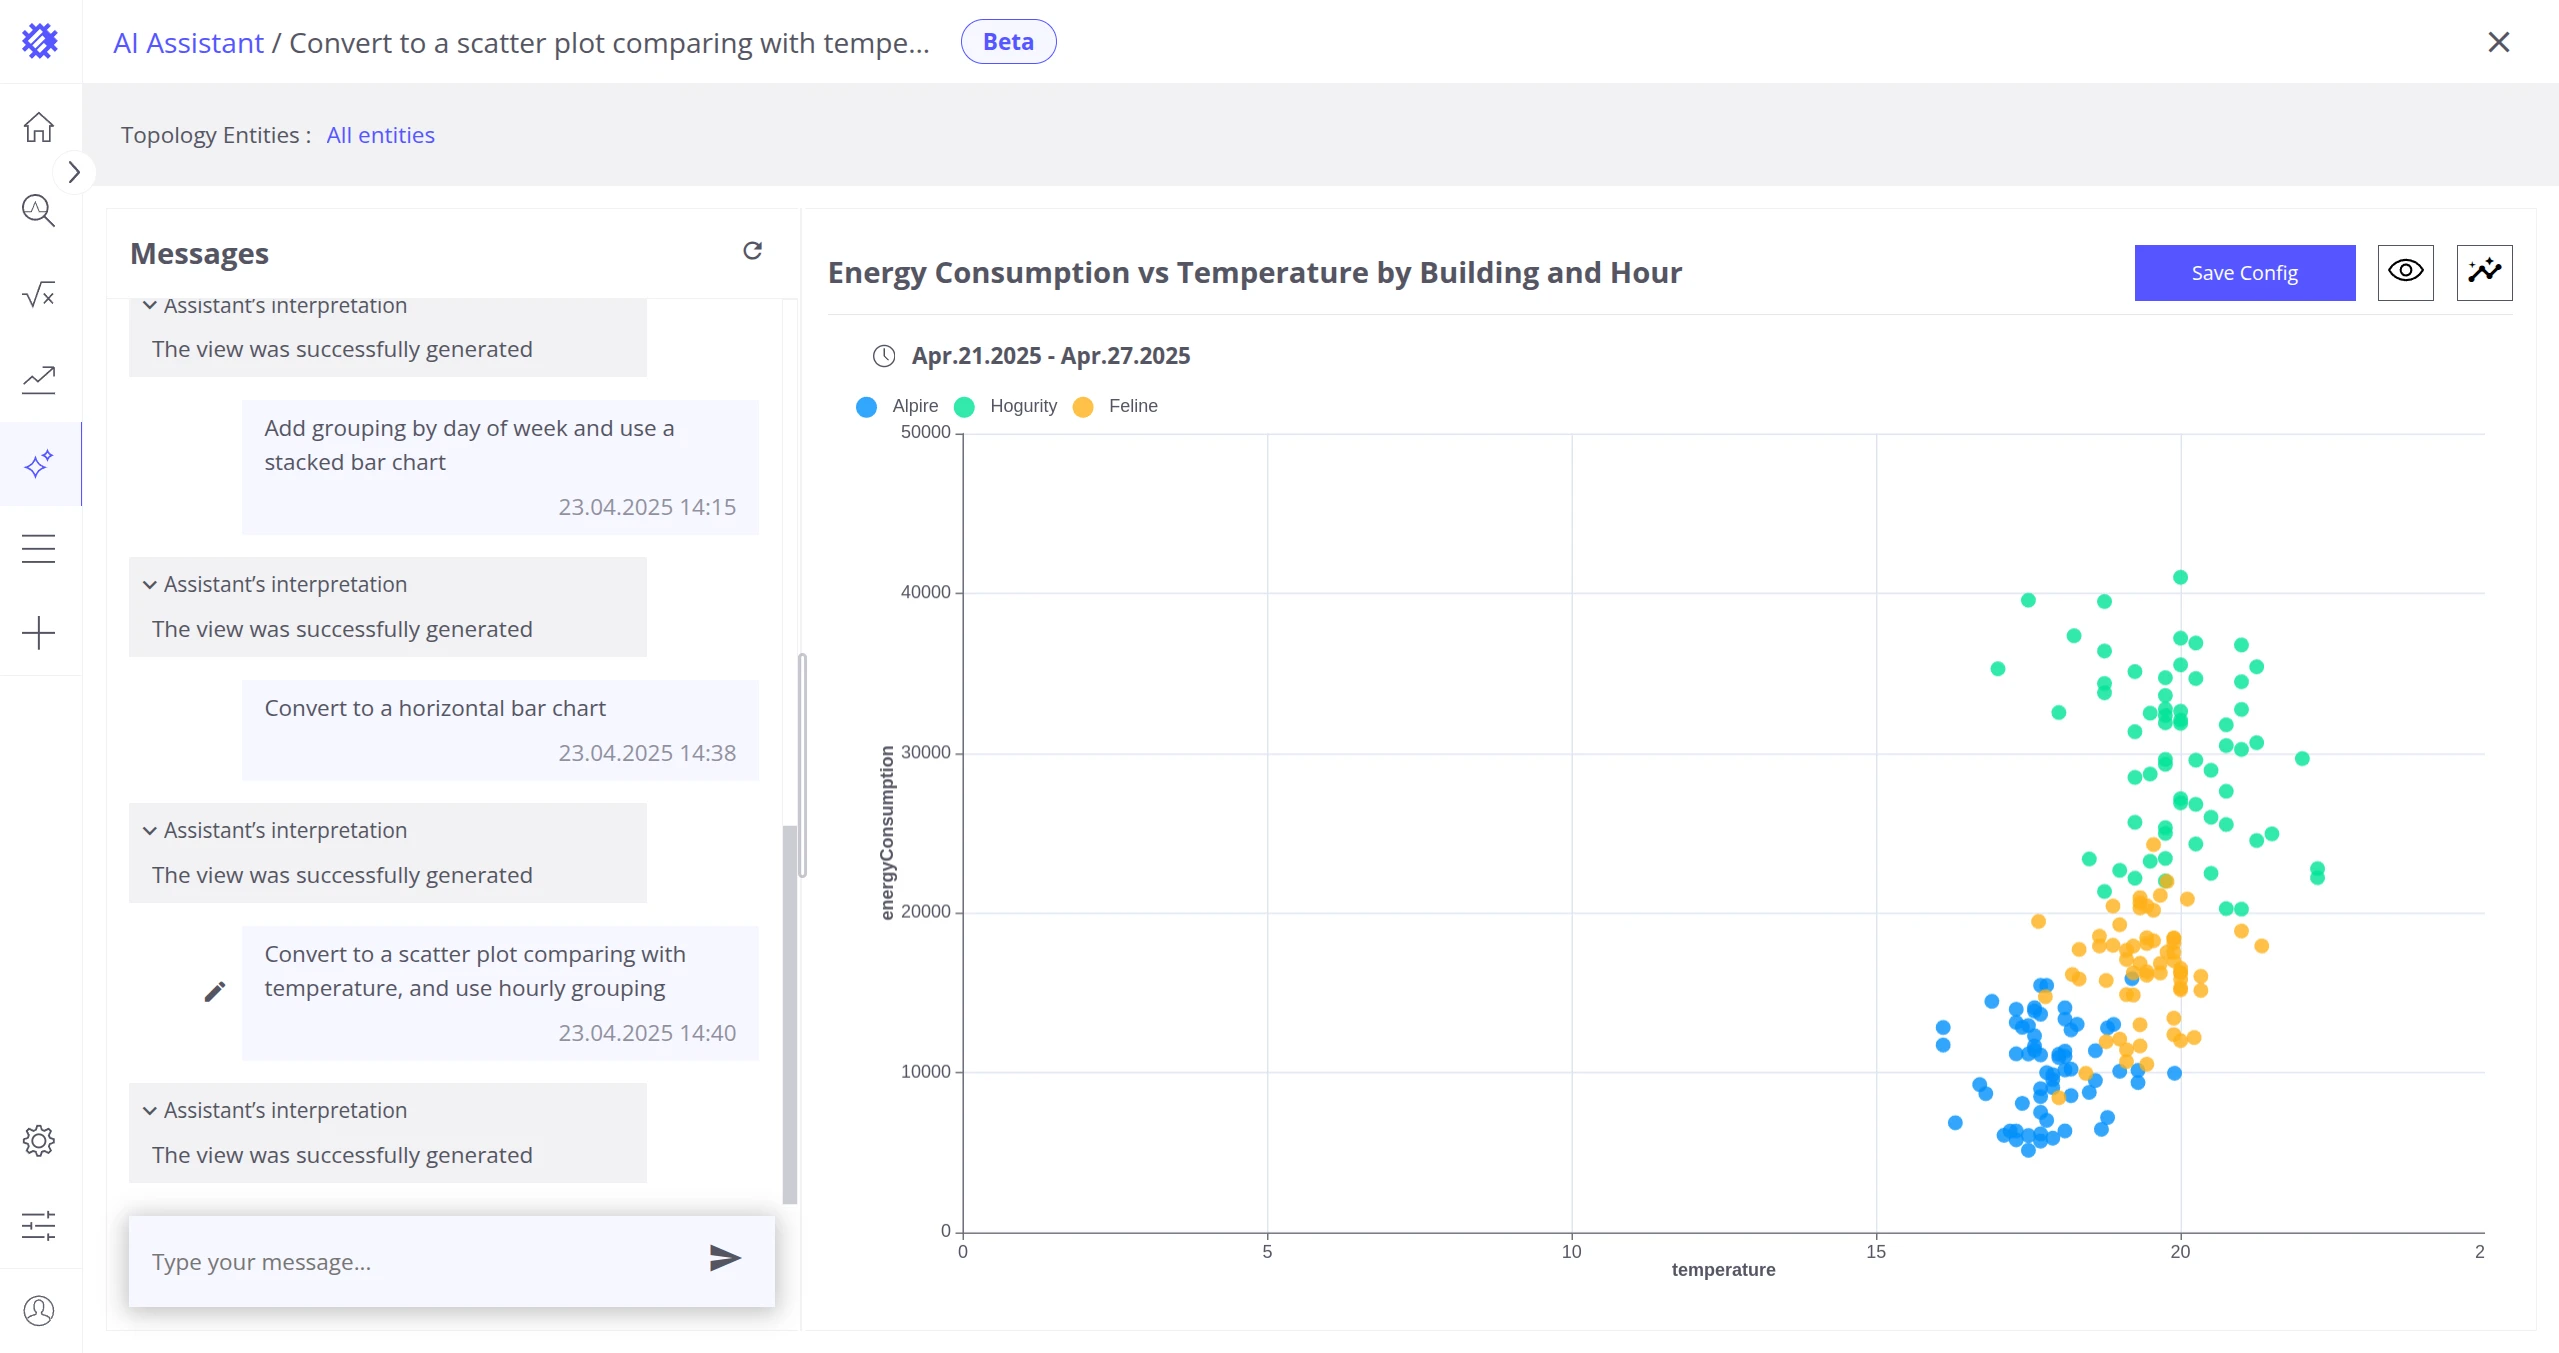
| Scatter Plot | |
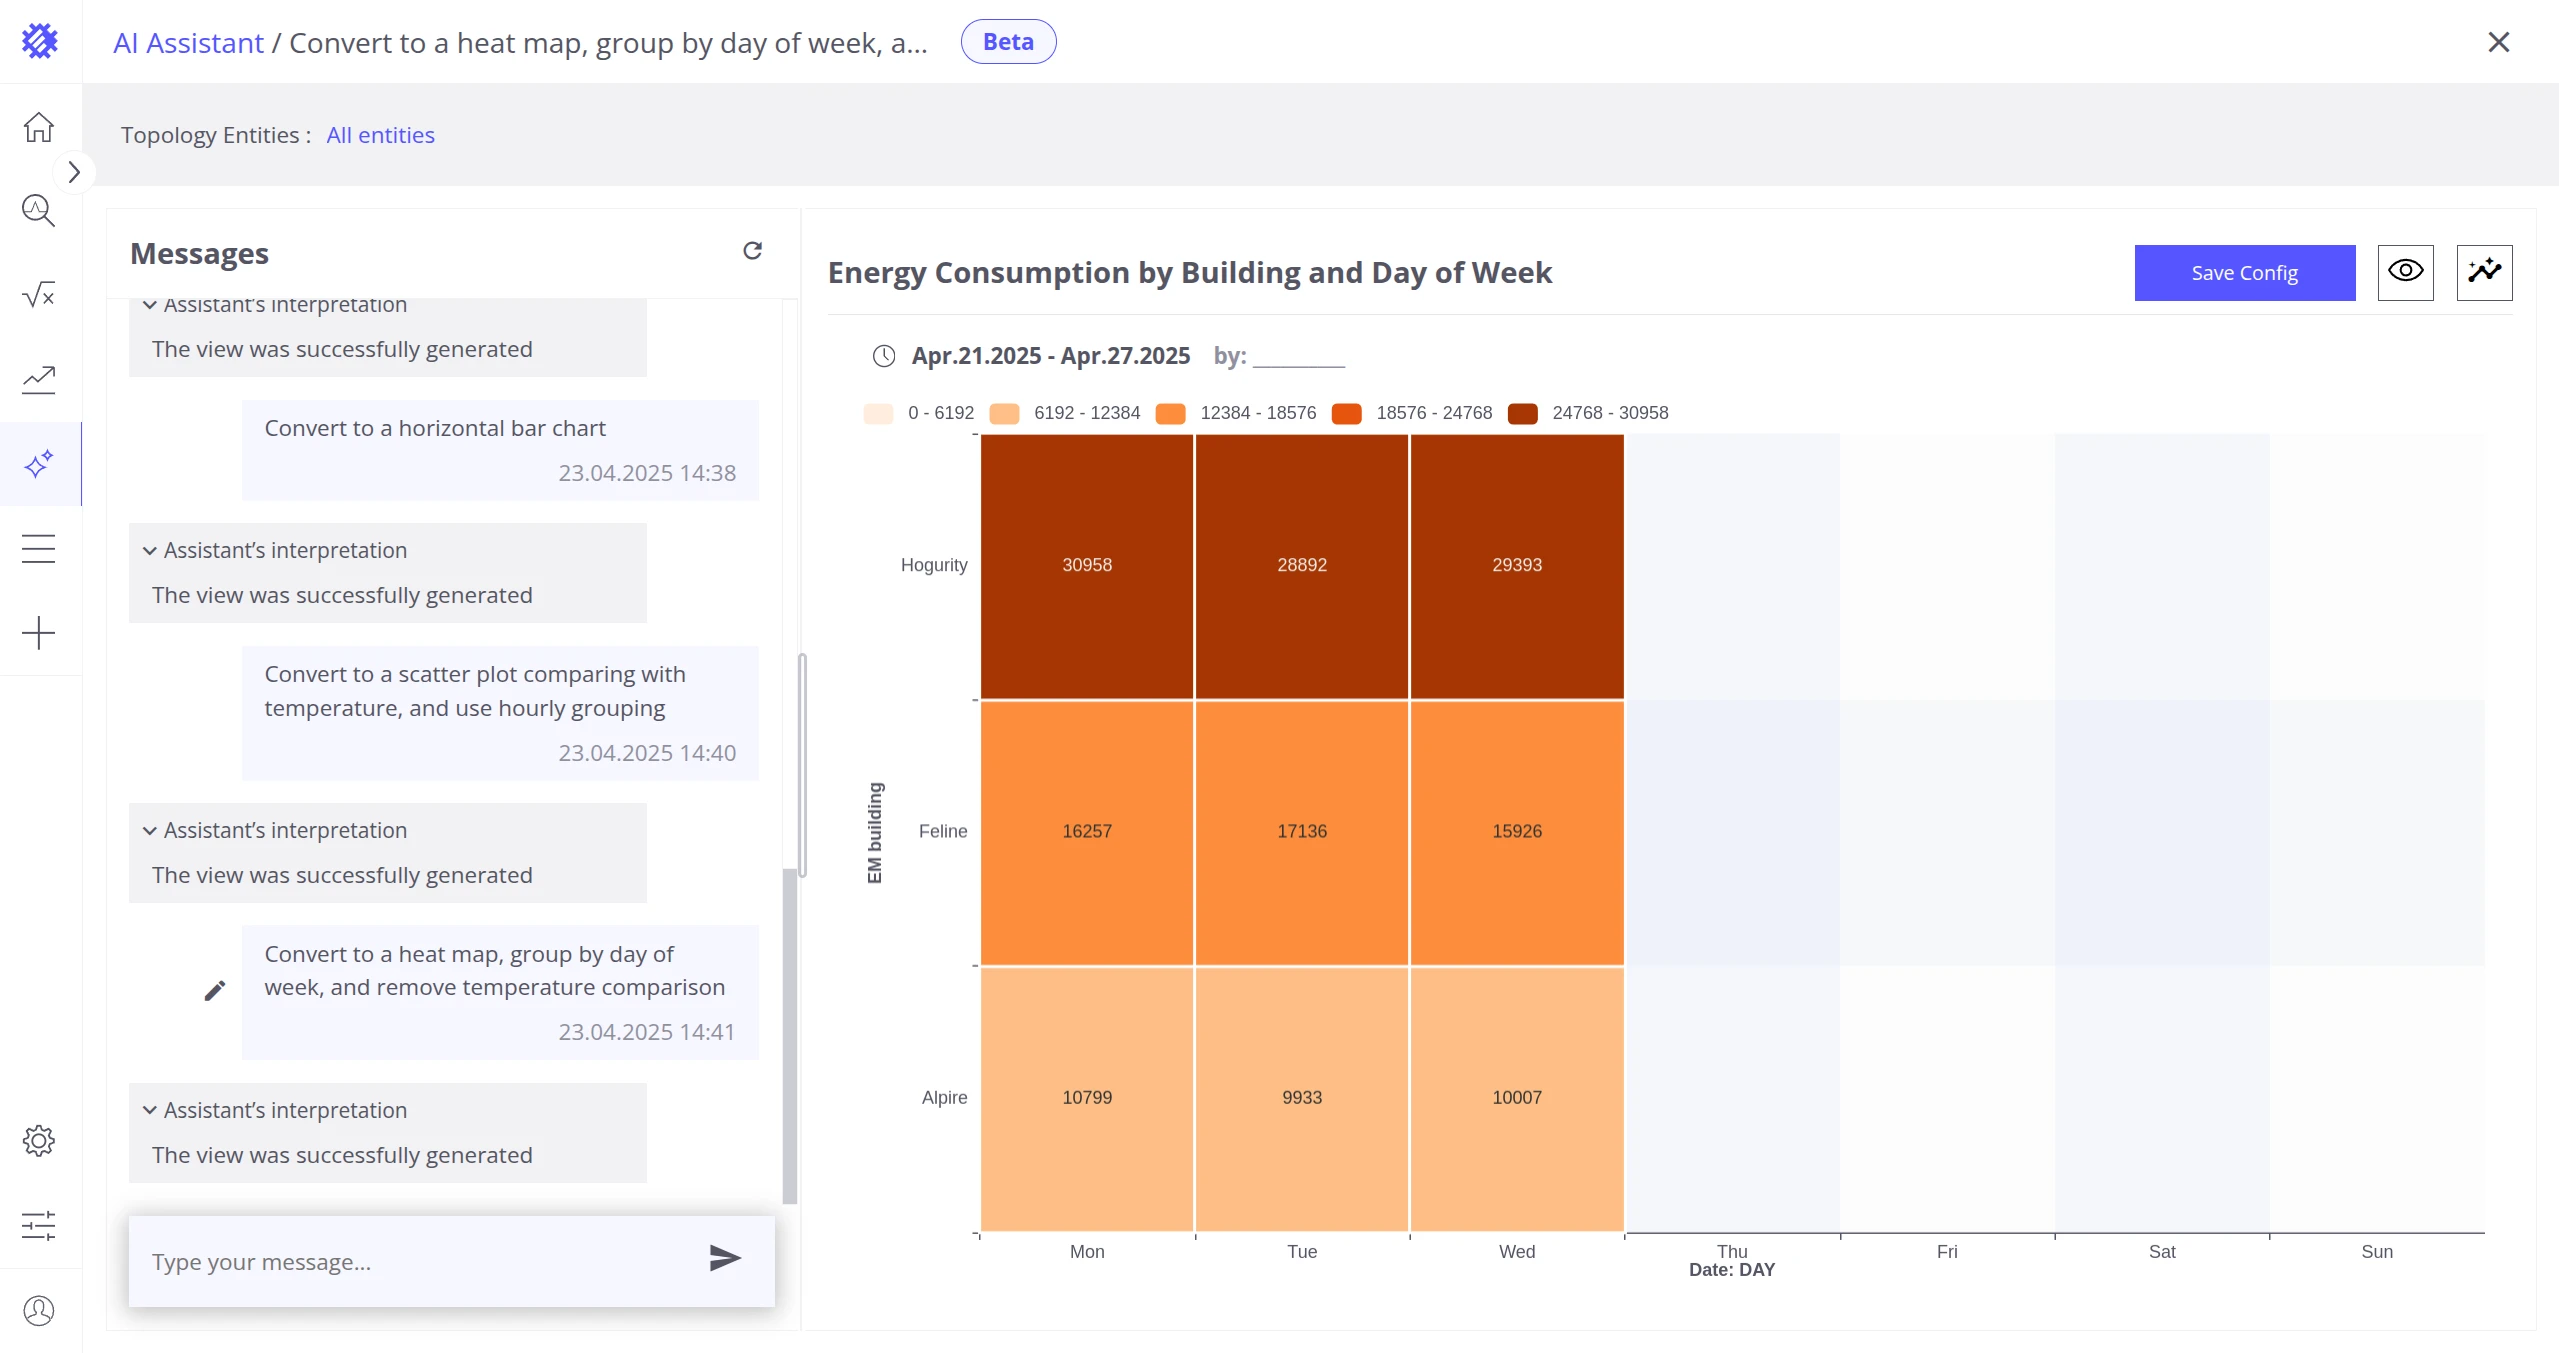
| Heatmap | |
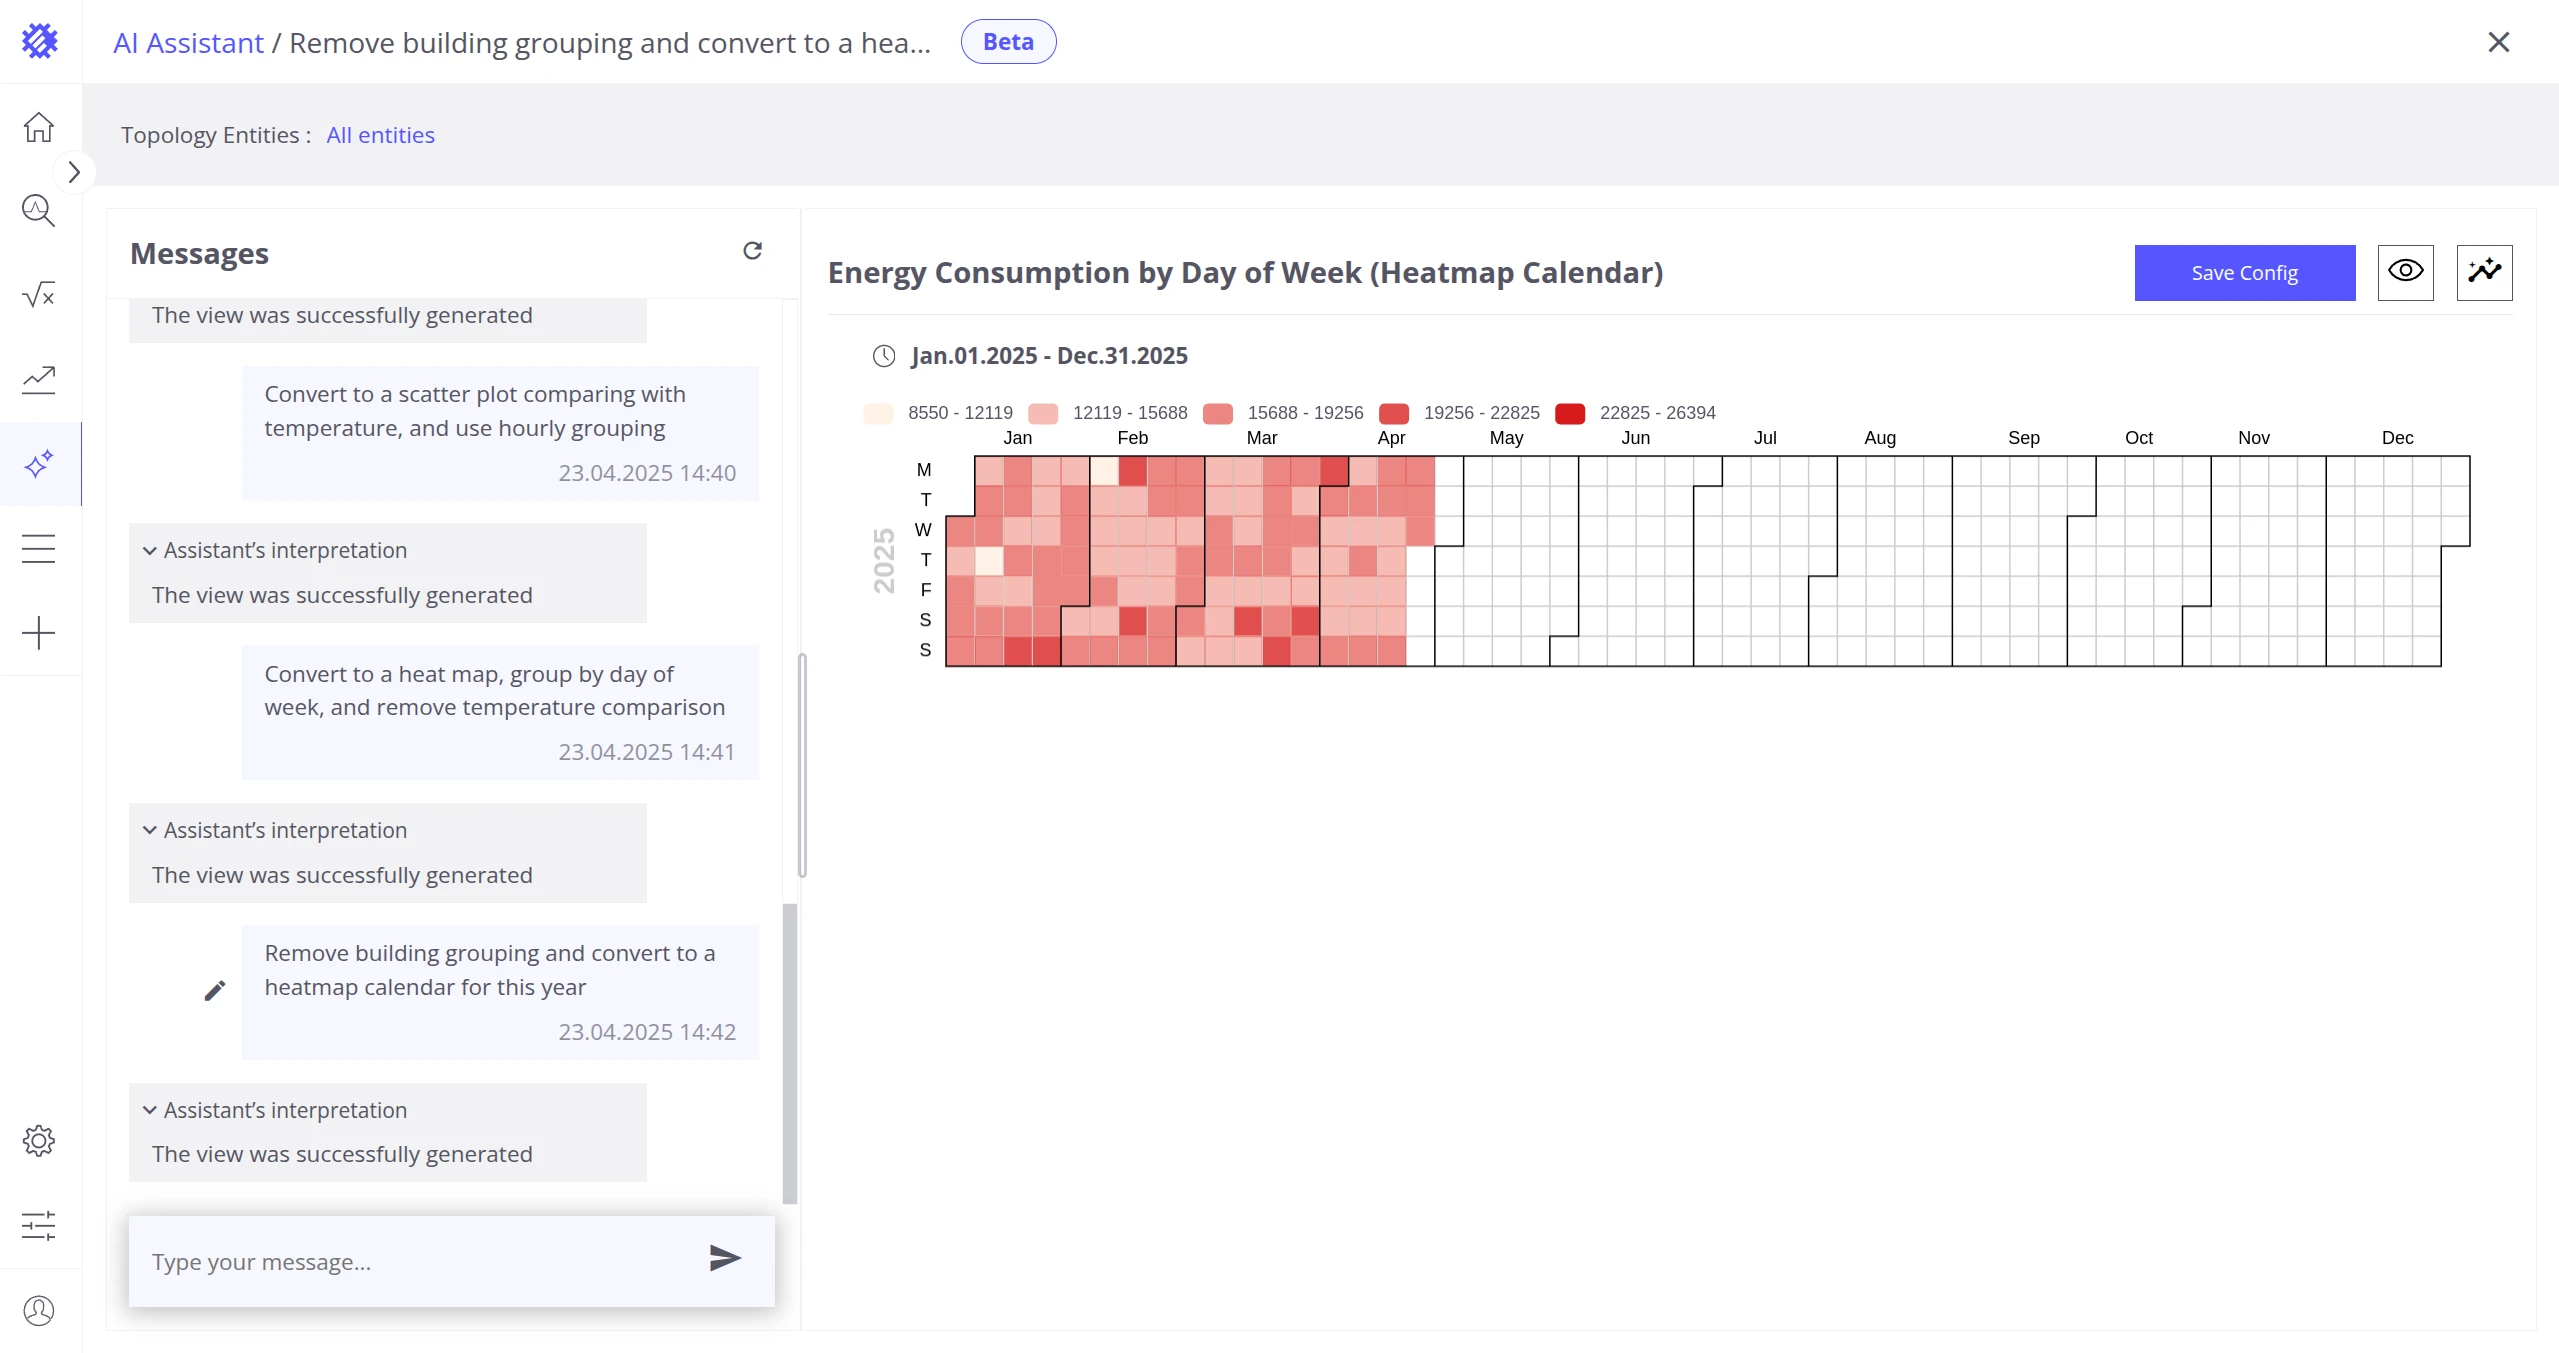
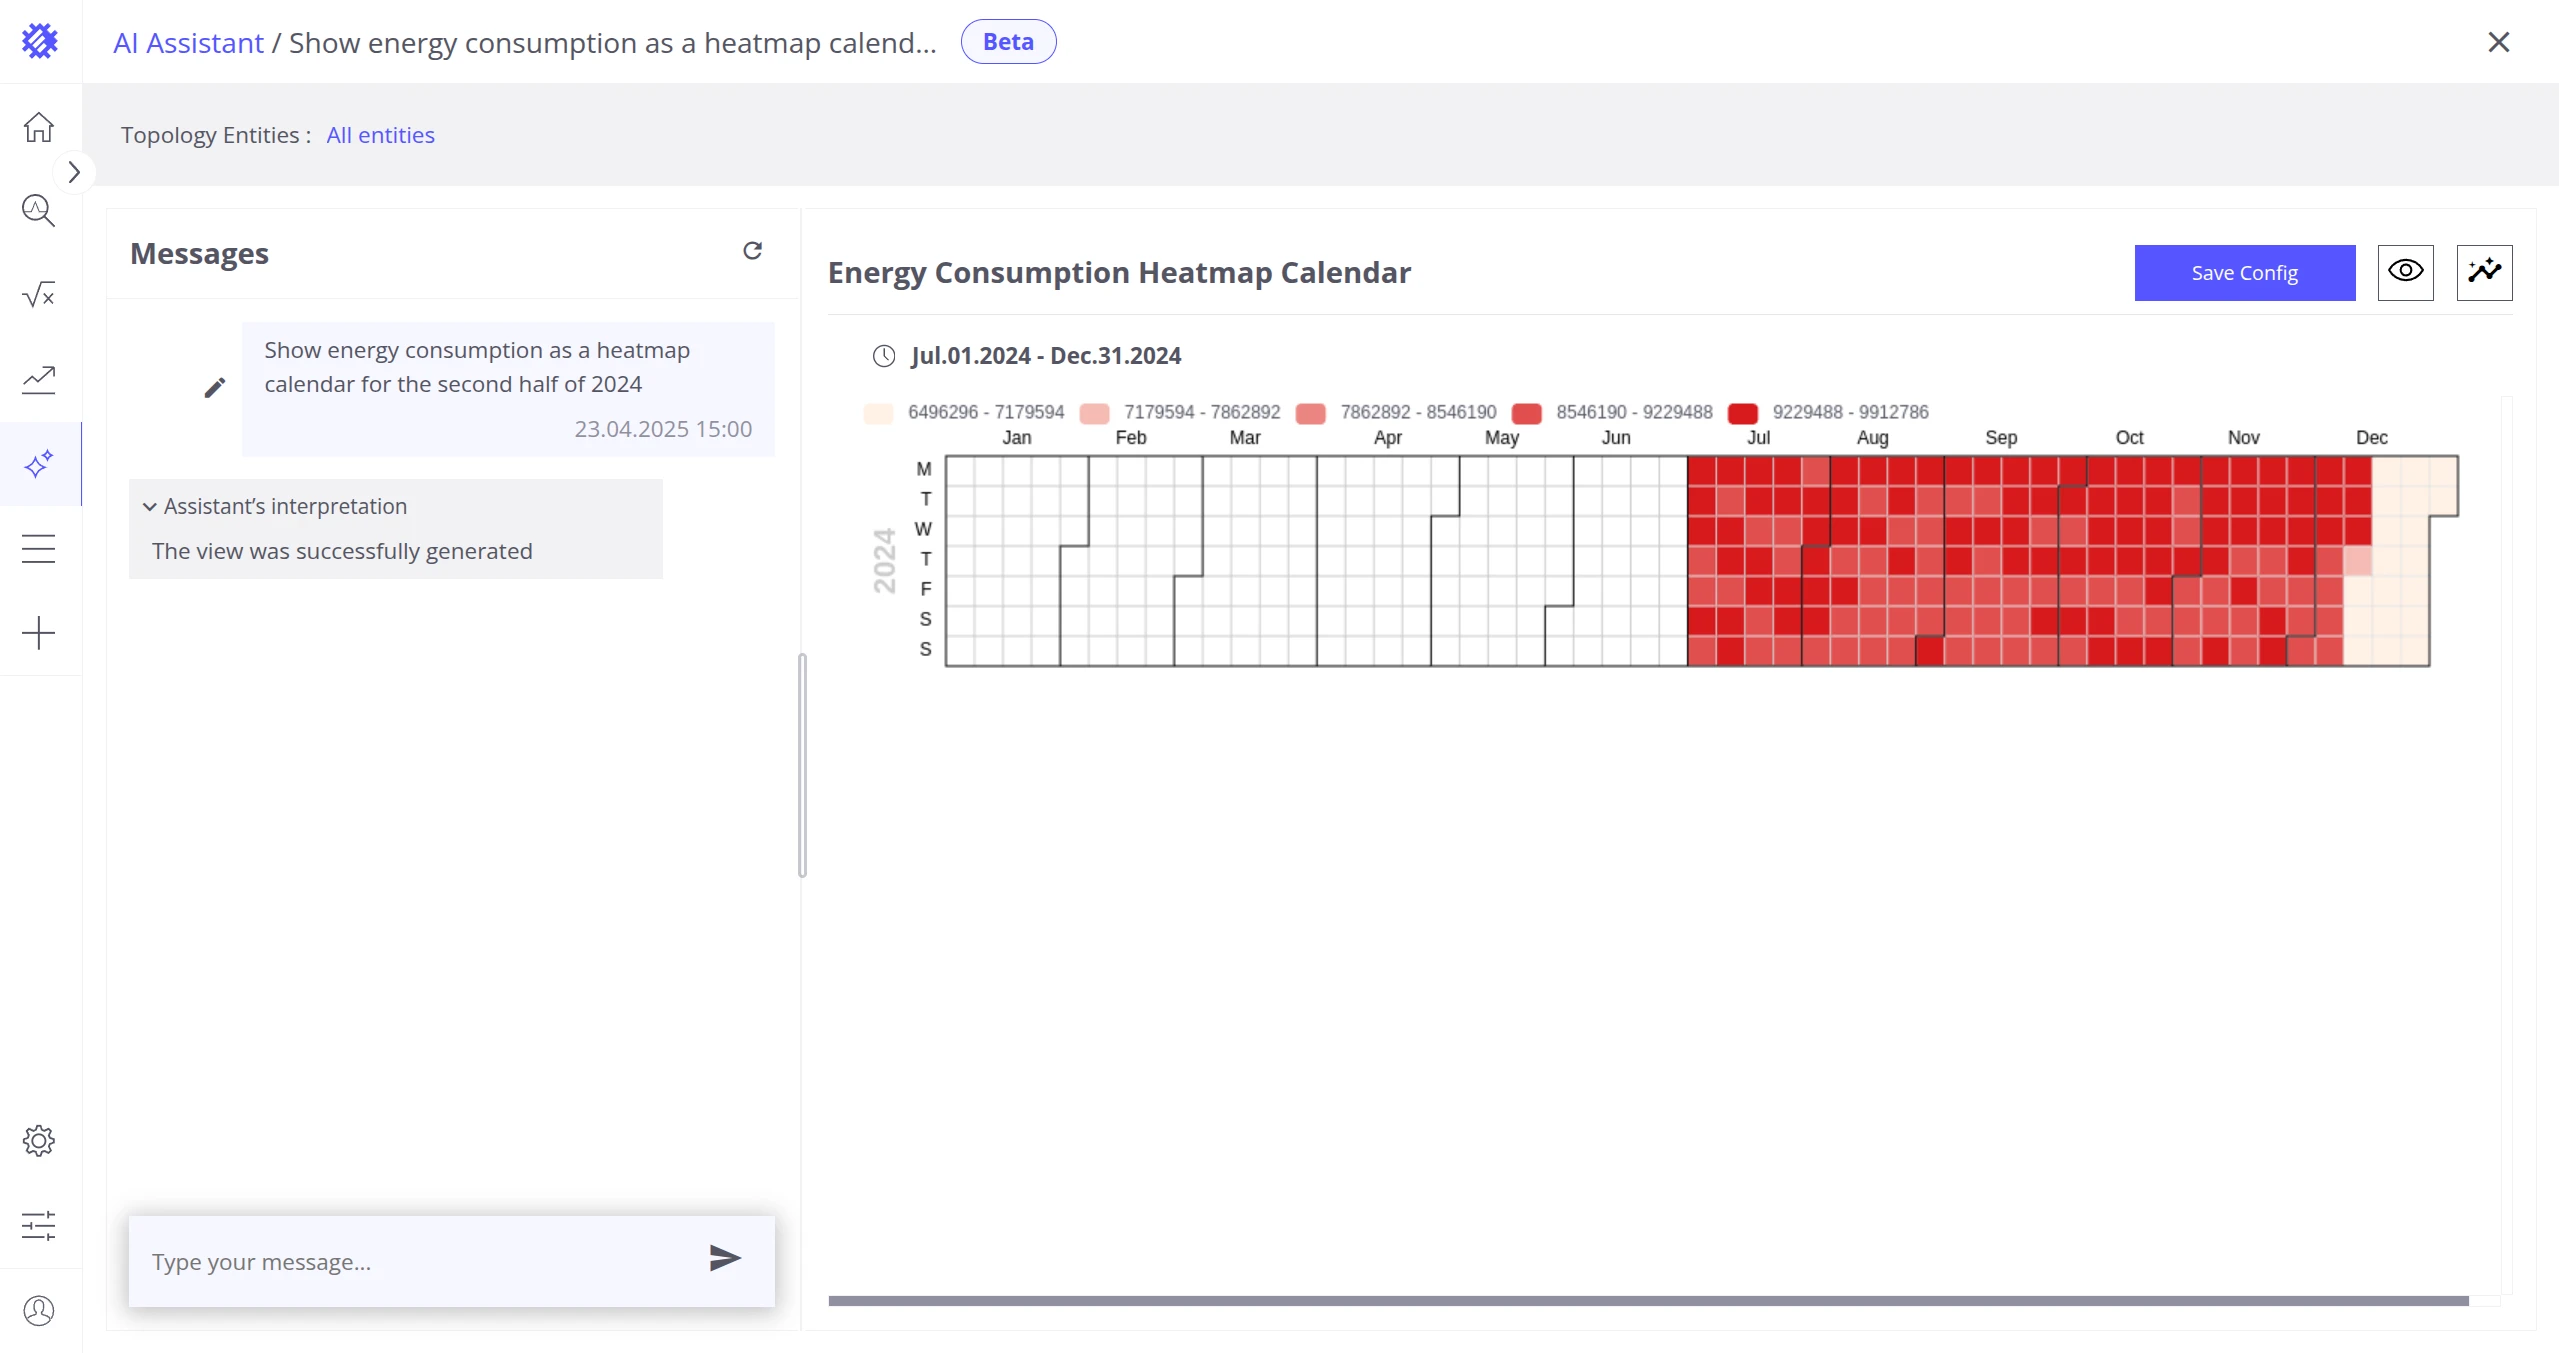
| Heatmap Calendar | |
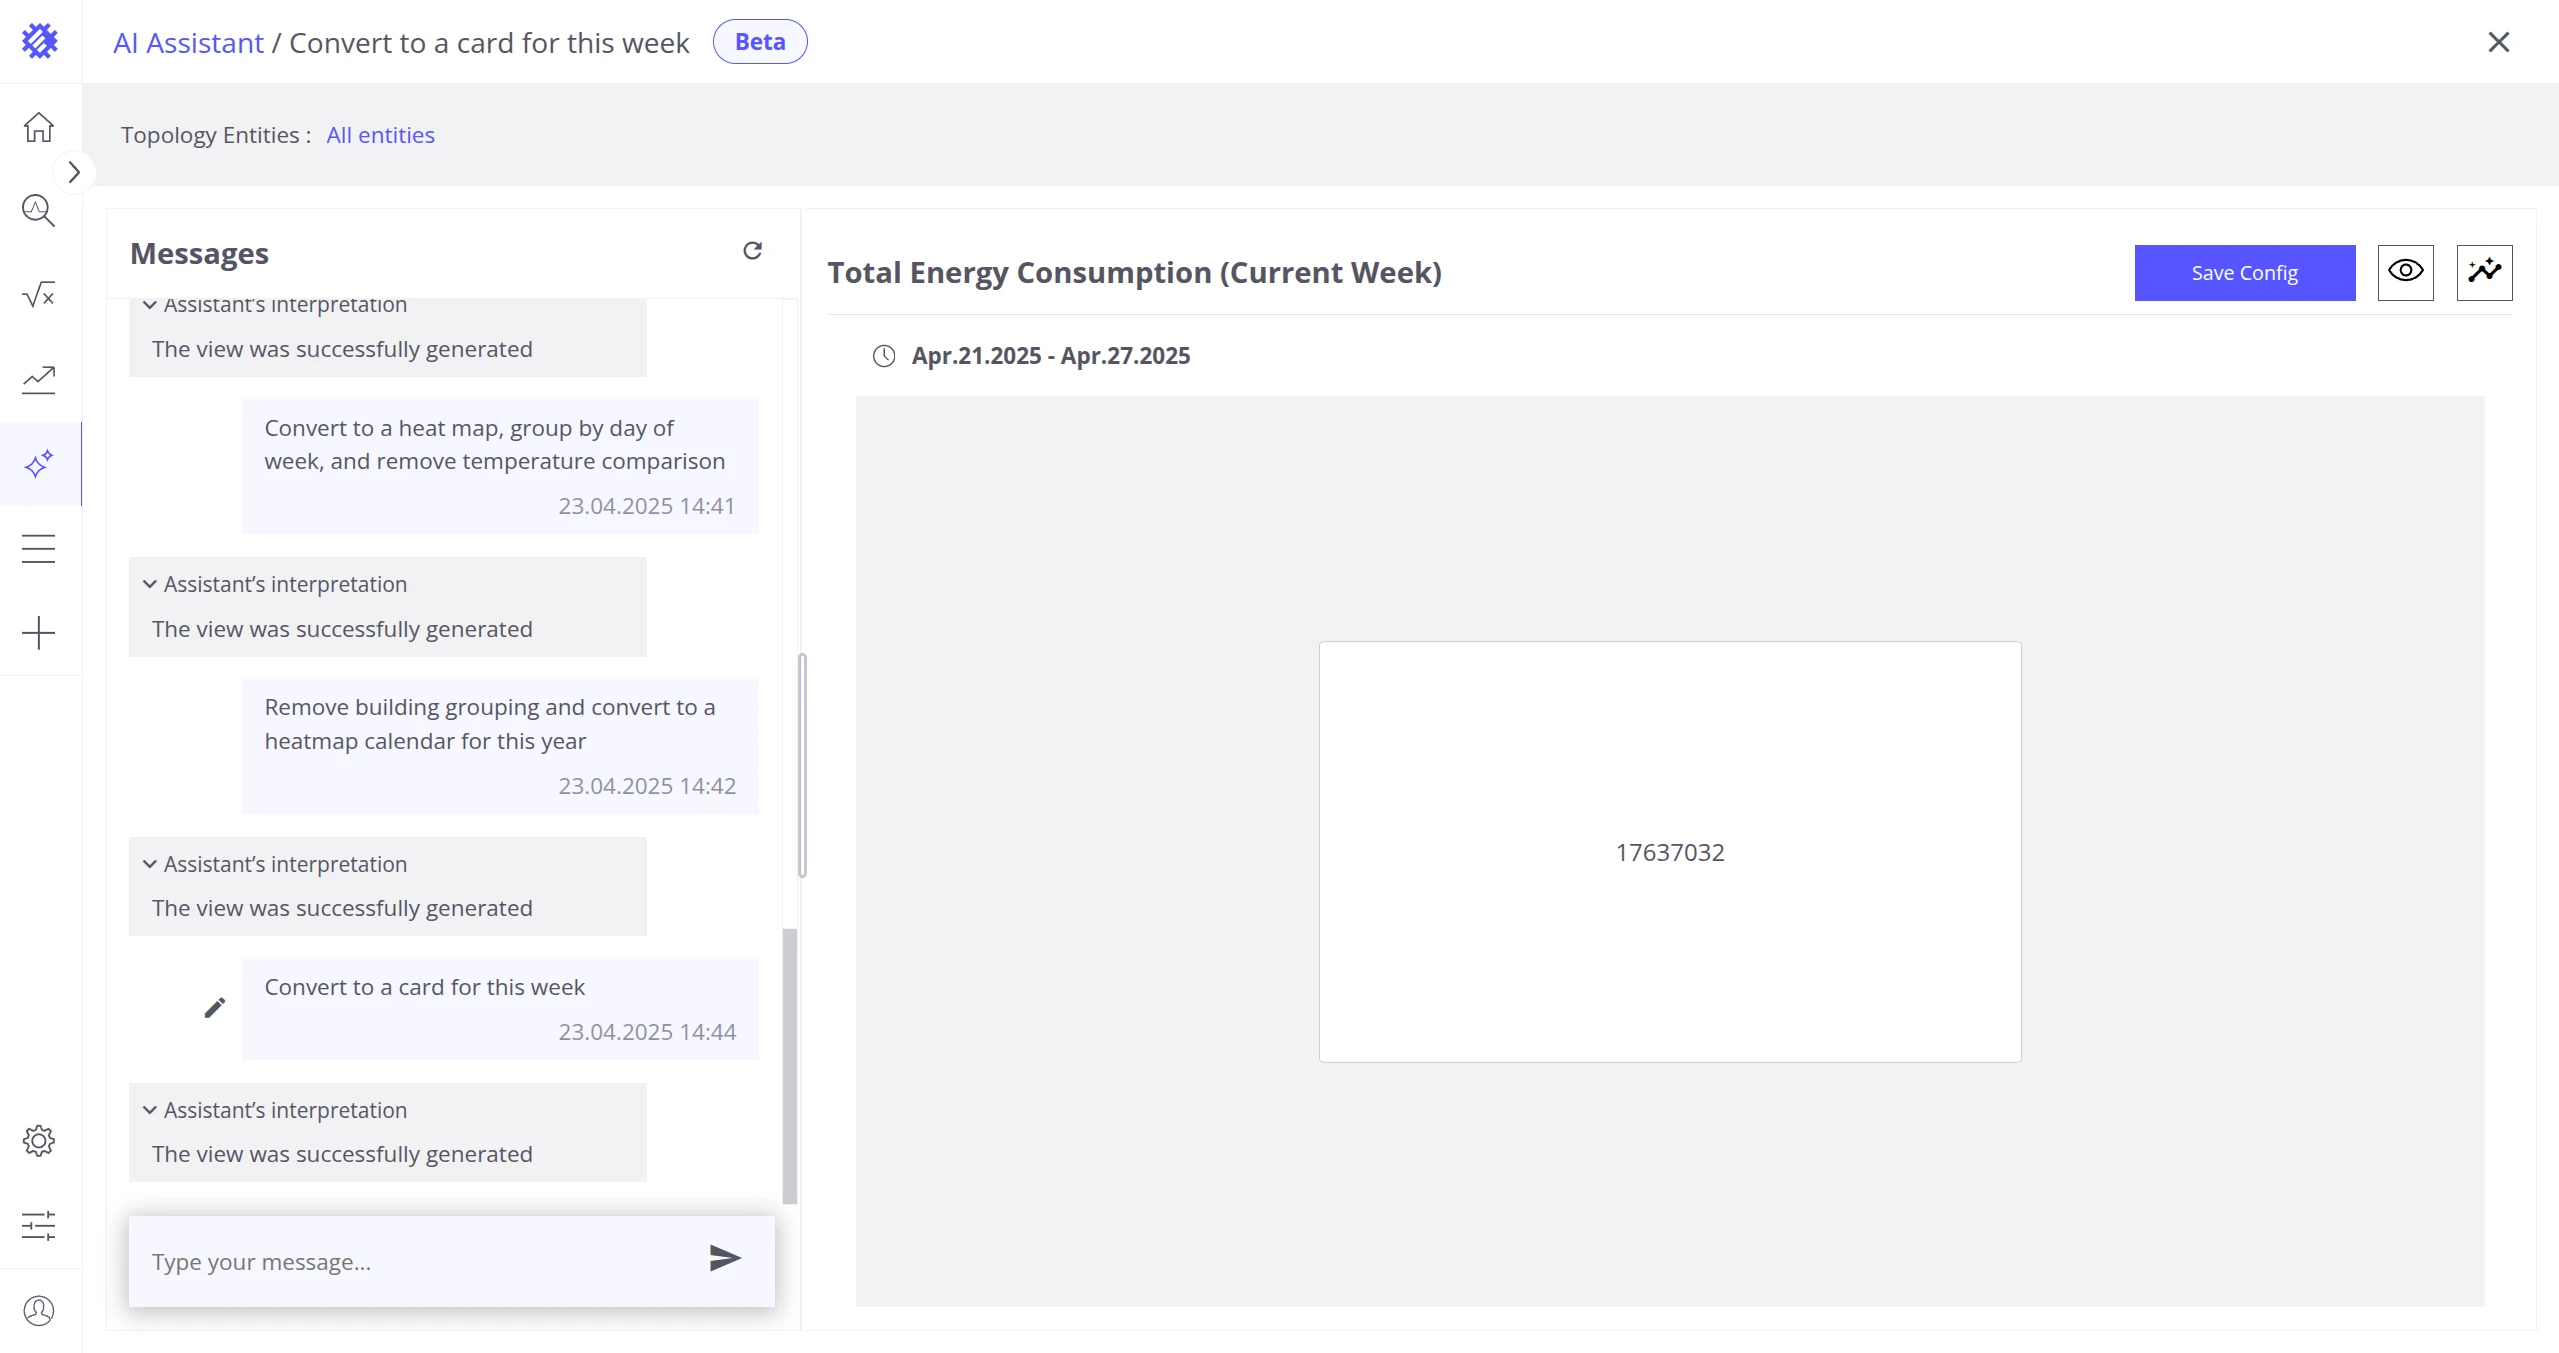
| Card | Without compared value |
| Card with Line |

Date Picker
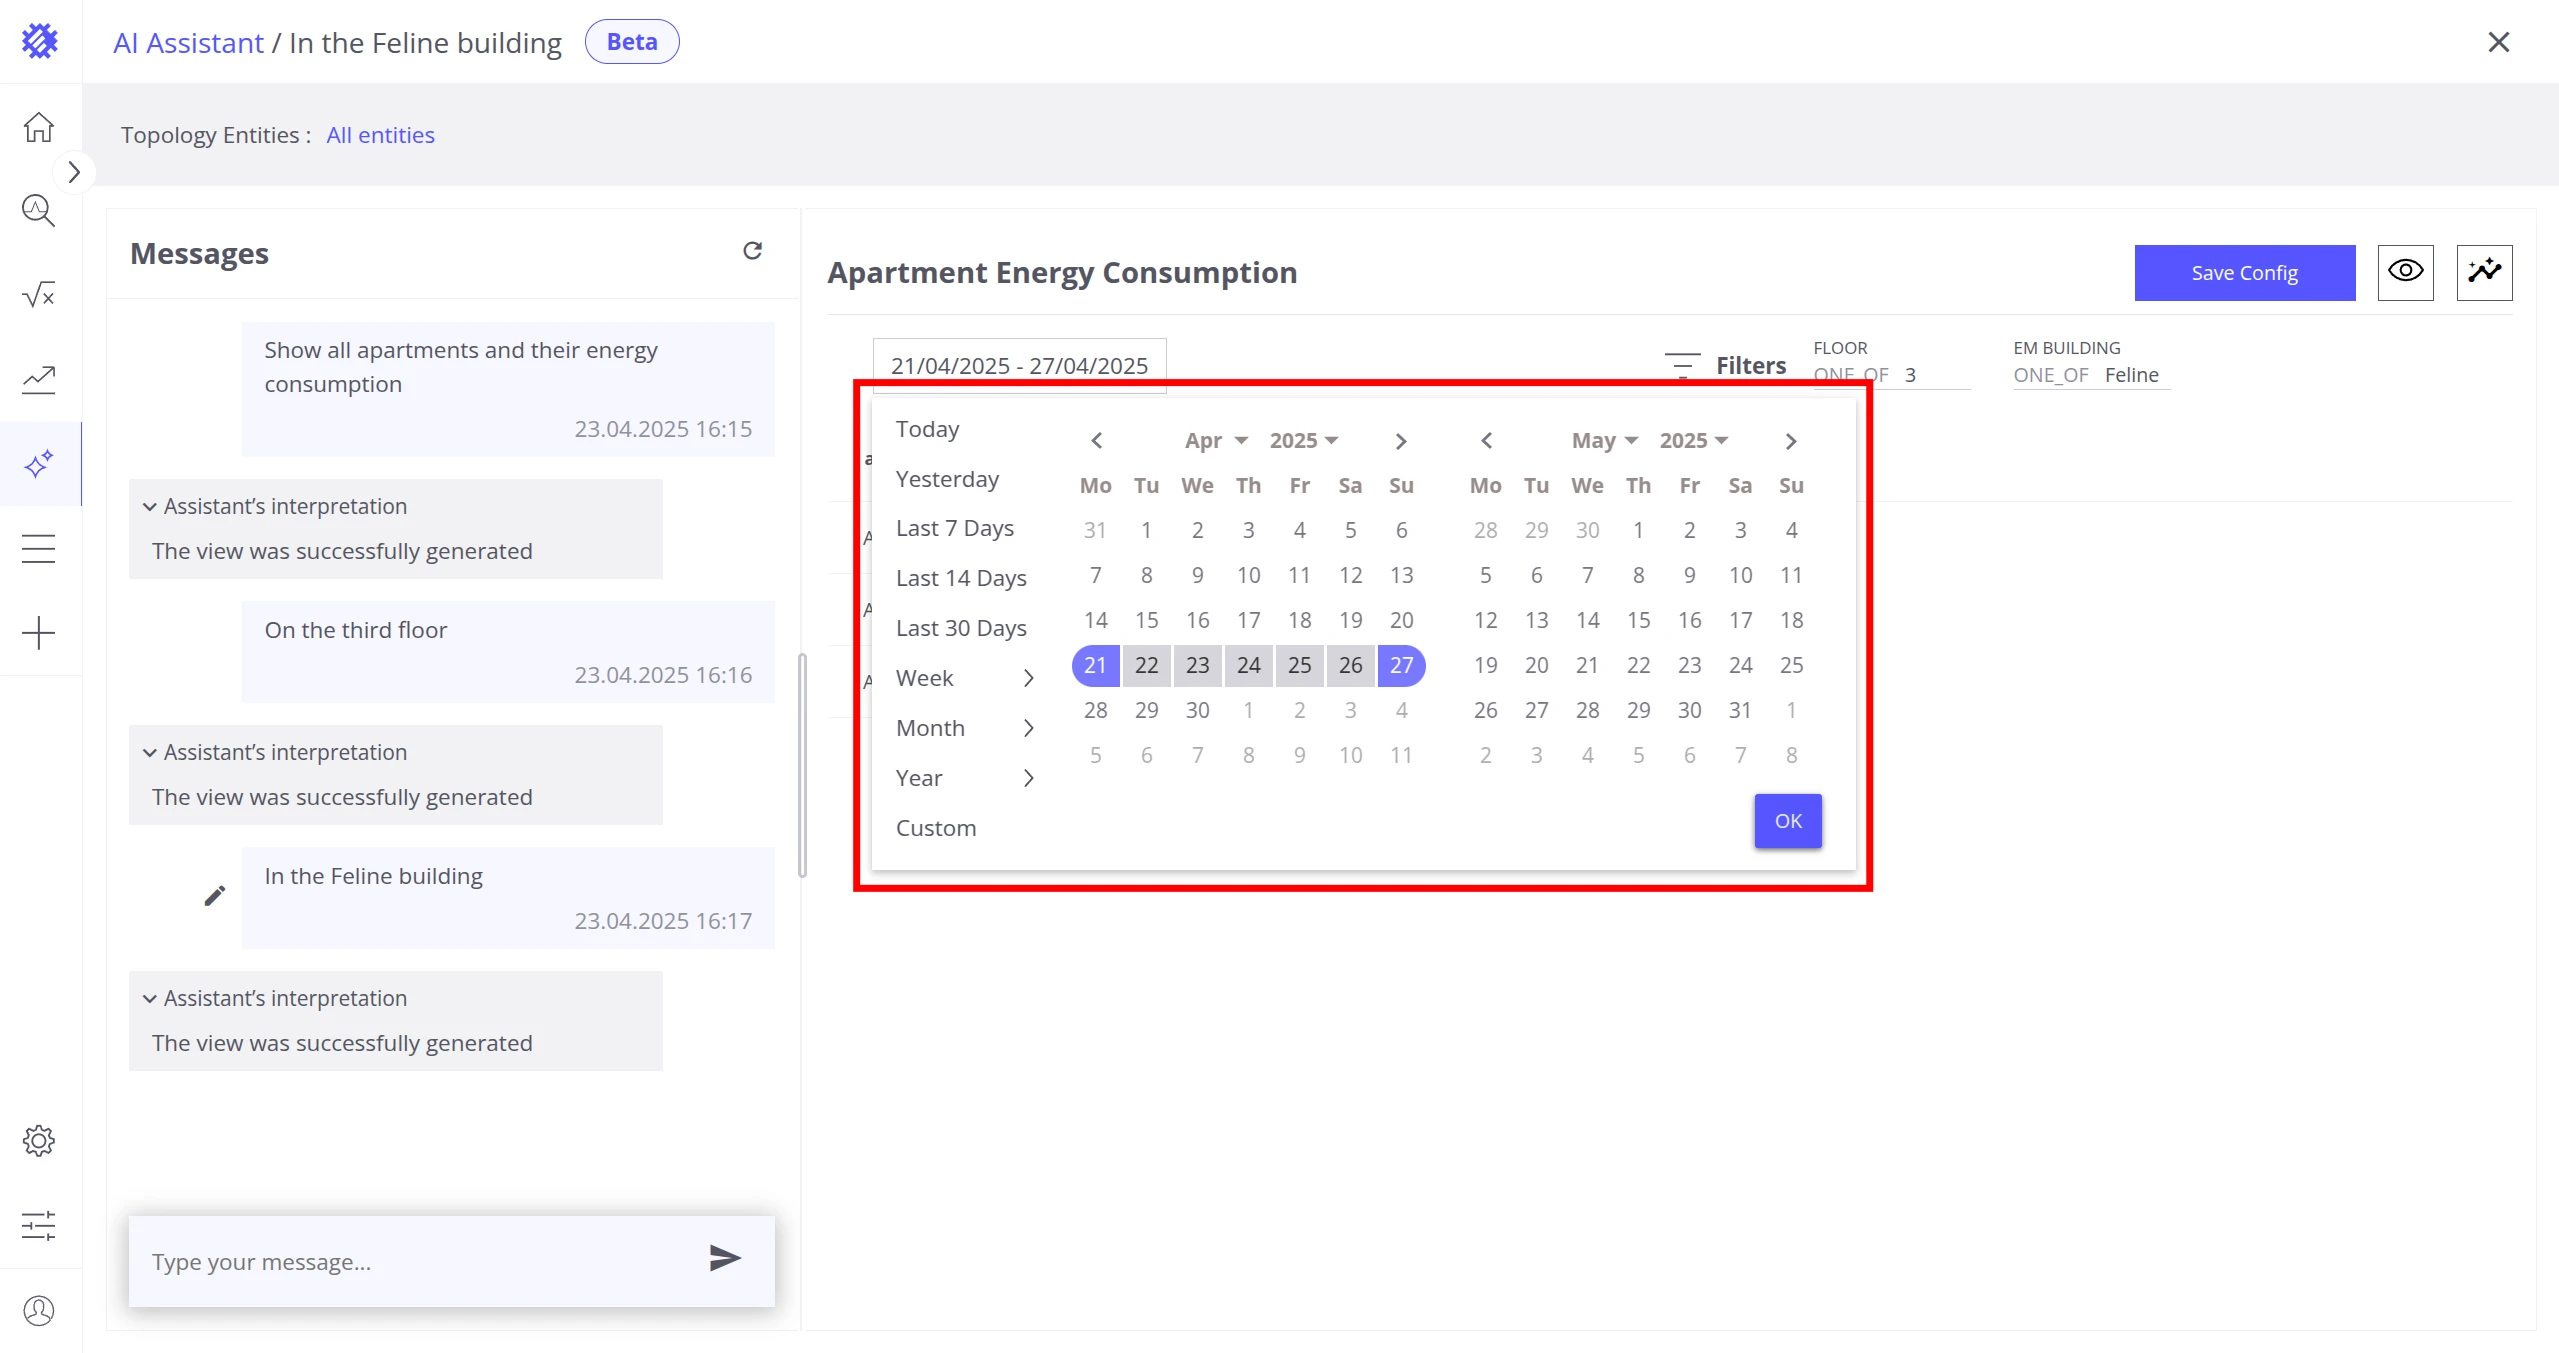
Section titled “Date Picker”The assistant applies a date picker to generated visualizations (this week by default).
Date Fields
Section titled “Date Fields”The assistant can use date fields as part of the query.
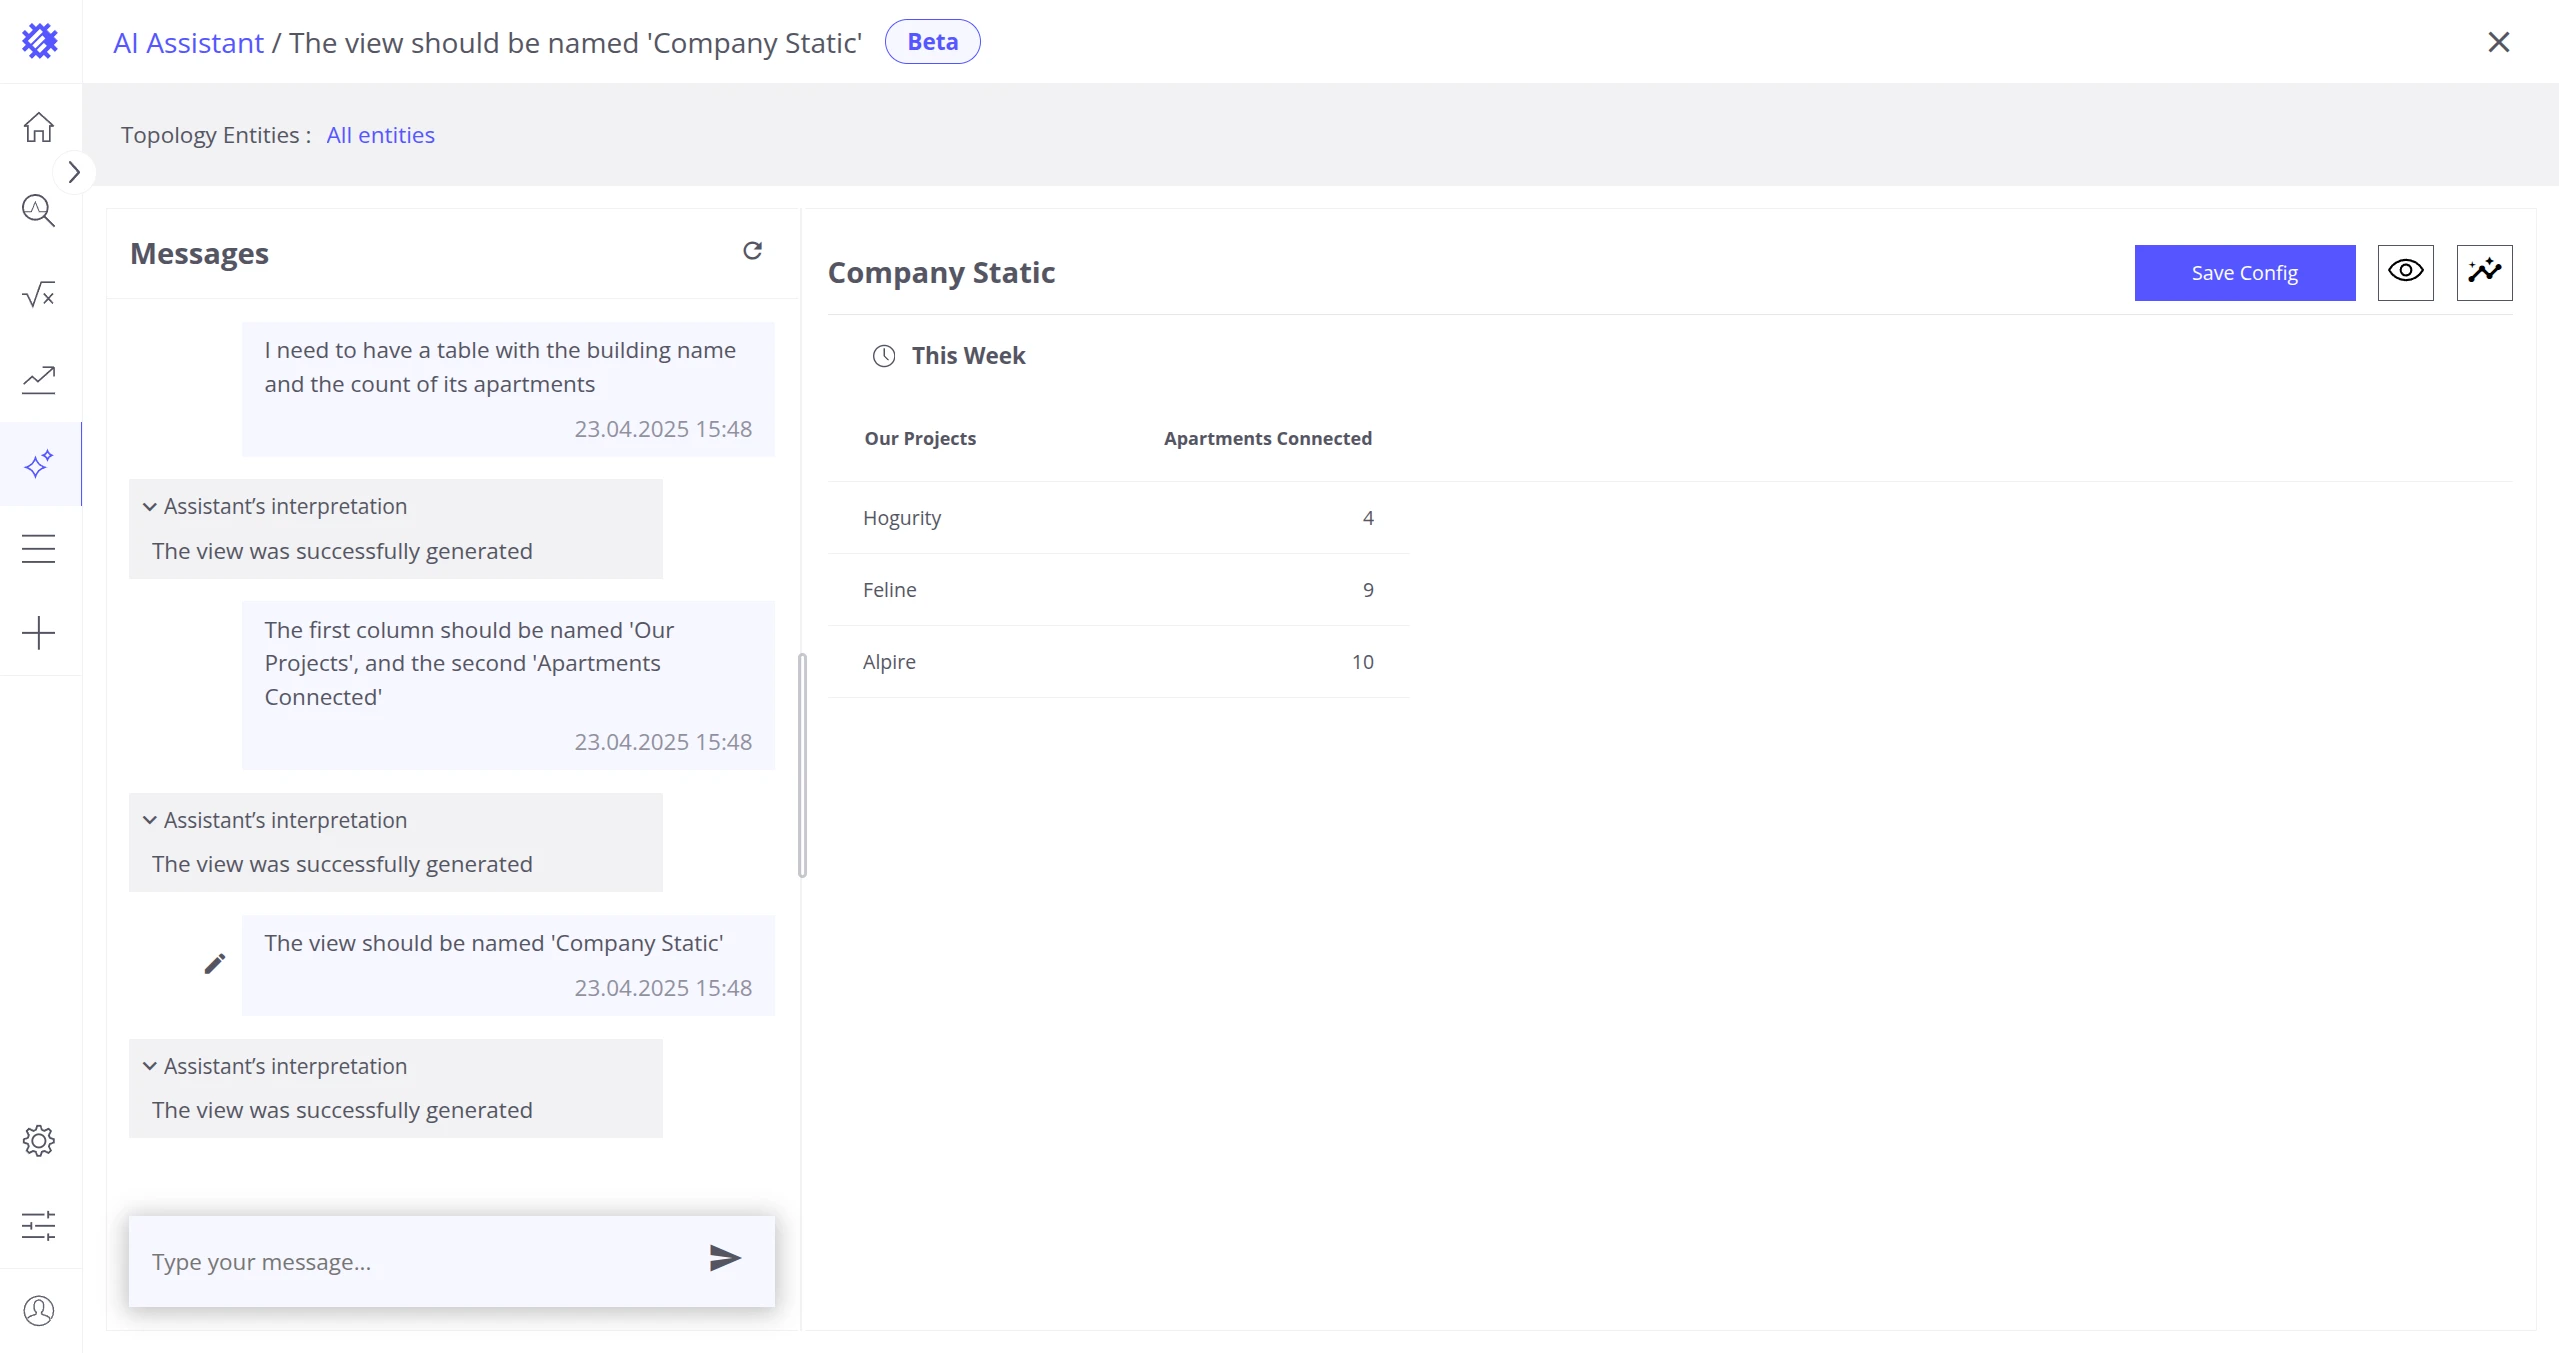
Column and Visualization Names
Section titled “Column and Visualization Names”The assistant assigns names to columns and the visualization based on your request.
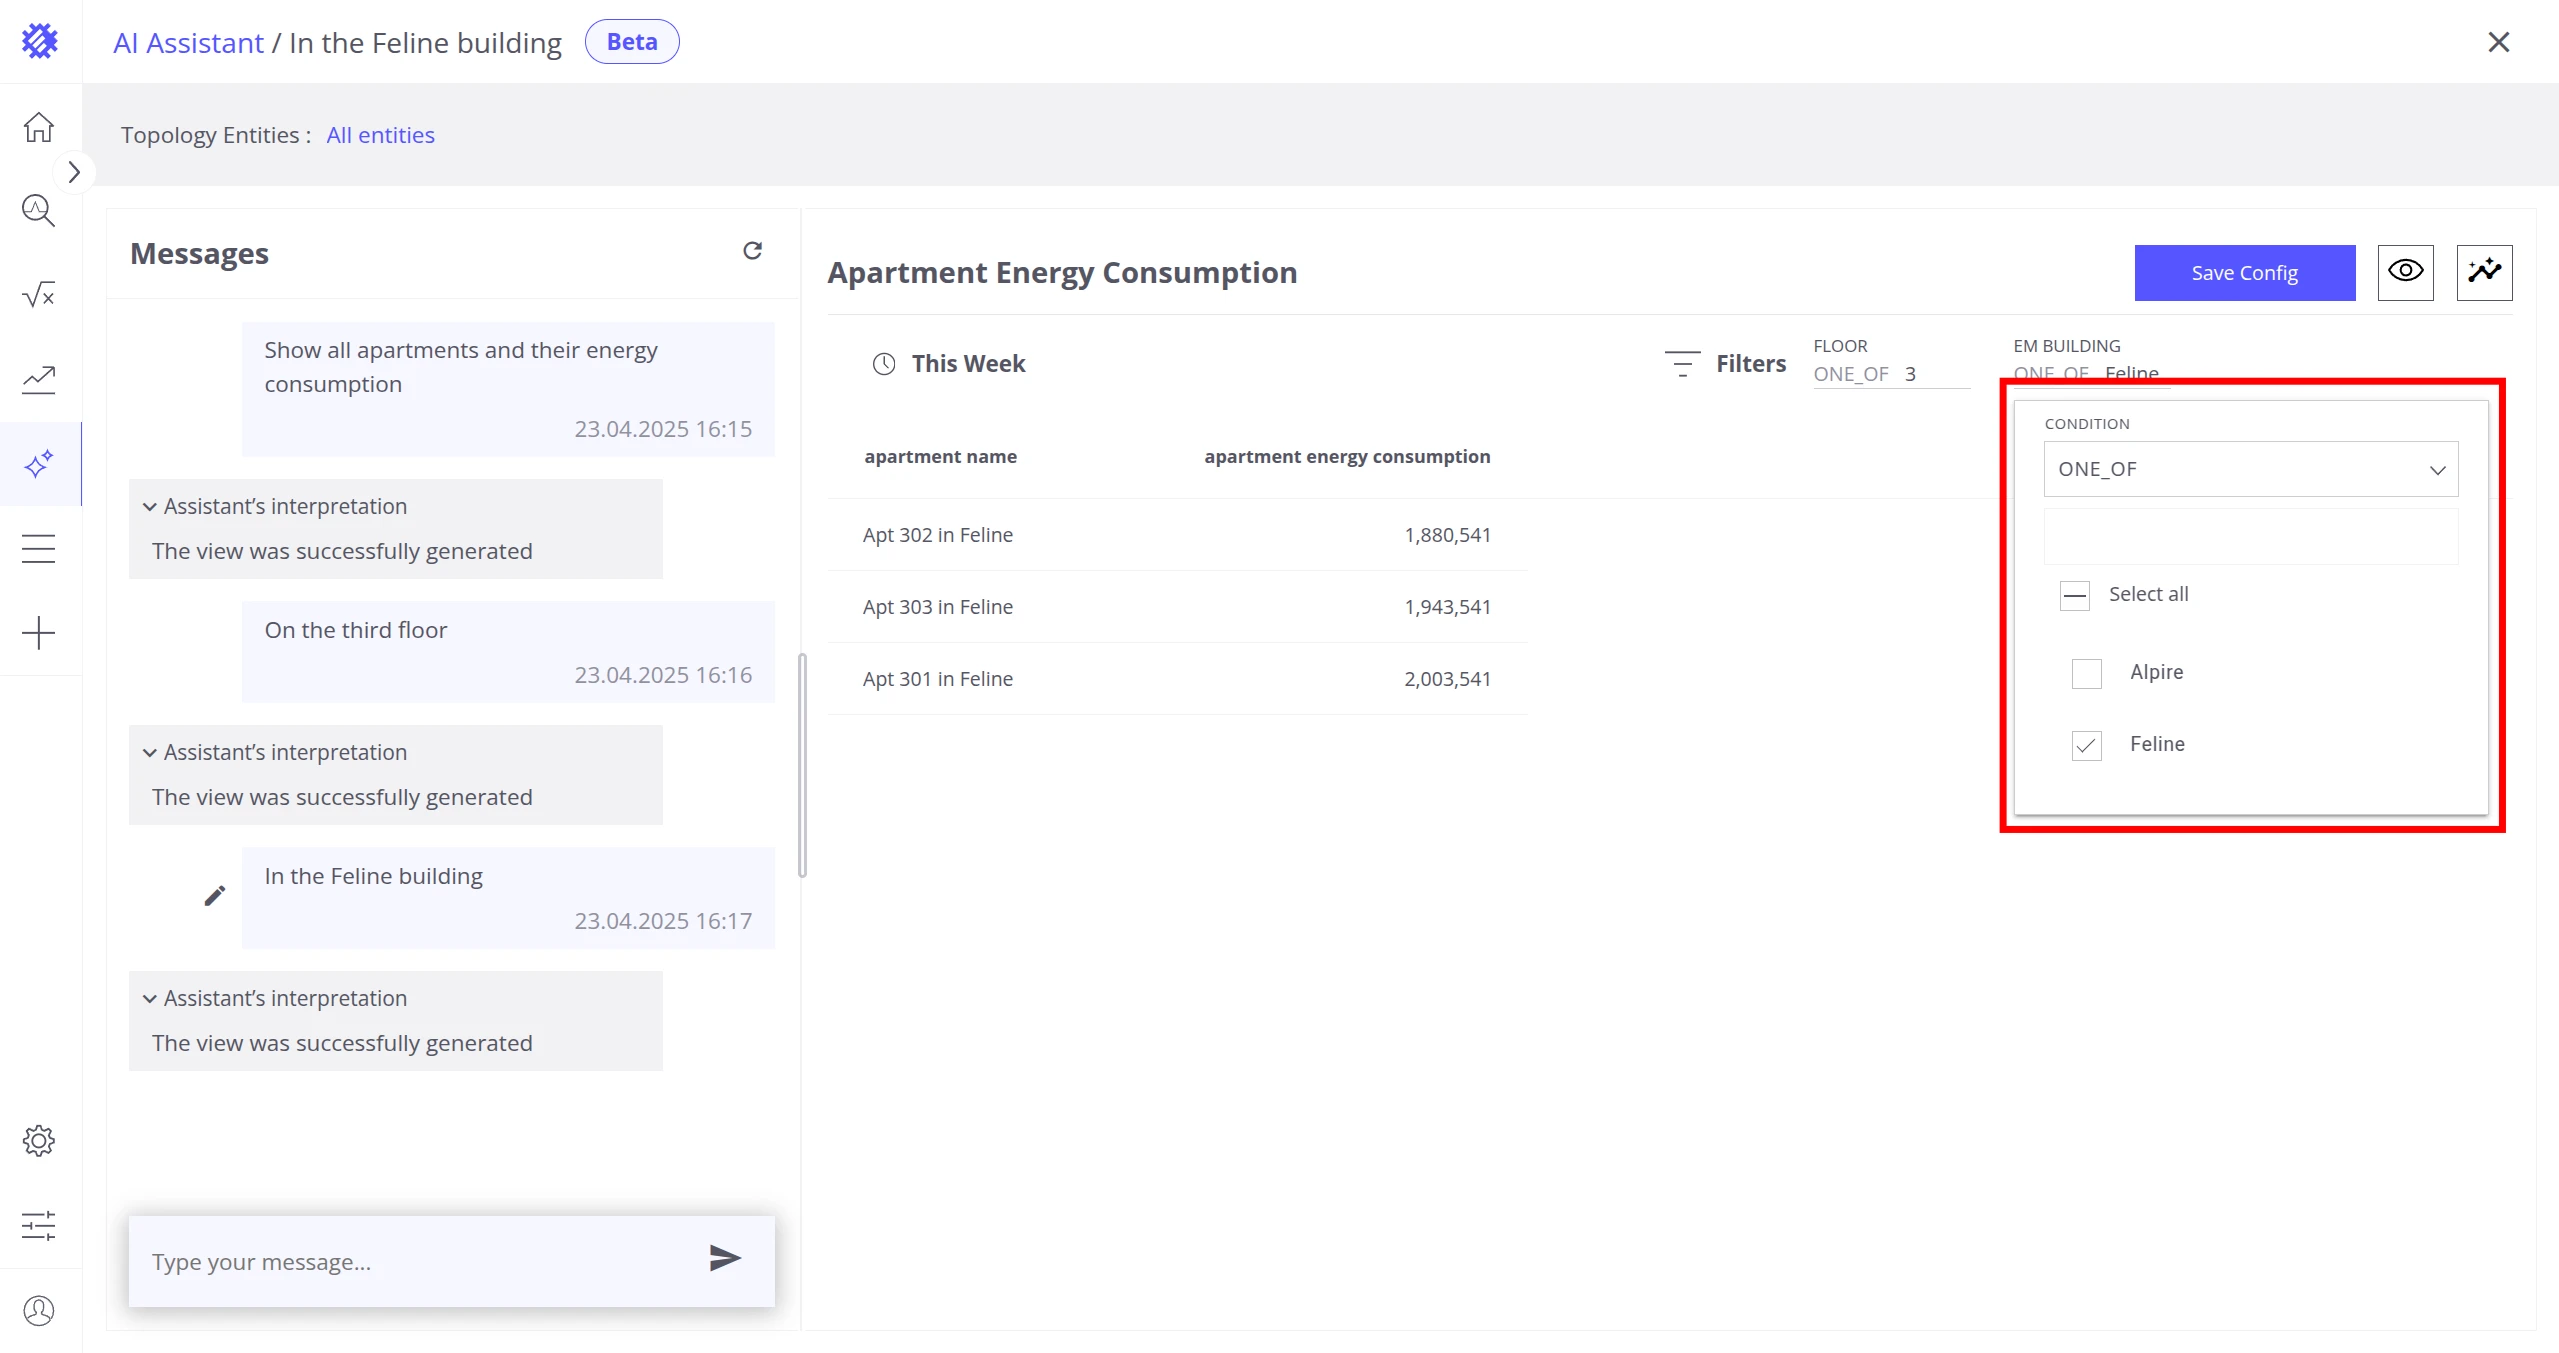
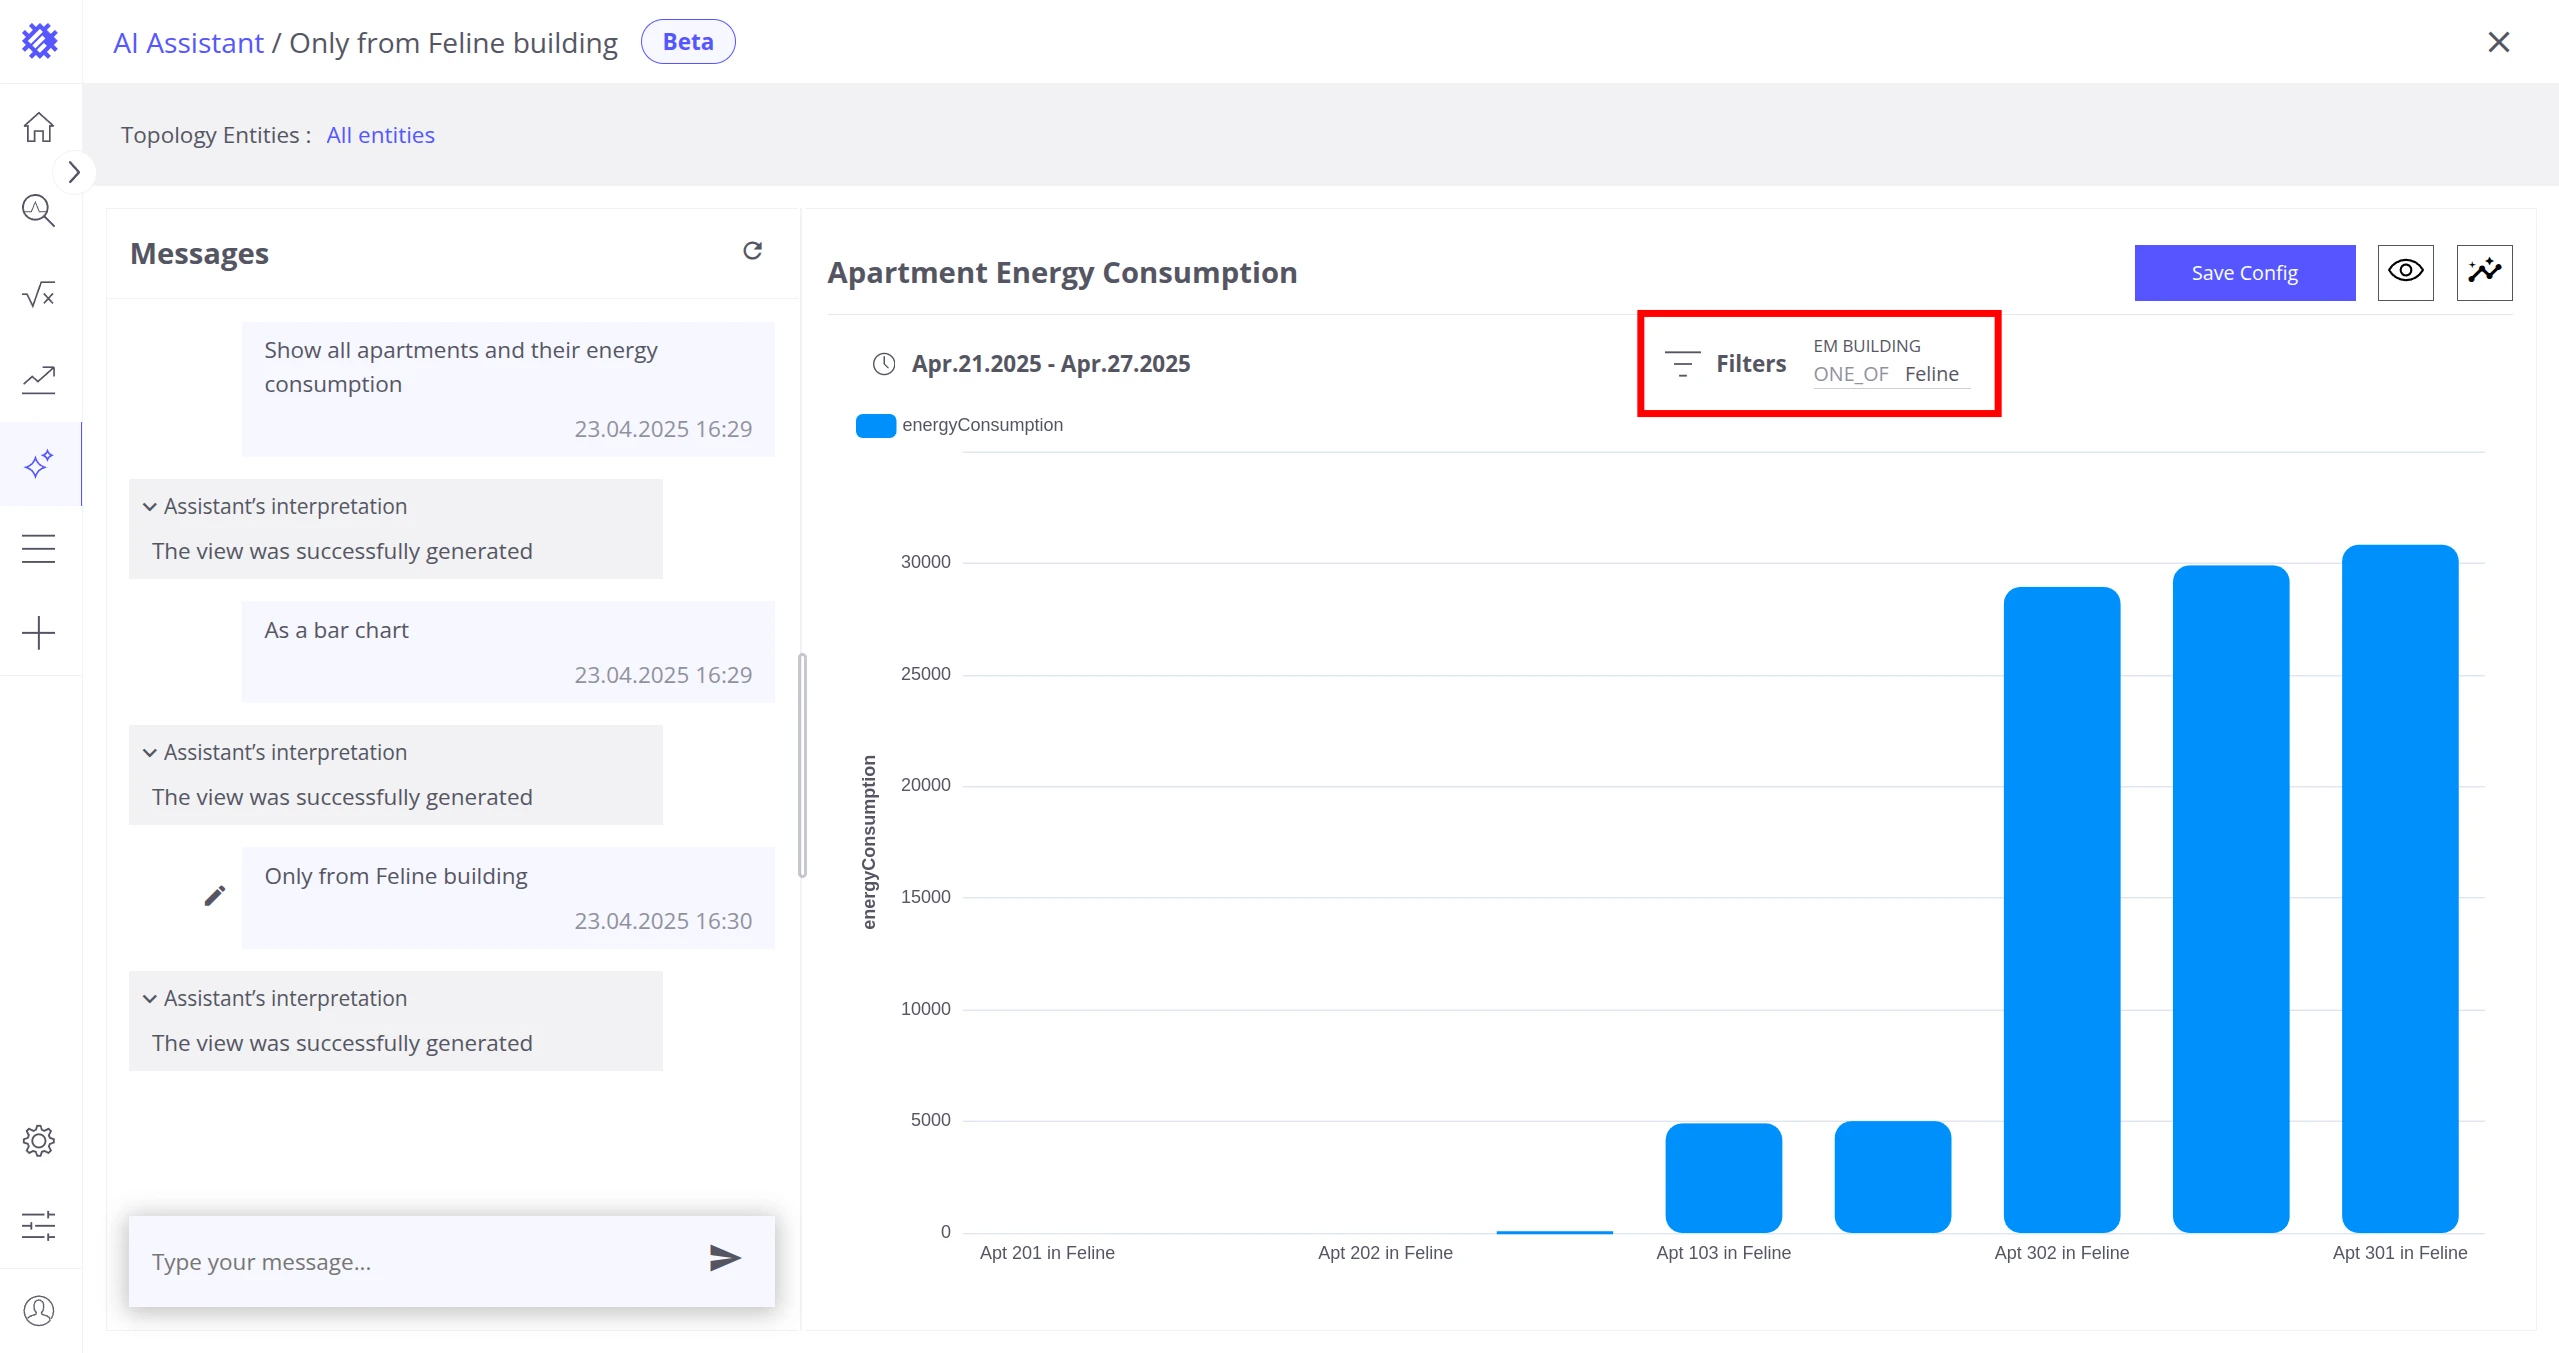
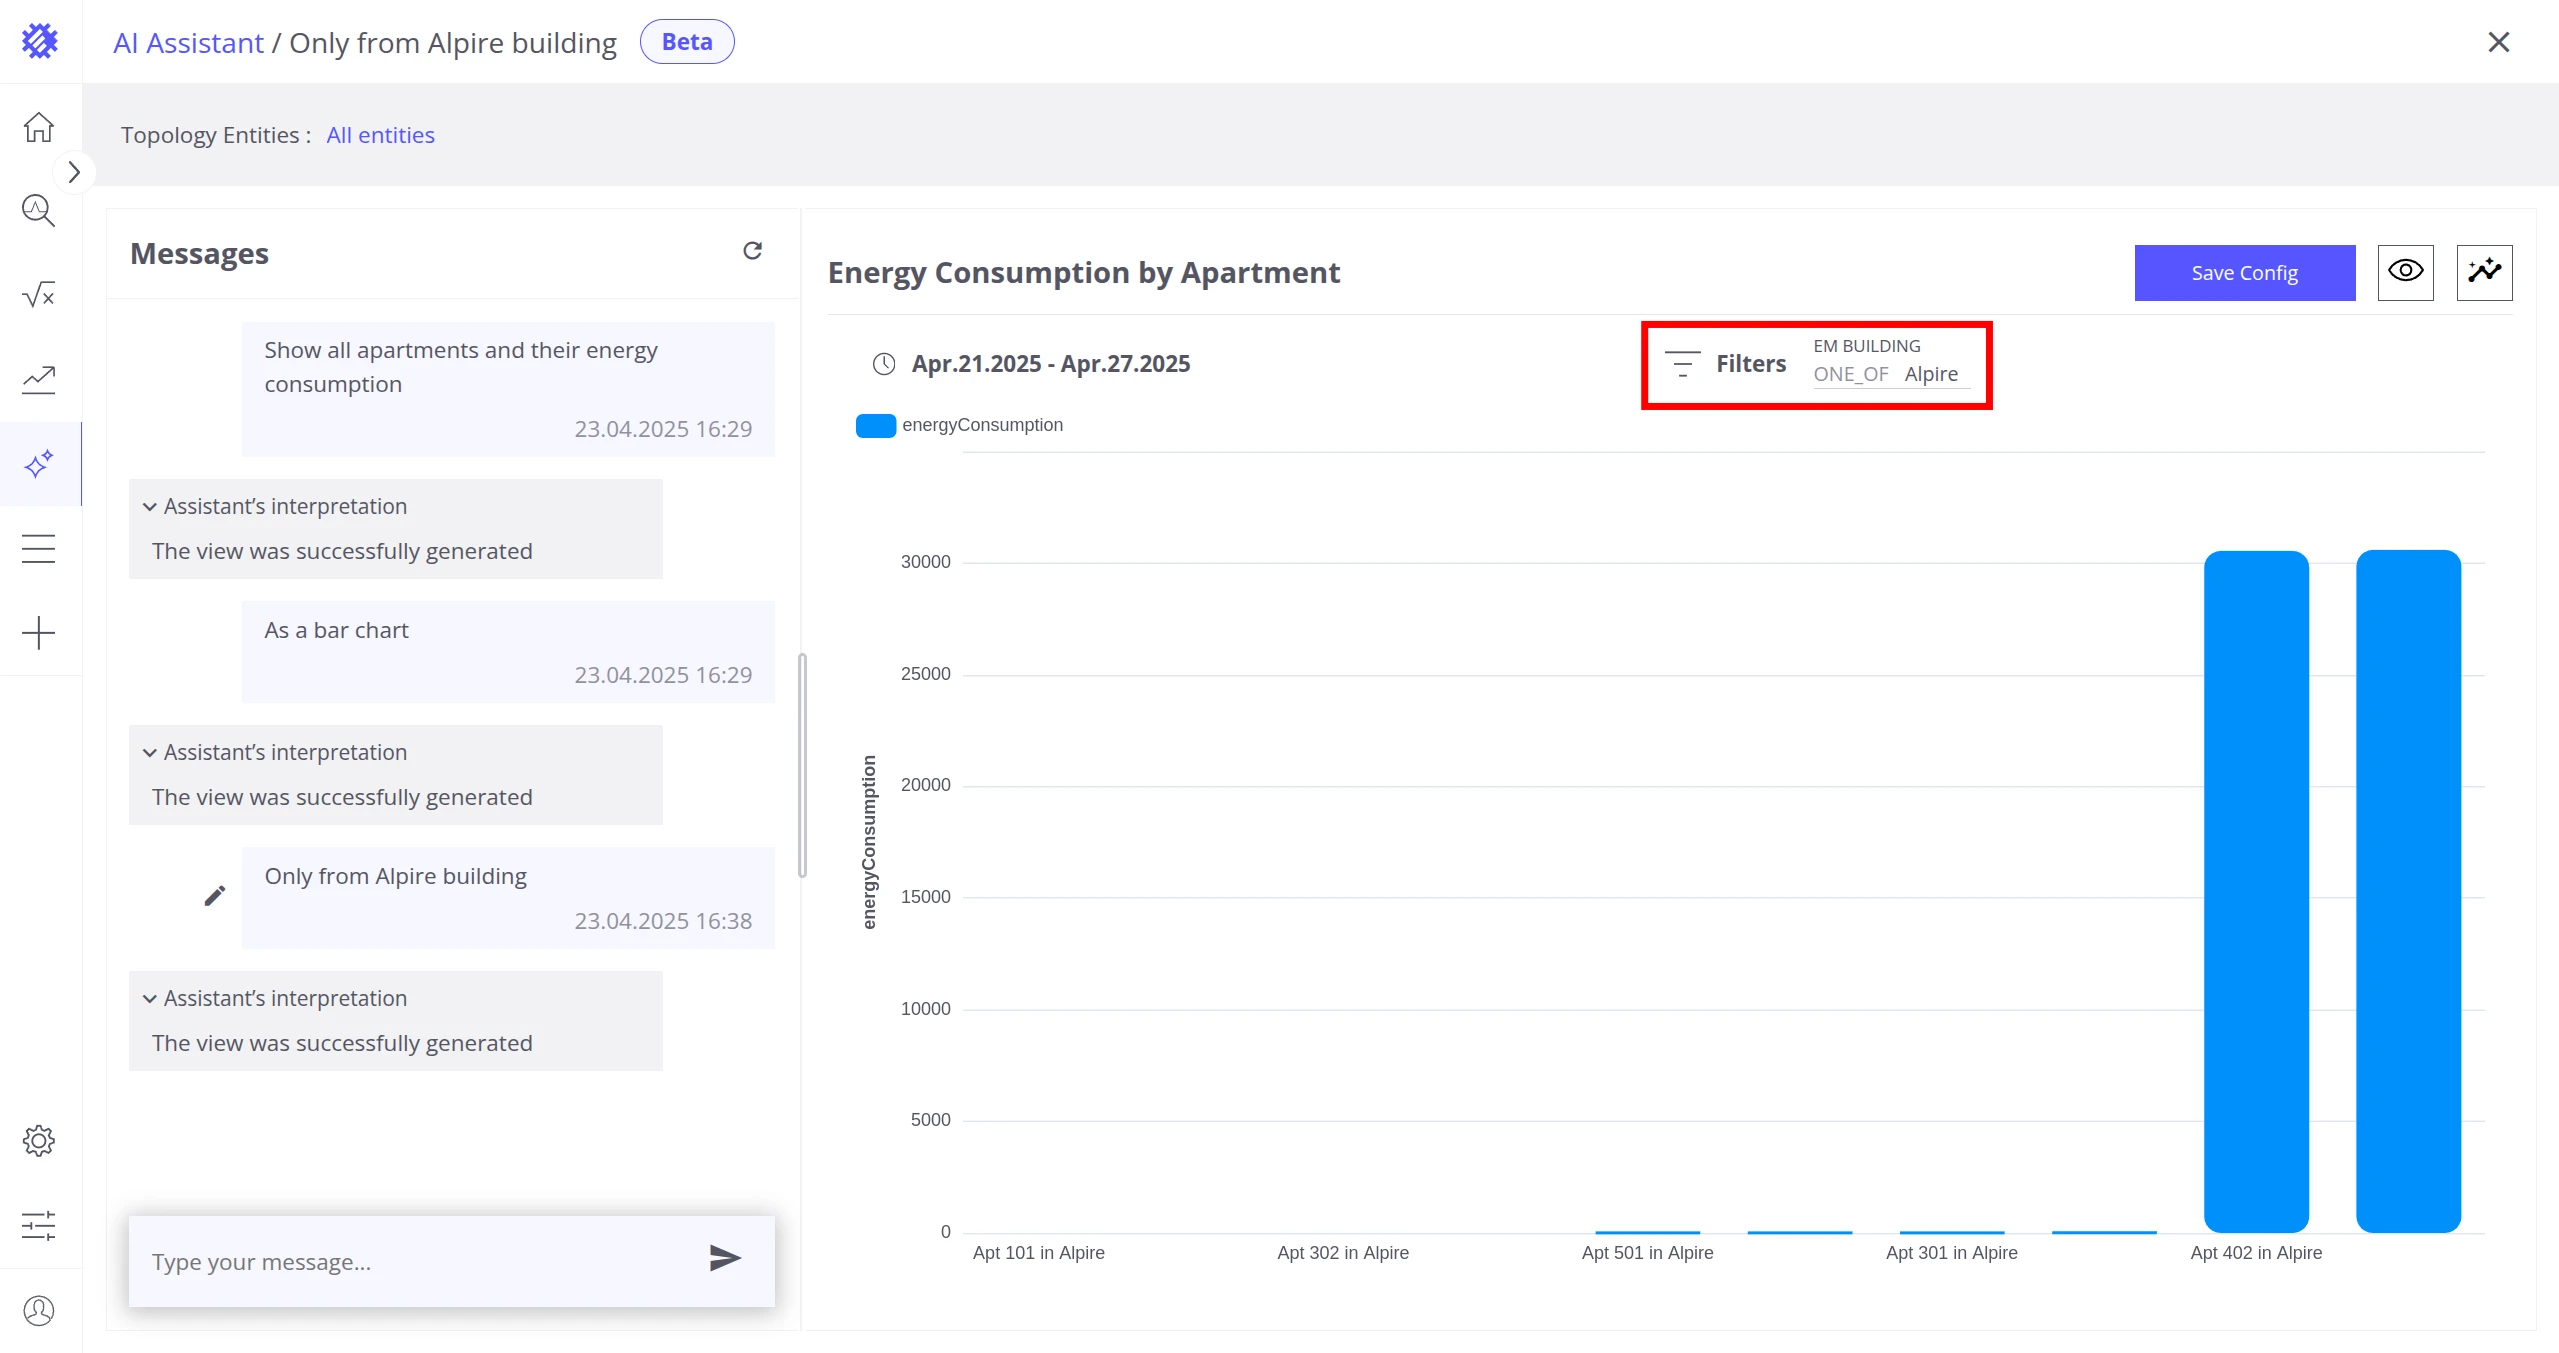
Filters
Section titled “Filters”The assistant adds filters to the generated view when specified in your question.
Multilingual Responses
Section titled “Multilingual Responses”The assistant responds in the language you use.
Conversation Context
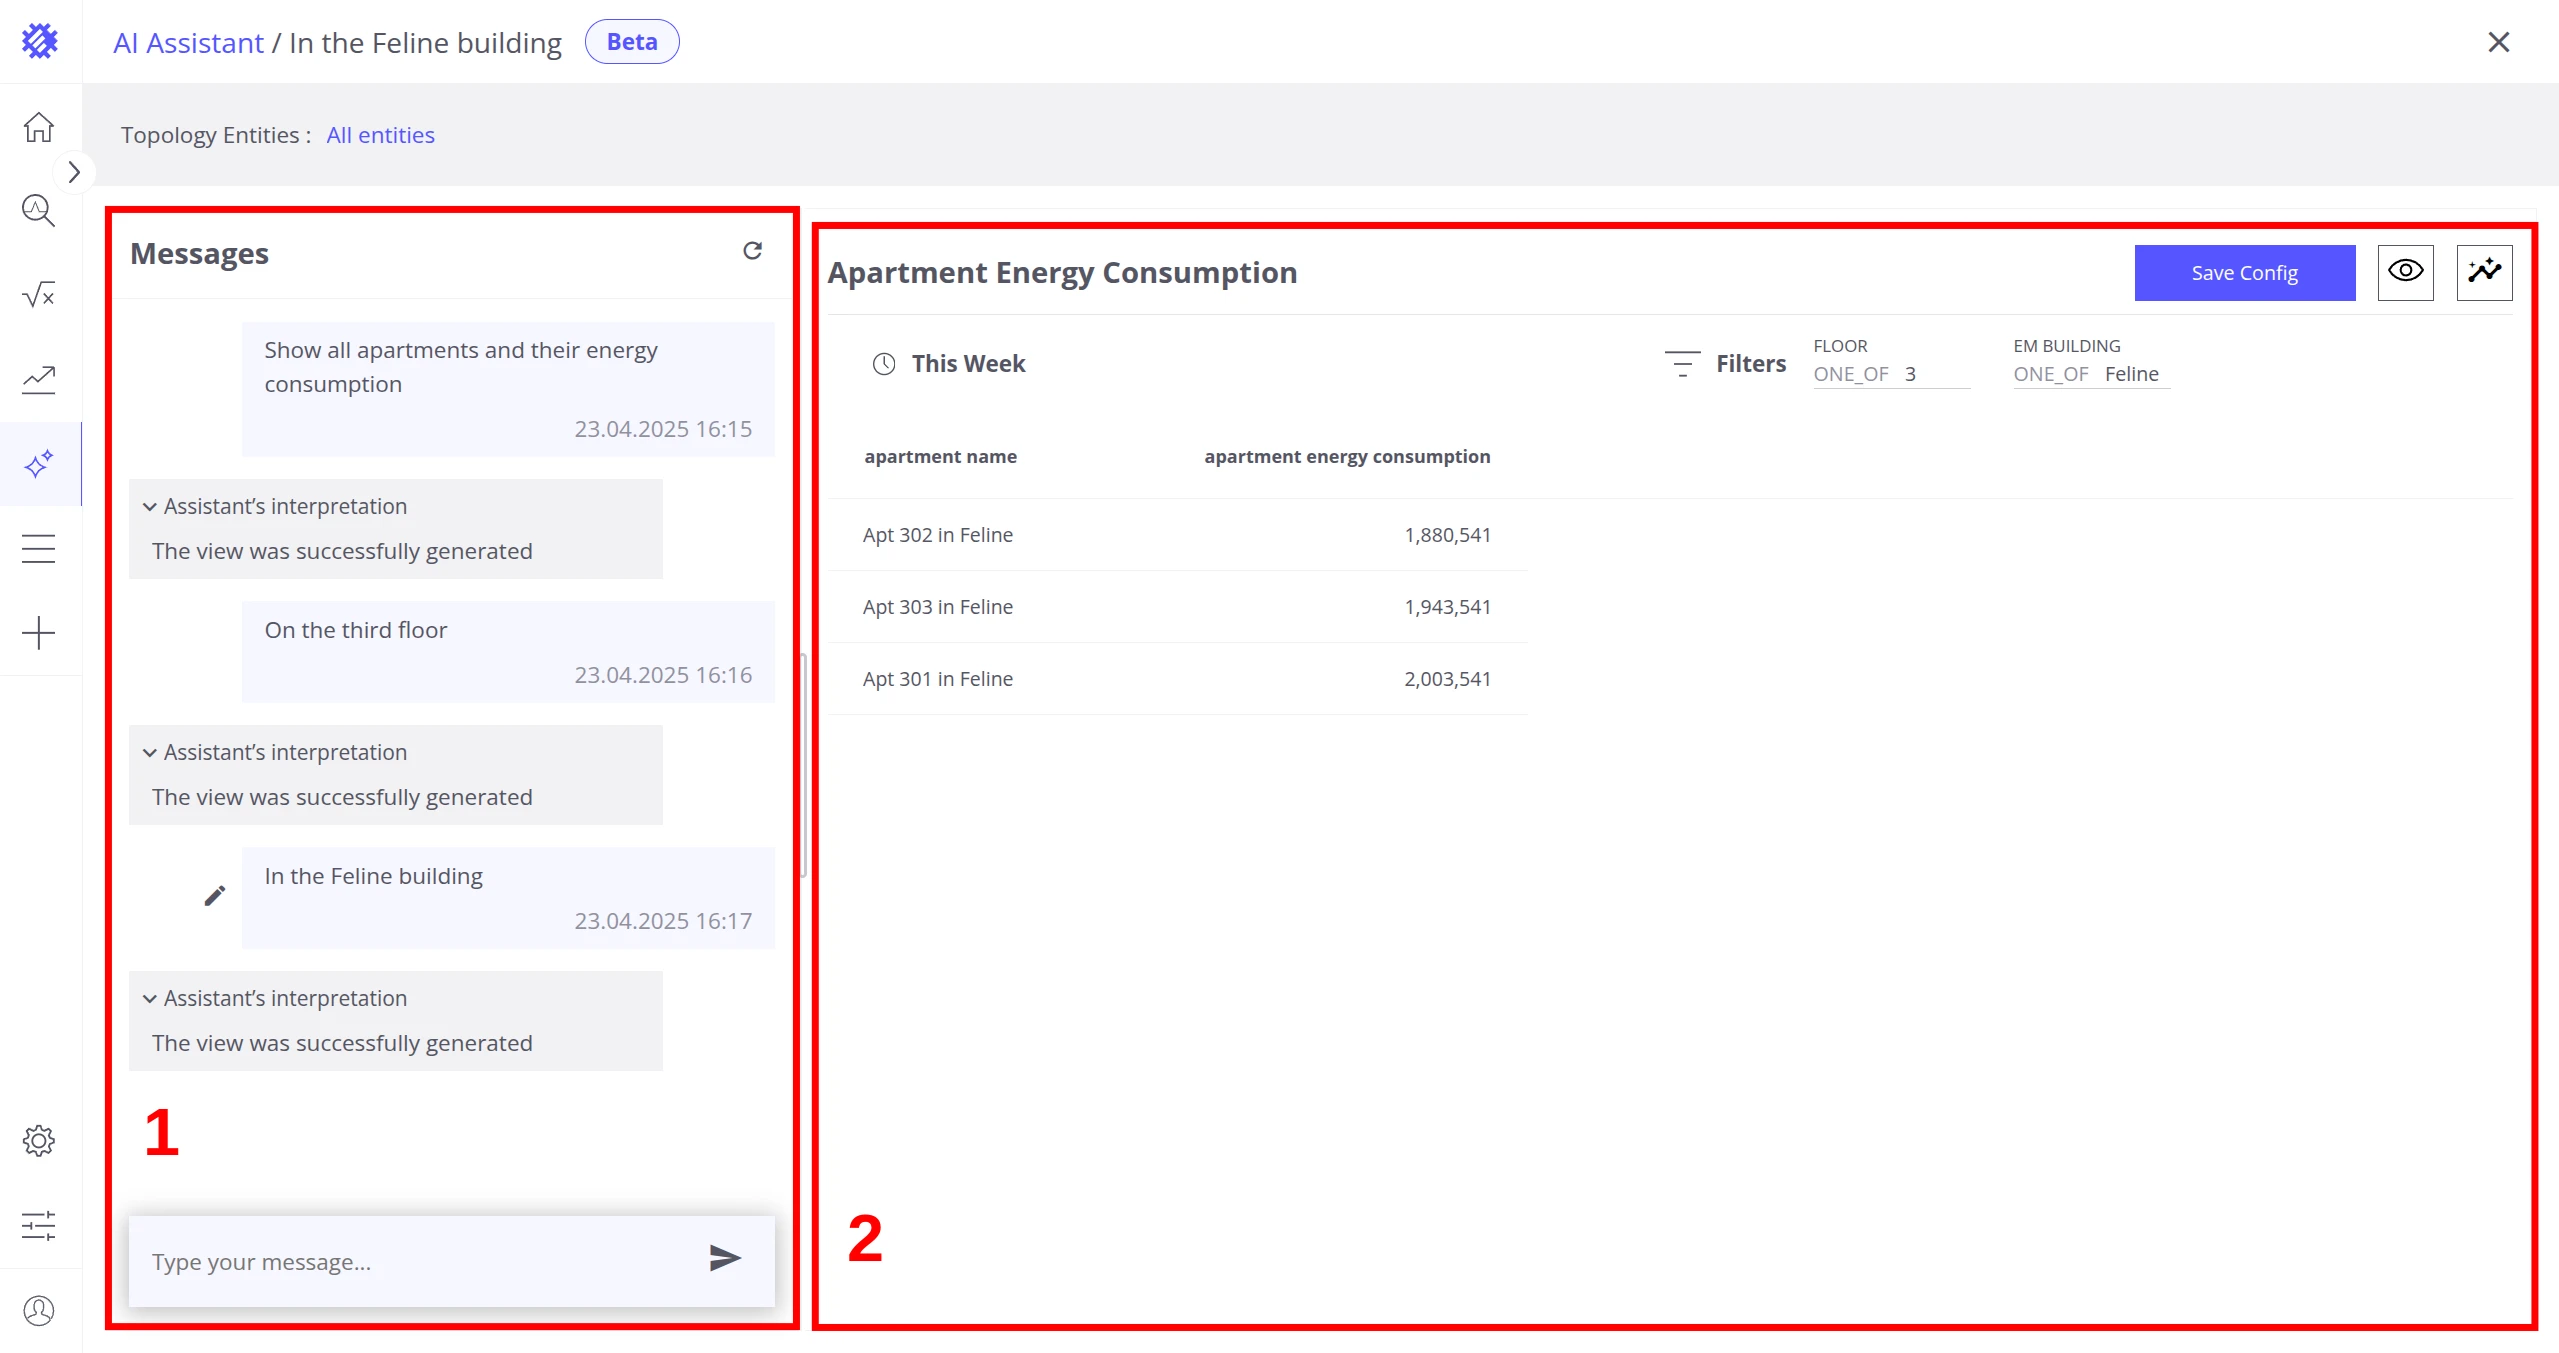
Section titled “Conversation Context”The assistant remembers the full conversation context and generates answers based on all previous messages, specifications, and responses. You can refine a result over multiple turns without restating the original request.
Chat Page
Section titled “Chat Page”After sending a message or selecting a previously saved chat, you are redirected to the Chat Page. The chat history appears on the left side of the screen, and the visualization for the selected message appears on the right.
Send a New Message
Section titled “Send a New Message”Type your message and click the Send icon on the right side of the input field.
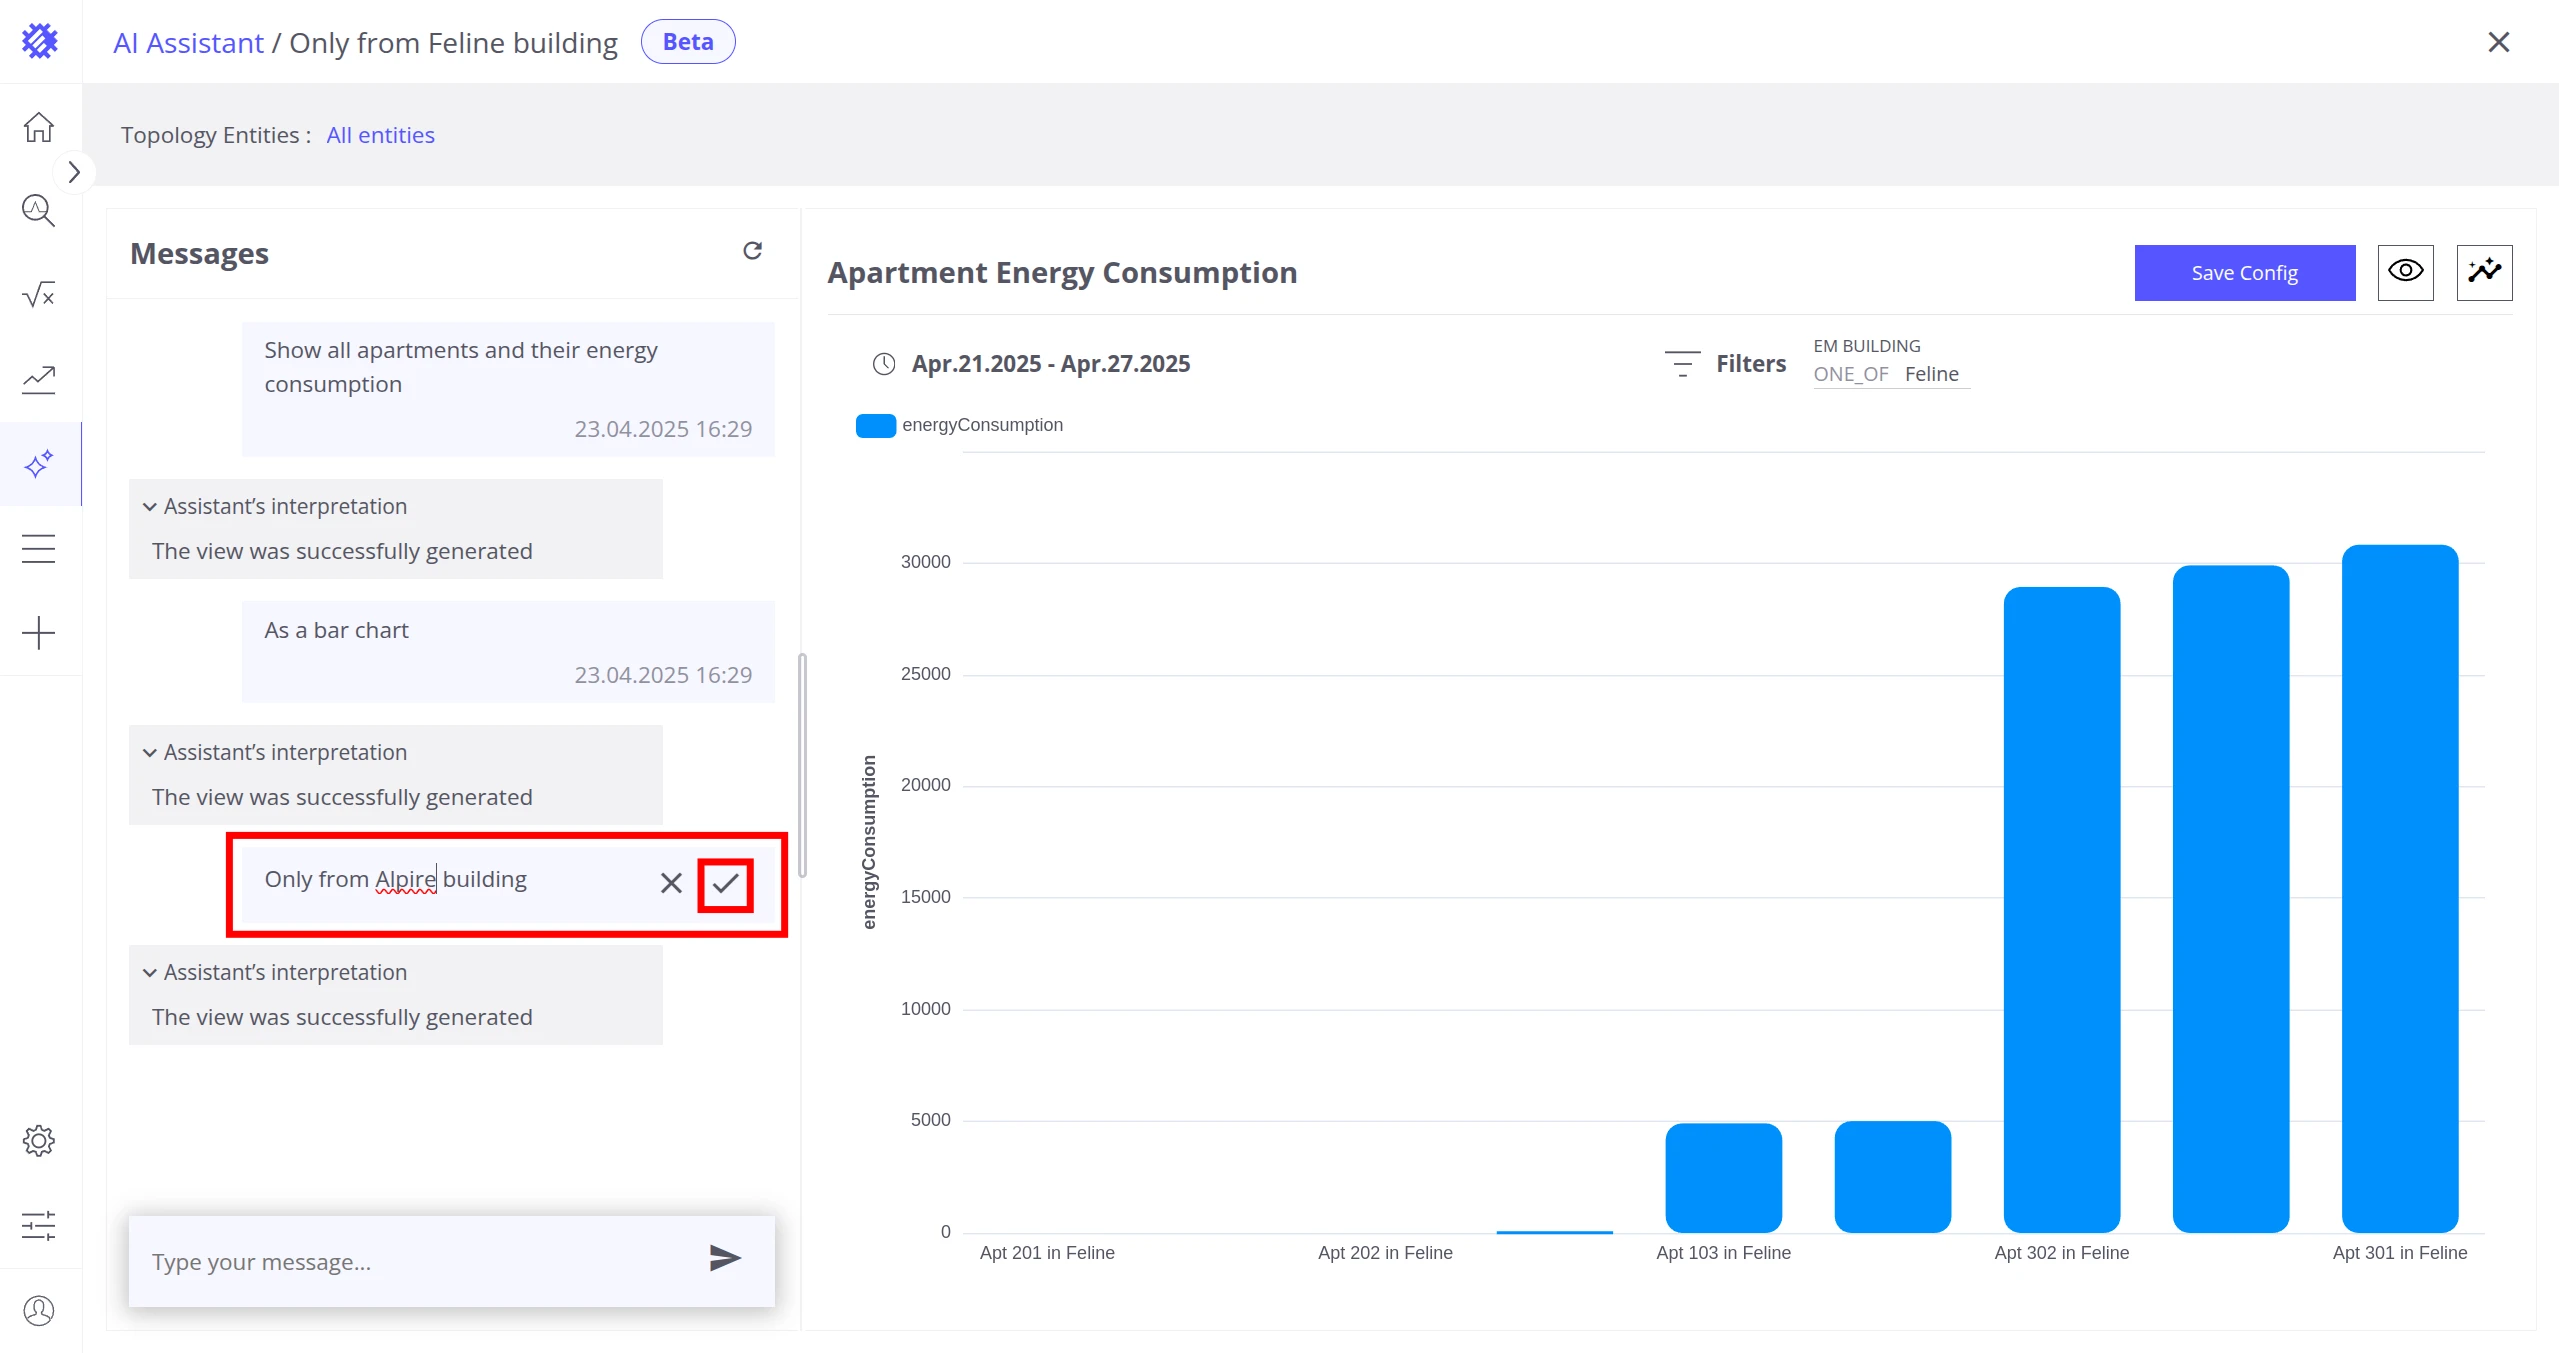
Edit the Last Message
Section titled “Edit the Last Message”Click the pencil icon next to the last message to modify it, then confirm or cancel the change. Use this when the assistant returned incorrect results and you want to provide more detail in the same message.

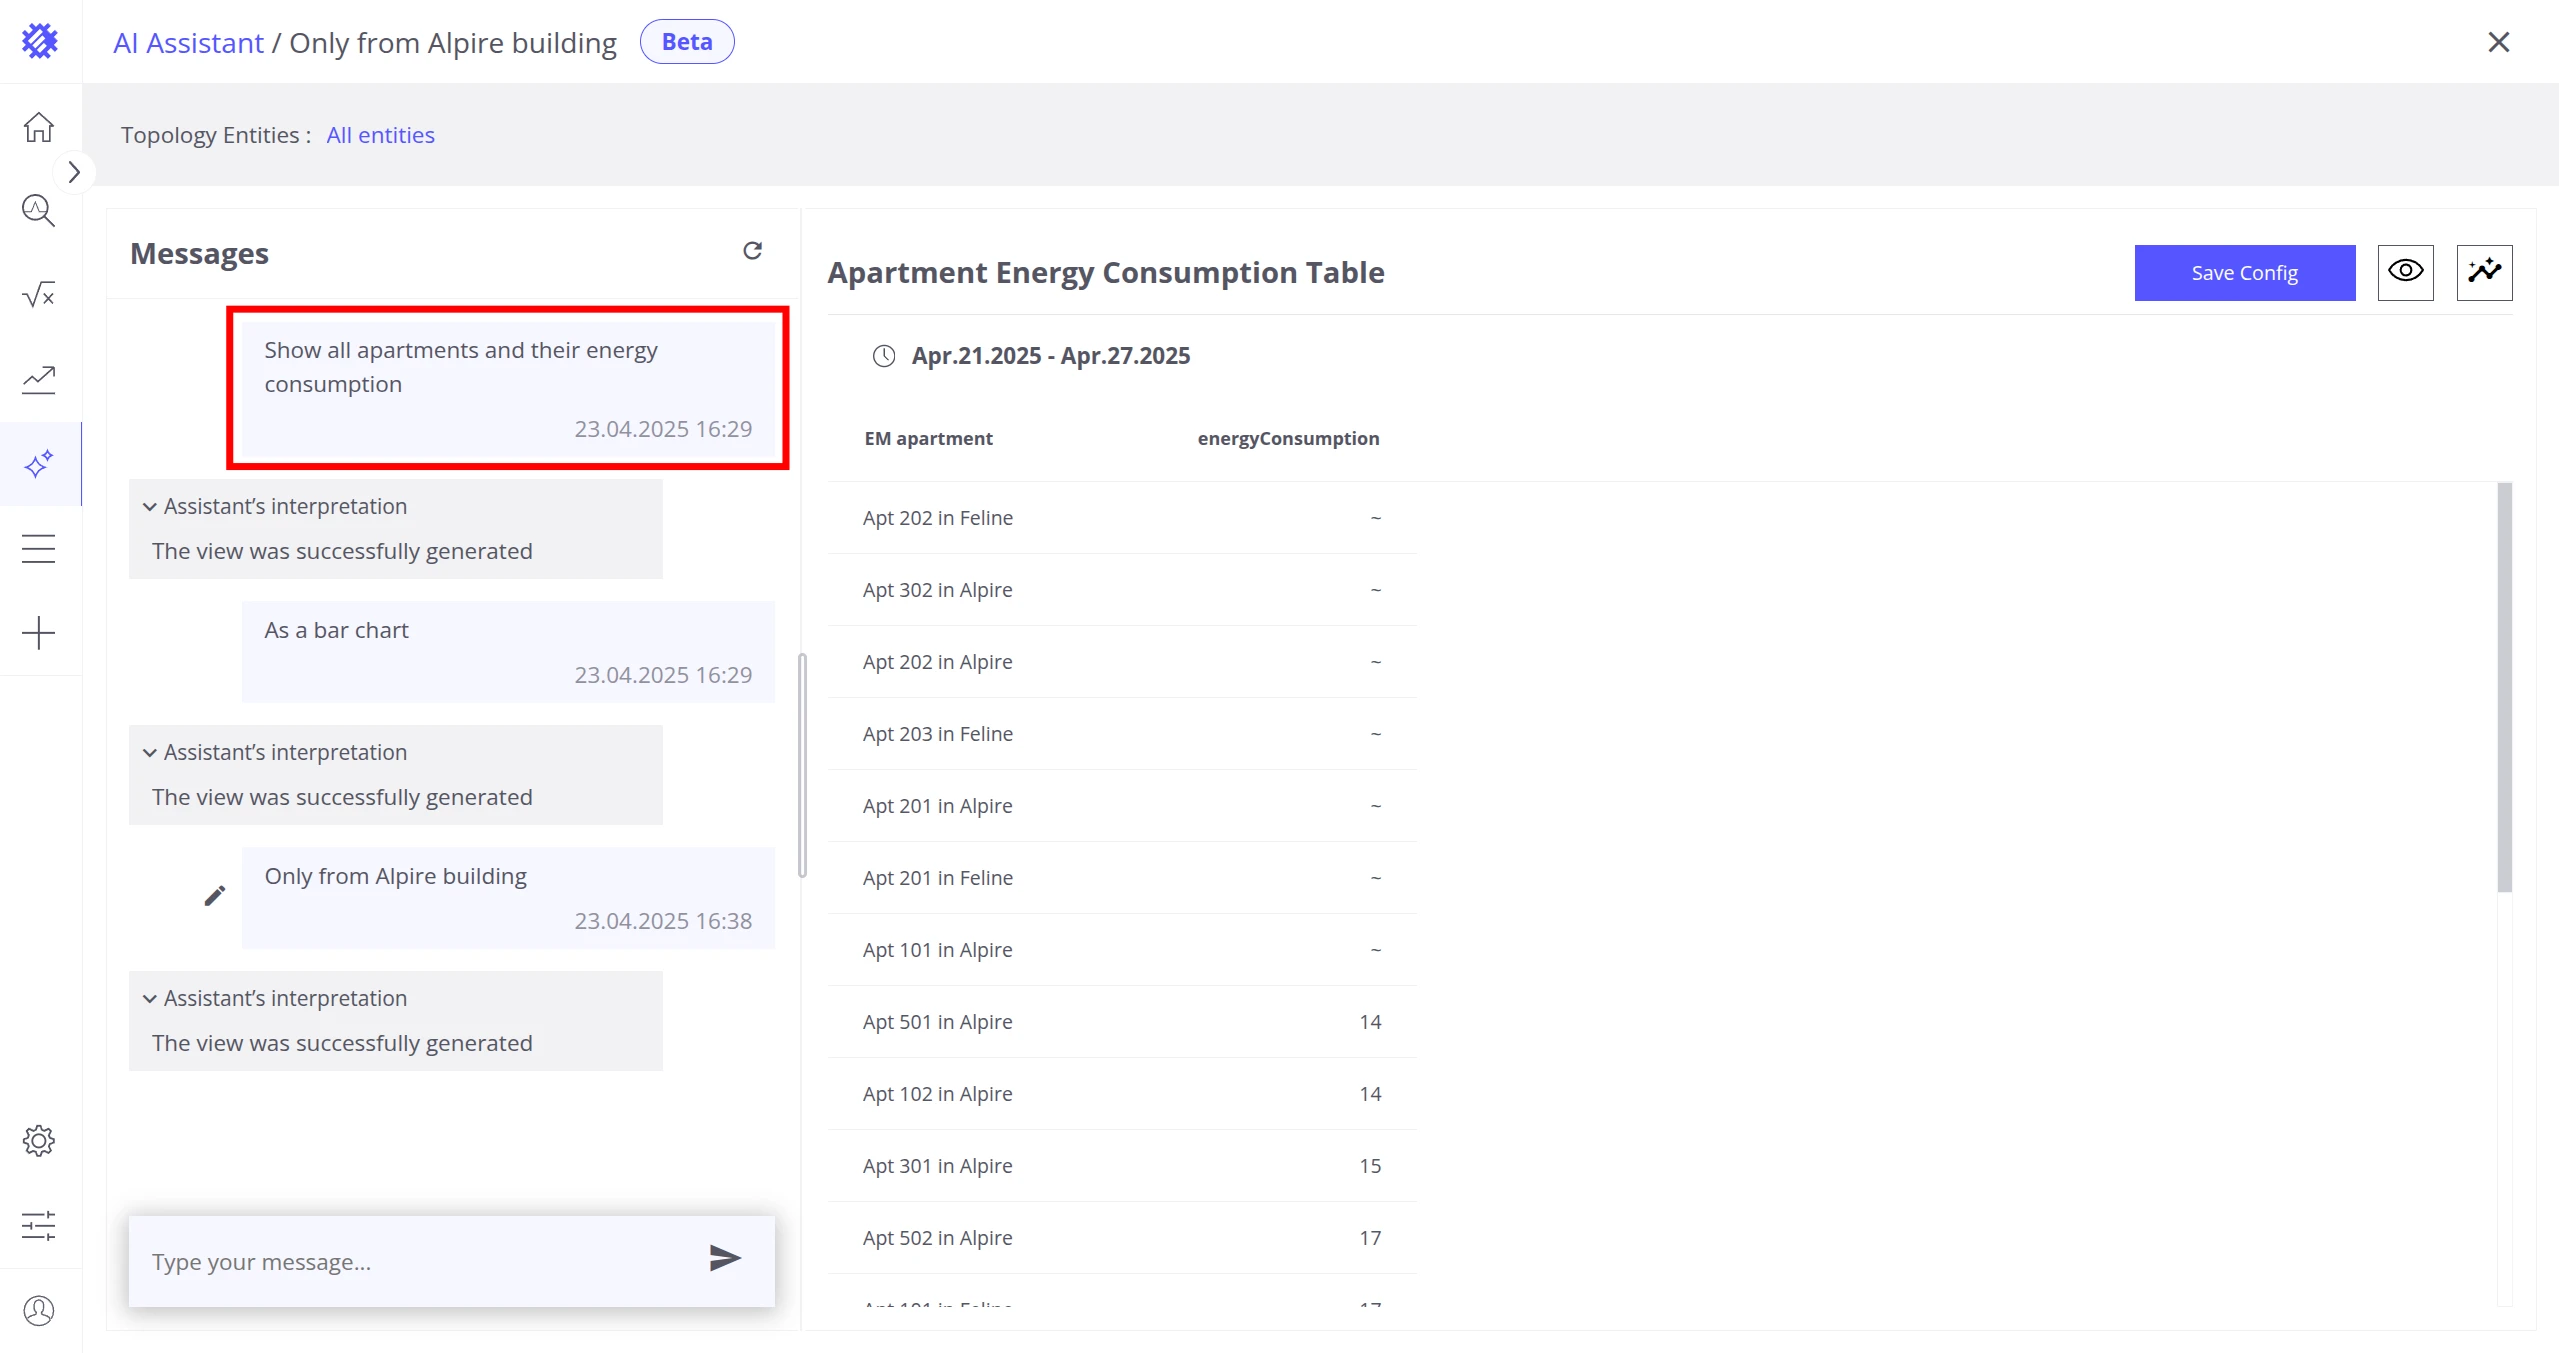
Review a Previous Message
Section titled “Review a Previous Message”Click any message in the chat history to display its previously generated answer on the right side of the screen.
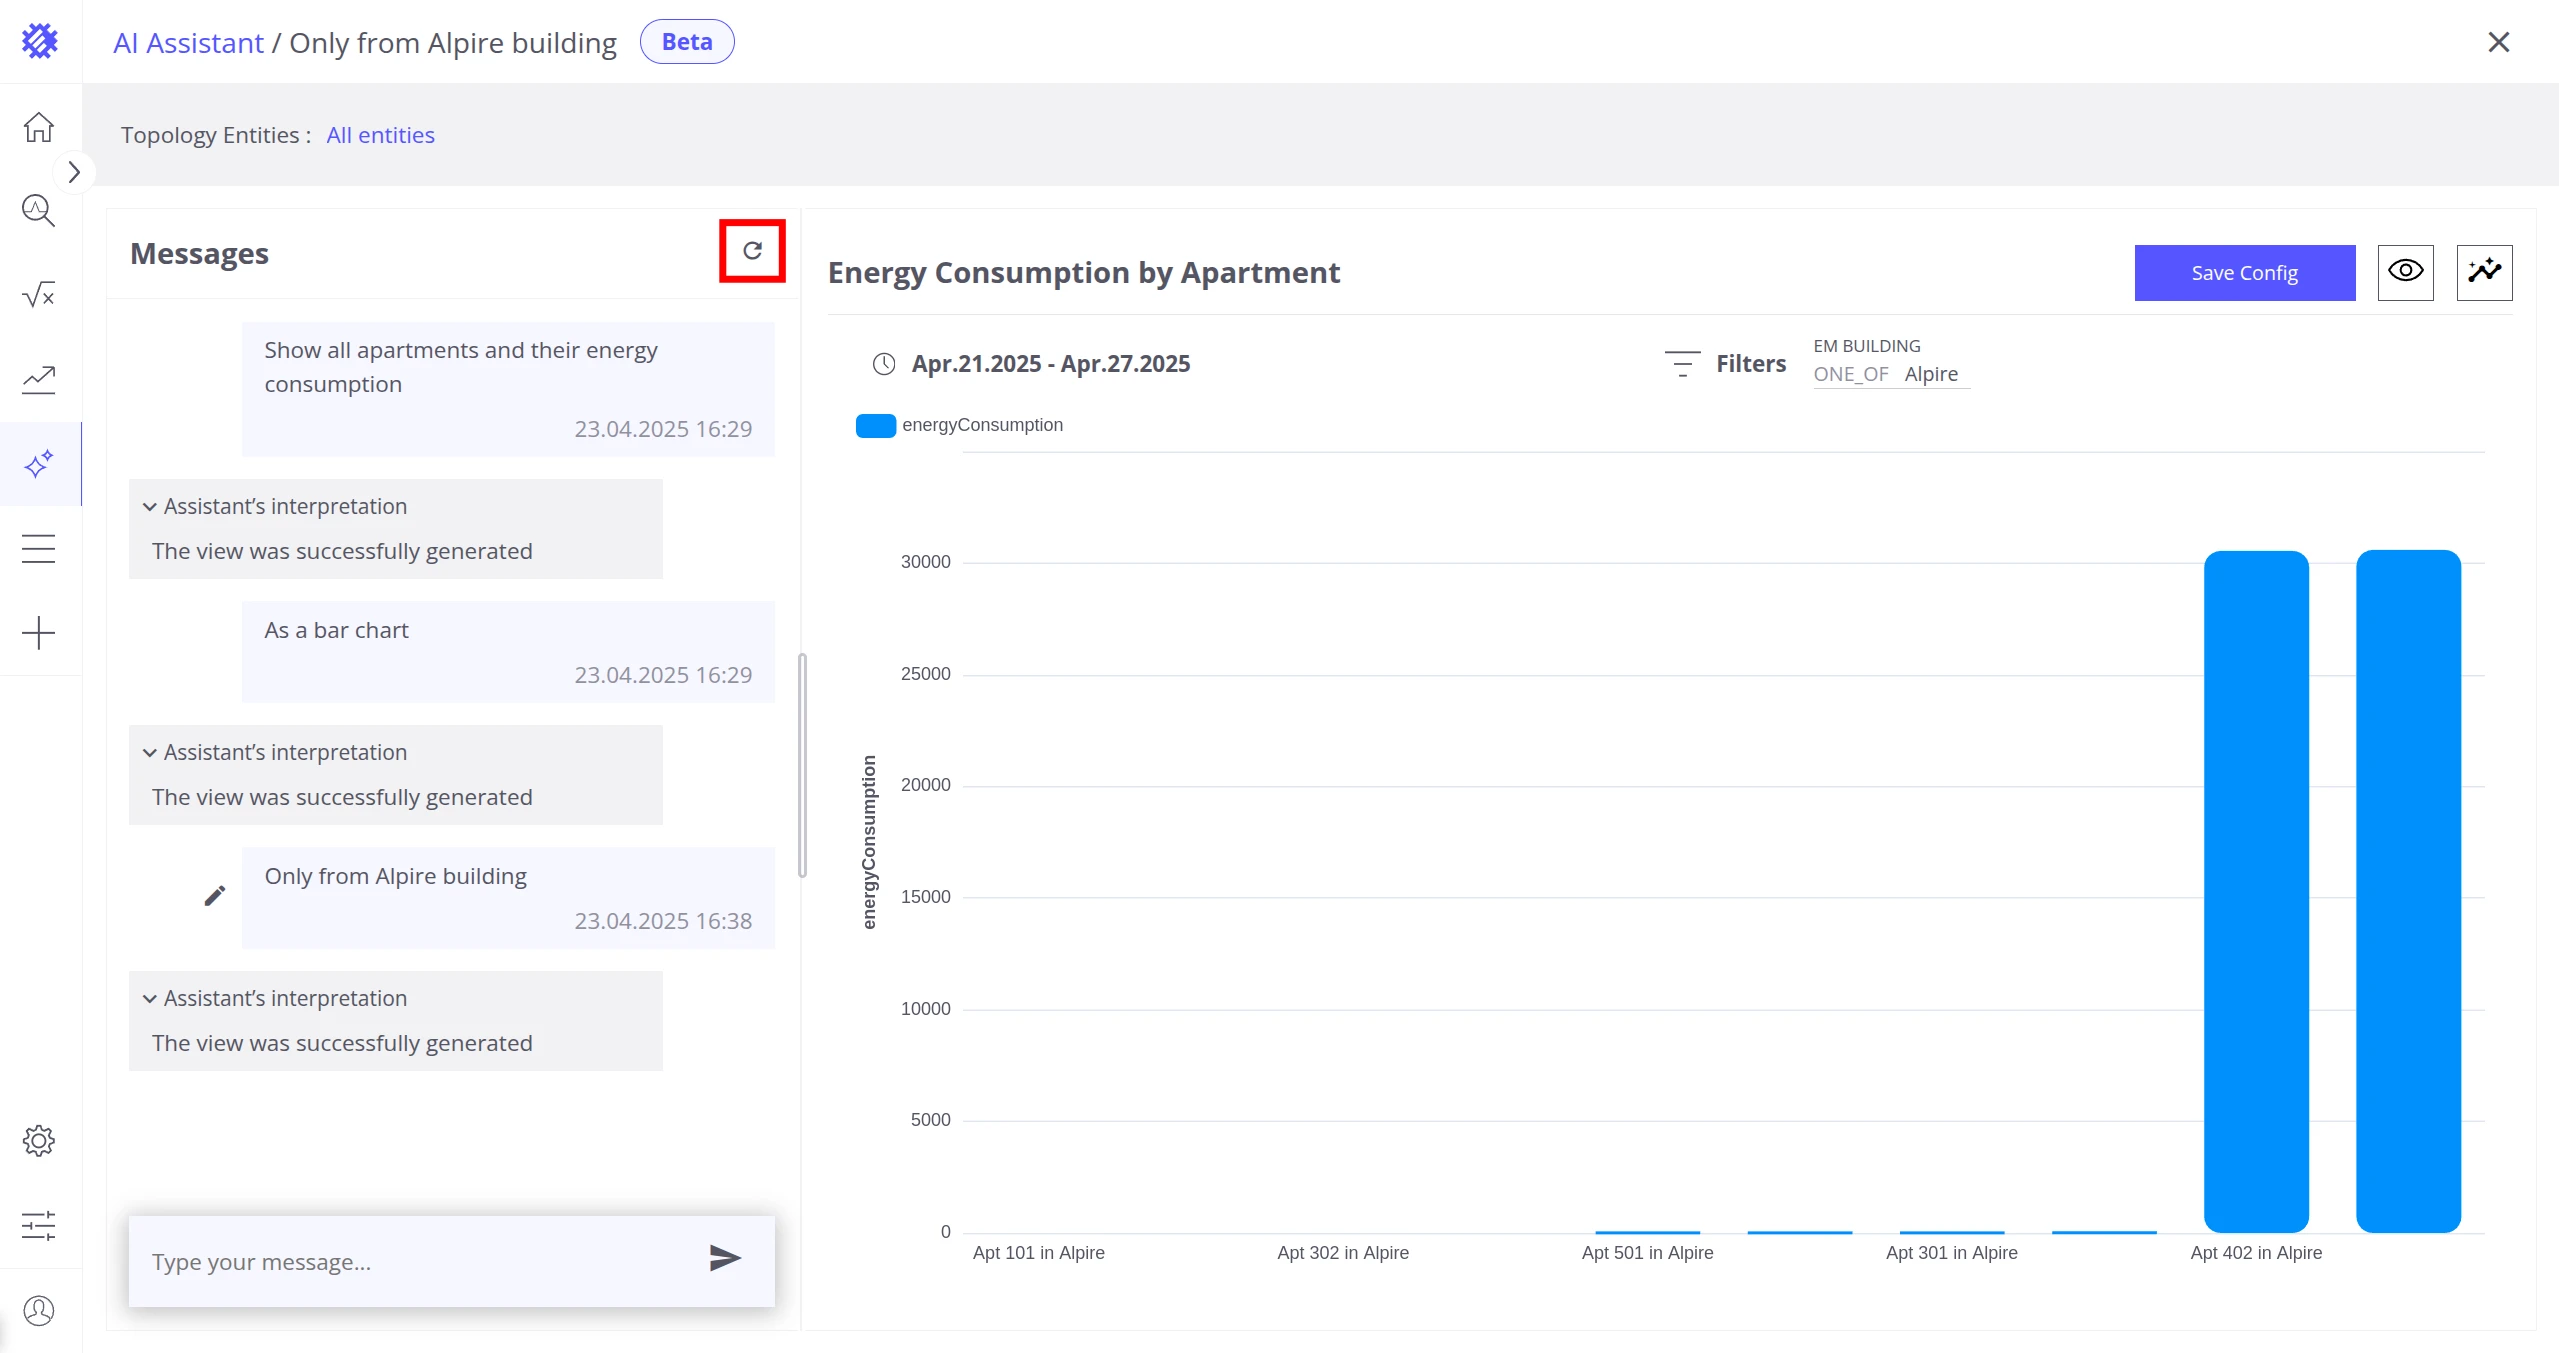
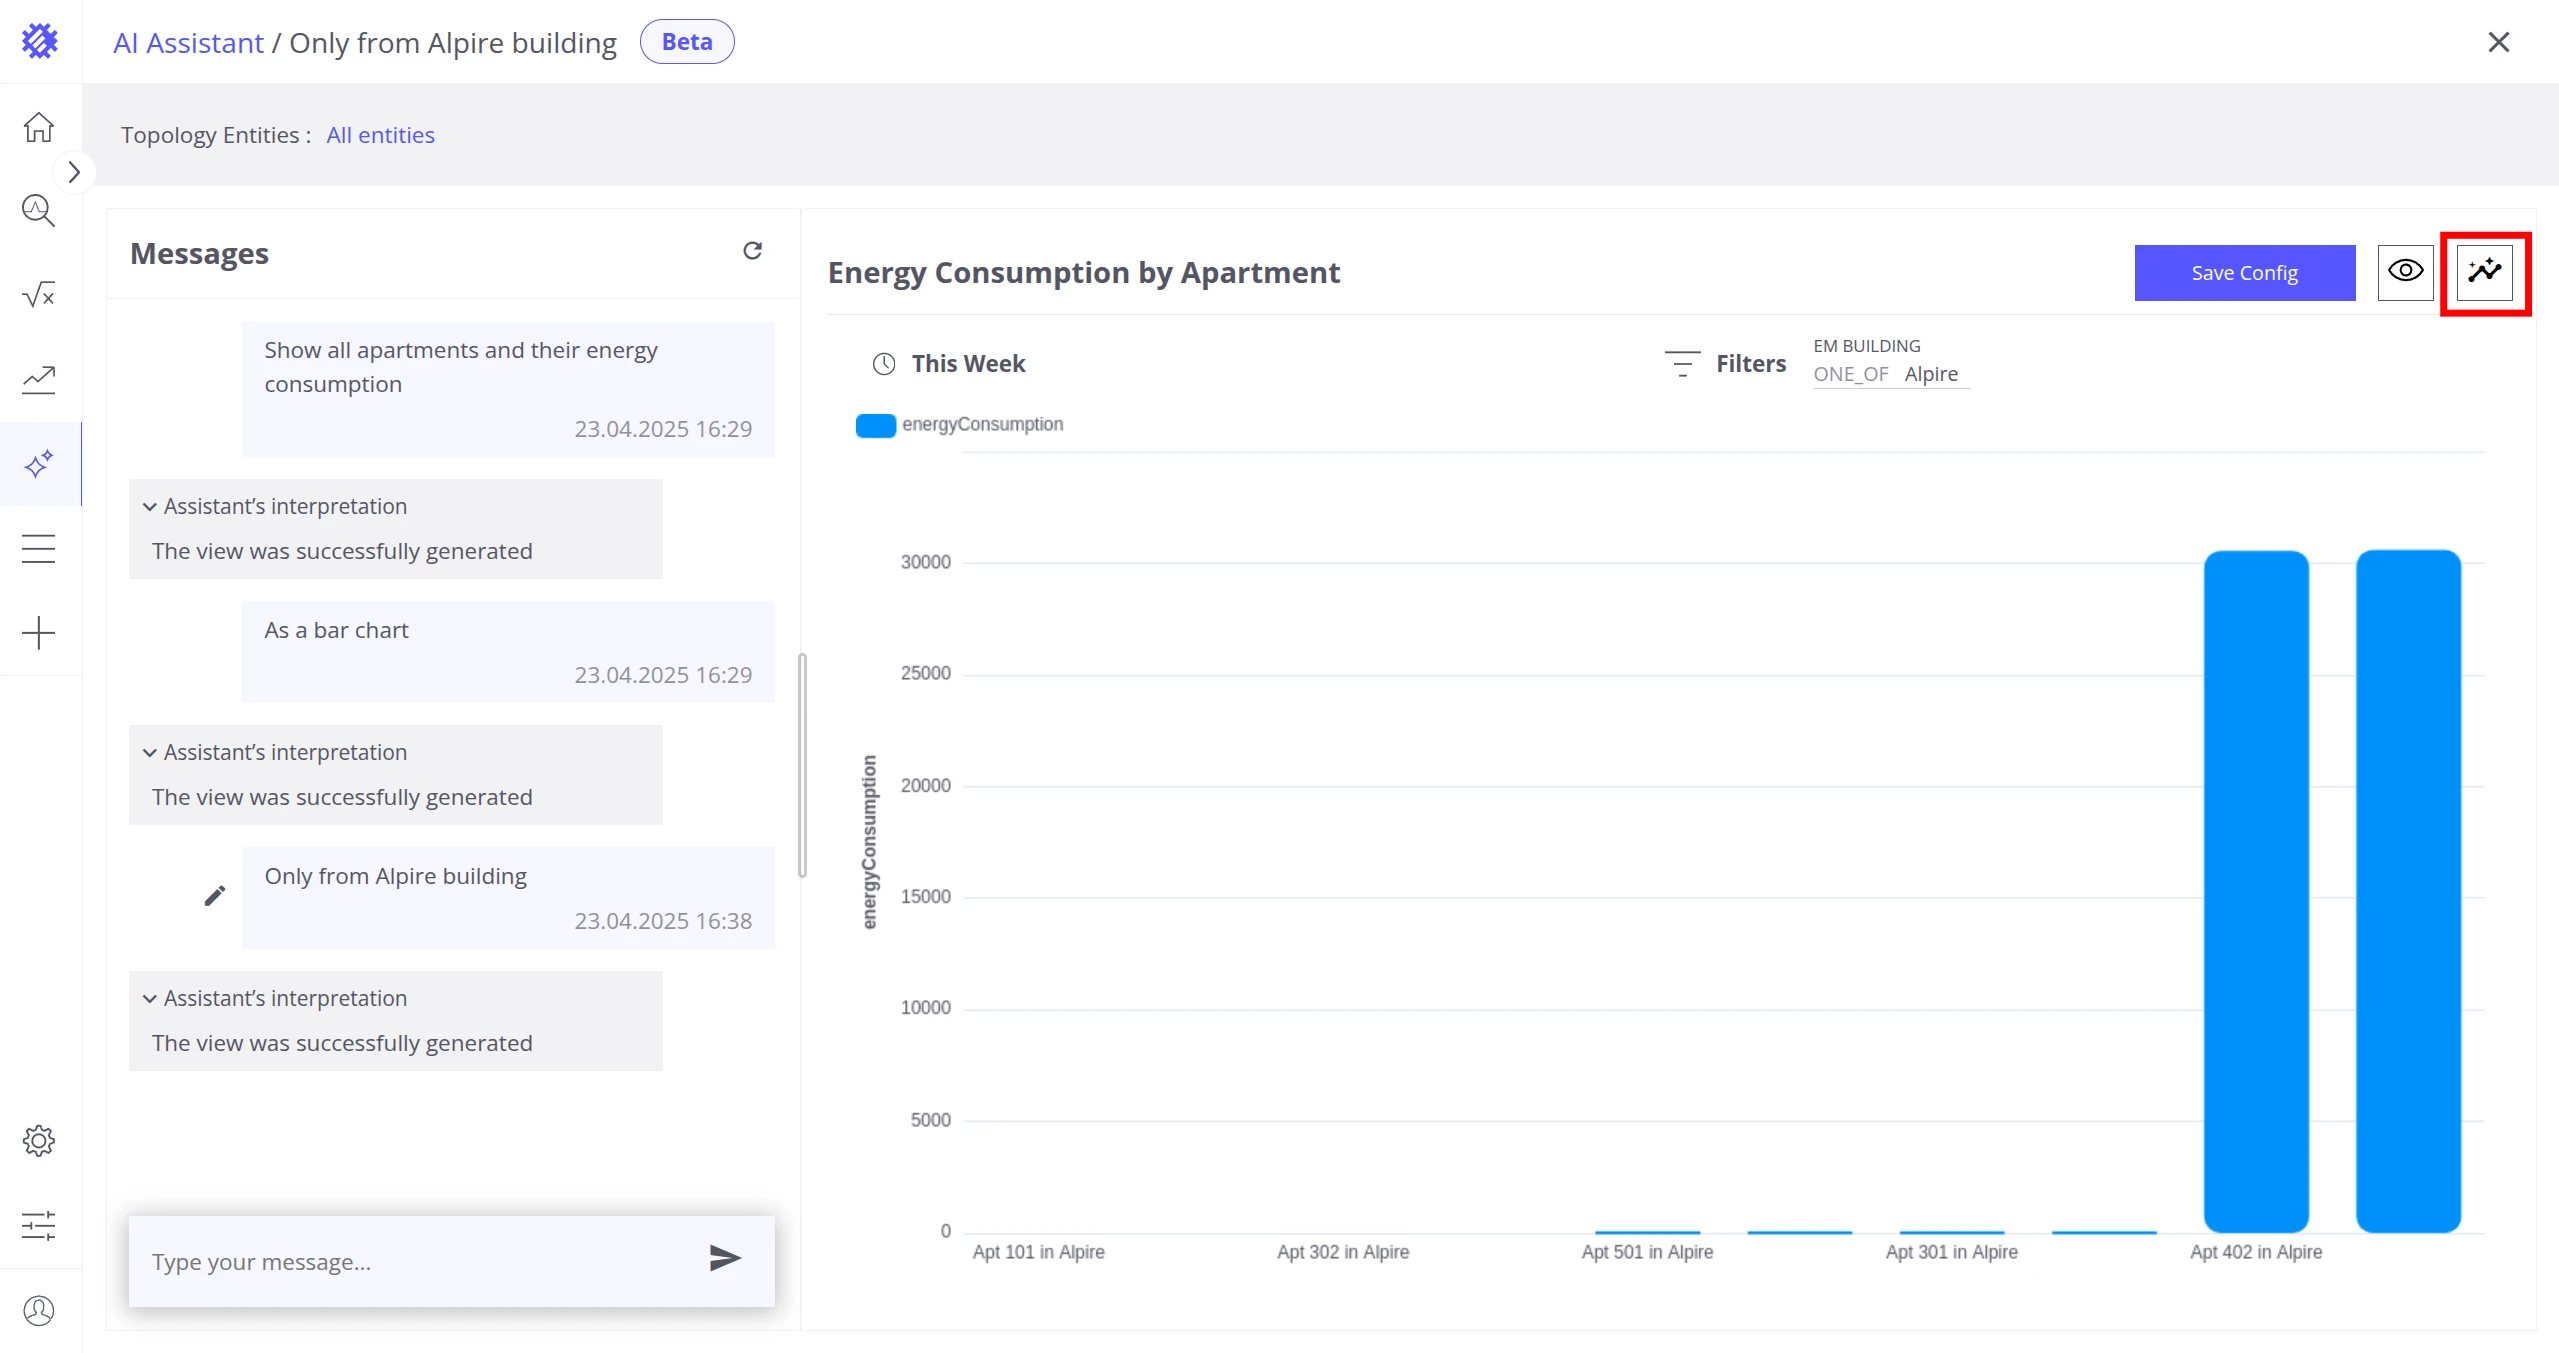
Regenerate an Answer
Section titled “Regenerate an Answer”Click the Refresh button at the top right of a message block to regenerate the assistant’s answer. Use this when a response was incorrect.
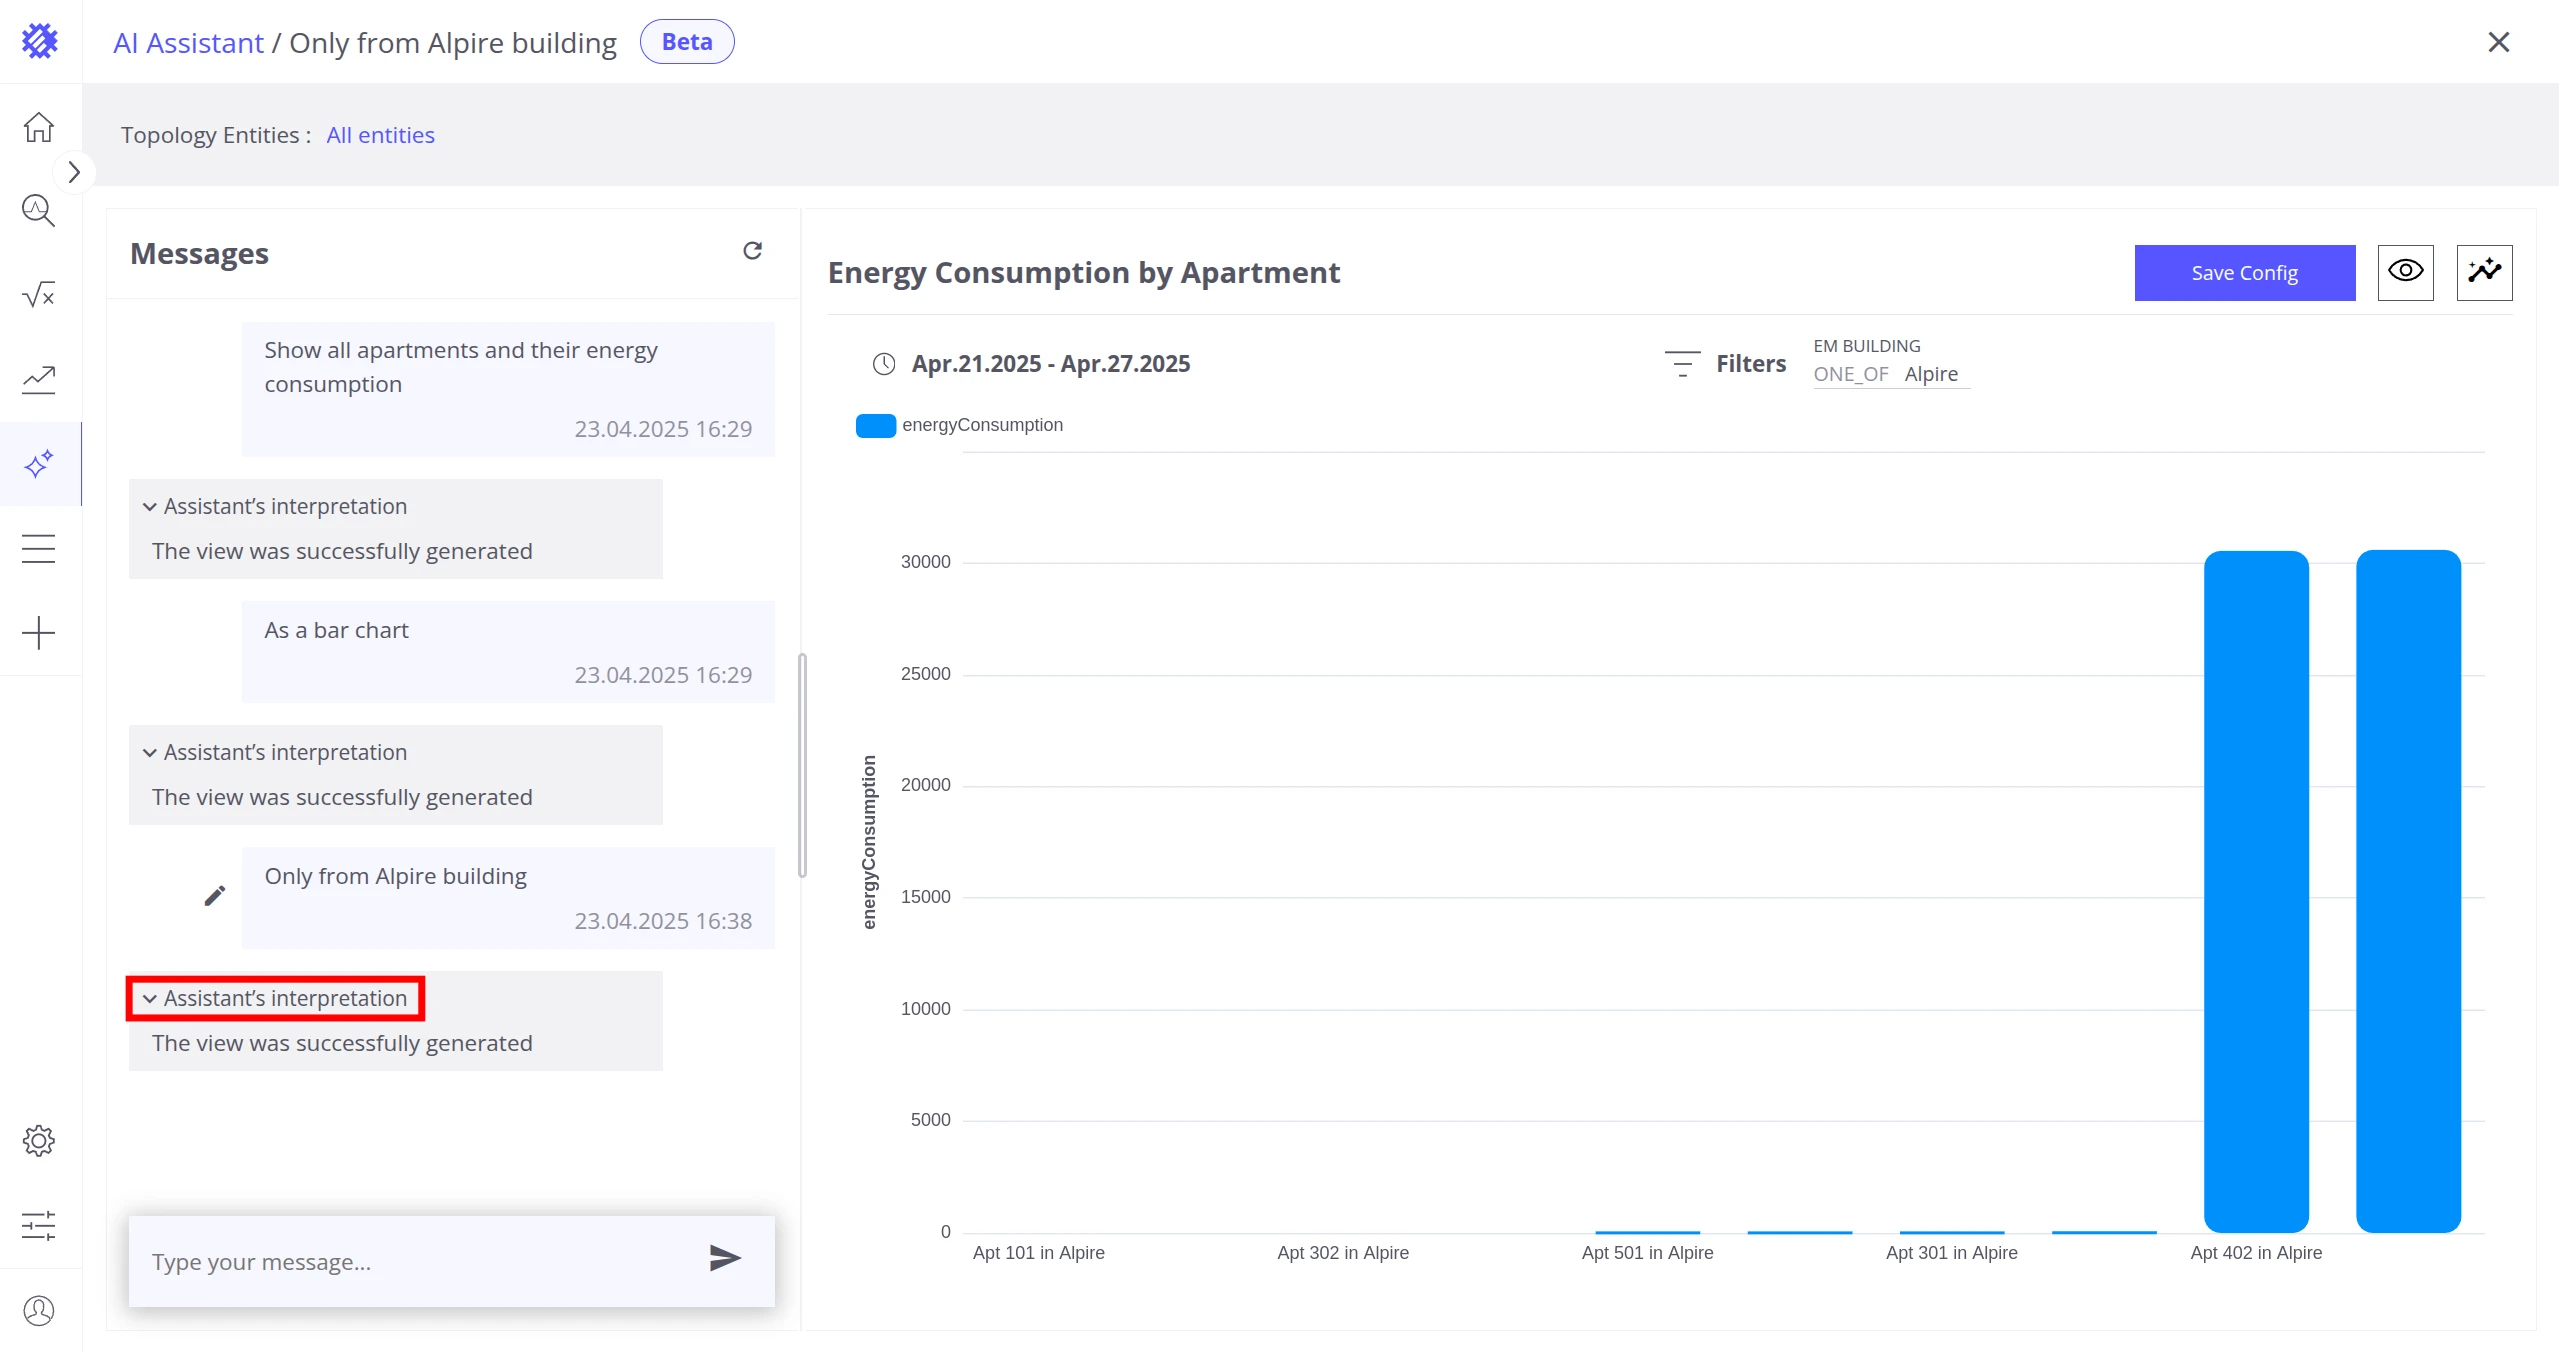
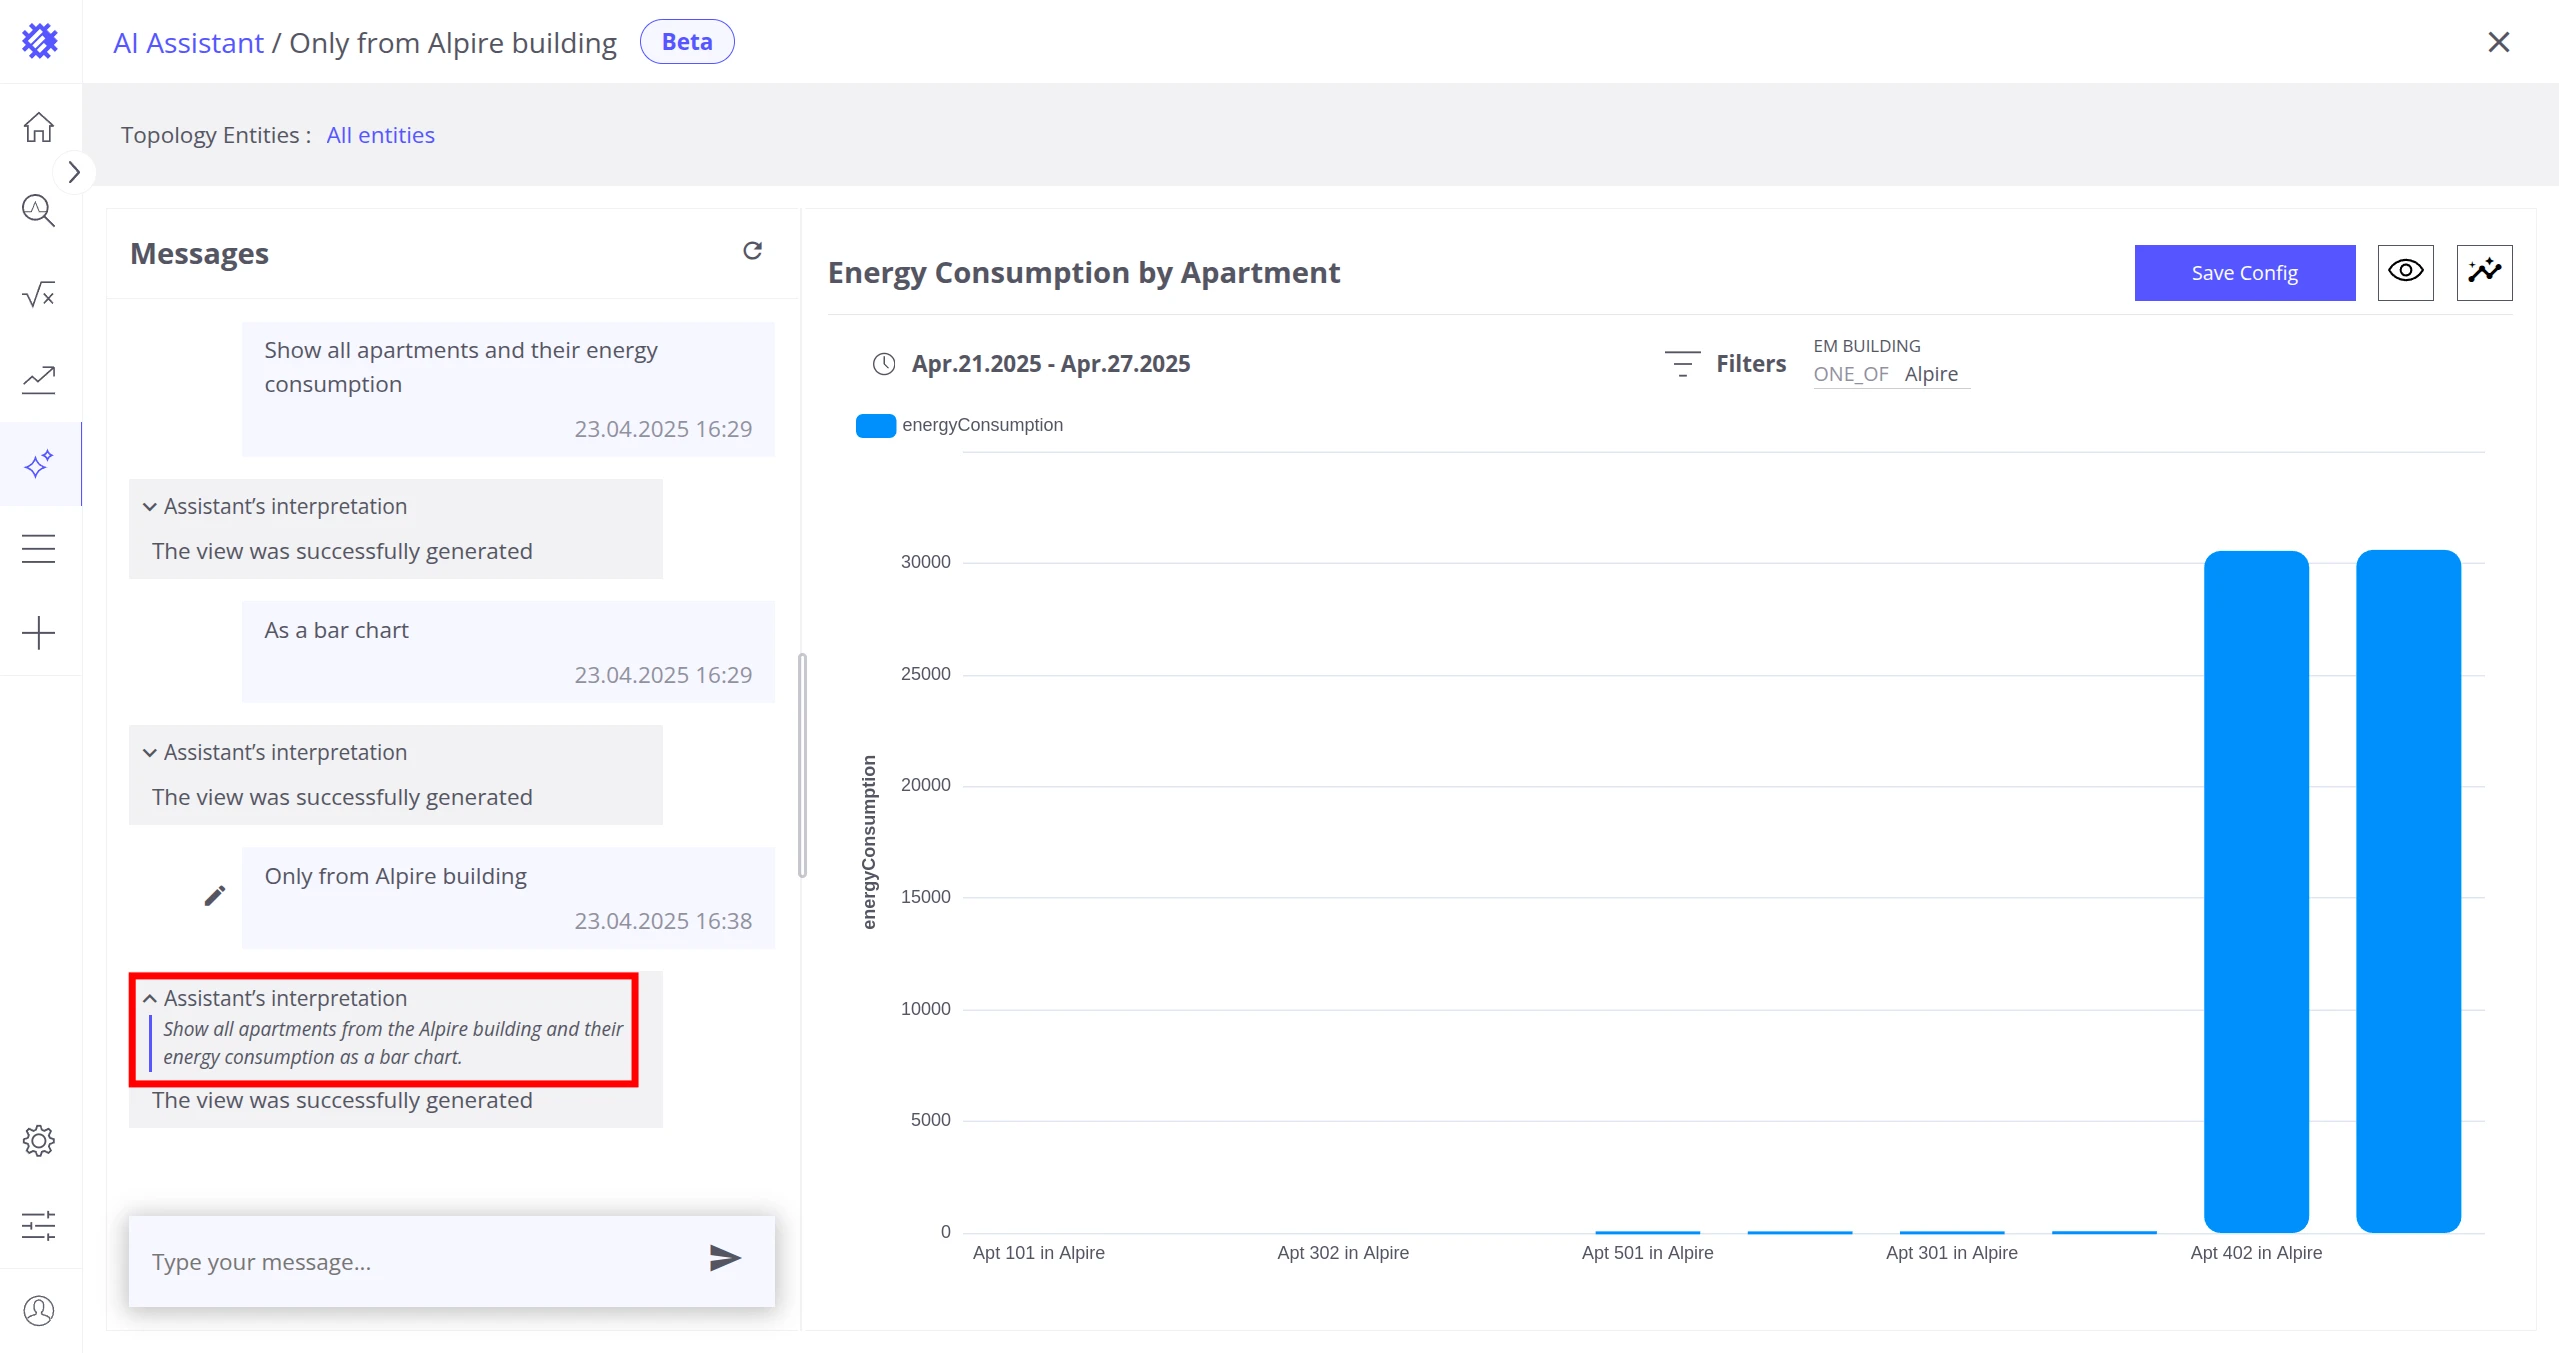
Check the Assistant’s Interpretation
Section titled “Check the Assistant’s Interpretation”Click the Assistant’s Interpretation label at the top left of a message to see how the assistant understood your request. This helps verify whether the AI correctly interpreted your question.
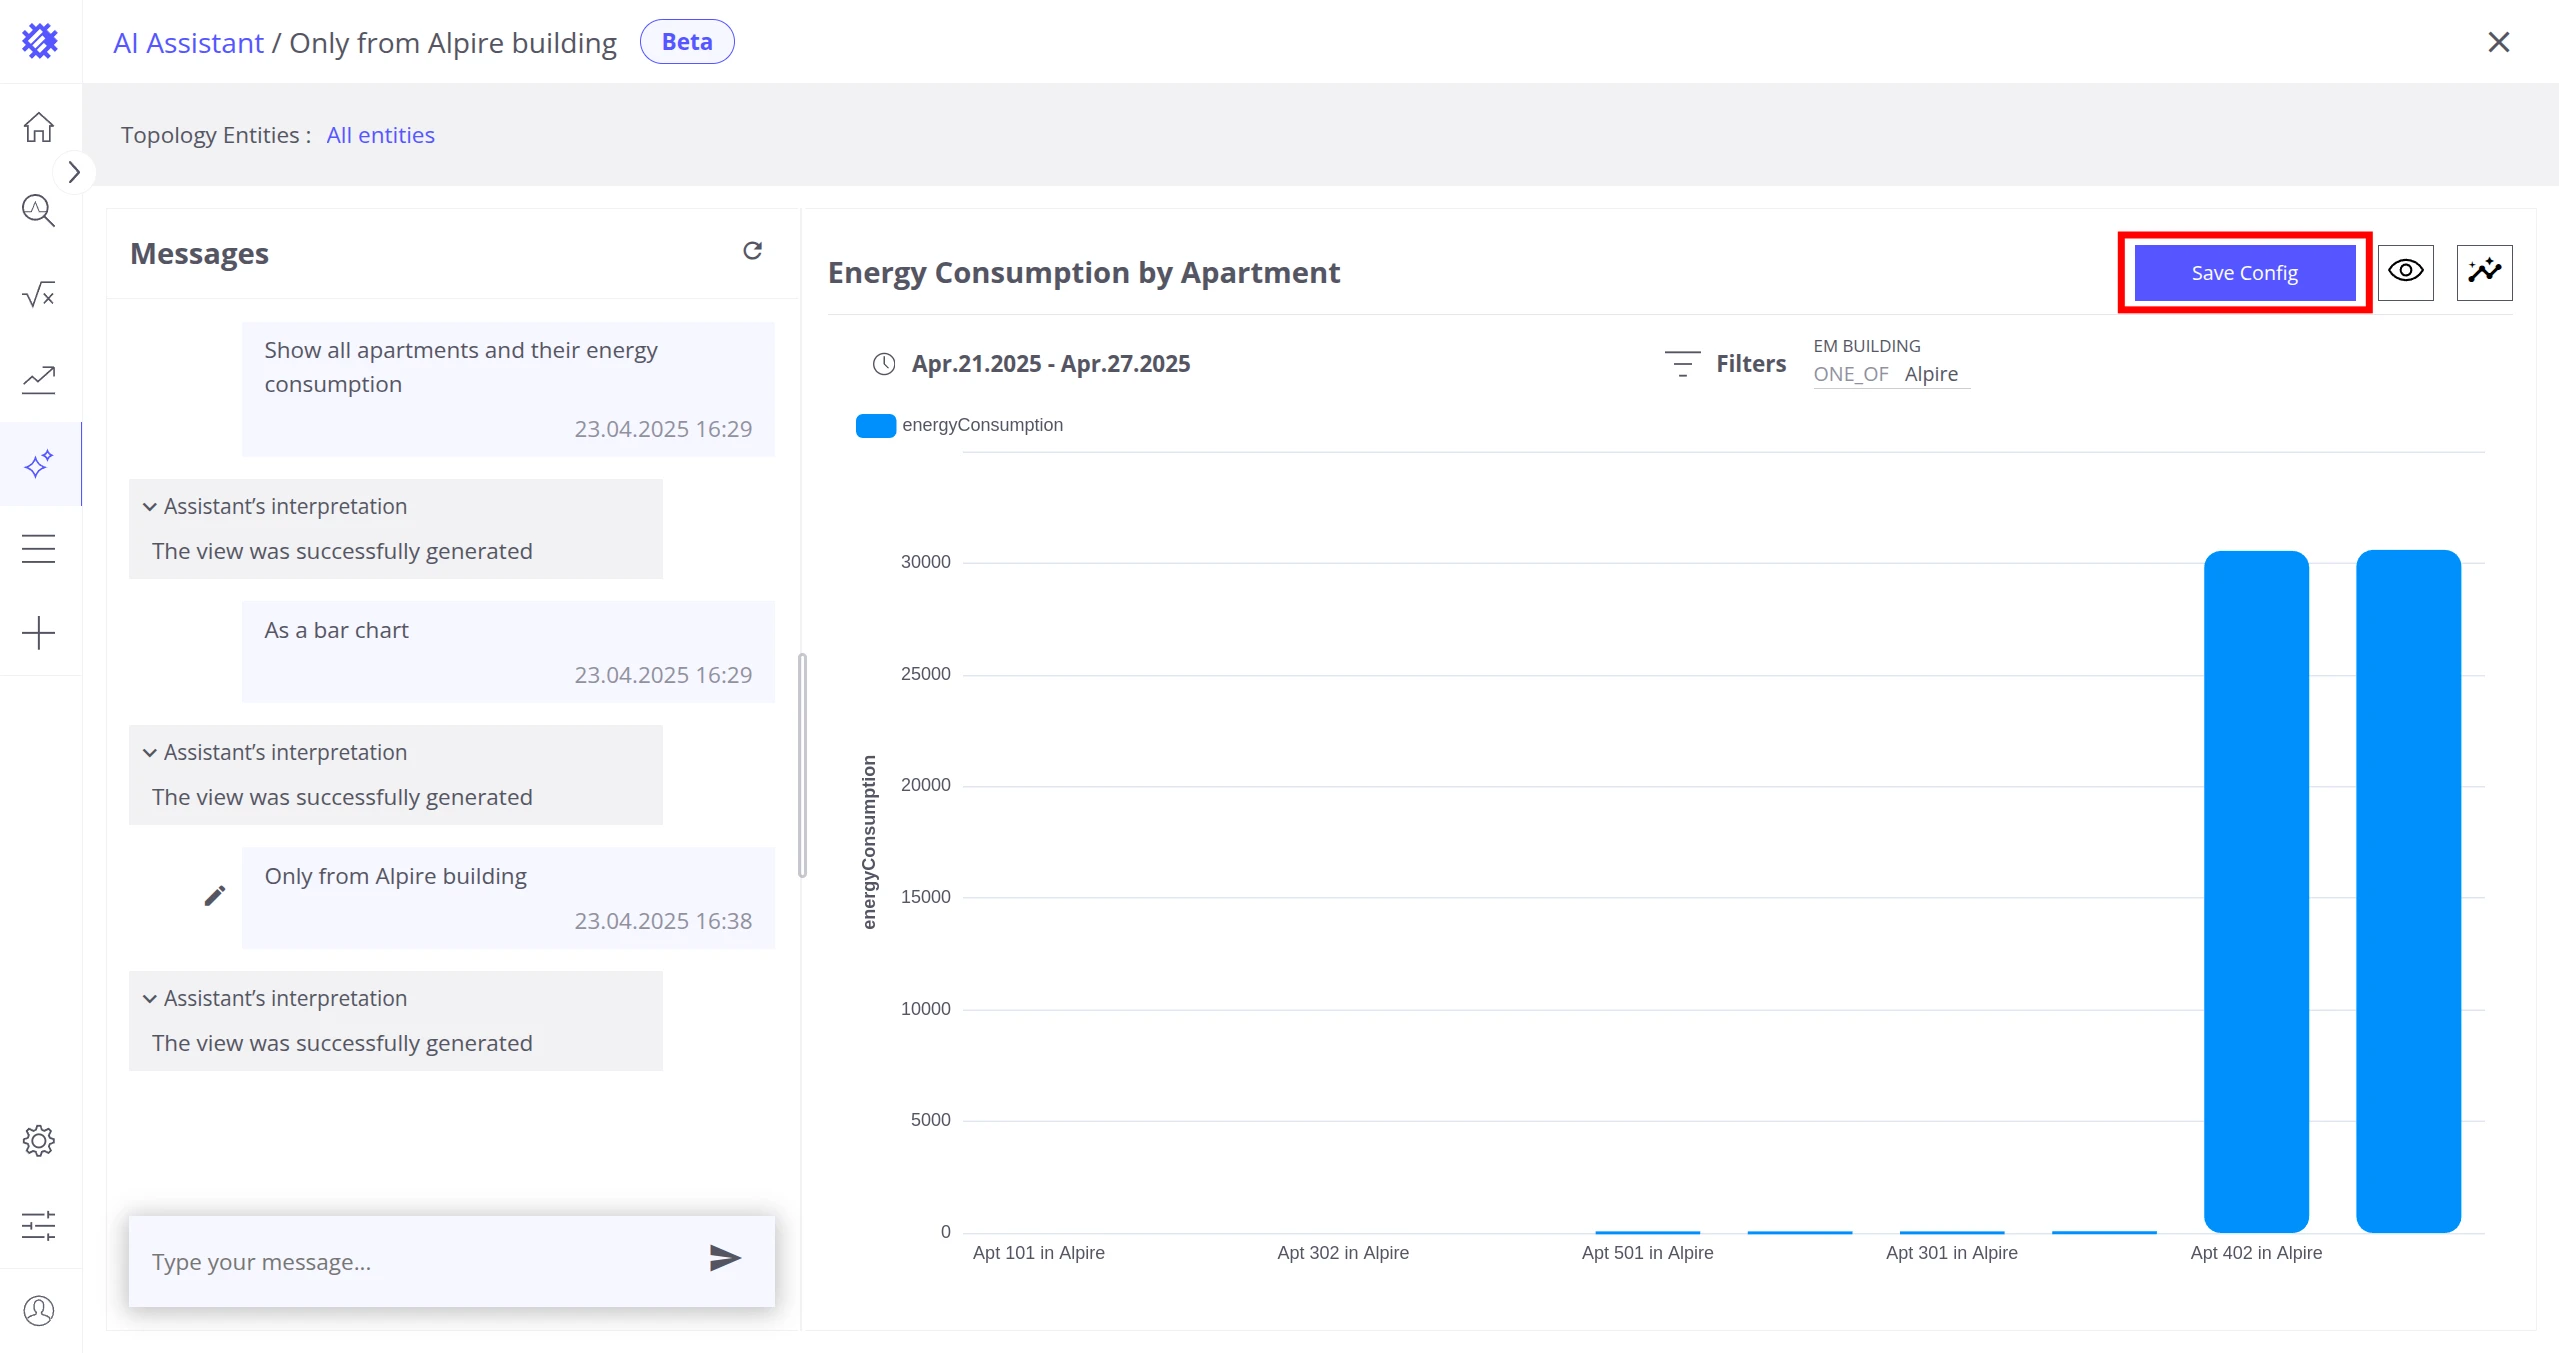
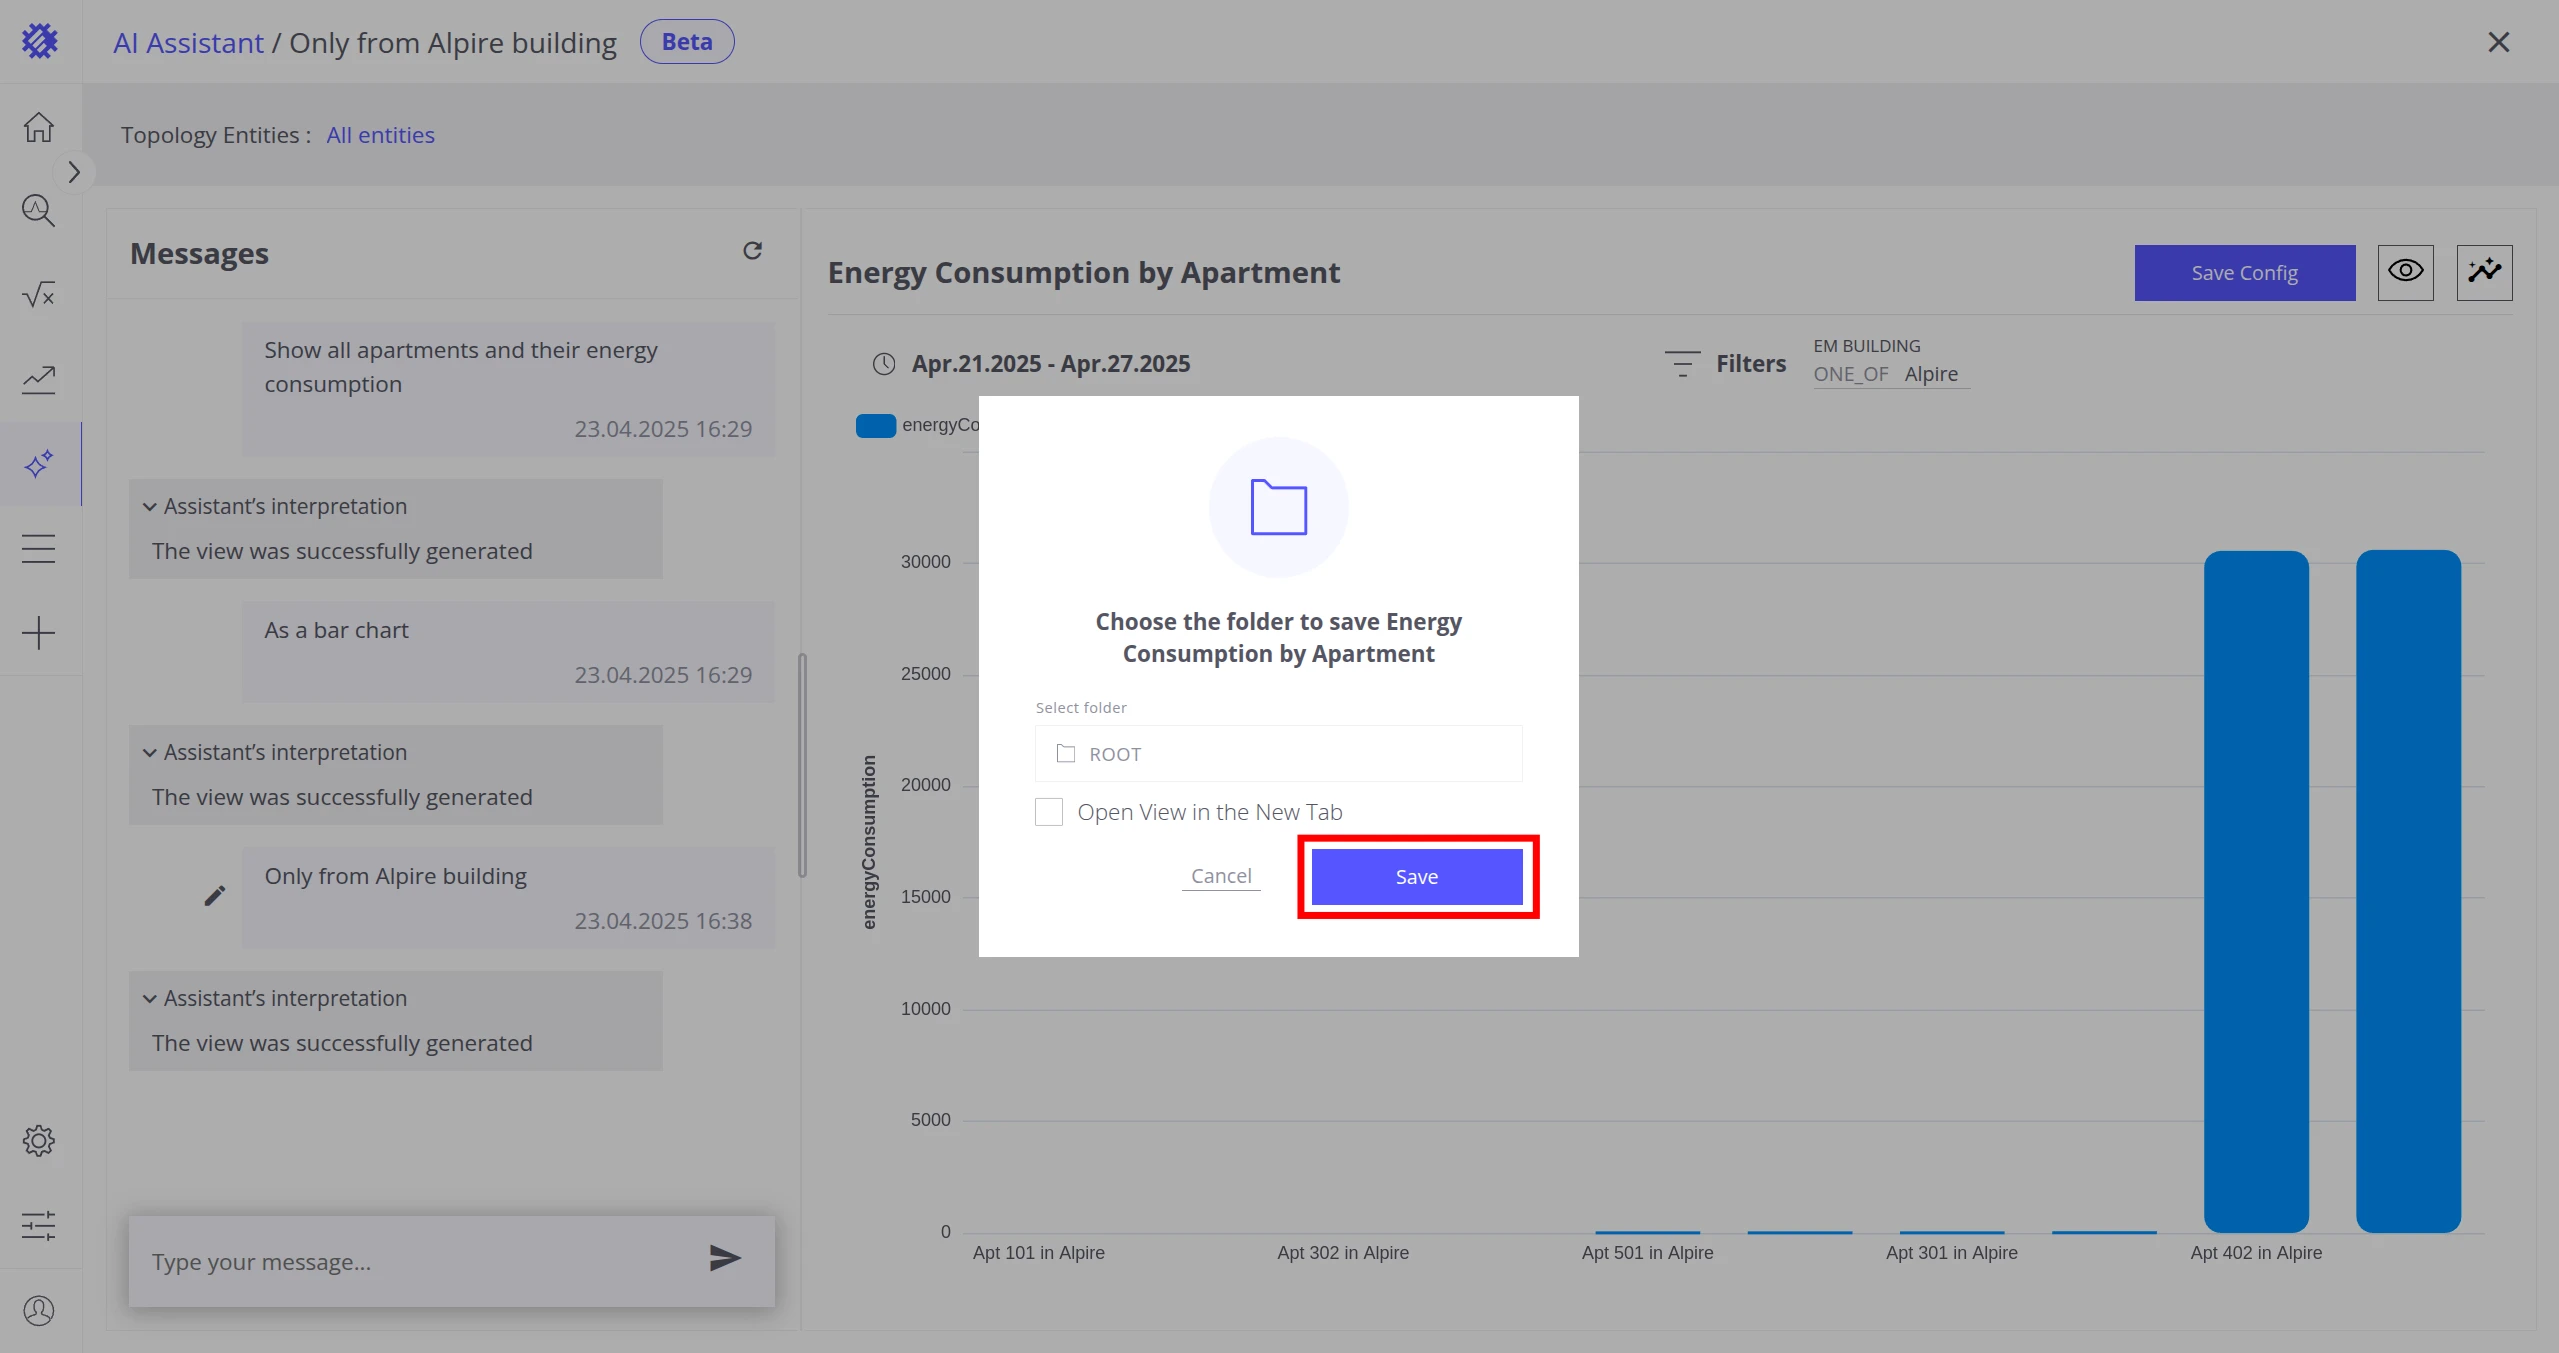
Save Config
Section titled “Save Config”Click the Save config button to save the generated view to a view collection.
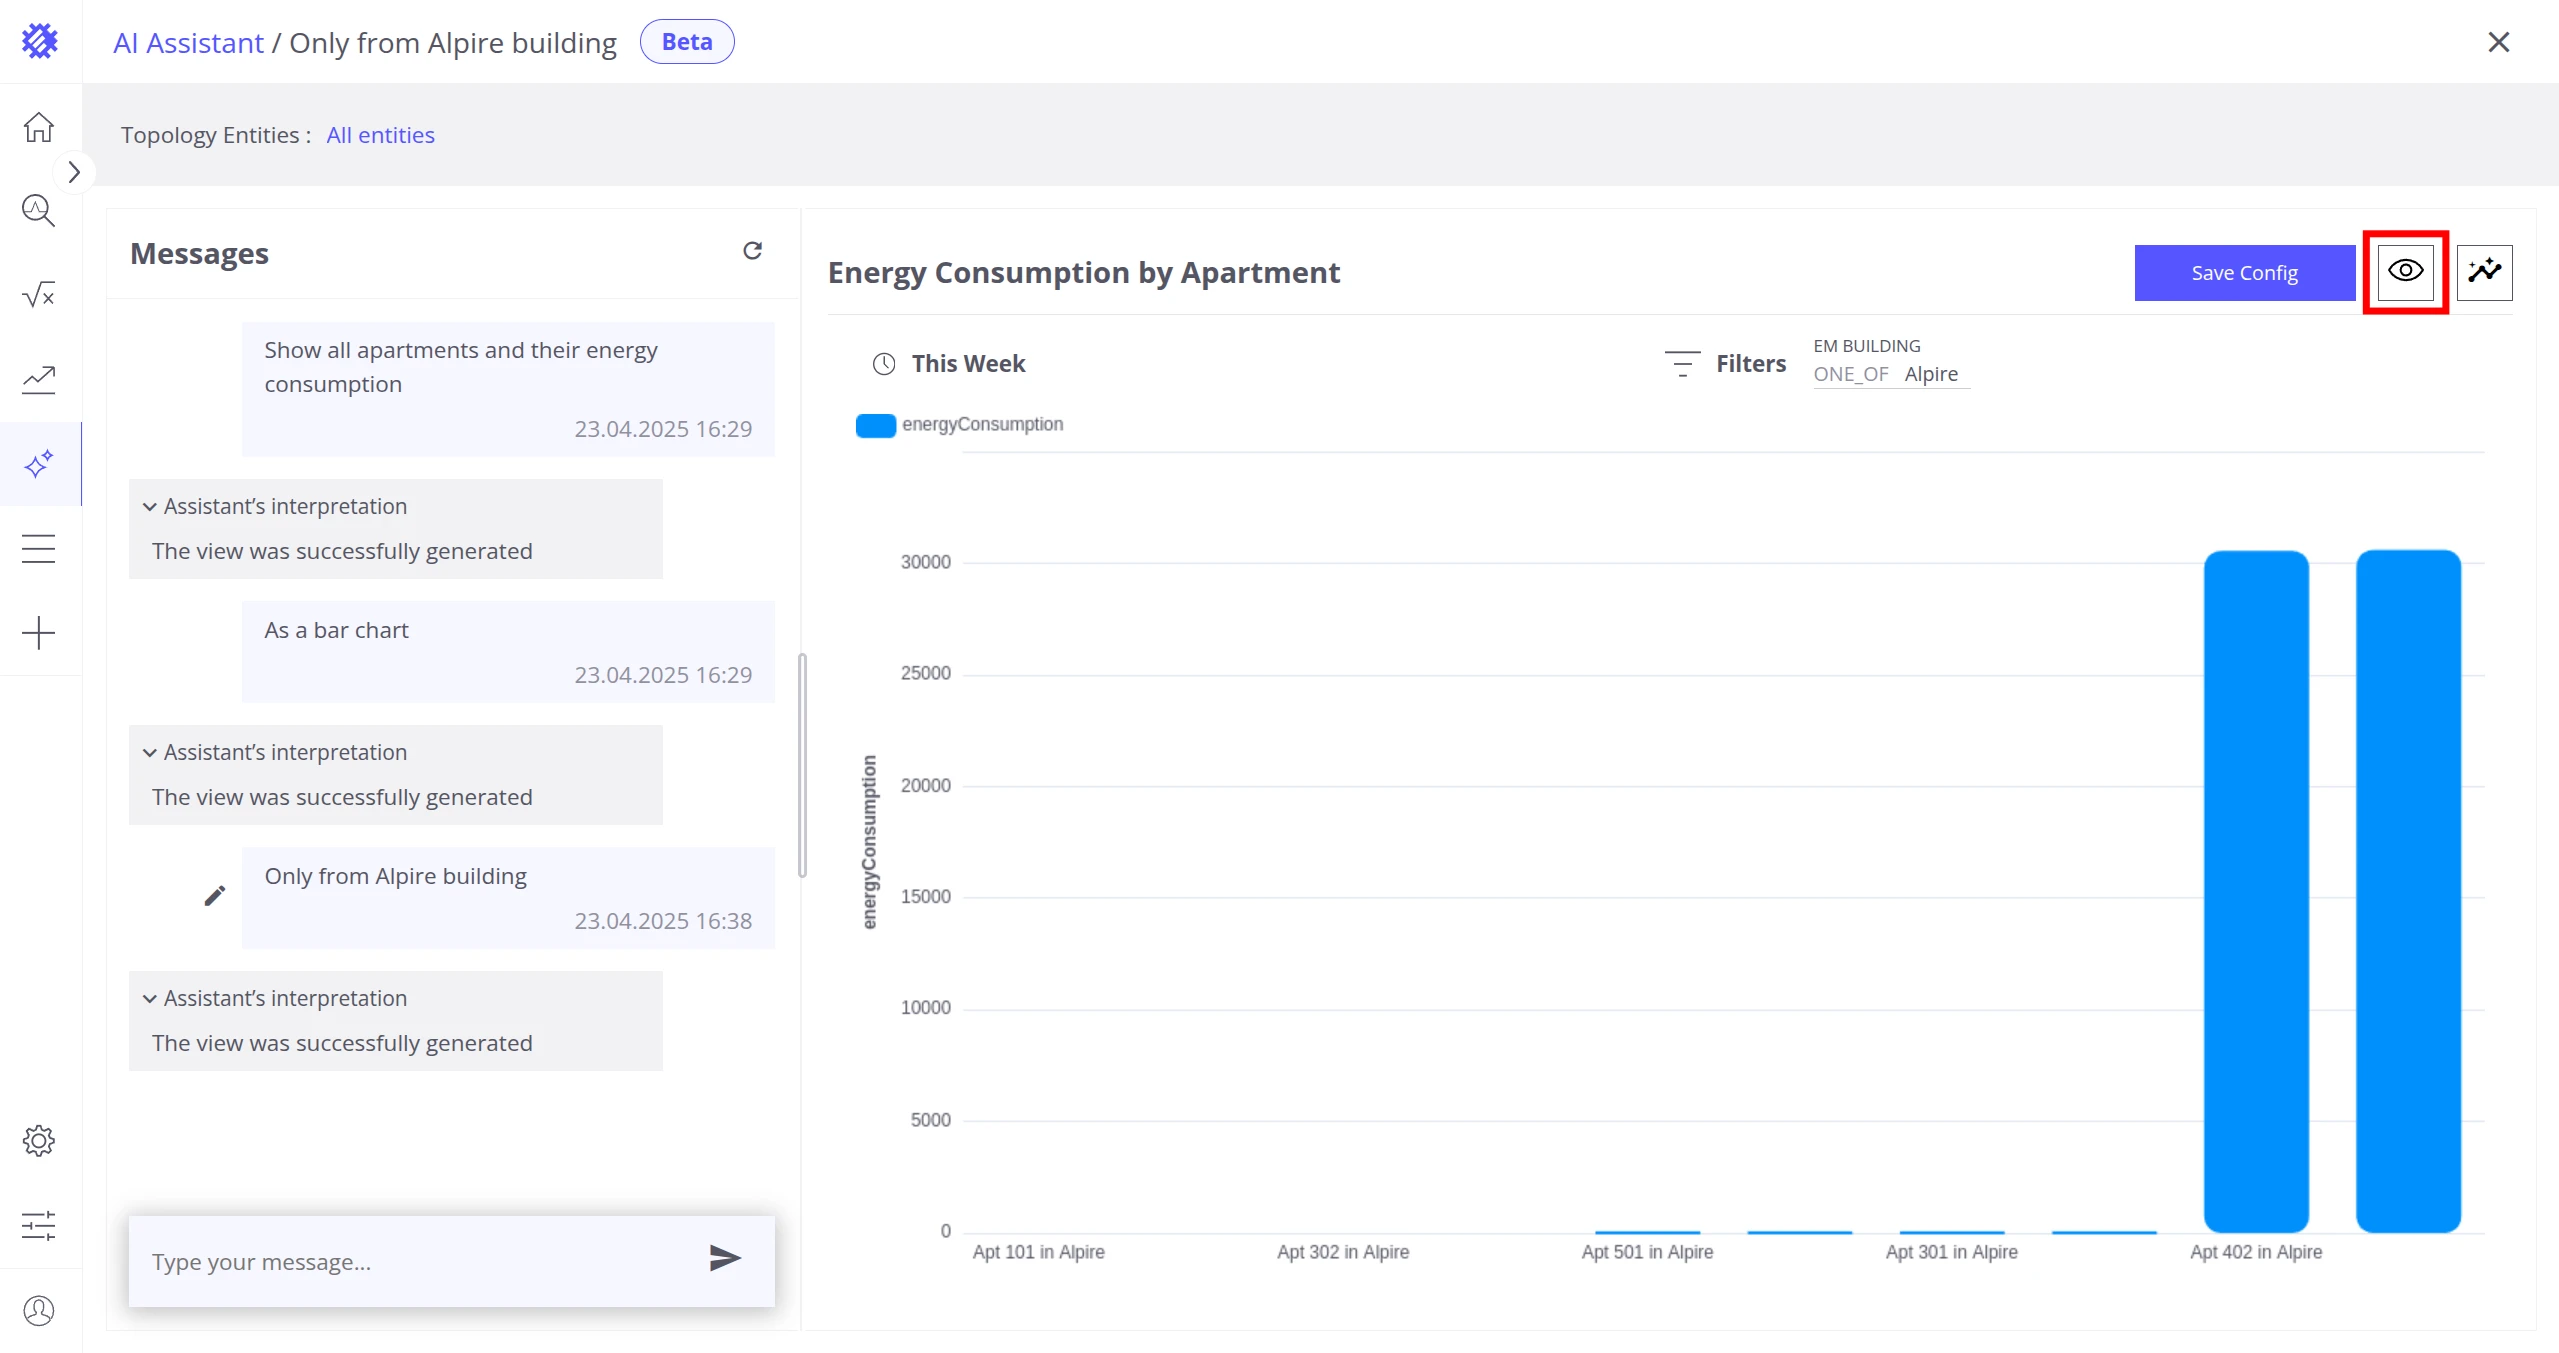
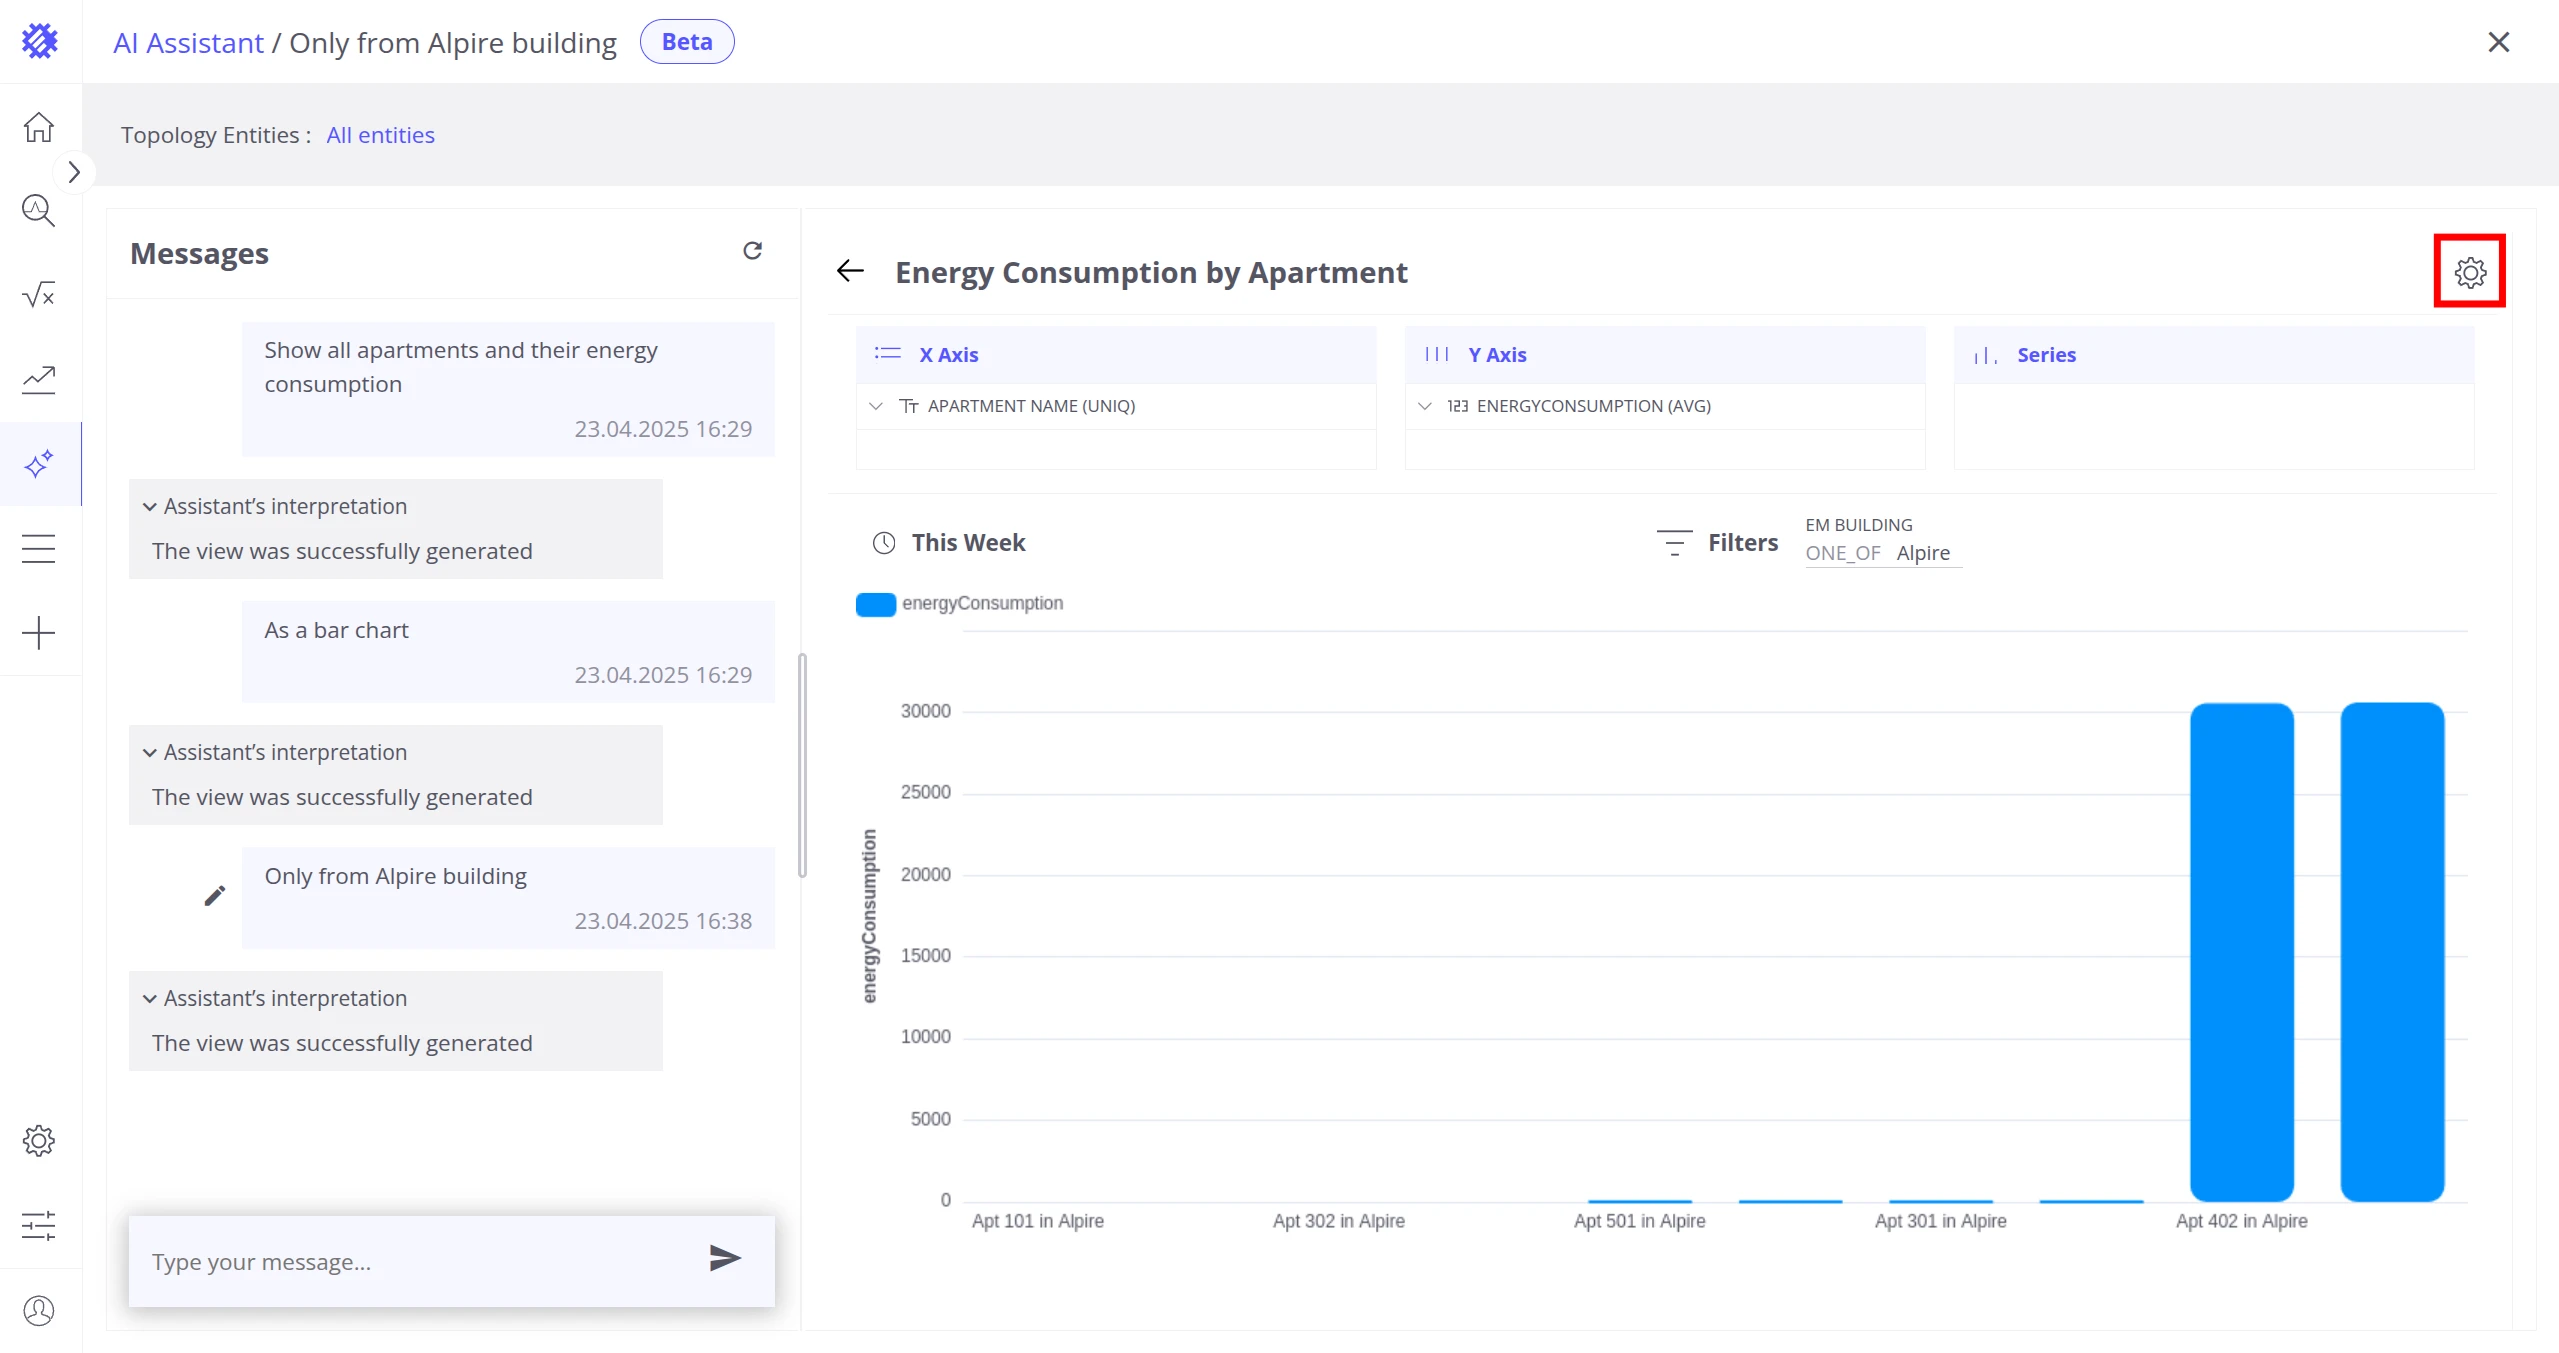
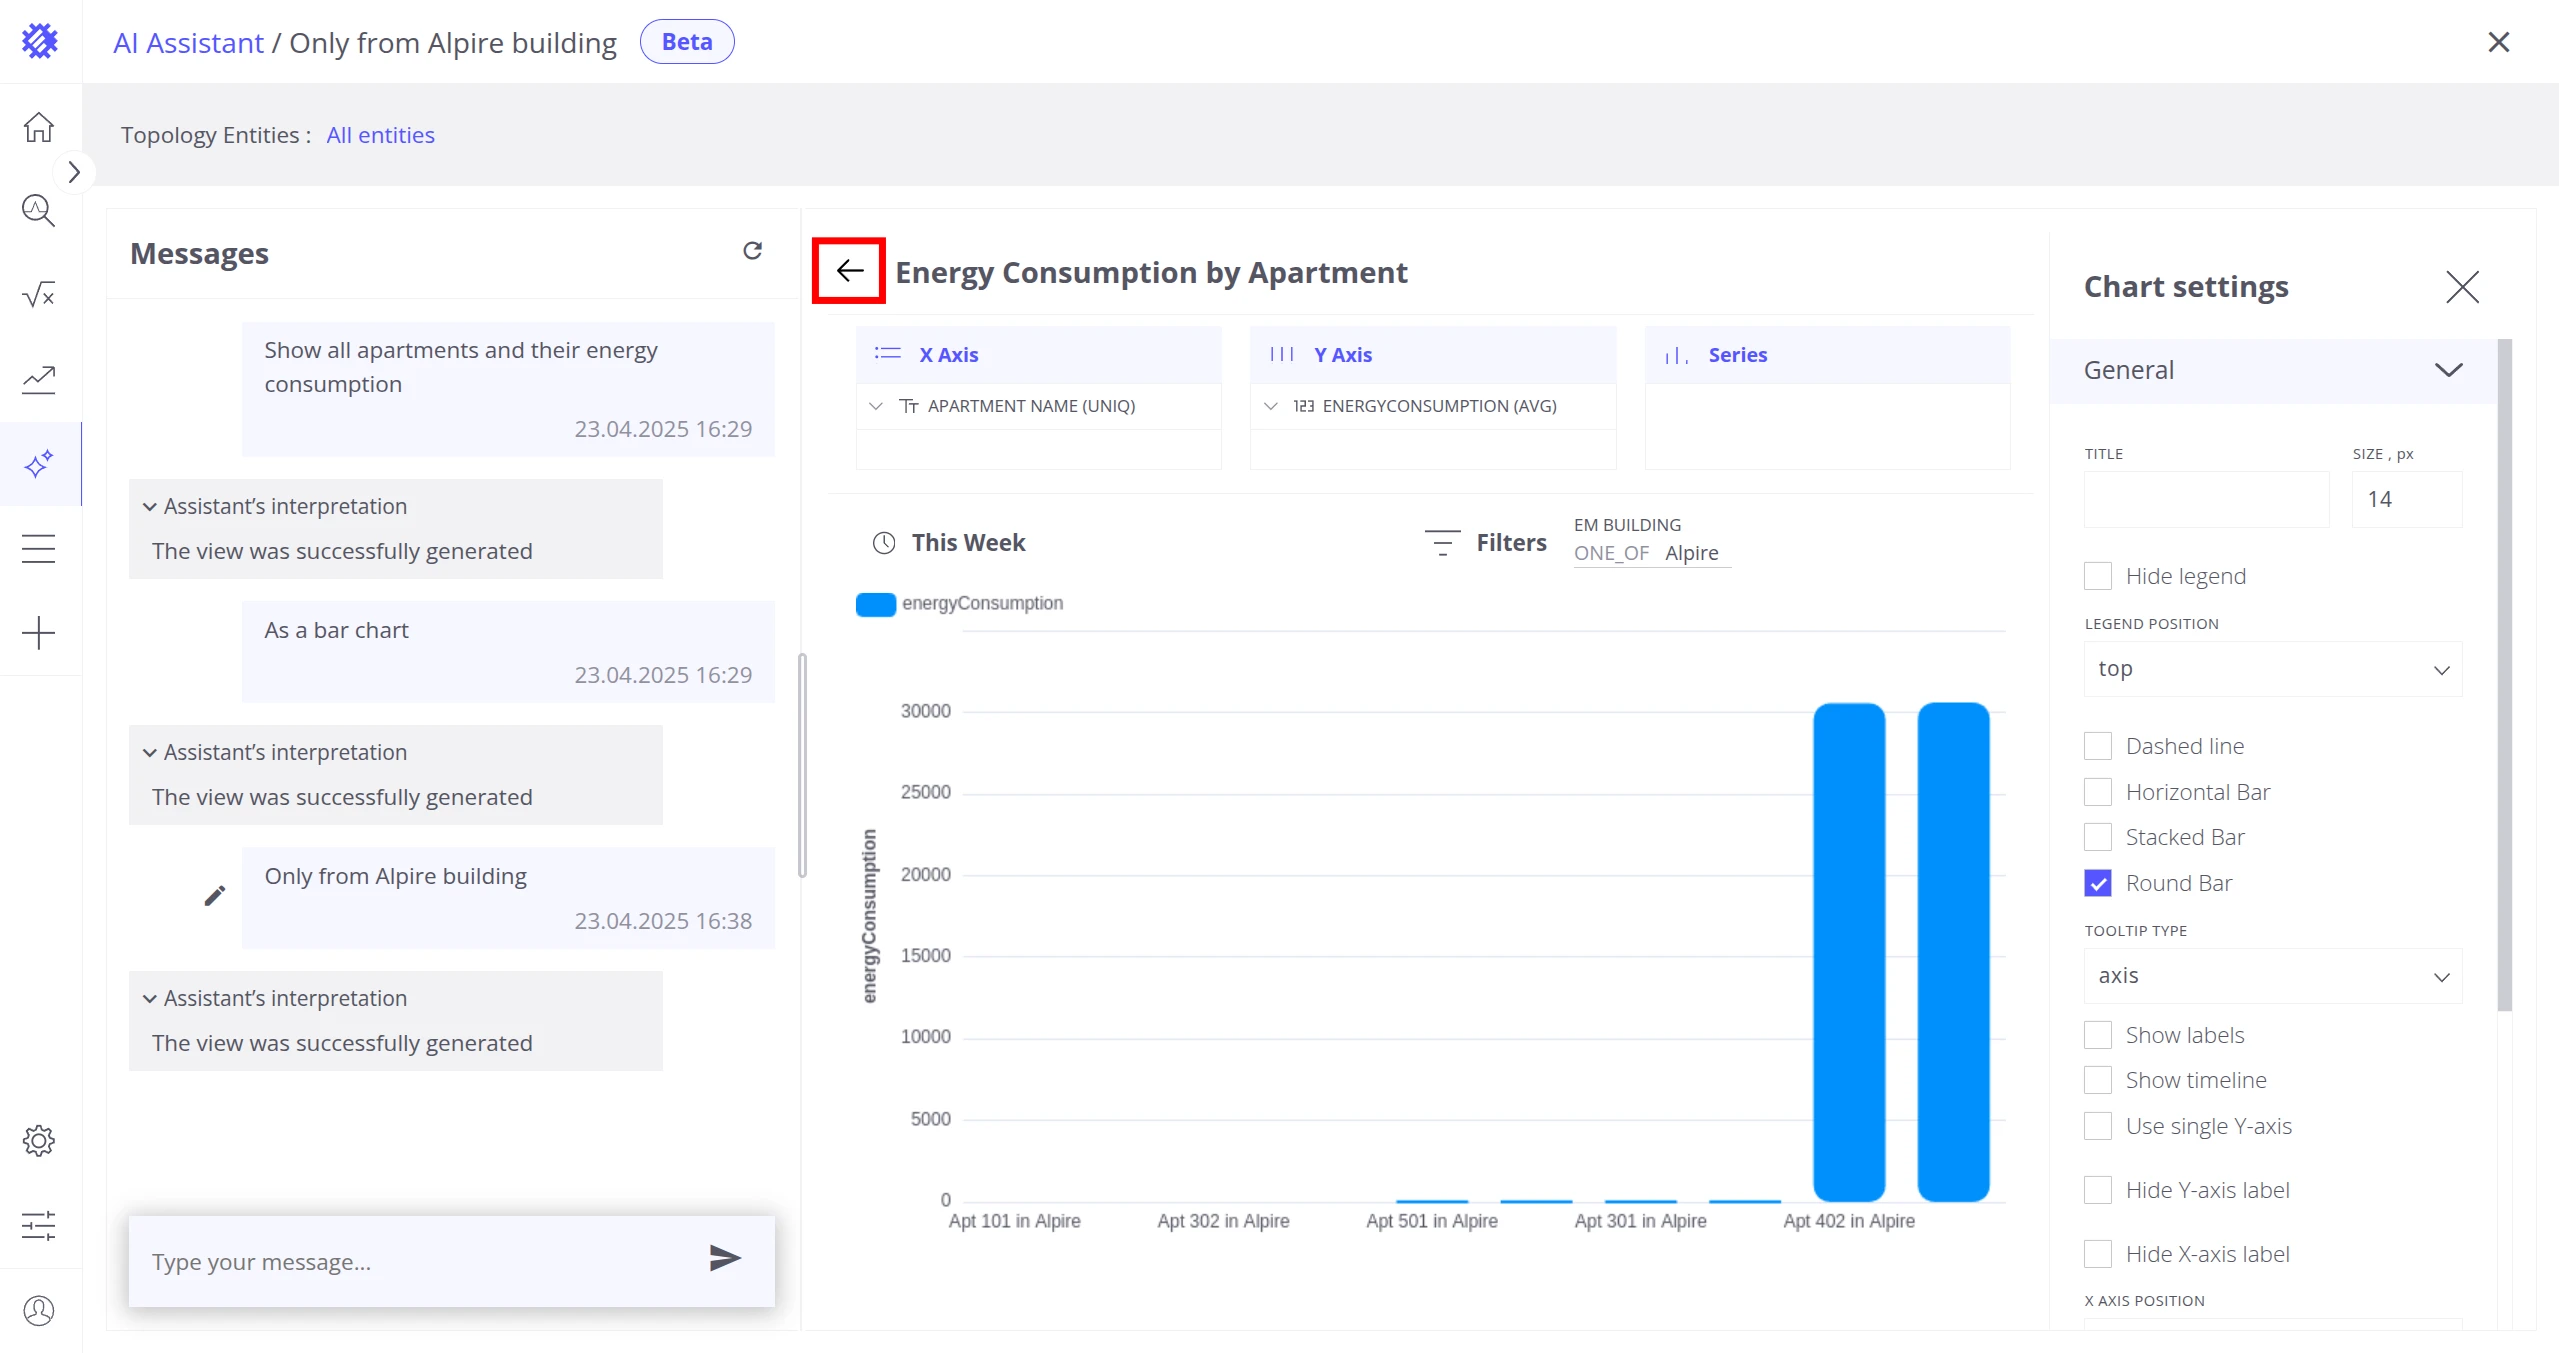
Review the Generated View
Section titled “Review the Generated View”Click See Details at the top right of the screen to open the generated view configuration. From there, click Settings to access additional settings, or Back to exit. This helps verify whether the assistant correctly selected business entities, fields, and aggregations.
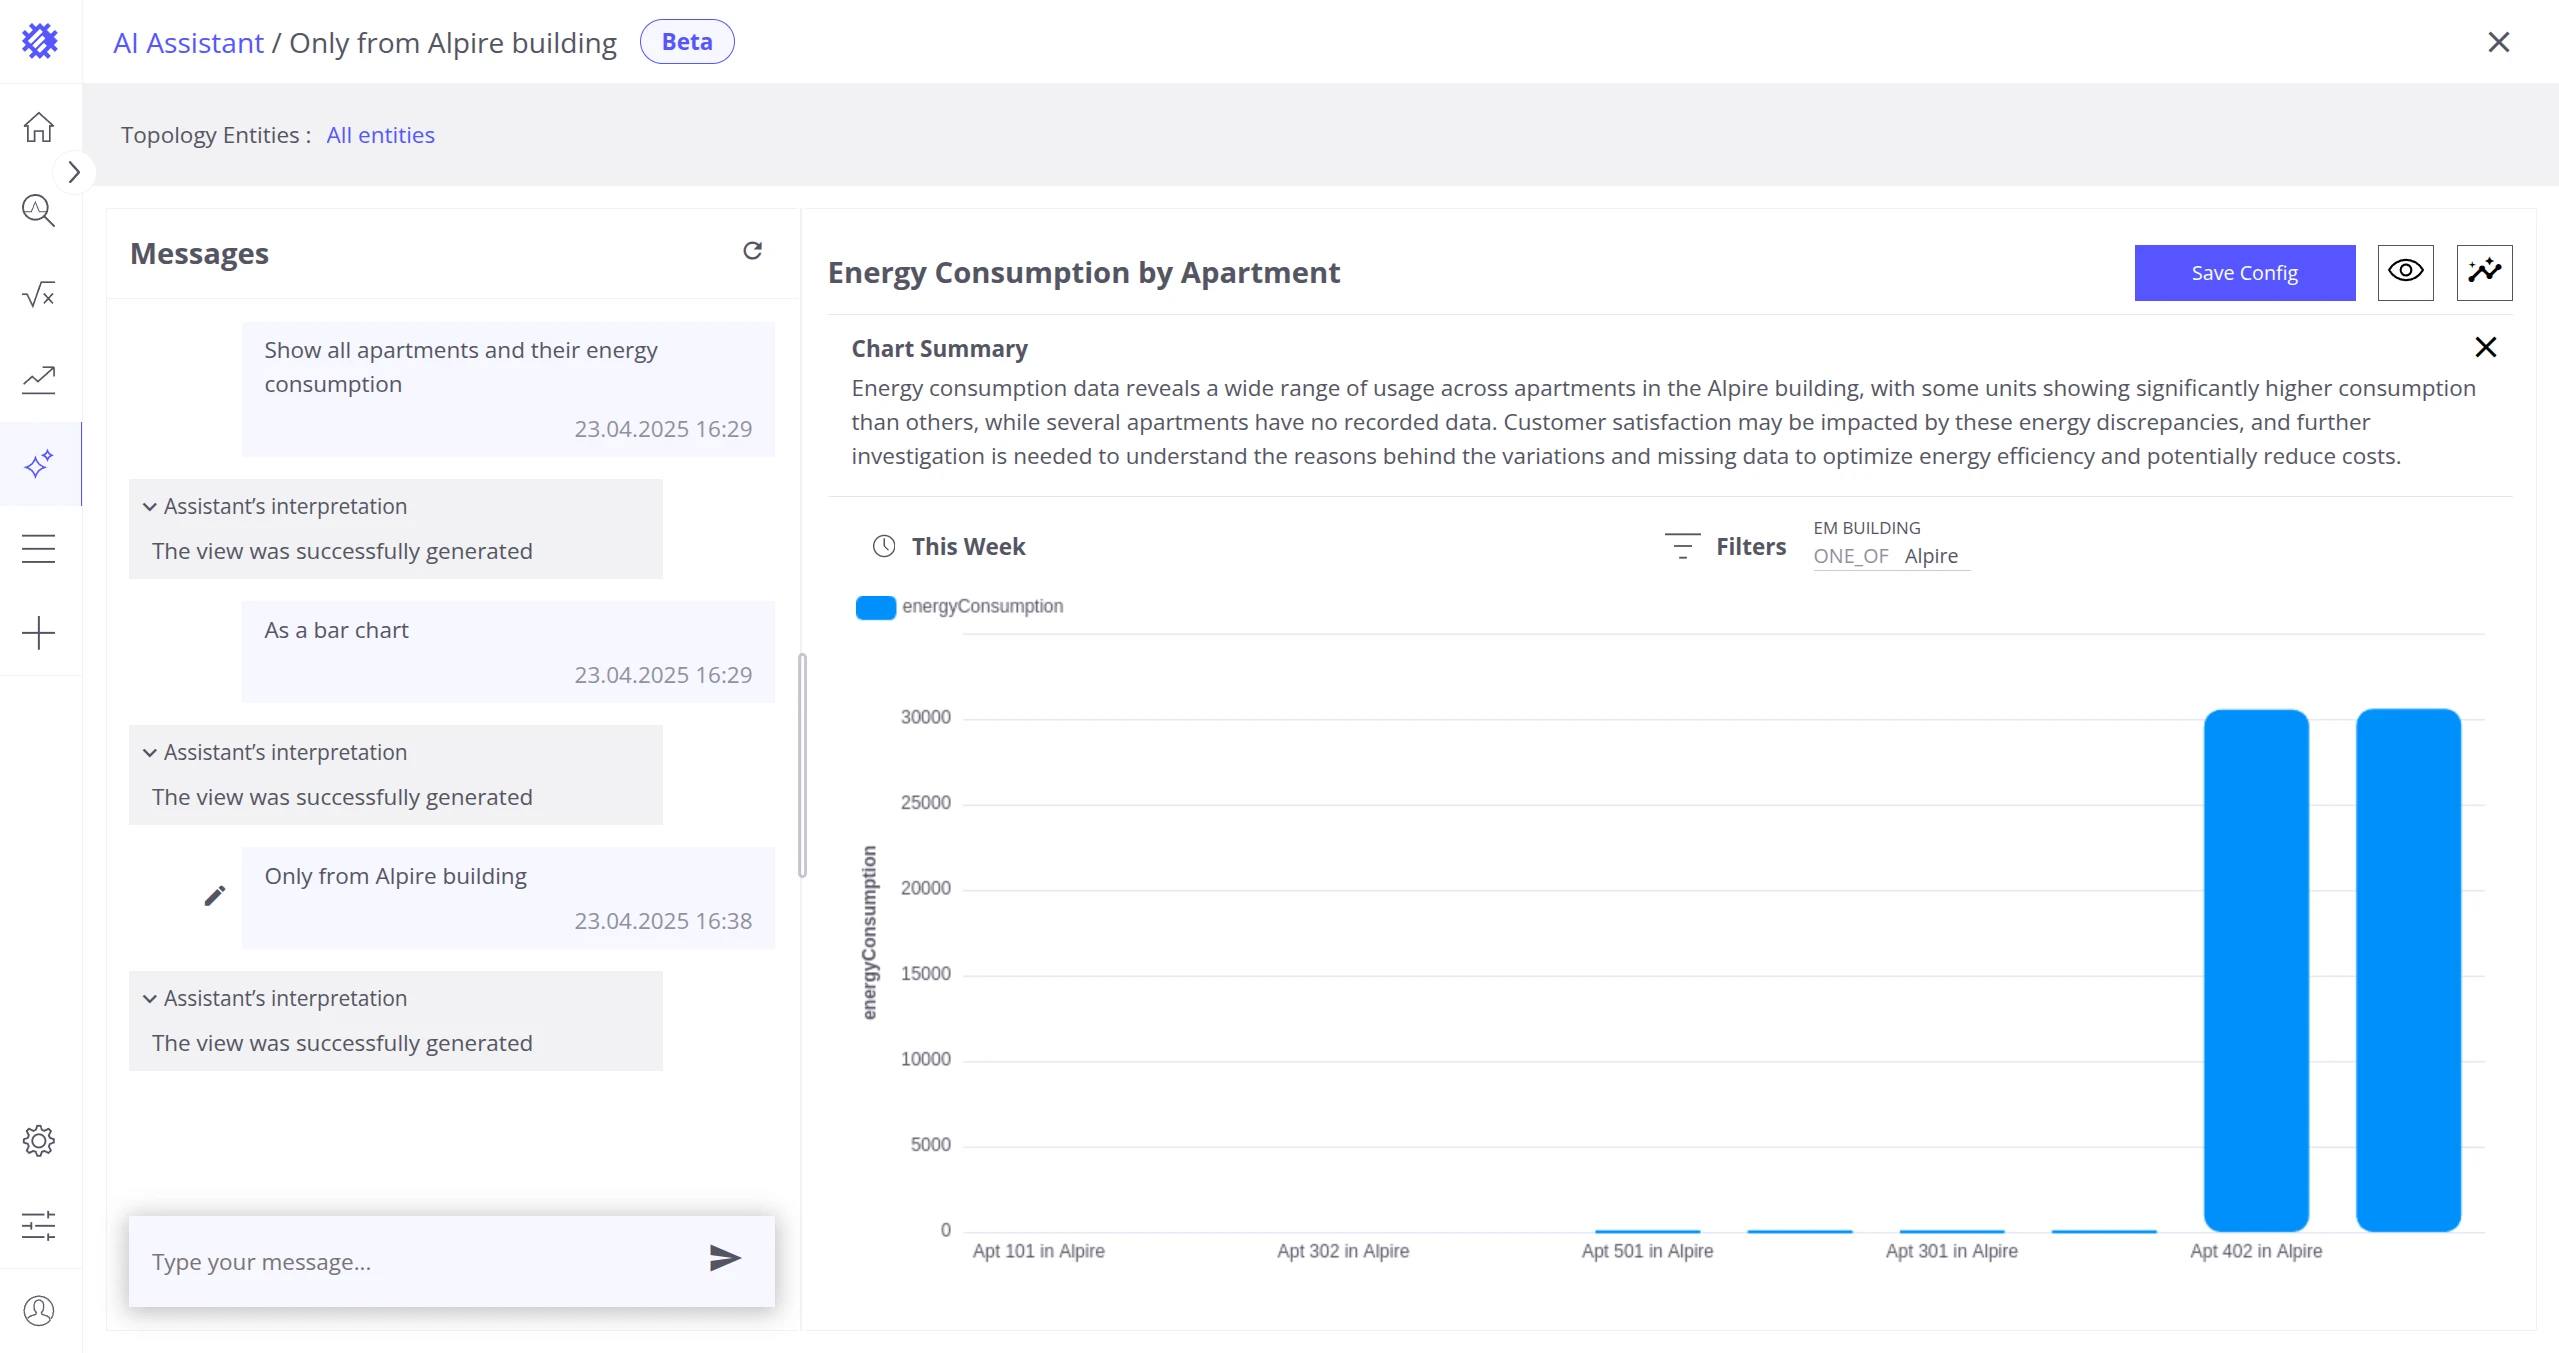
Generate Chat Summary
Section titled “Generate Chat Summary”Click Get Chat Summary at the top right of the screen to generate a summary of the conversation. The summary appears at the top of the screen and helps identify anomalies or correlations across the generated views.
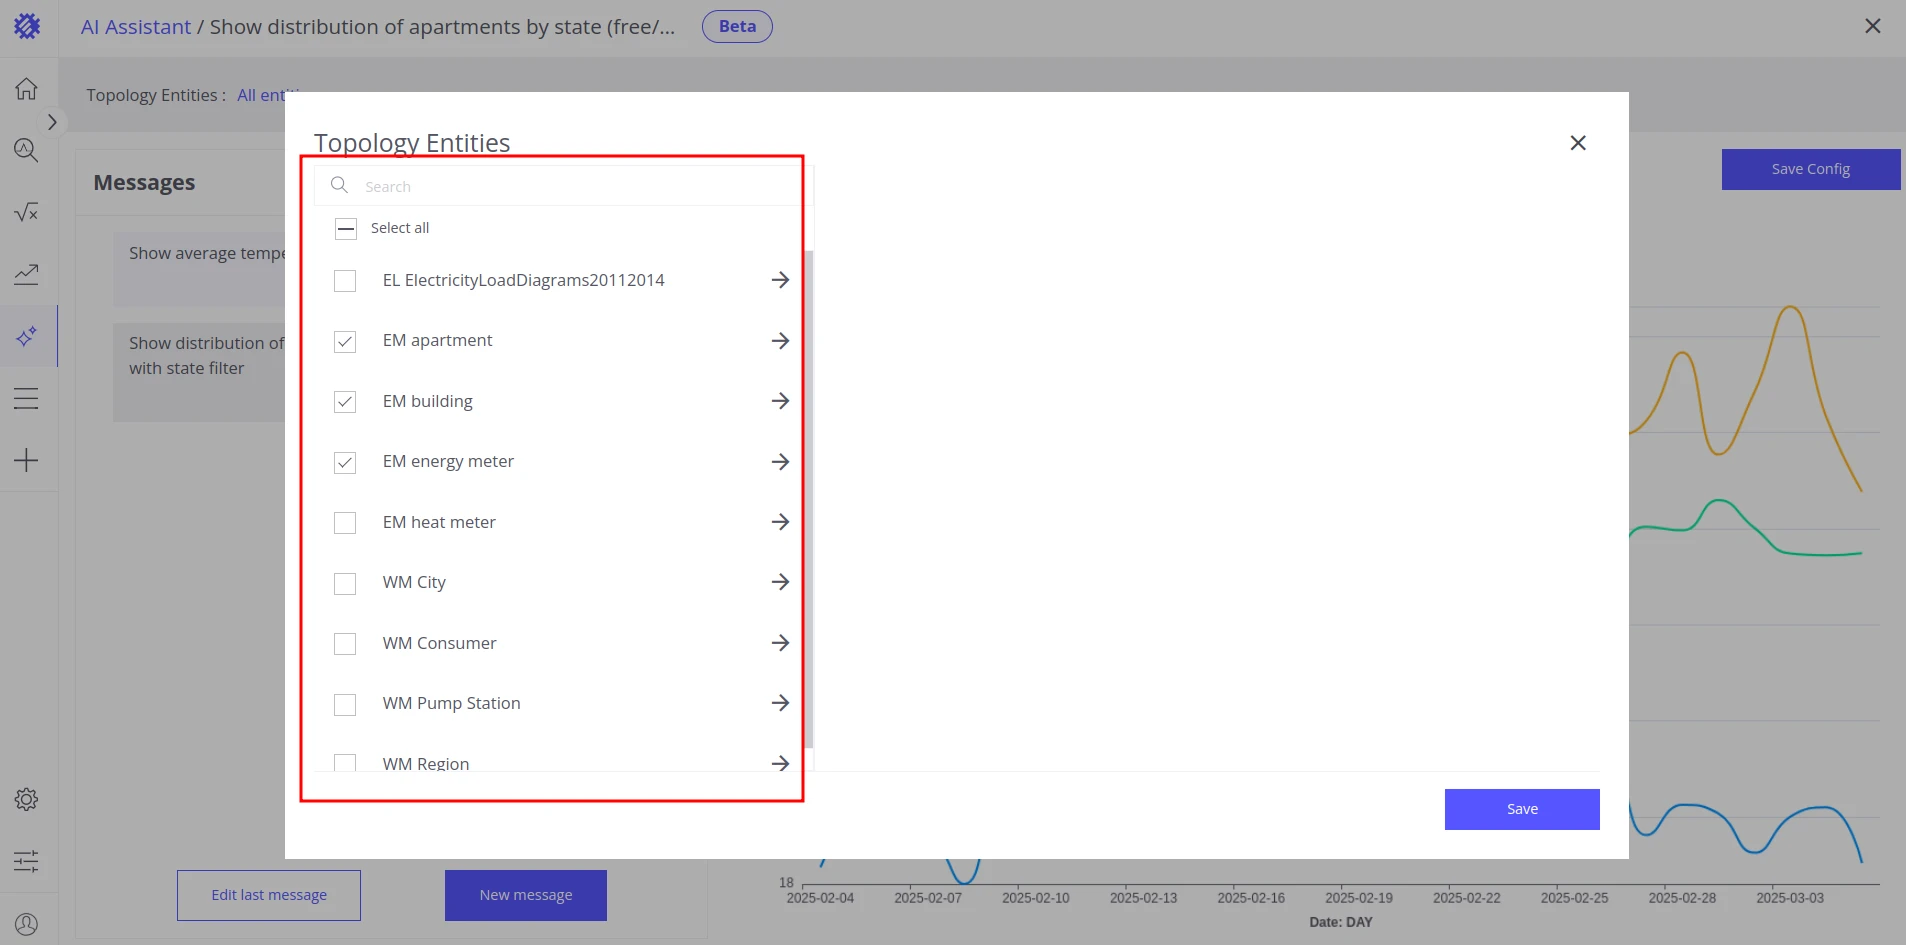
Chat Topology Entities
Section titled “Chat Topology Entities”The assistant builds visualizations by analyzing your topology — the business entities and their fields defined in Trendz. When a topology has hundreds of entities or fields, the accuracy of the assistant may decrease.
Use the Topology Entities window to explicitly tell the assistant which entities and fields are relevant to the current conversation. You can access it by starting a new chat or by clicking the entity selection next to the Topology Entities label in the upper left corner of the screen.

Best Practices
Section titled “Best Practices”- Narrow the topology: Use the Topology Entities tab to include only the entities and fields relevant to your question — especially important for large topologies.
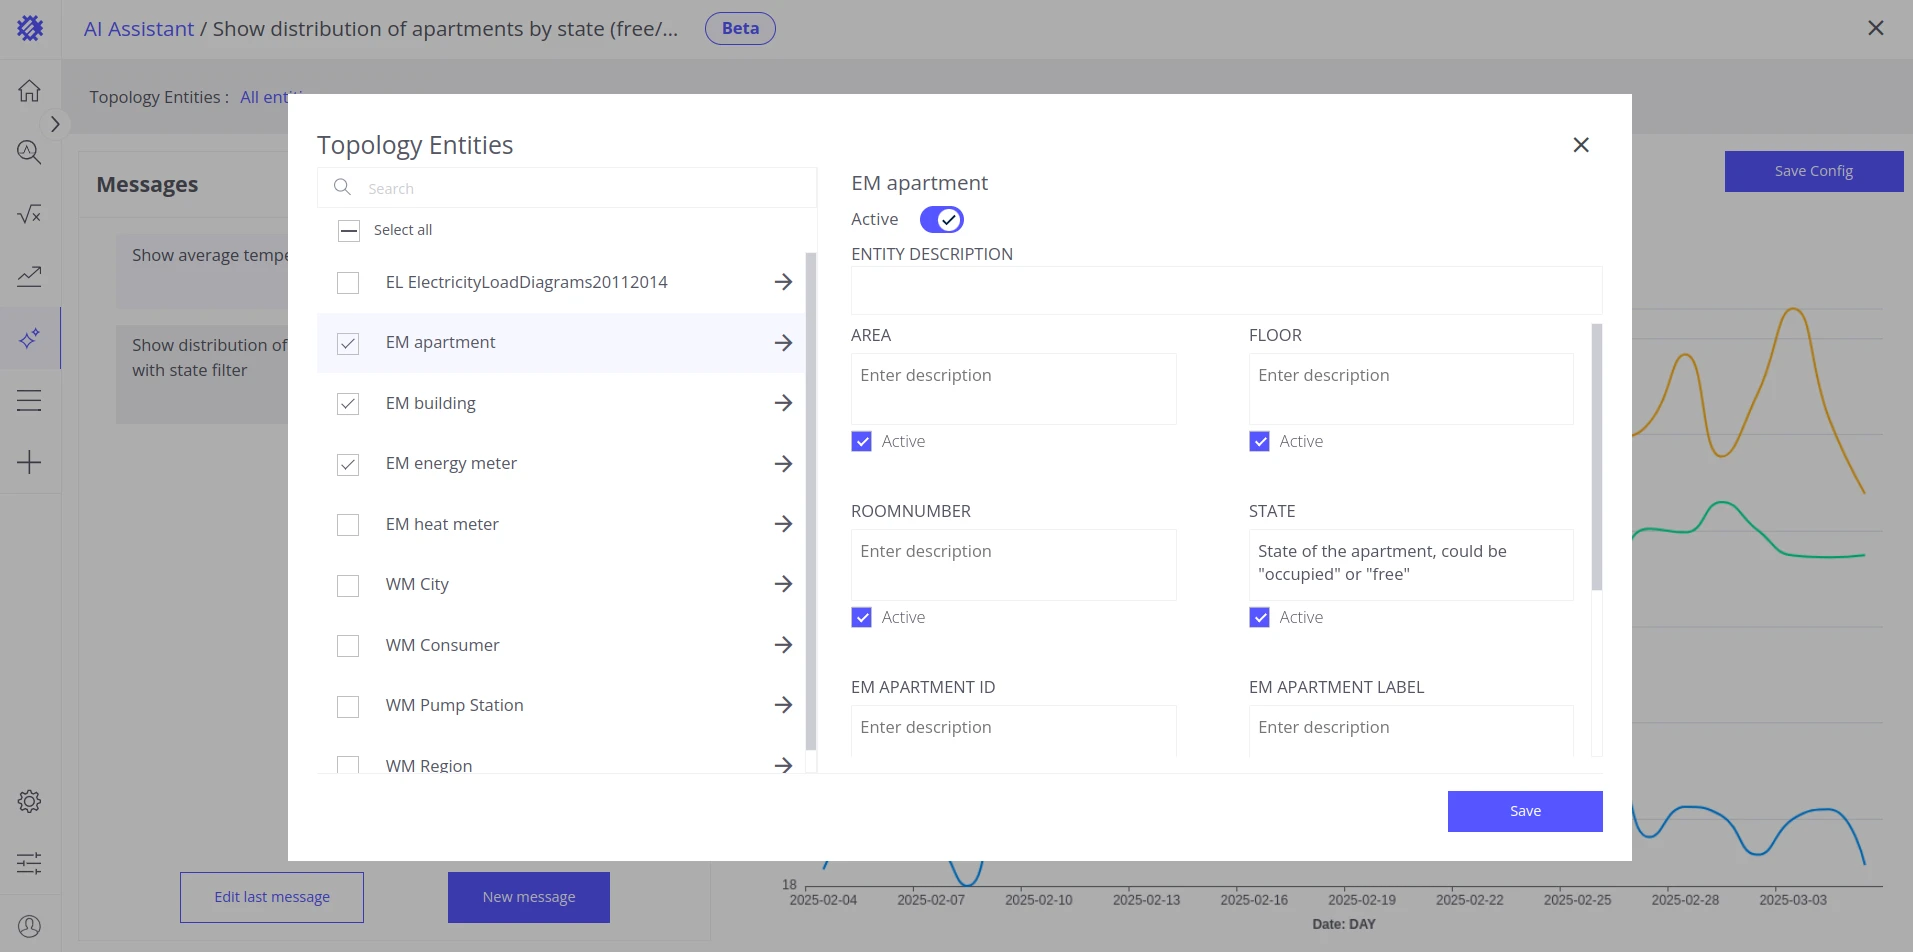
- Add field descriptions: When field names are abbreviated or unclear, add descriptions so the assistant can interpret them correctly.
- Refine with follow-ups: If a result is close but not quite right, send a follow-up message with additional specifications instead of starting over.
- Use your own model: For self-hosted installations or to avoid cloud token limits, configure a custom large language model. See AI Settings.
- Choose the right model: When self-hosting, balance model capability against cost — more capable models produce better results but cost more per query.
Limitations
Section titled “Limitations”Token Limit Cloud only
Section titled “Token Limit Cloud only”The number of messages you can send per month depends on your subscription type. When the monthly limit is reached, AI Assistance is unavailable for the rest of the month. Configuring your own model removes this restriction. See AI Settings.
Rate Limits
Section titled “Rate Limits”The number of messages per minute is capped at:
| Scope | Limit |
|---|---|
| Per user | 6 messages/min |
| Per customer | 20 messages/min |
| Per tenant | 50 messages/min |
No Default Model (Self-hosted only)
Section titled “No Default Model (Self-hosted only)”Self-hosted installations do not include a default large language model. You must configure a custom model before using AI Assistance. See AI Settings.
Feature Limitations
Section titled “Feature Limitations”The following capabilities are not yet supported and will be added in future releases:
- Creating anomaly or prediction models
- Creating calculation fields
- Creating cards with a compared value
- Specifying view or view field settings
Was this helpful?