Install with Remote Agent
Install and manage ThingsBoard IoT Gateway remotely with Remote Agent: a Docker container that runs on the target machine, connects to your ThingsBoard server, and deploys the Gateway on its behalf. No SSH access or manual Docker commands are required on the machine. This page covers the Gateway-specific flows; for the full feature — agents, profiles, application actions, and bulk operations — see the Remote Agent documentation.
The agent adds remote lifecycle management on top of the Gateway installation:
- Remote installation: Deploy the Gateway from the ThingsBoard UI.
- Upgrades from the cloud: Push new Gateway versions without touching the machine.
- Restart and recovery: Restart the Gateway remotely; the agent restores it if a deployment fails.
- Monitoring: Container states, CPU, memory, and live logs in the ThingsBoard UI.
- Fleet operations: Update all gateways of a fleet at once with bulk actions.
Prerequisites
Section titled “Prerequisites”- ThingsBoard server or a ThingsBoard Cloud tenant.
- Docker installed on the target machine (Linux, amd64 or arm64).
- Outbound network access from the target machine to the ThingsBoard gRPC port (default
7070).
Auto-provision the Gateway
Section titled “Auto-provision the Gateway”Full guide: Auto-provision an agent.
Nothing needs to be deployed or created up front, neither the agent nor the gateway device. Generate one provisioning command bound to an agent profile and run it on the target machine: the command starts the agent, and ThingsBoard registers it and creates the gateway device tied to it automatically, configured from the application profile assigned to the agent profile.
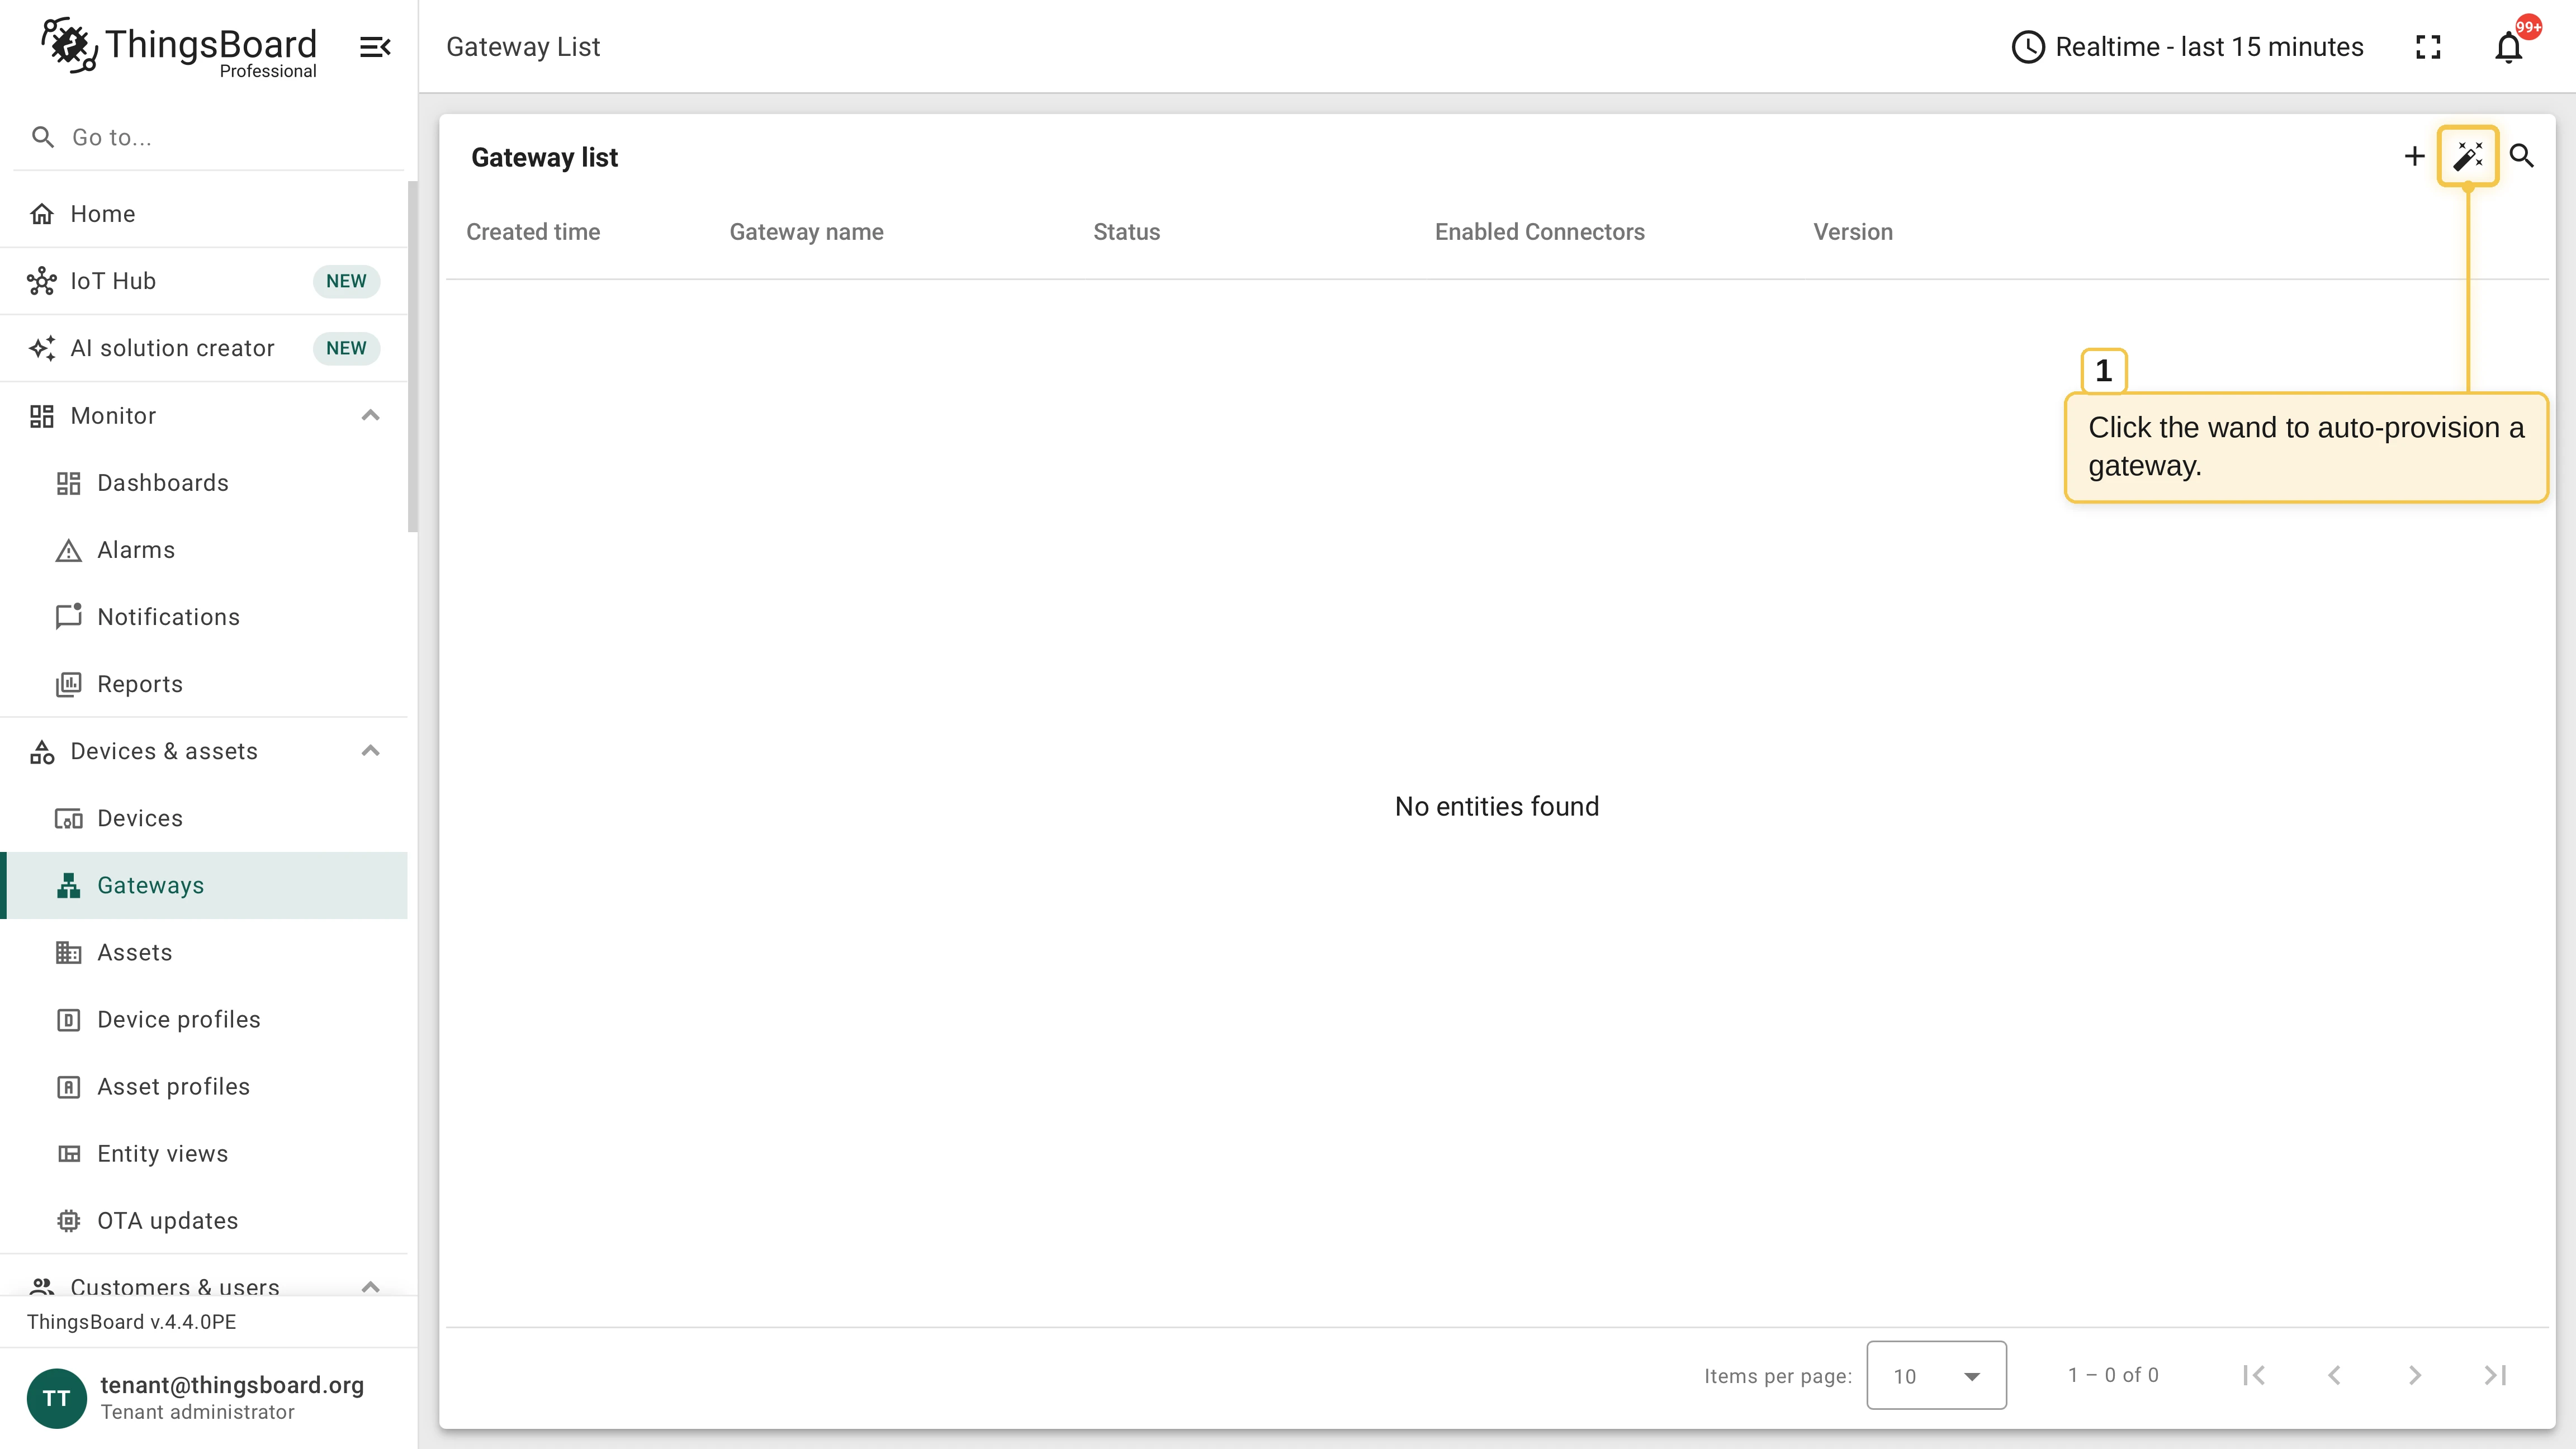
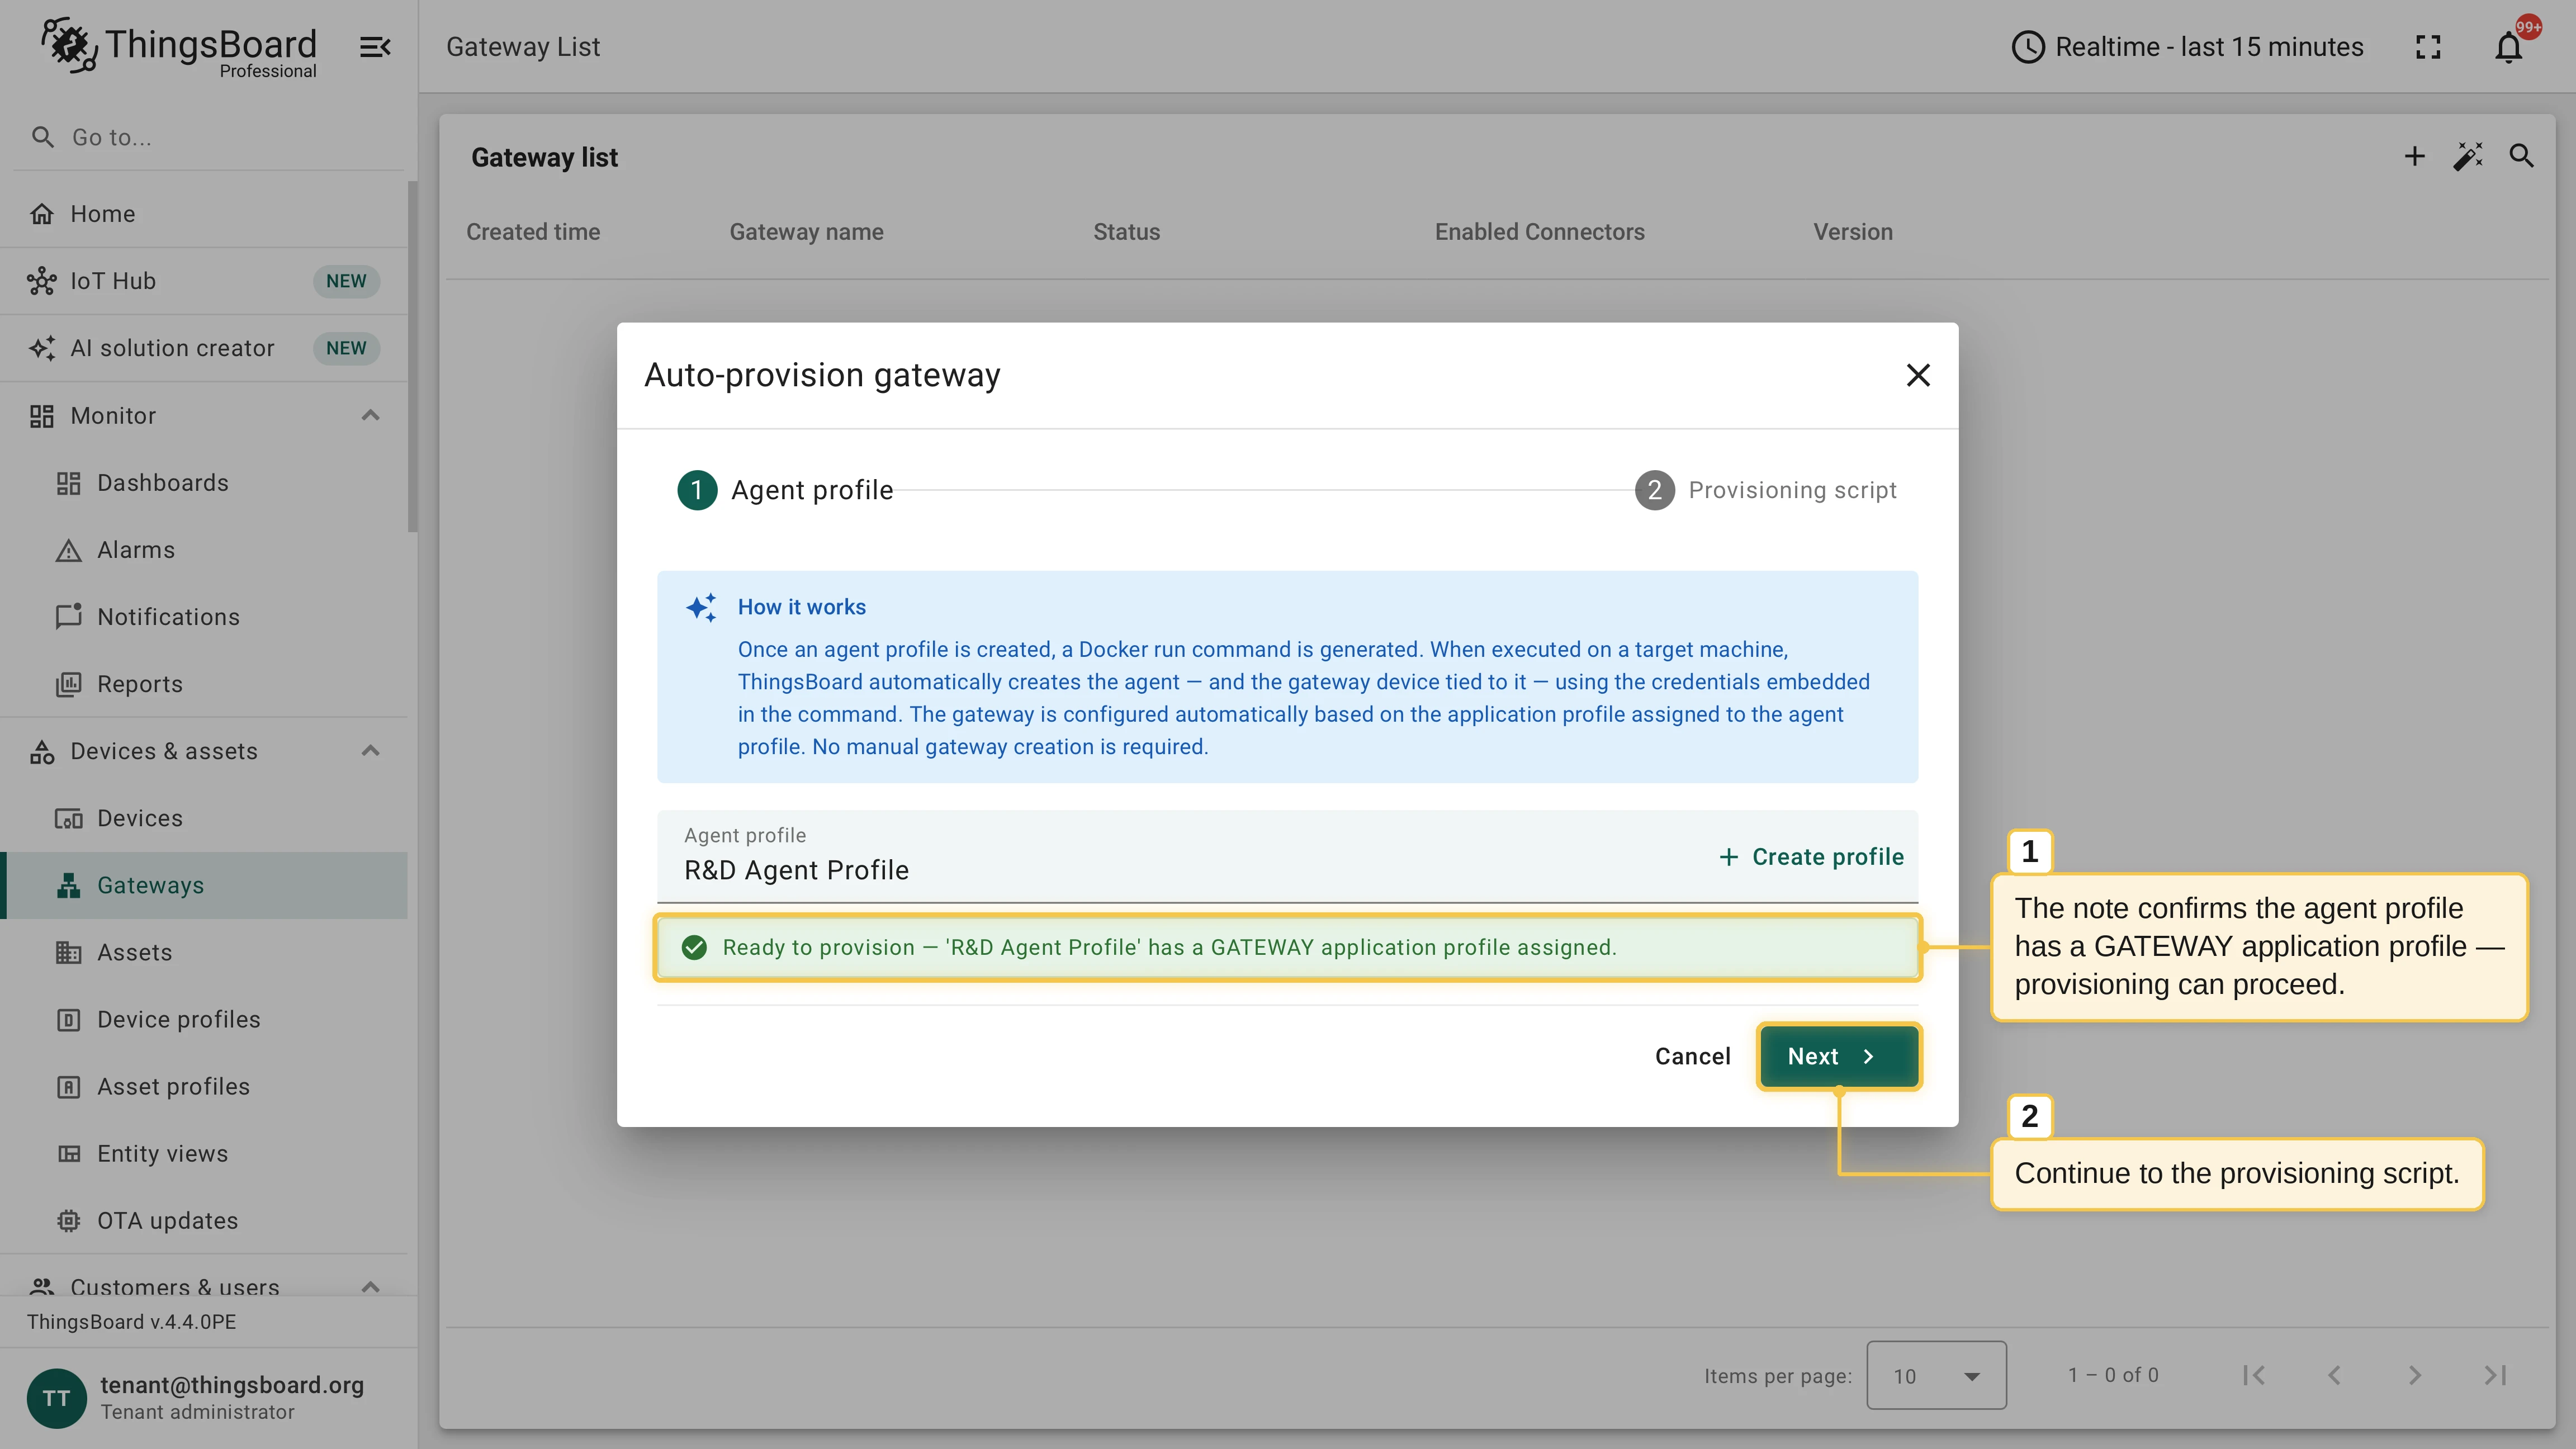
Go to Devices & assets > Gateways and click the wand icon in the upper-right corner. The Auto-provision gateway dialog opens.
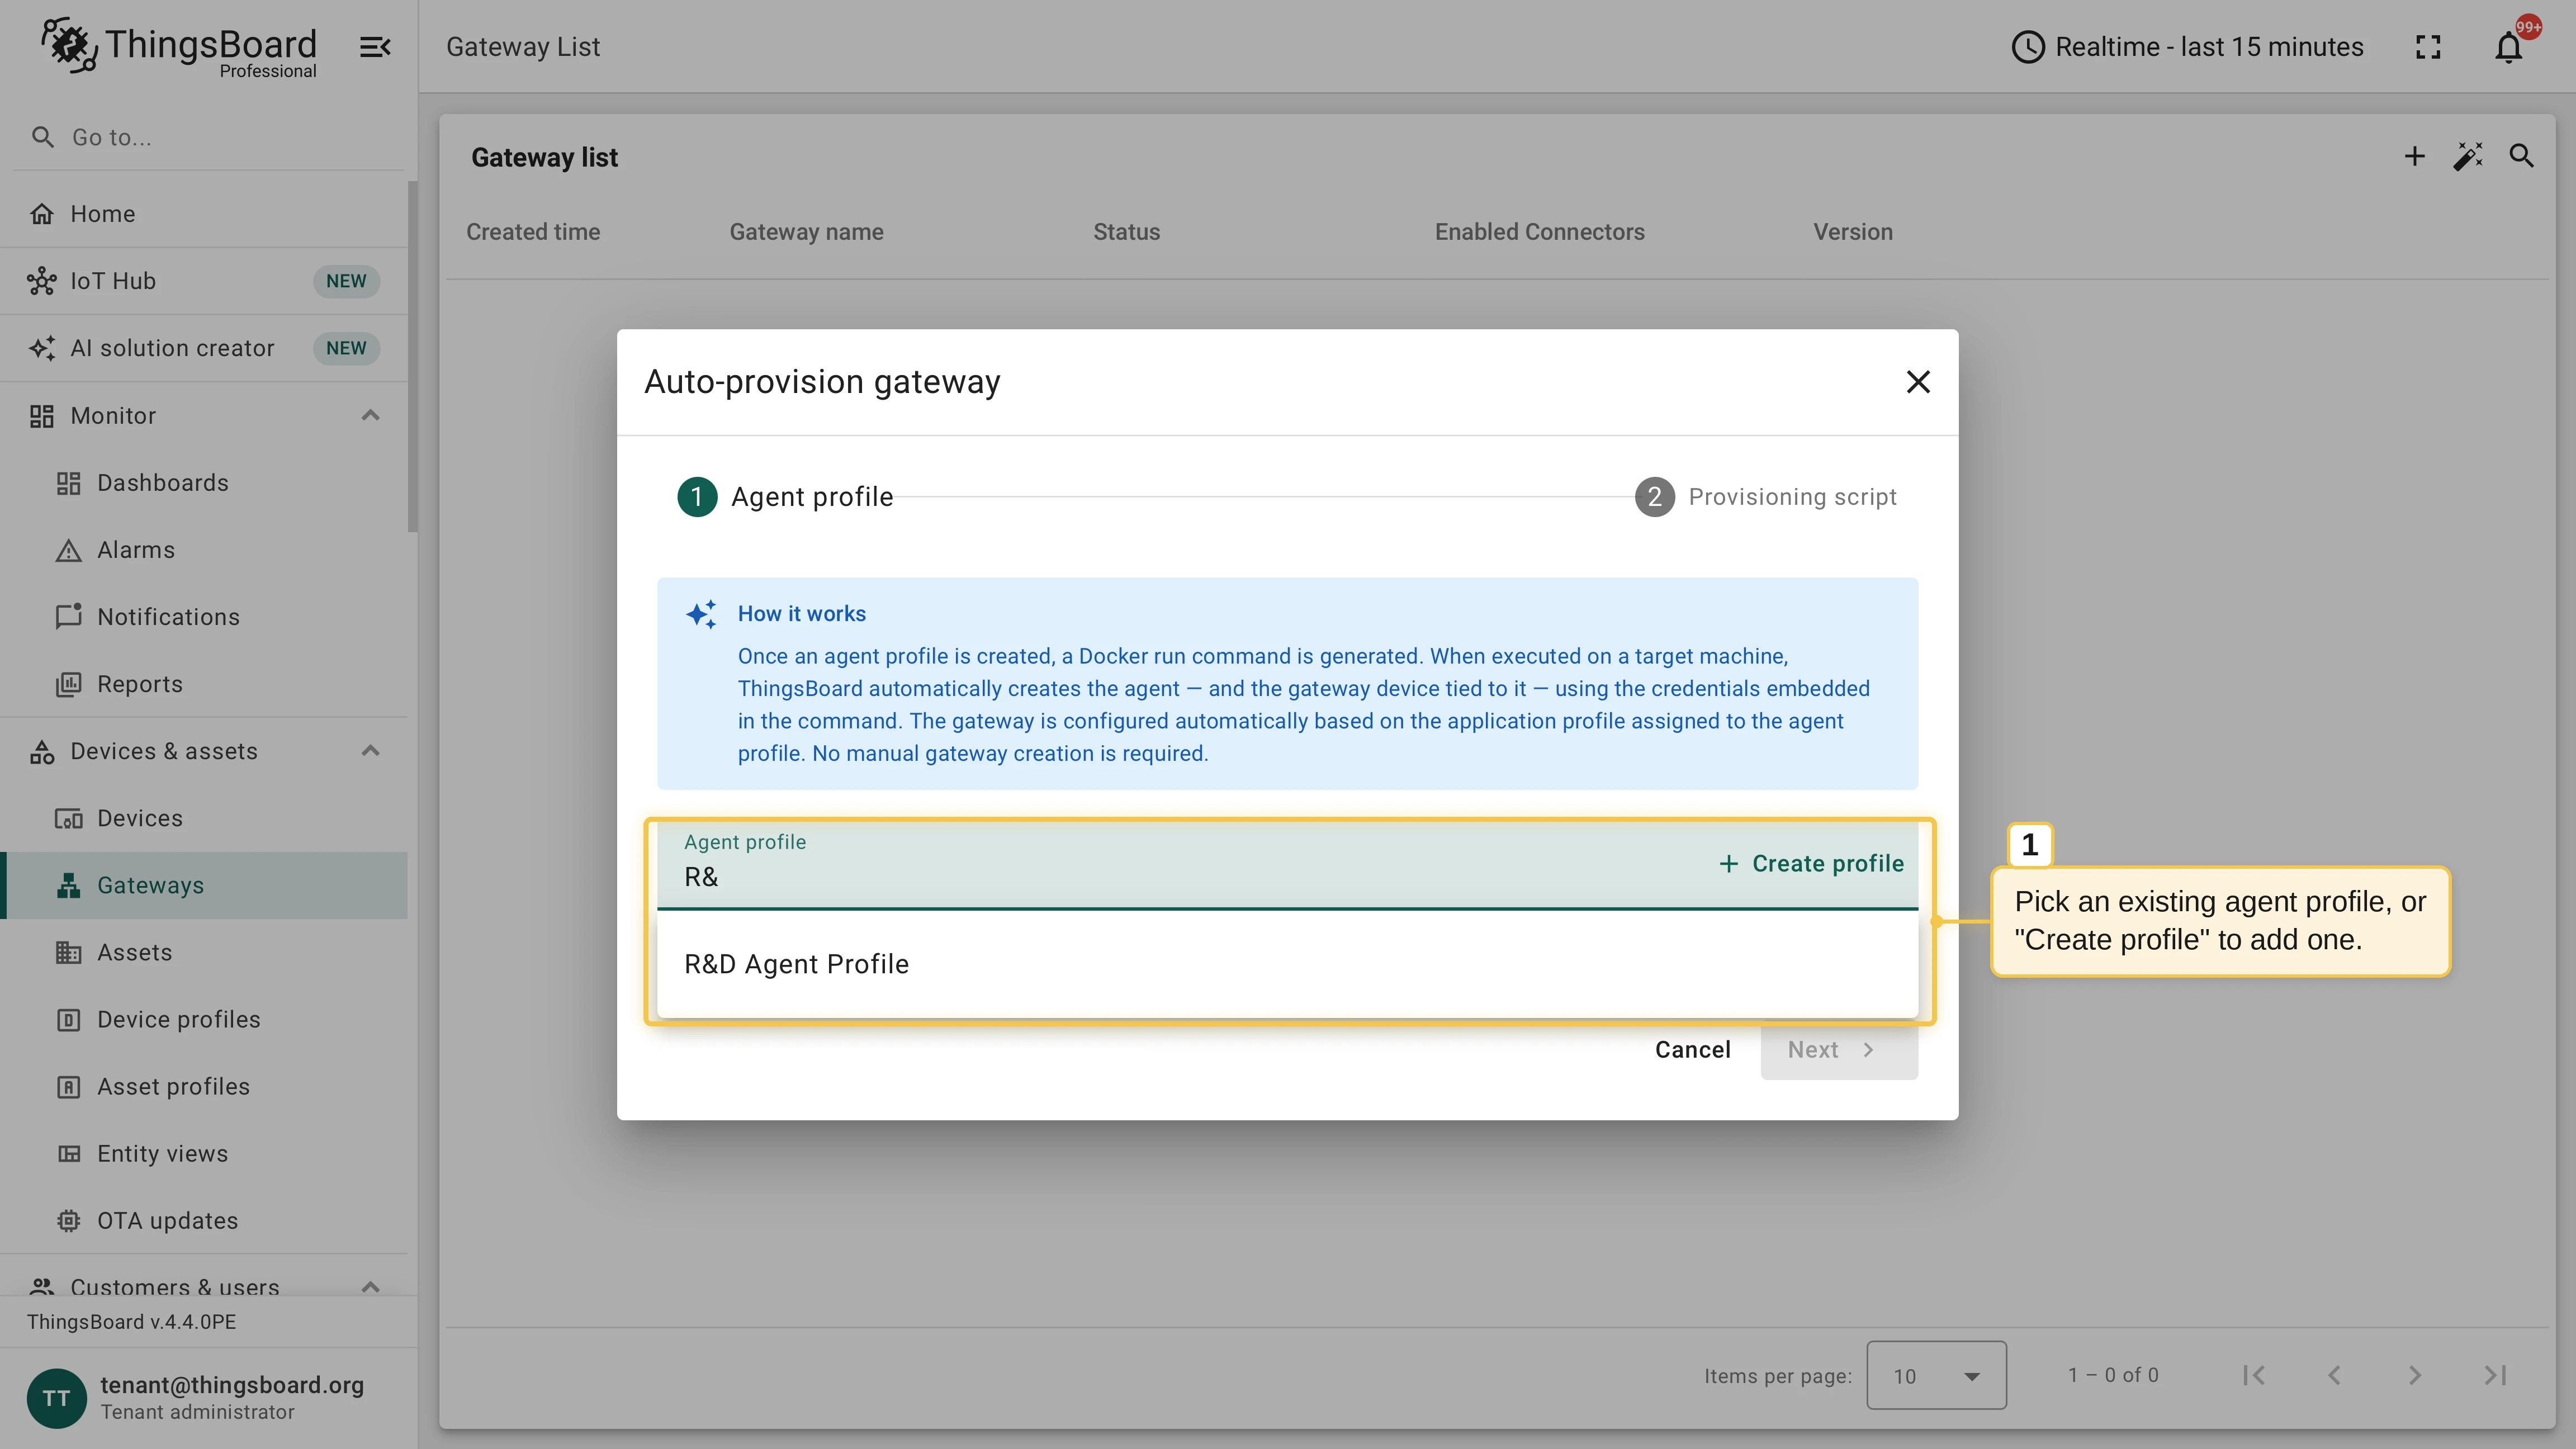
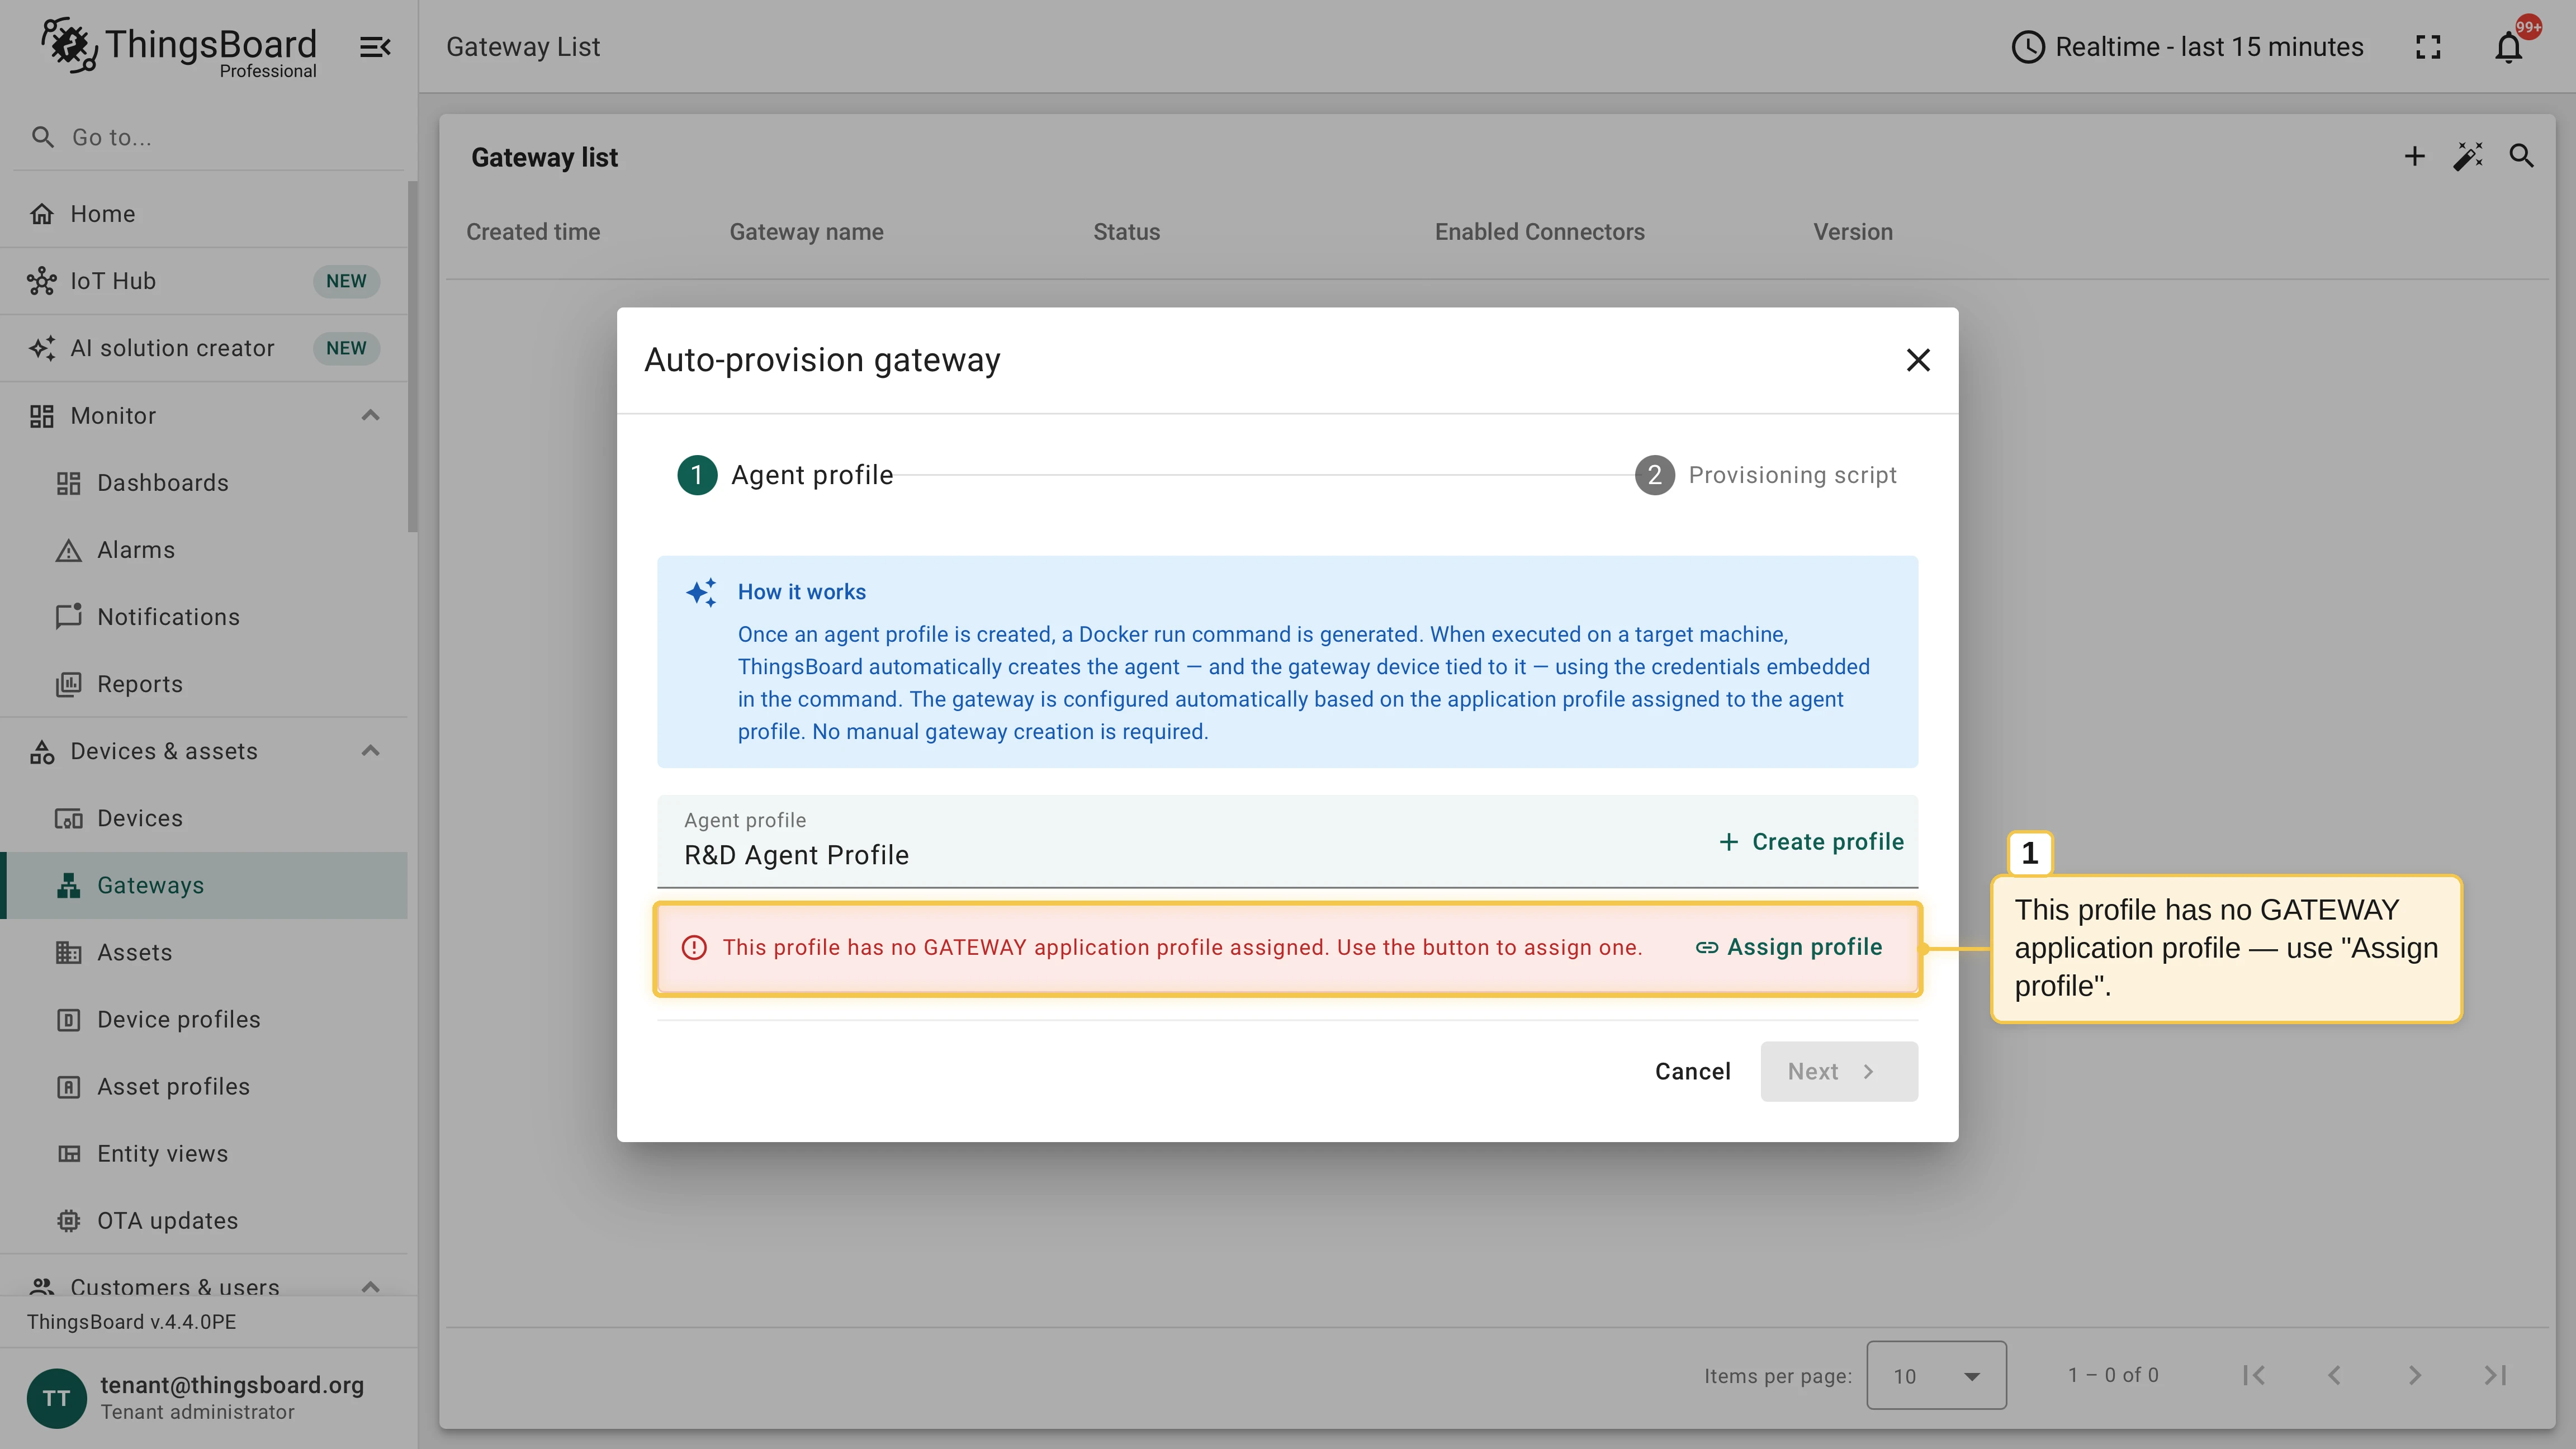
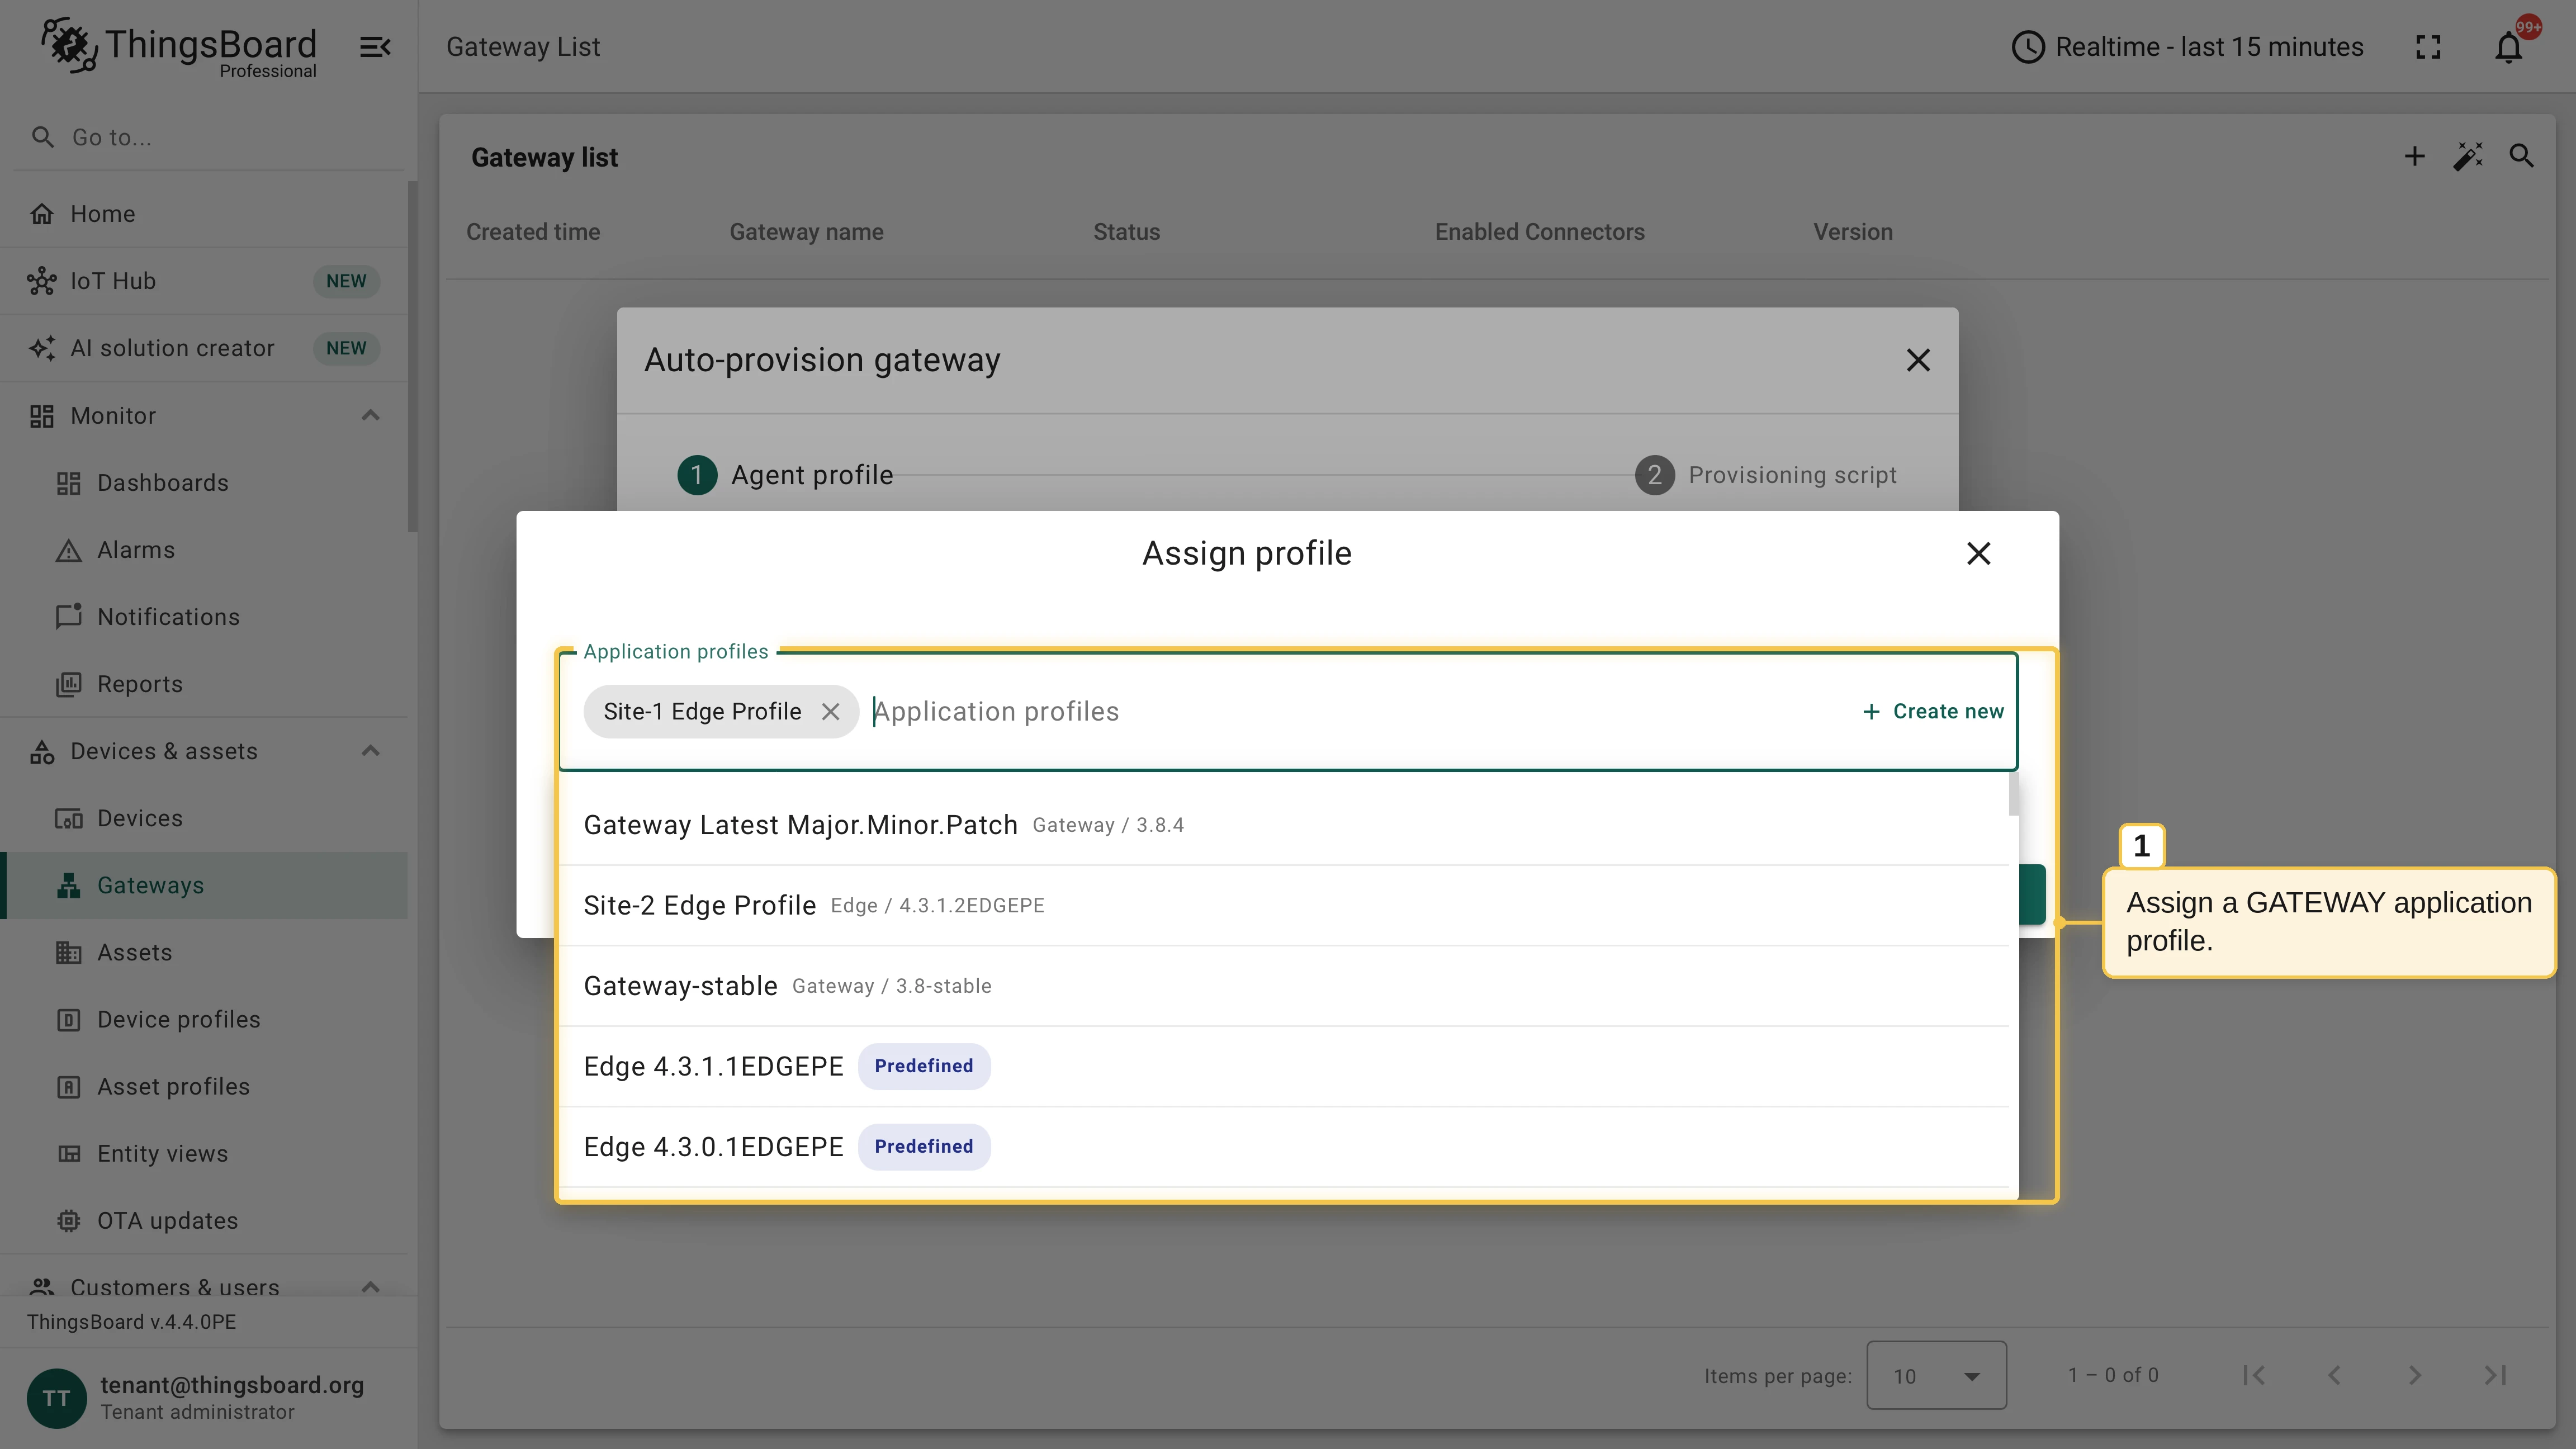
Pick an existing agent profile or create one. The profile must have a Gateway application profile assigned: if it does not, the dialog warns you — click Assign profile and select one, like the predefined Gateway Latest Major.Minor.Patch. Once the profile qualifies, the dialog shows Ready to provision; click Next.
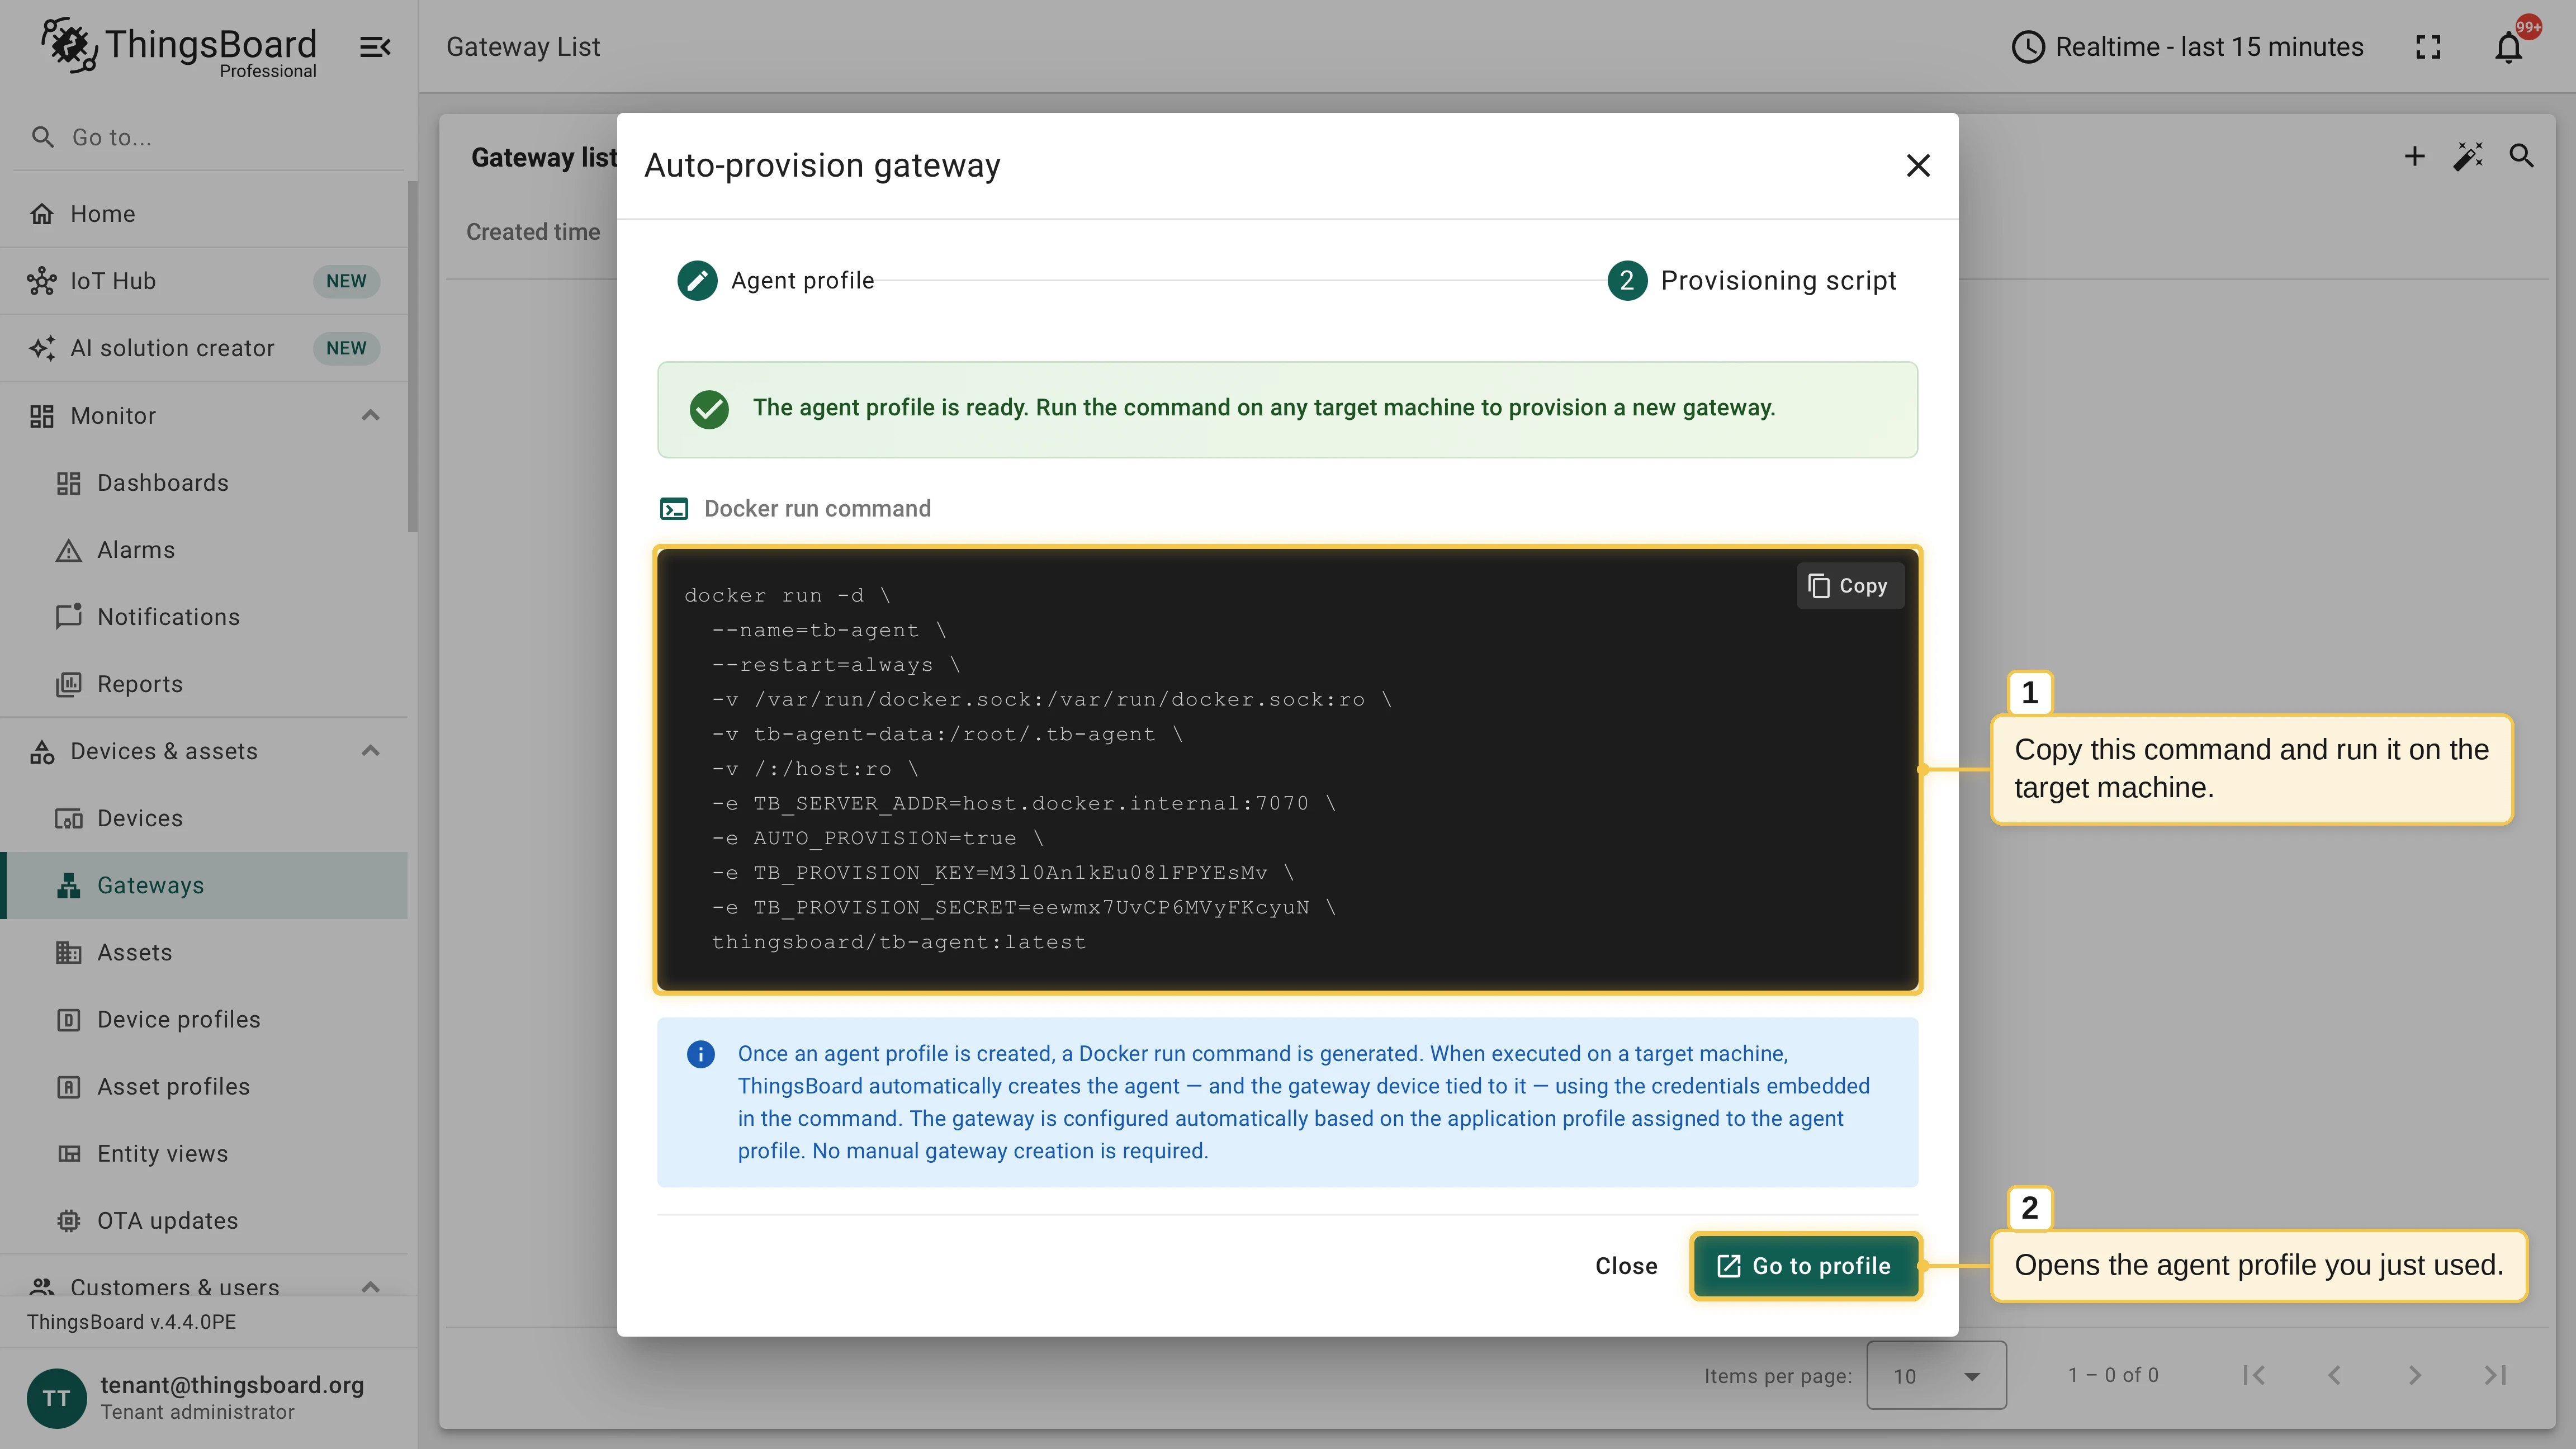
Copy the Docker run command — the provision key and secret are already filled in — and run it on the target machine.
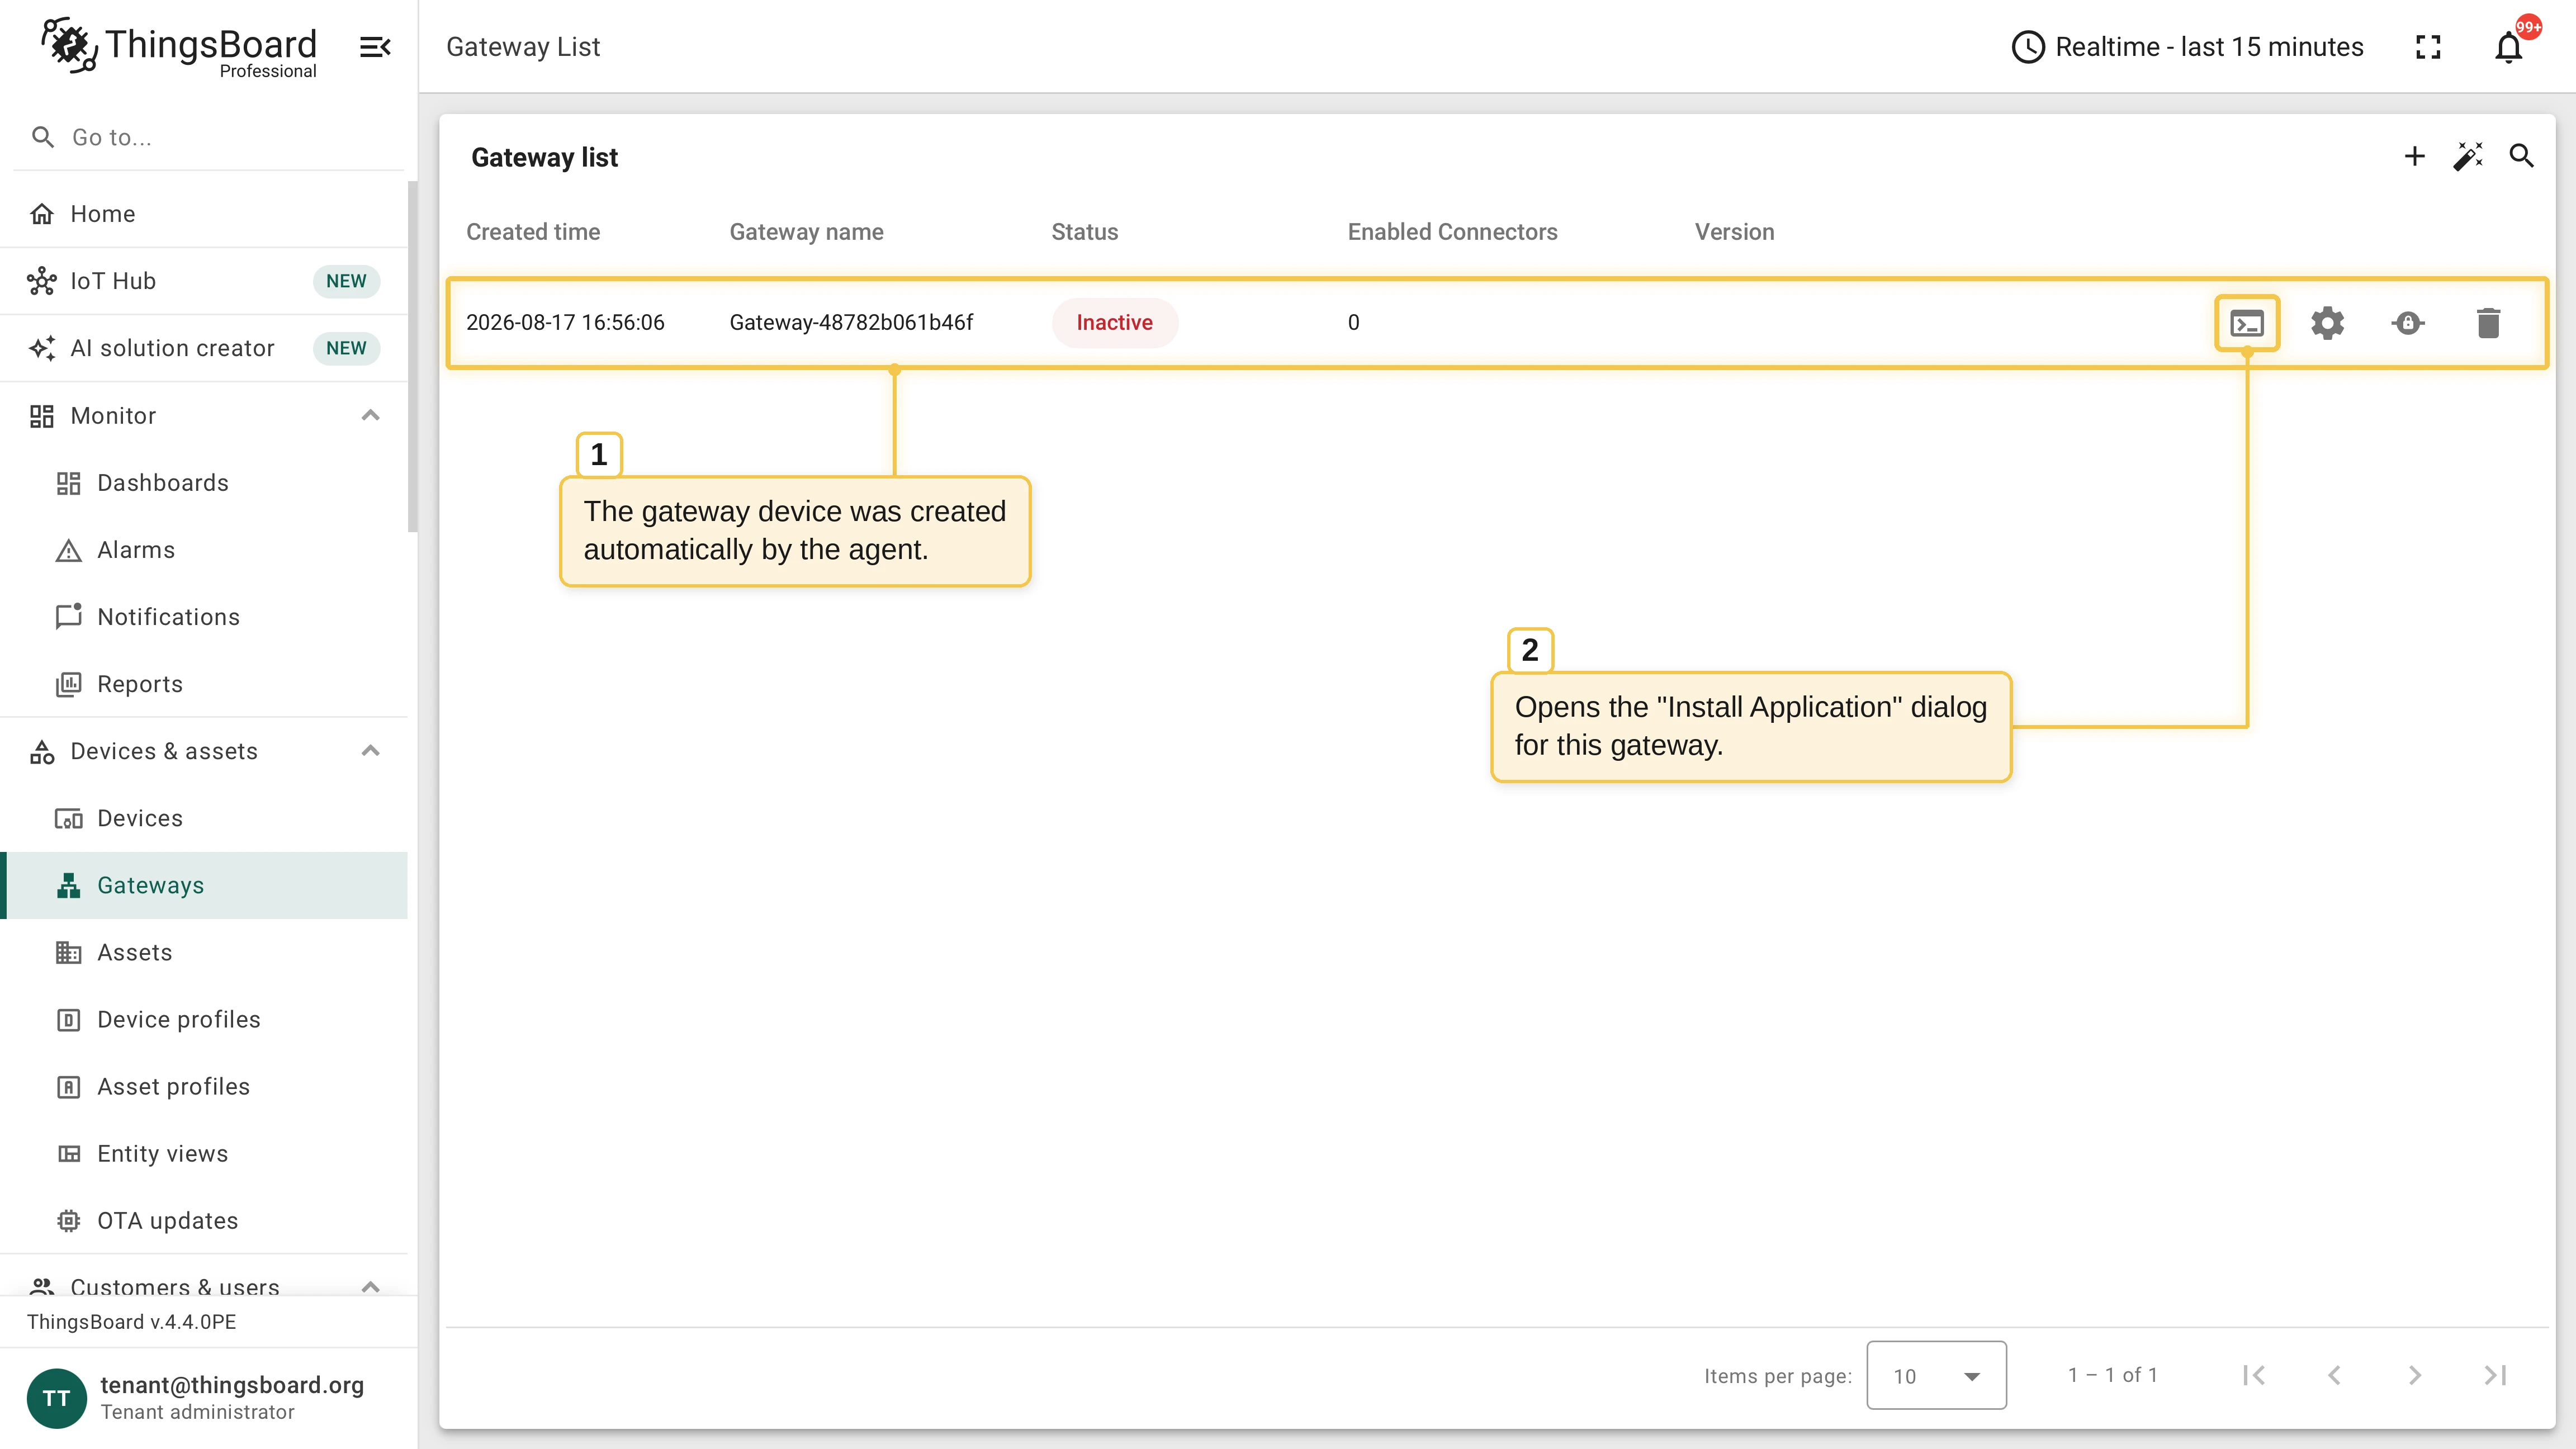
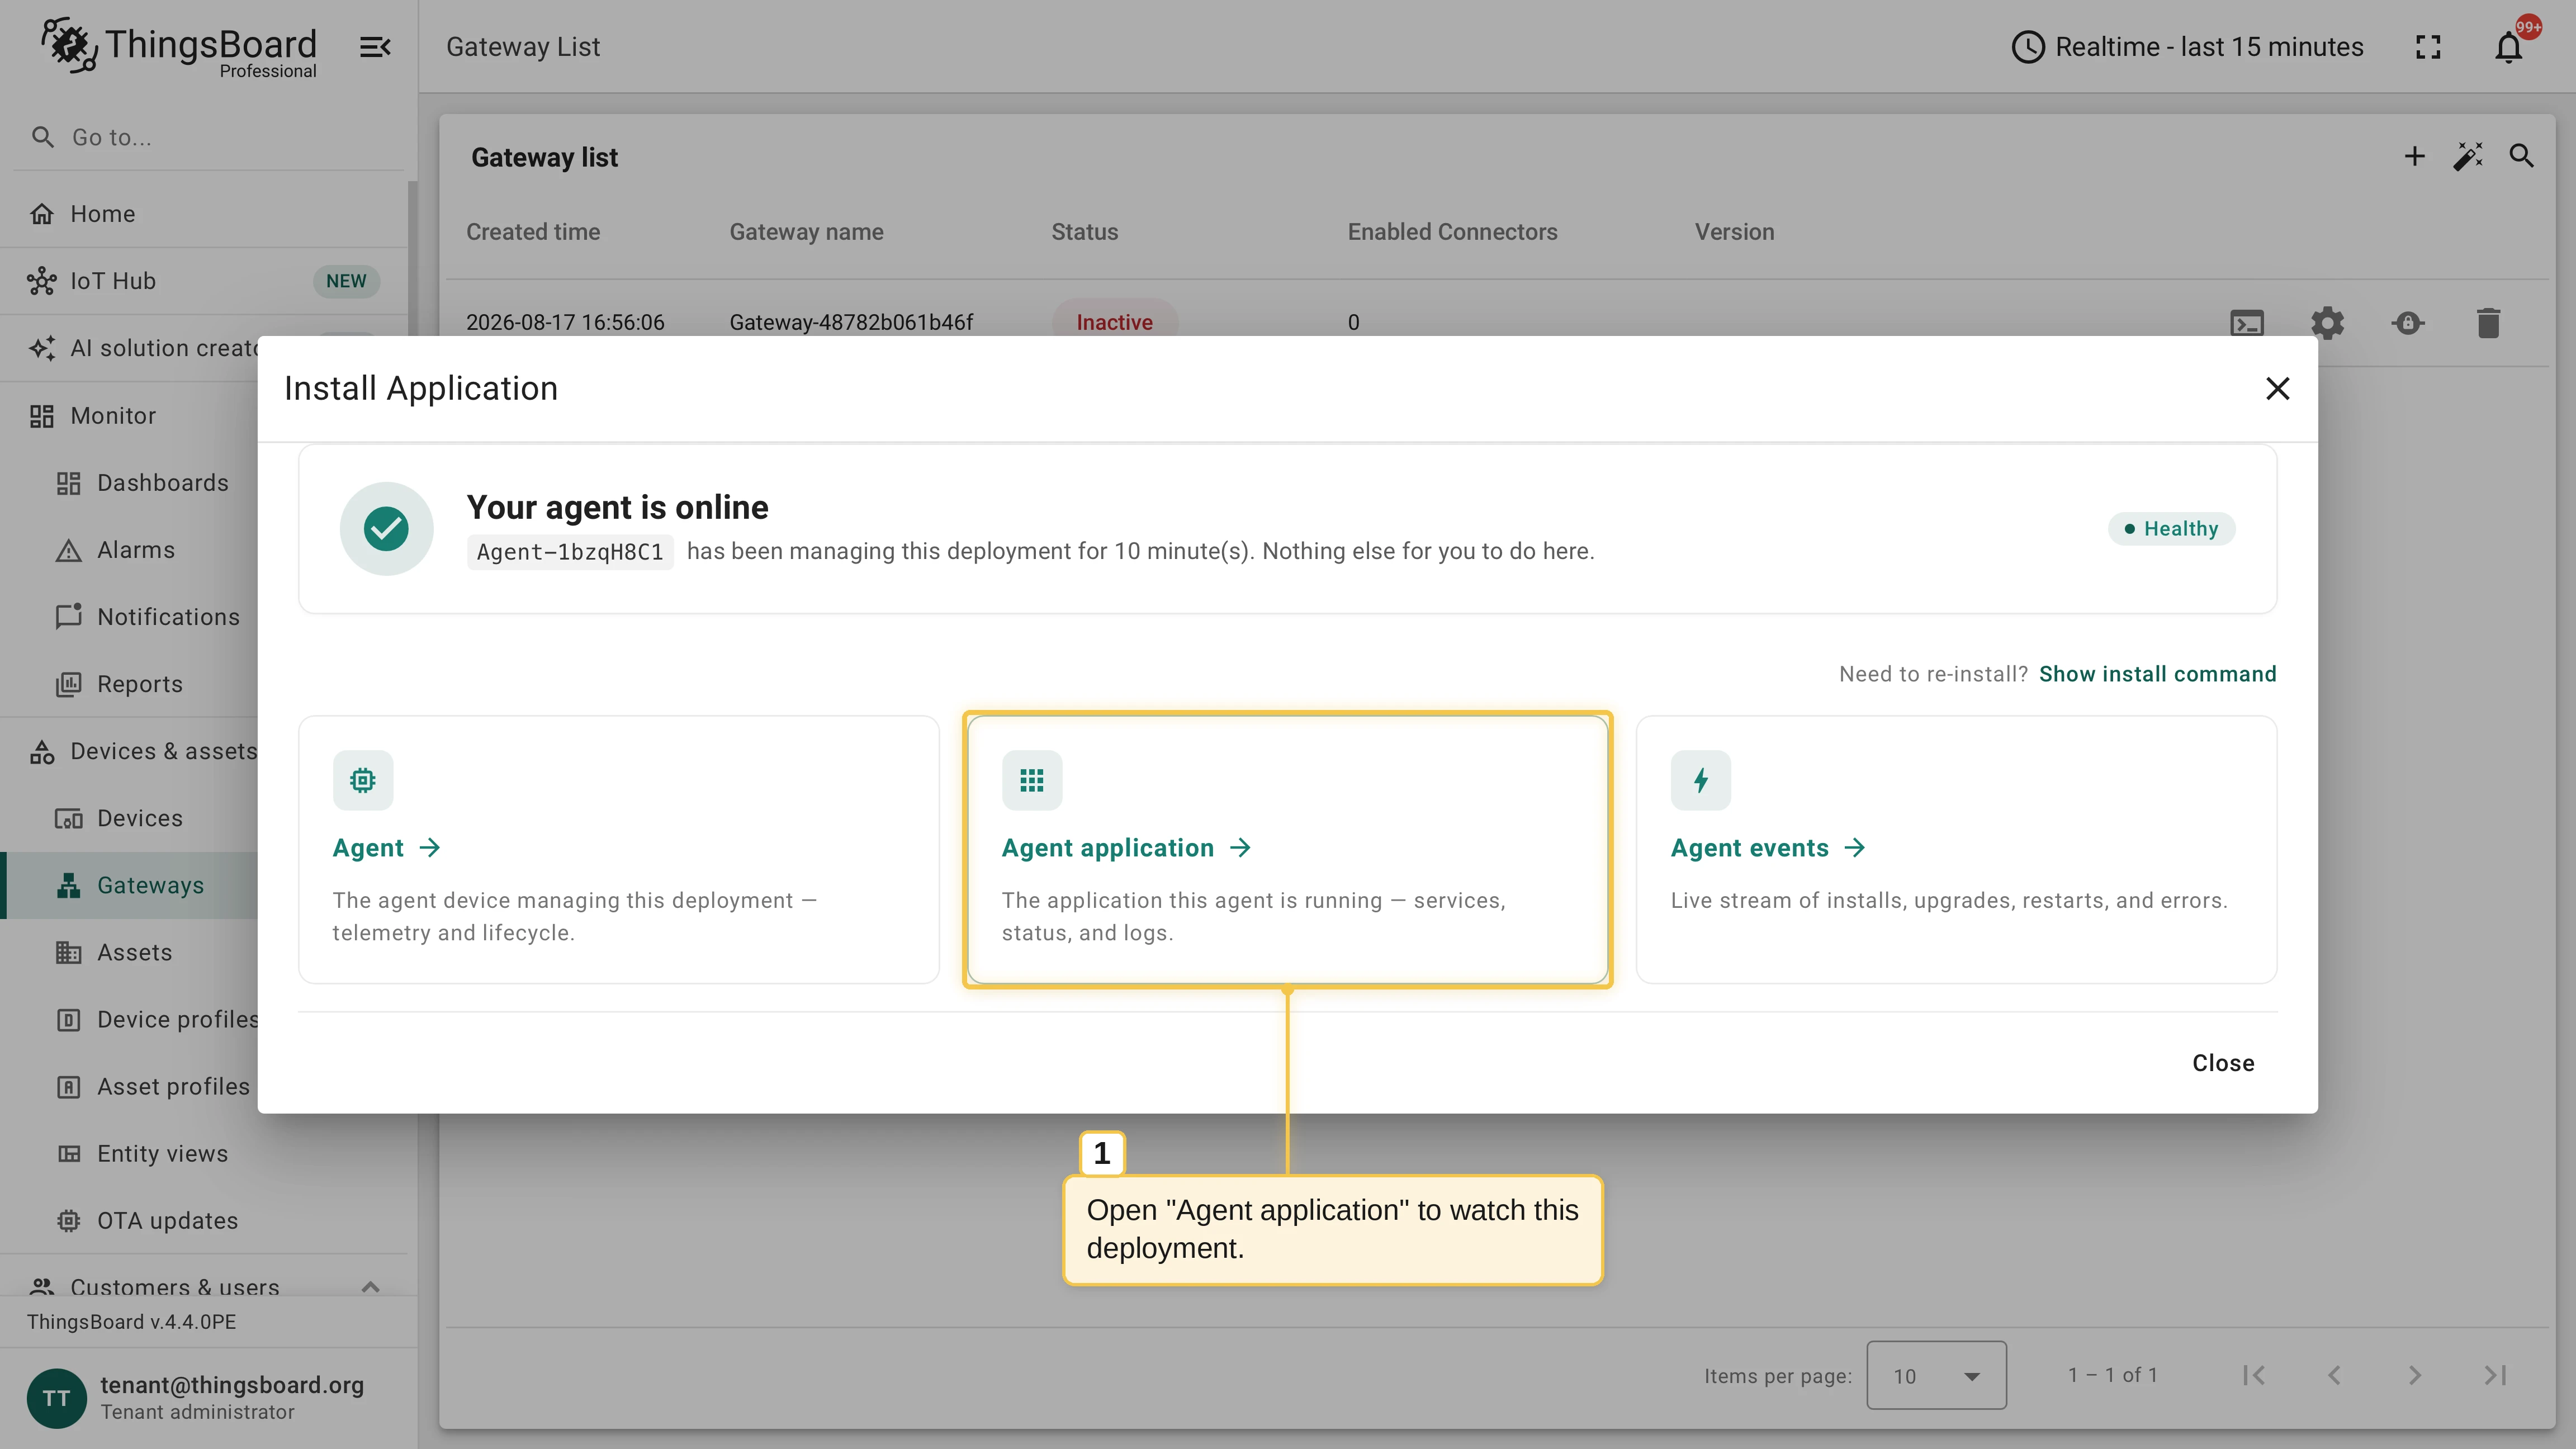
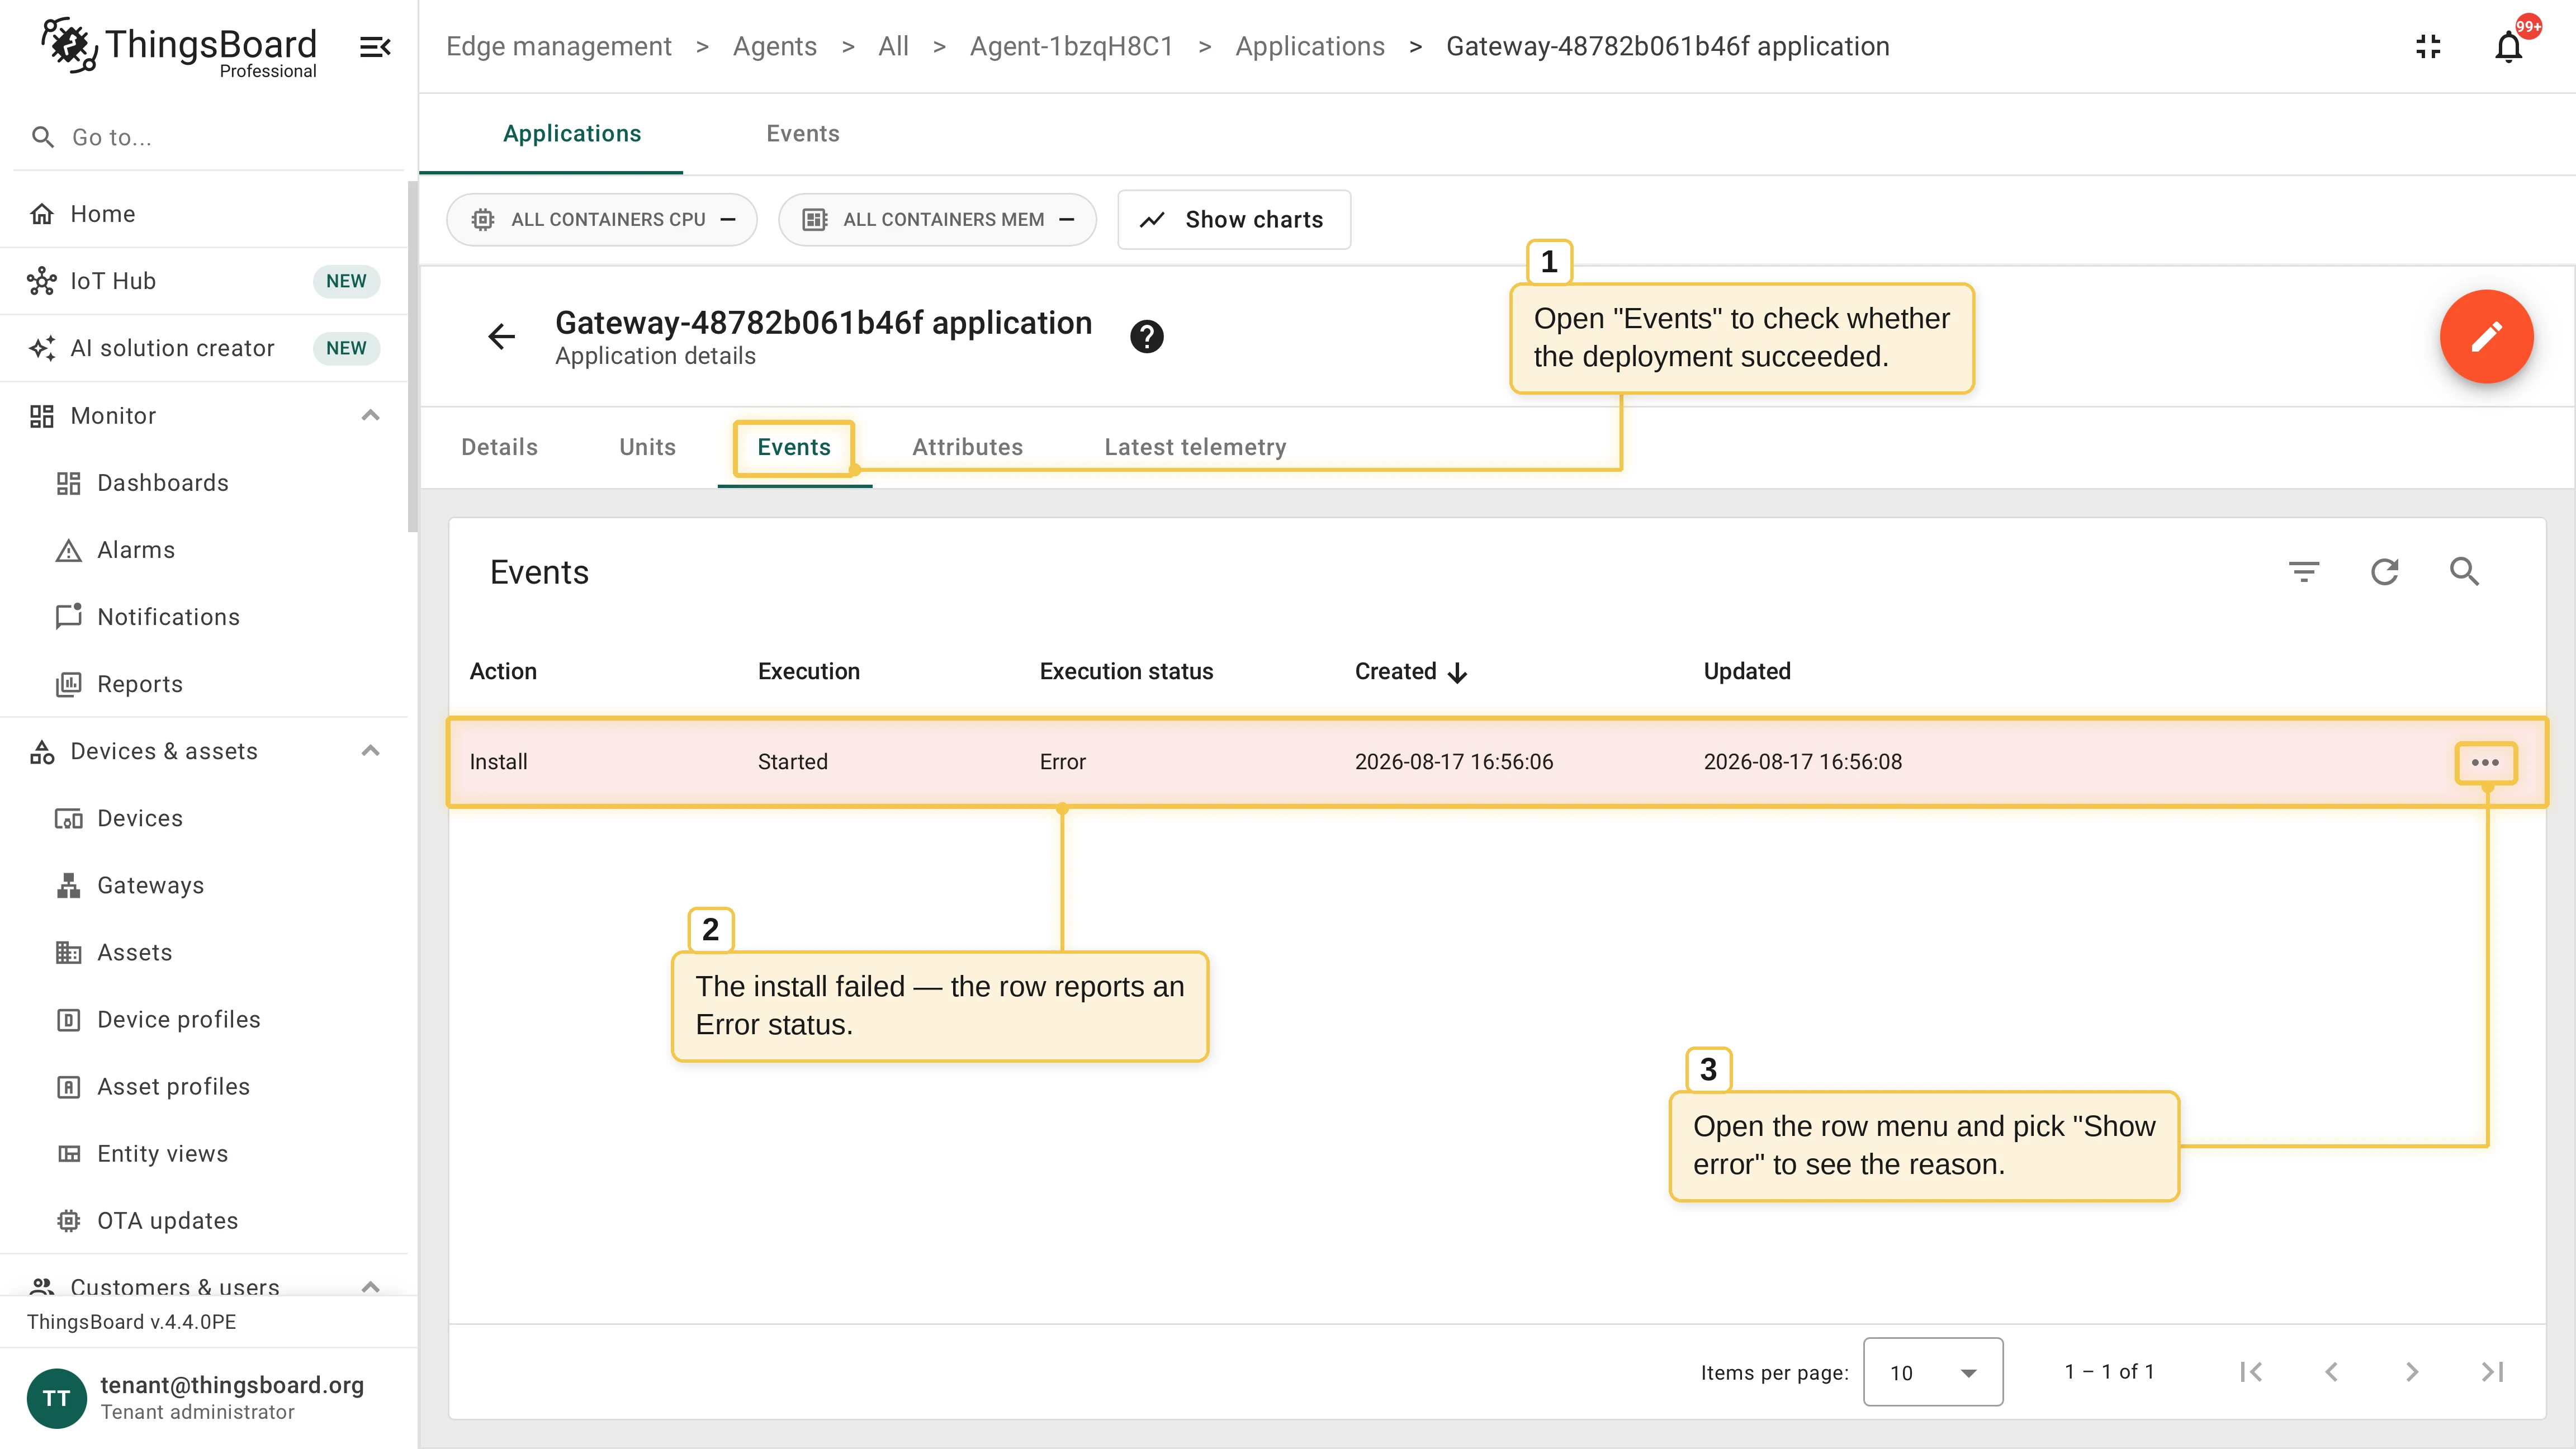
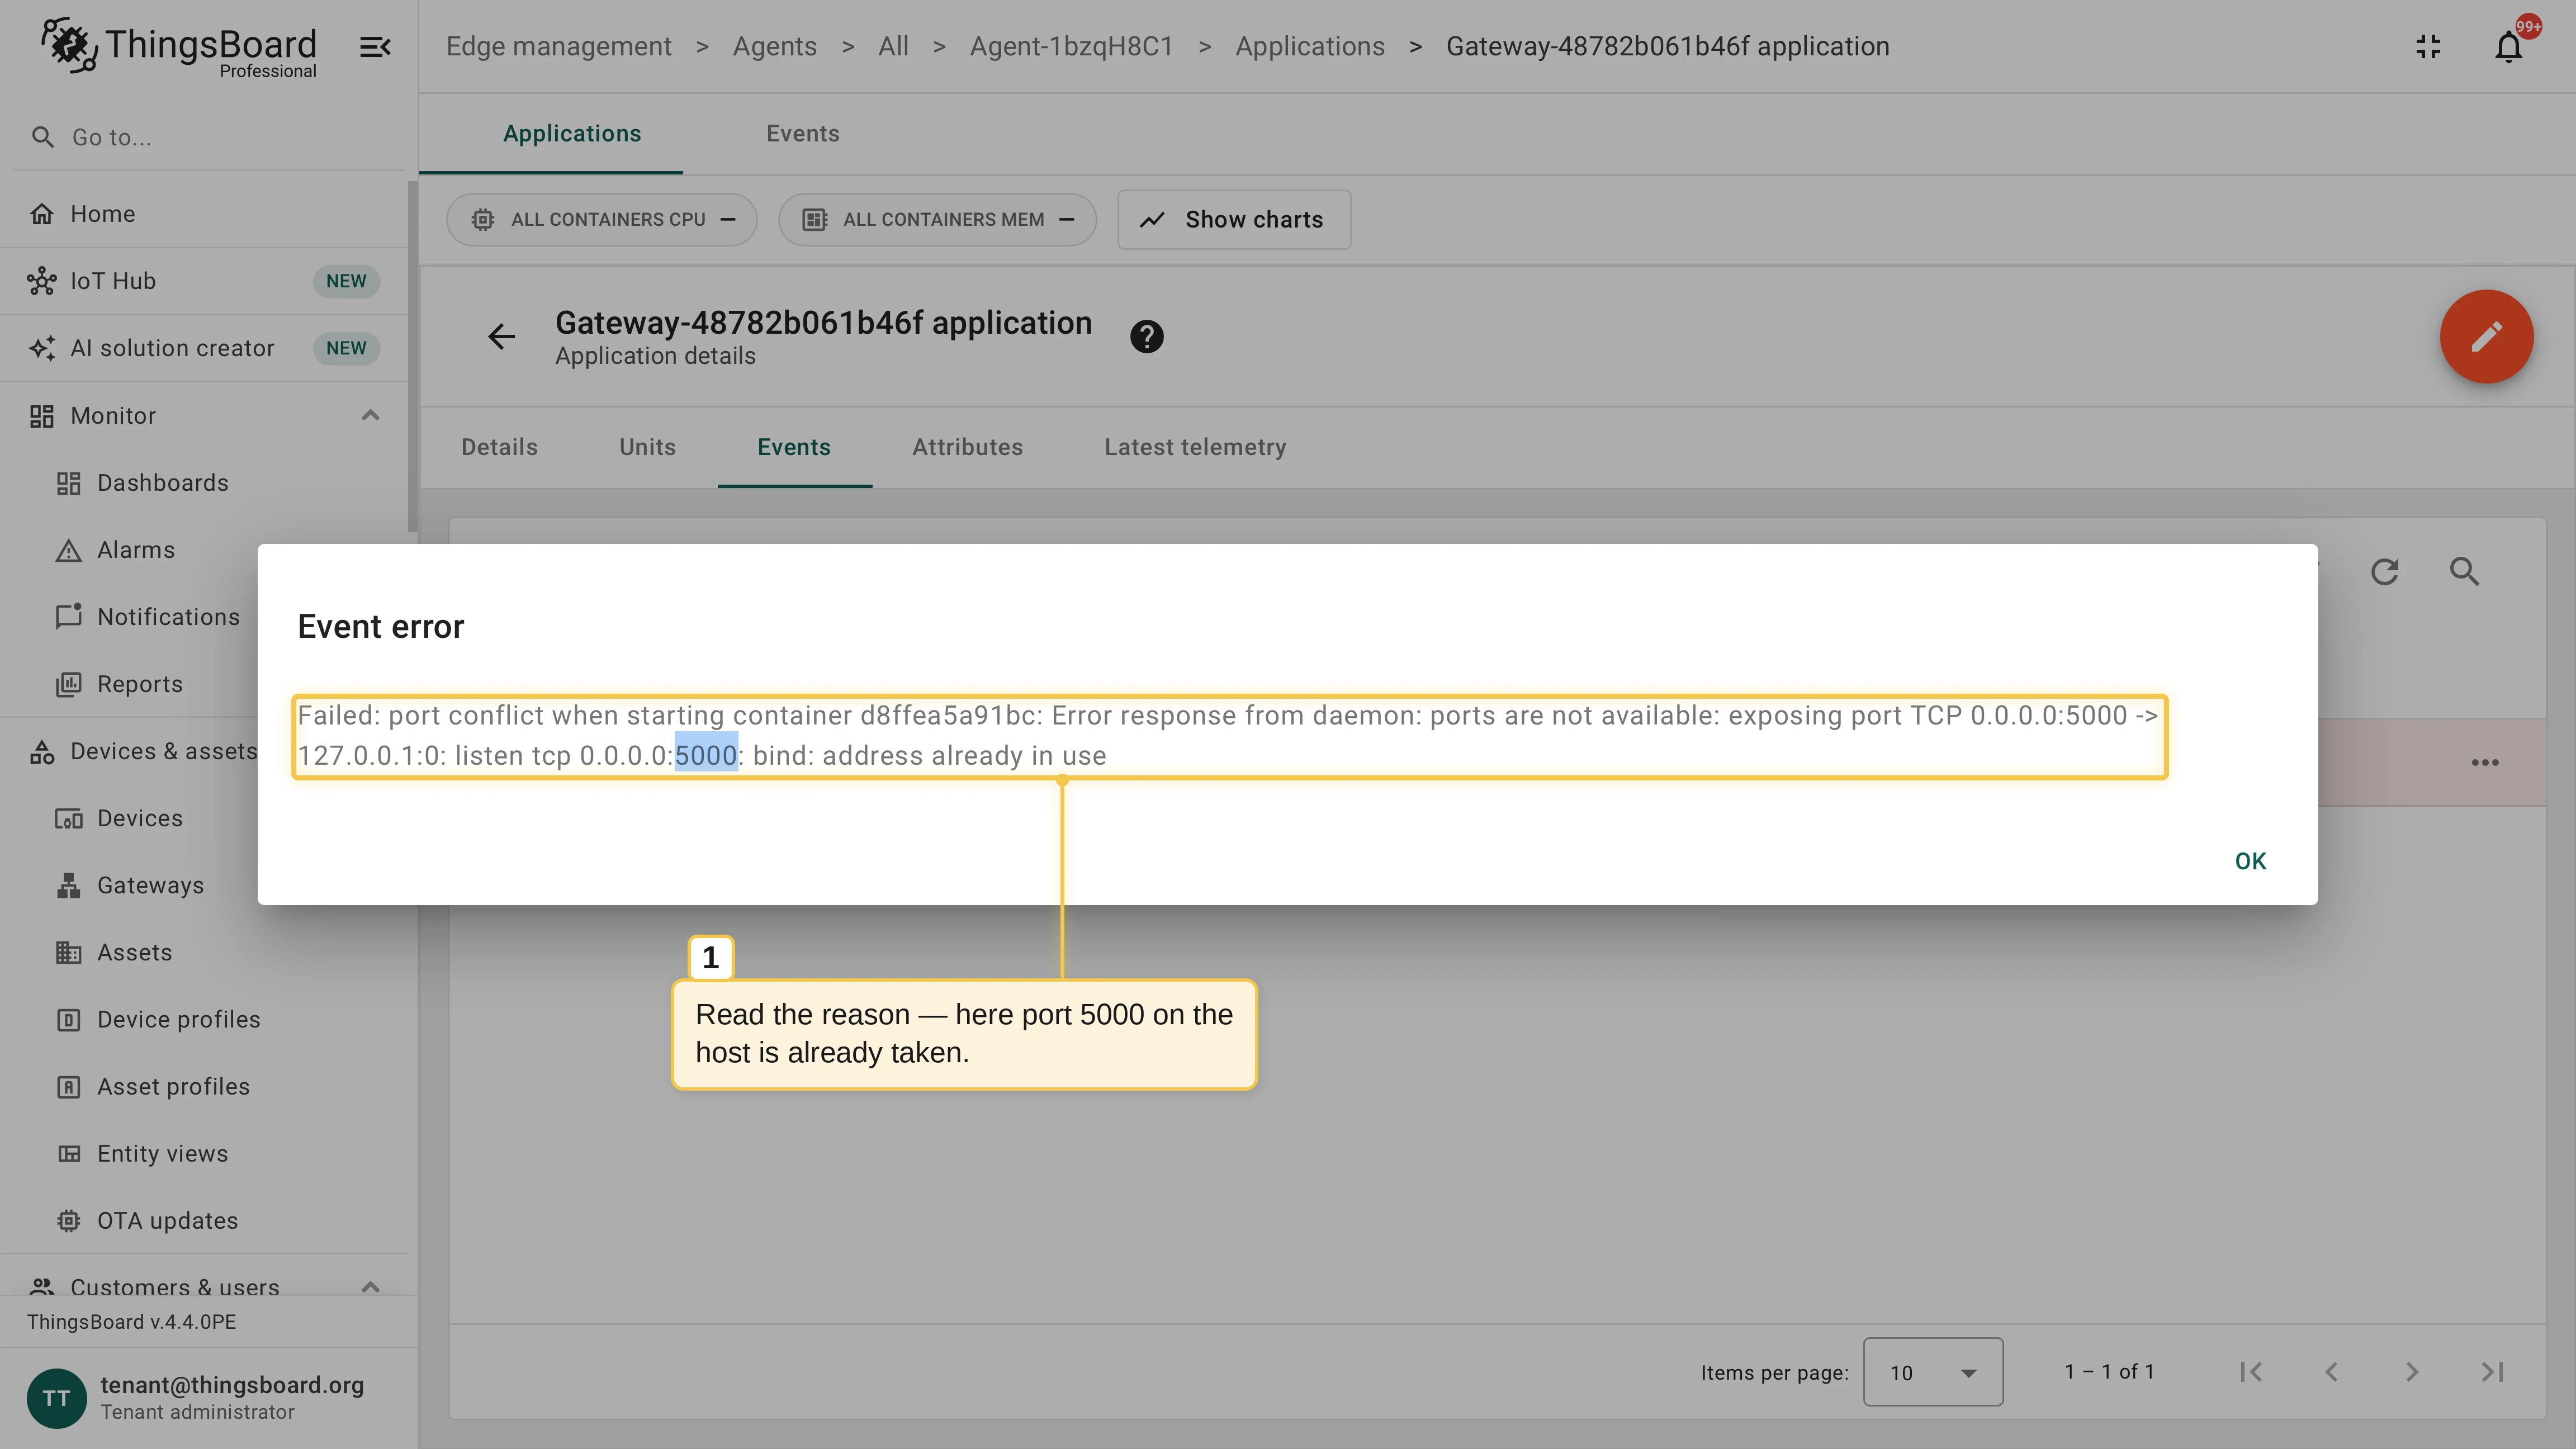
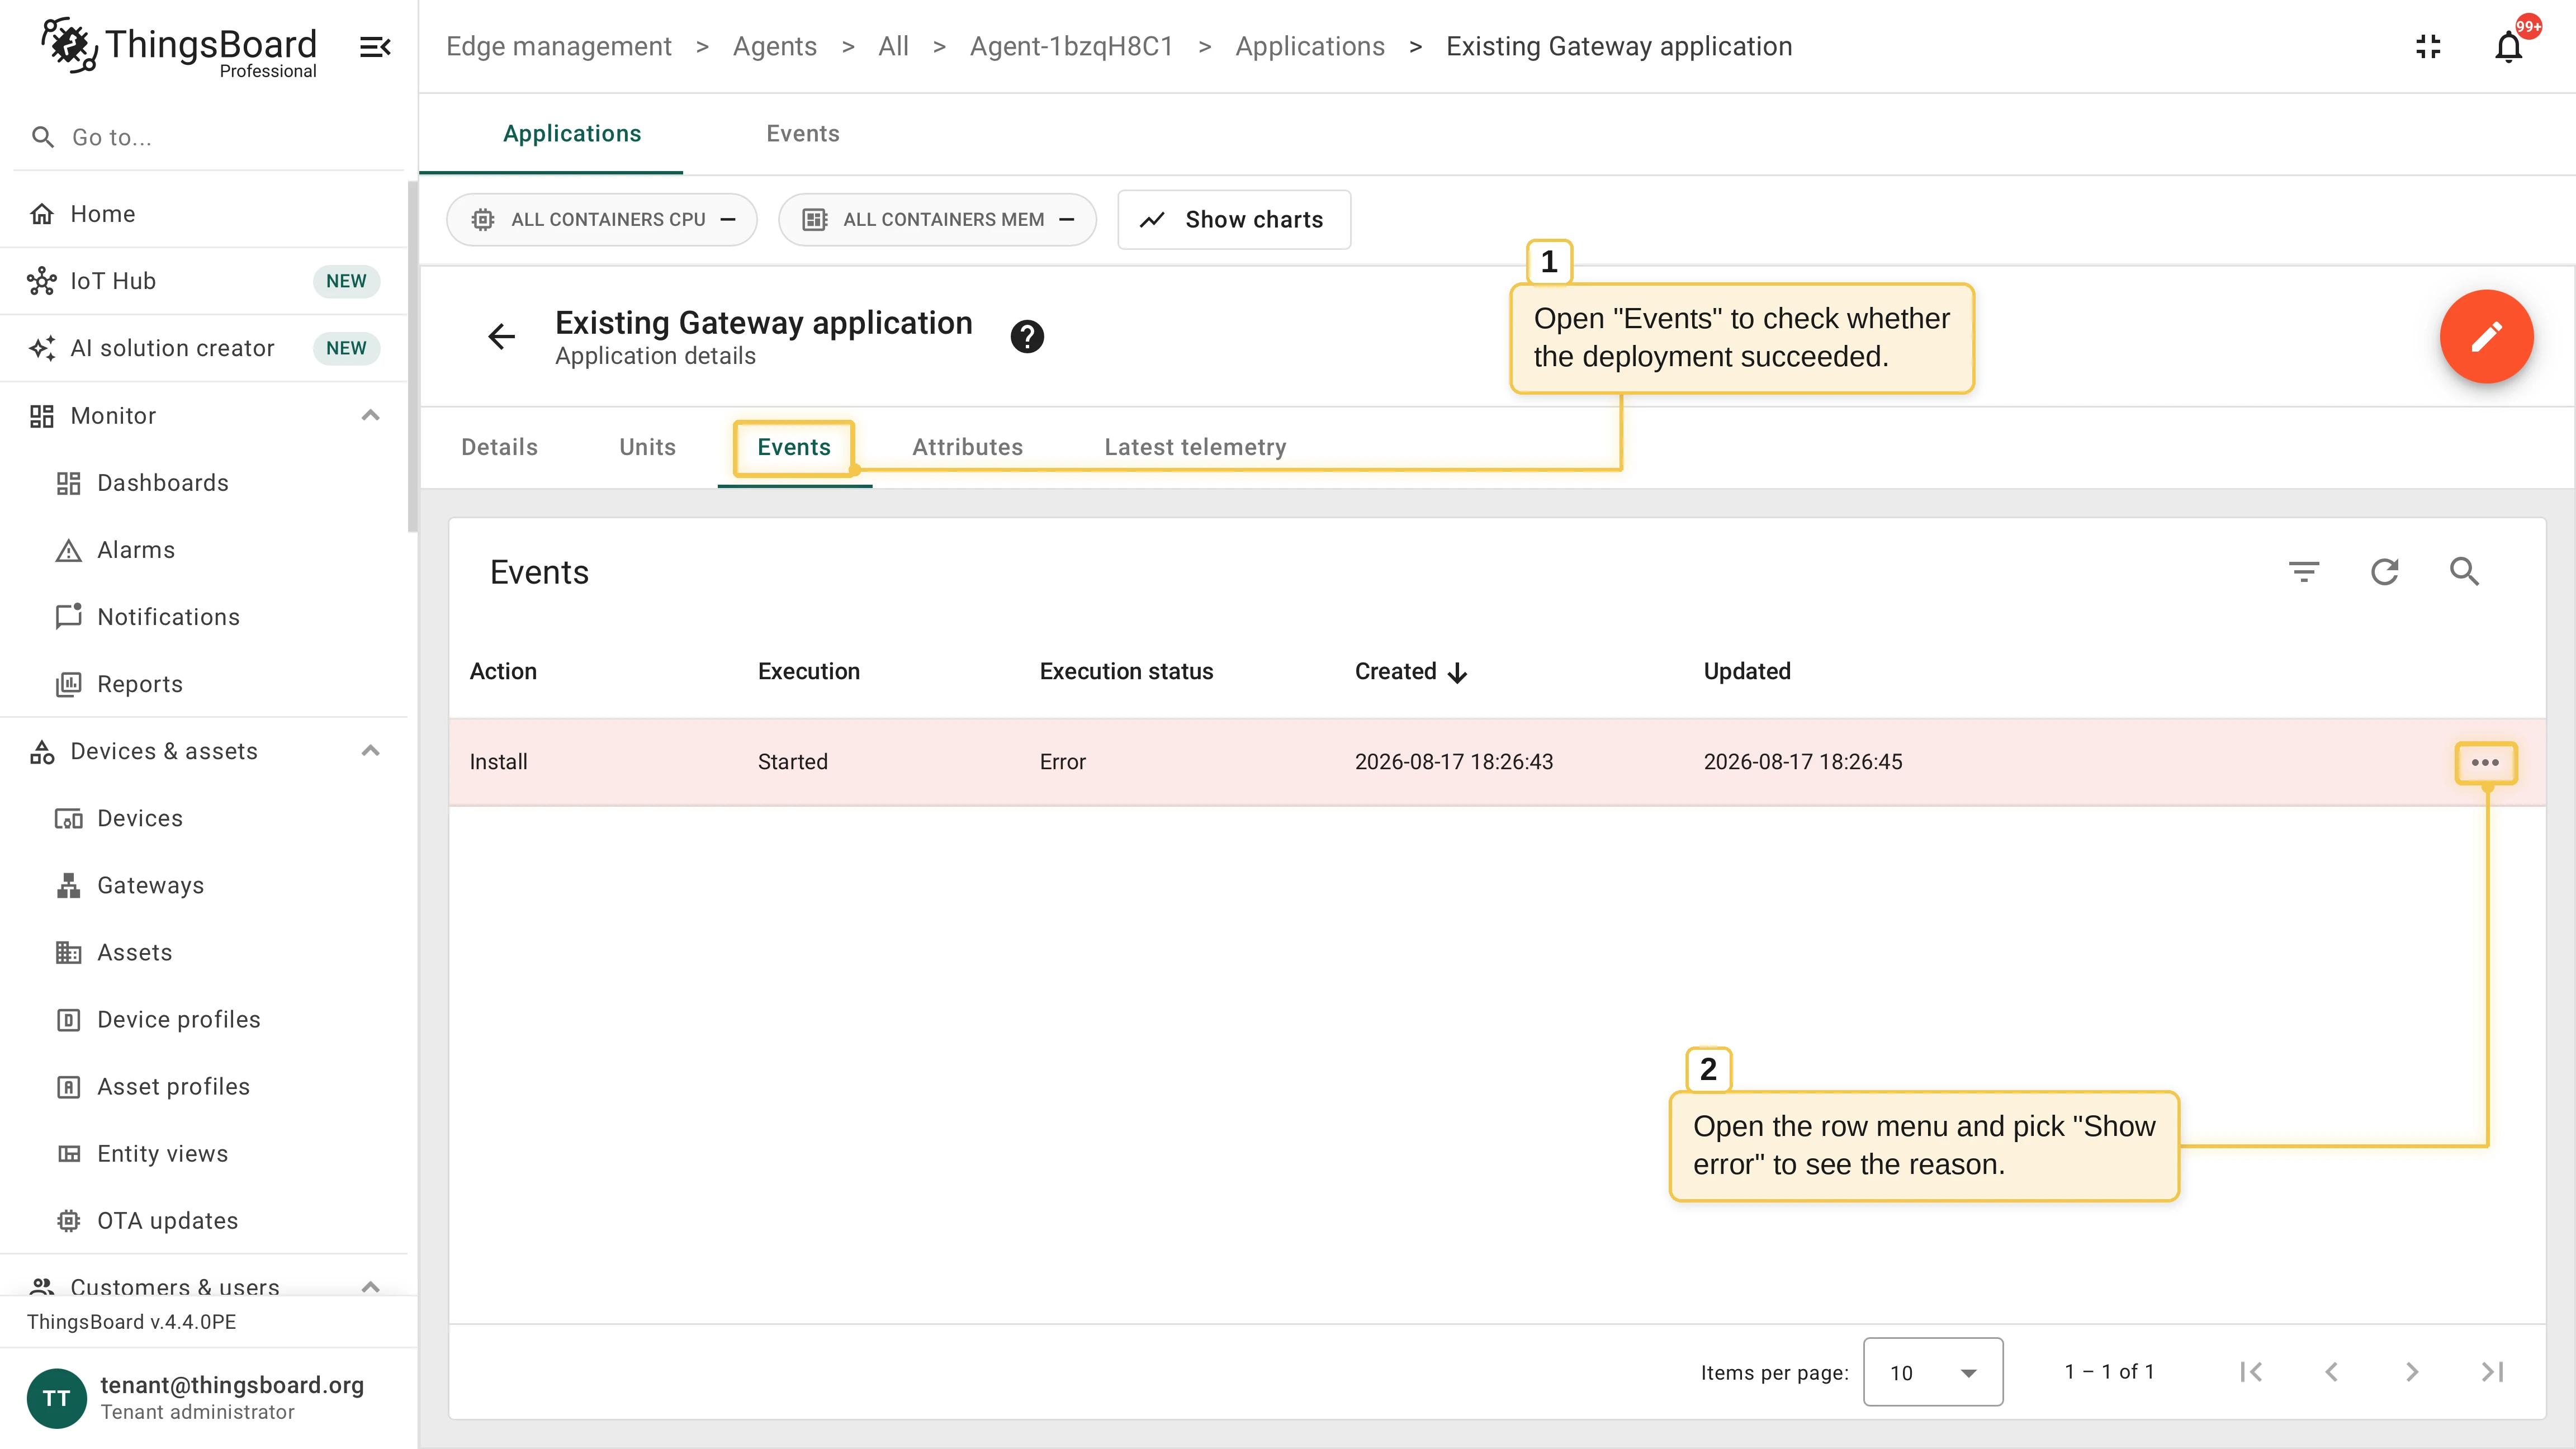
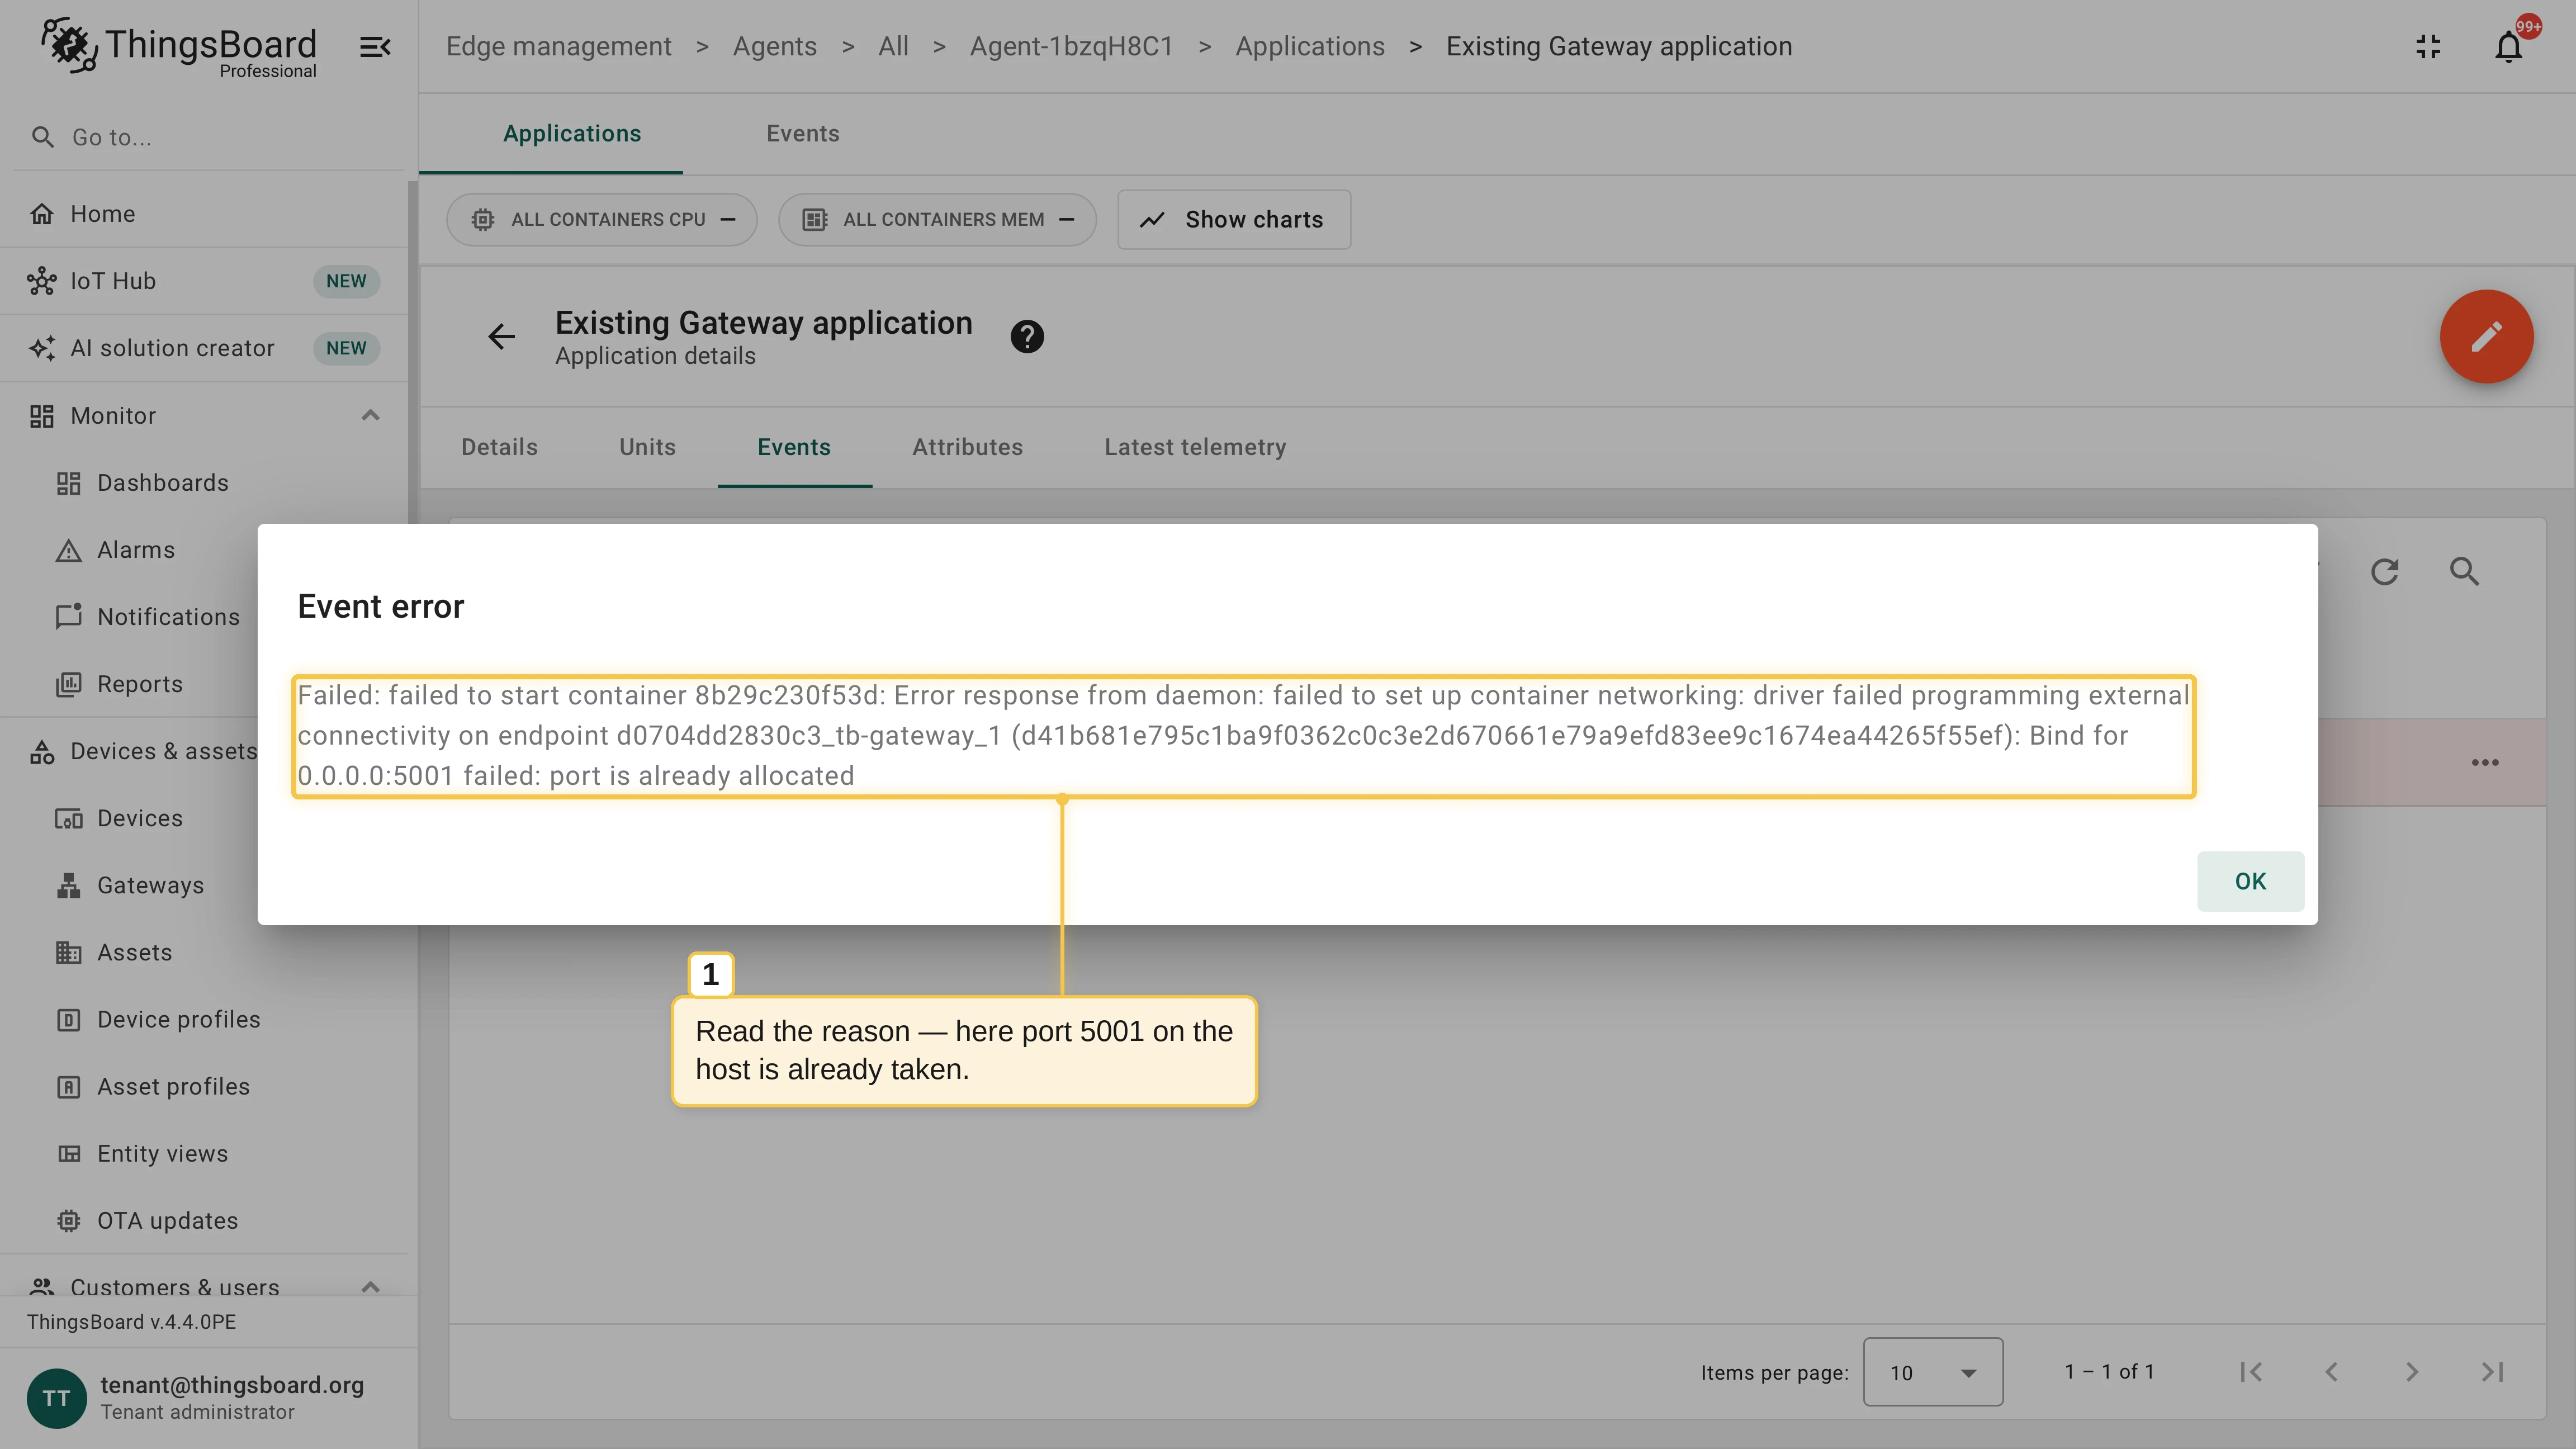
The machine registers as a new agent, and the gateway device appears in the Gateway list automatically. Open the Install Application dialog with the terminal row action: it confirms the agent is online; open Agent application and check its Events tab to verify that the deployment succeeded.
Install on an existing agent
Section titled “Install on an existing agent”Full guide: Deploy an application.
When the gateway device already exists in ThingsBoard, deploy it to a machine that runs an agent — or create the agent along the way:
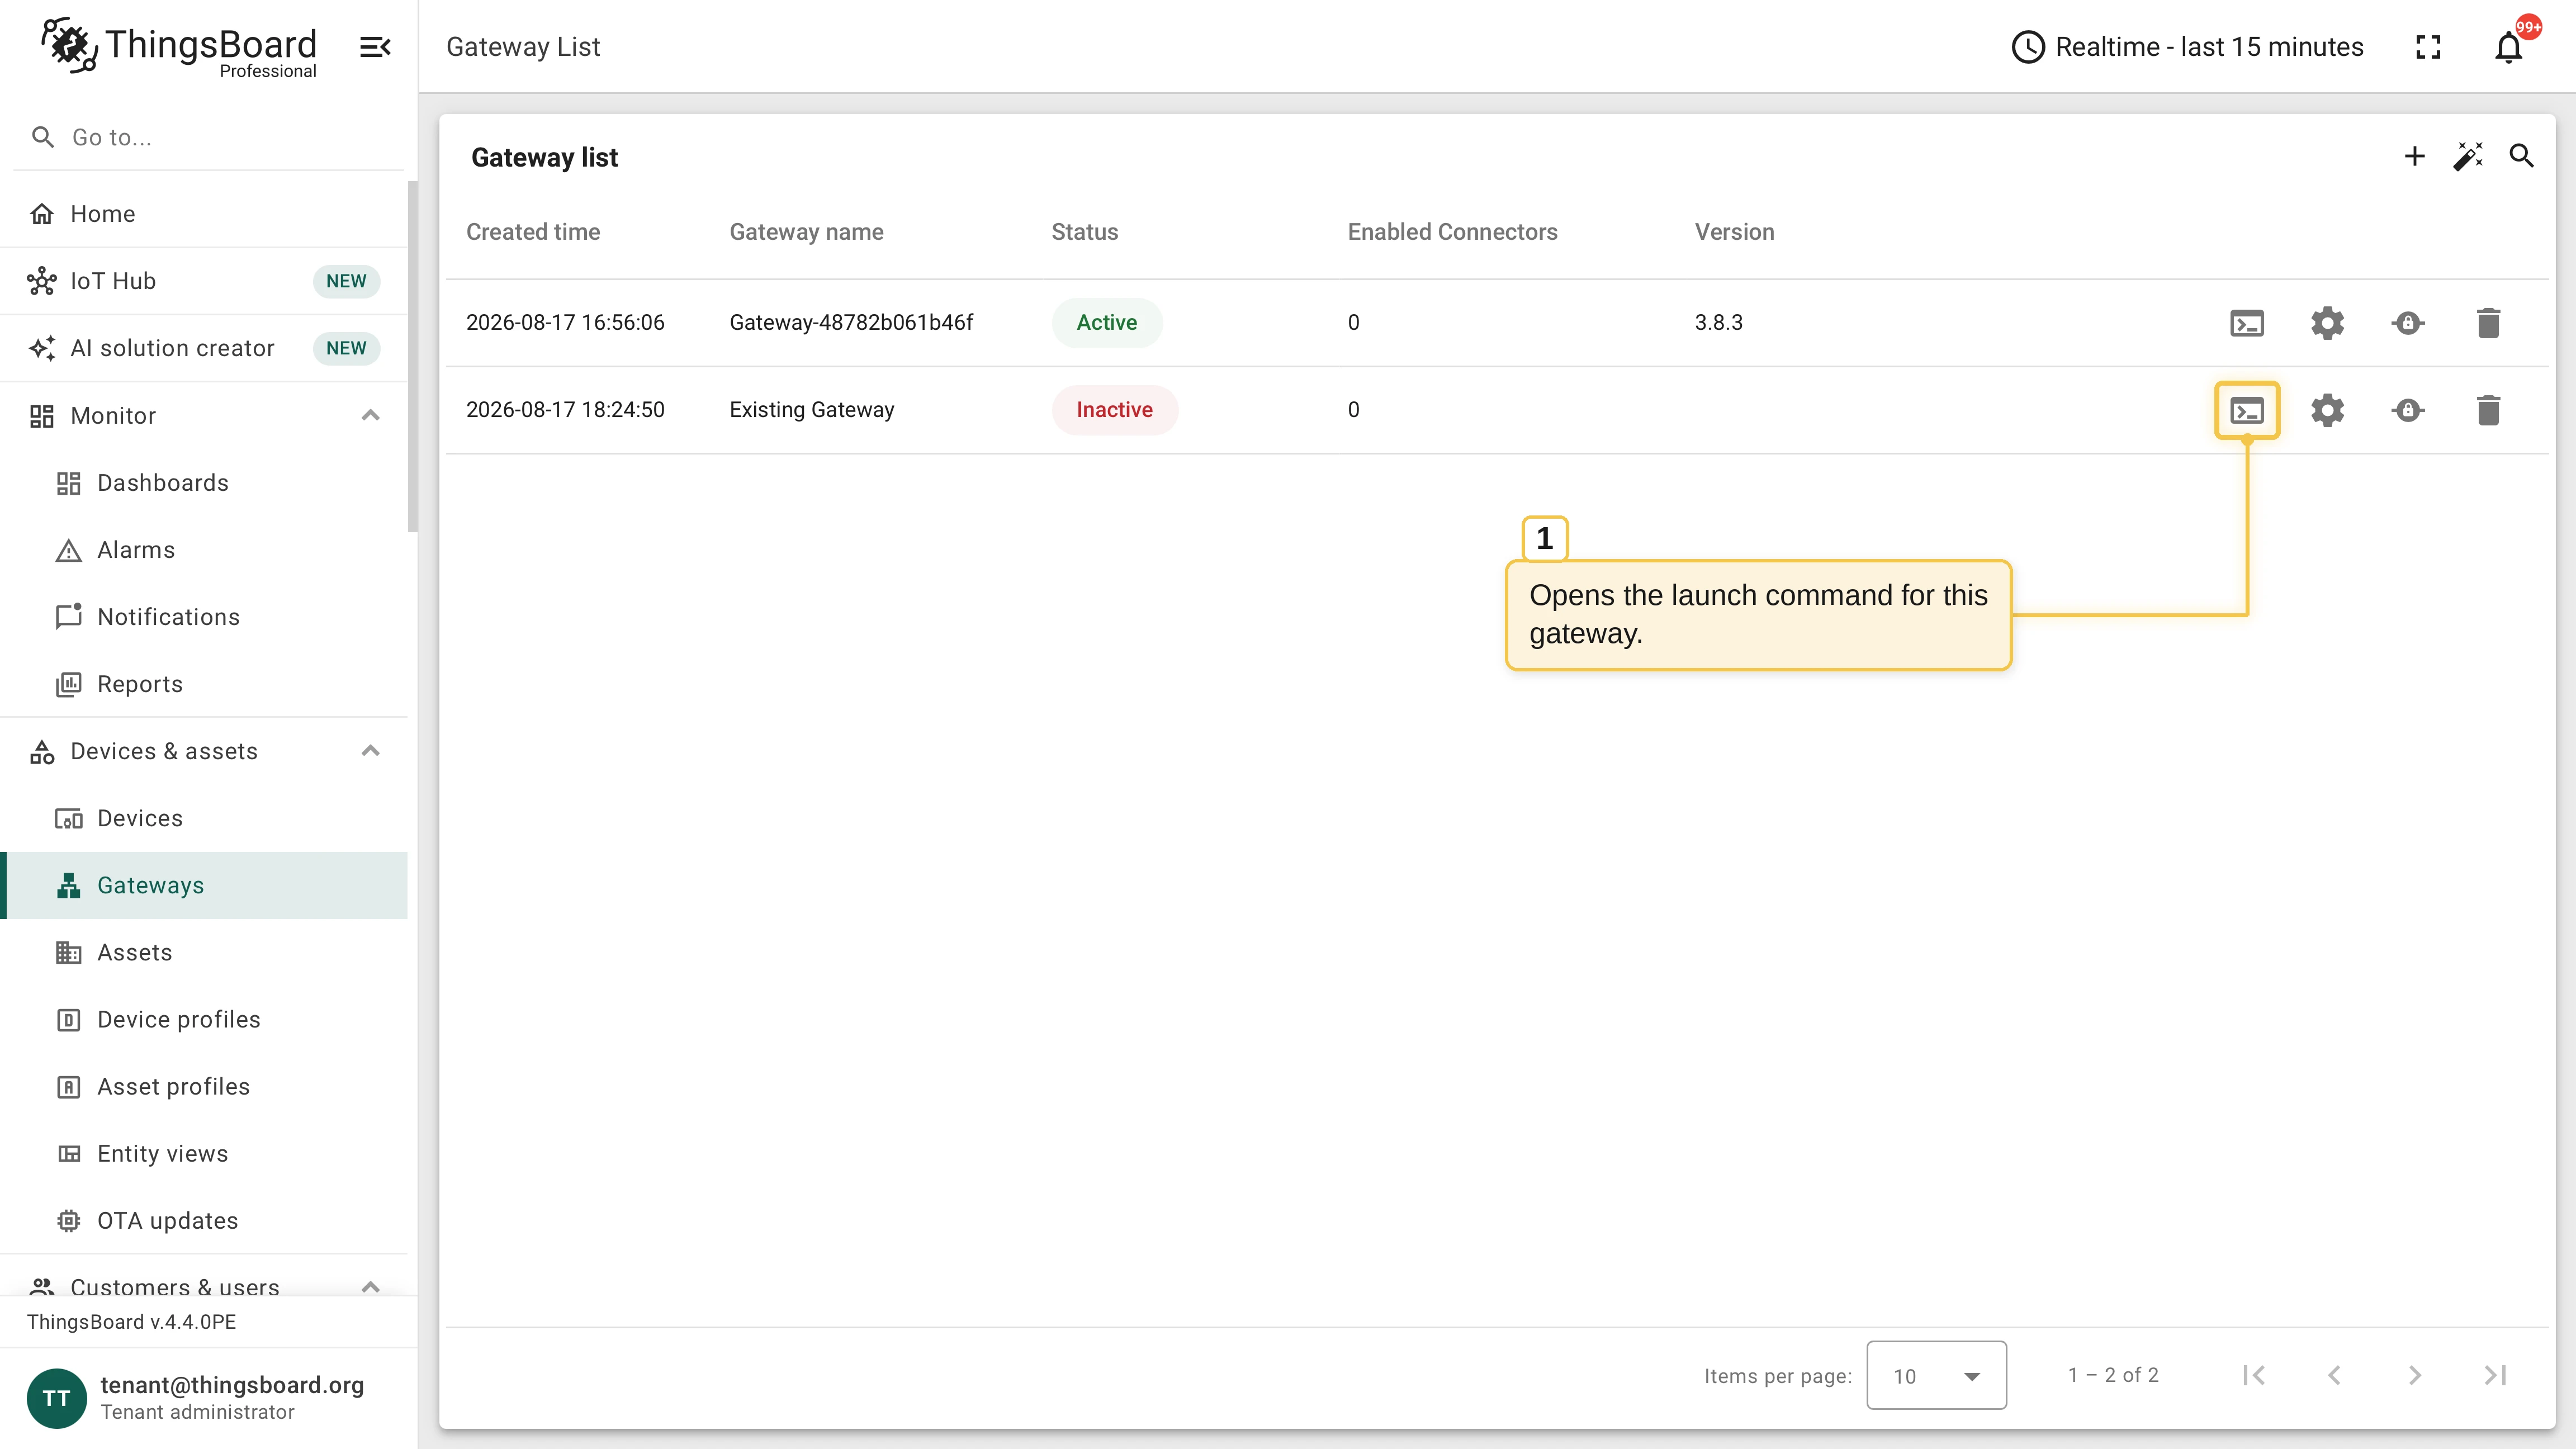
In the Gateway list, open the Launch command with the terminal row action.
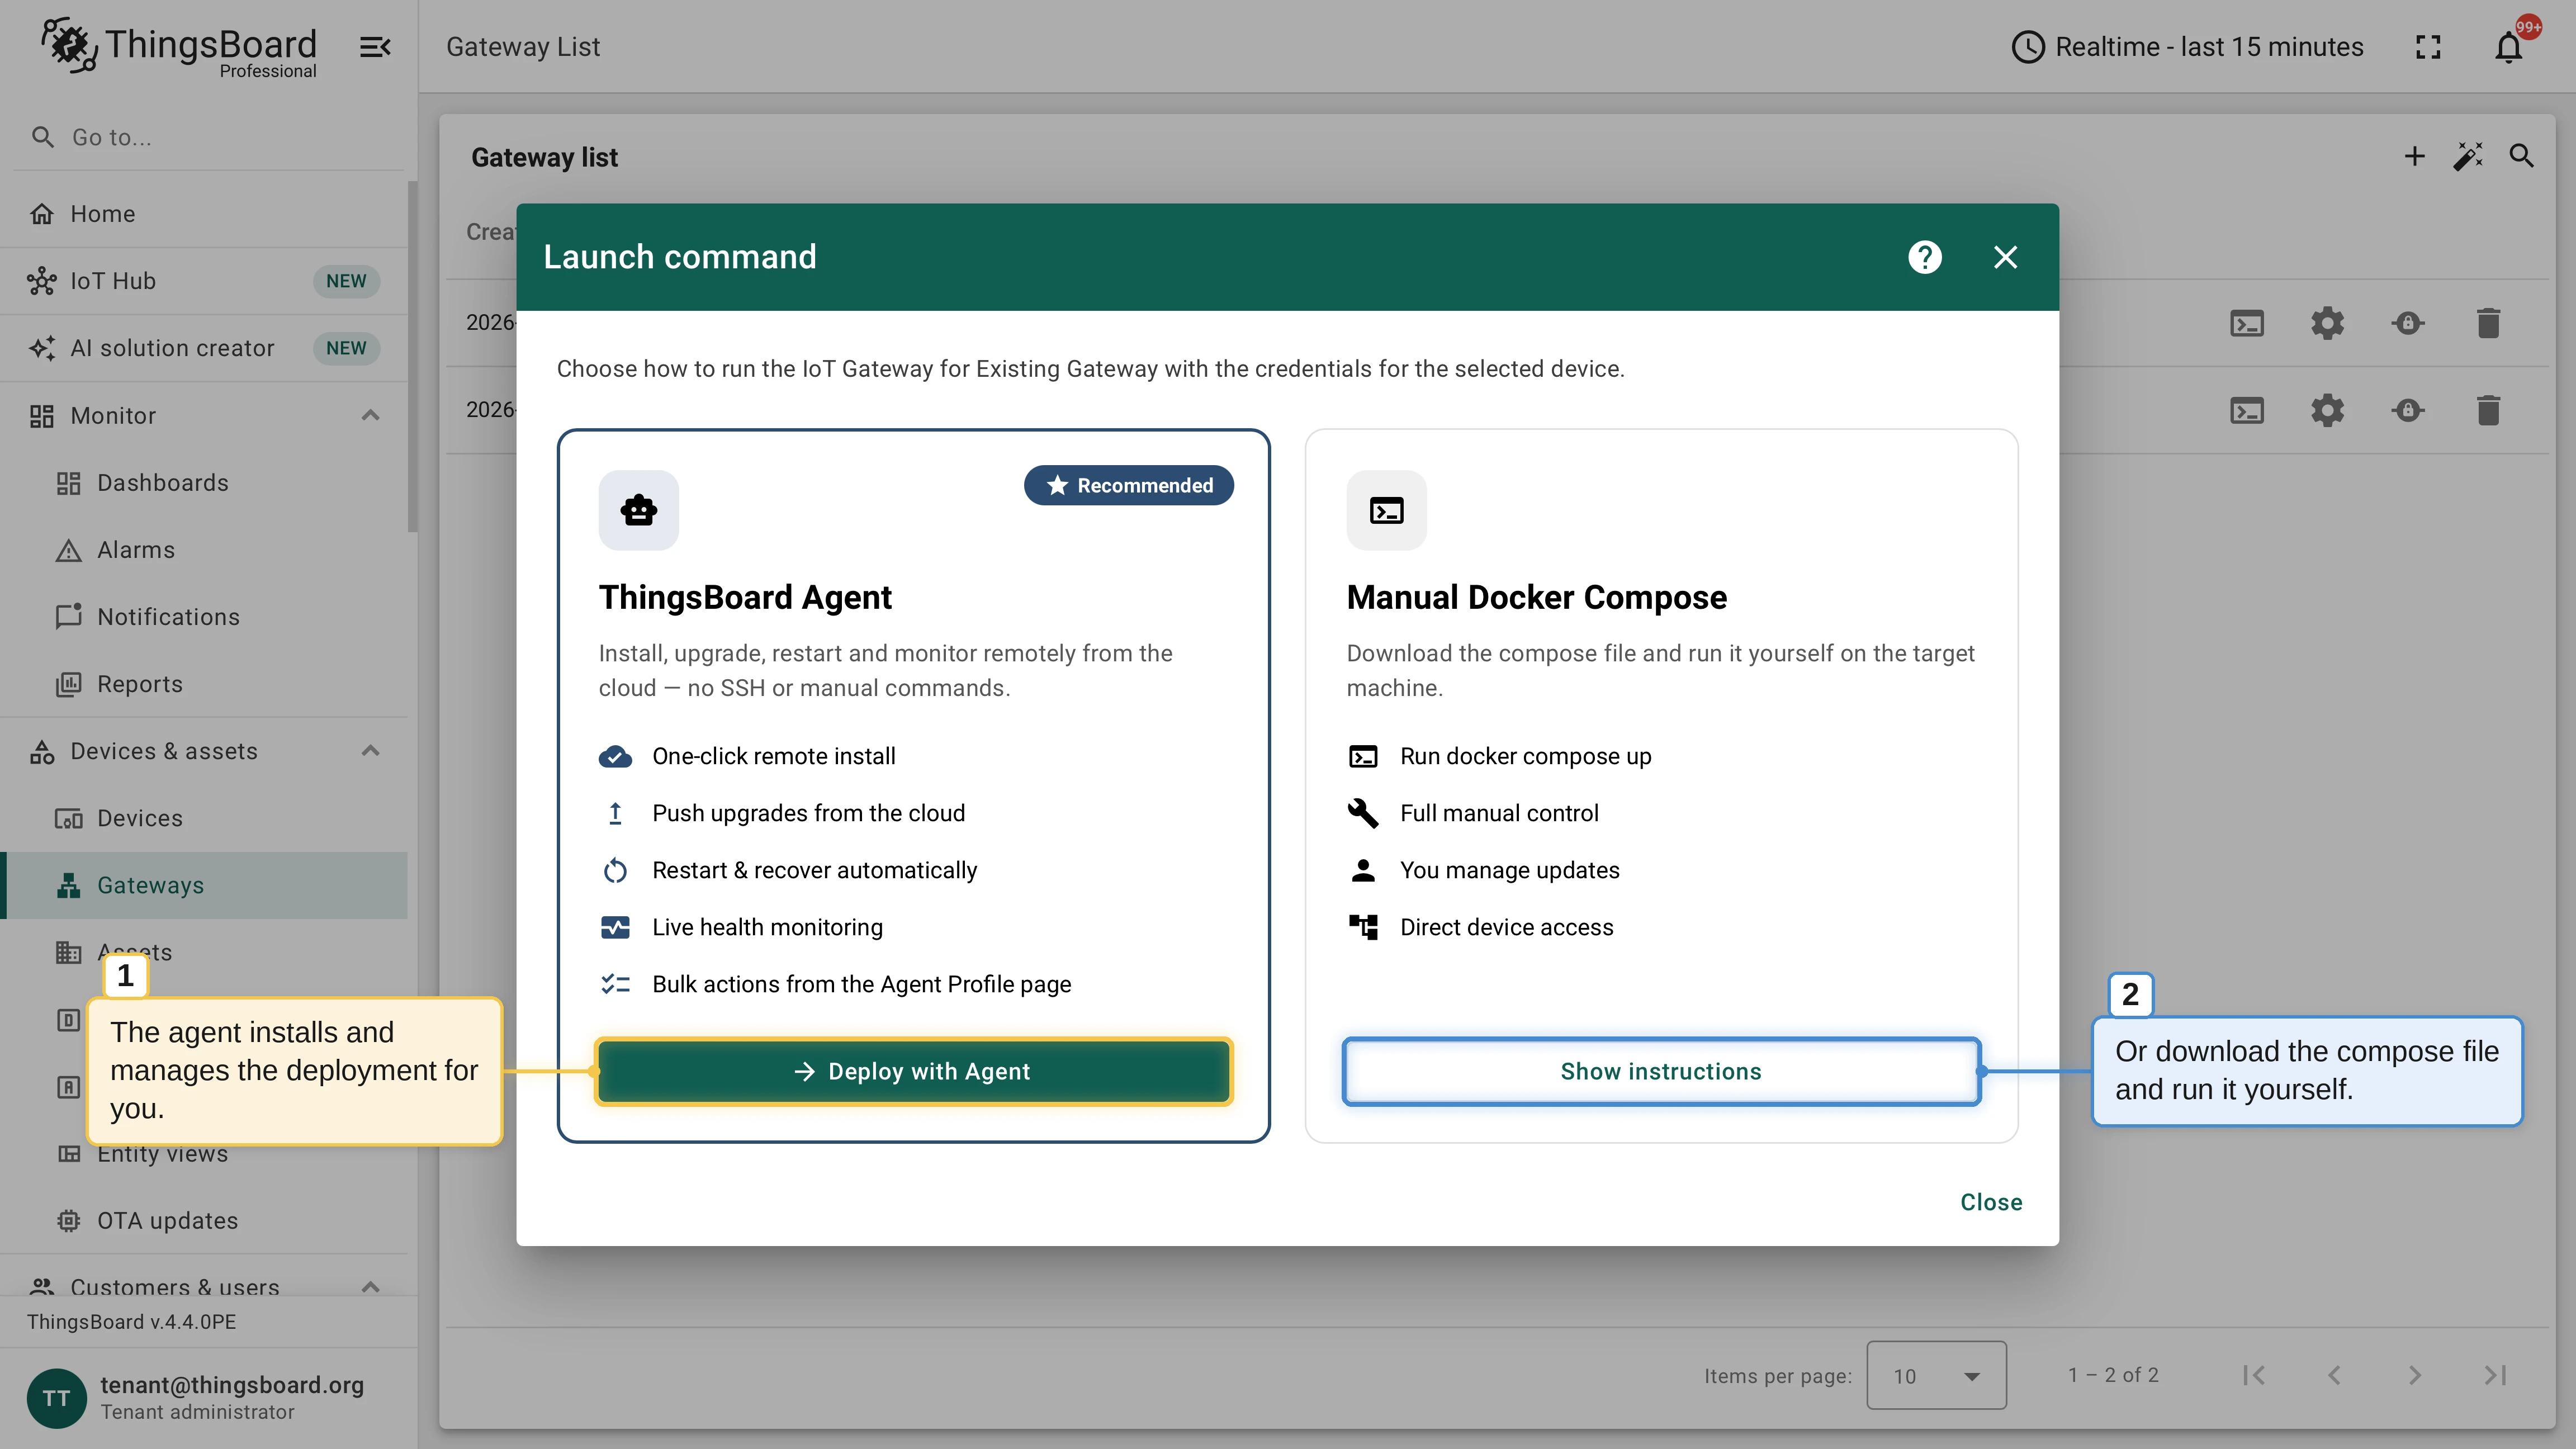
Select the ThingsBoard Agent option and click Deploy with Agent: the agent installs and manages the deployment for you. The Manual Docker Compose card covers the manual installation instead.
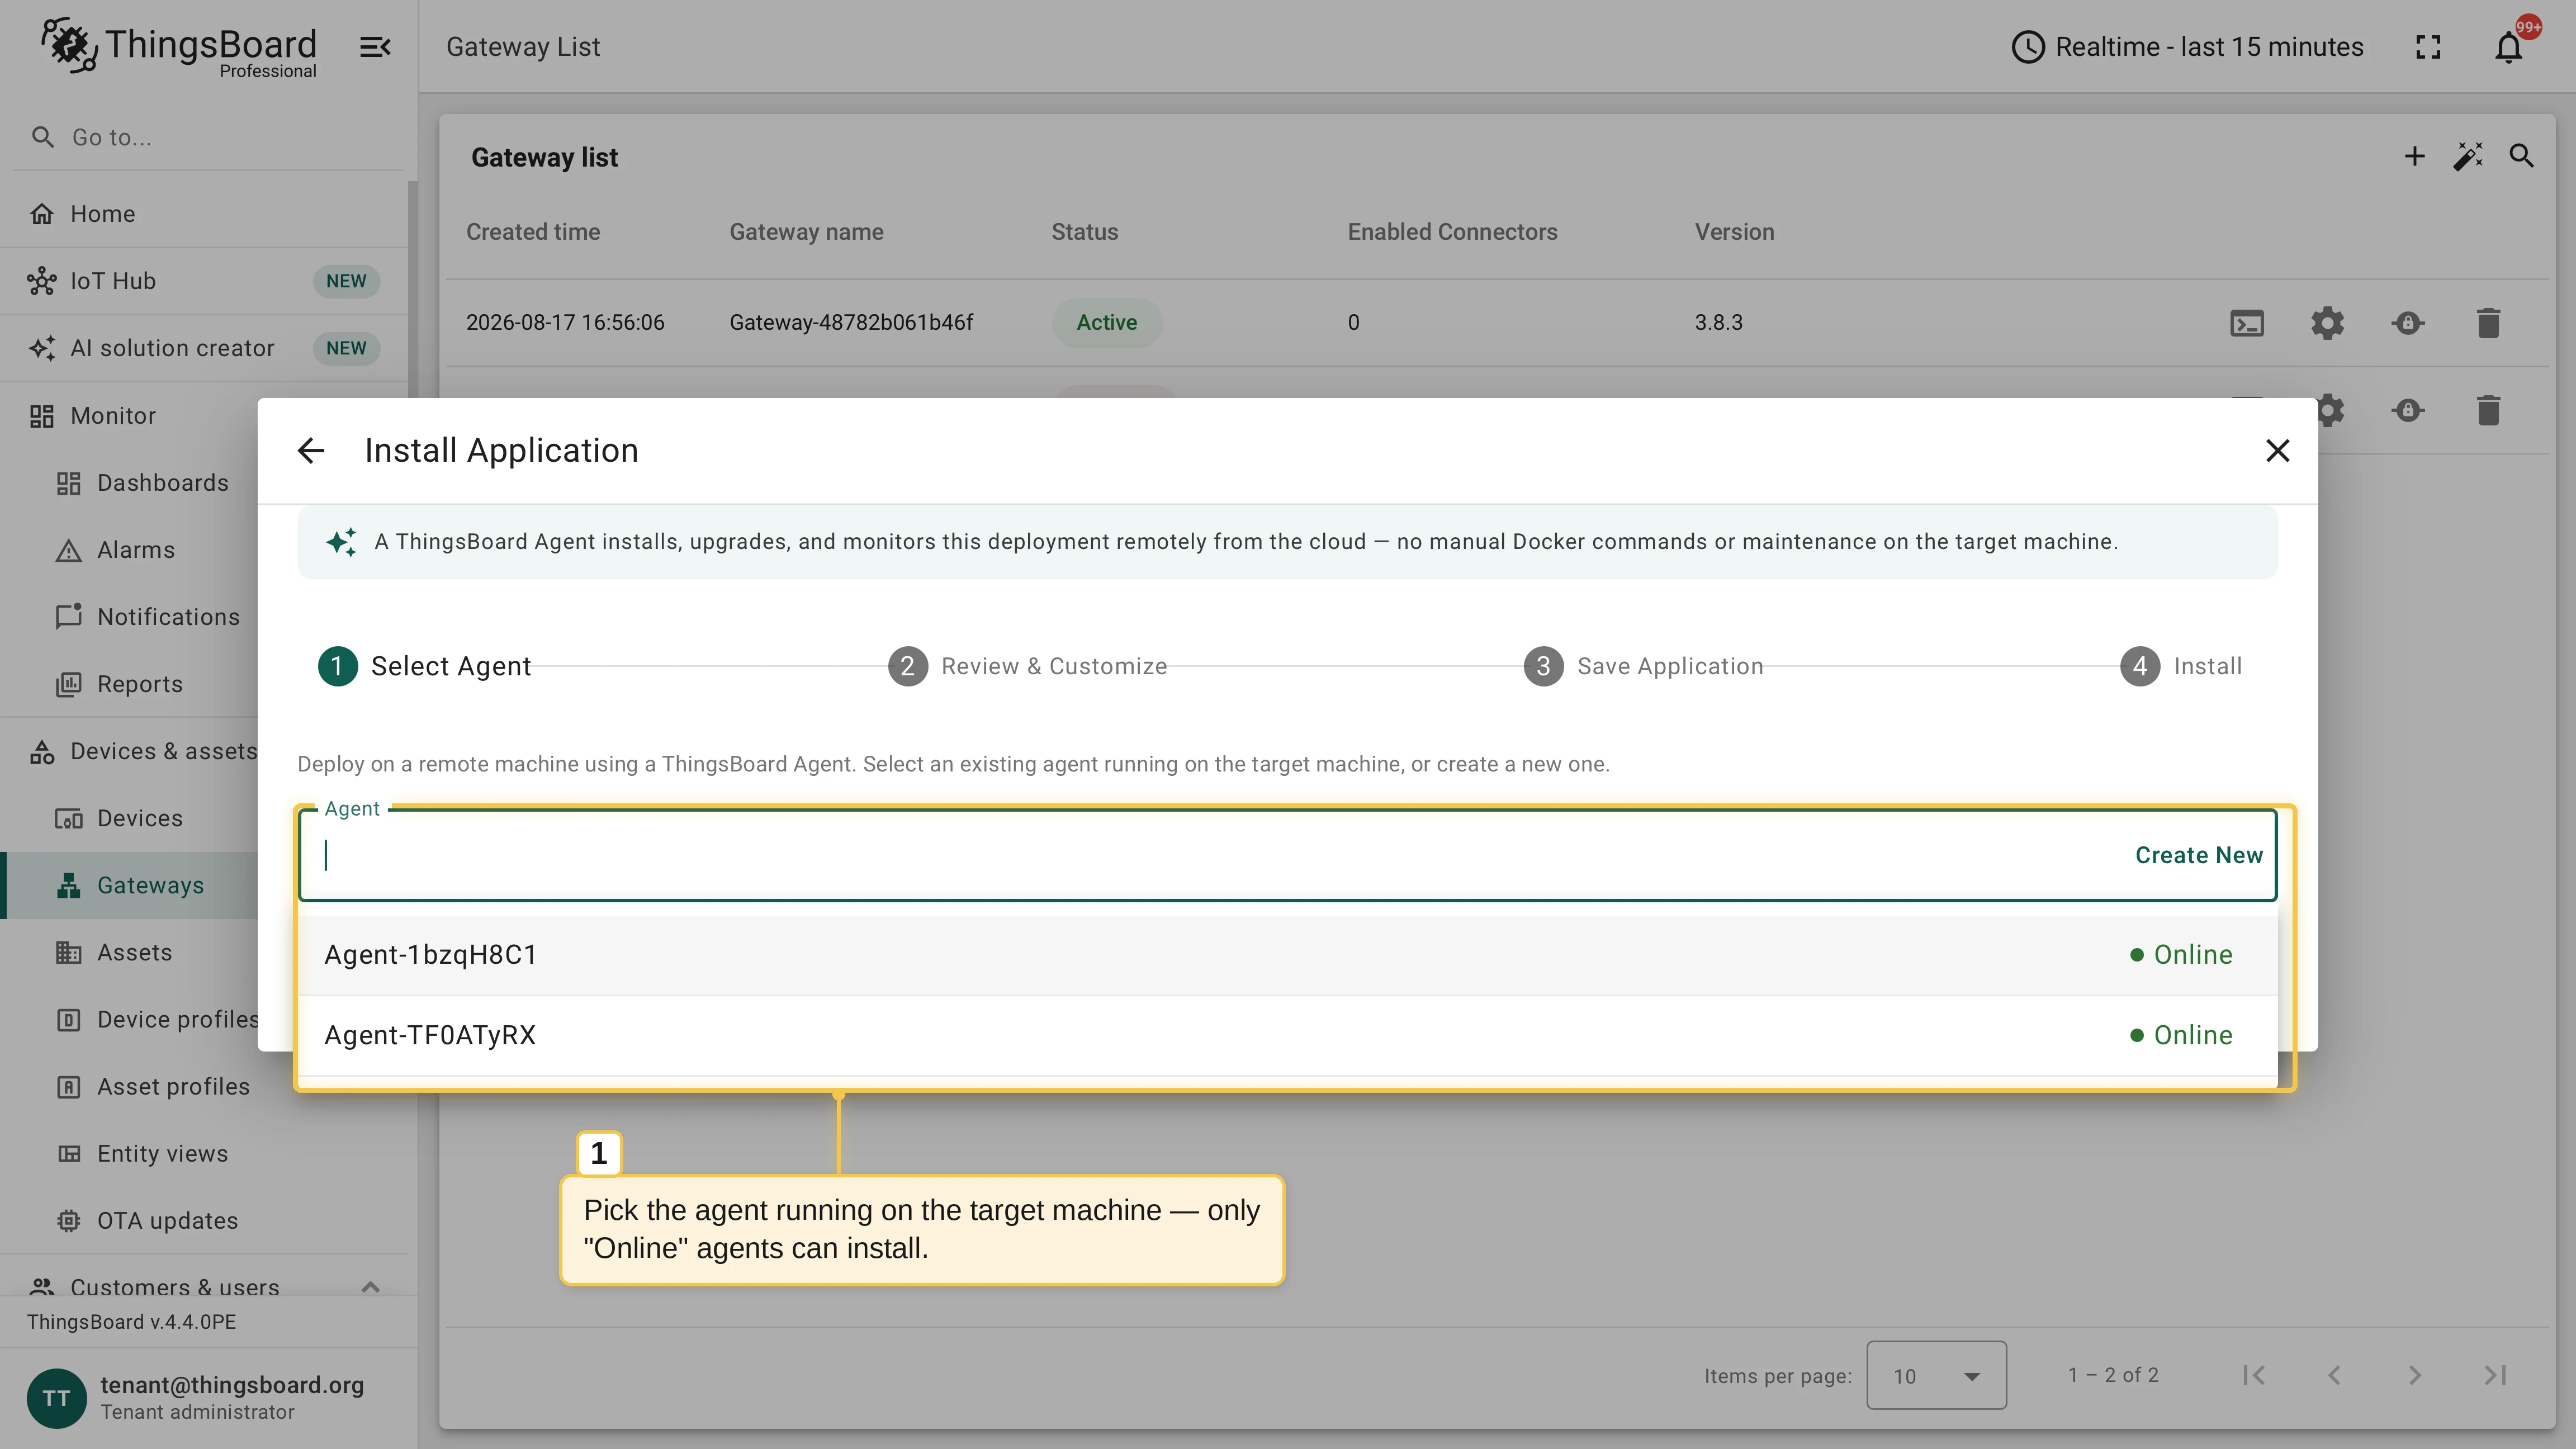
On Select Agent, pick the agent that runs on the target machine — only online agents can install — or create a new one.
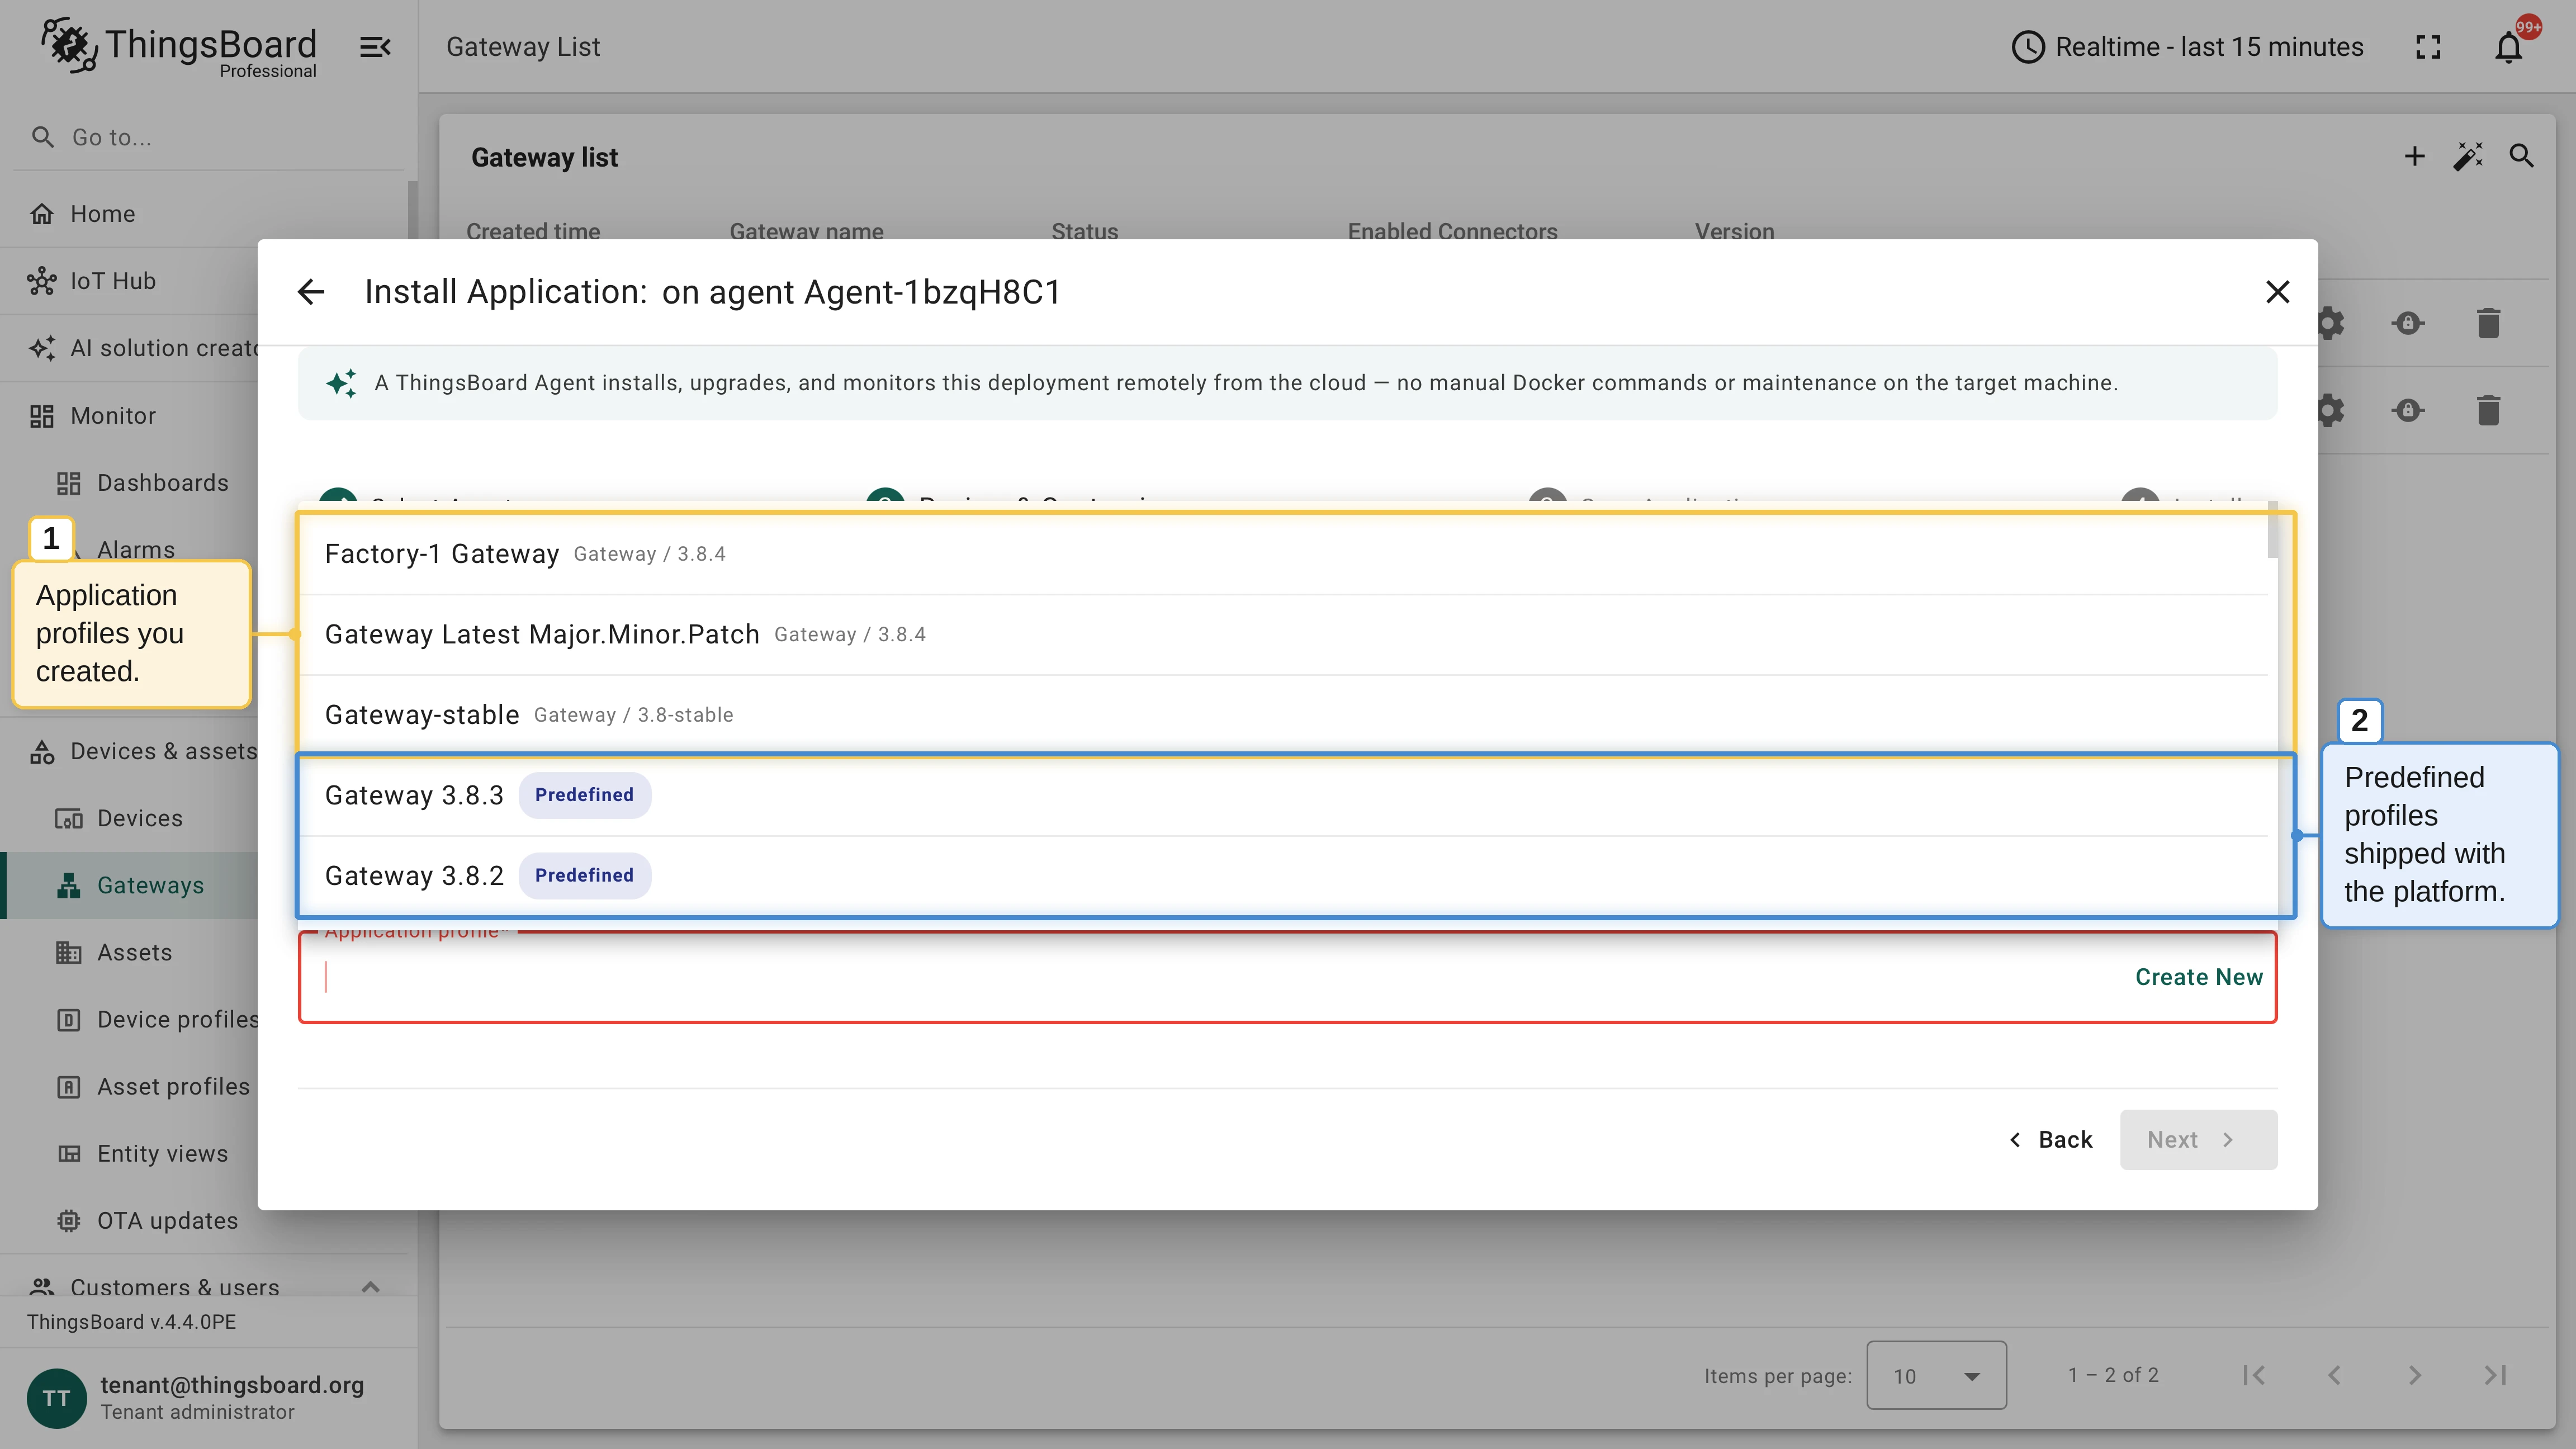
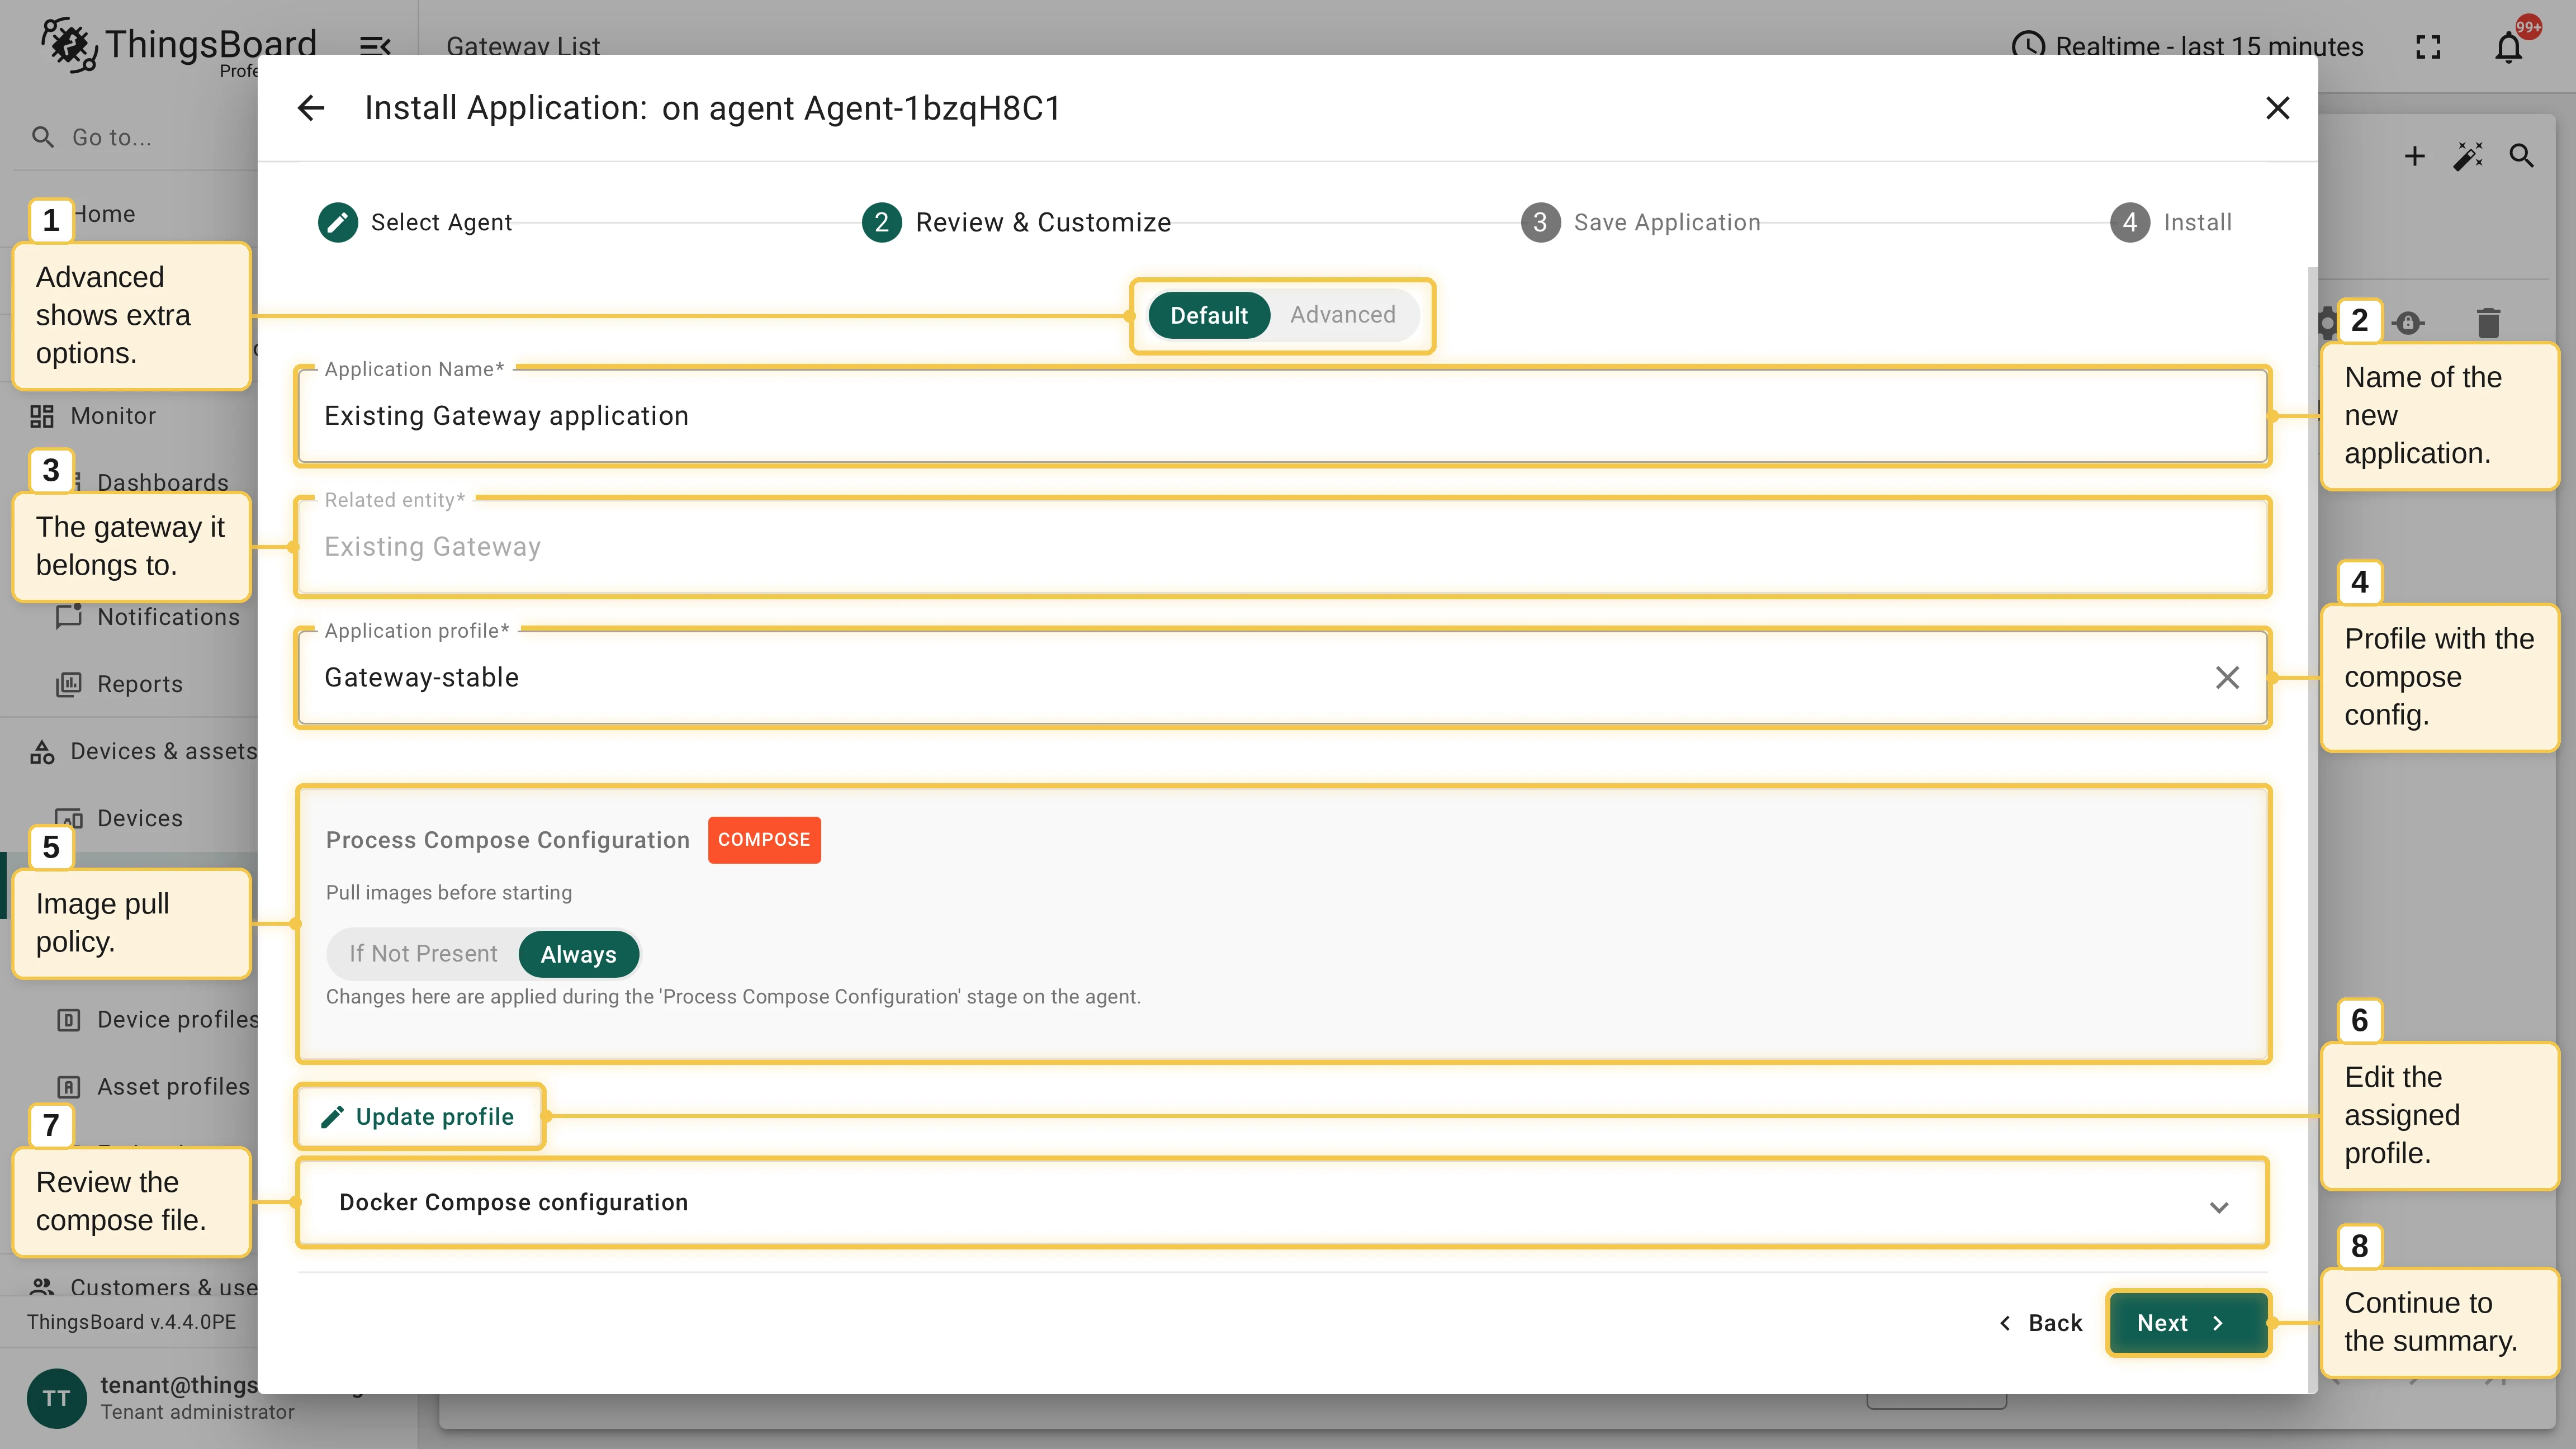
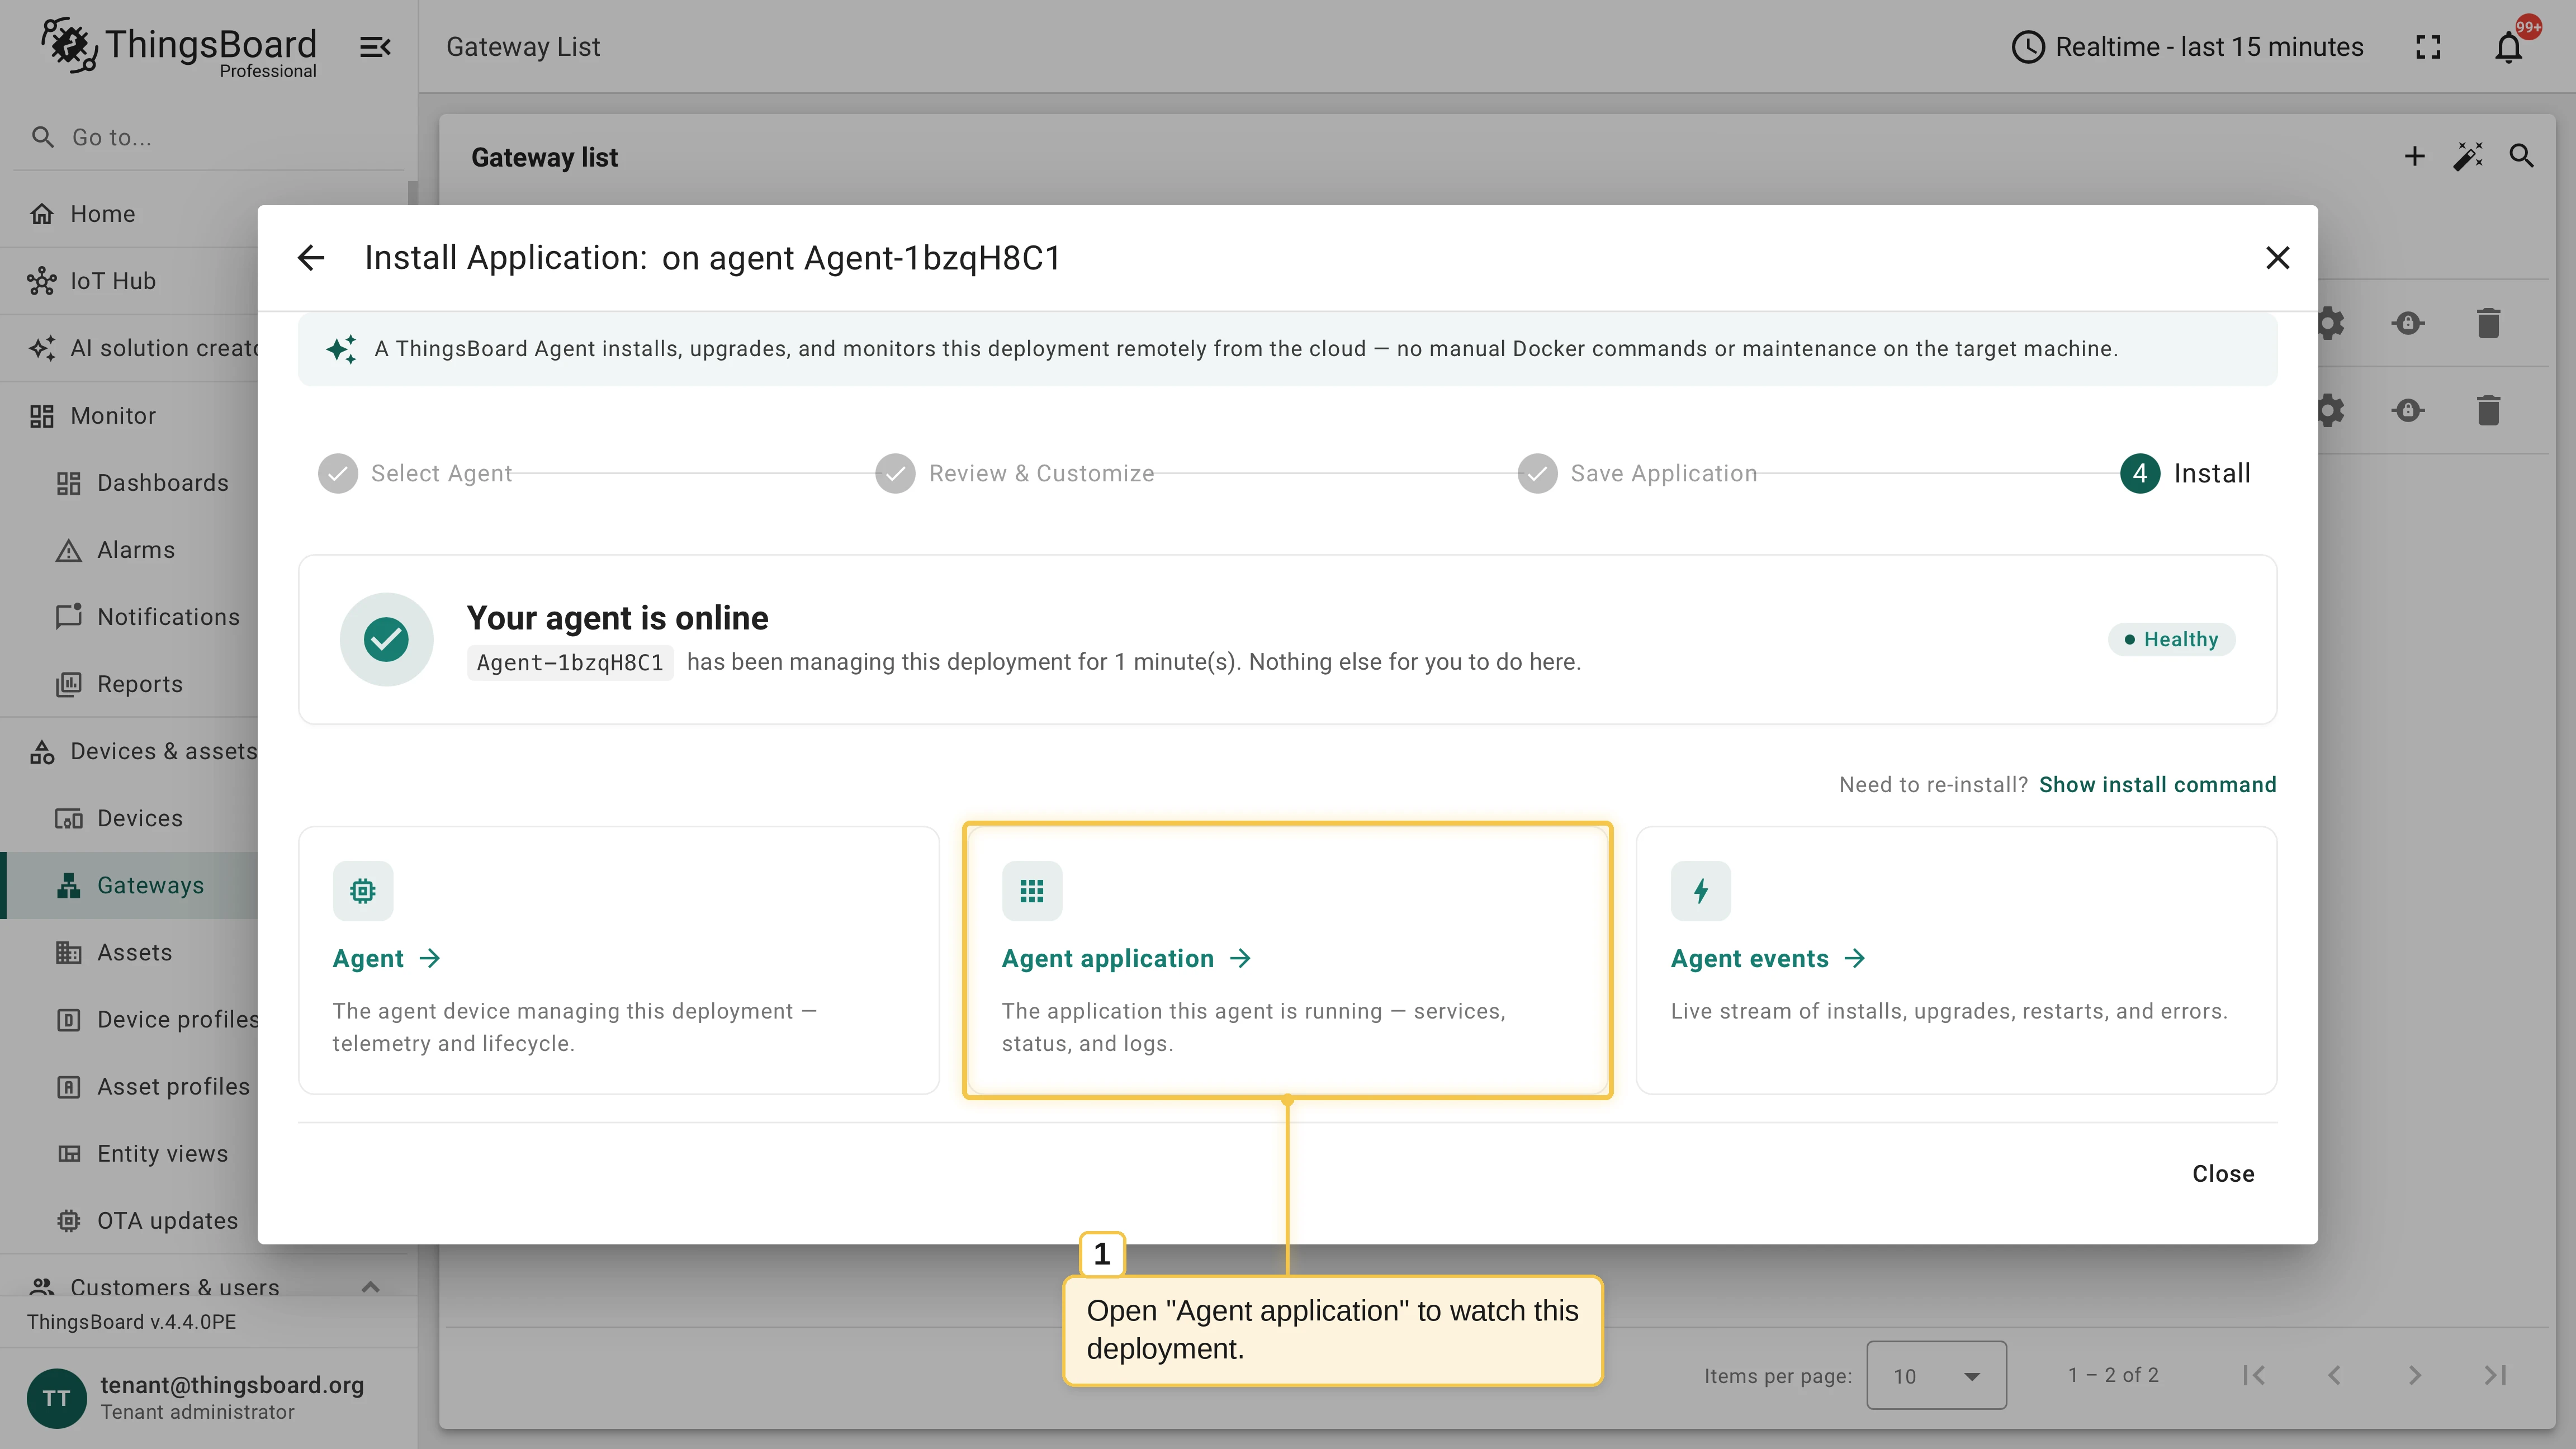
On Review & Customize, select the application profile that supplies the Docker Compose configuration — one of your profiles or a predefined one — then check the application name, the related gateway device, and the image pull policy, and review the Compose configuration. Continue to the summary and save: the Install step confirms the agent is online; open Agent application to watch the deployment.
Update the deployment
Section titled “Update the deployment”Full guide: Update an application.
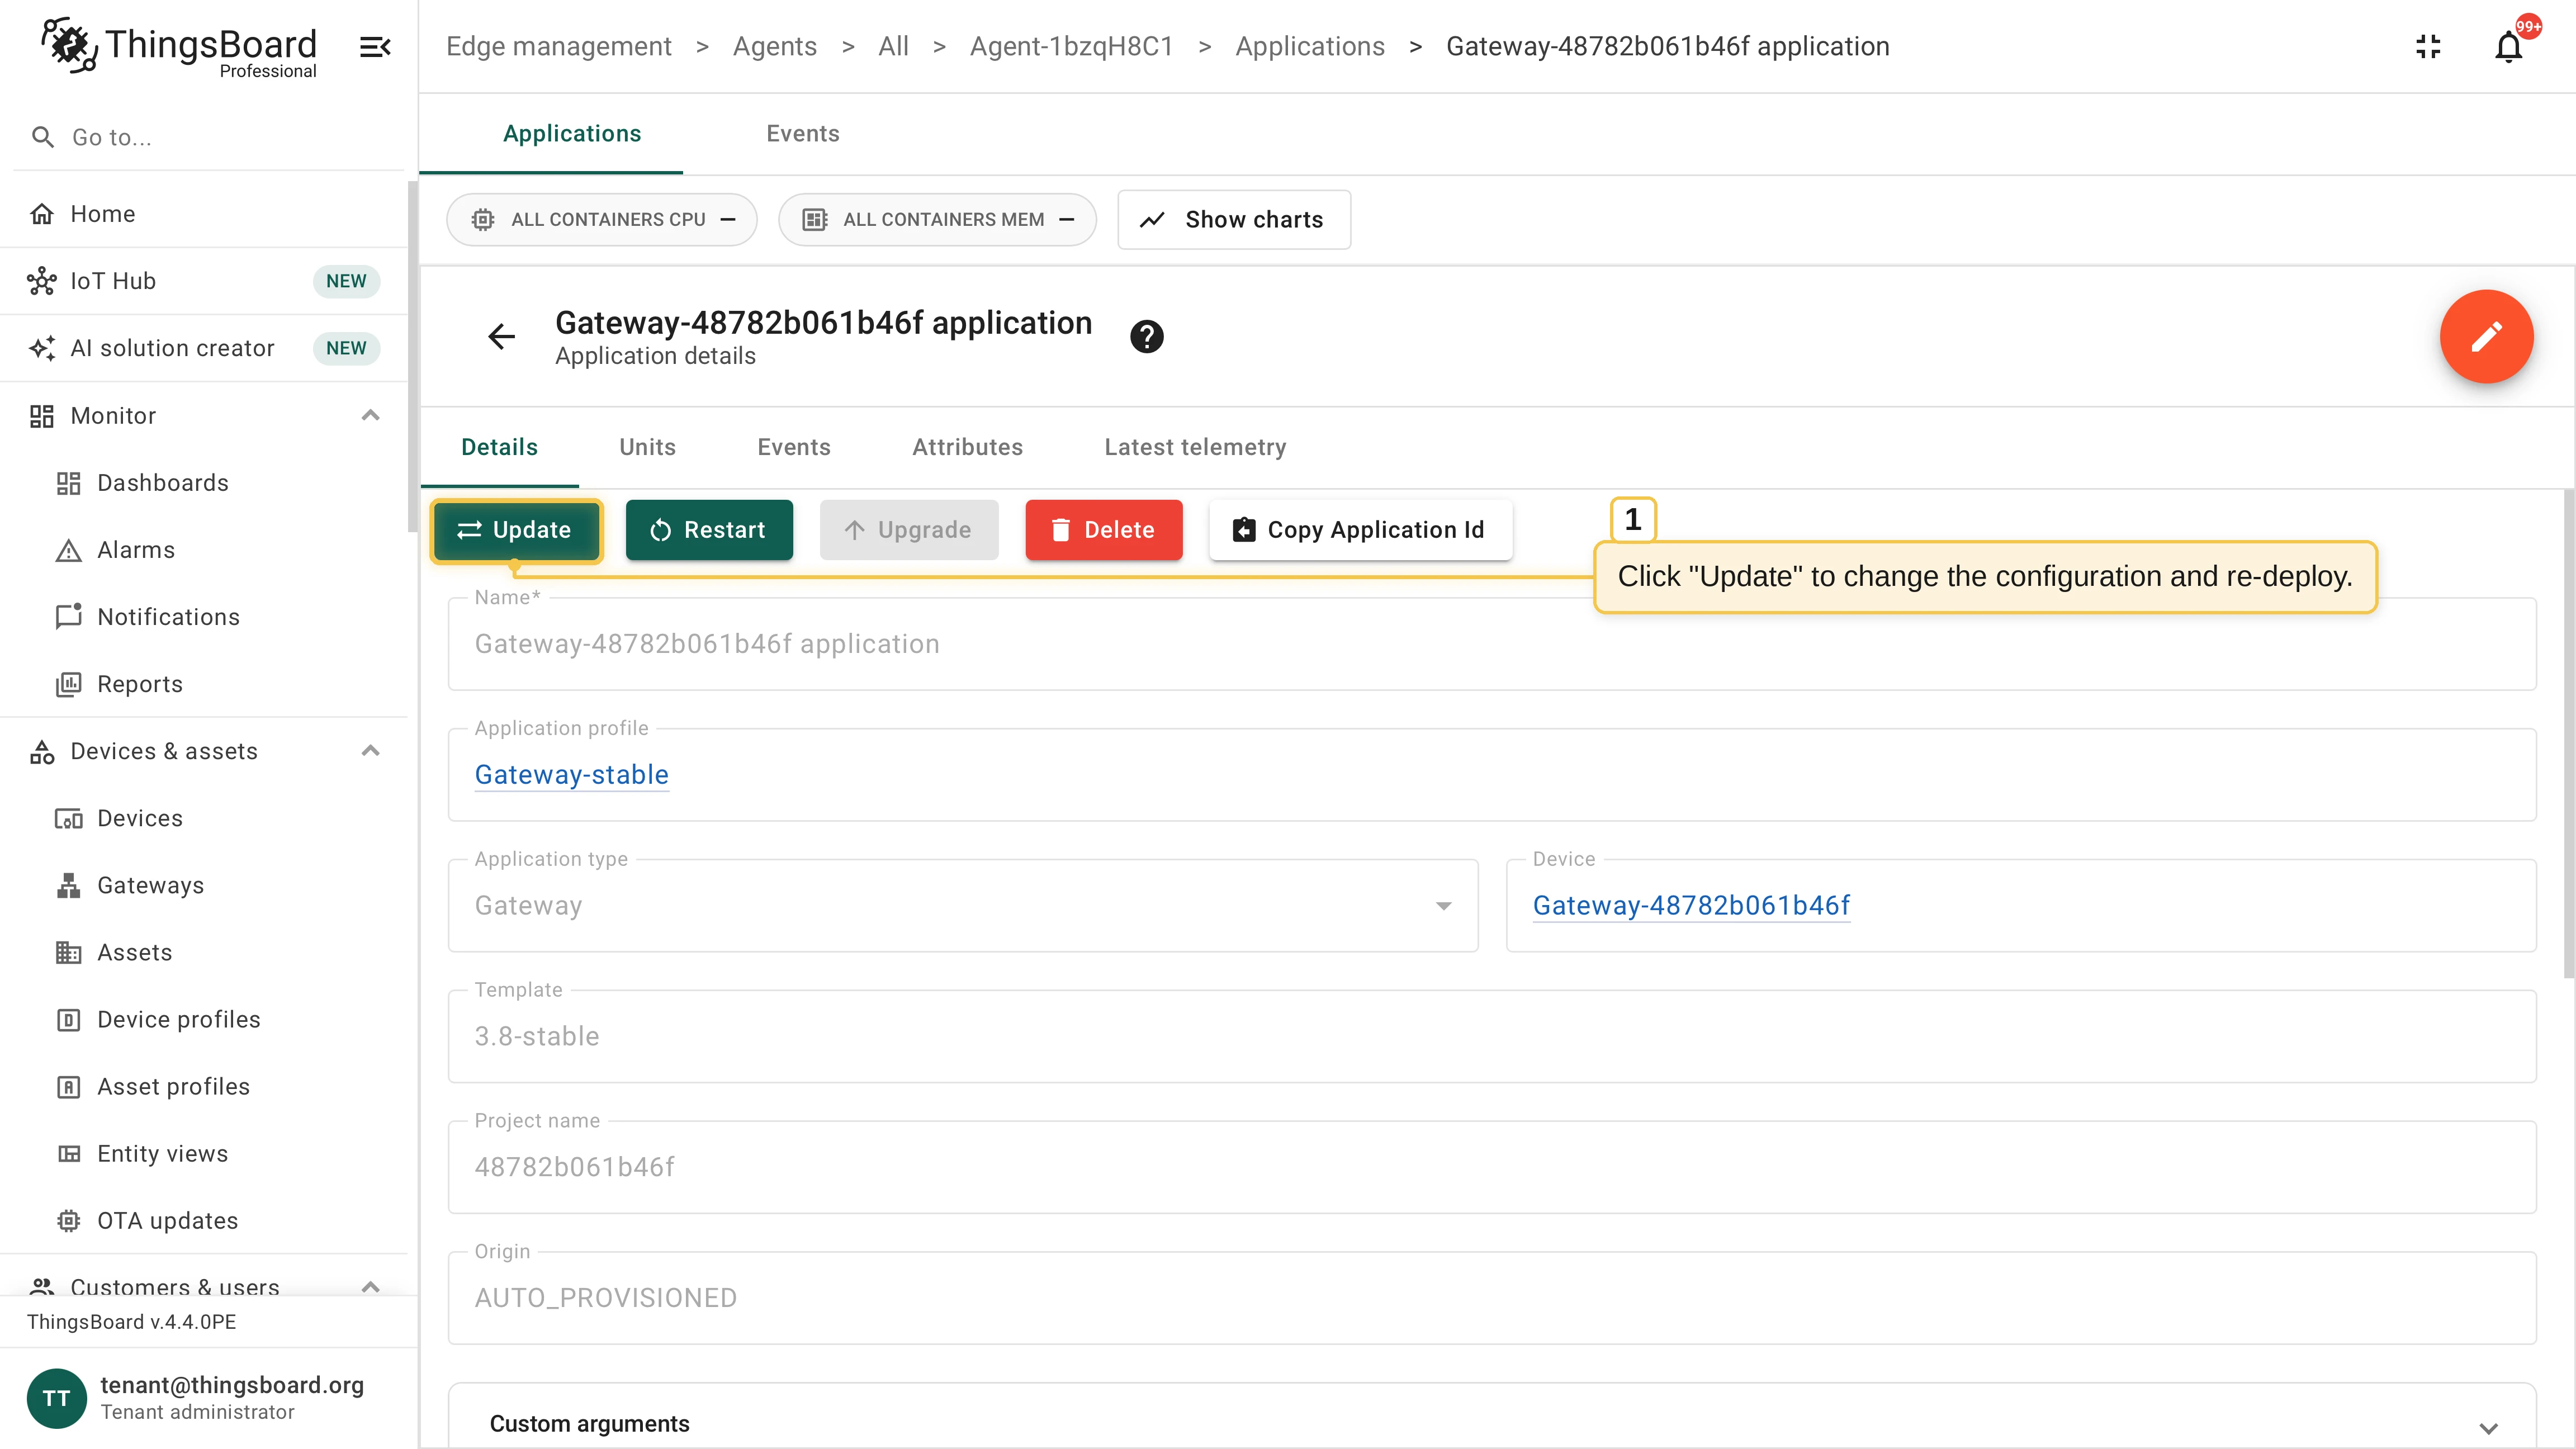
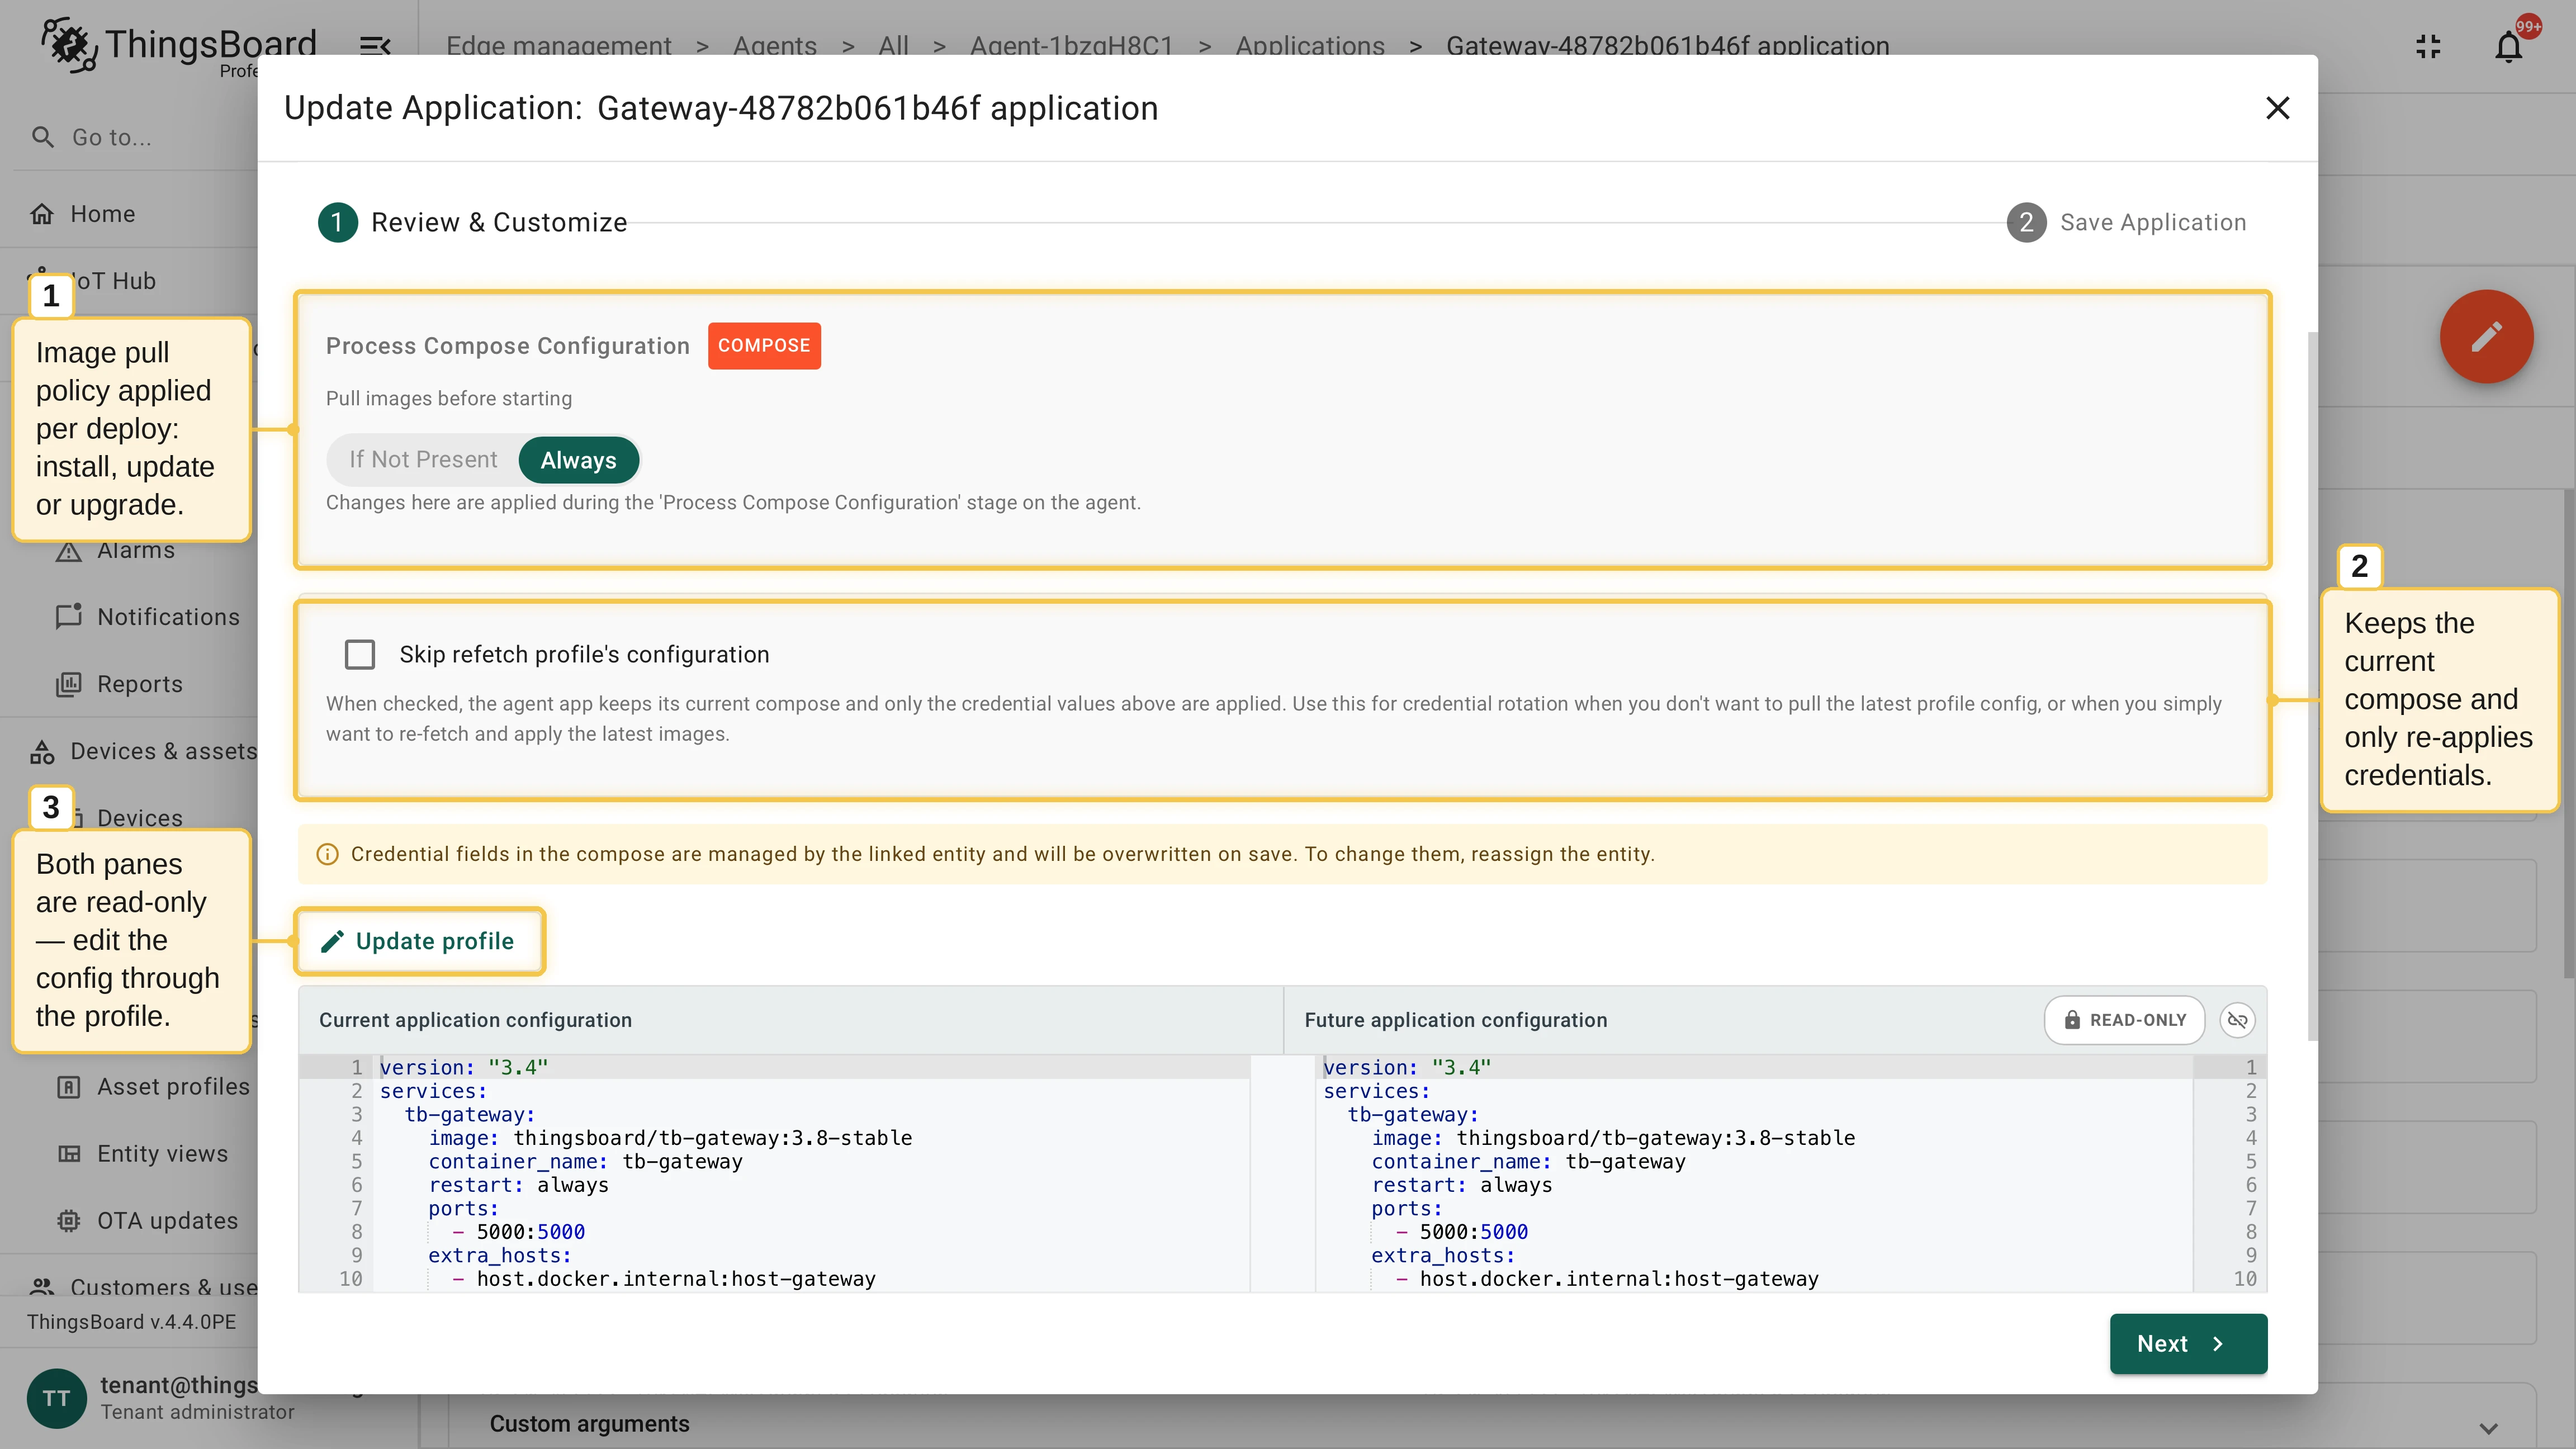
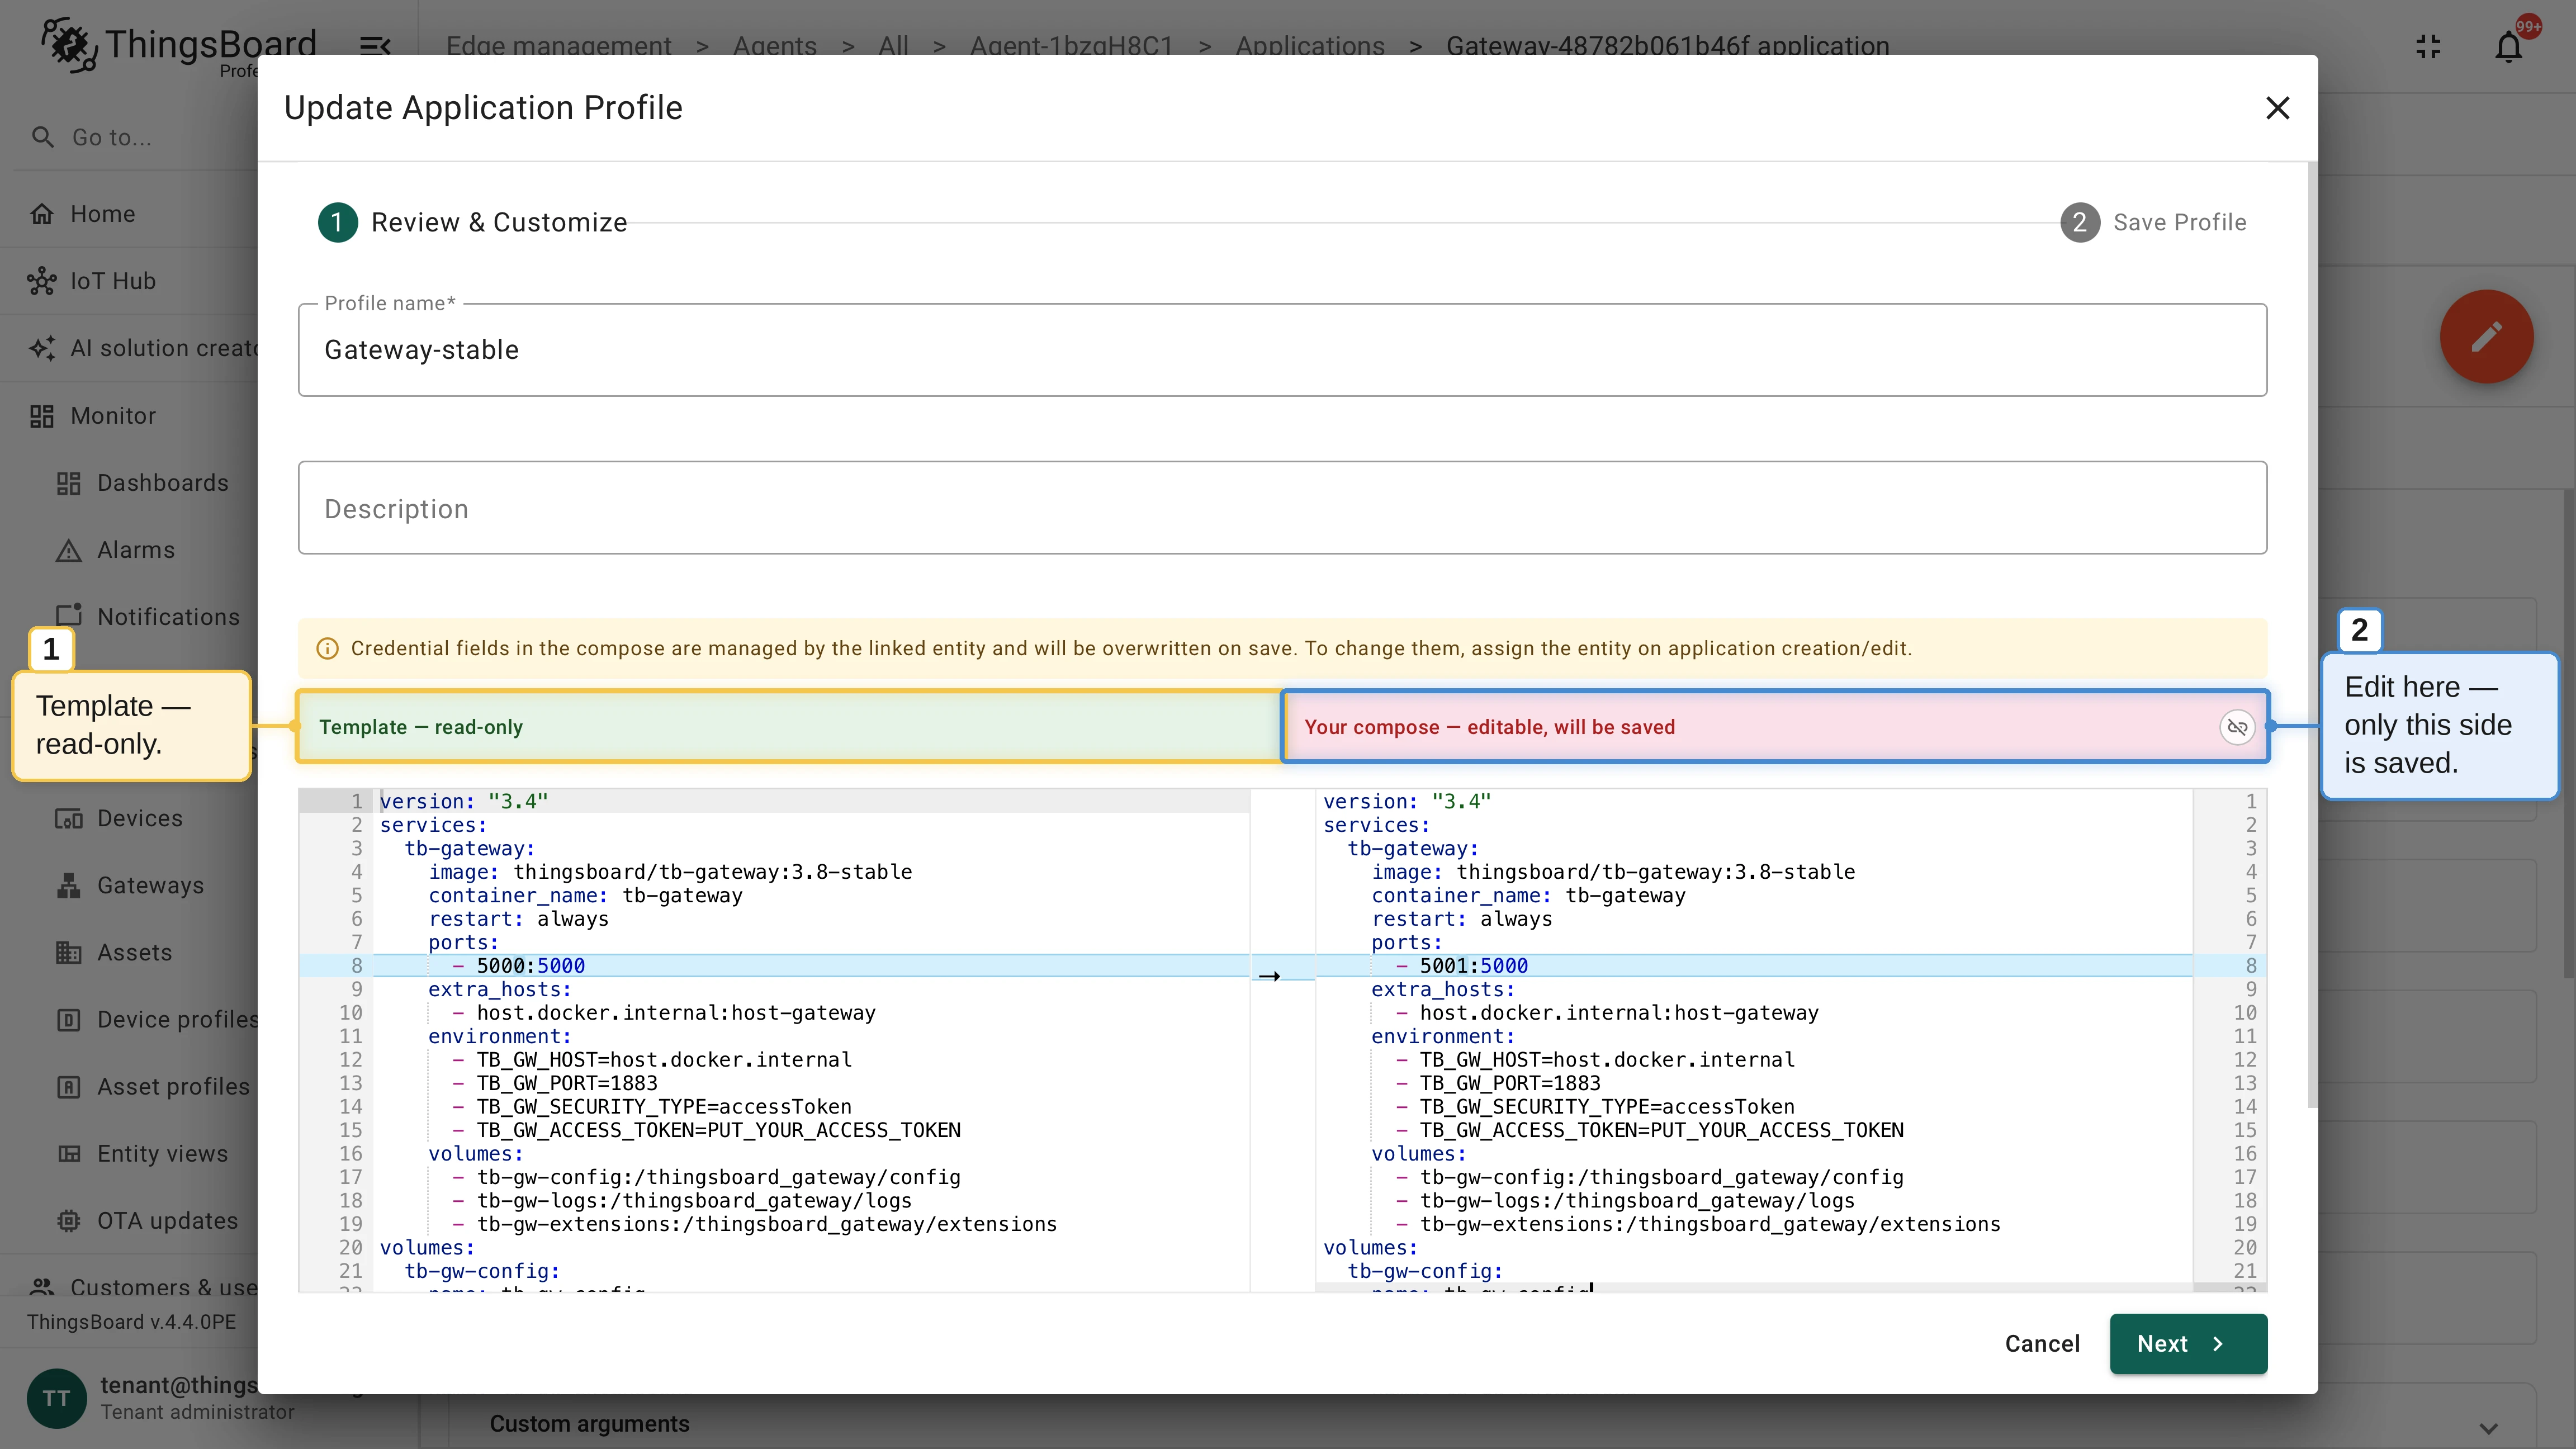
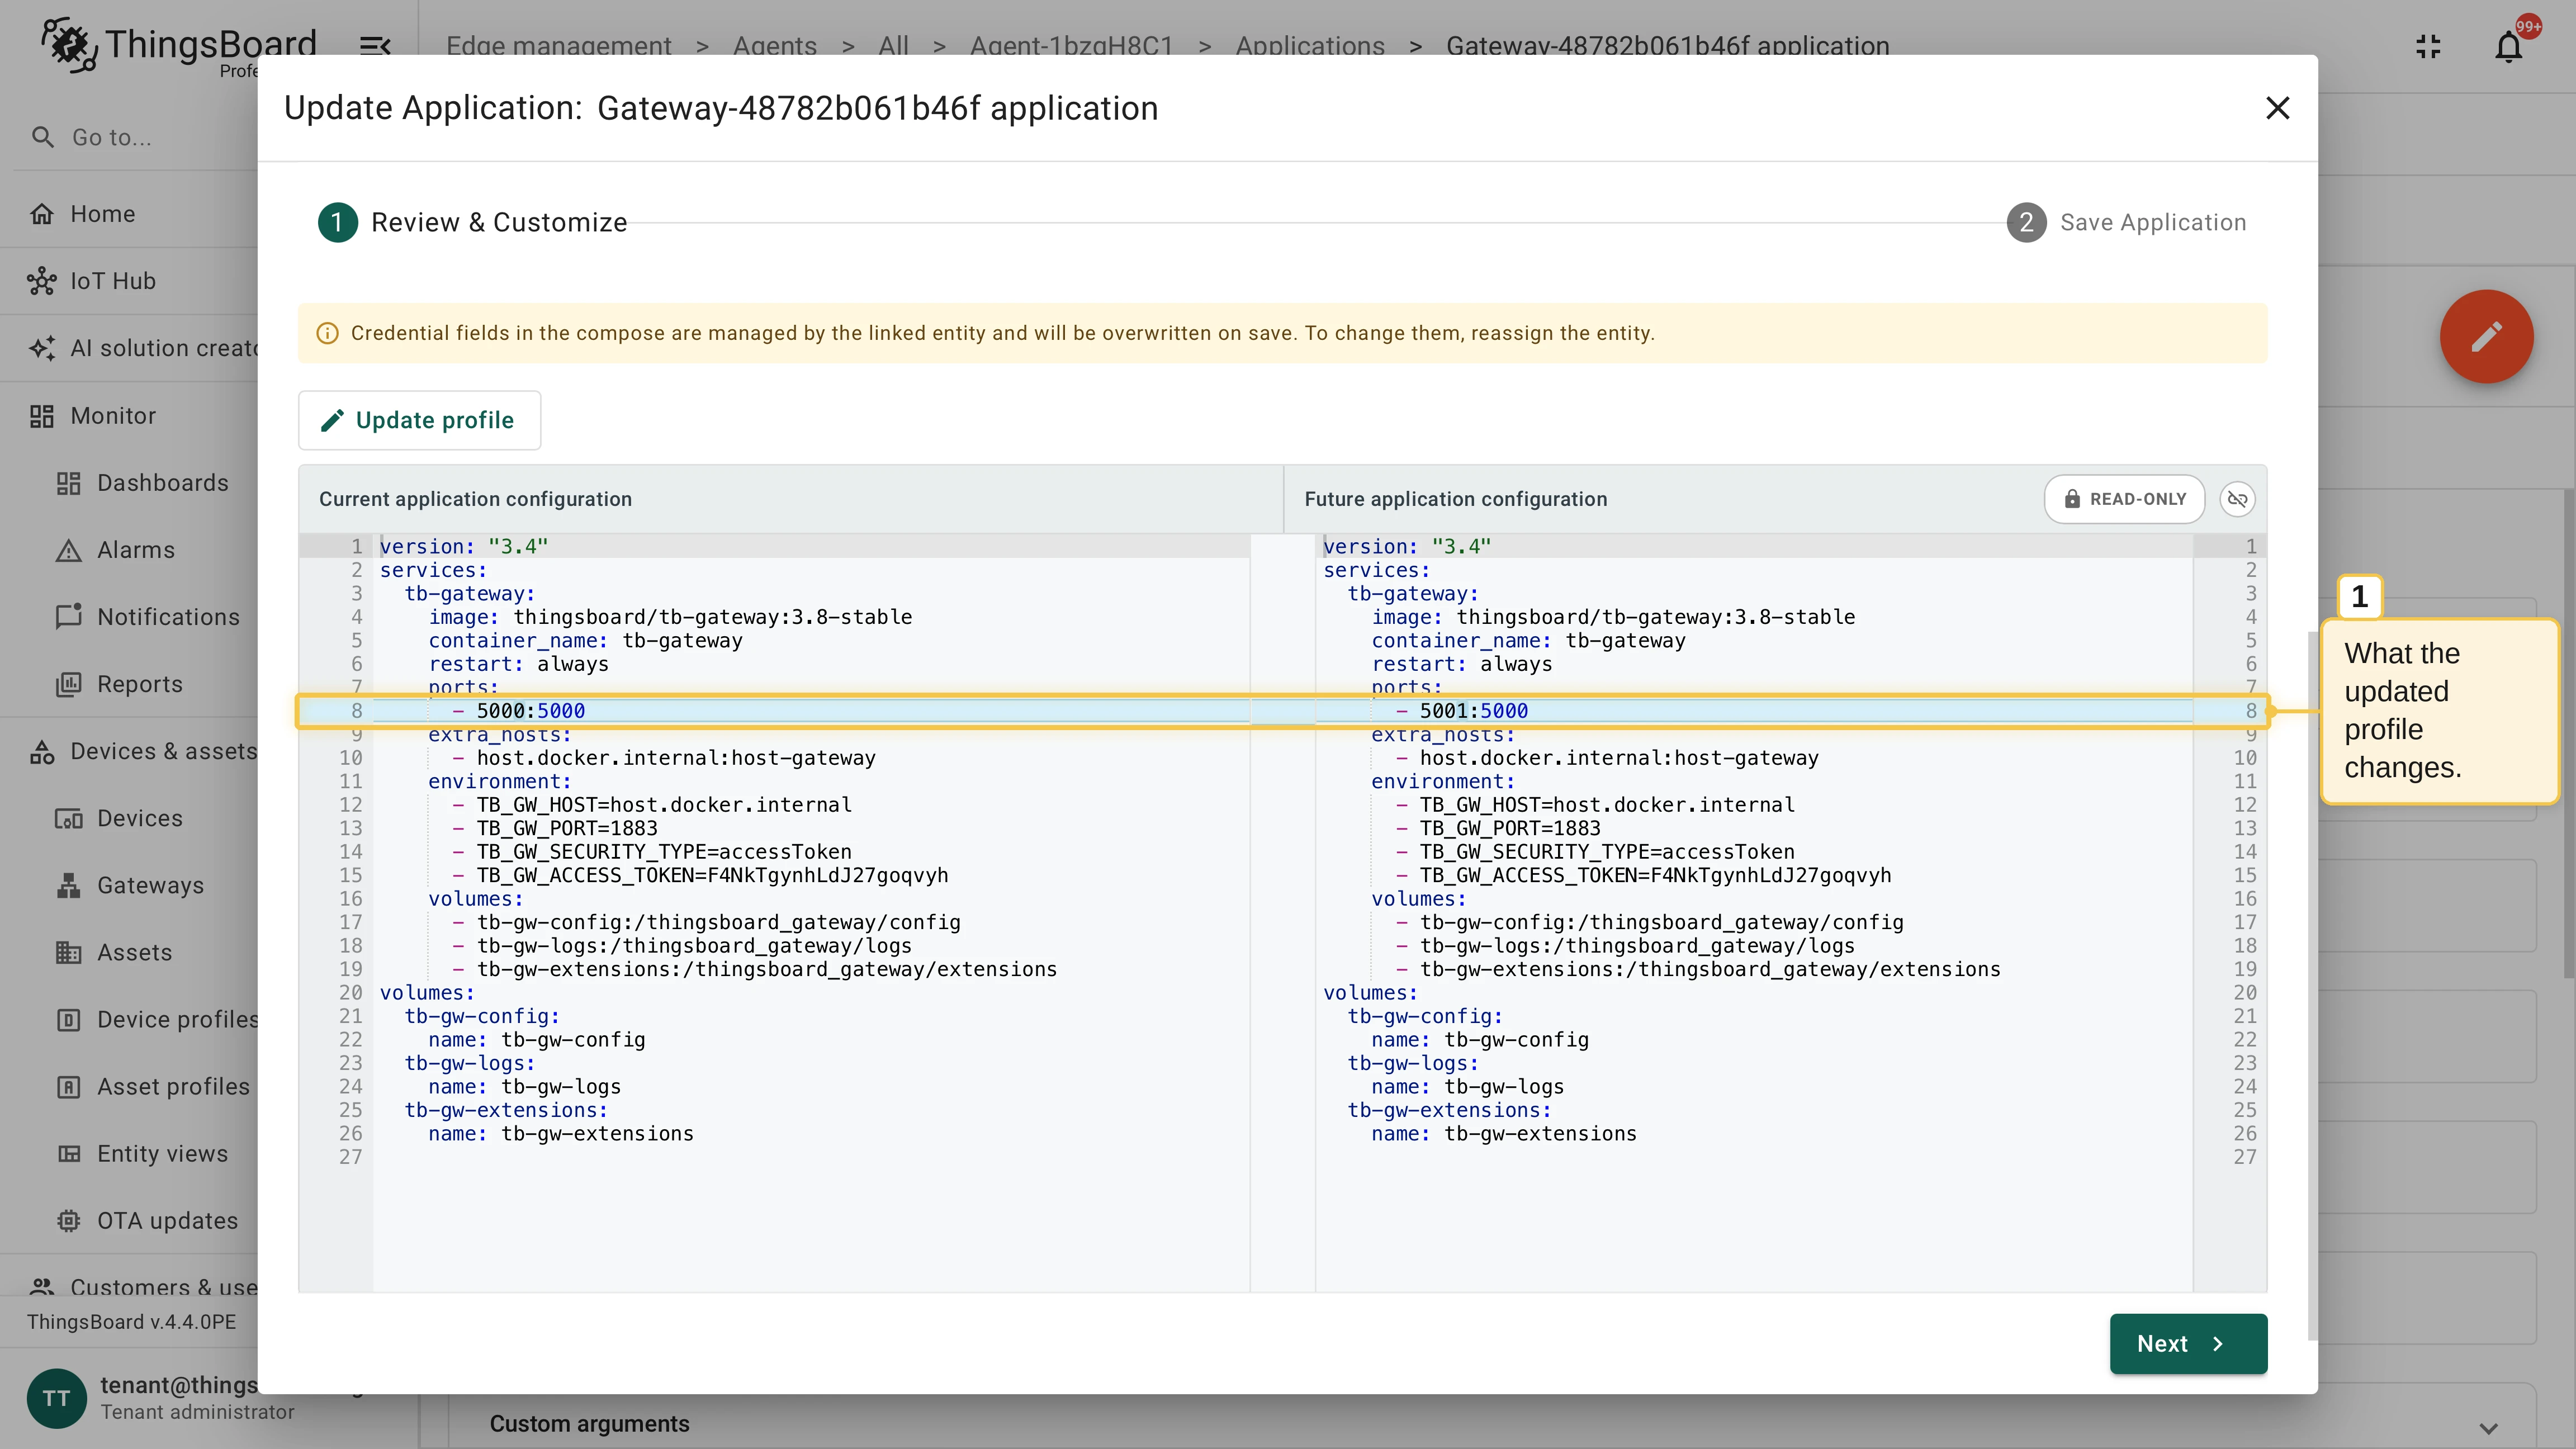
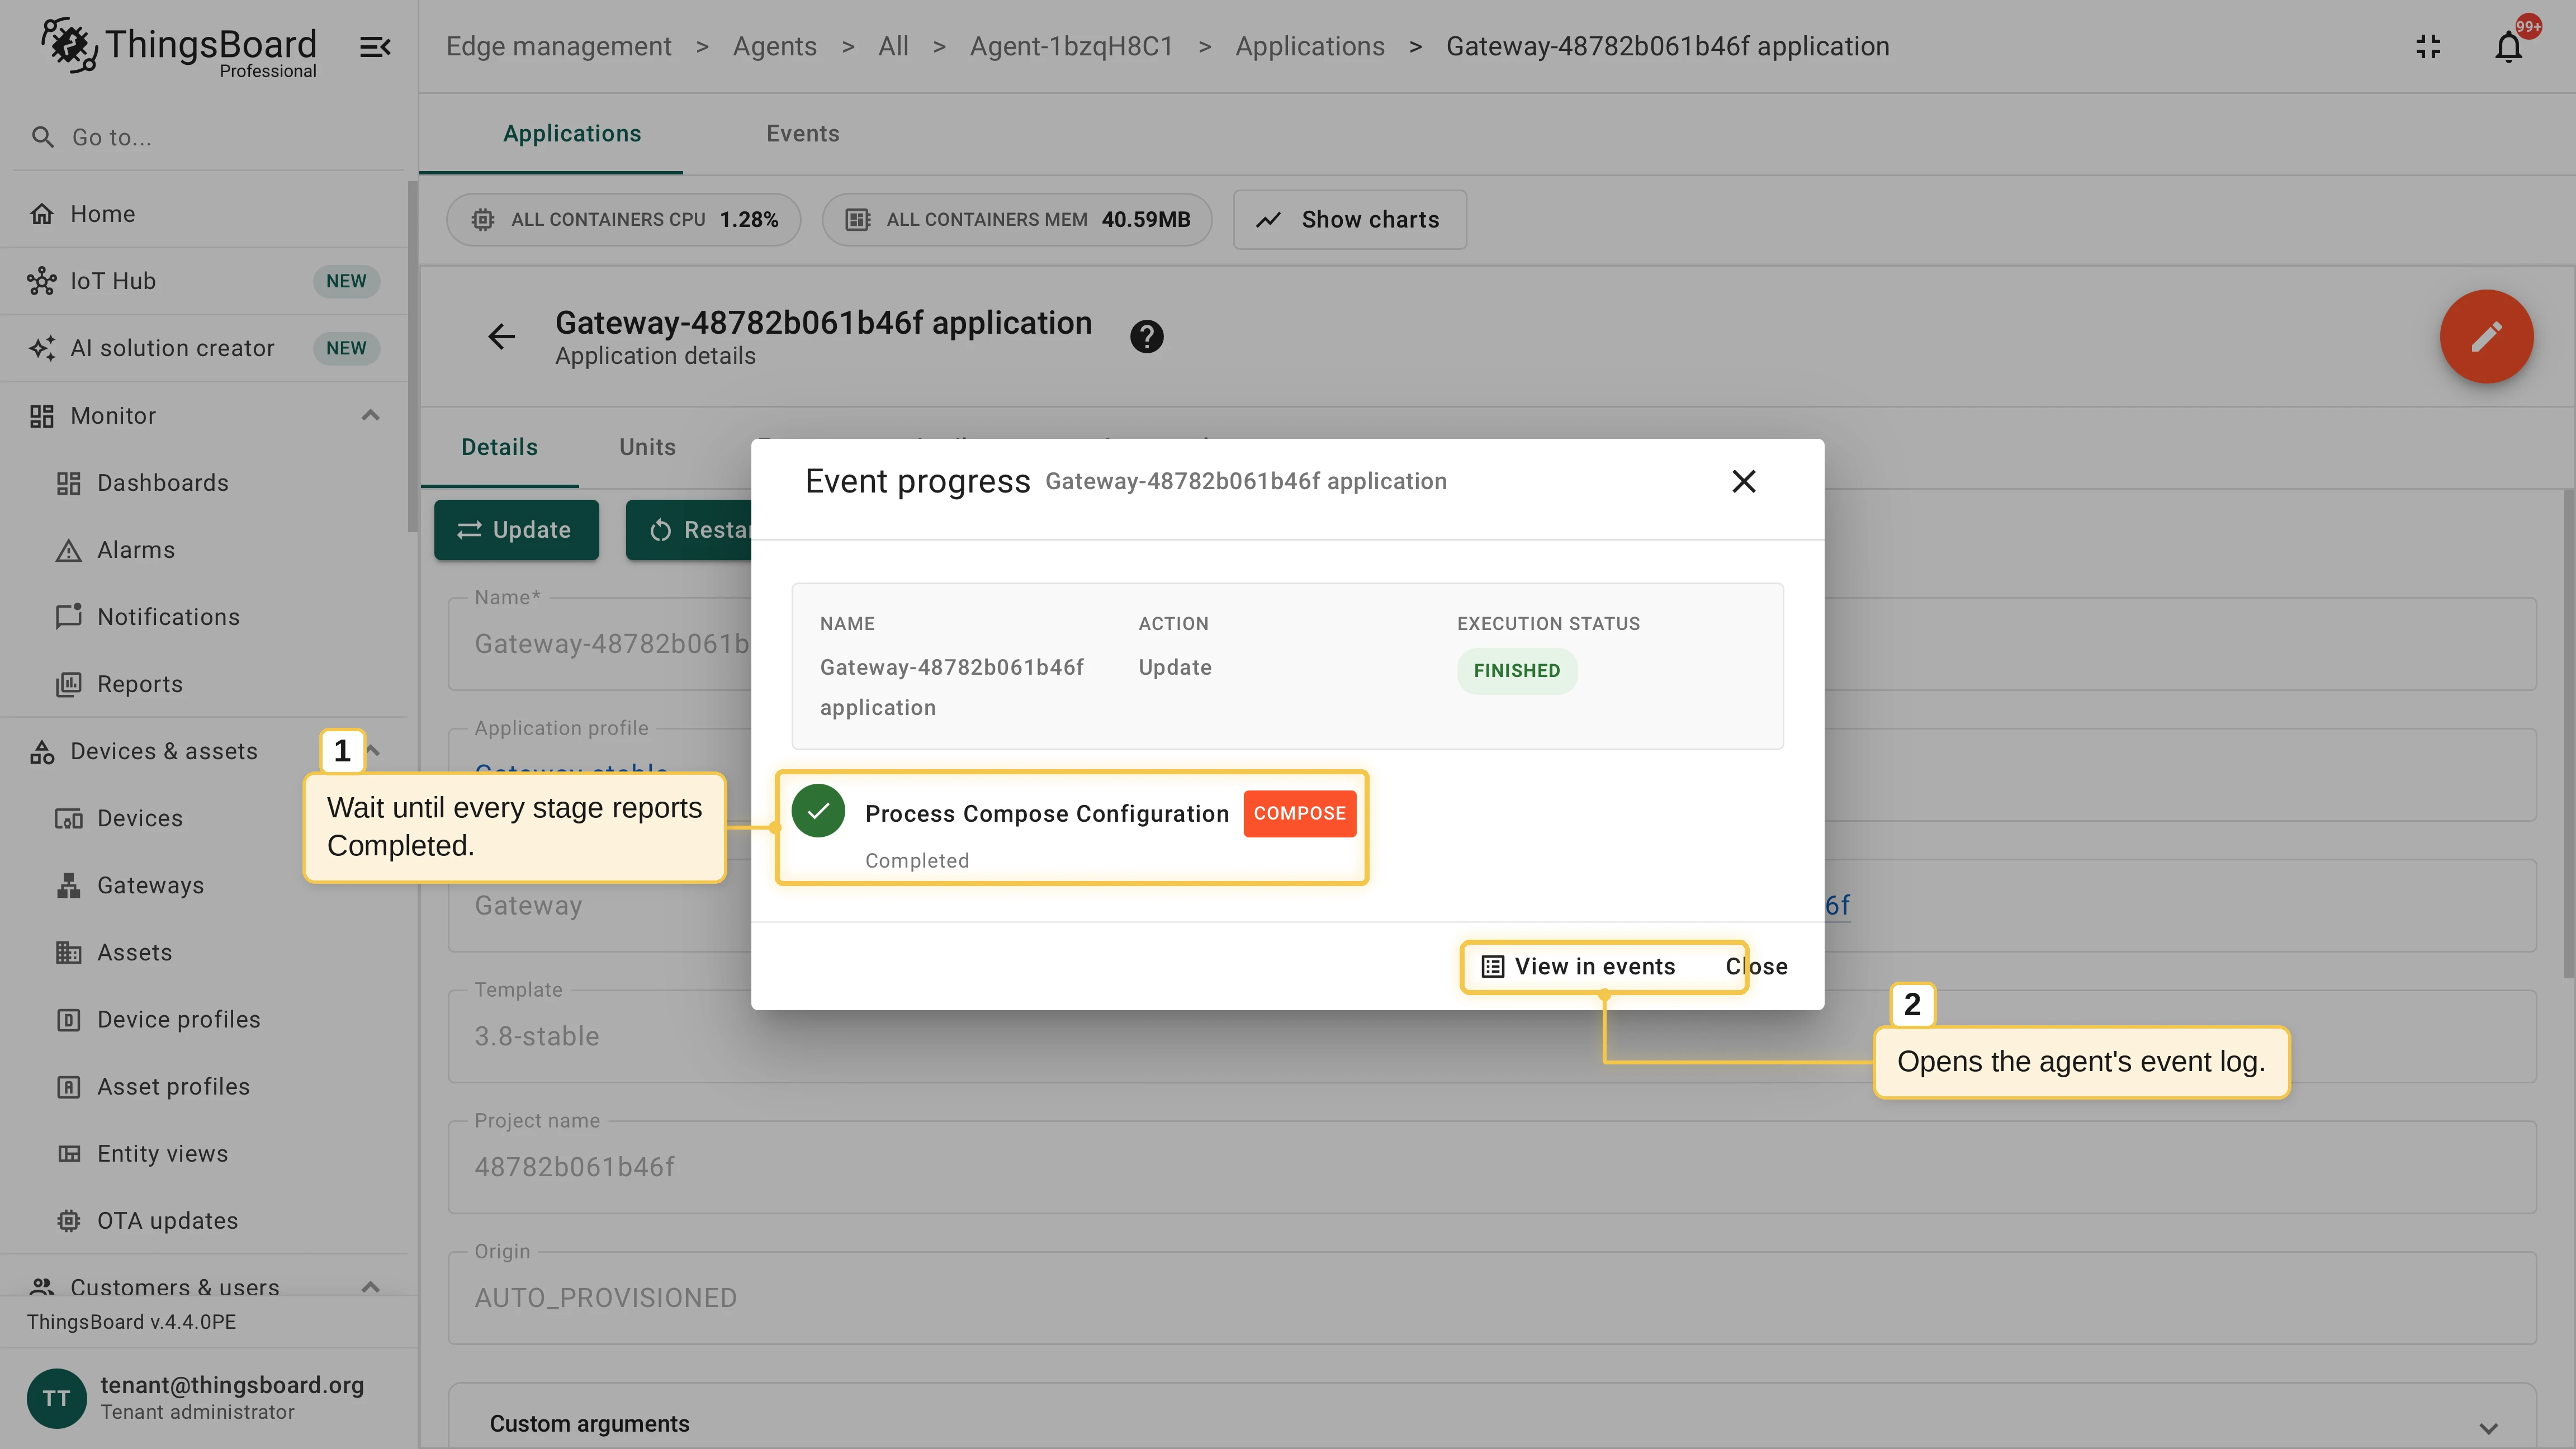
To change the configuration of a deployed Gateway, click Update on the application details page. For a profile-managed application, the configuration panes in the update dialog are read-only: edit the configuration through the profile with Update profile. In the profile editor, the template stays read-only on the left, and your Compose on the right is what gets saved. Back in the update dialog, the comparison shows exactly what the updated profile changes; confirm with Update, and the agent re-deploys the Gateway with the new configuration and the credentials merged in. Select Skip refetch profile’s configuration to keep the current Compose untouched and apply only the credentials: use it for credential rotation or a plain image re-pull.
Monitor the deployment
Section titled “Monitor the deployment”Full guide: Monitor an application.
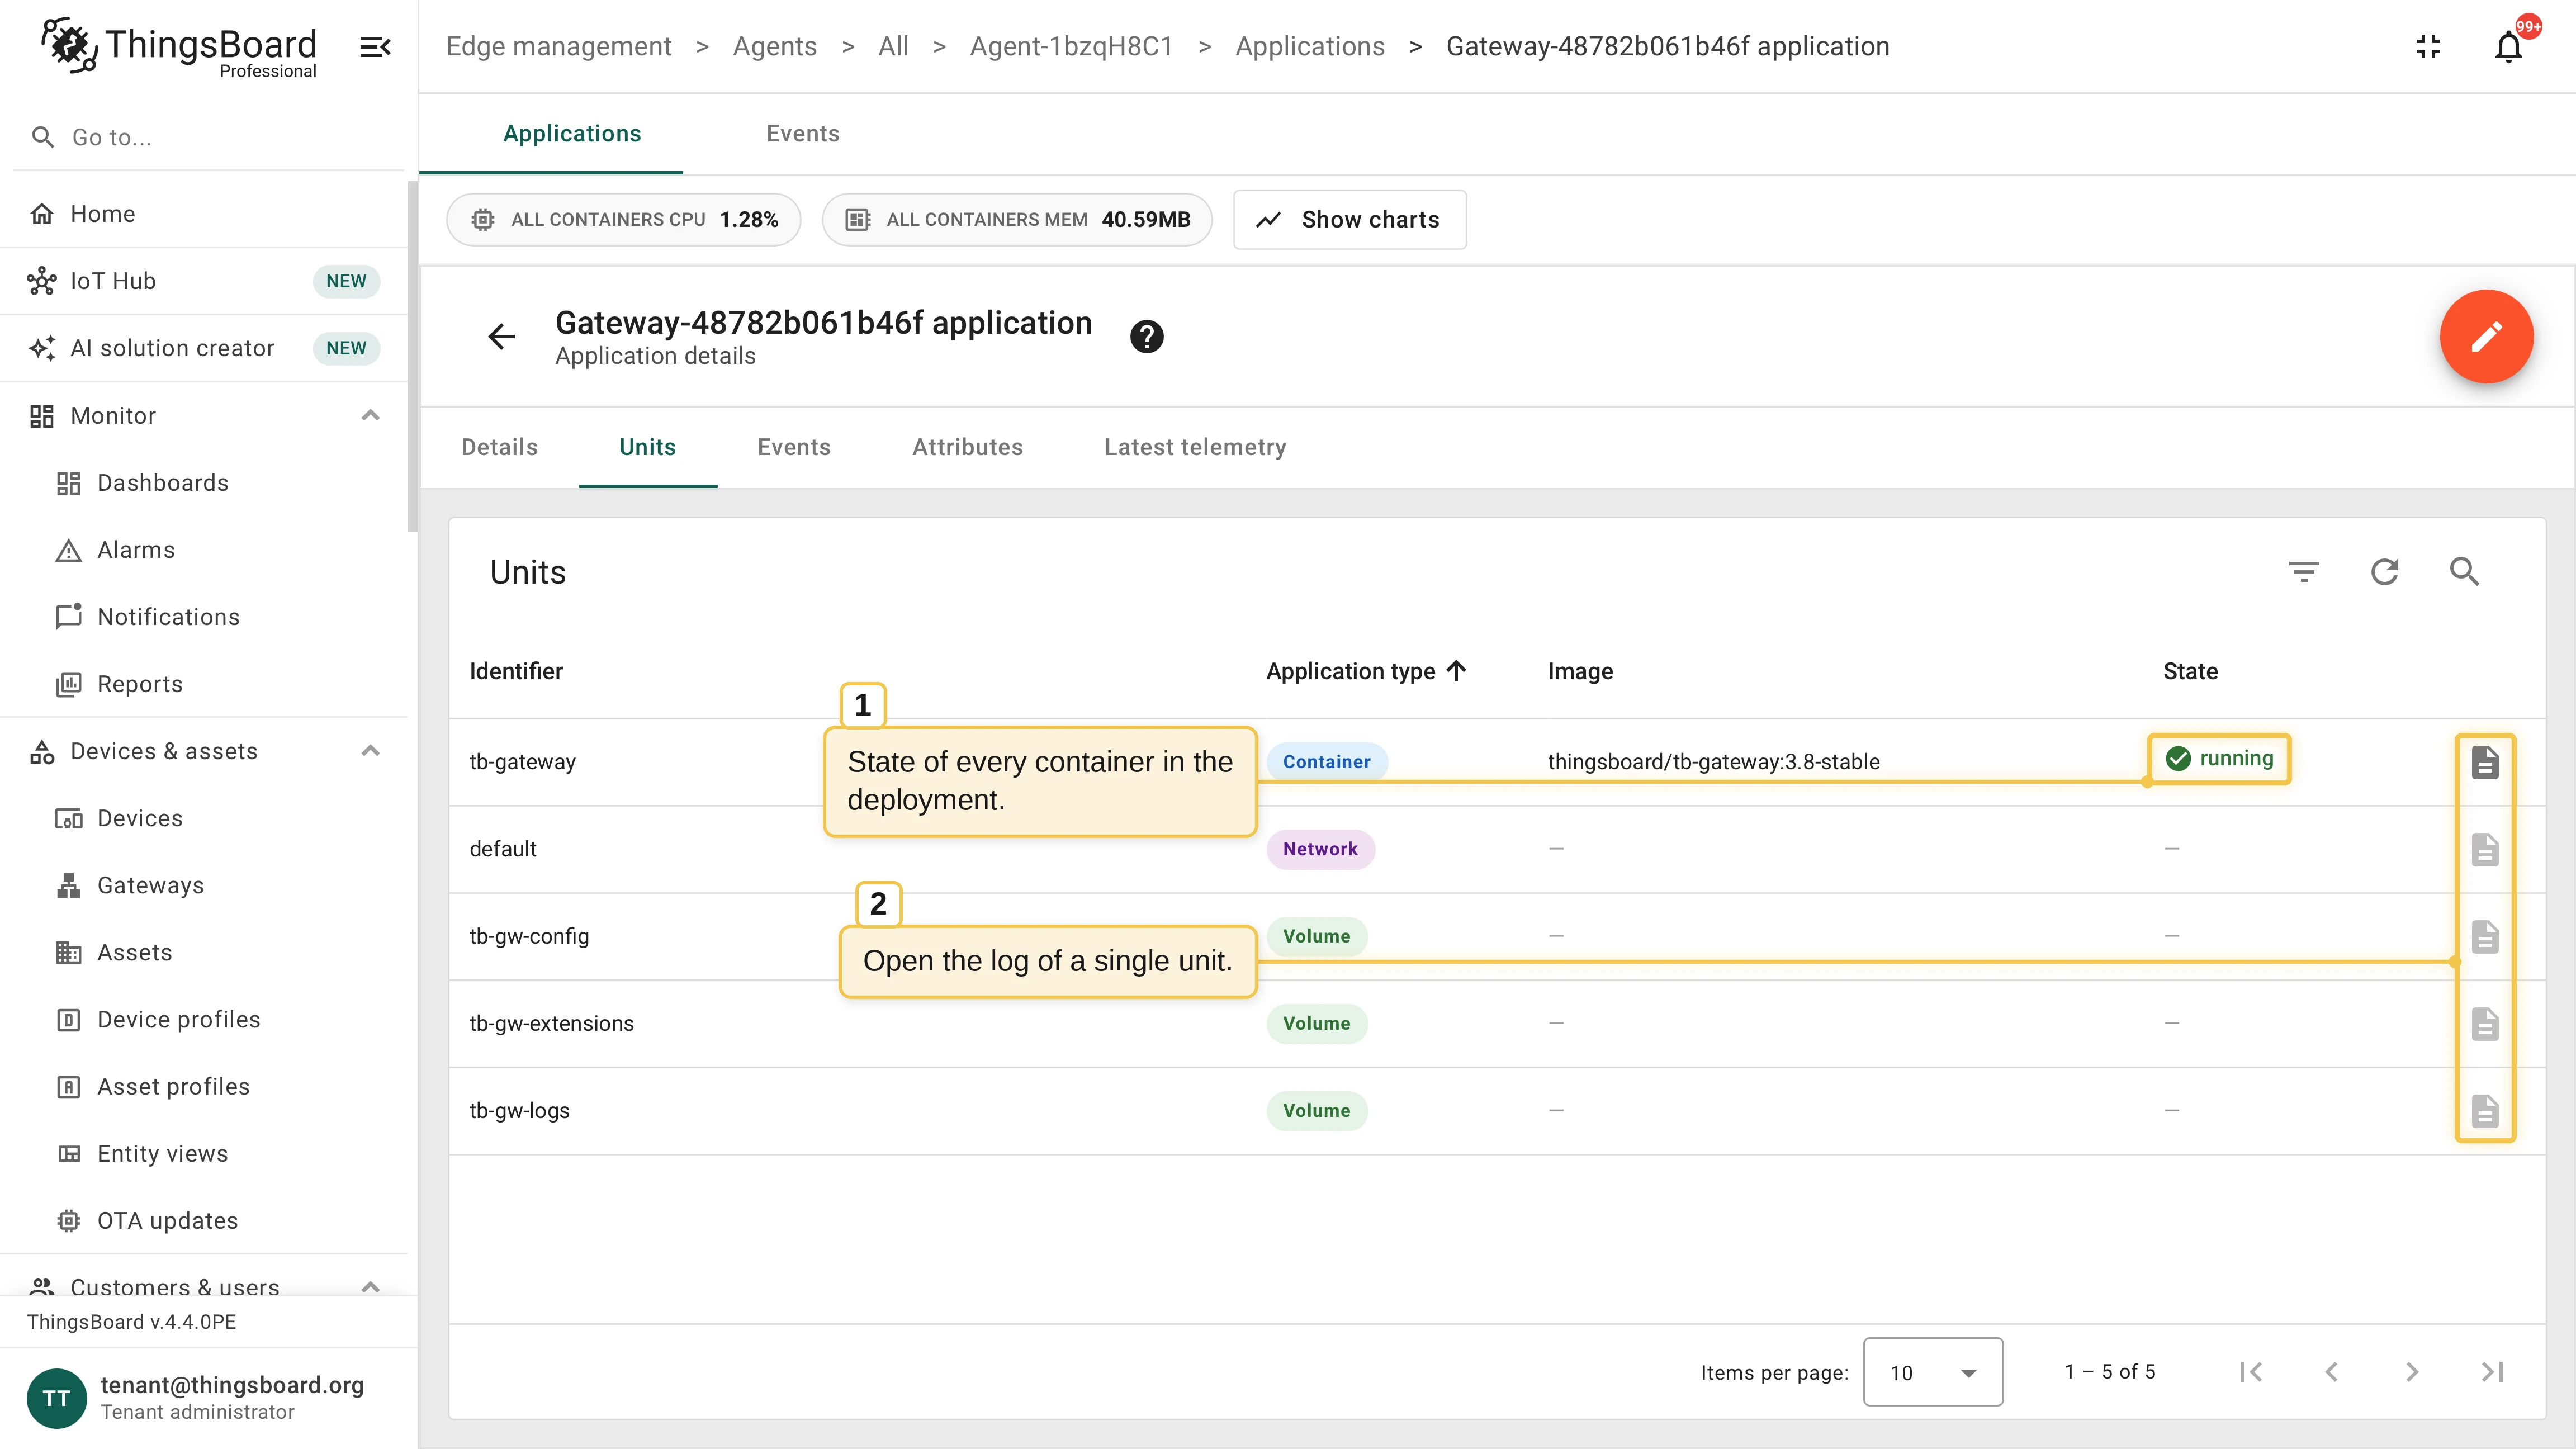
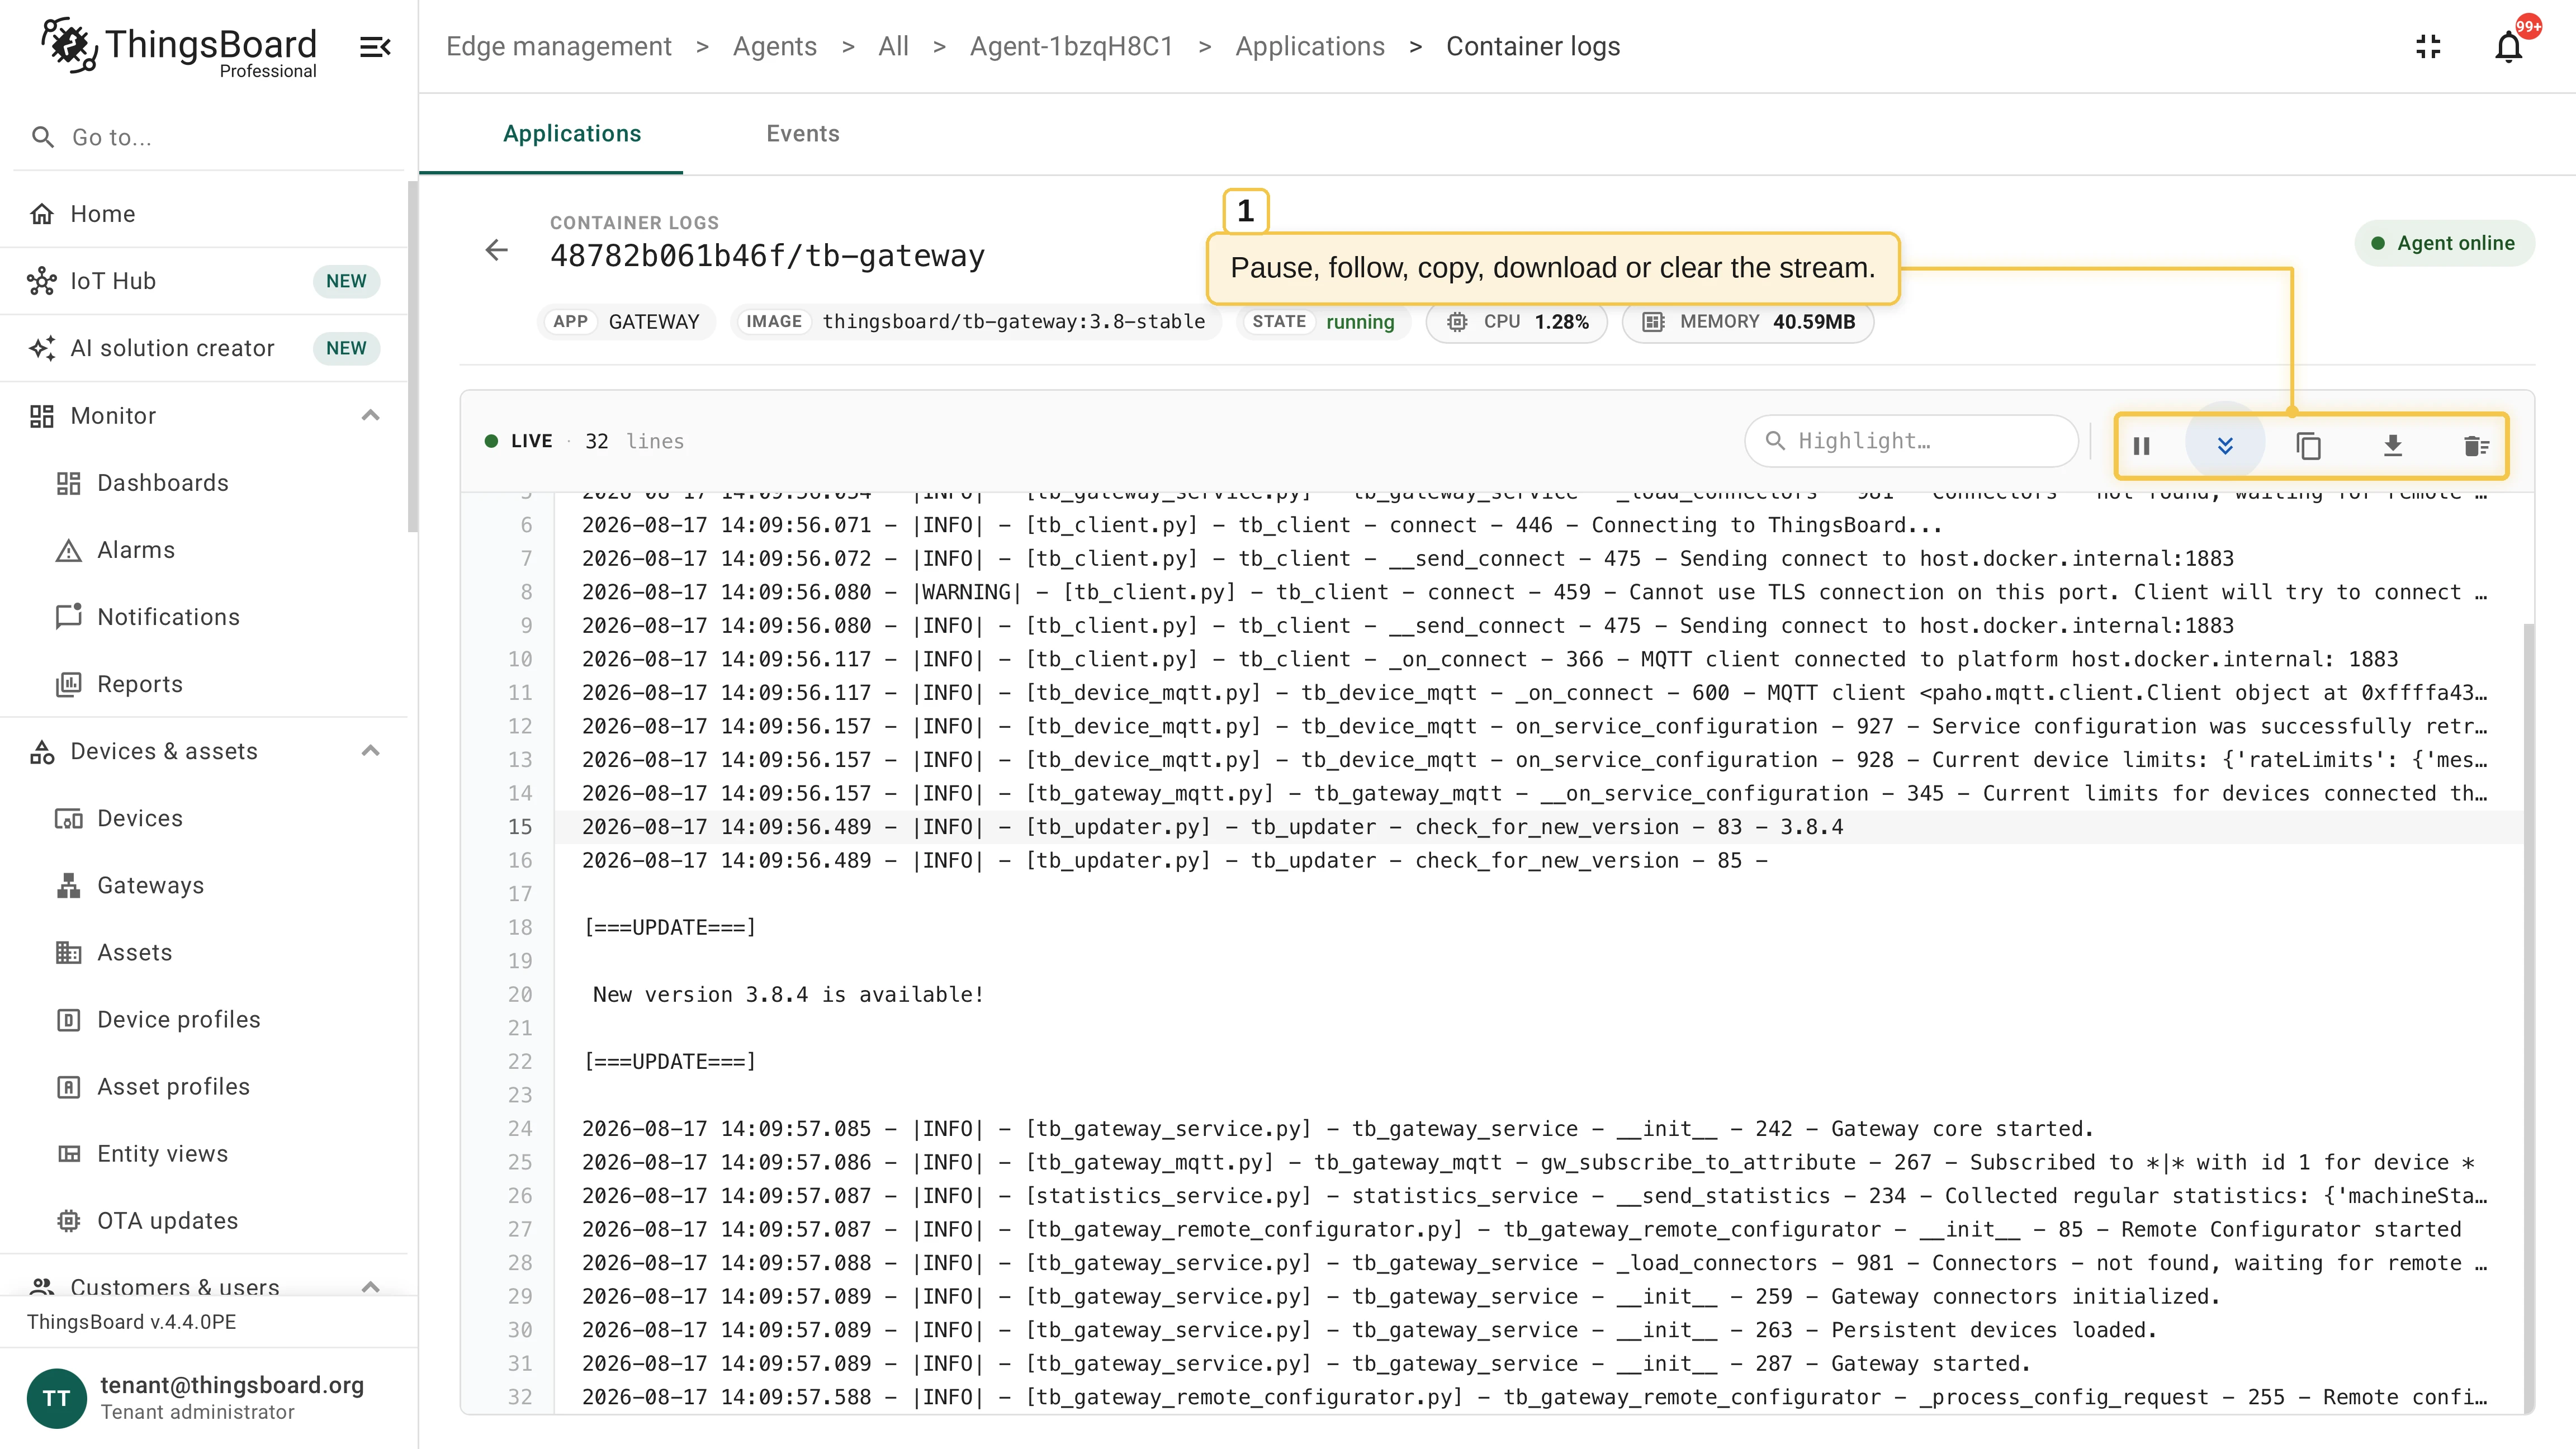
On the application’s Units tab, check the state of every container and open the live logs of a single unit. The log viewer streams live logs from the remote container: pause, follow, copy, download, or clear the stream from the toolbar.
Upgrade the Gateway remotely
Section titled “Upgrade the Gateway remotely”Full guide: Upgrade an application.
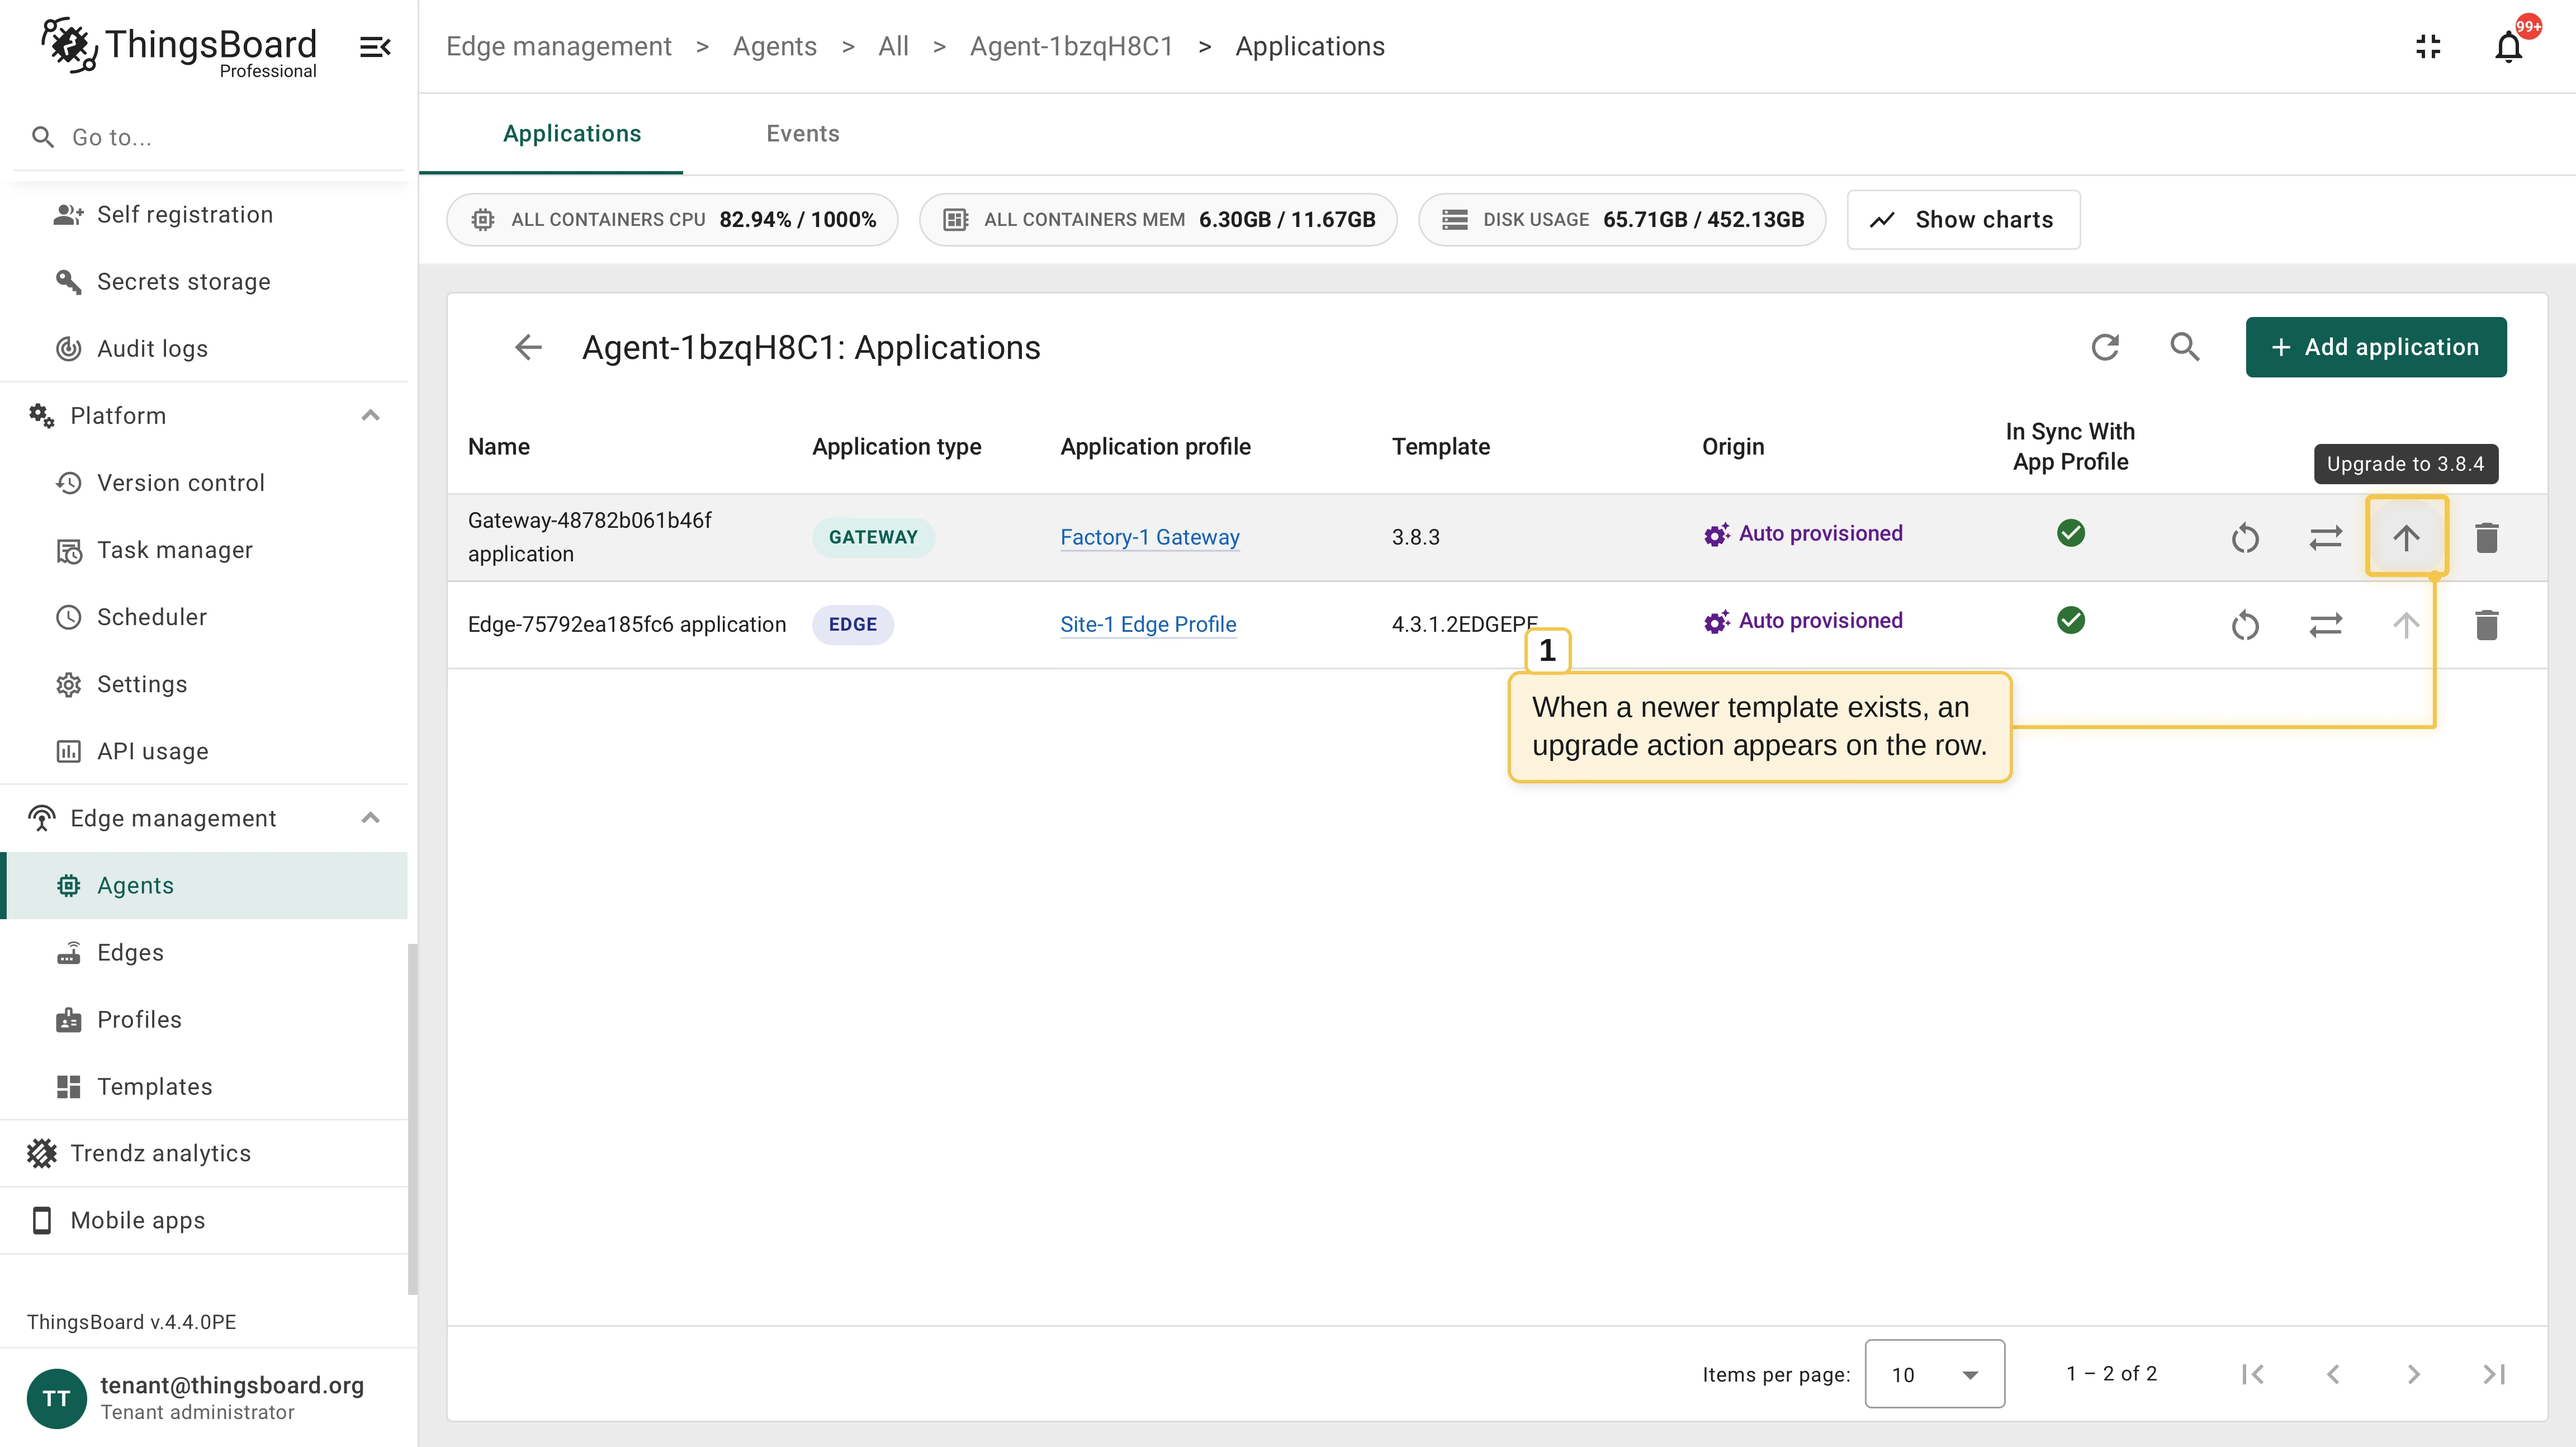
When a newer Gateway template version exists, an upgrade action appears on the application row in the agent’s Applications table. A failed upgrade rolls back automatically.
Open the agent’s Applications table and click the upgrade action on the gateway application row. The Upgrade Application wizard opens.
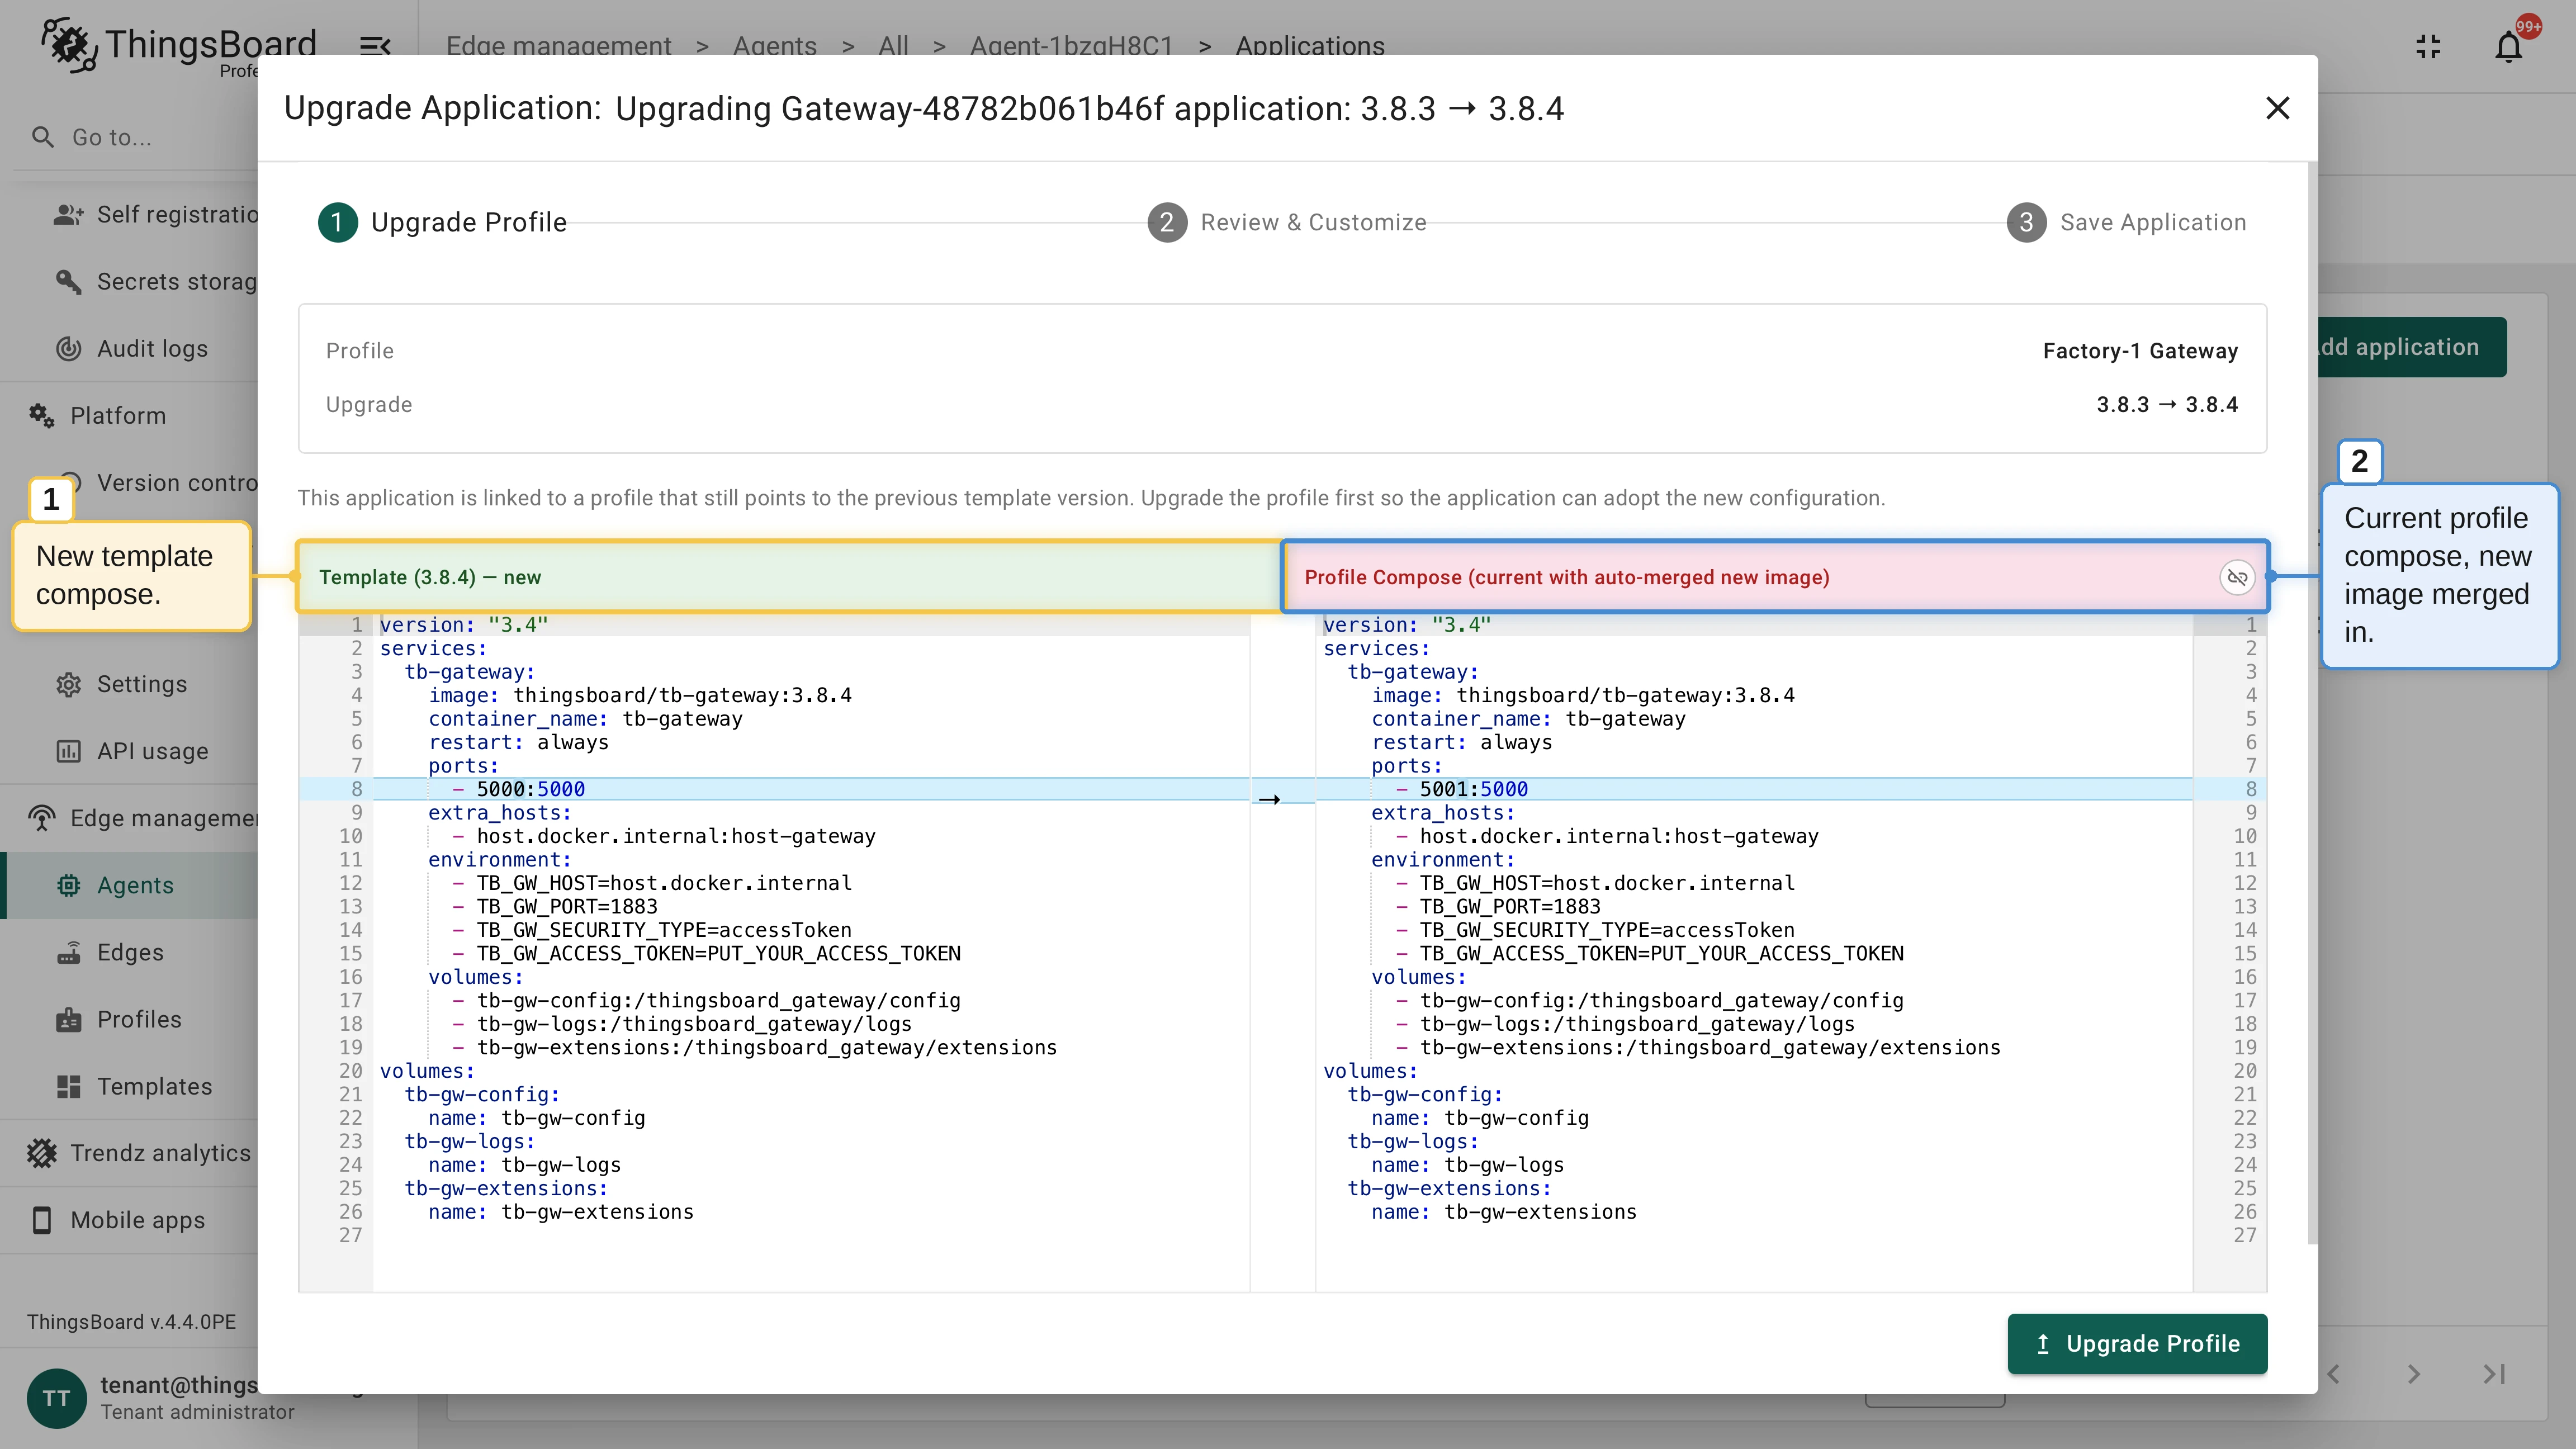
If the application is linked to a profile that still points to the previous template version, the wizard starts with the Upgrade Profile step: review the new template next to the profile’s current Compose with the new image auto-merged in, and click Upgrade Profile so the application can adopt the new configuration.
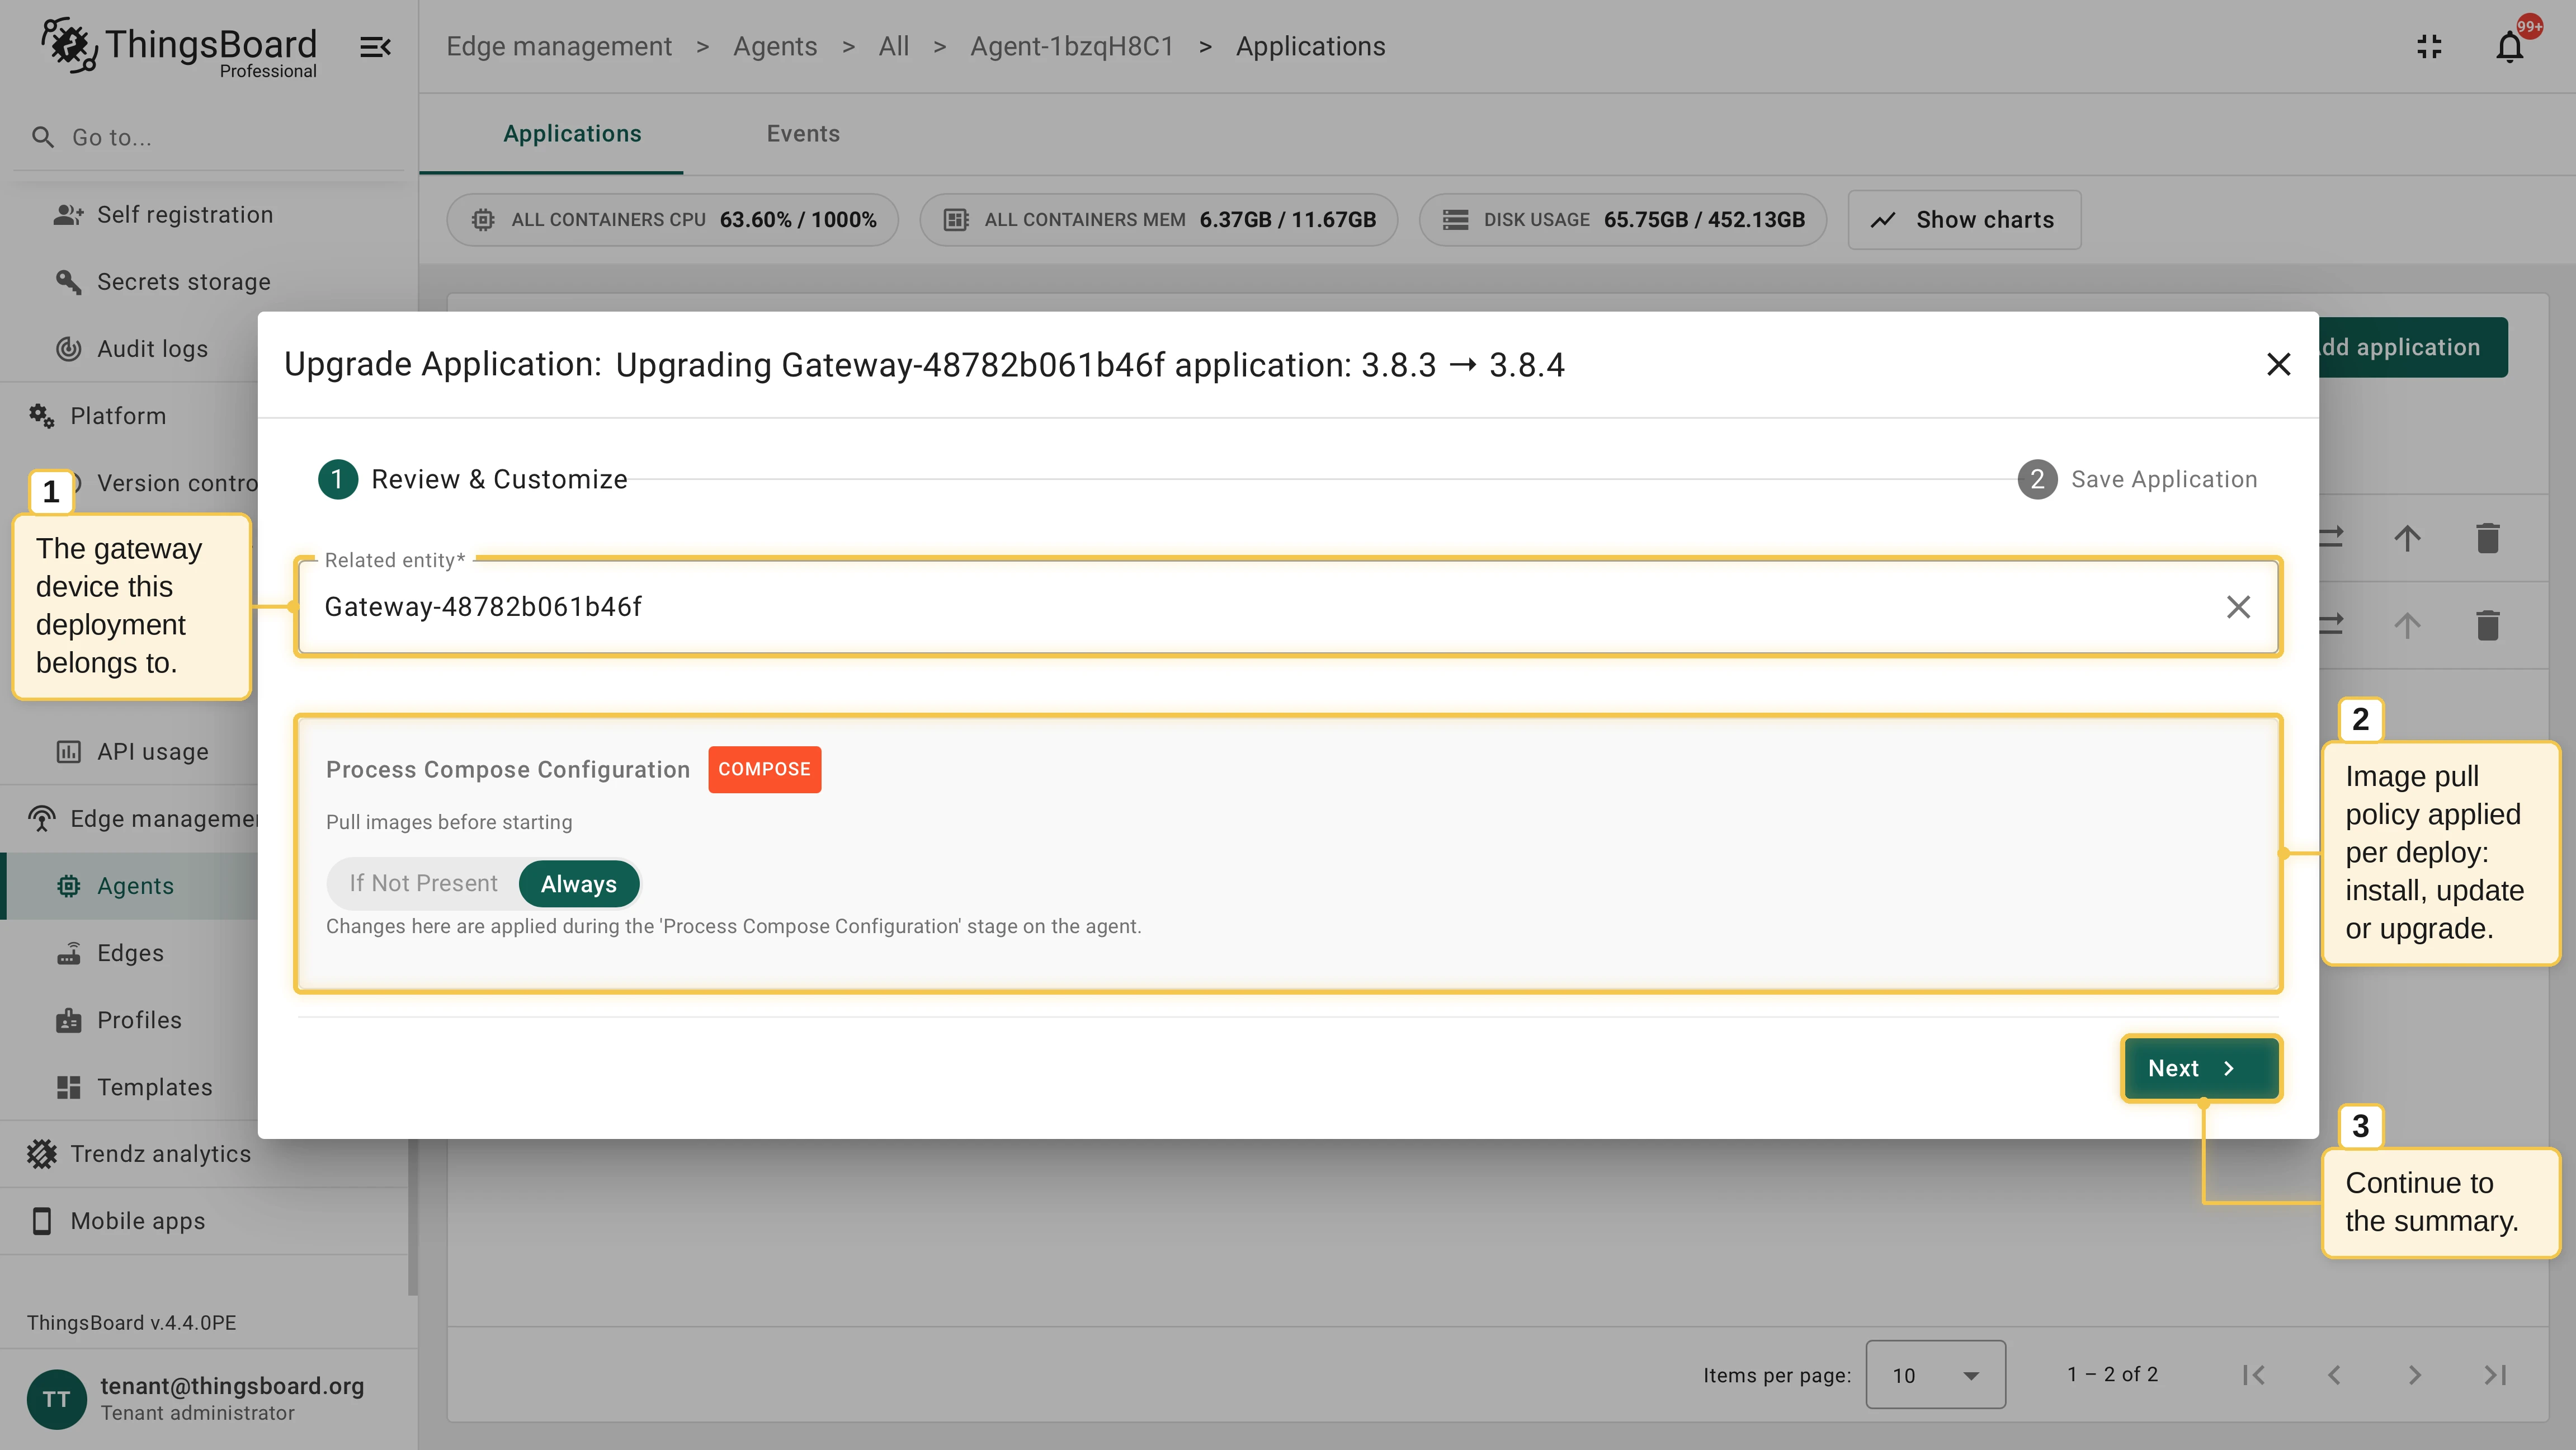
On Review & Customize, check the related gateway device and the image pull policy, then click Next.
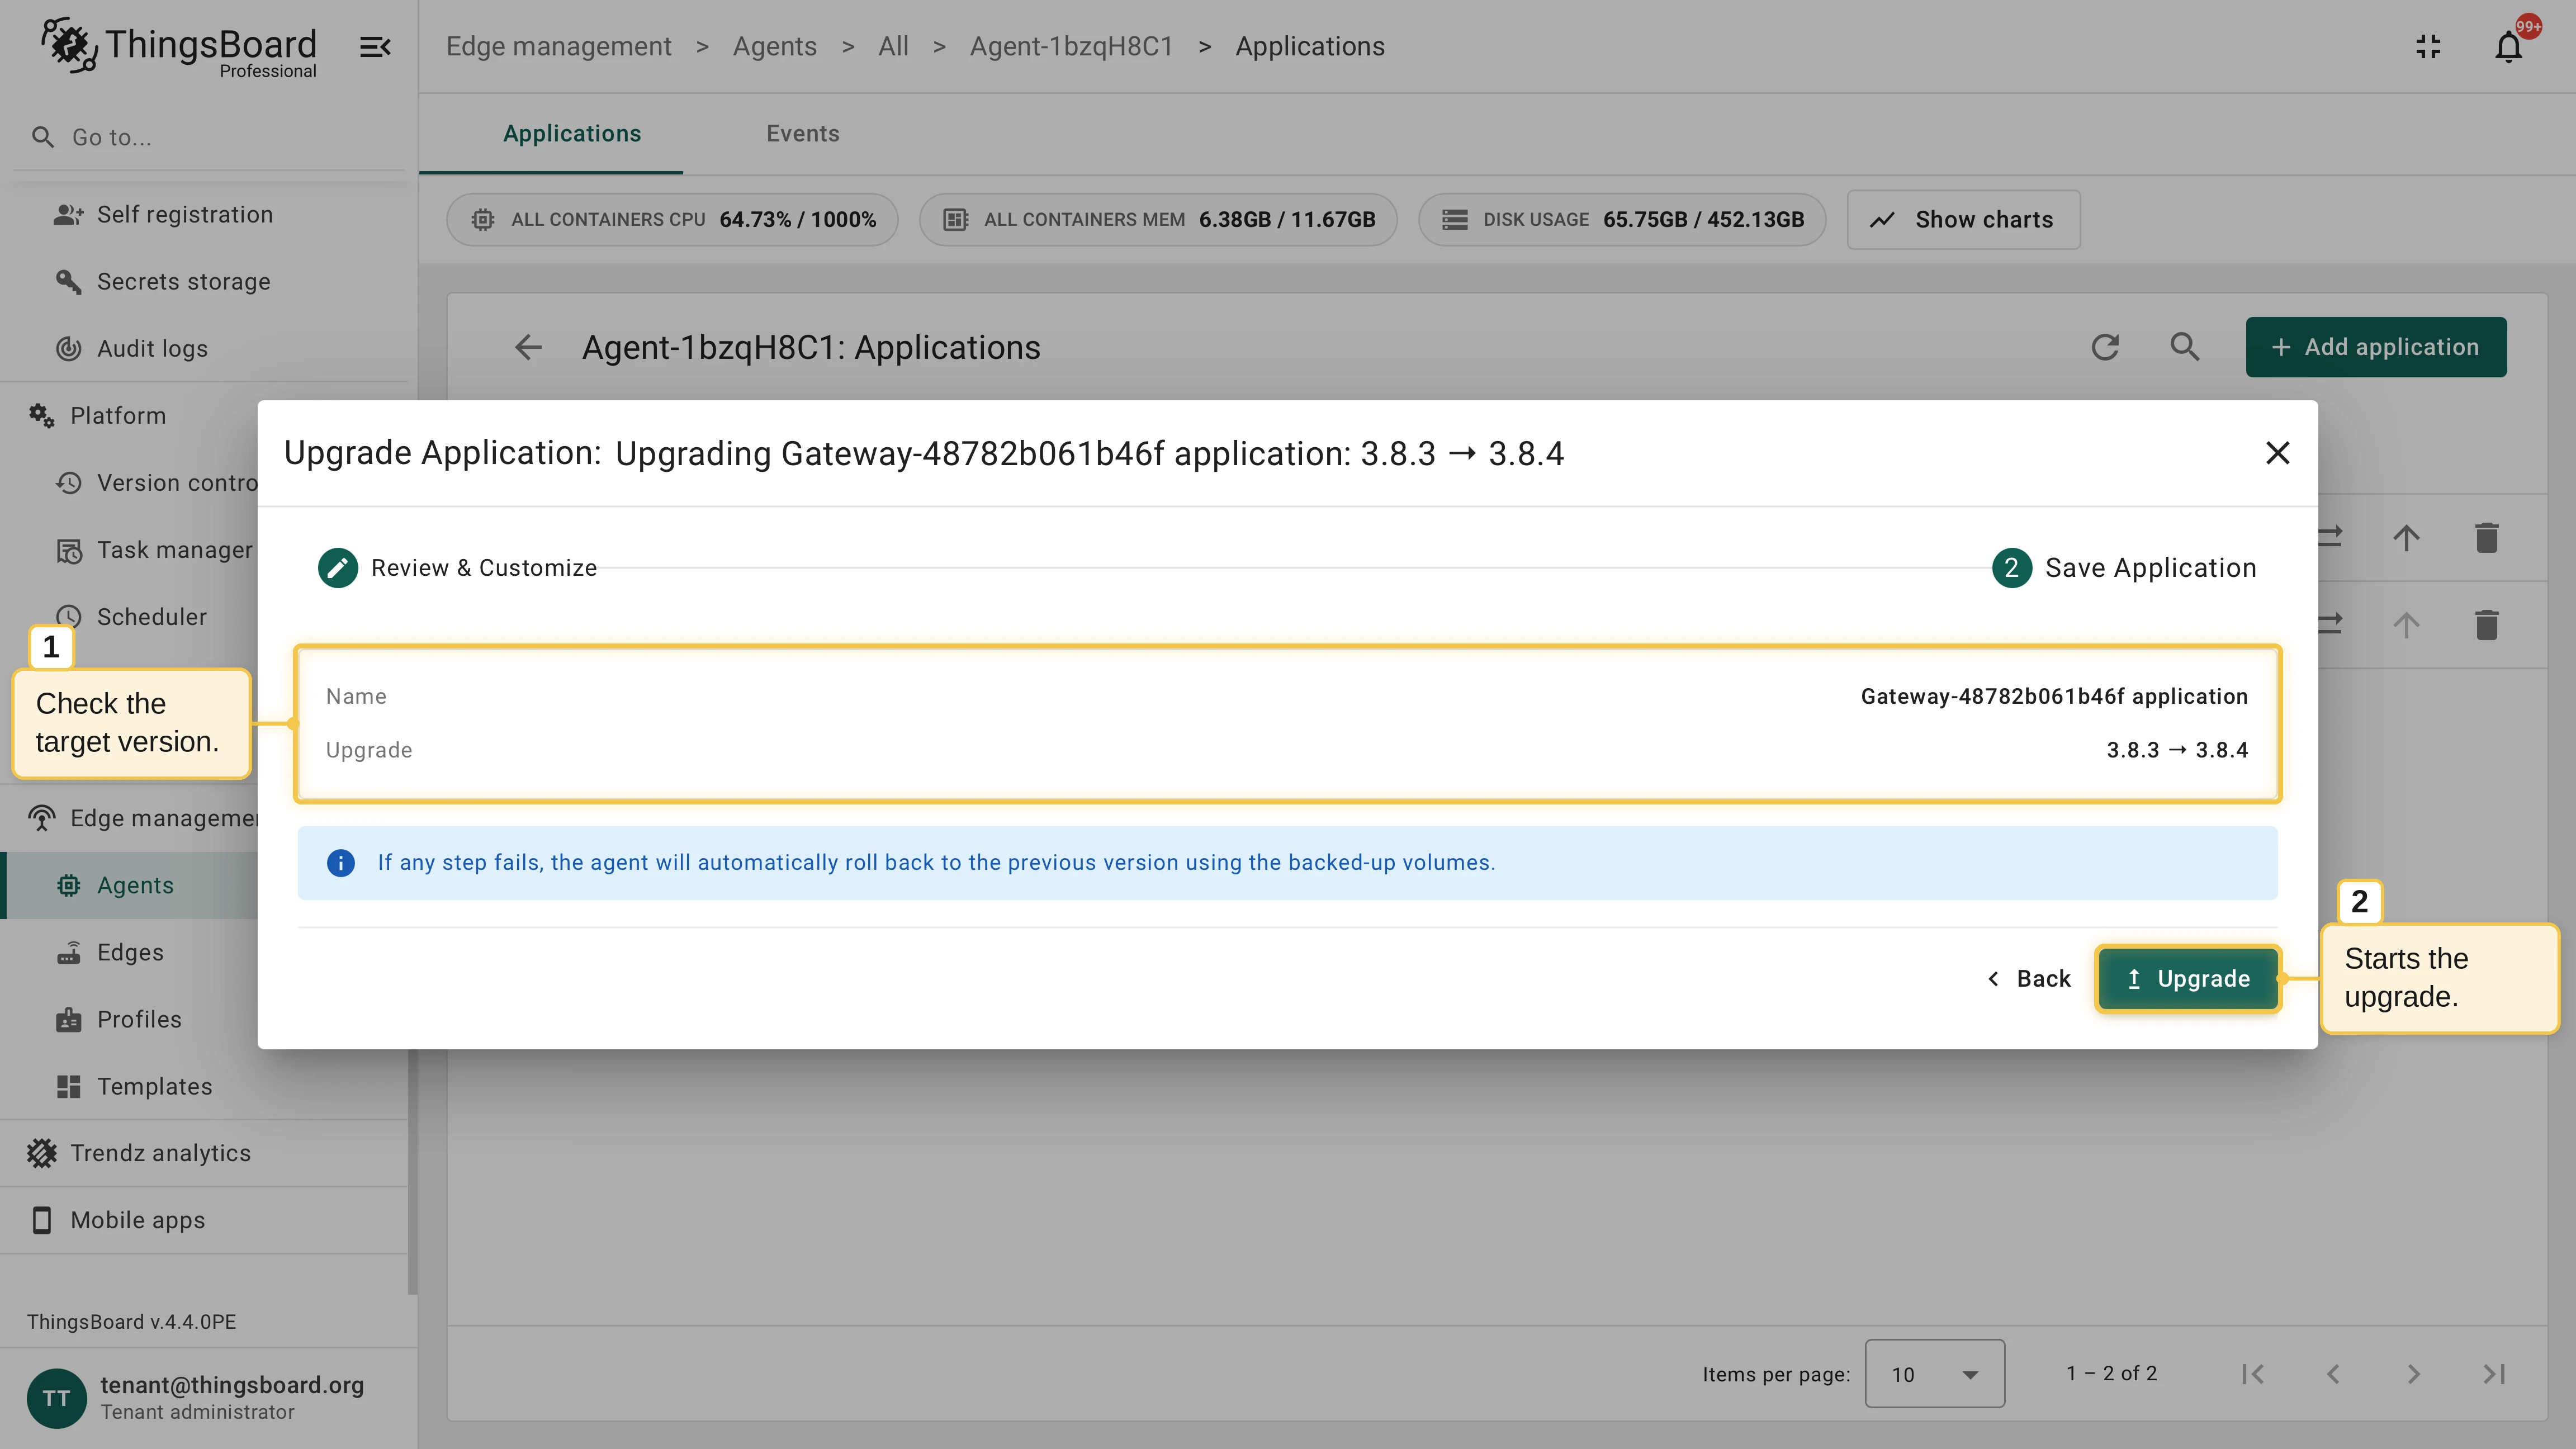
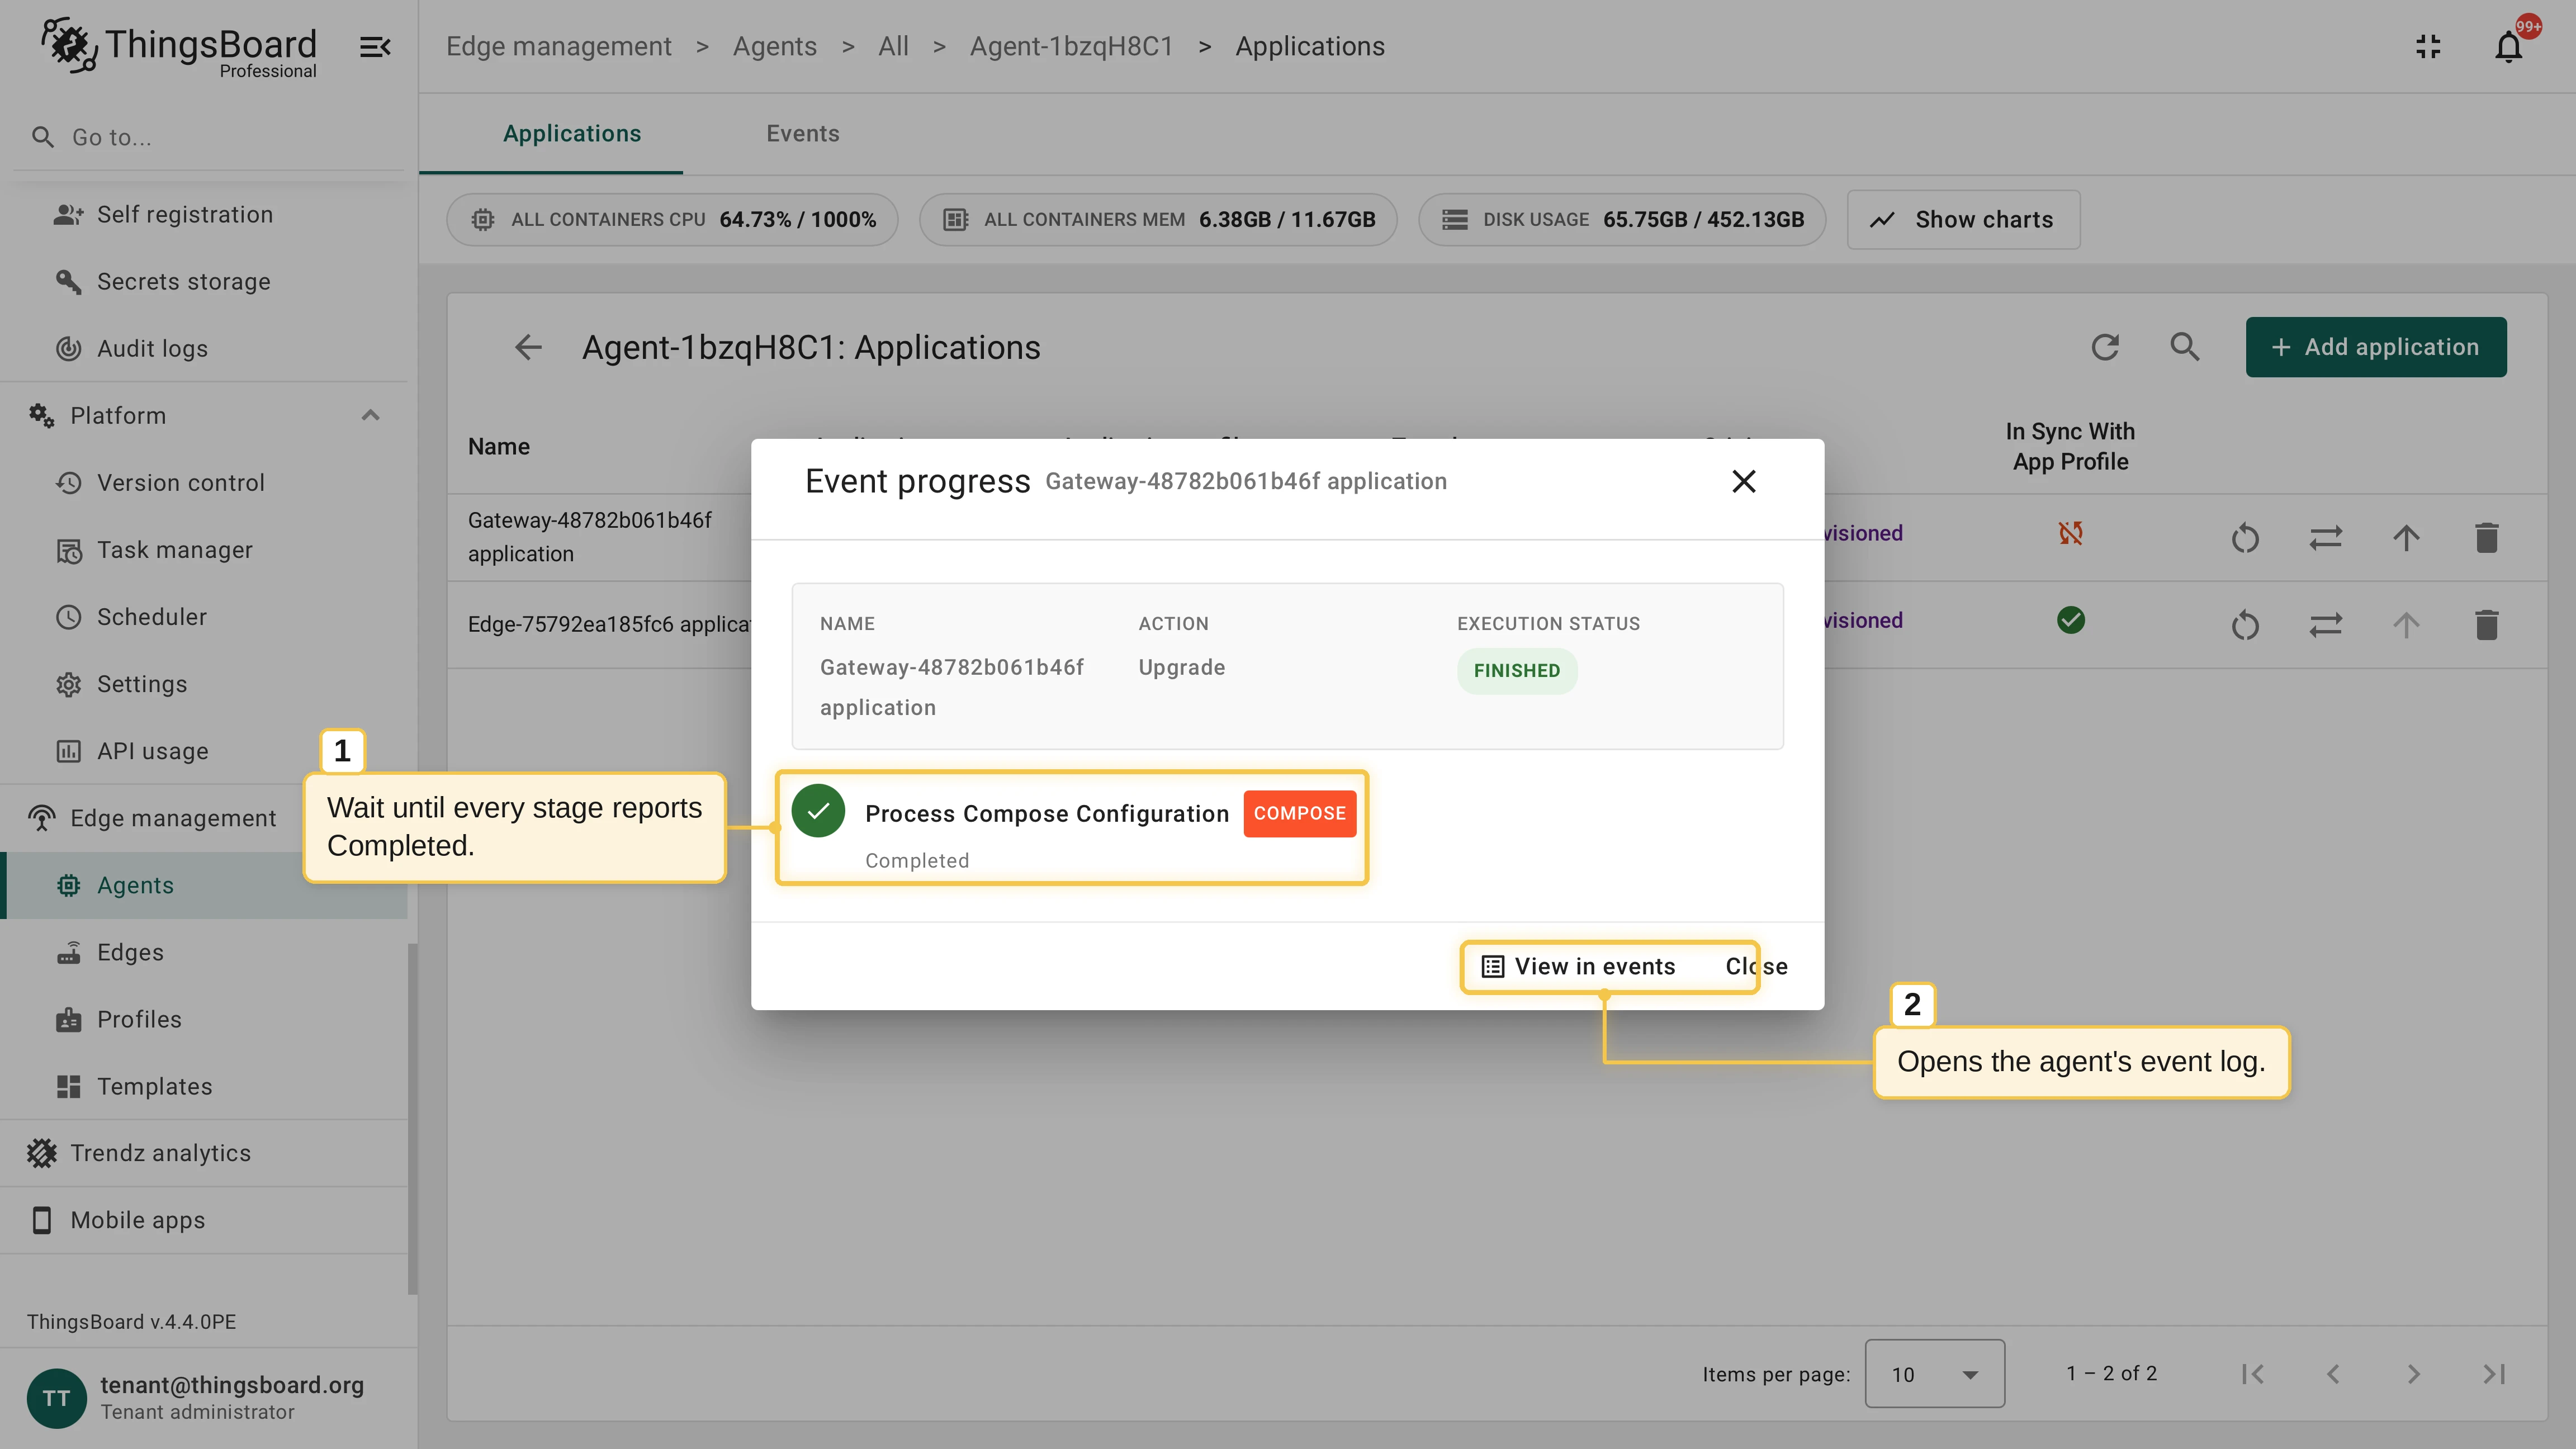
On Save Application, confirm the target version and click Upgrade. Wait in the Event progress dialog until every stage reports Completed.
Gateway configuration works the same as with any other installation: use the remote configuration feature or the Gateways dashboard.
Was this helpful?