Skip to content

Cookie preferences

We use cookies for our own analytics, to see how our campaigns perform and, if you allow it, to load content from other services such as the Google site search. We never sell your data. Necessary cookies keep the site working and cannot be switched off. See our Cookie Policy for details and our Privacy Policy for how we handle personal data.

Security, load balancing and remembering your cookie choice.

Show us which pages people read and how they find the site, so we can improve it (Google Analytics).

Show us which of our ad campaigns bring visitors to the site and remember the campaign or partner link you arrived from (Google Ads, partner program). We do not use these cookies to build advertising profiles.

Load the site search from Google when you use it. Google sets its own cookies and shows ads in the search results.

© 2026 The ThingsBoard Authors
Try for free

ThingsBoard Cloud

Choose your data region

Your data stays in the region you choose, for residency and compliance. No credit card required.

Rather run it yourself? Install on your own servers

Step 1. Create a new gateway device

First, add a gateway device to your ThingsBoard instance by following these steps:

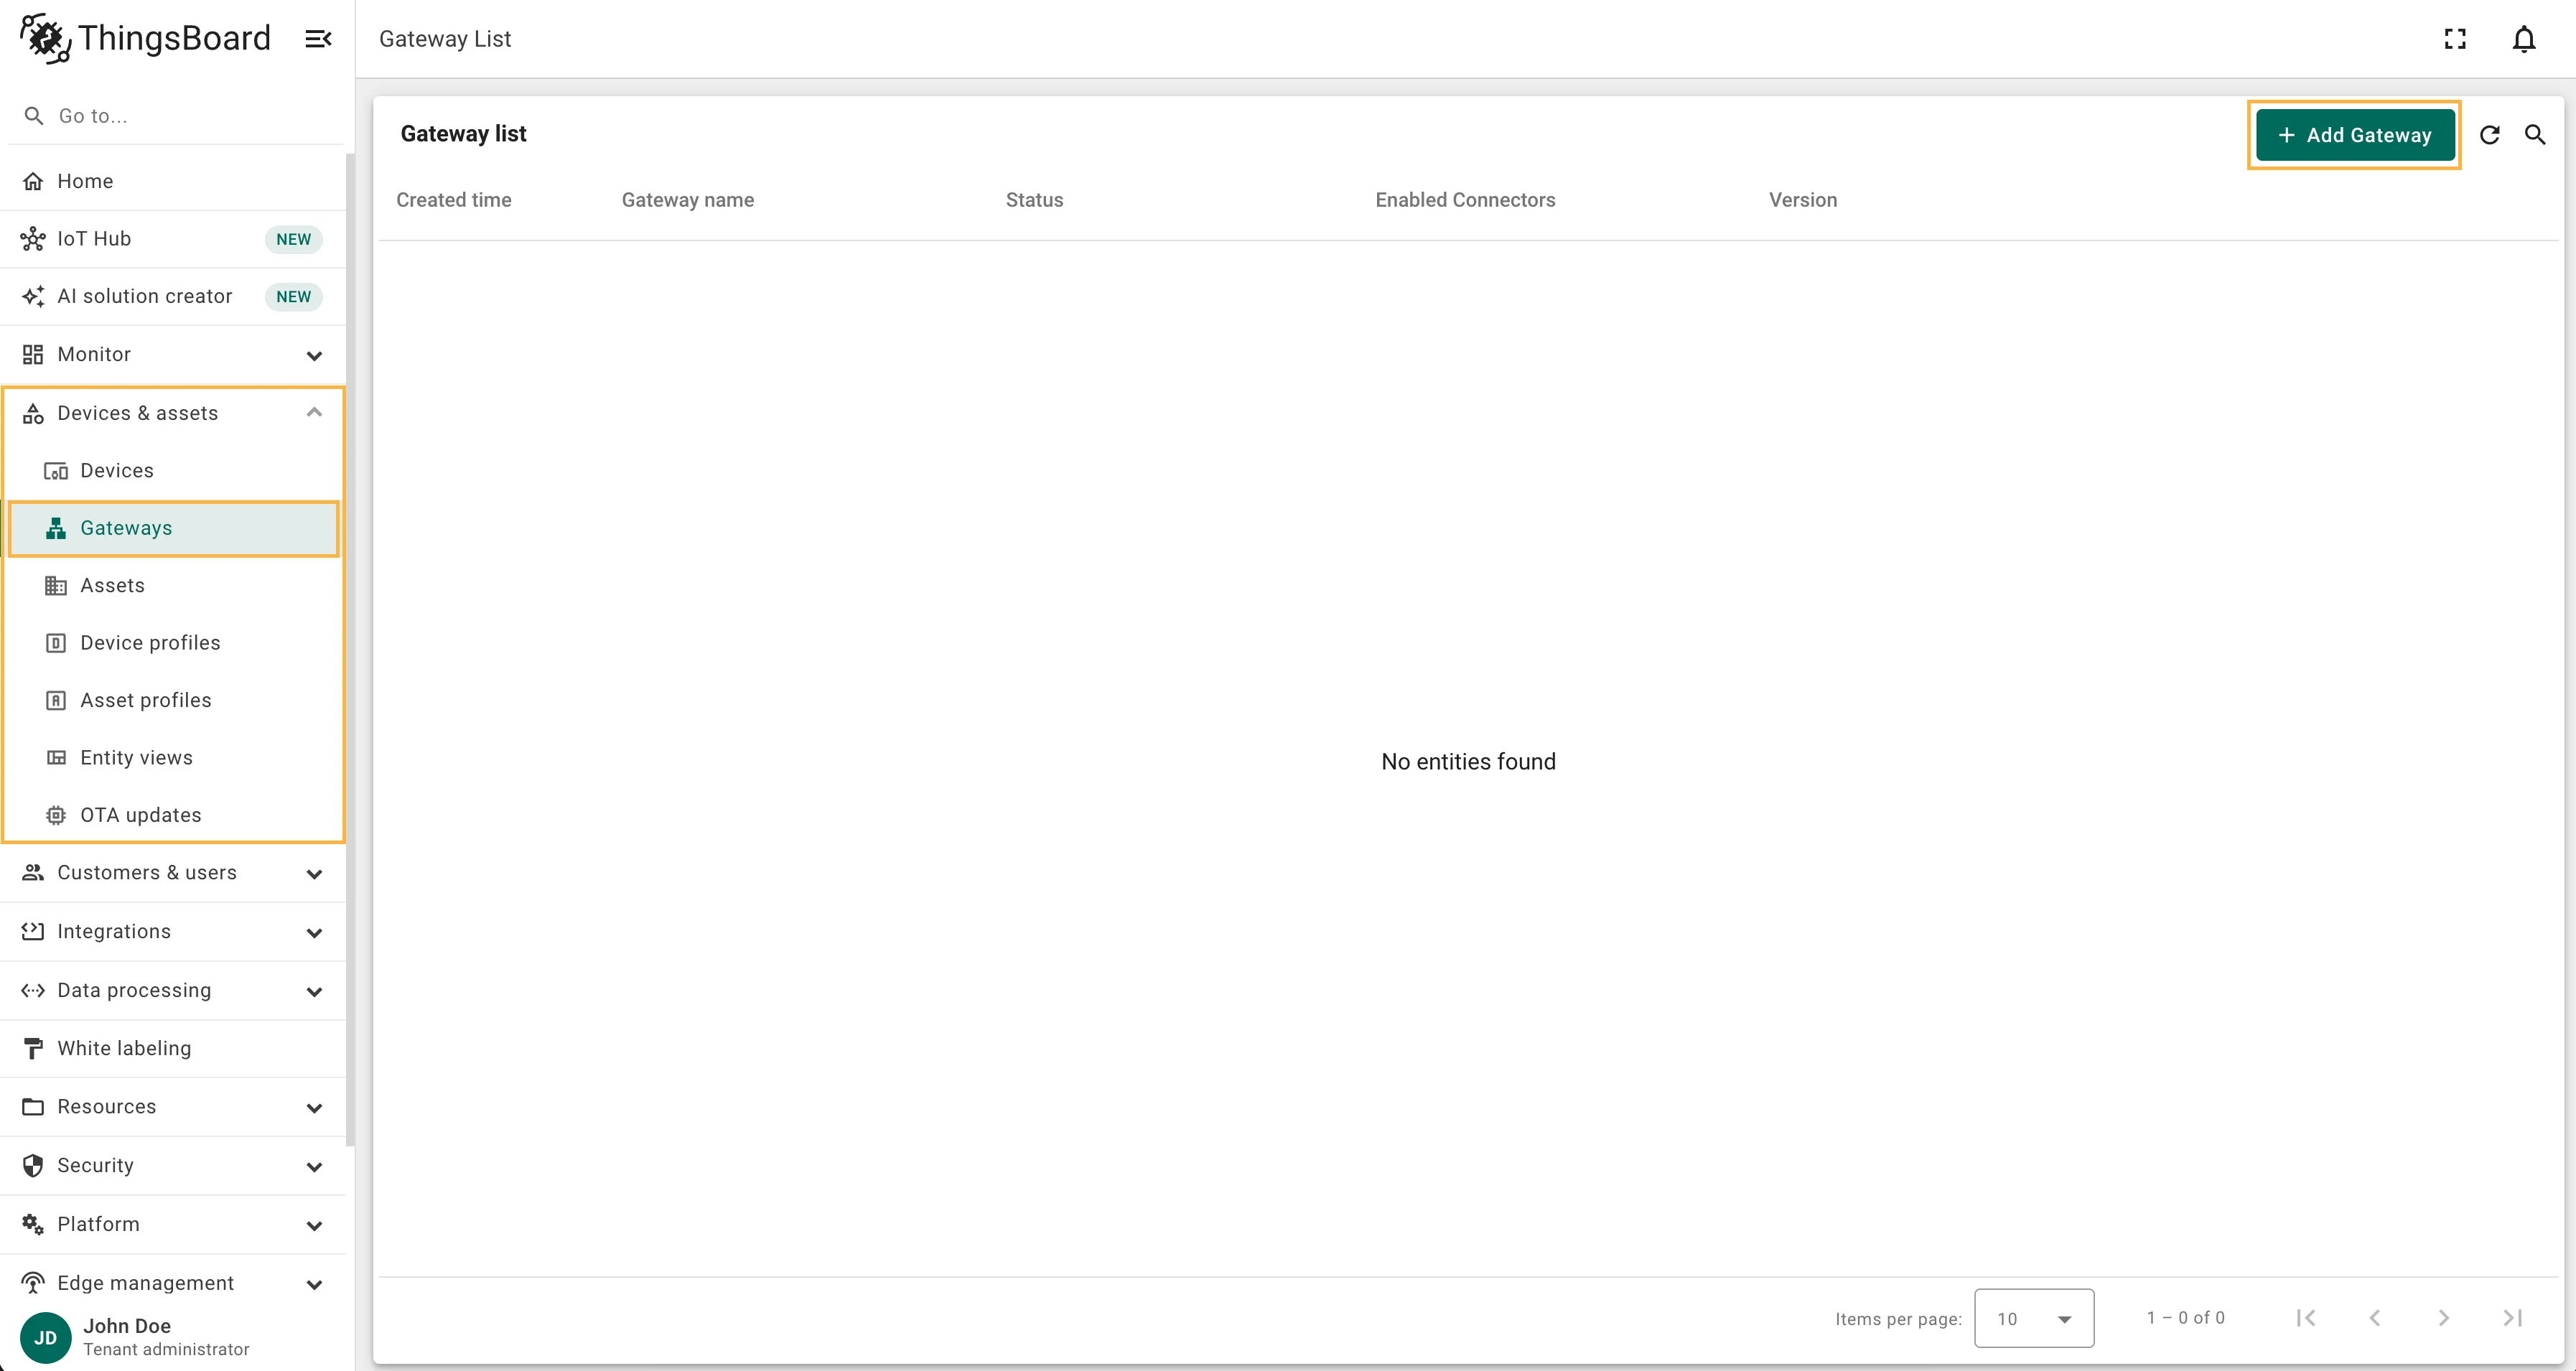
  1. Go to Devices & assets > Gateways tab.
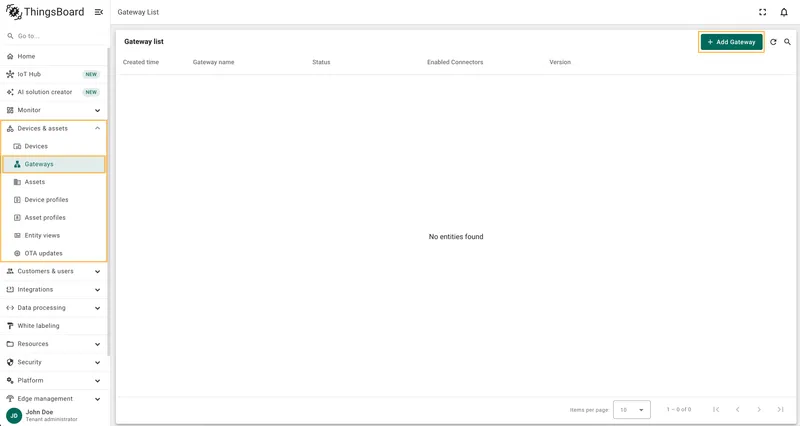
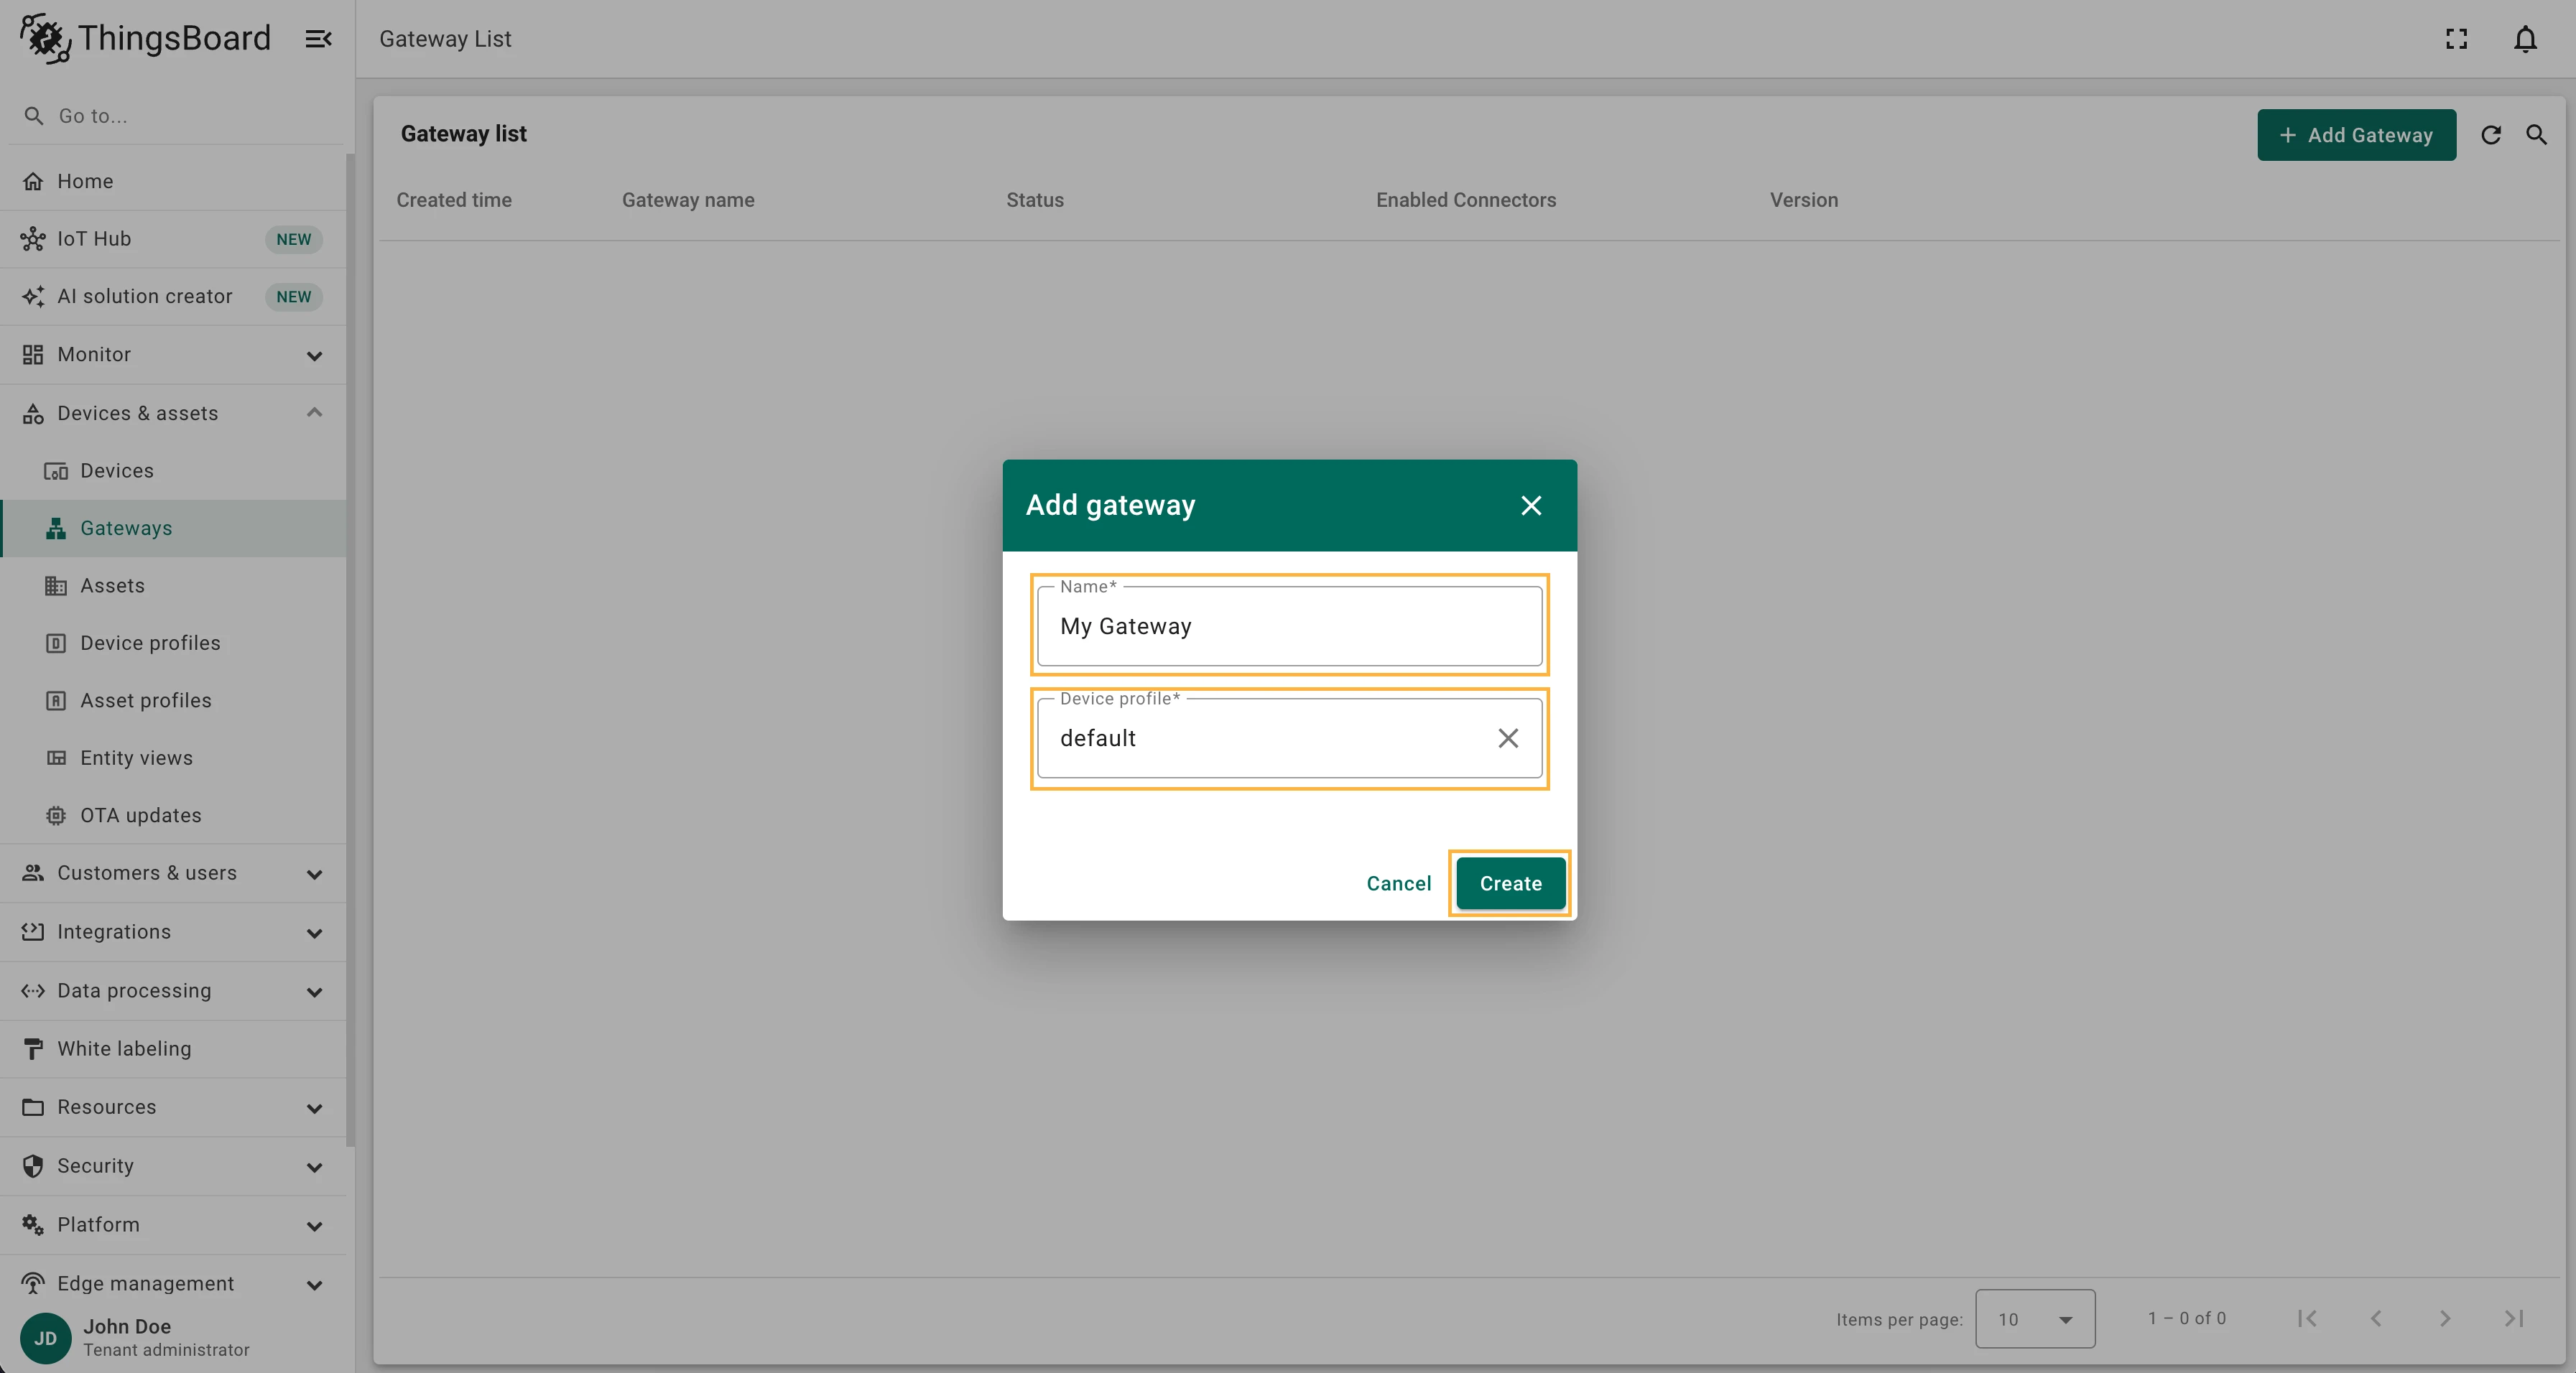
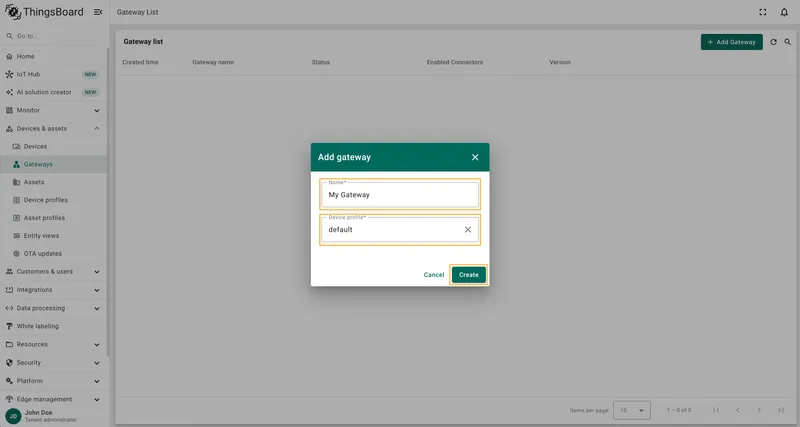
  2. Click the + button, enter the gateway device name (e.g., “My Gateway”), and select the device profile. Click on Create button.
To launch the gateway, use the following steps:

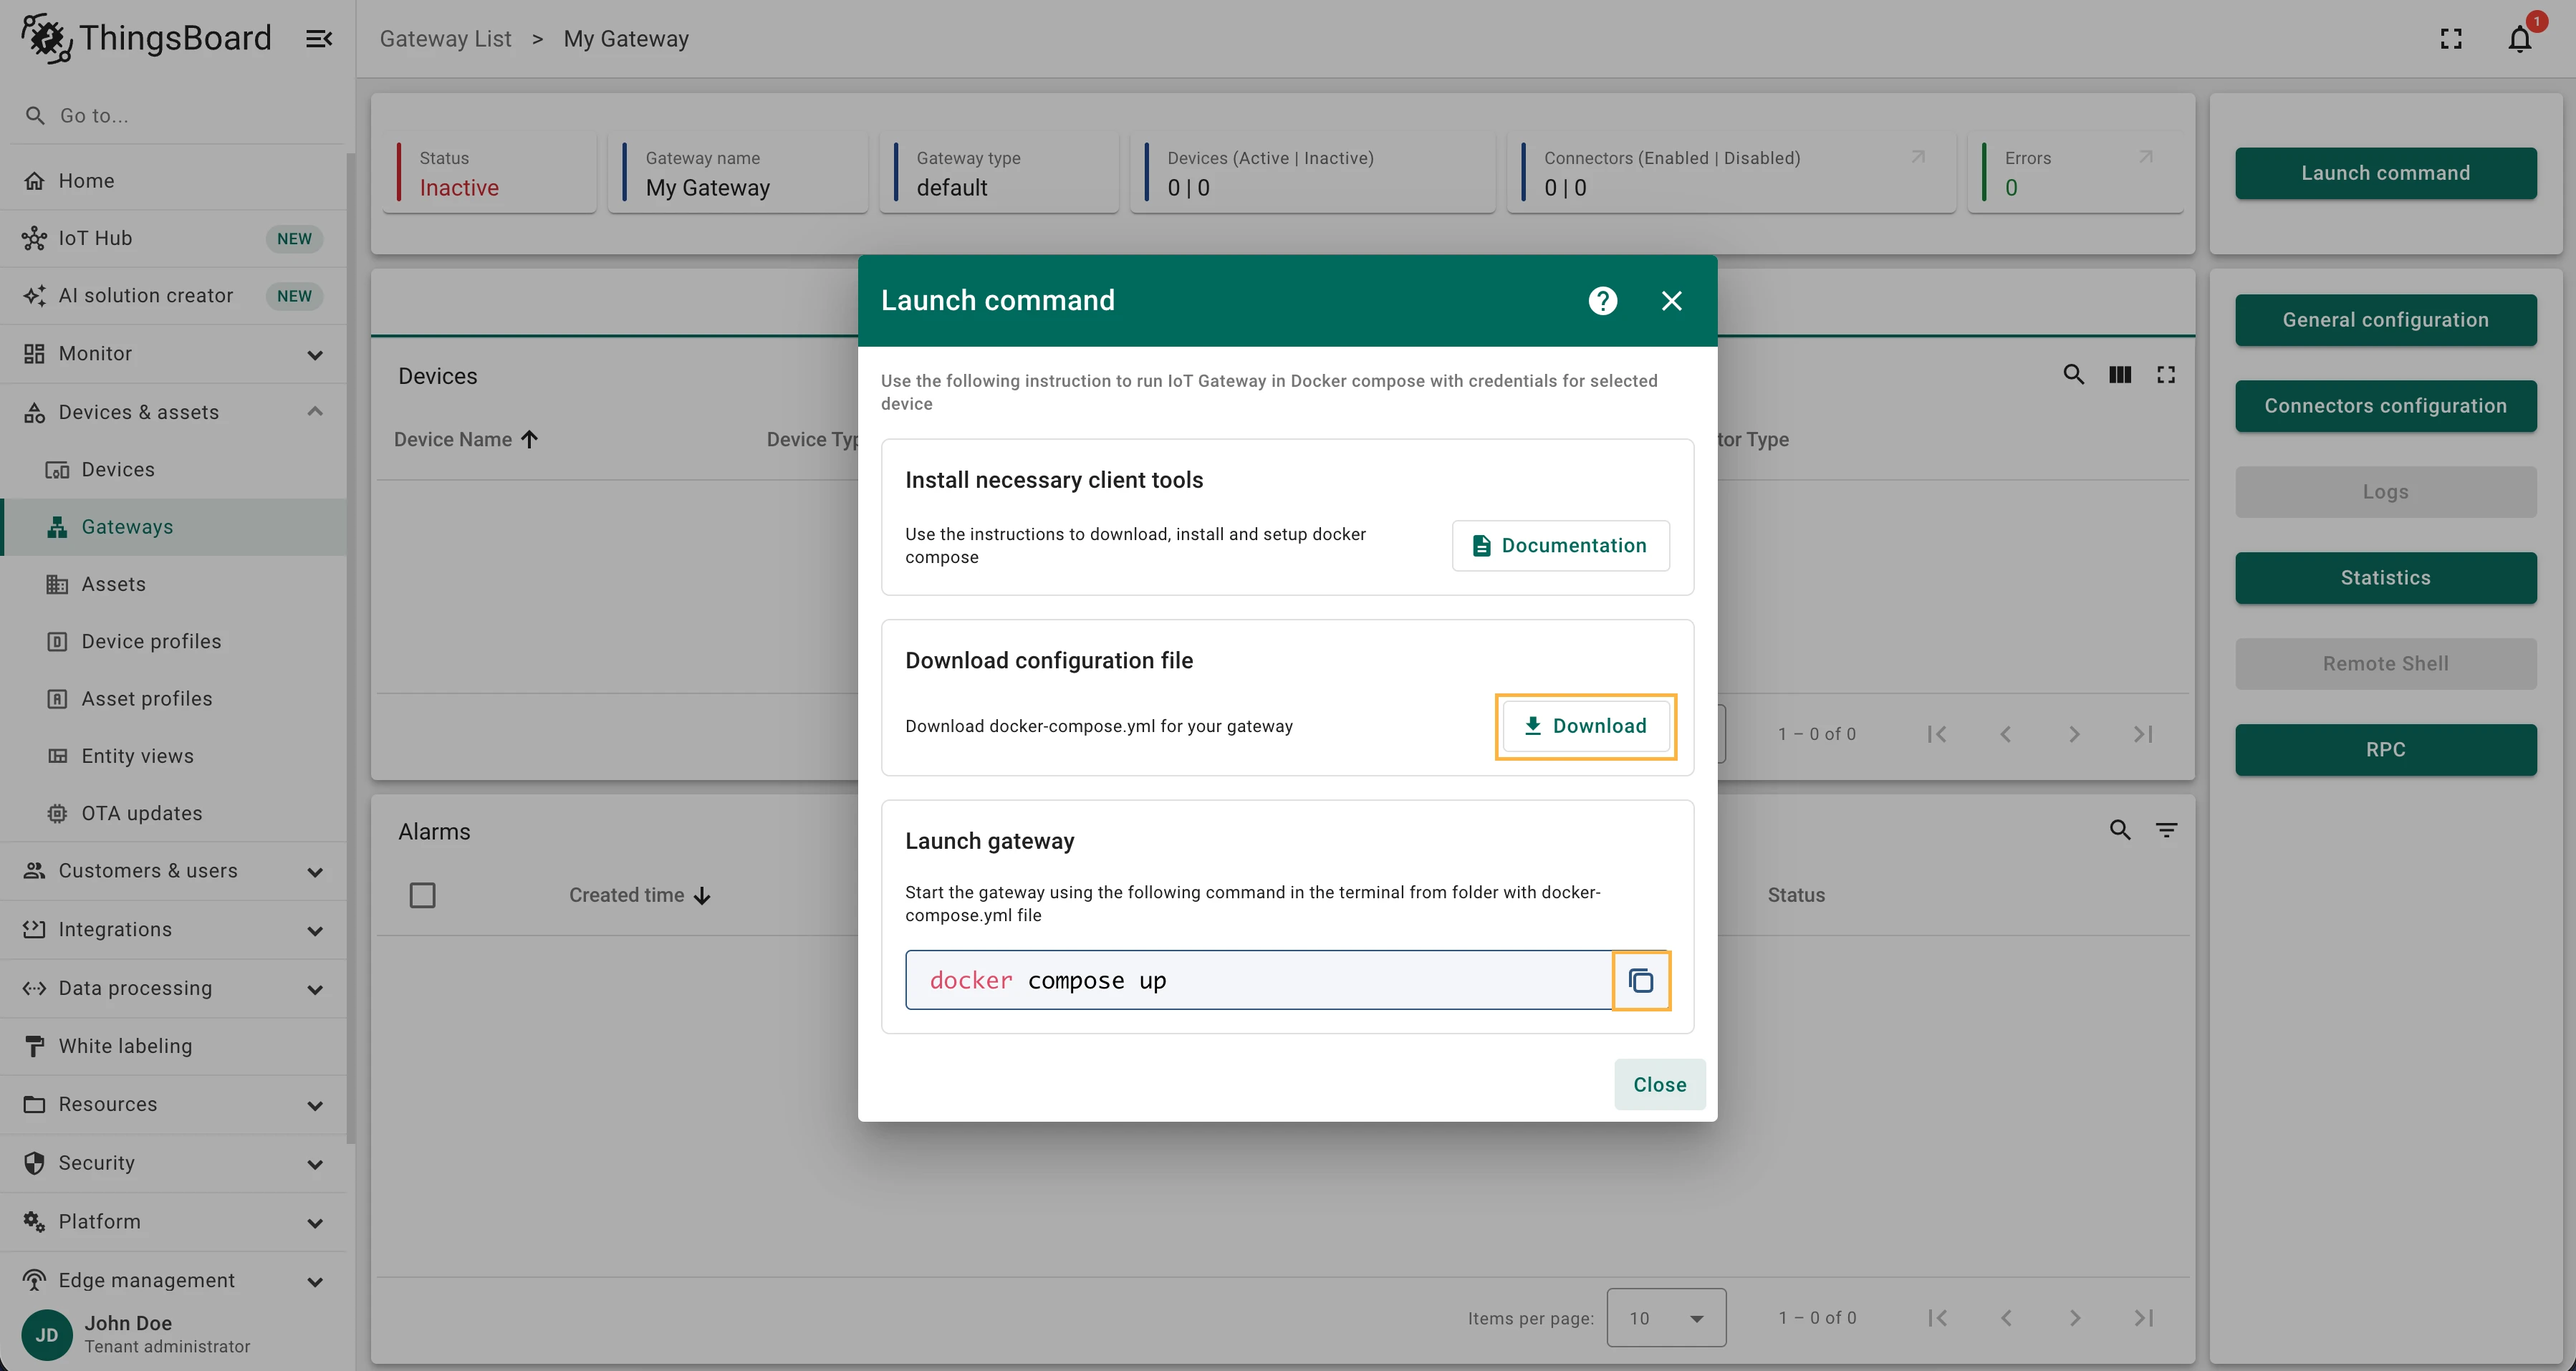
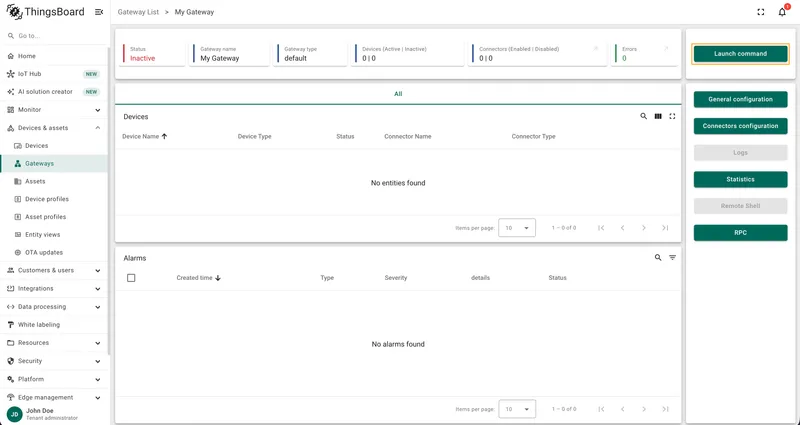
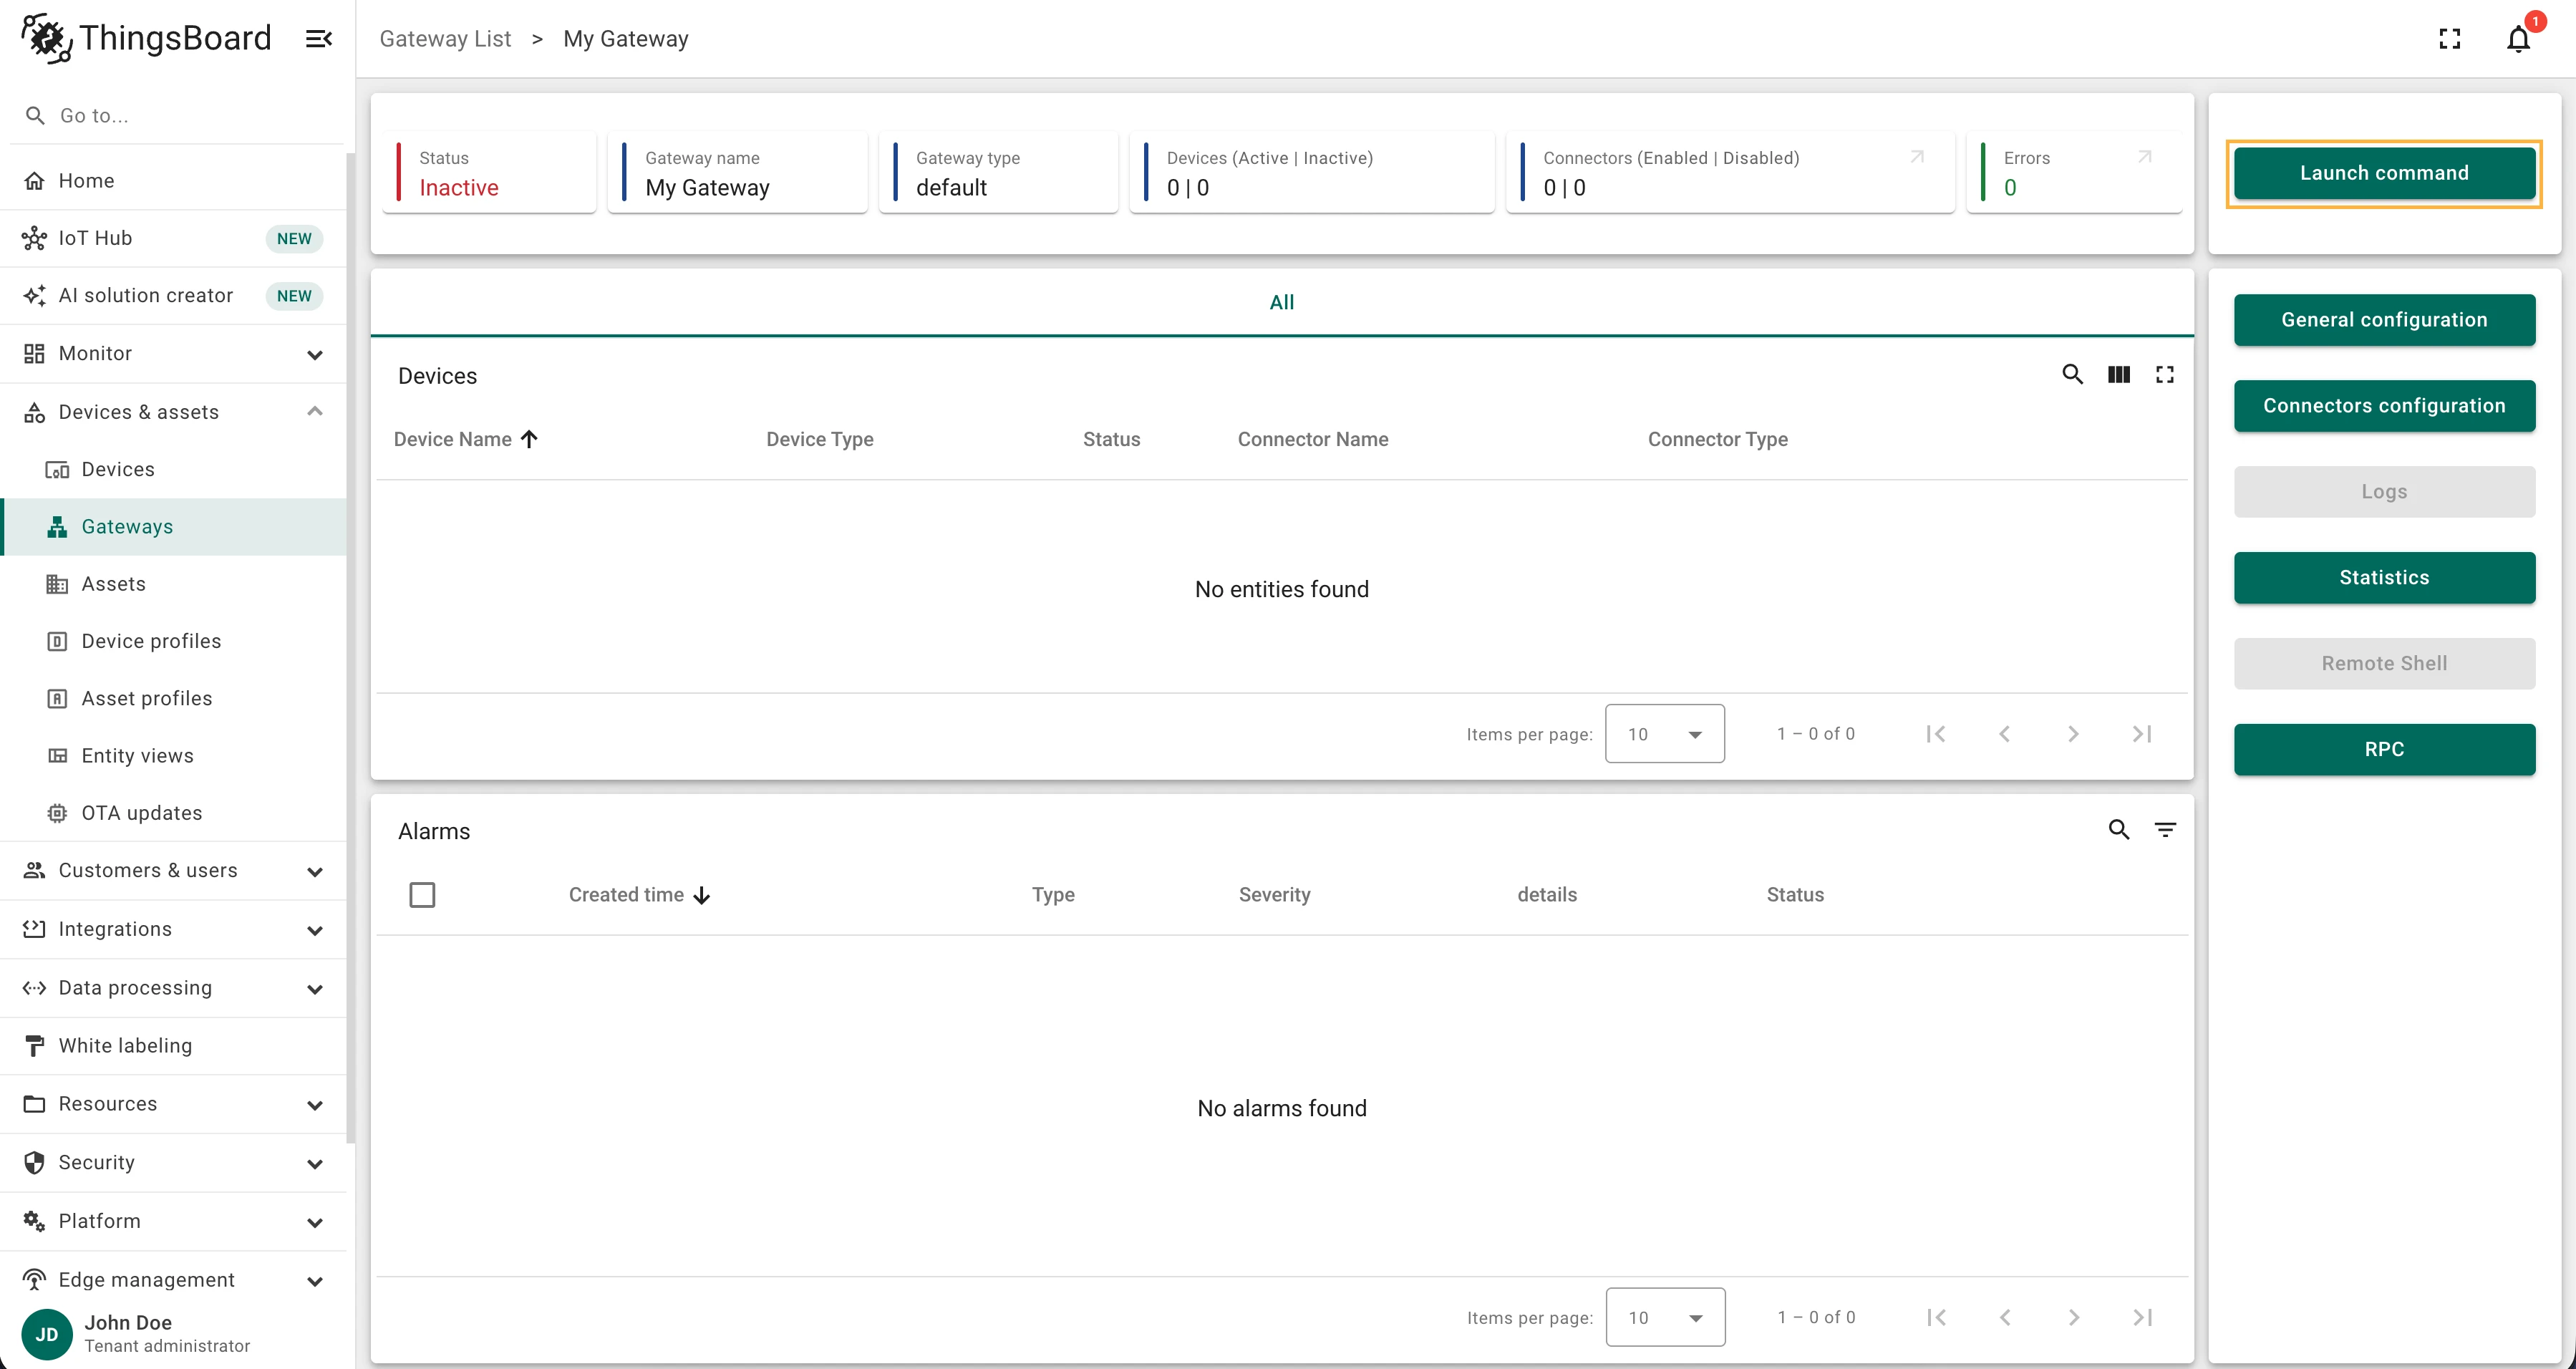
  1. Select and click on the newly created gateway, then click on the Launch command button in the top right corner.
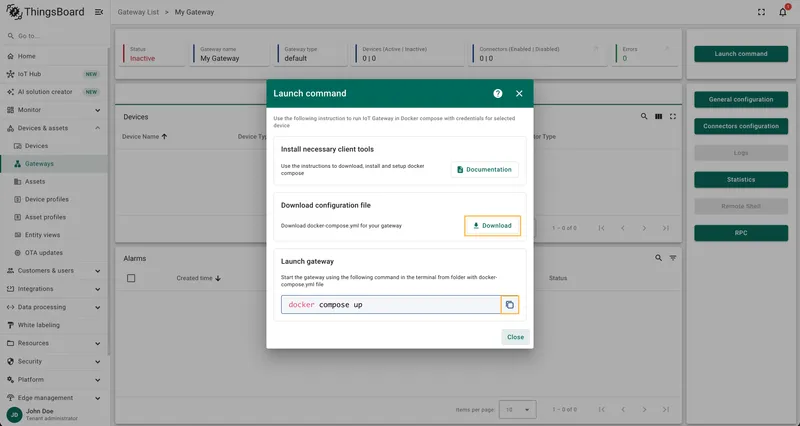
  2. Click to download docker-compose.yml file to your PC, copy the command and execute it in your terminal.
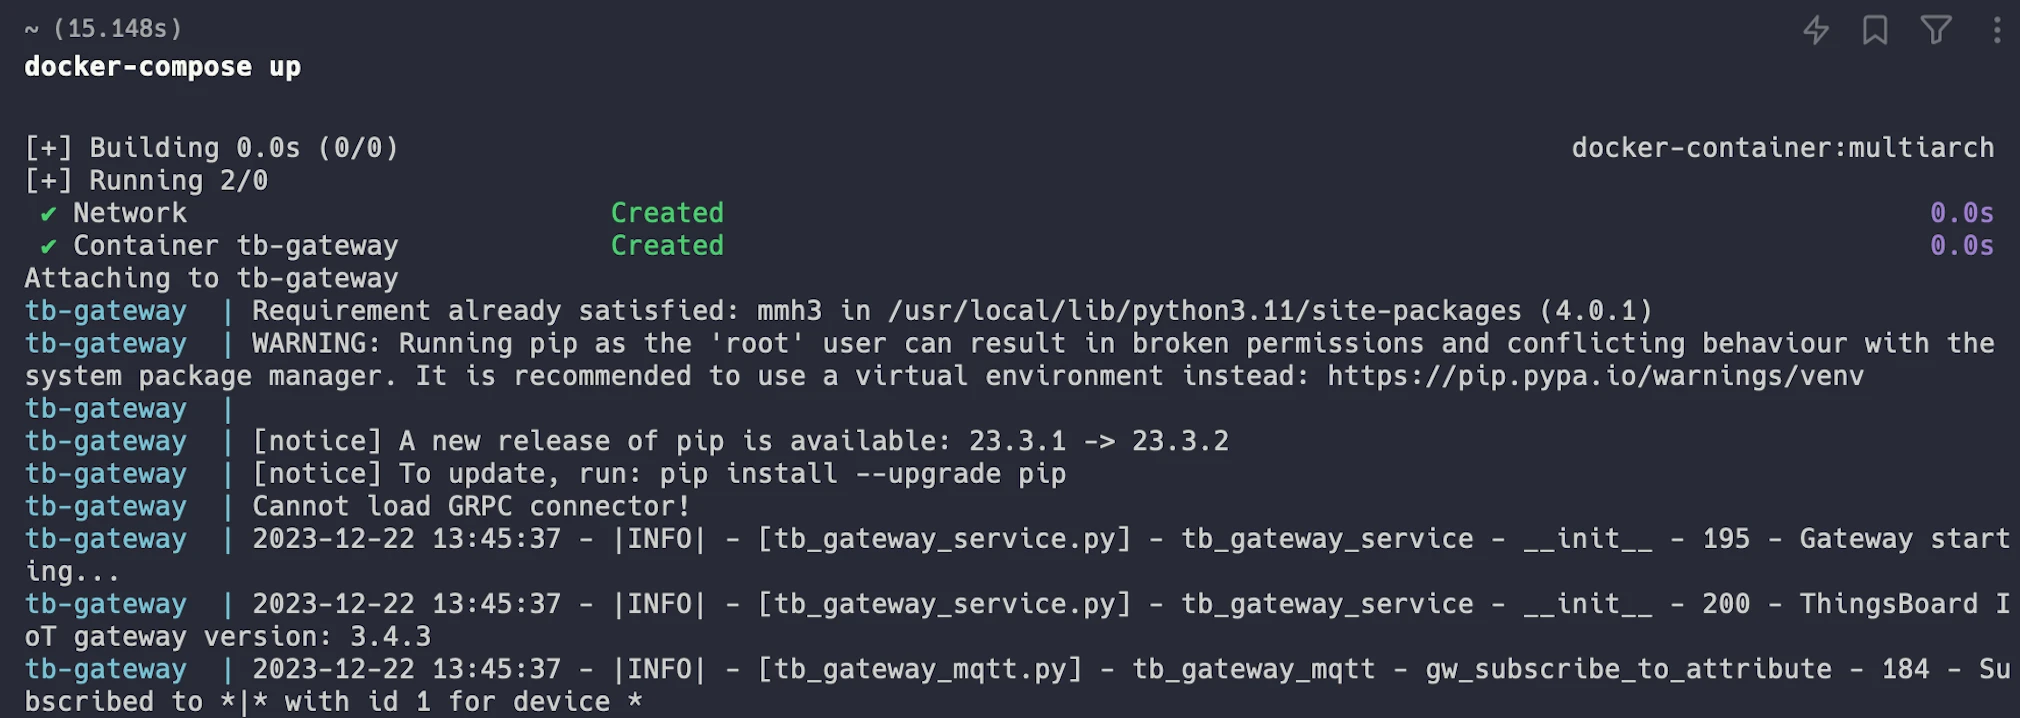
After running the gateway Docker image, you can see the following logs in your terminal: