In ThingsBoard, a User is an entity with credentials to access the platform.
Users in ThingsBoard Professional Edition benefit from an extended access control model that enables the creation of flexible, multi-level organizational structures with fine-grained control over entities, resources, dashboards, and more.
Key characteristics of users:
- Ownership: Each user belongs to a specific Tenant or Customer.
- Access control: A Role-Based Access Control (RBAC) model defines user permissions, including rights to read, write, and manage entities, resources, dashboards, and more.
- User groups: A user can belong to one or more user groups, which simplifies bulk permission management.
This model allows ThingsBoard to scale efficiently for large organizations and IoT projects with multiple users and complex access requirements.
Creating new user
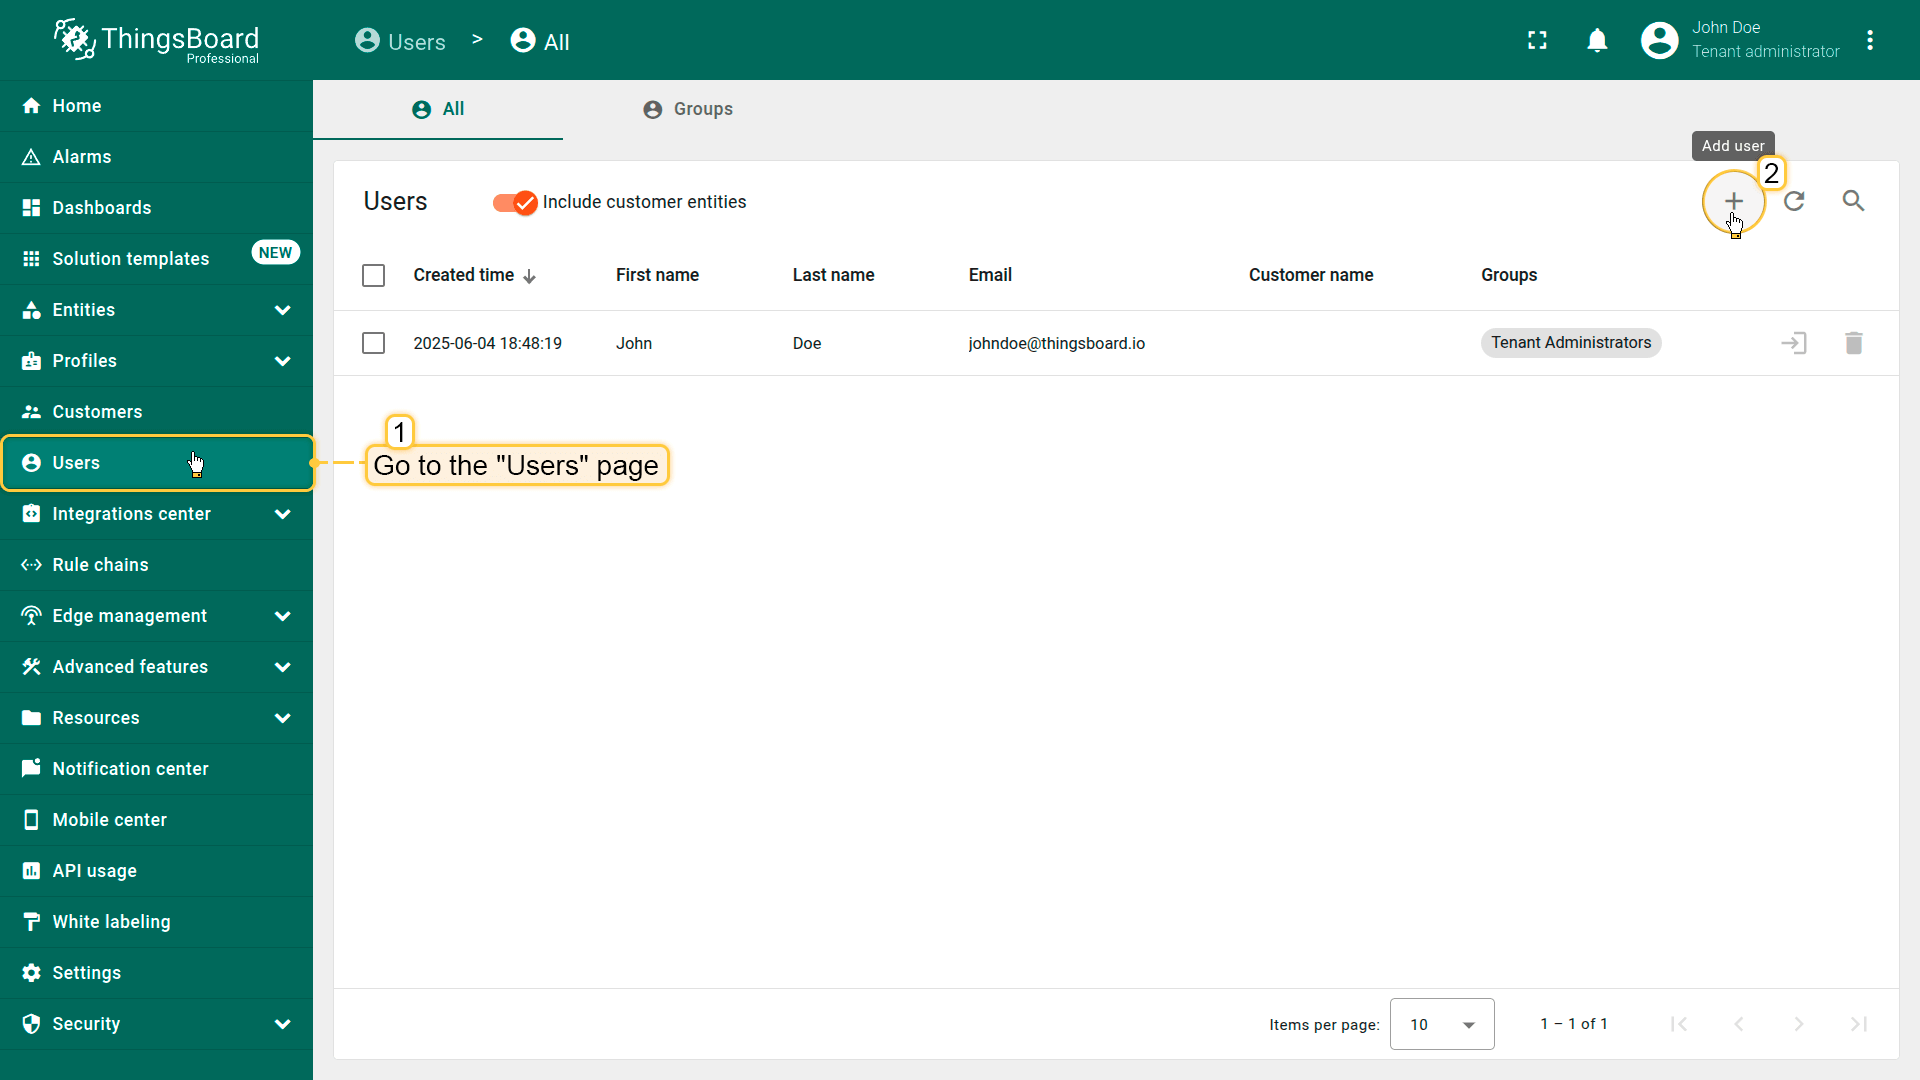
To create a new user in ThingsBoard:
- Log in as a Tenant Administrator or Customer Administrator.
- Navigate to the “Users” section from the left-hand menu.
- Click the “Add user” button in the top-right corner.
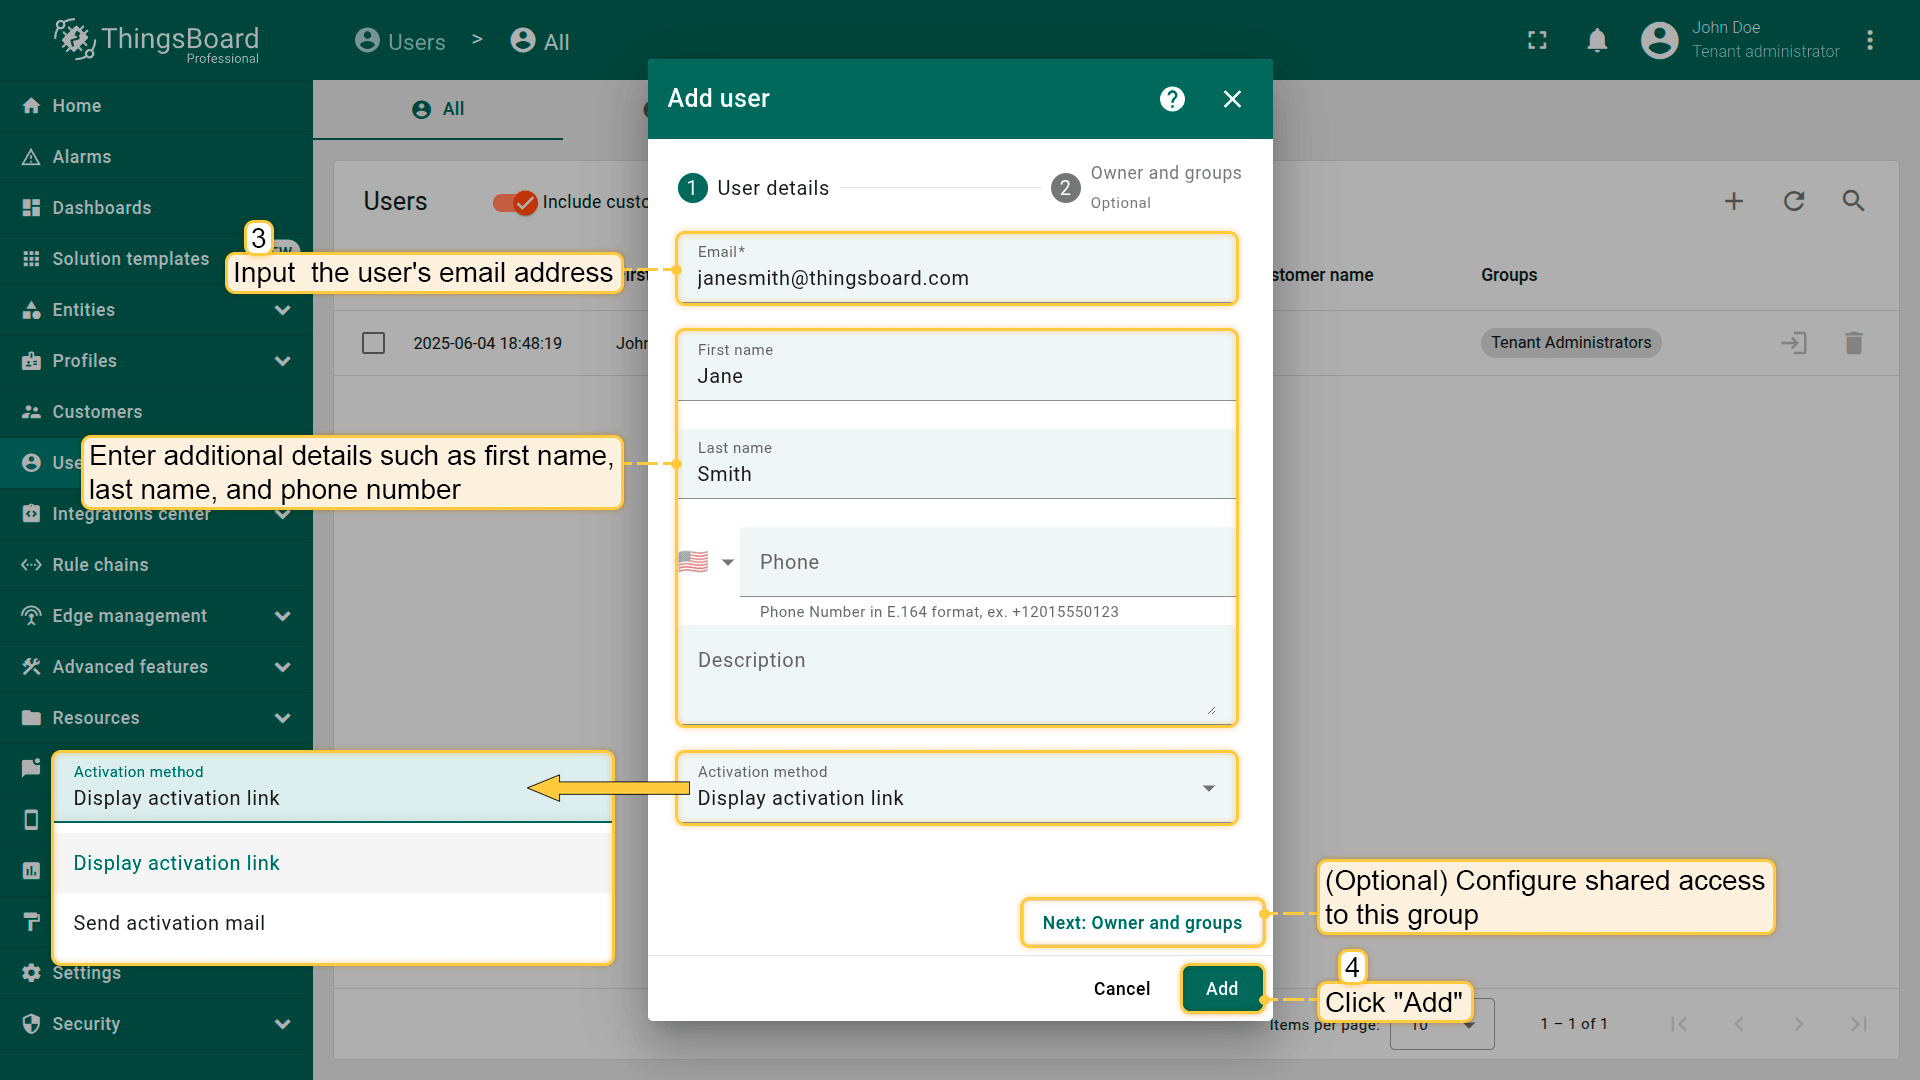
- Fill in the user form:
- Email: the user's email address (used as the login username).
- Optional fields: enter additional details such as first name, last name, and phone number.
- (Optional) Adjust the activation method:
- Display activation link – generates an activation URL that must be manually copied and sent to the user so they can activate their account.
- Send activation email – sends an email invitation to the user with a link to set their password.
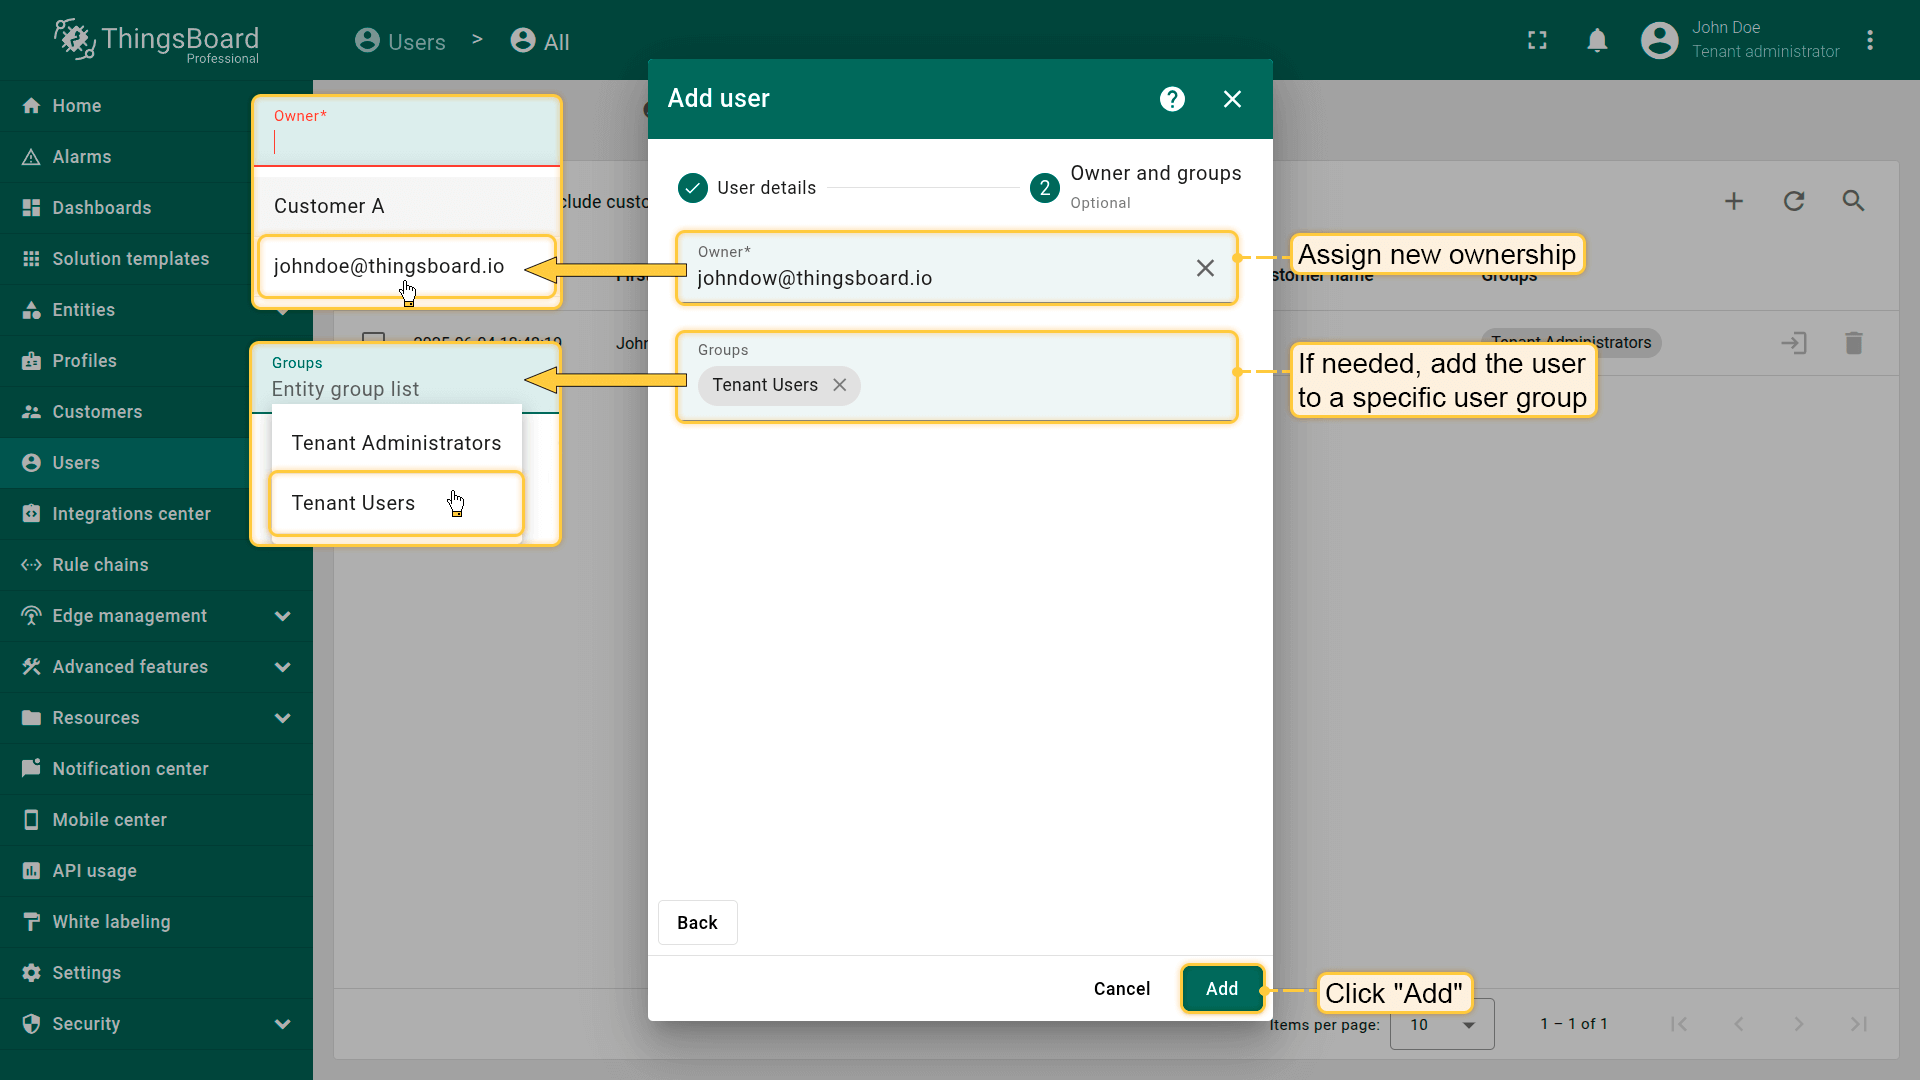
- (Optional) Assign ownership and place the user into a specific user group with the appropriate permissions.
- Click “Add” to create the user.
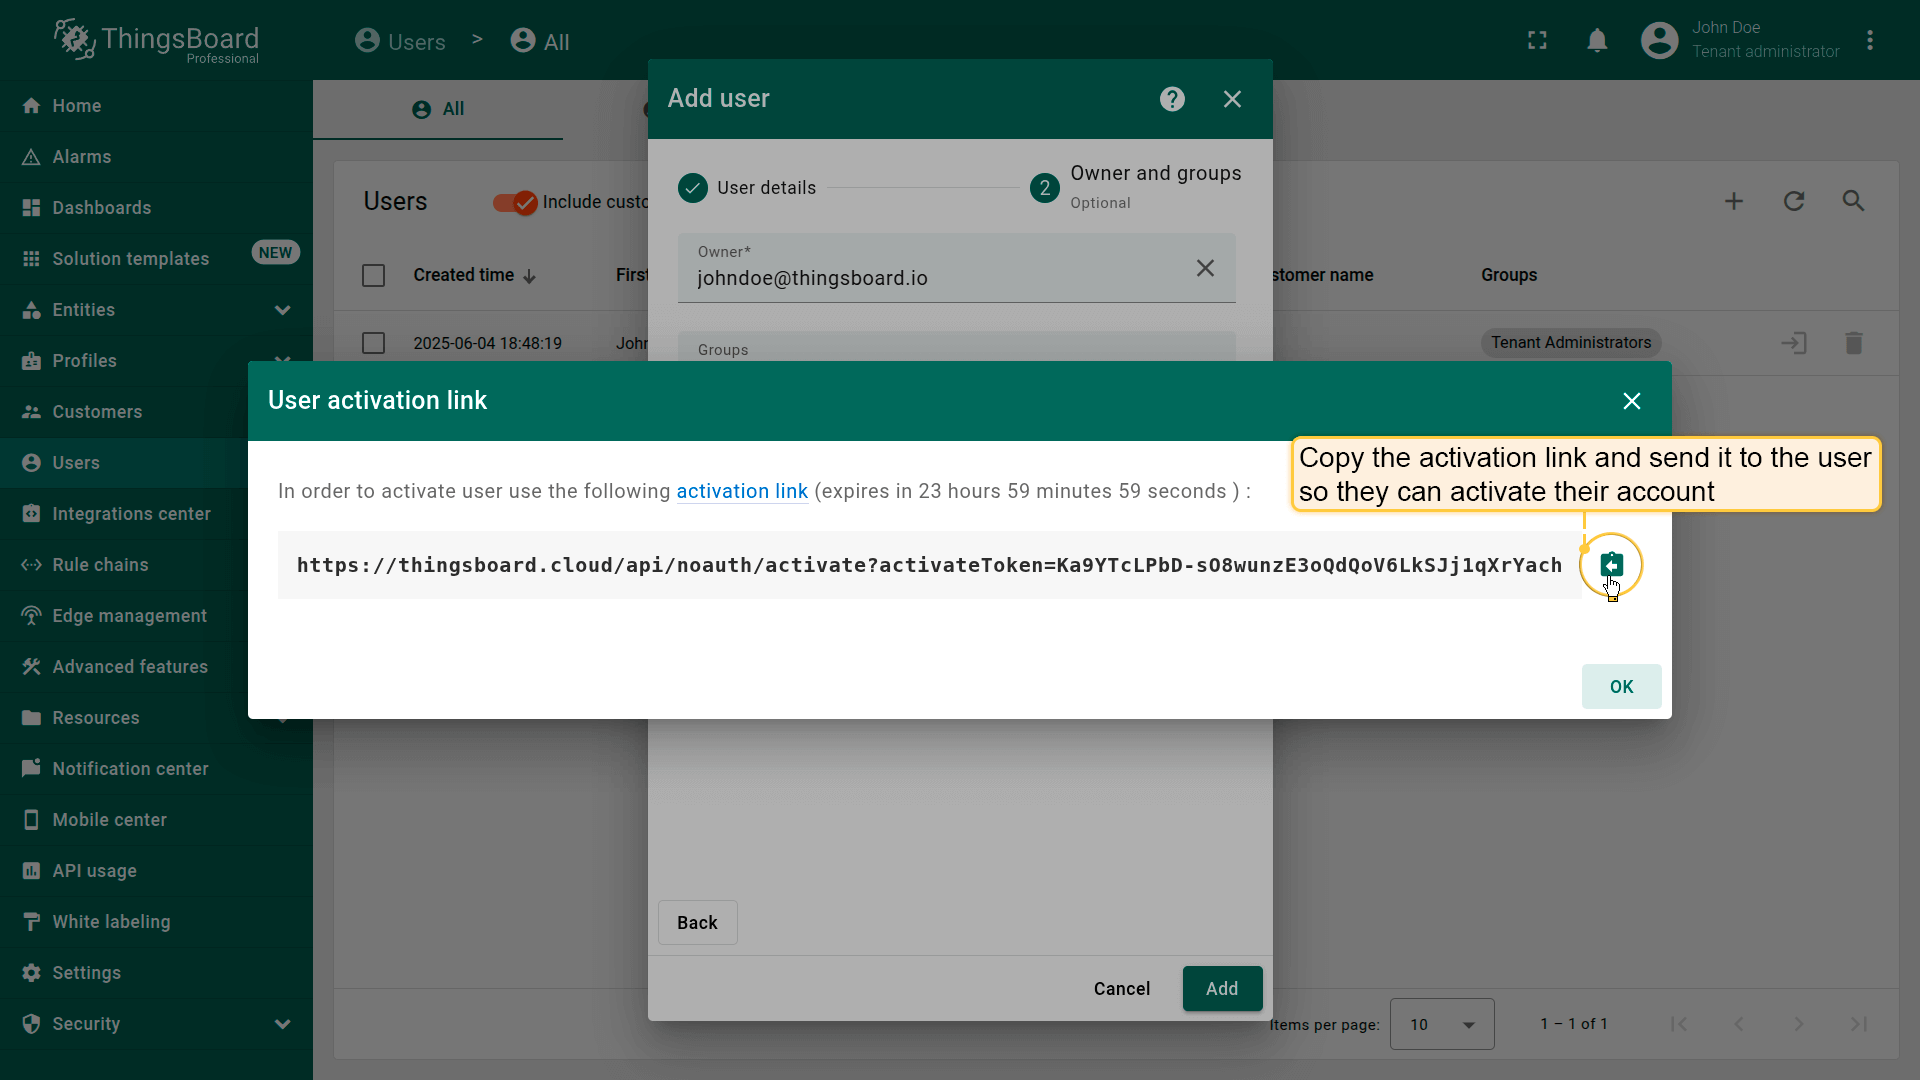
User has been created.
If you selected the “Display activation link” option, you need to copy the activation link and send it to the user so they can activate their account.
(Optional) Change ownership and assign permissions.
Log in as user
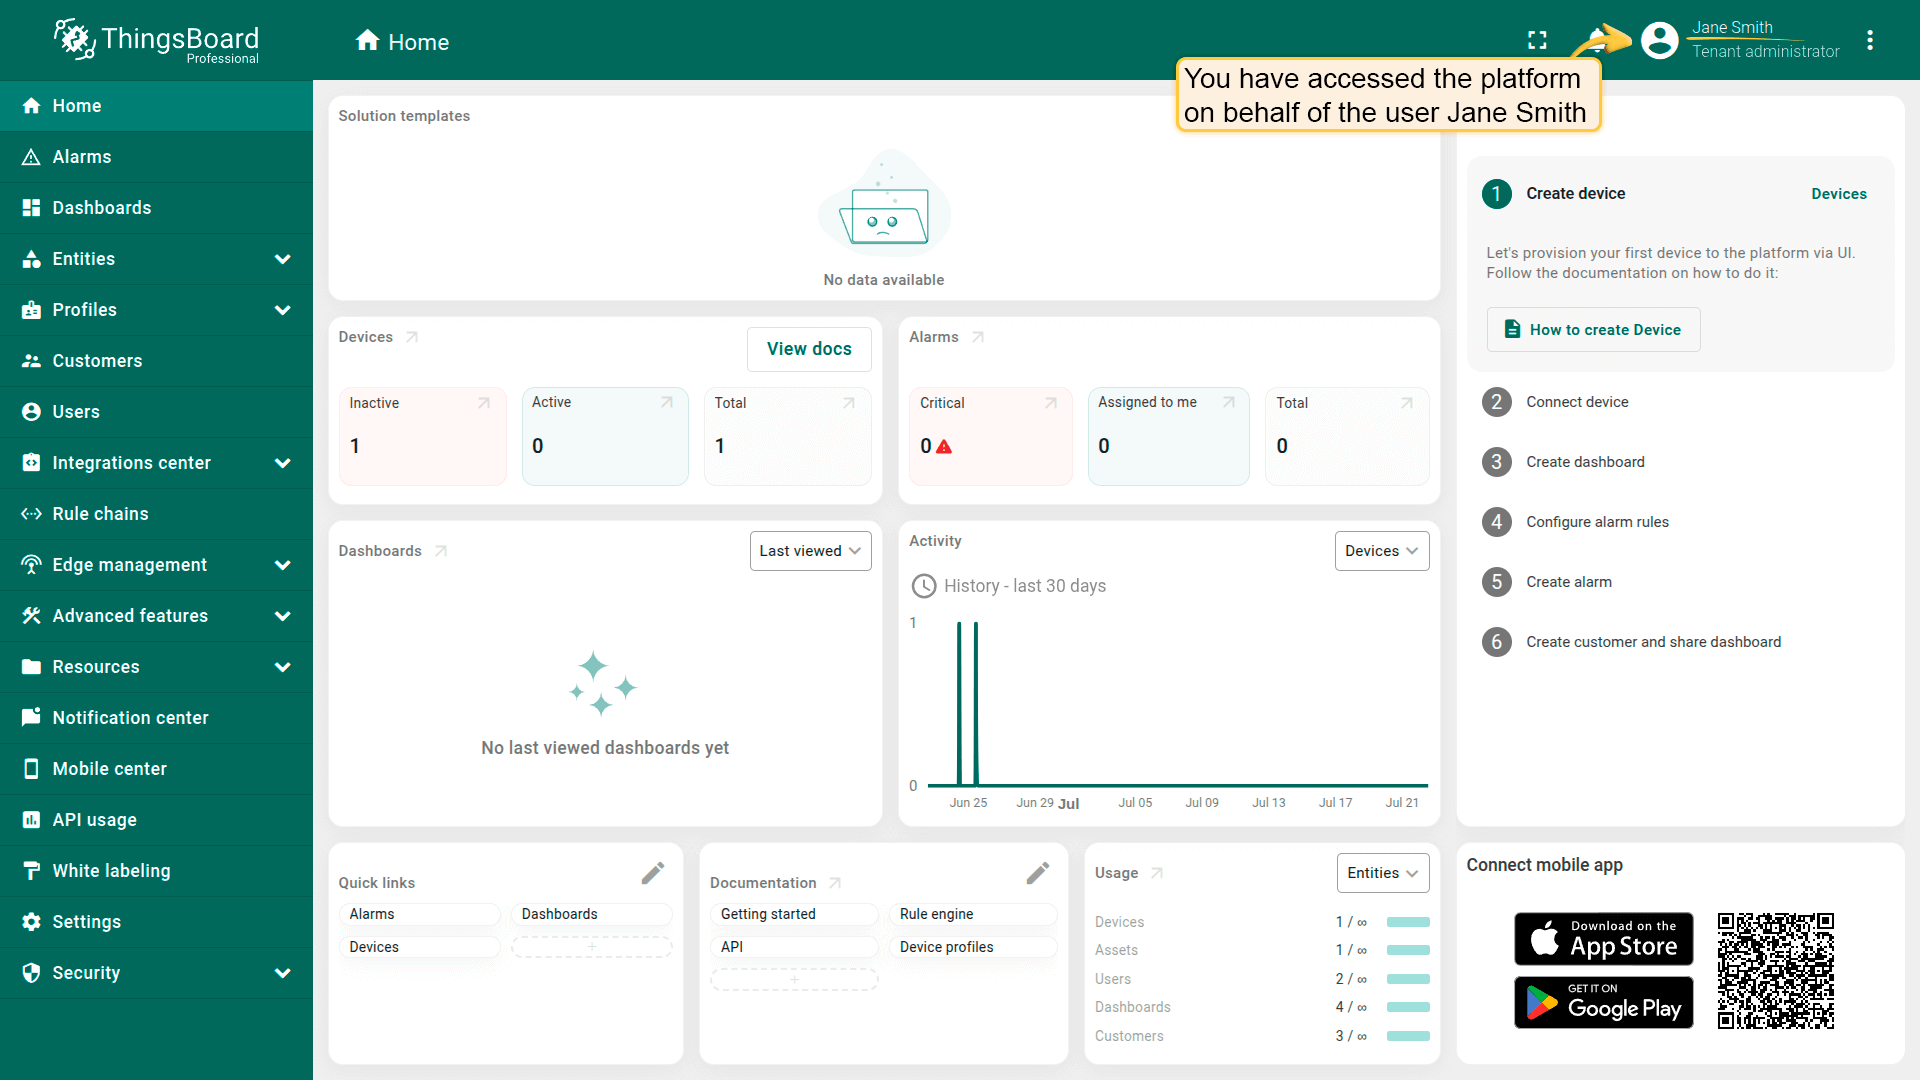
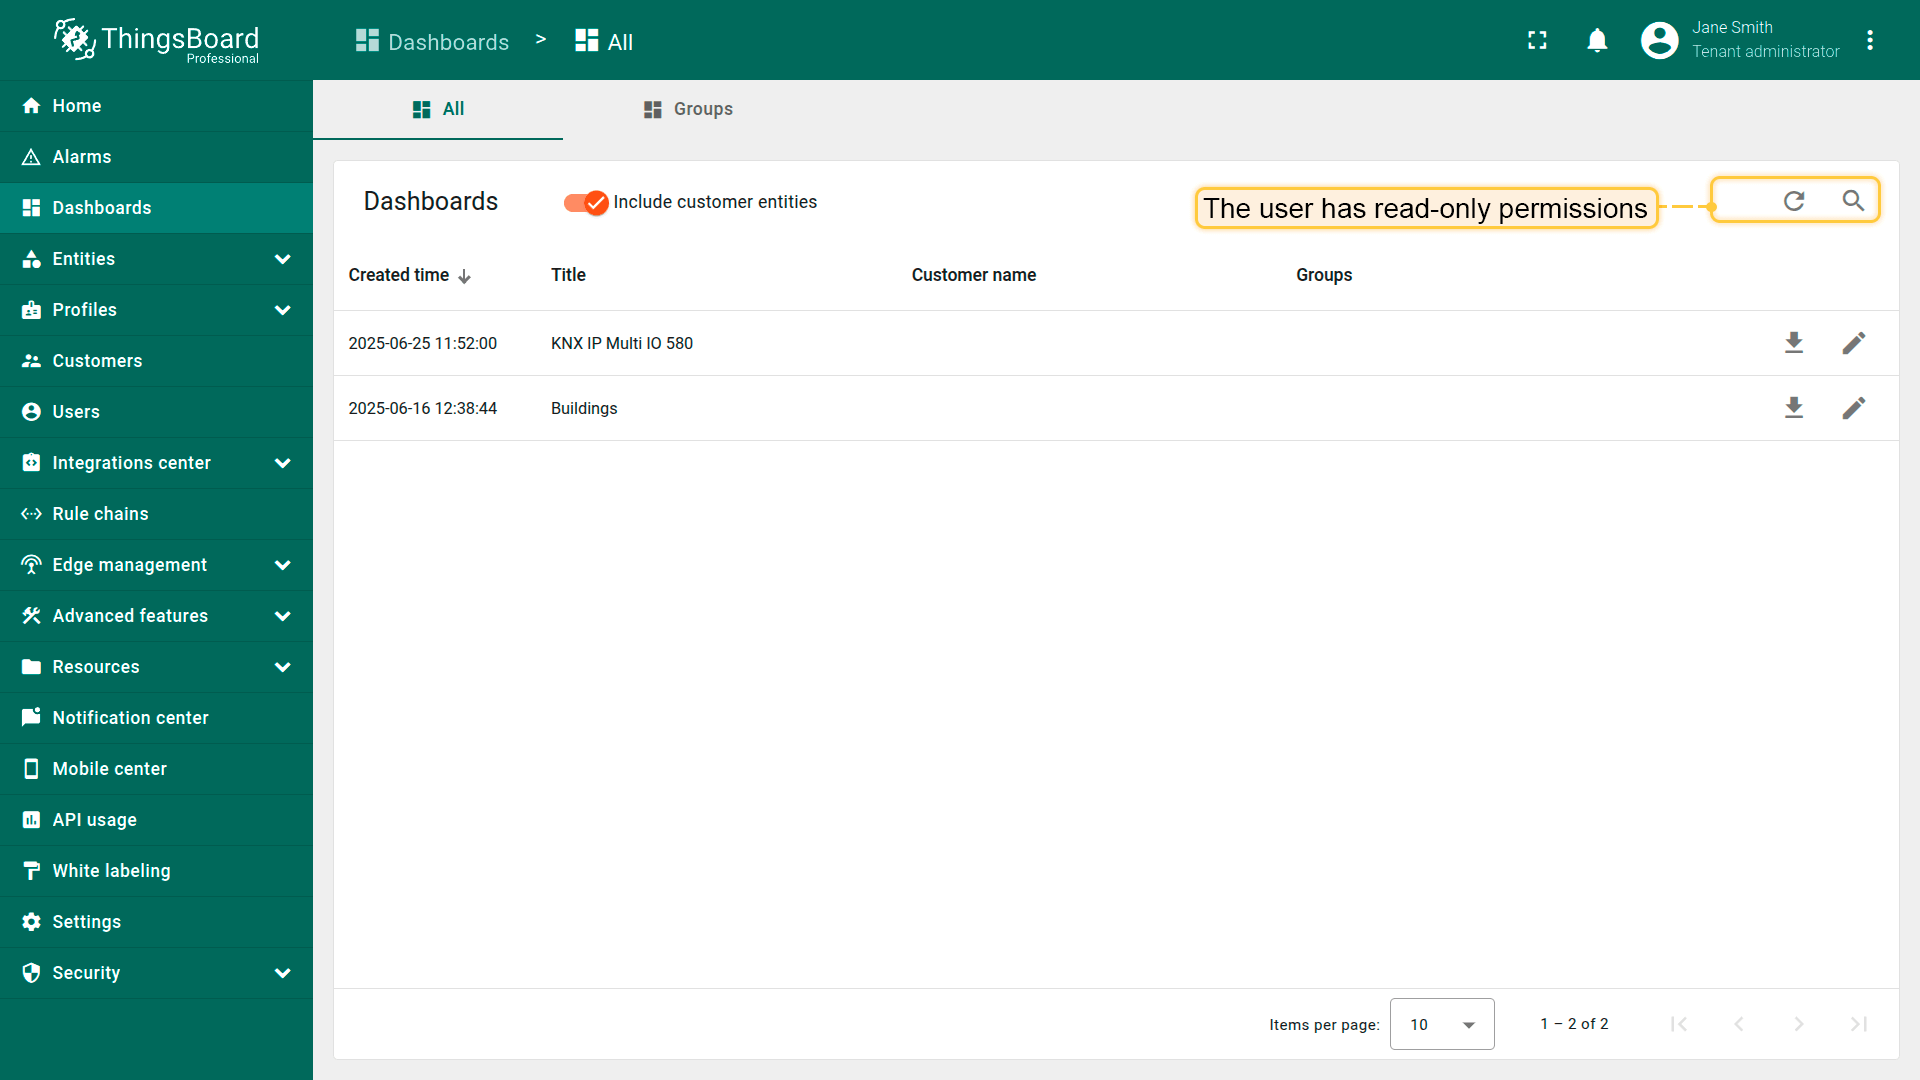
You can temporarily access the platform on behalf of a new user, which is useful for verifying permissions or troubleshooting access issues.
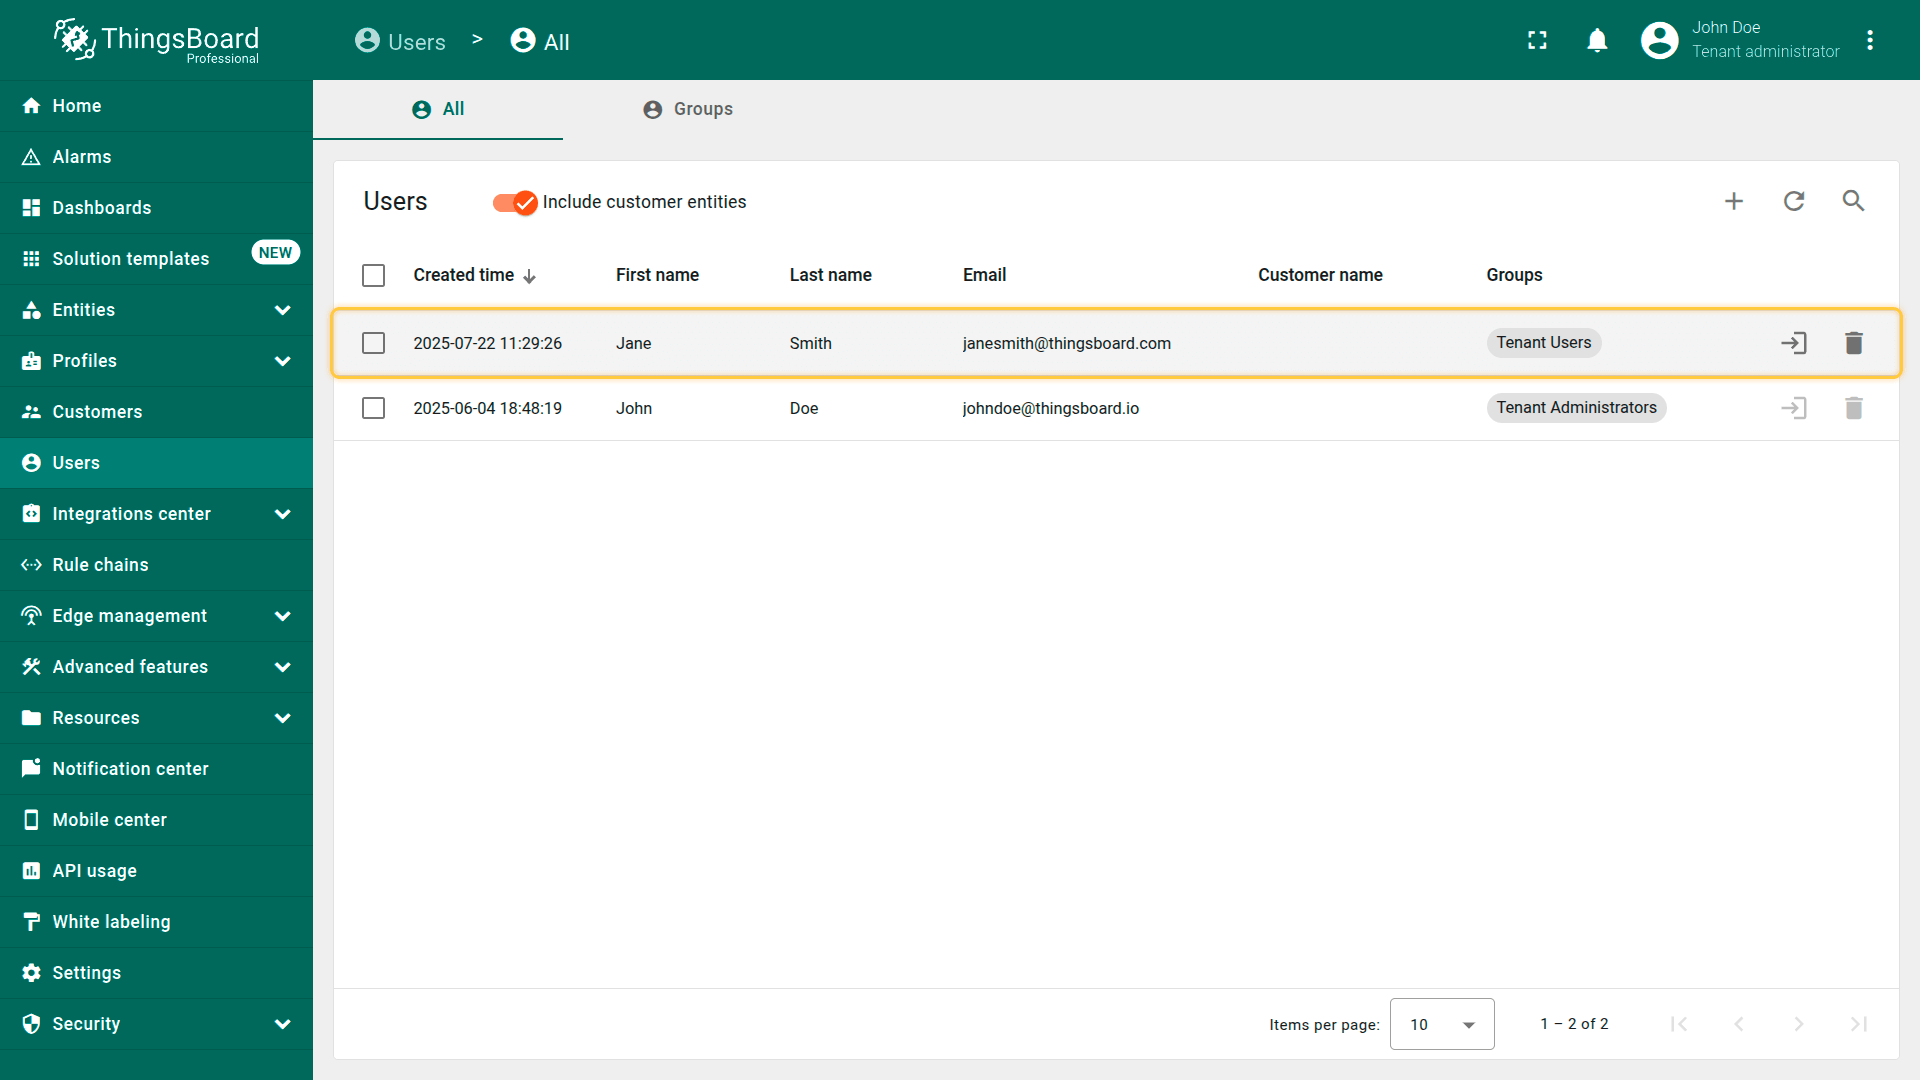
To log in on behalf of a user:
- Go to the Users list.
- Click the “login” icon next to the desired user’s name.
Note: In this example, the user has read-only permissions. They can view resources such as dashboards or devices, but cannot add, edit, or delete any objects.

User activation
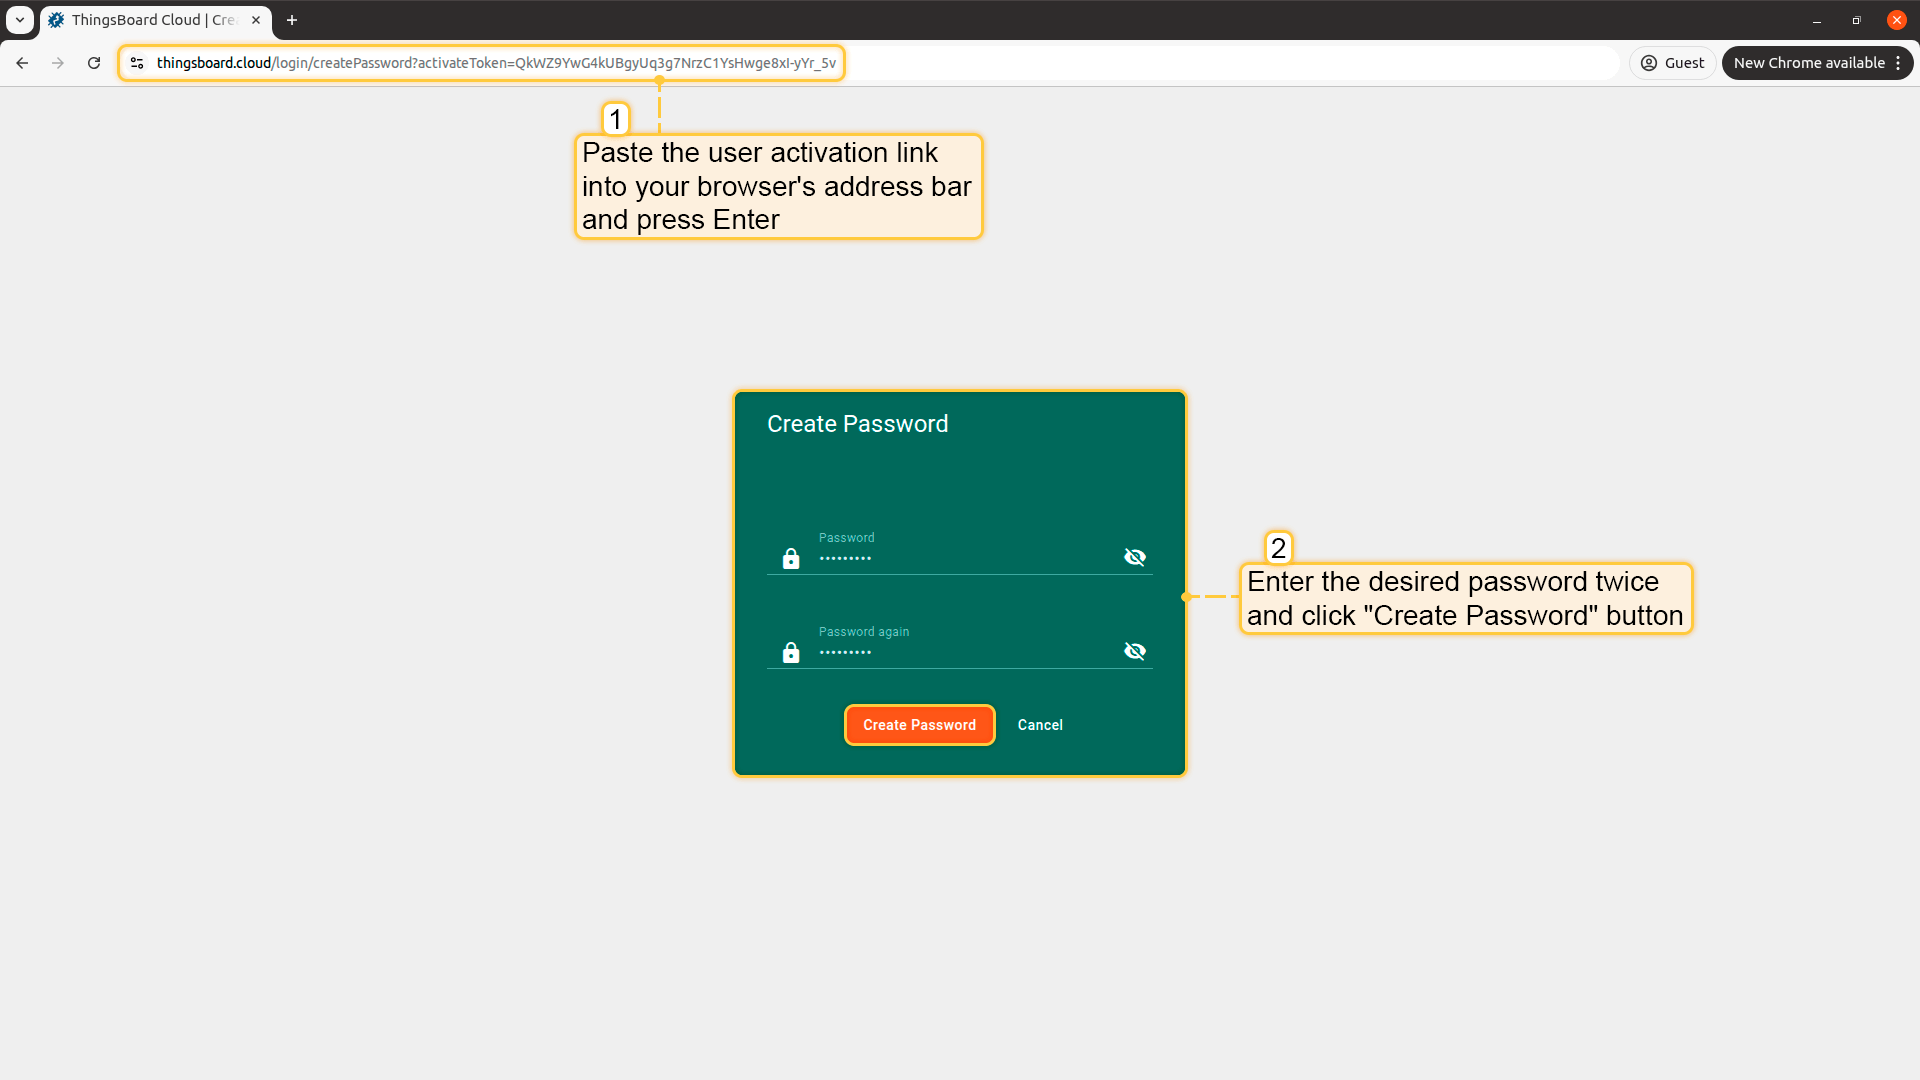
Once the user receives an activation link (via email or any other method), they can activate their account by following these steps:
- Click the activation link, or copy and paste it into your browser’s address bar and press Enter.
- You will be prompted to create a password.
- Enter the desired password twice to confirm.
- Click “Create Password”.
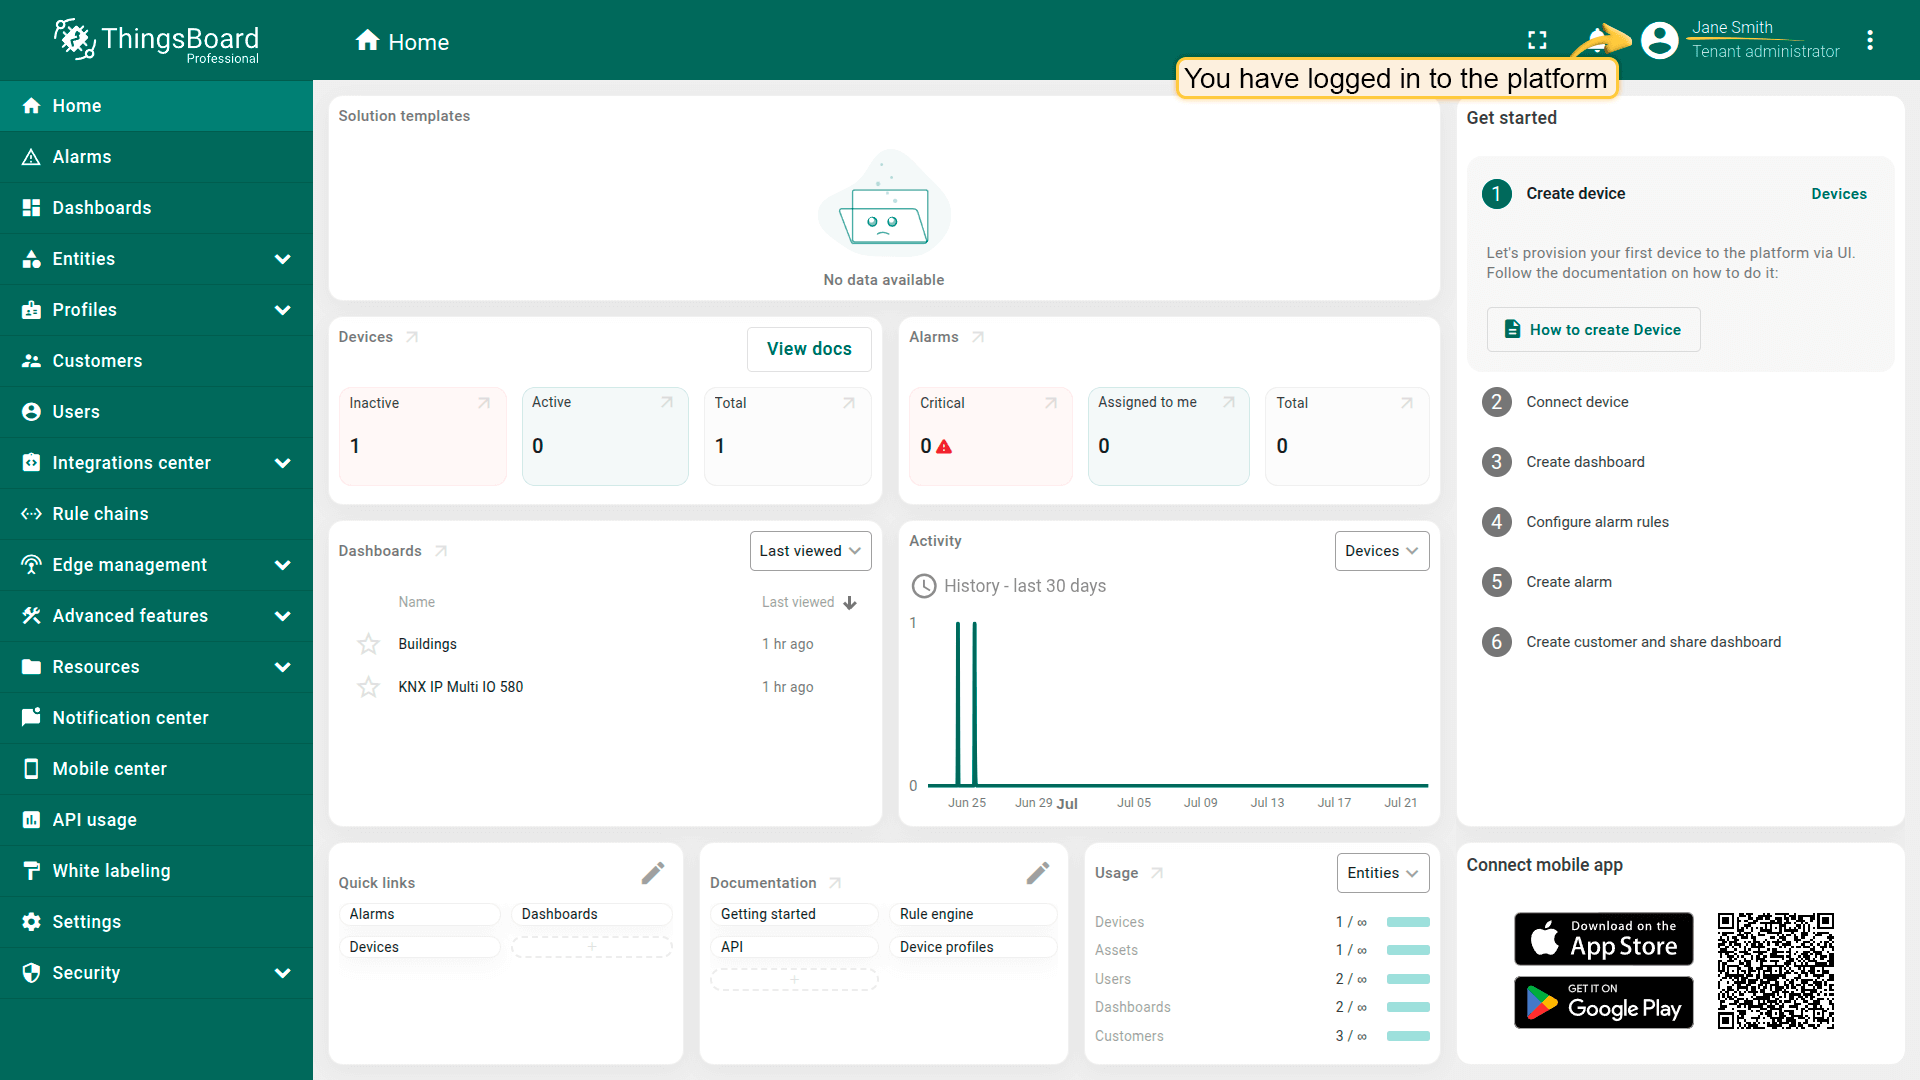
After completing this step, the user will log in to their instance and gain access to resources according to the permissions assigned to them.
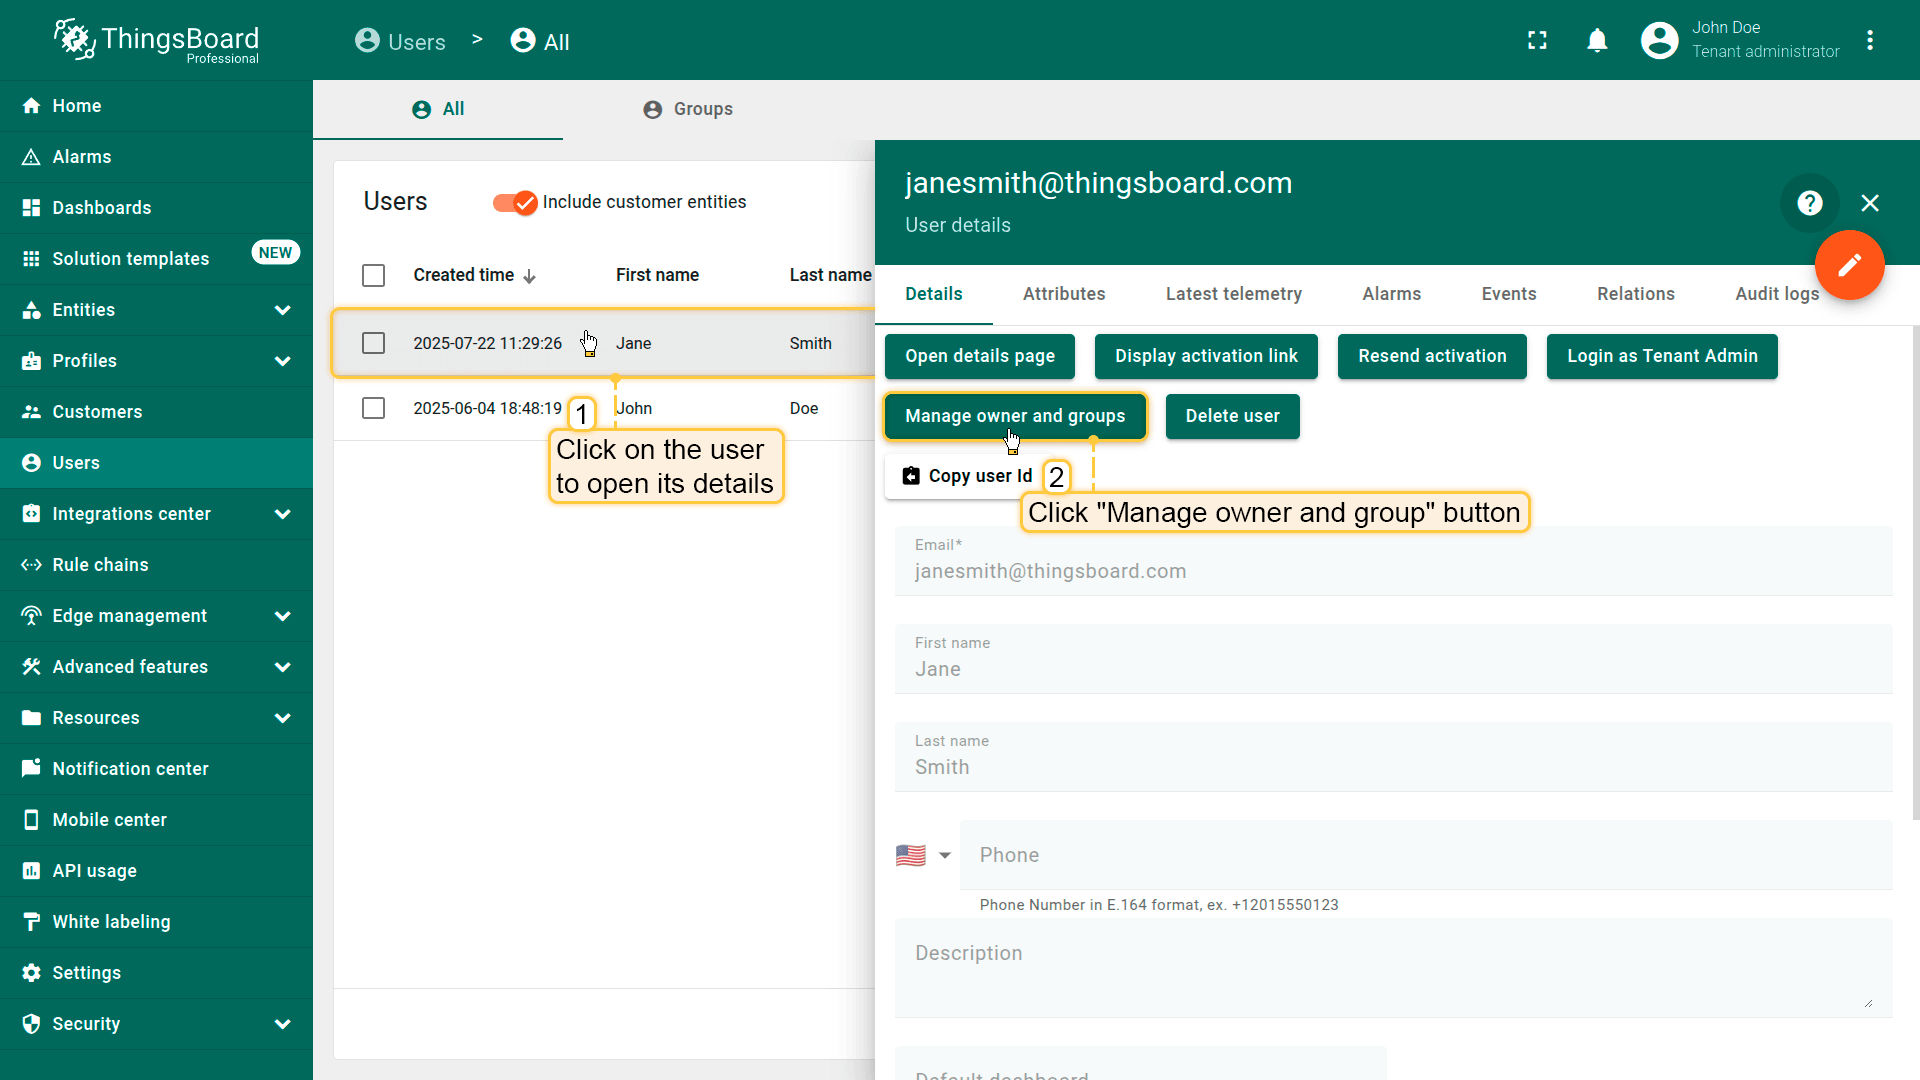
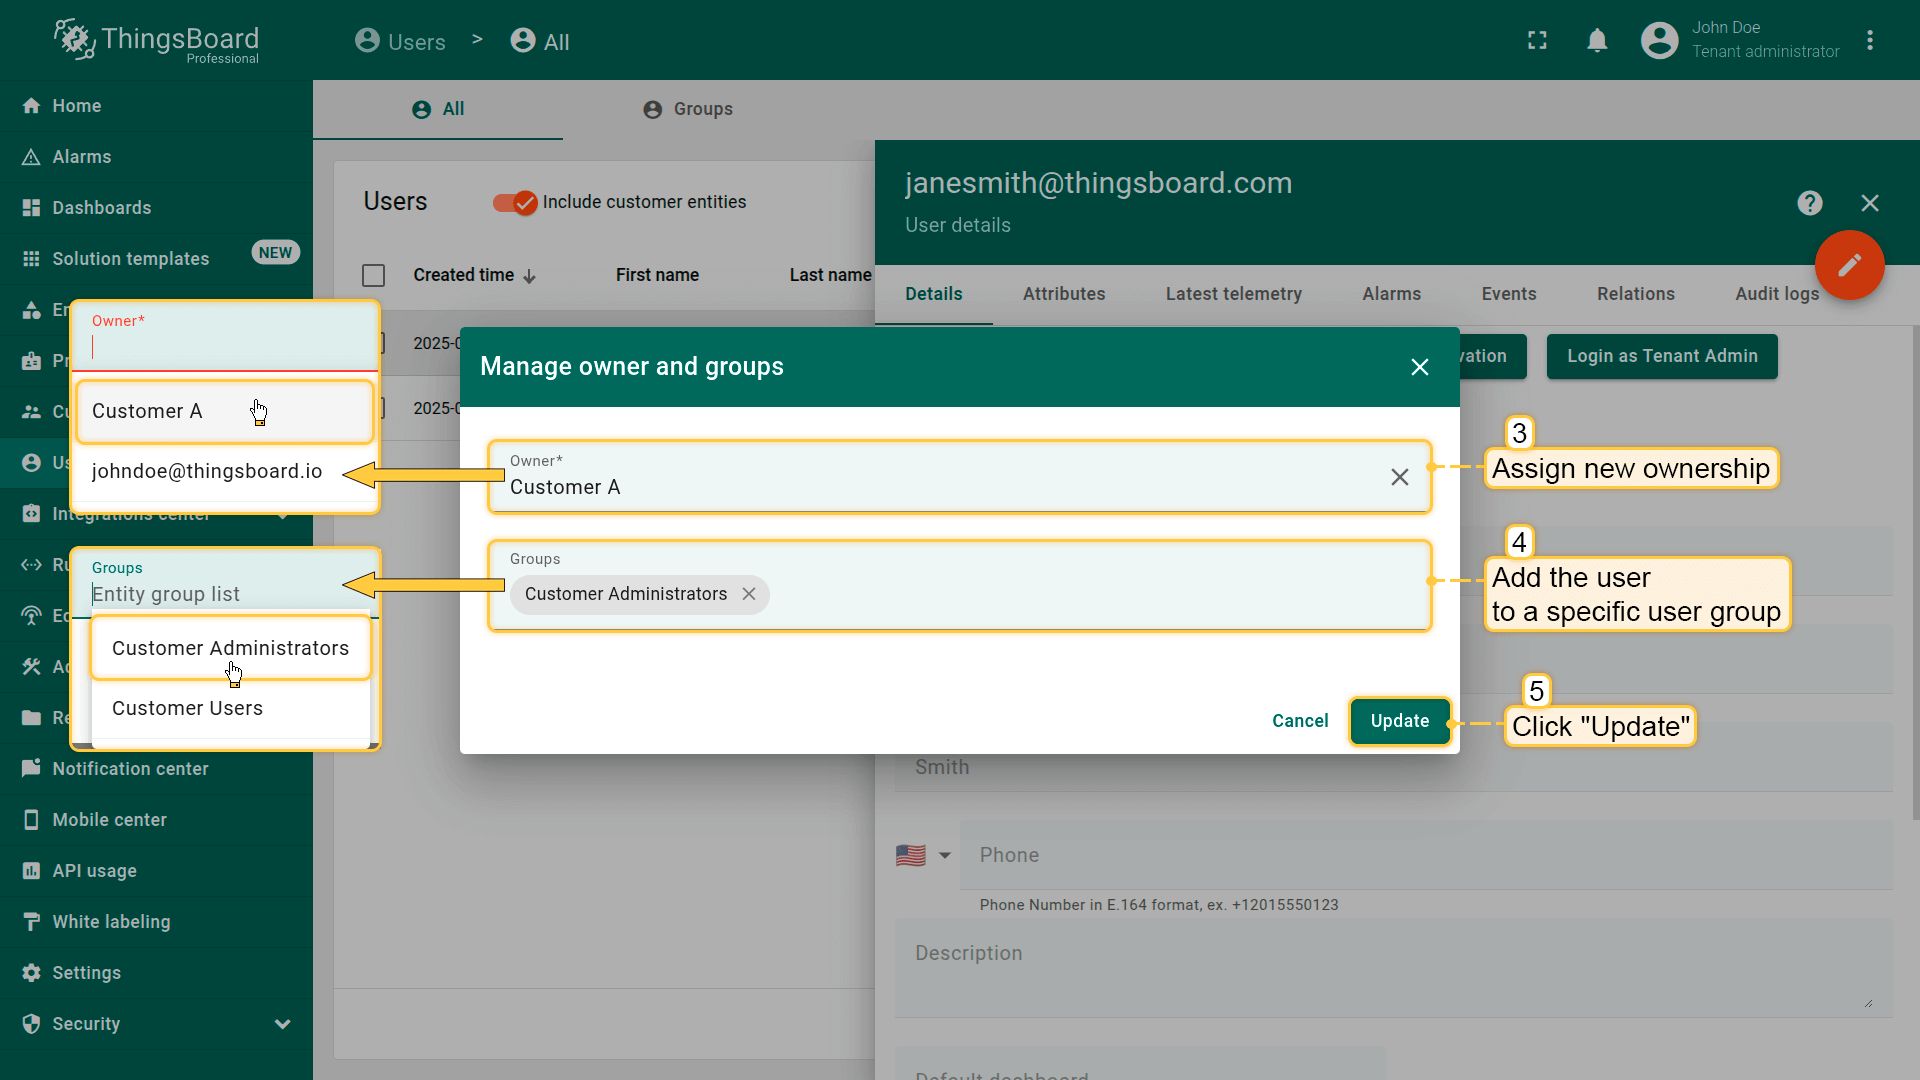
Manage owner and groups
You can change a user’s owner (which can be either a Tenant or a Customer, see glossary) and assign them to one or more user groups. Changing the owner moves the user to the selected level and updates access based on groups.
To do this:
- Click on the user to open their User details.
- Click “Manage owner and groups” button.
- In Owner field, select Tenant or a specific Customer.
- Add the user to the relevant user groups or create a new group if needed.
- Click “Update” to confirm and apply the changes.
Note: Changes to group membership and ownership take effect immediately and update the user’s access permissions according to the roles of the assigned groups.
You can reassign or revoke the ownership change of user if needed.
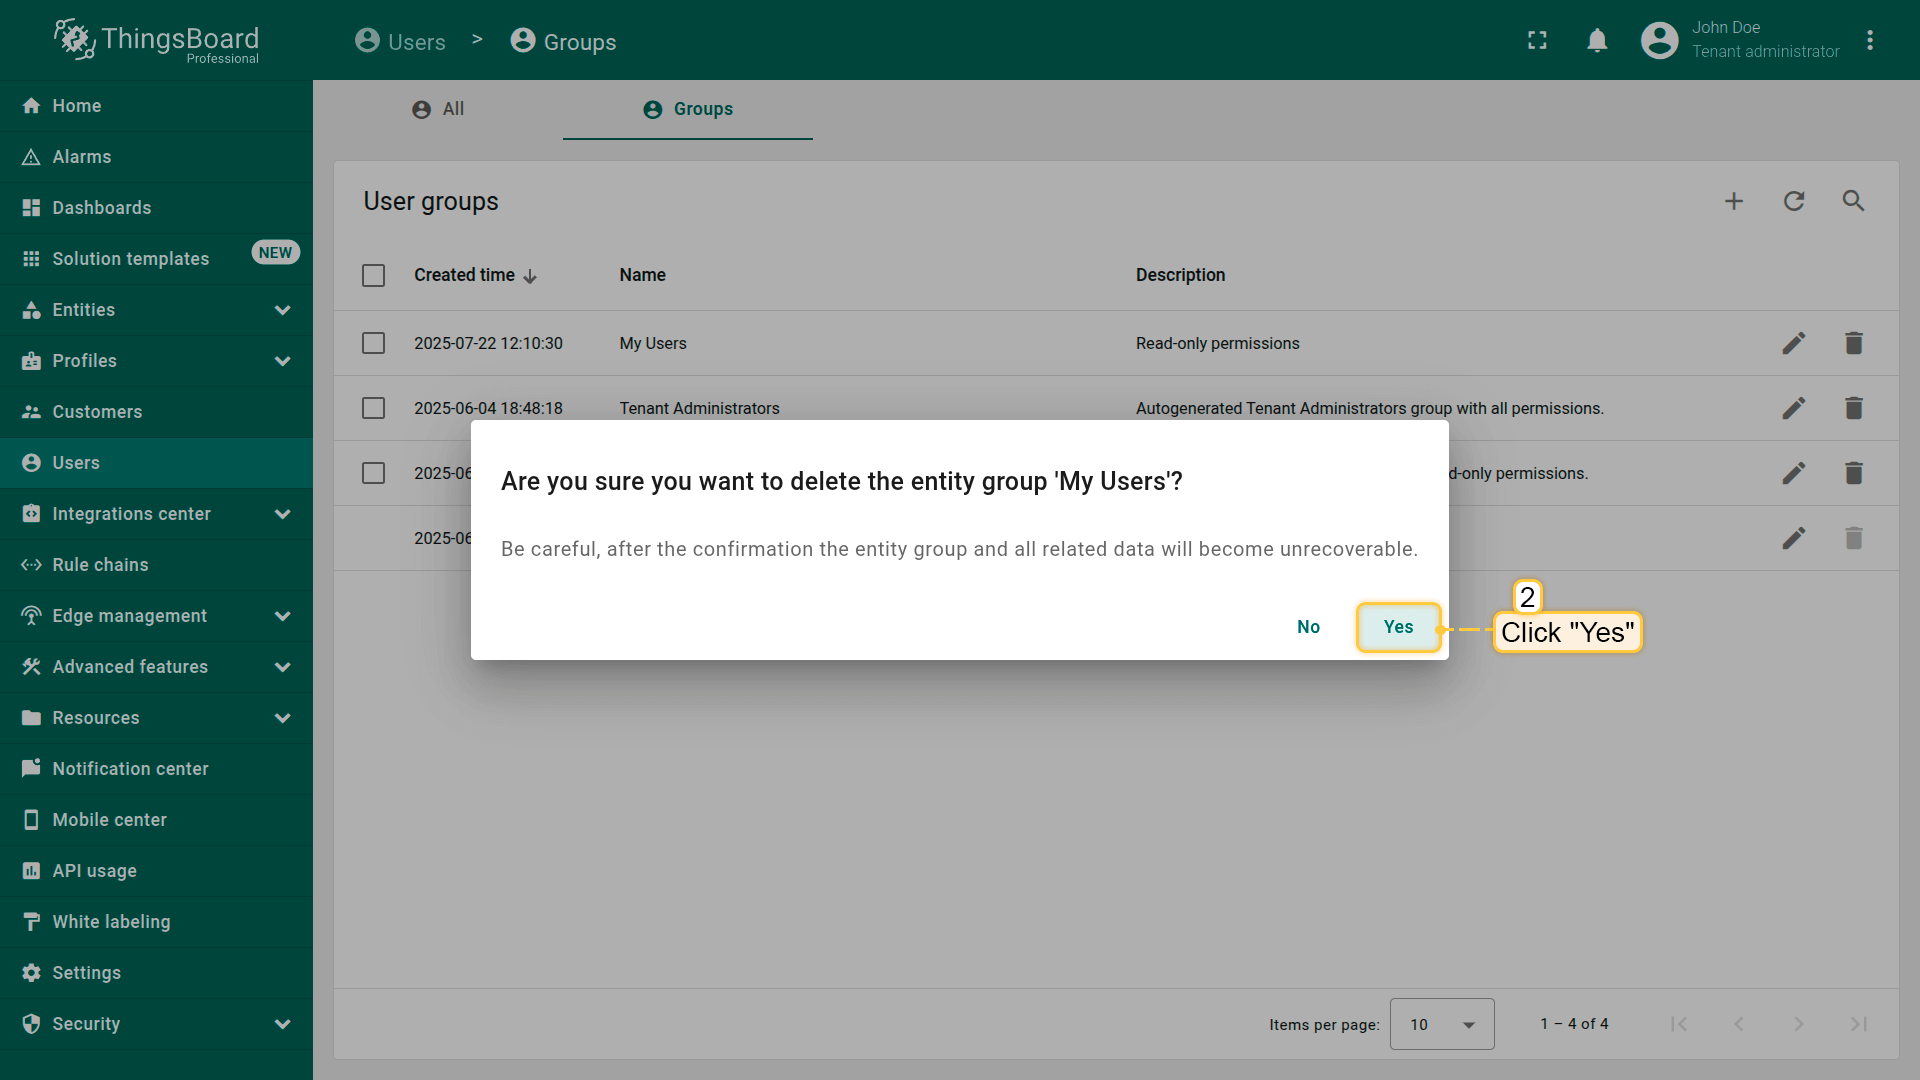
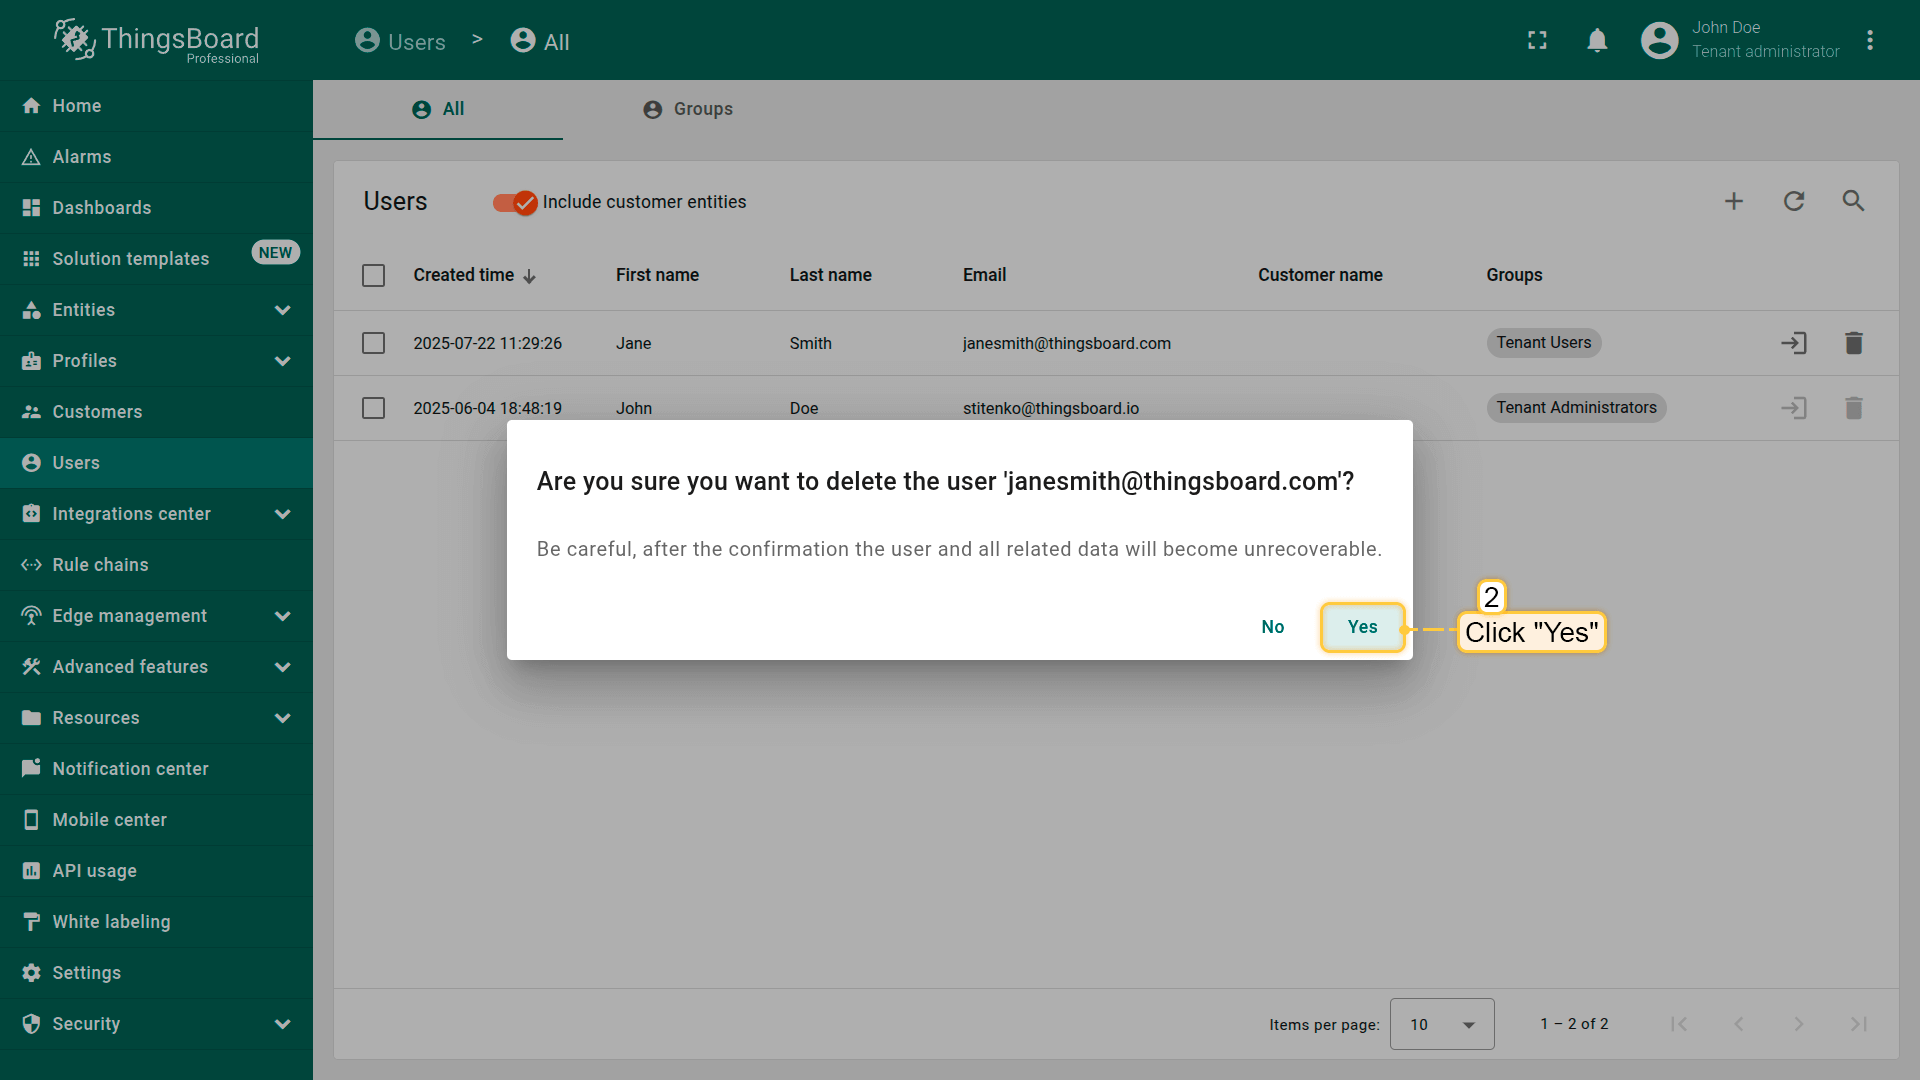
Deleting user
A user with sufficient permissions can delete other users from the system.
To delete a user:
- Navigate to the Users page.
- Click the “trash bin” icon (🗑)️ at the end of the row for the user you wish to remove.
- Confirm the deletion in the dialog window.
Note: Deleting a user does not affect entities, dashboards, or data previously created by that user. The user will be removed from all user groups, including the special “All” group, which every user is a member of by default.

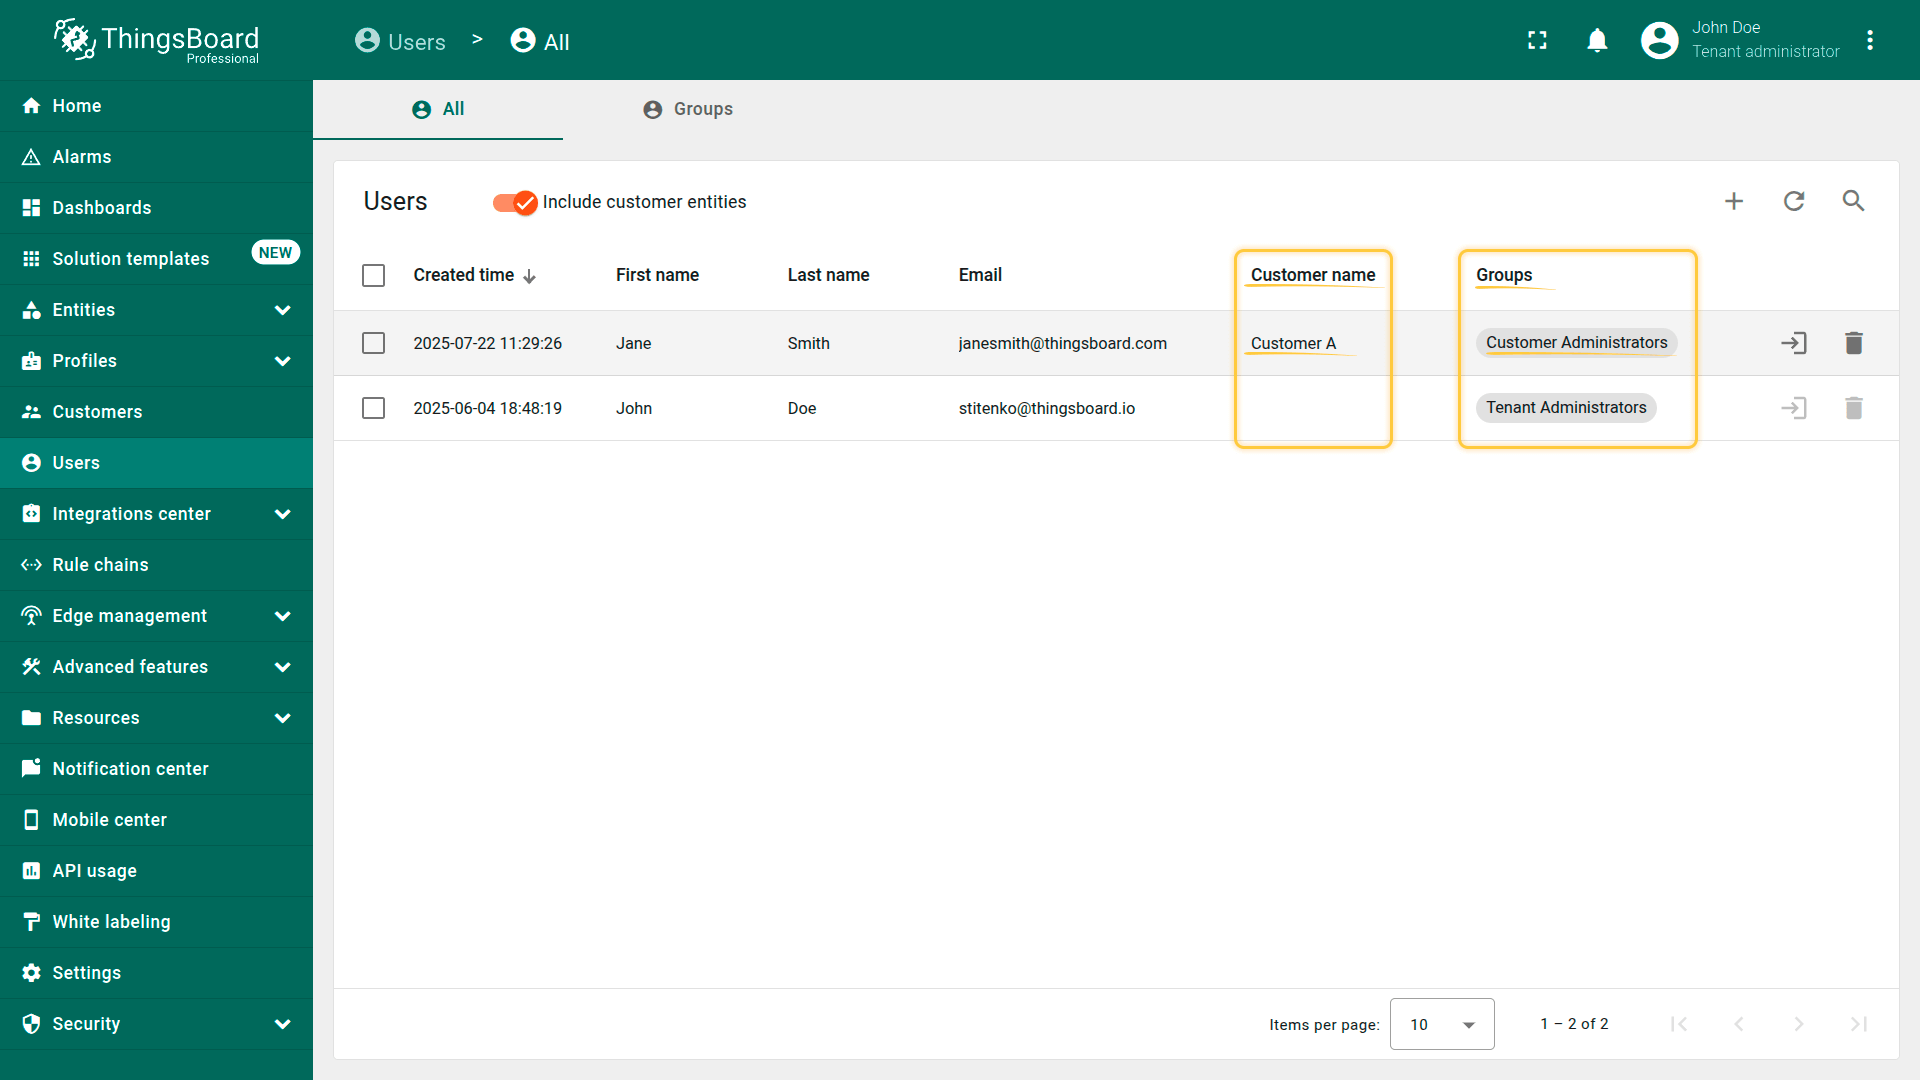
User group
A User group is a mechanism for grouping users who share the same level of access to ThingsBoard resources. It enables centralized management of access to entities, dashboards, widgets, and more.
A single user can belong to multiple user groups simultaneously.
Each group defines roles and permissions, which are inherited by all its members.
In ThingsBoard PE, predefined user groups are automatically created for each level (Tenant / Customer):
- For Tenant level:
- Tenant Administrators – includes users with full access to all tenant resources.
- Tenant Users – includes users with
read-onlypermissions.
- For Customer level:
- Customer Administrators – includes users who act as Customer Administrators and have full access to all entities owned by that customer.
- Customer Users – standard customer users with
read-onlypermissions.
A Tenant Admin or Customer Admin can create new users directly within these groups, and users will automatically inherit the appropriate access level.
The "All" group
There is also a special built-in user group called “All”. This group does not have any permissions assigned by default.
A user created without being added to a specific group (or assigned only to the “All” group) will not have any access rights and will not see any entities or dashboards.
This is useful during the initial creation of new users, who will later be assigned to the appropriate user groups.
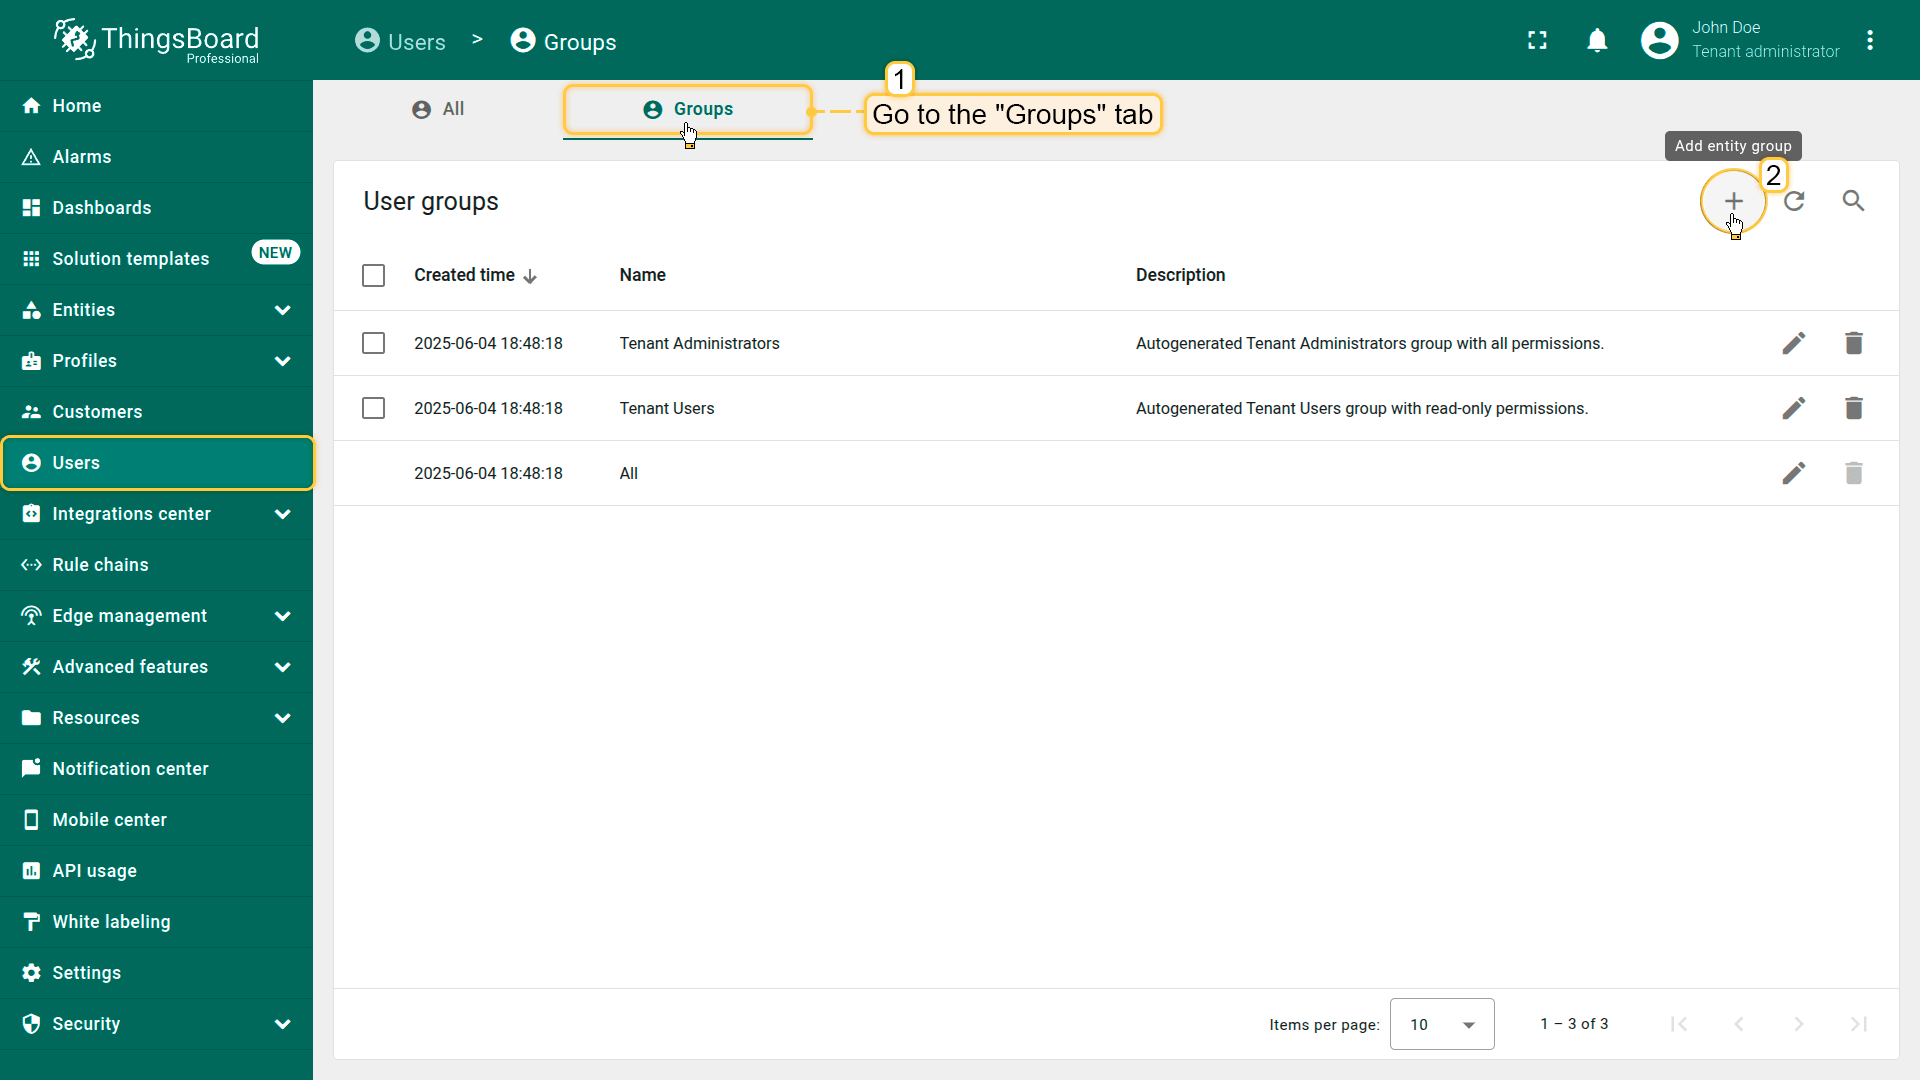
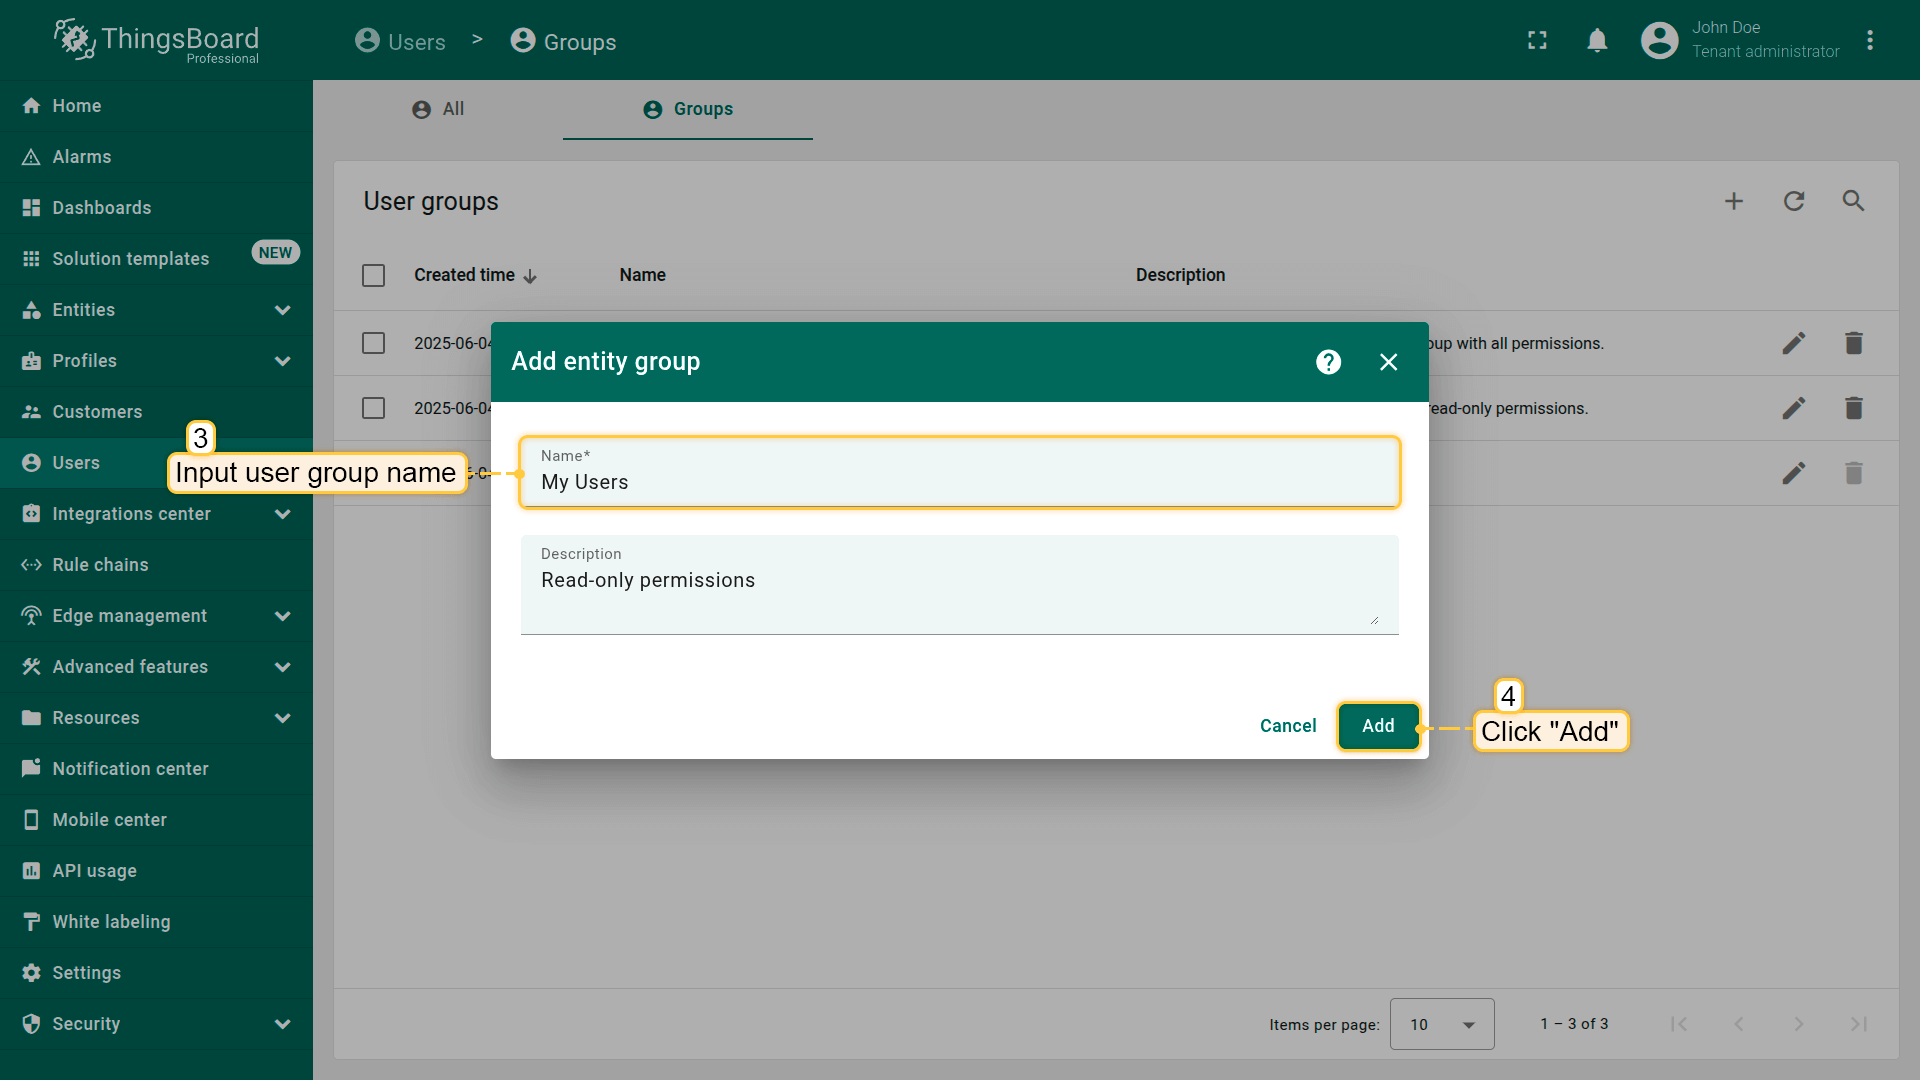
Create new user group
Tenant Administrators and Customer Administrators can create user groups and configure permissions for those groups.
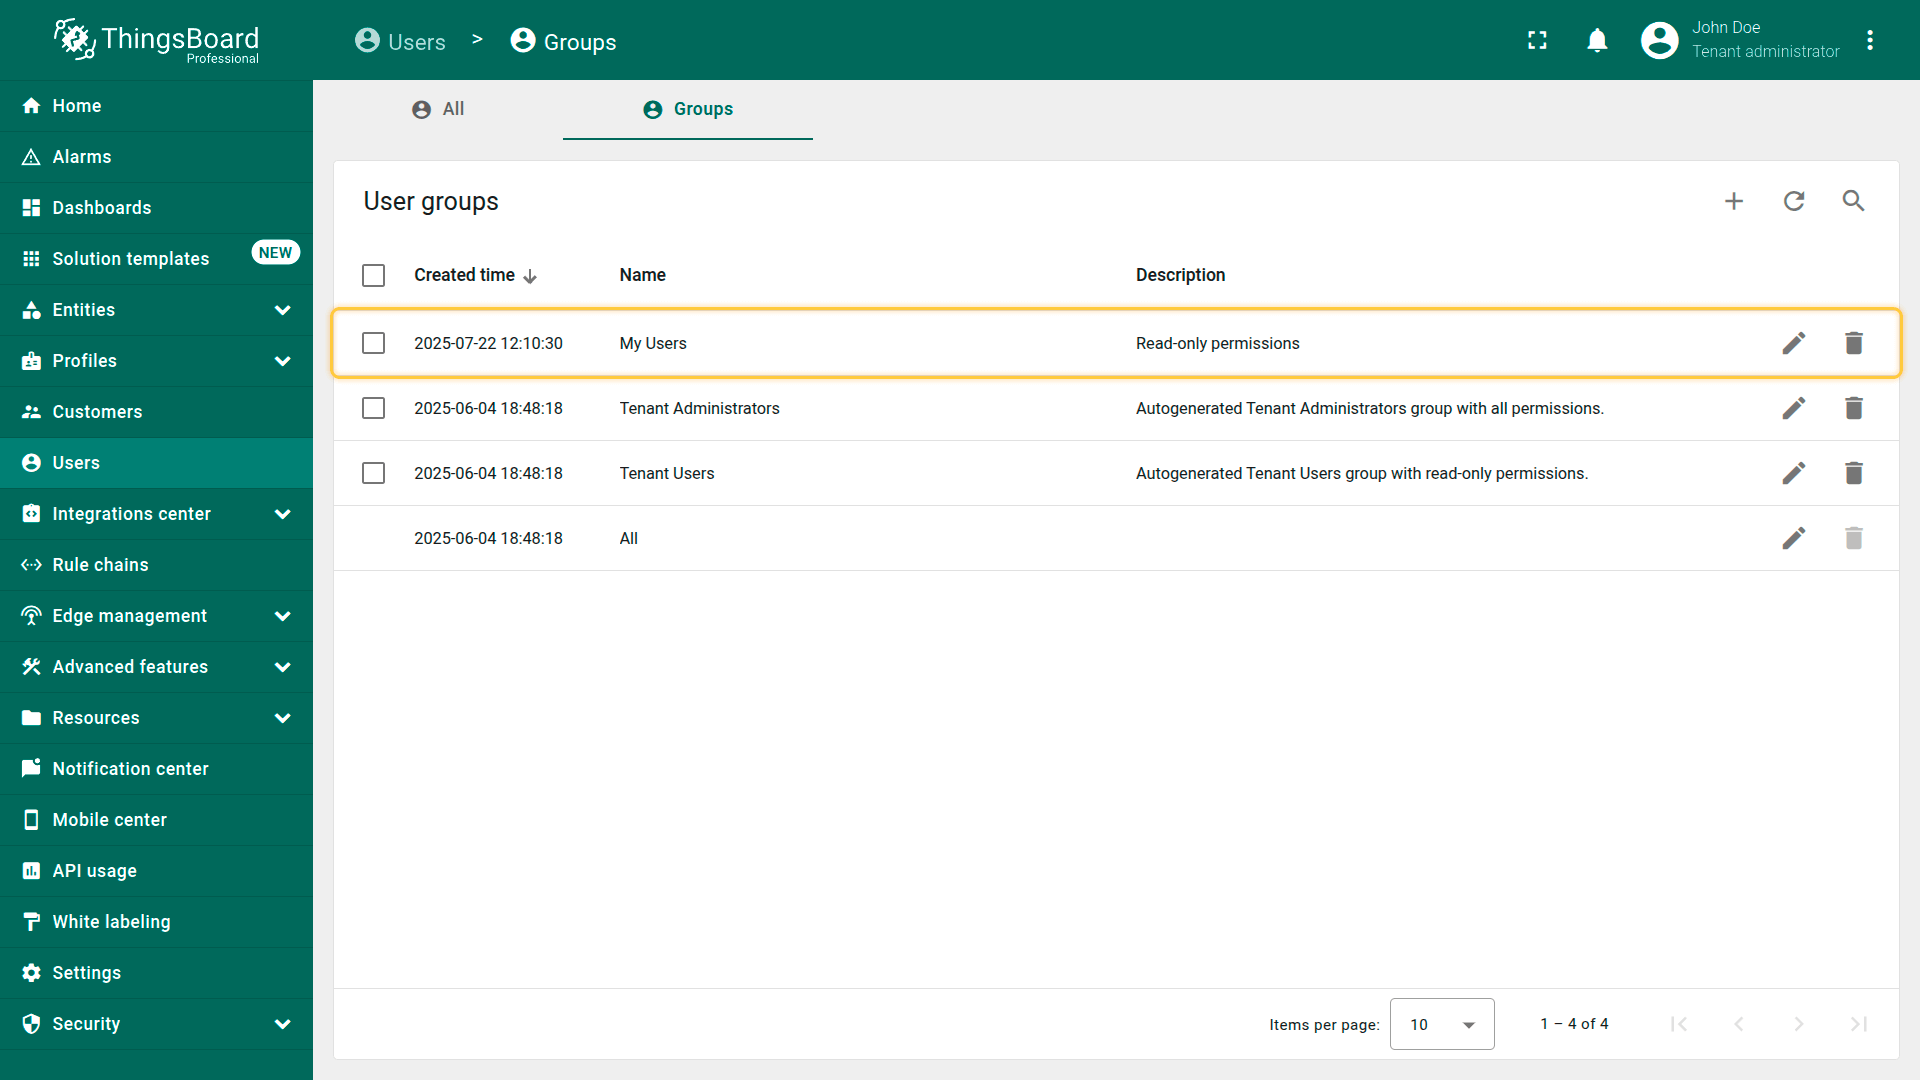
To create a new user group:
- From the Users screen, navigate to the “Groups” tab.
- Click the “+” (Add entity group) icon in the upper-right corner.
- Enter the name for the new user group.
- Click “Add” to create the group.
Once created, you can add users to this group and configure group-level permissions to control access to specific entities, dashboards, or features.
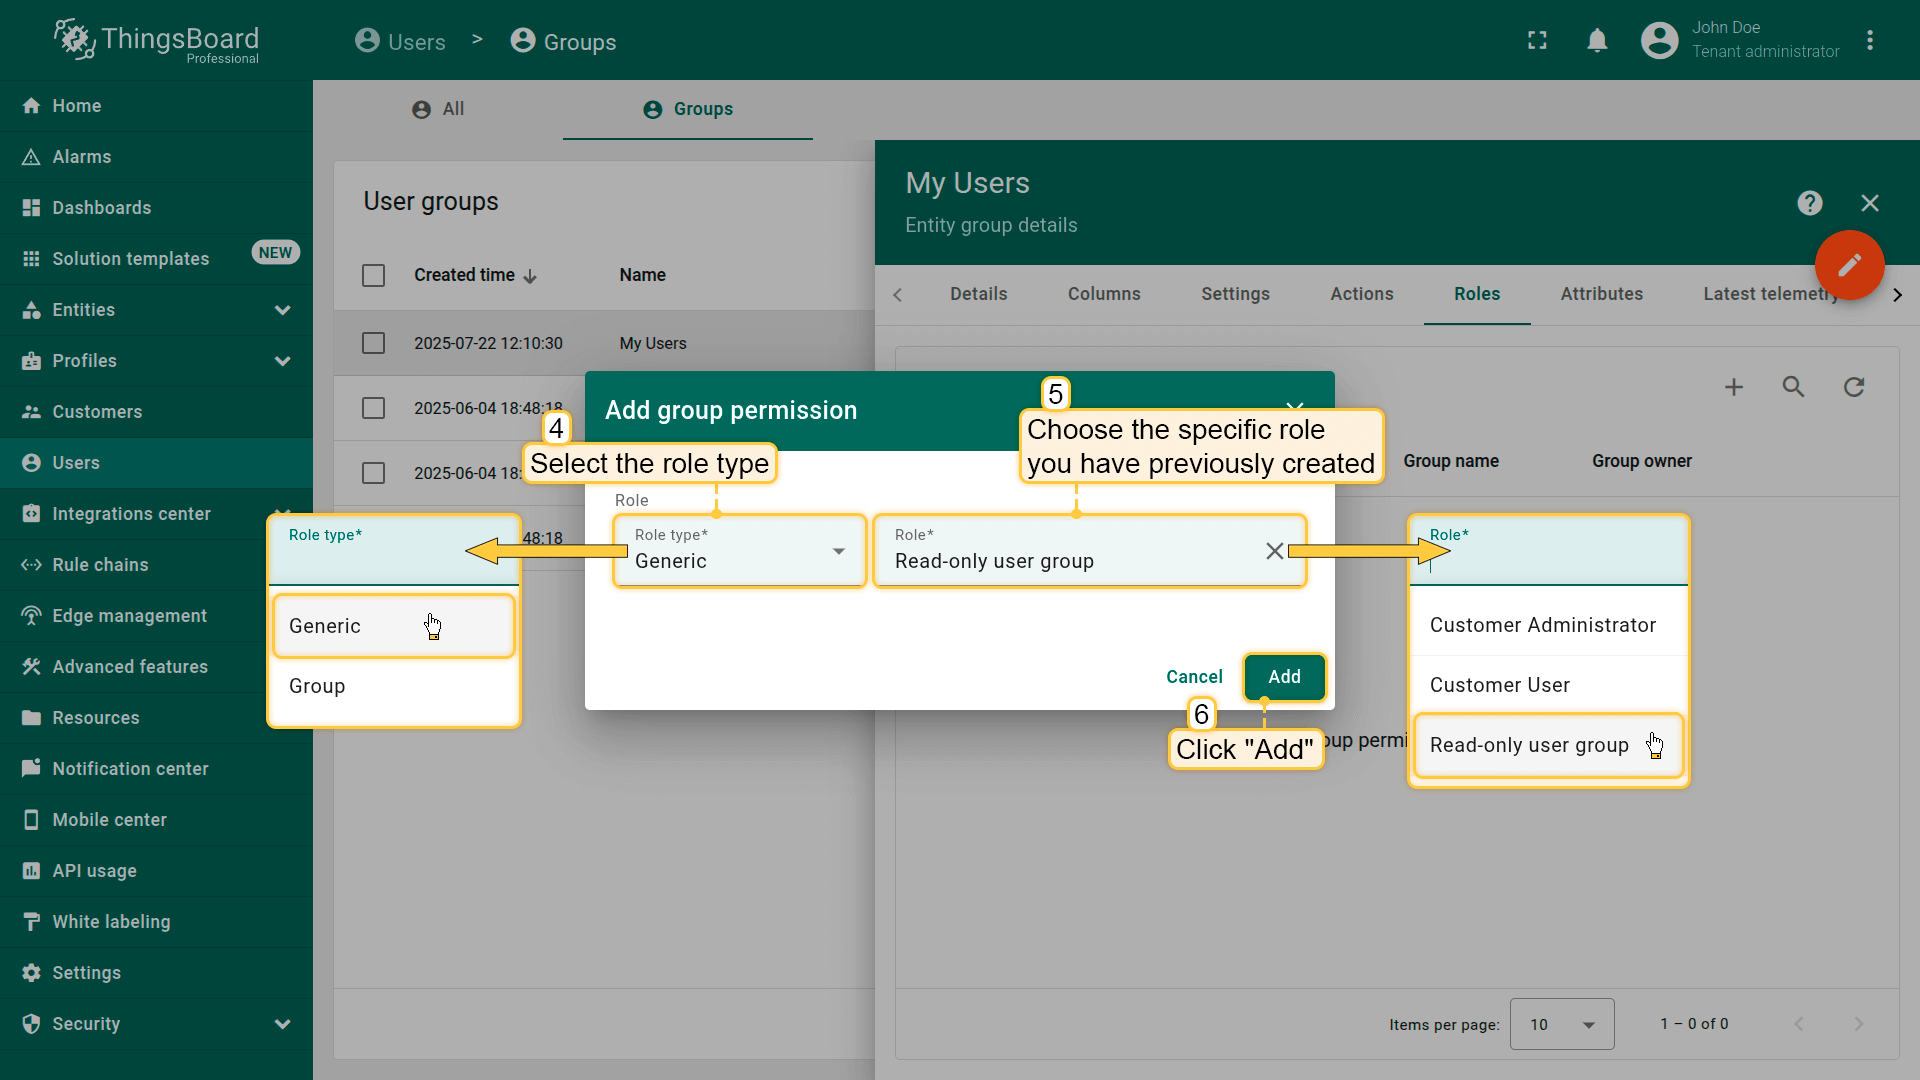
Assigning permissions to user group
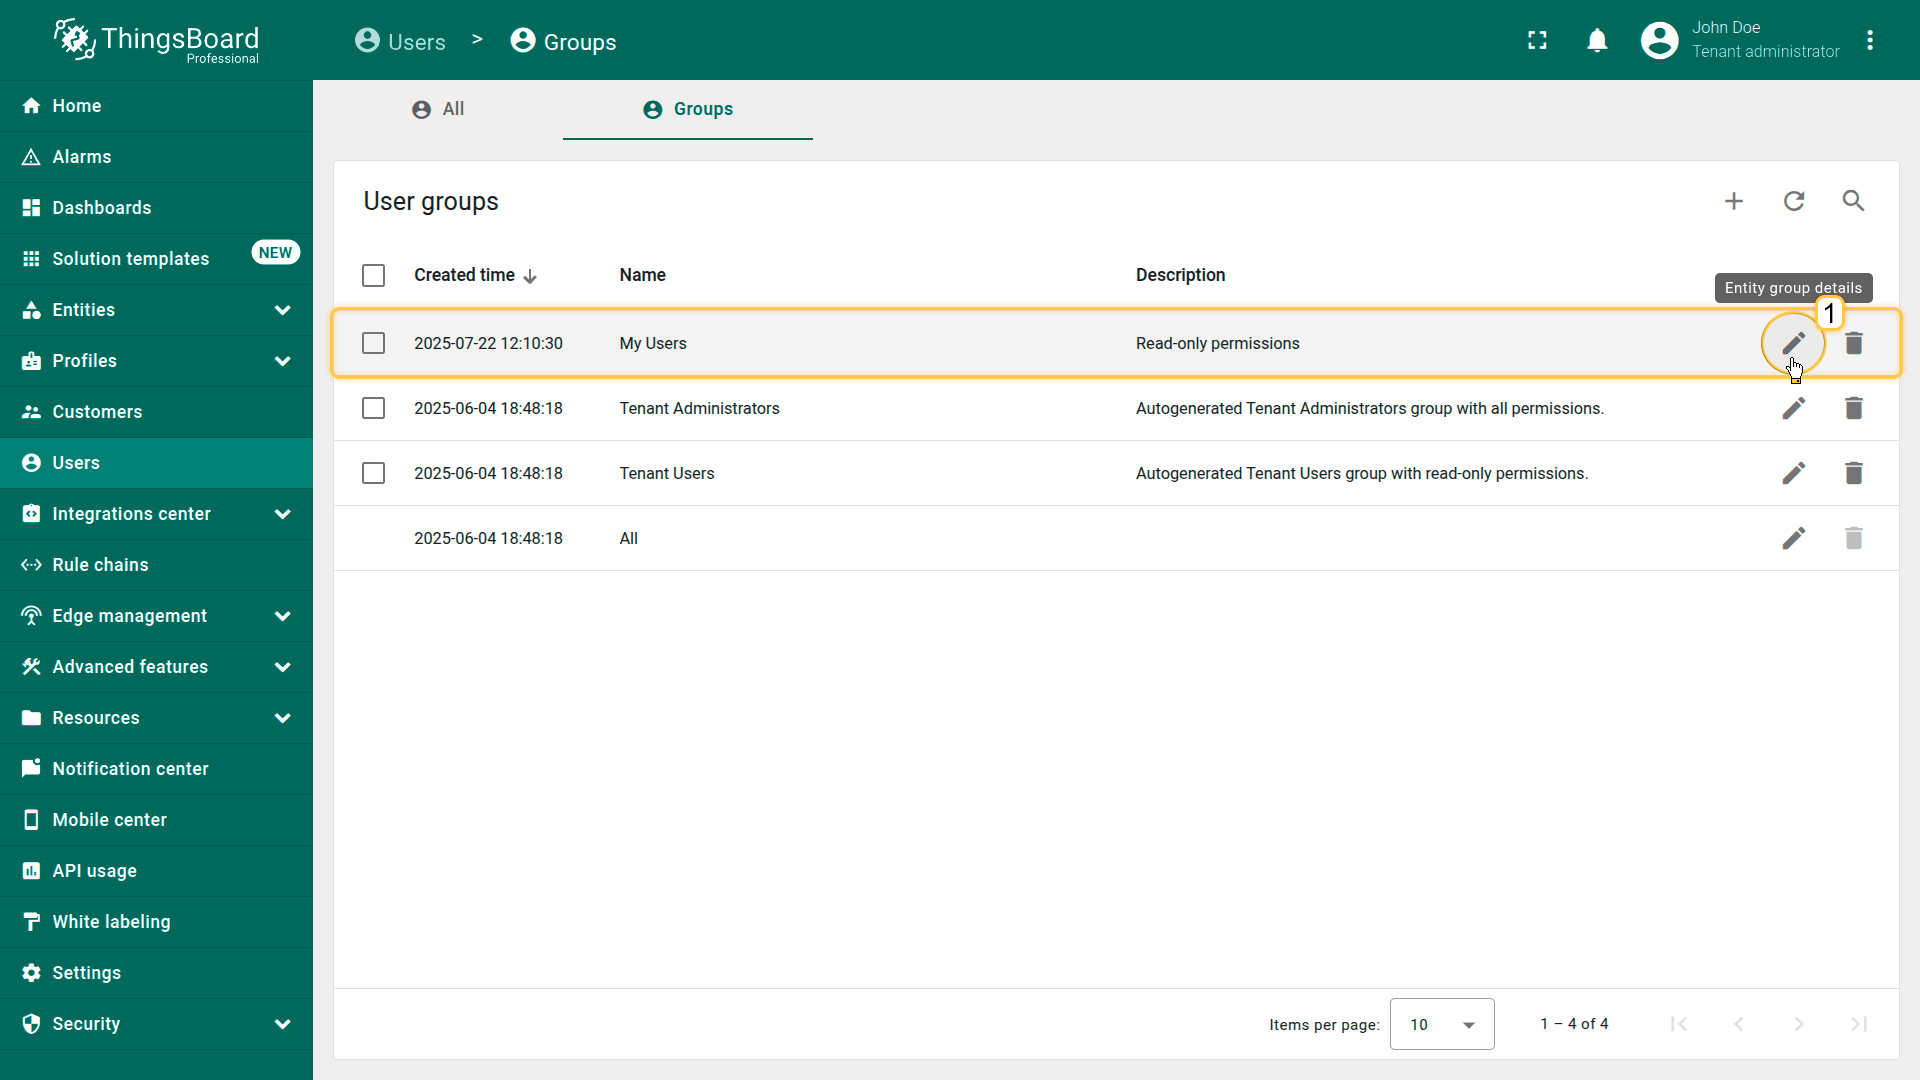
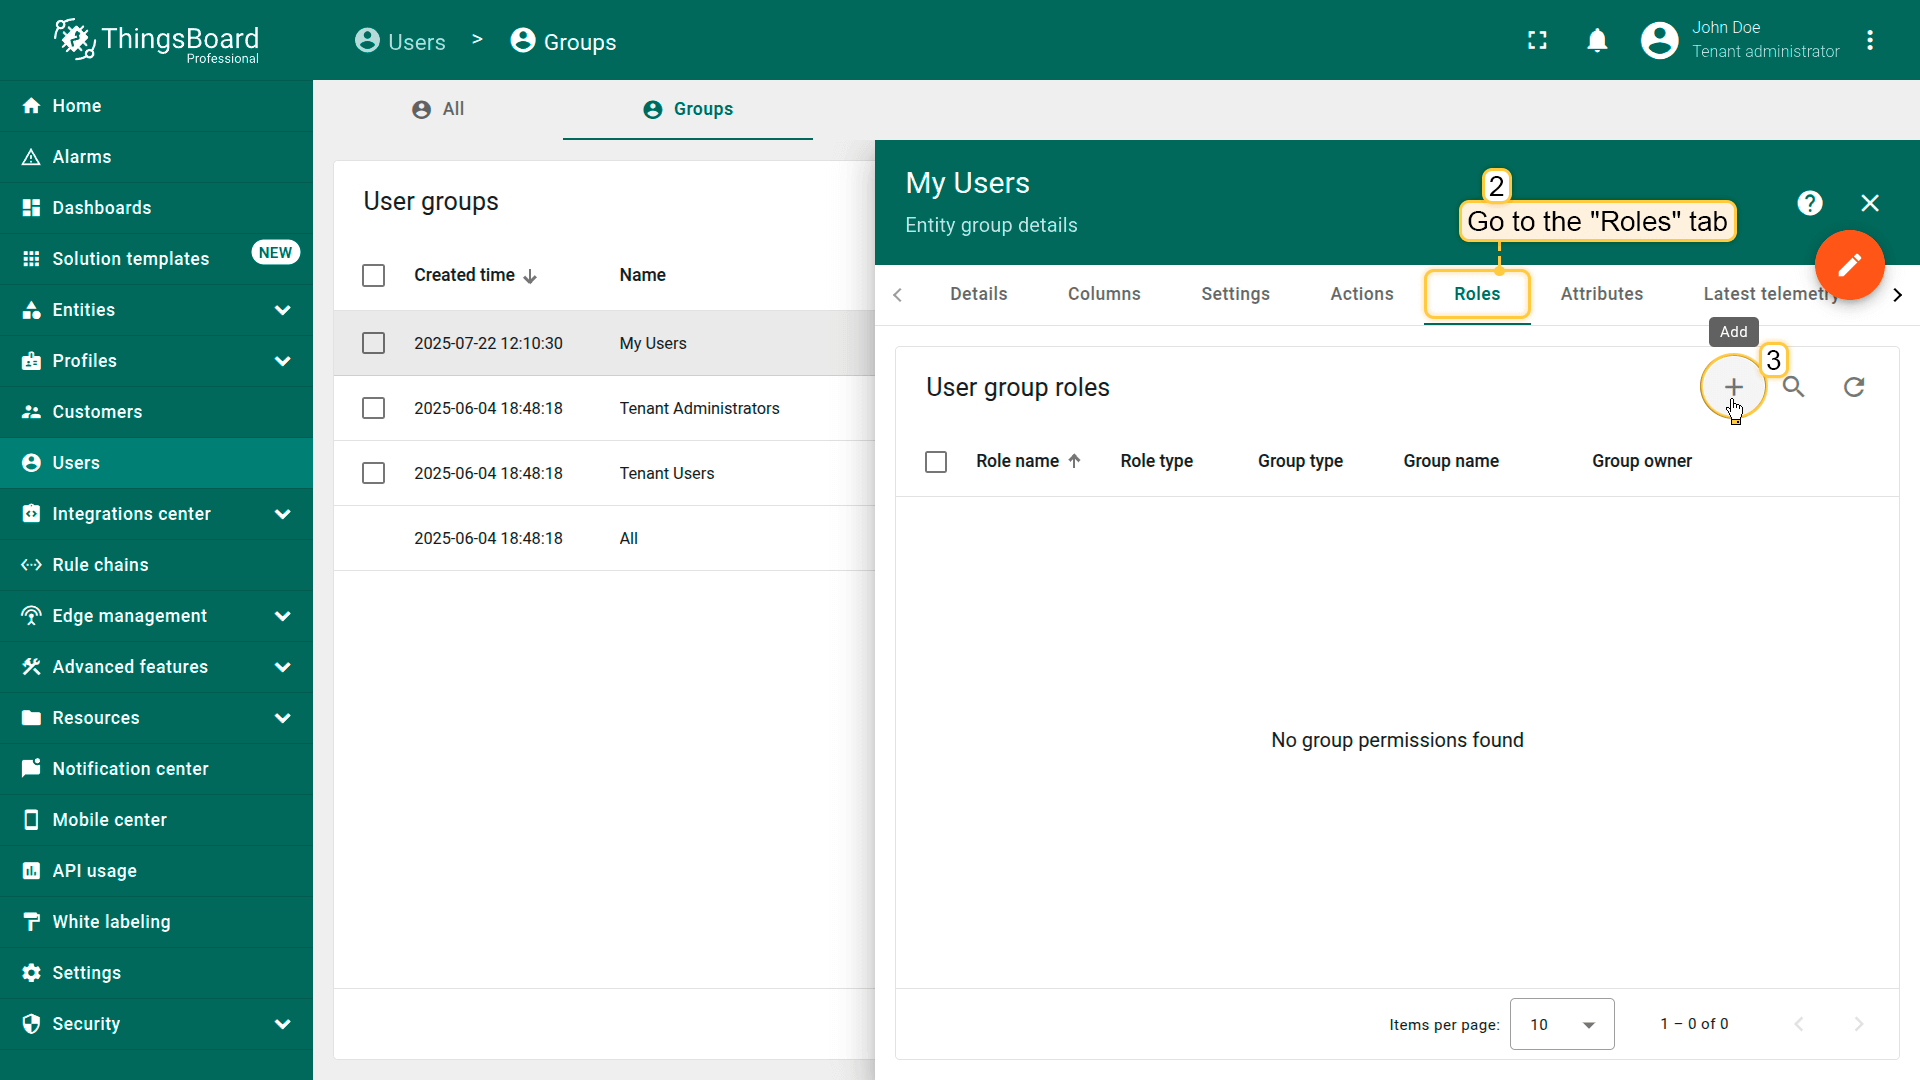
To configure user permissions for a new group using roles, follow these steps:
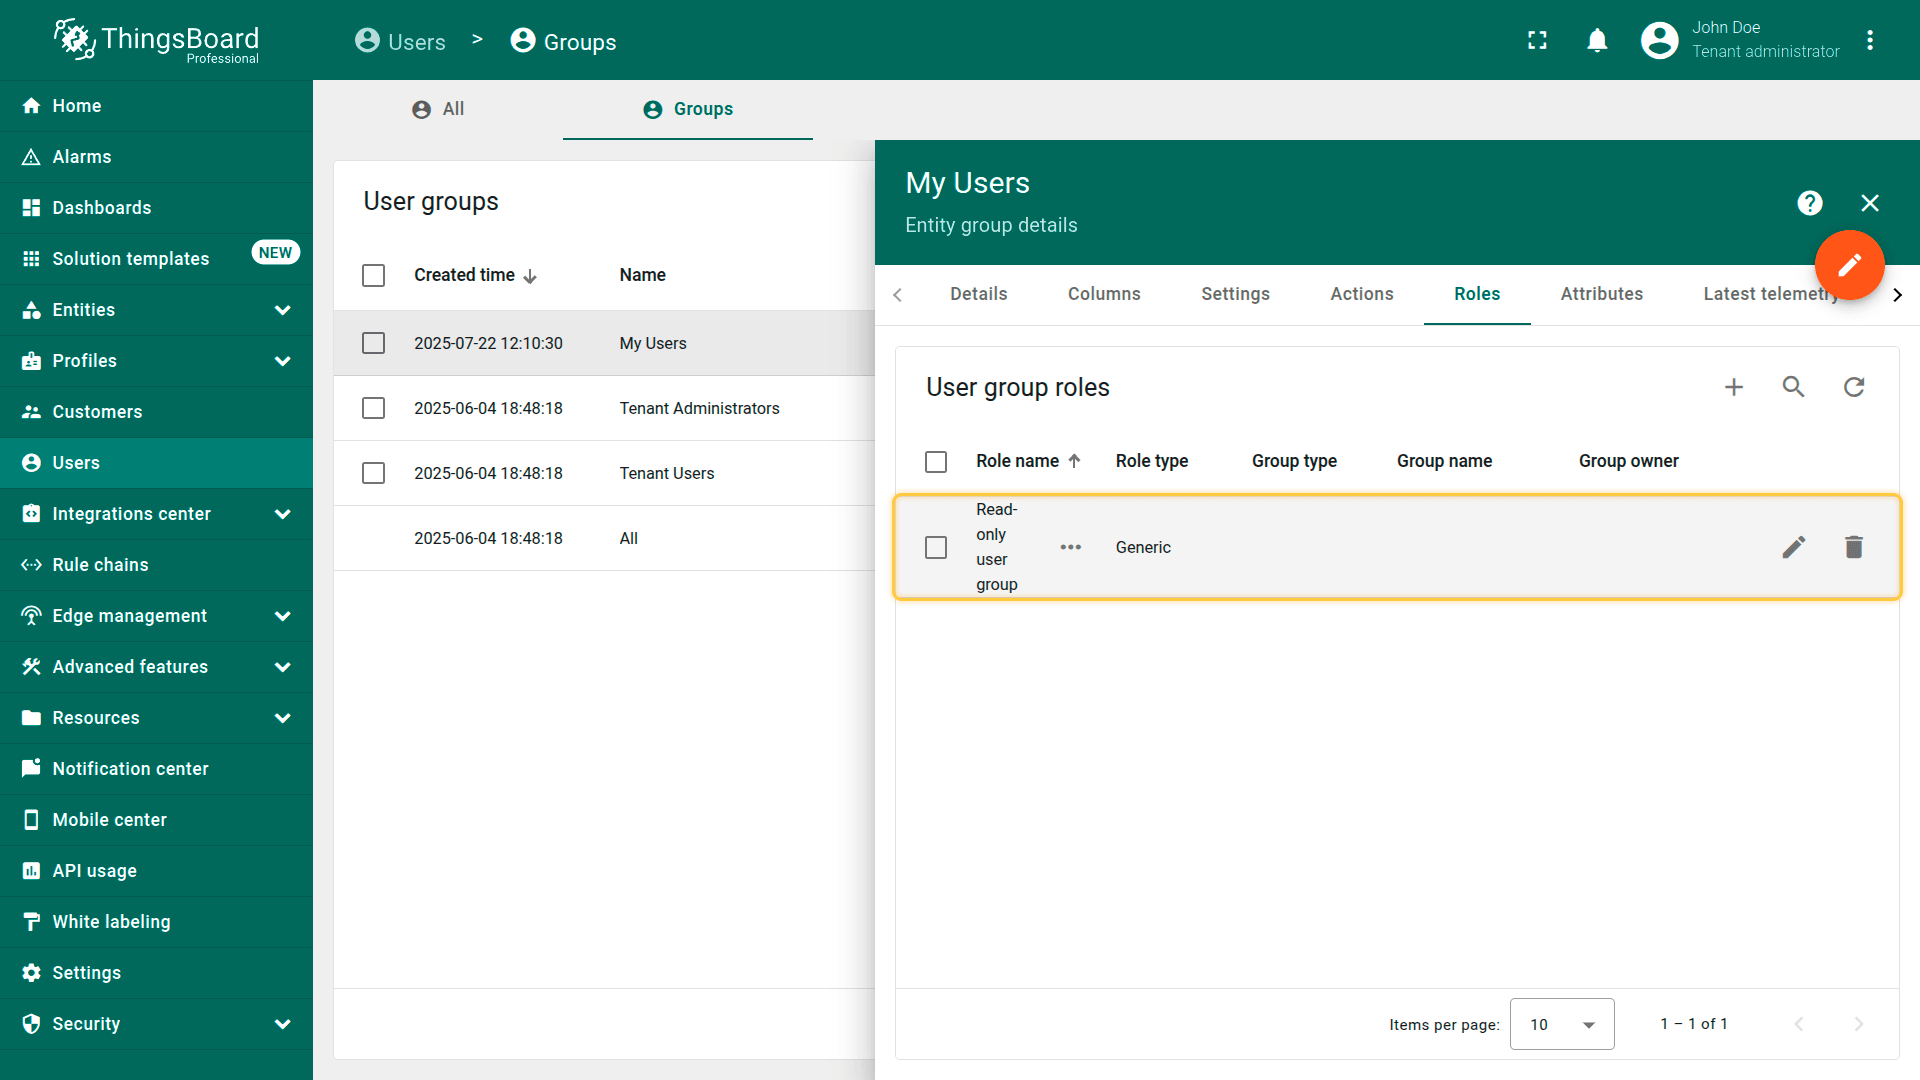
- In the “Groups” tab of the Users section, click the “pencil” (✏️) icon next to the desired user group.
- In the group details view, navigate to the “Roles” tab.
- Click ”+” (Add) to assign a role to the group.
- In the dialog window:
- Select the role type (Generic or Group).
- Choose the specific role you have previously created.
- Click “Add” to apply the role to the group.
Once completed, all users in this group will inherit the permissions defined by the selected role.
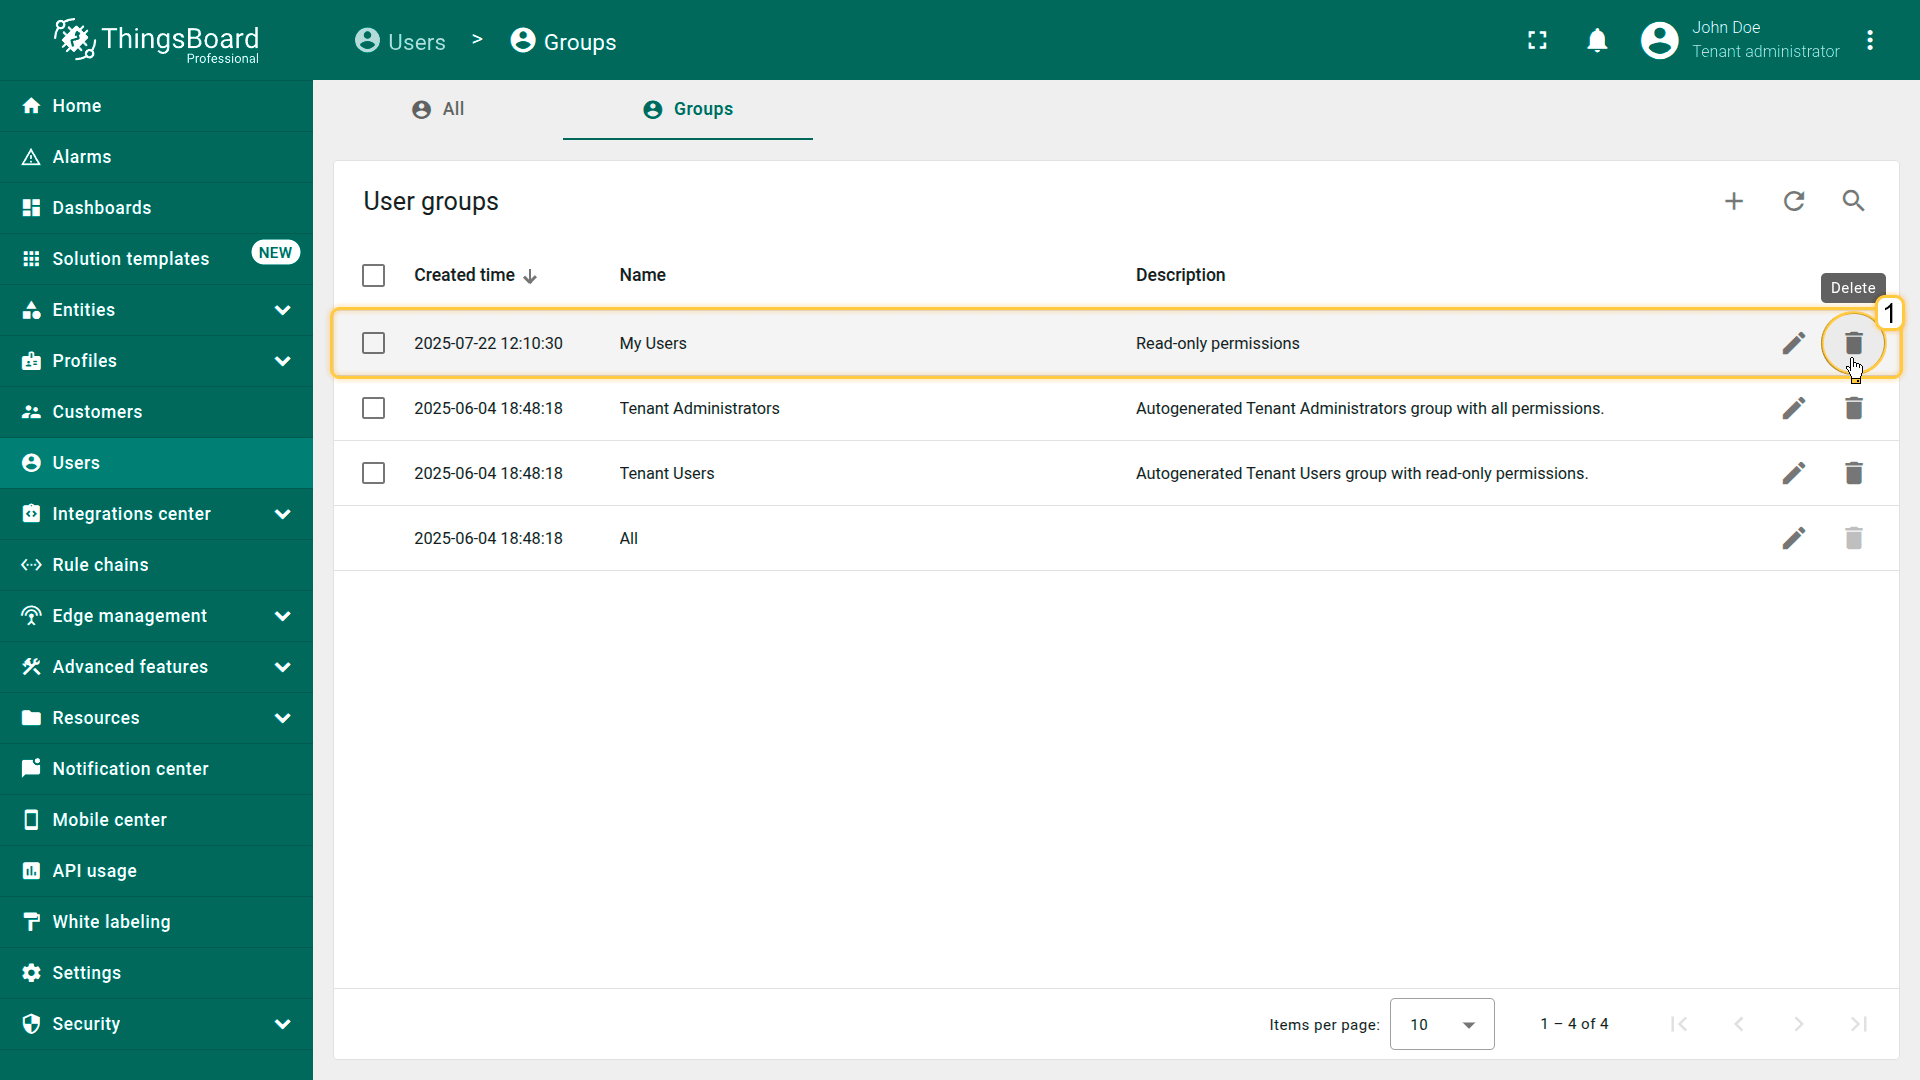
Deleting user group
A user with sufficient permissions can delete a user group.
Deleting a group does not remove the users associated with it — they will remain in the system.
Since a user can belong to multiple groups, they may still retain access through other groups, and every user is always a member of the special “All” group by default.
To delete a user group:
- From the Users screen, navigate to the “Groups” tab.
- Click the “trash bin” icon (🗑)️ at the end of the row for the group you want to delete.
- Confirm the deletion in the dialog prompt.
Note: Deleting a group will revoke its associated permissions from all users who were part of that group.