API Keys
API keys provide a simpler alternative to password-based authentication for the ThingsBoard REST API. Unlike JWT tokens, which require a login request and expire periodically, API keys are long-lived credentials that remain valid until they expire or are manually revoked.
| Feature | Description |
|---|---|
| No login required | API keys work immediately without exchanging a username and password. |
| Long-lived | They stay valid until the expiration date you set. |
| Permission inheritance | The key inherits the same permissions as the user it was created for. |
| Easy management | Enable, disable, or delete a key at any time. |
| Simple integration | Ideal for third-party apps, scripts, and MCP servers where you want to avoid complex authentication code. |
Creating API Keys
Section titled “Creating API Keys”API keys can be created for your own account or for other platform users, depending on your permissions.
Creating an API Key for Your Account
Section titled “Creating an API Key for Your Account”- Click your profile name in the bottom-left corner and select Account.
- Navigate to the Security tab.
- In the API keys section, click the Manage button.
- Click the + Generate button.
- Enter a description for the API key (e.g., Production server, Testing environment).
- Select the expiration period.
- Click Generate.
Creating an API Key for Another User
Section titled “Creating an API Key for Another User”A system administrator can create API keys for users of any tenant; a tenant administrator can create them for their customer users.
- Navigate to the Customers & users ⇾ Users section.
- Click the desired user to open their details.
- Go to the API keys tab.
- Click the + Generate button.
- Enter a description for the API key.
- Select the expiration period.
- Click Generate.
Using API Keys
Section titled “Using API Keys”In API Requests
Section titled “In API Requests”Include the API key in the X-Authorization header with the ApiKey prefix:
X-Authorization: ApiKey $YOUR_API_KEY_VALUEExample:
curl -X GET --header 'Accept: application/json' \ --header 'X-Authorization: ApiKey $YOUR_API_KEY_VALUE' \ 'https://$THINGSBOARD_HOST_NAME/api/auth/user'Replace $YOUR_API_KEY_VALUE with your API key and $THINGSBOARD_HOST_NAME with your ThingsBoard hostname.
In Swagger UI
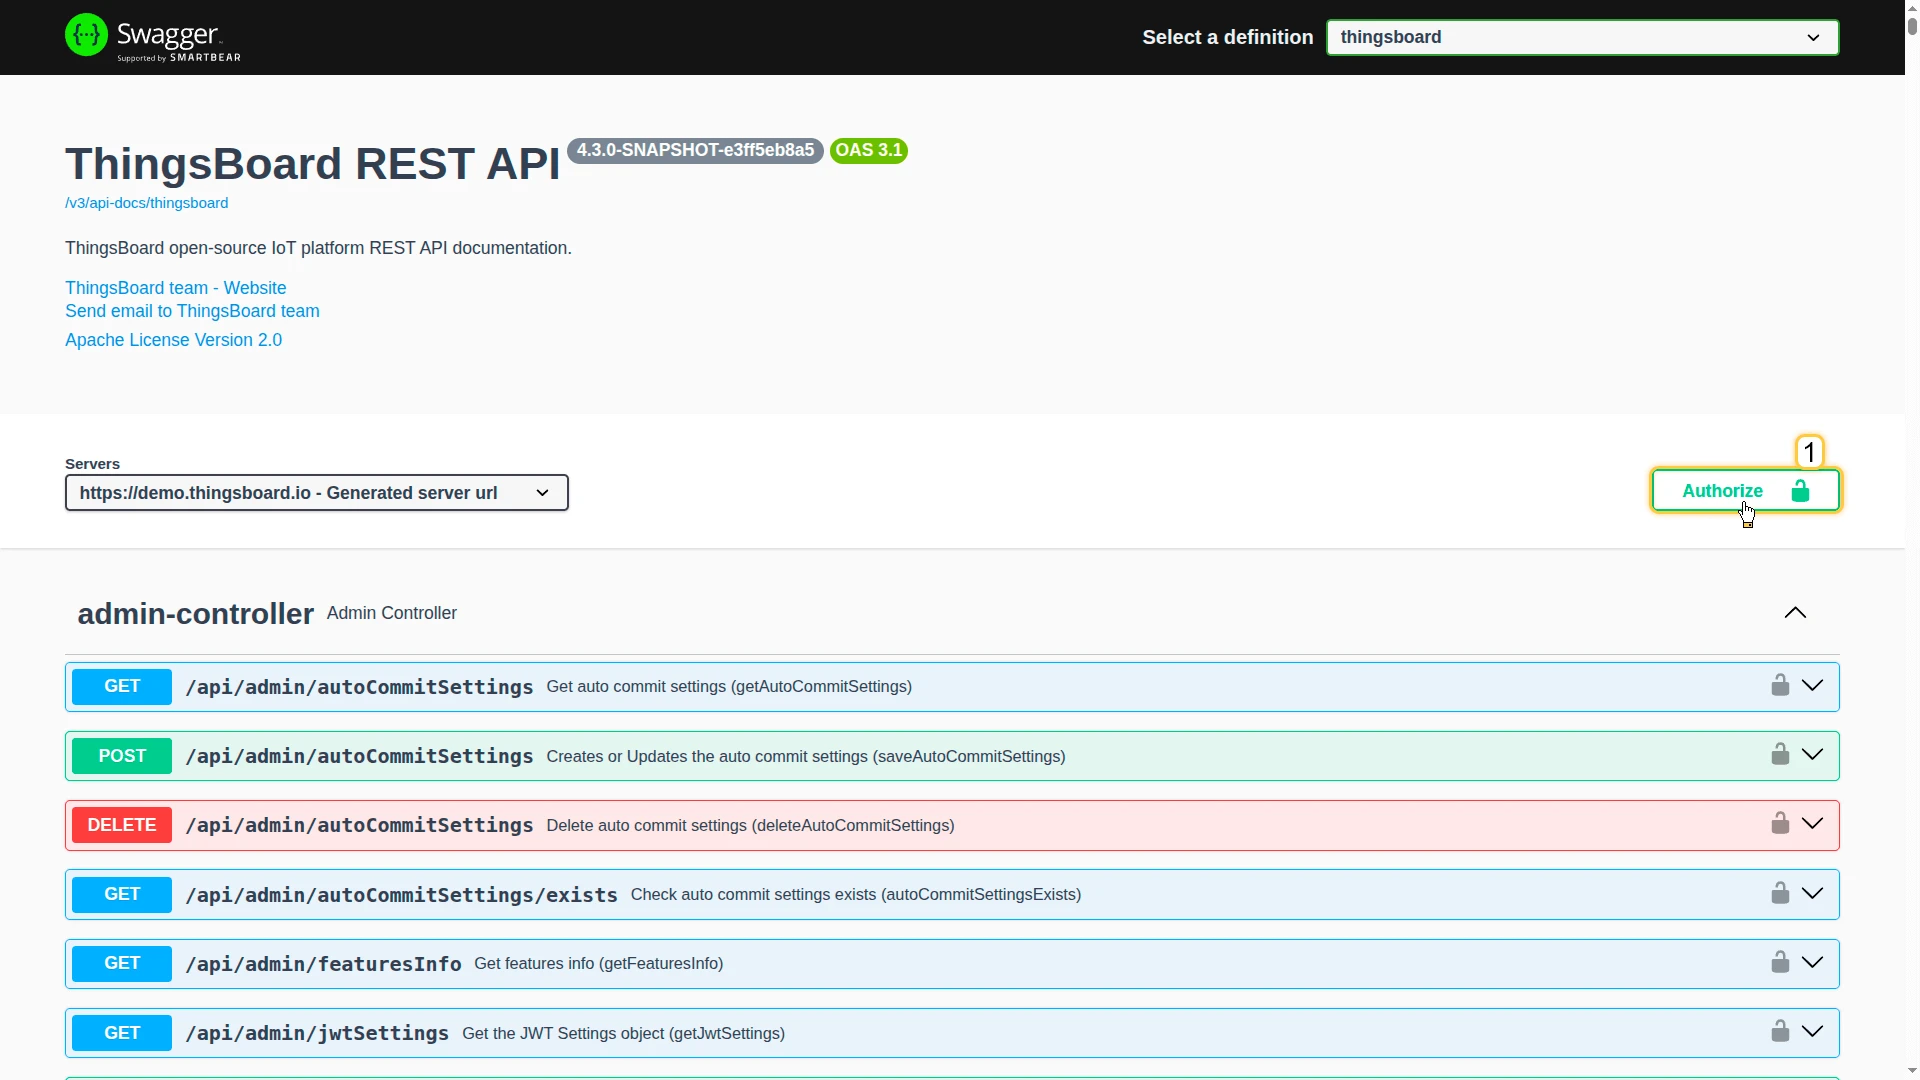
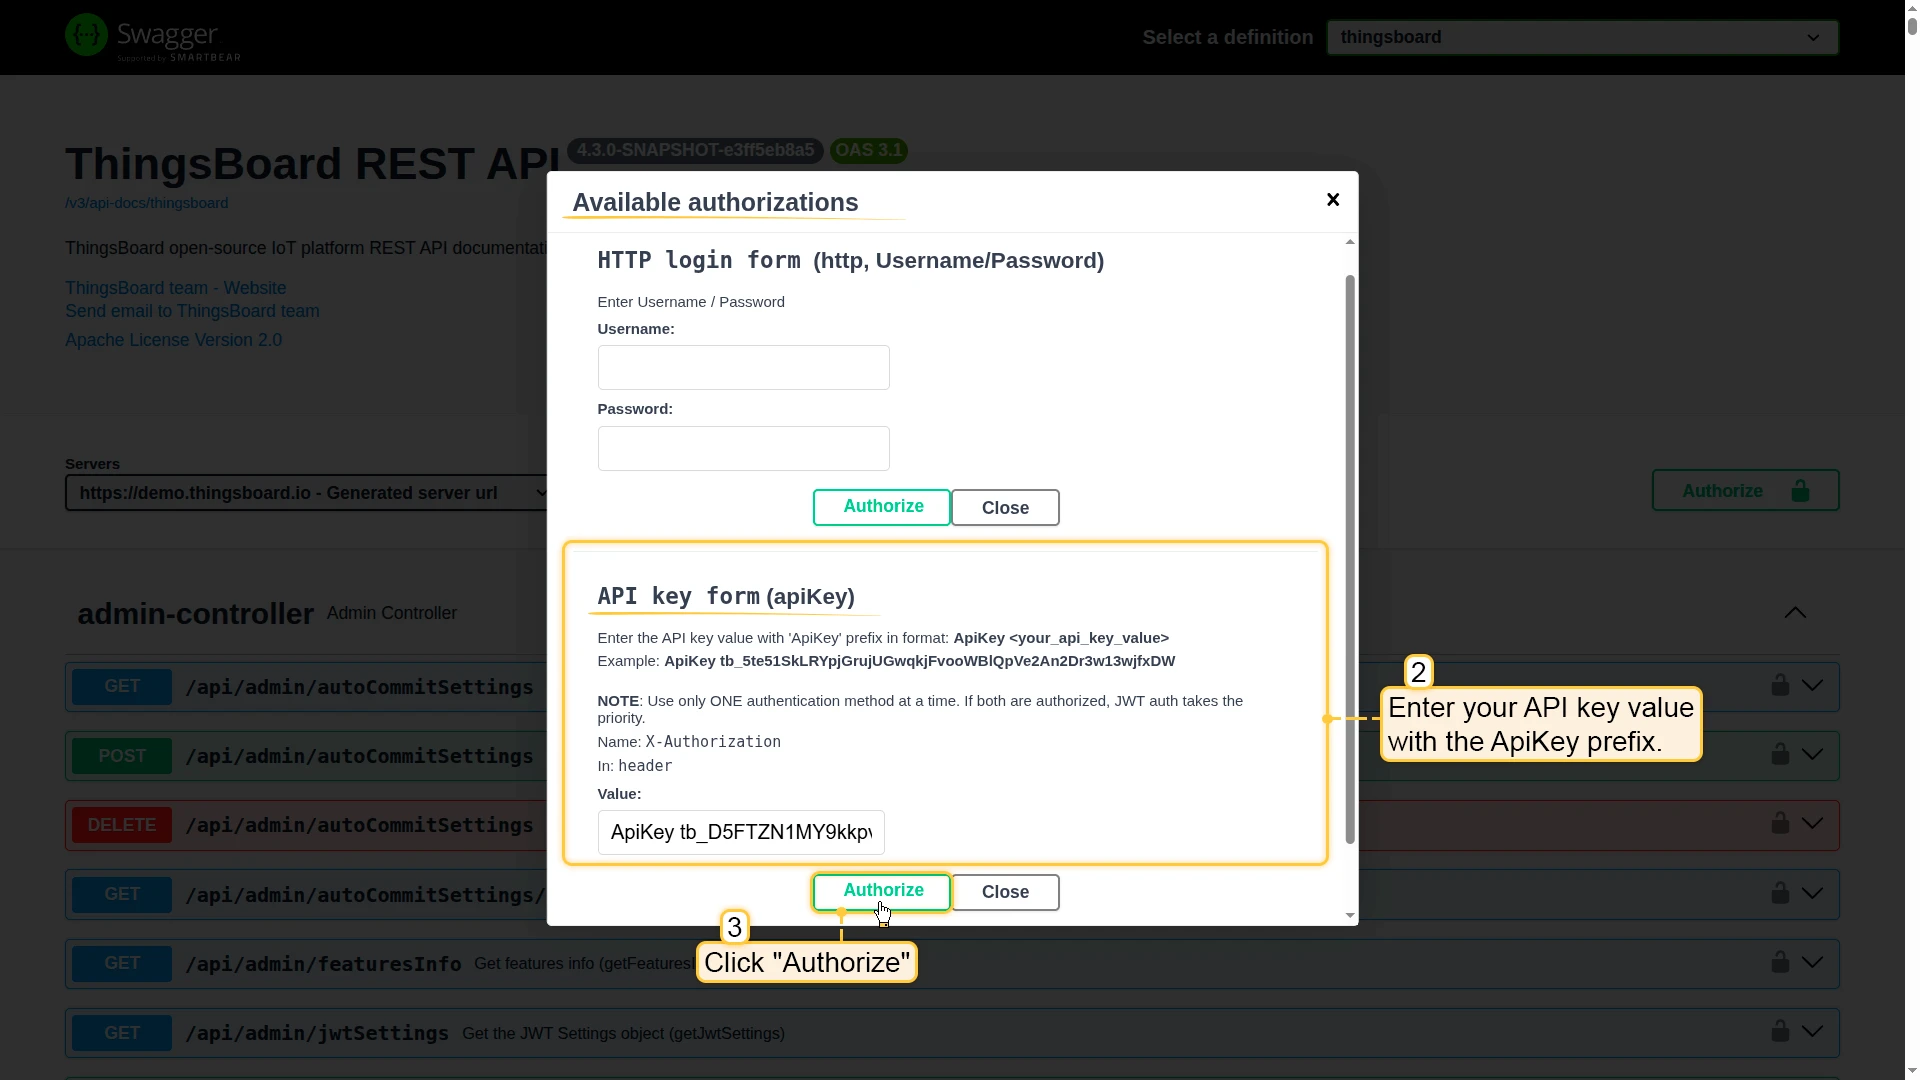
Section titled “In Swagger UI”When using Swagger UI, you can authenticate with an API key:
- Open Swagger UI.
- Click the Authorize button.
- In the API key form (apiKey) section, enter your API key value with the
ApiKeyprefix:ApiKey YOUR_API_KEY_VALUE - Click Authorize.
Managing API Keys
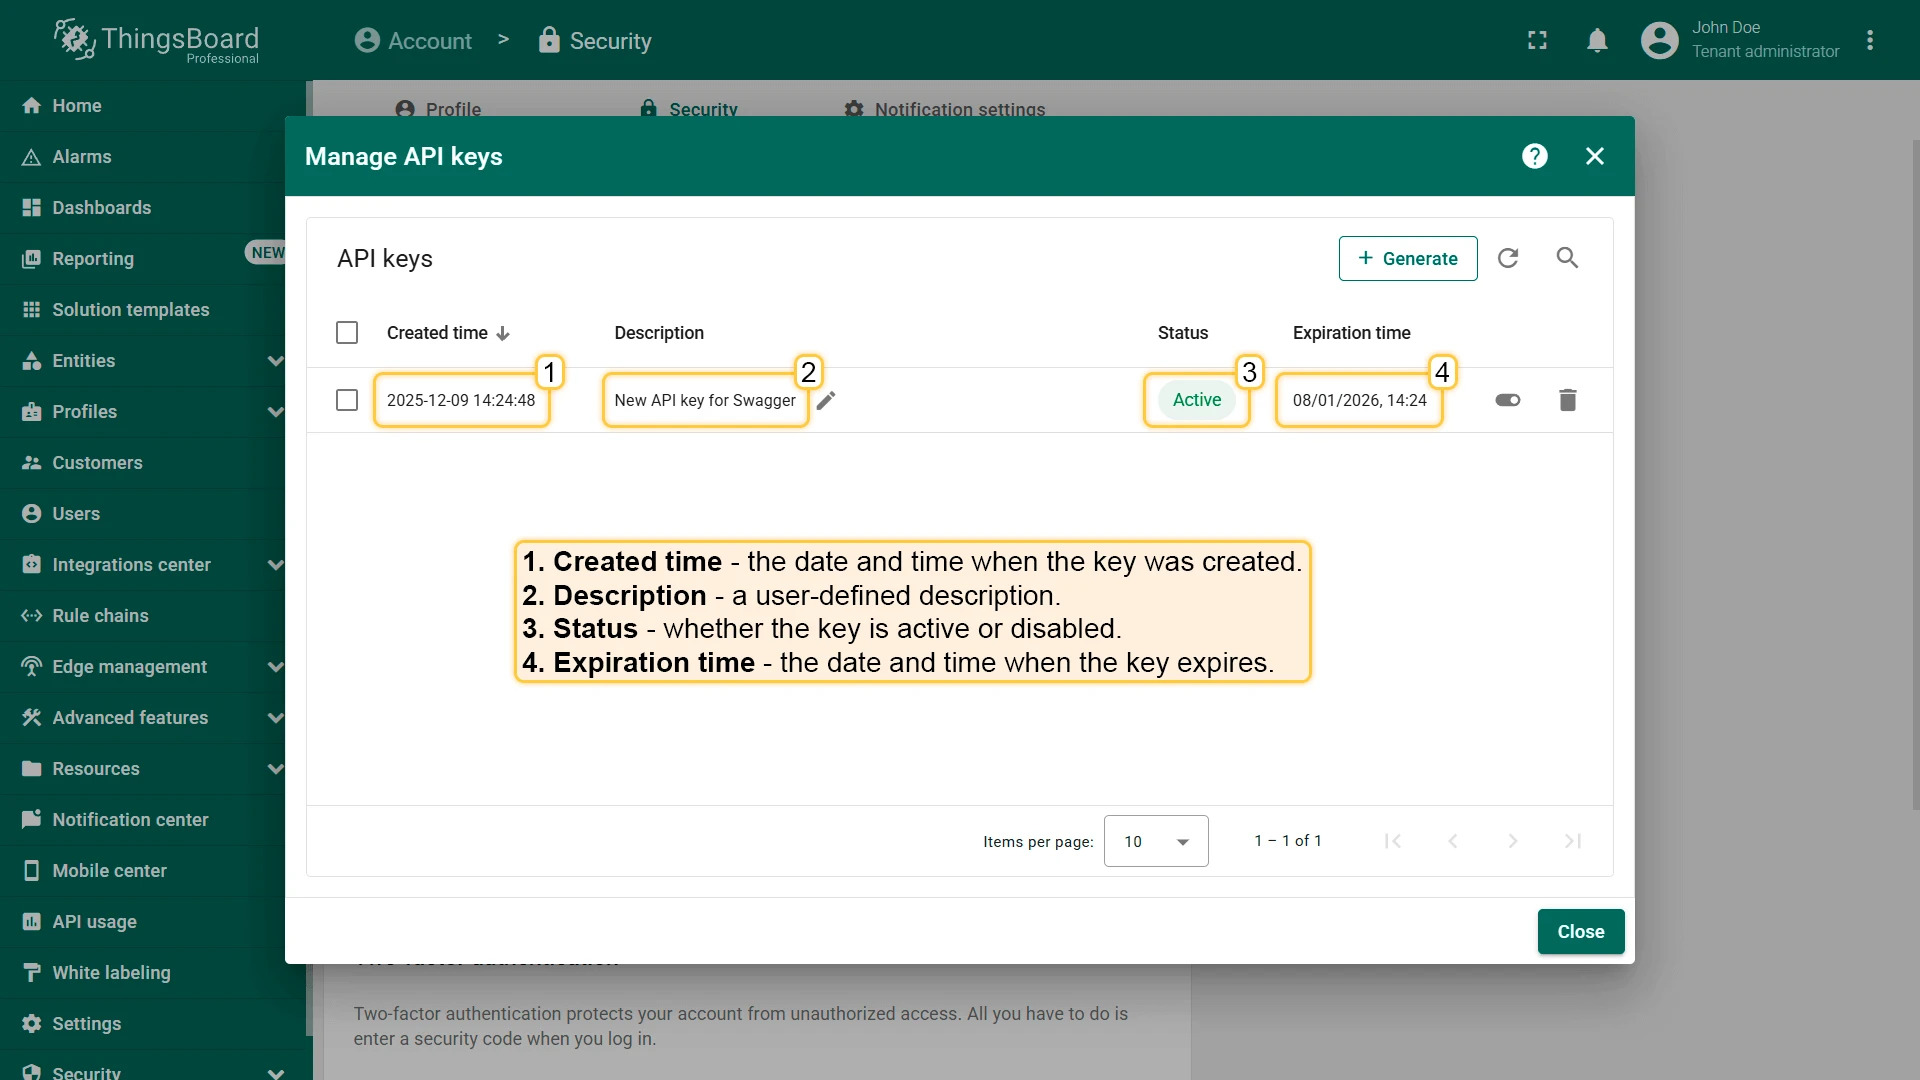
Section titled “Managing API Keys”Each API key in the table displays:
| Column | Description |
|---|---|
| Created time | When the API key was generated. |
| Description | The description assigned to the key. |
| Status | Whether the key is active or disabled. |
| Expiration time | The date and time when the key will expire. |
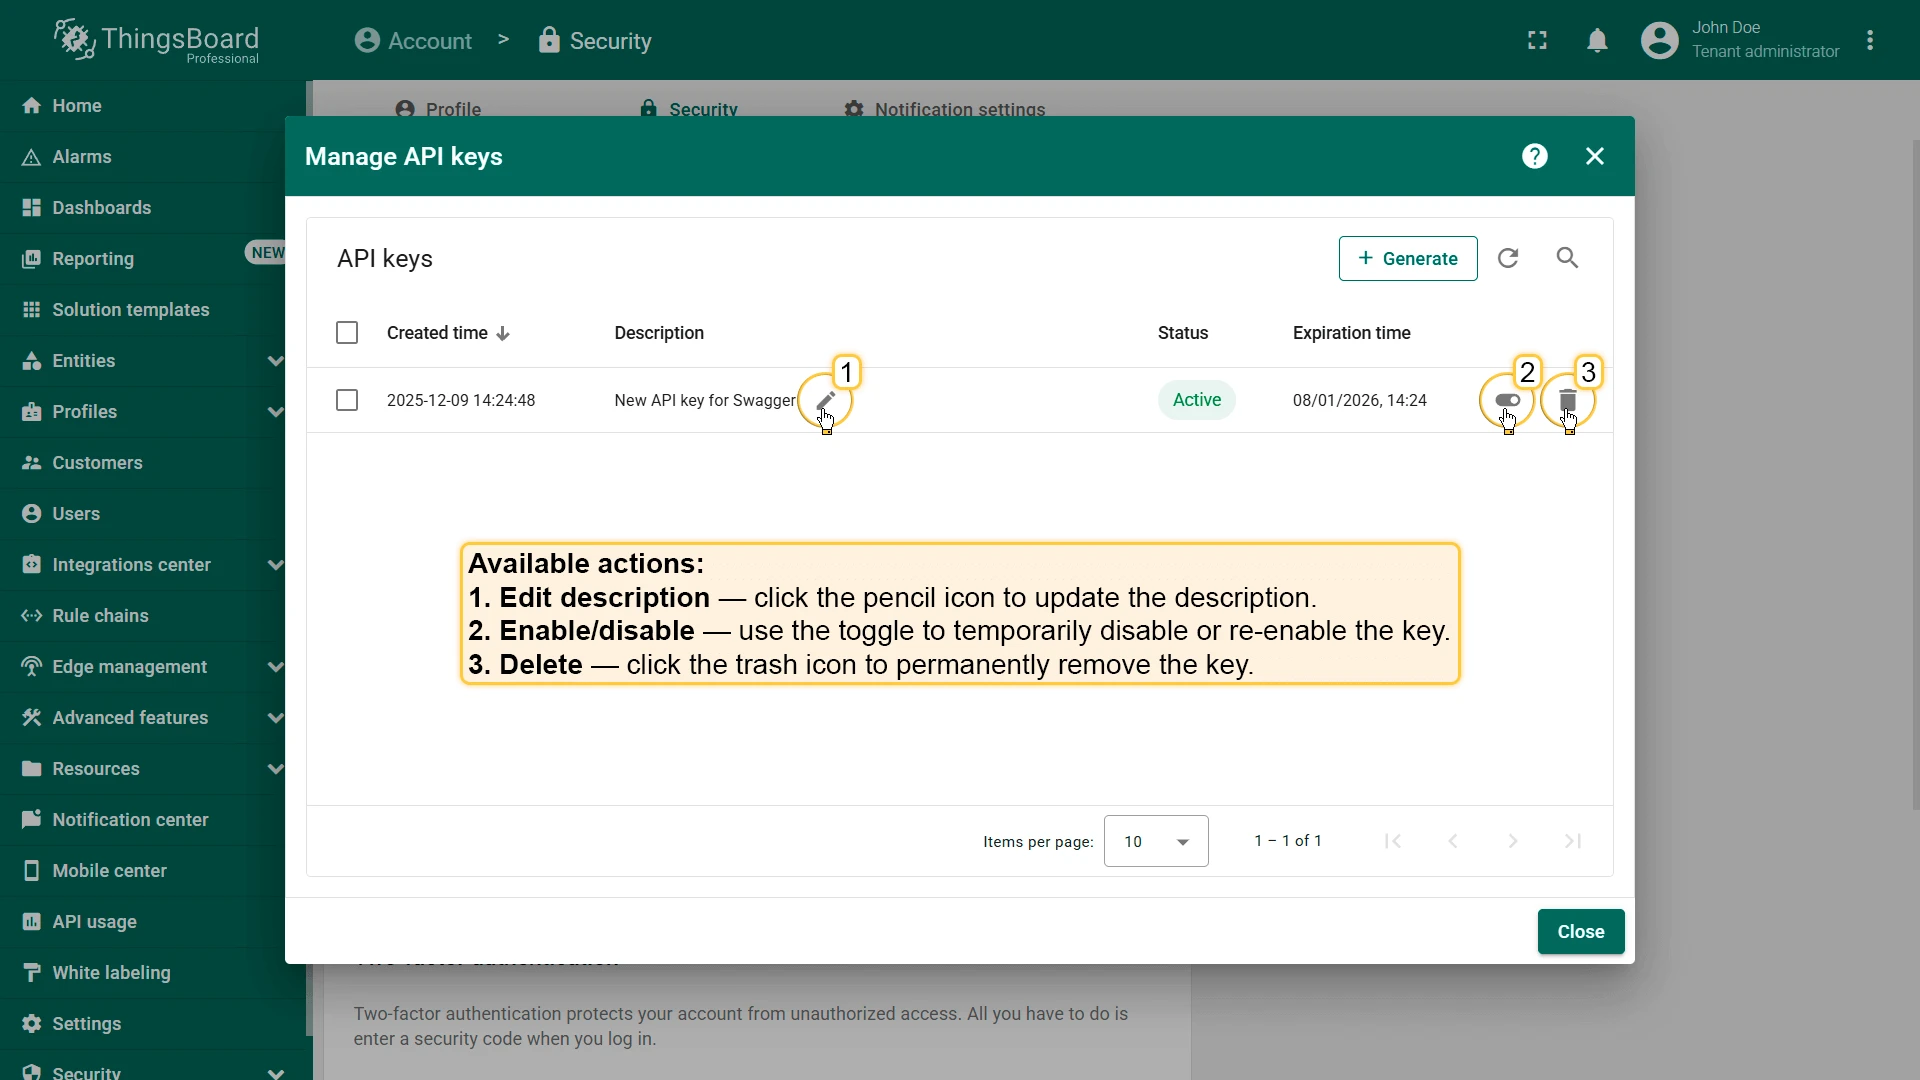
Available actions for each API key:
- Enable / disable — use the toggle to temporarily disable or re-enable a key.
- Delete — click the delete icon to permanently remove a key. This action cannot be undone.
- Edit description — click the edit icon to update the key’s description.
Was this helpful?