| Available since TB Version 4.2 |
Only Professional Edition supports Reporting feature.
Use ThingsBoard Cloud or install your own platform instance.
In ThingsBoard, you can attach ready-made reports to system notifications sent to users through available channels (only Web, Email or Slack). This lets you pair an event notification with a full report that recipients can open and view or download instantly.
Important: If the recipient is a Customer user, reports can only be attached to notifications sent via Email or Slack.
Viewing reports directly in the Web UI is available only for tenant users.
When it's useful:
- Automatically sending a report when a critical alarm occurs.
- Delivering regular summaries without needing to run the scheduler.
- Combining system events (like data updates) with up-to-date analytical content.
Example: Adding a Report to the "New alarm notification" Template
Let's walk through how to attach a report to a notification using the existing “New alarm notification” template. This template is used to send alerts to tenant administrators whenever a new alarm is created.
We'll make the following changes:
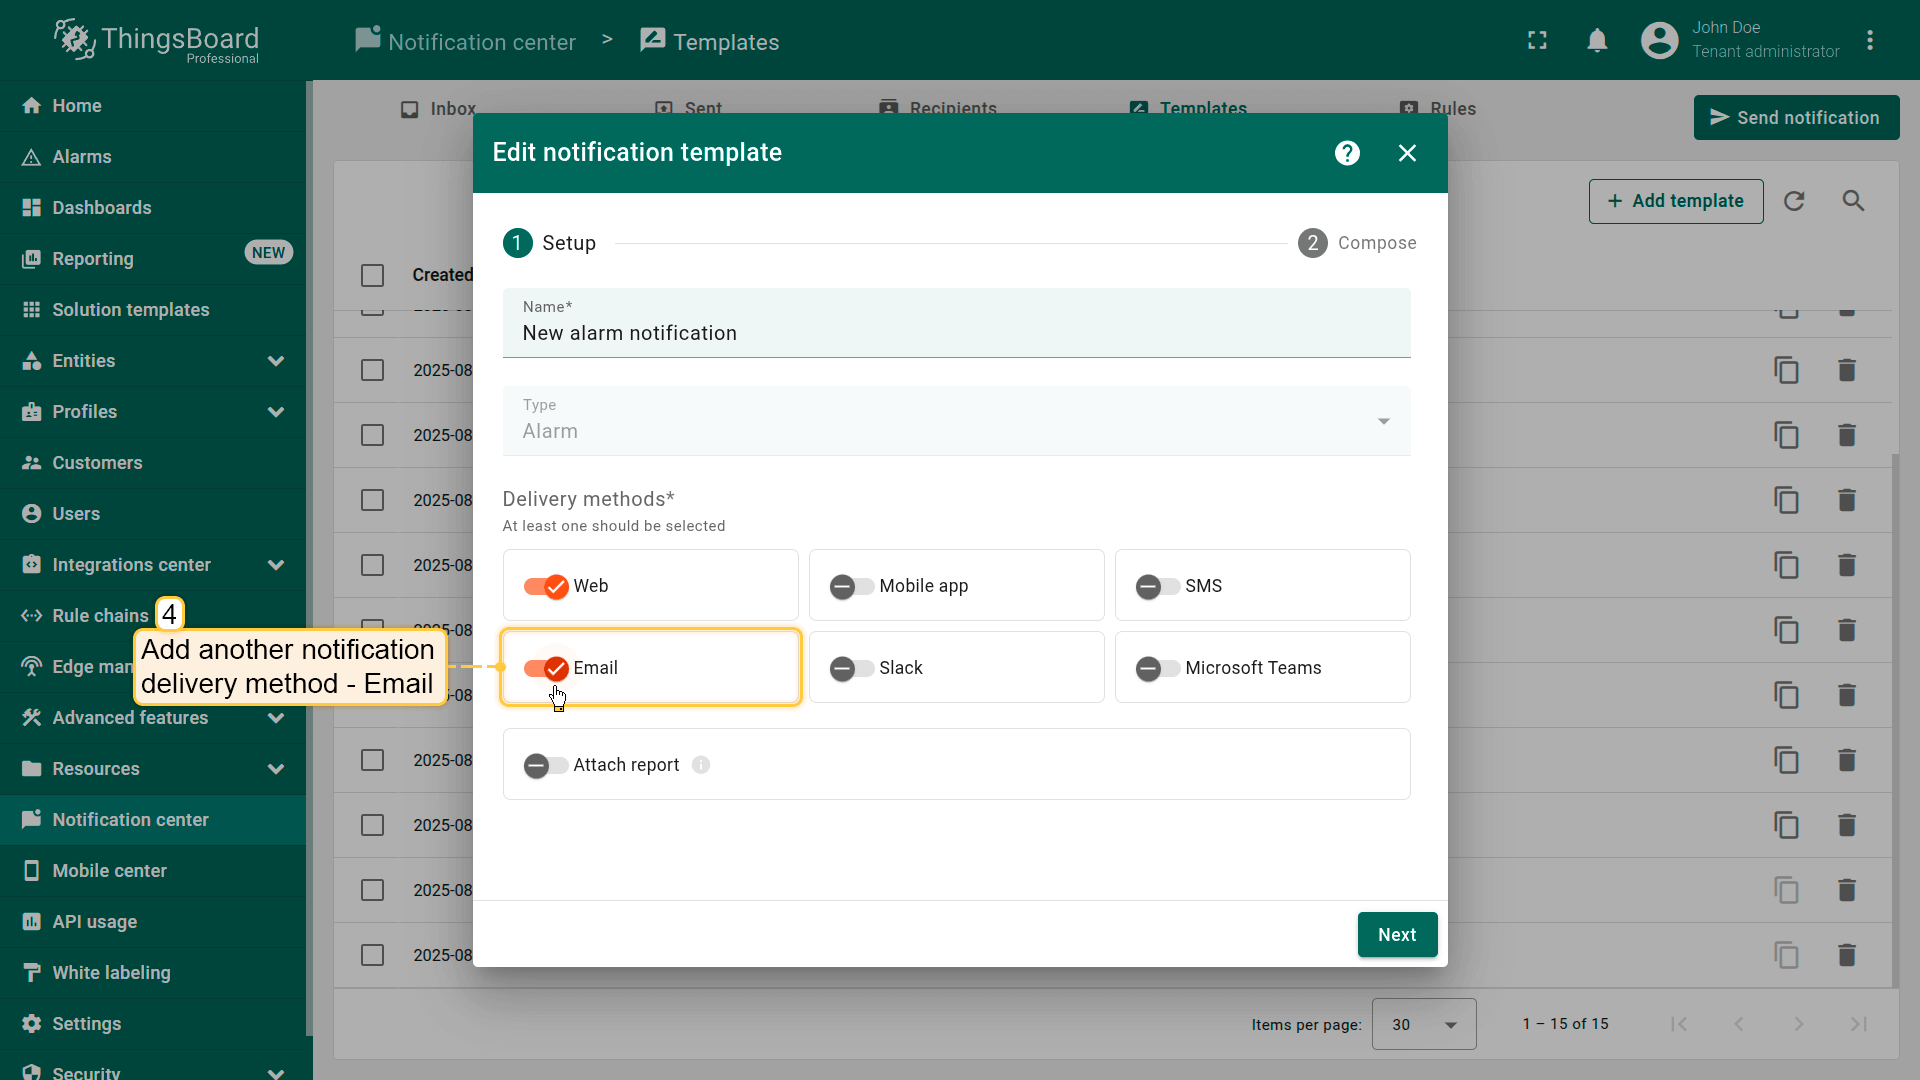
- Add another delivery method — Email (in addition to the existing Web notifications).
- Attach a PDF report with detailed alarm information to the email.
First, let's create a template for generating a PDF report.
We'll add a single component to the template — an Alarm Table — to display the created alarm and its details.
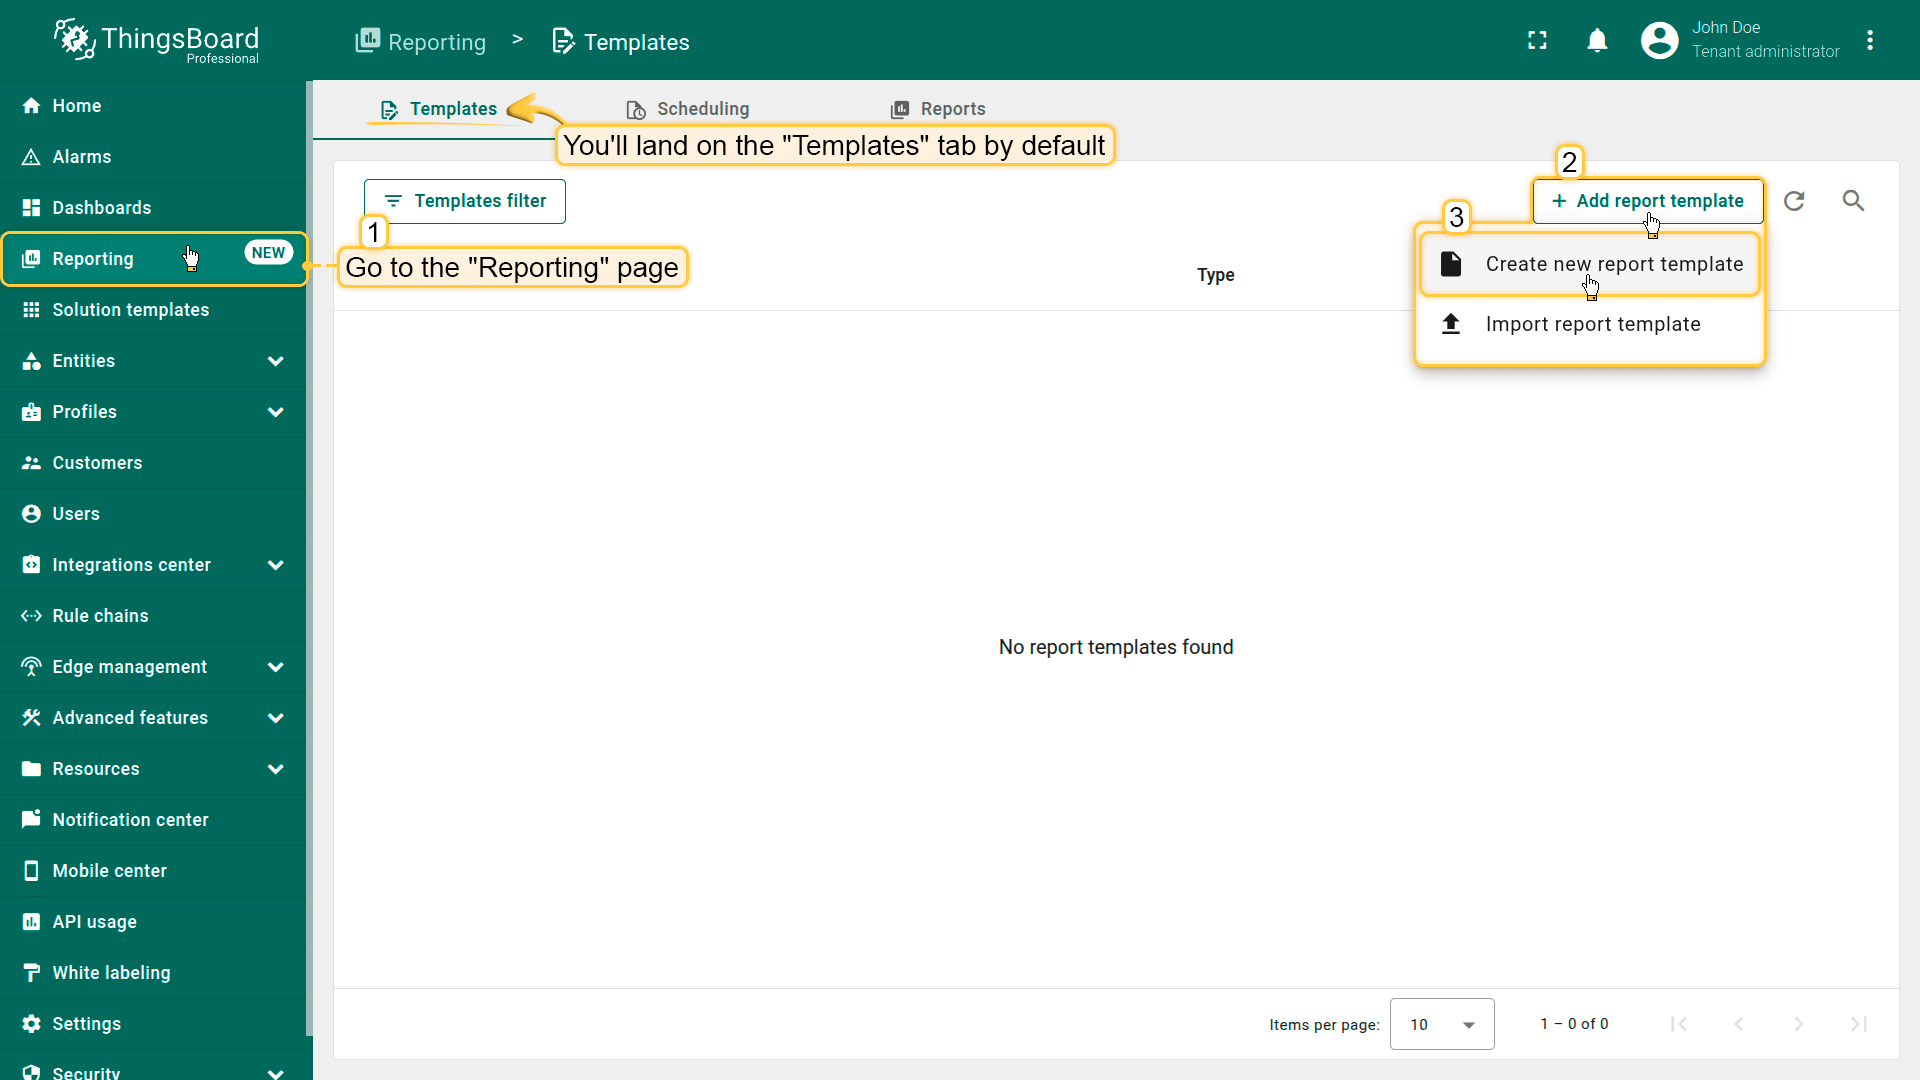
- Go to the “Reporting” page from the left-hand menu — you'll land on the “Templates” tab by default.
- Click the “+ Add report template” button in the top-right corner and select “Create new report template”.
- In the popup, fill out the following:
- Name it “New alarm”.
- Choose PDF report format.
- Choose Report as the template type.
- Click “Add” to create the report template and open the Report Builder interface.
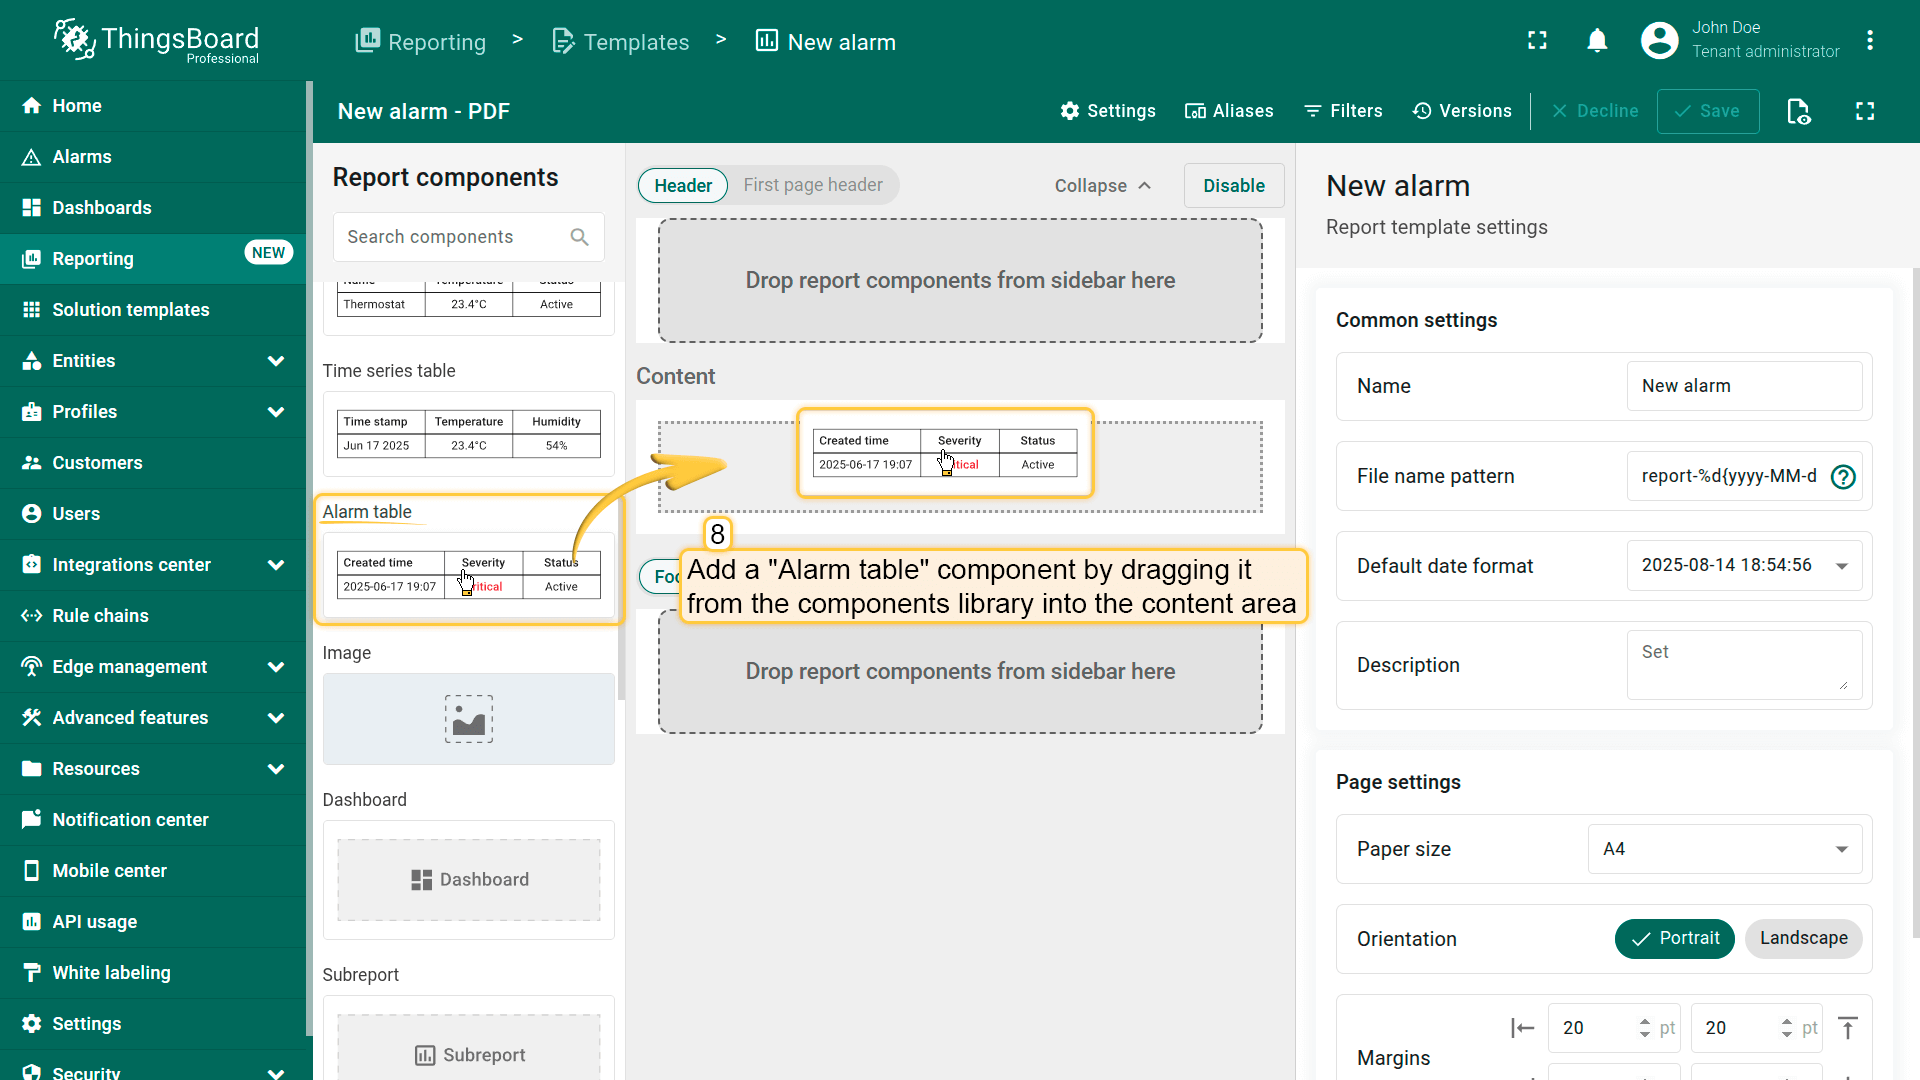
Configure the report in Report Builder:
- Locate and drag the “Alarm table” component into the content area of your report.
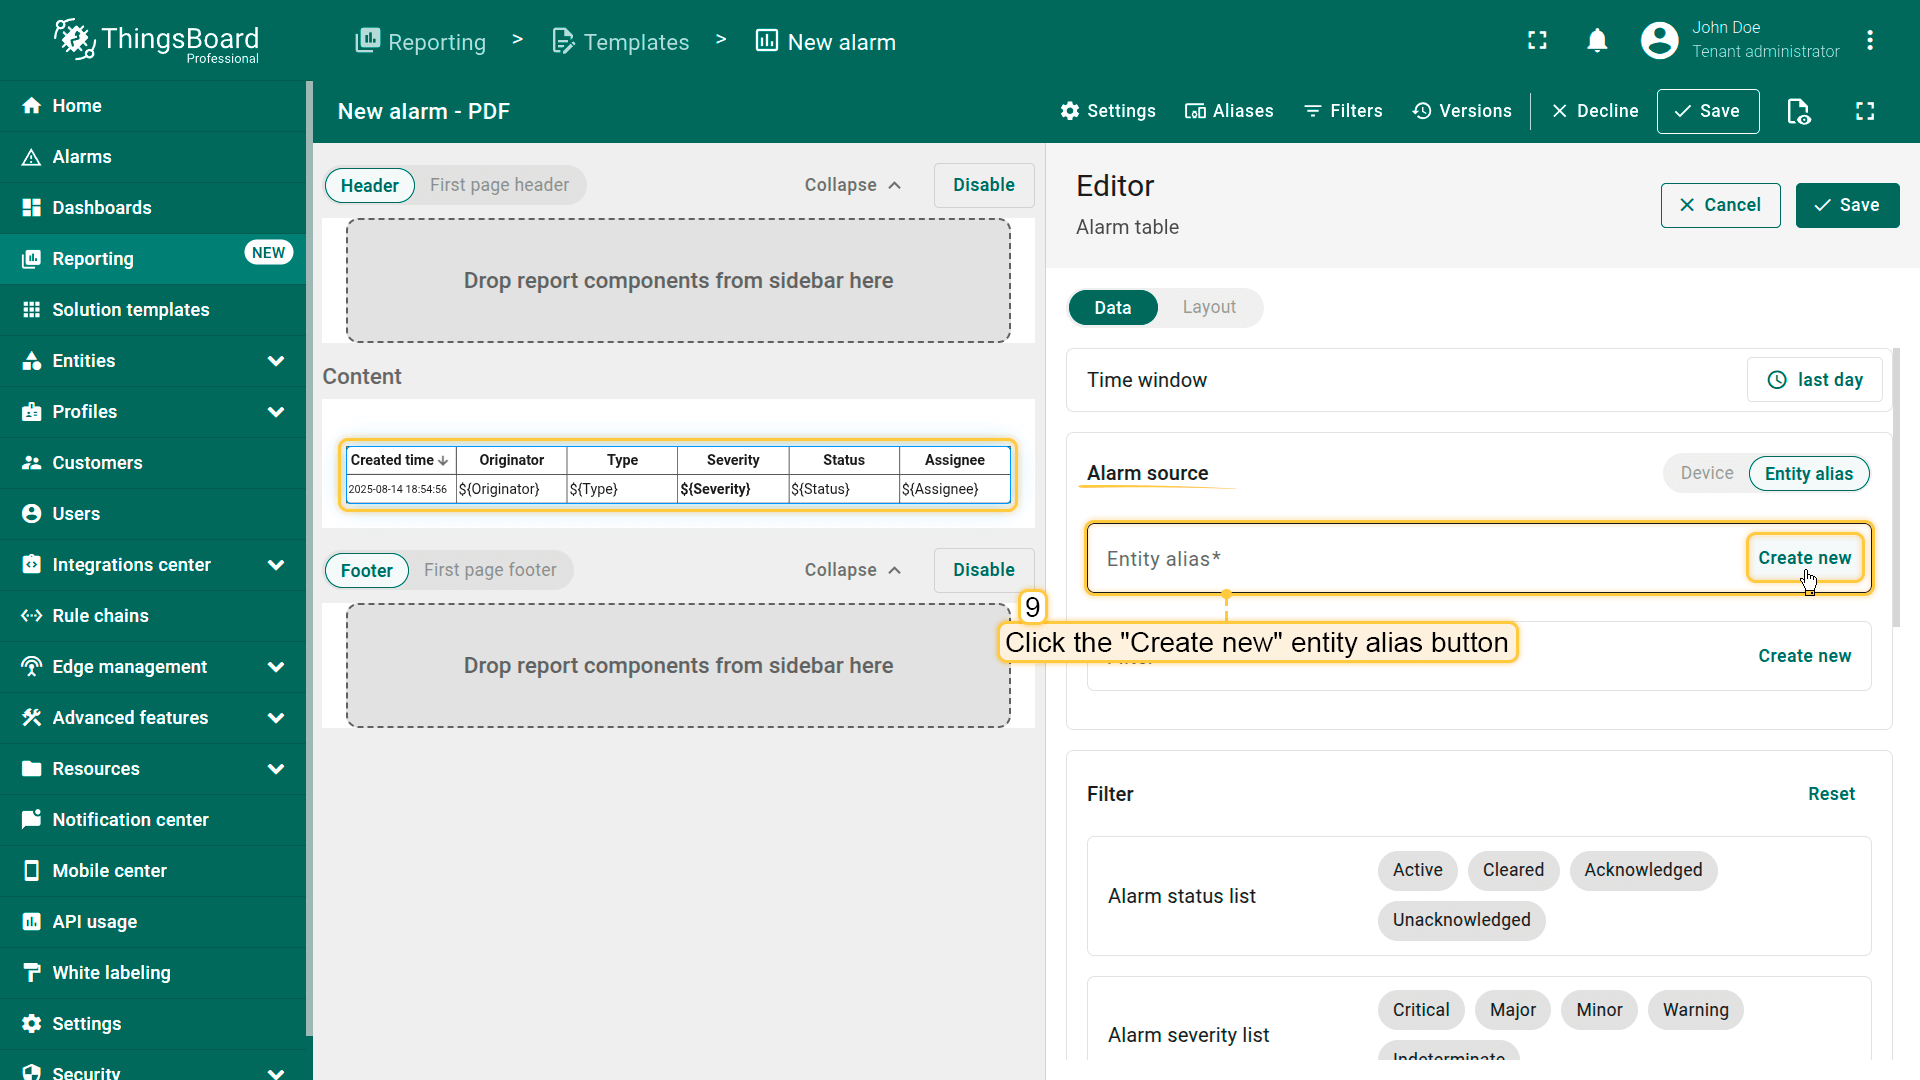
- In the “Alarm source” section, click “Create new” entity alias button.
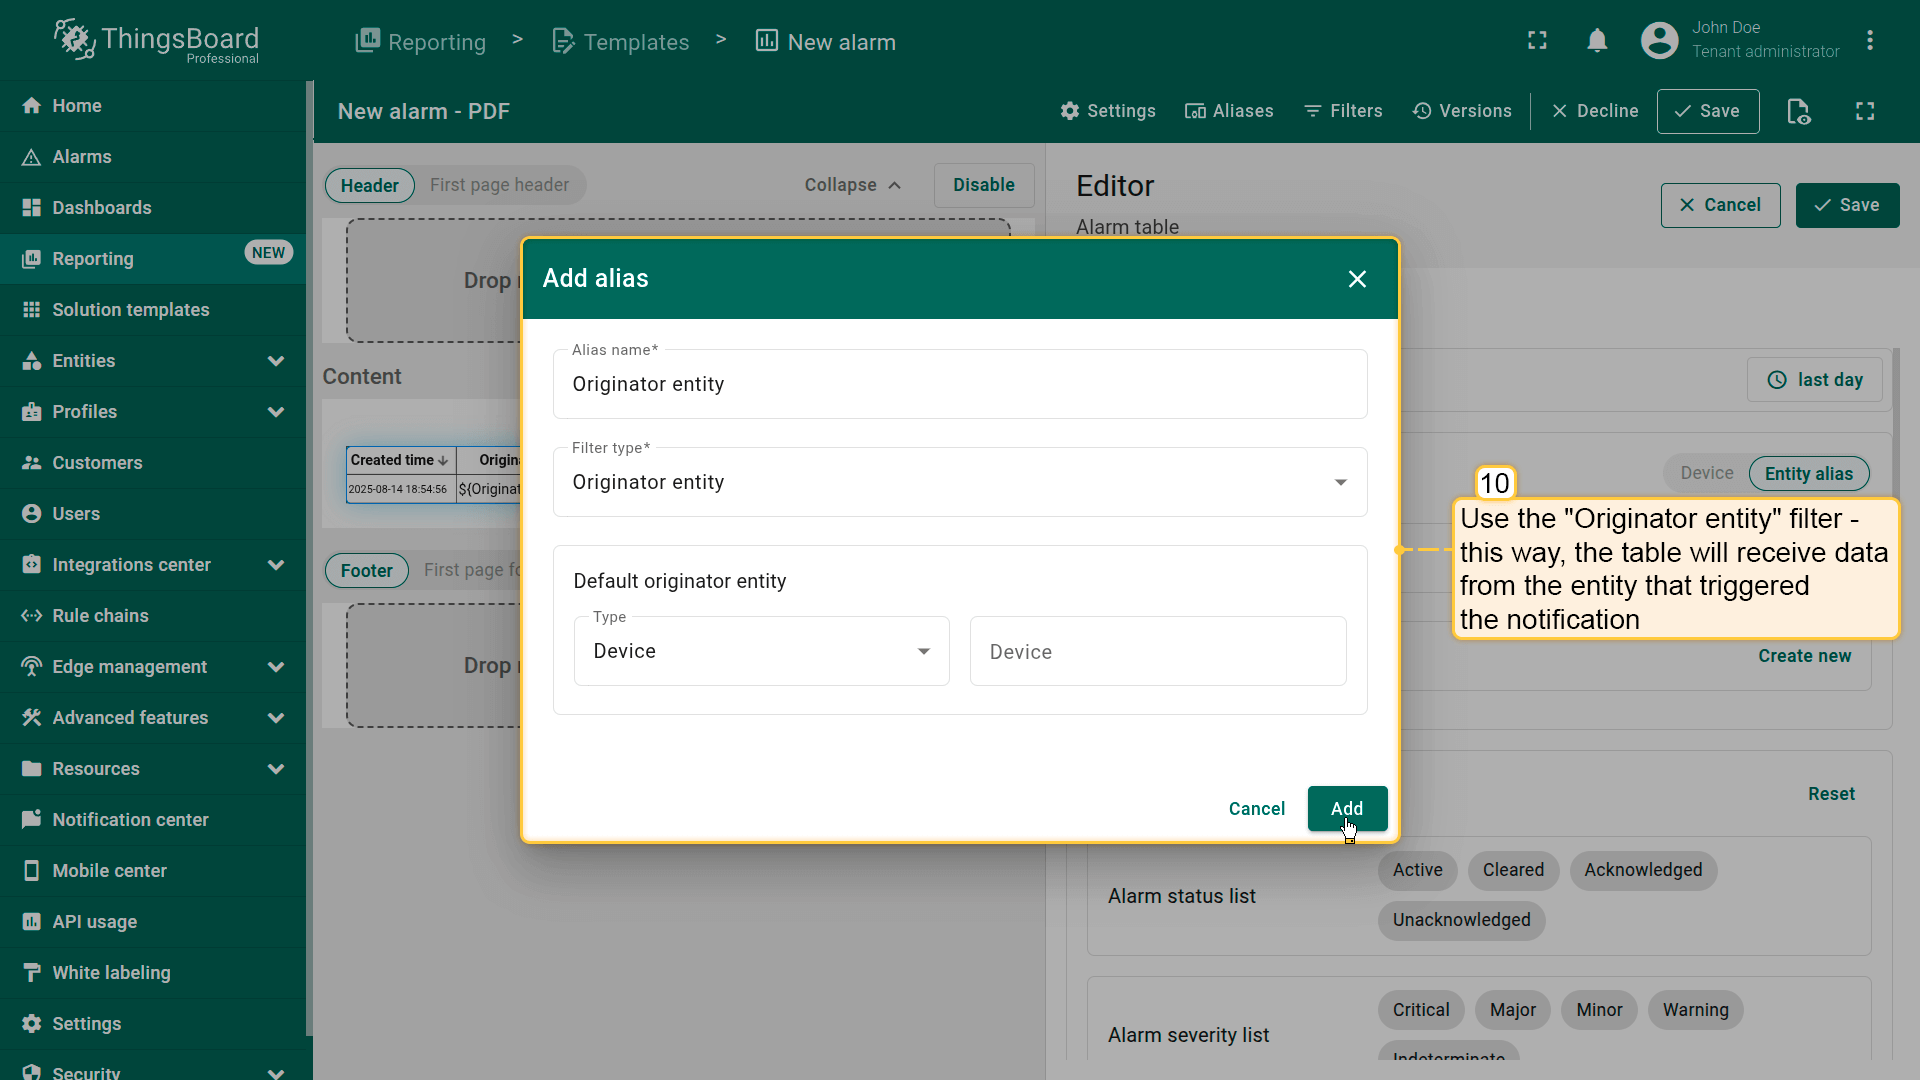
- Use the “Originator entity” filter — this way, the table will receive data from the entity that triggered the notification.
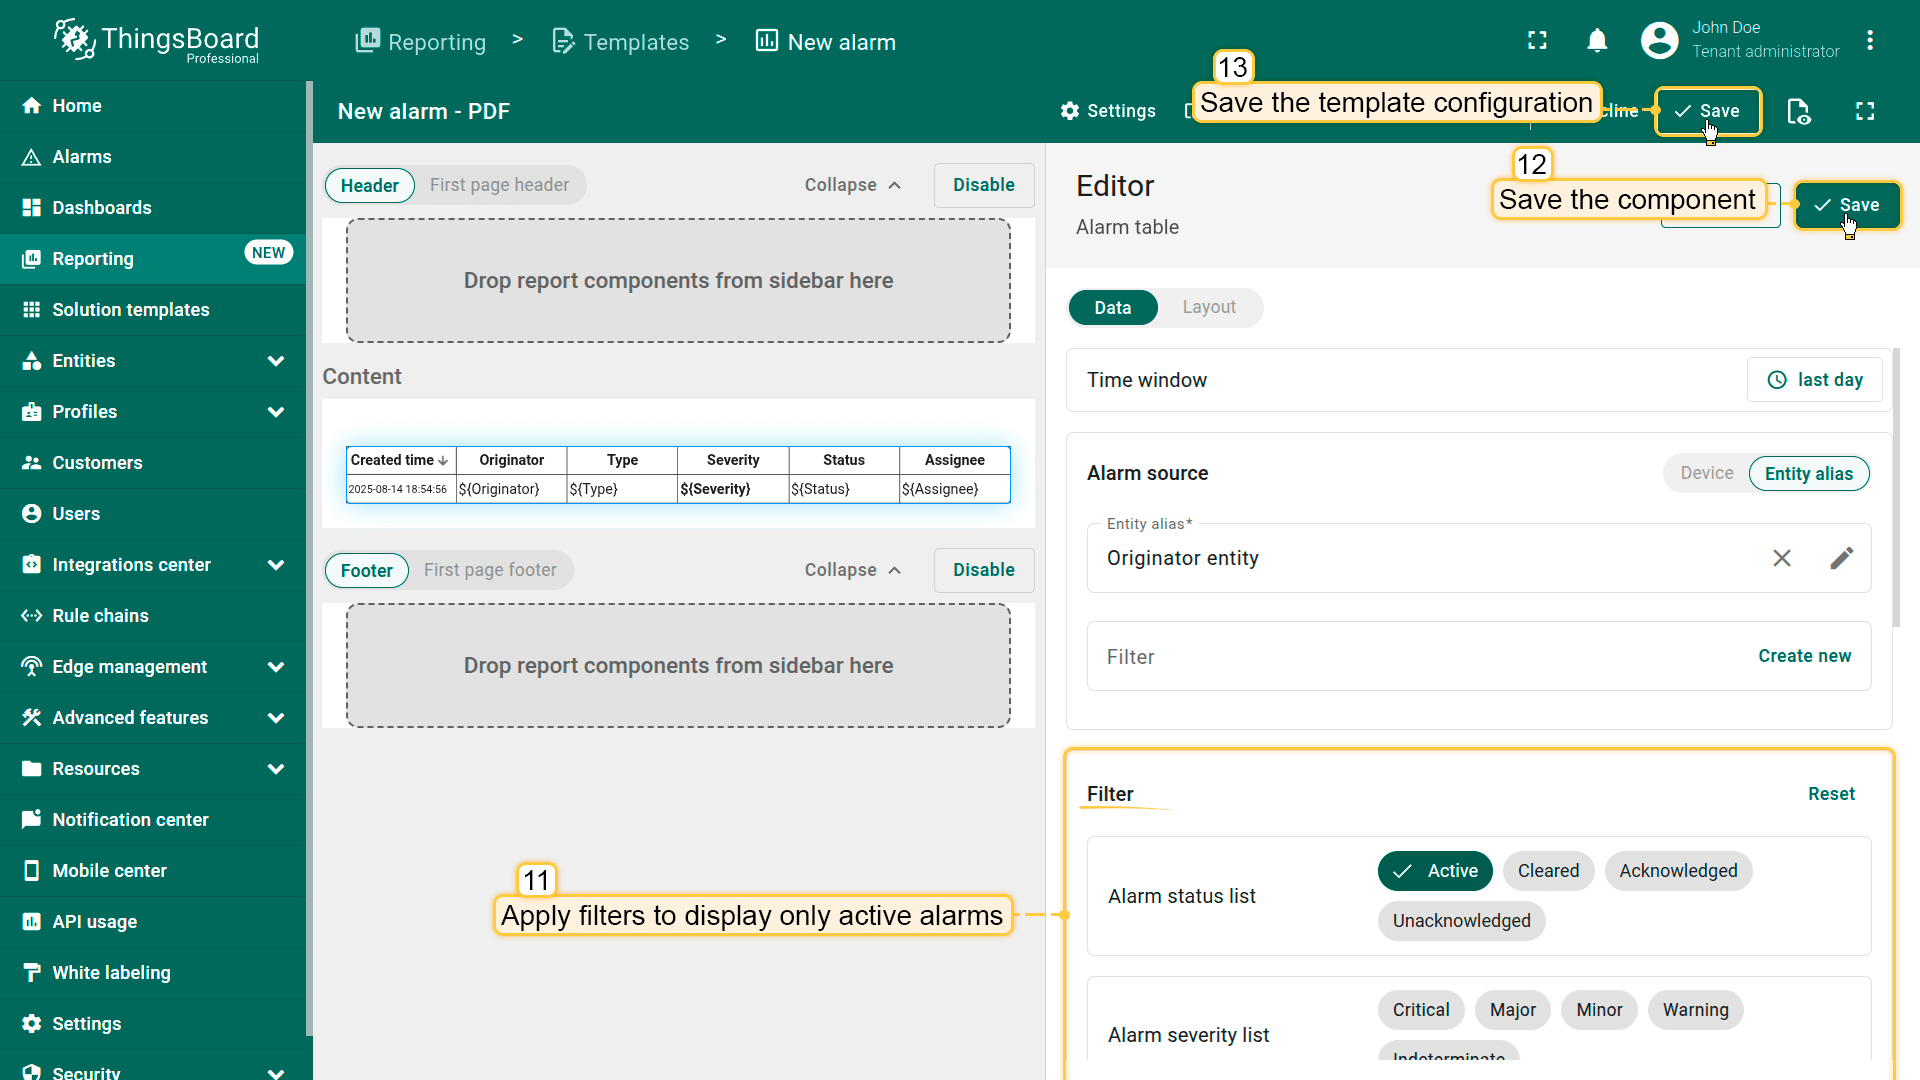
- Apply filters to display only active alarms.
- Save the component.
- Click “Save” in the top-right corner to store your template configuration.

- Name it "New alarm".
- Choose PDF report format.
- Choose Report as the template type.
- Click "Add" to create the report template and open the Report Builder interface.
- Click "Save" in the top-right corner to store your template configuration.
Now, let's modify the "New alarm notification" template.
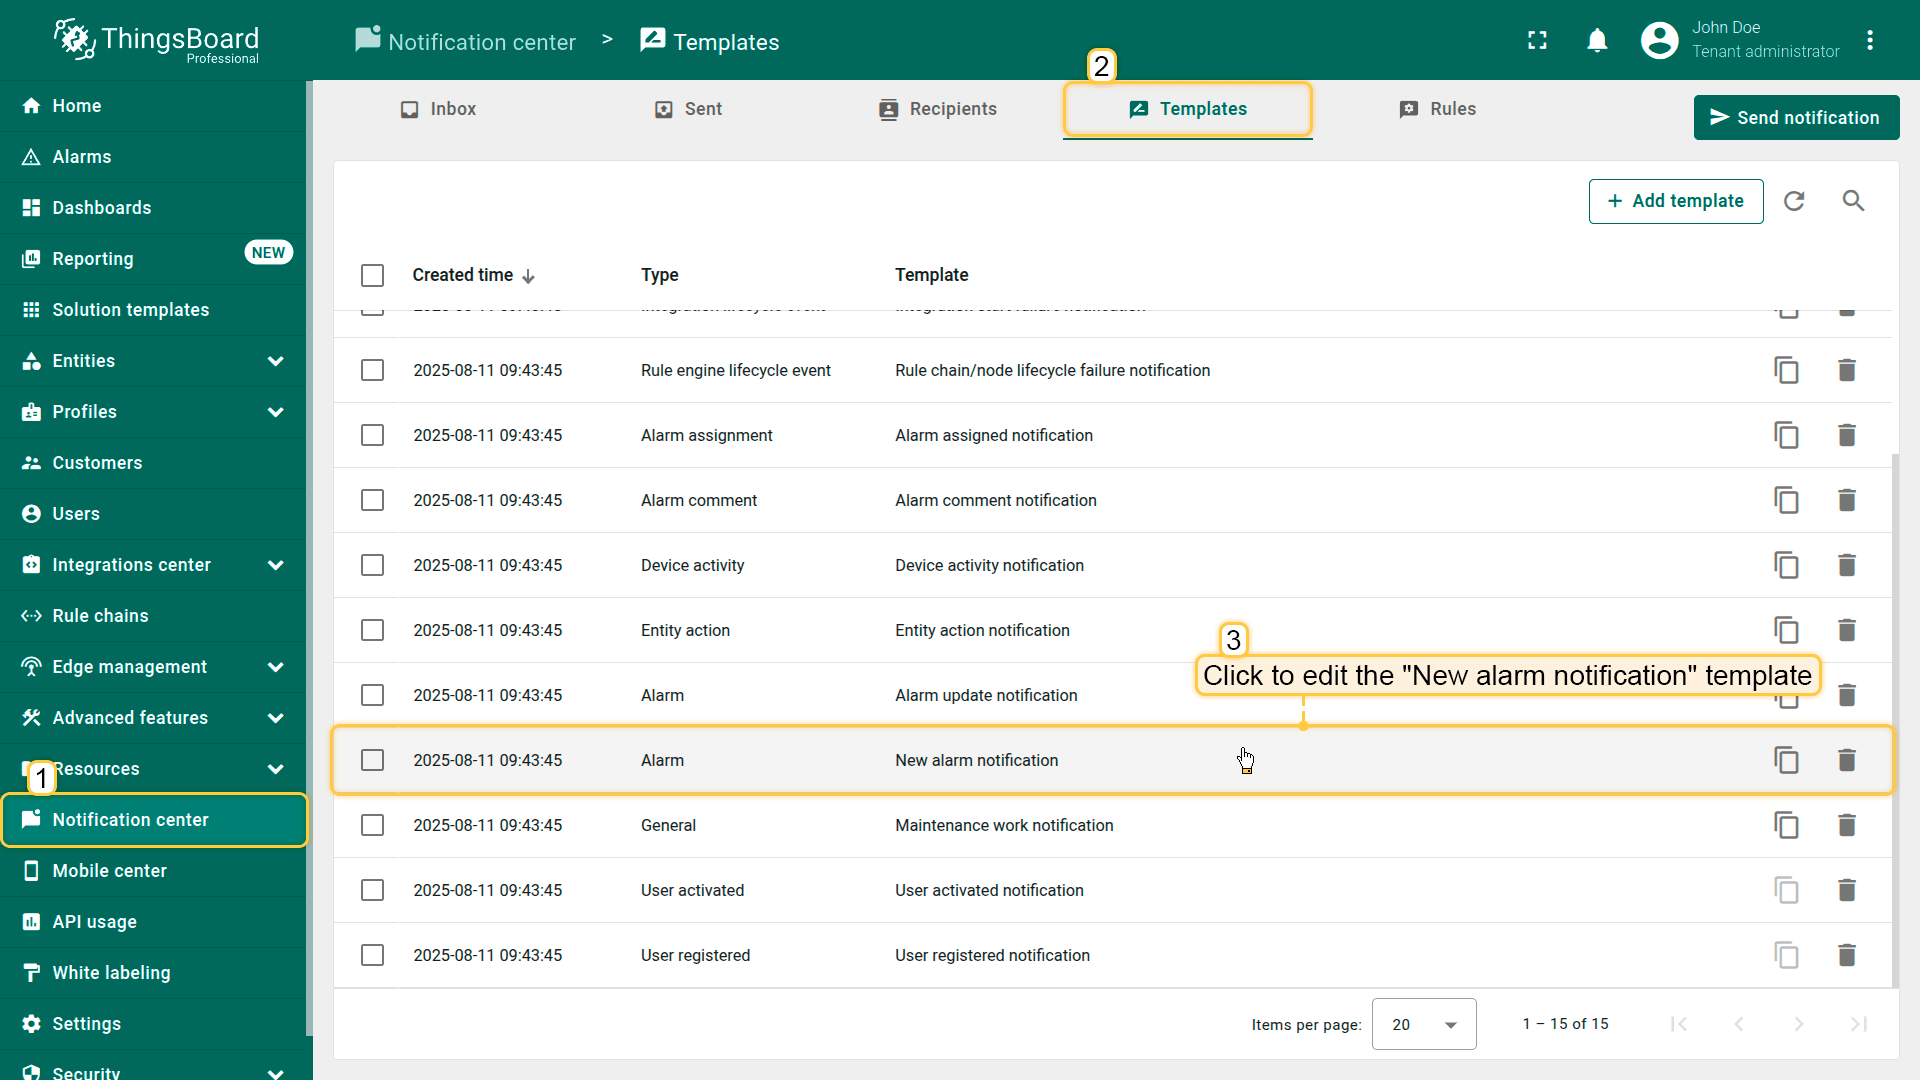
- Go to the “Templates” tab of the “Notification center” page.
- Find the “New alarm notification” template, and click on it to open it for editing.
- Let's add another notification delivery method — Email.
- Enable the “Attach report” option.
- Select the previously created New alarm template.
- Specify the user account on whose behalf the report will be generated: [email protected] (John Doe — Tenant Administrator).
- Click “Next”.
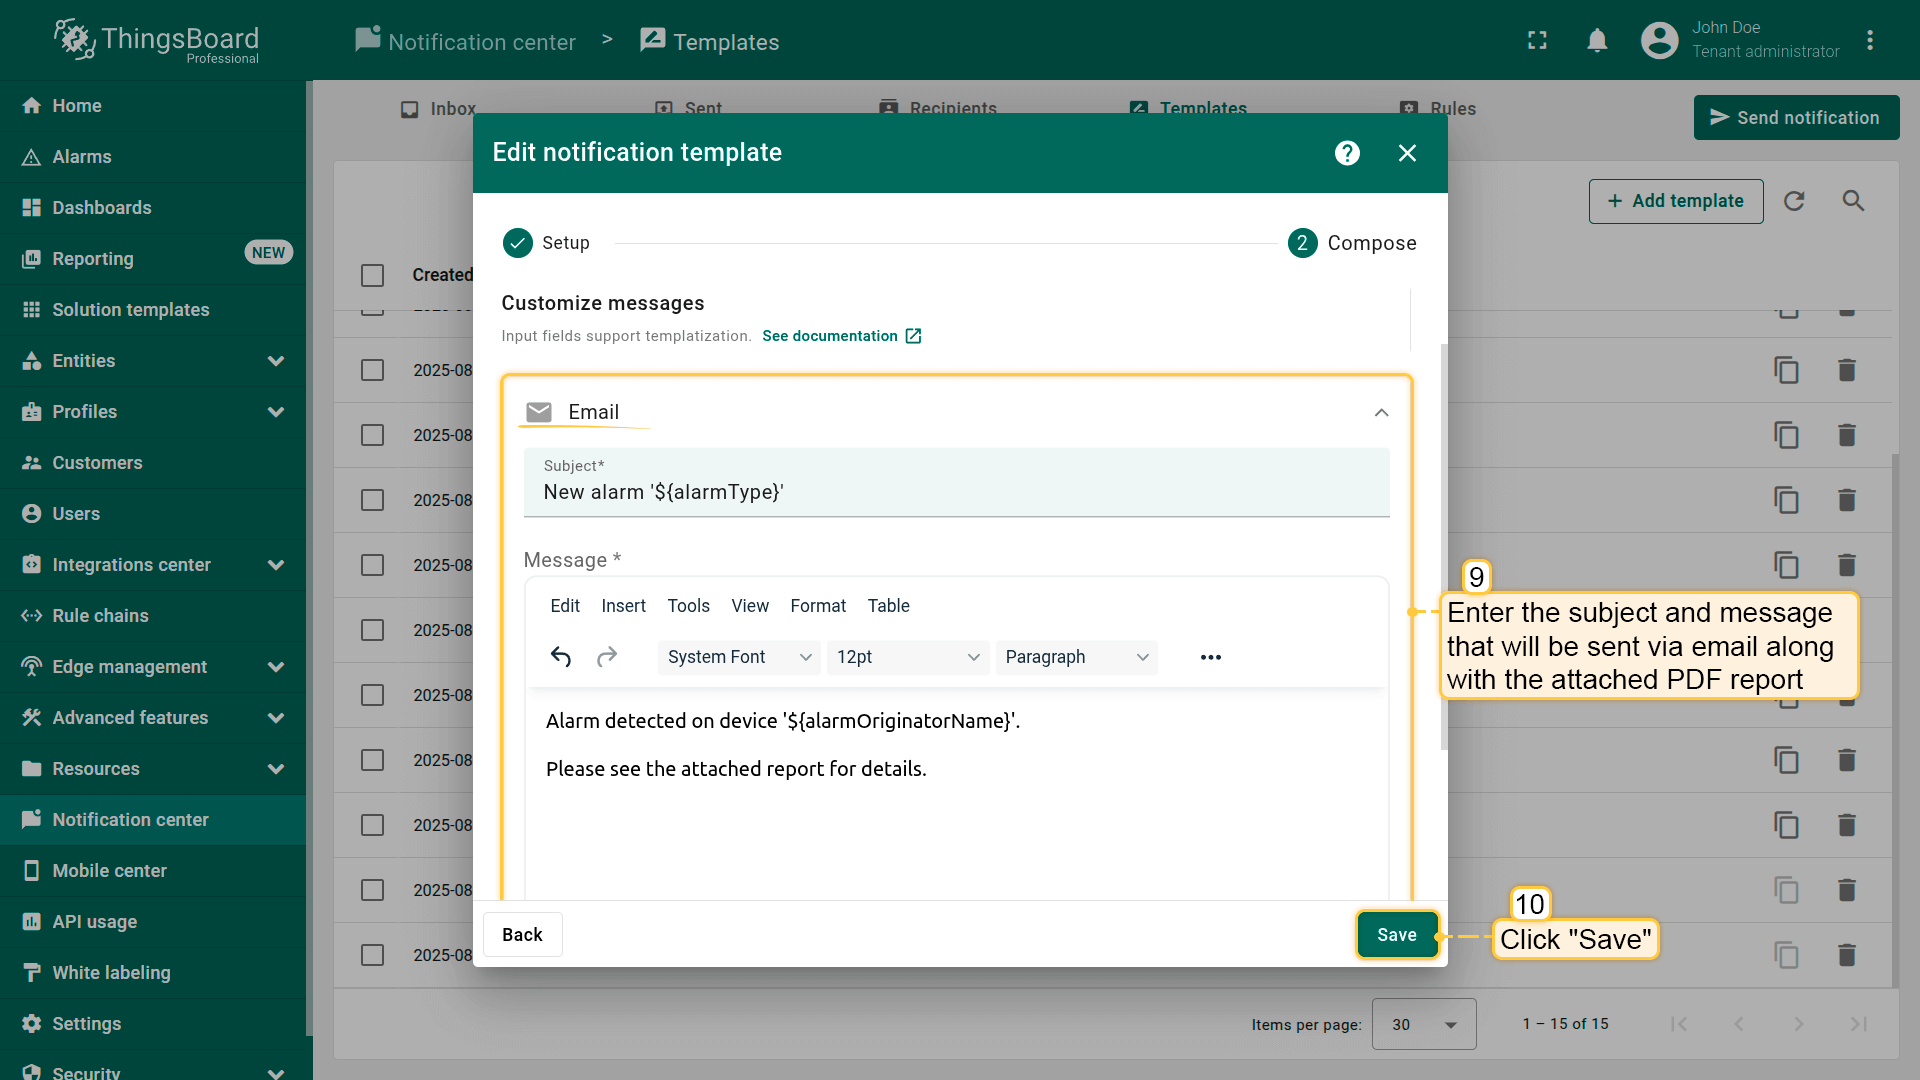
- Enter the subject and message that will be sent via email along with the attached PDF report.
- Save the changes to the template by clicking the “Save” button.
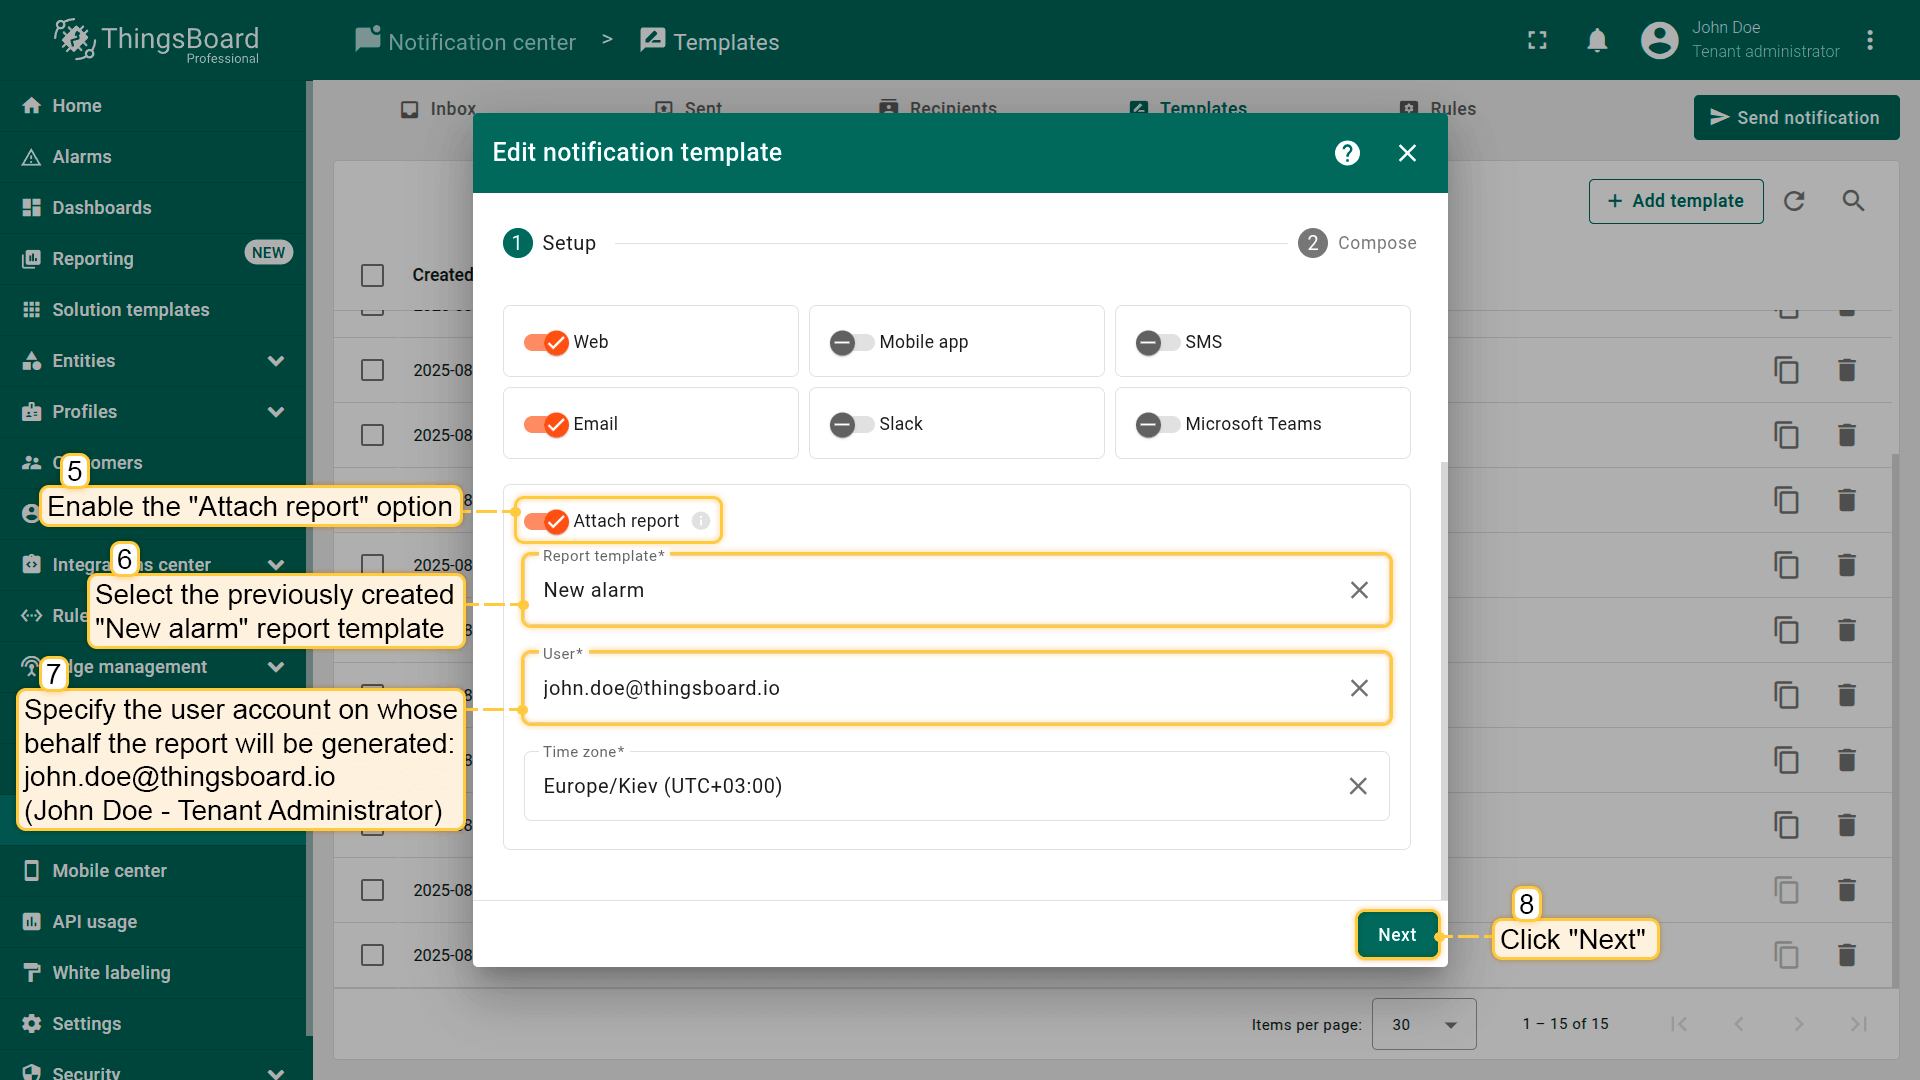
Specify the user account on whose behalf the report will be generated: [email protected] (John Doe — Tenant Administrator). Click "Next".
After making changes to the "New alarm notification" template, it's a good idea to test that everything works as expected.
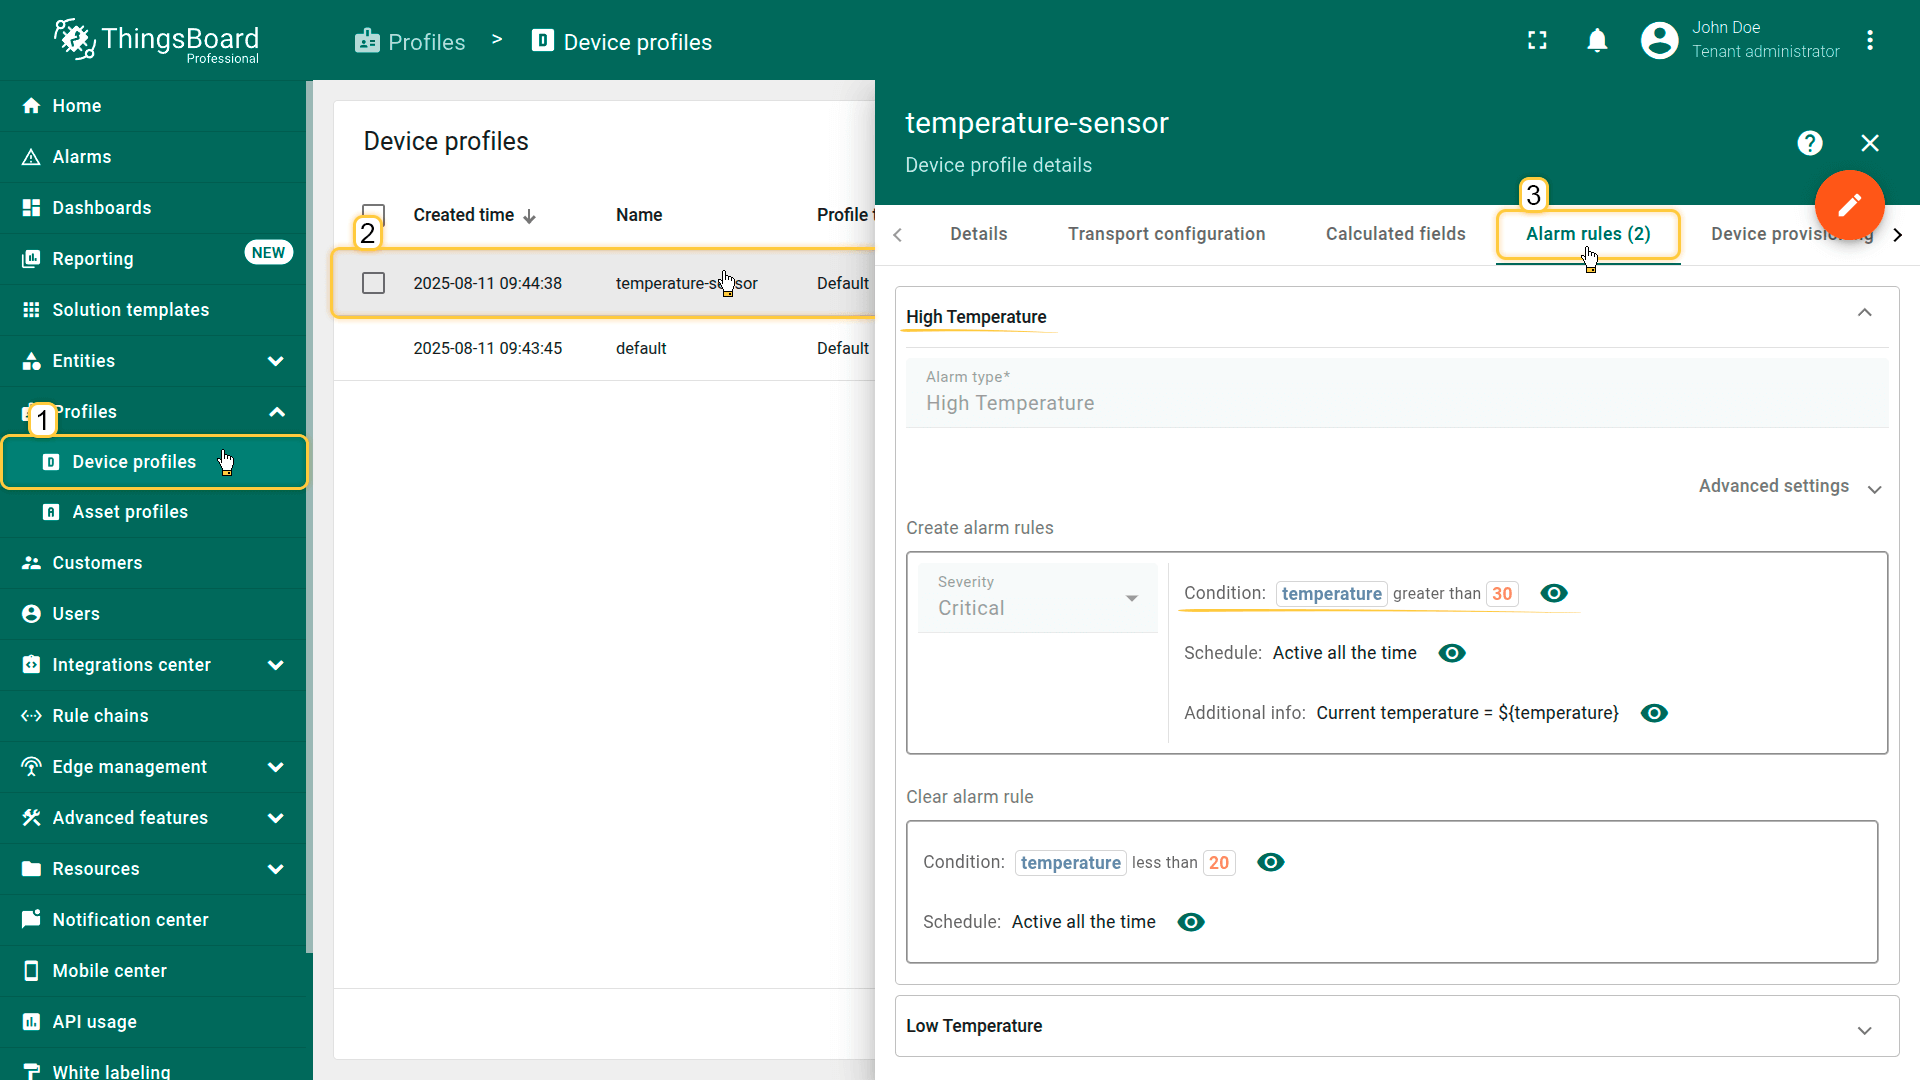
First, make sure that you have an alarm creation rule configured for your device. You can find instructions for setting up such a rule in the relevant section of the documentation (see the link).
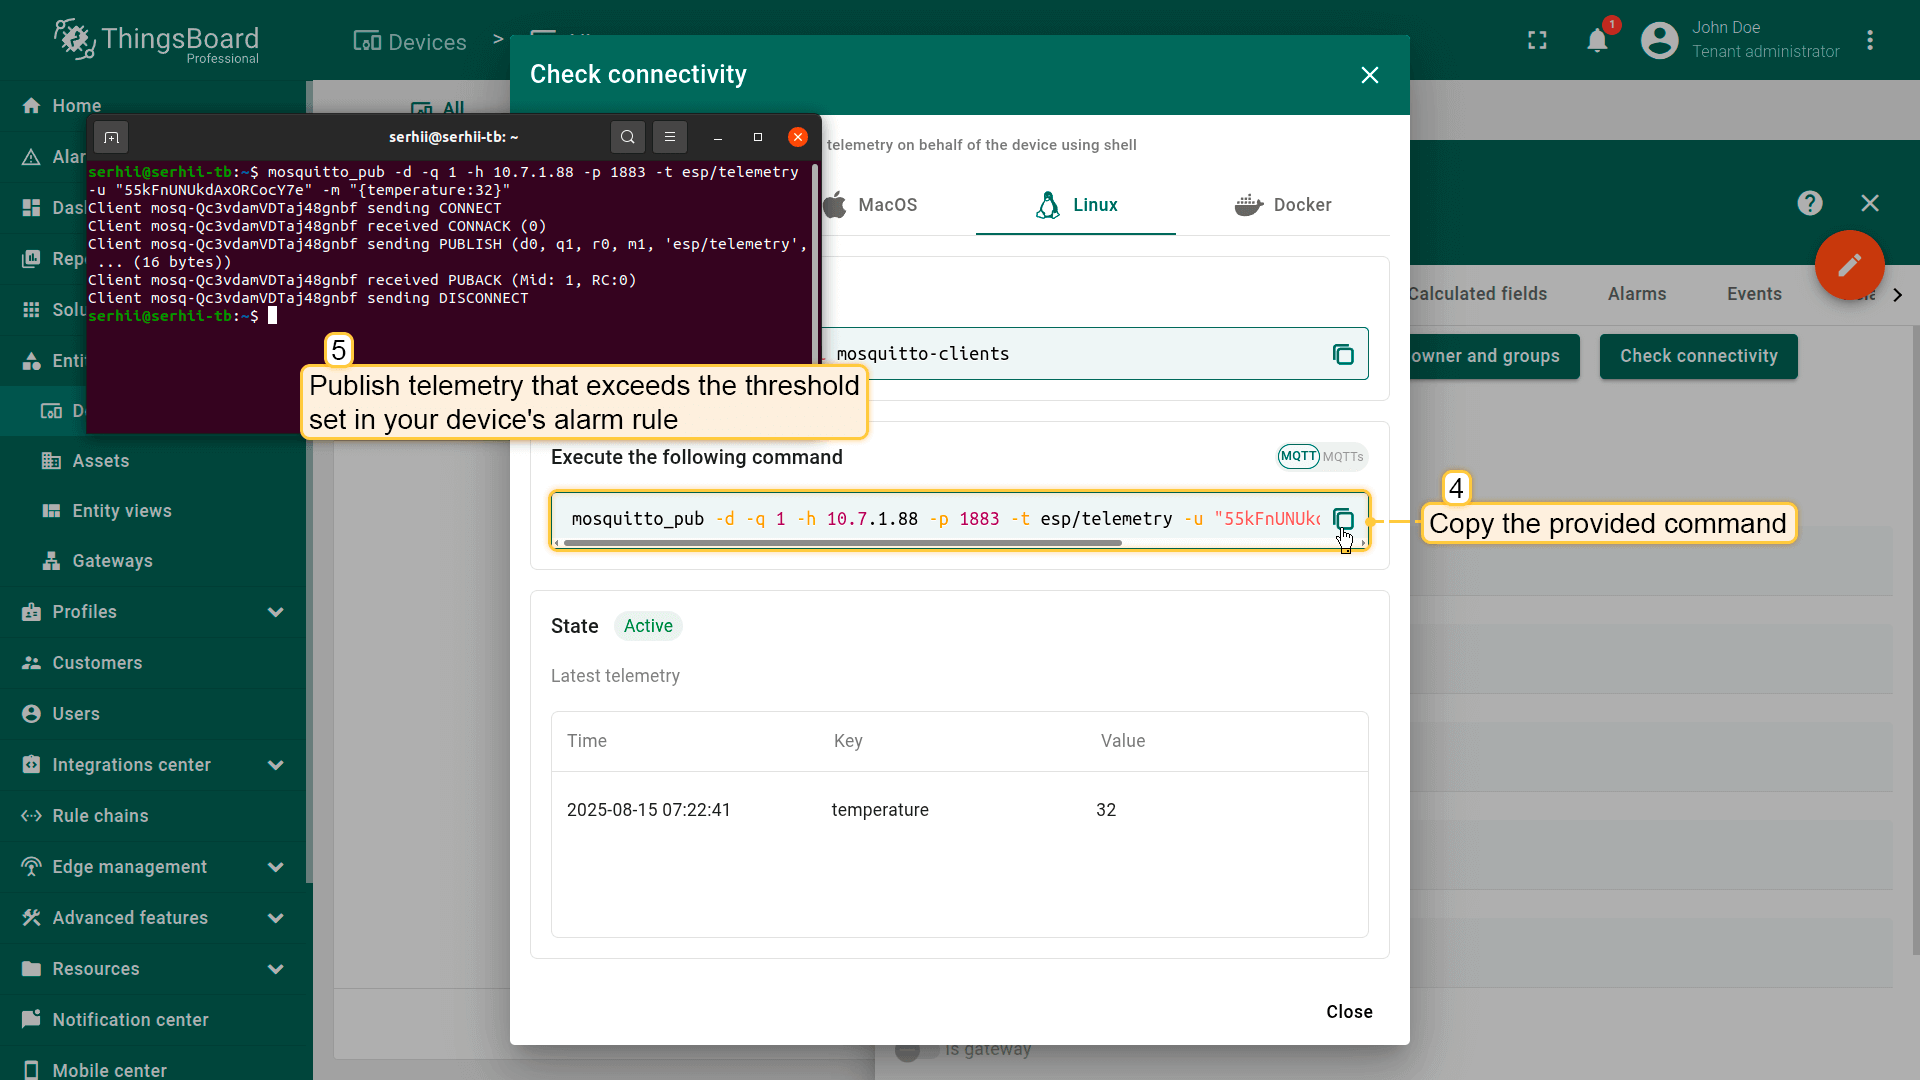
Trigger the alarm by publishing telemetry for your device that exceeds the threshold value defined in the alarm creation rule. The easiest way to do this is by using the Check connectivity feature in ThingsBoard.
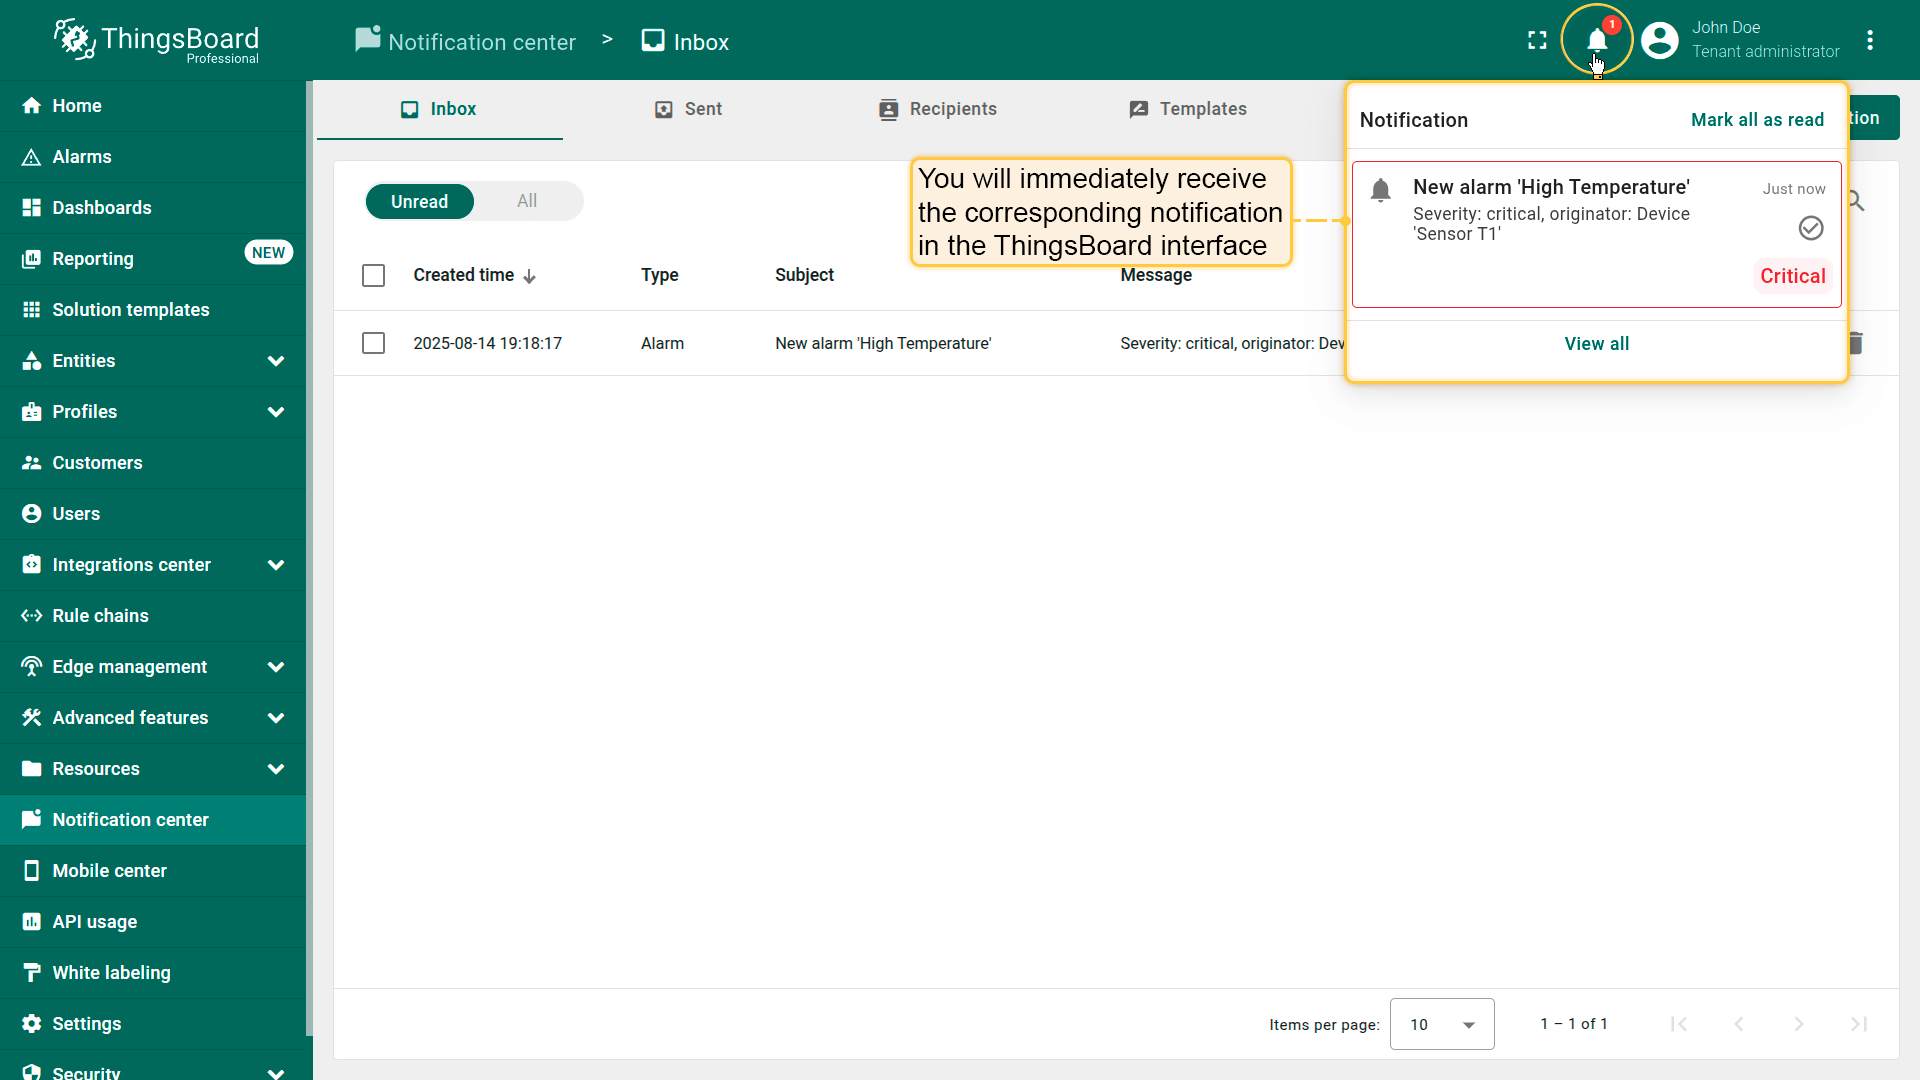
Check the notifications:
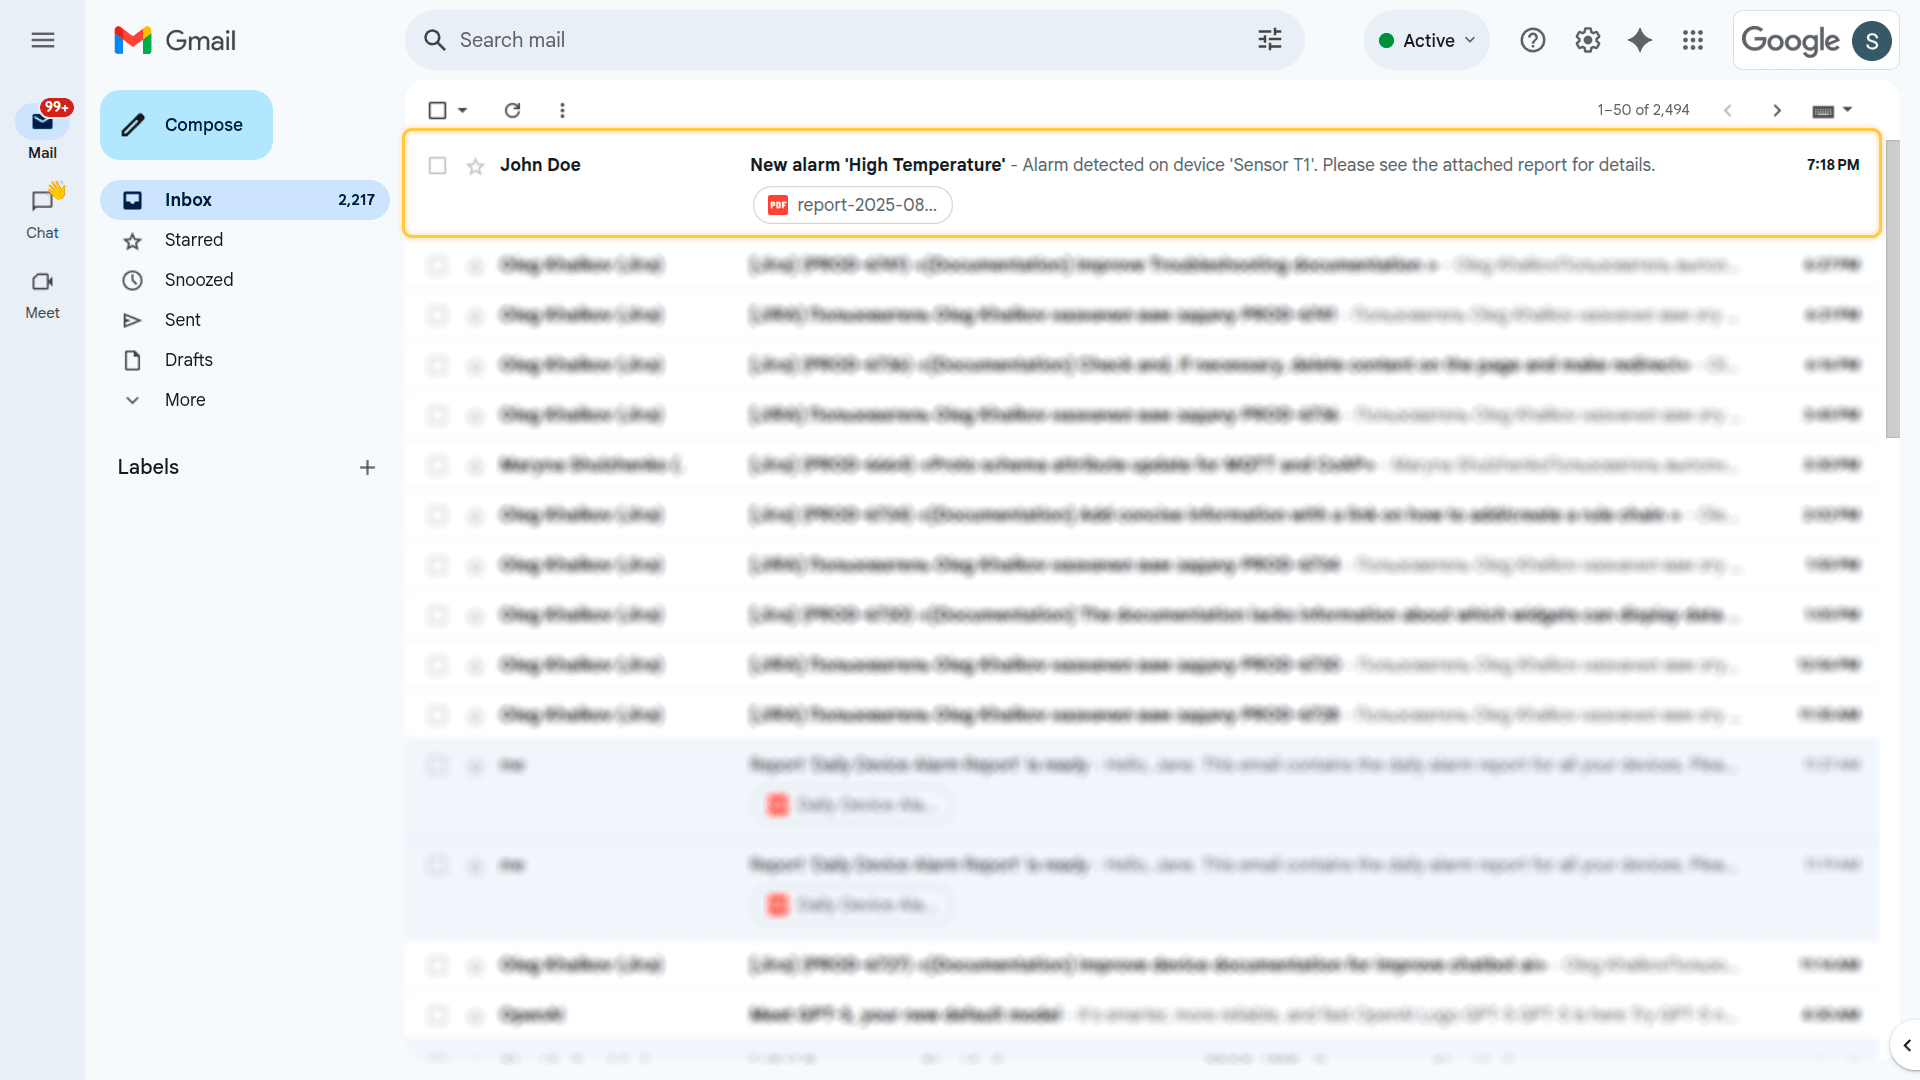
You should immediately see a notification in the ThingsBoard Web UI.
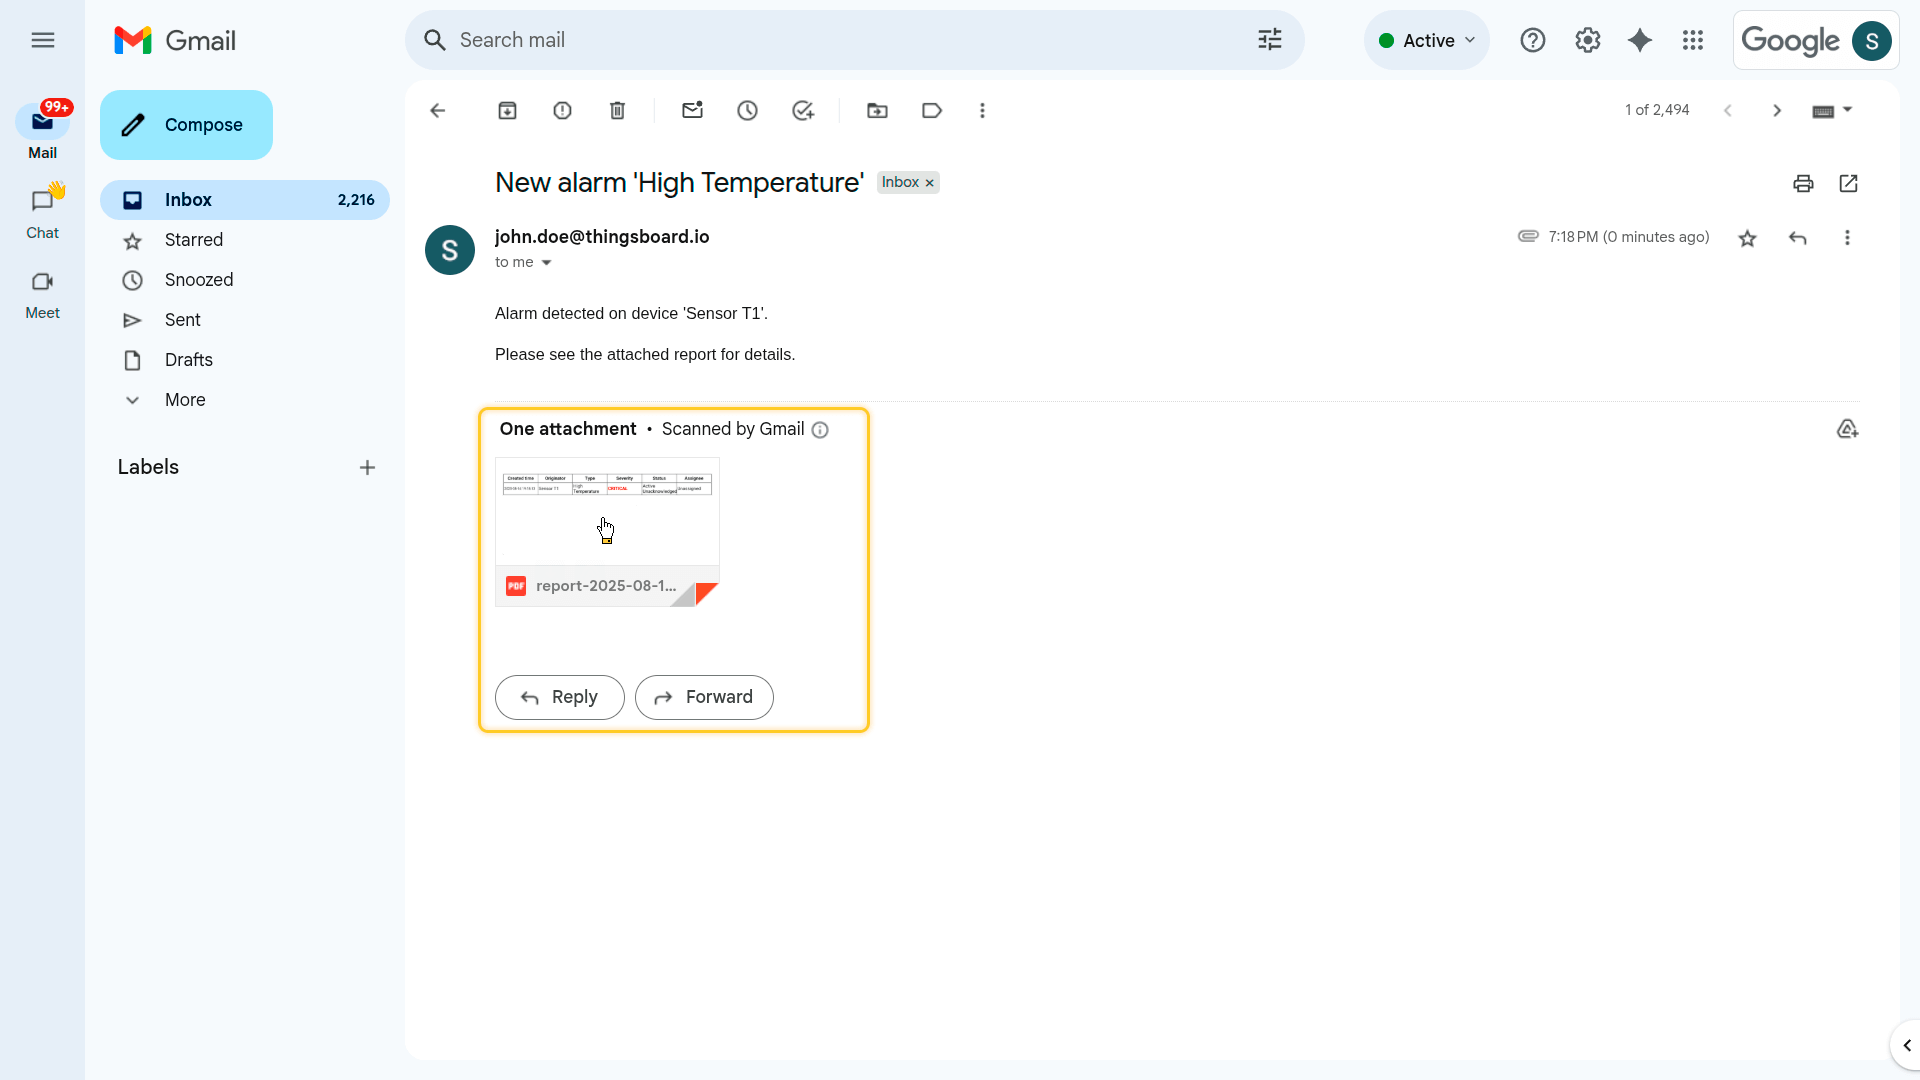
An email will also be sent to all Tenant Administrators, with a PDF report attached containing the alarm details. The user can open and view the report in their browser or download it.