Version Control
The ThingsBoard Version control service lets you export and restore entities using Git. As a tenant administrator, configure access to a Git repository through the UI or REST API. As a platform user, export one or more entities, browse version history, and restore entities to a specific version.
This feature improves collaboration when multiple engineers work on the same Rule chain or Dashboard and simplifies CI/CD. It also lets you clone solutions between tenants or platform instances.
Available since ThingsBoard 3.4.
Architecture
Section titled “Architecture”Entity External ID
Section titled “Entity External ID”Every ThingsBoard entity has an id field — the unique identifier of the entity within a particular ThingsBoard environment.
Every exportable entity also has an externalId field, used to identify the same entity when importing and exporting across multiple environments.
Both fields are UUIDs.
The externalId is also used to automatically substitute entity IDs in rule chains (rule nodes) and dashboards (aliases and widget actions).
If you import a rule chain that references specific devices or assets, make sure you have exported and imported the corresponding devices or assets as well.
Exportable entities
Section titled “Exportable entities”Supported entities: Device, Asset, Entity View, Customer, Dashboard, Widget Bundle, Rule Chain, Entity Group, Role, Converter, and Integration.
When exporting an entity, the system stores its JSON representation in Git. You can also export entity attributes, relations, and credentials (devices only).
Repository structure
Section titled “Repository structure”When you first export an entity, the entity id is used to name the file inside the Git repository.
When you import entities from Git back to ThingsBoard, the id from the file name becomes the externalId of the entity.
The externalId is unique within a tenant, so you can import and export between tenants of the same instance or between different instances.
Every subsequent export or import uses the externalId to find the right entity to update.
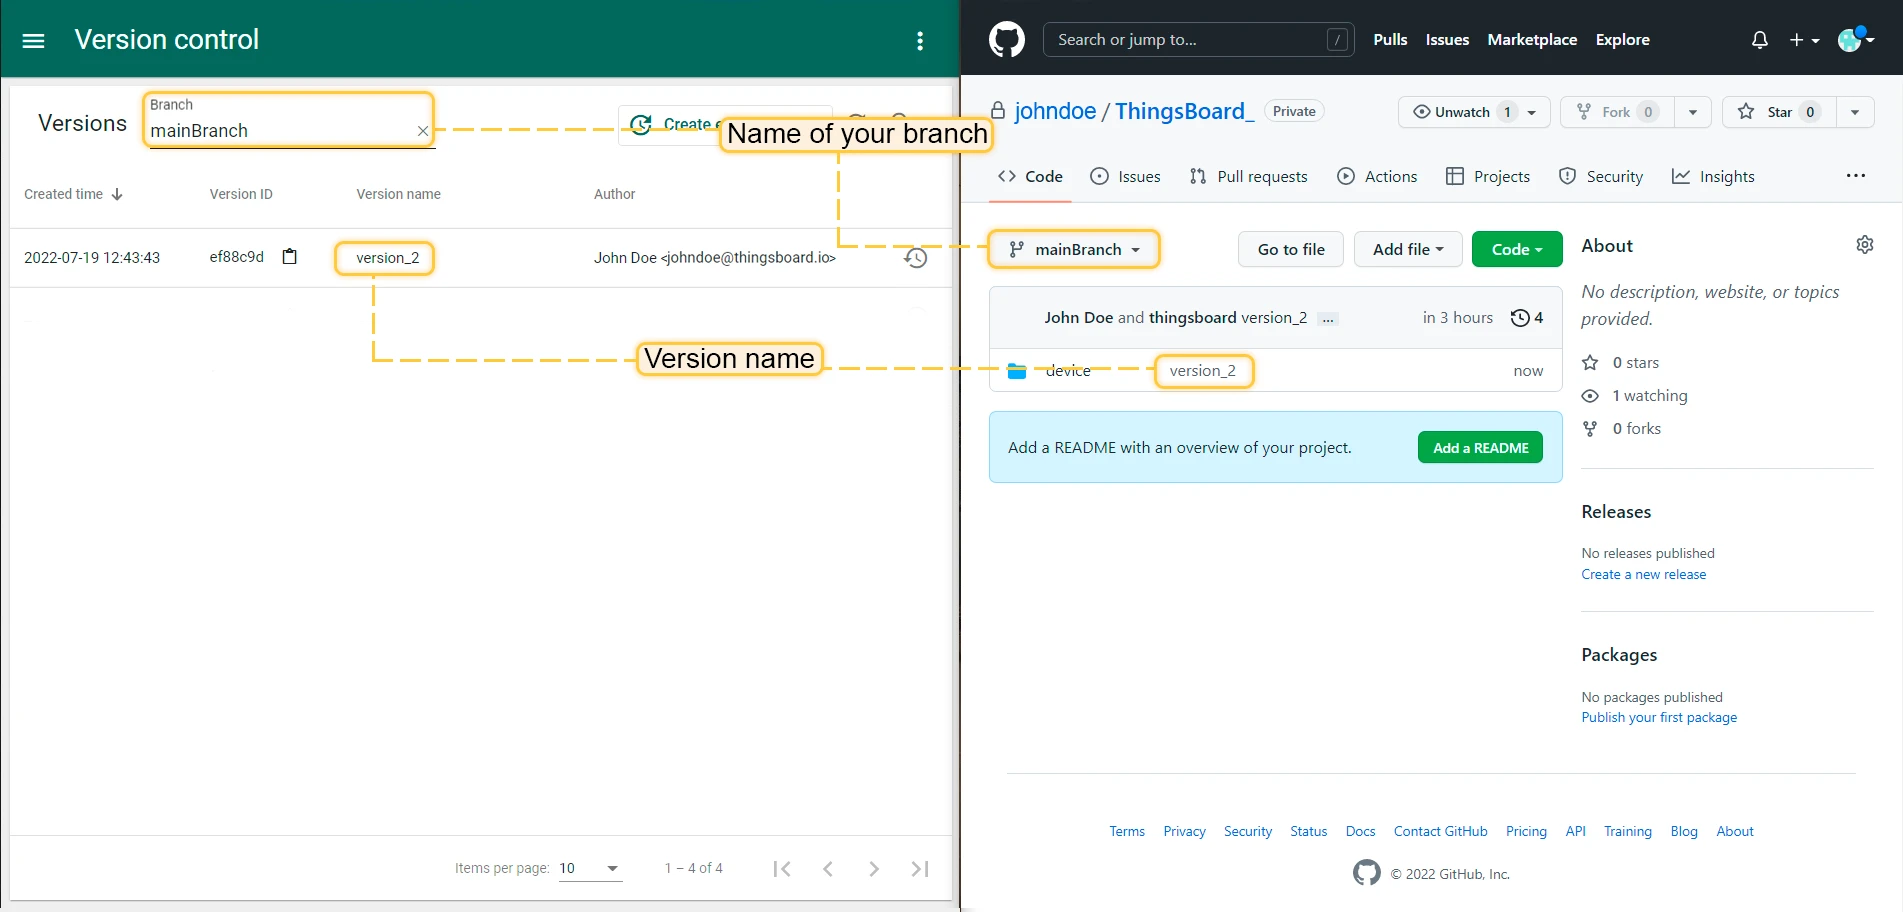
Example: export a dashboard named “Dashboard 1” with id 4864b750-da7d-11ec-a496-97fa2815d2fe from a development instance. The repository will contain:
dashboard/4864b750-da7d-11ec-a496-97fa2815d2fe.jsonImport this dashboard into a production instance — it will receive a new id, but its externalId will be set to 4864b750-da7d-11ec-a496-97fa2815d2fe.
Sync strategy
Section titled “Sync strategy”The platform supports two sync strategies for export:
| Strategy | Description |
|---|---|
| Merge (default) | Appends selected entities to the repository without removing other files. Use when adding or updating specific entities without affecting others. |
| Overwrite | Completely rewrites the corresponding repository files. Use when you want to fully synchronize a set of entities (e.g., all Dashboards) between your instance and Git. Entities previously saved but no longer present in your instance will be deleted from Git in the corresponding commit. |
Scalability
Section titled “Scalability”The Version Control service runs as part of a monolithic ThingsBoard instance or as a separate microservice for horizontal scalability. Each service instance handles synchronization for specific tenant partition(s) in the cluster.
Each “commit” API call may take some time. Concurrent commits within the same tenant are not supported — if a new commit request arrives while one is already in progress, the system cancels the in-progress call.
Git Settings
Section titled “Git Settings”- Navigate to Settings and open the Repository settings tab.
- Enter the Repository URL (the repository must be empty) and the Default branch name.
- Optionally enable Read-only mode or Show merge commits.
- Under Authentication settings, choose the authentication method (Password / access token, or SSH key) and enter your credentials.
- Click Check access to verify the connection, then click Save.
Export to Git
Section titled “Export to Git”Single Entity Export
Section titled “Single Entity Export”To export a single entity, open the entity details and switch to the Version control tab. Click Create version, specify the branch and version name, select what data to include (credentials, attributes, relations), and click Create.
The Version control tab also shows previously committed versions. You can compare any version with the current state of the entity (side-by-side JSON diff) or restore the entity to a previous version.
This works for devices, assets, entity views, rule chains, dashboards, and other exportable entities. Rule chains and dashboards also have a dedicated Version control icon in their respective editors for quick access.
Multiple Entity Export
Section titled “Multiple Entity Export”- Navigate to Advanced features ⇾ Version control. Click Create entities version.
- Specify the branch and version name.
- Choose the sync strategy — Merge (default) or Overwrite.
- Under Entities to export, expand each entity type to configure export settings individually. For each type you can set the sync strategy, select All entities or specific ones, and check which data to include (credentials, attributes, relations).
- Use Add entity type to include additional types, or Remove all to clear the list.
- Click Create.
The version control page also shows the history of all committed versions with their timestamps, version IDs, names, and authors.
Auto-Commit
Section titled “Auto-Commit”Auto-commit saves dashboards and rule chains to Git whenever you save the entity through the UI or REST API. The commit happens asynchronously to keep the UI responsive.
- Navigate to Settings and open the Auto-commit settings tab.
- Click Add entity type and select the entity type (e.g., Device).
- Choose the branch and configure which data to export (credentials, attributes, relations).
- Click Save.
Restore from Git
Section titled “Restore from Git”- Navigate to Advanced features ⇾ Version control. Select a commit from the version history list.
- In the Restore entities dialog, review the entity types to restore. Remove any types you do not want to restore by clicking the Remove button next to them.
- Optionally use Add entity type to include additional types, or Remove all to clear the list.
- Enable Rollback on error if you want the system to revert all changes if any entity fails to restore.
- Click Restore.
Was this helpful?