Assets
Assets are abstract entities in ThingsBoard that represent physical objects, spaces, or organizational units — buildings, rooms, production areas, fields, streetlights, substations, or vehicles. Unlike devices, assets don’t generate telemetry on their own but can aggregate data from related devices and participate in rule chains, alarms, and dashboards.
Assets vs. Devices
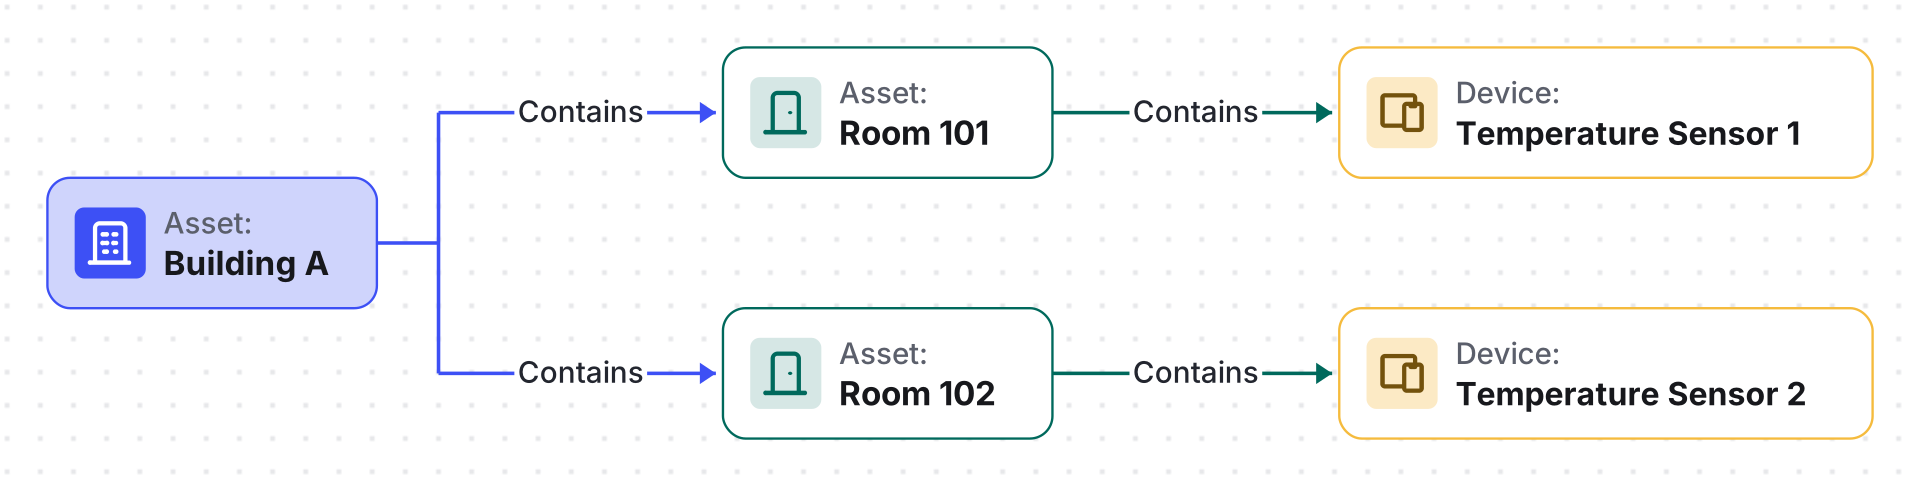
Section titled “Assets vs. Devices”Use a Device for anything that connects to ThingsBoard and sends its own telemetry — a sensor, a controller, a gateway. Use an Asset for something that doesn’t connect directly but still needs to exist as an entity — a building, a room, a vehicle, a production line — so it can group related devices into a hierarchy or aggregate their data.
A common pattern: model the physical structure with assets (Building → Floor → Room), then relate each room to the devices physically inside it via Relations. Telemetry rolls up to the asset through Calculated Fields or is queried across the whole hierarchy on a dashboard.
Managing Assets
Section titled “Managing Assets”Create an Asset
Section titled “Create an Asset”- Navigate to Devices & assets ⇾ Assets.
- Click + Add asset and select Add new asset — or Import assets to create many at once from a CSV file (see Bulk Provisioning).
- Enter a Name (must be unique within the tenant).
- Optionally select an Asset profile (defaults to
default), Label, or Description. - Click Add.
Edit an Asset
Section titled “Edit an Asset”- Click the asset in the list to open its details.
- Click the pencil icon.
- Update the name, label, profile, or description.
- Click Apply changes.
Delete an Asset
Section titled “Delete an Asset”Click the trash icon next to the asset and confirm, or open the asset details page and click Delete asset.
Asset Details
Section titled “Asset Details”Clicking an asset opens its details panel. The header exposes the following actions:
| Action | Description |
|---|---|
| Open details page | Opens the asset on its own full page instead of a side panel. |
| Manage owner and groups | Change the asset’s owner and group membership. |
| Delete asset | Deletes the asset — see Delete an Asset. |
| Copy asset Id | Copies the asset’s unique identifier, e.g. for use with the REST API. |
Below the actions, a set of tabs provides access to the asset’s data and configuration:
| Tab | Contents |
|---|---|
| Attributes | Client, server, and shared key-value pairs (location, category, configuration parameters) |
| Latest Telemetry | Telemetry propagated from related devices, aggregated via calculated fields, or added manually; supports manual entry and deletion |
| Calculated Fields | Values computed from telemetry or attributes using formulas |
| Alarm Rules | Conditions, thresholds, and triggers configured for alarm generation |
| Alarms | Active and historical alarms for this asset |
| Relations | Directed connections to other entities (devices, dashboards, rule chains) |
| Audit Logs | History of user actions: creation, updates, deletions |
| Version Control | Git-based export and restore for backup and collaboration |
Manage Owner and Groups
Section titled Manage Owner and GroupsYou can change the owner of an asset to control which Customer (or the Tenant) has access to it.
- Click the asset to open its details.
- Click Manage owner and groups.
- In the Owner field, select the Tenant or a specific Customer.
- Add the asset to relevant asset groups or create a new group.
- Click Update.
The Include customer entities toggle on the Assets page controls whether assets owned by customers appear in the list alongside tenant-owned assets.
Asset Groups
Section titled Asset GroupsAssets can belong to one or multiple groups for organization and access control — the same generic entity-group workflow (create, add/move/remove, share, make public or private) used across every entity type. Every asset is automatically added to the “All” group of its owner.
On the Assets screen, go to the Groups tab to create and manage asset groups. See Entity Groups for the full create/share/move/permissions workflow — it’s identical for assets.
Managing Relations
Section titled “Managing Relations”You can create, view, edit, and delete relations between an asset and other entities from the Relations tab of the asset details page.
Add a relation:
- Open the asset details → Relations tab.
- Select the direction: From (outbound) or To (inbound).
- Click +.
- Set the Relation type and choose the target entity — see Relation Types for the full list (Contains, Manages, Uses, Supports).
- Click Add.
Troubleshooting
Section titled “Troubleshooting”| Symptom | Cause | Fix |
|---|---|---|
| Dashboard widget shows no data for an asset | The widget’s entity alias doesn’t resolve to the asset, or the asset has no related device sending data | Check the alias in Entity Aliases, and confirm the asset has a relation to a device that’s actively sending telemetry |
| Calculated field on an asset never produces a value | The source device isn’t related to the asset yet, or the calculated field was defined at the wrong level | Check the asset’s Relations tab, and confirm whether the calculated field belongs on the asset or on its Asset Profile |
| Can’t find a way to share a single asset | Assets aren’t shareable individually | Share the asset group that contains it instead — see Entity Groups |
| Dashboard still references a deleted asset | Deleting an asset breaks its relations but not the dashboard widgets built on them | Update the affected entity aliases or widgets to point at a different asset |
Where Assets Are Used
Section titled “Where Assets Are Used”- Dashboards — visualize aggregated data, attributes, and alarms via widgets
- Maps — plot asset locations (buildings, vehicles, fields) and show related device data directly on the map
- Rule Engine — process attribute updates, trigger alarms, route messages
- Calculated Fields — compute derived values by aggregating data from related devices
- Relations — model hierarchies (e.g., Building → Contains → Room → Contains → Sensor)
- Entity Views — expose a subset of an asset’s telemetry and attributes to a Customer without granting full access
- REST API — query, create, and manage assets programmatically
Was this helpful?