The ThingsBoard Notification center is a comprehensive tool for sending, managing, and automating notifications within the platform. It allows for a variety of notification methods, including web, email, mobile application, SMS, and integrations with Slack and Microsoft Teams. Users can manually send notifications, automate them through REST API, or set triggers based on events within the system. Users may also schedule delivery of the notification for a particular time.
The Notification center is accessible through the sidebar menu and includes options for sending notifications, viewing inbox and sent messages, managing recipients, creating templates, and setting up rules for automated notifications.

Let’s look at each of the key components of the notification center below.
Notification delivery methods
ThingsBoard offers several notification delivery methods to keep you and your customers promptly informed about any events in your IoT solution:
- Web. Receive notifications directly within the ThingsBoard web interface. This is perfect for users who are always logged in.
- Mobile app. Receive instant push notifications directly to your smartphone through the ThingsBoard PE Mobile Application. Stay informed about all events in your IoT solution, even when you’re on the go.
To use this notification delivery method, you first need to configure the ThingsBoard PE Mobile Application and make some settings in the “Mobile settings” section on the ThingsBoard platform itself. These steps are detailed in this documentation. - SMS. The ThingsBoard supports notification delivery via SMS to mobile devices, providing the ability to deliver important information even in the absence of internet access. To send SMS notifications, you need to set up an SMS provider. Use the system administrator’s configuration or set the settings at your level.
- Email. Receive notifications directly in your email inbox. Perfect for users who prefer to stay informed through their email accounts. To send email notifications, you must configure an outgoing mail server. Use the system administrator’s configuration or set the settings at your level.
- Slack. Integrate Slack with ThingsBoard to send notifications as messages to individual users or channels within your Slack workspace. To use this method of notification delivery, you first need to configure the Slack settings in ThingsBoard using this guide.
- Microsoft Teams. Integration of Microsoft Teams with ThingsBoard allows for delivering notifications in the form of messages to specific channels in your Microsoft Teams environment. To use this method a tenant administrator must get webhook URL for a needed Microsoft Teams channel using this guide.
Send notification
To send a notification manually, follow these steps:
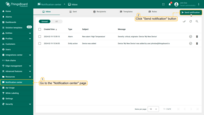
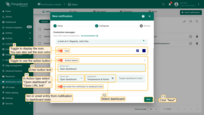
- Click the "Send notification" button in the upper right corner of the "Notification center" page to open the new notification wizard;
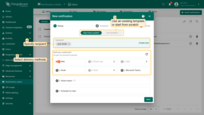
- Select recipients and one or more delivery methods. In this example, let's consider the Web delivery method;
- If necessary, use the scheduler. Click "Next";
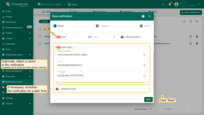
- Enter subject and text of the message;
- You can use the action button in the notification. Enter the button text, select the action type ("Open dashboard" or "Open URL link") and specify the URL link or dashboard that should open when the button is clicked. You can also display the icon in the notification and set its color. Click "Next";
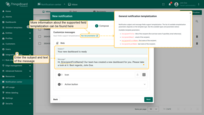
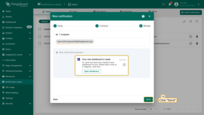
- In this window, you can see how the notification will look and also view the list of notification recipients. Click "Send";
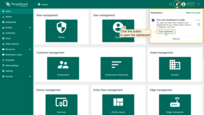
- The user received a new notification and can view it on the Notification center page or by clicking on the bell icon in the upper right corner of the screen;
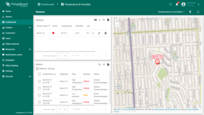
- By clicking on the "Open this dashboard" button in the message, the user will open the dashboard window.
Inbox
Browse your incoming notifications, mark them as read, or delete them on the “Inbox” tab. By default, only unread notifications are displayed. To view all notifications, switch to the “All” tab in the incoming notifications table.
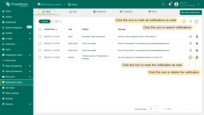
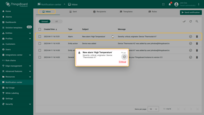
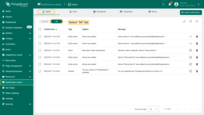
You can also view your incoming notifications by clicking on the bell icon in the top right corner of the screen. The number next to the icon indicates the number of unread notifications. Here you can also read the notification, mark it as read, or take action by clicking the action button.
Sent
In the “Sent” tab, you’ll find a list of all the notifications you’ve sent out, along with their current status.
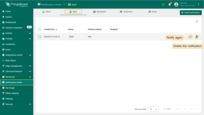
To resend a notification, click on the “Notify again” icon in the row of the corresponding notification. You can also delete notifications by clicking the “delete” icon.
Additionally, you can investigate delivery issues for specific notifications here. If there are delivery issues, the “Status” column will provide relevant information. This typically occurs when the recipient’s email address or phone number is incorrect.
Recipients
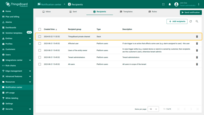
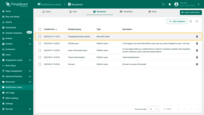
In the “Recipients” tab, you’ll find a list of configured notification recipients. You can add, edit existing, and delete notification recipients as needed. Recipients can be added based on their roles, individual user accounts, predefined groups, etc.
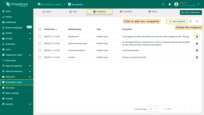
For delivering notifications through the mobile app, SMS, and email, basic configuration requirements, which we previously covered in the Notification delivery methods section, apply. For delivering notifications through the ThingsBoard platform, Microsoft Teams, and Slack, you’ll additionally need to specify the exact destination for your notification at the recipient adding stage.
Depending on the type of recipient you choose, the setup process will vary. Therefore, we will take a closer look at each option individually:
ThingsBoard platform users
To add recipient from the ThingsBoard user list, follow these steps:
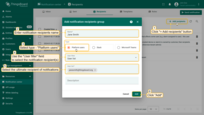
- Click the “Add recipients” button in the upper right corner of the “Recipients” tab;
- A new window will pop up. Here, type in the name of the notification recipient(s);
- Select “Platform users” type;
- In the “User filter” list, select who you want to send notifications to. It can be a single user, a group of users, tenant administrators, etc.;
- Click “Add”.
A new recipient has been added. Now you can use it to send a new notification or create a new notification rule.
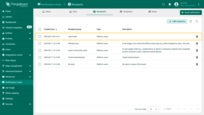
You can also add a new recipient at the stage of manually sending a new notification:
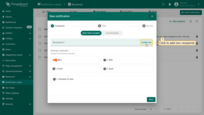
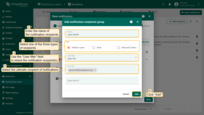
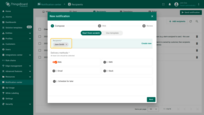
There are several user filters that help you to define a recipients:
For System administrator:
-
All users - all users of the platform. Includes all tenant administrators and all customer users;
-
Tenant administrators - set of tenant administrator users that are selected based on the list of tenants or their tenant profiles;
-
Affected tenant administrators - The tenant that is affected by the notification trigger event;
-
System administrators;
For Tenant administrator:
-
All users - all users of the current tenant. Includes the tenant administrator and all customer users;
-
Tenant administrators - all administrators of the current tenant;
-
User list - selected users;
-
User group list - selected user group;
-
Customer users - all users that belong to customers of the current tenant;
-
User role - selected user role;
-
Users of the entity owner - all users that belong to the entity owner. For example, users of the customer that owns the device or tenant administrators if the device is not assigned to the customer;
-
Affected user - The user that is affected by the notification trigger event. For example, the person that is assigned to investigate the alarm event.
Slack
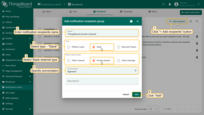
Send ThingsBoard notifications as Slack messages to a public or private channel, or direct message.
- Click the “Add recipients” button in the upper right corner of the “Recipients” tab;
- A new window will pop up. Here, type in the name of the notification recipient(s);
- Select “Slack” type;
- In the “Slack channel type” field, choose the destination where you’d like your notifications to land: public channel, private channel, or direct message;
- In the additional “Conversation” field, specify the exact conversation or channel in Slack where you want to send notifications;
- Click “Add”.
Microsoft Teams
Send ThingsBoard notifications as messages to your Microsoft Teams channel.
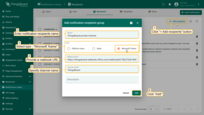
- Click the “Add recipients” button in the upper right corner of the “Recipients” tab;
- A new window will pop up. Here, type in the name of the notification recipient(s);
- Select “Microsoft Teams” type;
- Next, you need to specify the webhook URL for the Microsoft Teams channel where the notifications will be sent;
- In the “Channel name” field, specify the channel to which you want to send notifications;
- Click “Add”.
Templates
The “Templates” tab displays the list of notification templates. Here you can create new templates, duplicate existing ones for easy editing, or delete those you no longer need.
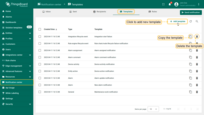
The template defines the content of the notification and the set of delivery methods to use. Each template contains a notification subject and message. The user may adjust the notification content for specific delivery methods. For example, you may use a concise message for SMS and an advanced HTML template for the Email.
Notification subject and message fields support templatization. The list of available templatization parameters depends on the template type. See the available types and parameters below.
Parameter names must be wrapped using ${...}. For example: ${recipientFirstName}.
You may also modify the value of the parameter with one of the sufixes:
upperCase, for example -${recipientFirstName:upperCase}lowerCase, for example -${recipientFirstName:lowerCase}capitalize, for example -${recipientFirstName:capitalize}
Add new template
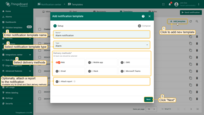
To add a new template, follow these steps:
- Click the “Add template” button in the upper right corner of the “Templates” tab;
- In the new window, enter the notification template name;
- Select a template type from the drop-down list;
- Next, select one or more delivery methods. In this example, let’s consider the Web delivery method. Click “Next”;
- Enter the subject and text of the message;
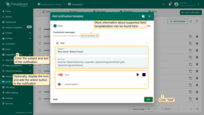
- Optionally, you can display the icon in the notification and set its color. Also, you can use the action button in the notification;
- Click “Add”.
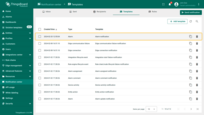
Let’s take a closer look at all the available template types.
General
The general template is used to send generic notifications. For example, system maintenance or important announcement. Available template parameters:
- recipientTitle - title of the recipient (first and last name if specified, email otherwise);
- recipientEmail - email of the recipient;
- recipientFirstName - first name of the recipient;
- recipientLastName - last name of the recipient.
Let’s consider an example with the following event: maintenance work for the server is scheduled for tomorrow.
The notification in ThingsBoard may look like this:

Alarm
The alarm template is used to send notification about alarms. For example, alarm creation or acknowledgment. Available template parameters contain all parameters available for the General template, plus:
- alarmType - alarm type;
- action - one of: ‘created’, ‘severity changed’, ‘acknowledged’, ‘cleared’, ‘deleted’;
- alarmId - the alarm id as uuid string;
- alarmSeverity - alarm severity (lower case);
- alarmStatus - the alarm status;
- alarmOriginatorEntityType - the entity type of the alarm originator, e.g. ‘Device’;
- alarmOriginatorName - the name of the alarm originator, e.g. ‘Sensor T1’;
- alarmOriginatorId - the alarm originator entity id as uuid string.
Let’s consider an example with the following event: A new alarm with the type ‘High Temperature’ has been created for the device ‘Compressor NM-56’.
The notification in ThingsBoard may look like this:

Device activity
The device activity template is used to send notifications about whether a device is active or inactive. Available template parameters contain all parameters available for the General template, plus:
- deviceId - the device id as uuid string;
- deviceName - the device name;
- deviceLabel - the device label;
- deviceType - the device type;
- eventType - one of: ‘inactive’, ‘active’.
Let’s consider an example with the following event: the device ‘Compressor MN-56’ became inactive.
The notification in ThingsBoard may look like this:

Entity action
The entity action template is used to send notification about entity action: creation, update or deletion. Available template parameters contain all parameters available for the General template, plus:
- entityType - the entity type, e.g. ‘Device’;
- entityId - the entity id as uuid string;
- entityName - the name of the entity;
- actionType - one of: ‘added’, ‘updated’, ‘deleted’;
- userId - id of the user who made the action;
- userEmail - email of the user who made the action;
- userFirstName - first name of the user who made the action;
- userLastName - last name of the user who made the action.
Let’s consider an example with the following event: user [email protected] added new device ‘Compressor AO-99’.
The notification in ThingsBoard may look like this:

Alarm comment
The alarm comment template is used to send notification about comments on alarms. Available template parameters contain all parameters available for the Alarm template, plus:
- comment - text of the comment;
- action - one of: ‘added’, ‘updated’;
- userEmail - email of the user who made the action;
- userFirstName - first name of the user who made the action;
- userLastName - last name of the user who made the action.
Let’s consider an example with the following event: John Doe left a comment for Jane regarding the ‘High Temperature’ alarm of the device ‘Compressor RK-25’.
The notification in ThingsBoard may look like this:

Alarm assignment
The alarm assignment template is used to send notification when alarm is assigned or unassigned. Available template parameters contain all parameters available for the Alarm template, plus:
- assigneeEmail - email of the assignee;
- assigneeFirstName - first name of the assignee;
- assigneeLastName - last name of the assignee;
- assigneeId - the id of the assignee as uuid string;
- userEmail - email of the user who made the action;
- userFirstName - first name of the user who made the action;
- userLastName - last name of the user who made the action;
- action - one of: ‘assigned’, ‘unassigned’.
Let’s consider an example with the following event: [email protected] assigned the ‘High Temperature’ alarm of the device ‘Compressor BJ-66’ to [email protected].
The notification in ThingsBoard may look like this:

Rule engine lifecycle event
The rule engine lifecycle event template is used to send notification about rule chain or rule node lifecycle events. For example, notify when new rule node fails to start. Available template parameters contain all parameters available for the General template, plus:
- componentType - one of: ‘rule chain’, ‘rule node’;
- componentId - the component id as uuid string;
- componentName - the rule chain or rule node name;
- ruleChainId - the rule chain id as uuid string;
- ruleChainName - the rule chain name;
- eventType - one of: ‘started’, ‘updated’, ‘stopped’;
- action - one of: ‘start’, ‘update’, ‘stop’;
- error - the error text.
Let’s consider an example with the following event: the “Kafka” rule node misconfigured.
The notification in ThingsBoard may look like this:

Rule node
The rule node template is used to send notifications from the ‘send notification’ rule node. You may use data or metadata from the incoming message to build the notification subject and body. Available template parameters contain all parameters available for the General template, plus:
- values from the incoming message metadata referenced using the metadata key name;
- values from the incoming message data referenced using the data key name;
- originatorType - type of the originator, e.g. ‘Device’;
- originatorId - id of the originator;
- msgType - type of the message;
- recipientEmail - email of the recipient;
- recipientFirstName - first name of the recipient;
- recipientLastName - last name of the recipient.
Let’s consider an example with the following event: the incoming message to the ‘send notification’ rule node contains data about the temperature value in Building 1.
The notification in ThingsBoard may look like this:

Integration lifecycle event
The integration lifecycle event template is used to send notification about integration lifecycle events. For example, notify when new integration fails to start. Available template parameters contain all parameters available for the General template, plus:
- integrationType - type of the integration;
- integrationName - name of the integration;
- integrationId - id of the integration as uuid string;
- eventType - one of: ‘started’, ‘updated’, ‘stopped’;
- action - one of: ‘start’, ‘update’, ‘stop’;
- error - the error text.
Let’s consider an example with the following event: failed to start MQTT Integration.
The notification in ThingsBoard may look like this:

Edge connection
The Edge connection template is used to send notifications about changes in the connection status between ThingsBoard and the Edge.
Available template parameters:
- edgeId - the edge id as uuid string;
- edgeName - the name of the edge;
- eventType - the string representation of the connectivity status: connected or disconnected.
Let’s consider an example with the following event: ThingsBoard connected to Edge.
The notification in ThingsBoard may look like this:

Edge communication failure
The Edge communication failure template is used to send notifications about ThingsBoard connection failures with the Edge.
Available template parameters:
- edgeId - the edge id as uuid string;
- edgeName - the name of the edge;
- failureMsg - the string representation of the failure, occurred on the Edge.
Let’s consider an example with the following event: failed to connect ThingsBoard to Edge.
The notification in ThingsBoard may look like this:

Entities limit
This template is intended to notify tenants that they will reach the limit on the number of entities (devices, assets, etc.). Only the system administrator can use this template. Available template parameters contain all parameters available for the General template, plus:
- entityType - one of: ‘Device’, ‘Asset’, ‘User’, etc.;
- currentCount - the current count of entities;
- limit - the limit on number of entities;
- percents - the percent from the notification rule configuration;
- tenantId - id of the tenant;
- tenantName - name of the tenant.
Let’s consider an example with the following event: the tenant created 800 devices with the max allowed number is 1000.
The notification in ThingsBoard may look like this:

API usage limit
This template is intended to notify tenants when they hit a specific API limit. Only the system administrator can use this template. Available template parameters contain all parameters available for the General template, plus:
- feature - API feature for which the limit is applied; one of: ‘Device API’, ‘Telemetry persistence’, ‘Rule Engine execution’, ‘JavaScript functions execution’, ‘Email messages’, ‘SMS messages’, ‘Alarms’;
- status - one of: ‘enabled’, ‘warning’, ‘disabled’;
- unitLabel - name of the limited unit; one of: ‘message’, ‘data point’, ‘Rule Engine execution’, ‘JavaScript execution’, ‘email message’, ‘SMS message’, ‘alarm’;
- limit - the limit on used feature units;
- currentValue - current number of used units;
- tenantId - id of the tenant;
- tenantName - name of the tenant.
Let’s consider an example with the following event: the tenant’s devices have sent 8000 messages out of 10000.
The notification in ThingsBoard may look like this:

New platform version
This template is intended to notify tenants about the release of a new version of the ThingsBoard platform. Only the system administrator can use this template. Available template parameters contain all parameters available for the General template, plus:
- latestVersion - the latest platform version available;
- latestVersionReleaseNotesUrl - release notes link for latest version;
- upgradeInstructionsUrl - upgrade instructions link for latest version;
- currentVersion - the current platform version;
- currentVersionReleaseNotesUrl - release notes link for current version.
Let’s consider an example with the following event: a new 3.6.3 version is released but currently deployed version is 3.6.2.
The notification in ThingsBoard may look like this:

Exceeded rate limits
This template is for notifying about exceeding rate limits. Only the system administrator can use this template. Available template parameters contain all parameters available for the General template, plus:
- api - rate-limited API label; one of: ‘REST API requests’, ‘REST API requests per customer’, ‘transport messages’, ‘transport messages per device’, ‘Cassandra queries’, ‘WS updates per session’, ‘notification requests’, ‘notification requests per rule’, ‘entity version creation’, ‘entity version load’, ‘reports generation’, ‘integration messages’, ‘integration messages per device’, ‘Edge events’, ‘Edge events per edge’, ‘Edge uplink messages’, ‘Edge uplink messages per edge’;
- limitLevelEntityType - entity type of the limit level entity, e.g. ‘Tenant’, ‘Device’, ‘Notification rule’, ‘Customer’, etc.;
- limitLevelEntityId - id of the limit level entity;
- limitLevelEntityName - name of the limit level entity;
- tenantId - id of the tenant;
- tenantName - name of the tenant;
Let’s consider an example with the following event: a customer ‘Jane Smith’ exceeded rate limit for per-customer REST API requests.
The notification in ThingsBoard may look like this:

Rules
Notification rules allow you to automate the delivery of notifications on a particular trigger event. For example, rule automatically sends a notification when a new alarm is created. The trigger event types are tightly coupled to the notification template types.
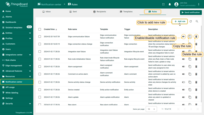
Let’s take a closer look at all rules:
Alarm
Using the “Alarm” rule the system sends notifications on specific events: alarm is created, acknowledged, cleared, severity updated, or alarm deleted.
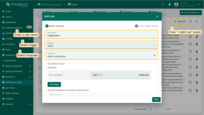
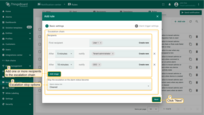
To create a new alarm rule, follow these steps:
- Click the “Add rule” button in the upper right corner of the “Rules” tab;
- In the new pop-up window, enter the rule's name;
- Select trigger - Alarm;
- Then, select pre-made template from the list or create your own;
- Build an escalation chain. The escalation chain allows you to configure multiple recipients of the notification. The first recipient group will receive the notification immediately. Other recipient groups will receive the notification after a configurable delay. You may also configure alarm statuses, which will stop the escalation chain. Click “Next”;
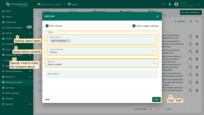
- The alarm trigger filter allows you to filter events based on alarm type and severity;
- You may also select the event types that will trigger notification;
- Click “Add”.
Default rule
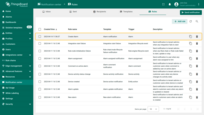
The default rule ‘New alarm’ will notify tenant administrators when an alarm is created.
Template subject: New alarm '${alarmType}'
Template message: Severity: ${alarmSeverity}, originator: ${alarmOriginatorEntityType} '${alarmOriginatorName}'
See Alarm template for a list of the available template parameters.
Device activity
Using the “Device activity” rule the system sends notifications when the device becomes active or inactive.
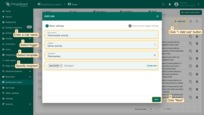
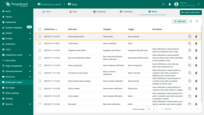
To create a new device activity rule, follow these steps:
- Click the “Add rule” button in the upper right corner of the “Rules” tab;
- In the new pop-up window, enter the rule's name;
- Select trigger - Device activity;
- Then, select pre-made template from the list or create your own;
- Specify the recipient of the notification. Click “Next”;
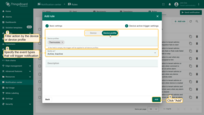
- The trigger filter allows you to configure specific devices or device types;
- You may also select the event types that will trigger notification;
- Click “Add”.
Default rule
The default rule ‘Device activity status change’ will notify tenant admins when any device changes its activity state
Template subject: Device '${deviceName}' became ${eventType}
Template message: Device '${deviceName}' of type '${deviceType}' is now ${eventType}
See Device activity template for a list of the available template parameters.
Entity action
Using the “Entity action” rule the system sends notifications when an entity is created, updated or deleted.
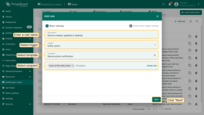
To create a new entity action rule, follow these steps:
- Click the “Add rule” button in the upper right corner of the “Rules” tab;
- In the new pop-up window, enter the rule's name;
- Select trigger - Entity action;
- Then, select pre-made template from the list or create your own;
- Specify the recipient of the notification. Click “Next”;
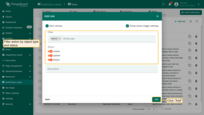
- The trigger filter allows you to filter events by entity type;
- You may also select the event types that will trigger notification;
- Click “Add”.
Default rule
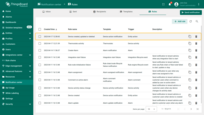
The default rule ‘Device created’ will notify tenant administrators when device is created.
Template subject: ${entityType} was ${actionType}
Template message: ${entityType} '${entityName}' was ${actionType} by user ${userEmail}
See Entity action template for a list of the available template parameters.
Alarm comment
Using the “Alarm comment” rule the system sends notifications when an alarm is commented.
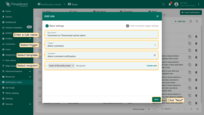
To create a new alarm comment rule, follow these steps:
- Click the “Add rule” button in the upper right corner of the “Rules” tab;
- In the new pop-up window, enter the rule's name;
- Select trigger - Alarm comment;
- Then, select pre-made template from the list or create your own;
- Specify the recipient of the notification. Click “Next”;
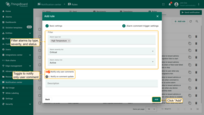
- The trigger filter allows you to filter alarms by type, severity, and status;
- You may also select to notify only on user comments and skip system comments. Optionally, you may notify users on comments update;
- Click “Add”.
Default rule
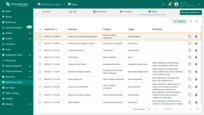
The default rule ‘Comment on active alarm’ will notify tenant administrators when comment is added by user on active alarm.
Template subject: Comment on '${alarmType}' alarm
Template message: ${userEmail} ${action} comment: ${comment}
See Alarm comment template for a list of the available template parameters.
Alarm assignment
Using the “Alarm assignment” rule the system sends notifications when an alarm is assigned or unassigned.
To create a new alarm assignment rule, follow these steps:
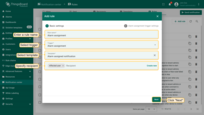
- Click the “Add rule” button in the upper right corner of the “Rules” tab;
- In the new pop-up window, enter the rule's name;
- Select trigger - Alarm assignment;
- Then, select pre-made template from the list or create your own;
- Specify the recipient of the notification. Click “Next”;
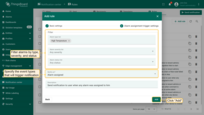
- The trigger filter allows you to filter alarms by type, severity, and status;
- You may also select the event types that will trigger notification: assign or unassign;
- Click “Add”.
Default rule
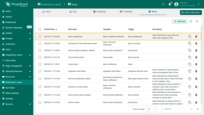
The default rule ‘Alarm assignment’ will notify a user when any alarm was assigned to him.
Template subject: Alarm '${alarmType}' (${alarmSeverity}) was assigned to user
Template message: ${userEmail} assigned alarm on ${alarmOriginatorEntityType} '${alarmOriginatorName}' to ${assigneeEmail}
See Alarm assignment template for a list of the available template parameters.
Rule engine lifecycle event
Using the “Rule engine lifecycle event” rule the system sends notifications about the rule chain or rule node lifecycle events. For example, notify when a new rule node fails to start (typically due to misconfiguration).
Trigger settings: the trigger filter allows you to filter based on rule chains and events status: Started, Updated, Stopped.
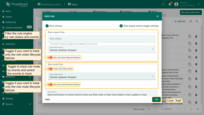
To create a new Rule engine lifecycle event rule, follow these steps:
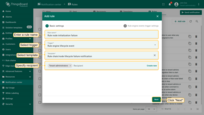
- Click the “Add rule” button in the upper right corner of the “Rules” tab;
- In the new pop-up window, enter the rule's name;
- Select trigger - Rule engine lifecycle event;
- Then, select pre-made template from the list or create your own;
- Specify the recipient of the notification. Click “Next”;
- The trigger filter allows you to filter notifications by type, severity, and status;
- You may also select the event types that will trigger notification: assign or unassign;
- Click “Add”.
Default rule
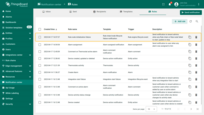
The default rule ‘Rule node initialization failure’ will notify tenant administrators when any Rule chain or Rule node failed to start, update or stop.
Template subject: ${action:capitalize} failure in Rule chain '${ruleChainName}'
Template message: ${componentType} '${componentName}' failed to ${action}
See Rule engine lifecycle event template for a list of the available template parameters.
Integration lifecycle event
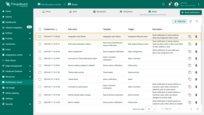
Using the “Integration lifecycle event” rule the system sends notifications about the integration lifecycle events. For example, notify when a integration fails to start (typically due to misconfiguration).
Trigger settings: the trigger filter allows you to filter based on integration status: Started, Updated, Stopped.
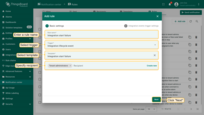
To create a new integration lifecycle event rule, follow these steps:
- Click the “Add rule” button in the upper right corner of the “Rules” tab;
- In the new pop-up window, enter the rule's name;
- Select trigger - Integration lifecycle event;
- Then, select pre-made template from the list or create your own;
- Specify the recipient of the notification. Click “Next”;
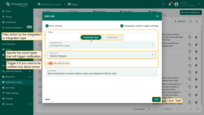
- The trigger filter allows you to filter notifications by integration type;
- You may also select the event types that will trigger notification: started, updated, stopped;
- Click “Add”.
Default rule
The default rule ‘Integration start failure’ will notify tenant administrators when any integration fails to start.
Template subject: ${integrationType} integration start failure
Template message: Integration '${integrationName}' failed to start:<br/>${error}
See Integration lifecycle event template for a list of the available template parameters.
Edge connection
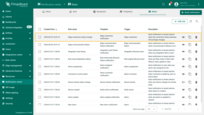
Using the “Edge connection” rule the system sends a notification to tenant admins when the connection status between TB and Edge changes.
Trigger settings: the trigger filter allows you to filter notifications based on Edge instance status: Connected, Disconnected.
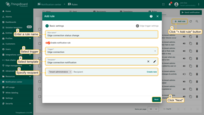
To create a new Edge connection rule, follow these steps:
- Click the “Add rule” button in the upper right corner of the “Rules” tab;
- In the new pop-up window, enter the rule's name;
- Select trigger - Edge connection;
- Then, select pre-made template from the list or create your own;
- Specify the recipient of the notification. Click “Next”;
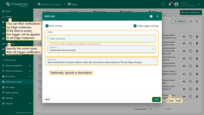
- The trigger filter allows you to filter notifications by Edge instances. If the field is empty, the trigger will be applied to all edge instances;
- You may also select the event types that will trigger notification: connected, disconnected;
- Click “Add”.
Default rule
The default rule ‘Edge connection status change’ will notify tenant administrators when connection status between TB and Edge changes.
Template subject: Edge connection status change
Template message: Edge '${edgeName}' is now ${eventType}
See Edge connection template for a list of the available template parameters.
Edge communication failure
Using the “Edge communication failure” rule the system sends a notification to tenant admins when communication failures occur.
To create a new Edge communication failure rule, follow these steps:
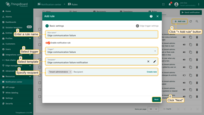
- Click the “Add rule” button in the upper right corner of the “Rules” tab;
- In the new pop-up window, enter the rule's name;
- Select trigger - Edge communication failure;
- Then, select pre-made template from the list or create your own;
- Specify the recipient of the notification. Click “Next”;
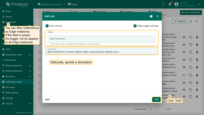
- The trigger filter allows you to filter notifications by Edge instances. If the field is empty, the trigger will be applied to all edge instances;
- Click “Add”.
Default rule
The default rule ‘Edge communication failure’ will notify tenant administrators when communication failures occur.
Template subject: Edge '${edgeName}' communication failure occurred
Template message: Failure message: '${failureMsg}'
See Edge communication failure template for a list of the available template parameters.
Entities limit
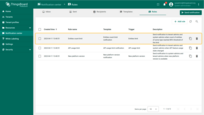
The system administrator can use the “Entities limit” rule to notify tenants that they will reach the limit on the number of entities (devices or assets). For example, notify when tenant has reached 80% of the 100 devices allowed. The max number of devices is extracted from the tenant profile.
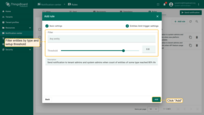
To create a new entities limit rule, follow these steps:
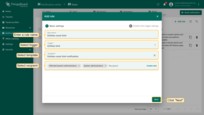
- Click the “Add rule” button in the upper right corner of the “Rules” tab;
- In the new pop-up window, enter the rule's name;
- Select trigger - Entities limit;
- Then, select a pre-made template from the list or create your own;
- Specify the recipient of the notification. Click “Next”;
- The trigger filter allows you to filter entities by type and setup threshold;
- Click “Add”.
Default rule
The default rule ‘Entities Limit’ will notify affected tenant administrators and system administrators when number of devices is above 80% of allowed.
Template subject: ${entityType}s limit will be reached soon
Template message: ${entityType}s usage: ${currentCount}/${limit} (${percents}%)
See Entities limit template for a list of the available template parameters.
API usage limit
The system administrator can use the “API usage limit” rule to notify tenants that they have reached the limit of used units.
For example, notify when tenant has reached 80% of the 100 alarms . The max number of alarms is extracted from the tenant profile.
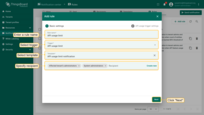
To create a new API usage limit rule, follow these steps:
- Click the “Add rule” button in the upper right corner of the “Rules” tab;
- In the new pop-up window, enter the rule's name;
- Select trigger - API usage limit;
- Then, select a pre-made template from the list or create your own;
- Specify the recipient of the notification. Click “Next”;
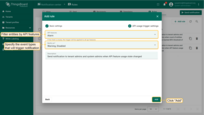
- The trigger filter allows you to filter entities by API features;
- You may also select the event types that will trigger notification: enable, warning, disabled;
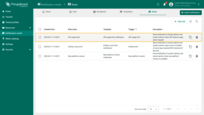
- Click “Add”.
Default rule
The default rule ‘API usage limit’ will notify affected tenant administrators and system administrators when number of units is above 80% of allowed.
Template subject: ${feature}s limit will be reached soon
Template message: ${feature} feature - ${status:upperCase} (usage: ${currentValue} out of ${limit} ${unitLabel}s)
See API usage limit template for a list of the available template parameters.
New platform version
The system administrator can use the “New platform version” rule to notify tenants and system administrators about the release of a new version of the ThingsBoard platform.
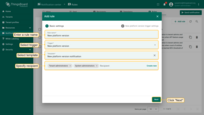
To create a new platform version rule, follow these steps:
- Click the “Add rule” button in the upper right corner of the “Rules” tab;
- In the new pop-up window, enter the rule's name;
- Select trigger - New platform version;
- Then, select a pre-made template from the list or create your own;
- Specify the recipient of the notification. Click “Next”;
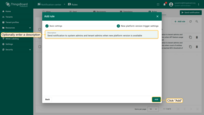
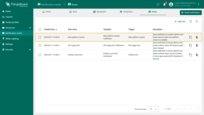
- Optionally enter a description, then click “Add”.
Default rule
The default rule ‘New platform version’ will notify affected tenant administrators and system administrators when a new version of the ThingsBoard platform is released.
Template subject: New version ${latestVersion} is available
Template message: Current version is ${currentVersion}. You can upgrade your ThingsBoard instance to version ${latestVersion}.
See New platform version template for a list of the available template parameters.
Exceeded rate limits
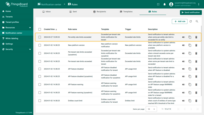
The system administrator can use the “Exceeded rate limits” rule to notify tenants and system administrators about the exceeded rate limits.
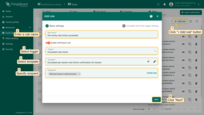
To create a exceeded rate limits rule, follow these steps:
- Click the “Add rule” button in the upper right corner of the “Rules” tab;
- In the new pop-up window, enter the rule's name;
- Select trigger - Exceeded rate limits;
- Then, select a pre-made template from the list or create your own;
- Specify the recipient of the notification. Click “Next”;
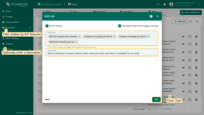
- The trigger filter allows you to filter entities by API features;
- Optionally enter a description, then click “Add”.
Default rule
The default rule ‘Exceeded rate limits’ will notify affected tenant administrators and system administrators when an exceeded rate limits.
Template subject: Rate limits exceeded
Template message: Rate limits for ${api} exceeded for '${limitLevelEntityName}'
