Image Gallery
The Image gallery is a centralized repository for storing and managing images in ThingsBoard. Upload logos, icons, backgrounds, or any visual asset and reuse it across Dashboards, Widgets, device profiles, and mobile applications — ensuring a consistent, branded look across the platform.
Available since ThingsBoard 3.6.2.
Cache Configuration
Section titled Cache ConfigurationThe image API uses ETags to optimize caching — images are only downloaded when they have changed, saving bandwidth.
By default, no Cache-Control headers are applied. You can customize caching behavior through environment variables:
| Variable | Description | Default |
|---|---|---|
CACHE_SPECS_IMAGE_ETAGS_TTL |
Image ETags cache TTL, in minutes | 44 640 (31 days) |
CACHE_SPECS_IMAGE_ETAGS_MAX_SIZE |
Maximum cache size, in bytes. 0 = disabled |
0 |
CACHE_SPECS_IMAGE_SYSTEM_BROWSER_TTL |
Browser cache TTL for system images, in minutes | 0 (disabled) |
CACHE_SPECS_IMAGE_TENANT_BROWSER_TTL |
Browser cache TTL for tenant images, in minutes | 0 (disabled) |
A longer TTL improves load time for repeated visits and reduces server load; a shorter TTL ensures users see updated images sooner. See the Configuration guide for instructions on changing these values.
Adding Images
Section titled “Adding Images”Add images in native image file format (PNG, JPEG, GIF, etc.) or as a JSON export.
Upload an Image File
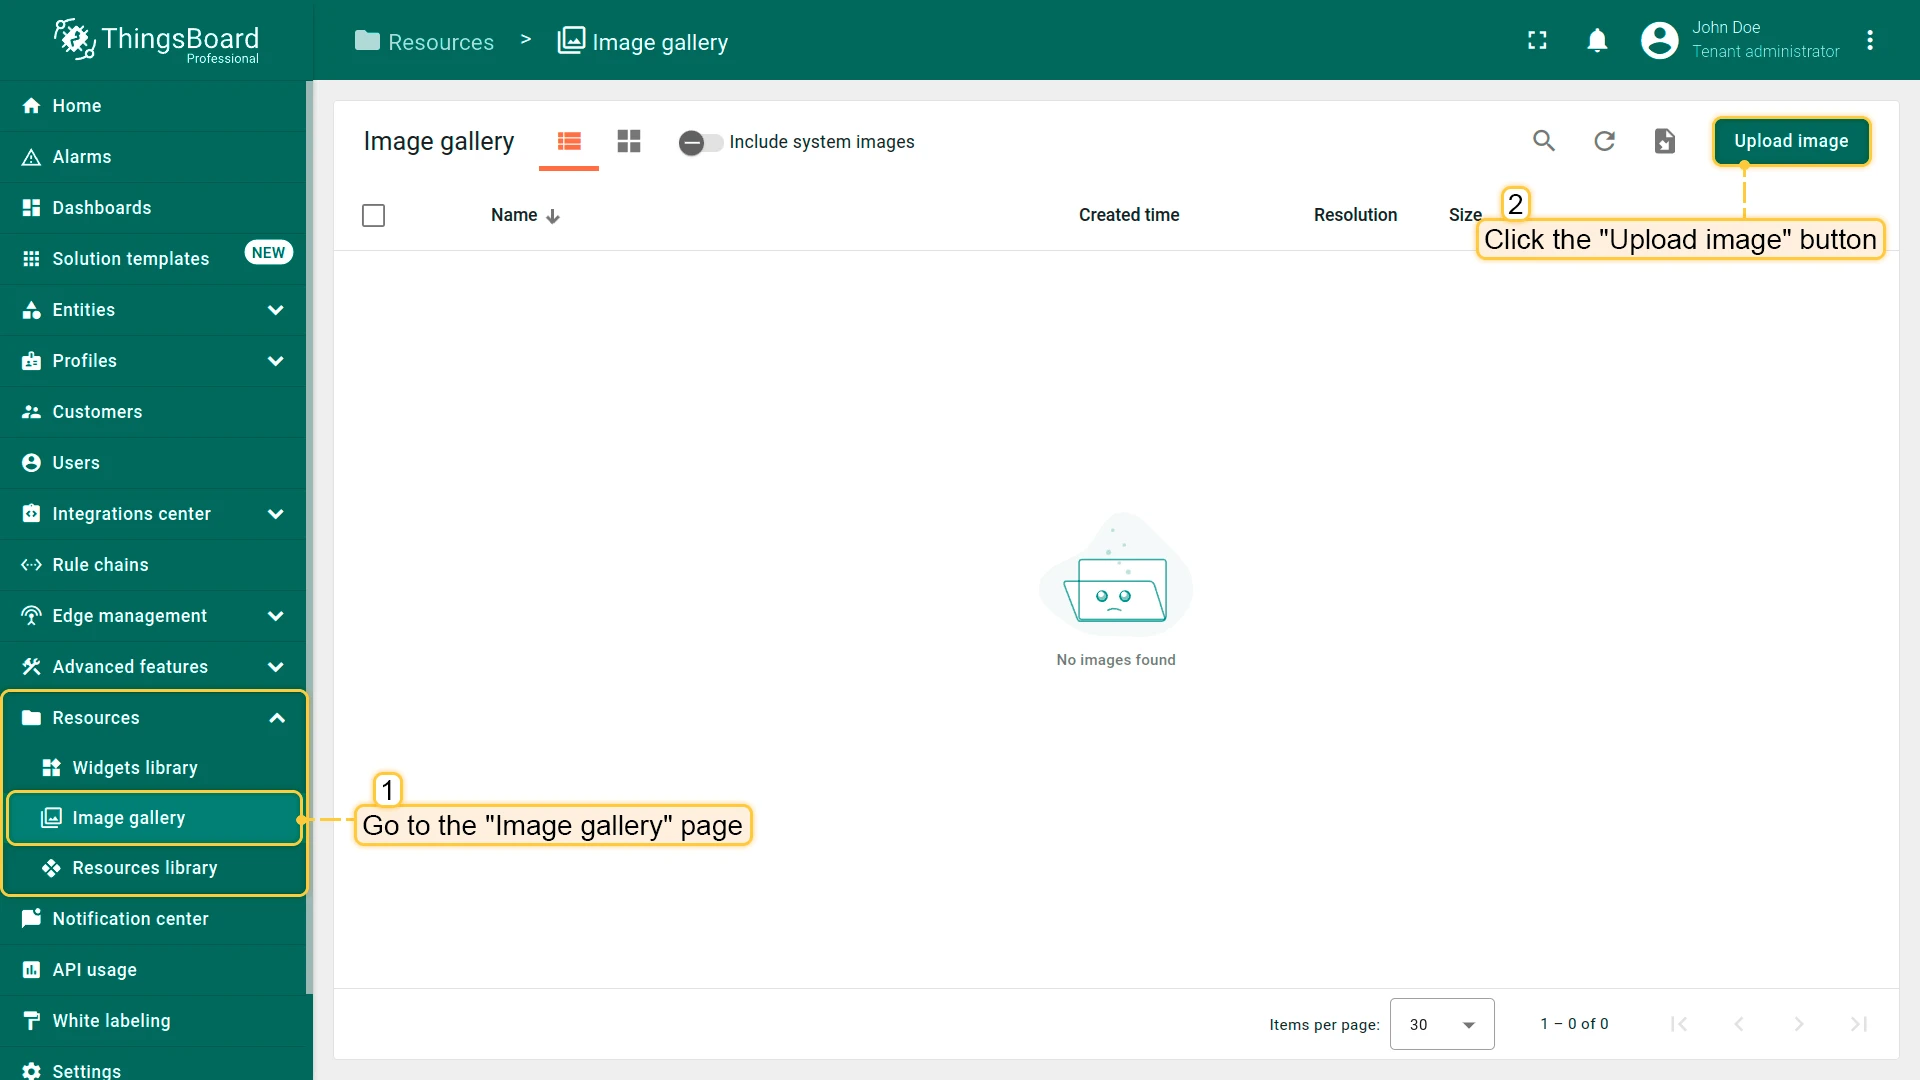
Section titled “Upload an Image File”- Go to the Resources ⇾ Images.
- Click the Upload image button in the top-right corner.
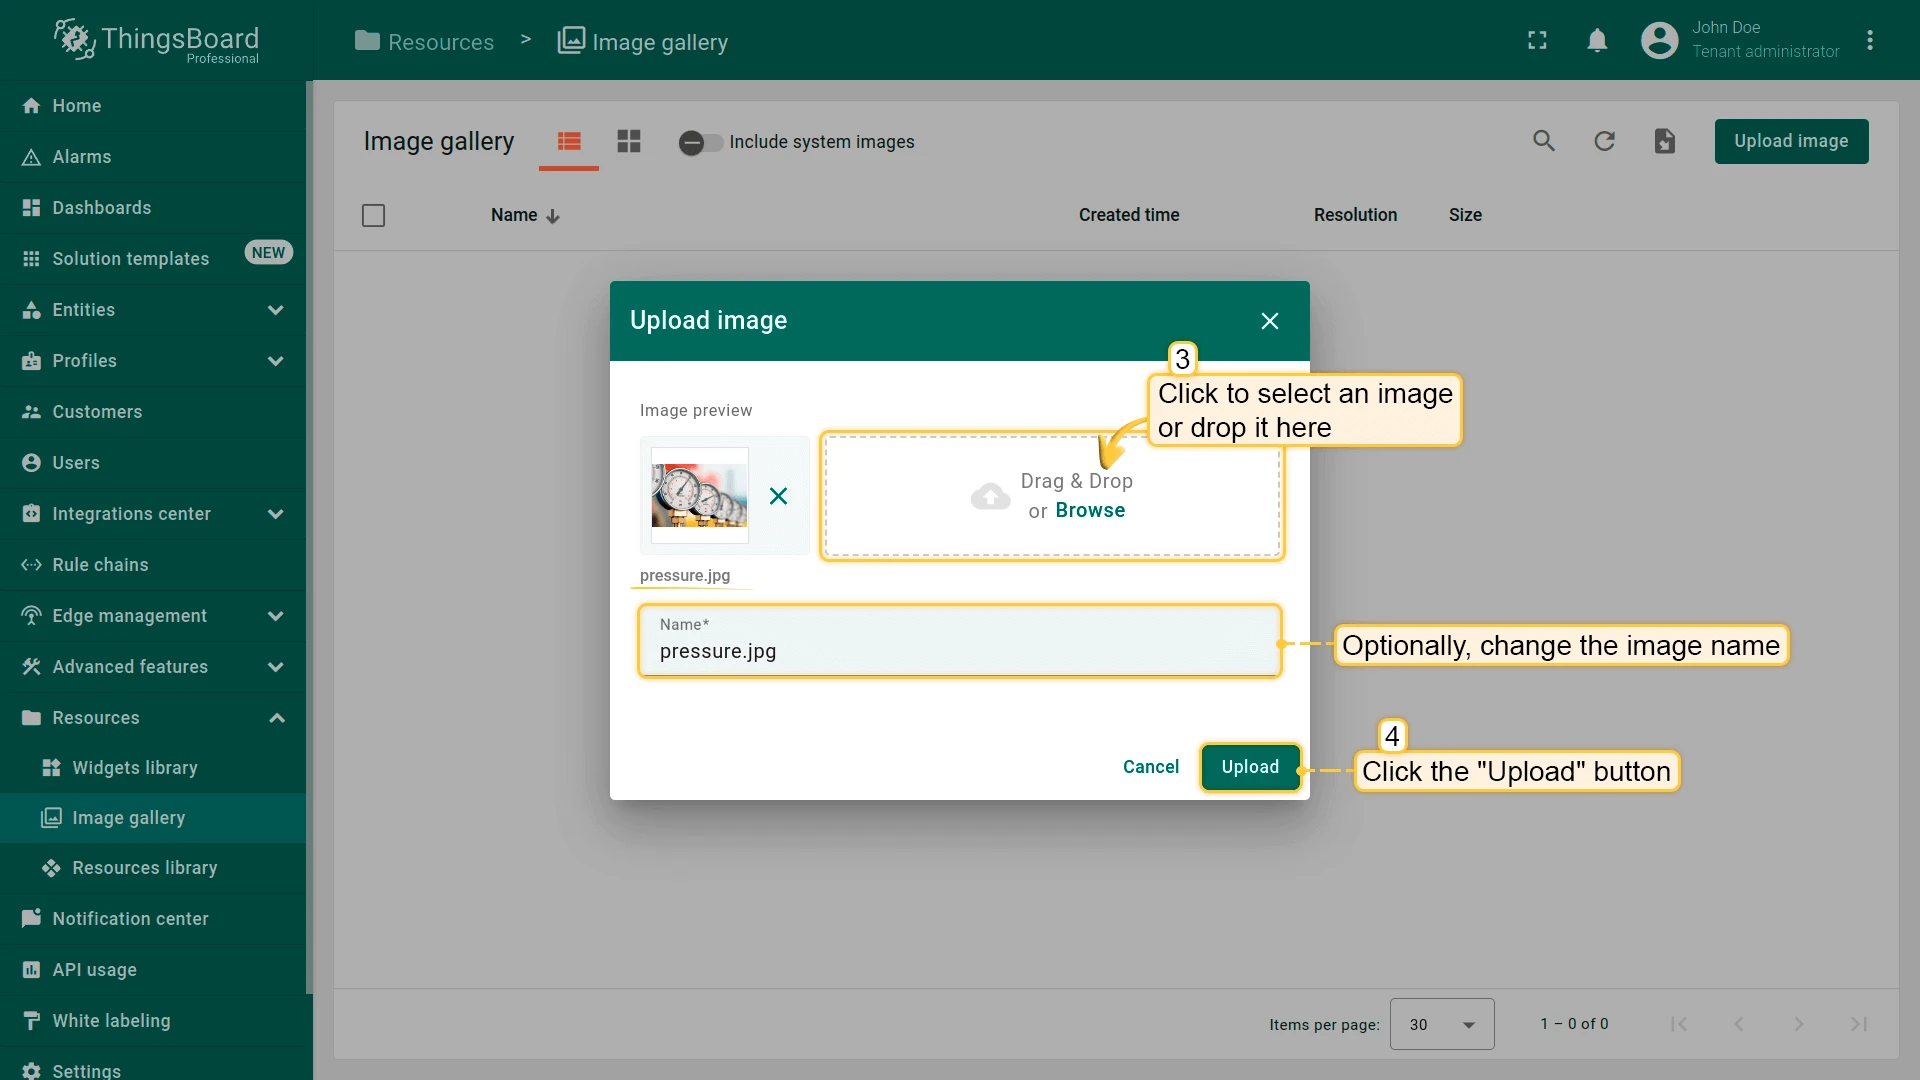
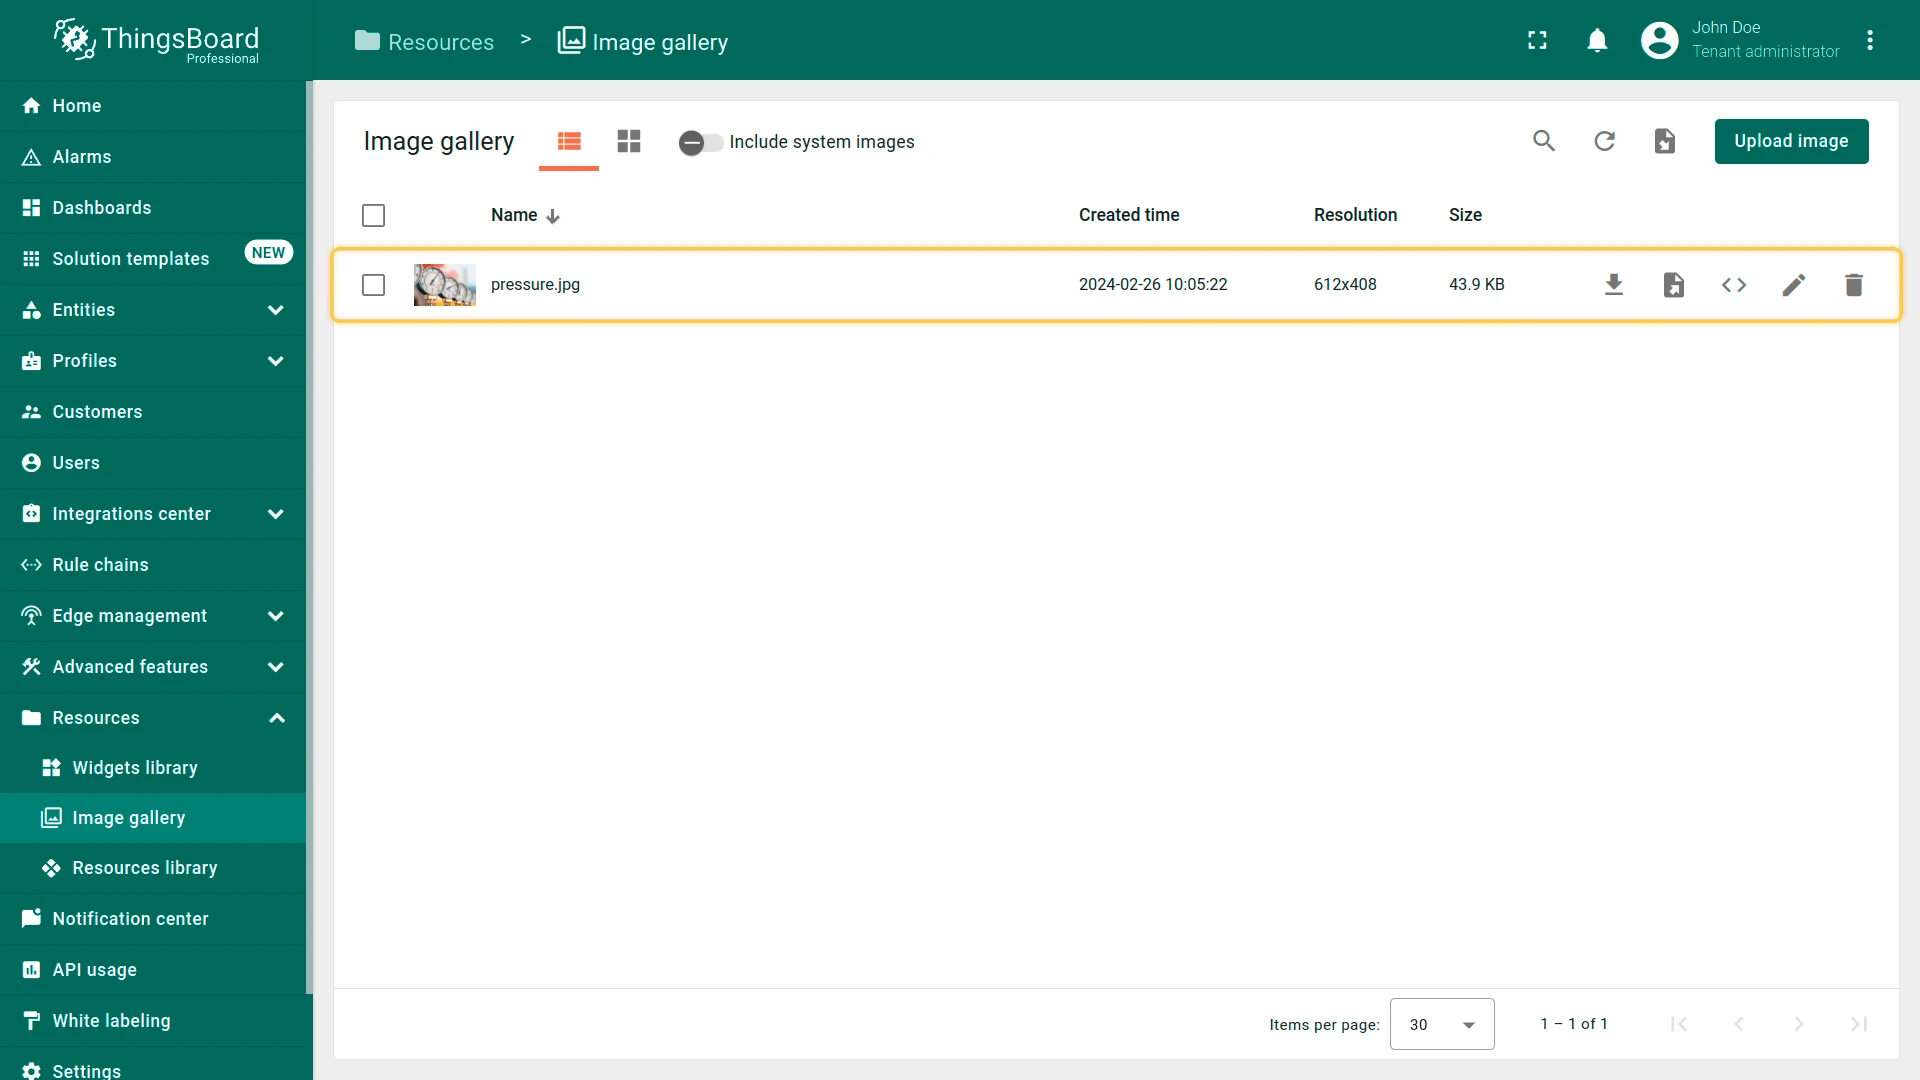
- Select an image or drag it into the upload window, then click Upload.
Import from JSON
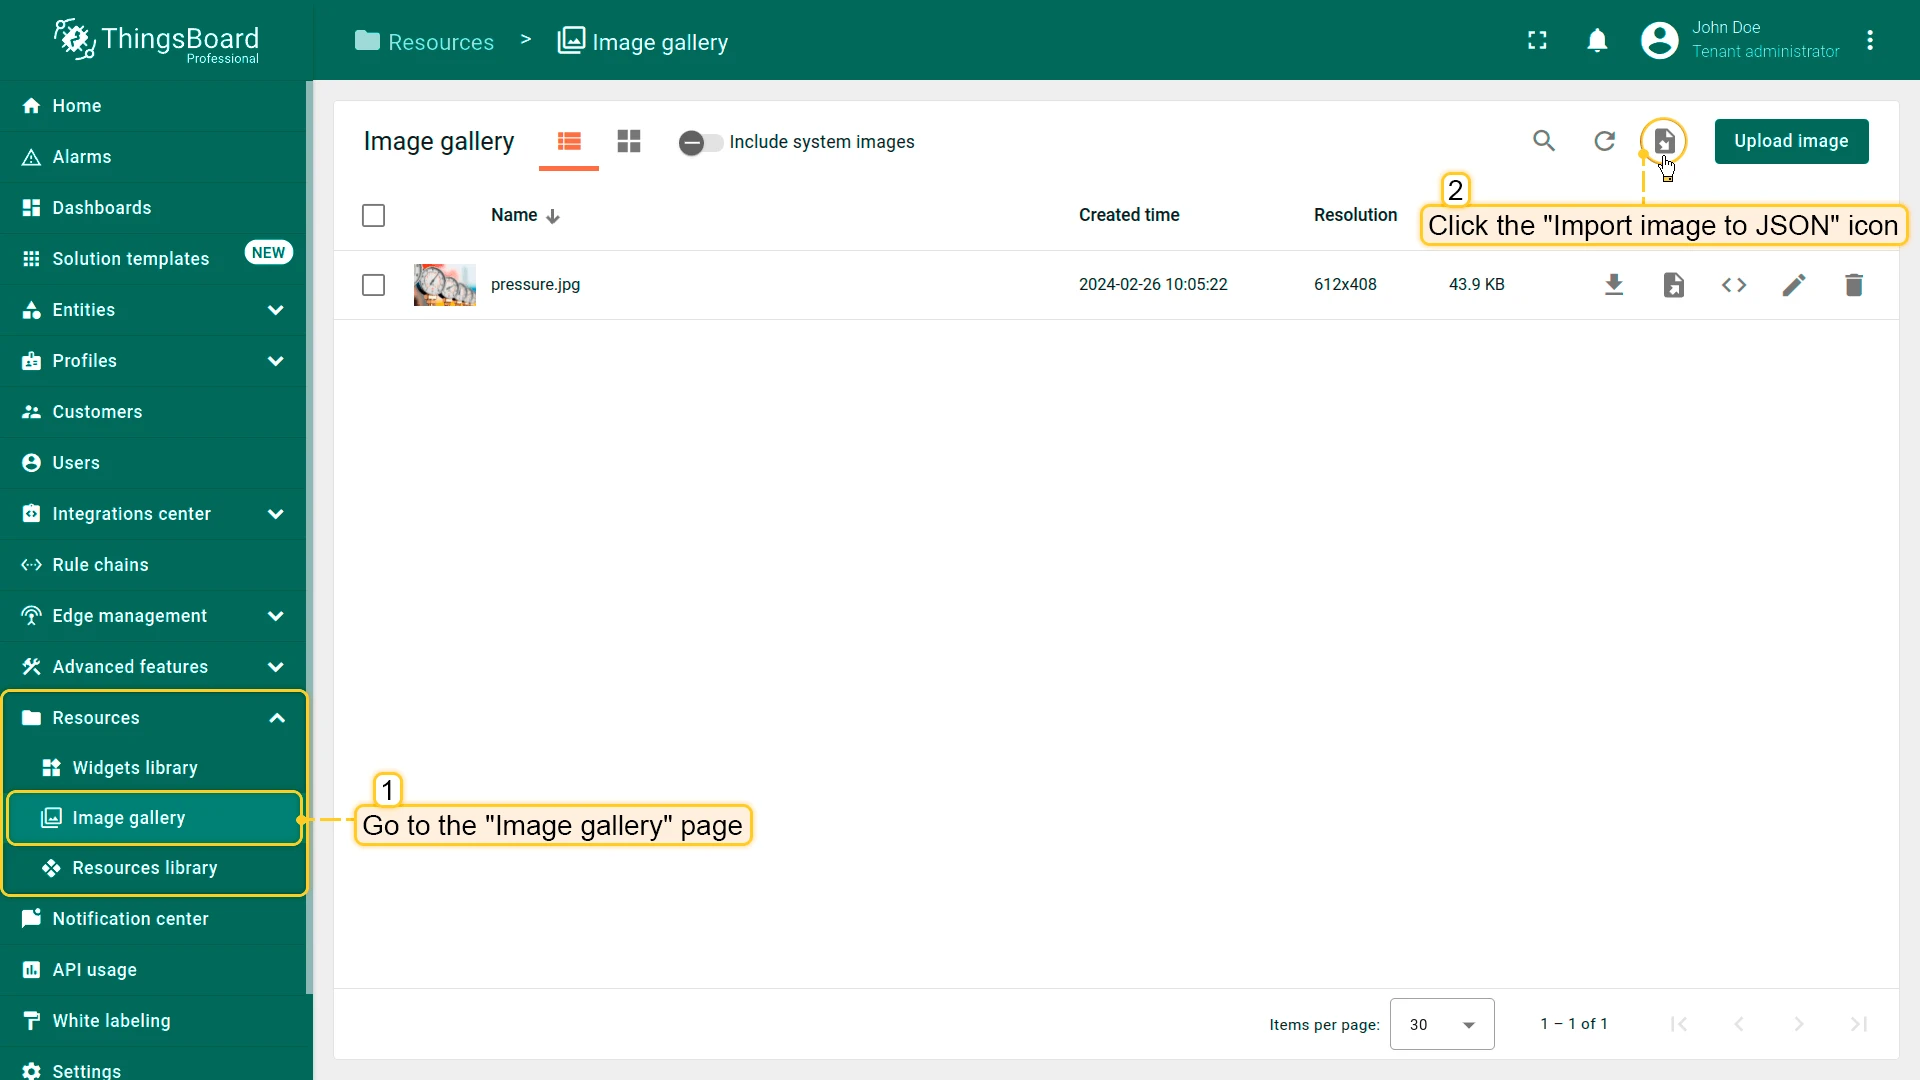
Section titled “Import from JSON”- Click the Import image icon in the top-right corner of the Resources ⇾ Images page.
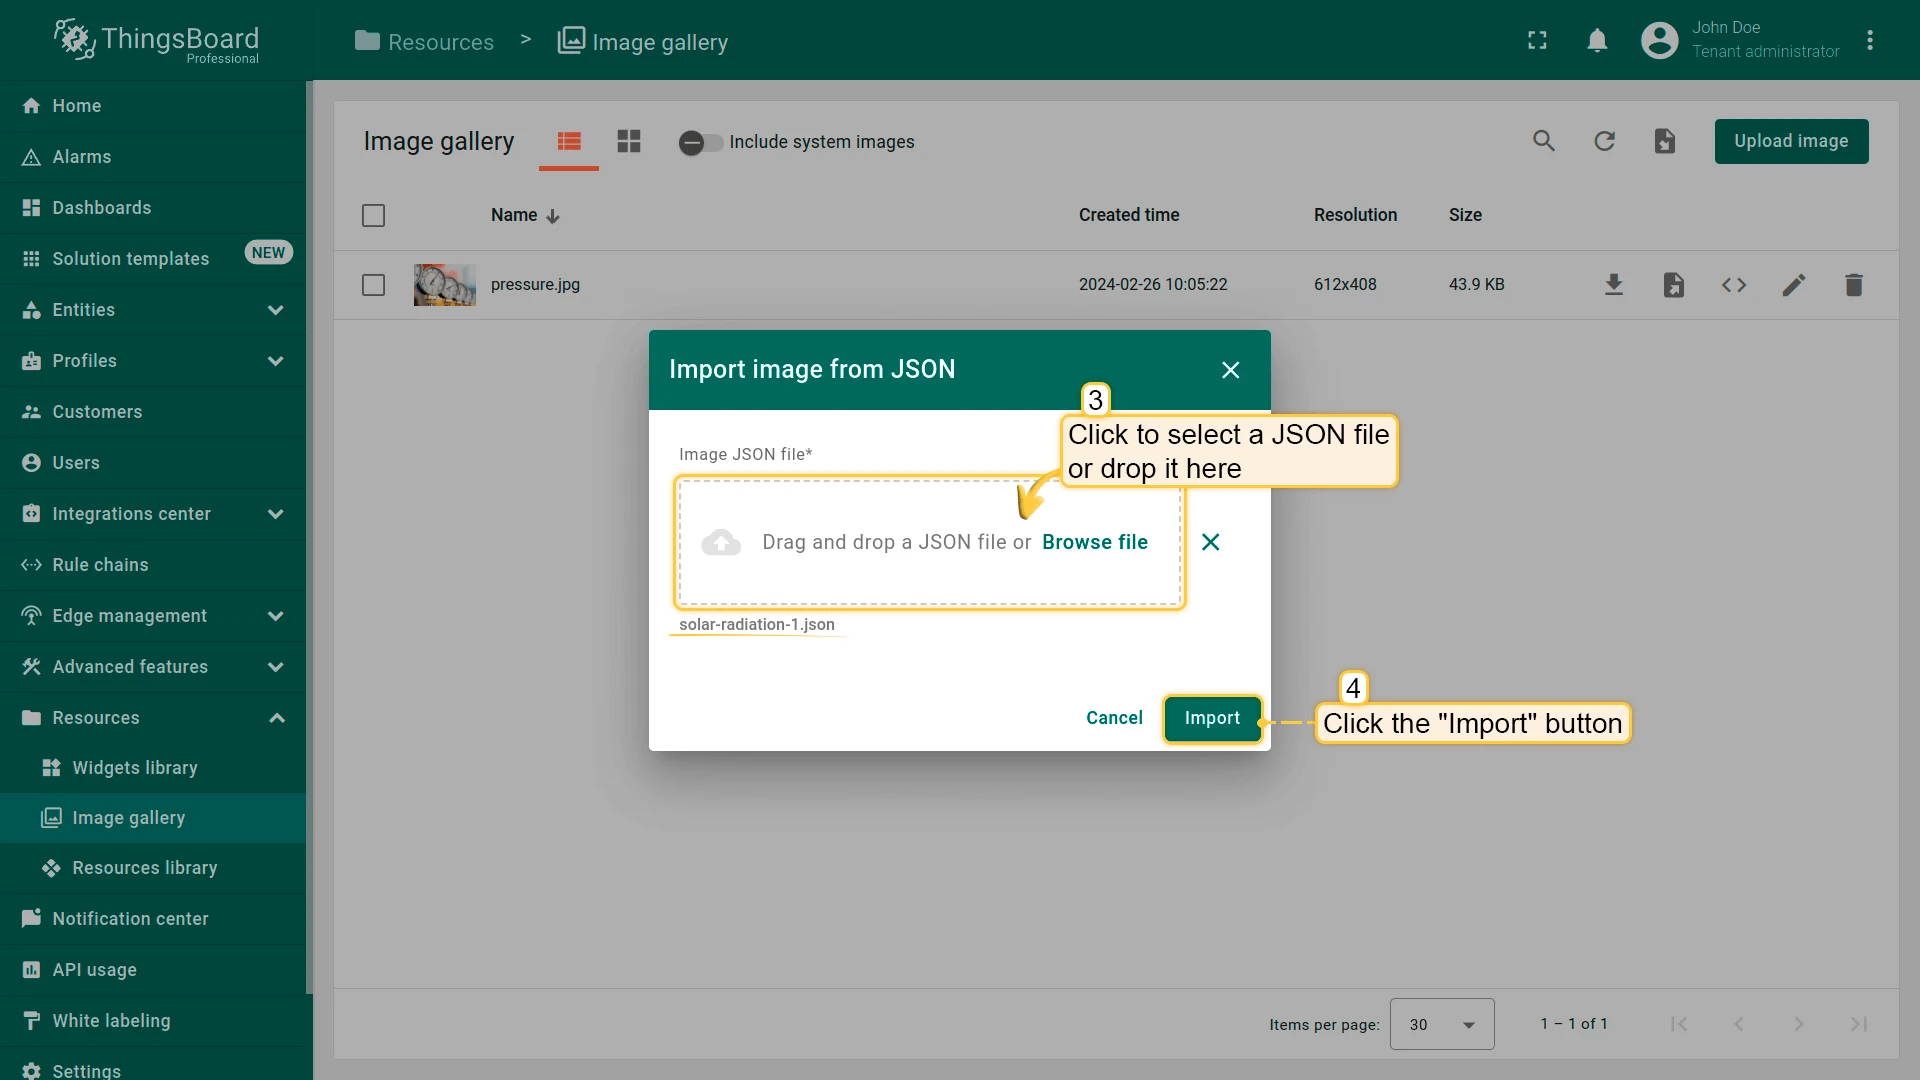
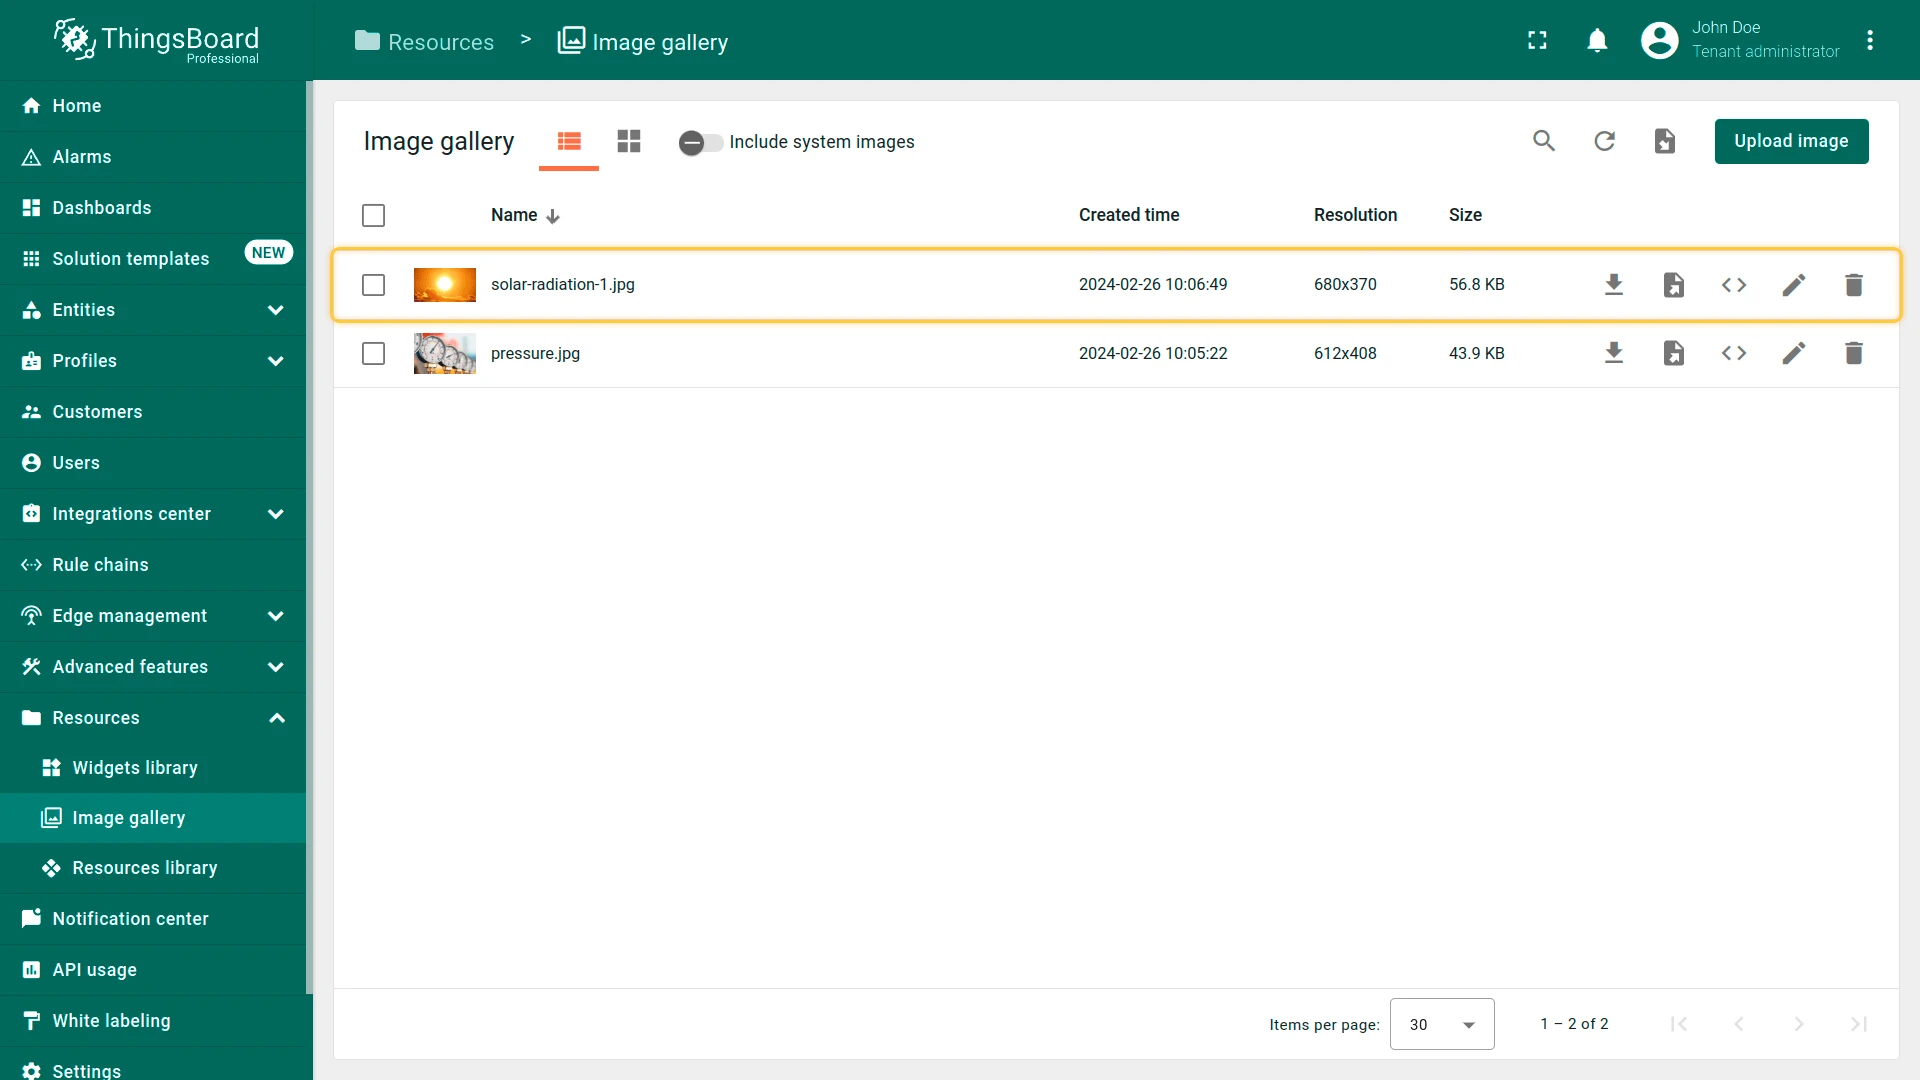
- Upload a JSON image file and click Import.
System Images
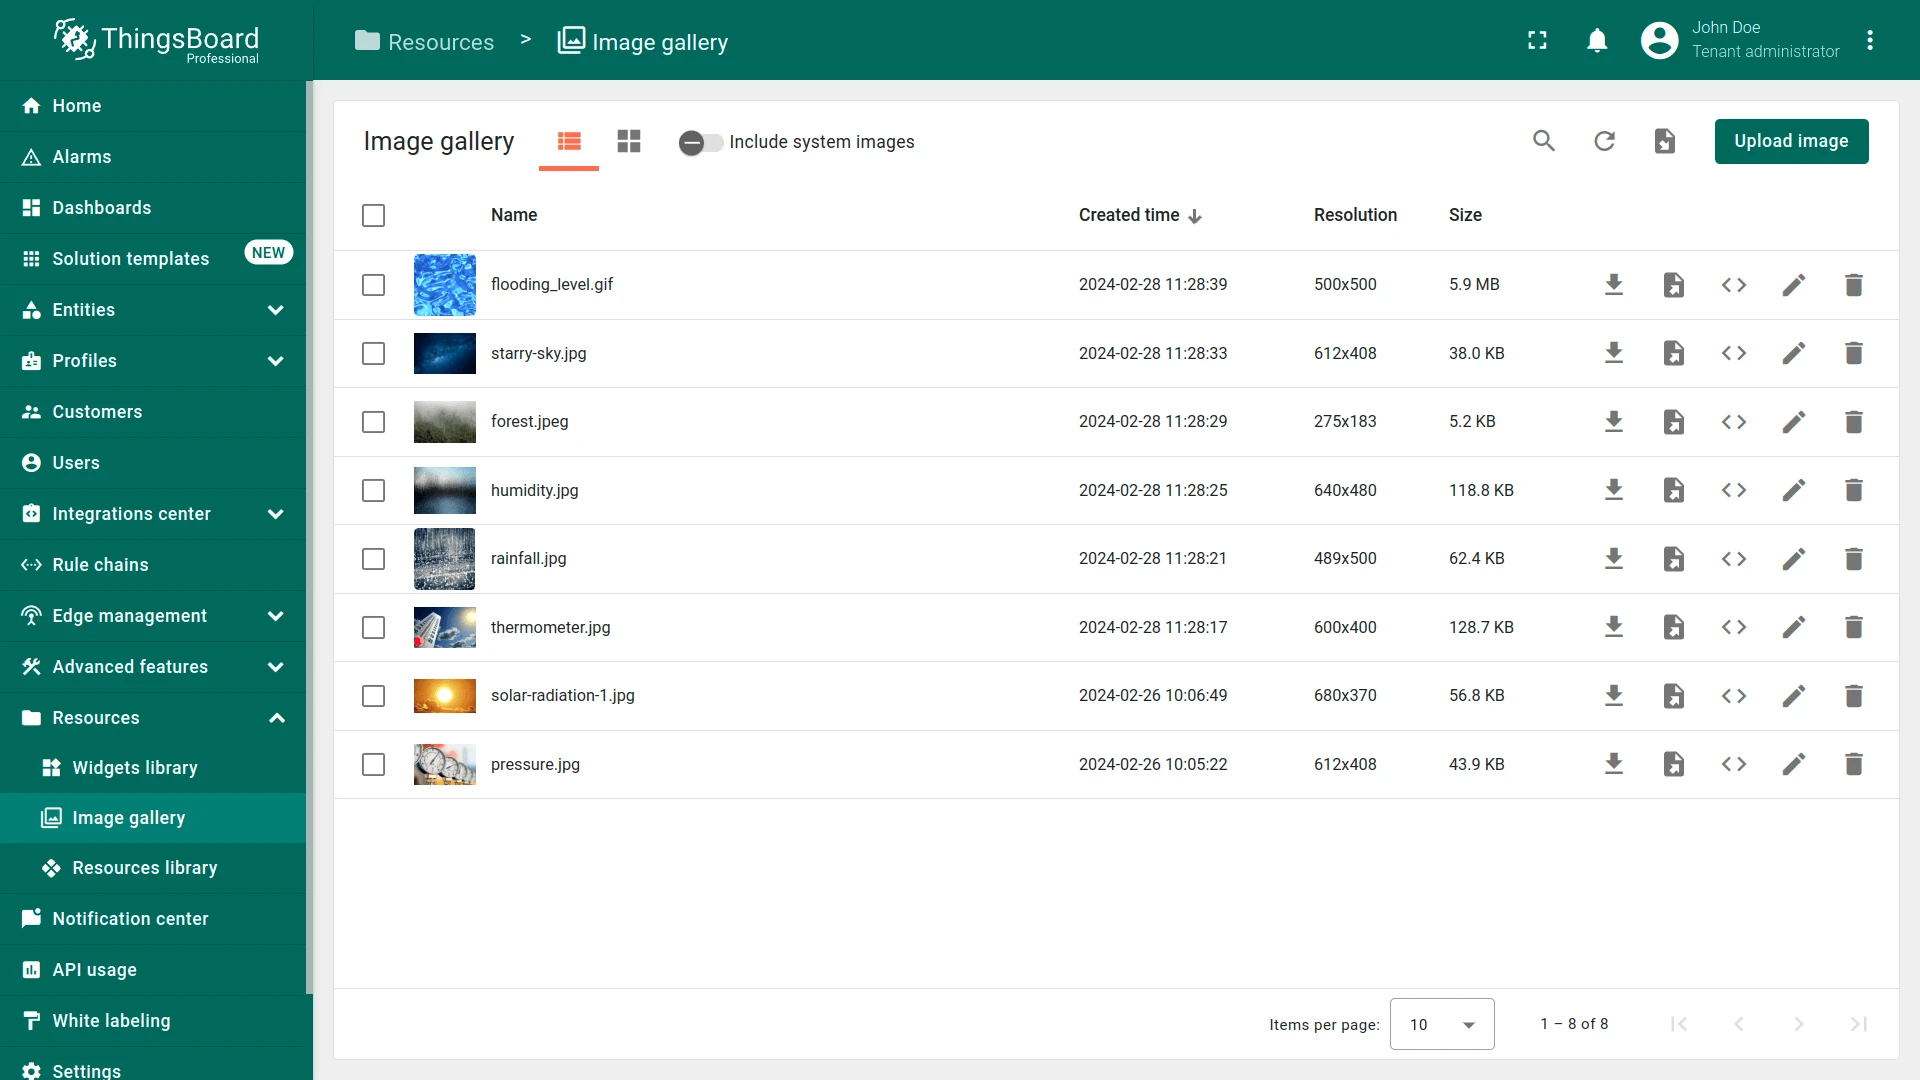
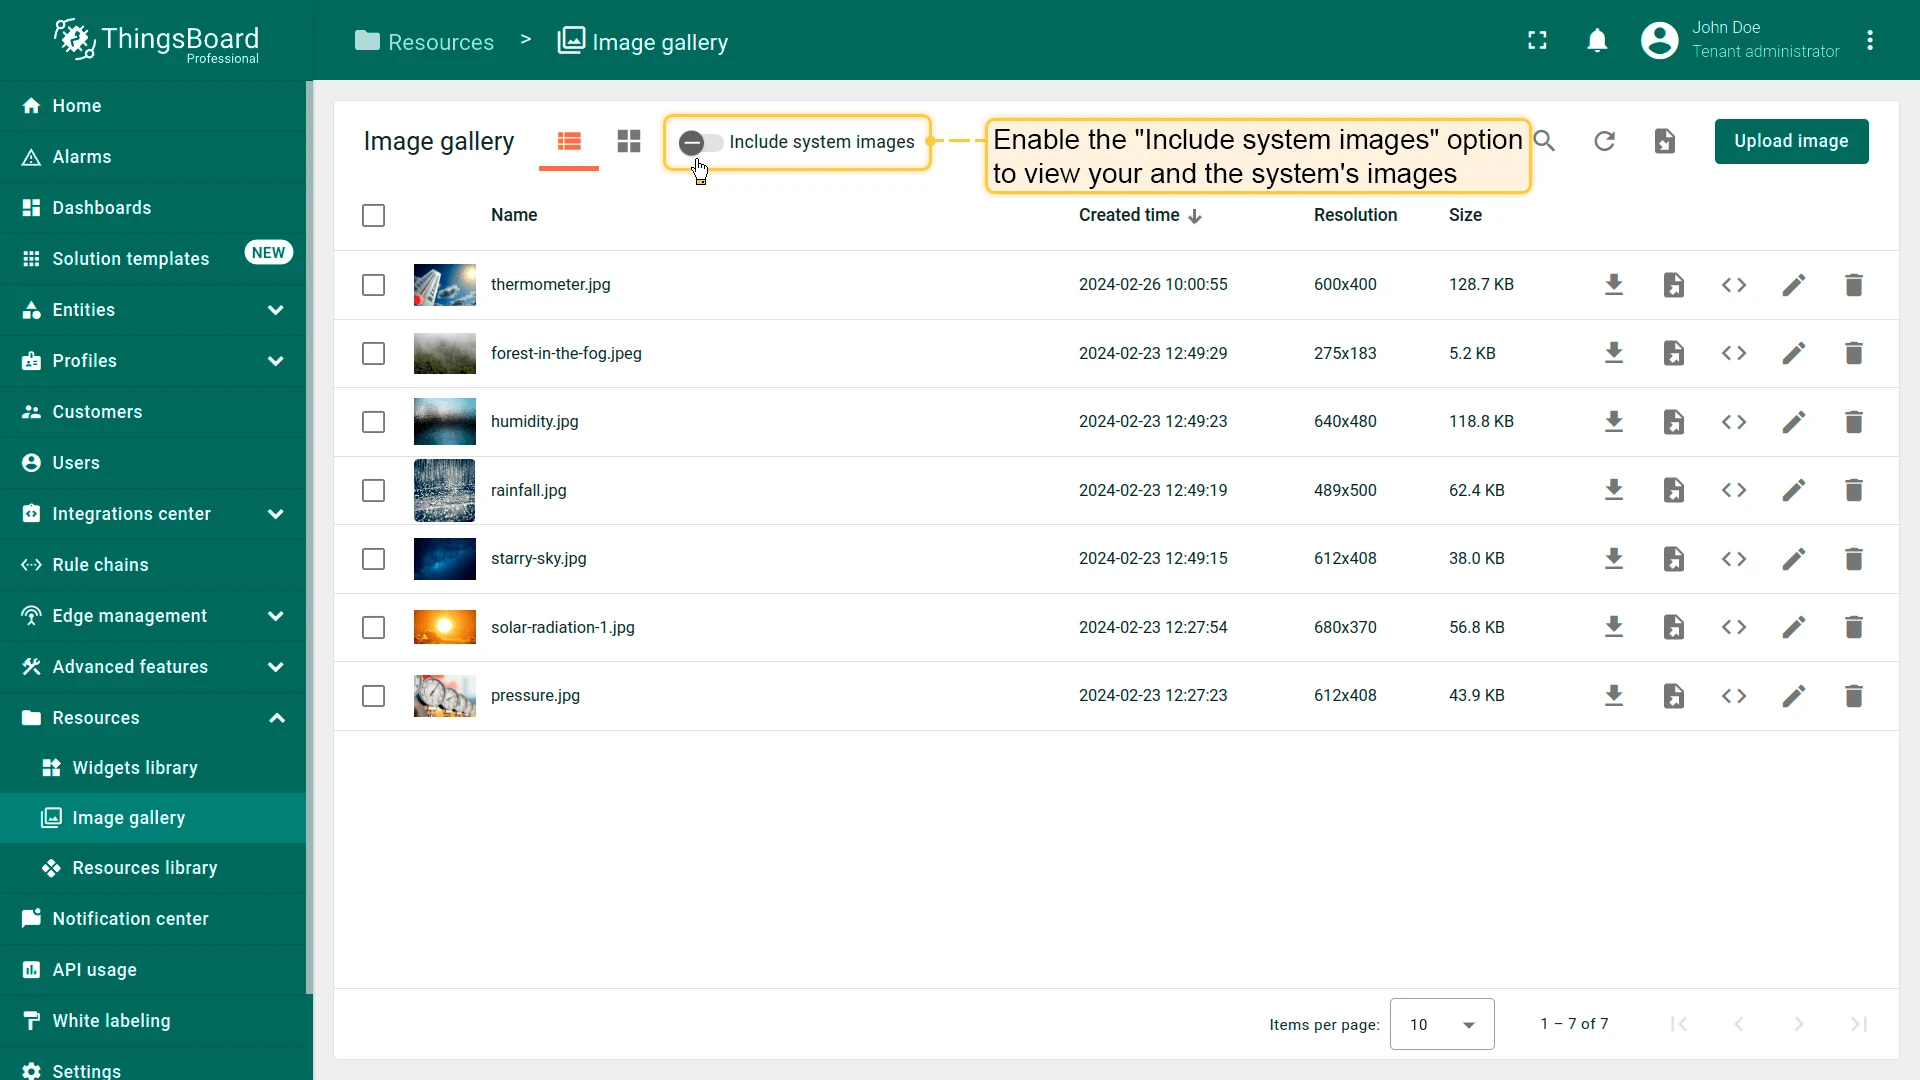
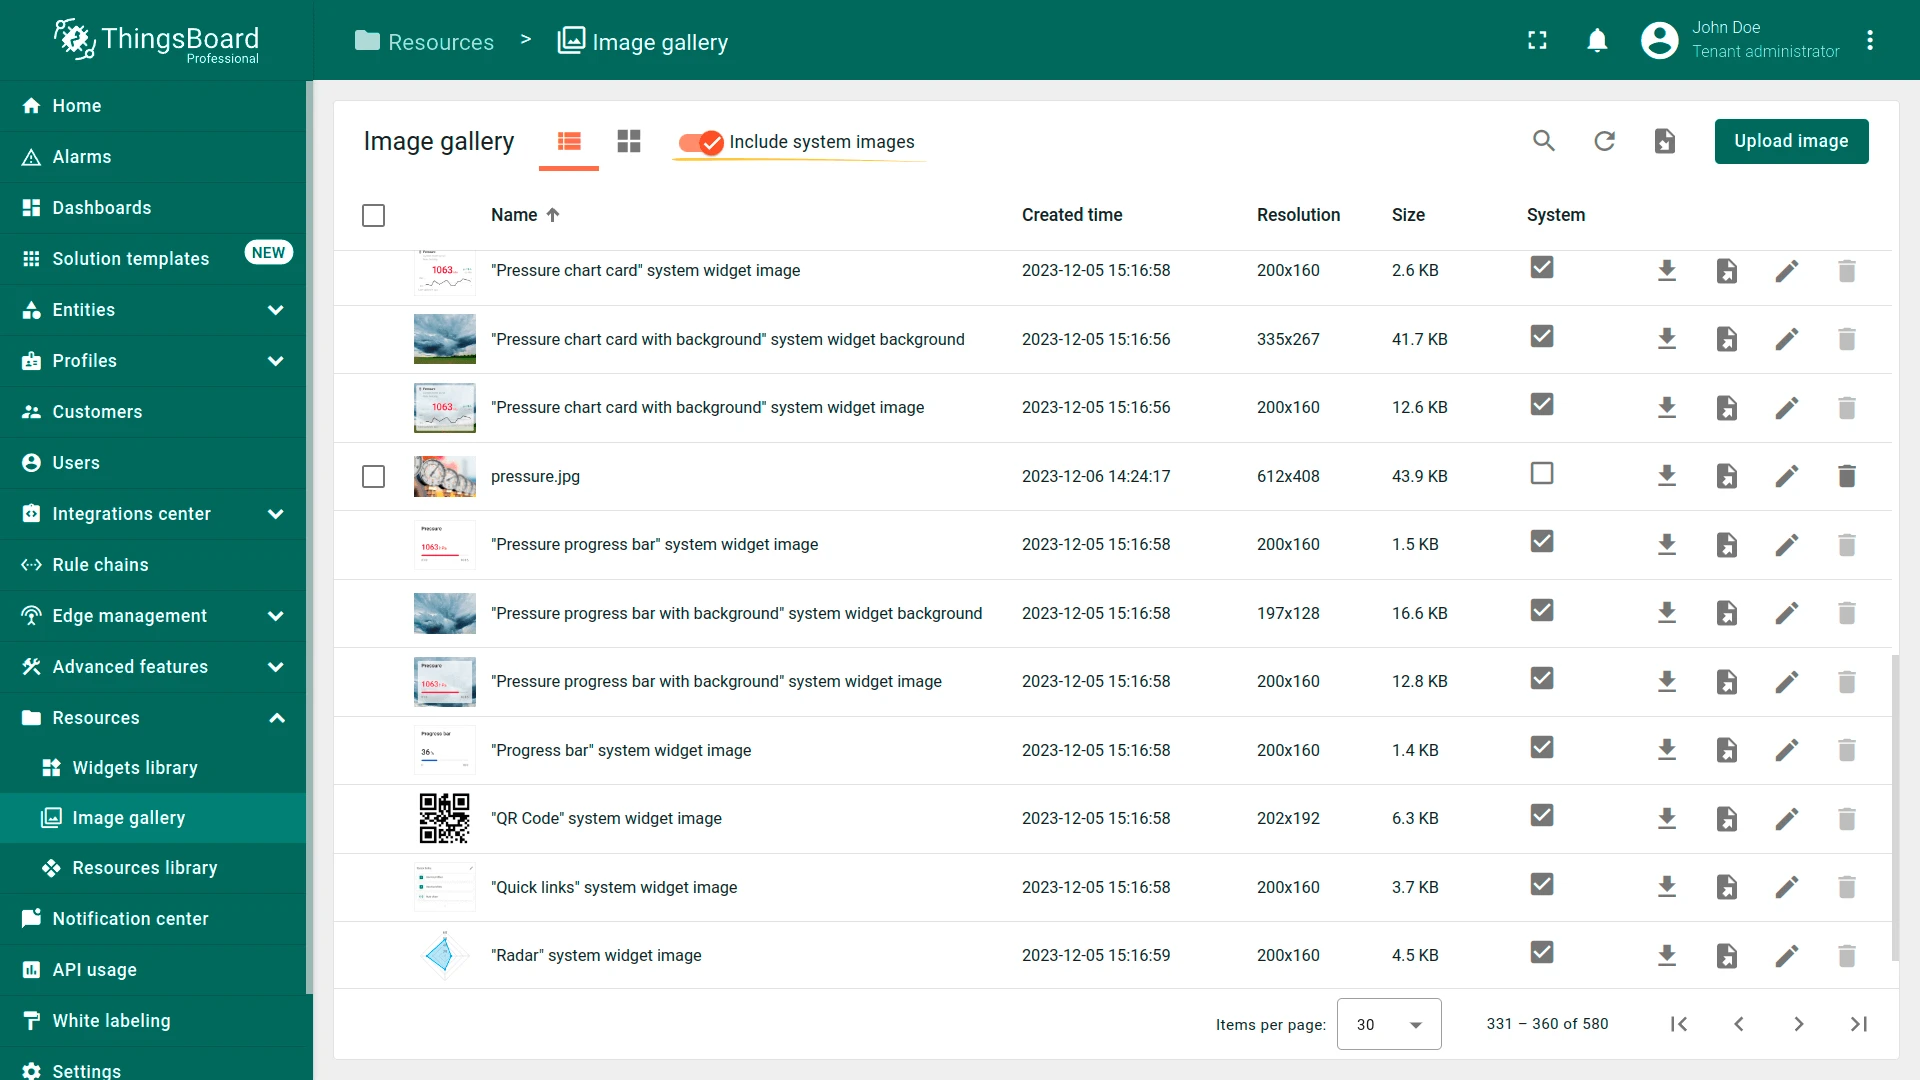
Section titled “System Images”The gallery includes built-in system images you can use in dashboards and widgets. By default, only tenant images are shown. Enable the Include system images toggle to see both.
View Modes
Section titled “View Modes”Images can be displayed in list or grid mode. Switch between them using the toggle in the top-left corner of the gallery.
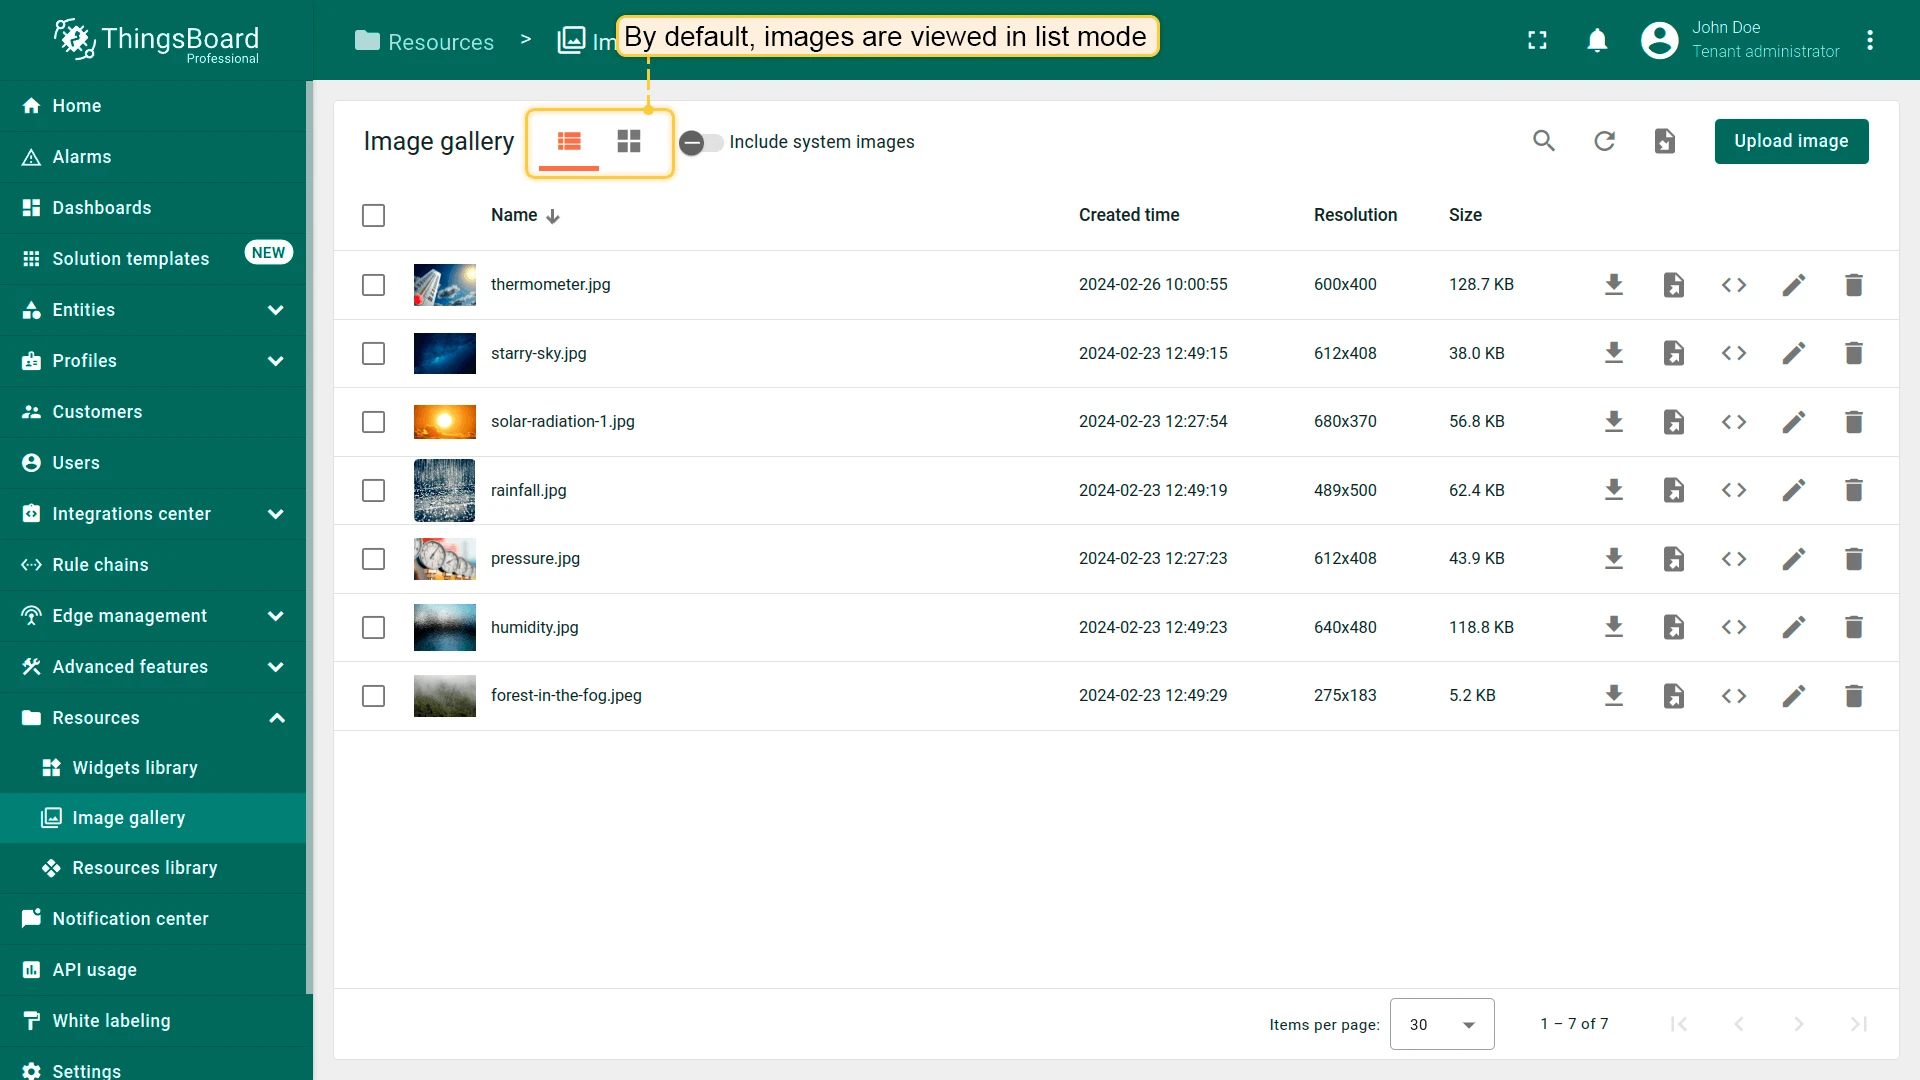
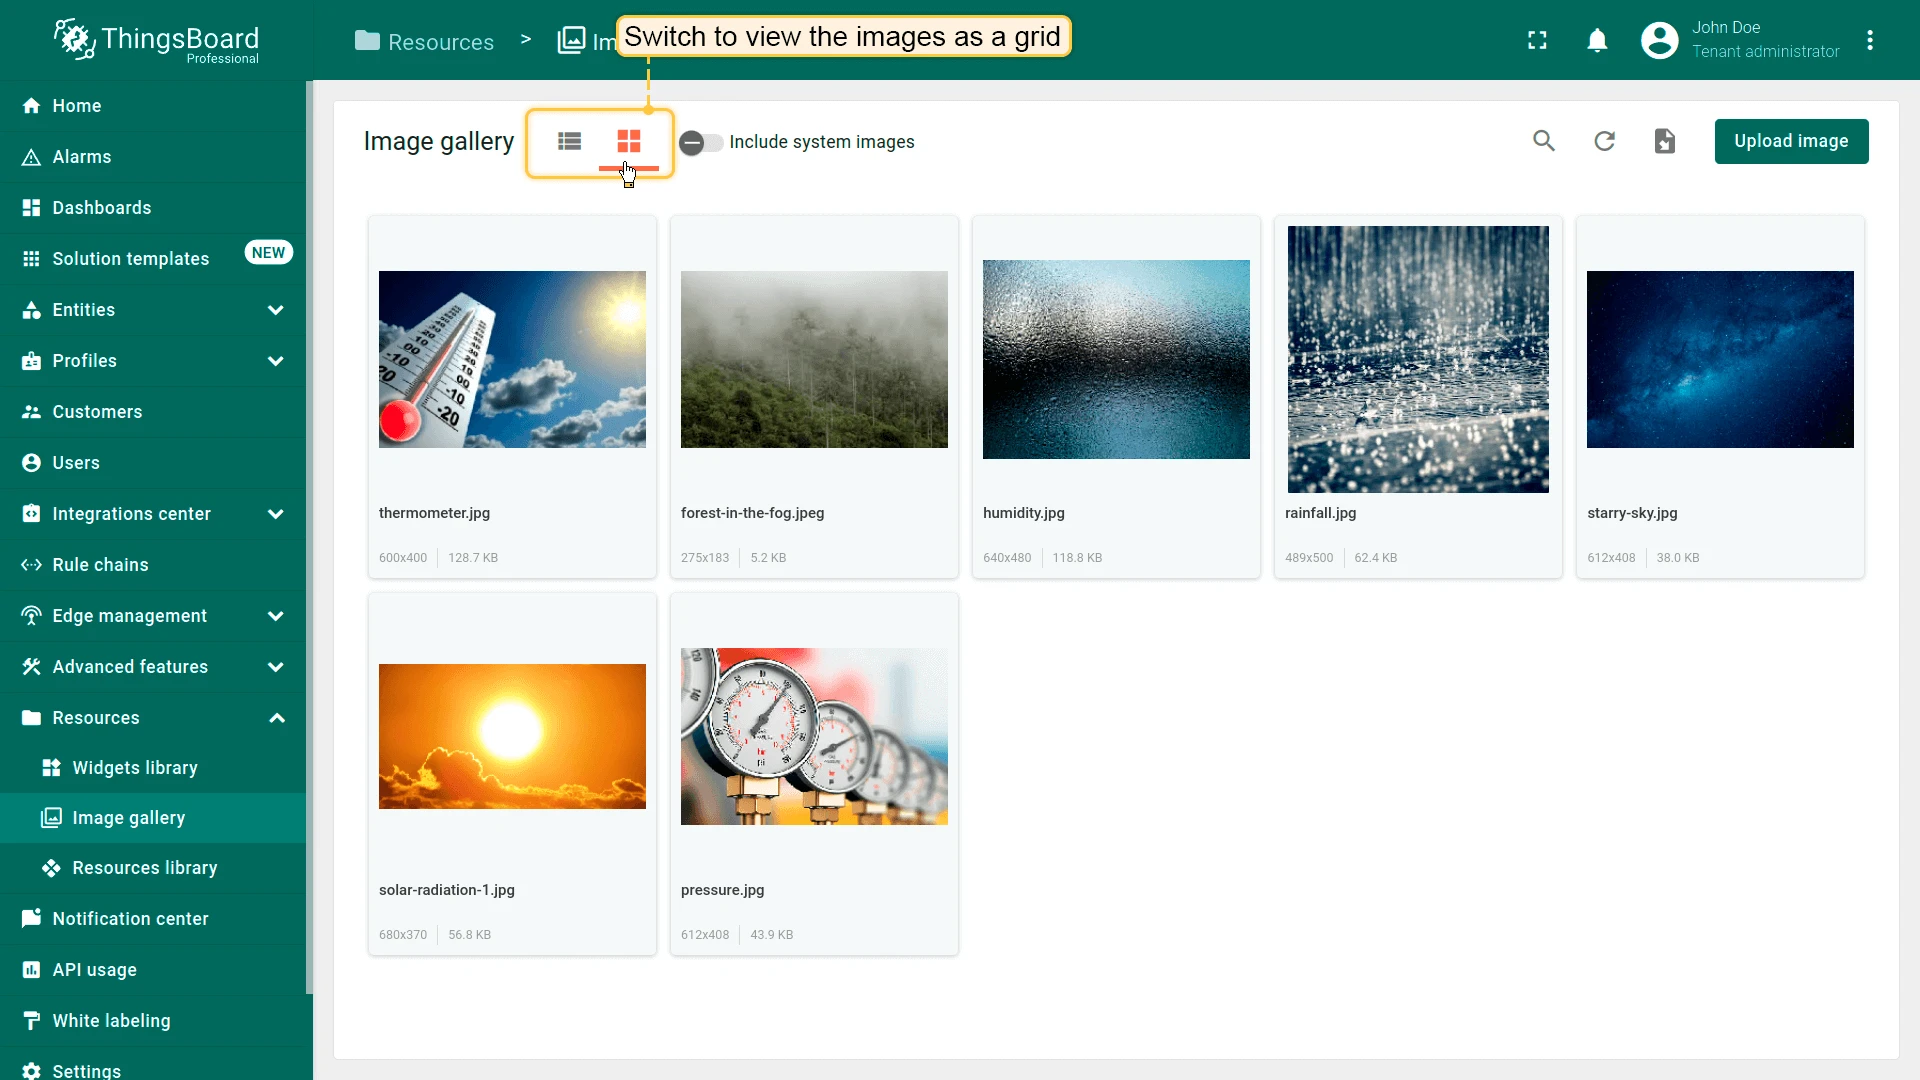
Image Operations
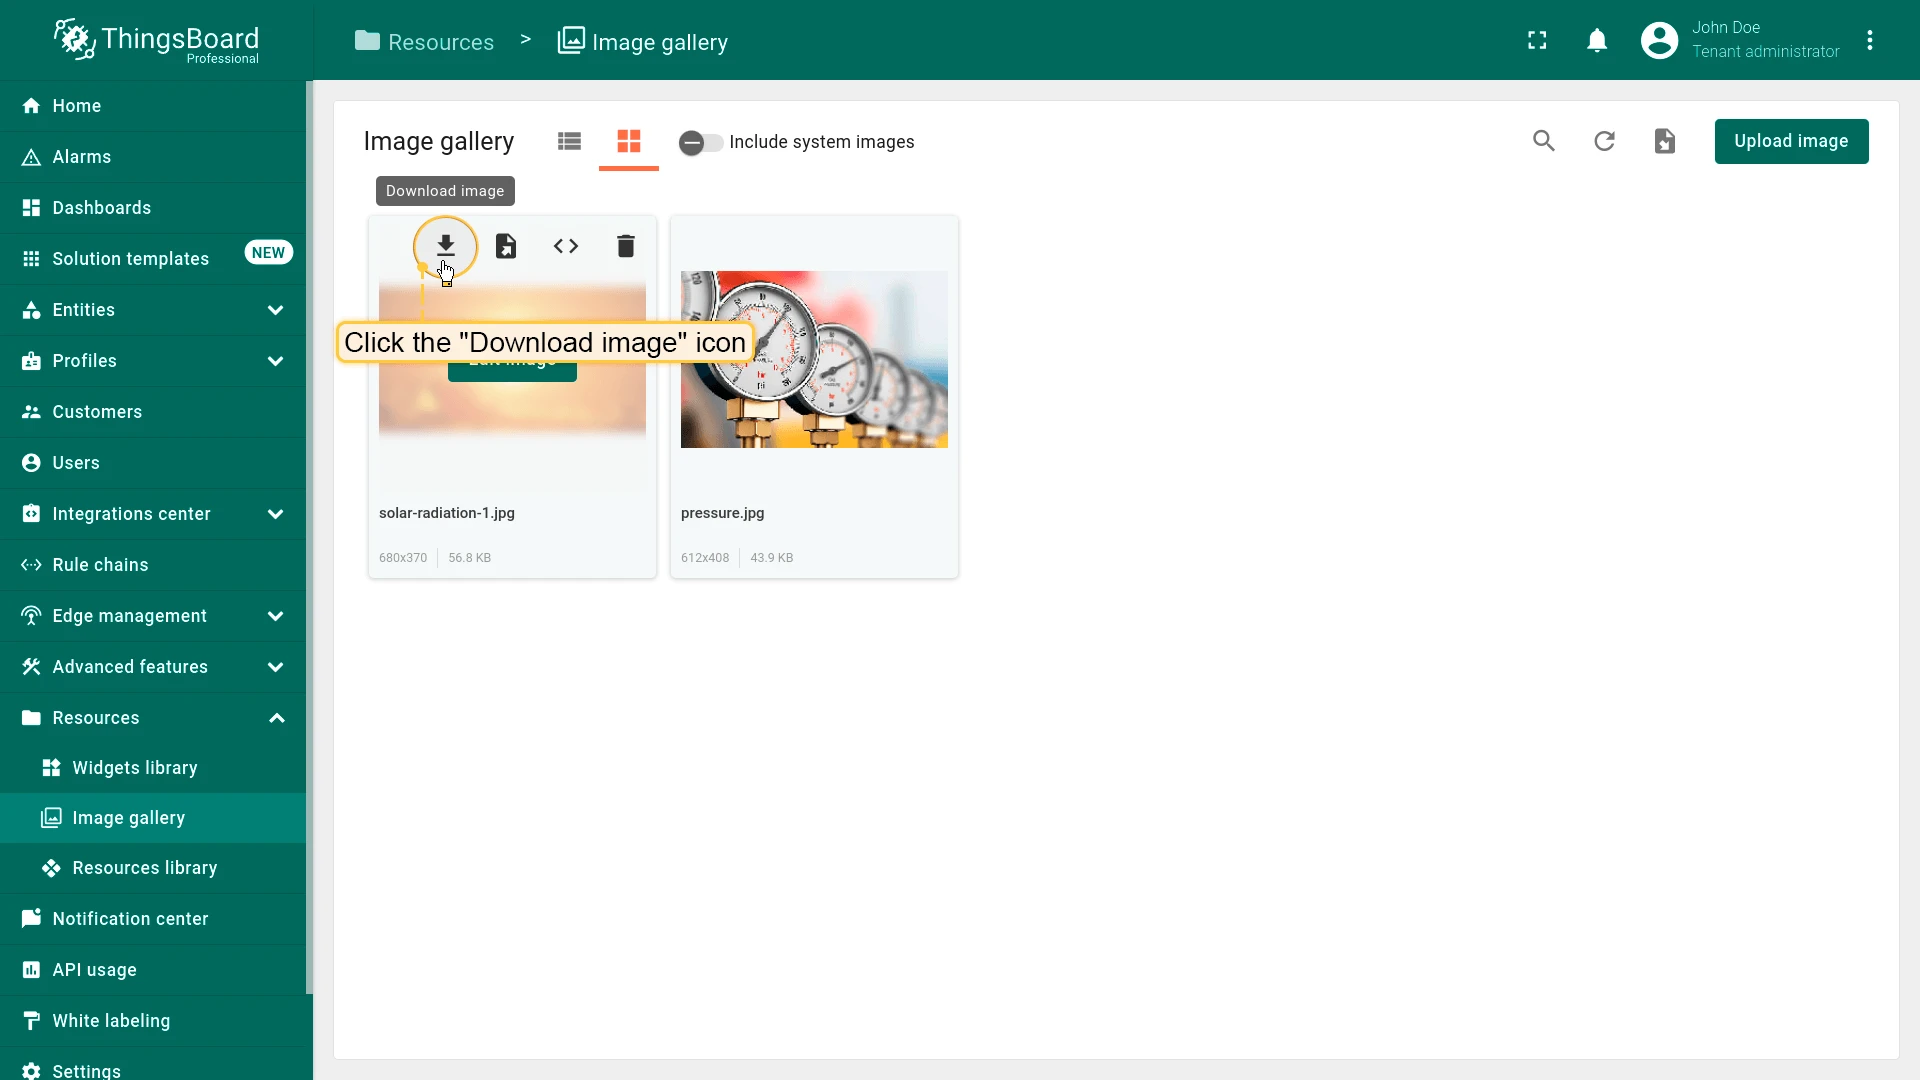
Section titled “Image Operations”Download
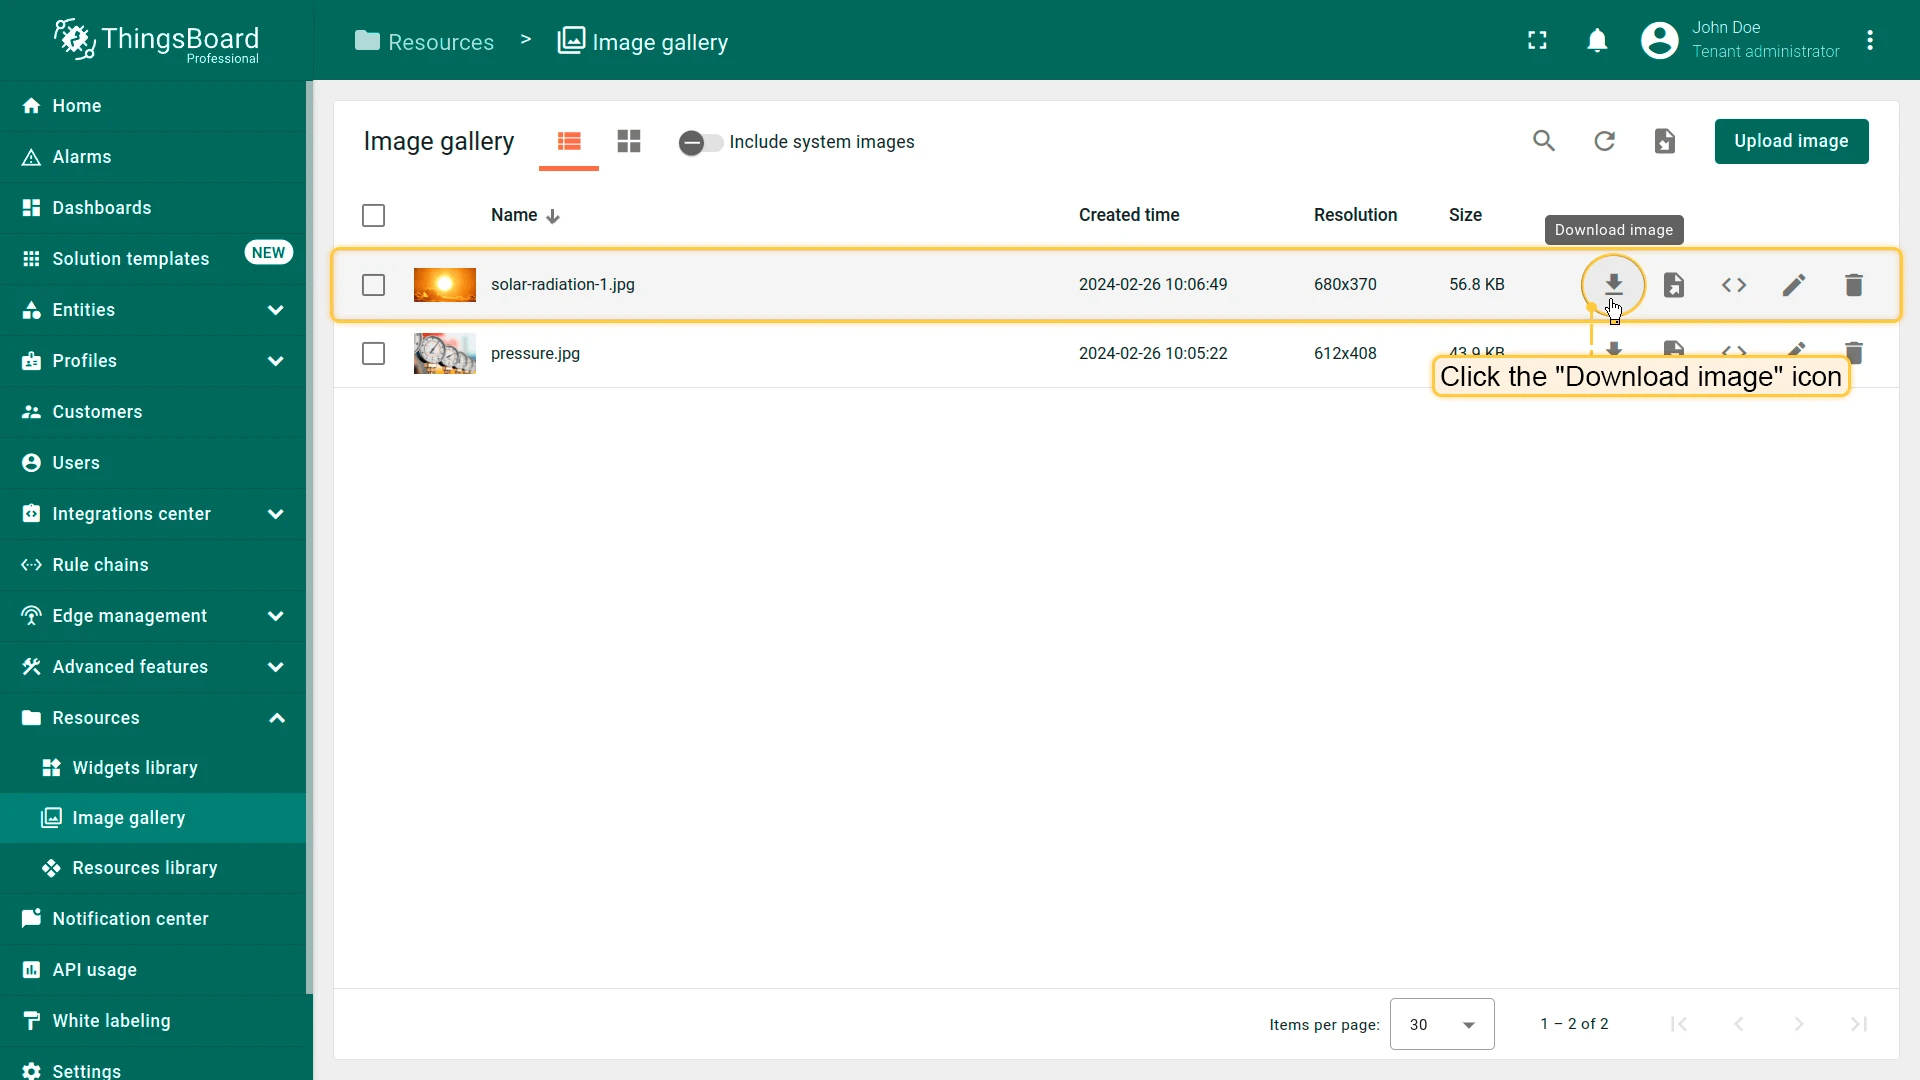
Section titled “Download”Download an image in its original file format:
- List view — click the Download image icon next to the image name.
- Grid view — hover over the image and click the Download image icon.
Export to JSON
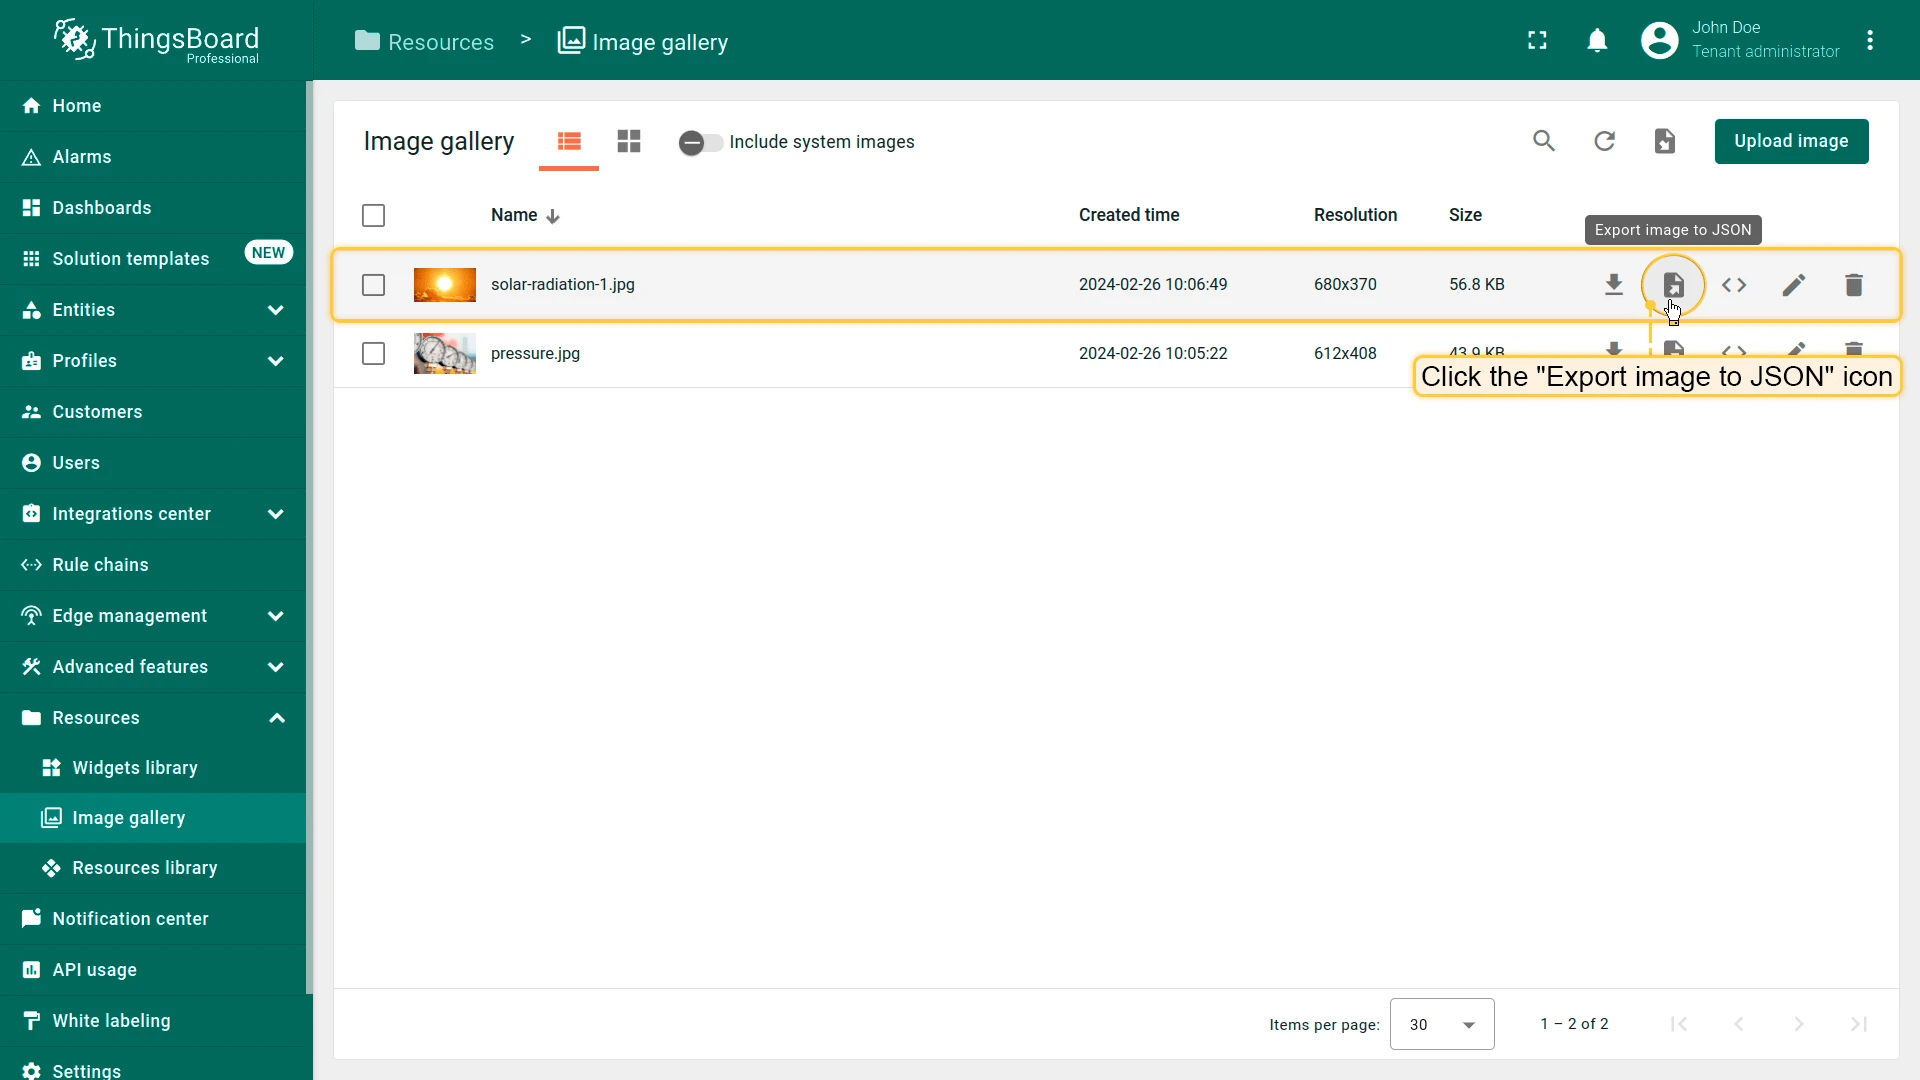
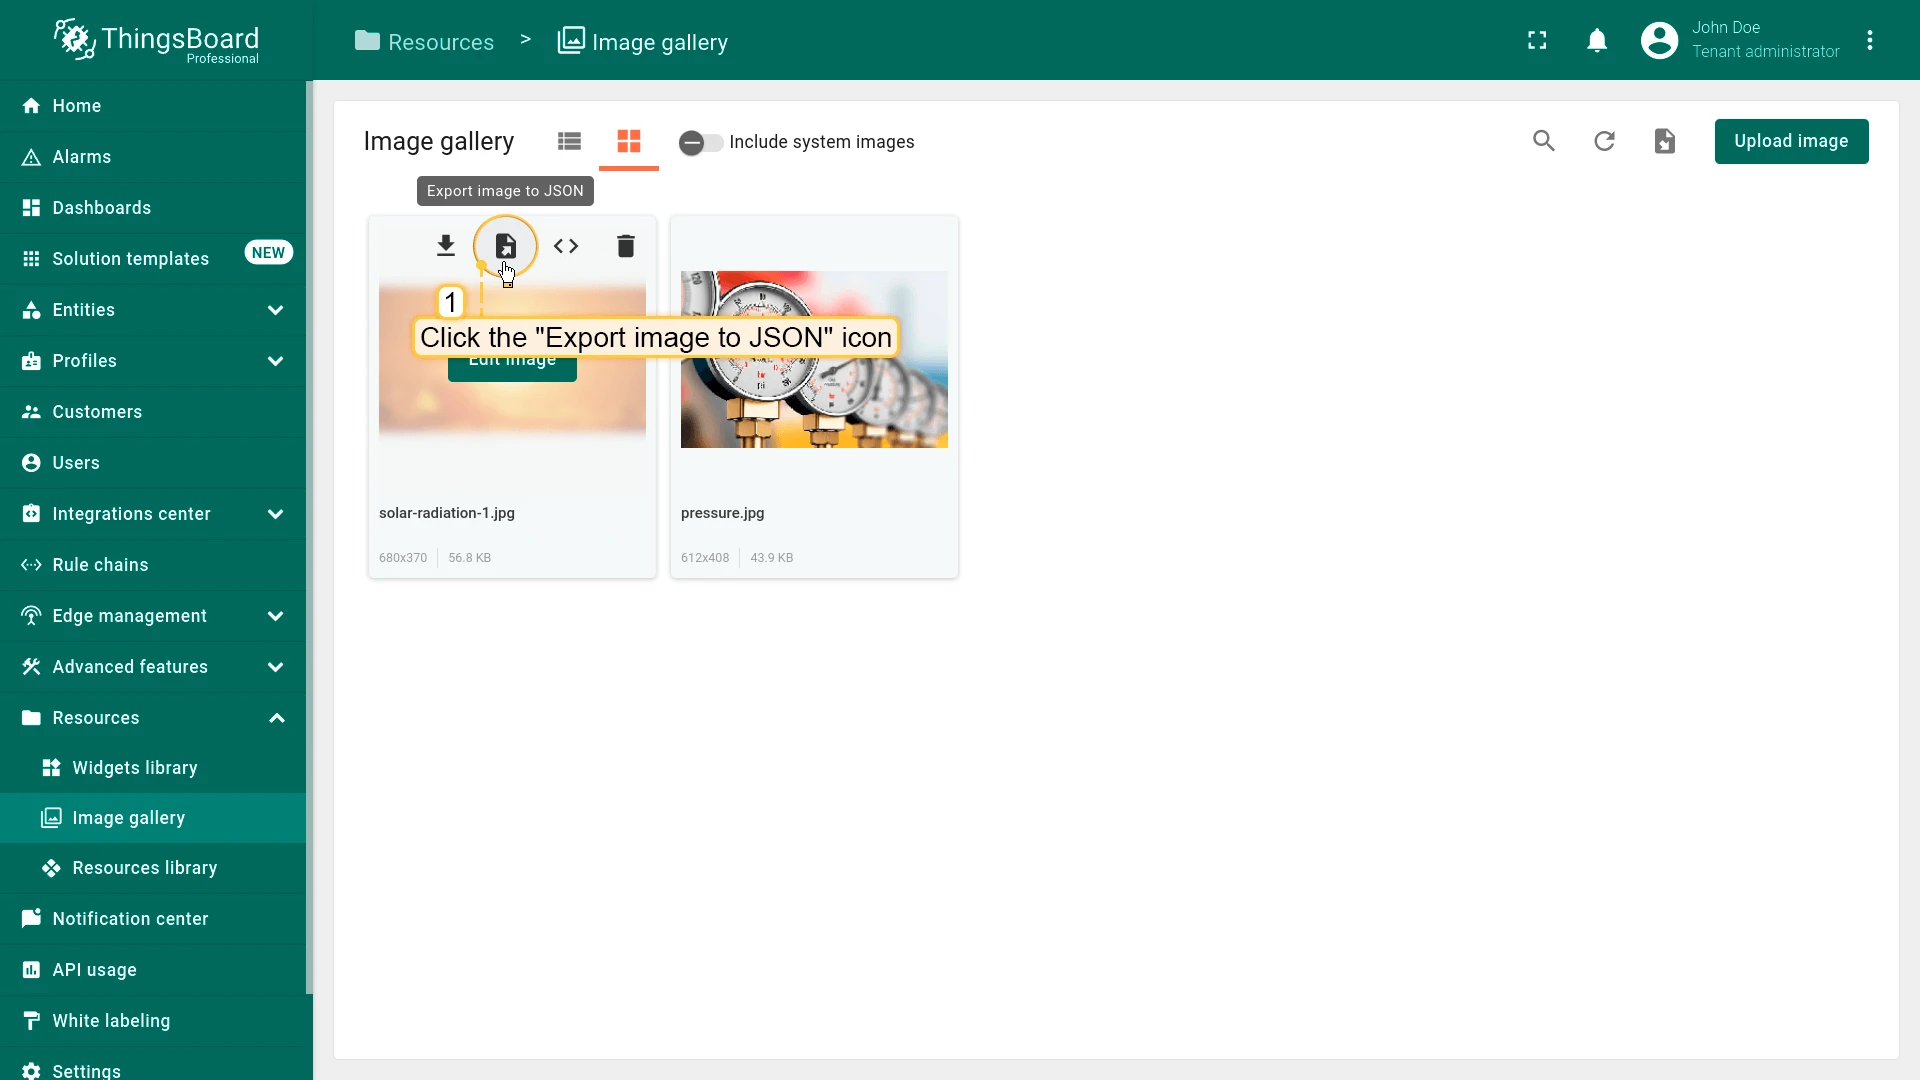
Section titled “Export to JSON”Export an image as a JSON file (useful for migrating images between ThingsBoard instances):
- List view — click the Export image to JSON icon next to the image name.
- Grid view — hover over the image and click the Export image to JSON icon.
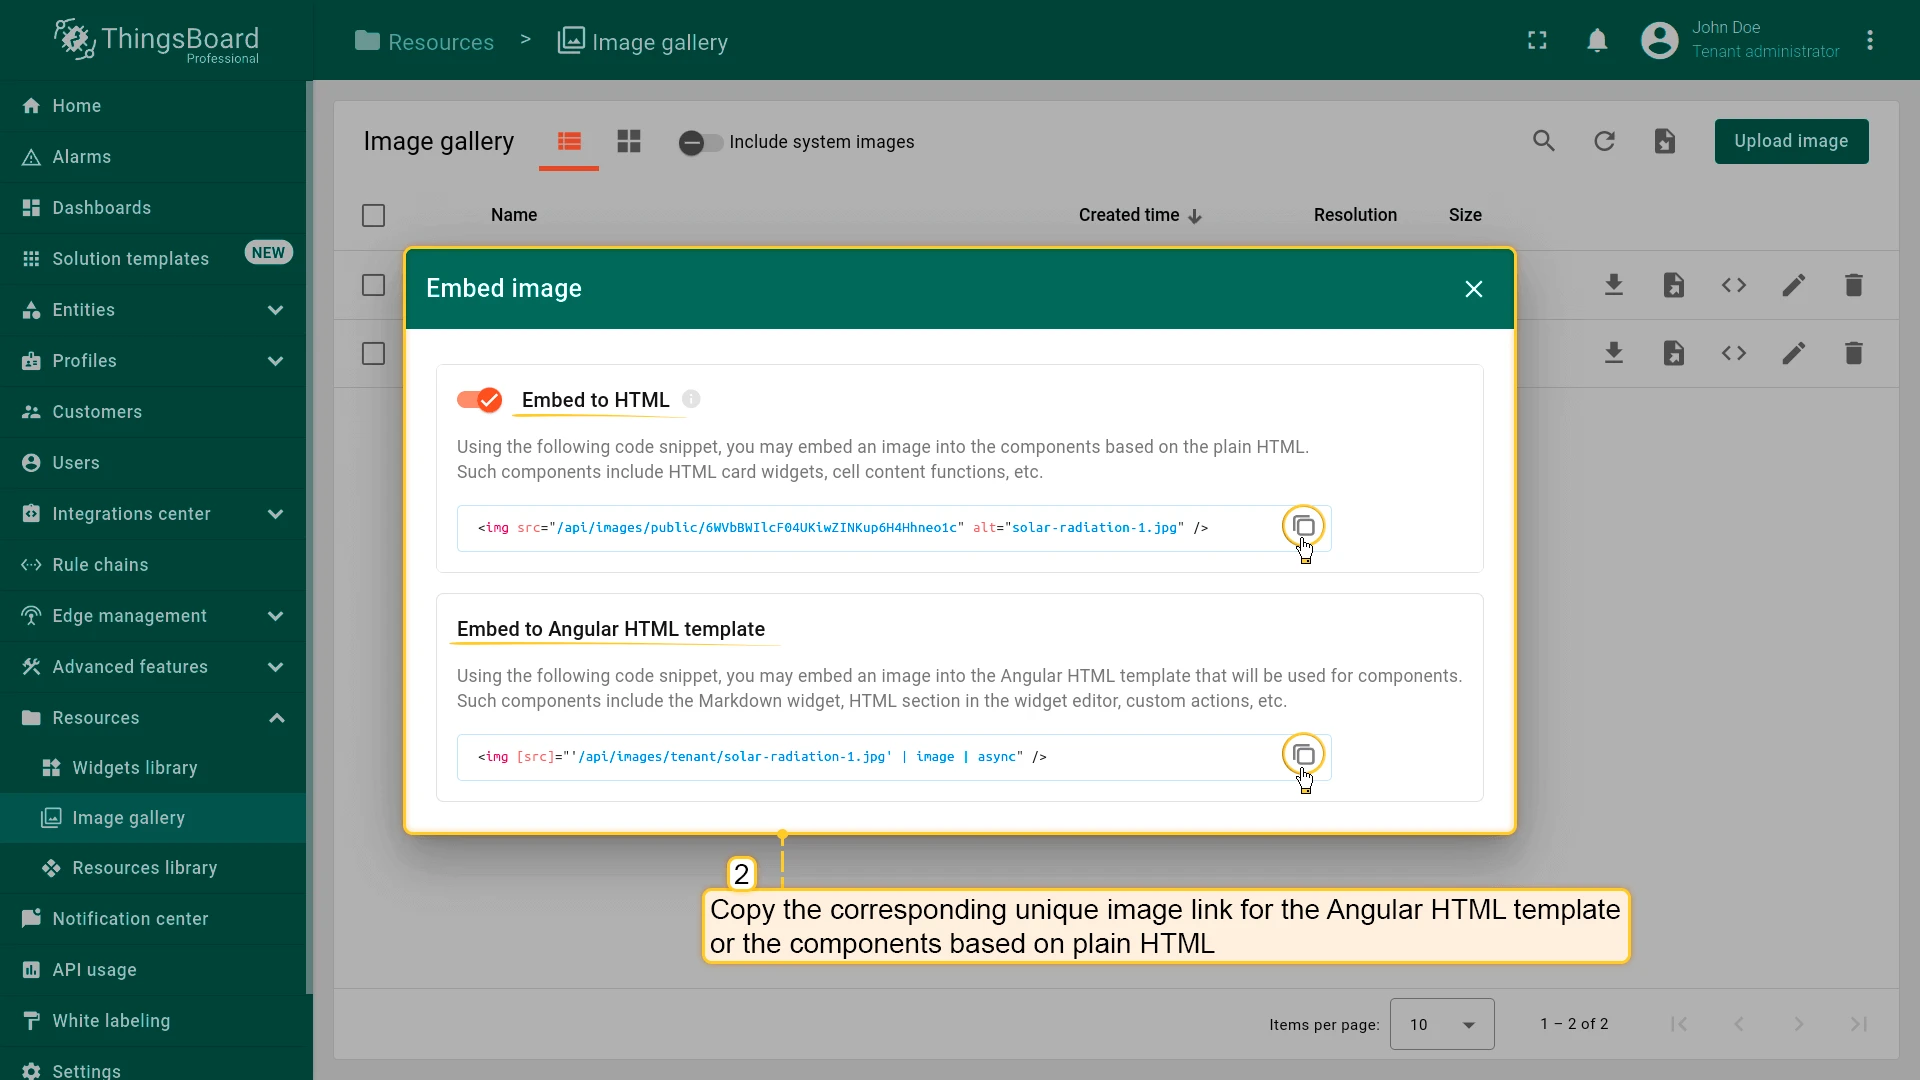
After adding an image to the gallery, you can embed it in HTML Card widgets, the HTML section of the widget editor, cell content functions, custom actions, and more.
Each image has a unique URL. Use the snippet that matches your context:
Plain HTML (no authentication — use in HTML Card widgets, cell content functions, etc.):
<img src="relative link to the image" alt="text description of the image" />Angular HTML template (with authentication — use in Markdown/HTML Card widget, widget editor HTML section):
<img [src]="'image URL' | image | async" />The Angular method automatically includes authentication headers, allowing the same URL to return different images for different users.
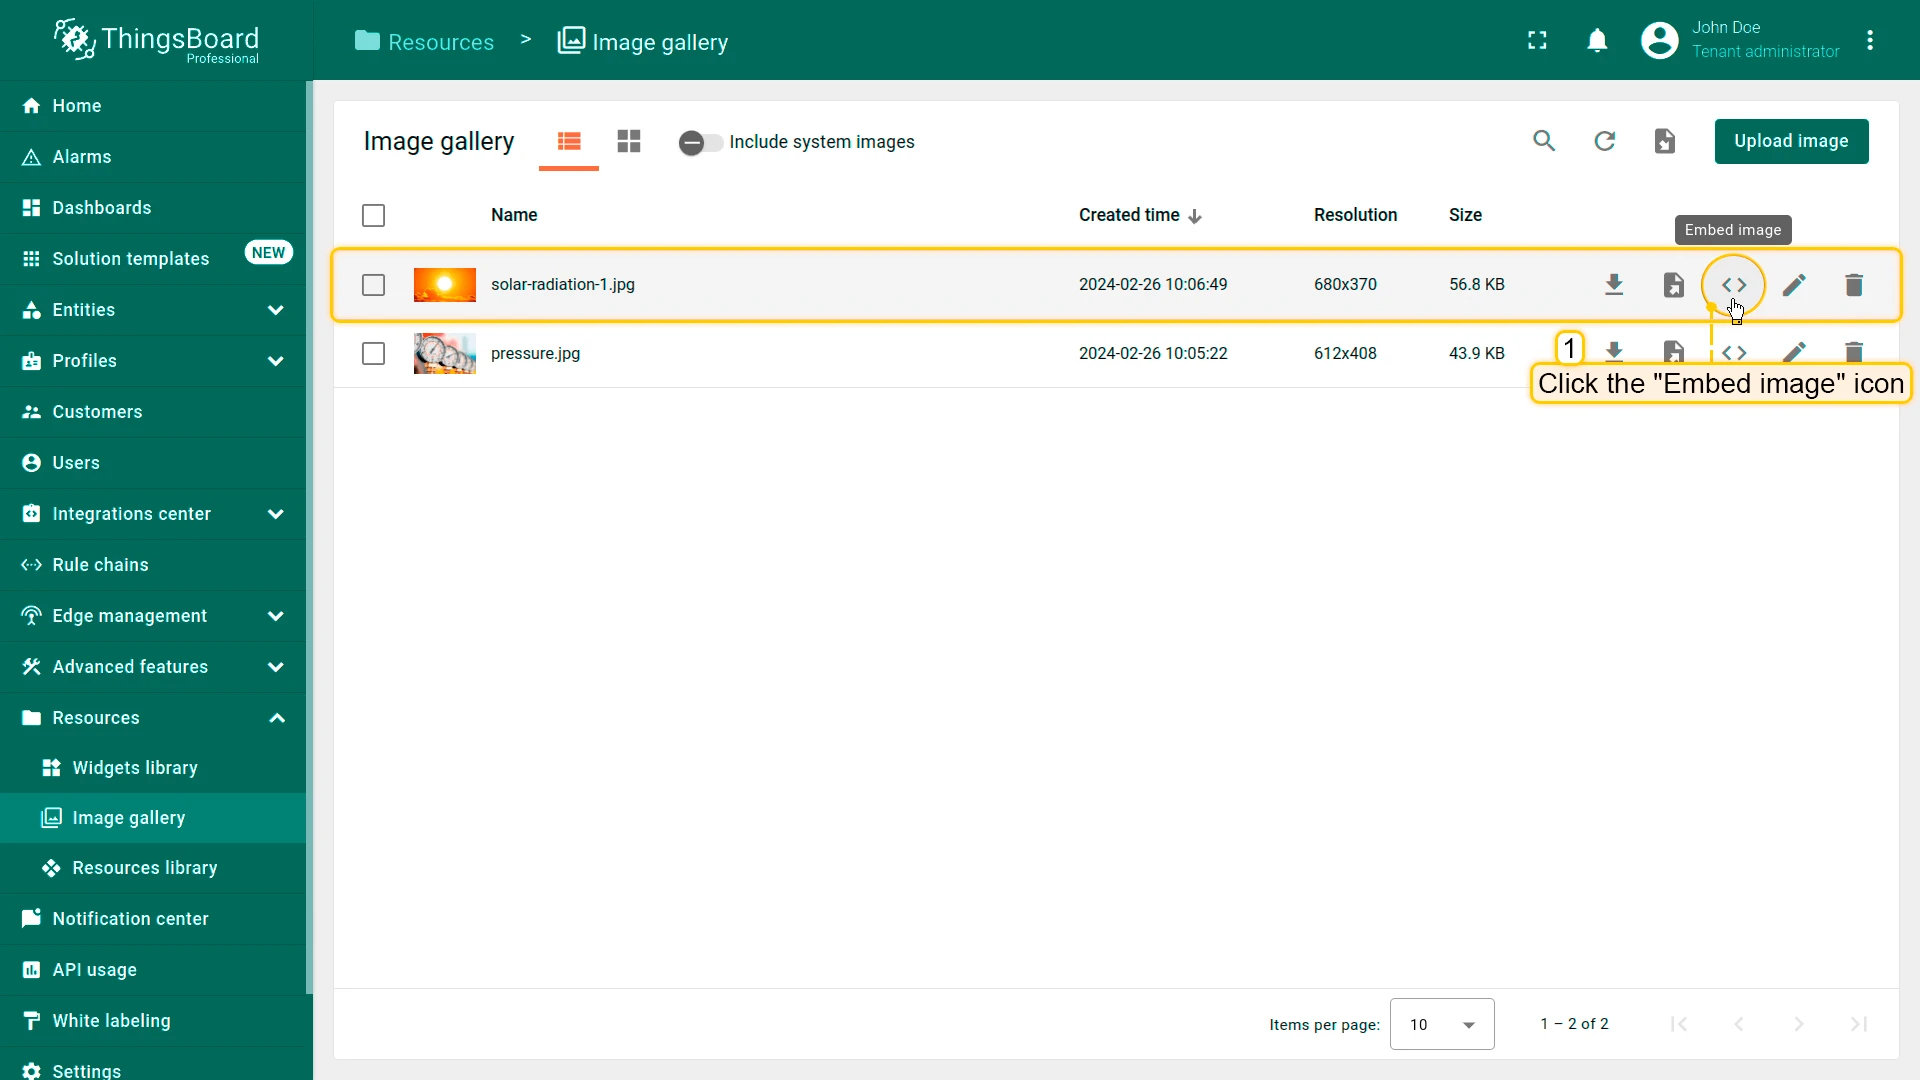
To get the embed link:
- Click the Embed image icon next to the image name (in grid view, hover first).
- Select the code snippet type (Angular or plain HTML) and copy the unique image URL.
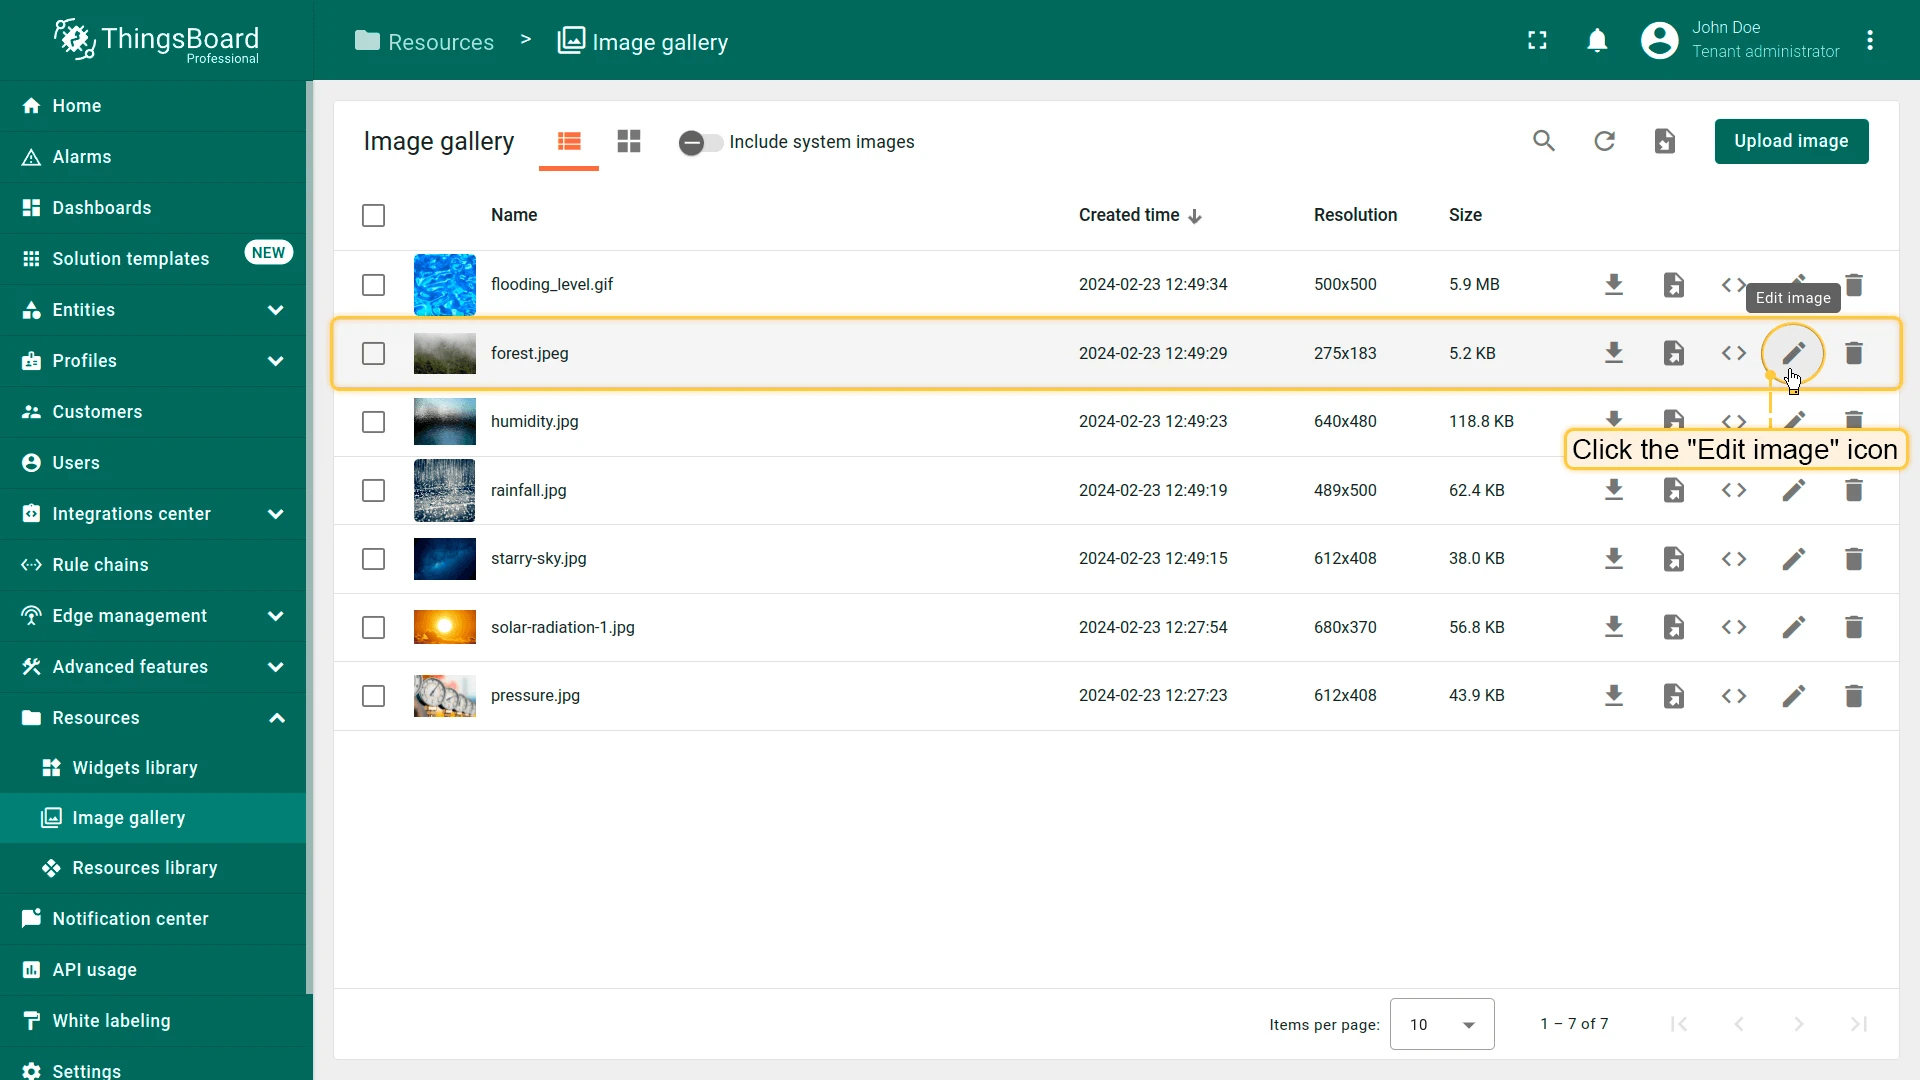
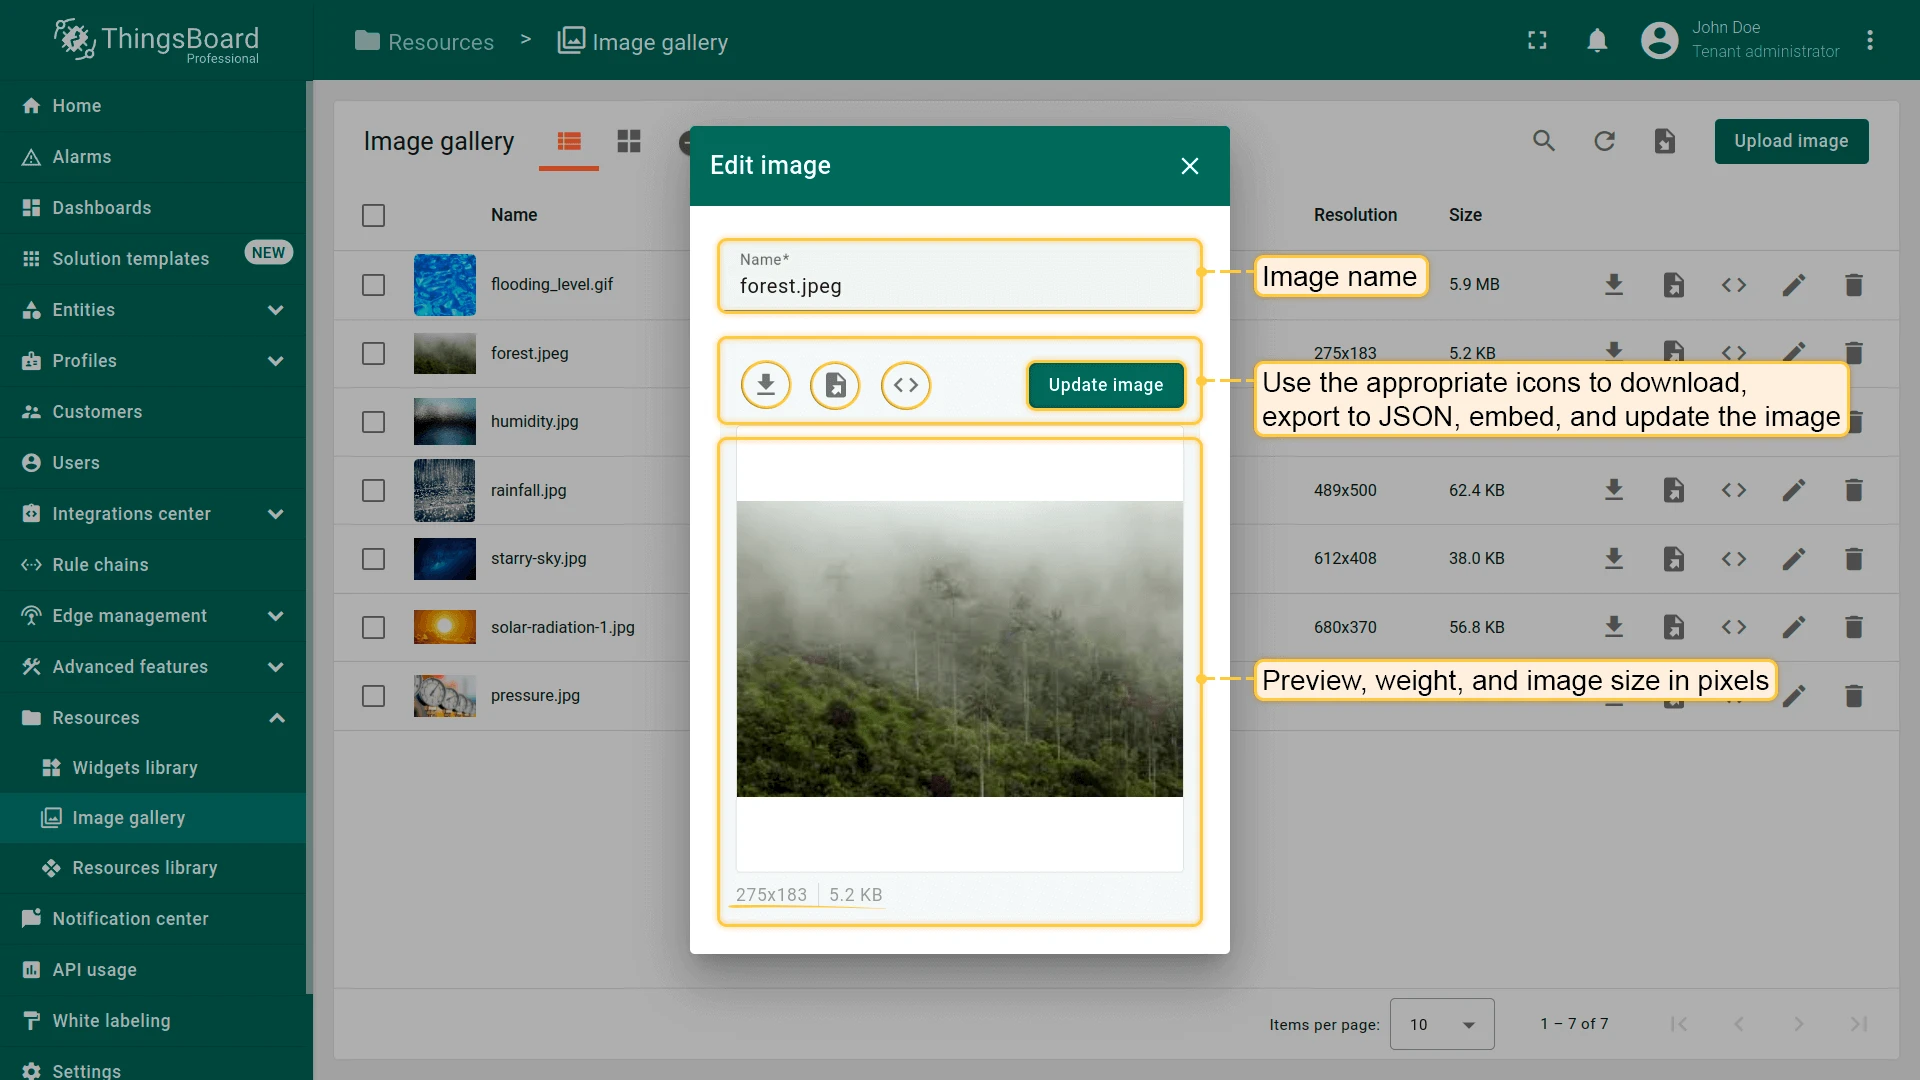
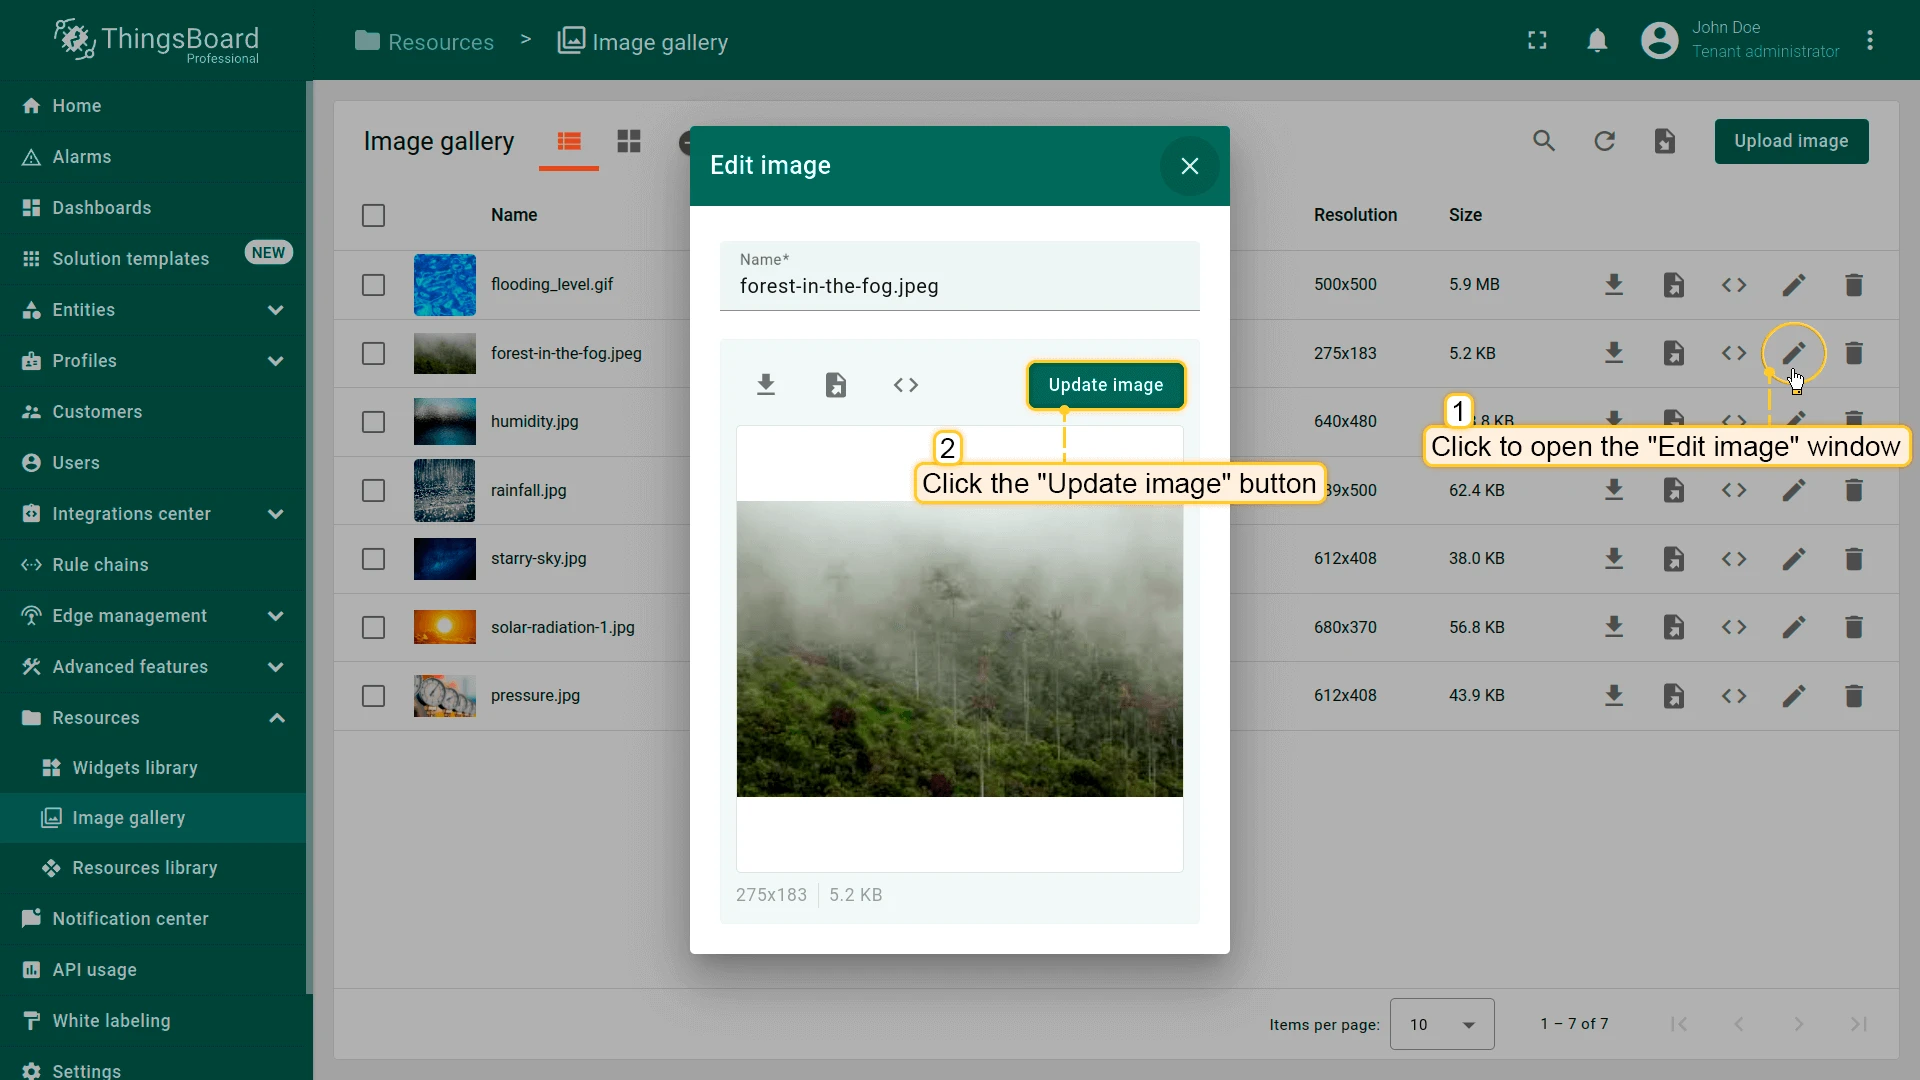
Click the Edit image icon next to the image name (in grid view, hover first) to open the editing window. From here you can rename, download, export, embed, or update the image.
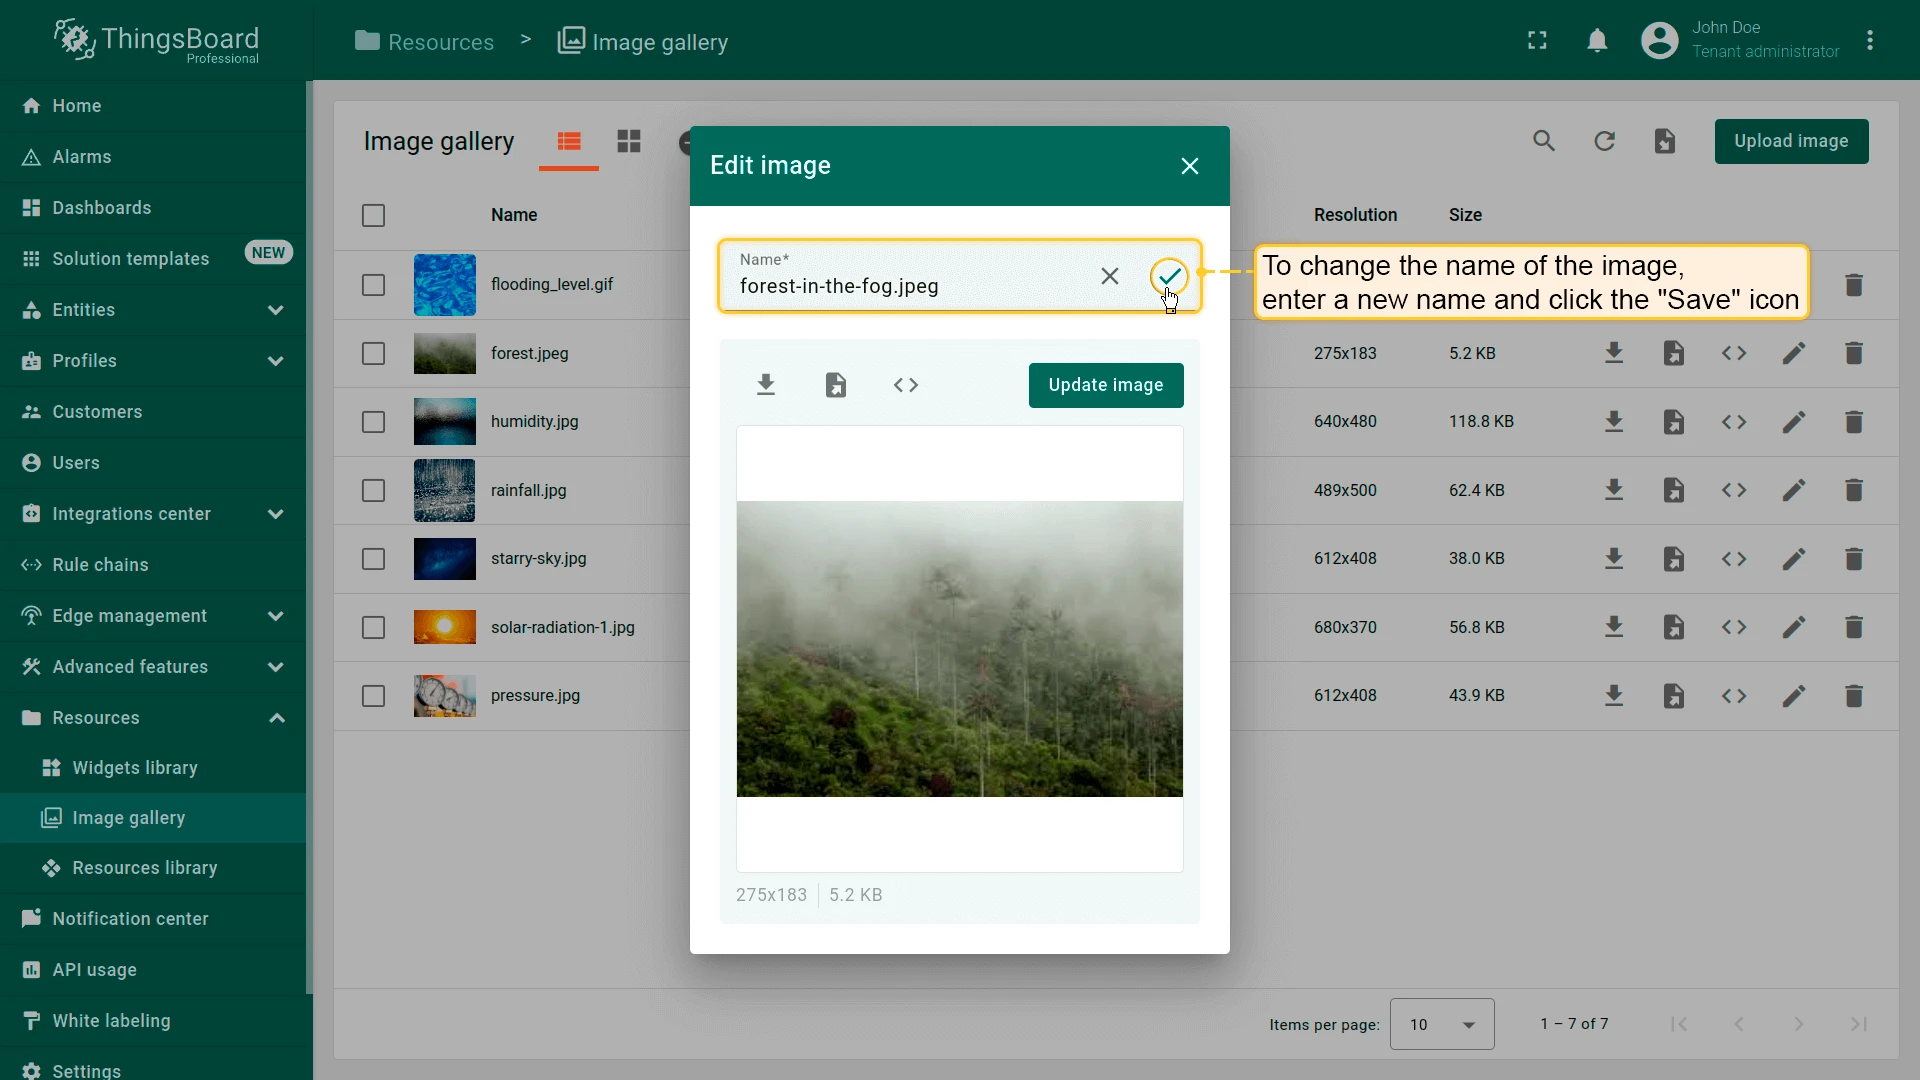
To rename an image, enter the new name and click the Save icon.
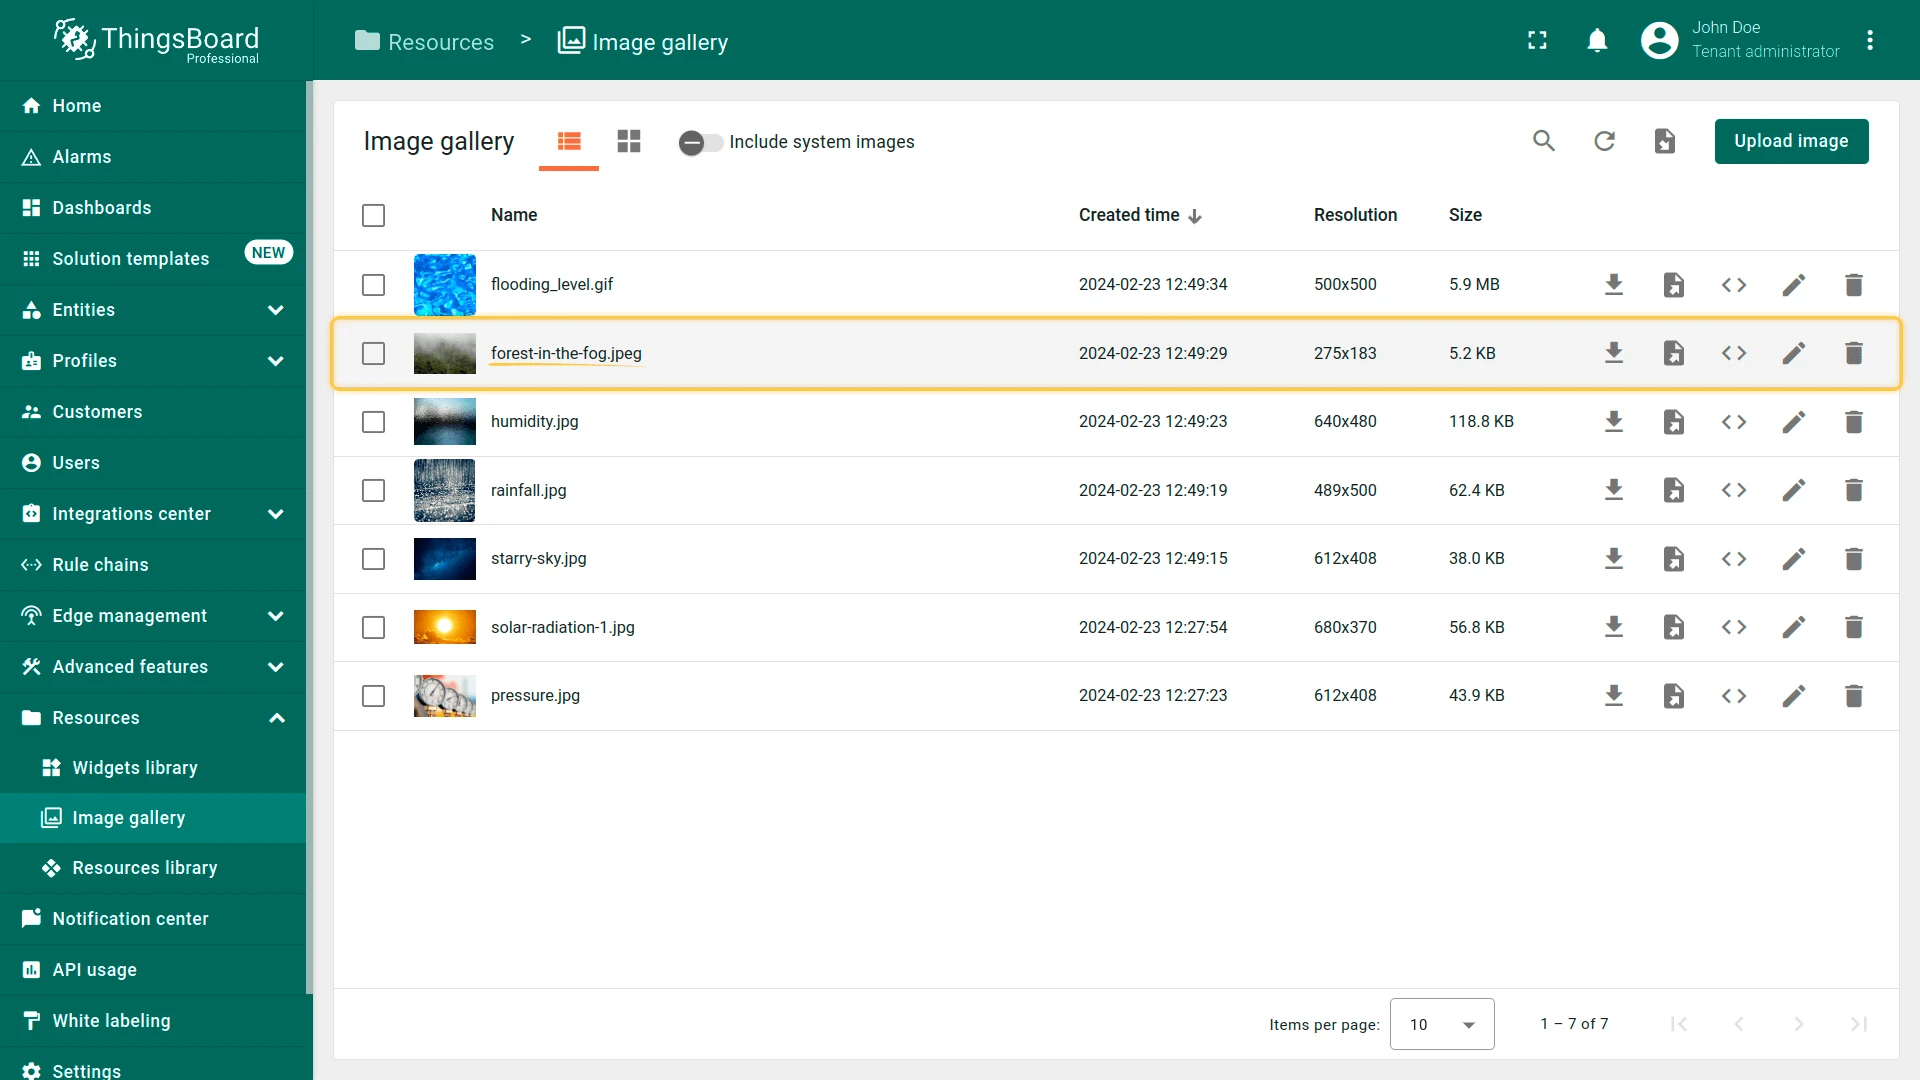
Update
Section titled “Update”Replacing an image is useful when the same picture serves as the background for multiple dashboards — update it once and all references automatically reflect the new version.
- Open the image editing window and click Update image.
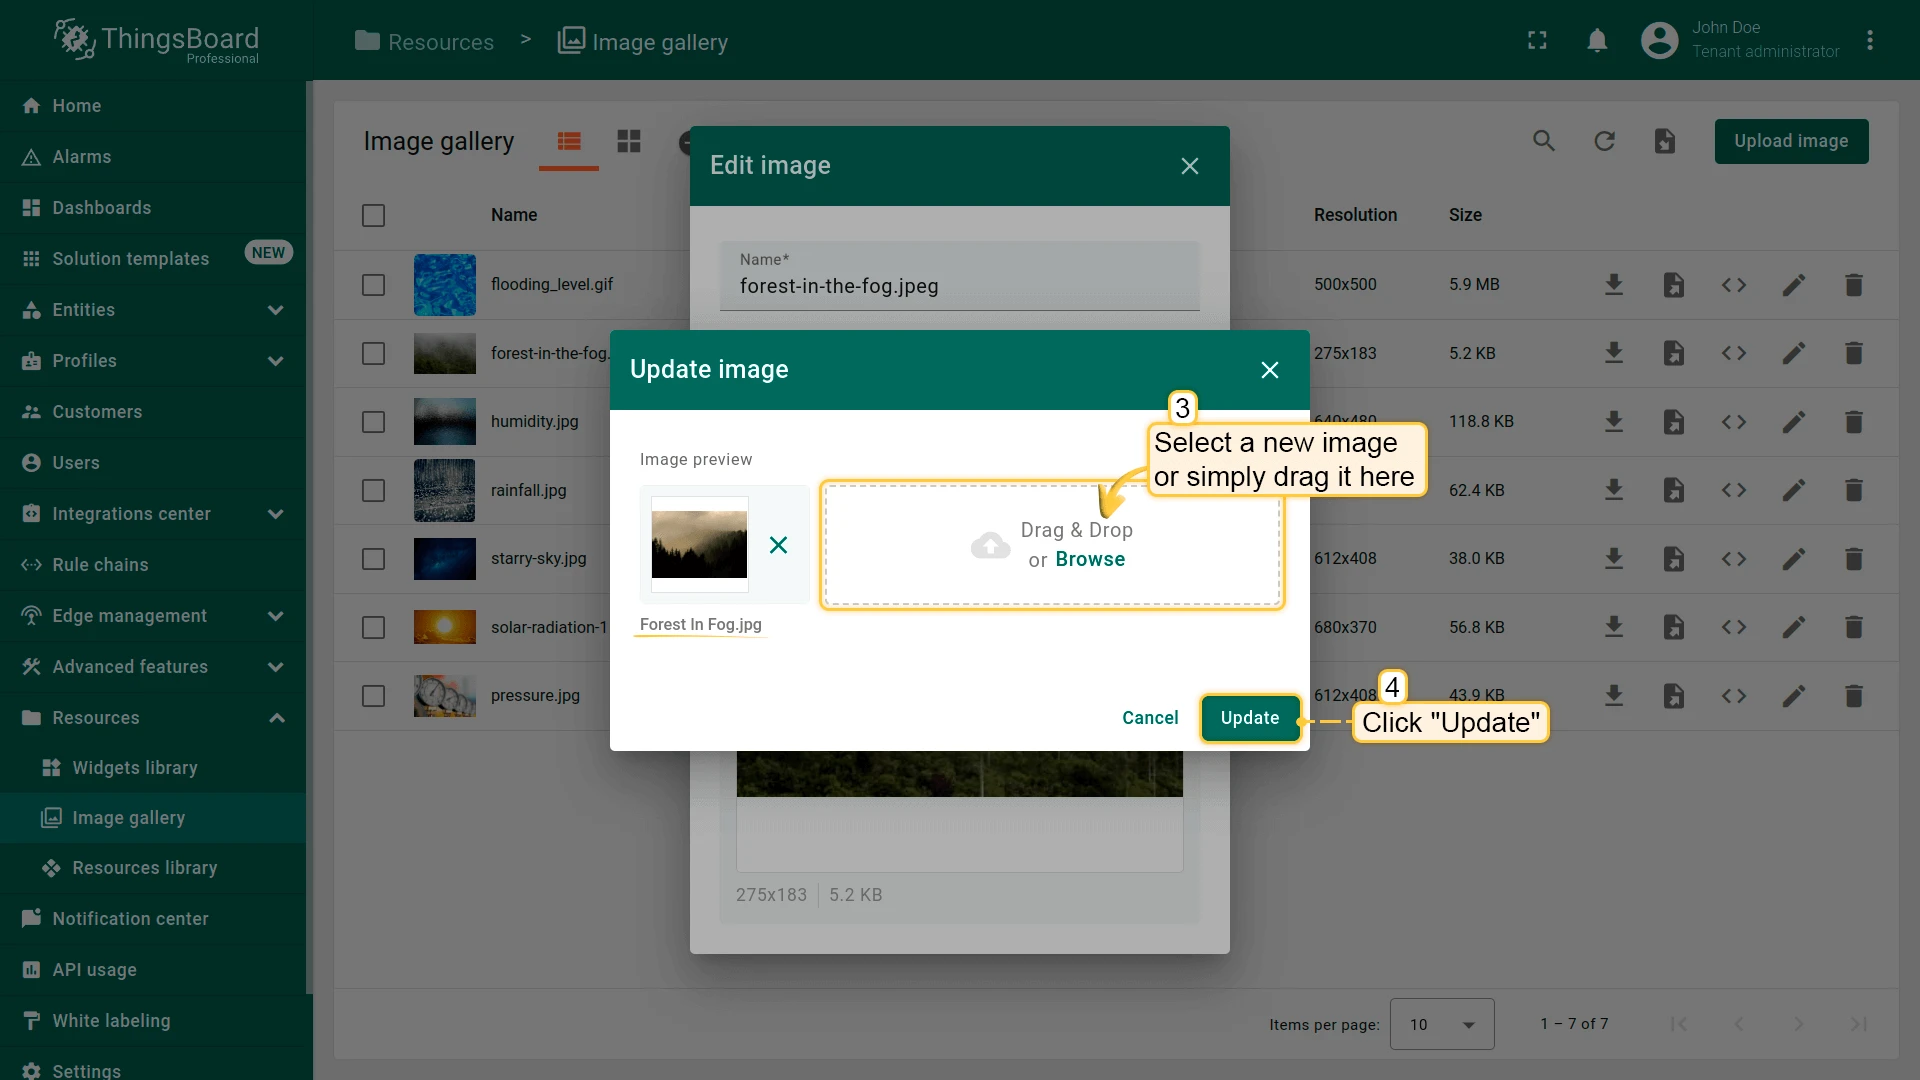
- Select a new image or drag it into the window, then click Update.
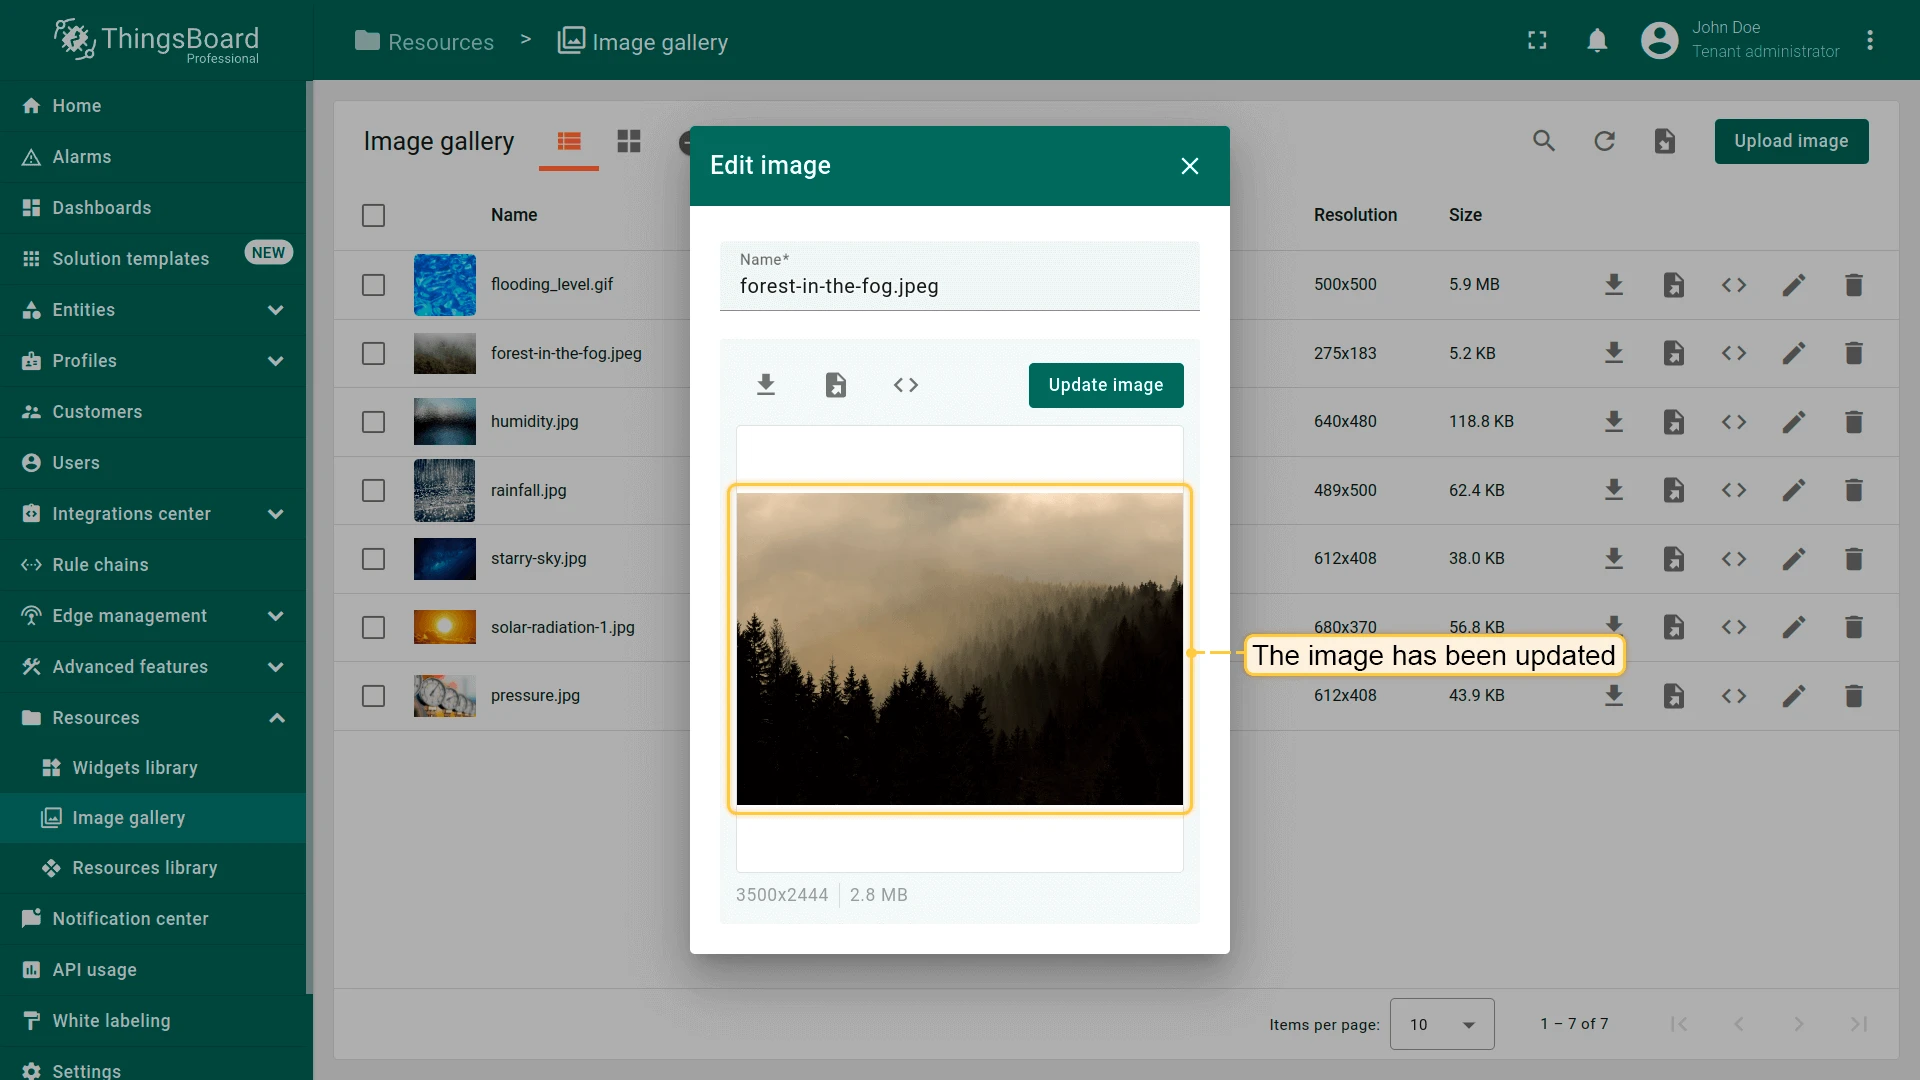
- The image is updated. All dashboards and widgets referencing it now show the new version.
Delete
Section titled “Delete”Delete from list view:
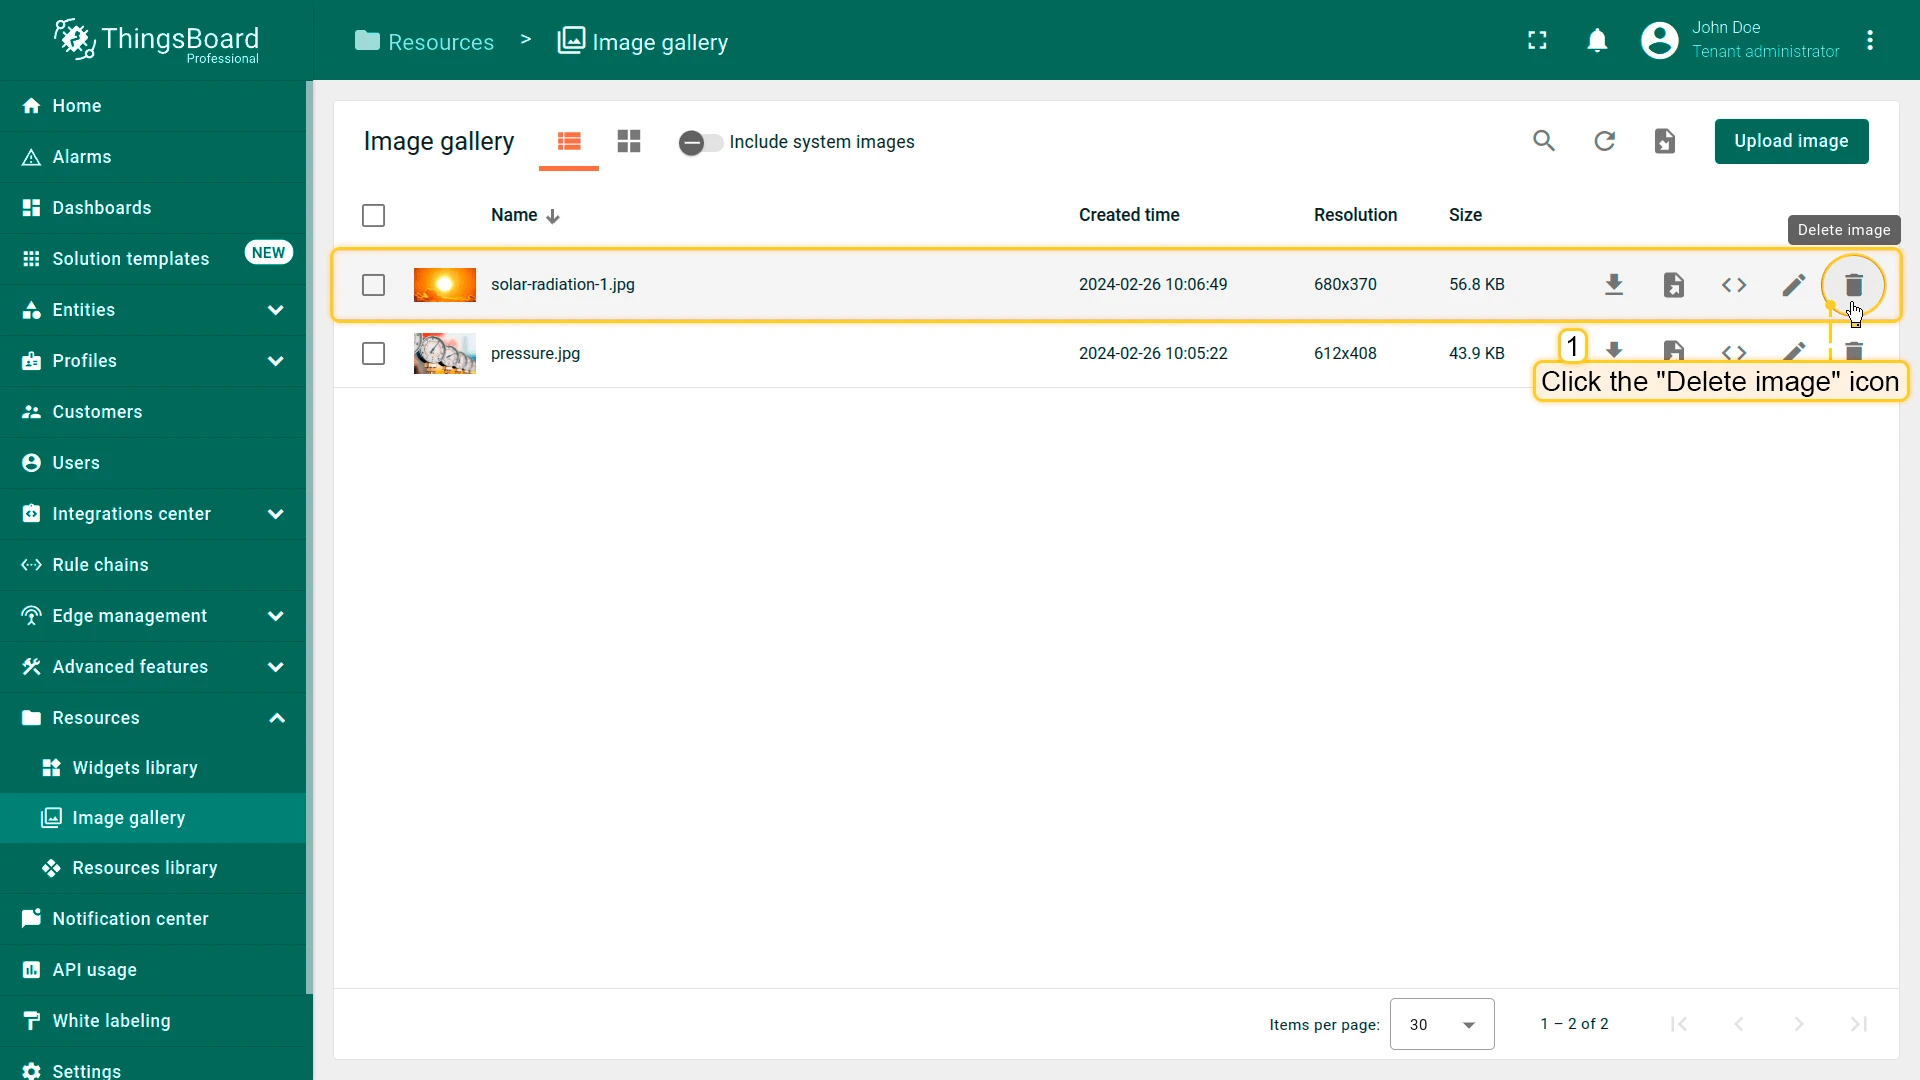
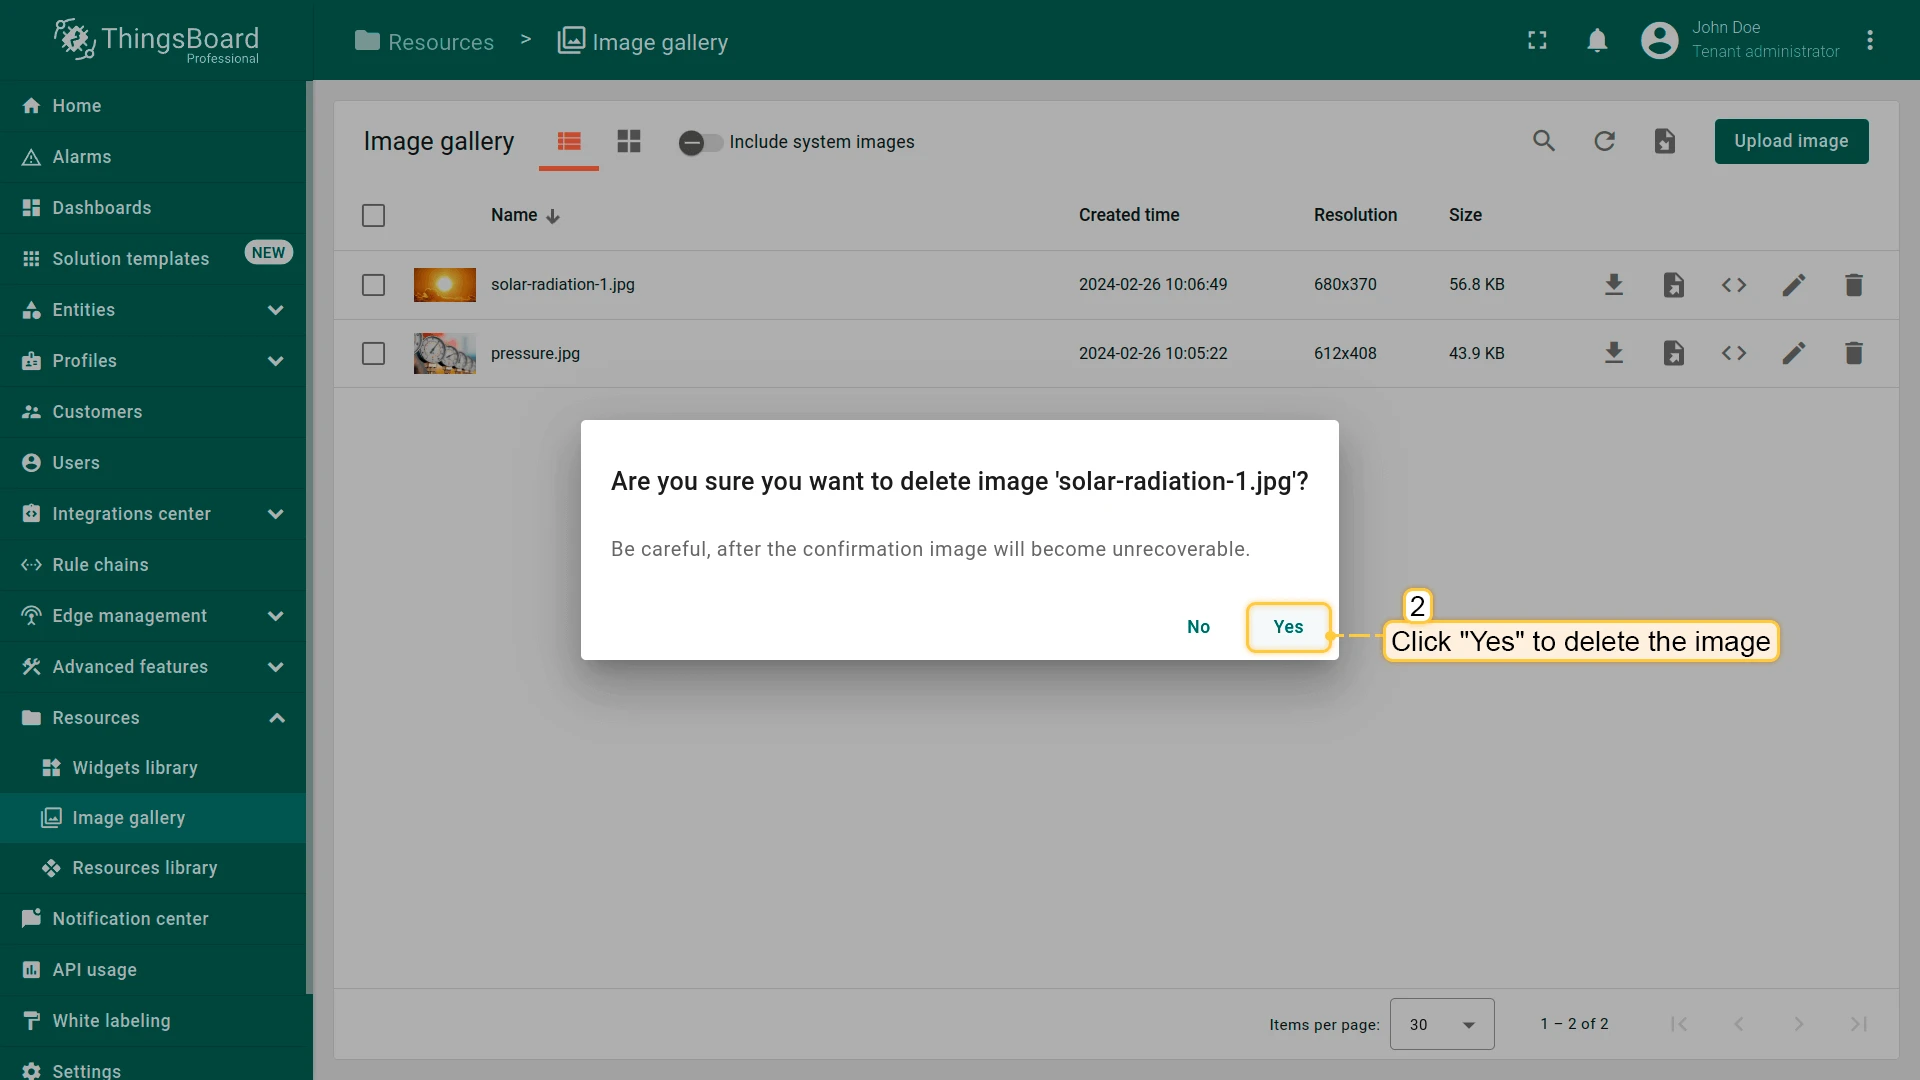
Delete from grid view:
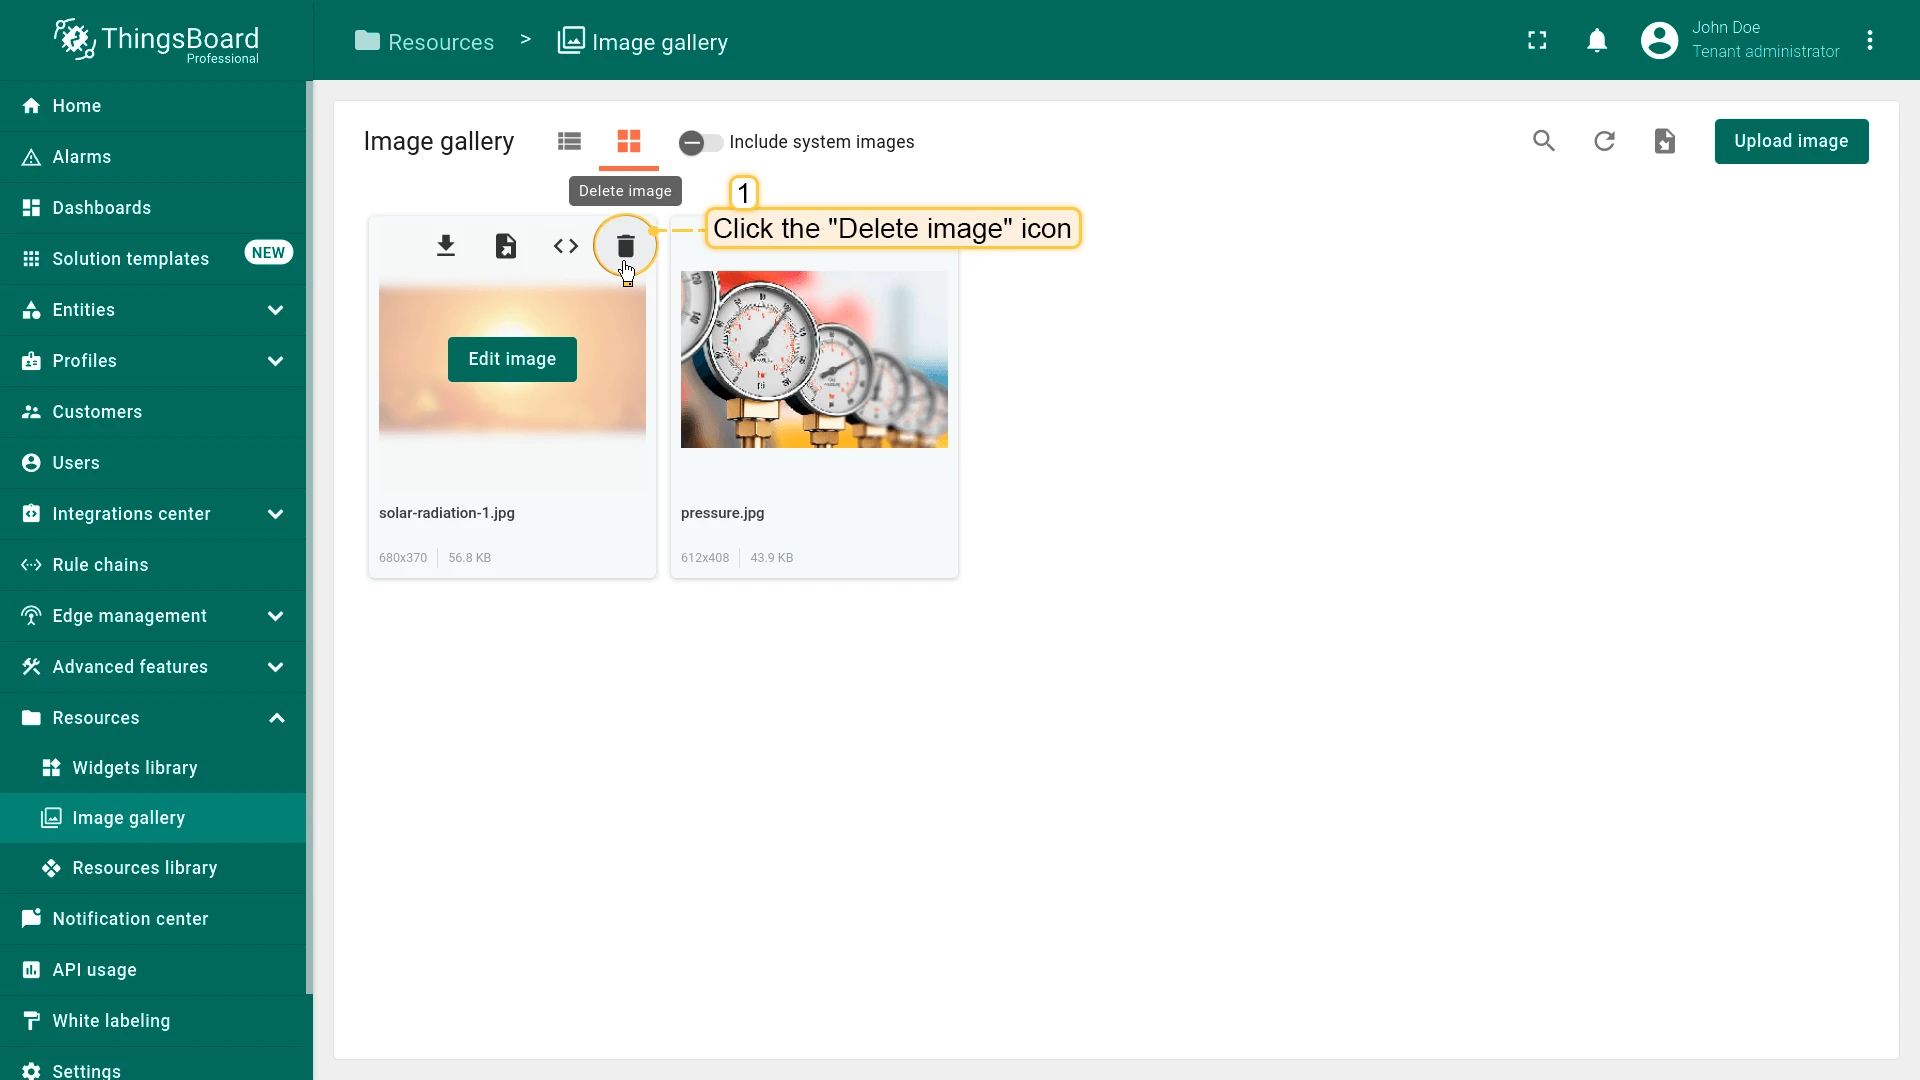
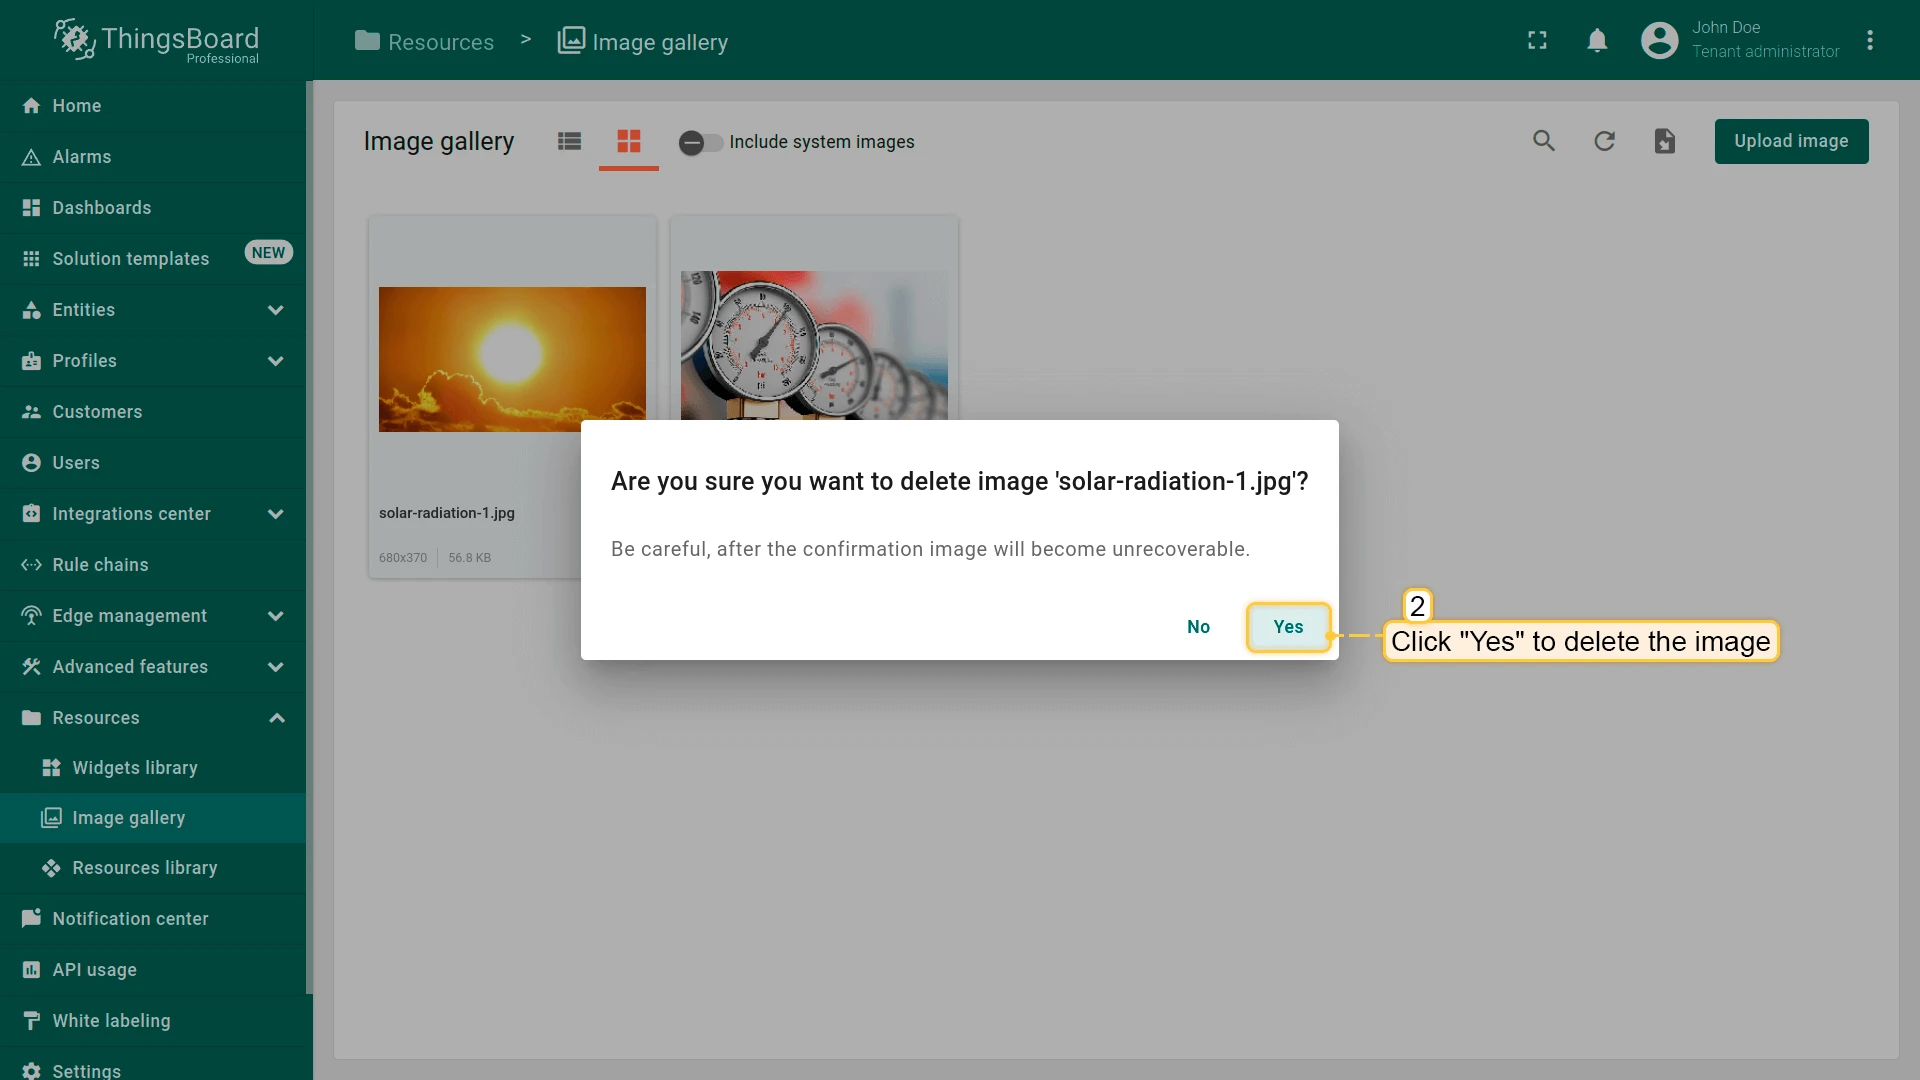
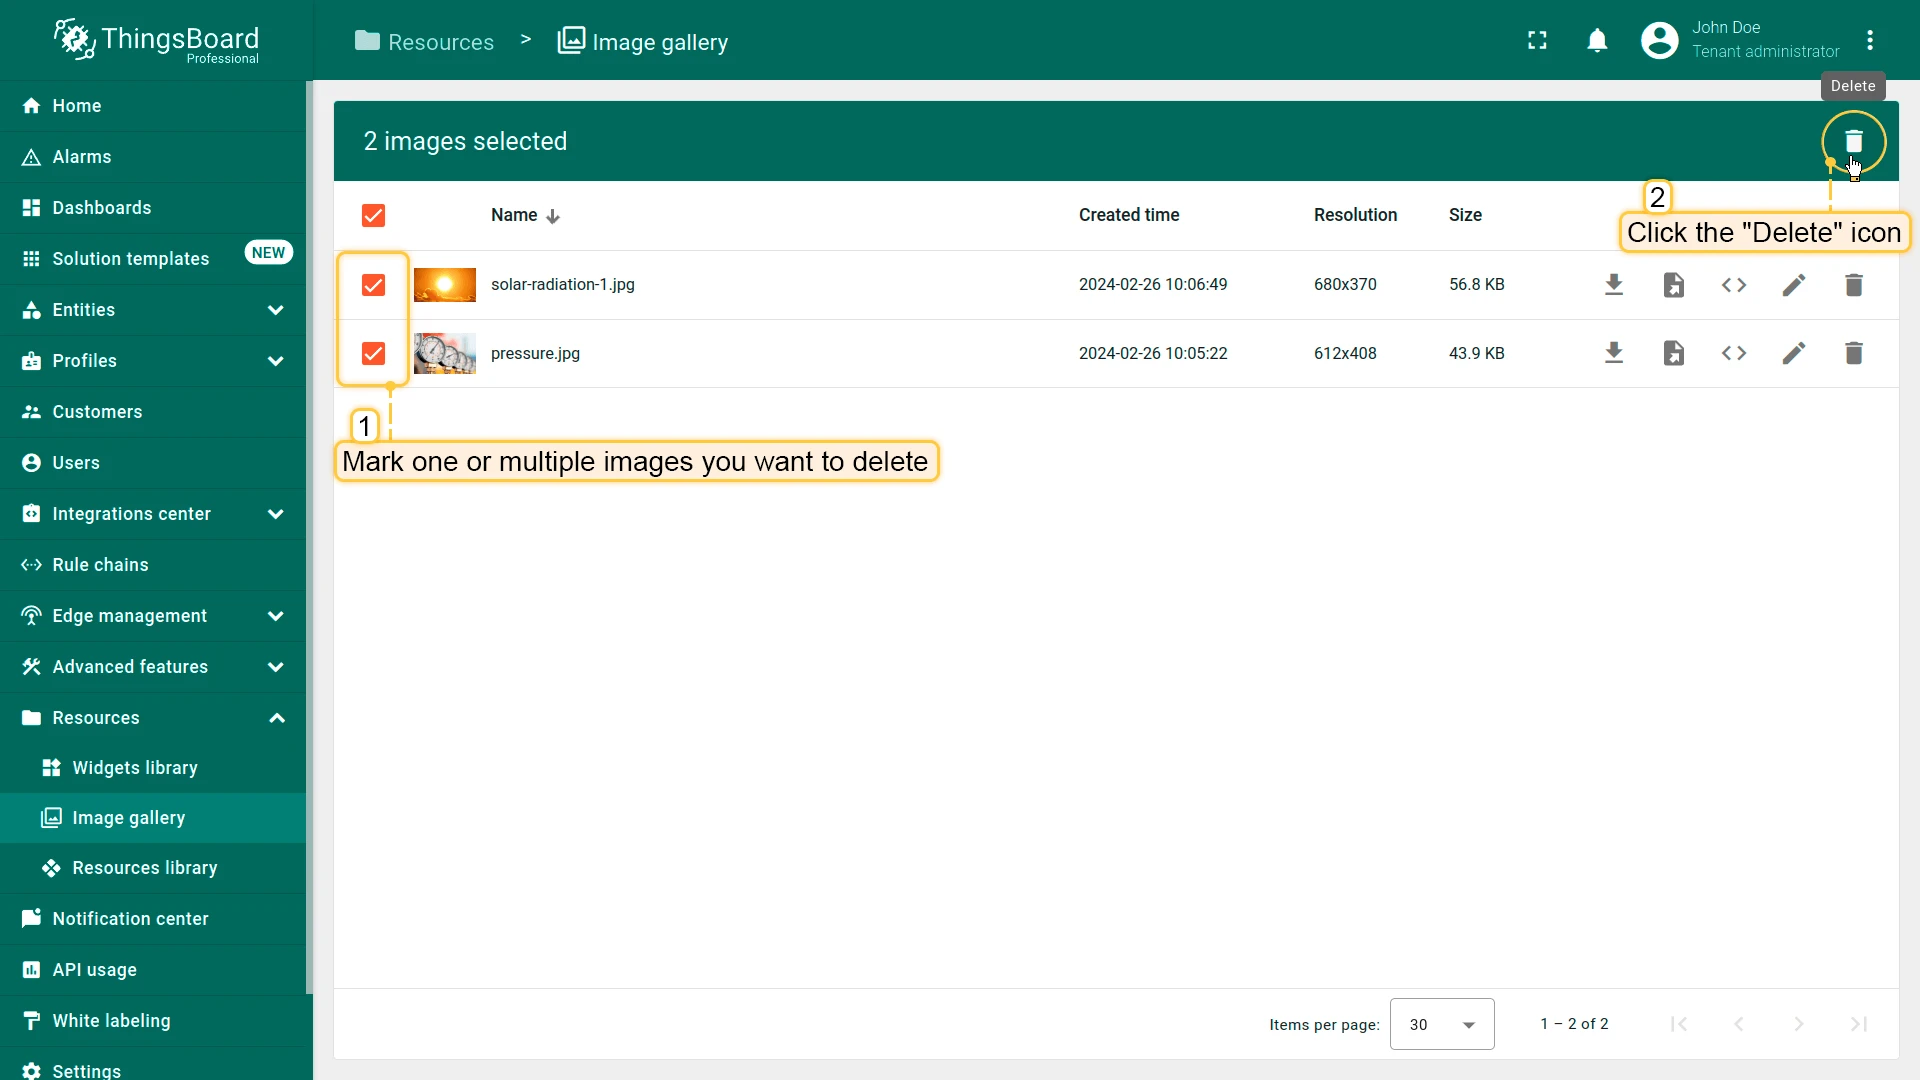
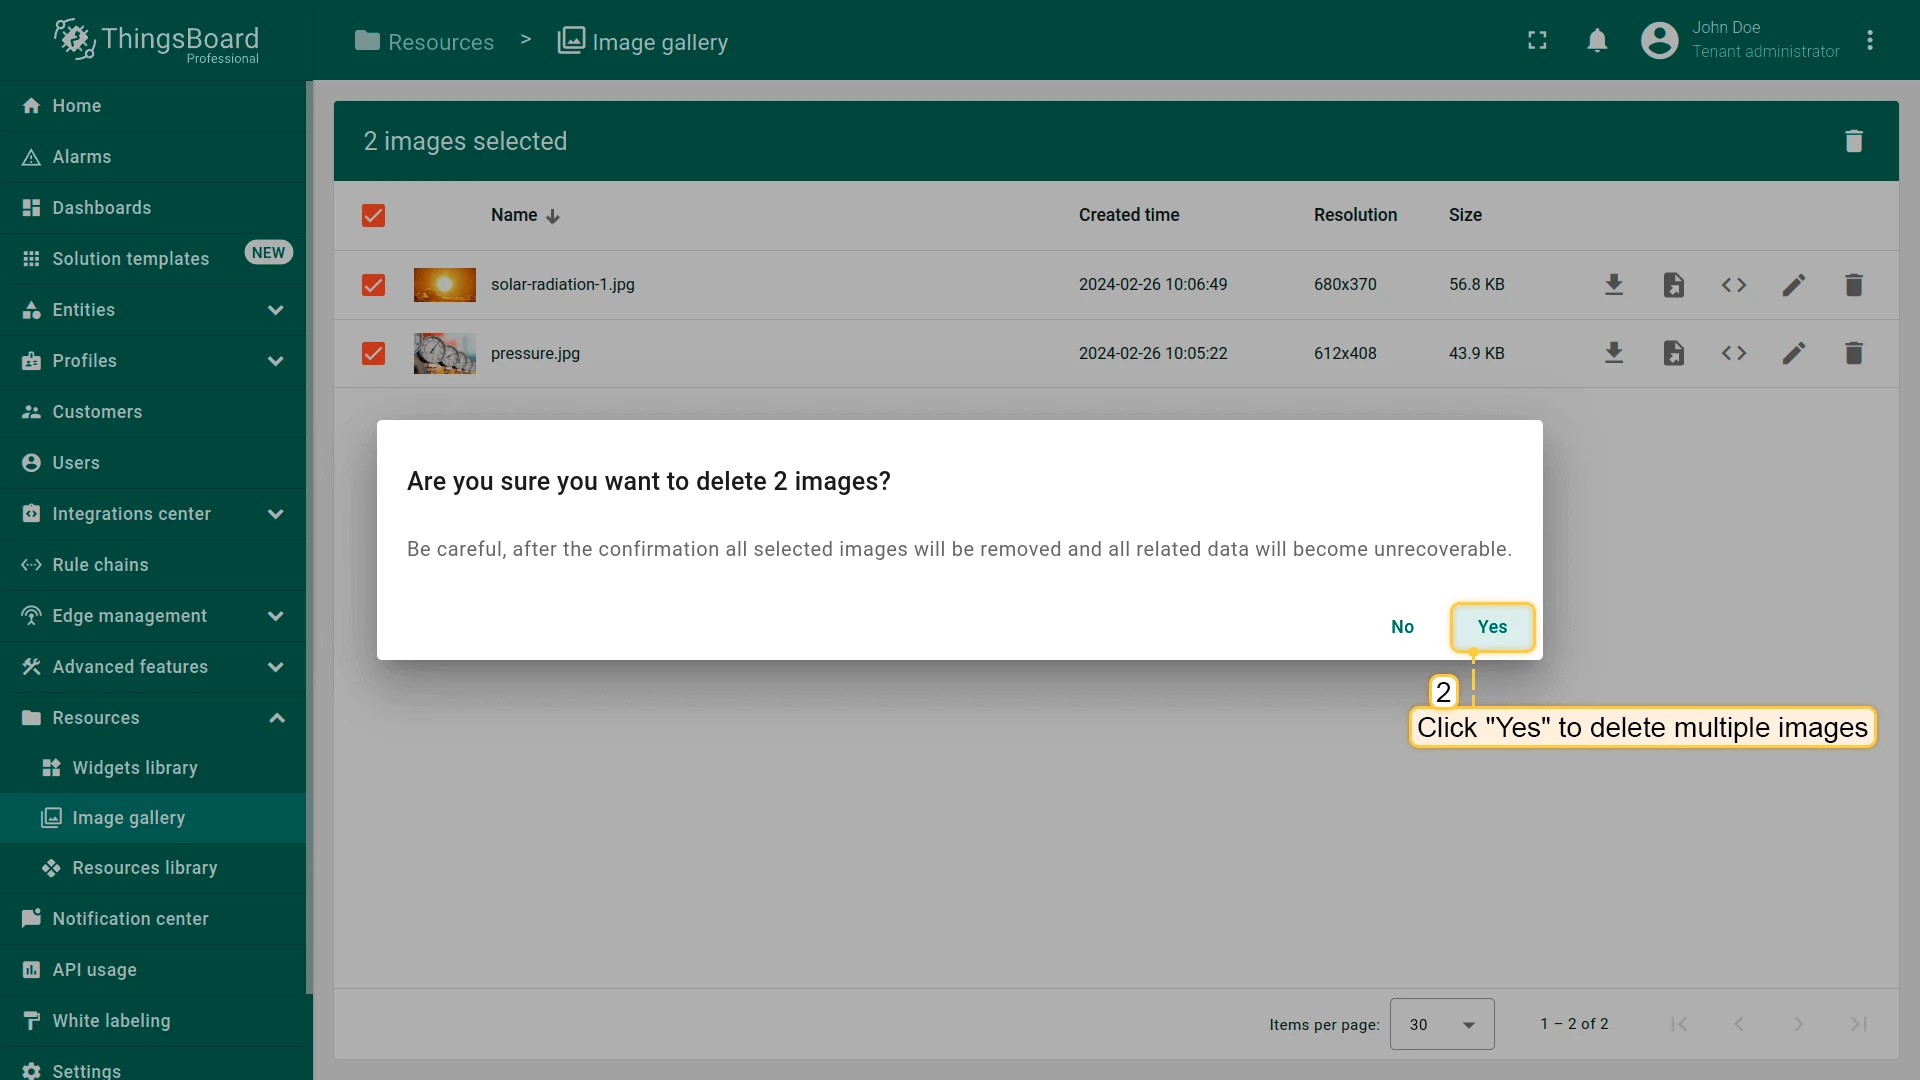
Delete multiple images (list view only):
Was this helpful?