RabbitMQ Integration
RabbitMQ Integration connects ThingsBoard to a RabbitMQ broker over AMQP. ThingsBoard consumes messages from one or more queues, decodes them via an uplink converter, and stores the resulting telemetry and attributes. An optional downlink converter lets ThingsBoard publish messages back to a RabbitMQ exchange in response to rule engine events.
Prerequisites
Section titled “Prerequisites”Before creating the integration, prepare the following:
- A running RabbitMQ broker (local installation or a managed service such as CloudAMQP).
- A queue to consume from. The queue must exist before the integration is created.
- Credentials (username and password) with permission to read from the queue.
CloudAMQP setup
Section titled “CloudAMQP setup”CloudAMQP provides a fully managed RabbitMQ service with a free Little Lemur plan (100 queues, 1 million messages/month, 20 connections) — enough to test the integration without installing anything locally.
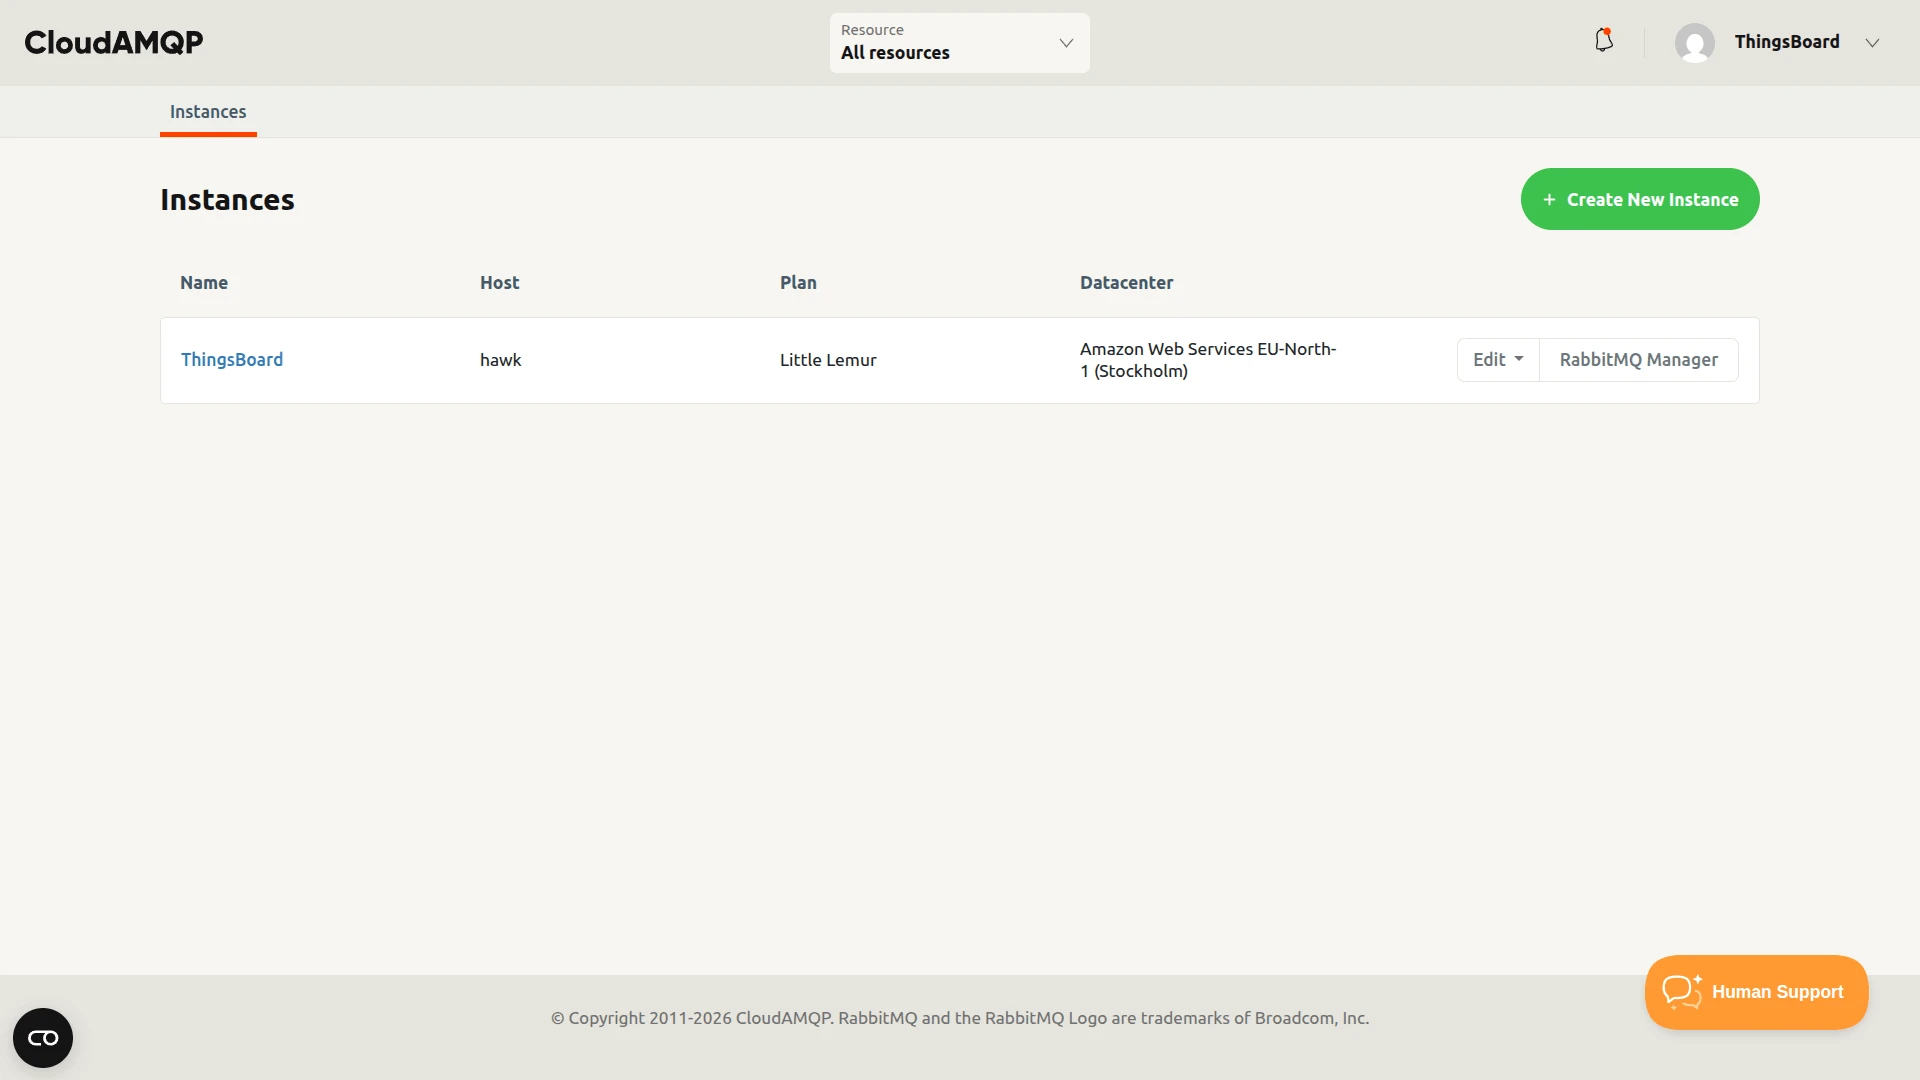
Create an instance.
Sign up at customer.cloudamqp.com/signup. In the console, click Create New Instance, choose the Little Lemur (Free) plan, select a region close to your ThingsBoard deployment, and click Create instance.Copy the connection details.
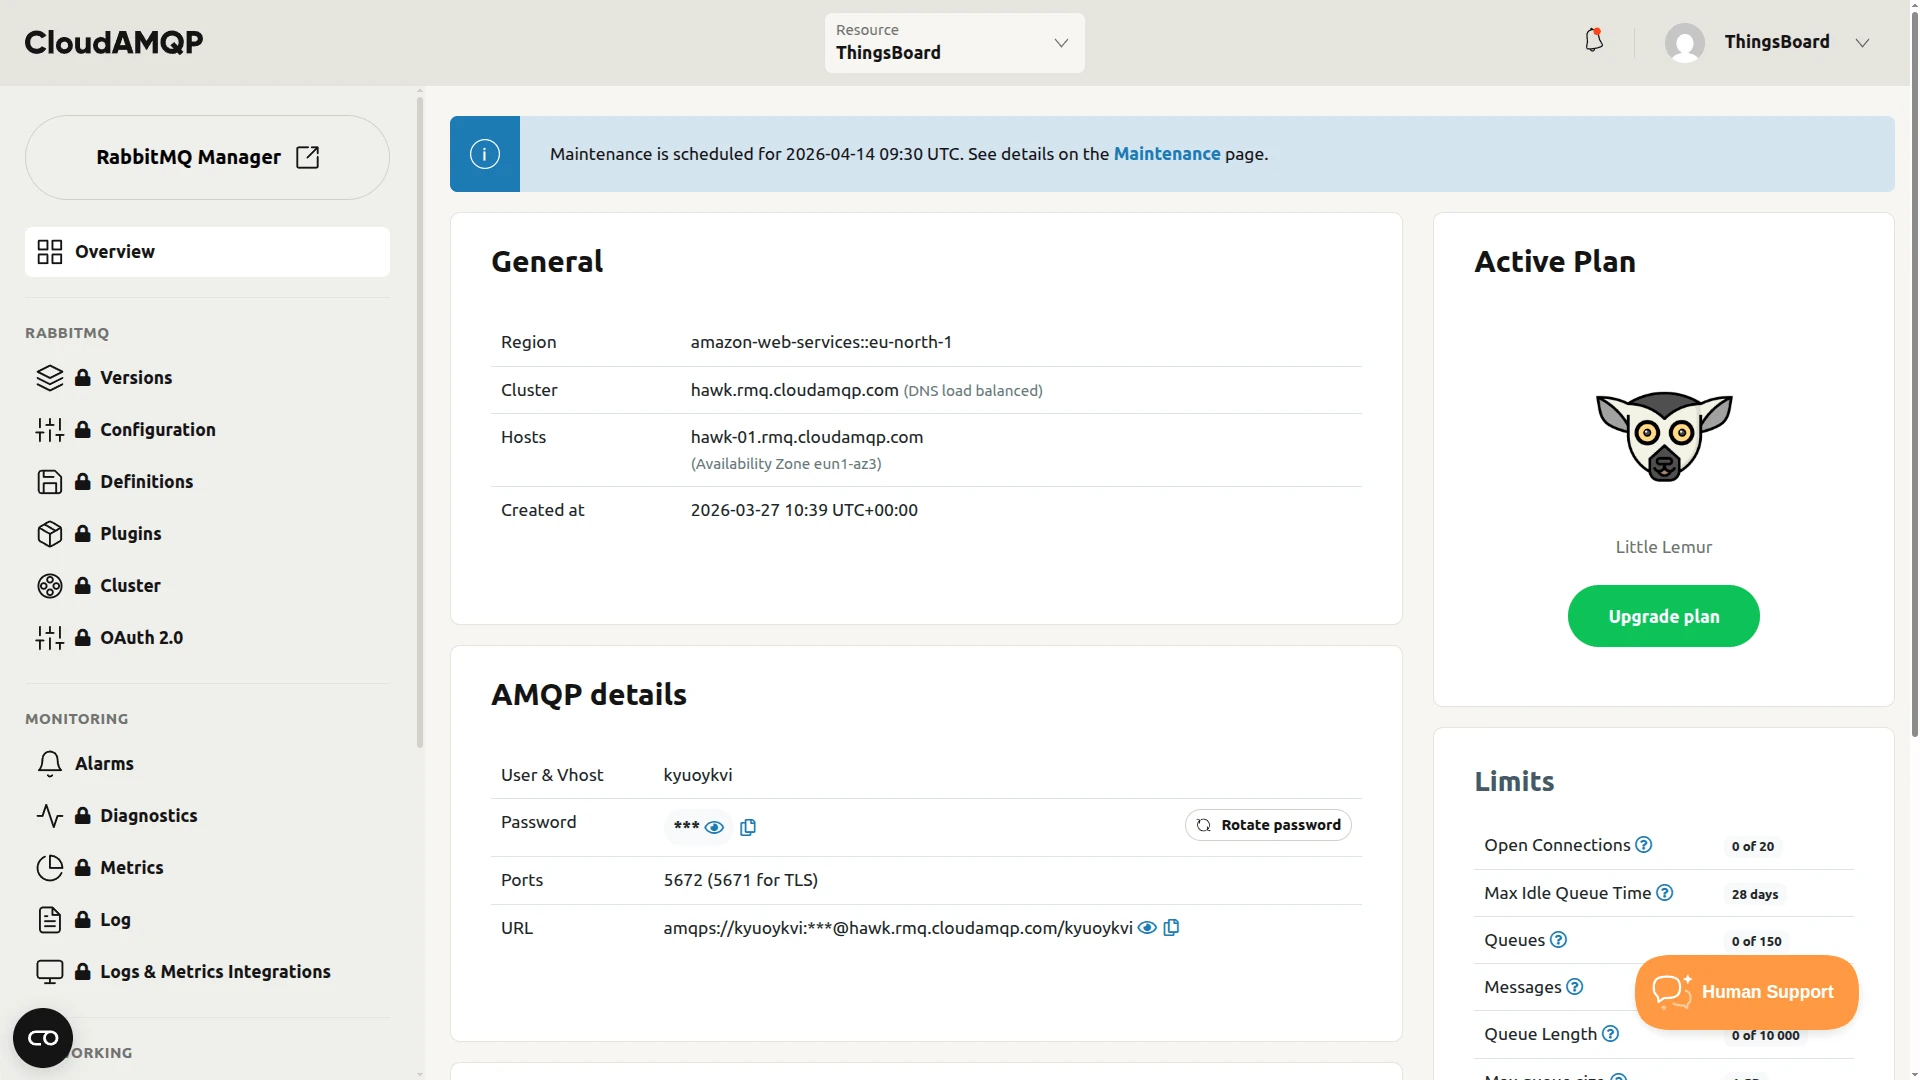
Open the instance and go to its Overview page. Copy the following values — you will need them in the ThingsBoard Connection step:- Host — the hostname portion of the AMQP URL (e.g.
crow.rmq.cloudamqp.com). - User & Vhost — the username and virtual host (both are the same string, e.g.
abcdefgh). - Password — click Show to reveal it.
The full AMQP URL is shown for reference:
amqps://user:password@host/vhost.- Host — the hostname portion of the AMQP URL (e.g.
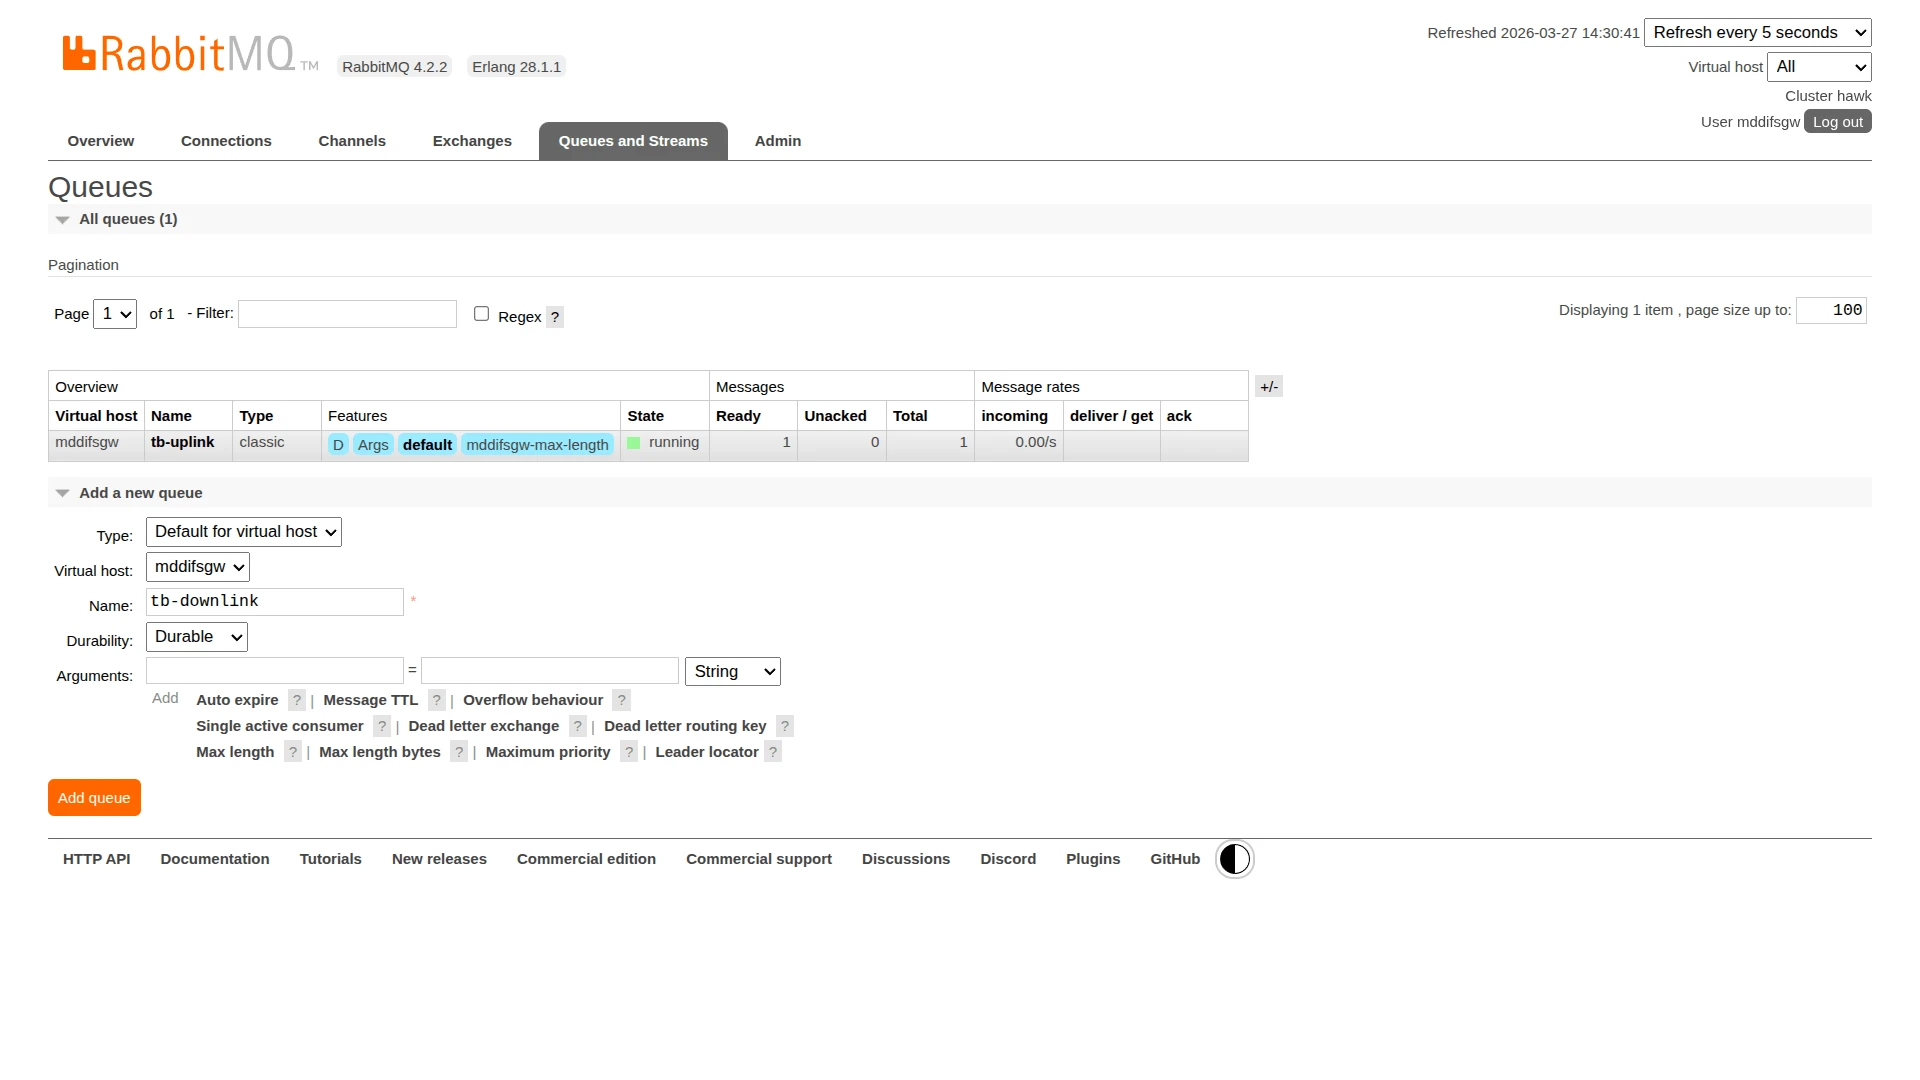
Create the uplink queue.
Click the green RabbitMQ Manager button on the Overview page to open the Management UI (hosted athttps://<host>/).
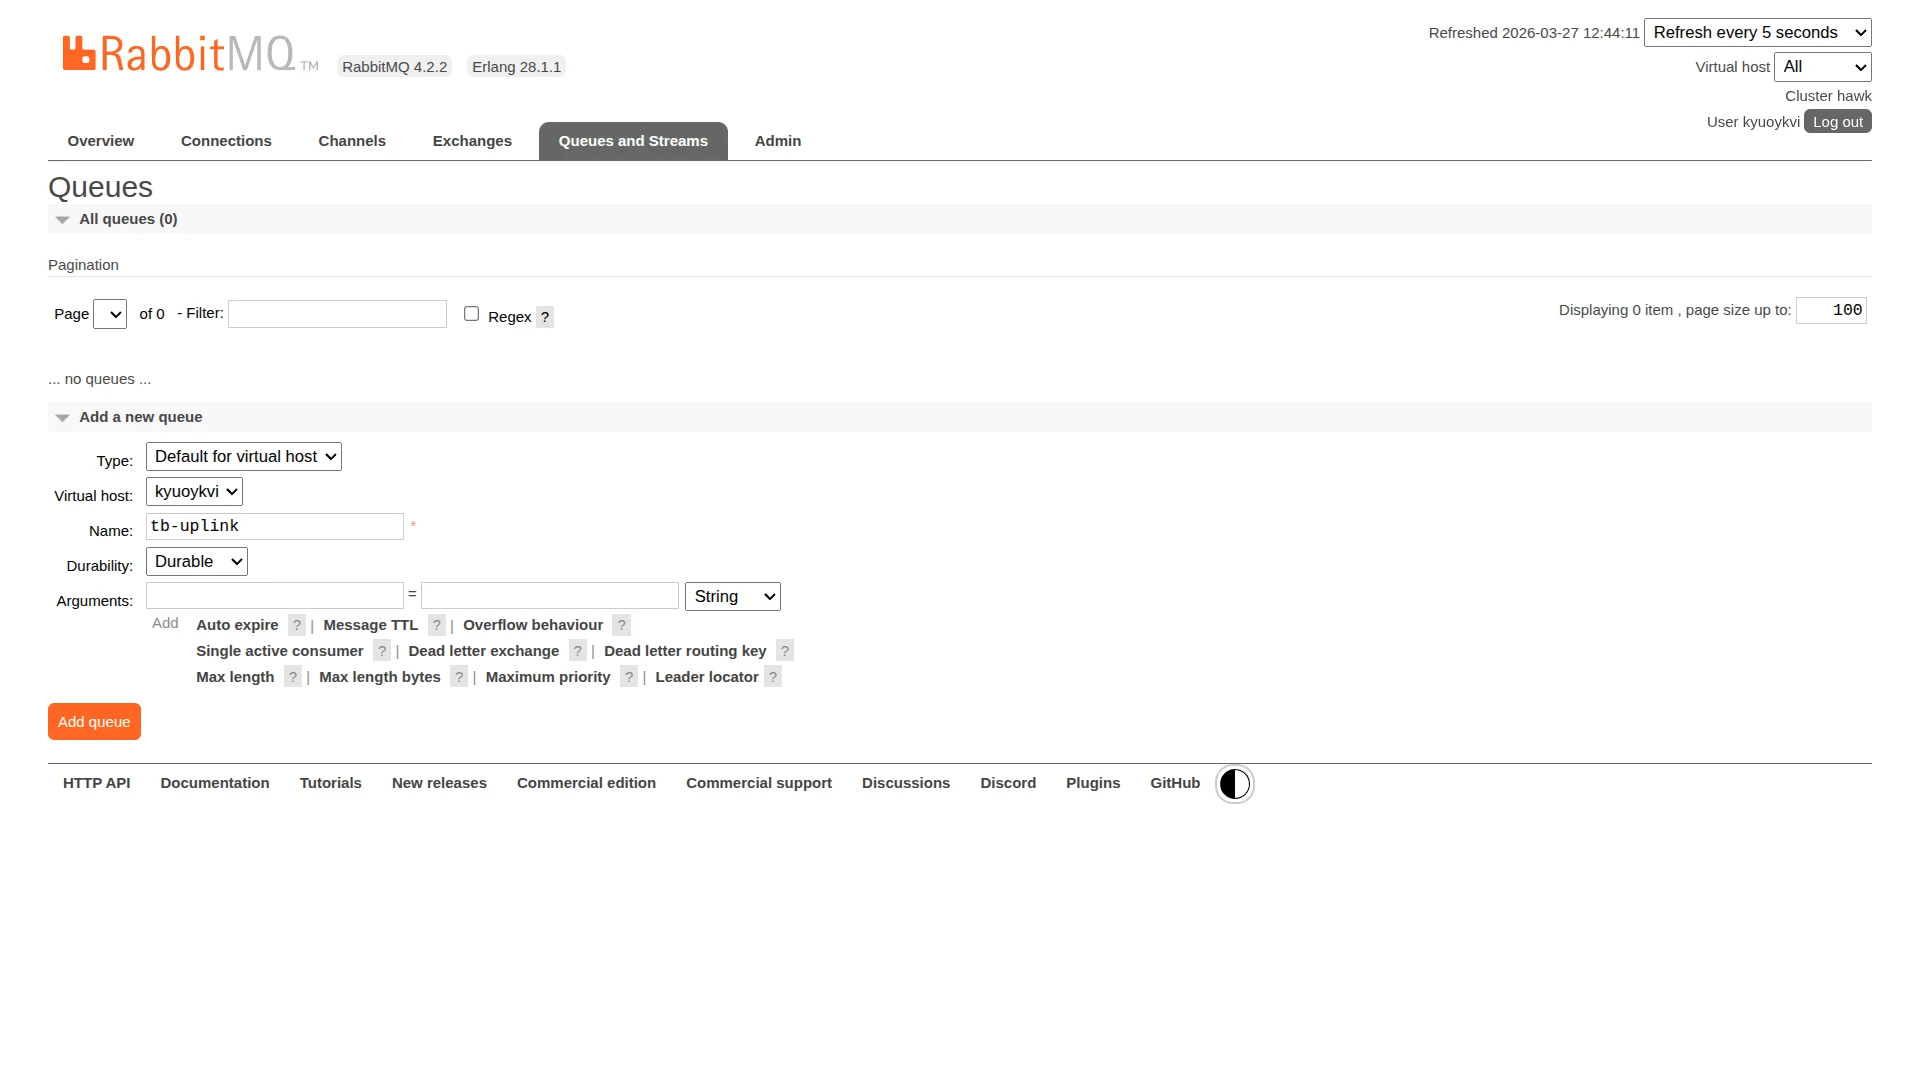
Go to Queues and Streams, click Add a new queue, set Durability to Durable, entertb-uplinkas the name, and click Add queue.
ThingsBoard integration setup
Section titled “ThingsBoard integration setup”Create an uplink converter
Section titled “Create an uplink converter”The uplink converter decodes incoming RabbitMQ messages and maps them to the ThingsBoard data model. RabbitMQ uses a generic uplink converter.
The decoder function receives:
payload— raw AMQP message body as a UTF-8 byte arraymetadata—integrationNameand any key-value pairs configured in the integration’s Metadata settings
Sample payload:
{ "deviceName": "Sensor A1", "deviceType": "thermostat", "temperature": 23.5, "humidity": 60}- Go to Integrations center ⇾ Data converters.
- Click + Add data converter ⇾ Create new converter.
- Set Converter type to Uplink (default).
- Select integration type from the dropdown — RabbitMQ.
- Enter a converter name:
RabbitMQ Uplink Converter. - Paste the decoder function from the tab below.
The decoder function used in this tutorial:
// Decode an uplink message from a buffer// payload - array of bytes// metadata - key/value object
/** Decoder **/
// decode payload to JSONvar data = decodeToJson(payload);
// --- Device name and type ---var deviceName = data.deviceName != null ? data.deviceName : 'Unknown Device';var deviceType = data.deviceType != null ? data.deviceType : 'default';// var customerName = 'Customer C';// var groupName = 'thermostat devices';
// use assetName and assetType instead of deviceName and deviceType// to automatically create assets instead of devices.// var assetName = 'Asset A';// var assetType = 'building';
// --- Timestamp parsing ---var timestamp = -1;if (data.ts != null) {  timestamp = data.ts;} else if (data.timestamp != null) {  timestamp = new Date(data.timestamp).getTime();}if (timestamp == -1) {  timestamp = Date.now();}
// --- Telemetry and attributes ---var telemetry = {};var attributes = {  model: 'Model A',  serialNumber: 'SN111',  integrationName: metadata['integrationName'],};
// Keys to exclude from telemetry (already used or non-telemetry fields)var excludeFromTelemetryList = ["deviceName", "deviceType", "ts", "timestamp"];
// Parse all remaining JSON fields as telemetrytelemetry.putAll(toFlatMap(data, excludeFromTelemetryList, true));
// Result object with device attributes/telemetry datavar result = {  deviceName: deviceName,  deviceType: deviceType,  // customerName: customerName,  // groupName: groupName,  // assetName: assetName,  // assetType: assetType,  attributes: attributes,  telemetry: {    ts: timestamp,    values: telemetry  }};
/** Helper functions 'decodeToString', 'decodeToJson' and 'toFlatMap' are already built-in **/
return result;
// Decode an uplink message from a buffer// payload - array of bytes// metadata - key/value object
/** Decoder **/
// decode payload to JSONvar data = decodeToJson(payload);
// --- Device name and type ---var deviceName = data.deviceName != null ? data.deviceName : 'Unknown Device';var deviceType = data.deviceType != null ? data.deviceType : 'default';// var customerName = 'Customer C';// var groupName = 'thermostat devices';
// use assetName and assetType instead of deviceName and deviceType// to automatically create assets instead of devices.// var assetName = 'Asset A';// var assetType = 'building';
// --- Timestamp parsing ---var timestamp = -1;if (data.ts != null) { timestamp = data.ts;} else if (data.timestamp != null) { timestamp = new Date(data.timestamp).getTime();}if (timestamp == -1) { timestamp = Date.now();}
// --- Telemetry and attributes ---var telemetry = {};var attributes = { model: 'Model A', serialNumber: 'SN111', integrationName: metadata['integrationName'],};
// Keys to exclude from telemetry (already used or non-telemetry fields)var excludeFromTelemetryList = ["deviceName", "deviceType", "ts", "timestamp"];
// Parse all remaining JSON fields as telemetrytoFlatMap(data, telemetry, excludeFromTelemetryList);
// Result object with device attributes/telemetry datavar result = { deviceName: deviceName, deviceType: deviceType, // customerName: customerName, // groupName: groupName, // assetName: assetName, // assetType: assetType, attributes: attributes, telemetry: { ts: timestamp, values: telemetry }};
/** Helper functions **/
function decodeToString(payload) { return String.fromCharCode.apply(String, payload);}
function decodeToJson(payload) { var str = decodeToString(payload); return JSON.parse(str);}
function toFlatMap(obj, result, excludeList, prefix) { prefix = prefix || ''; for (var key in obj) { if (excludeList.indexOf(key) !== -1) continue; var value = obj[key]; var fullKey = prefix ? prefix + '.' + key : key; if (typeof value === 'object' && value !== null && !Array.isArray(value)) { toFlatMap(value, result, excludeList, fullKey); } else { result[fullKey] = value; } }}
return result;- Optionally, click Test payload decoder to validate.
- Click Add.
To adapt this converter to your device:
- Different device name / type fields — replace
data.deviceNameanddata.deviceTypewith the field names your device actually sends. - Timestamp — if your payload includes a Unix millisecond timestamp, name the field
ts; for an ISO 8601 string, usetimestamp. Without either, the converter falls back to server receive time. - Telemetry fields — all JSON fields not listed in
excludeFromTelemetryListare mapped to telemetry automatically viatoFlatMap. Add field names to the exclude list to keep them out of telemetry. - Static attributes — replace
modelandserialNumberwith actual device properties, or remove them if not needed. - Assets instead of devices — uncomment
assetName/assetTypeand comment outdeviceName/deviceType. - Customer or group assignment — uncomment
customerNameorgroupNameand set the appropriate values.
Create a downlink converter
Section titled “Create a downlink converter”The downlink converter encodes Rule Engine messages into AMQP payloads. Skip this step if you only need uplink.
The output must include:
contentType—TEXT,JSON, orBINARYdata— the message body to publishmetadata— optional AMQP message headers as key-value pairs
- Go to Integrations center ⇾ Data converters.
- Click + Add data converter ⇾ Create new converter.
- Set Converter type to Downlink (default).
- Select integration type from the dropdown — RabbitMQ.
- Enter a converter name:
RabbitMQ Downlink Converter. - Paste the decoder function from the tab below.
The encoder function used in this tutorial:
var result = {  contentType: 'JSON',  data: JSON.stringify(msg),  metadata: {    deviceName: metadata.deviceName  }};
return result;
var result = { contentType: 'JSON', data: JSON.stringify(msg), metadata: { deviceName: metadata.deviceName }};
return result;- Optionally, click Test encoder function to validate.
- Click Add.
To adapt this converter:
- Specific fields only — replace
JSON.stringify(msg)with a selective object to send only the relevant command fields. - Binary payload — set
contentTypetoBINARYand encodedataaccordingly.
Create the integration
Section titled “Create the integration”- Go to Integrations center ⇾ Integrations and click + Add integration.
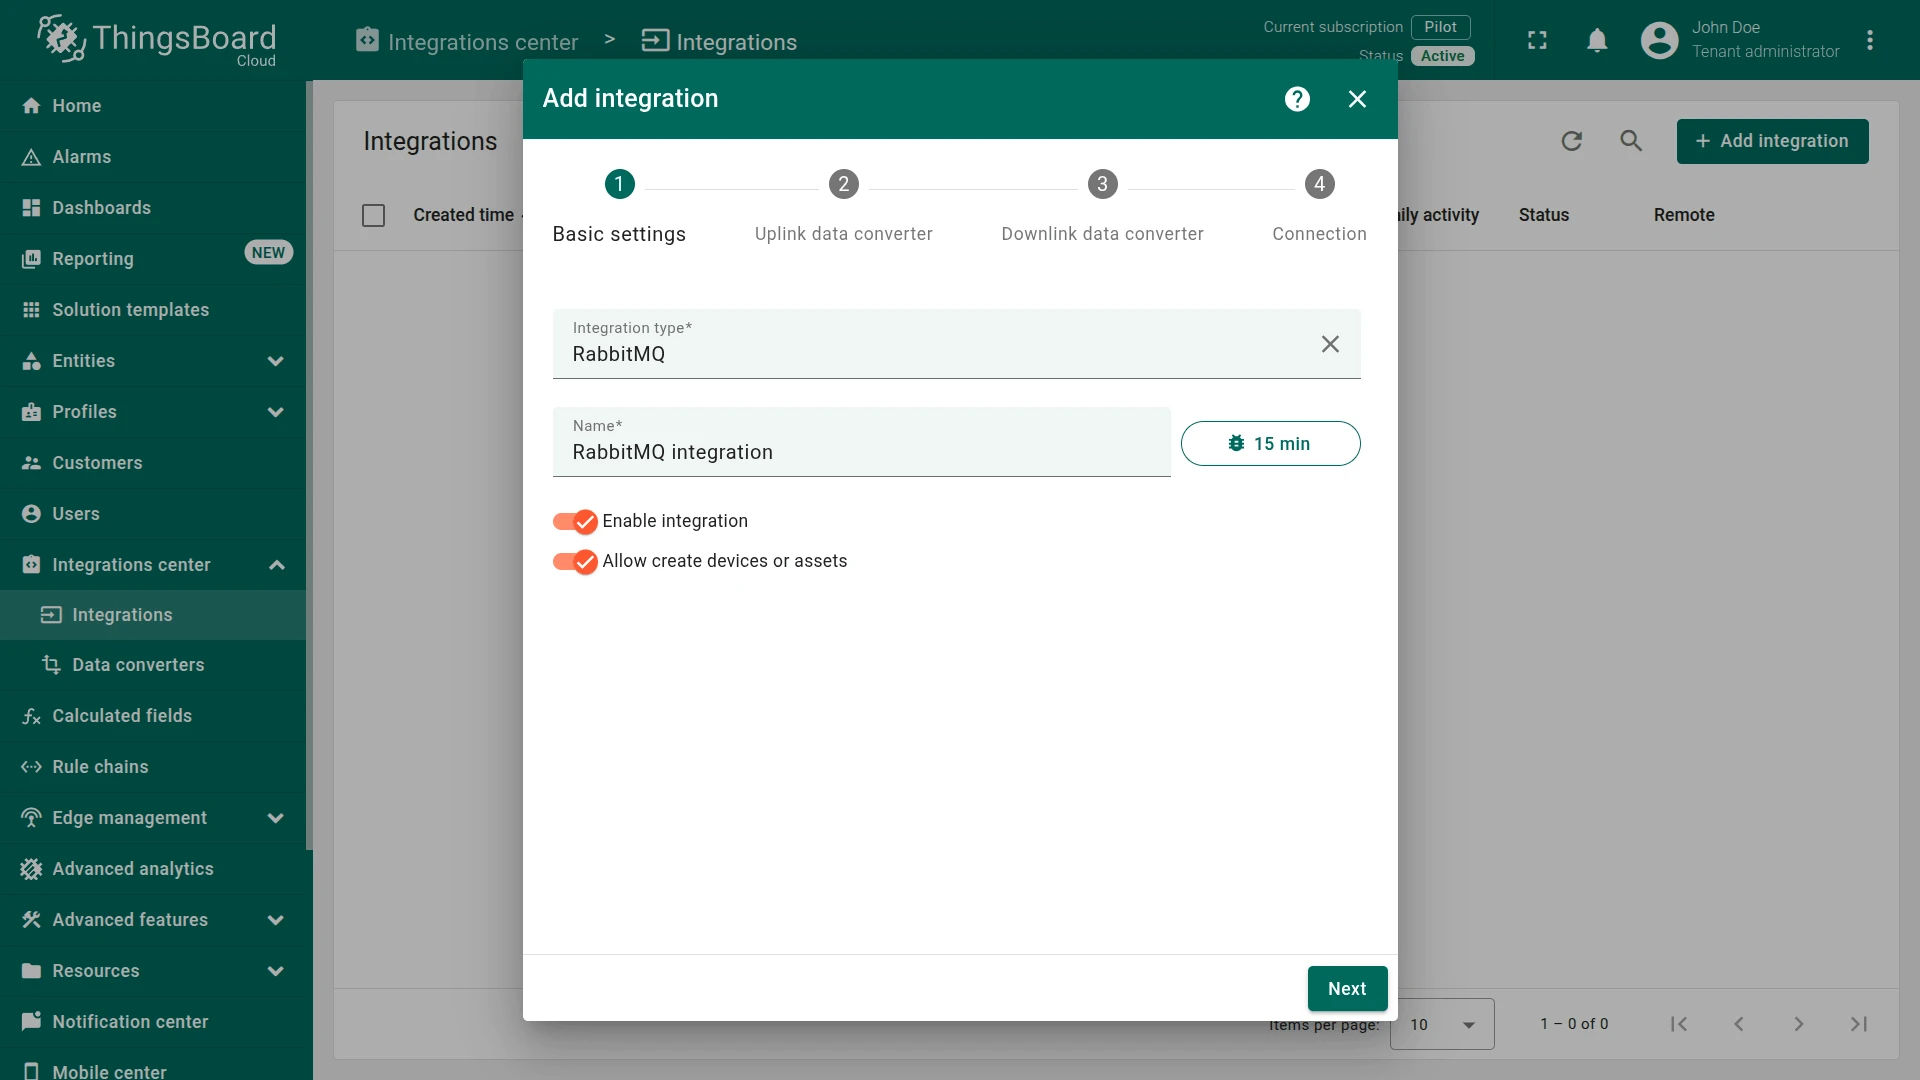
- Basic settings:
- Set Integration type to RabbitMQ.
- Enable integration and Allow create devices or assets are on by default.
- A 15 min badge is shown next to the name — this indicates that full debug events will be captured for the first 15 minutes after the integration is saved. No action is needed here.
- Click Next.
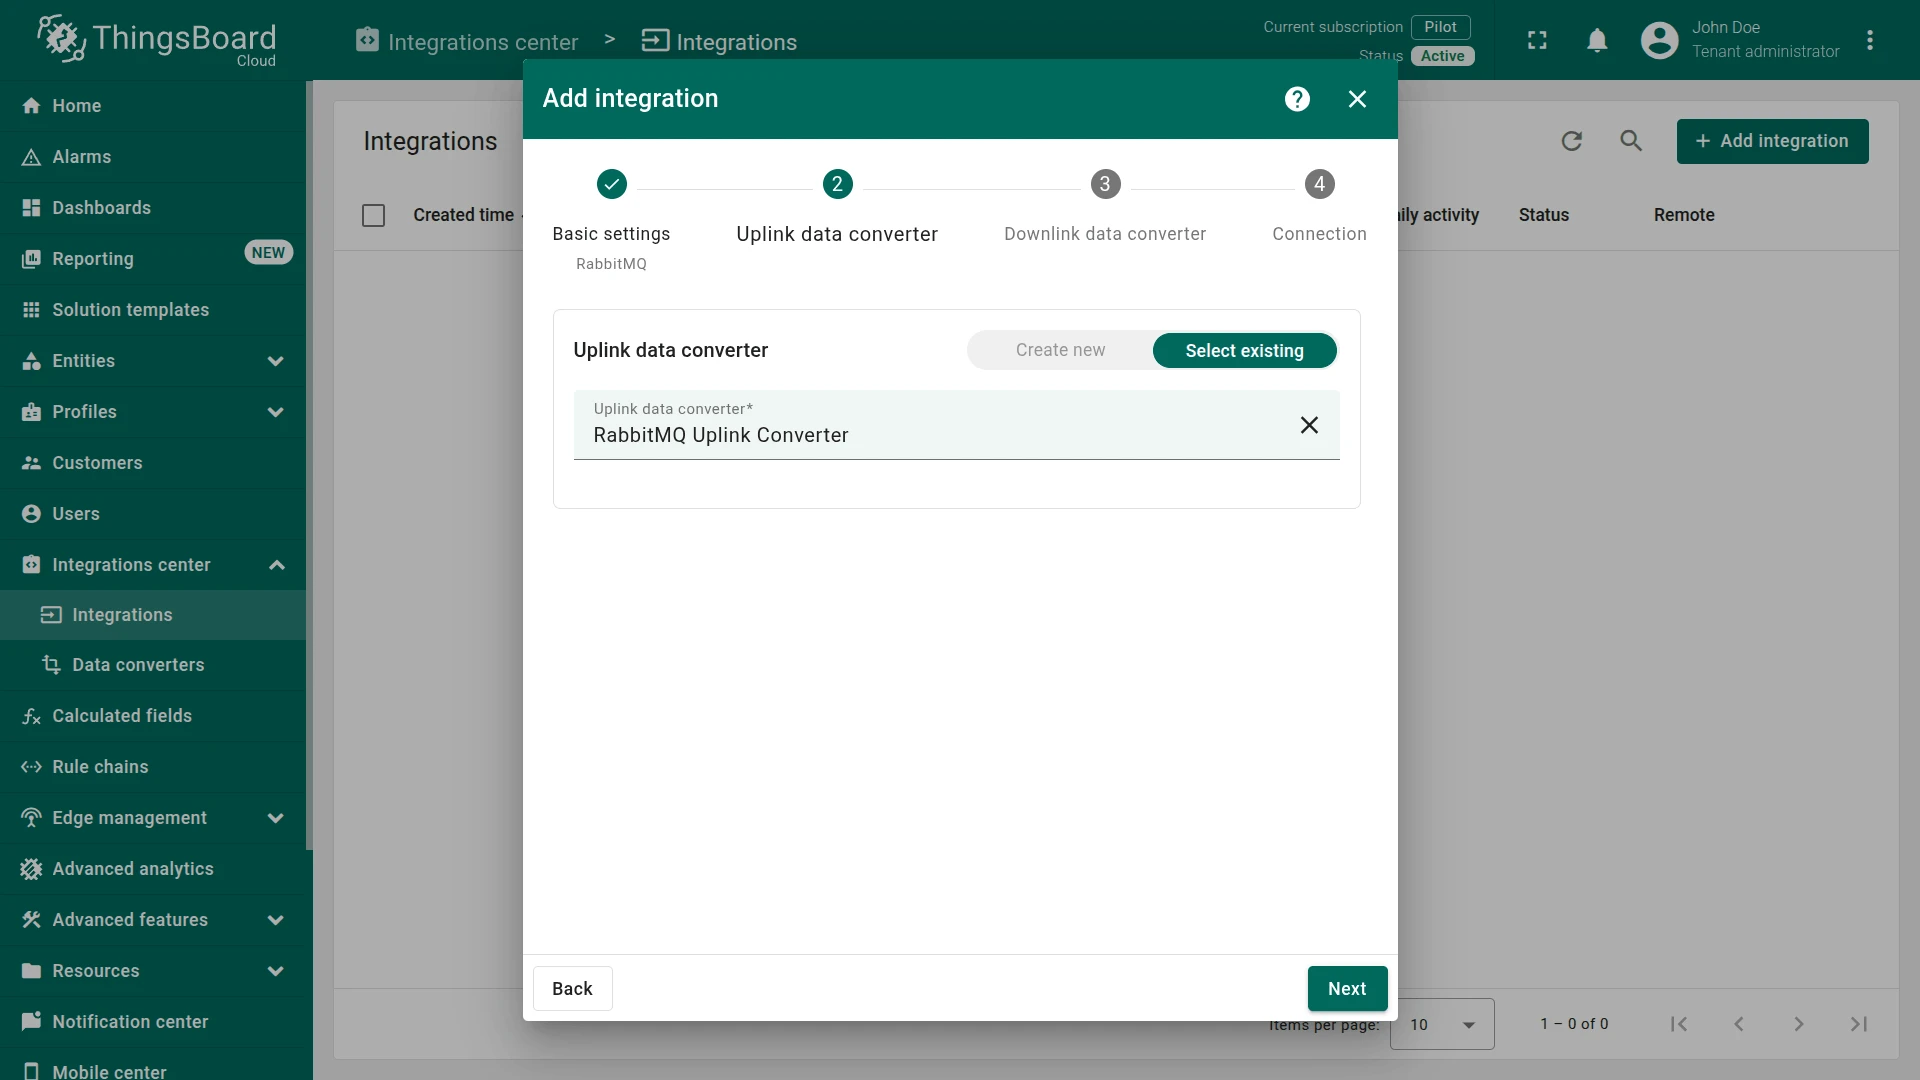
- Uplink data converter:
- Click Select existing and choose the previously created
RabbitMQ Uplink Converterfrom the list. - Click Next.
- Click Select existing and choose the previously created
- Downlink data converter:
- Click Select existing and choose the previously created
RabbitMQ Downlink Converterfrom the list. - Click Skip if you do not need downlink — it can be added later by editing the integration.
- Click Next.
- Click Select existing and choose the previously created
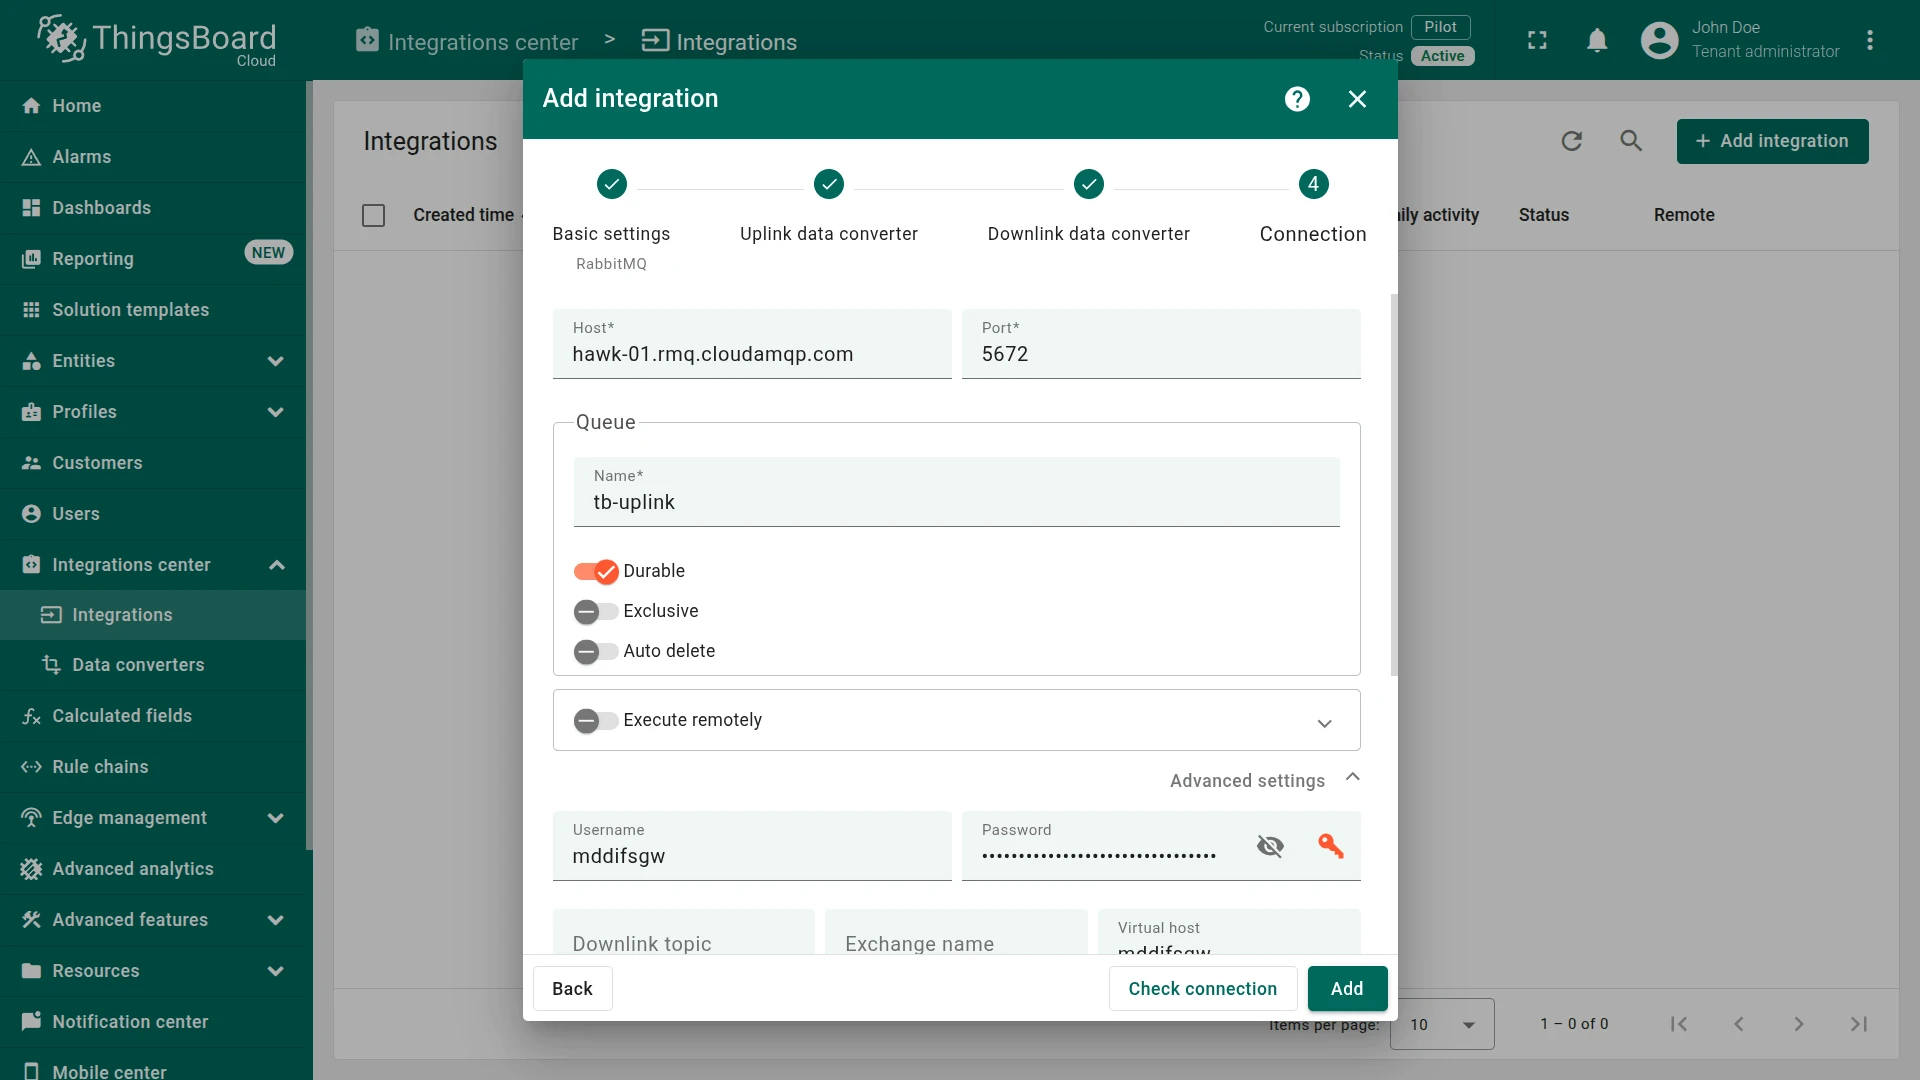
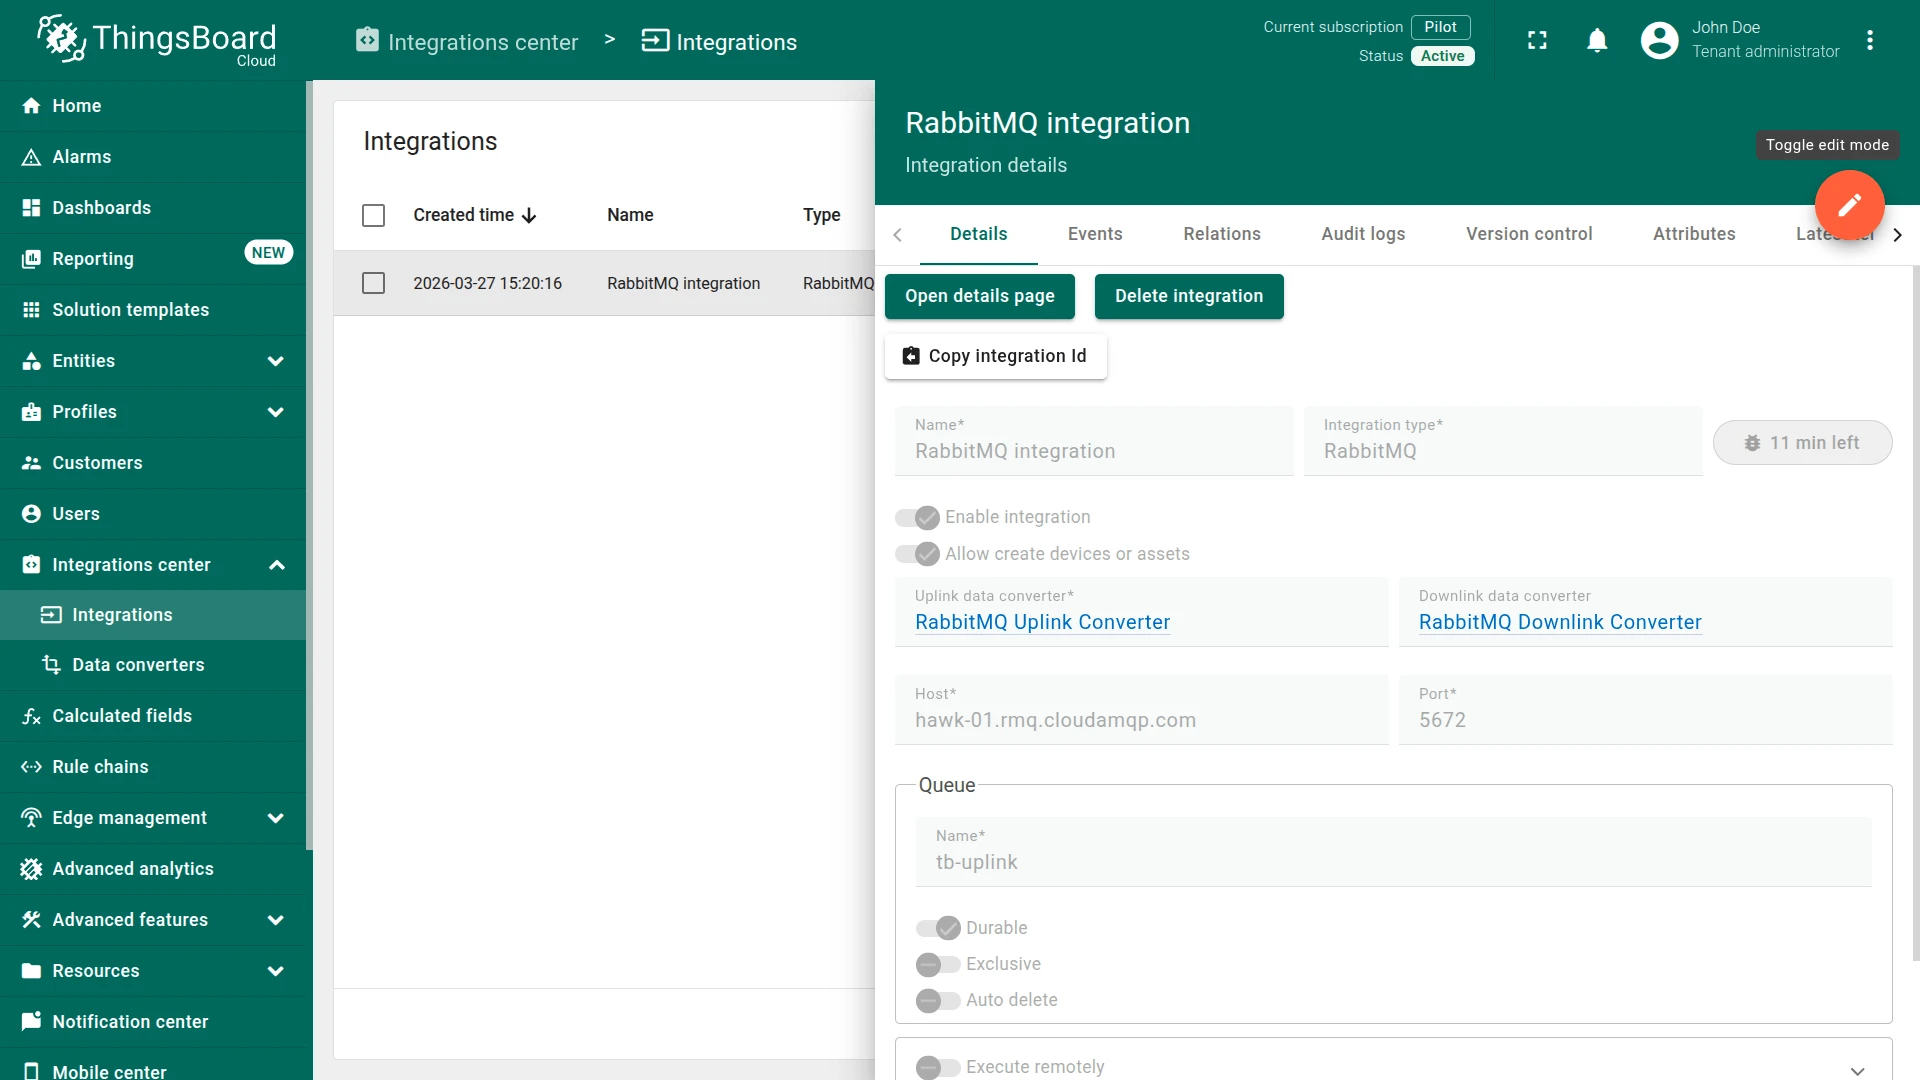
- Connection:
- Host — hostname of your RabbitMQ broker (e.g.
hawk-01.rmq.cloudamqp.com). - Port —
5672for plain AMQP,5671for AMQP over TLS. - Queue — add the queue to consume from (e.g.
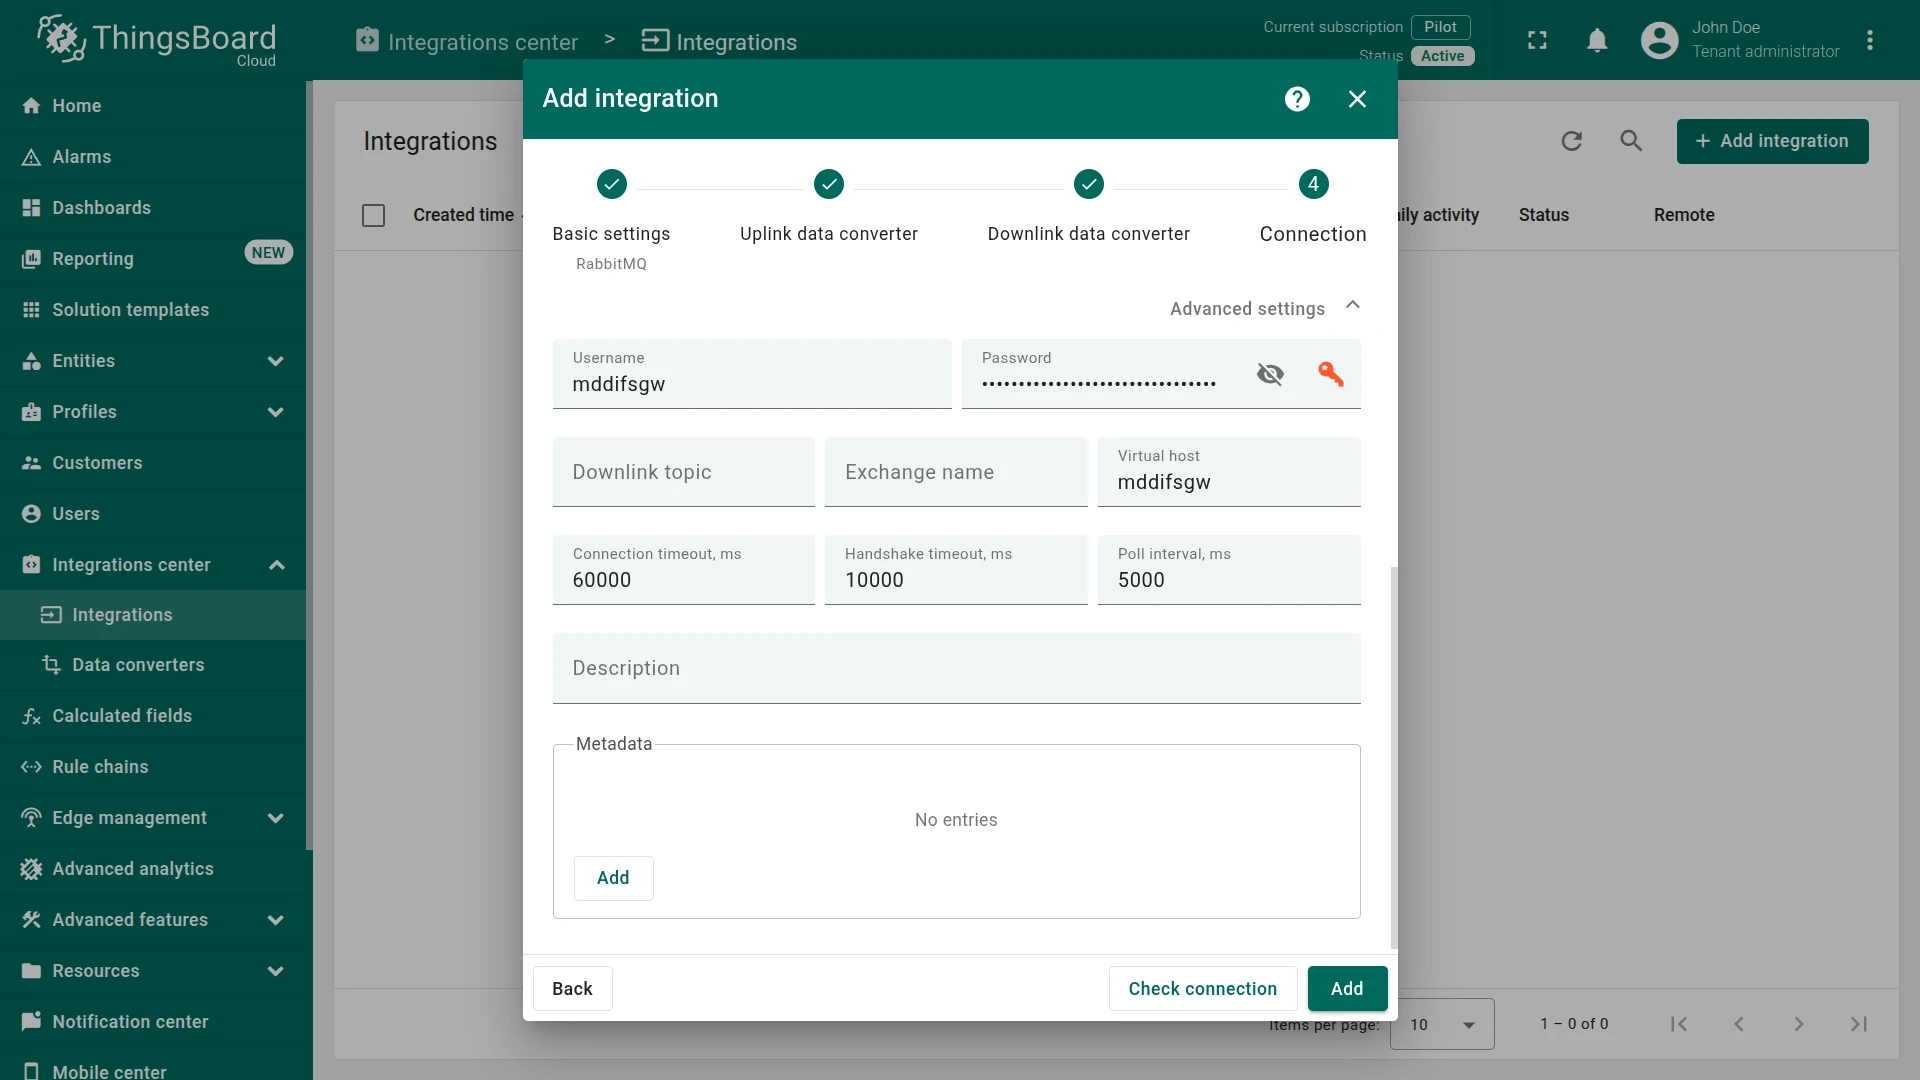
tb-uplink). Set Durable, Exclusive, and Auto delete to match the flags used when the queue was declared. - Expand Advanced settings and fill in Username, Password, and Virtual host. See Connection settings for details.
- Click Next.
- Host — hostname of your RabbitMQ broker (e.g.
- Check connection (optional):
- Click Check connection to verify the broker is reachable. A green Connected confirmation appears on success.
- Click Add to save the integration.


Connection settings
Section titled “Connection settings”Host
Hostname or IP address of the RabbitMQ broker (e.g. localhost, rabbitmq.example.com).
Port
AMQP port. Default: 5672. Use 5671 for AMQP over TLS.
Queue
List of queues ThingsBoard consumes messages from. For each queue:
| Parameter | Description |
|---|---|
| Name | Queue name (must exist on the broker). |
| Durable | Queue survives broker restart. Must match the flag used when the queue was declared. |
| Exclusive | Queue is accessible from only one connection and is deleted when that connection closes. |
| Auto delete | Queue is deleted when the last consumer disconnects. |
Advanced settings
| Parameter | Description |
|---|---|
| Username | RabbitMQ user for the AMQP connection. Default broker credentials are guest / guest, which are restricted to localhost only — use a dedicated user for remote access. |
| Password | Password for the above user. |
| Downlink topic | Routing key used when publishing downlink messages to the exchange. Required when a downlink converter is configured. |
| Exchange name | Exchange ThingsBoard publishes downlink messages to. Leave empty to use the RabbitMQ default exchange (amq.default). |
| Virtual host | RabbitMQ virtual host. Default: /. Change this if your broker uses isolated virtual hosts (e.g. CloudAMQP sets it to the instance username). |
| Connection timeout, ms | Maximum time to wait for an AMQP connection to be established. Default: 60000. |
| Handshake timeout, ms | Maximum time for the AMQP protocol handshake after TCP connection. Default: 10000. |
| Poll interval, ms | How often ThingsBoard polls the queue for new messages. Default: 5000. |
| Description | Optional text description for the integration. |
| Metadata | Key-value pairs injected into every uplink message as integrationMetadata in the converter script. |
Execute remotely
When enabled, ThingsBoard generates an Integration key and Integration secret that allow the integration to run as a separate process outside the ThingsBoard cluster — useful when the broker is only reachable from a restricted network. See Remote Integration.
Send a test uplink
Section titled “Send a test uplink”Publish a test message to the queue using the RabbitMQ Management UI, the CloudAMQP HTTP API, or the rabbitmqadmin CLI tool.
- Open the Management UI, go to Queues and Streams, and click the tb-uplink queue.
- Expand Publish message.
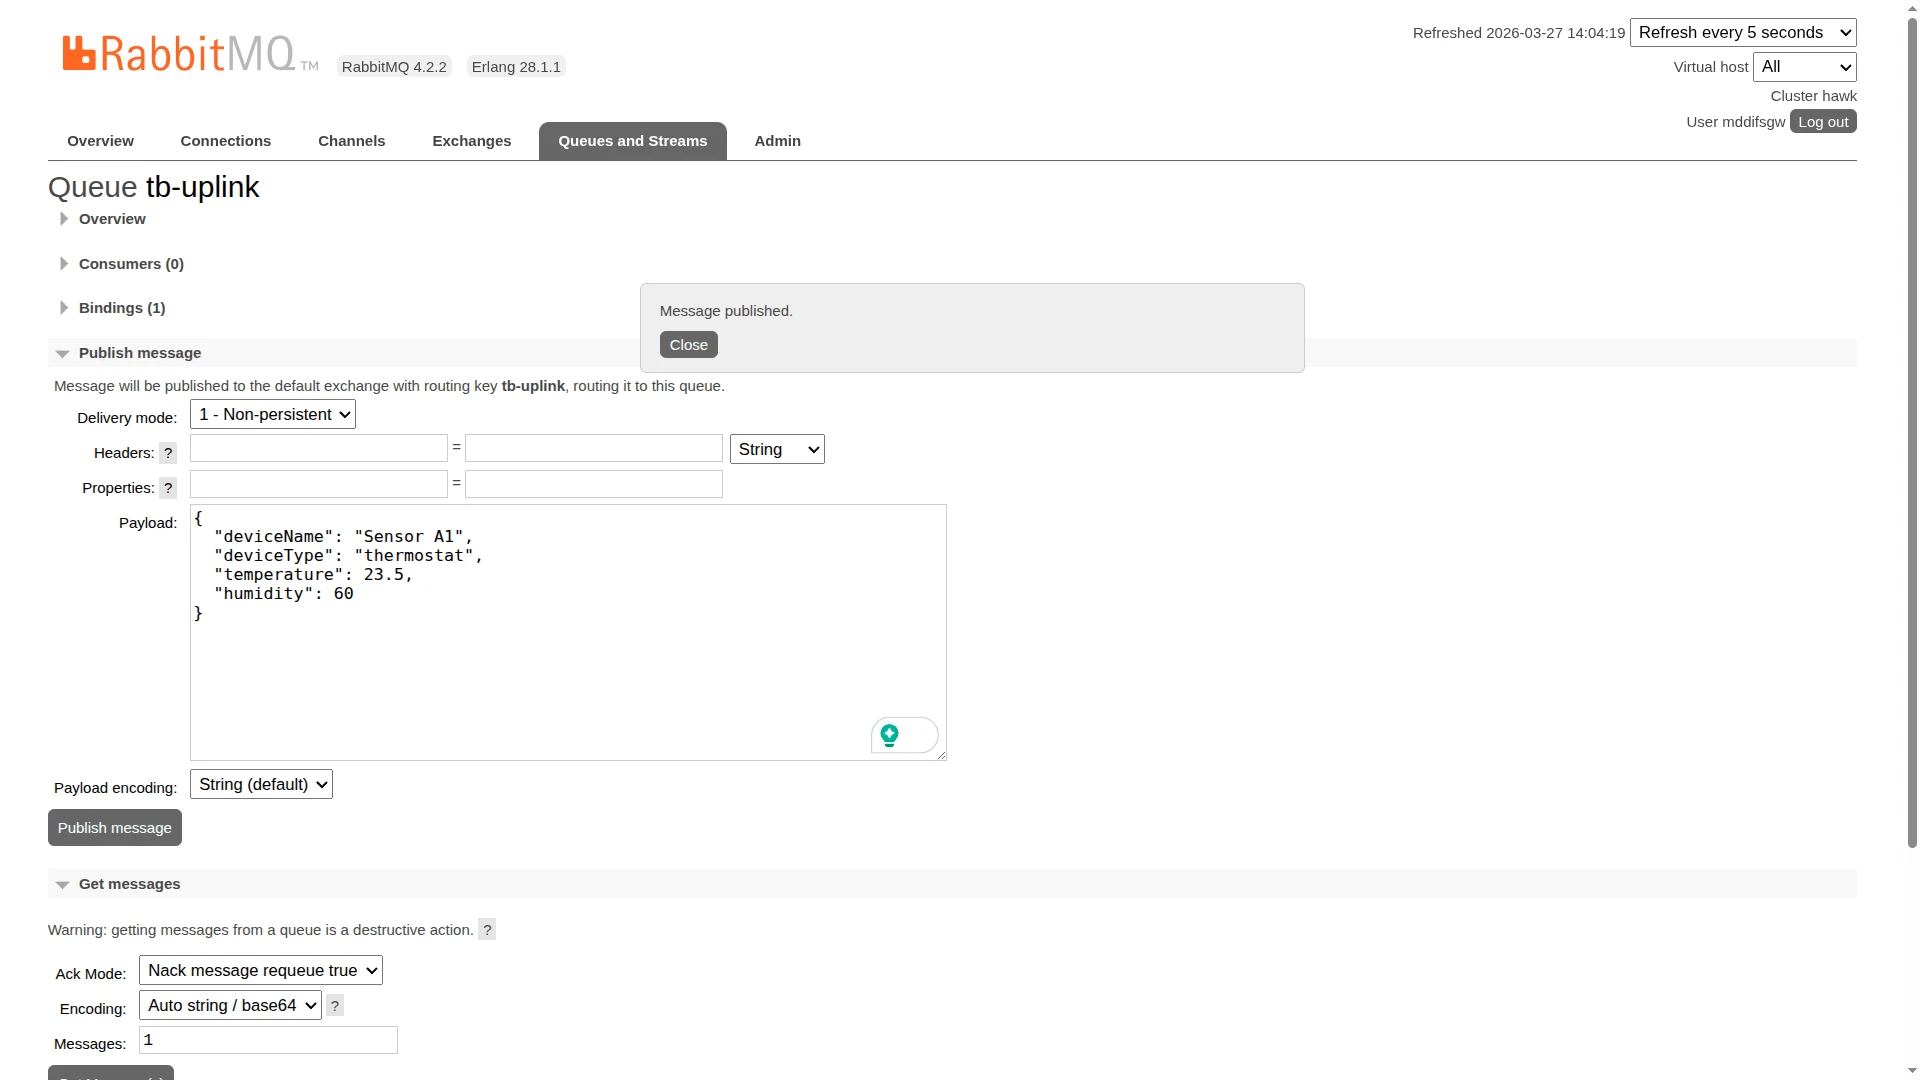
- Set Content type to
application/json, paste the JSON payload into the Payload field, and click Publish message.
{ "deviceName": "Sensor A1", "deviceType": "thermostat", "temperature": 23.5, "humidity": 60}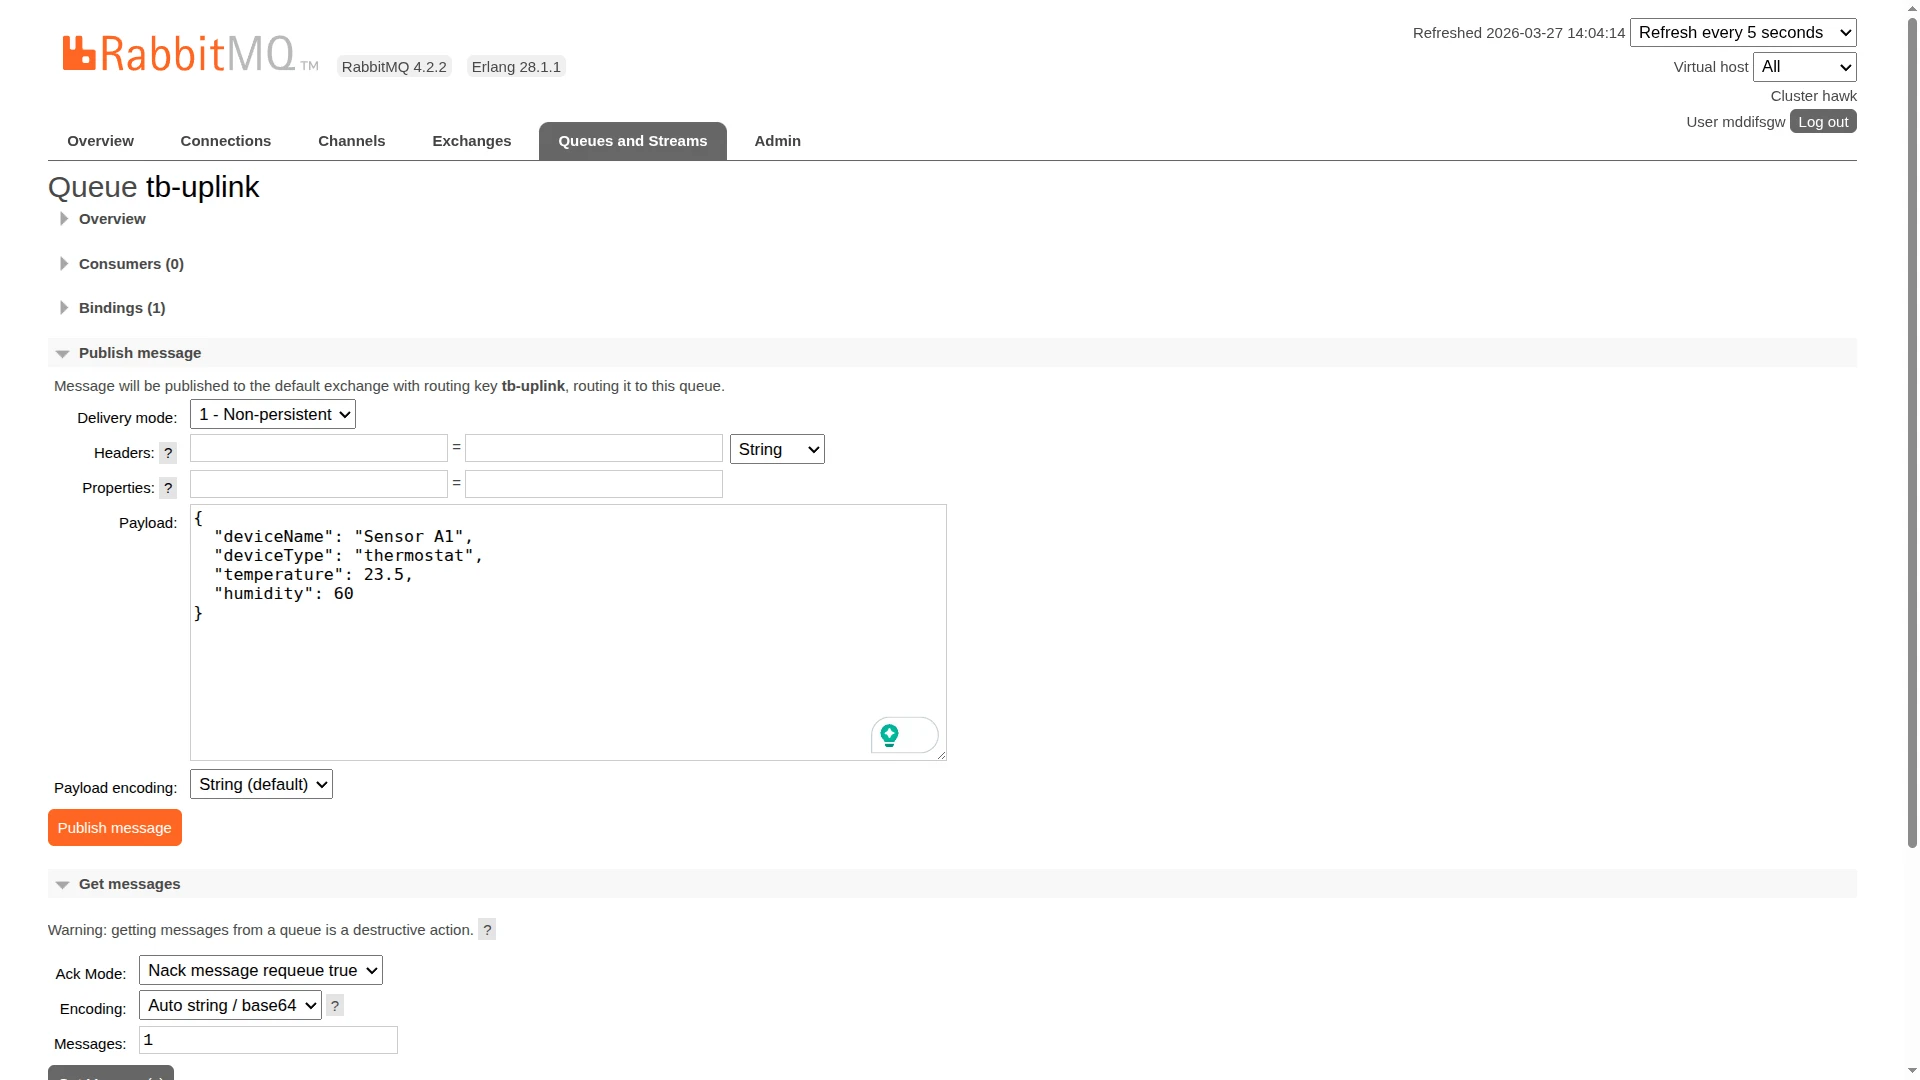
Use the RabbitMQ Management HTTP API exposed by CloudAMQP on port 443. Replace HOST, USER, PASSWORD, and VHOST with the values from your instance’s Overview page:
curl --user USER:PASSWORD \ --json '{ "properties": {"content_type": "application/json"}, "routing_key": "tb-uplink", "payload": "{\"deviceName\":\"Sensor A1\",\"deviceType\":\"thermostat\",\"temperature\":23.5,\"humidity\":60}", "payload_encoding": "string" }' \ "https://HOST/api/exchanges/VHOST/amq.default/publish"rabbitmqadmin publish \ exchange=amq.direct \ routing_key=tb-uplink \ payload='{"deviceName":"Sensor A1","deviceType":"thermostat","temperature":23.5,"humidity":60}' \ properties='{"content_type":"application/json"}'Verify in ThingsBoard
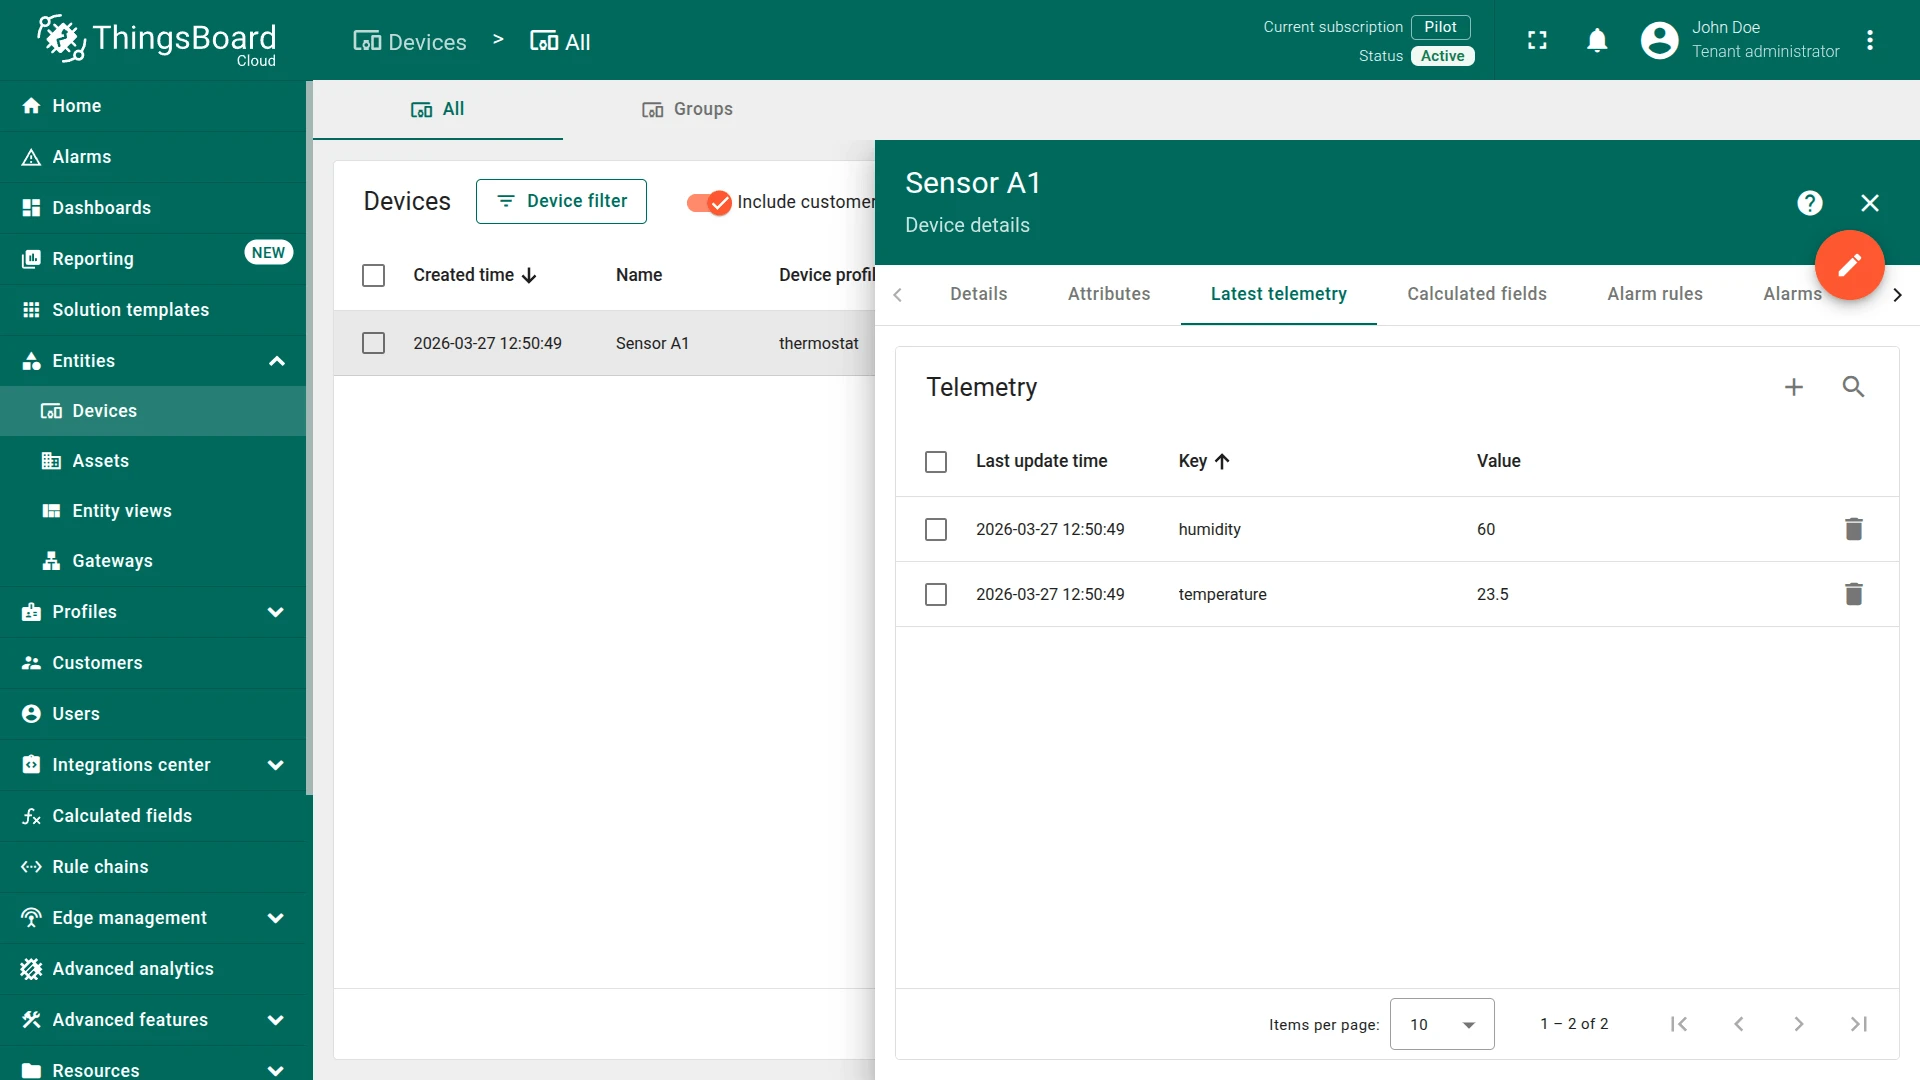
Section titled “Verify in ThingsBoard”Check device telemetry — go to Entities ⇾ Devices. The device Sensor A1 is automatically provisioned on the first message. Open it and check the Latest telemetry tab — temperature and humidity should reflect the published values.
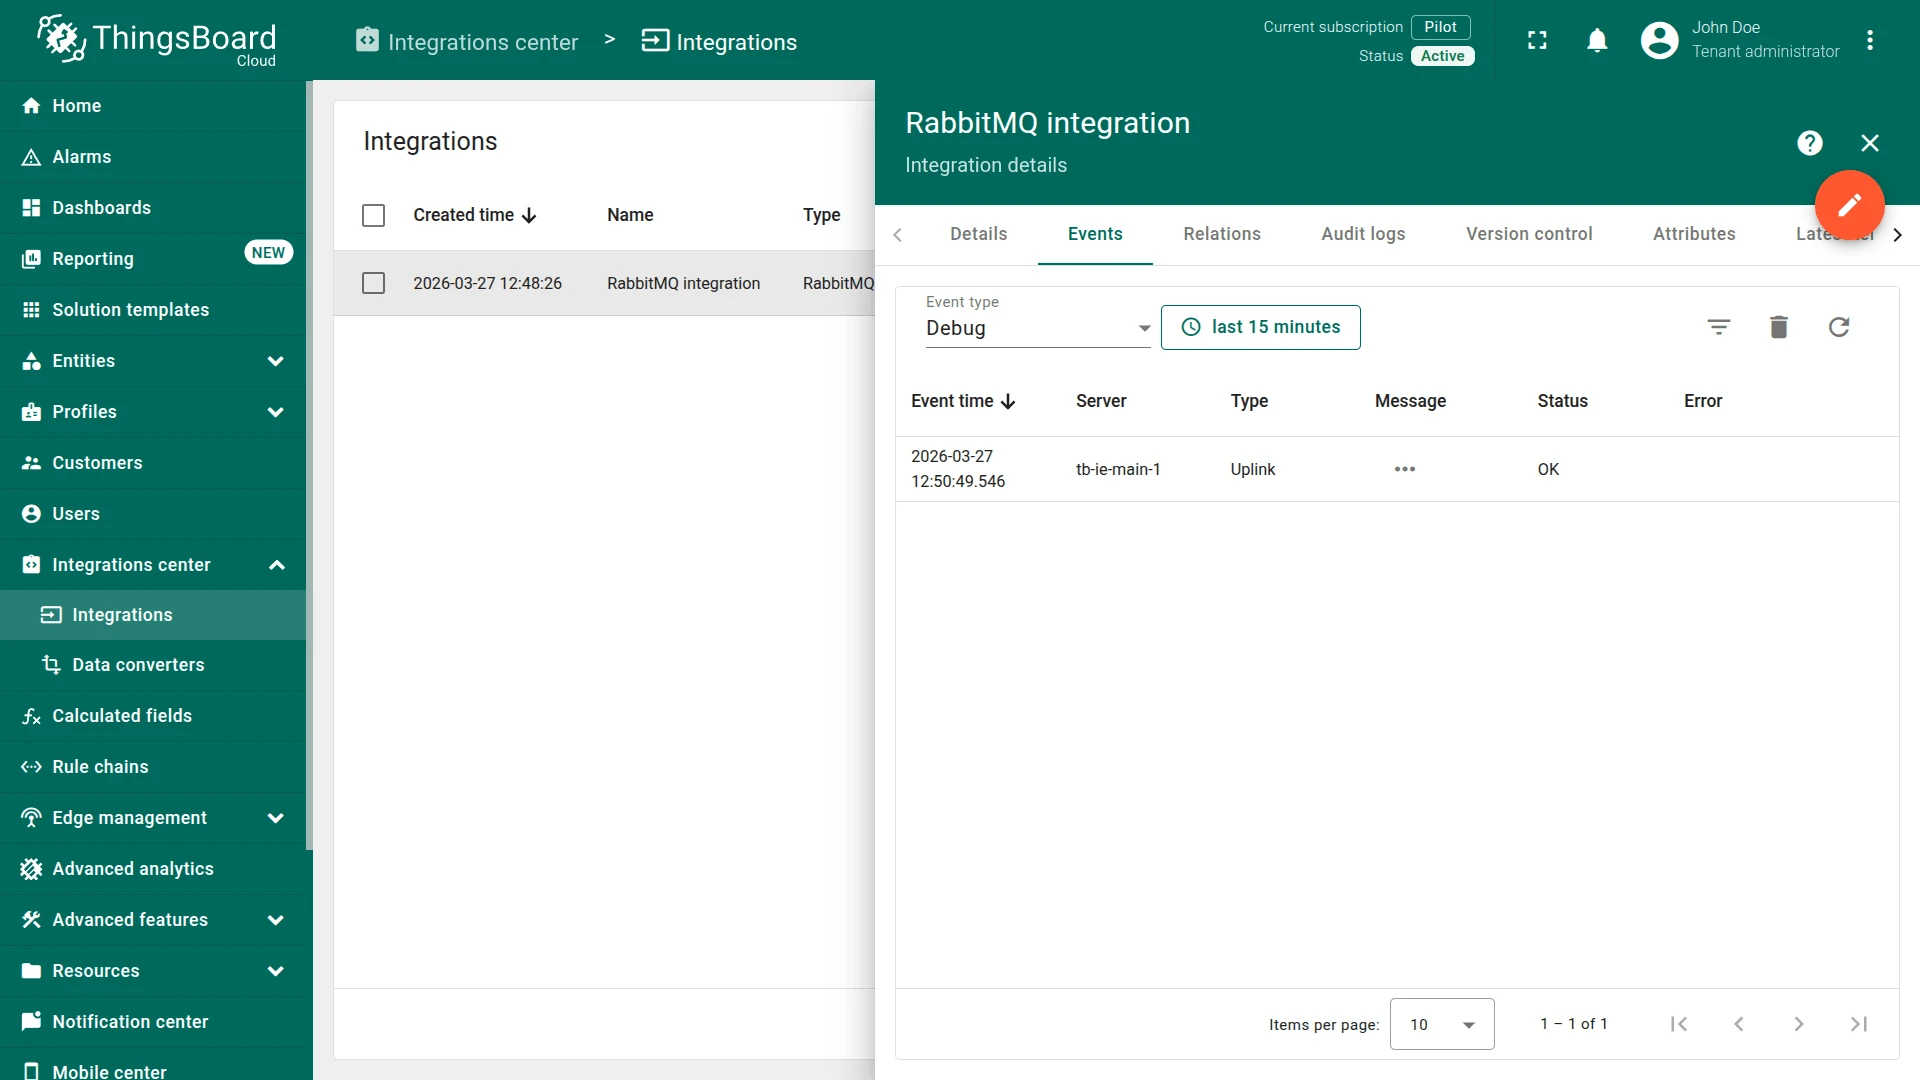
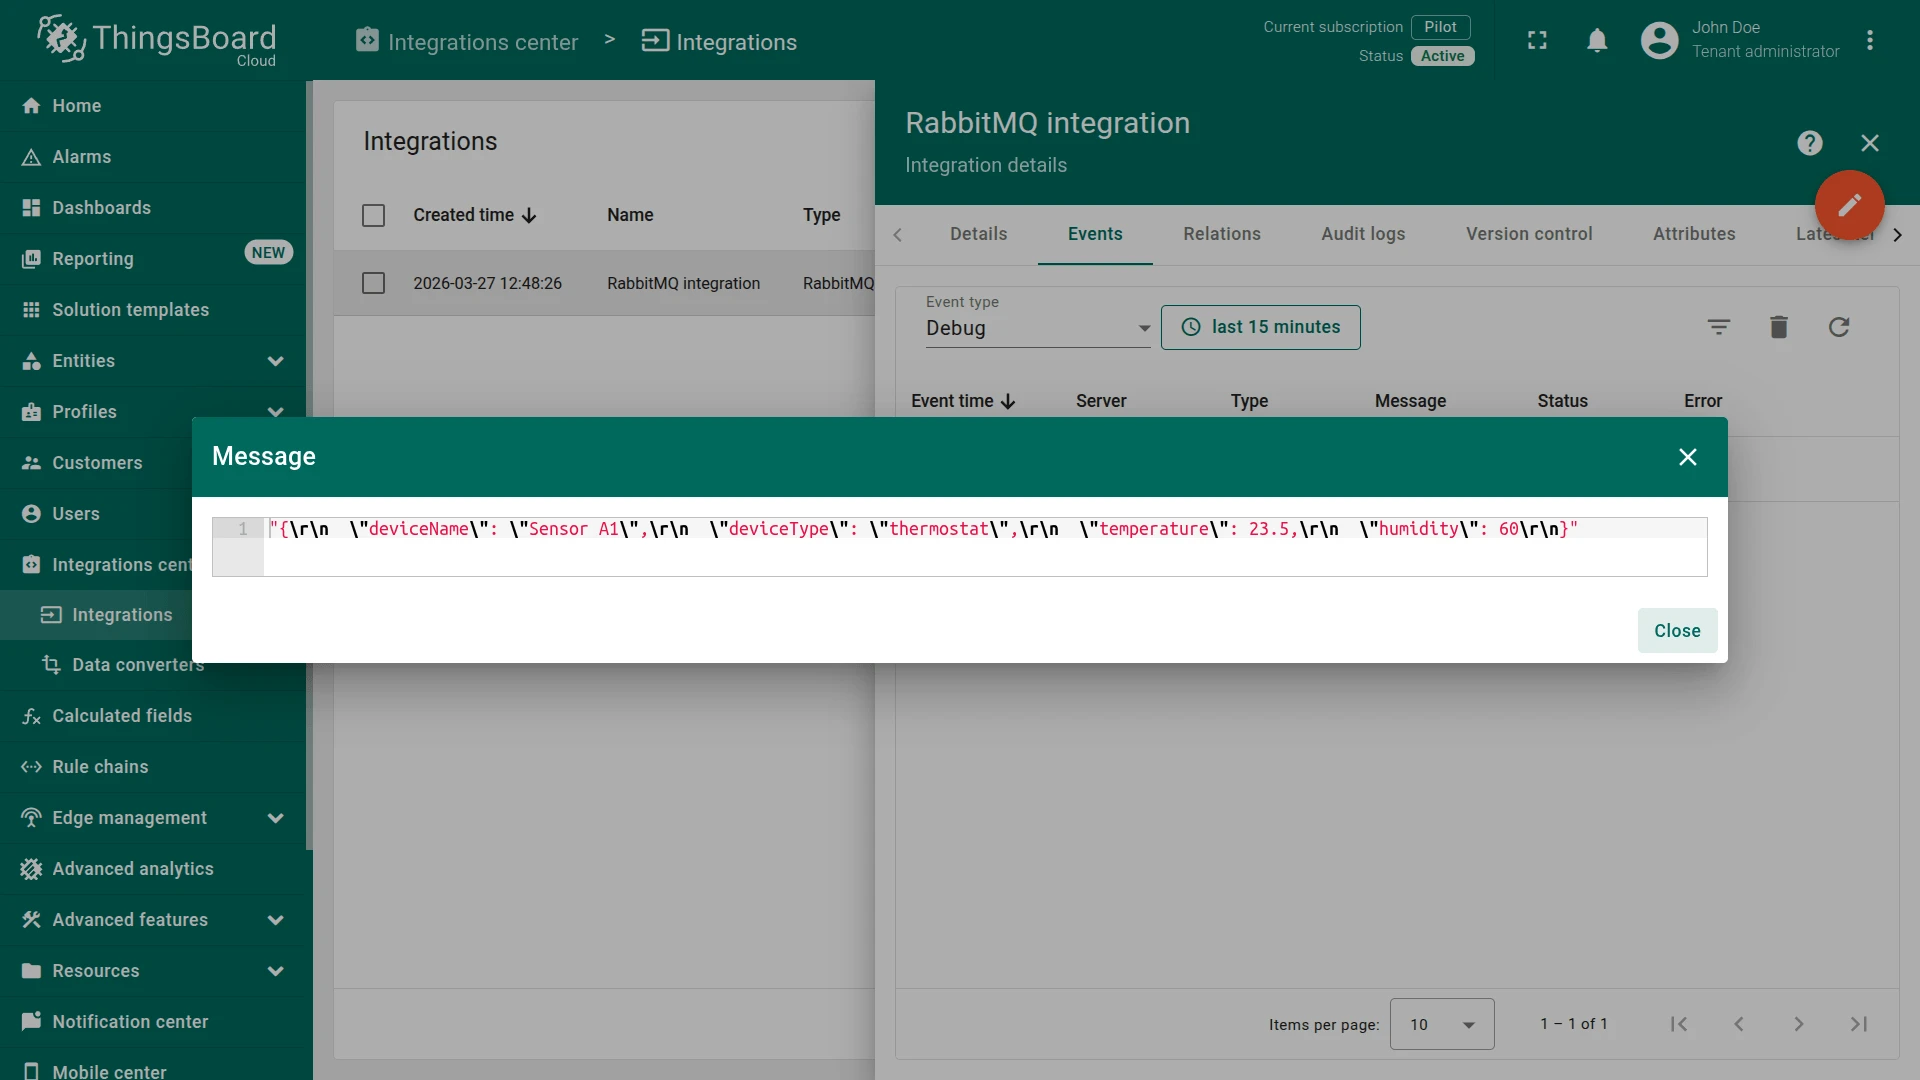
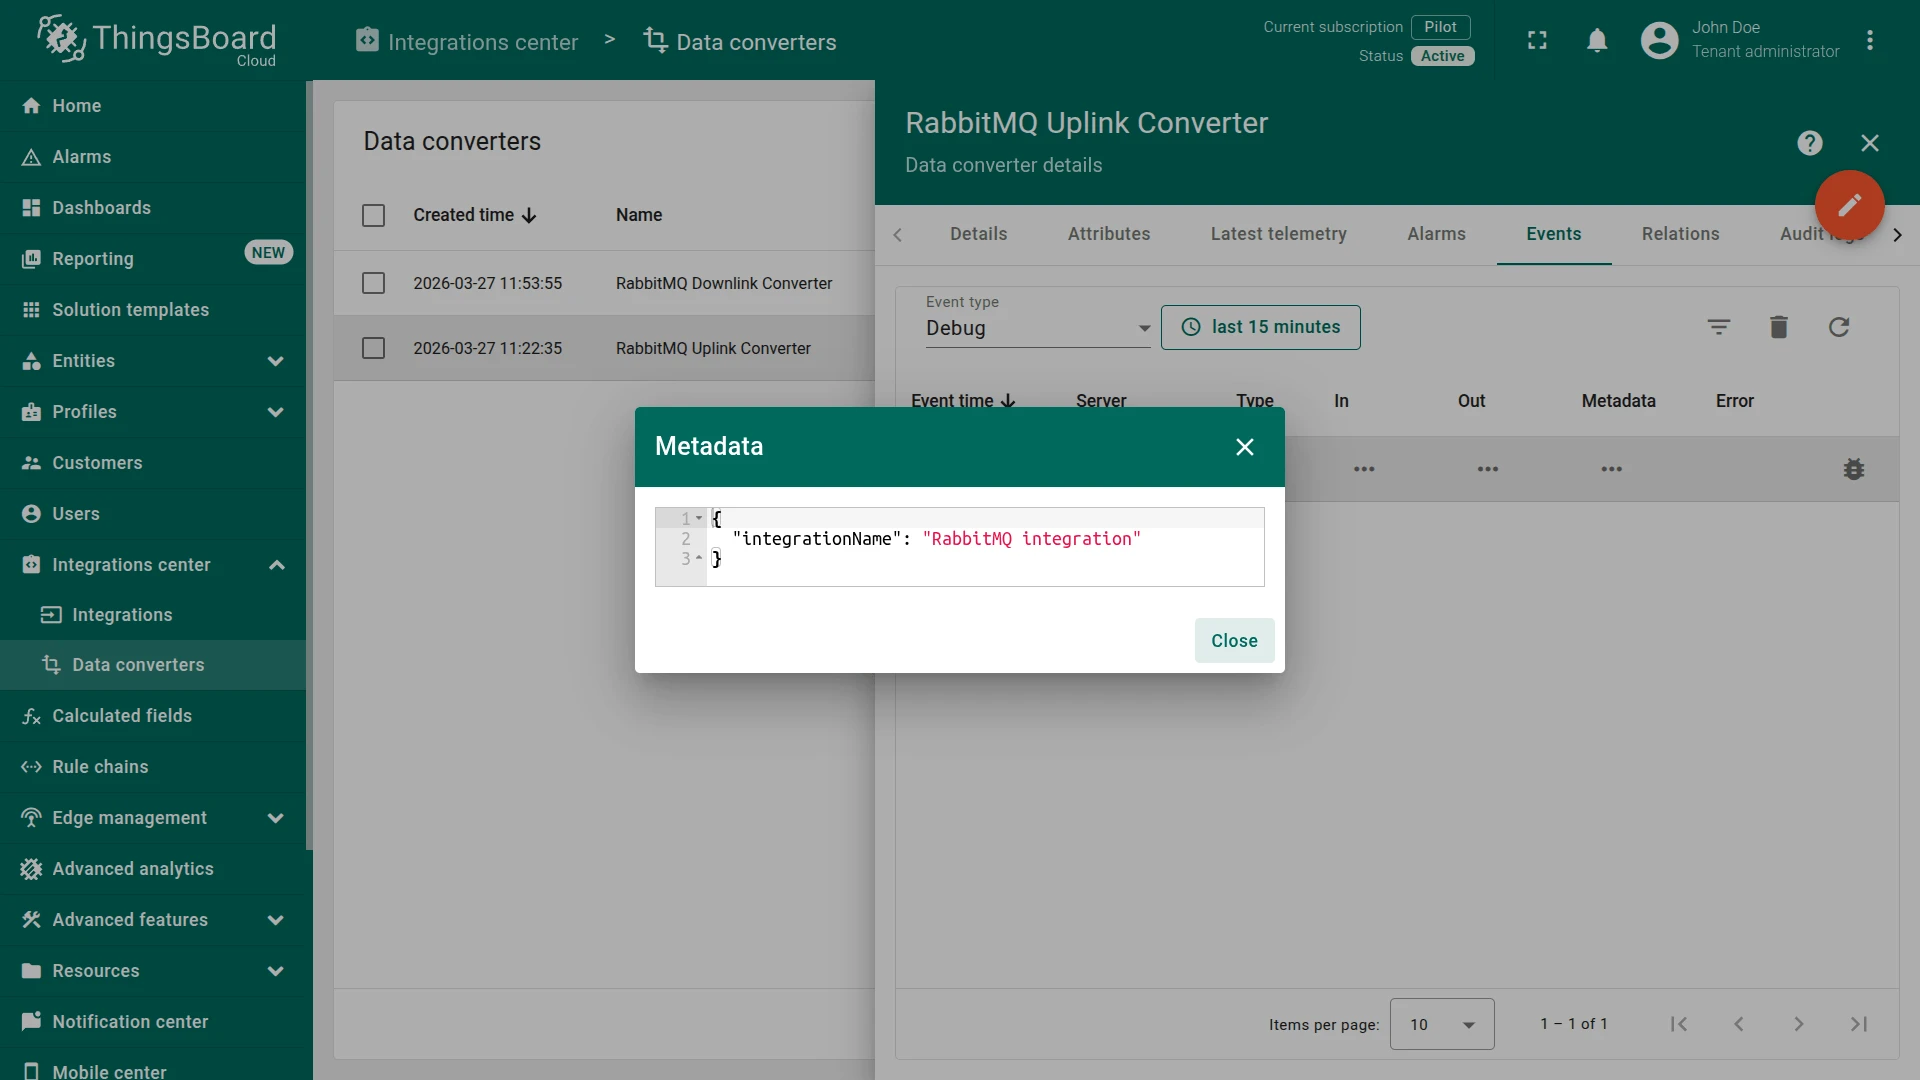
Integration events — go to Integrations center ⇾ Integrations, open the RabbitMQ integration, and check the Events tab. Click … in the Message column to inspect the raw payload consumed from the queue.
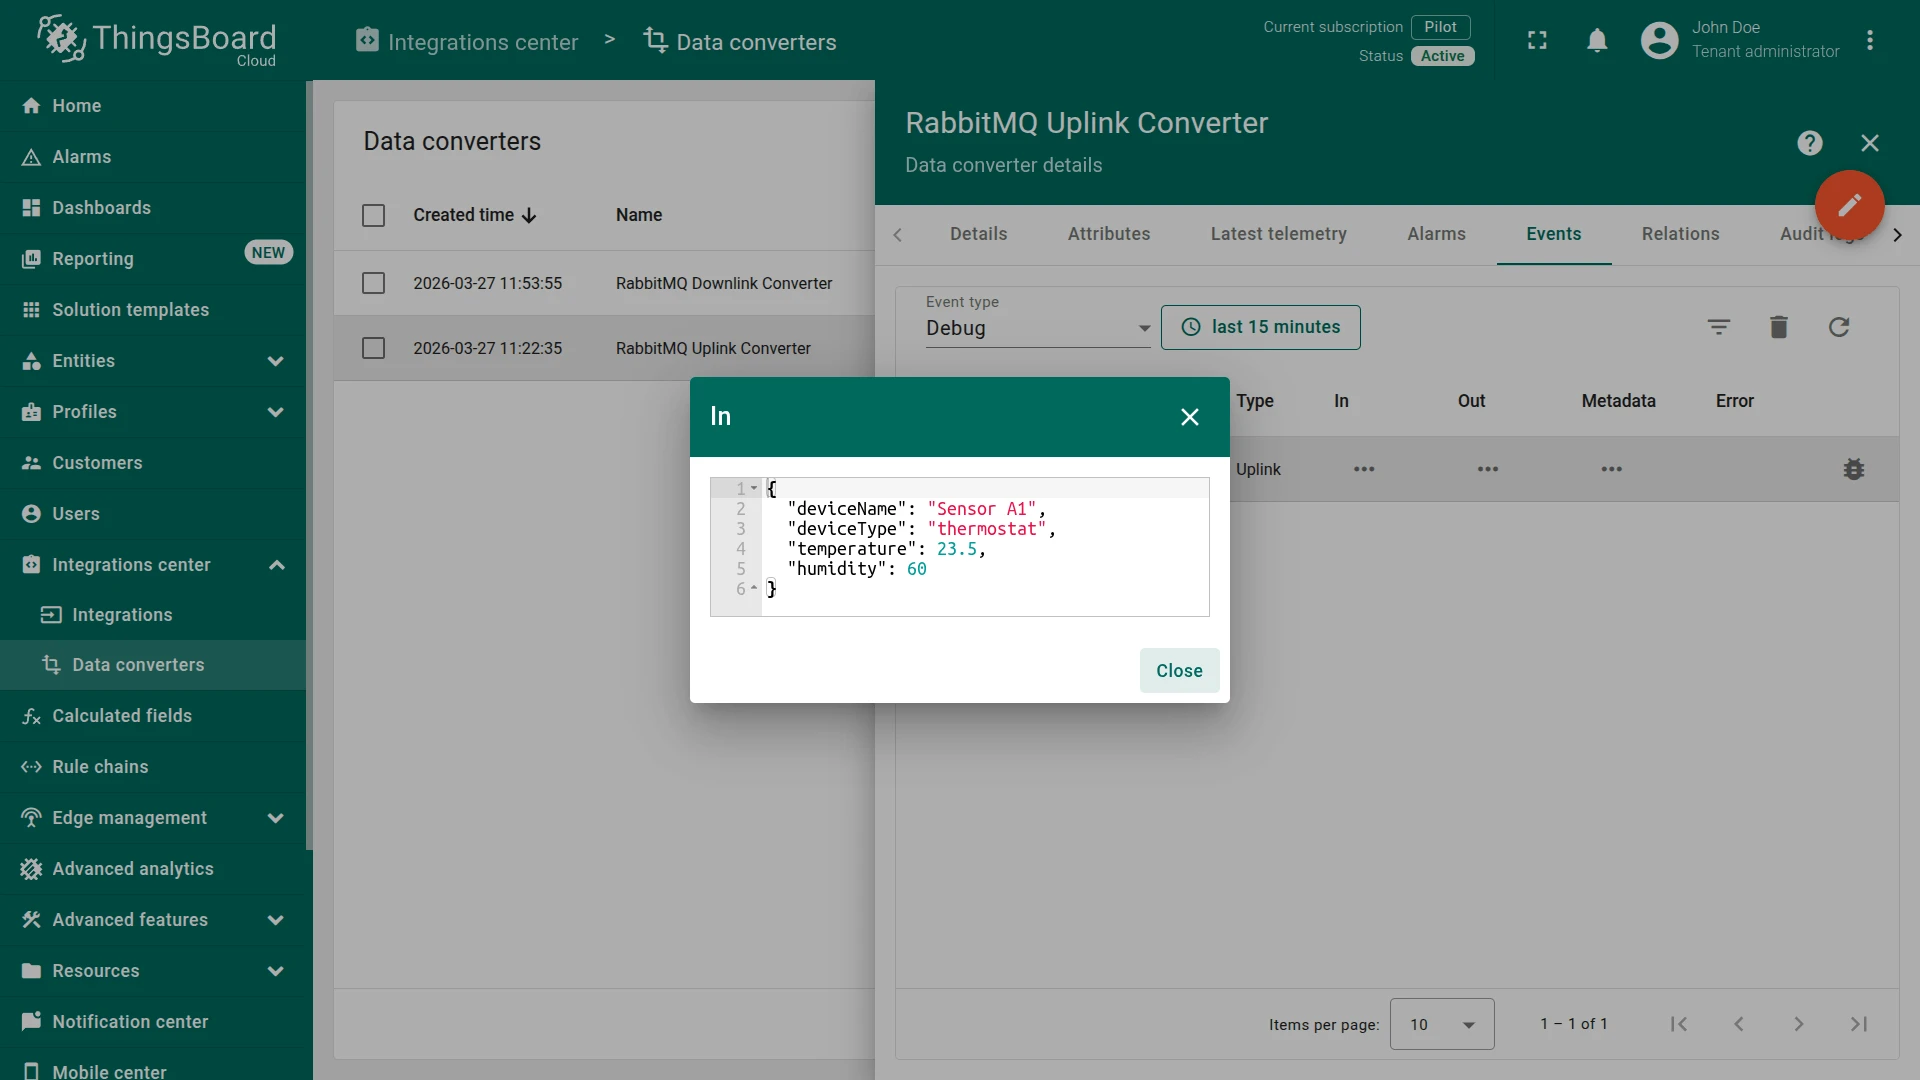
Converter events — go to Integrations center ⇾ Data converters, click the RabbitMQ Uplink Converter, and open its Events tab. Click … in the respective column to inspect each field:
- In — the raw payload passed to the converter.
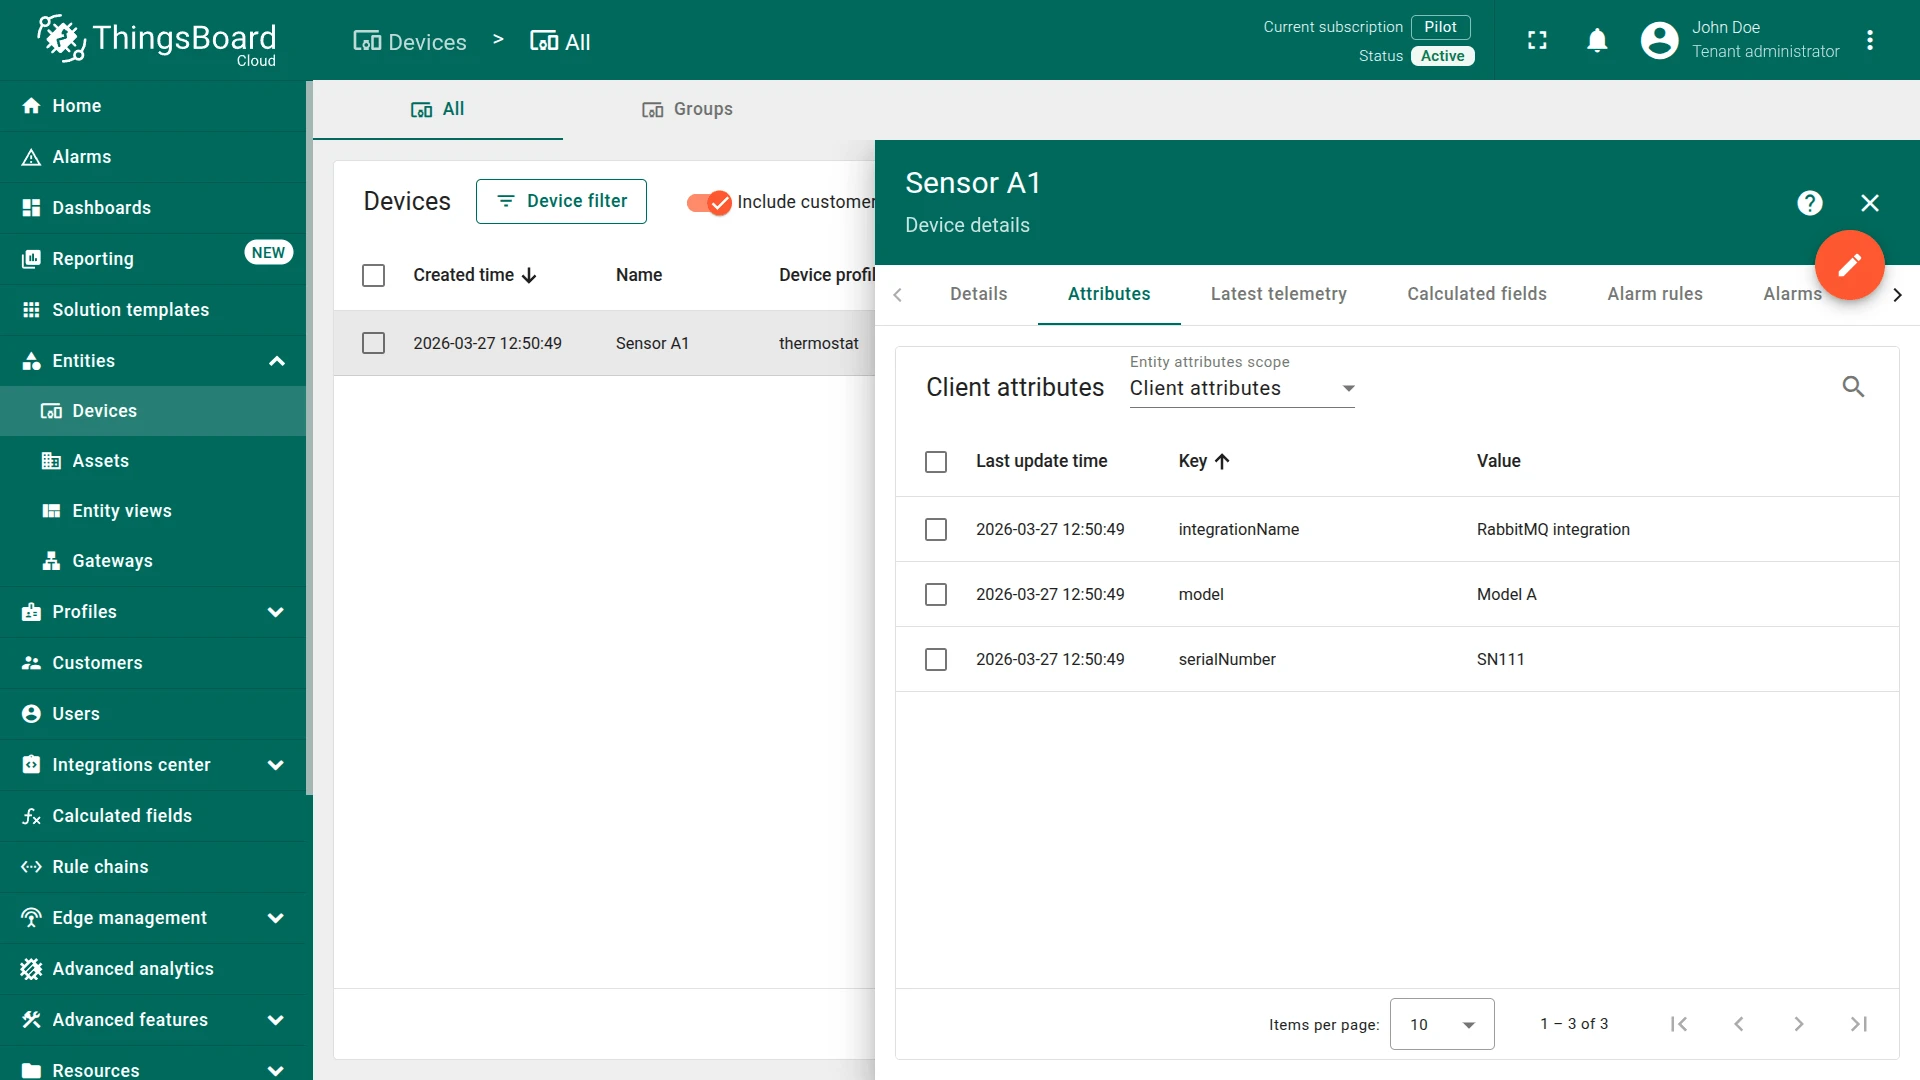
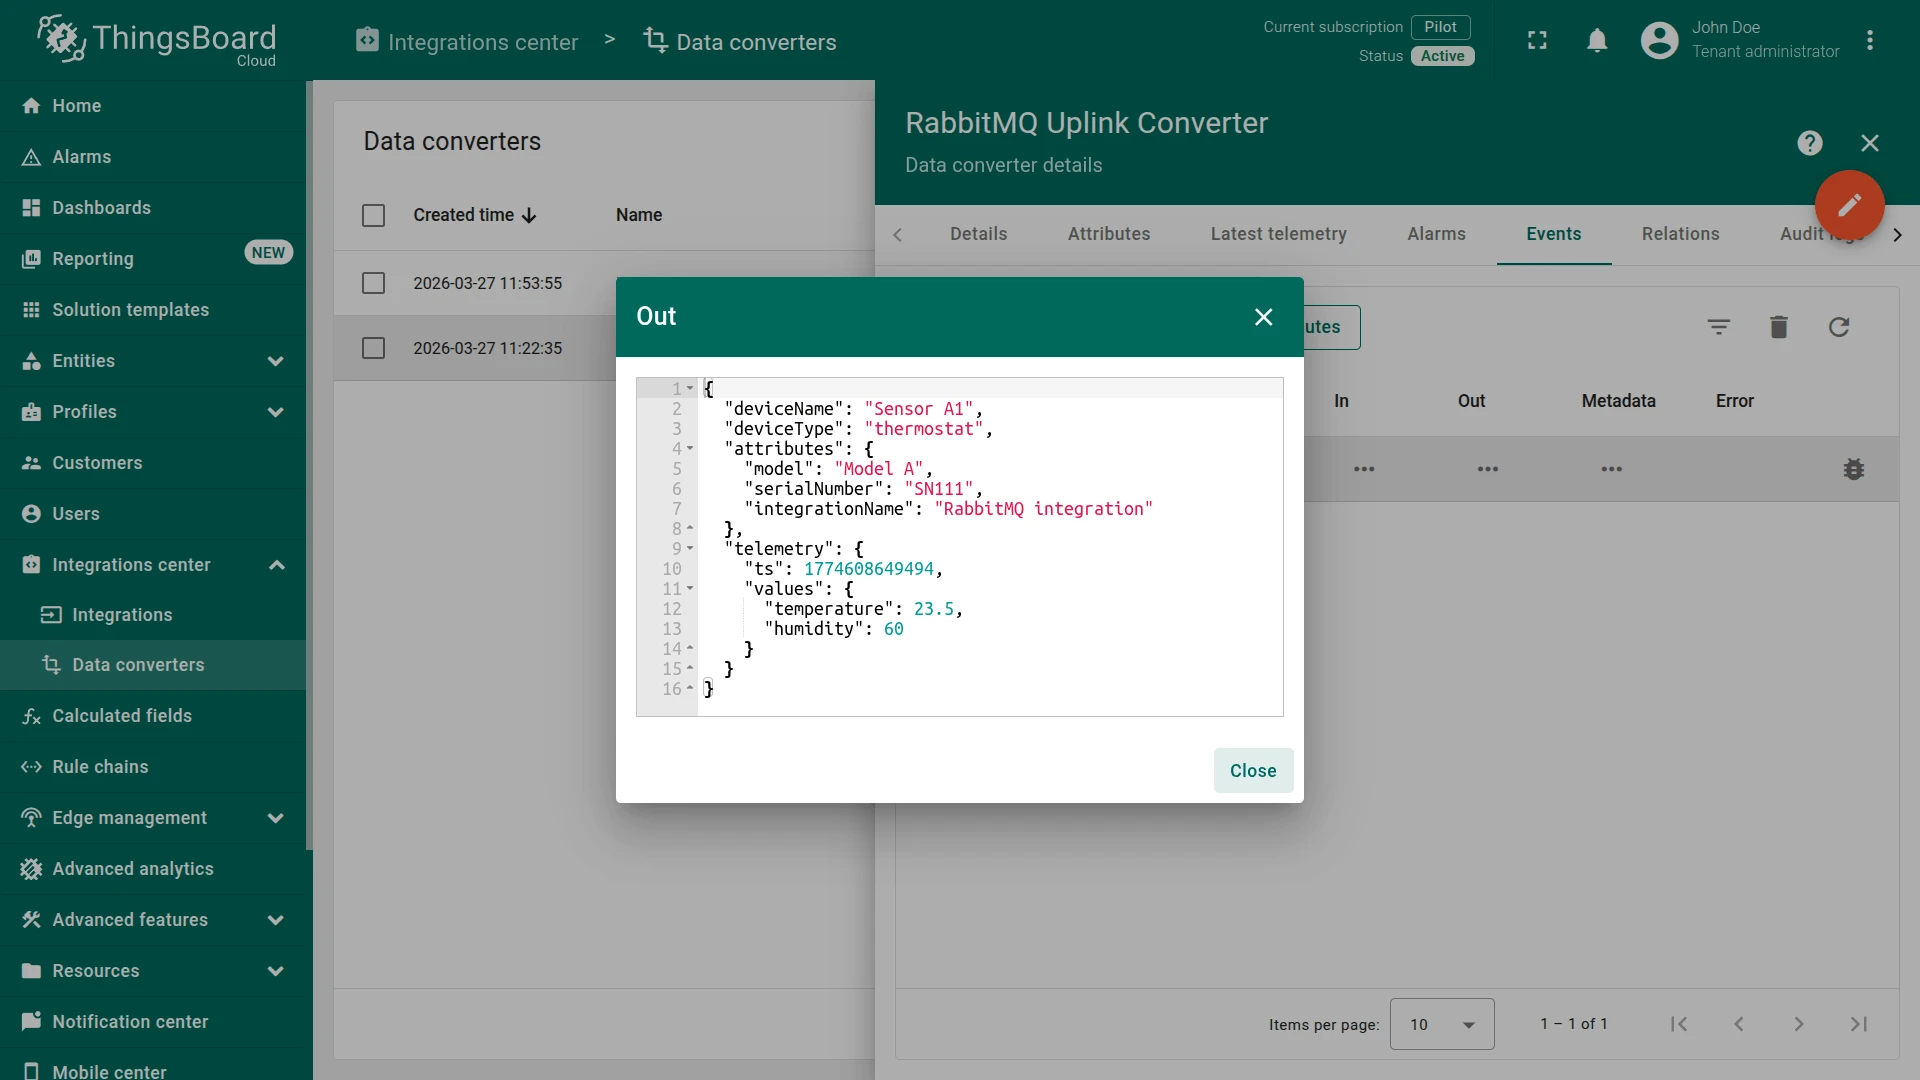
- Out — the decoded result:
deviceName,deviceType,attributes(model, serialNumber, integrationName), andtelemetry(temperature, humidity). - Metadata —
integrationNameinjected by the integration.

Configure downlink
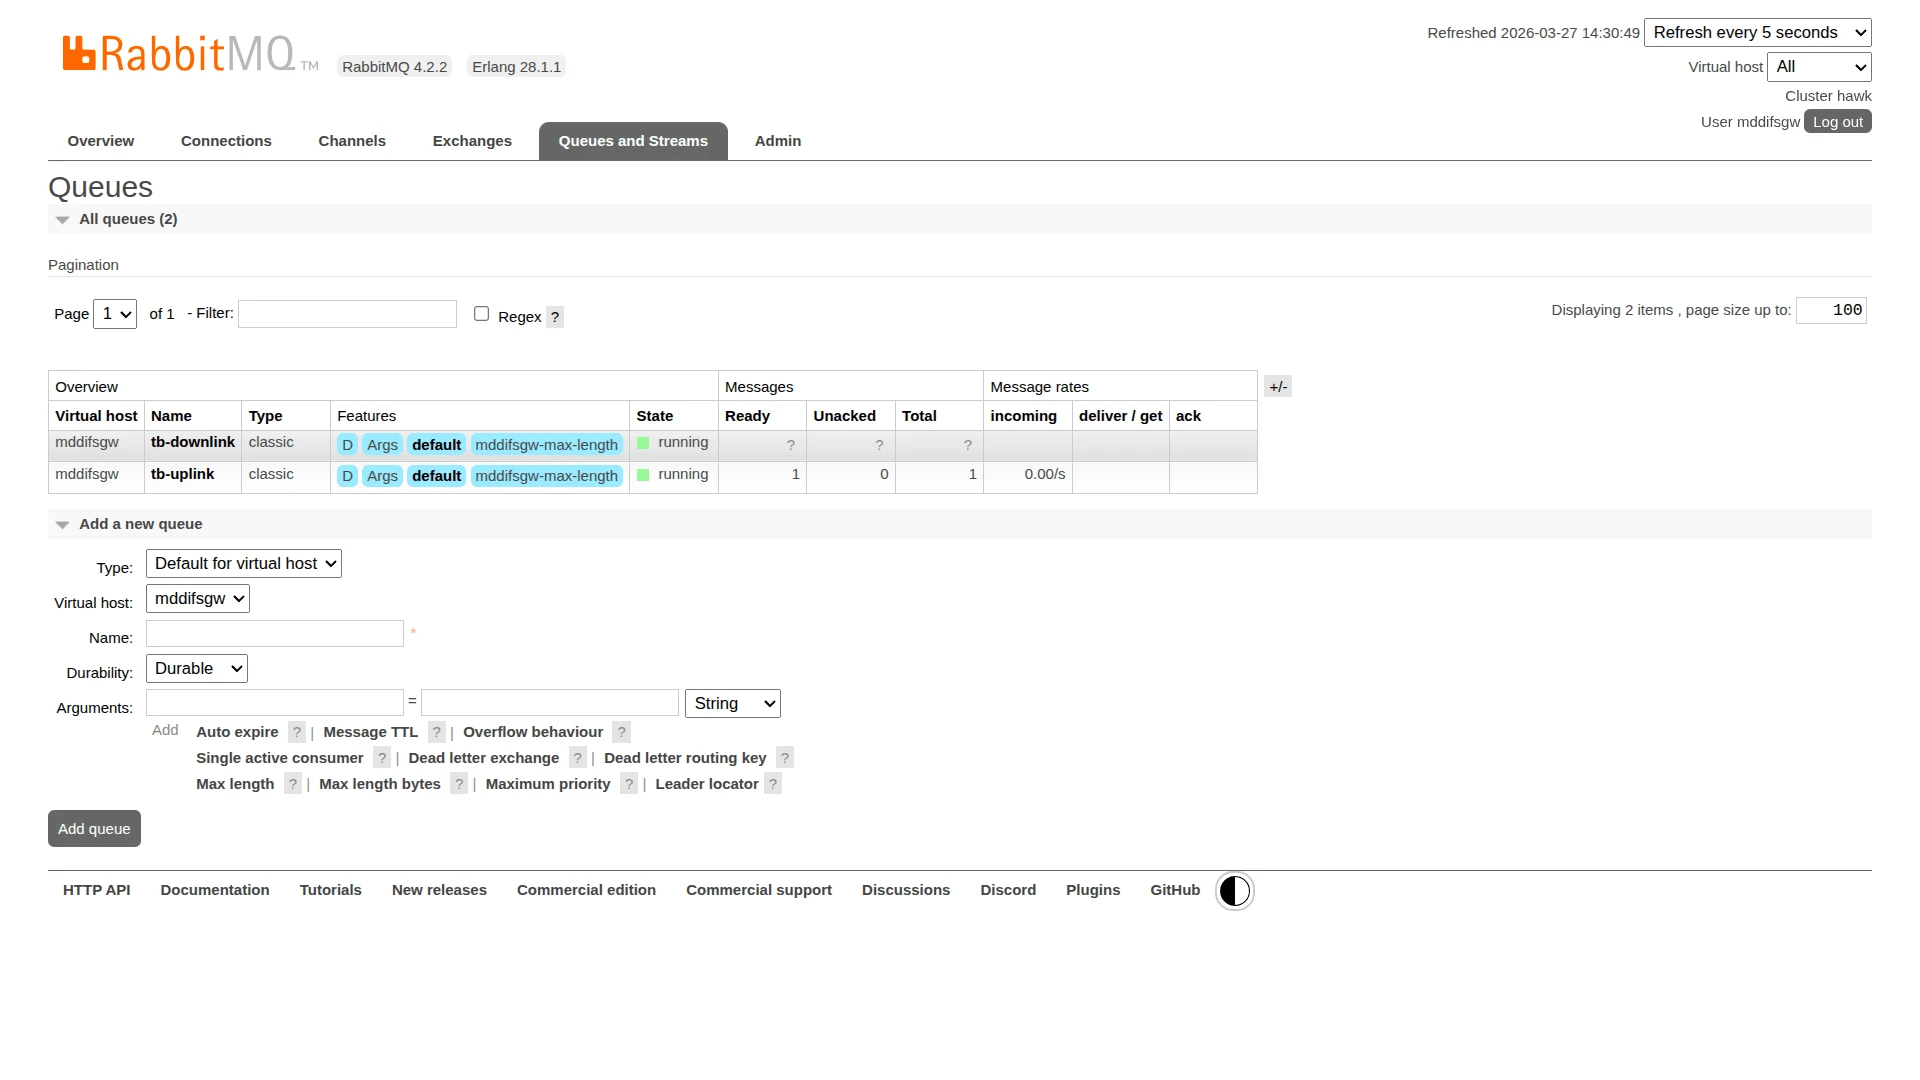
Section titled “Configure downlink”Create the downlink queue
Section titled “Create the downlink queue”In the CloudAMQP Management UI, create a dedicated queue for outgoing messages:
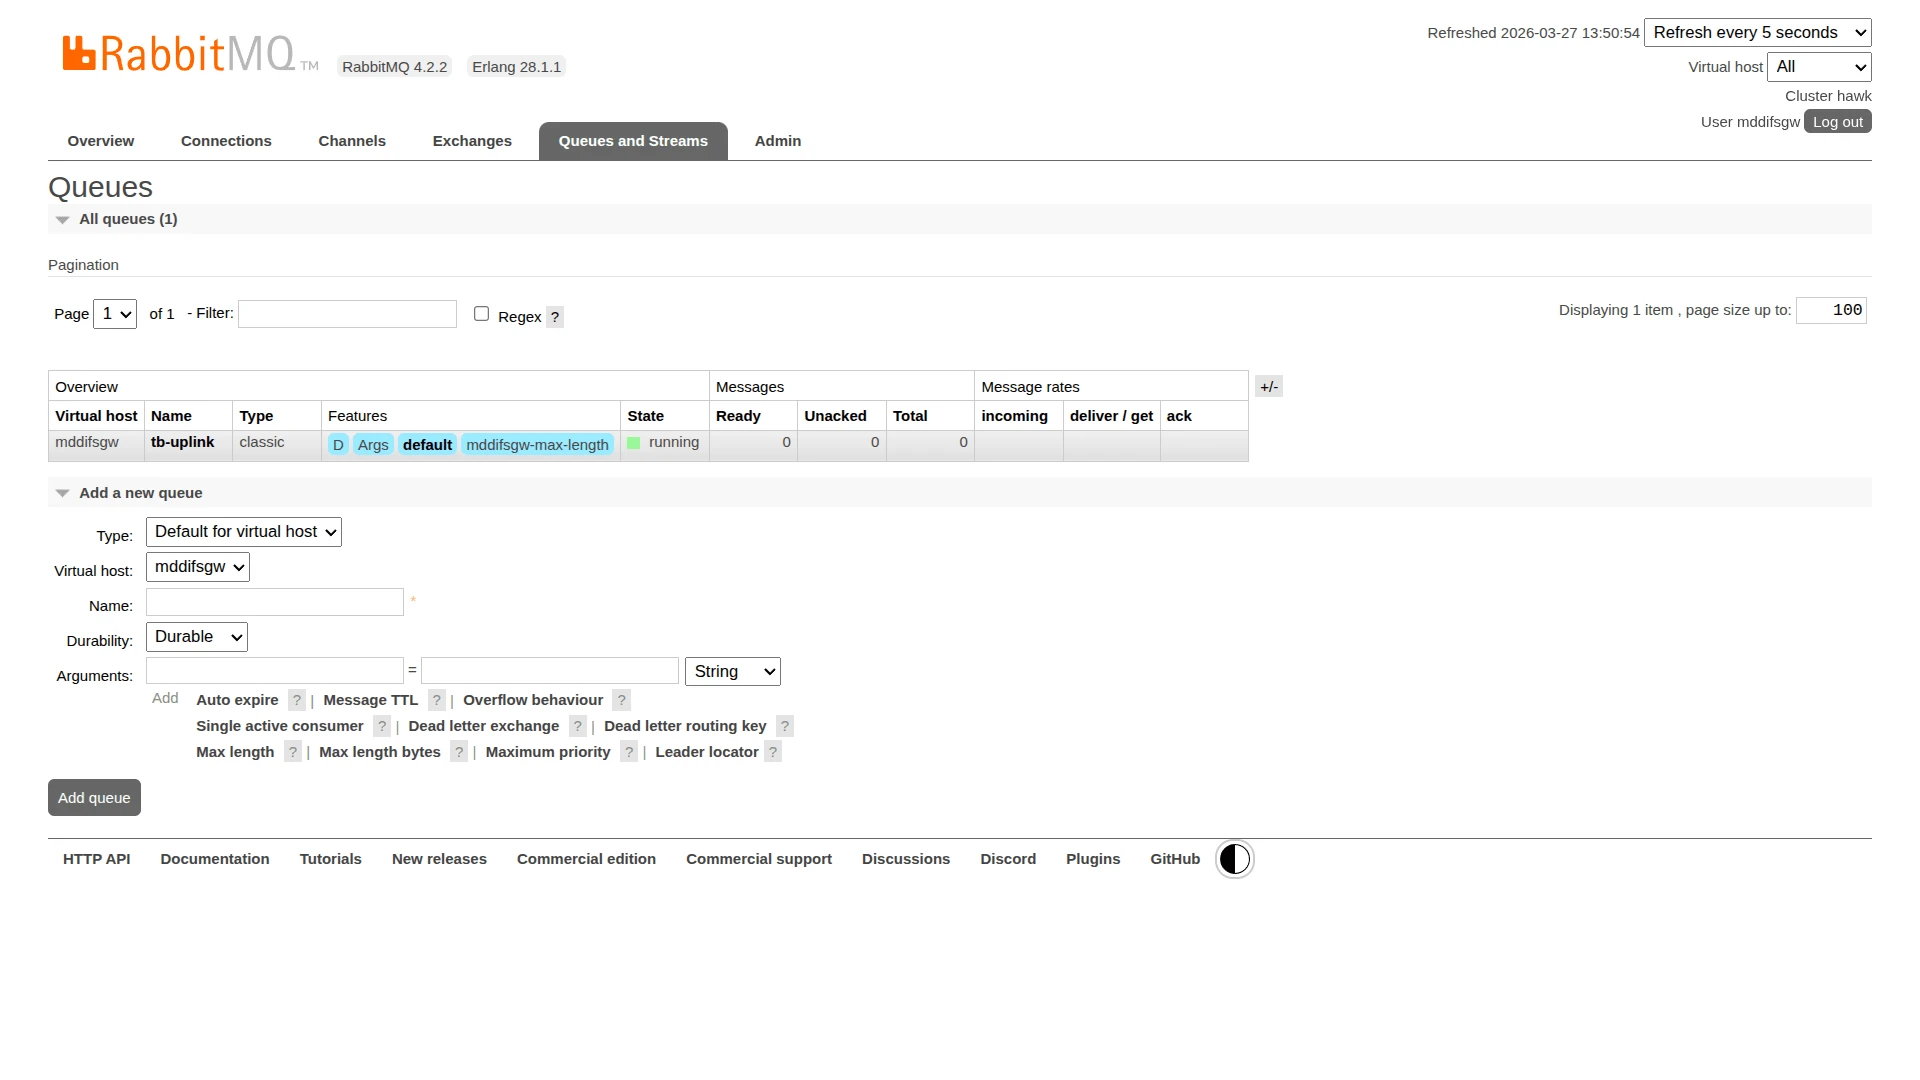
- Go to Queues and Streams and expand Add a new queue.
- Keep Type as Default for virtual host and Durability as Durable.
- Enter
tb-downlinkas the Name and click Add queue.
Configure the integration
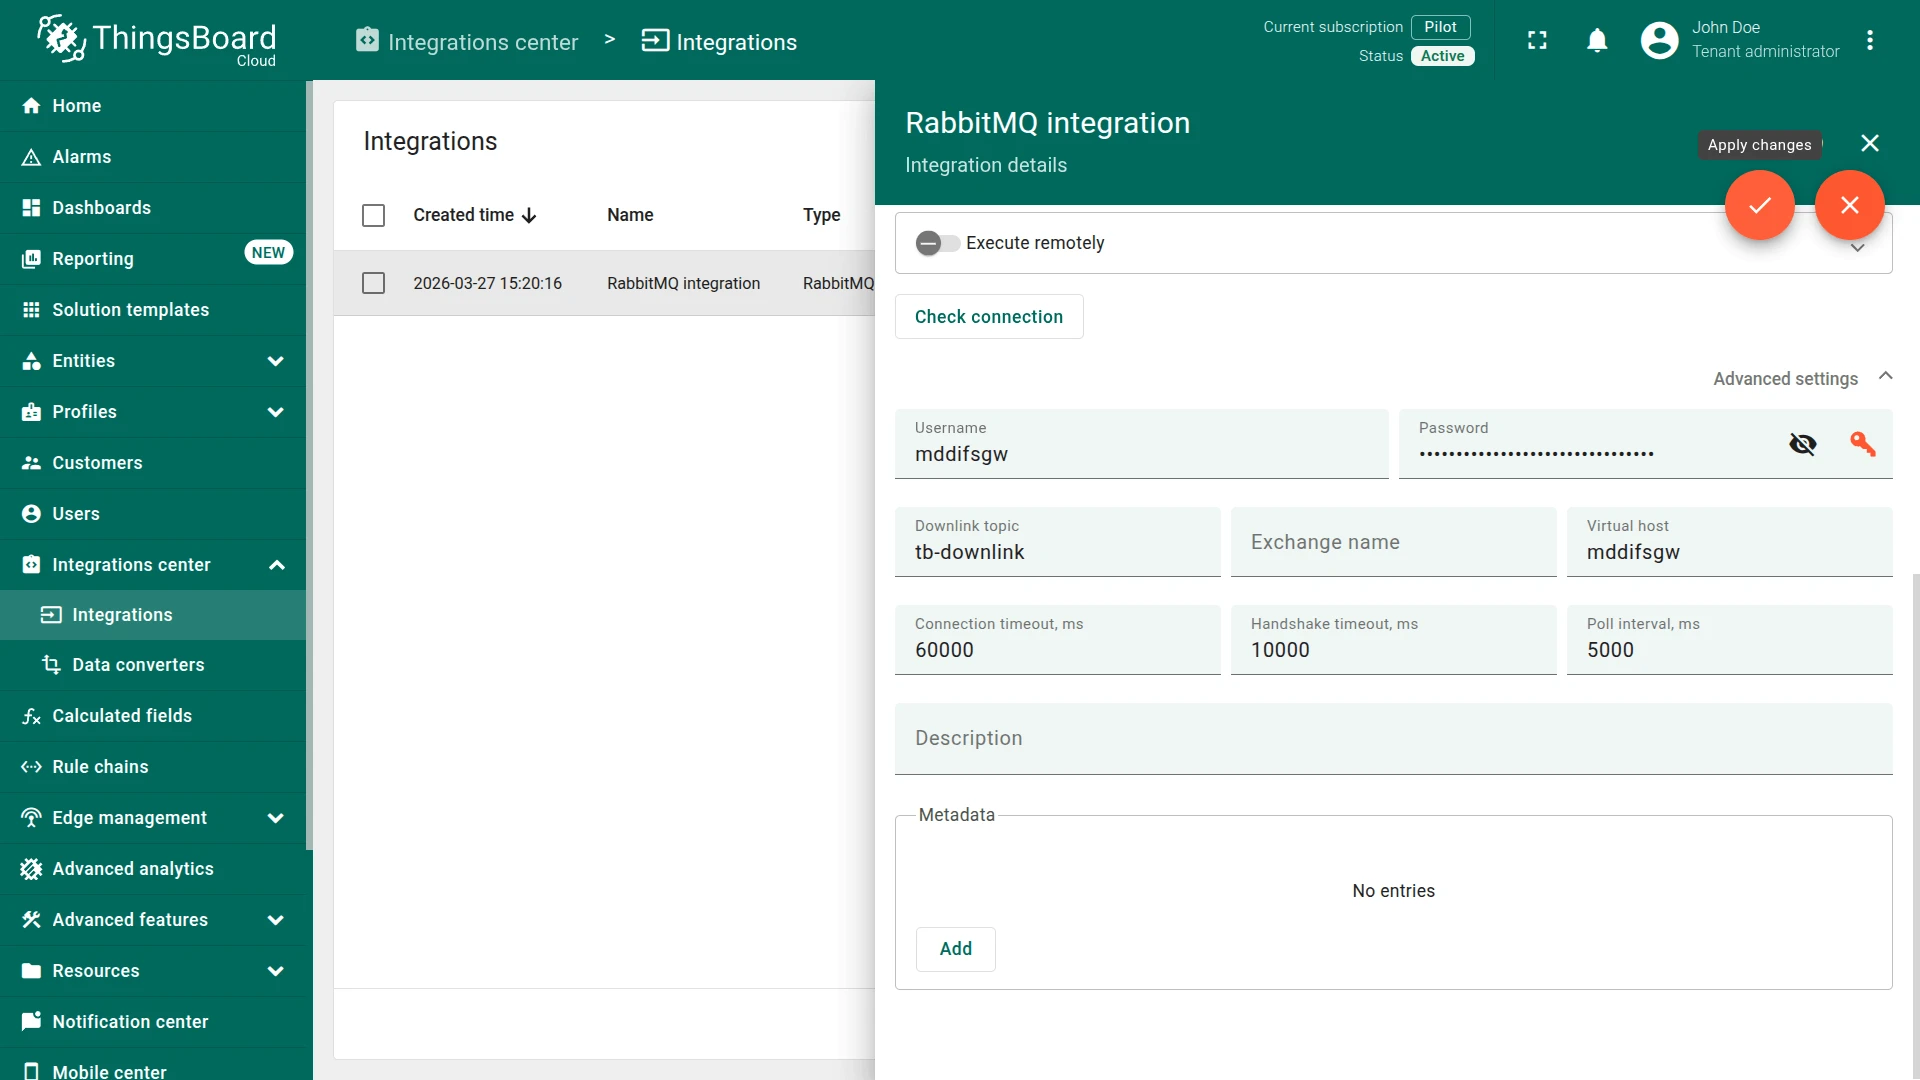
Section titled “Configure the integration”Open the RabbitMQ integration and click the edit icon (pencil). Verify that a Downlink data converter is attached, then expand Advanced settings and set:
- Downlink topic —
tb-downlink(used as the routing key when publishing downlink messages). - Exchange name — leave empty to use the default exchange.
Click Apply changes.
Wire the rule chain
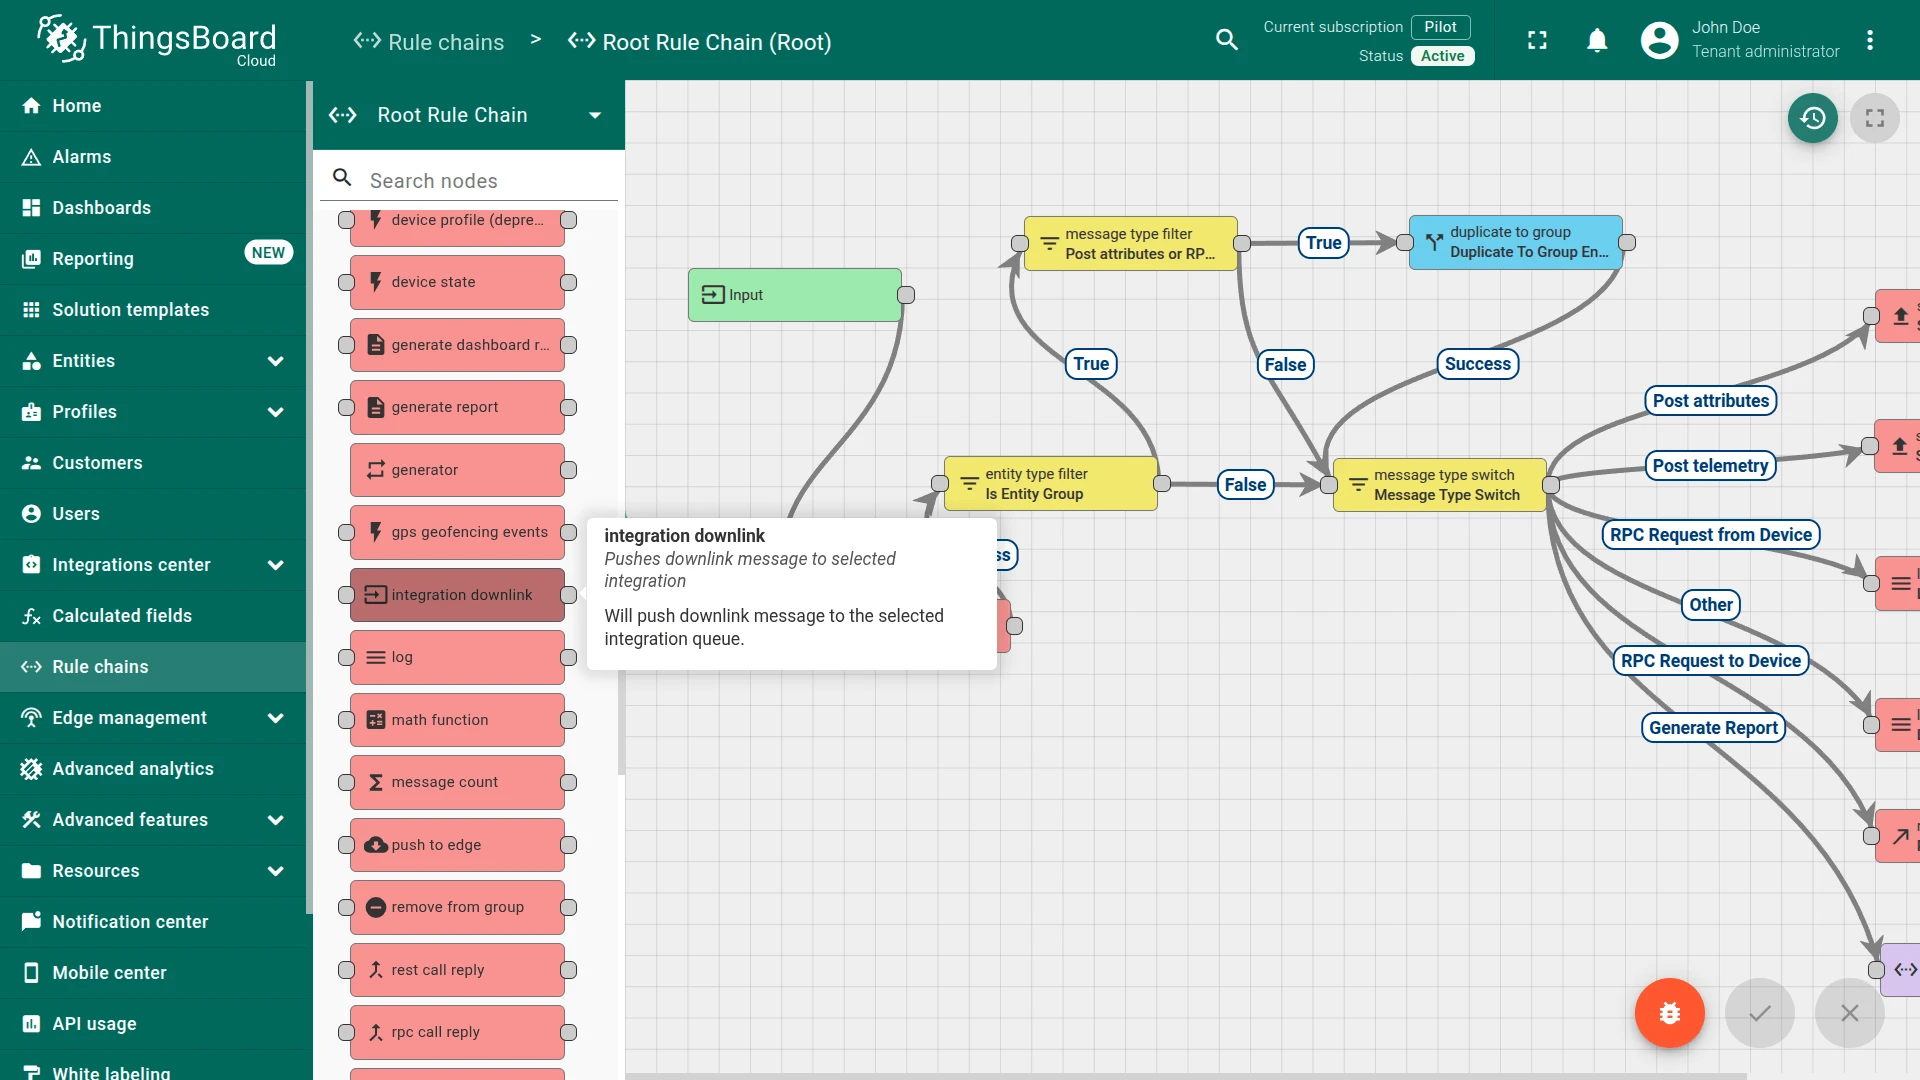
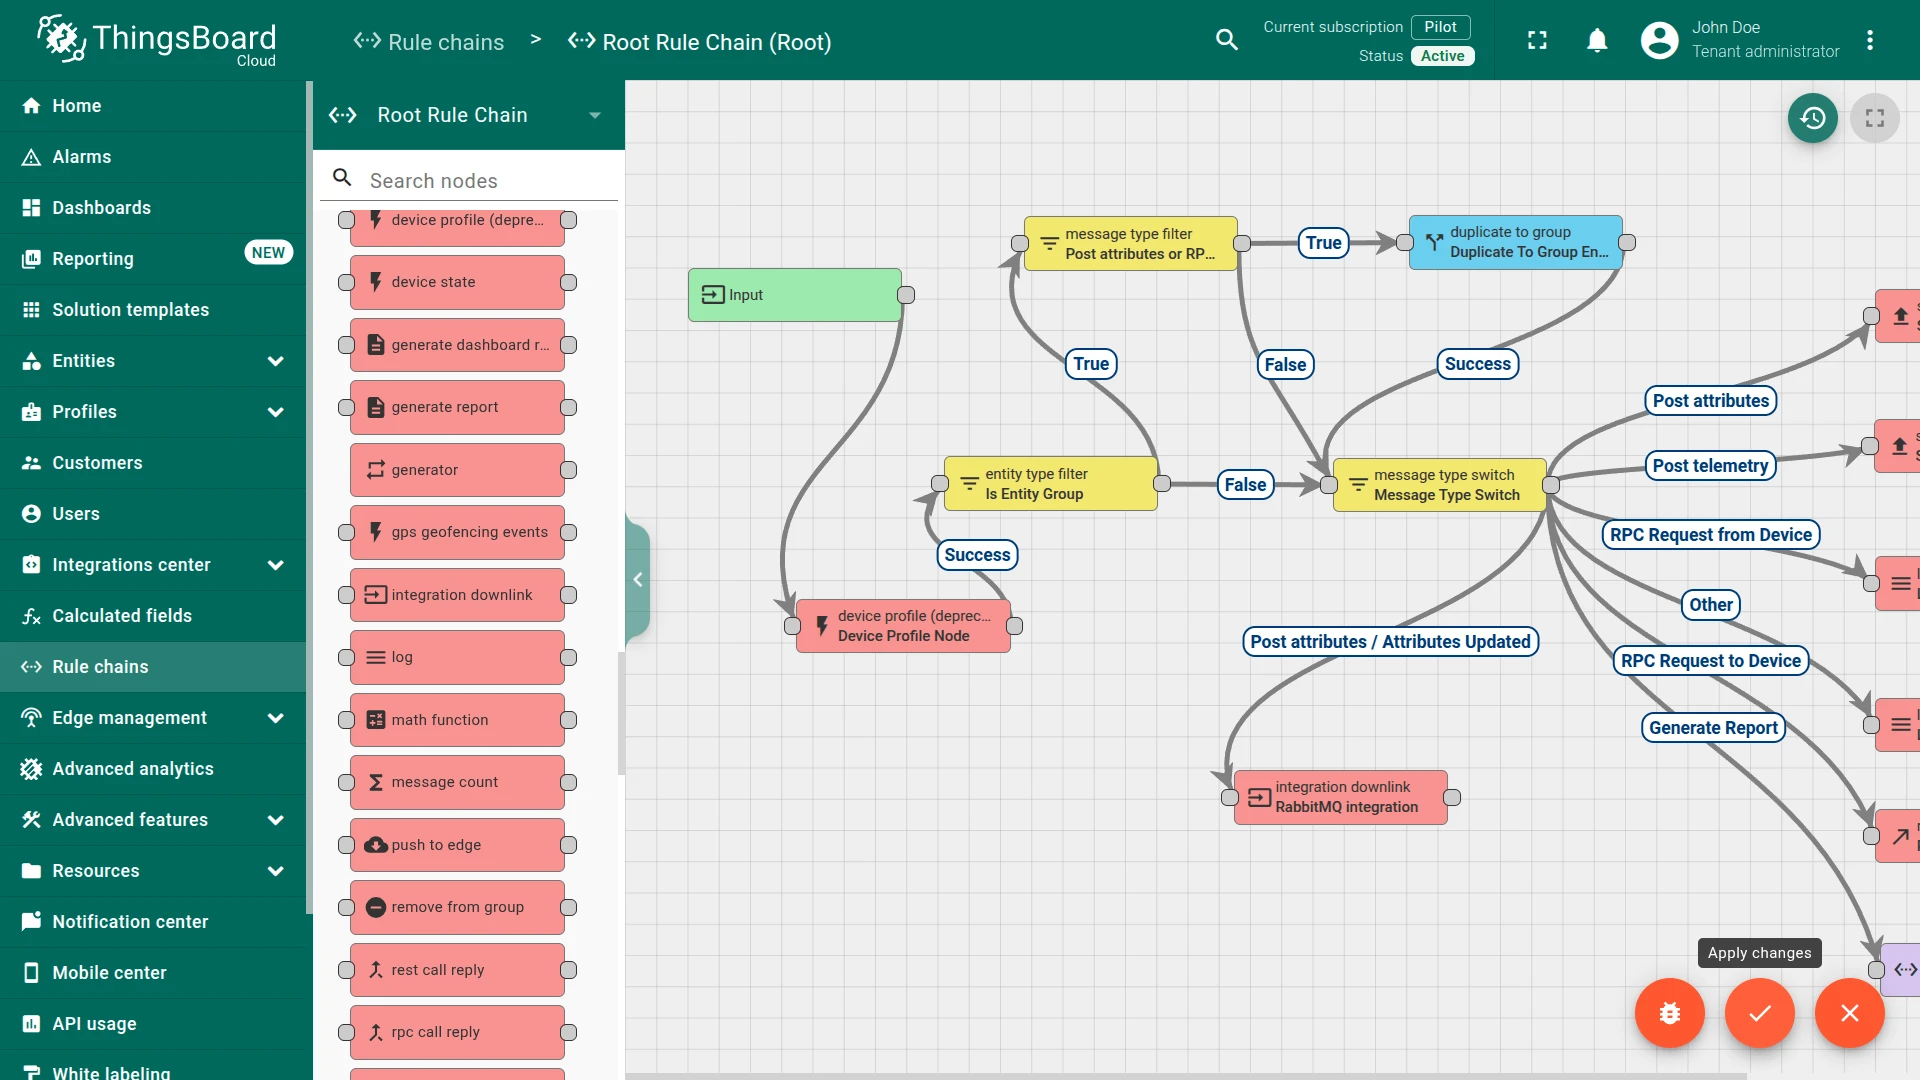
Section titled “Wire the rule chain”- Go to Rule chains and open the Root Rule Chain. Click the edit icon.
- Find Integration Downlink in the node panel and drag it onto the canvas.
- Enter a name (e.g.
RabbitMQ Integration), select RabbitMQ integration, and click Add. - Connect the Message Type Switch node to the new node via the Post attributes / Attributes Updated relation.
- Click Apply changes.

Test the downlink
Section titled “Test the downlink”Trigger a downlink by adding a shared attribute to device Sensor A1:
- Go to Entities ⇾ Devices and open Sensor A1.
- Navigate to the Attributes tab, switch to Shared attributes, and click +.
- Enter key
powerStateand valueon, then click Add.
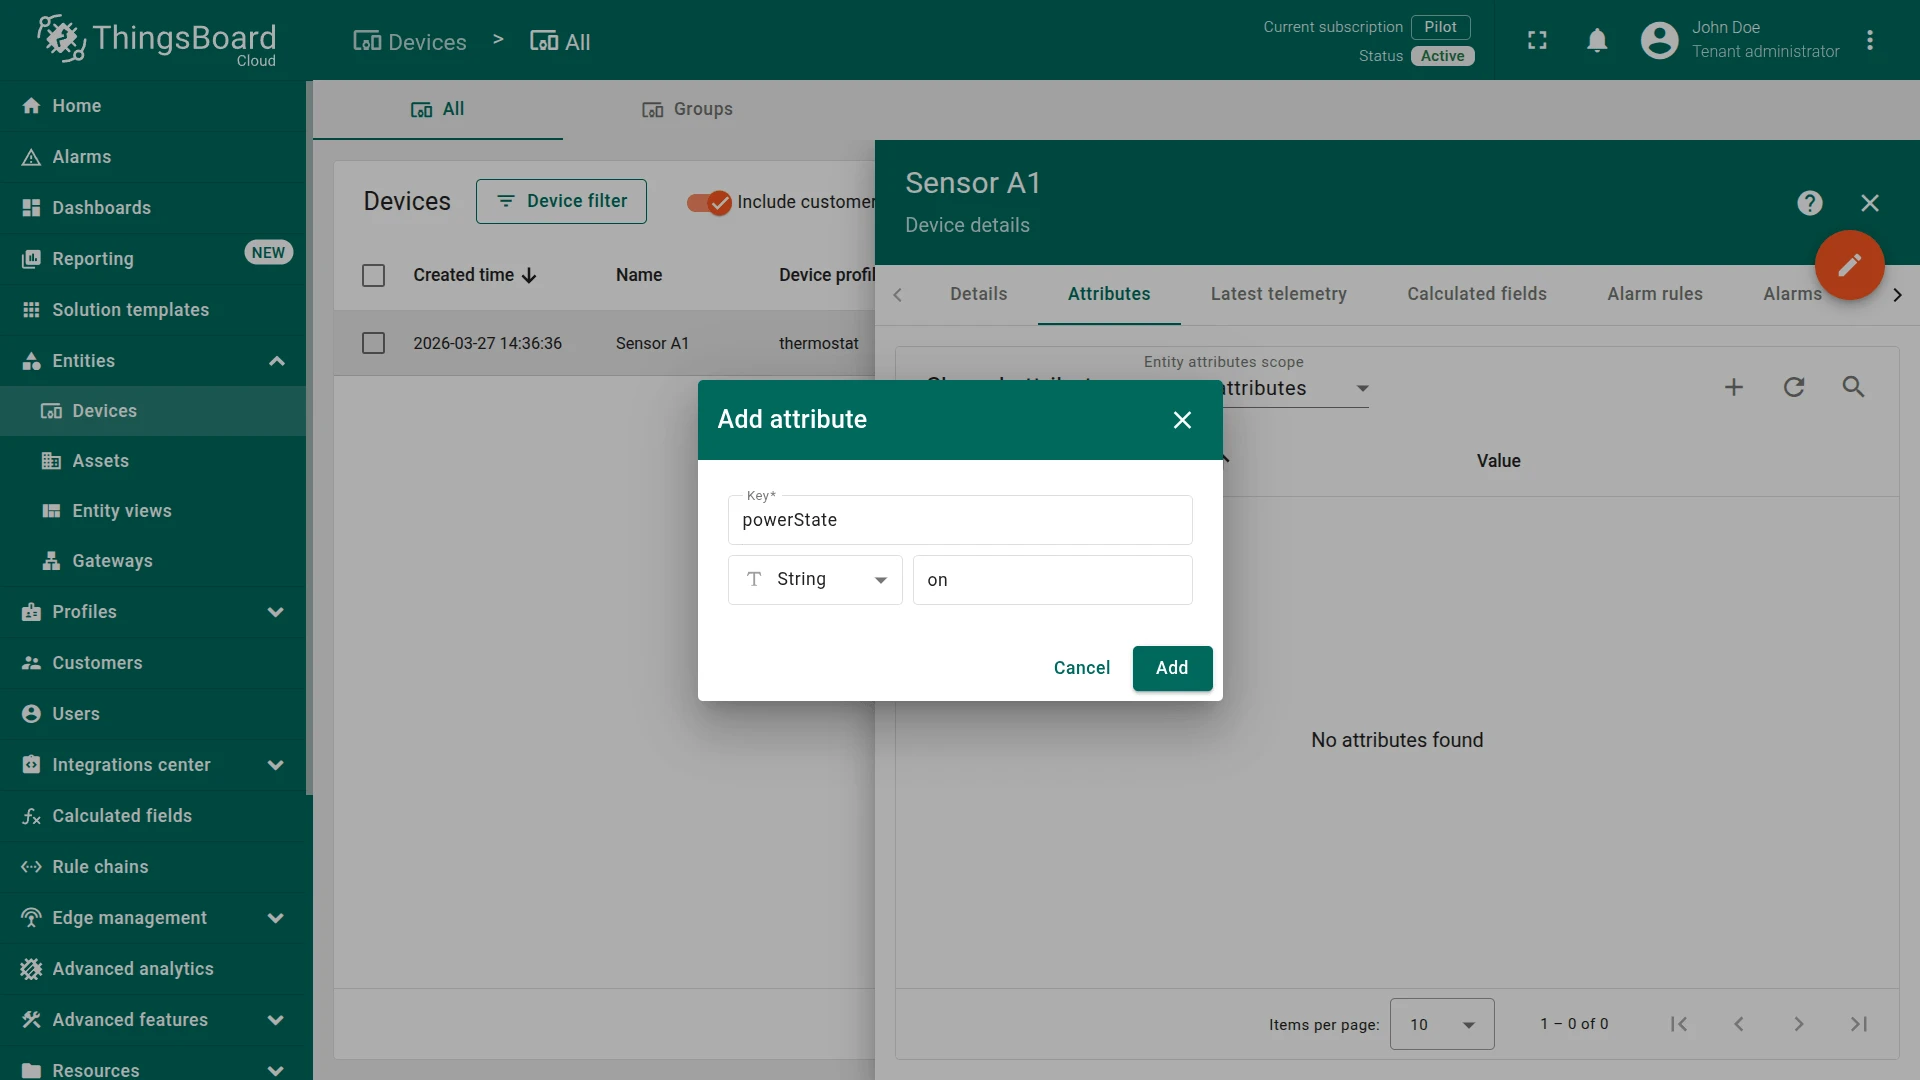
Adding the attribute fires the rule chain, which forwards the message through the Integration Downlink node to the RabbitMQ integration. The downlink converter encodes the message and ThingsBoard publishes it to the tb-downlink queue via the default exchange.
Verify in CloudAMQP
Section titled “Verify in CloudAMQP”In the Management UI at https://hawk.rmq.cloudamqp.com/, go to Queues and Streams and open the tb-downlink queue. Scroll to Get messages, set Ack mode to Nack message requeue true (peek without consuming), and click Get Message(s).
The result shows:
- Exchange —
(AMQP default) - Routing Key —
tb-downlink - Payload — the downlink converter output, e.g.
{"powerState":"on"}

Troubleshooting
Section titled “Troubleshooting”Integration status is not Active
- Confirm the Host and Port are reachable from the ThingsBoard server.
- Verify the Username and Password in Advanced settings are correct.
- Check that the Virtual host matches the one on the broker (default
/). - Ensure the queue exists on the broker before the integration tries to connect.
Messages are not appearing in ThingsBoard
- Check the integration Events tab for channel-level errors — a flag mismatch is shown there.
- Verify the Durable, Exclusive, and Auto delete flags match the queue’s original declaration.
- Confirm the publisher is routing messages to the correct queue (check bindings in the Management UI).
- Use the Converter Events tab to inspect the raw In payload — verify the uplink converter handles the actual message format.
Downlink messages are not published
- Confirm the downlink converter is attached to the integration (edit the integration and check step 4).
- Verify the Integration Downlink rule node is correctly connected in the rule chain.
- Check the rule node’s Events tab for processing errors.
See also
Section titled “See also”Was this helpful?