Only Professional Edition supports Platform Integrations feature.
Use ThingsBoard Cloud or install your own platform instance.
- Overview
- Create IoT hub using the Azure portal.
- Add Azure Event Hub integration
- Test it up!
- Advanced usage: create Downlink converter
- Advanced usage: Check Downlink using Azure IoT Hub integration
- Conclusion
- Next steps
Overview
Azure Event Hub Integration allows to stream data from Azure Event Hub to ThingsBoard and converts device payloads to the ThingsBoard format.

Create IoT hub using the Azure portal.
First, sign in to the Azure portal.
Create IoT Hub in Azure
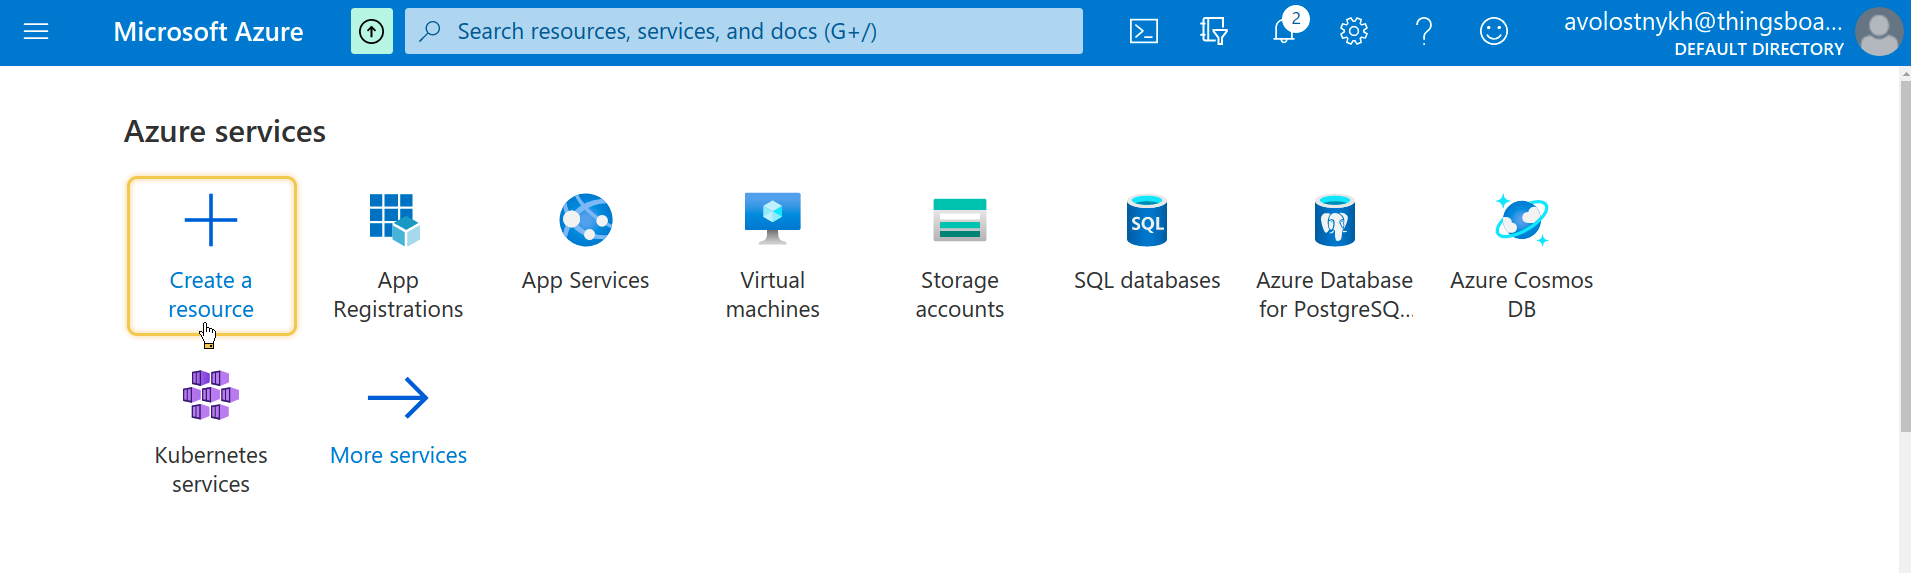
For now, you need to create IoT hub. Here you will create devices and do some other operations. Let’s do this step by step:
- In the Azure portal, click on the “Create a resource” button;
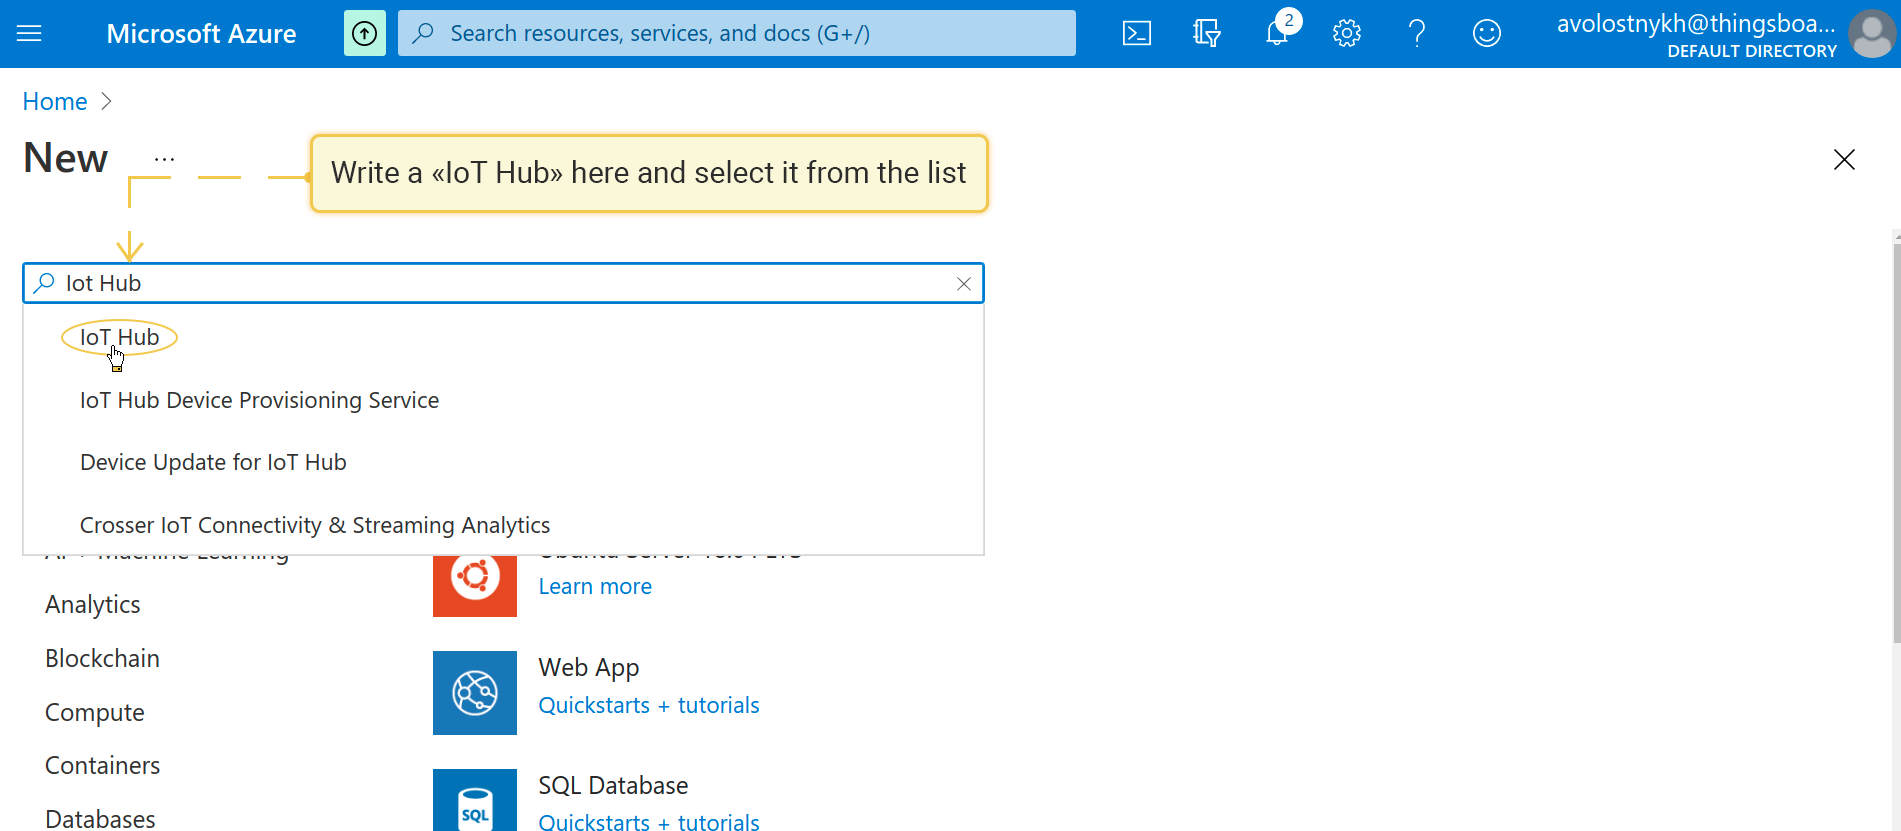
- In the search field, type “IoT Hub” and select the matching item from the list;
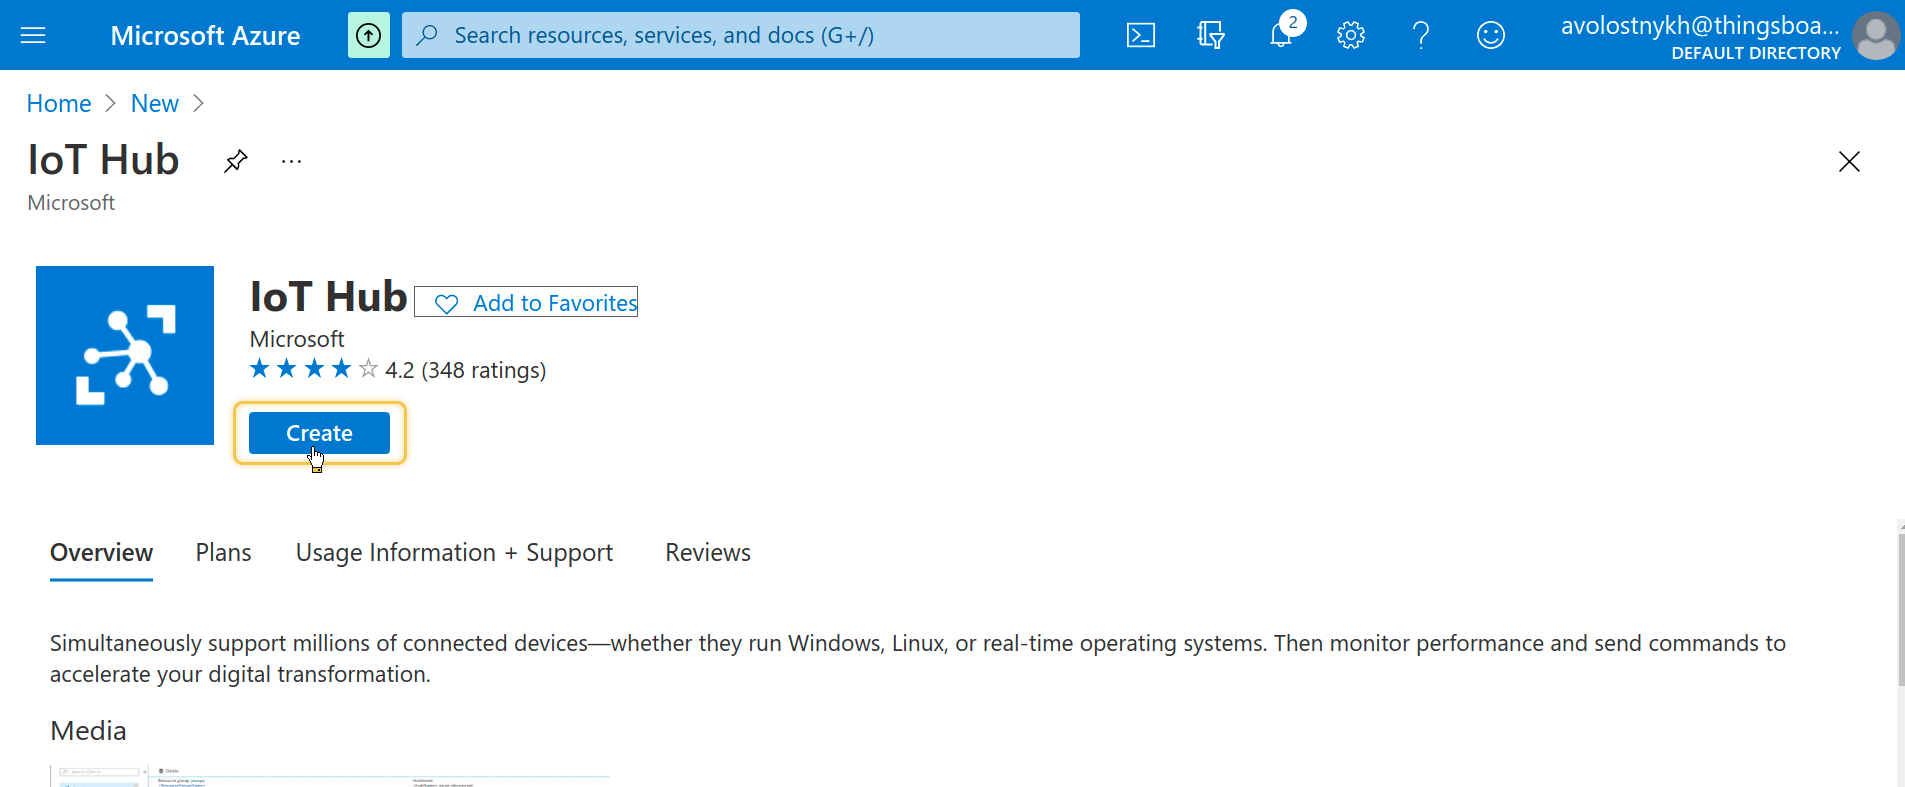
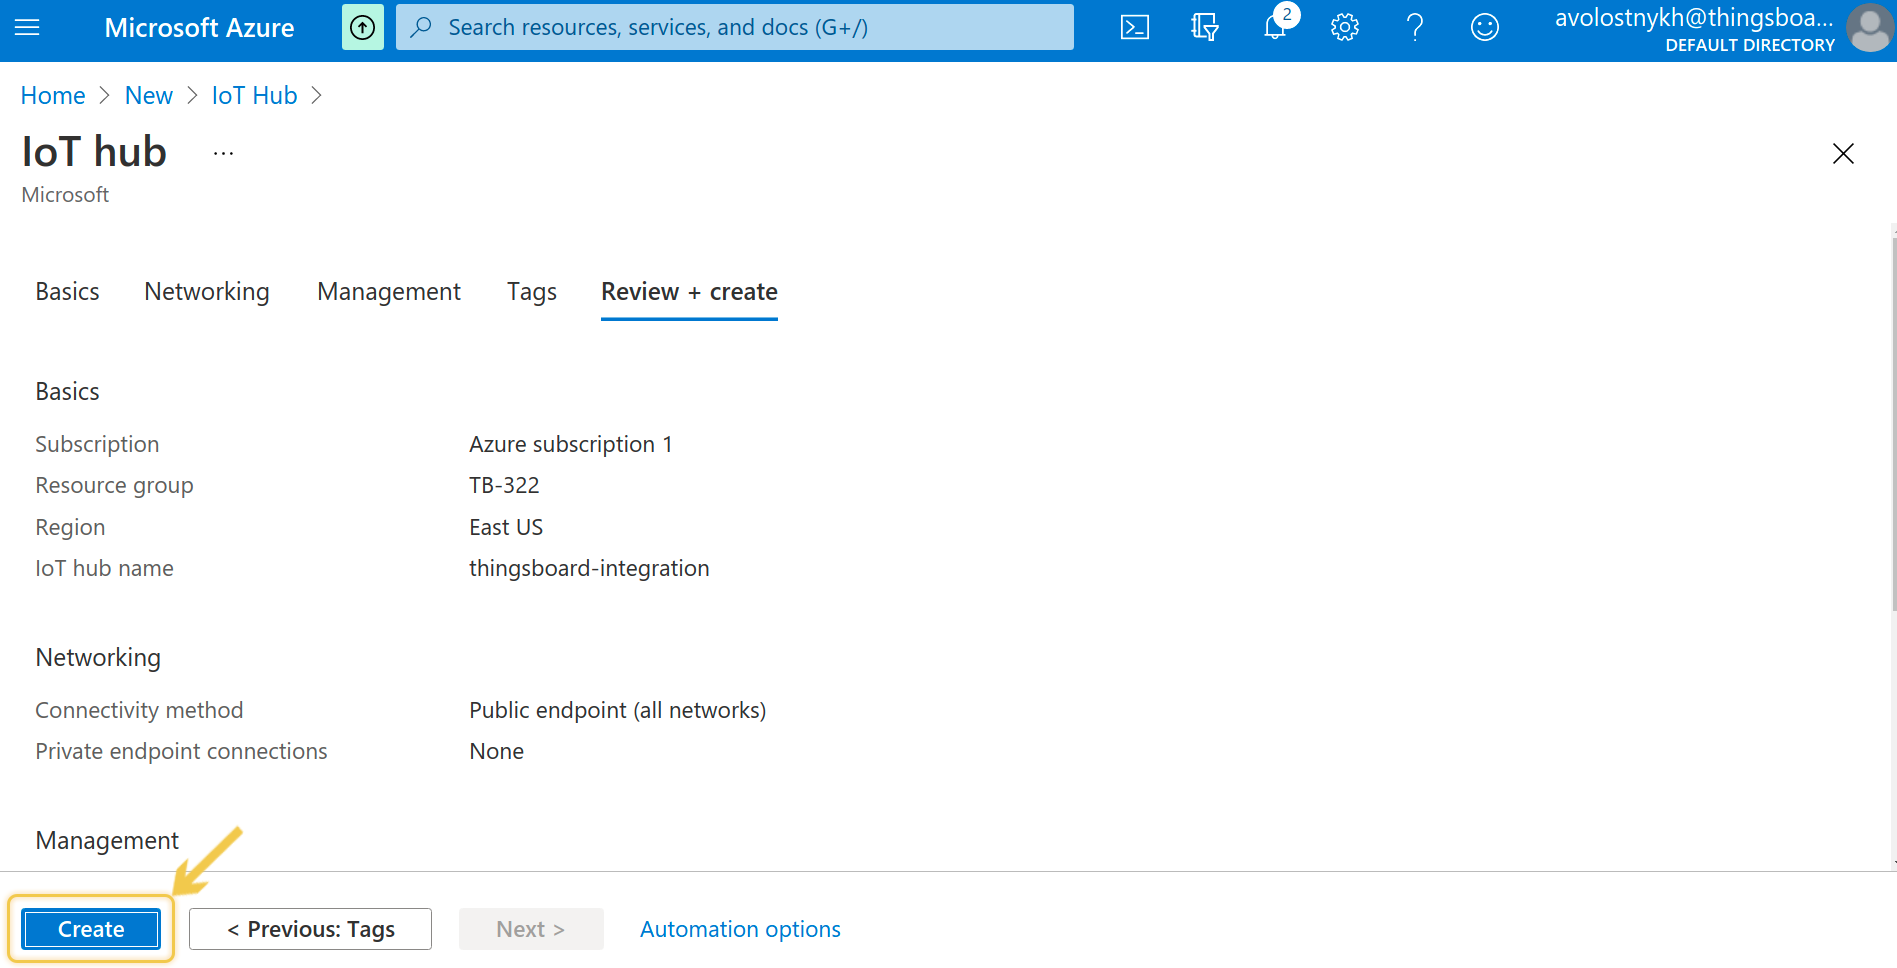
- Click “Create”;
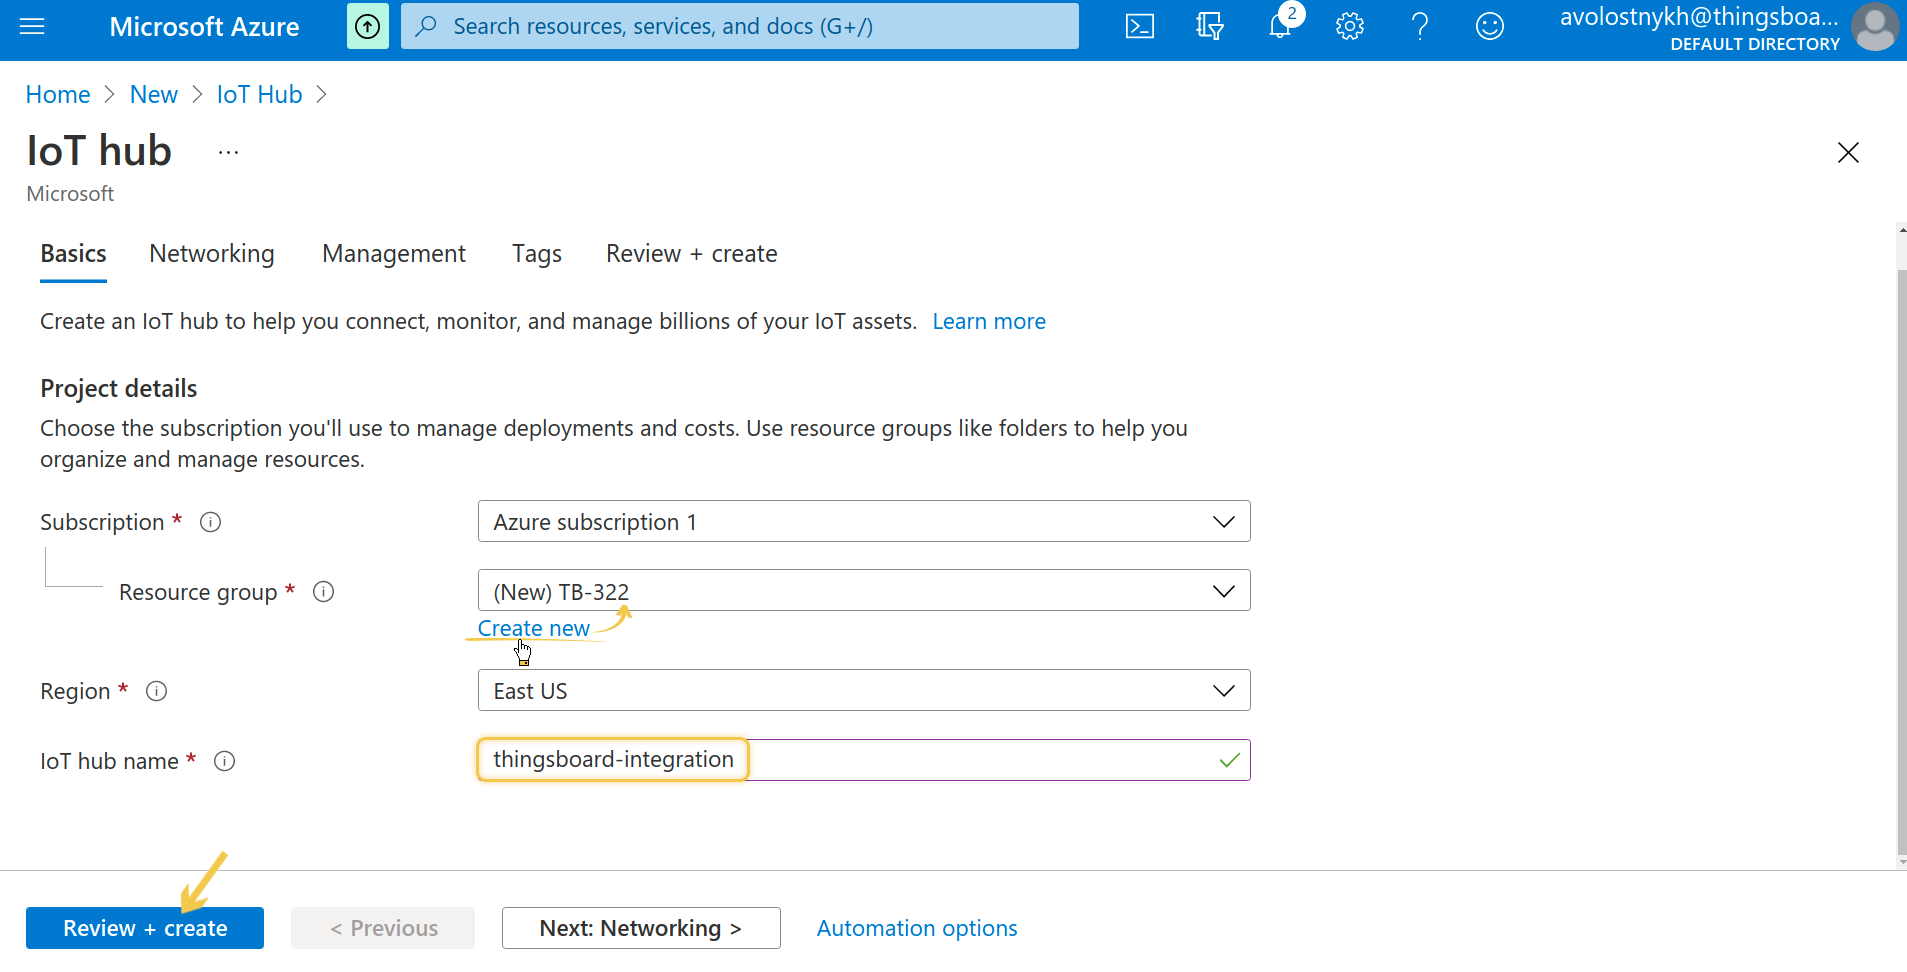
- On the configuration page, click “Create new”, specify the resource group and IoT hub name, then click “Review + create”;
- On the next page, click “Create”;
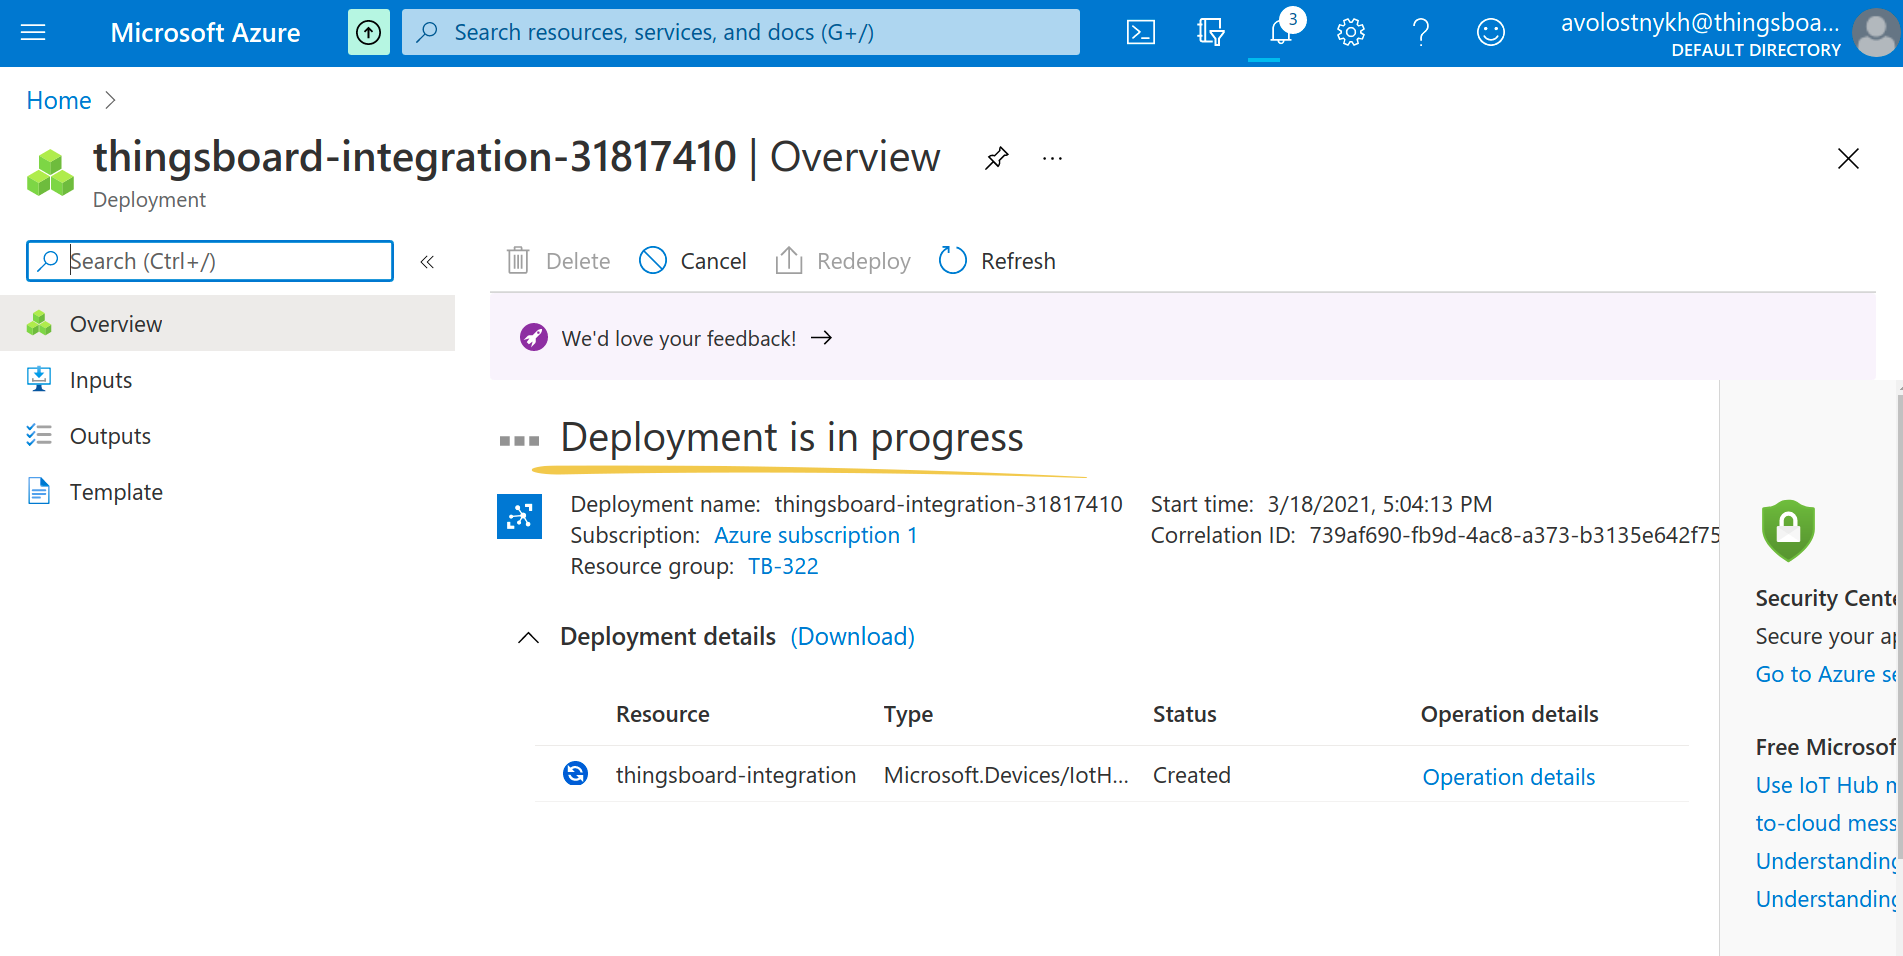
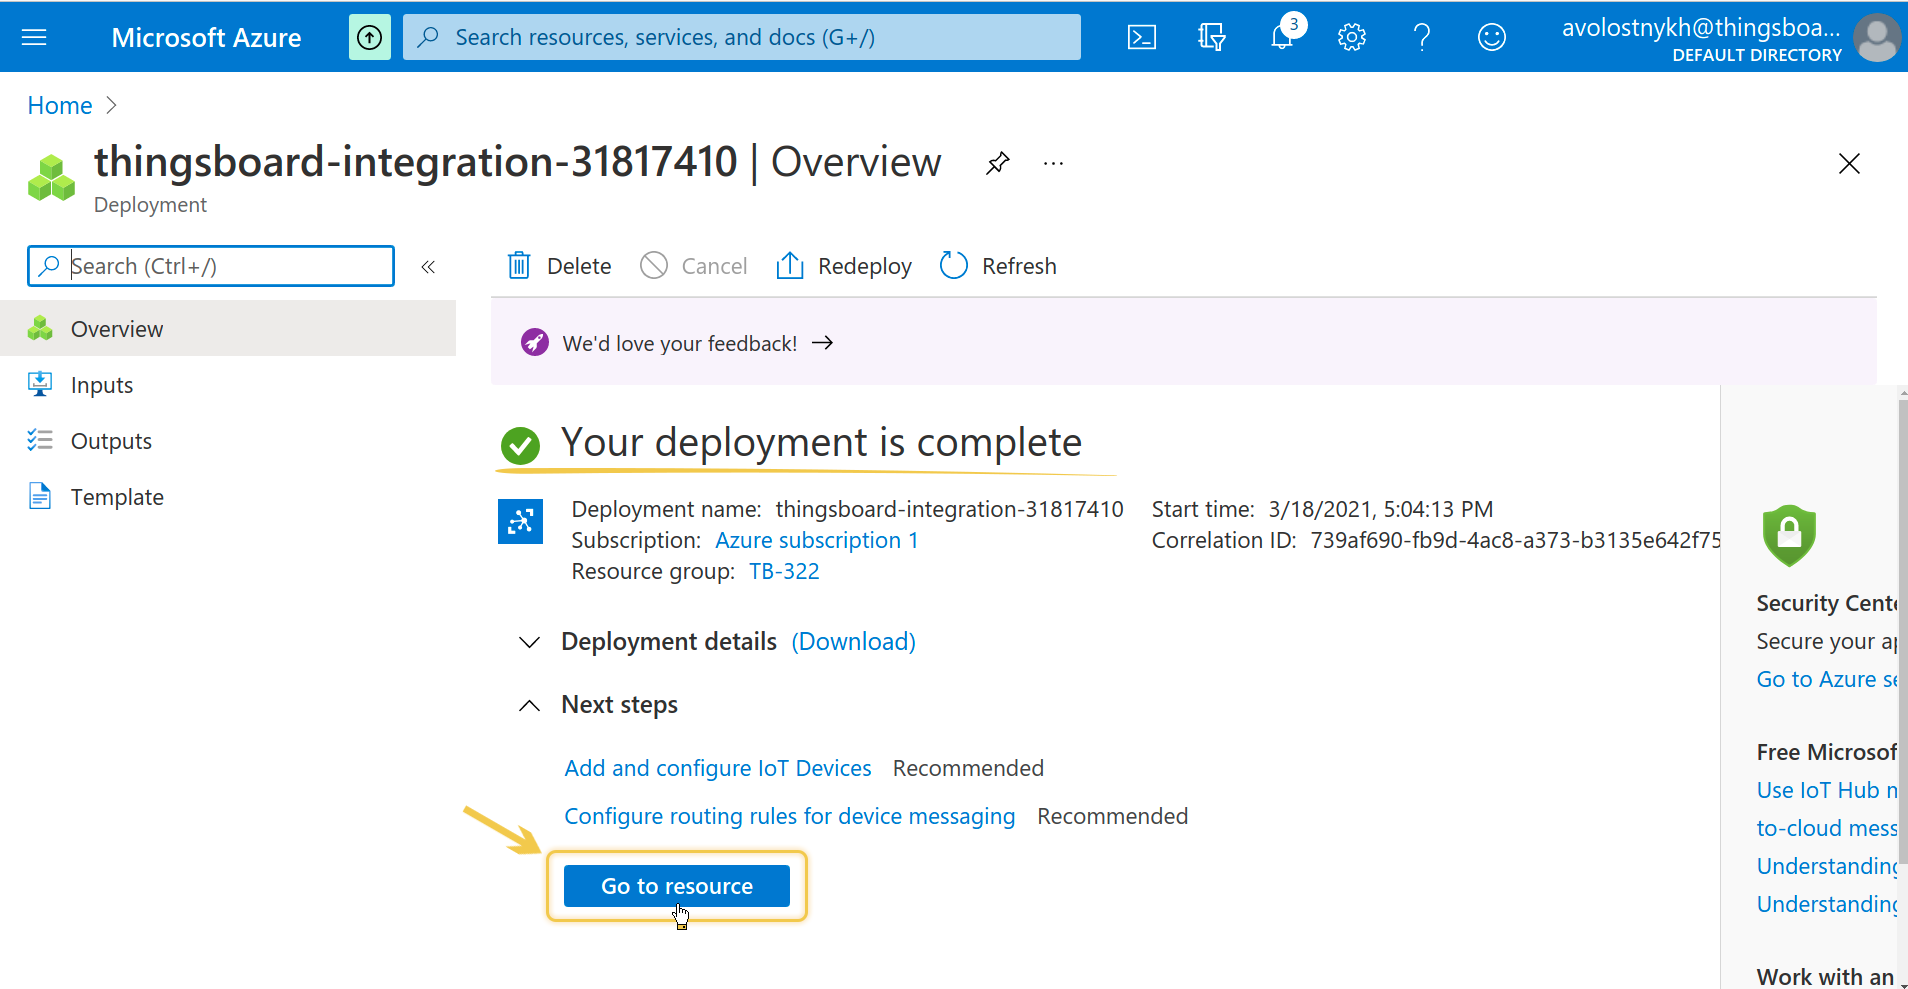
- Wait for the deployment process to complete, and then click “Go to resource”;
Create device in IoT Hub
After completing the first step, follow these instructions to create a new device:
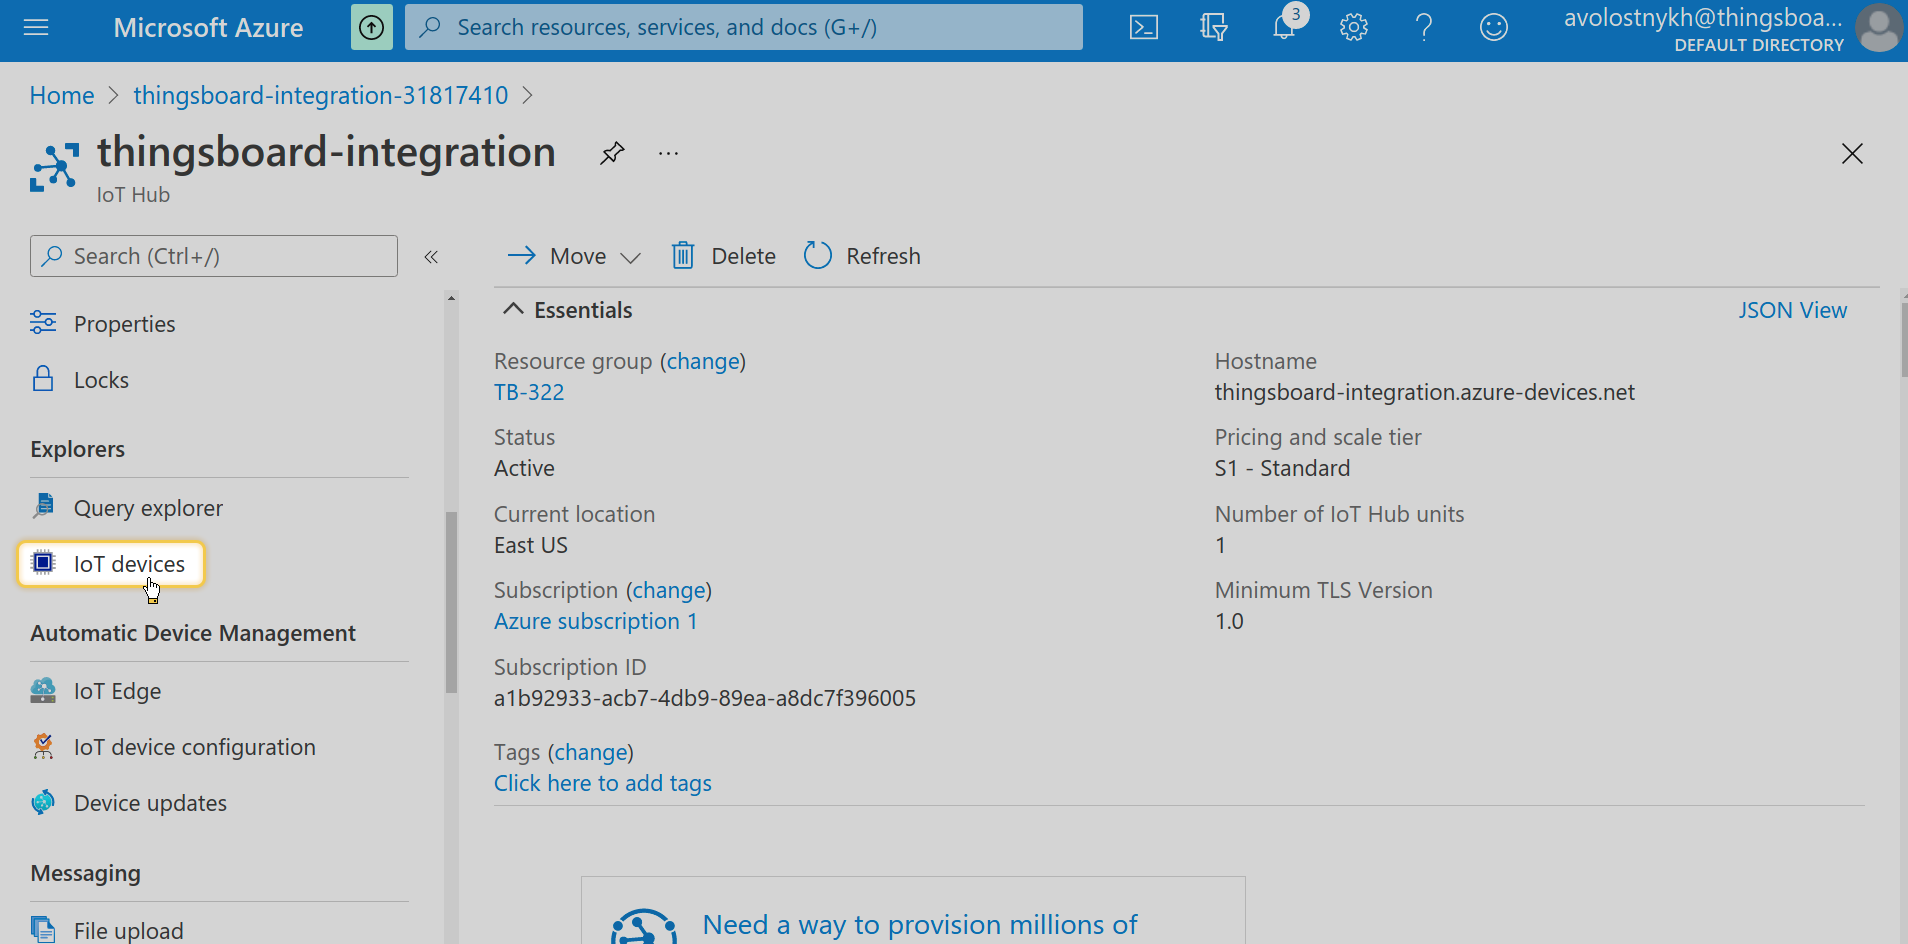
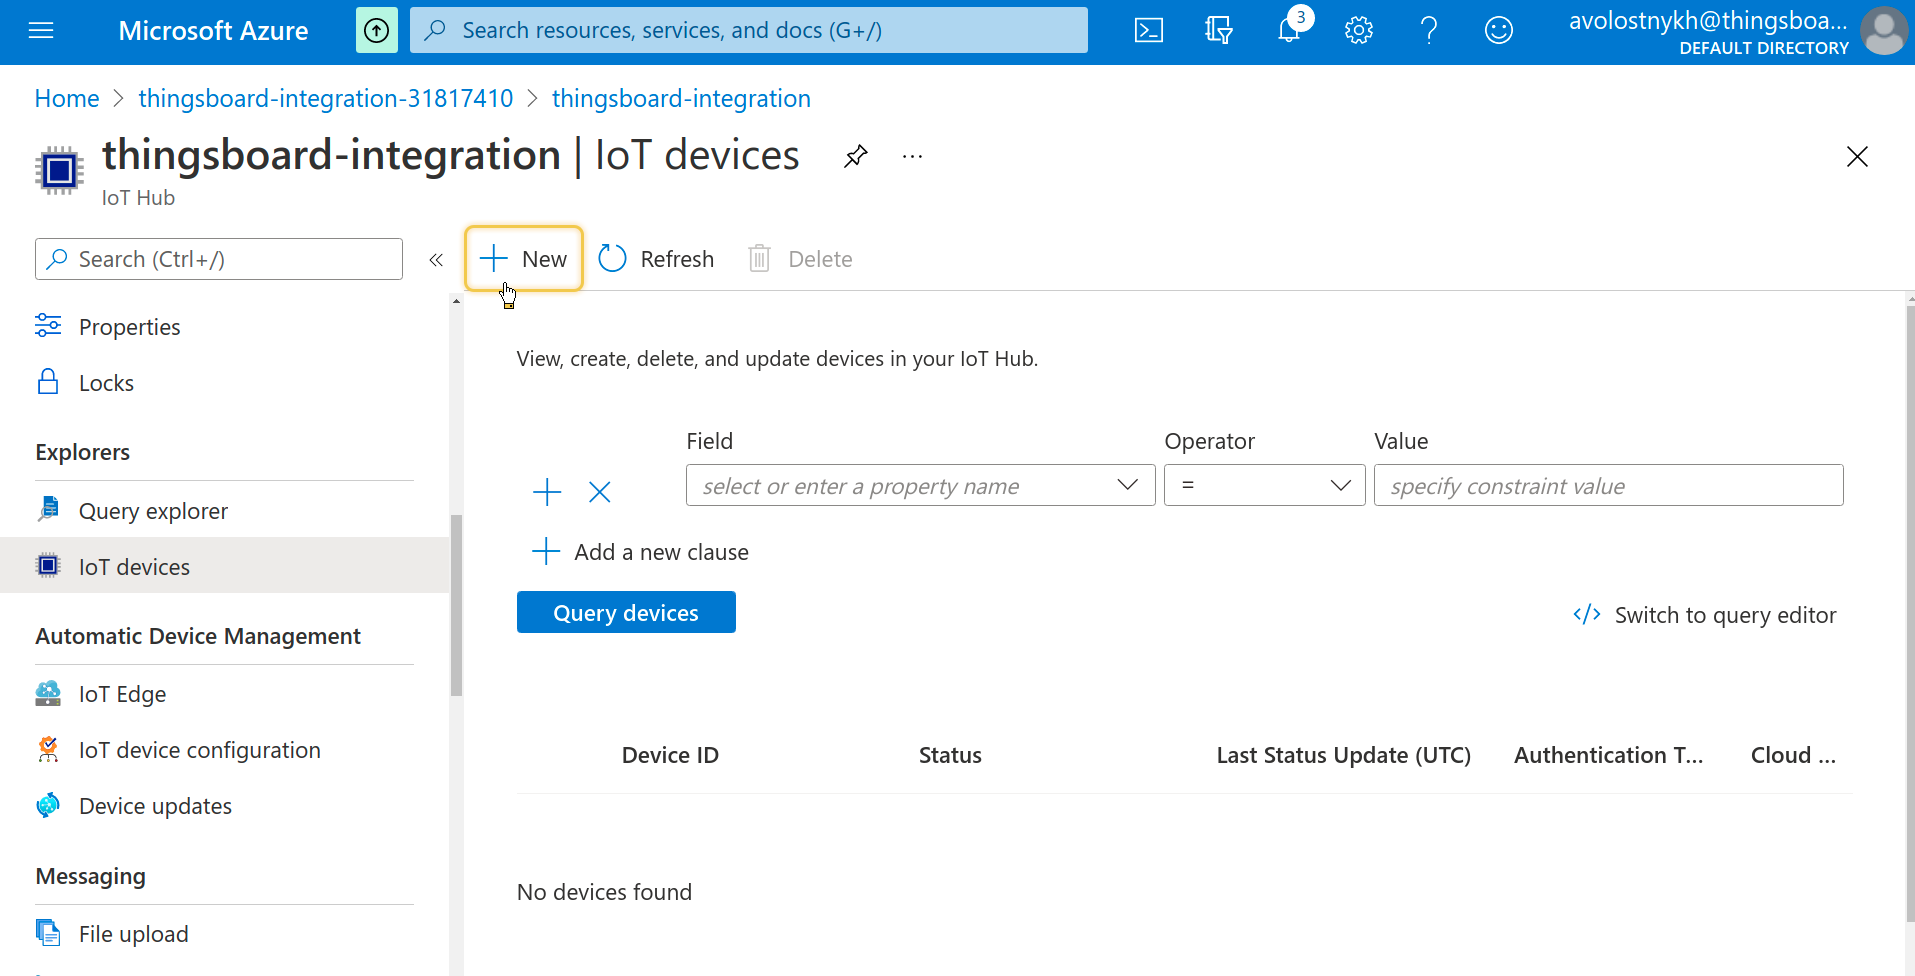
- Navigate to the “IoT devices” page from the context menu;
- Click the “+ New” button;
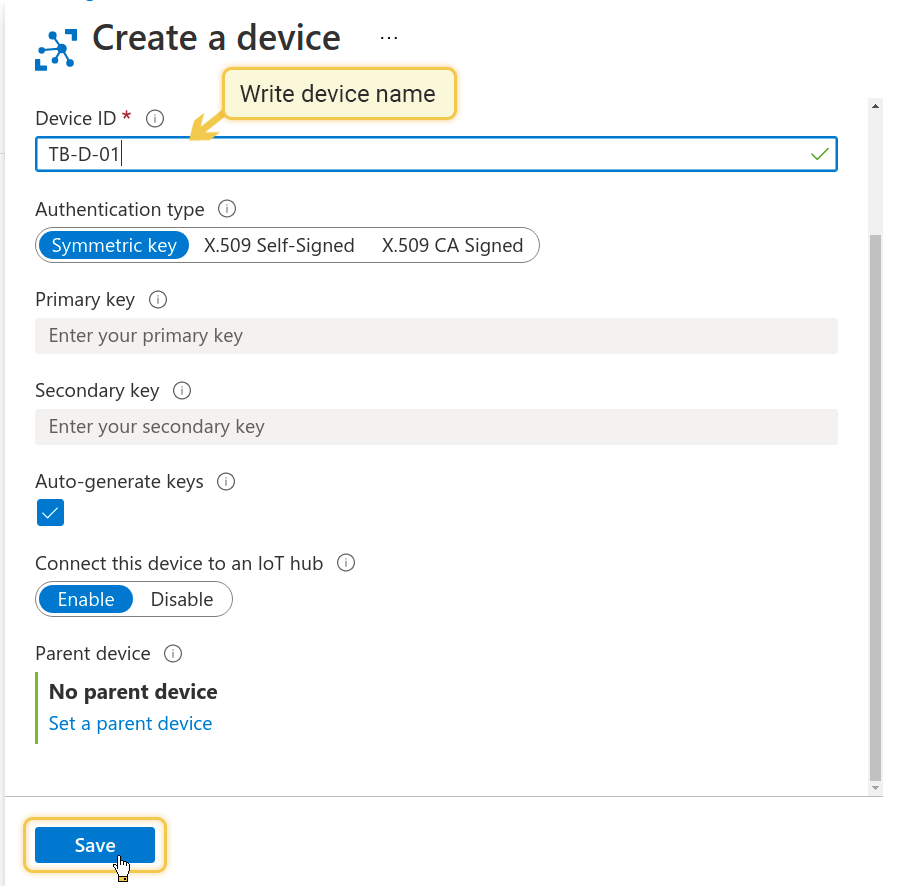
- In the pop-up window, enter the “Device ID” and click “Save”.
Great! You have successfully created your new device.
Add Azure Event Hub integration
1. Basic settings.
Go to the “Integrations” page of the “Integrations center” section. Click “plus” button to start adding new integration. Select type “Azure Event Hub” integration and click “Next”;

2. Uplink data converter.
Uplink is necessary in order to convert the incoming data from the device into the required format for displaying them in the ThingsBoard.
In the function decoder field, specify a script to parse and transform data. For our example, use the default decoder function (or use your own configuration). Then, click “Next”;

You can always change the decoder function after creating it.
3. Downlink data converter.
At the step of adding a downlink converter, you can also select a previously created or create a new downlink converter. But for now, leave the “Downlink data converter” field empty. Click “Skip”;

4. Connection.
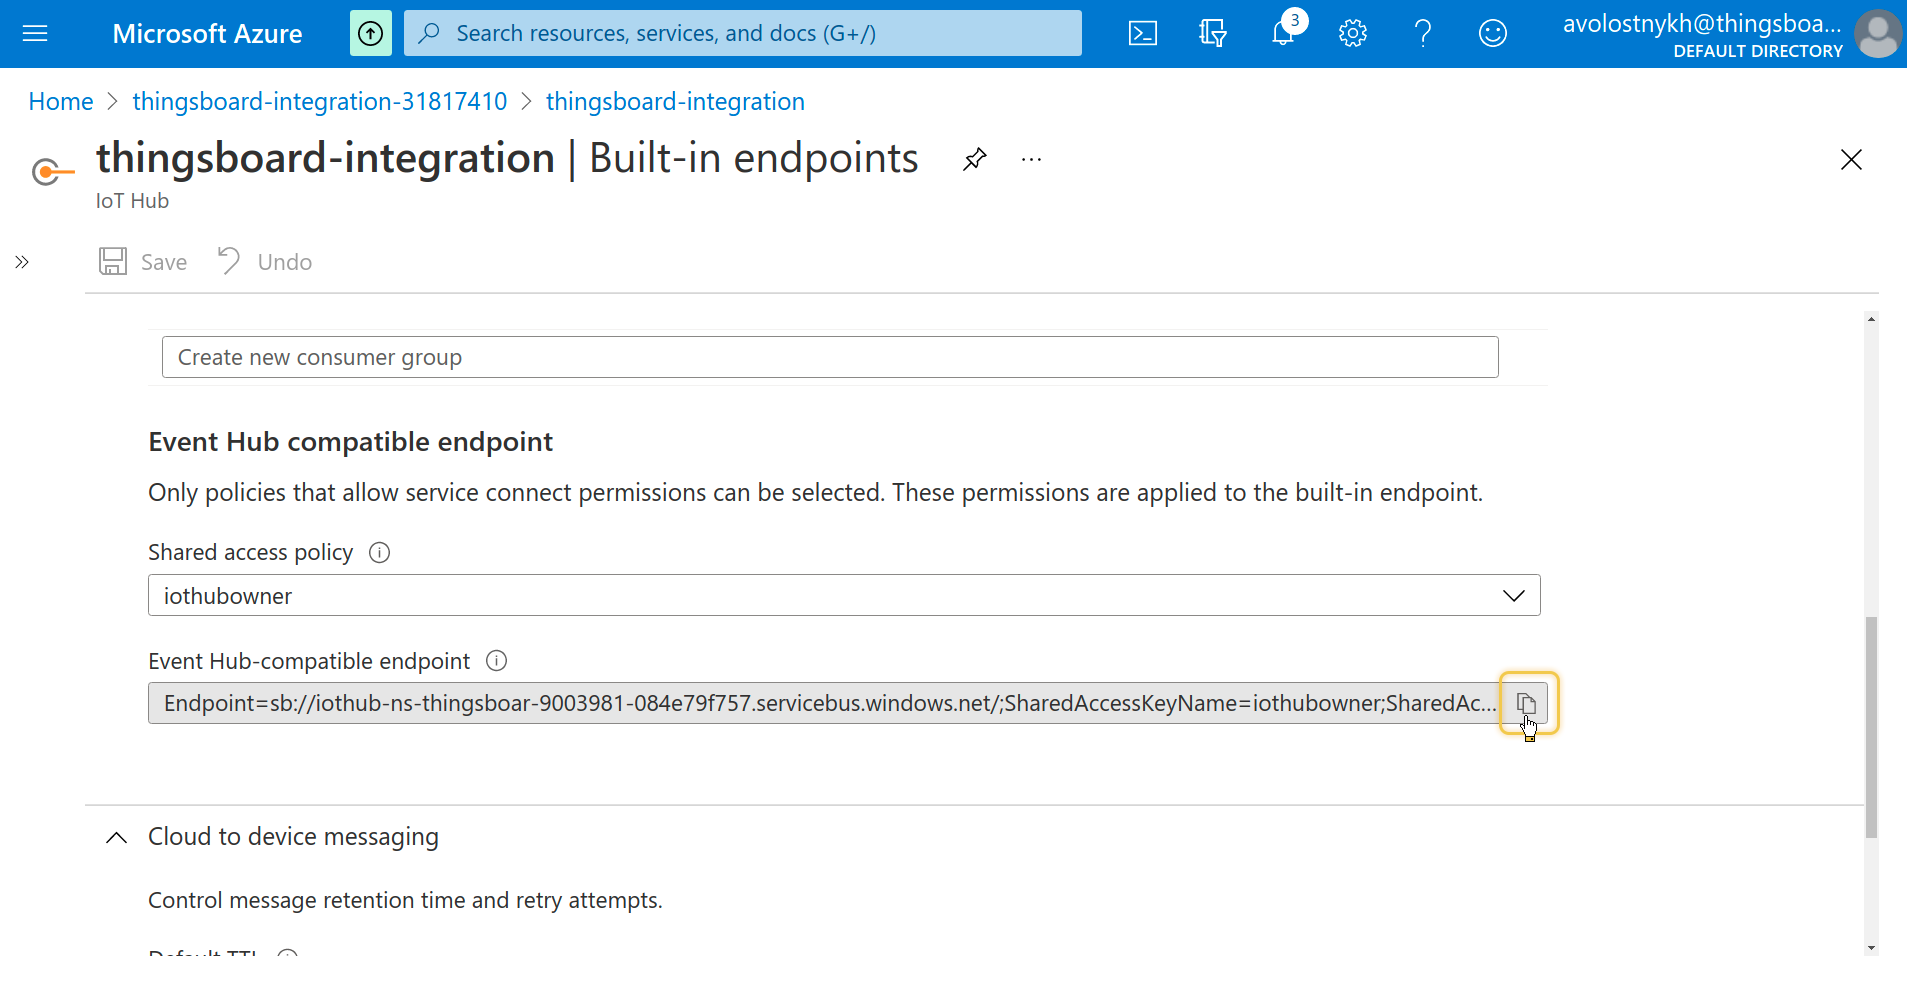
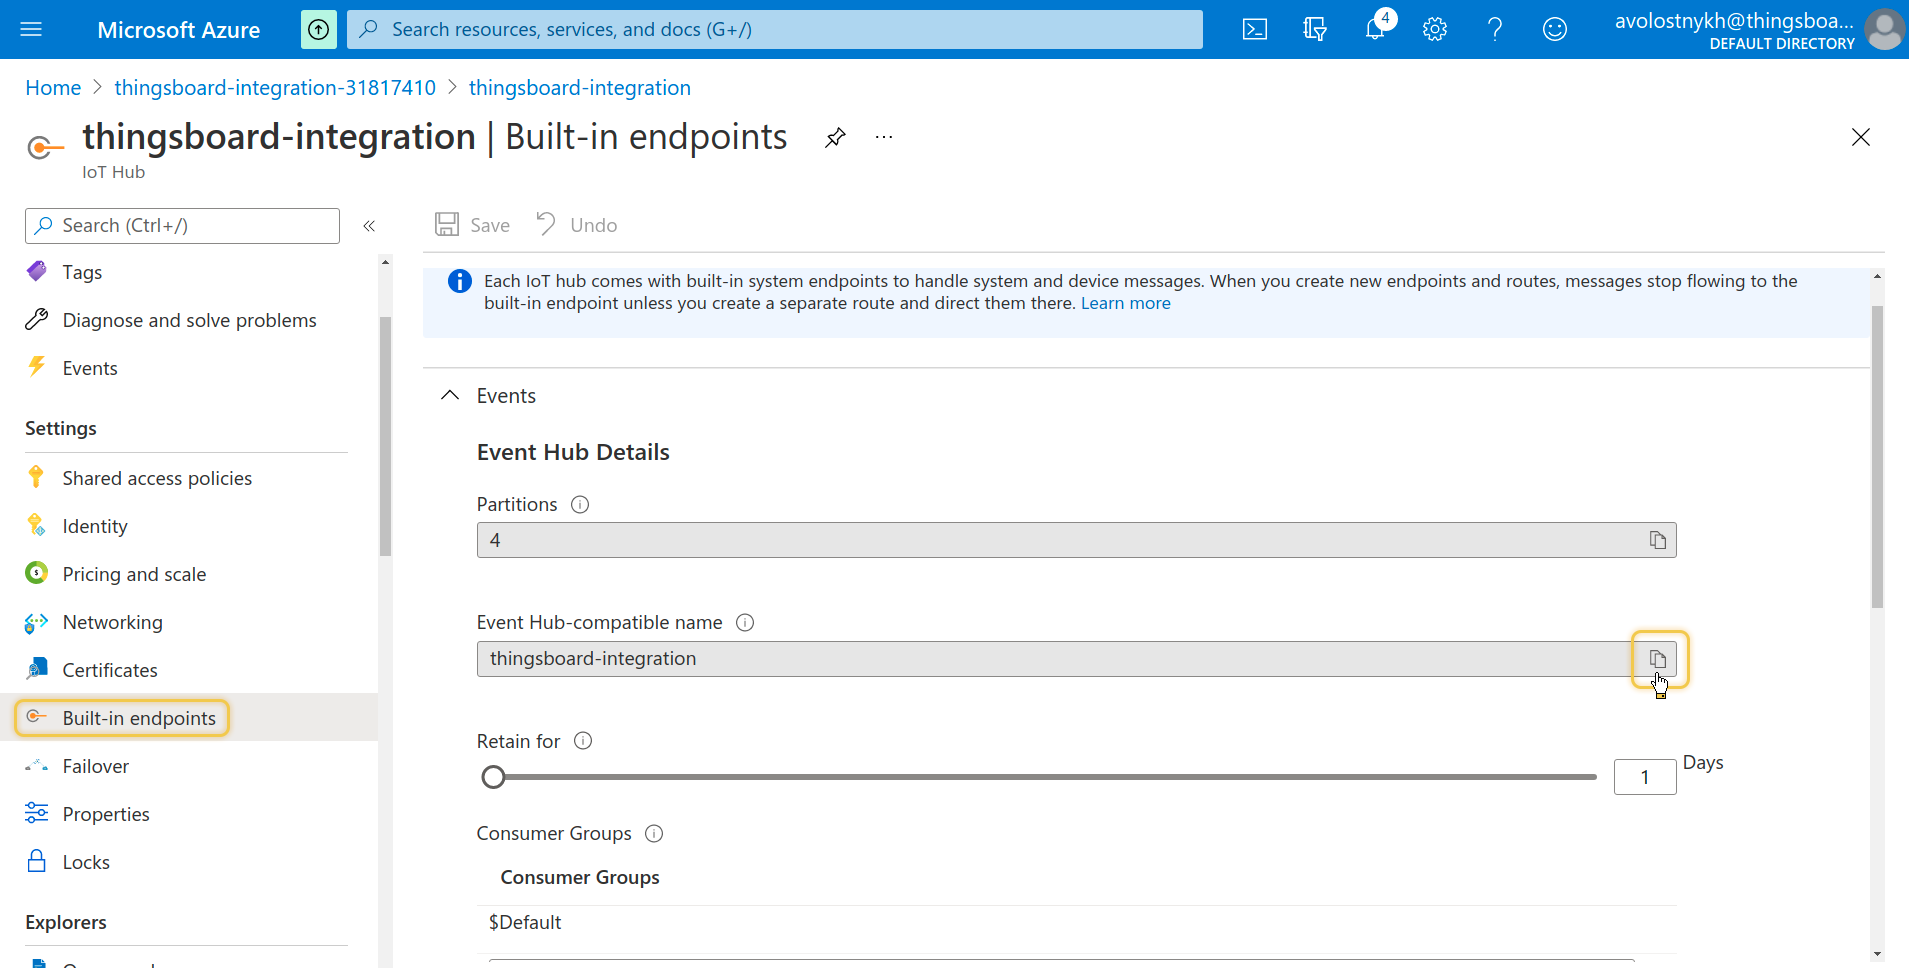
Retrieve the Event Hub-compatible Endpoint in the Azure portal:
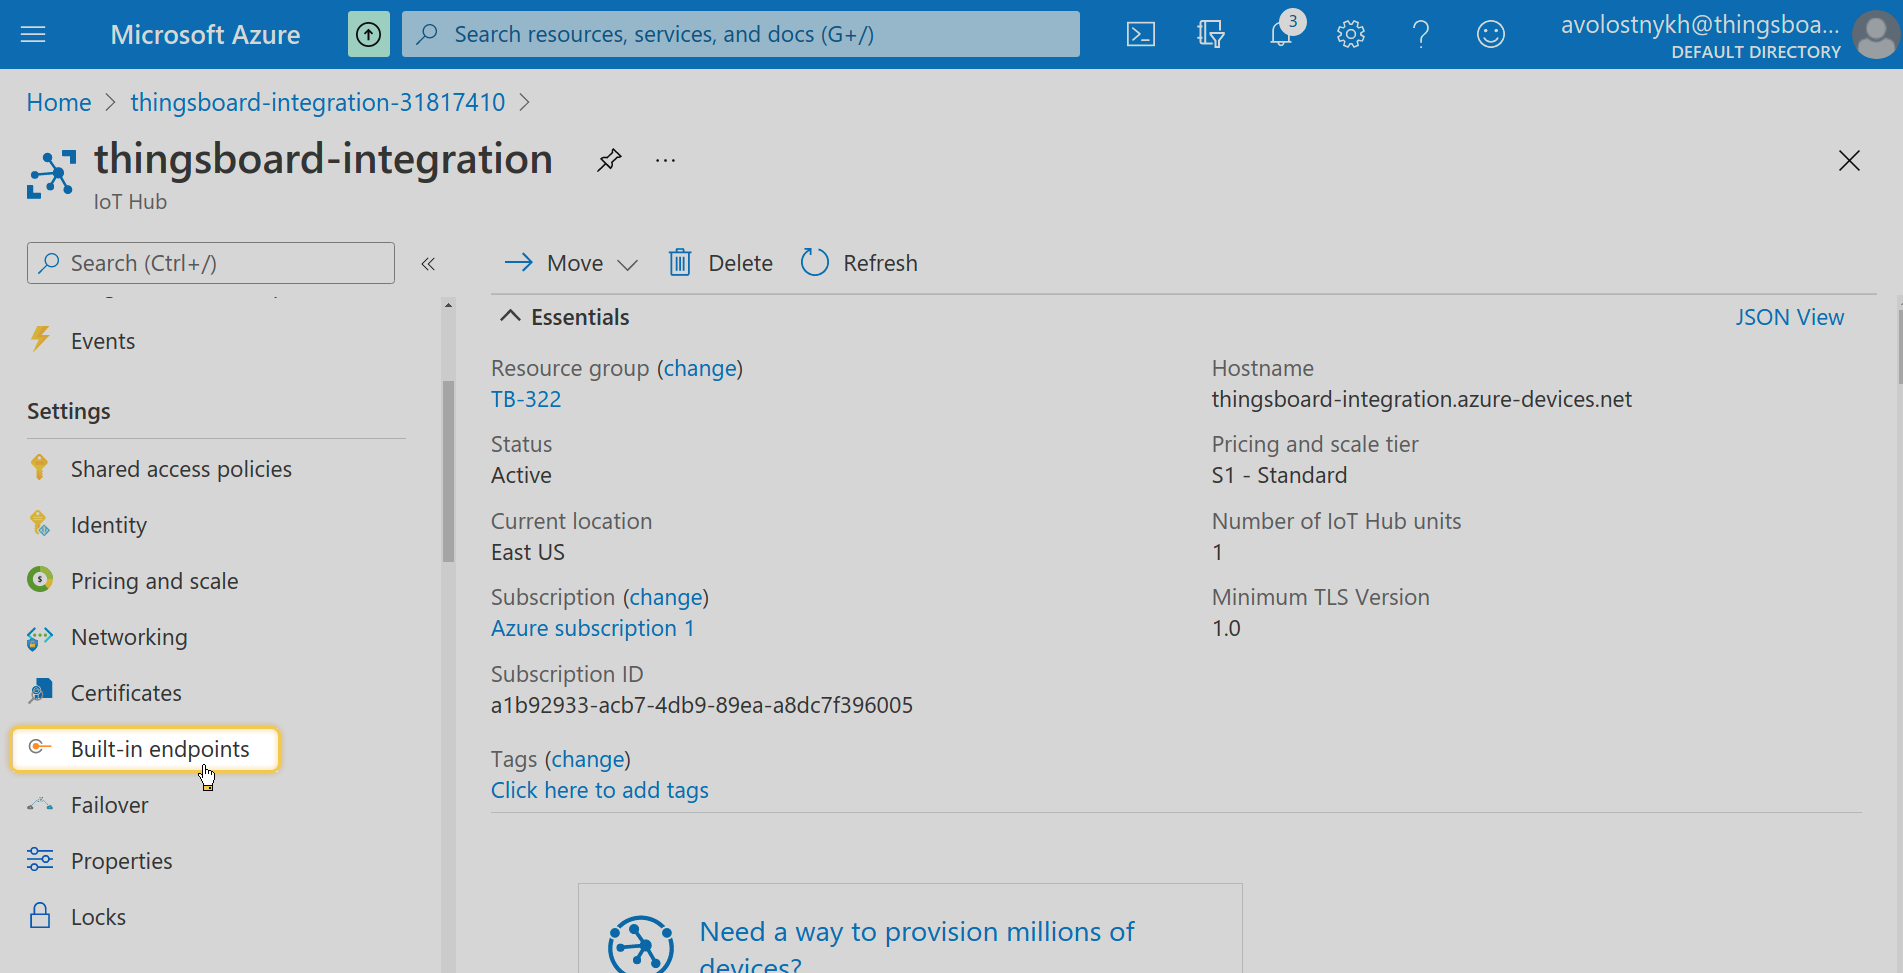
- Navigate to the “IoT Hub” resource;
- Open the “Built-in endpoints” page from the context menu;
- Locate and copy the “Event Hub-compatible endpoint” value.
This value will be used to integrate with ThingsBoard services.
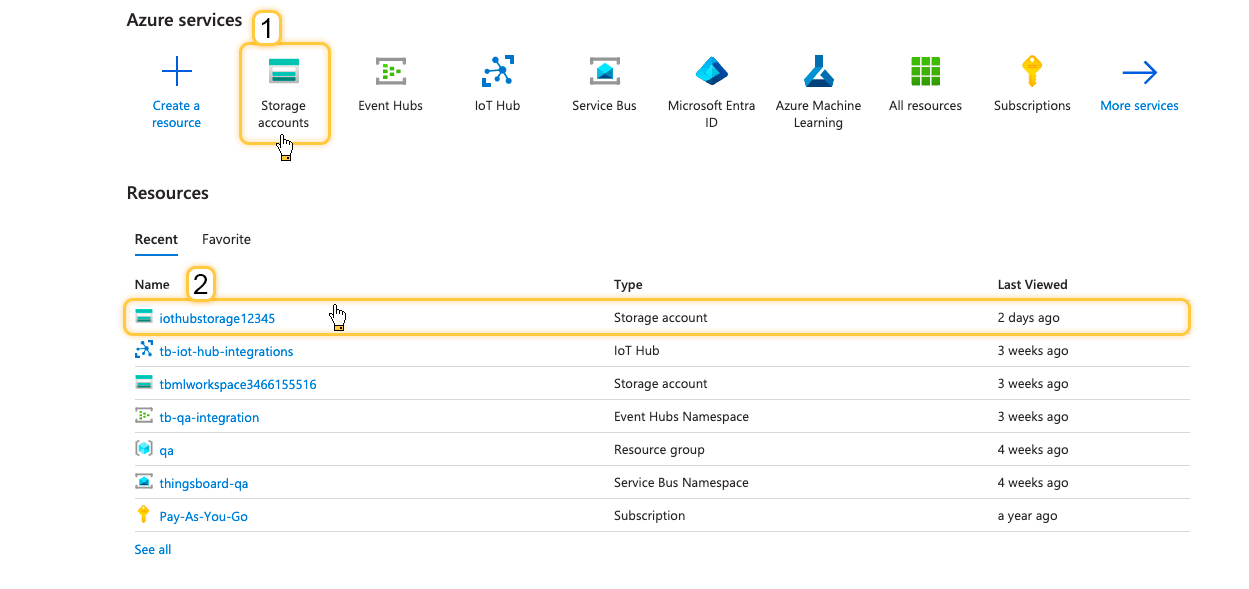
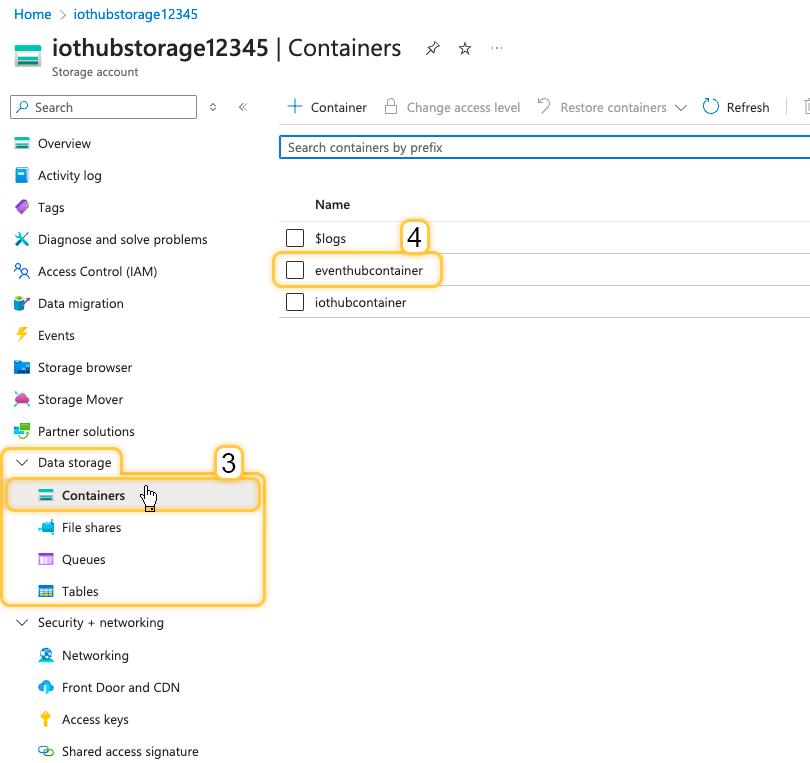
To find the container name:
- In the Azure portal, click the “Storage account”;
- Go to the “Containers” page of the “Data storage” section.
Here you will find the container. Save its name.
To find the storage connection string values, navigate to the “Access keys” page in the “Security + networking” section.

In ThingsBoard:
- Paste in the “Connection String” field copied “Event Hub-compatible endpoint”;
- Enable persistent checkpoints to resume processing from the last checkpoint after an integration restart, and fill in the fields “Storage connection string” and “Container name” with the appropriate values. Disable to always start from the latest event;
- [Optional] Click on “Check connection” button to check connection to check correctly copied connection string;
- Finally, click “Add” button to create the integration.

Test it up!
For now, we ready to test our integration. To do this, follow these steps:
1) Go to the “Rule chains” page and select one of your rule chains. In the search nodes field, type 'gen' to find the generator node in the menu. Drag it onto the canvas. In the pop-up window, specify the name of the generator, the number of messages, and the generate function (you can use our example). Finally, click “Add”;

1
2
3
4
5
6
7
8
9
10
11
var msg = {
    "devName": "TB-D-01",
    "msg": {
        "temp": 42,
        "humidity": 77
    }
};
var metadata = { data: 40 };
var msgType = "POST_TELEMETRY_REQUEST";

return { msg: msg, metadata: metadata, msgType: msgType };
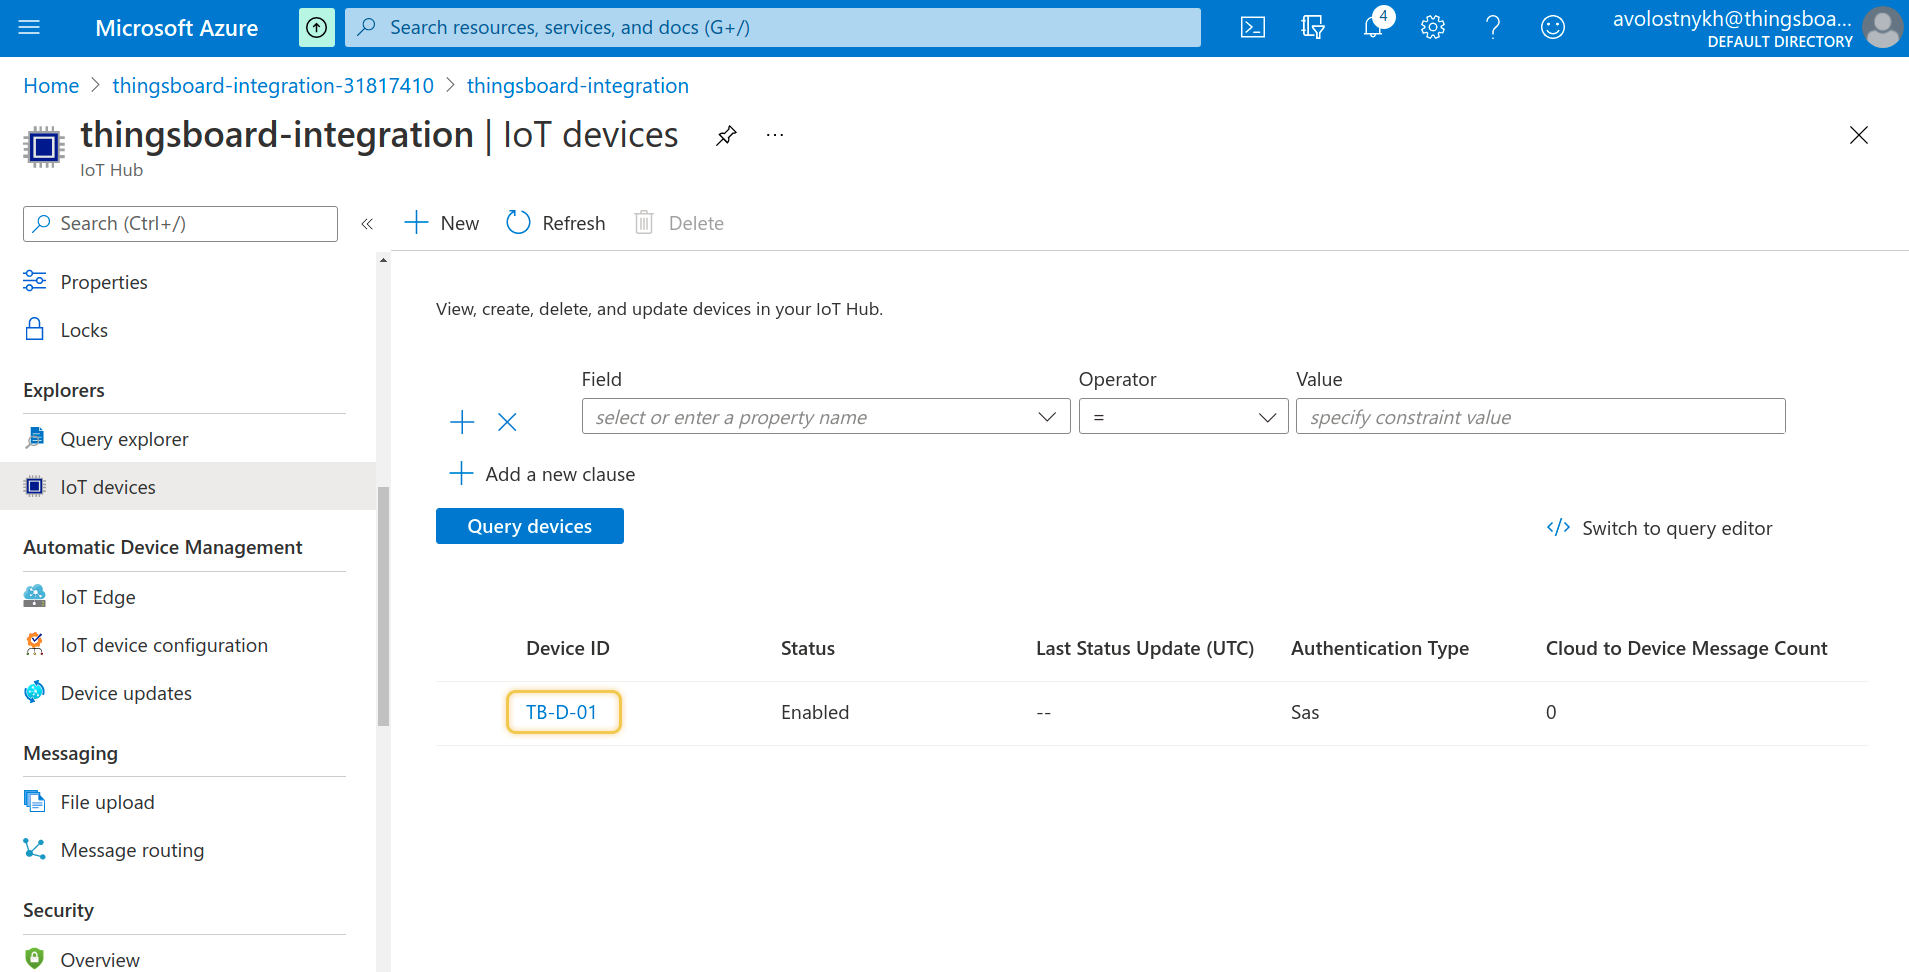
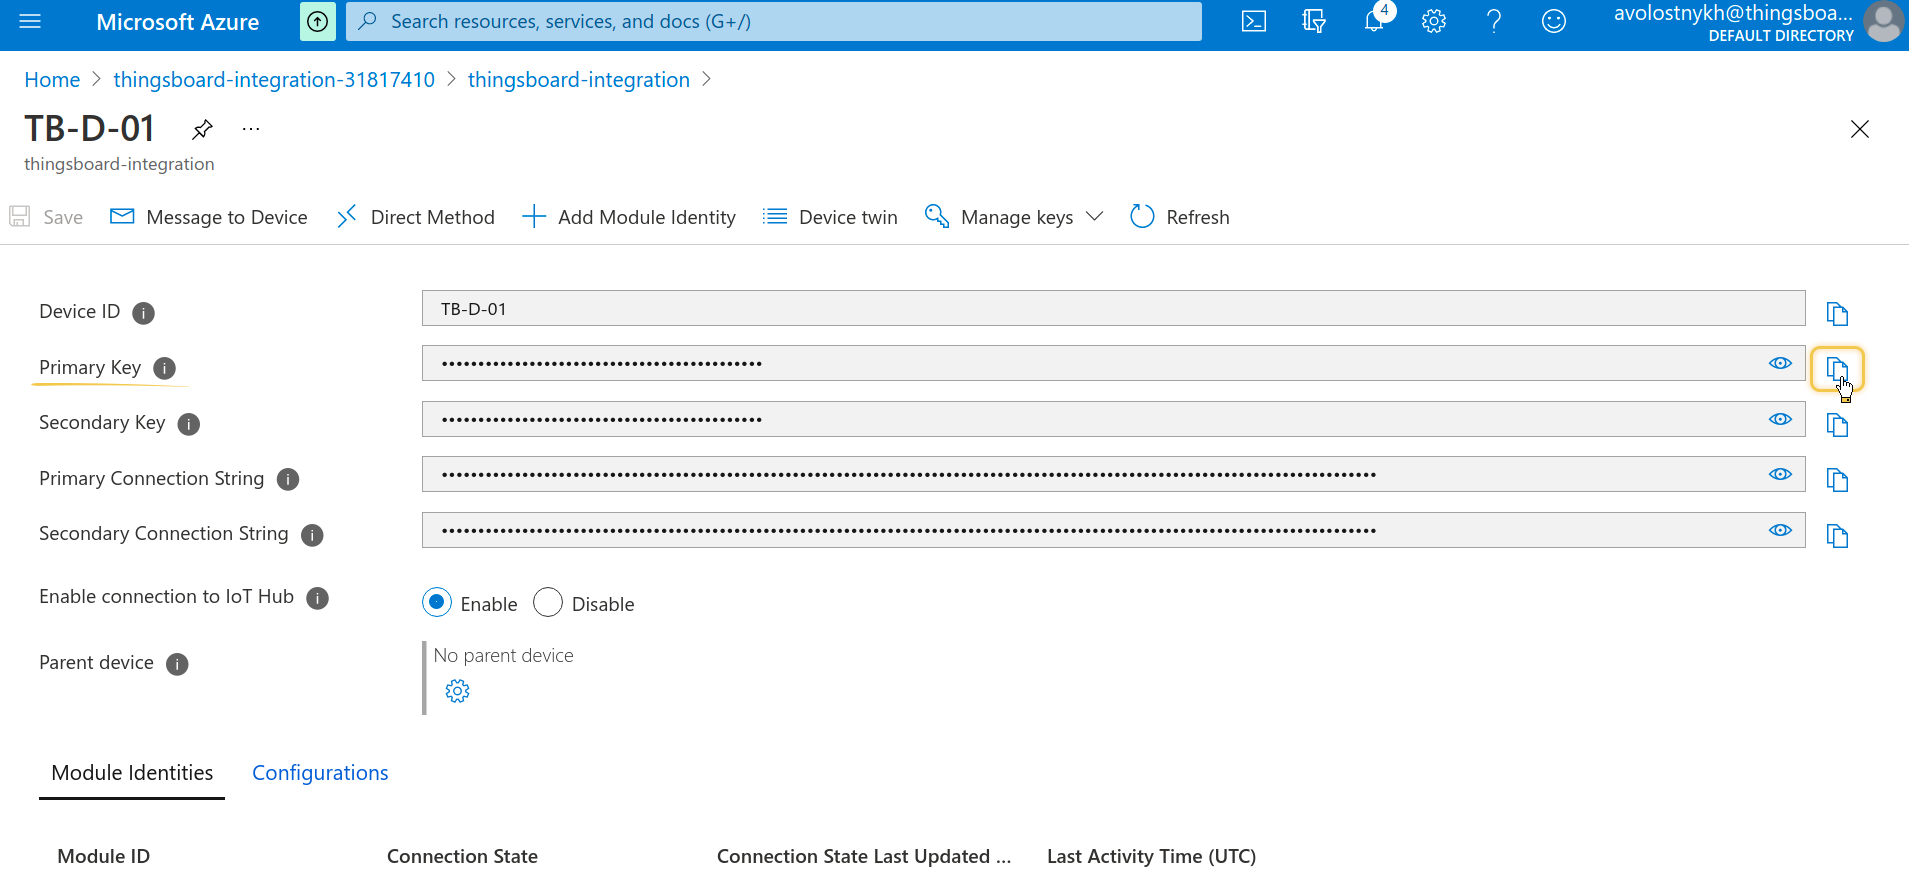
2) Now, find the device's Primary key. Go to the Azure portal, navigate to the IoT devices tab, select your device, and locate the “Primary key” field. Copy and save it for later use;
3) Return to your ThingsBoard instance. We need to find another rule node. Type 'iot' in the search nodes field and select the azure iot hub node. Drag it onto the canvas. In the pop-up window, specify the node name, replace <device_id> in the Topic with your Device Name, and enter the Hostname by retrieving it from the “IoT Hub” resource in the Azure portal. Enter the Device Name as the Device ID and add the SAS Key (Primary Key) that we previously copied from the device credentials. If you need to monitor events, enable Debug mode;

4) Connect the generator to the azure iot hub. Tap on the right grey circle of “generator” node and drag this circle to the left side of the azure iot hub node. Select the “Success” link and click “Add”. Save the rule chain, and go to the integration;

Go to the “Integrations” page and select your Azure Event Hub integration. If you see a message of type “Uplink” in the “Events” section of your integration, everything is working correctly.

Advanced usage: create Downlink converter
Downlink uses for send a message to device. For example information that message from device have been received.
1) At first, lets find IoT Hub name:
- Open the Azure portal and navigate to the “IoT Hub” resource;
- Go to the “Built-in endpoints” page from the context menu;
- Find and copy the value of “Event Hub-compatible name” — this represents the IoT Hub name.
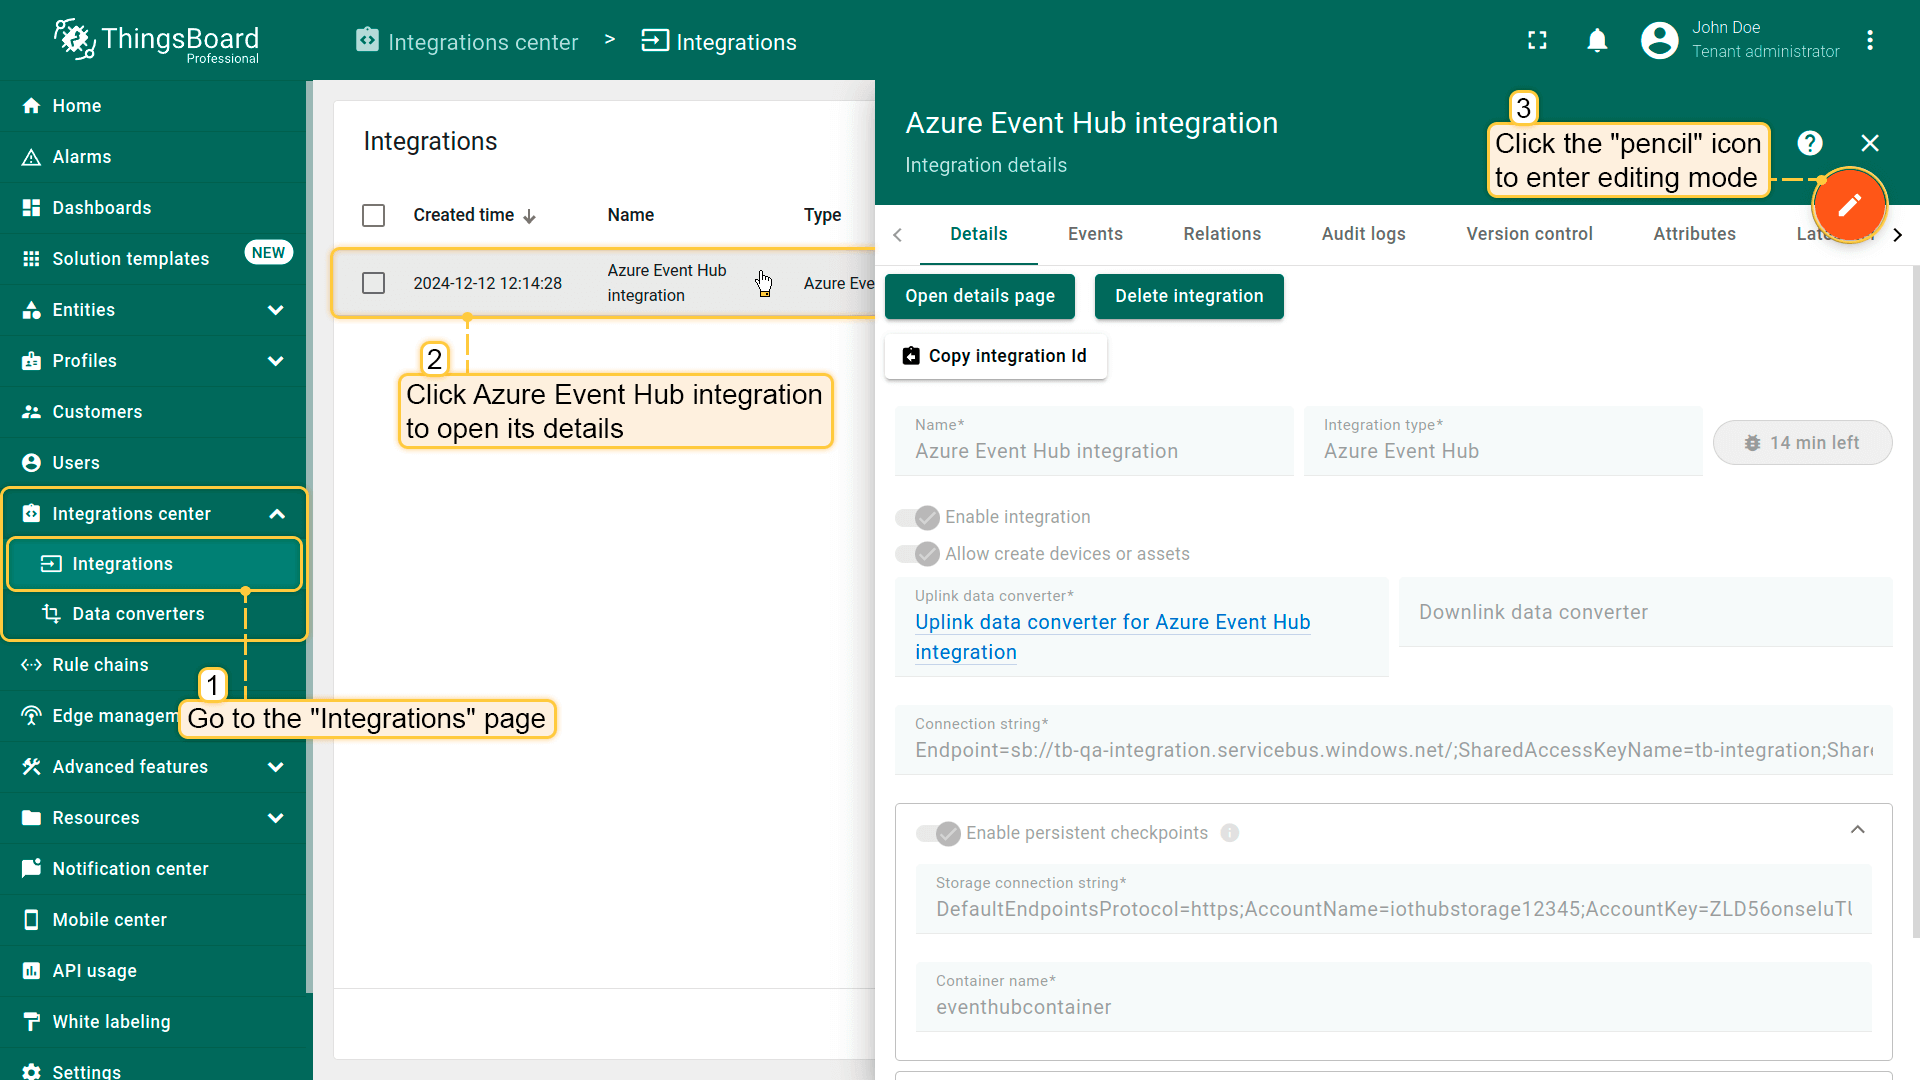
2) To add the Downlink data converter to the Azure Event Hub integration, follow these steps:
- Navigate to the “Integrations” page, select the Azure Event Hub integration to open its details, and click the “pencil” icon to enter editing mode;
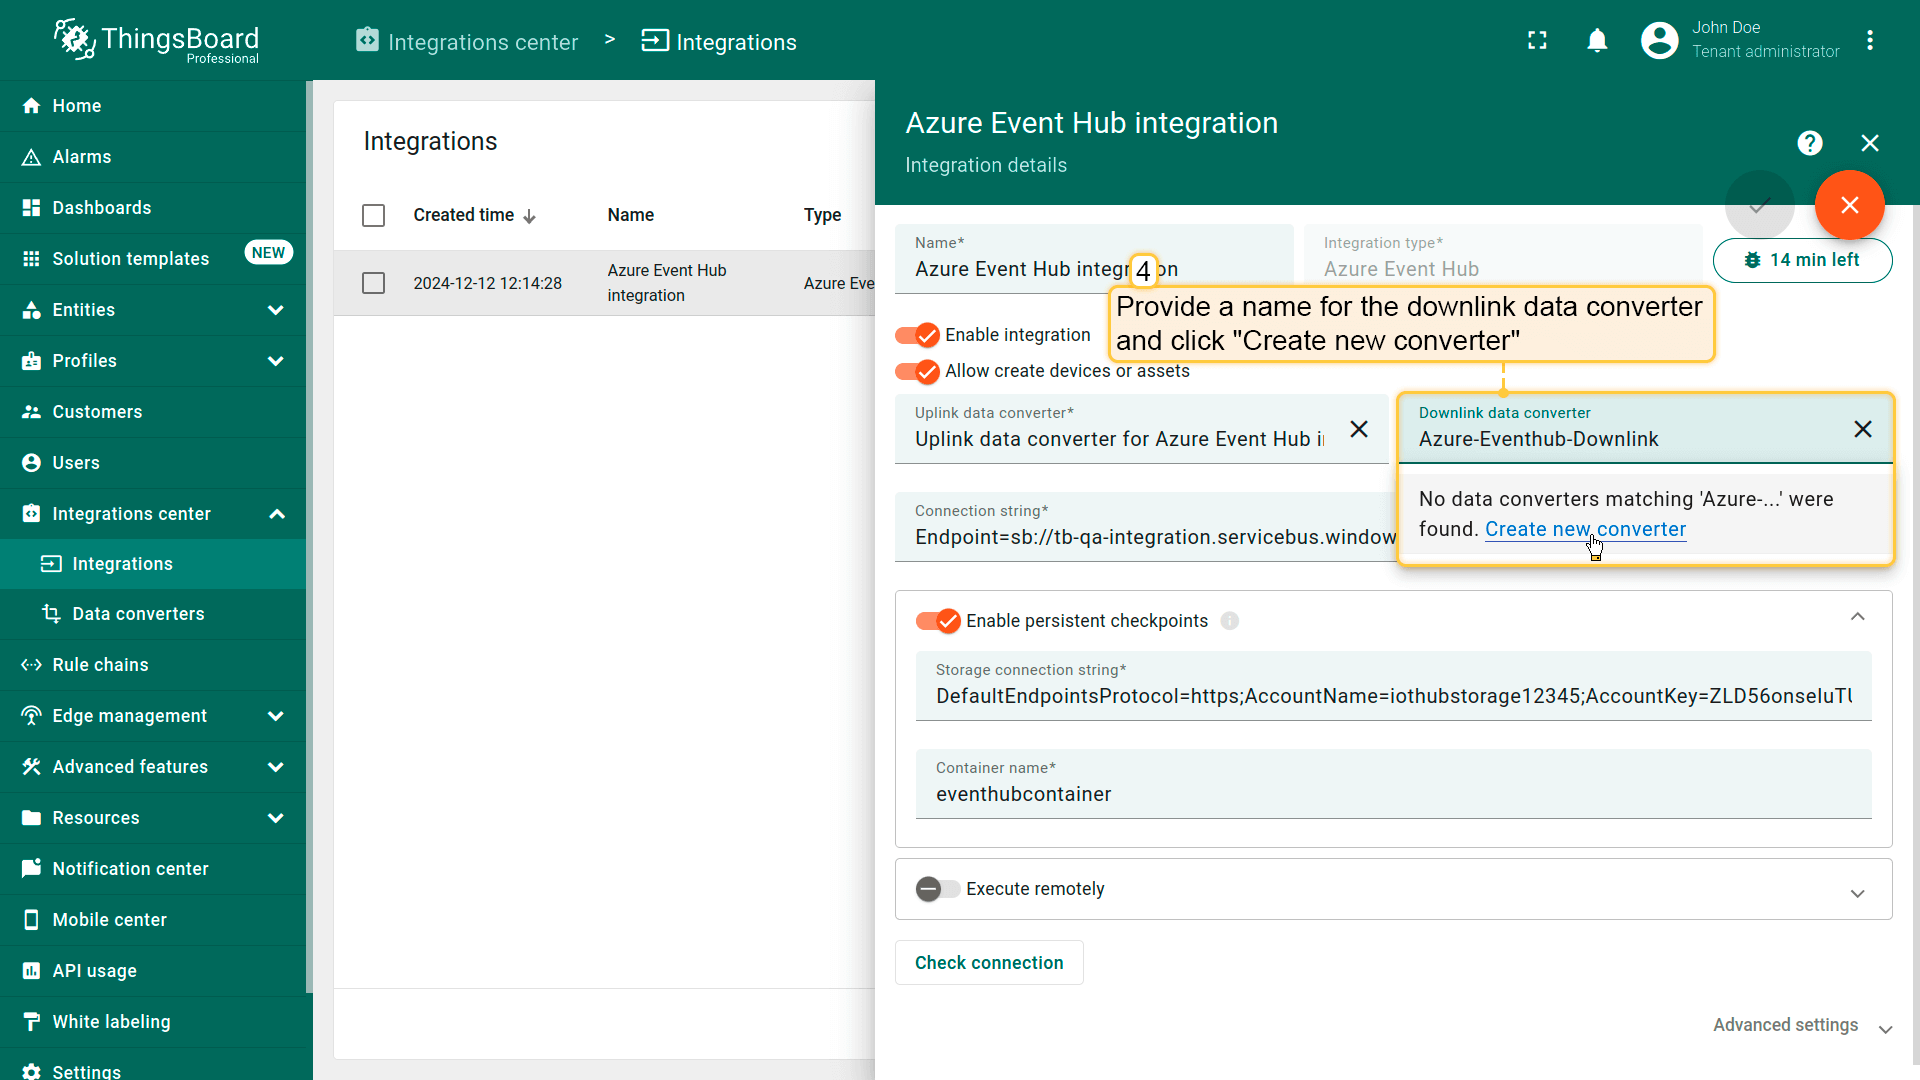
- Provide a name for the downlink data converter and click “Create new converter”;
- Paste the required script into the Encoder function section. Click “Add”;
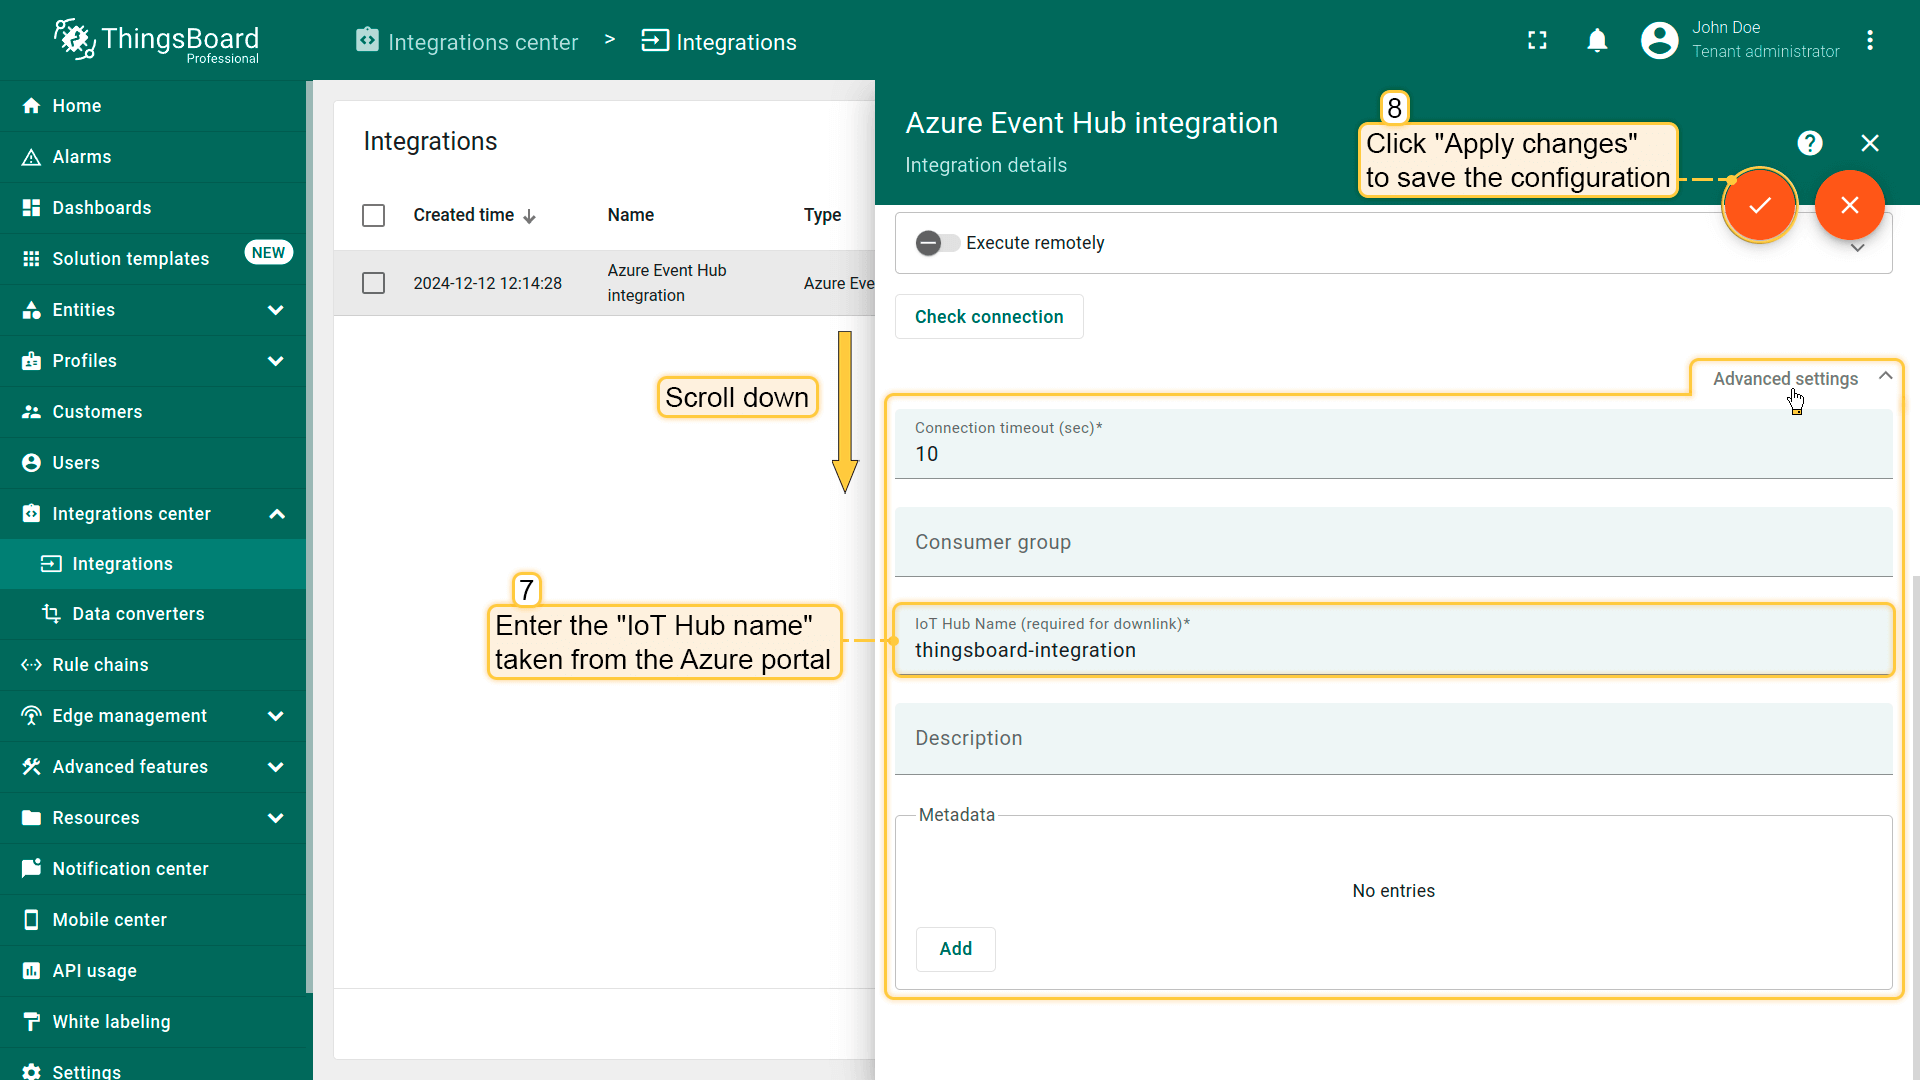
- In the advanced settings, add the “IoT Hub name” in the corresponding field;
- Click “Apply changes” to save the configuration.
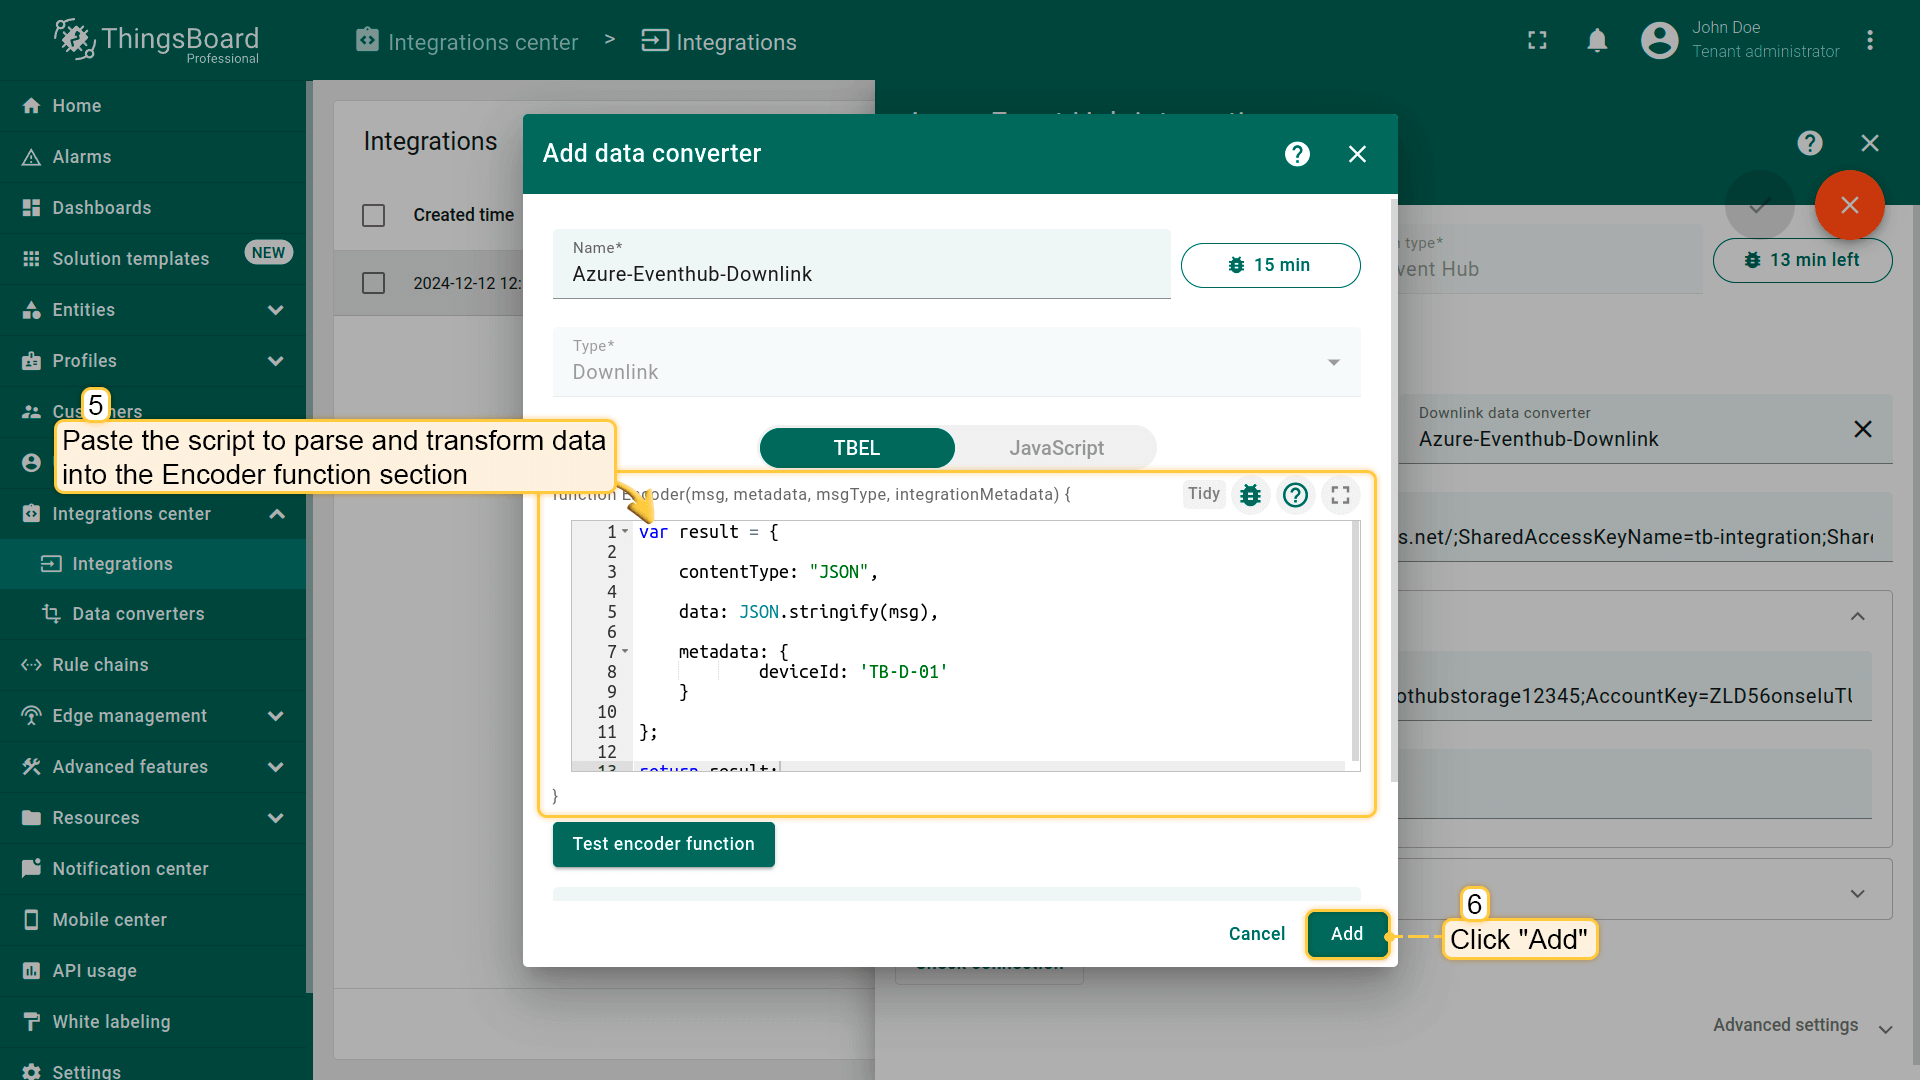
The Downlink converter used in this example:
1
2
3
4
5
6
7
8
9
10
11
12
13
var result = {

    contentType: "JSON",

    data: JSON.stringify(msg),

    metadata: {
            deviceId: 'TB-D-01'
    }

};

return result;
NOTE If you used another name of device (not TB-D-01) you have to specify in the Downlink converter your device name for deviceId field.
Ok, downlink converter ready, integration ready, Let’s test it:
1) After test of uplink, integration have created the device inside ThingsBoard, and we need to know for which Rule Chain it connected. Just go to the Device groups in ThingsBoard menu choose All and find the device with the name that we have used in the uplink.


2) Find the name of necessary rule chain in “Rule Chains” pages of ThingsBoard menu.
3) In the “Search nodes” field type ‘down’ and choose in the menu integration downlink node, drag it to the canvas. In pop-up you need to specify the name of rule node and choose our integration.
4) Click on left gray circle of message type switch node and drag it to gray circle of our “downlink” node. Here choose Attributes update and click “Add”.


5) Great. Save Canvas and let’s go to “Device groups” -> “All” and choose our device. Switch to Attributes in ‘Entity attributes scope’ list choose Shared attributes. Tap on ‘plus’ to create new. Specify in pop-up the key of attribute, type of value and some value.
6) Tap “Add” and go to the Integration to check the result of downlink.


How you can see, we have a message that Downlink successfully received by Integration and sent to Azure Event Hub. To check it in Azure IoT Hub we need to go to Azure Portal, choose IoT devices menu tab and see Cloud to Device Message Count number.

Advanced usage: Check Downlink using Azure IoT Hub integration
There is a simple explanation how to see your downlinks in Azure IoT Hub Integration. Just look this images to understand how we make simple downlink check for Azure Event Hub


You can familiarize with Azure Iot Hub using next Link: Azure IoT Hub Integration.
Conclusion
That’s it! Good luck in configuring of you IoT devices and dashboards!
Next steps
-
Getting started guides - These guides provide quick overview of main ThingsBoard features. Designed to be completed in 15-30 minutes.
-
Installation guides - Learn how to set up ThingsBoard on various available operating systems.
-
Data visualization - These guides contain instructions on how to configure complex ThingsBoard dashboards.
-
Data processing & actions - Learn how to use ThingsBoard Rule Engine.
-
IoT Data analytics - Learn how to use rule engine to perform basic analytics tasks.
-
Advanced features - Learn about advanced ThingsBoard features.