AI Widget Summary
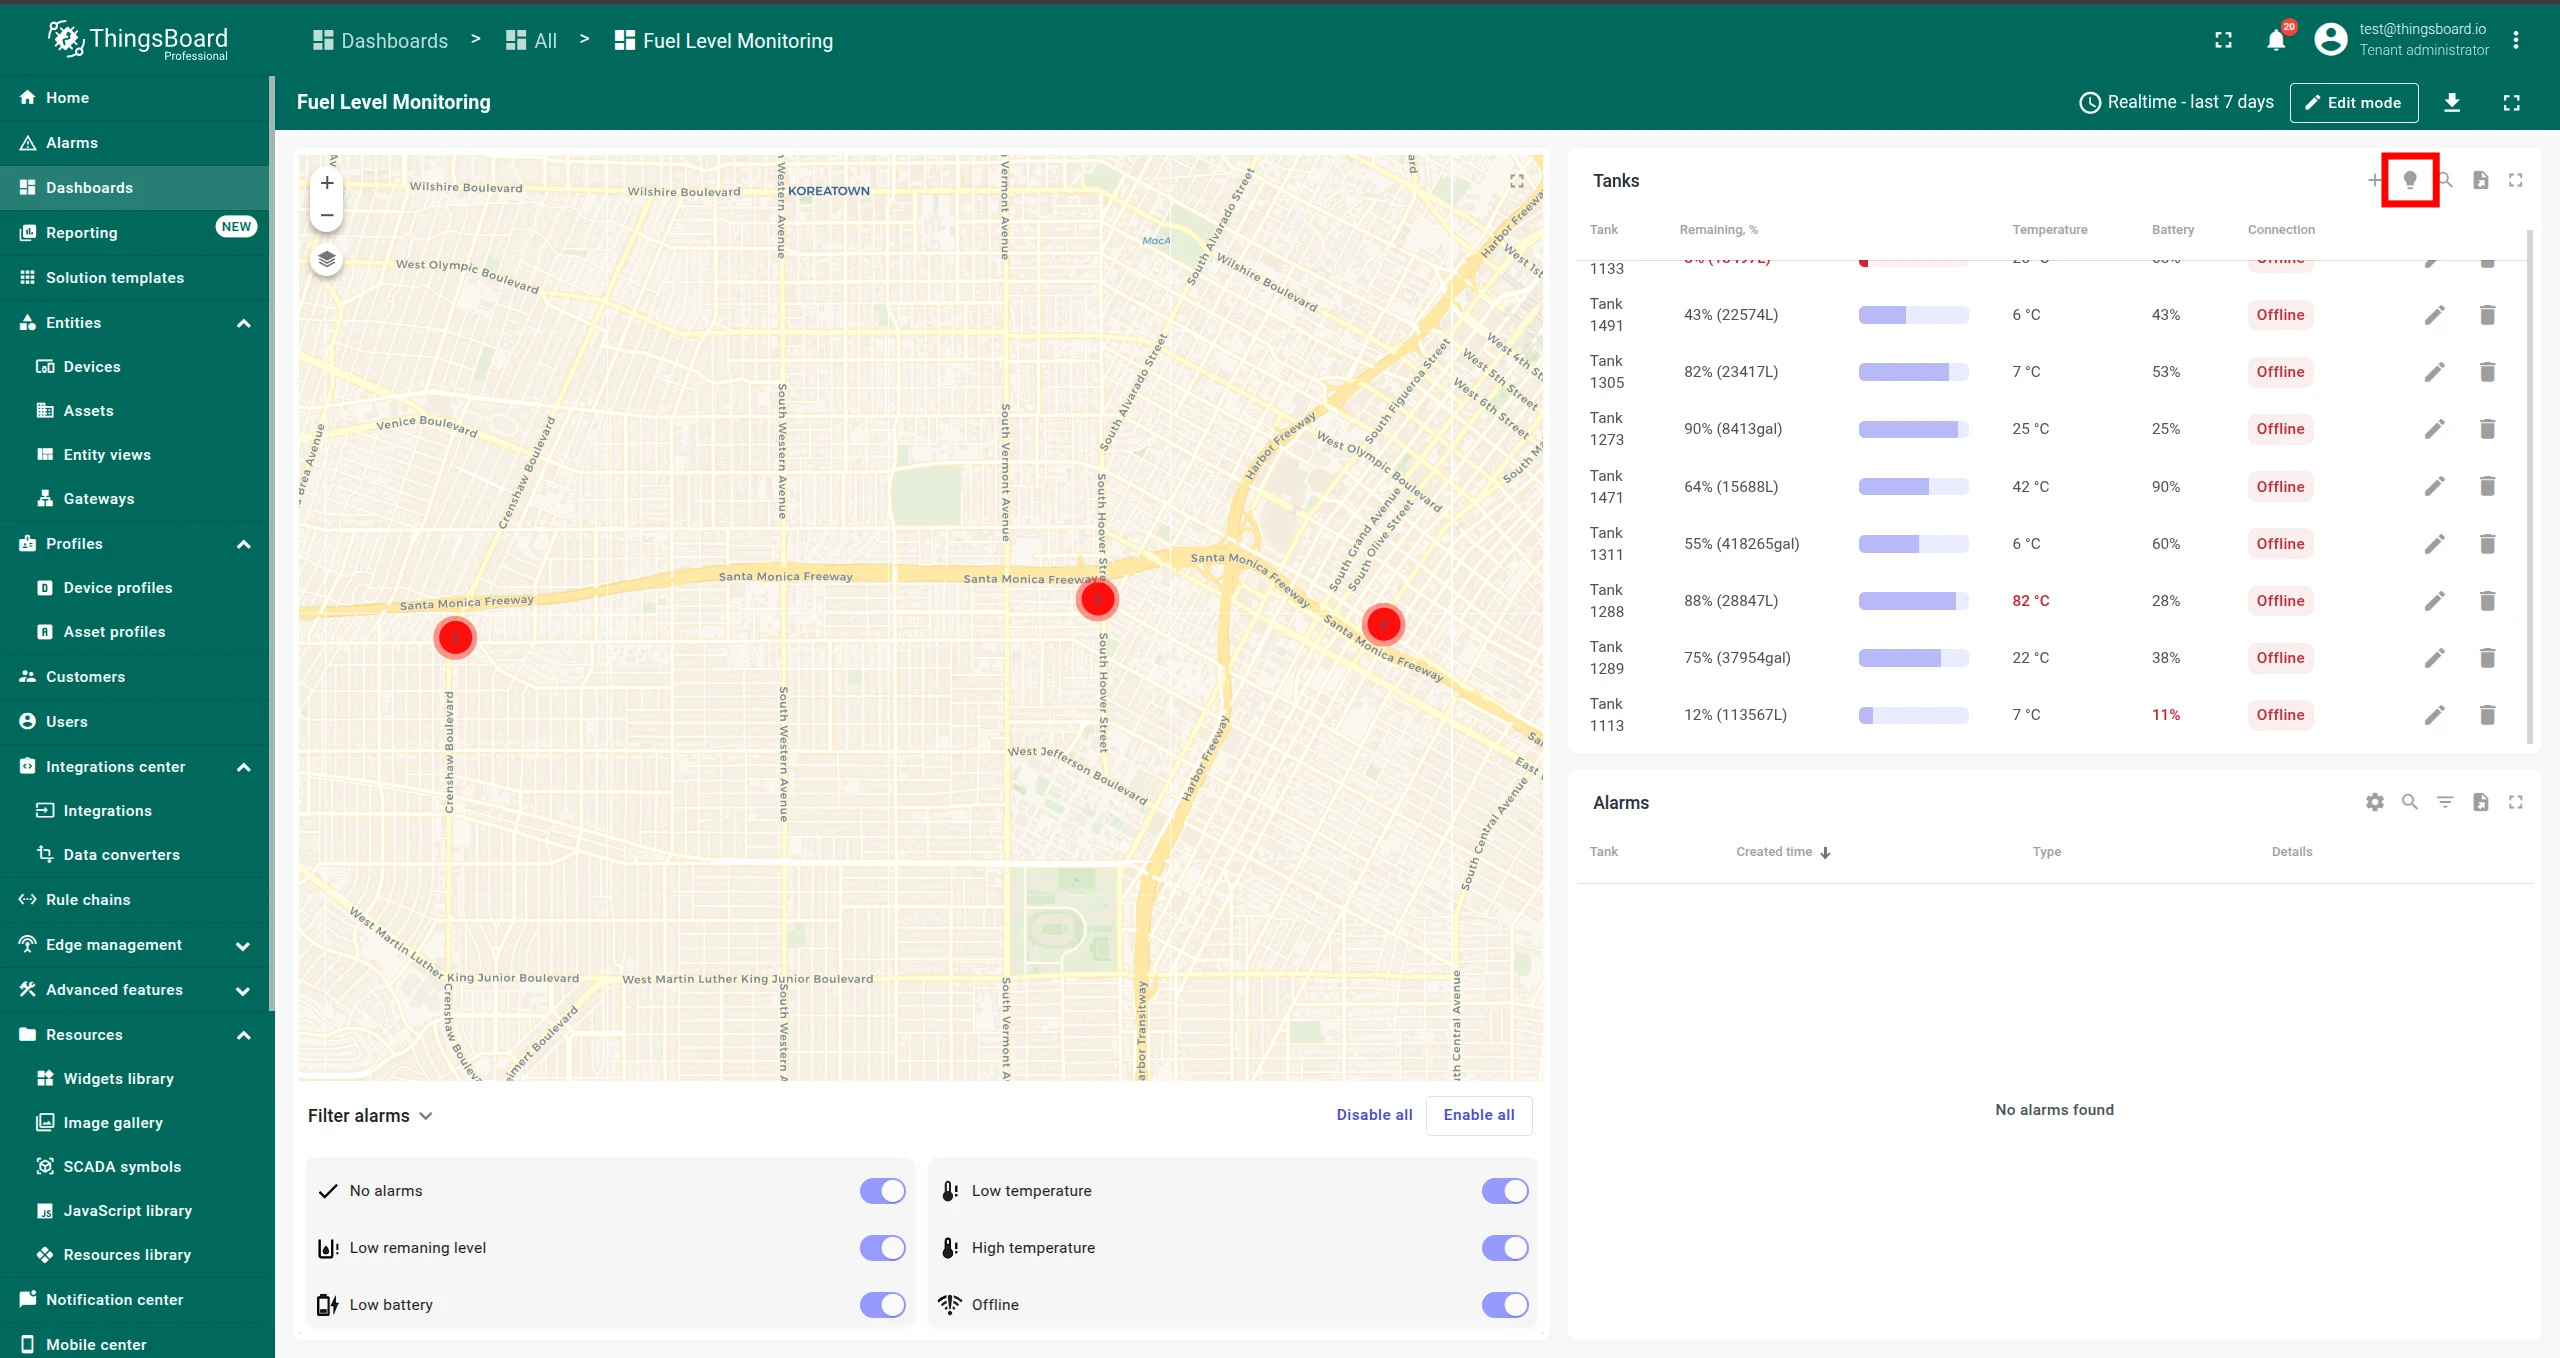
AI Widget Summary turns live ThingsBoard telemetry into an instant, human-readable analysis. A button in the widget header collects the telemetry and attributes you specify, fills a chosen prompt, and sends the request to the connected LLM. The response appears directly in the widget — a status digest, anomaly explanation, recommended next steps, or any other insight the prompt defines.
There are two ways to use AI summaries:
- ThingsBoard widgets — add a summary button to any existing widget via a custom action (v3.9+)
- Trendz widgets — the button is built in; enable it and optionally pick a prompt
ThingsBoard Widget Integration
Section titled “ThingsBoard Widget Integration”Step 1: Upload the Trendz AI Summary Module
Section titled “Step 1: Upload the Trendz AI Summary Module”-
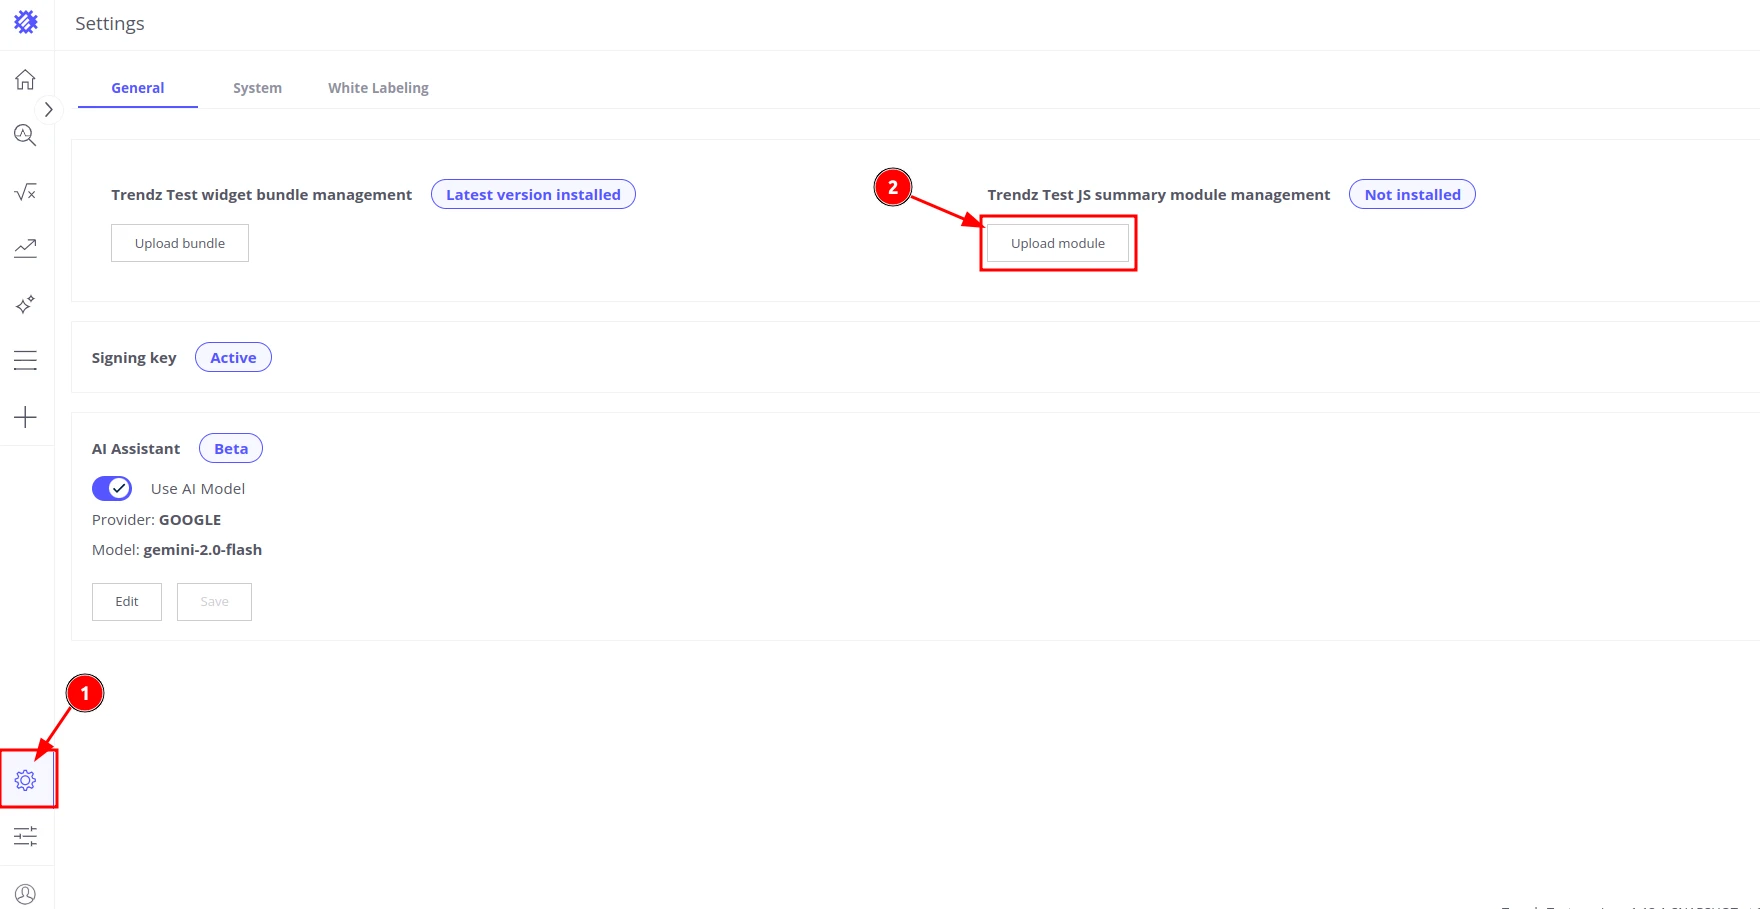
Open the Settings page in the Trendz app.
-
Click Upload Module.
-
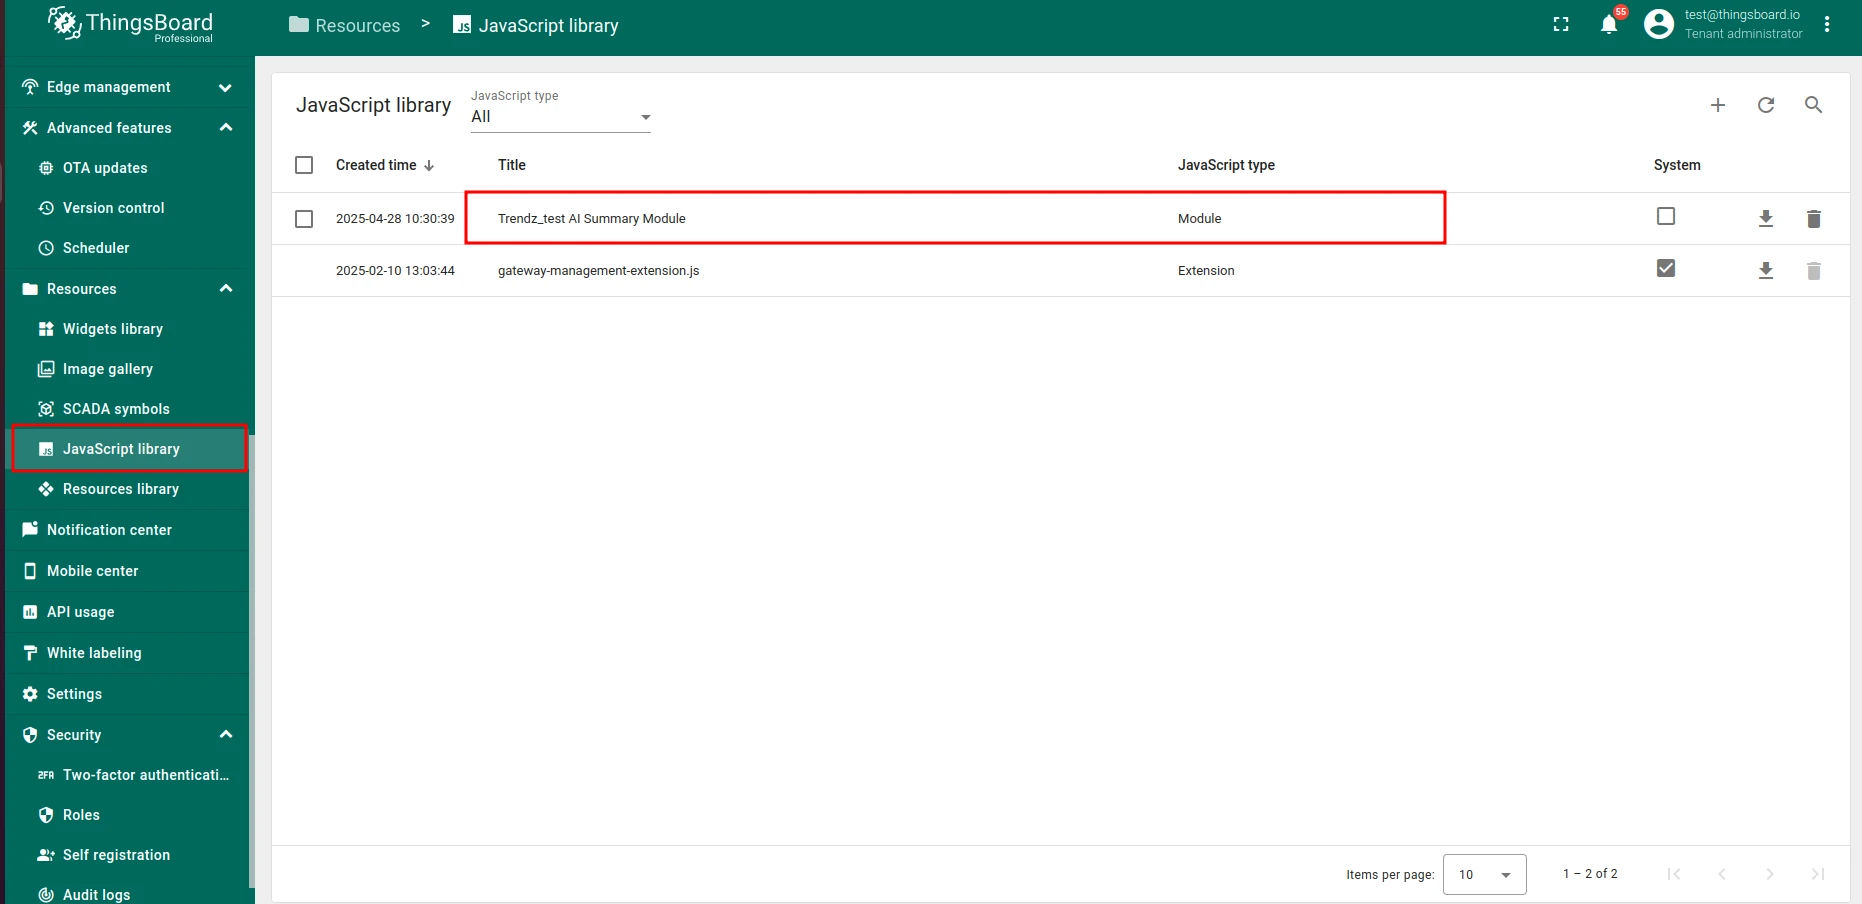
Confirm that the module appears in the list after upload.
Step 2: Add a Custom Action to the Widget
Section titled “Step 2: Add a Custom Action to the Widget”-
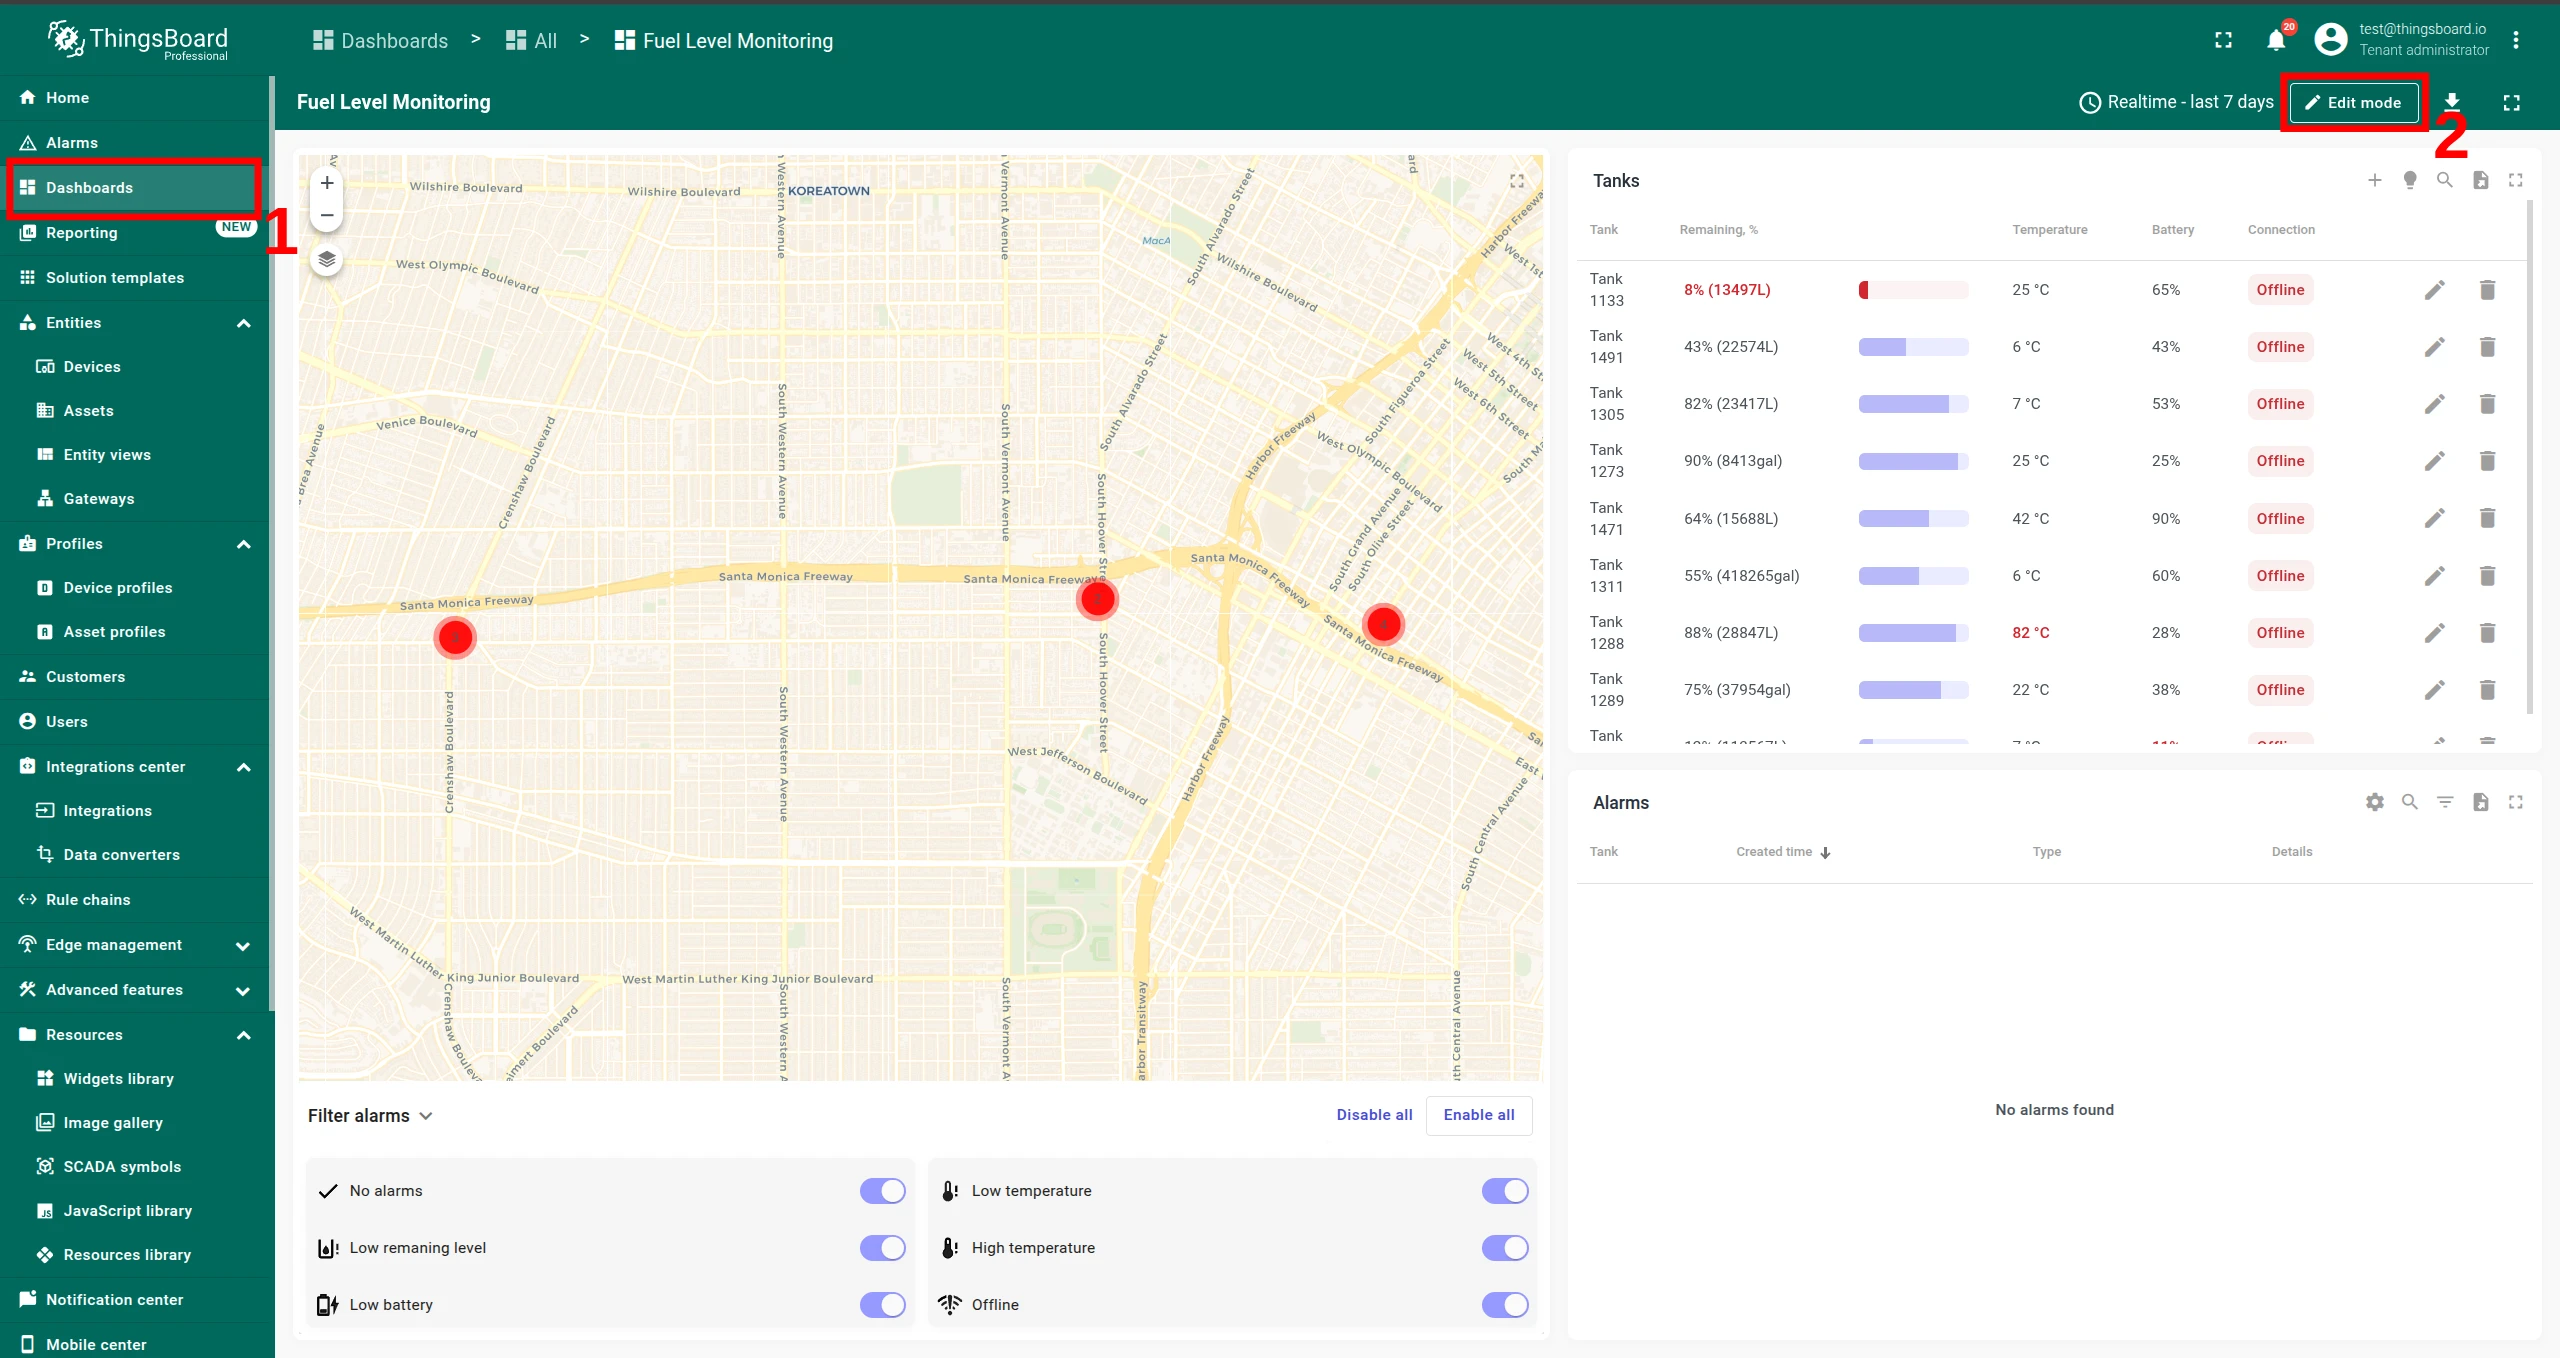
Open the dashboard containing your widget and switch to Edit mode.
-
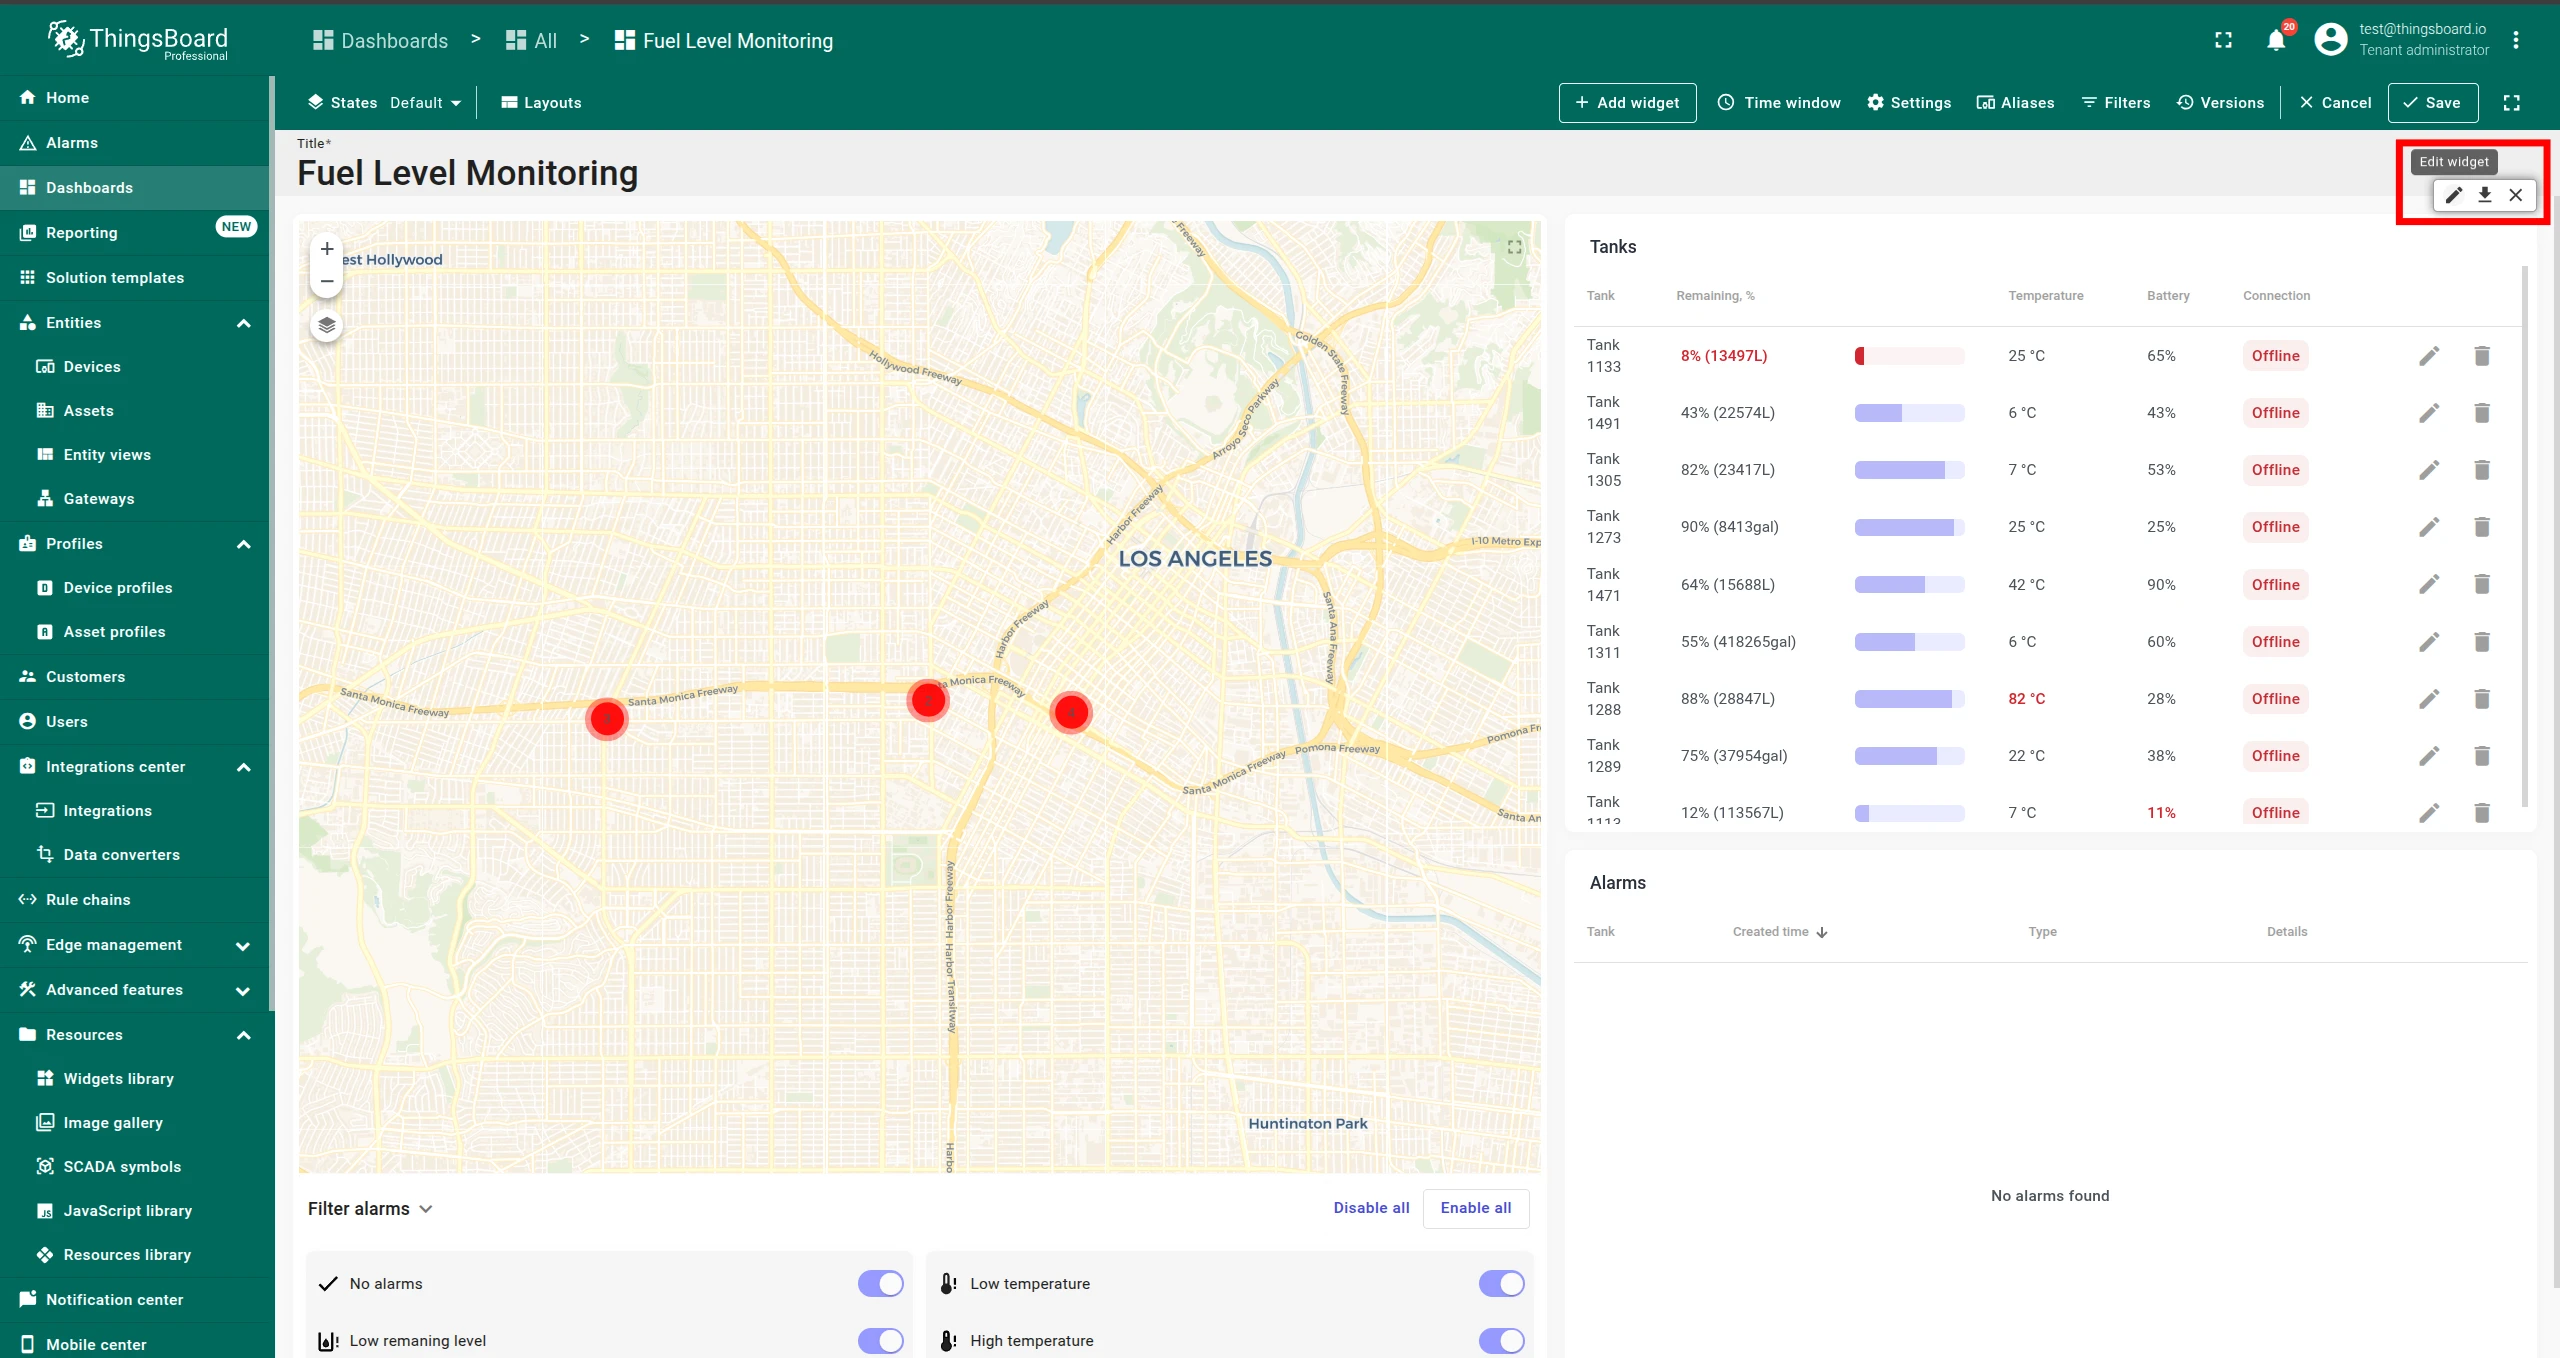
Click Edit Widget on the widget you want to add the summary action to.
-
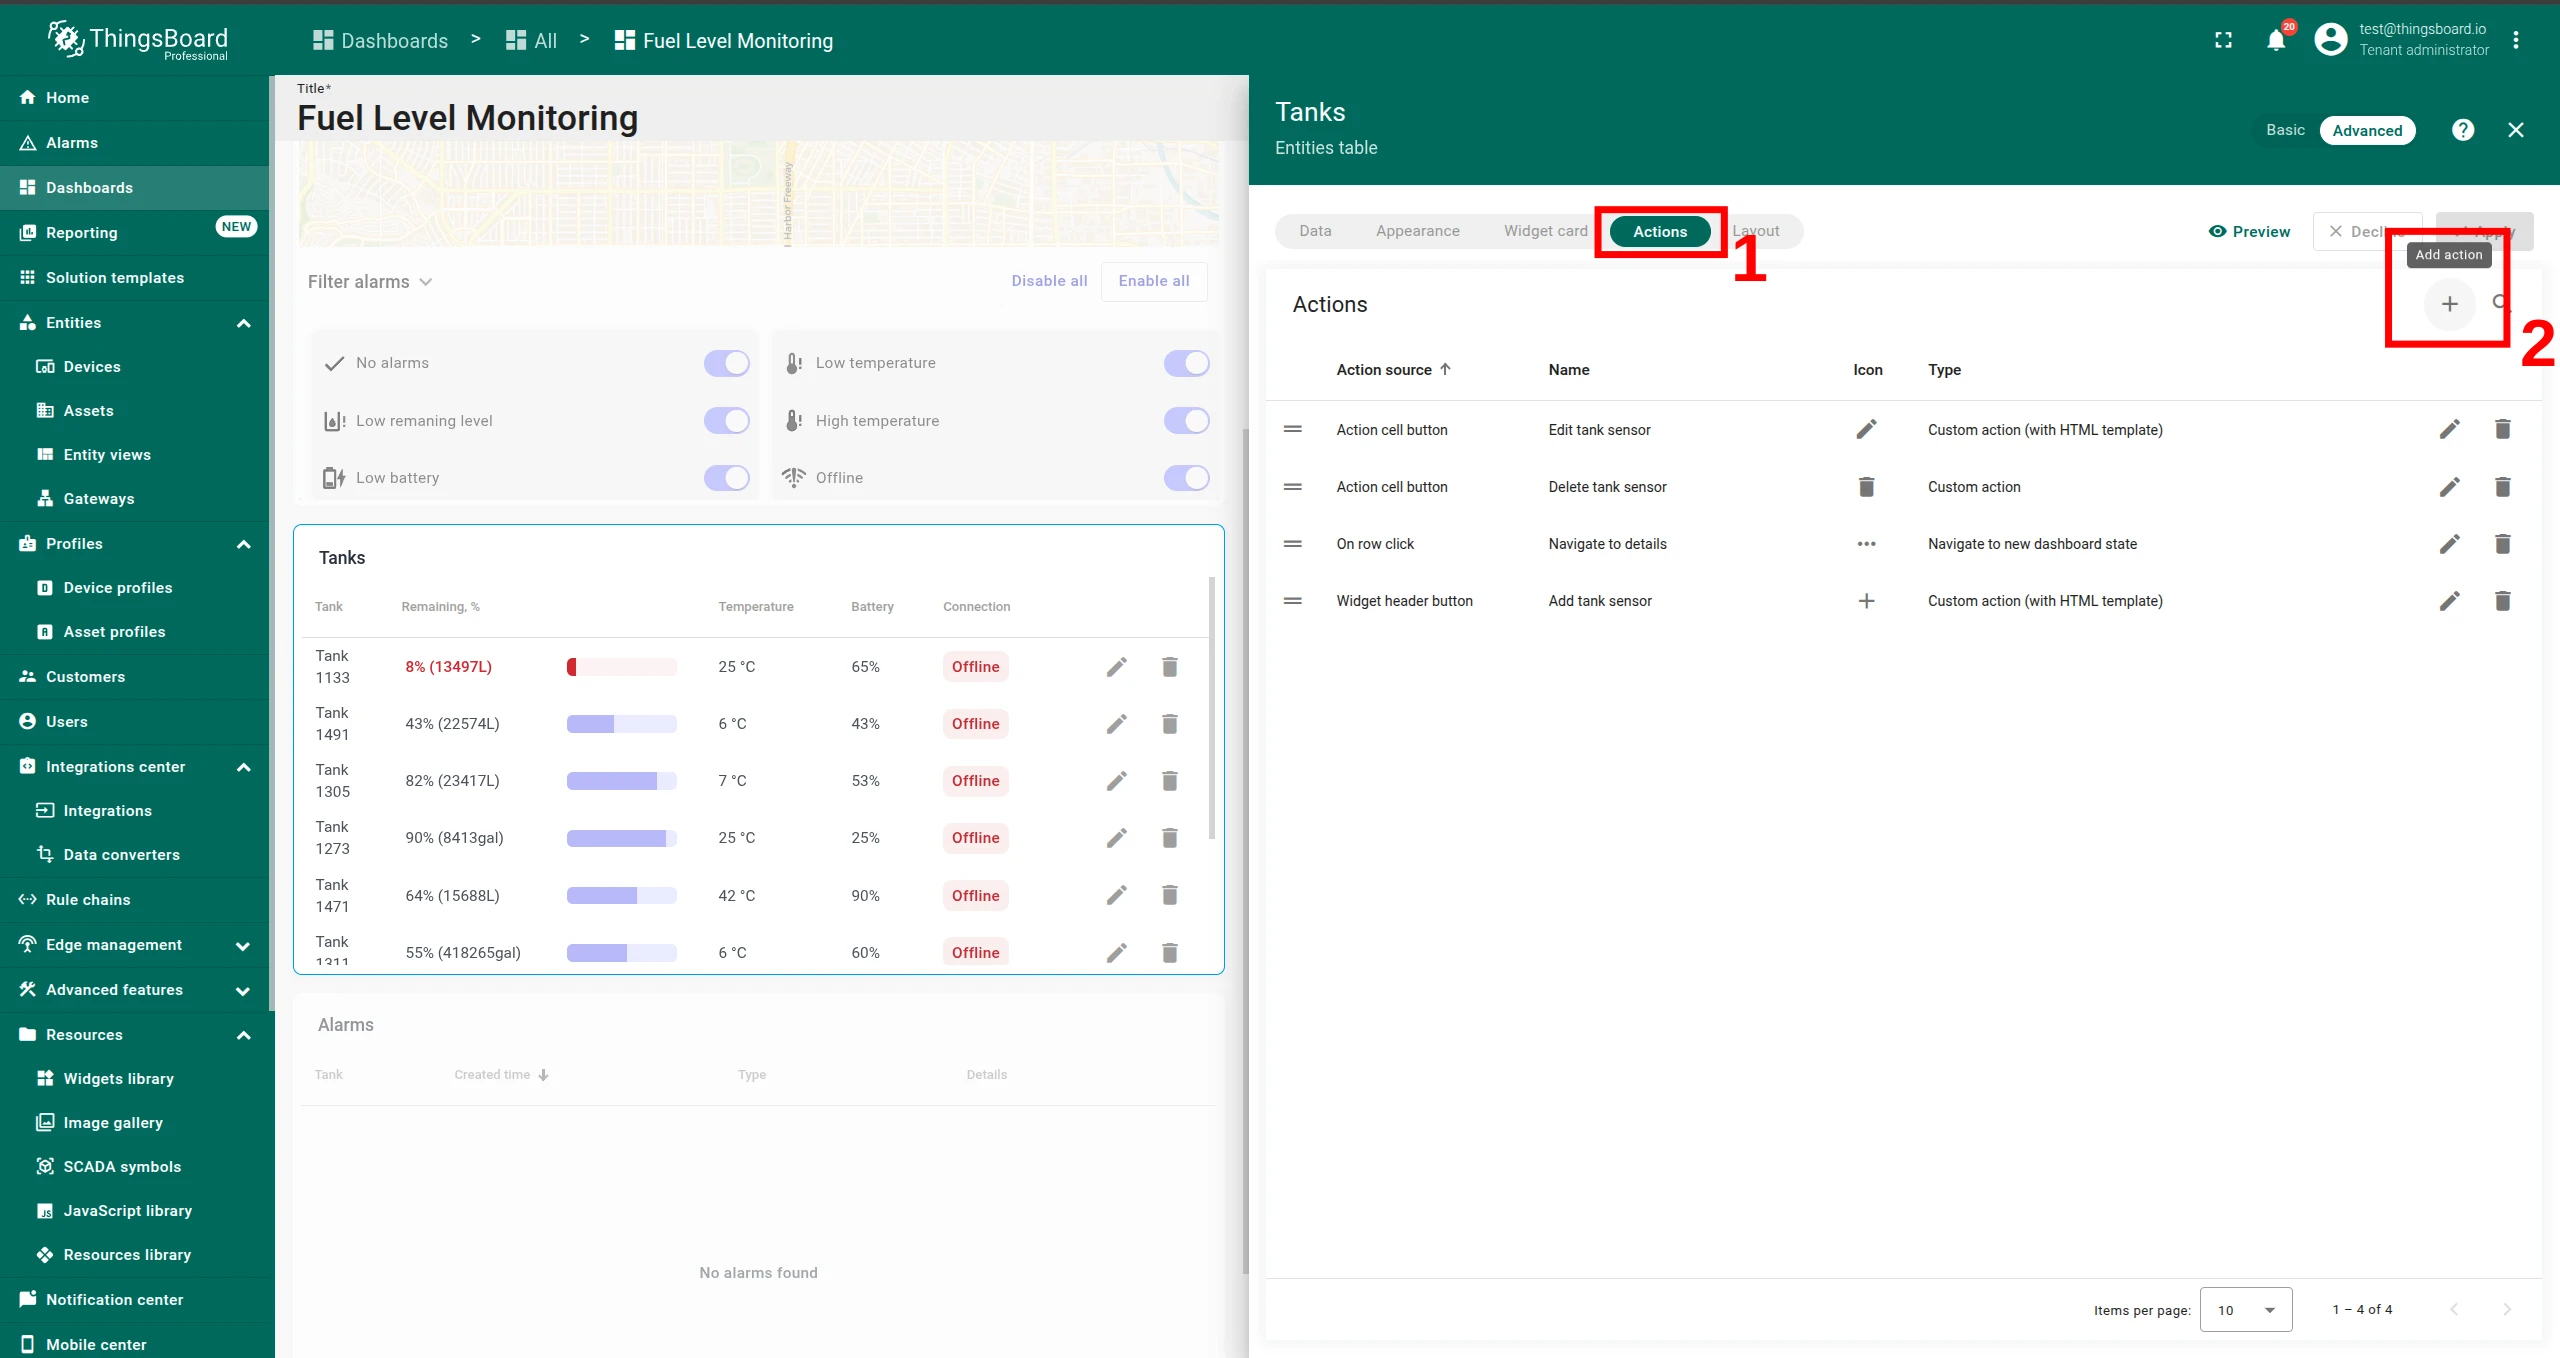
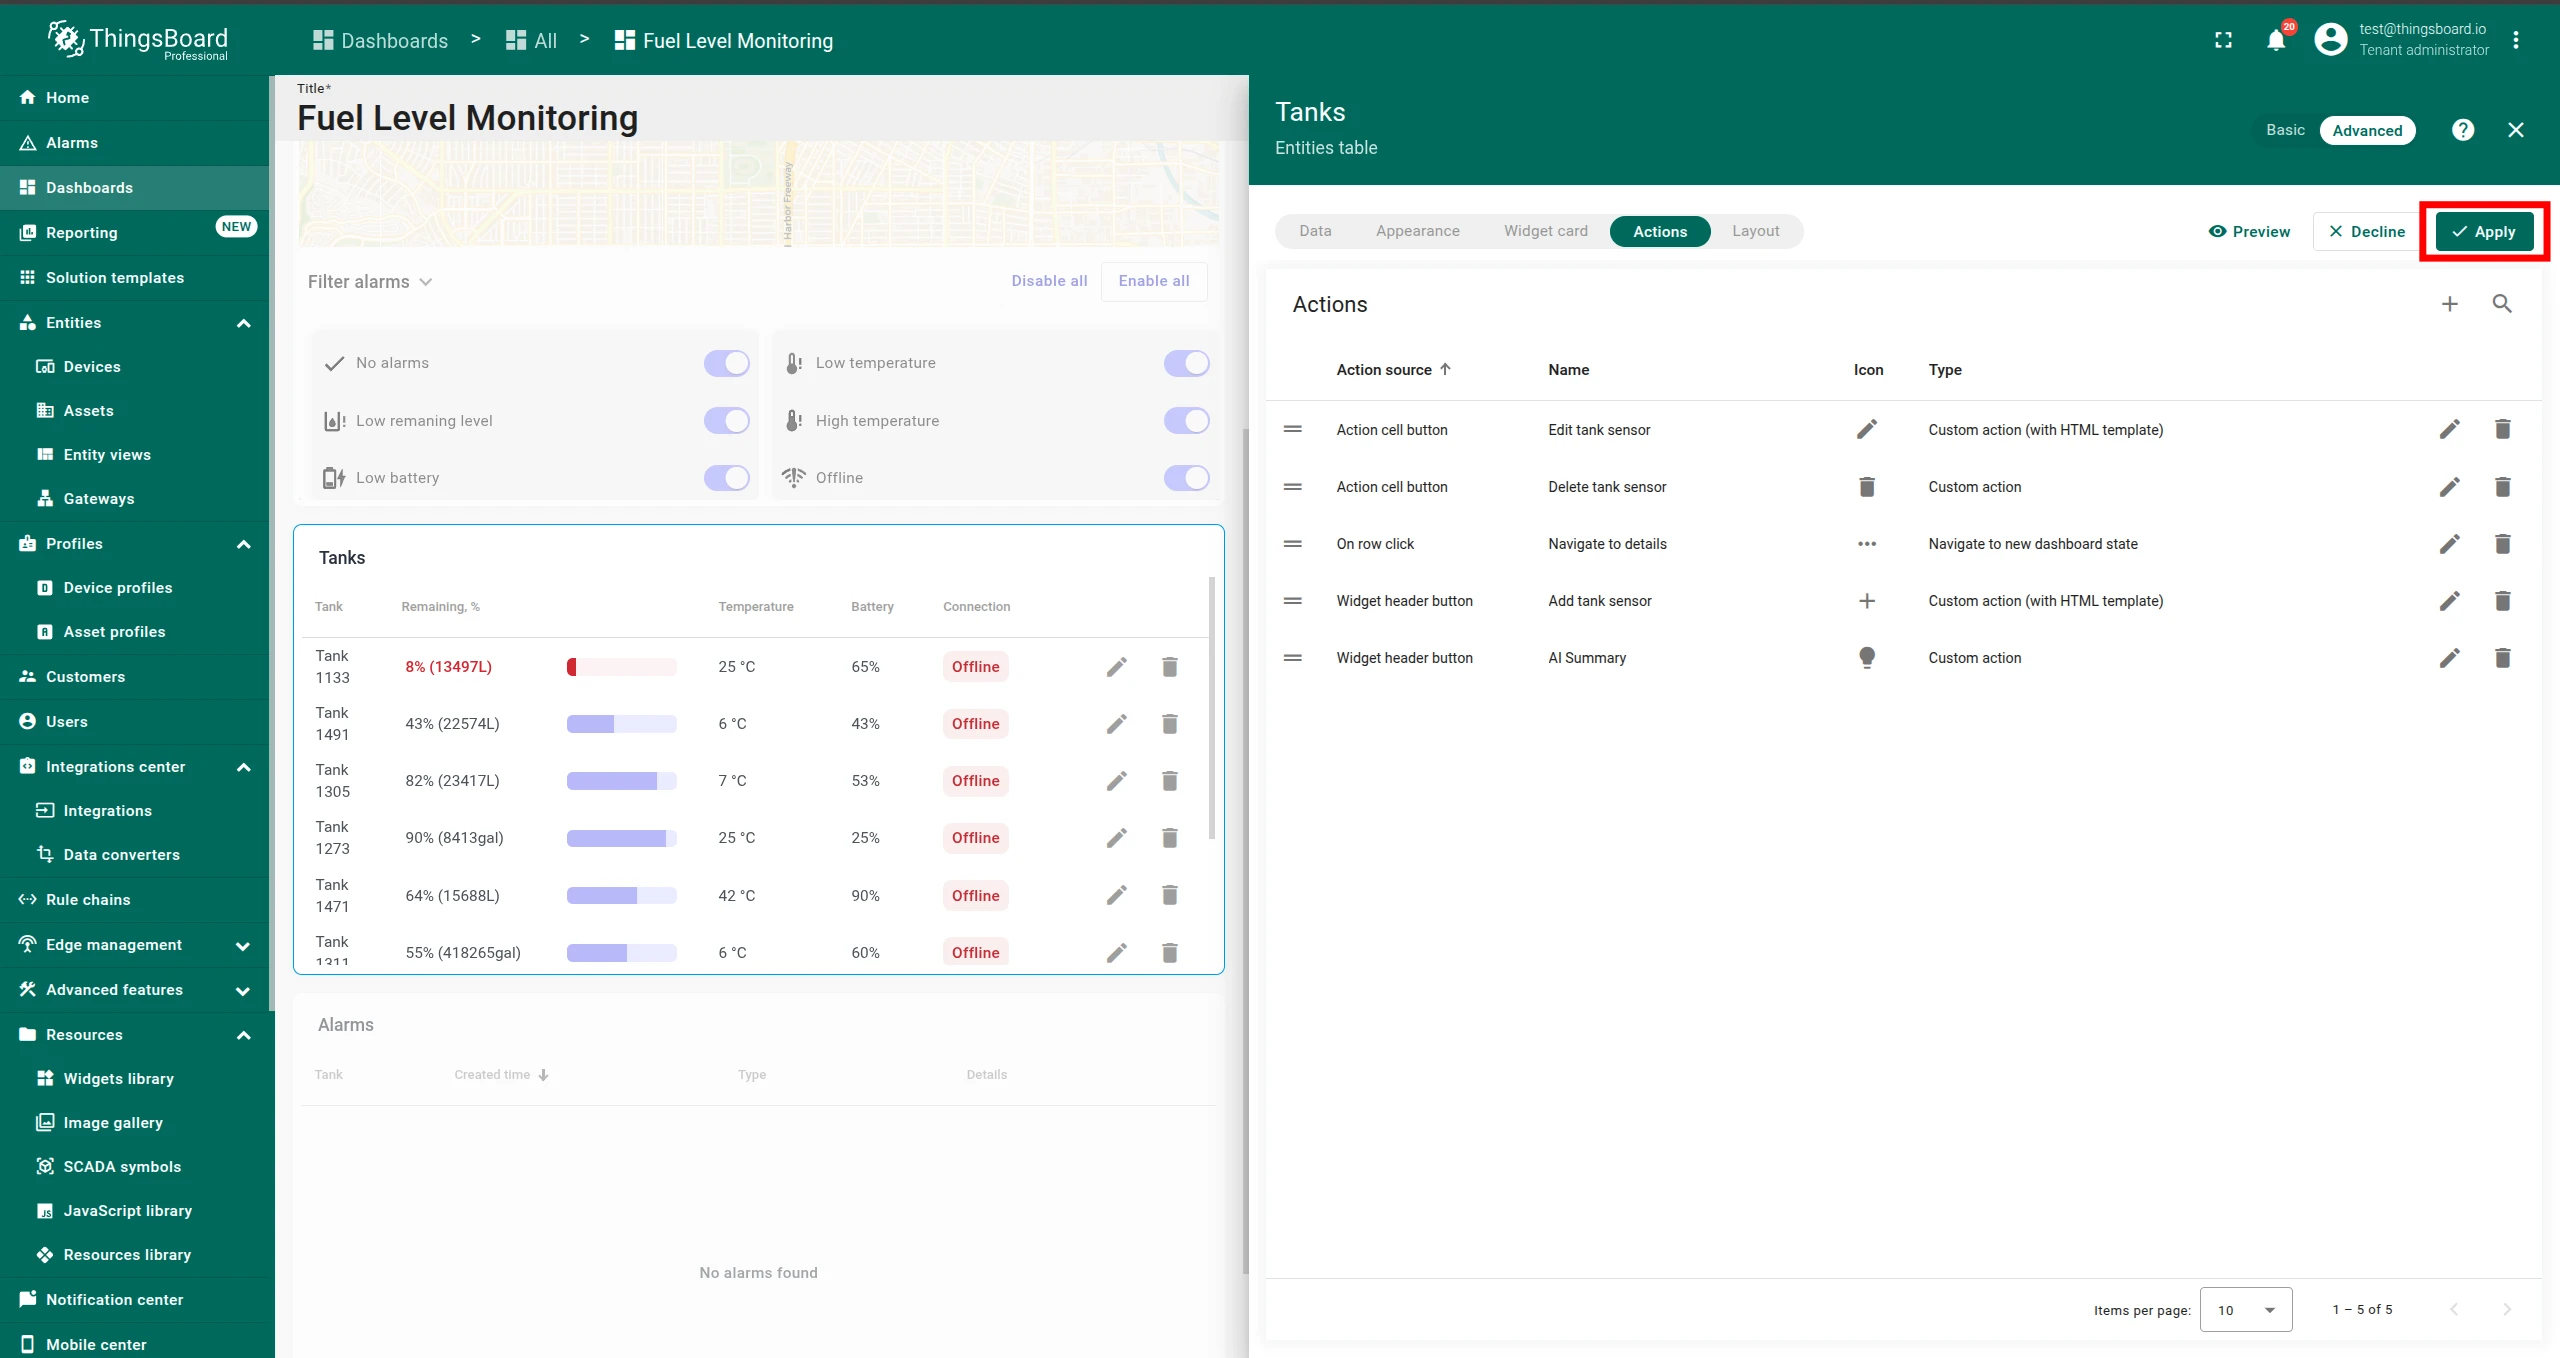
Go to the Actions tab and click Add action.
-
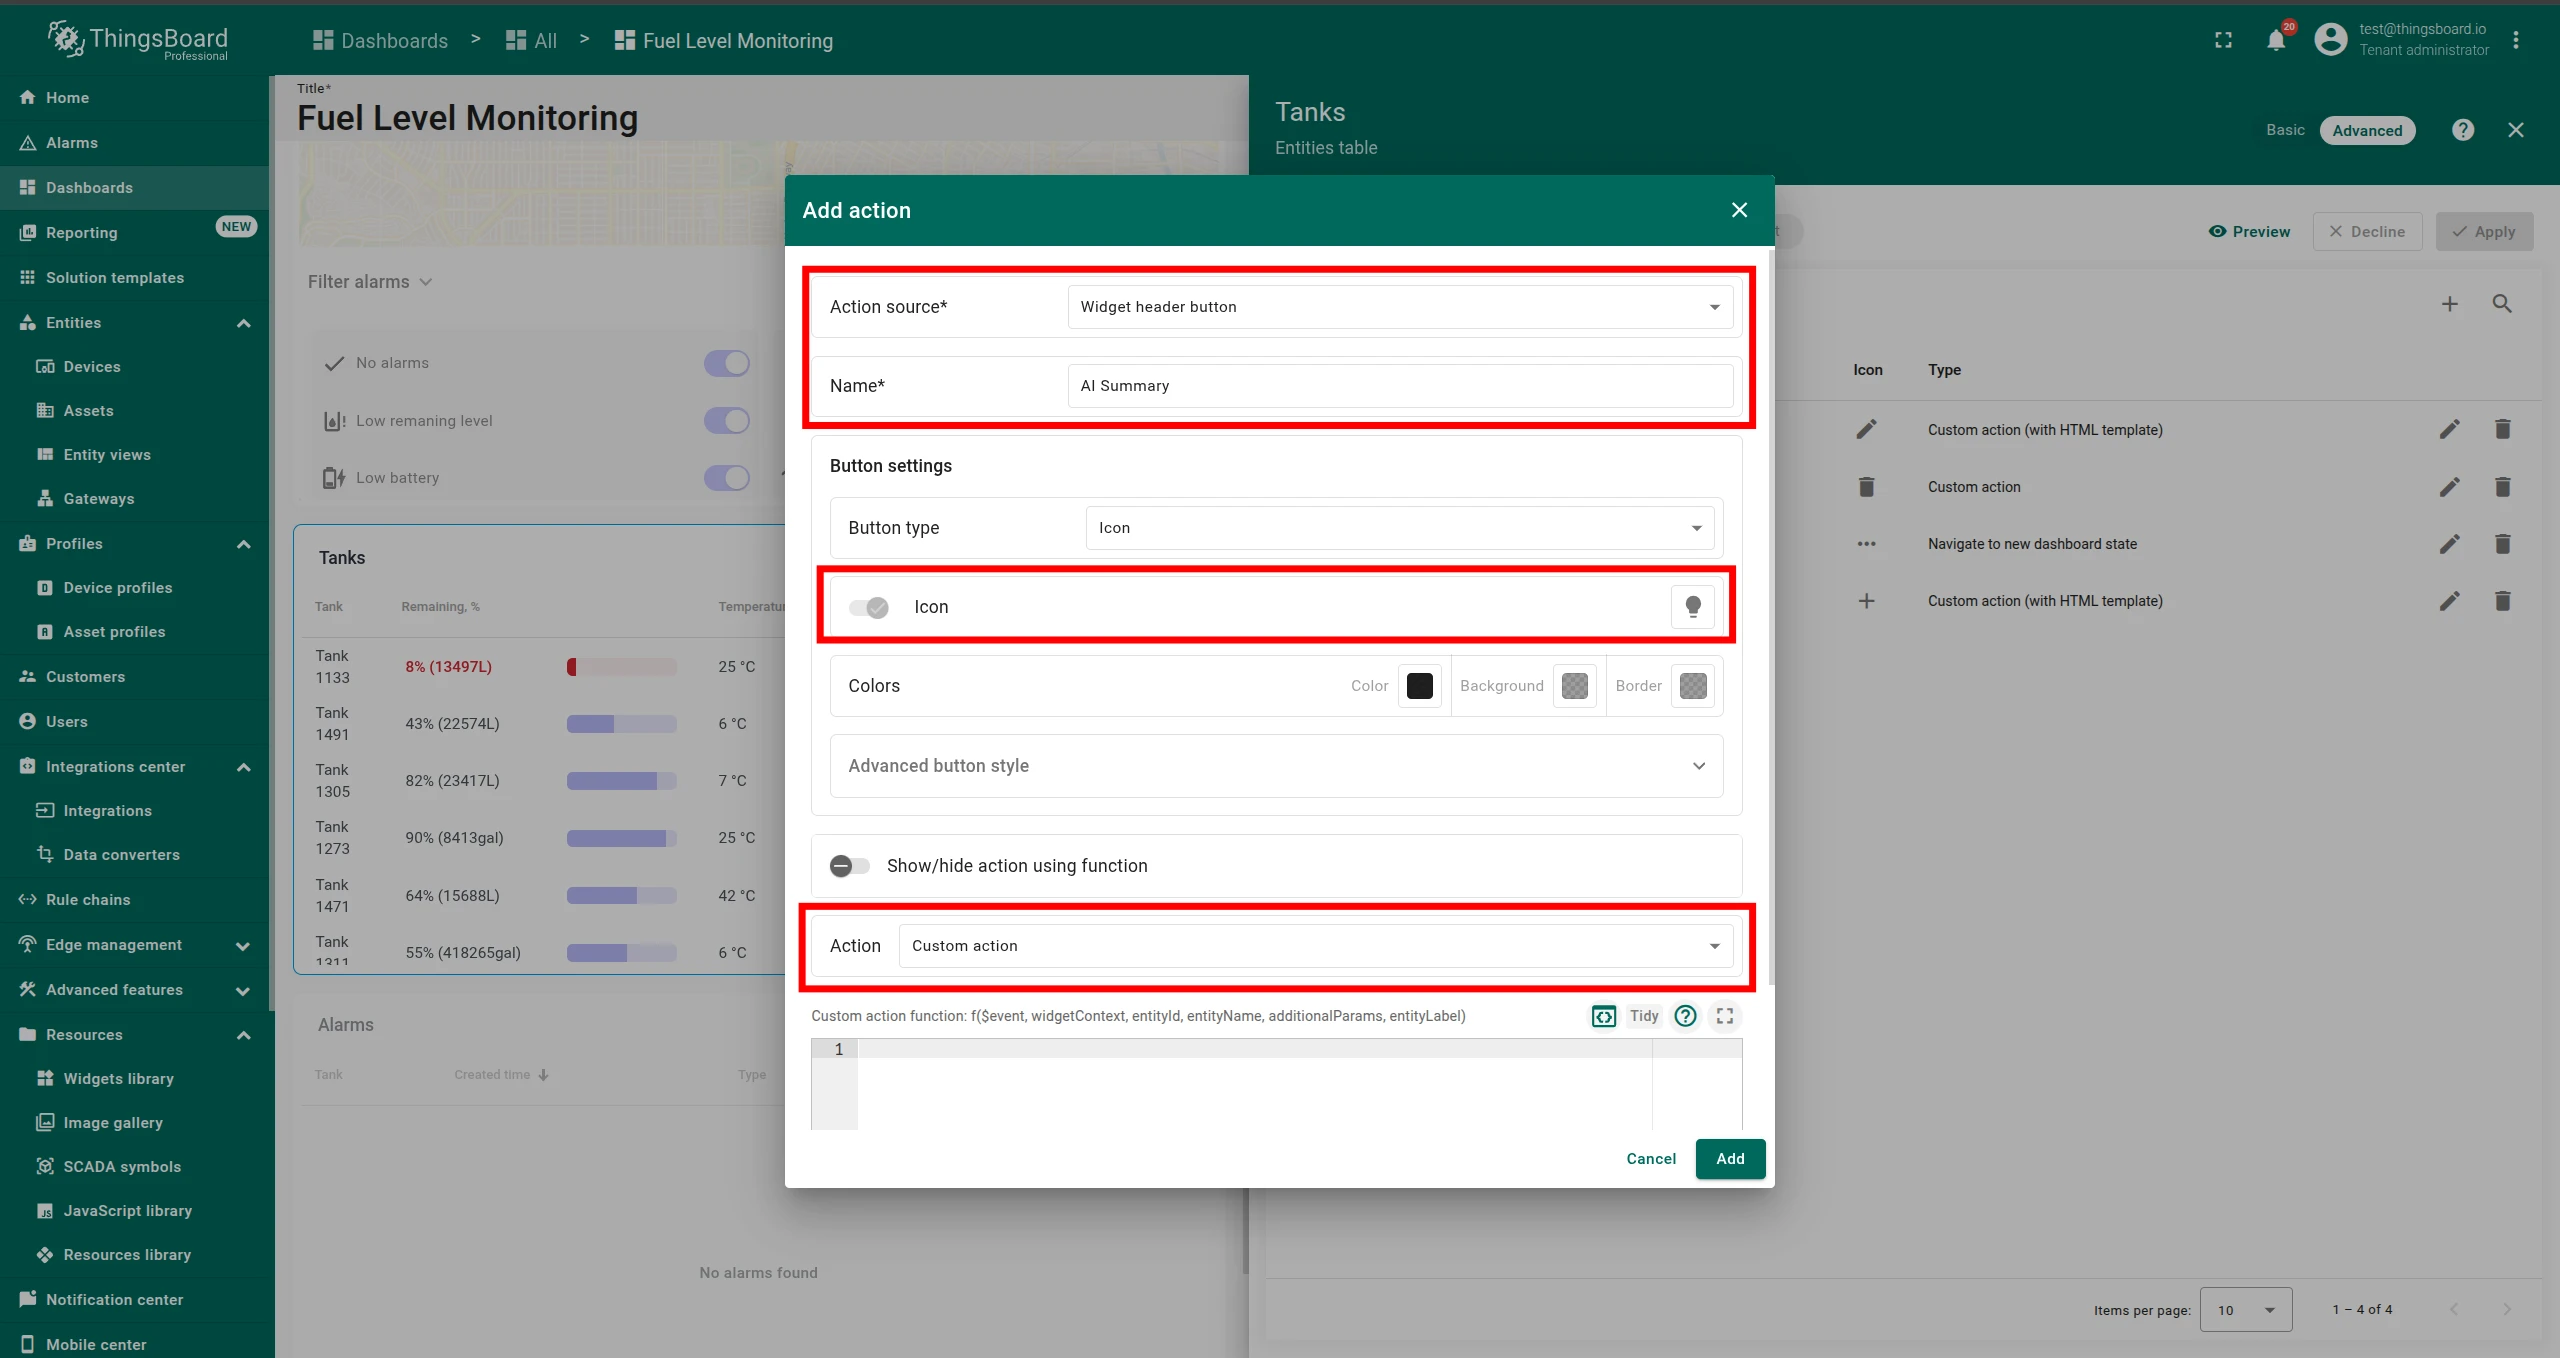
Configure the action:
Field Value Action source Widget header button Name Any (e.g. AI Summary)Button icon Any (default: ⋯)Action Custom action
Step 3: Link the JS Module and Add the Call
Section titled “Step 3: Link the JS Module and Add the Call”-
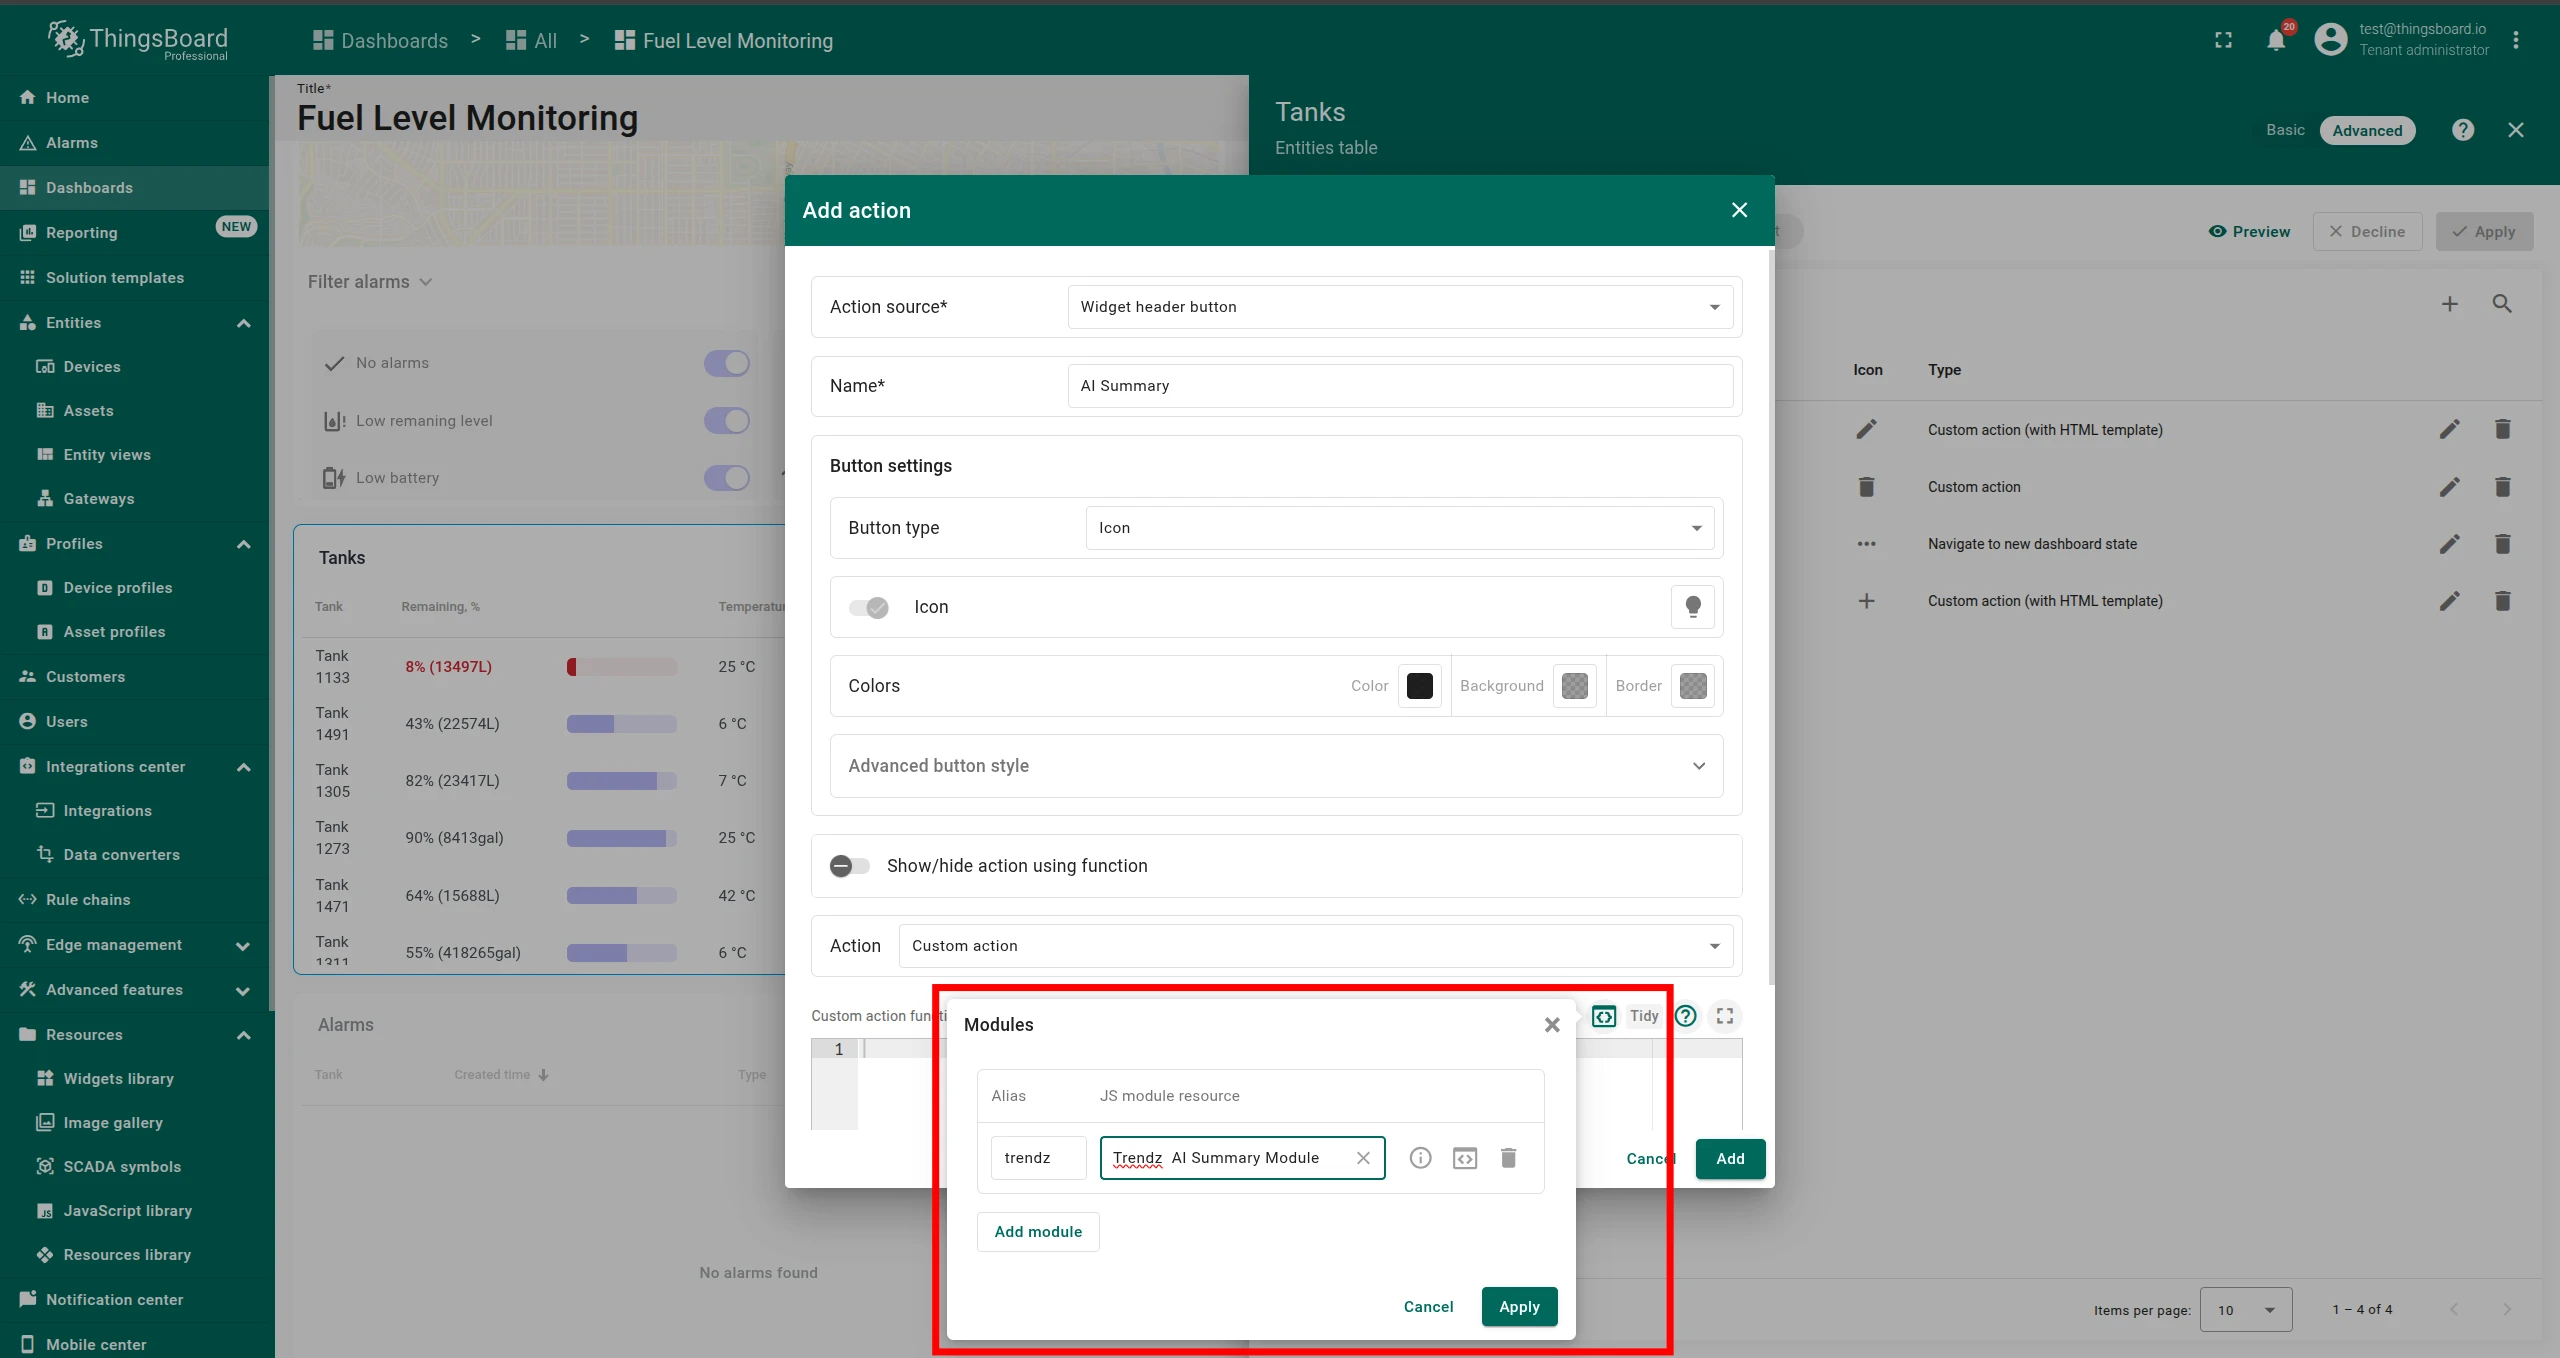
In the custom action editor, click Modules → Add module.
-
Set:
- Alias:
trendz - JS module resource:
Trendz AI Summary Module(name may differ in whitelabeled versions)
- Alias:
-
Click Apply.
-
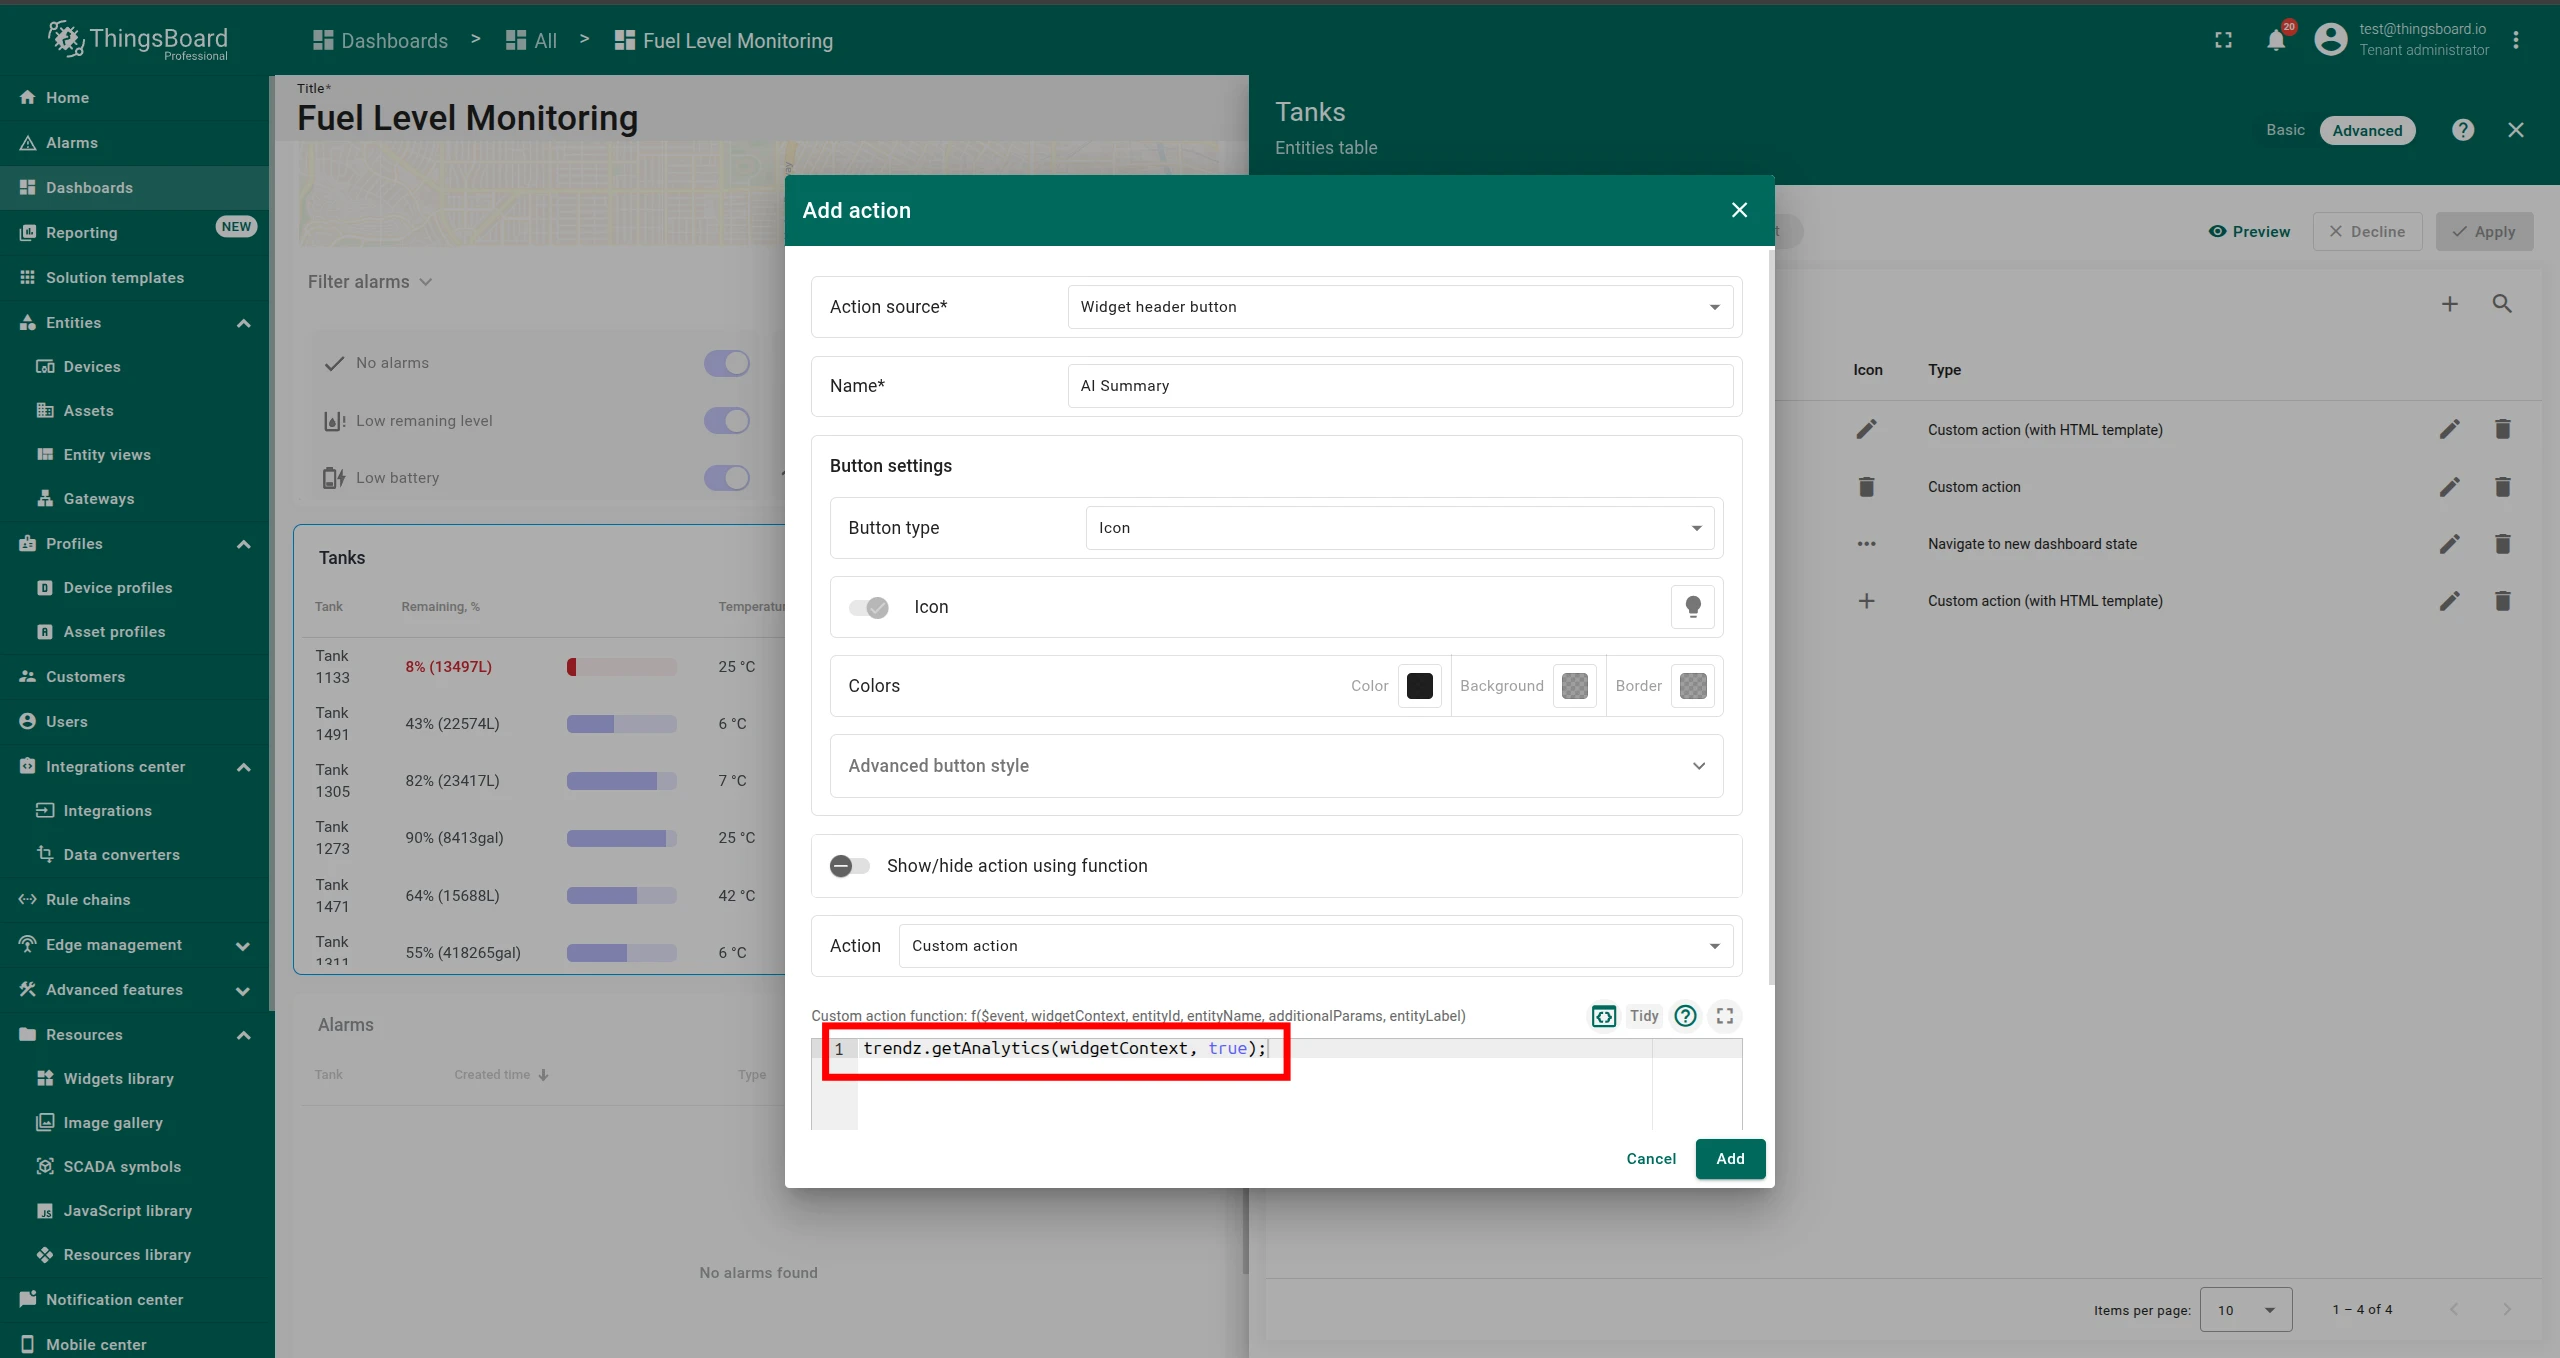
In the custom action code field, add:
trendz.getAnalytics(widgetContext, true); -
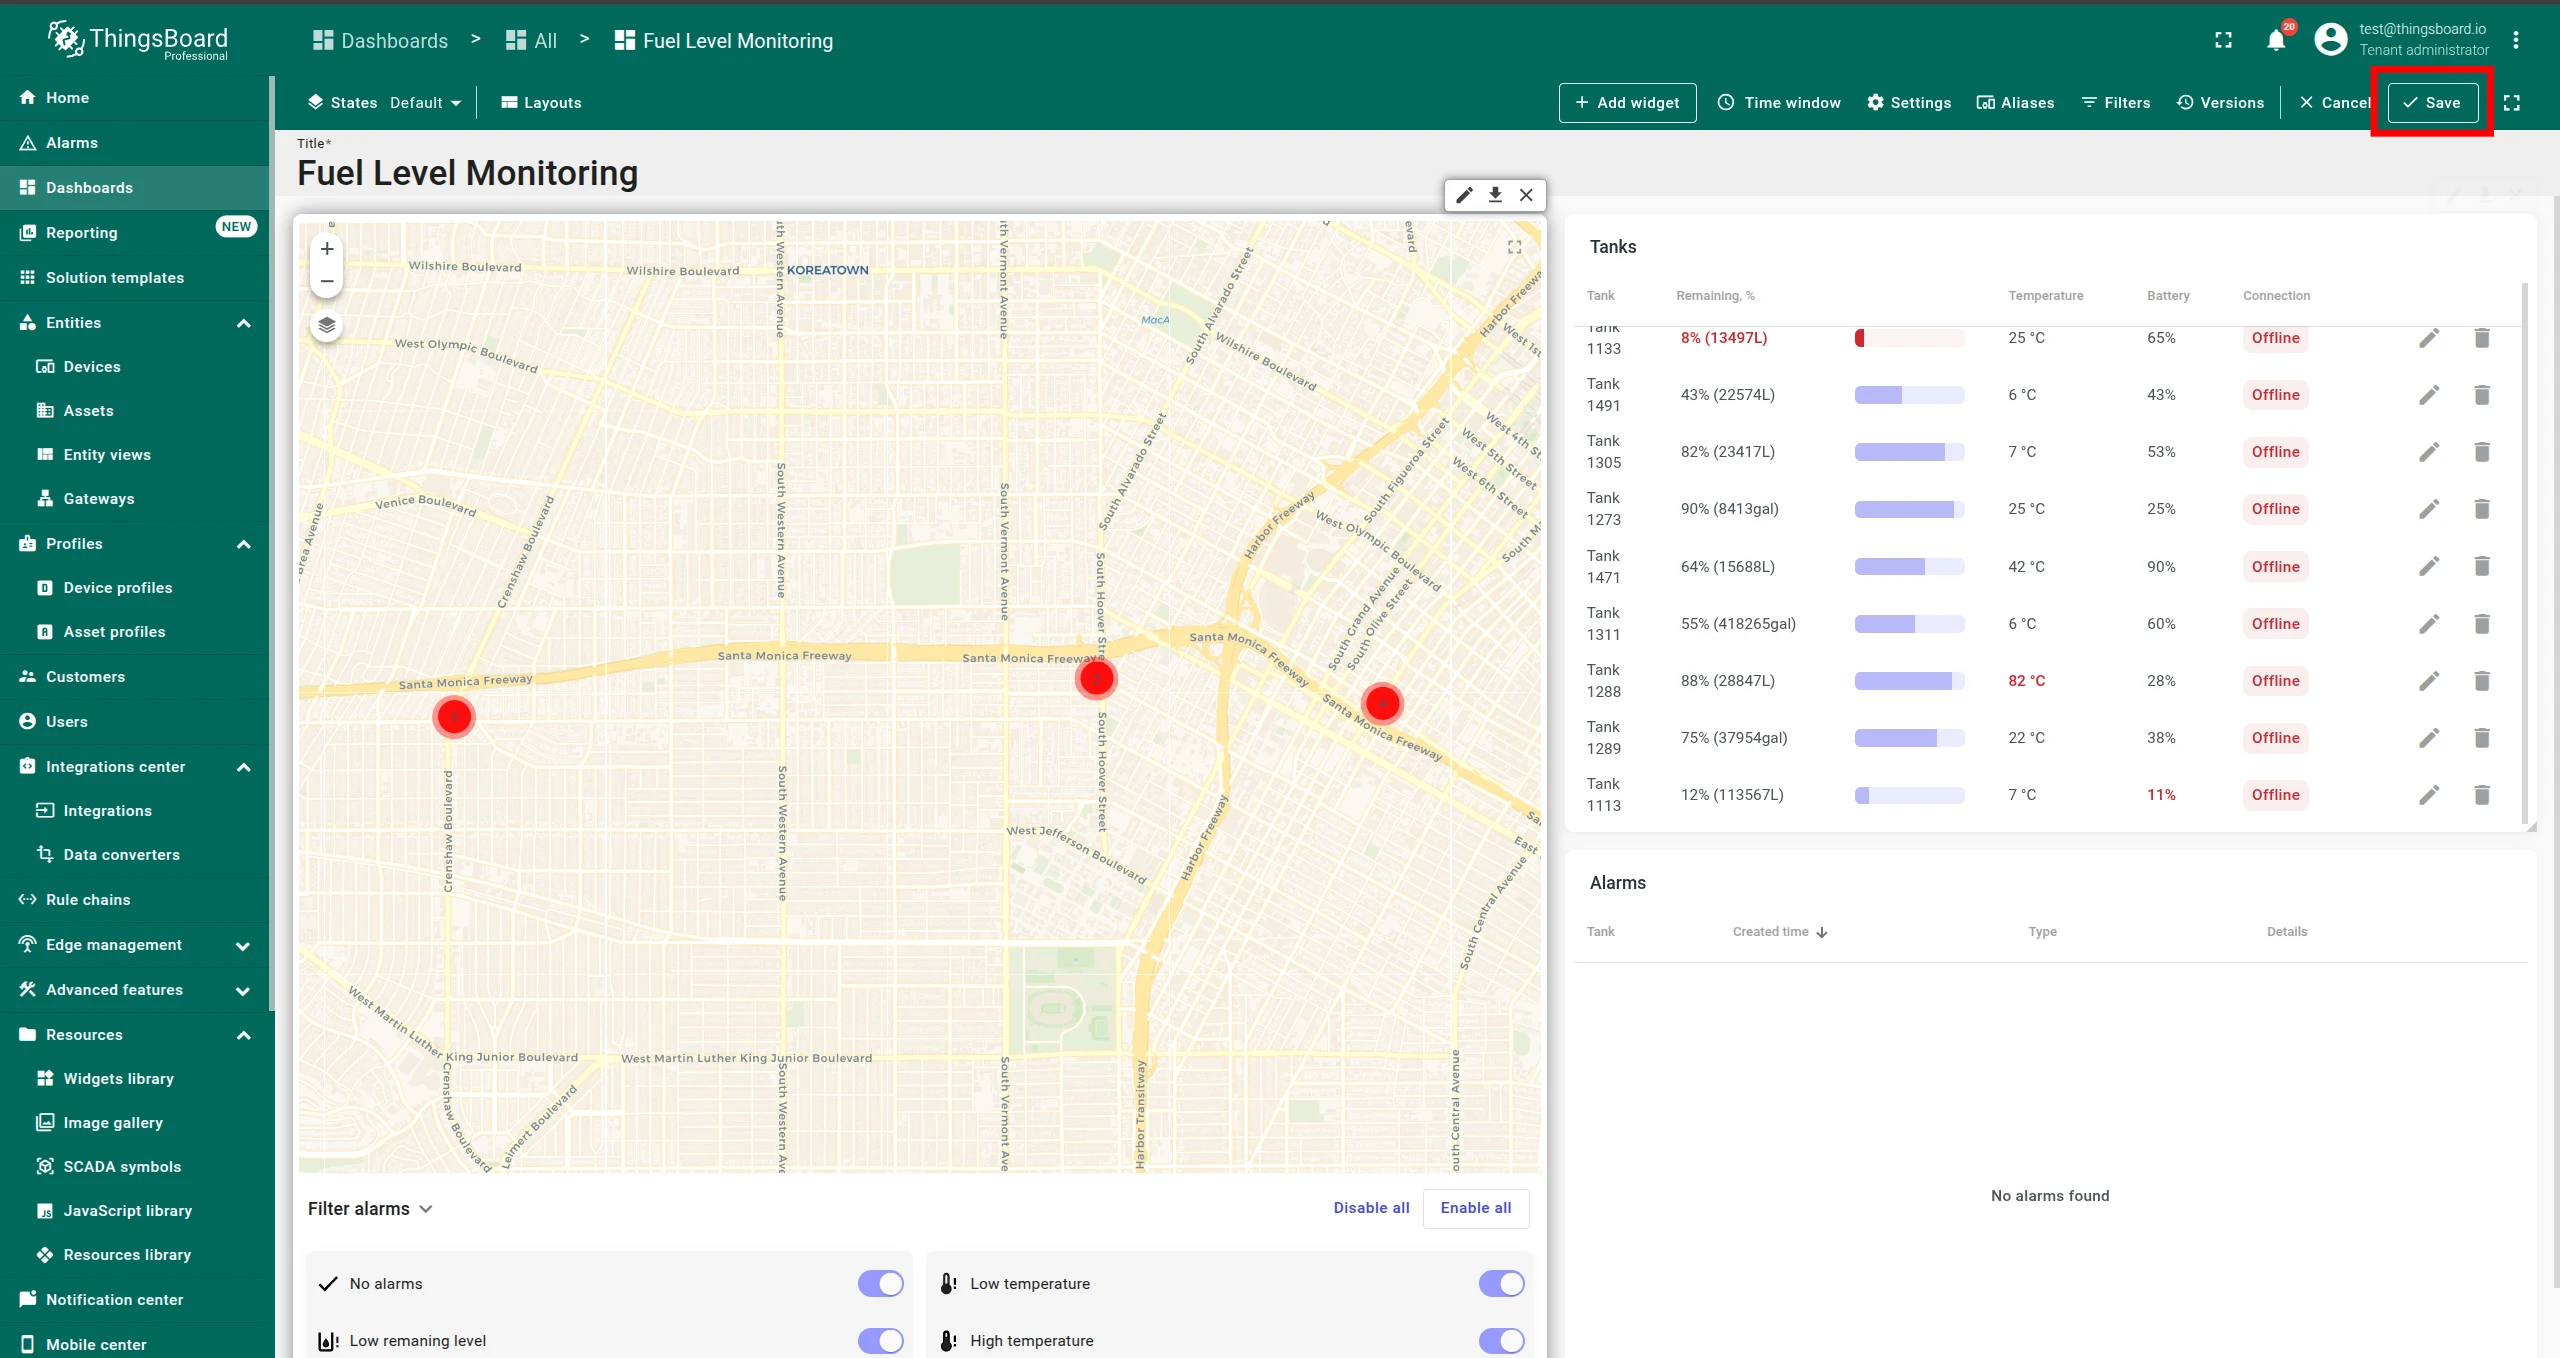
Click Add, then Apply, then Save.
Customize the Summary with getAnalytics()
Section titled “Customize the Summary with getAnalytics()”The getAnalytics() call accepts an optional third argument to control which prompt is used:
| Mode | Call | Description |
|---|---|---|
| Default prompt | trendz.getAnalytics(widgetContext, true) |
Uses the Trendz system default prompt |
| Inline prompt | trendz.getAnalytics(widgetContext, false, 'Your custom instruction here.') |
Sends a plain-text prompt you write inline |
| Saved prompt by ID | trendz.getAnalytics(widgetContext, false, 'ef348780-a034-4ea9-9225-8b6ad112c451') |
References a prompt saved in Trendz by its ID |
Trendz Widgets
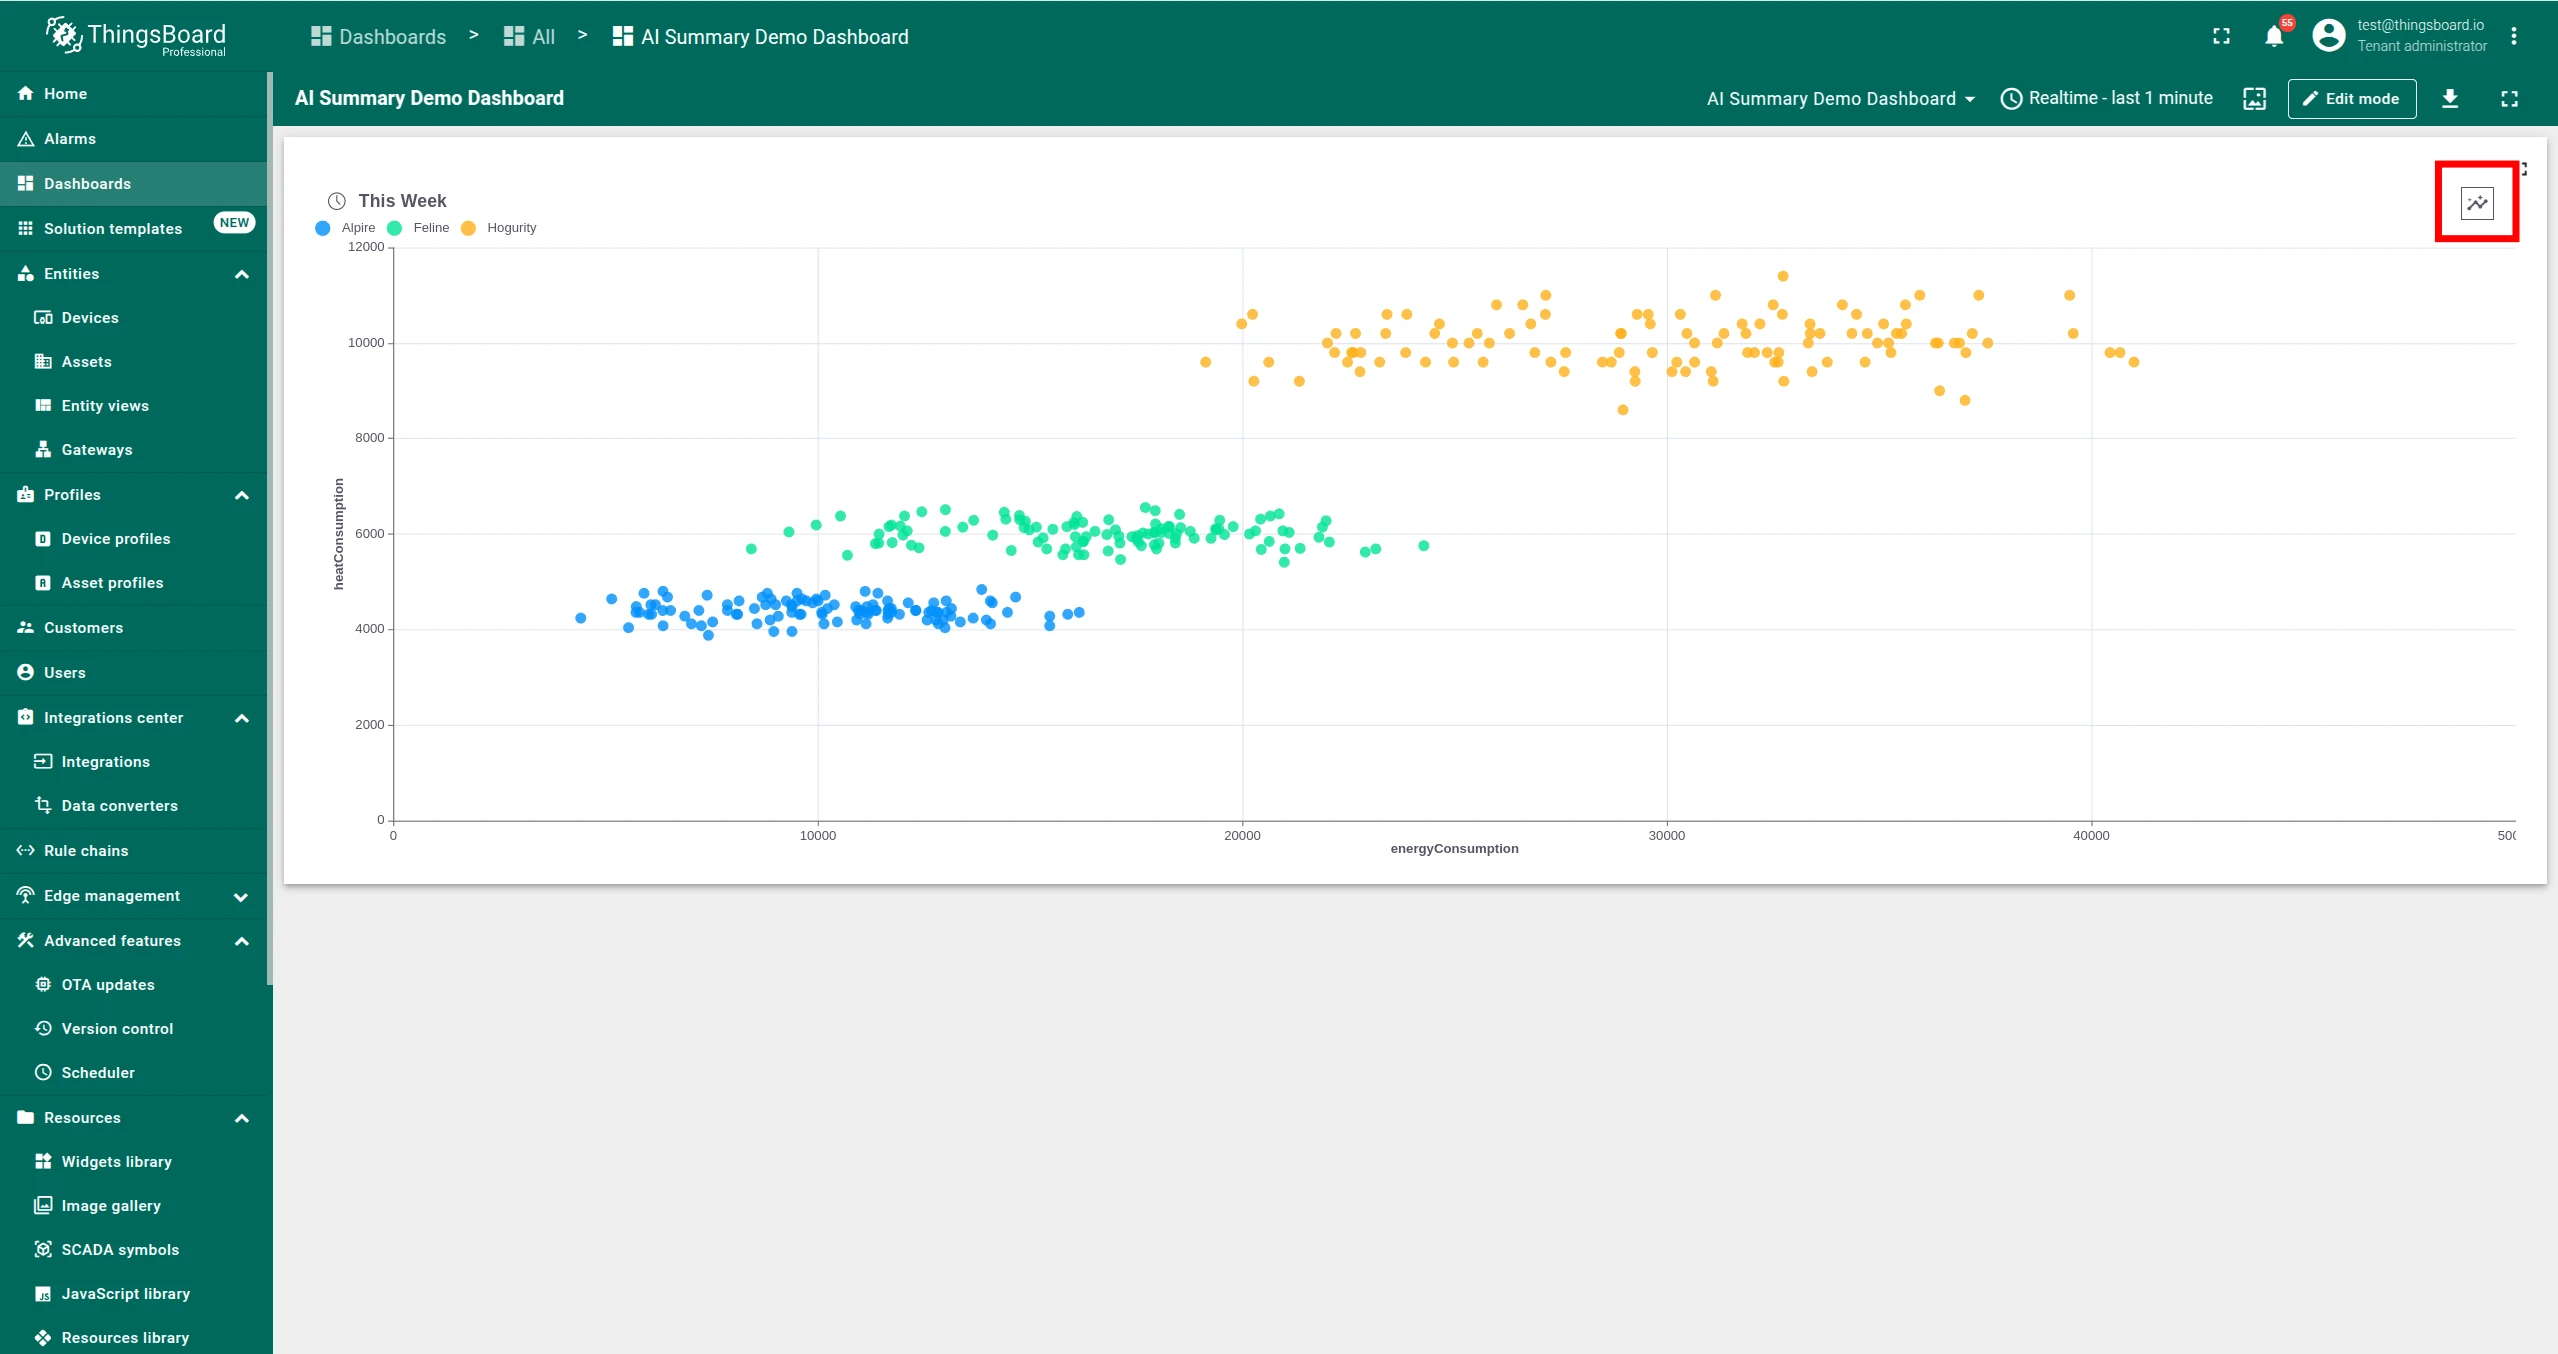
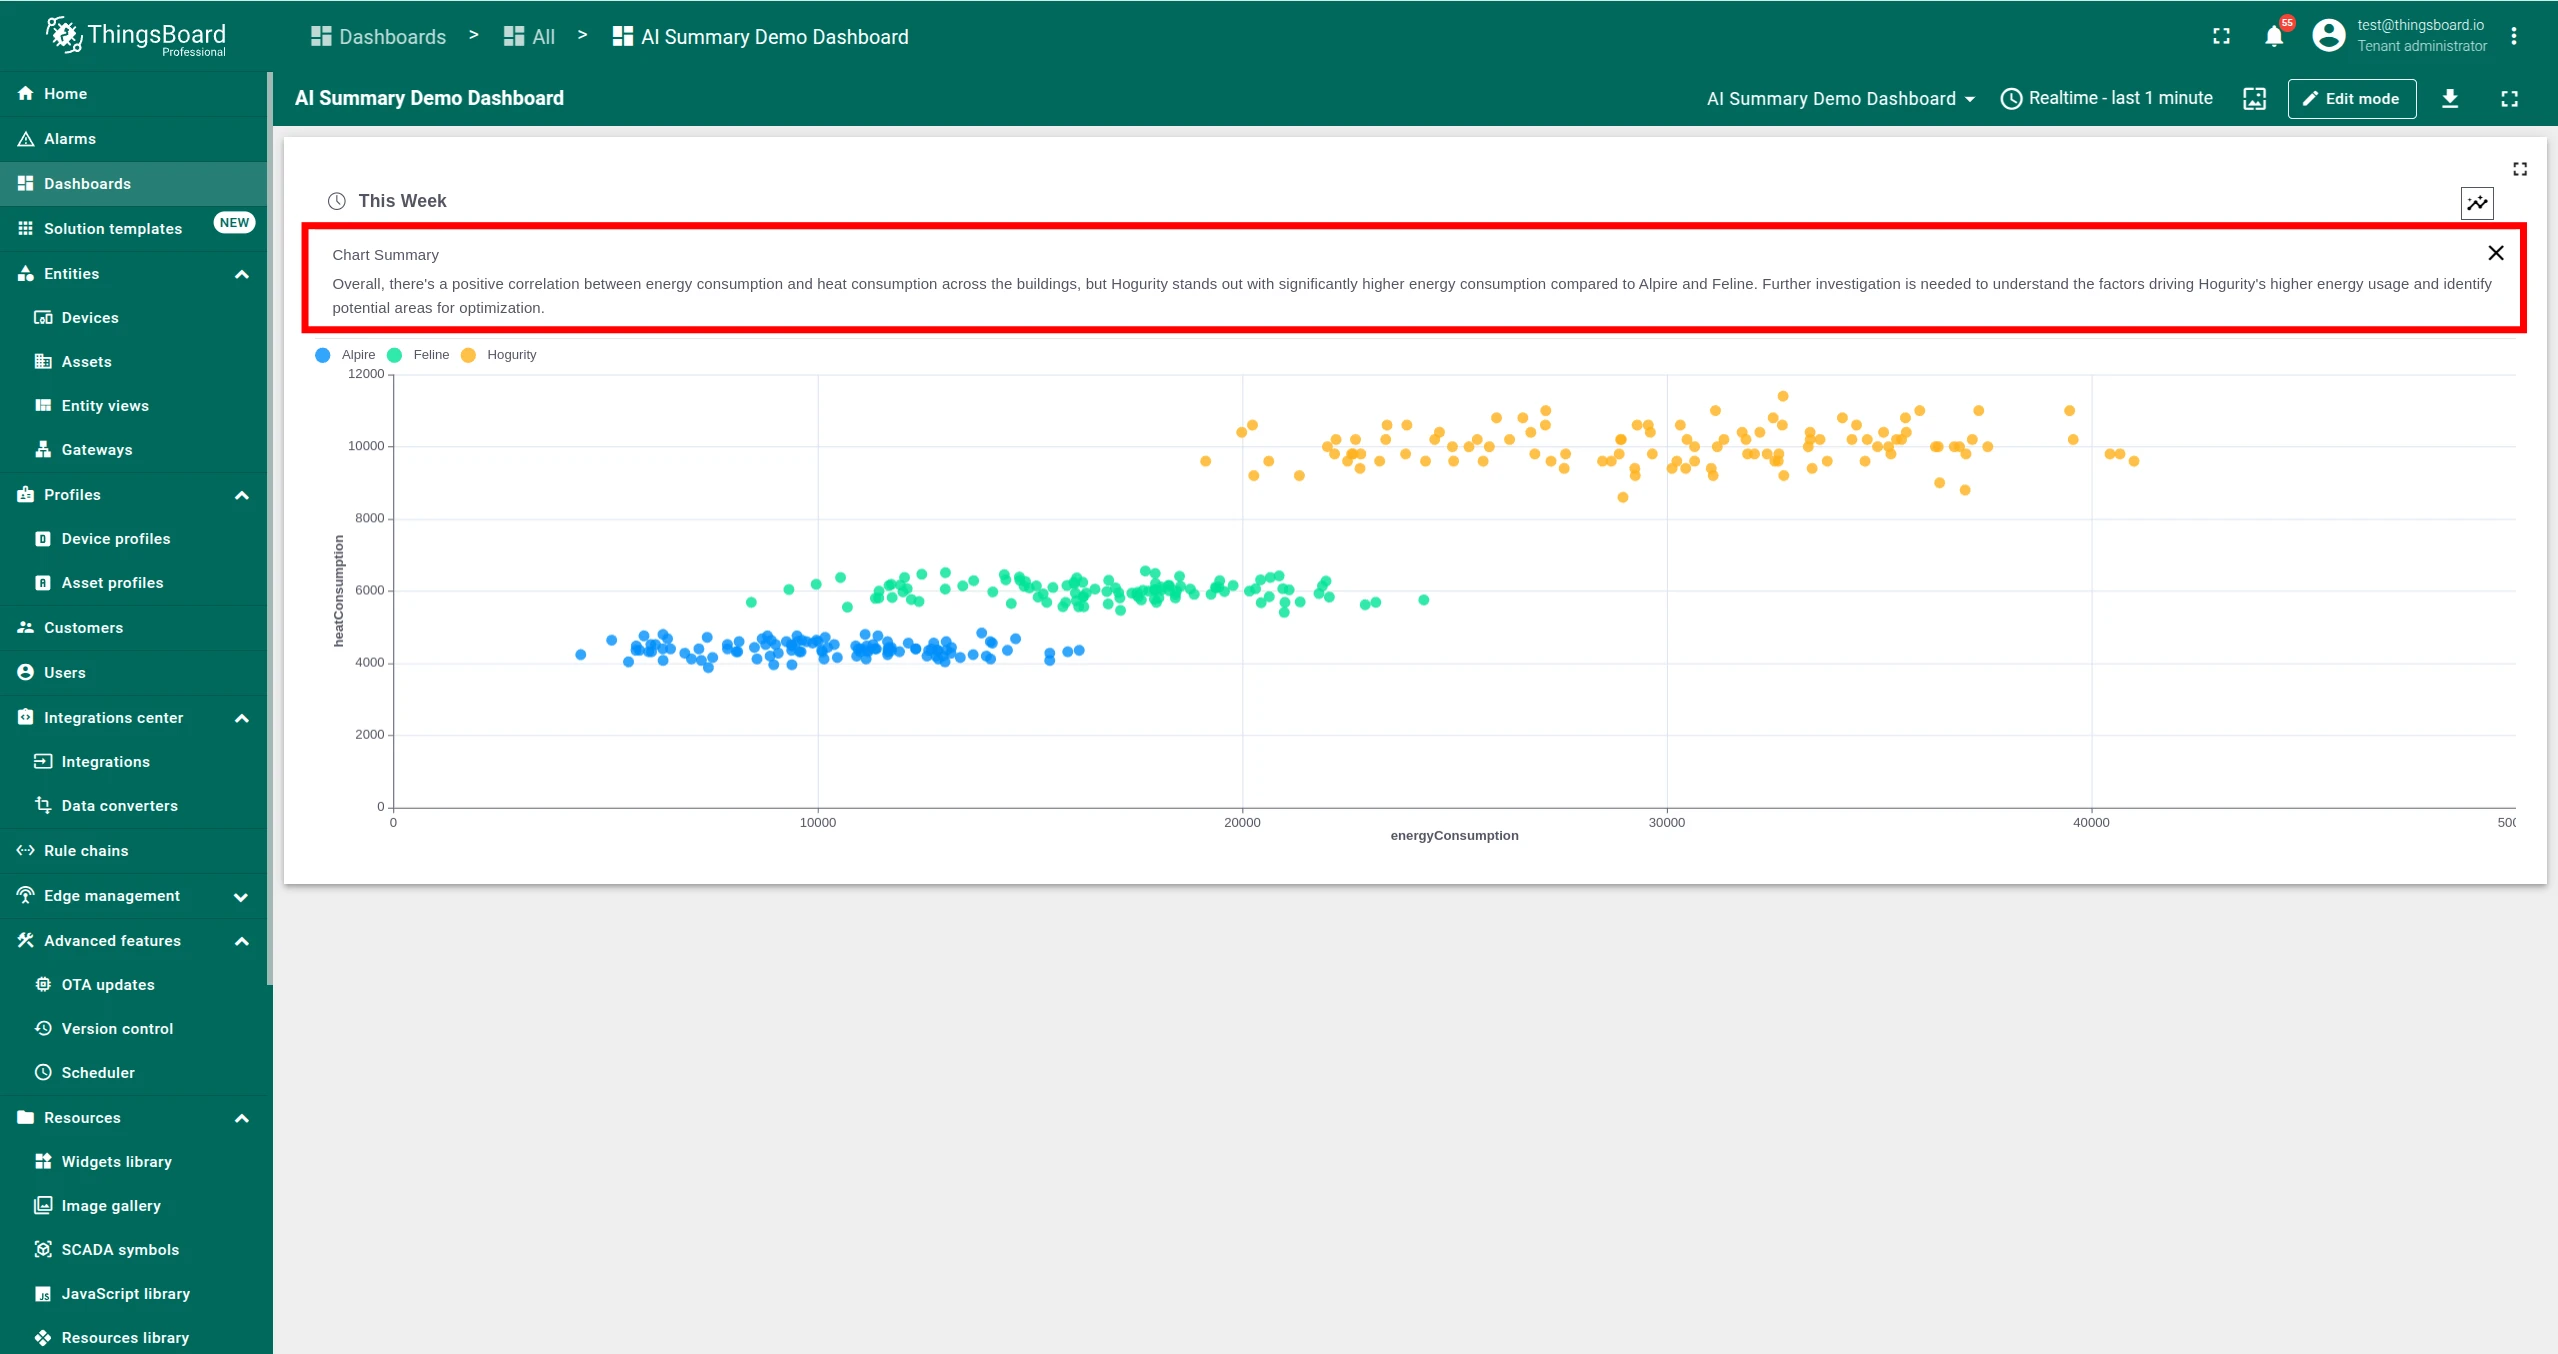
Section titled “Trendz Widgets”AI summary is built into all Trendz widget types. Click the AI summary button in the upper corner of a widget to generate and display a summary above the visualization. The summary reflects the time range currently applied to the widget. The result is plain text and can be copied directly from the widget.
Enable or Disable the AI Summary Button
Section titled “Enable or Disable the AI Summary Button”For views created before Trendz 1.13.1, the AI summary button is hidden by default on dashboards. To show or hide it:
-
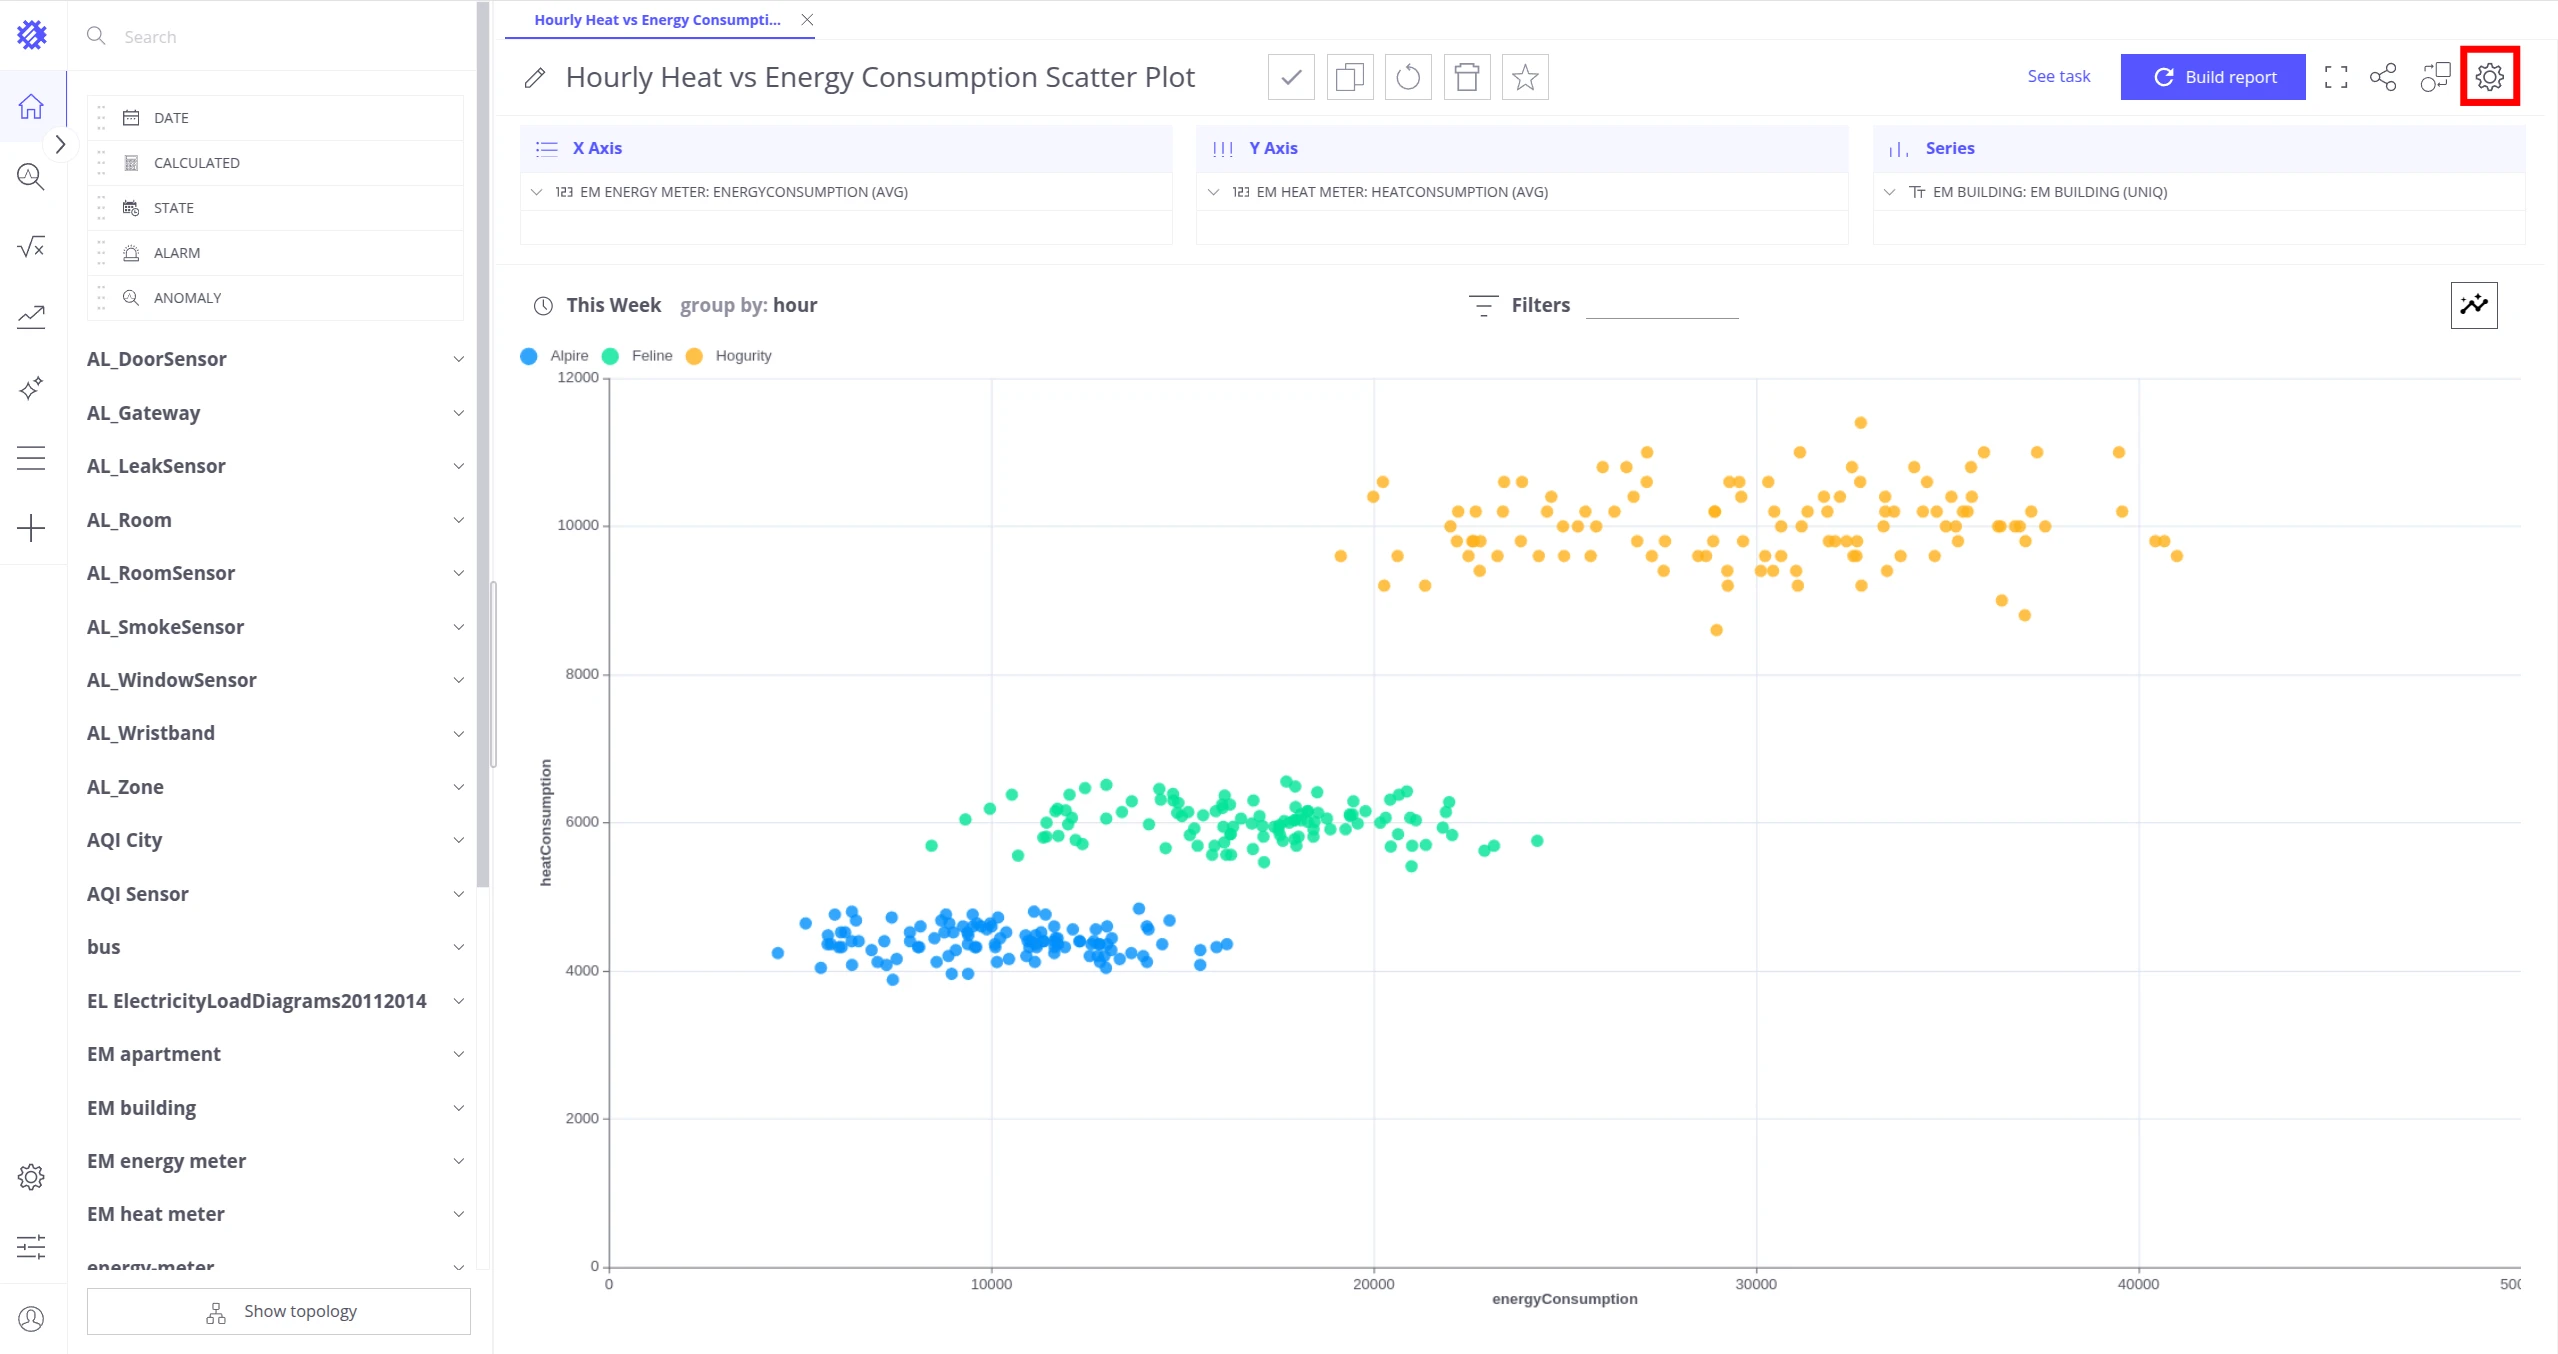
Open the desired view and go to View Settings.
-
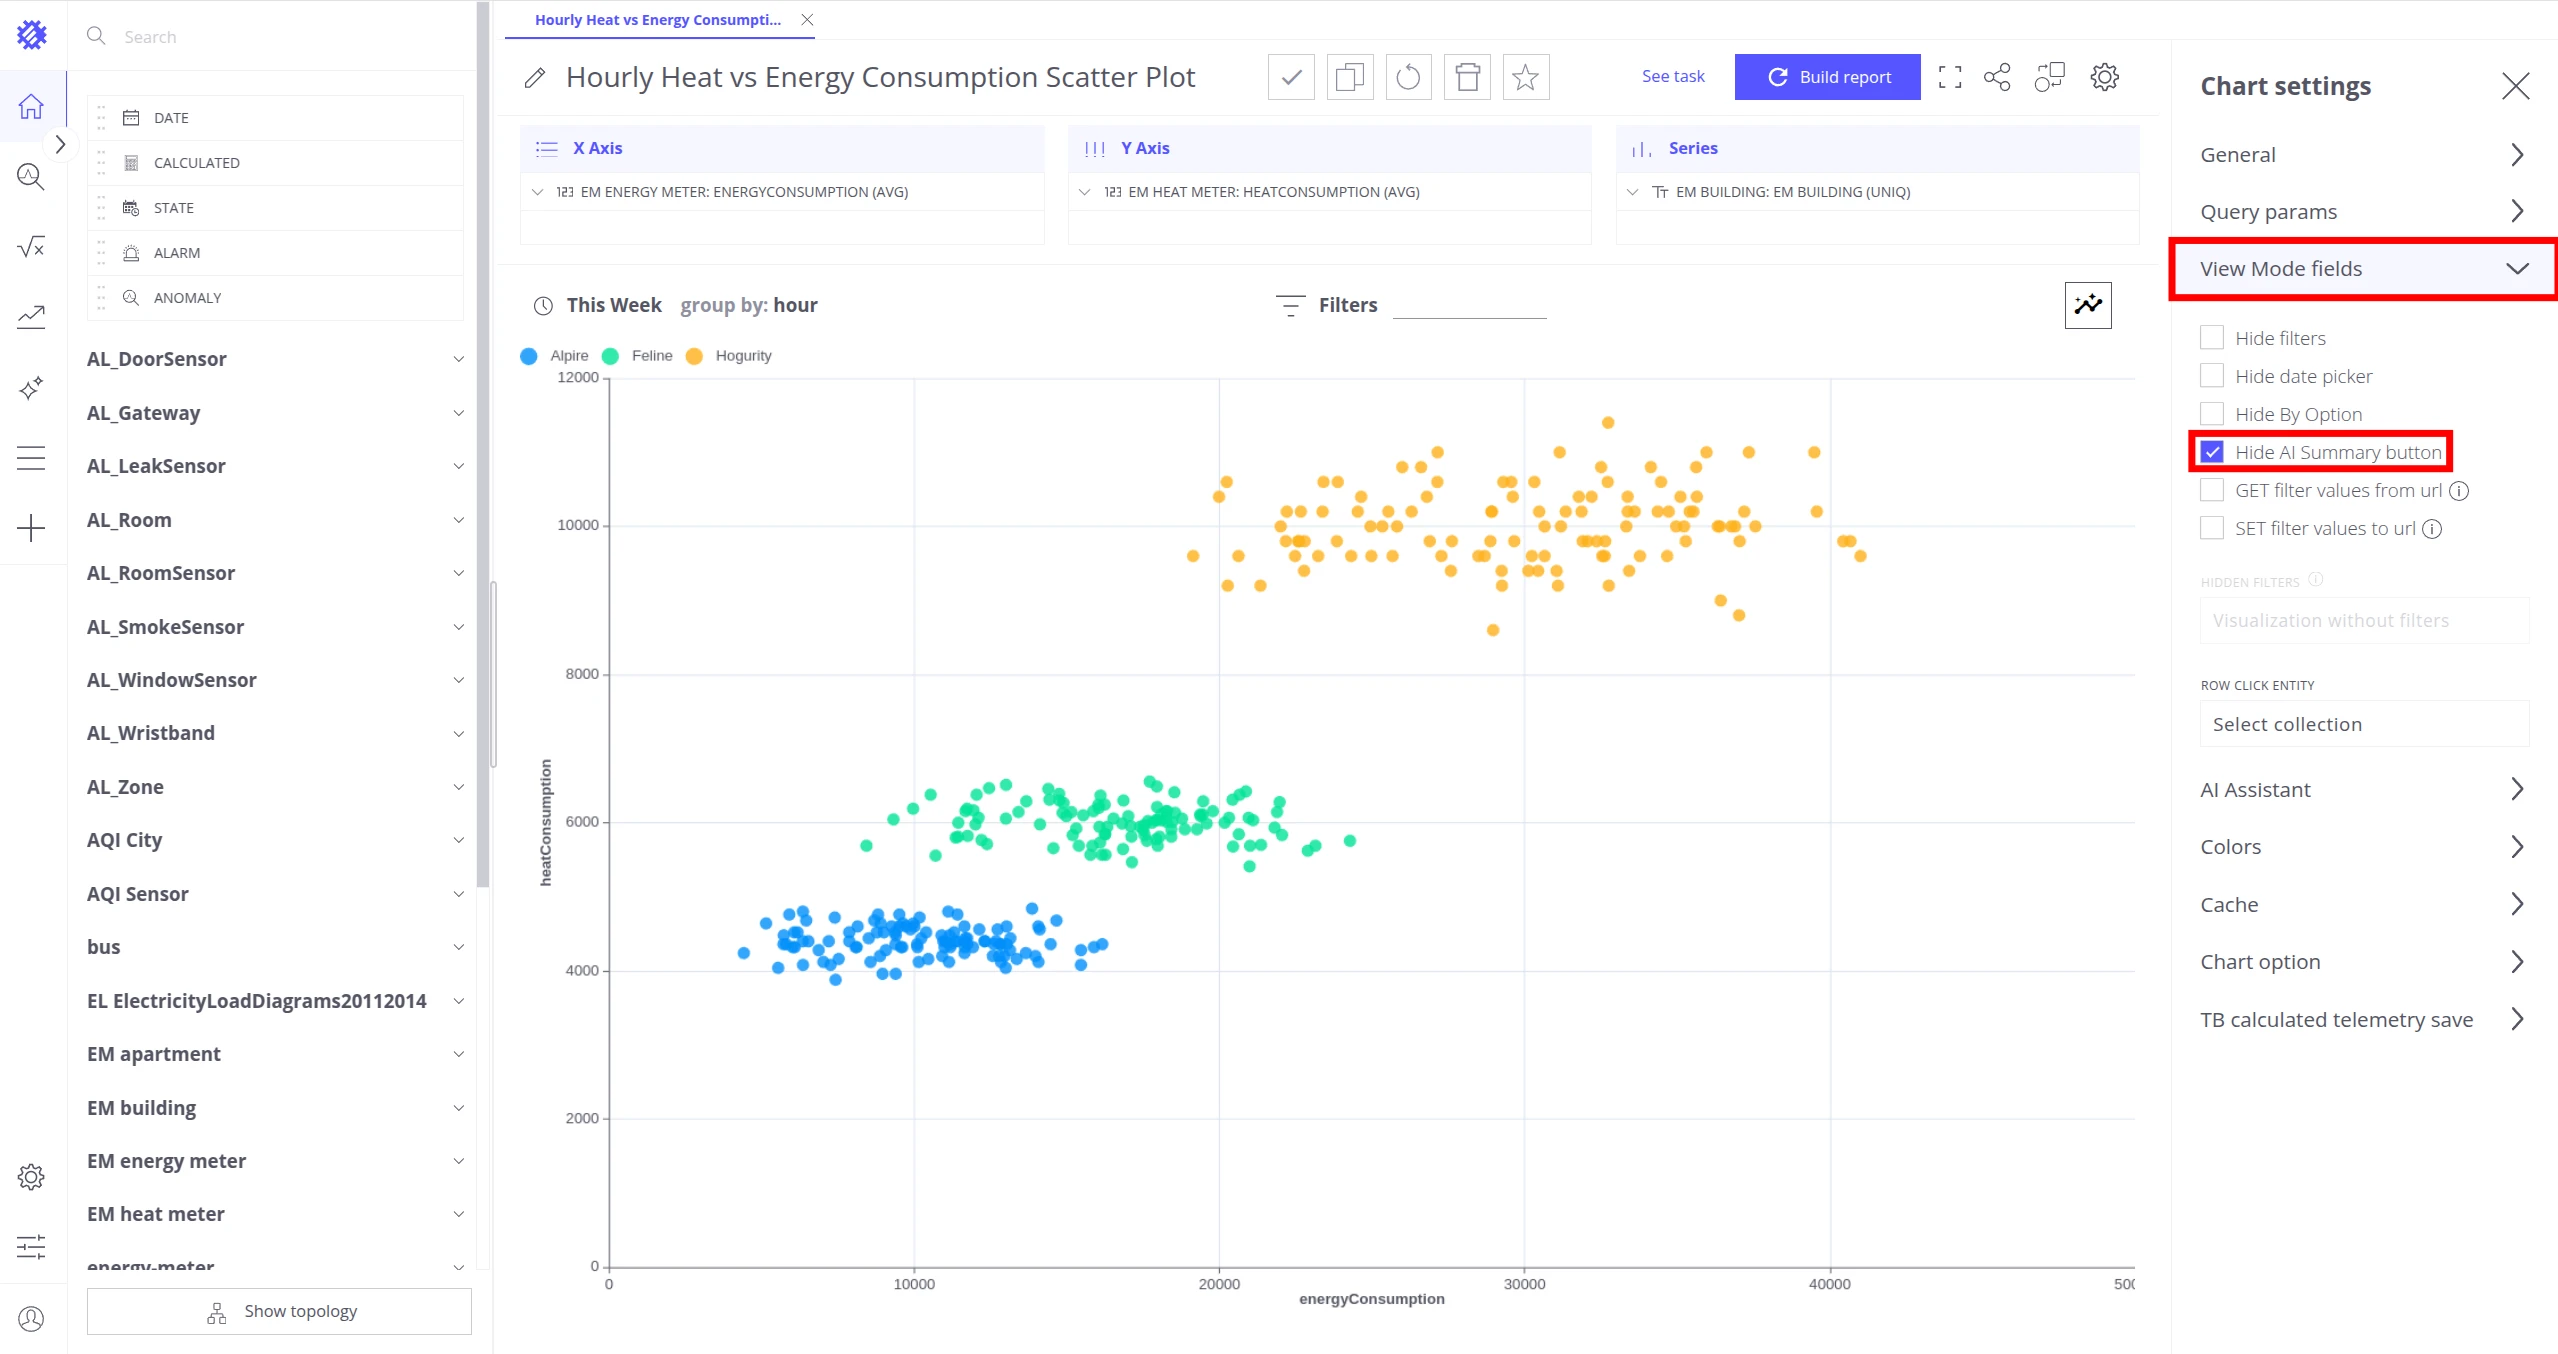
Navigate to the View Mode Fields section.
-
Enable or disable the AI Summary toggle.
-
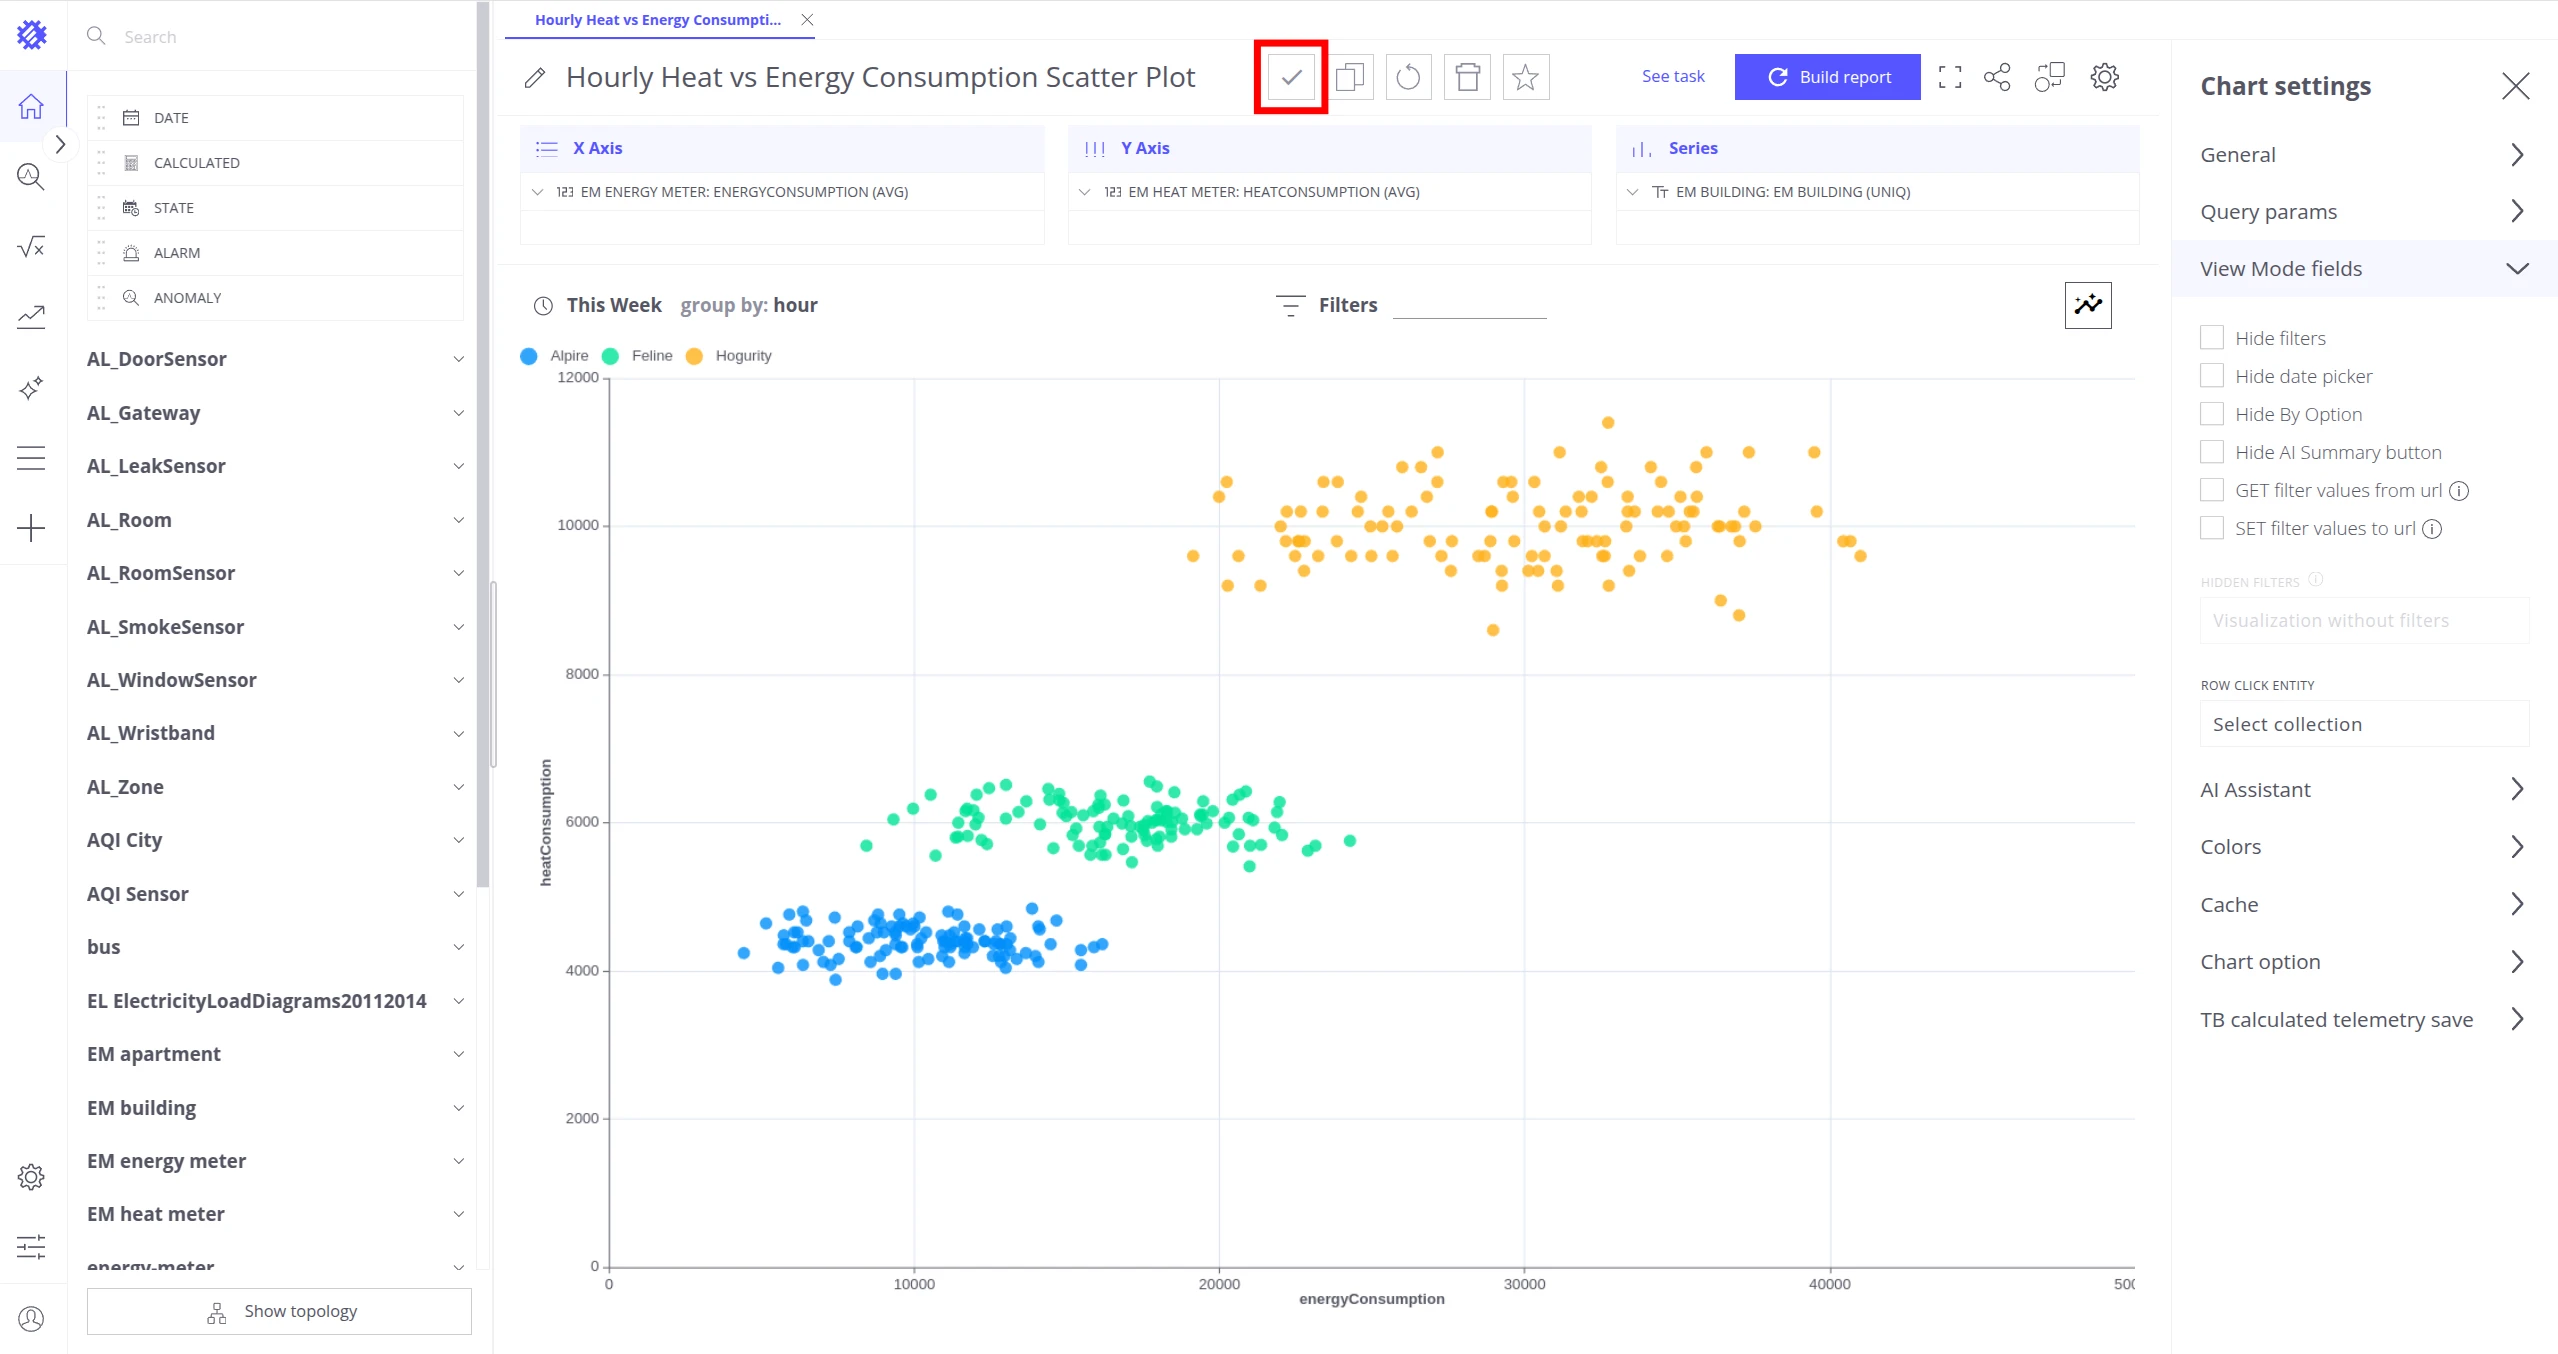
Save the changes.
Set the AI Summary Prompt
Section titled “Set the AI Summary Prompt”By default, the system prompt is used. To choose a different prompt for a specific view:
-
Open the desired view and go to View Settings.
-
Navigate to the AI Assistant section.
-
Choose a prompt from the dropdown.
-
Save the changes.
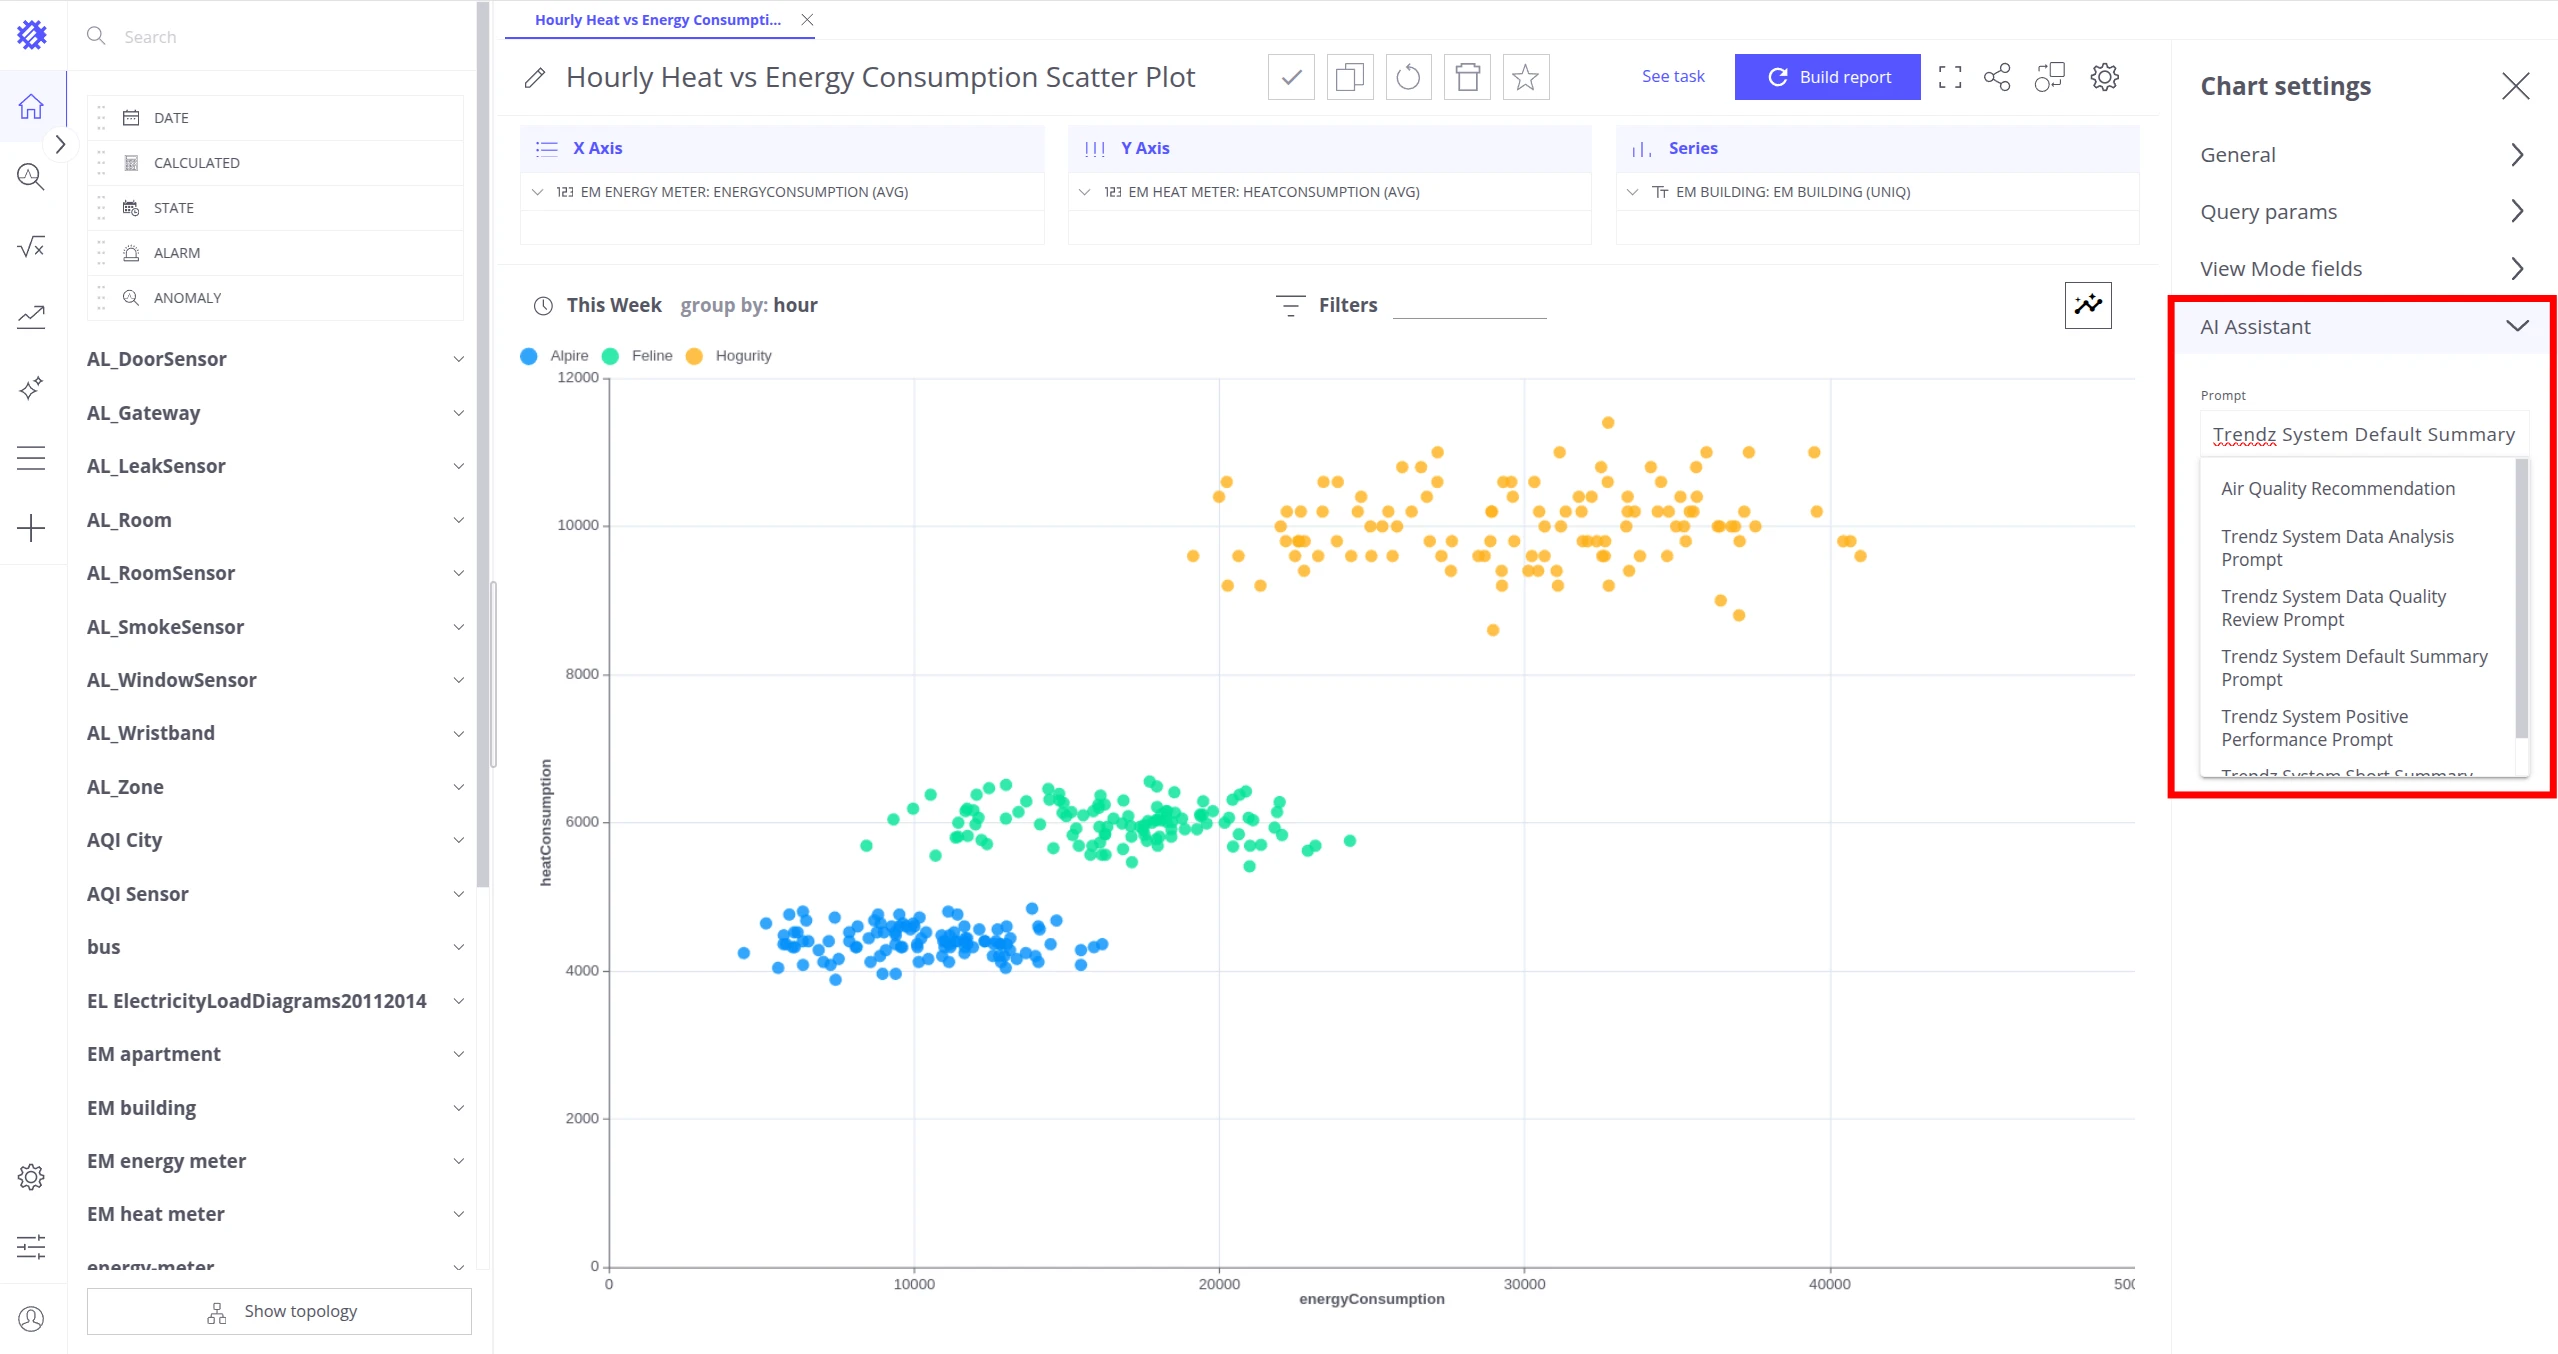
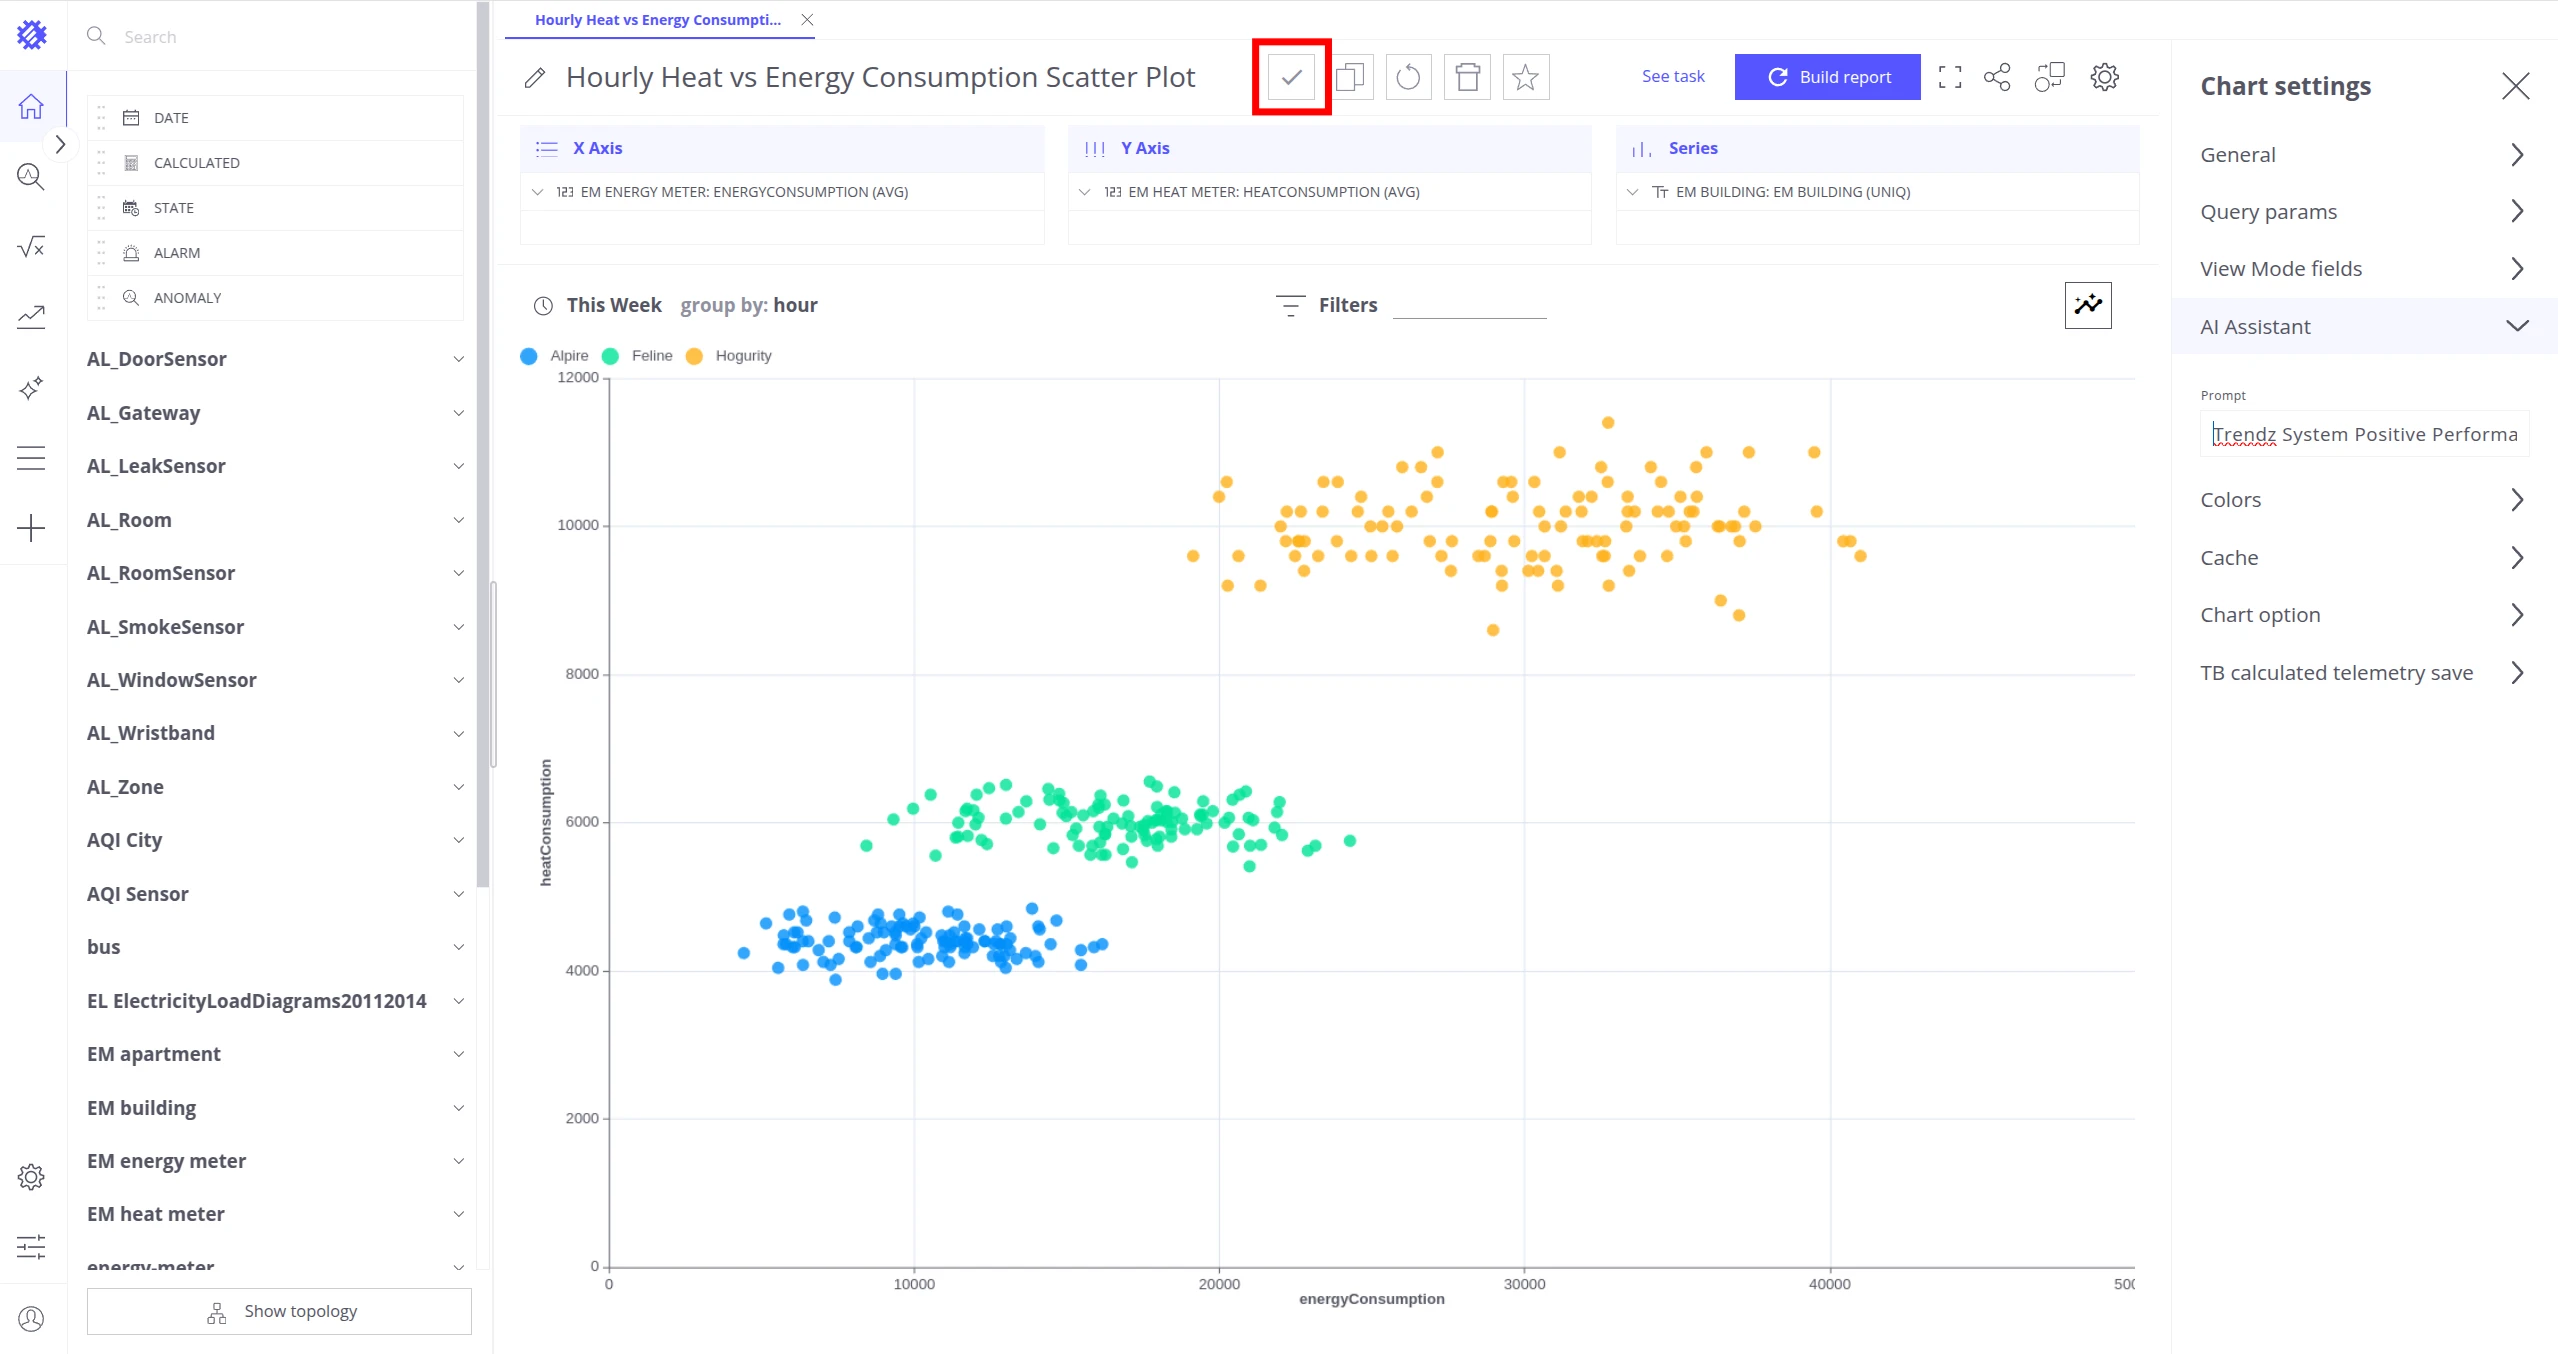
To create your own prompts, see AI Prompts.
Was this helpful?