Actions
Once a Trendz view is embedded on a ThingsBoard dashboard, the widget can trigger actions when a user interacts with it — letting you connect Trendz views to the rest of the dashboard.
This page covers the following actions:
- Date selected — clicking a date on a Calendar view updates the dashboard time window.
- On row click (Table) — clicking a table row can select an entity, navigate to a dashboard state, or run any custom script.
- On row click (Anomaly table) — clicking a row selects an entity and updates the time window simultaneously.
- On row click — Pass related entities into alias — clicking a row populates a dashboard alias with all related entities of that row.
Date selected action
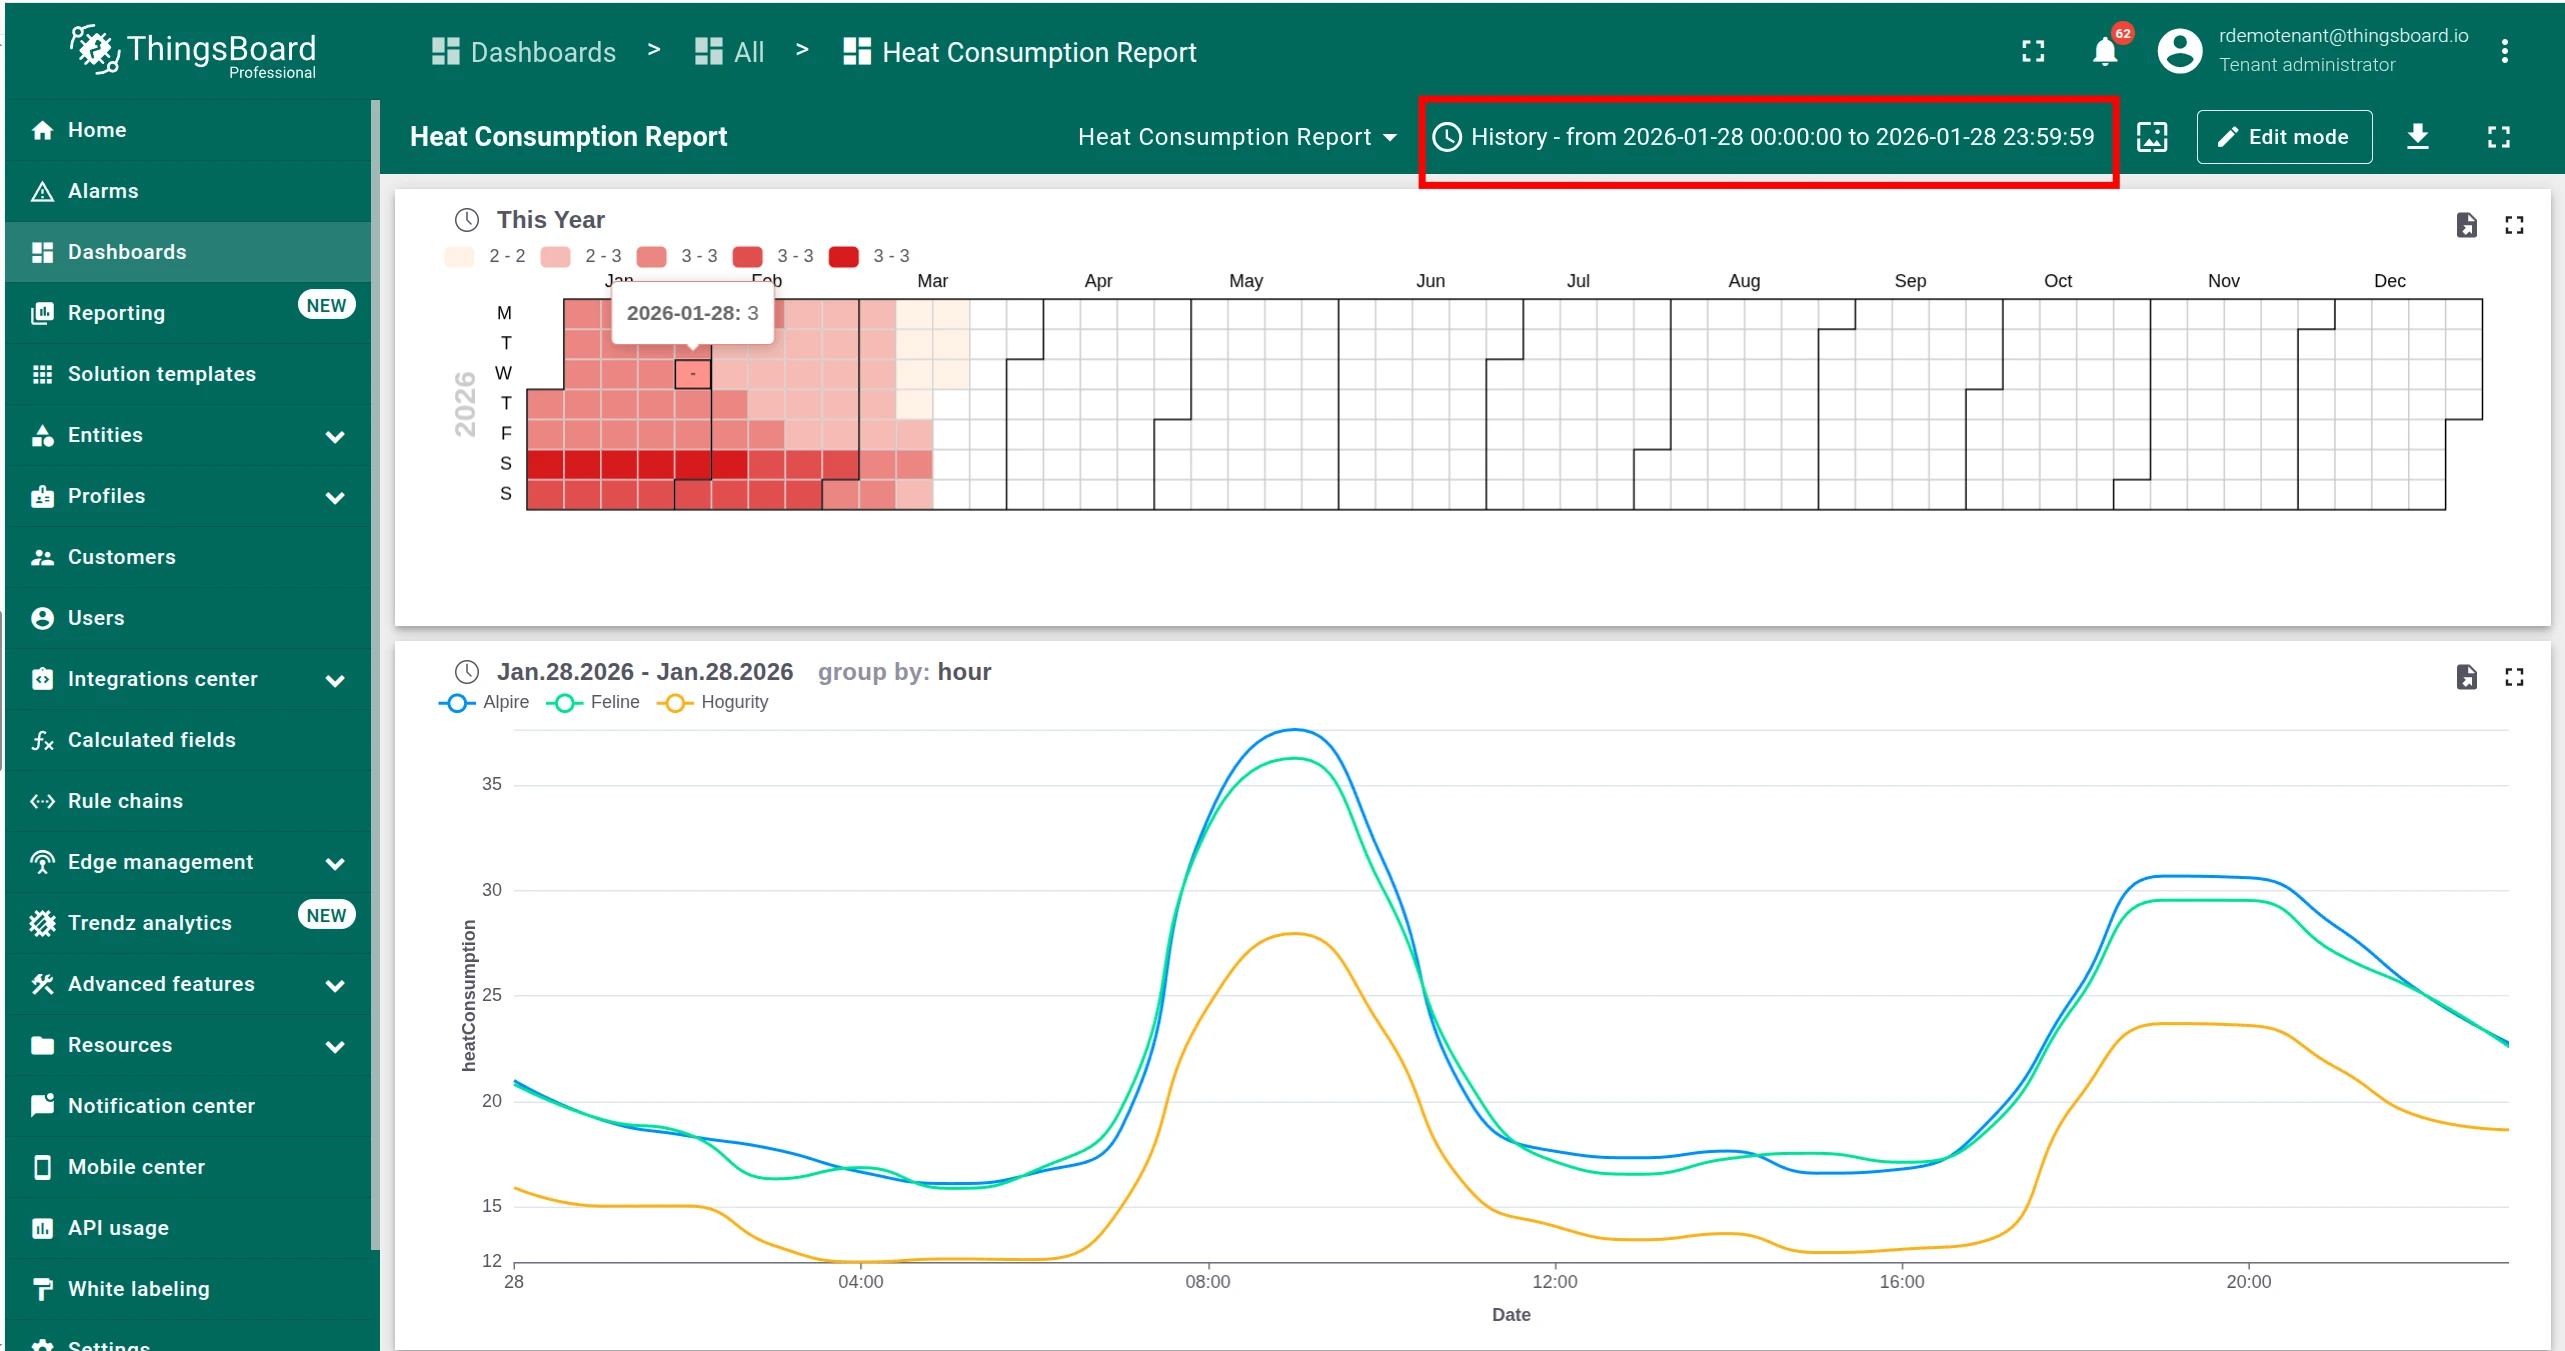
Section titled “Date selected action”The Calendar and Anomaly table views support a date-selected action. When a user clicks a date or a date range on a Calendar view, the action fires and you can use it to update the ThingsBoard dashboard time window — so that all other widgets on the dashboard instantly zoom into the selected period.
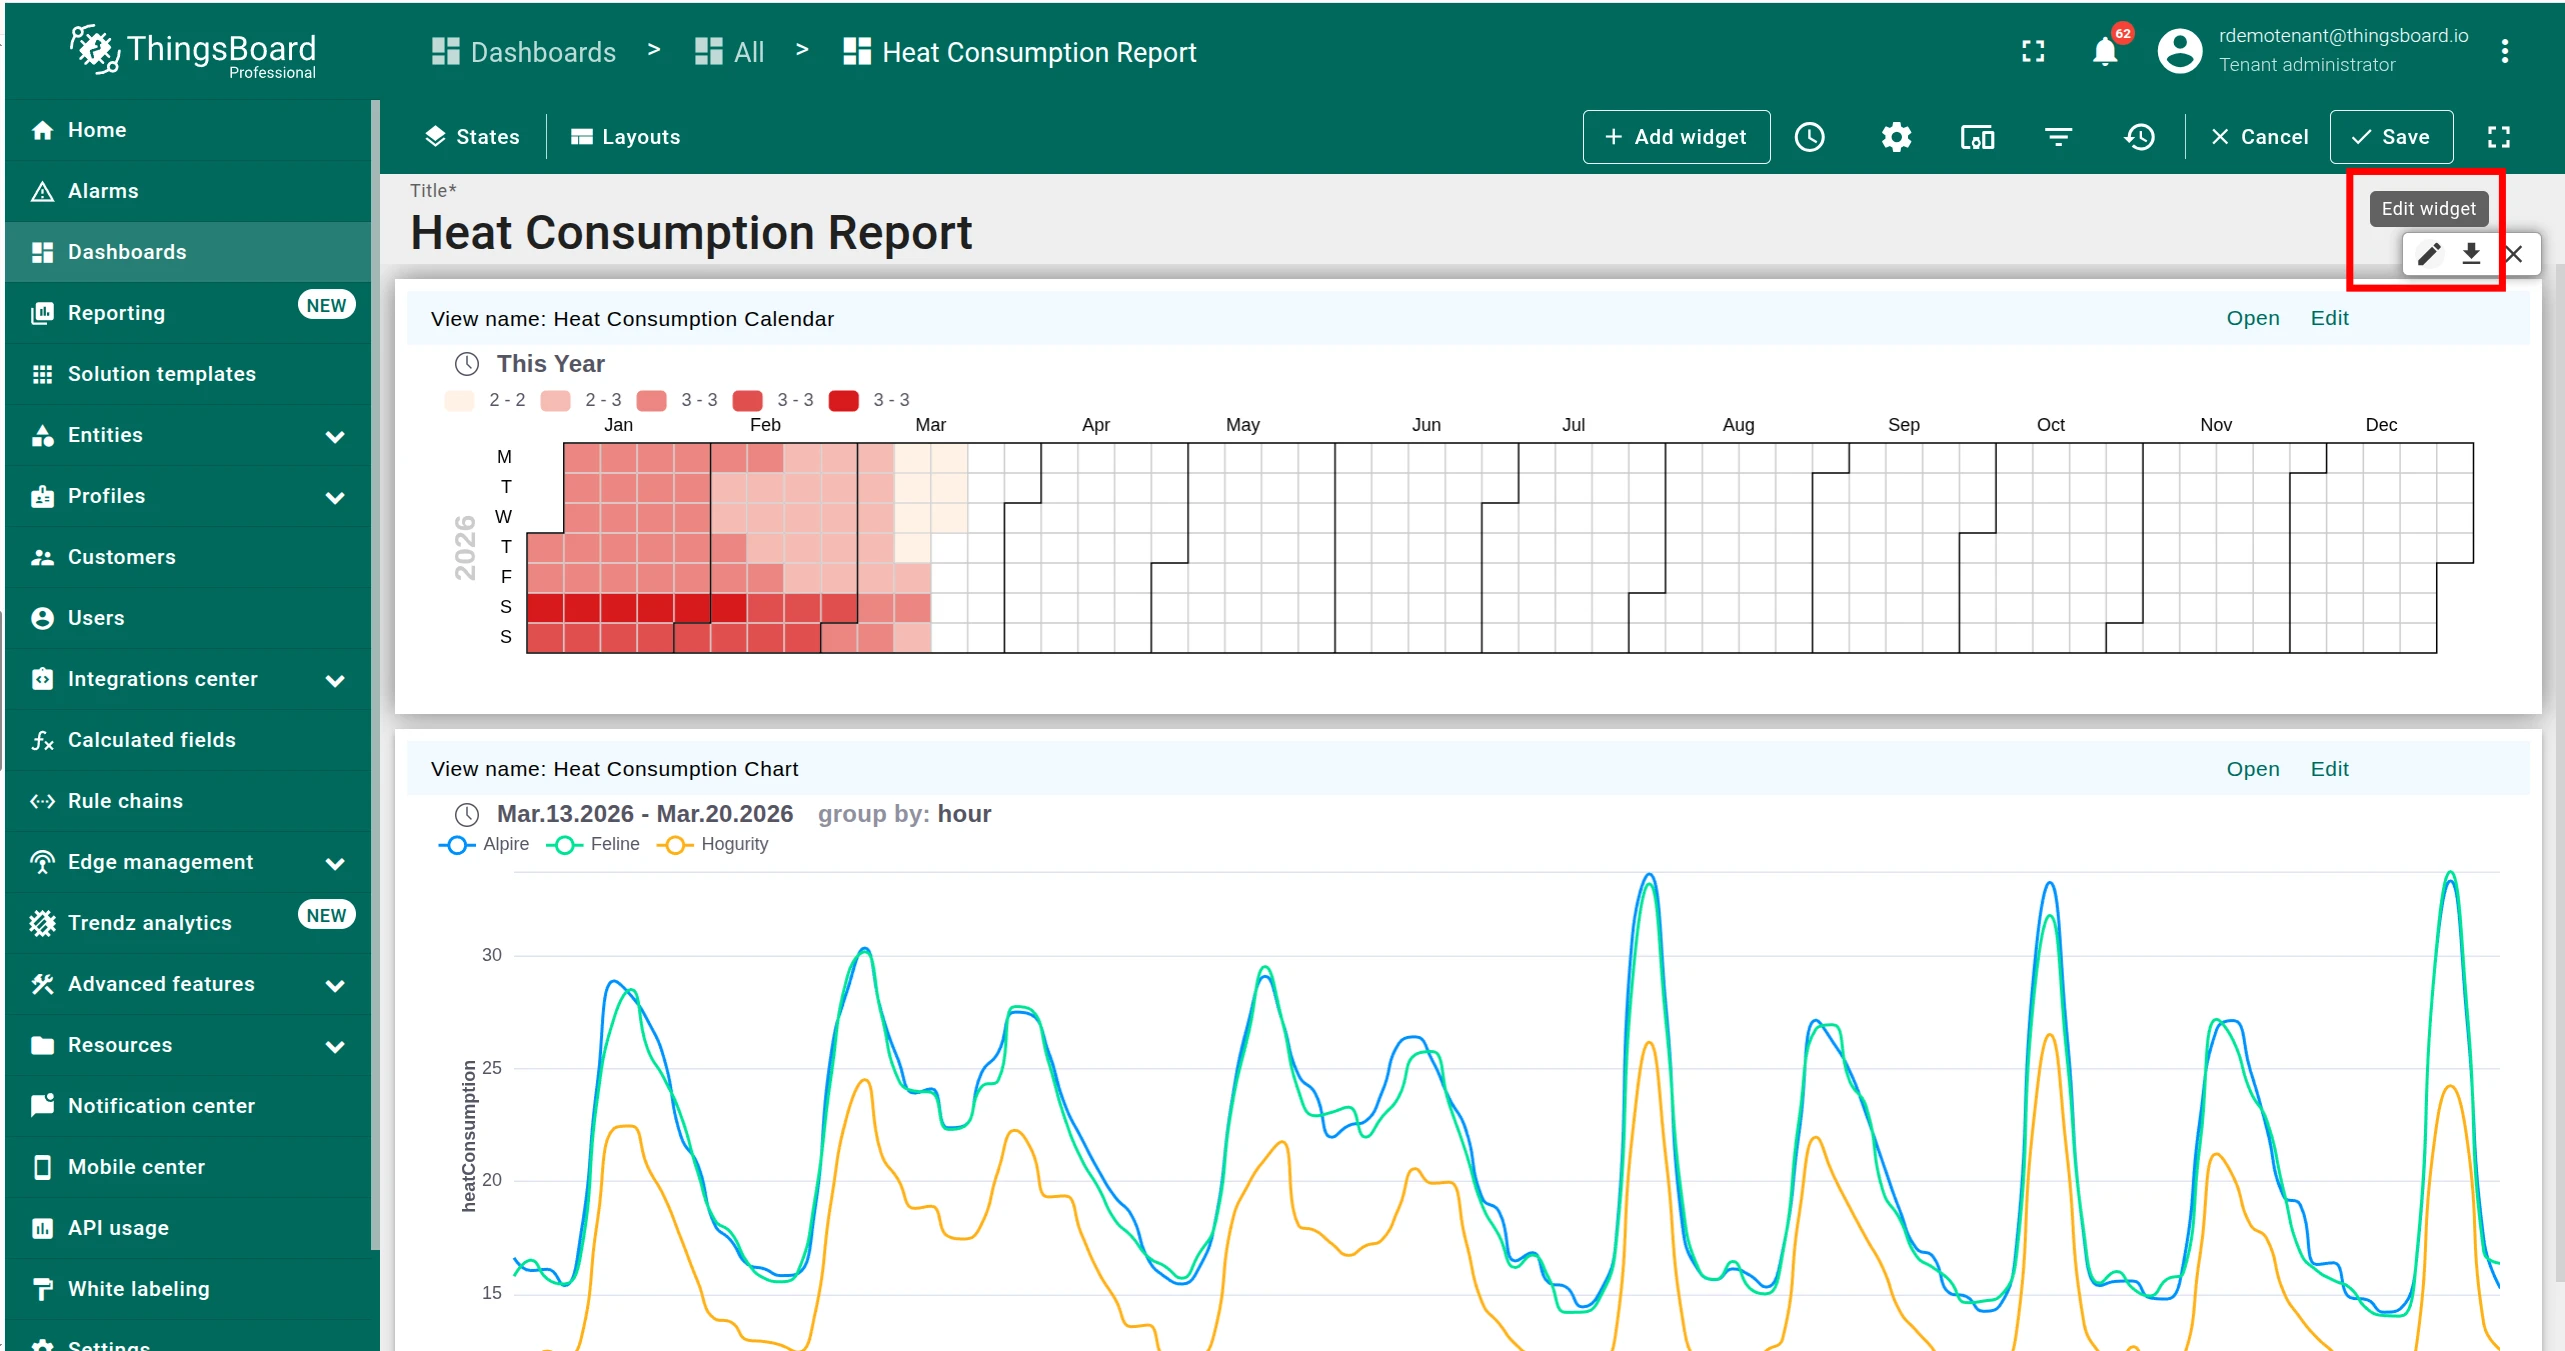
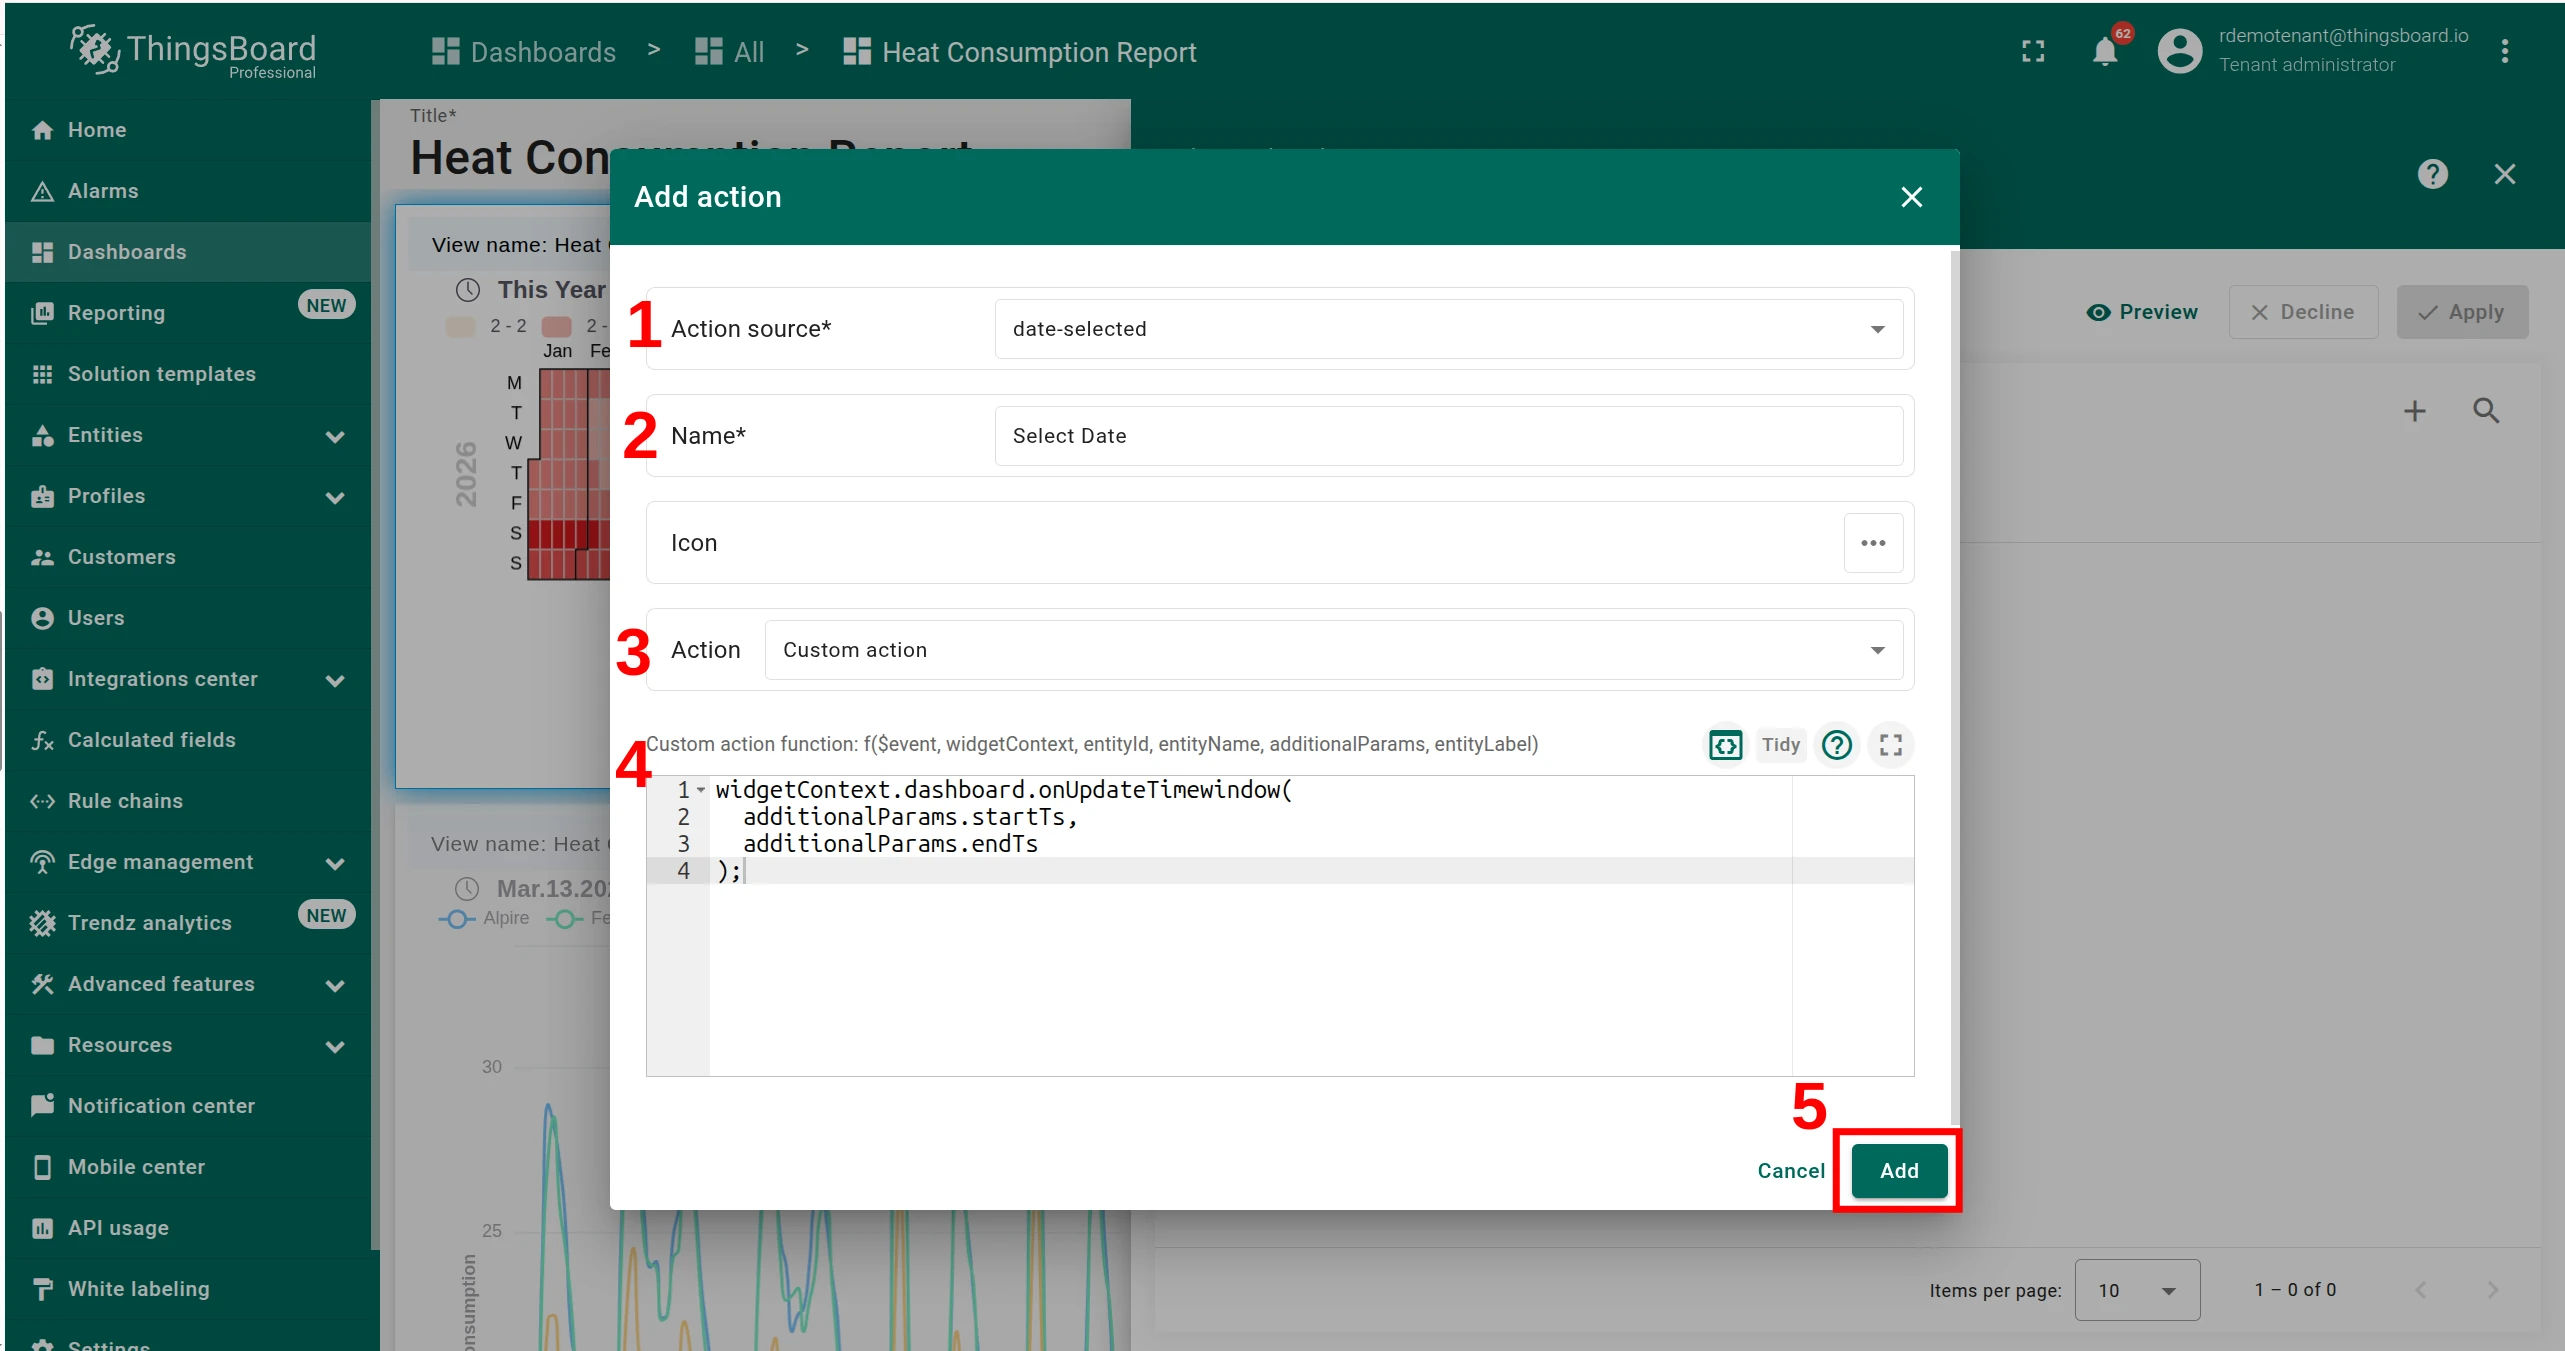
Configure the action
Section titled “Configure the action”-
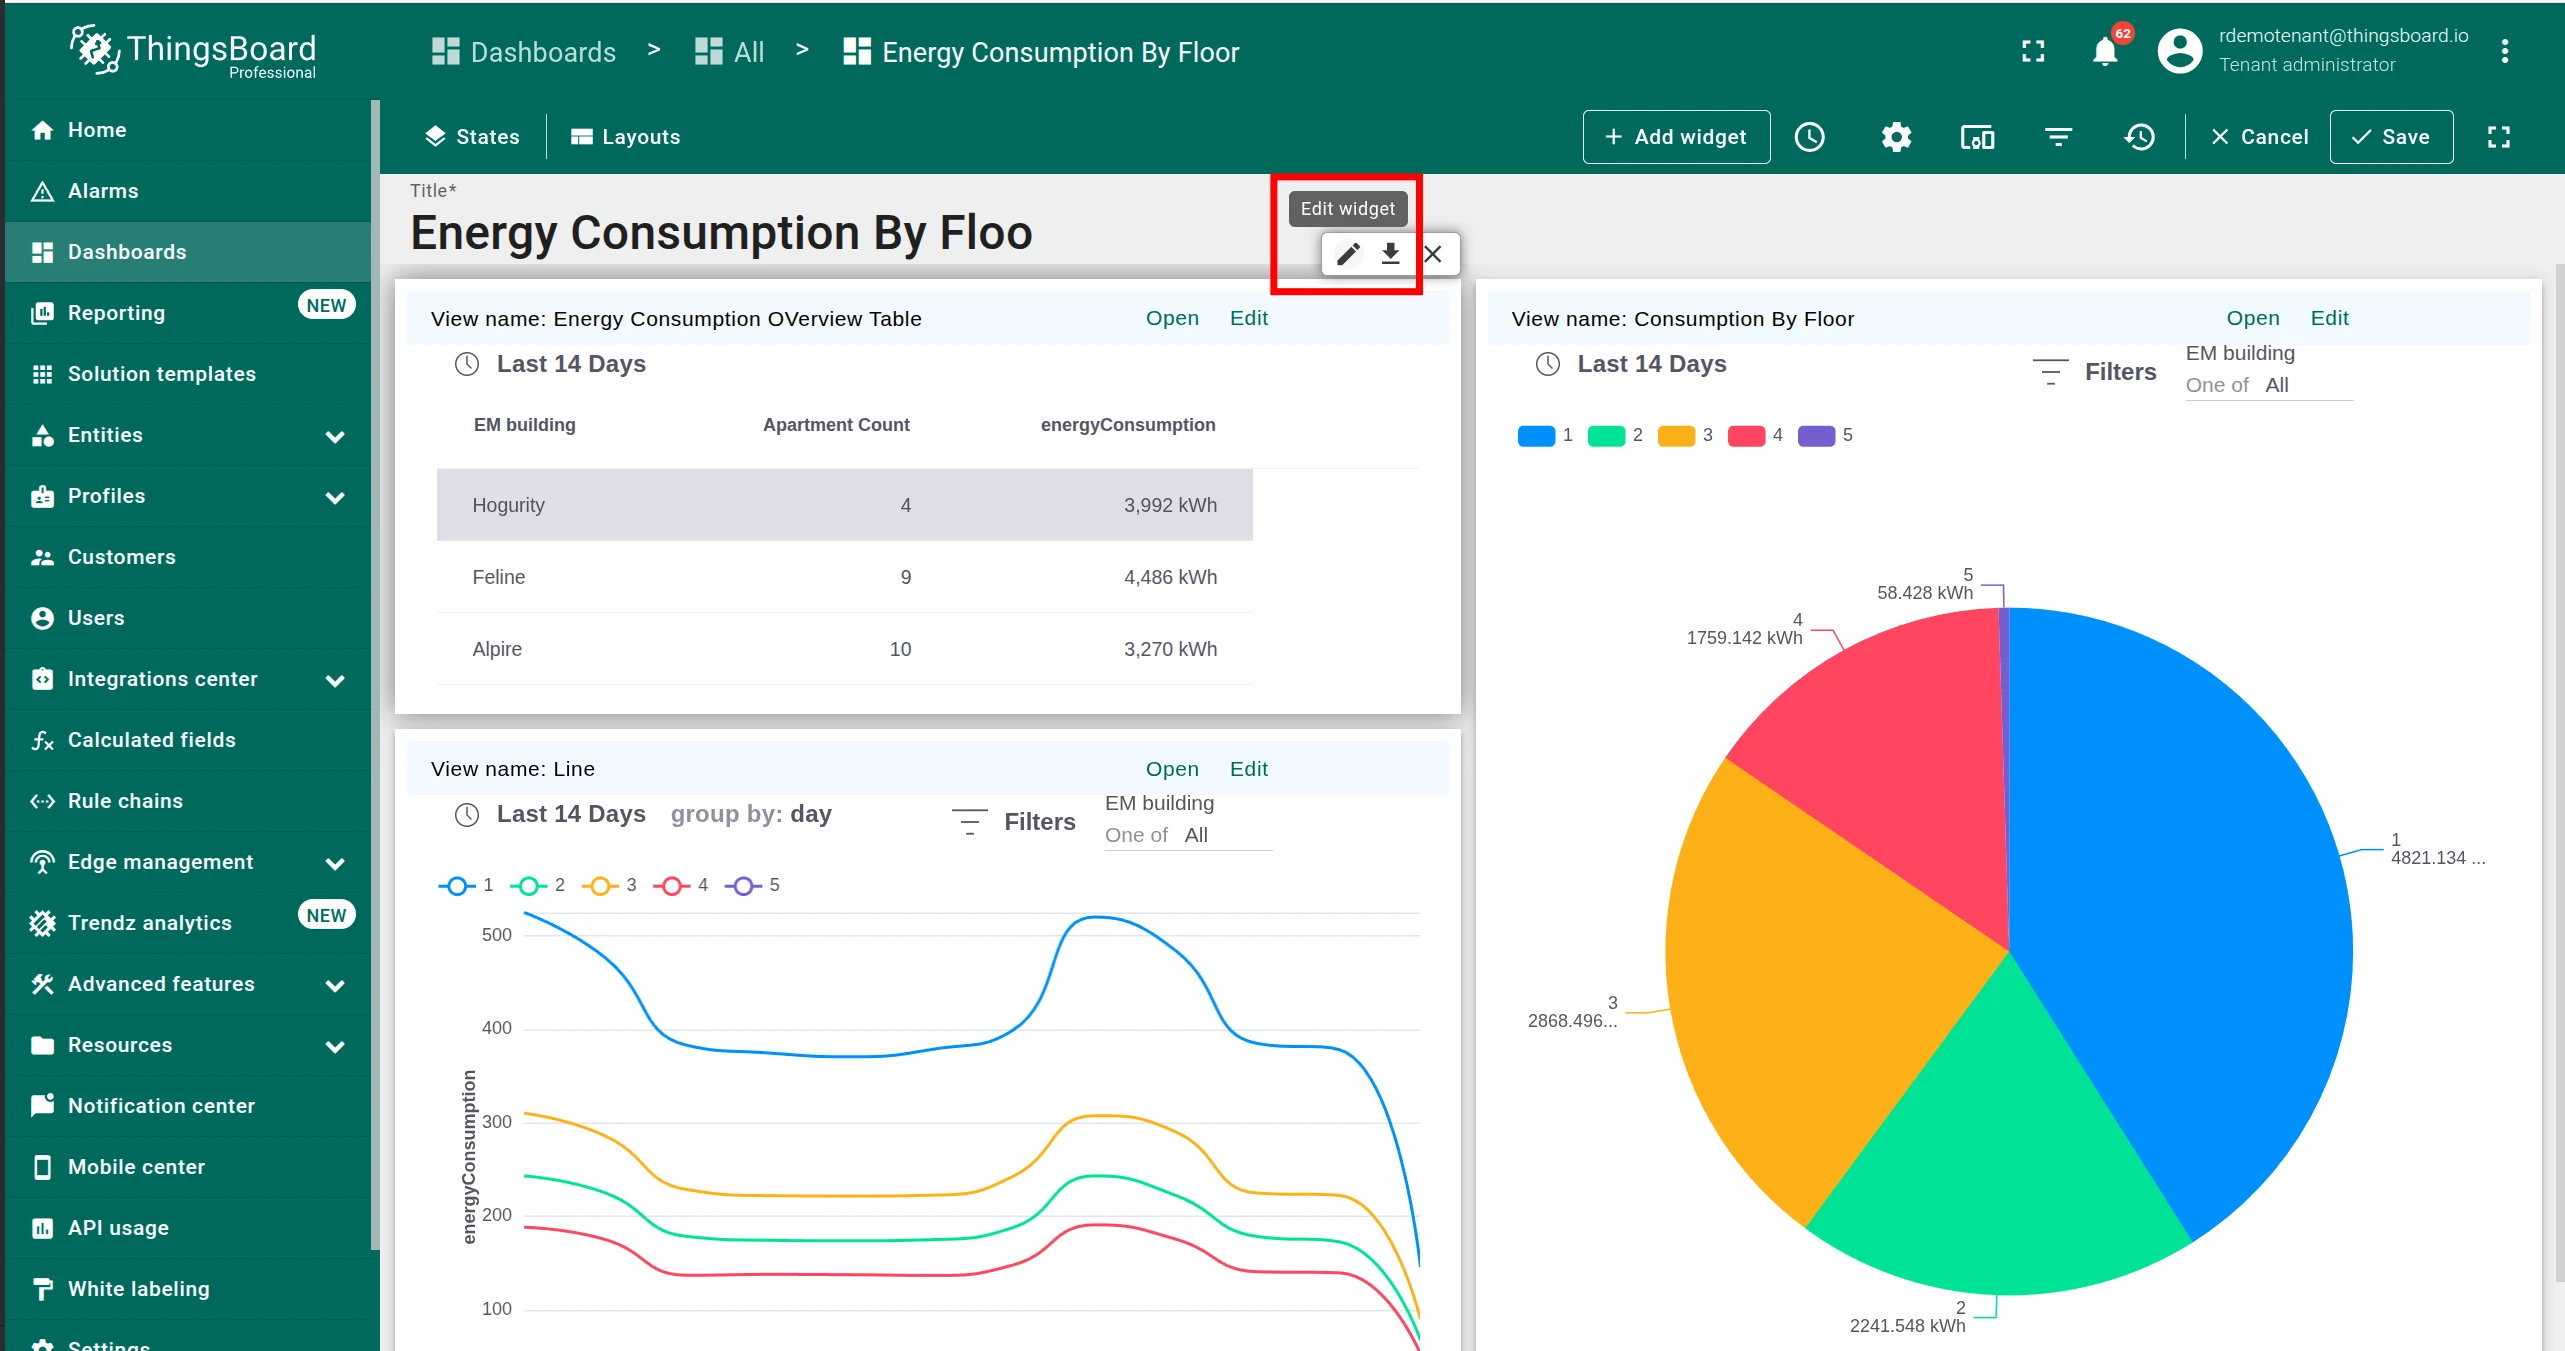
Open the dashboard in edit mode and click Edit widget on the Trendz Calendar view.
-
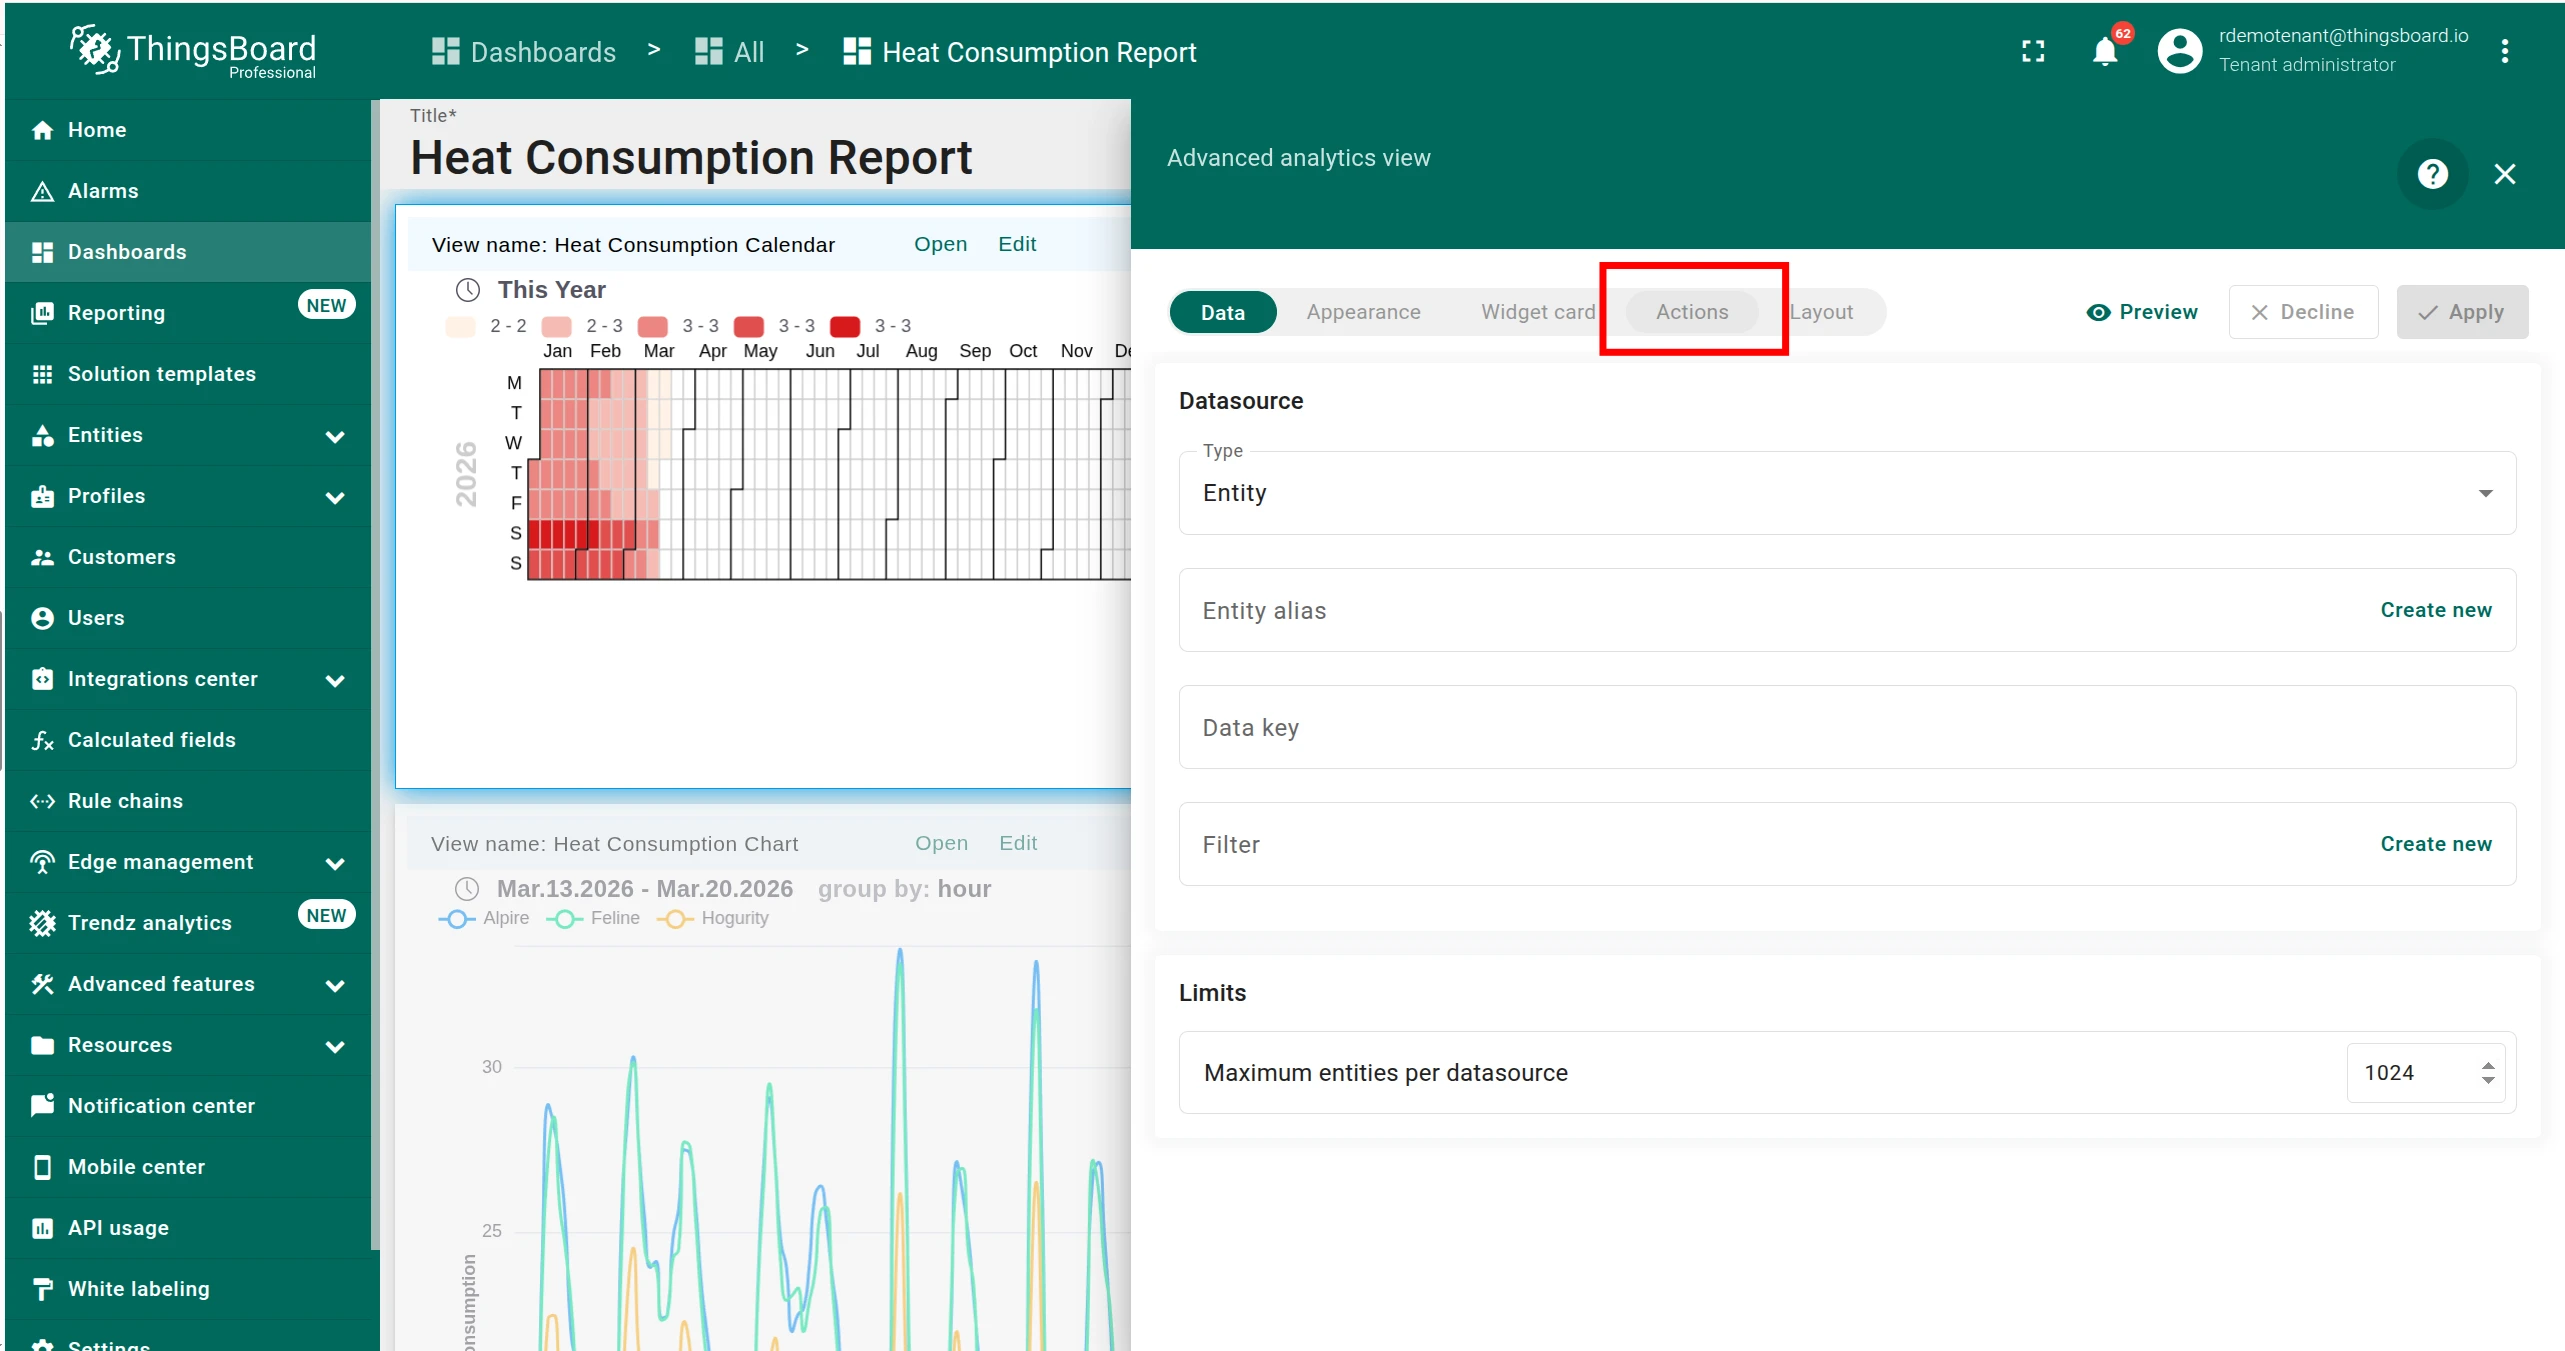
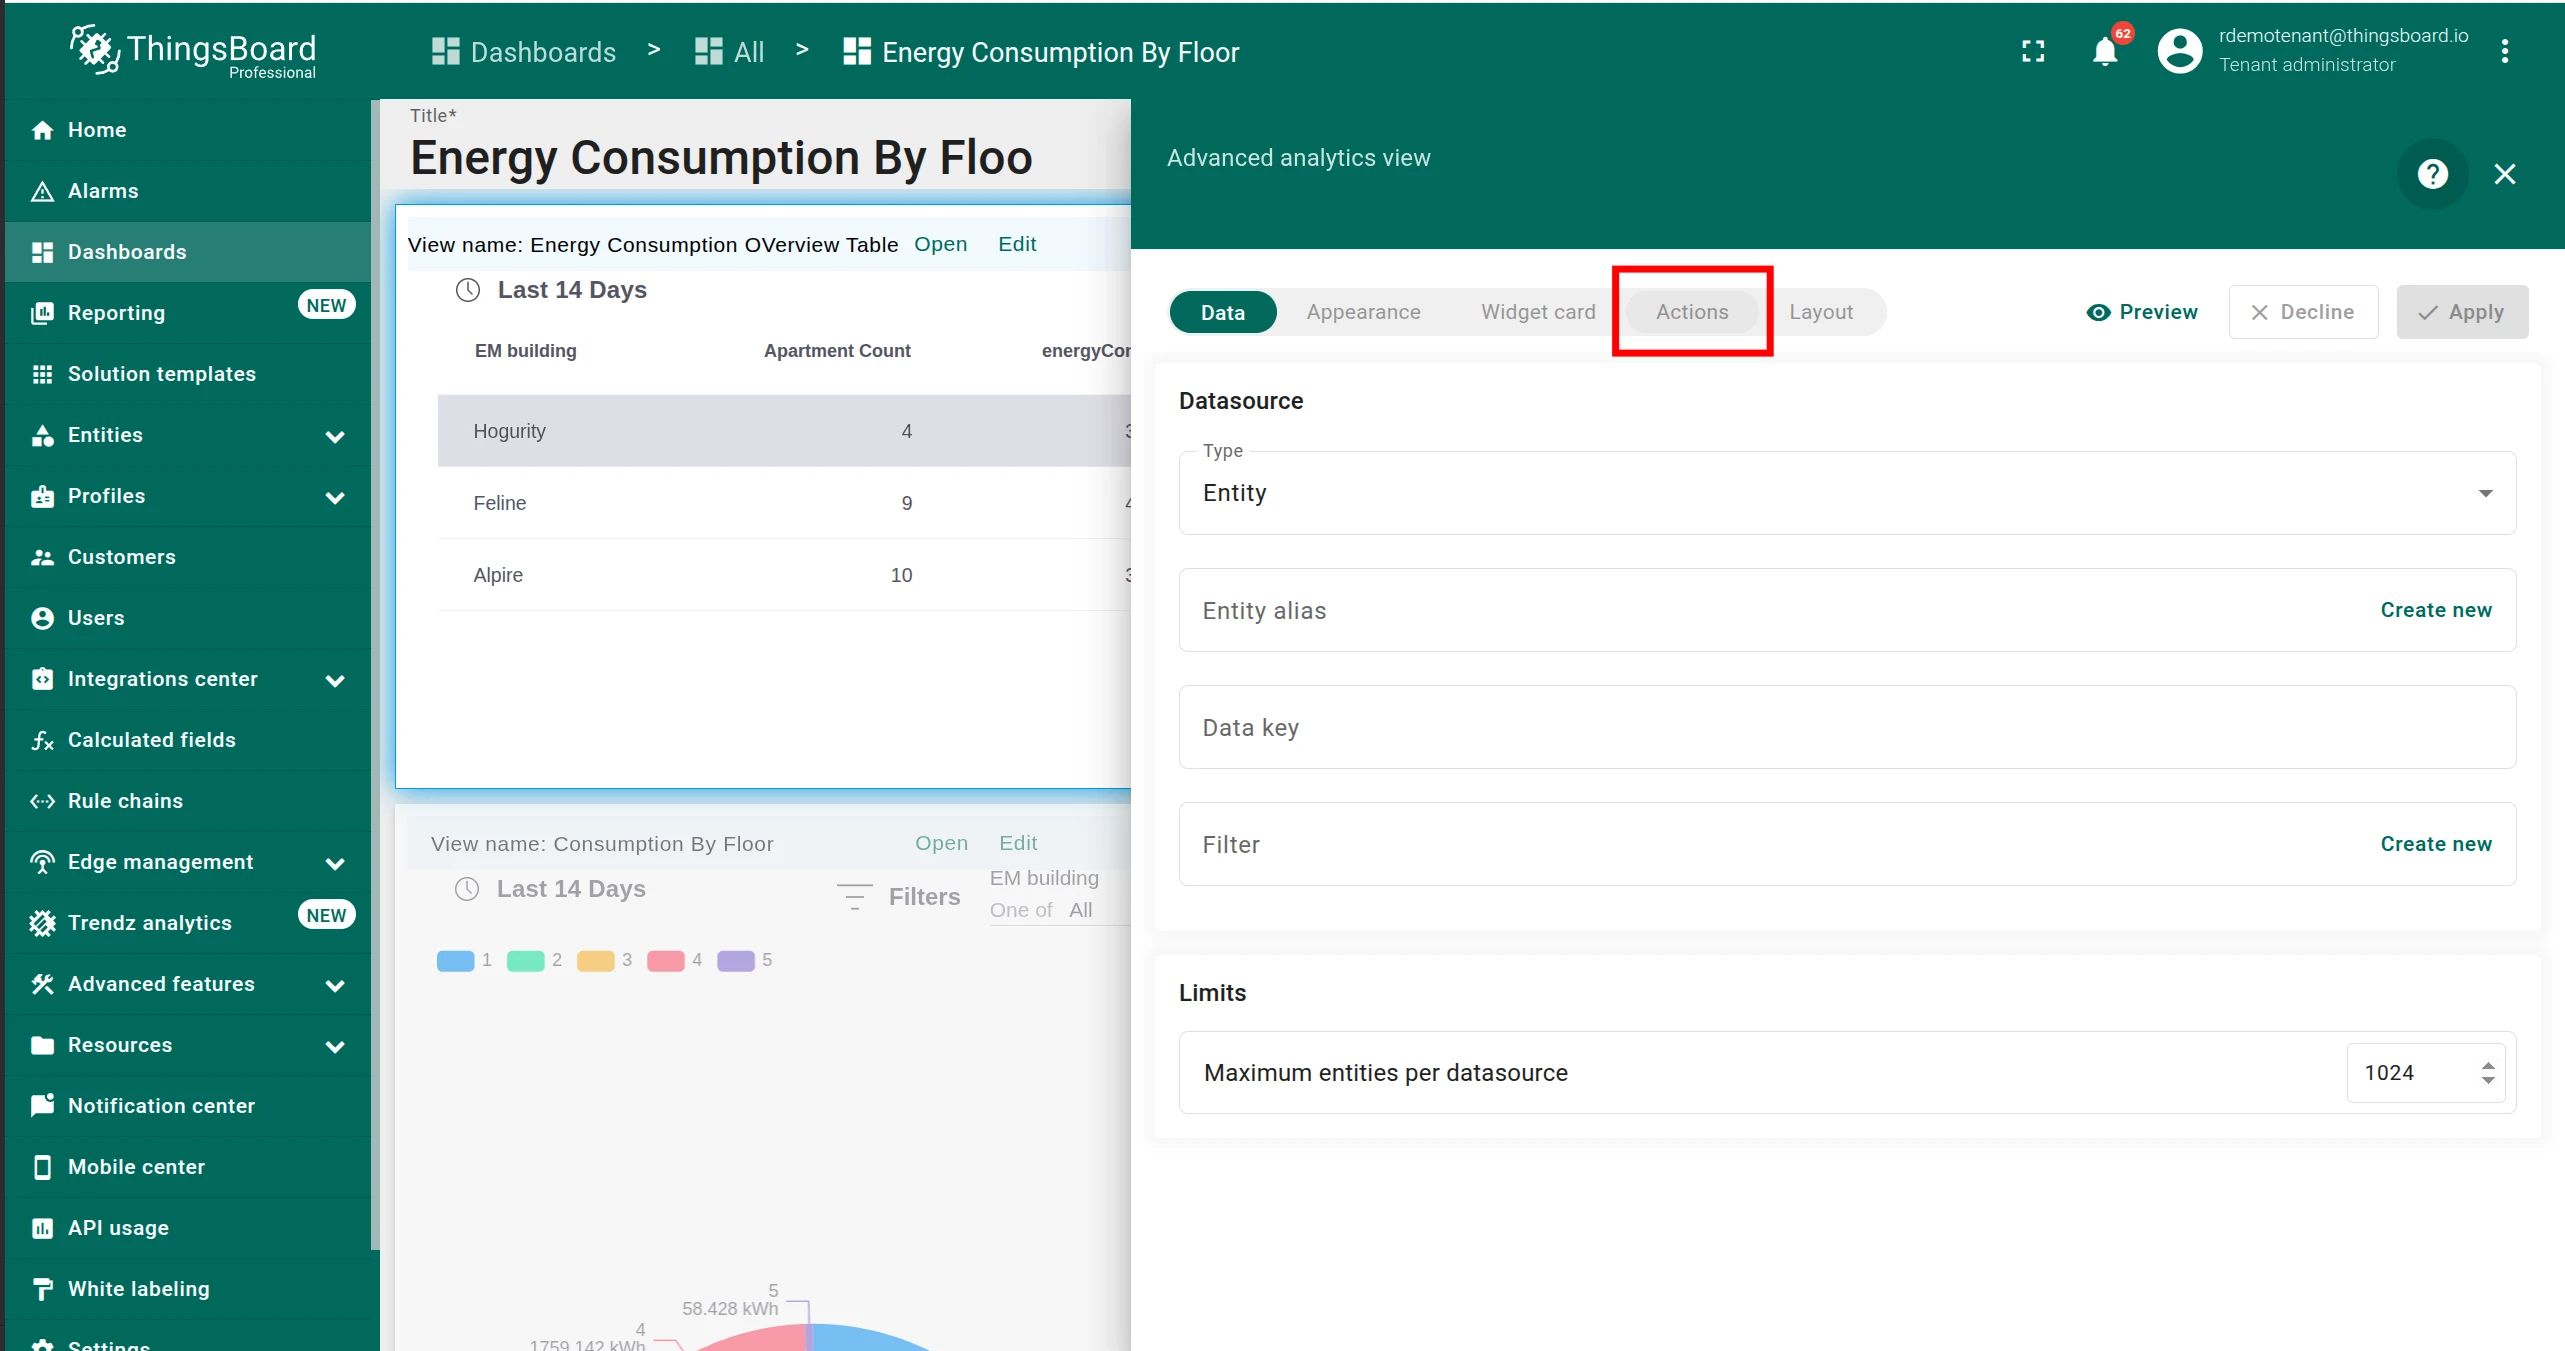
Switch to the Actions tab.
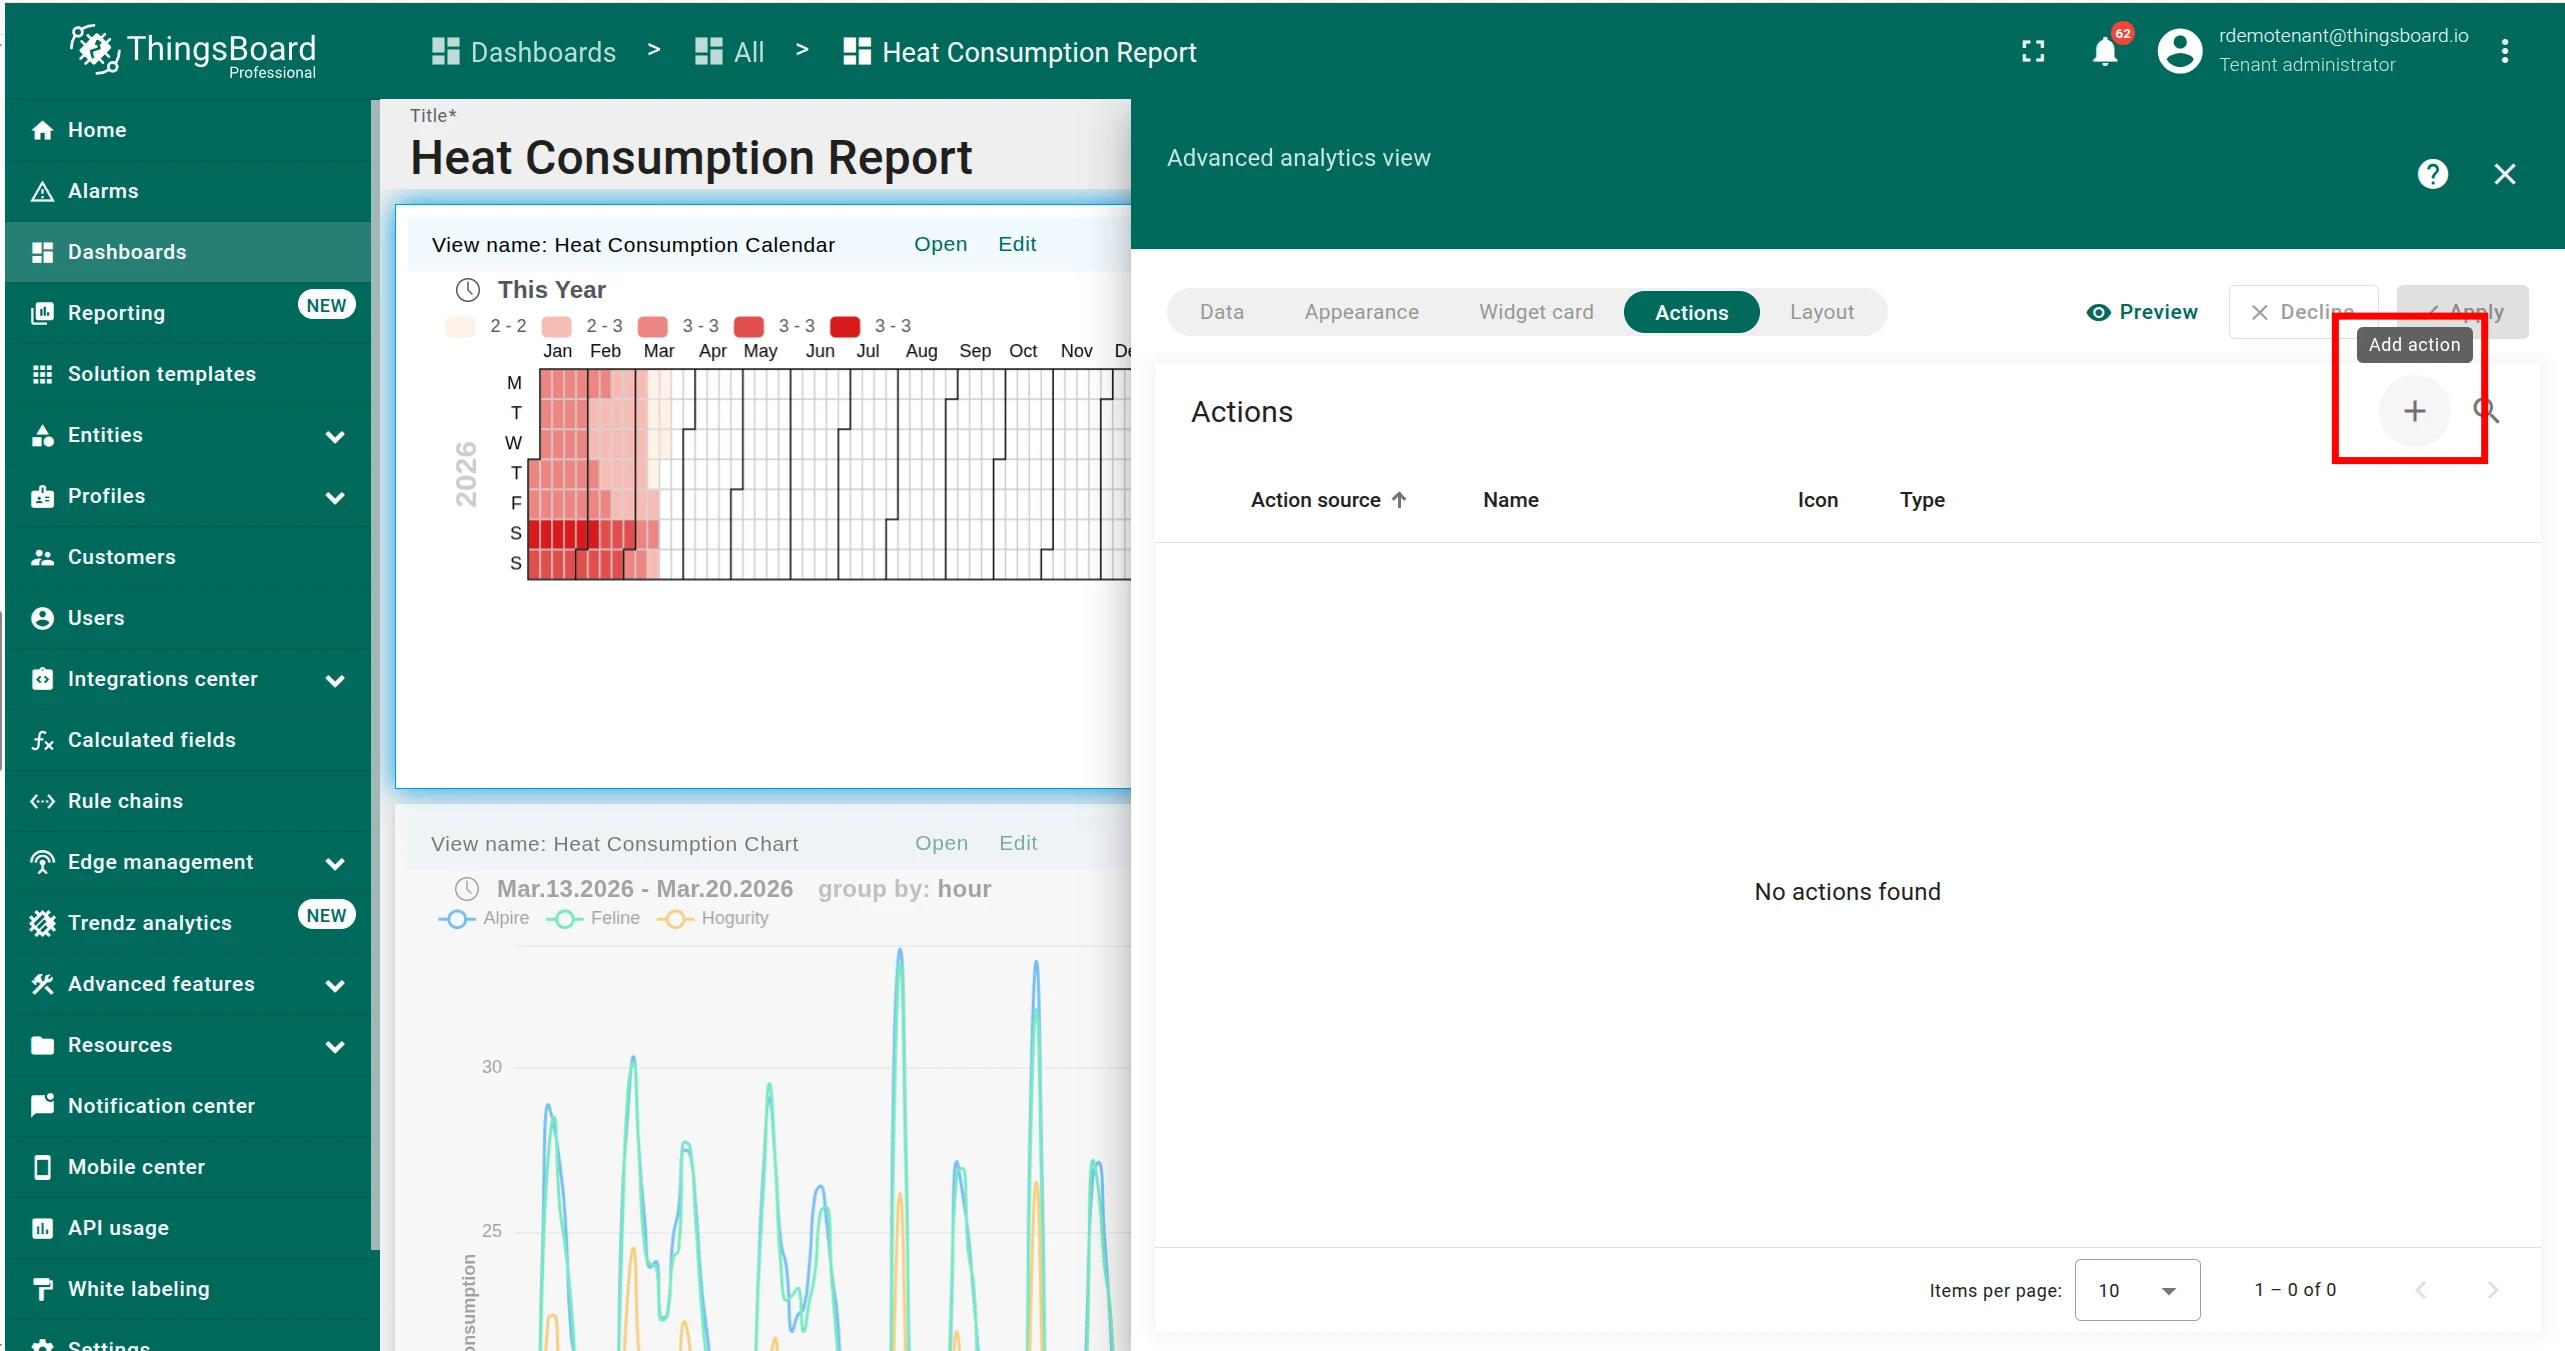
-
Click Add action.
-
In the Add action dialog:
- Set Action source to
date-selected. - Enter a Name (e.g.
Select Date). - Set Action to Custom action.
- Paste the following code into the custom action function:
widgetContext.dashboard.onUpdateTimewindow(additionalParams.startTs,additionalParams.endTs); - Set Action source to
-
Click Add.
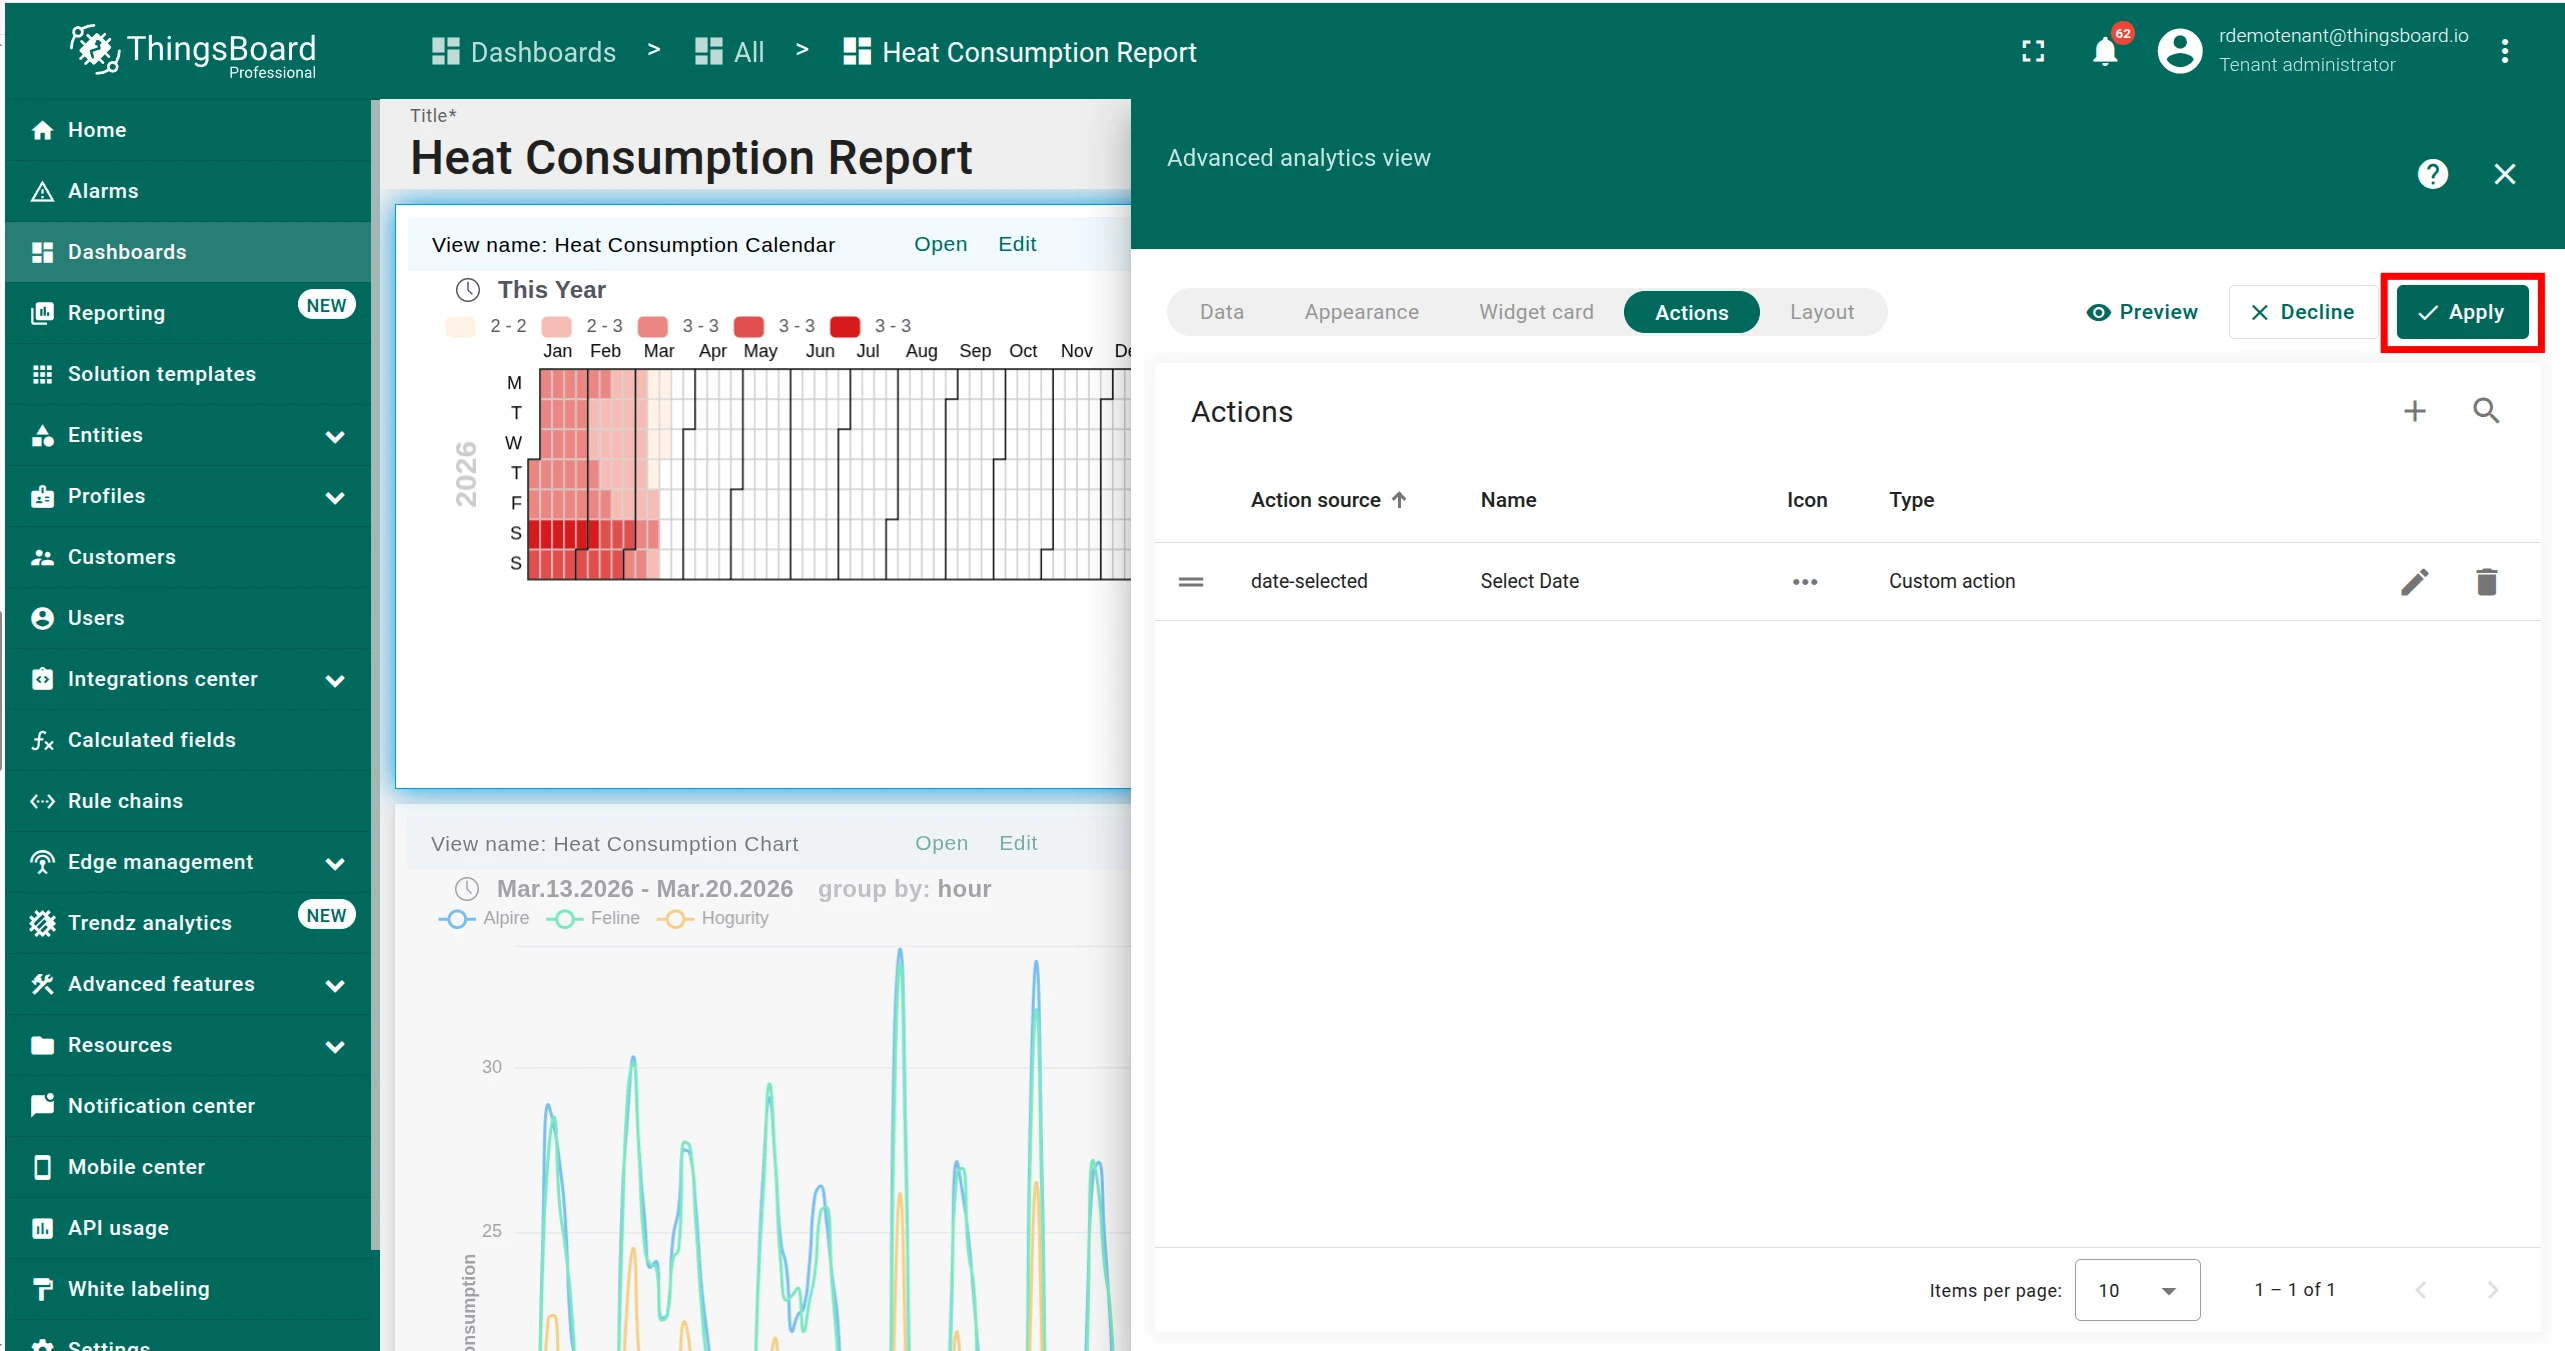
Now when a user clicks a date on the calendar, the dashboard time window updates to that date and all other widgets refresh to show data for the selected period.
On row click — Table view
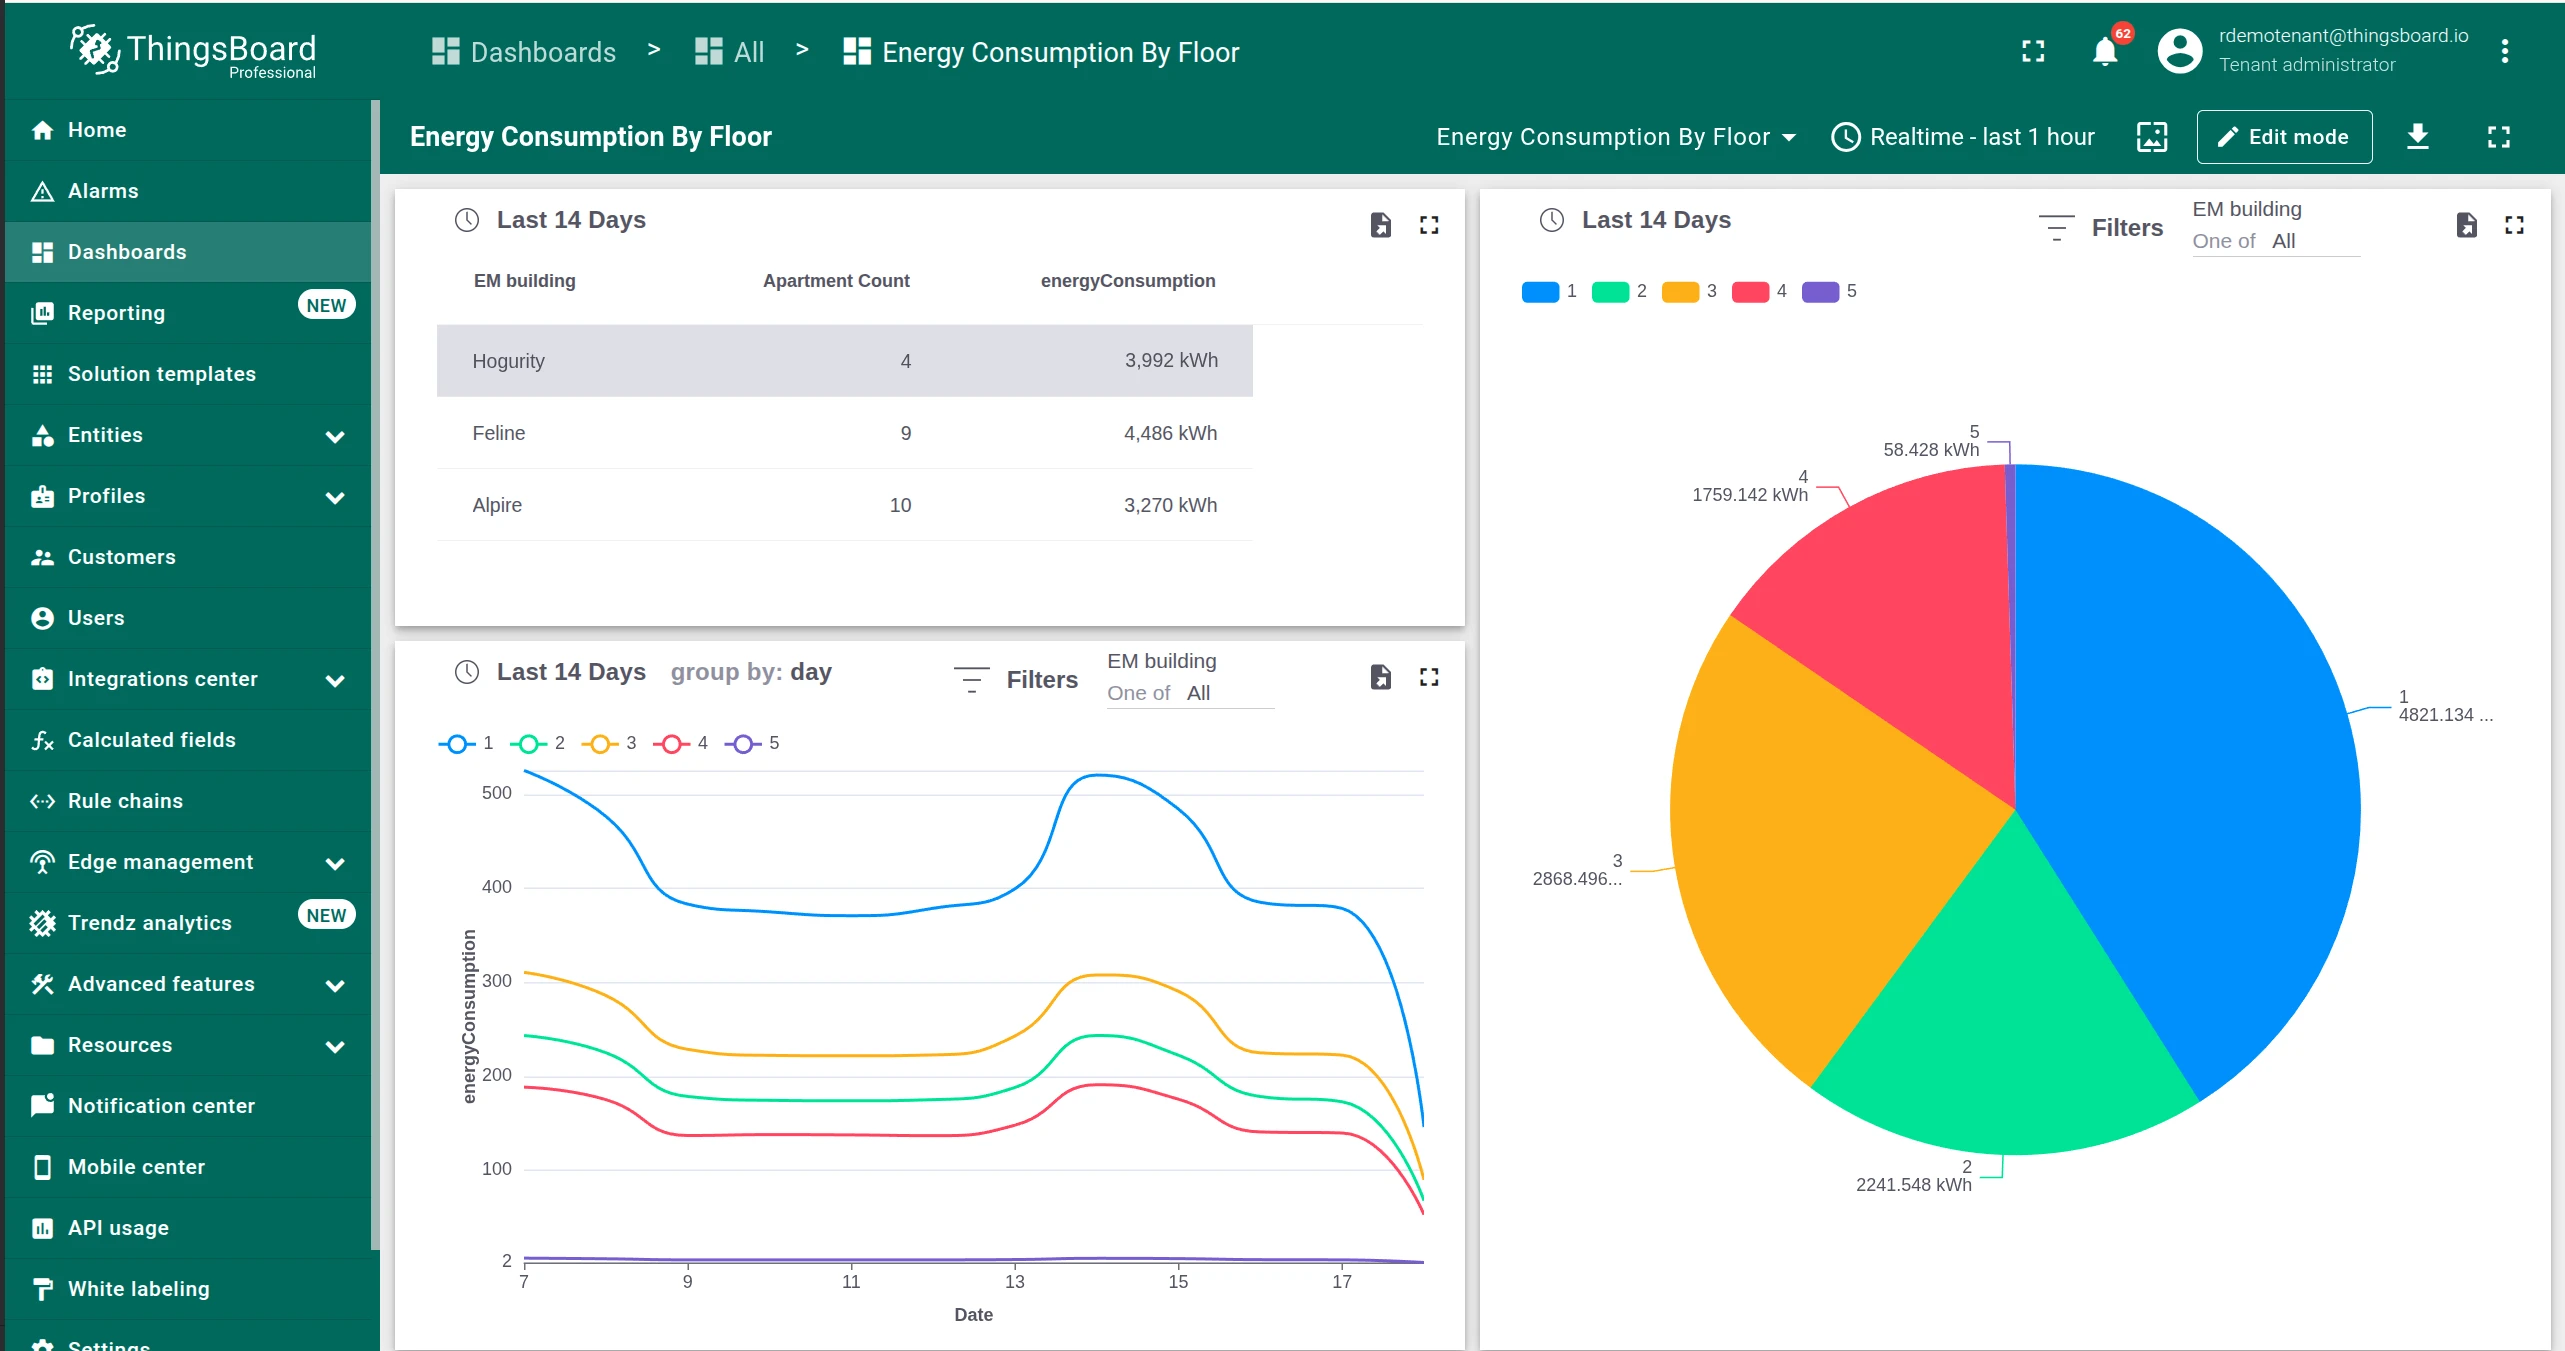
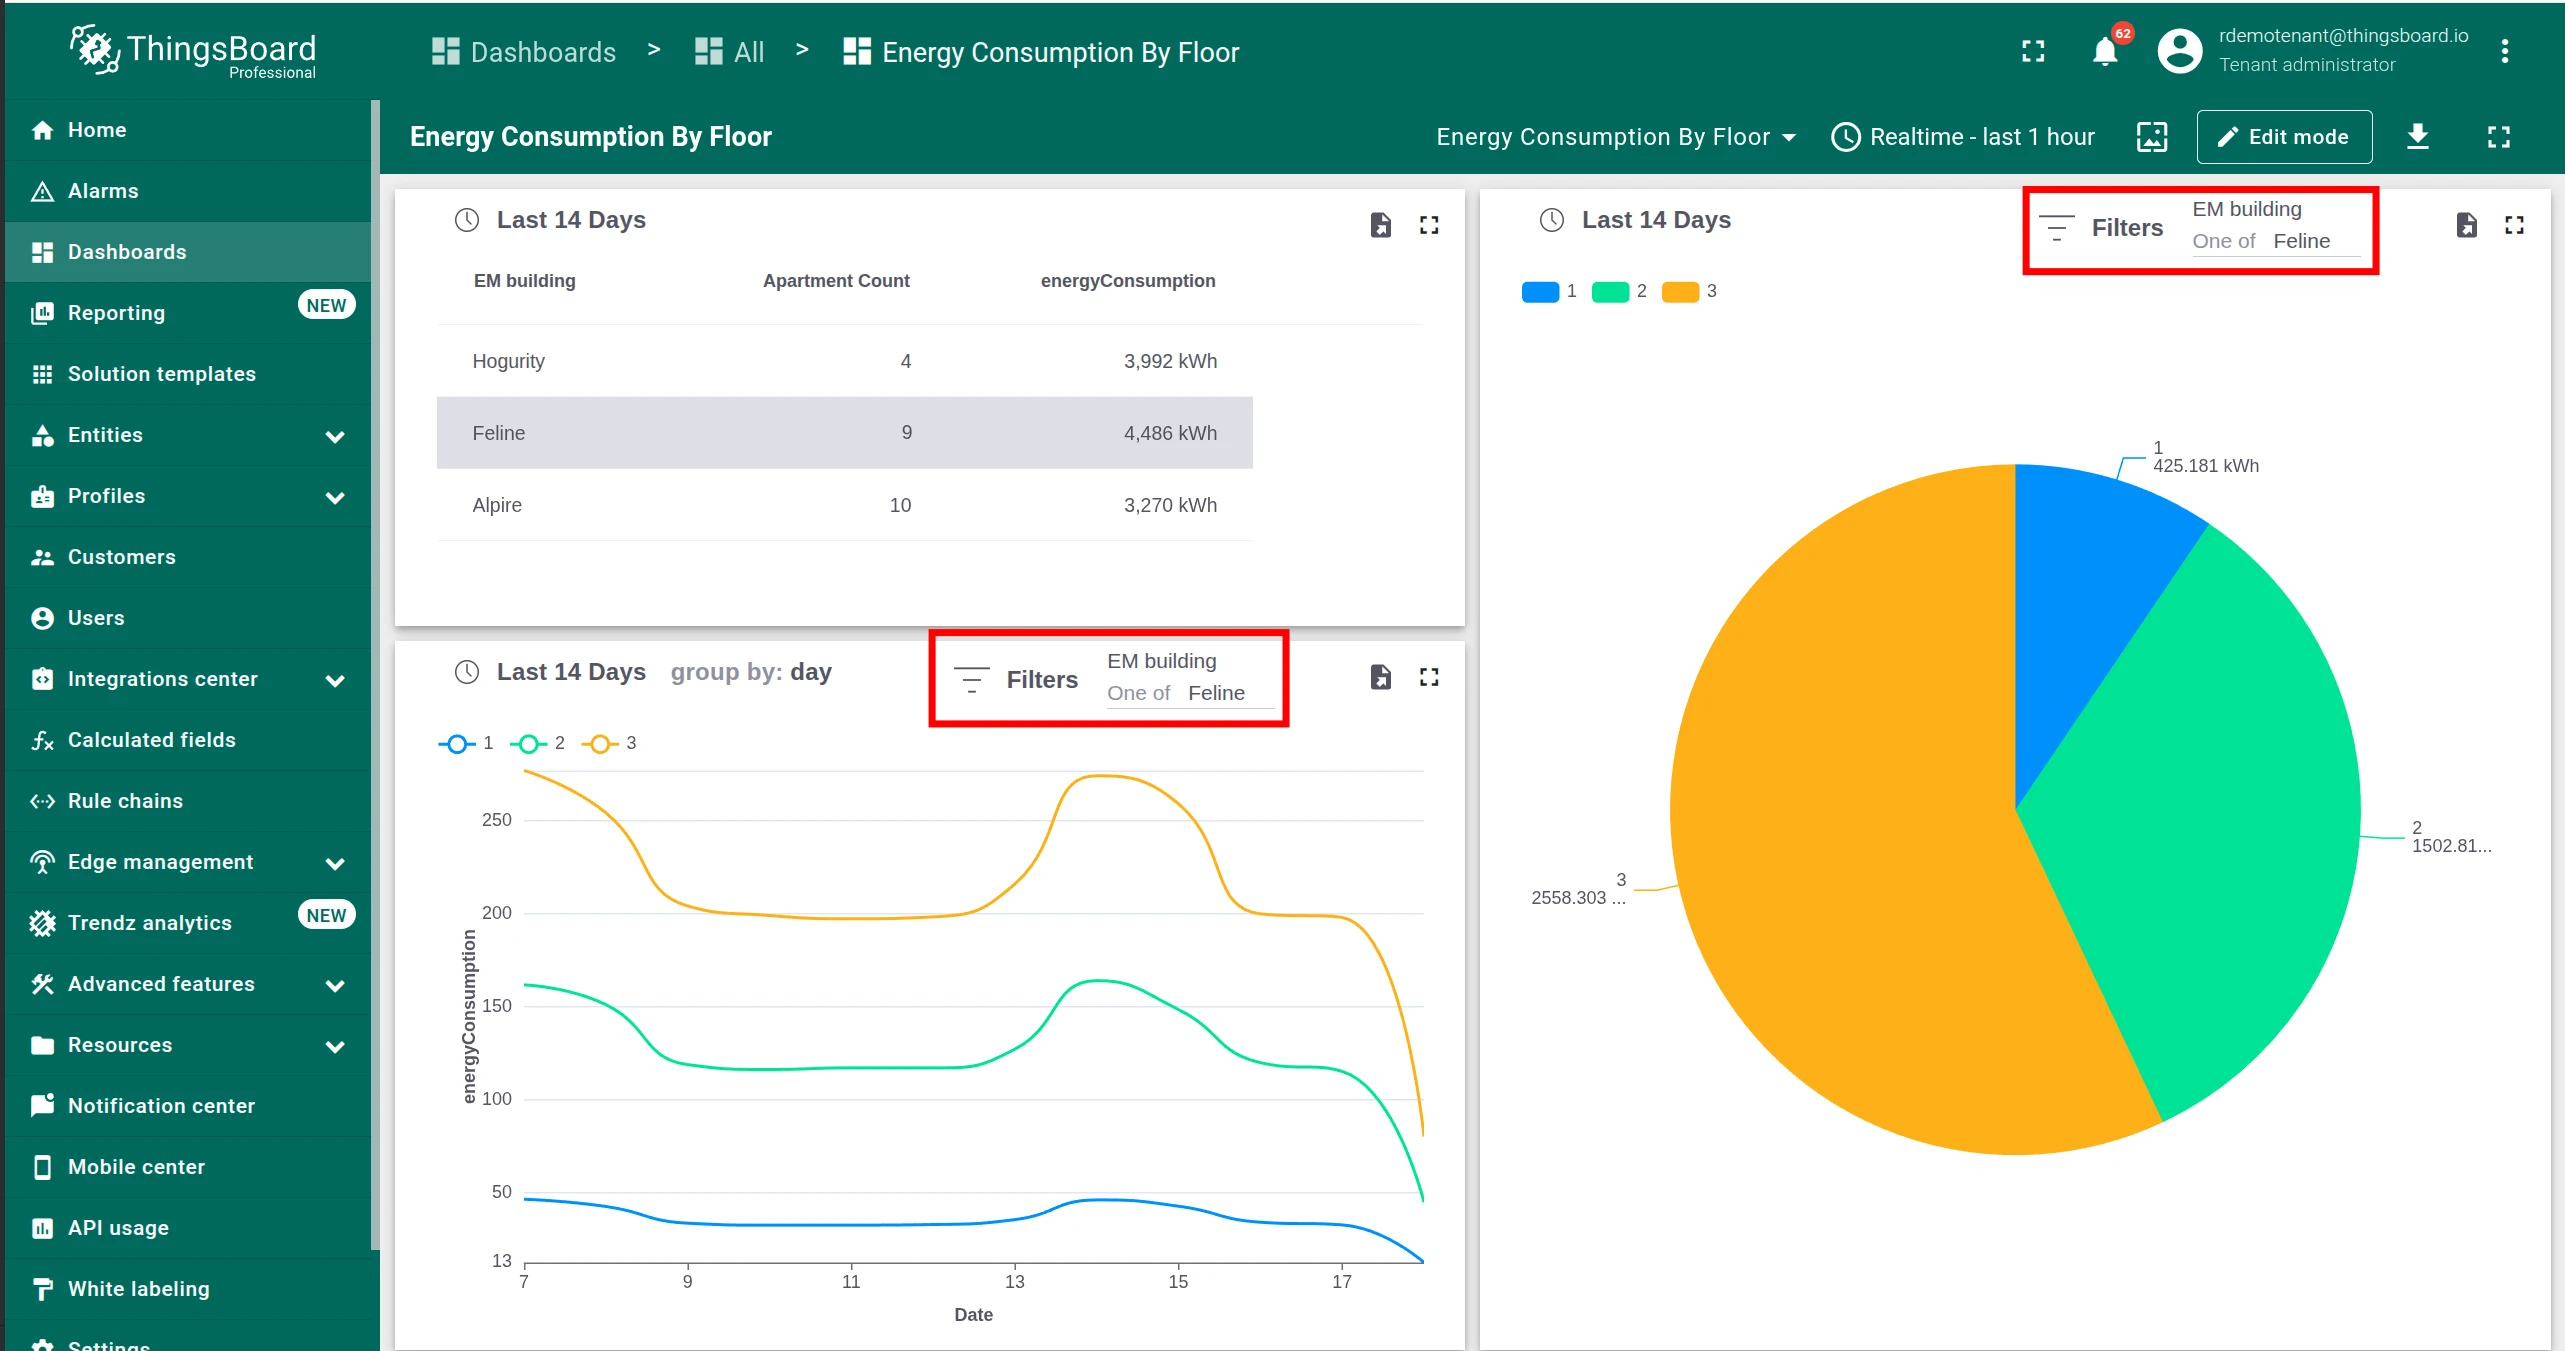
Section titled “On row click — Table view”The On row click action is available for the Table and Anomaly table view types. When a user clicks a row, the action fires and you can use it to navigate to a dashboard state, select an entity, or run any custom script.
Example: A dashboard shows buildings with aggregated energy consumption. Clicking a building row filters all other widgets — the line chart and pie chart update instantly to show data only for that building.
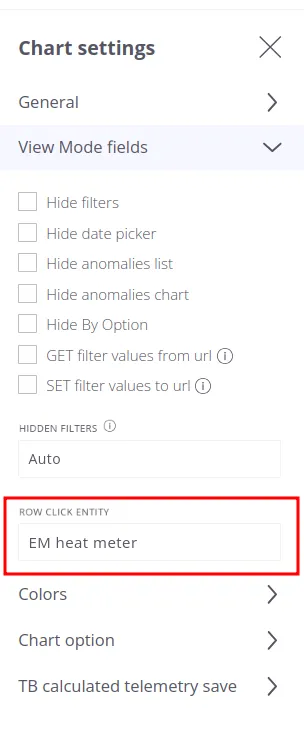
Step 1 — Set the Row click entity in Trendz
Section titled “Step 1 — Set the Row click entity in Trendz”Each row in a Trendz table can aggregate data from multiple entity types. You need to tell Trendz which entity type represents the selected row — this entity will be passed to the ThingsBoard action.
-
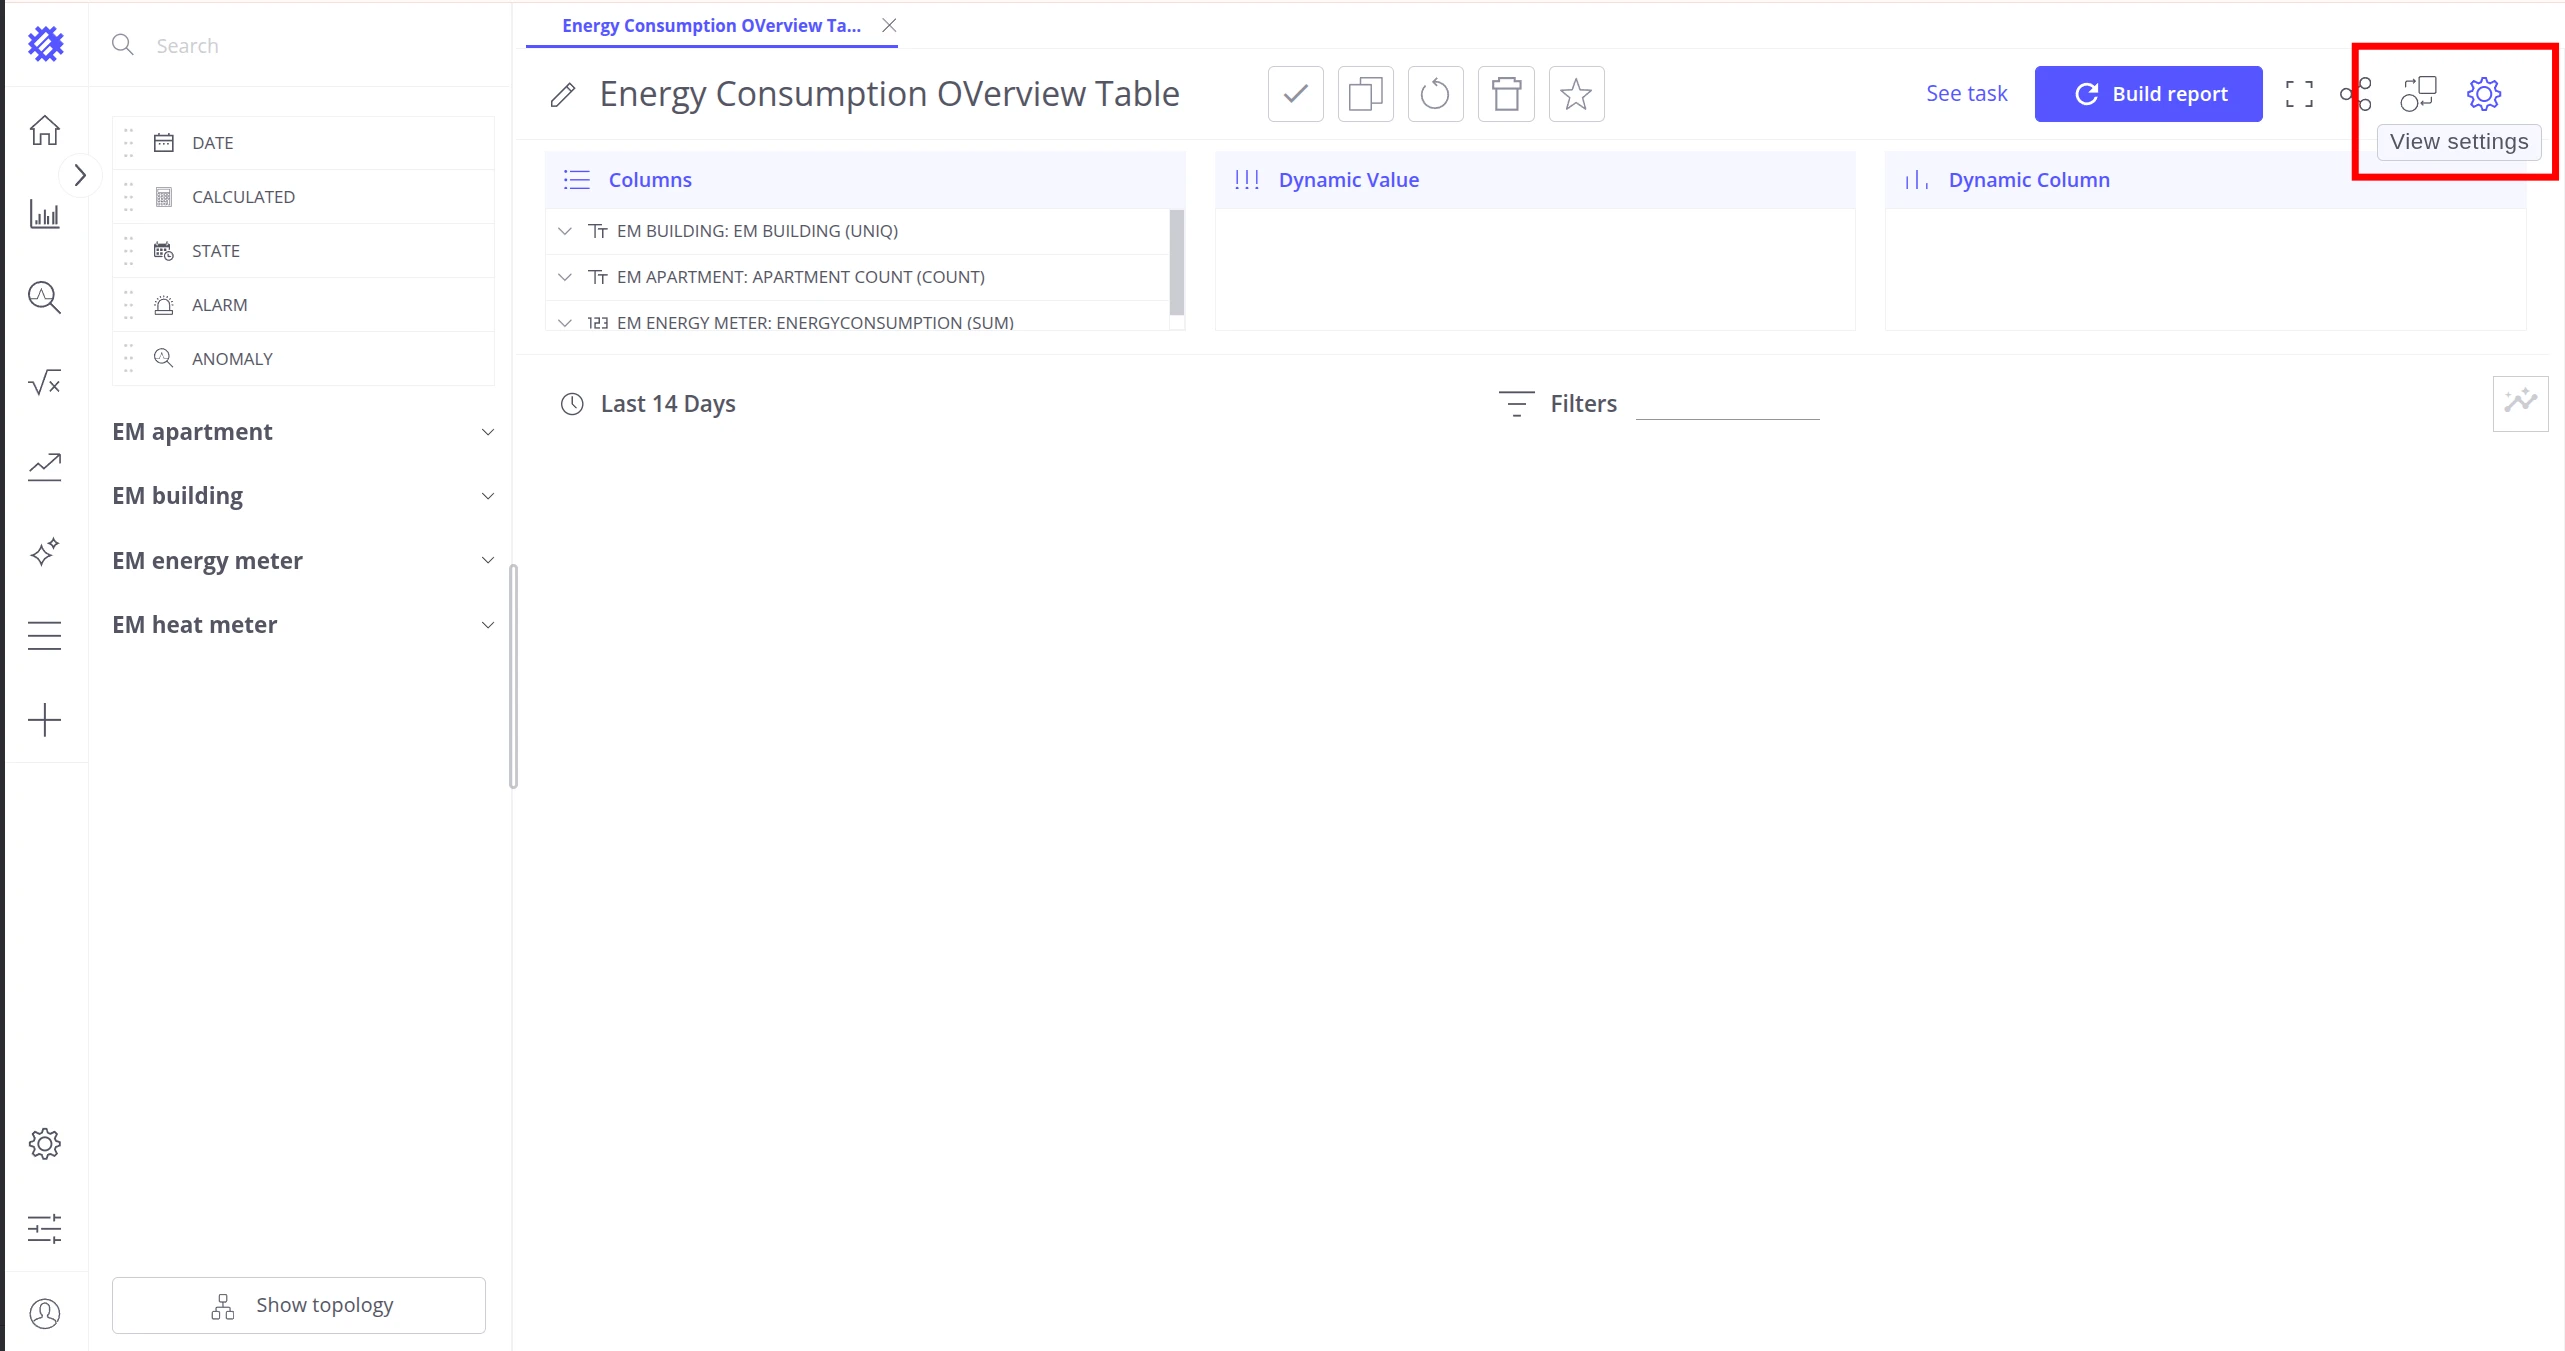
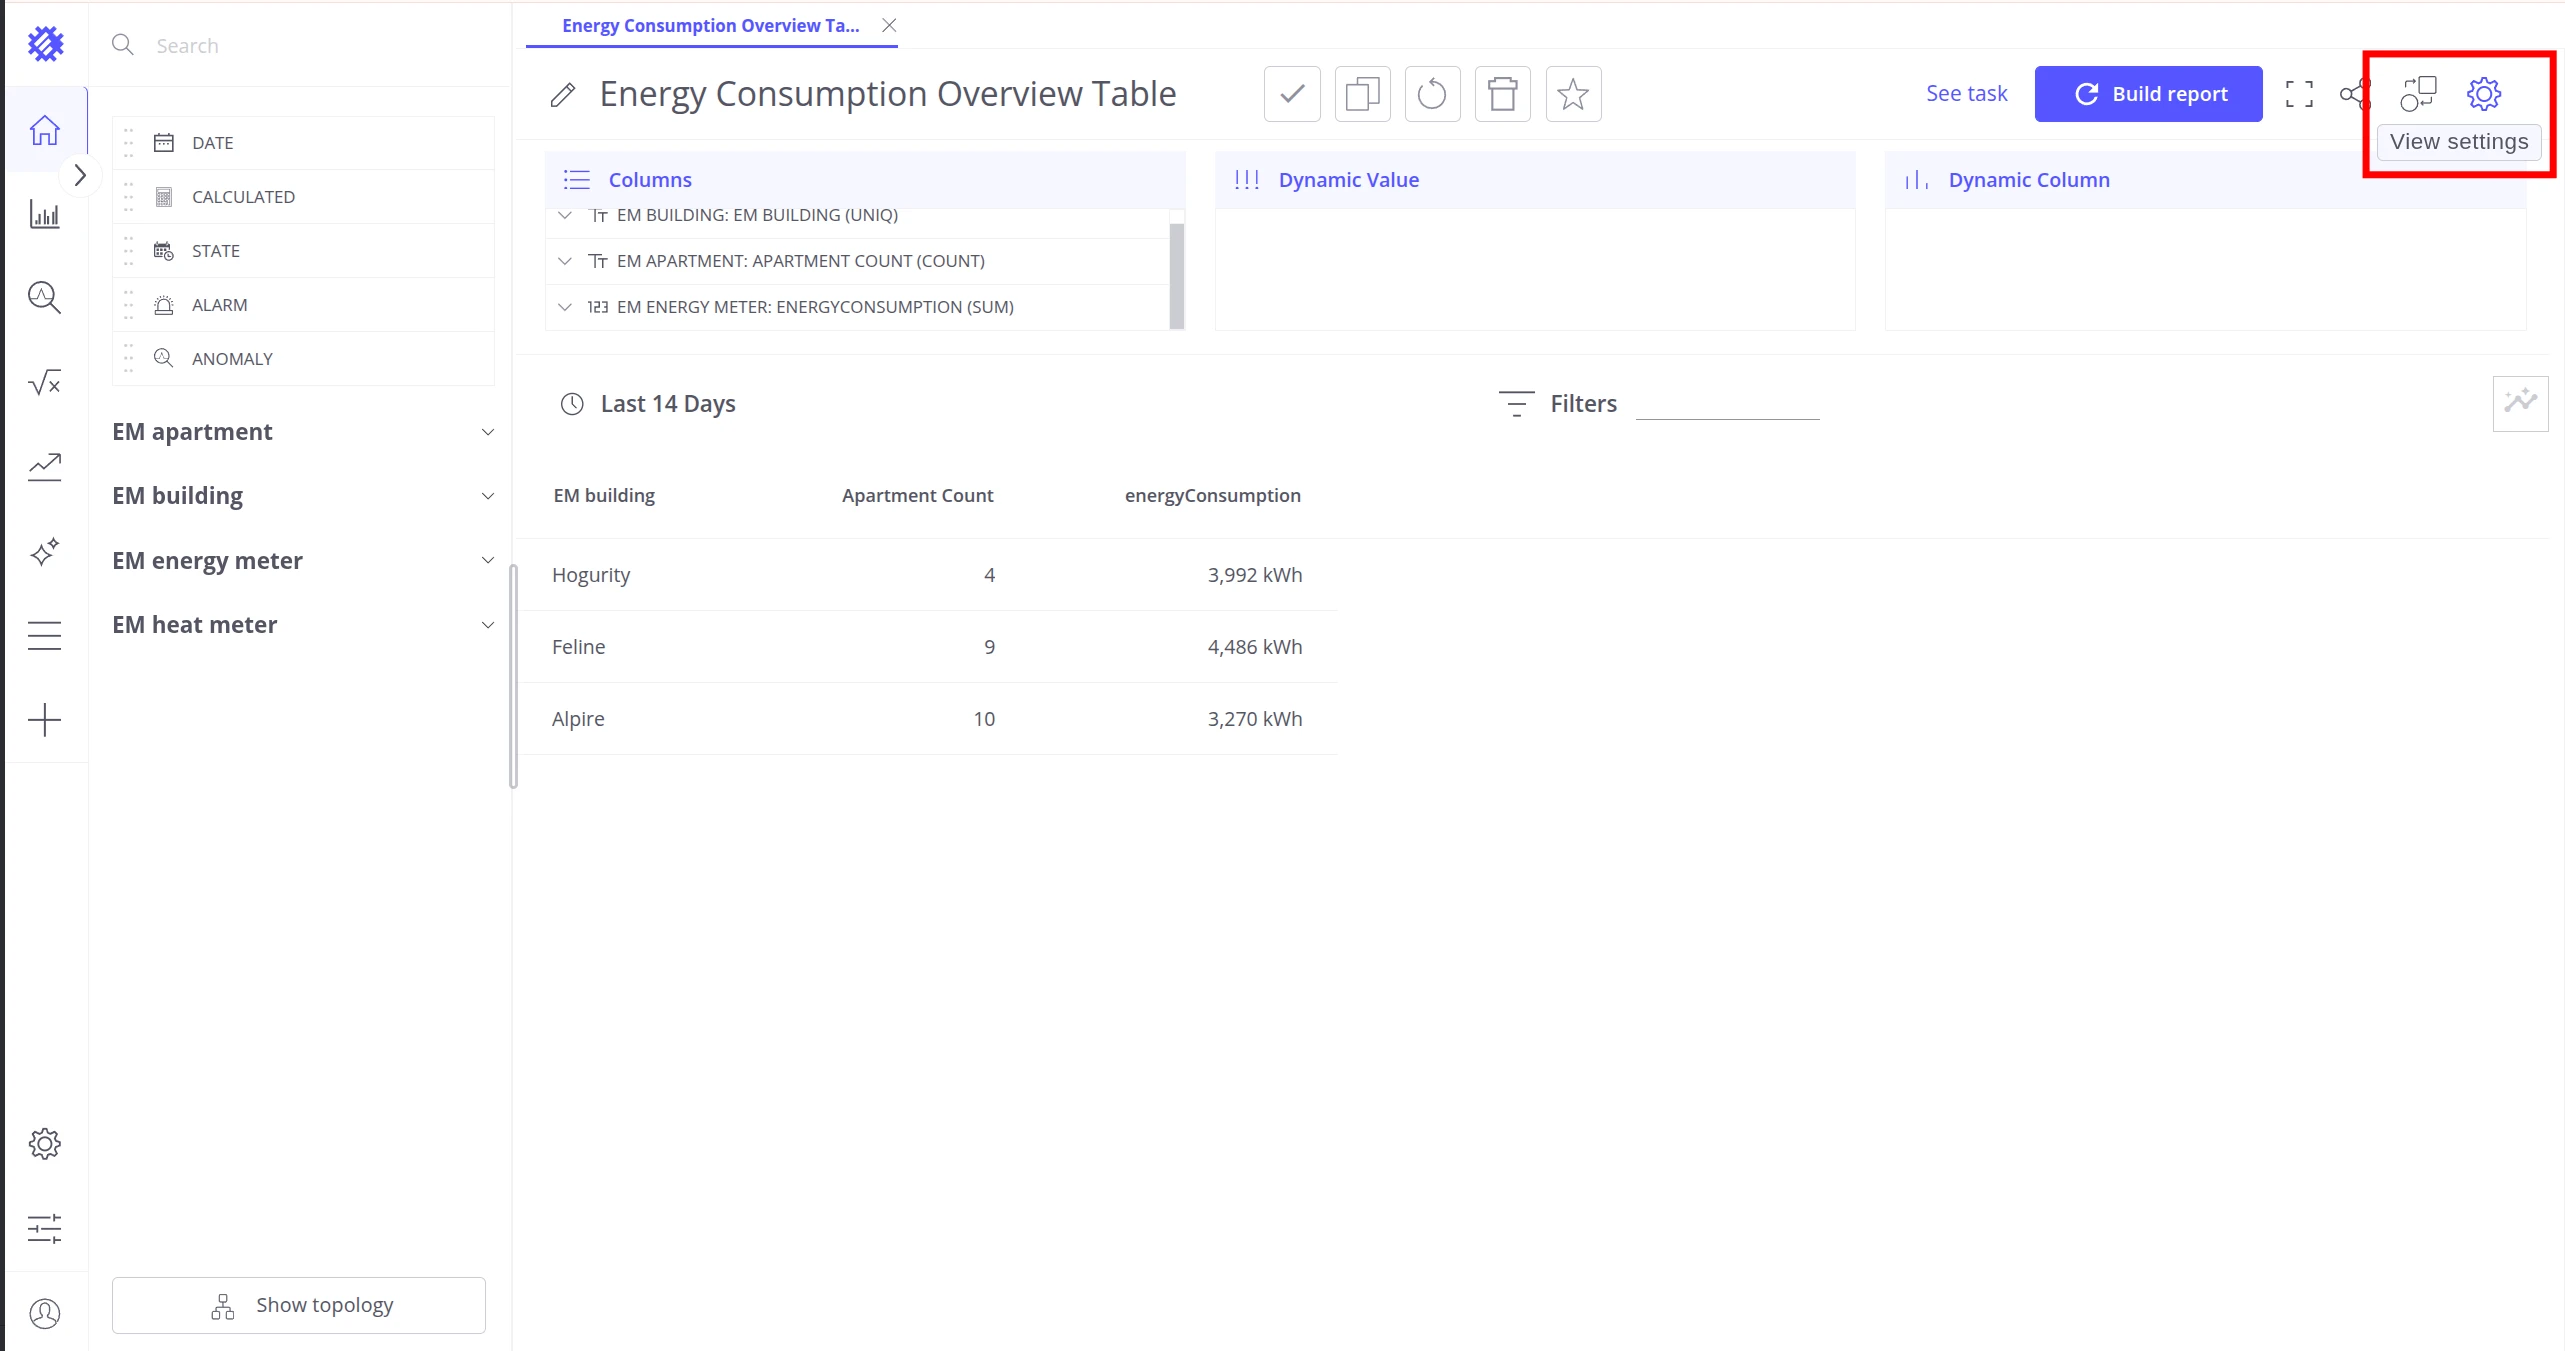
Open the view in Trendz and click View Settings (the gear icon in the top-right corner).
-
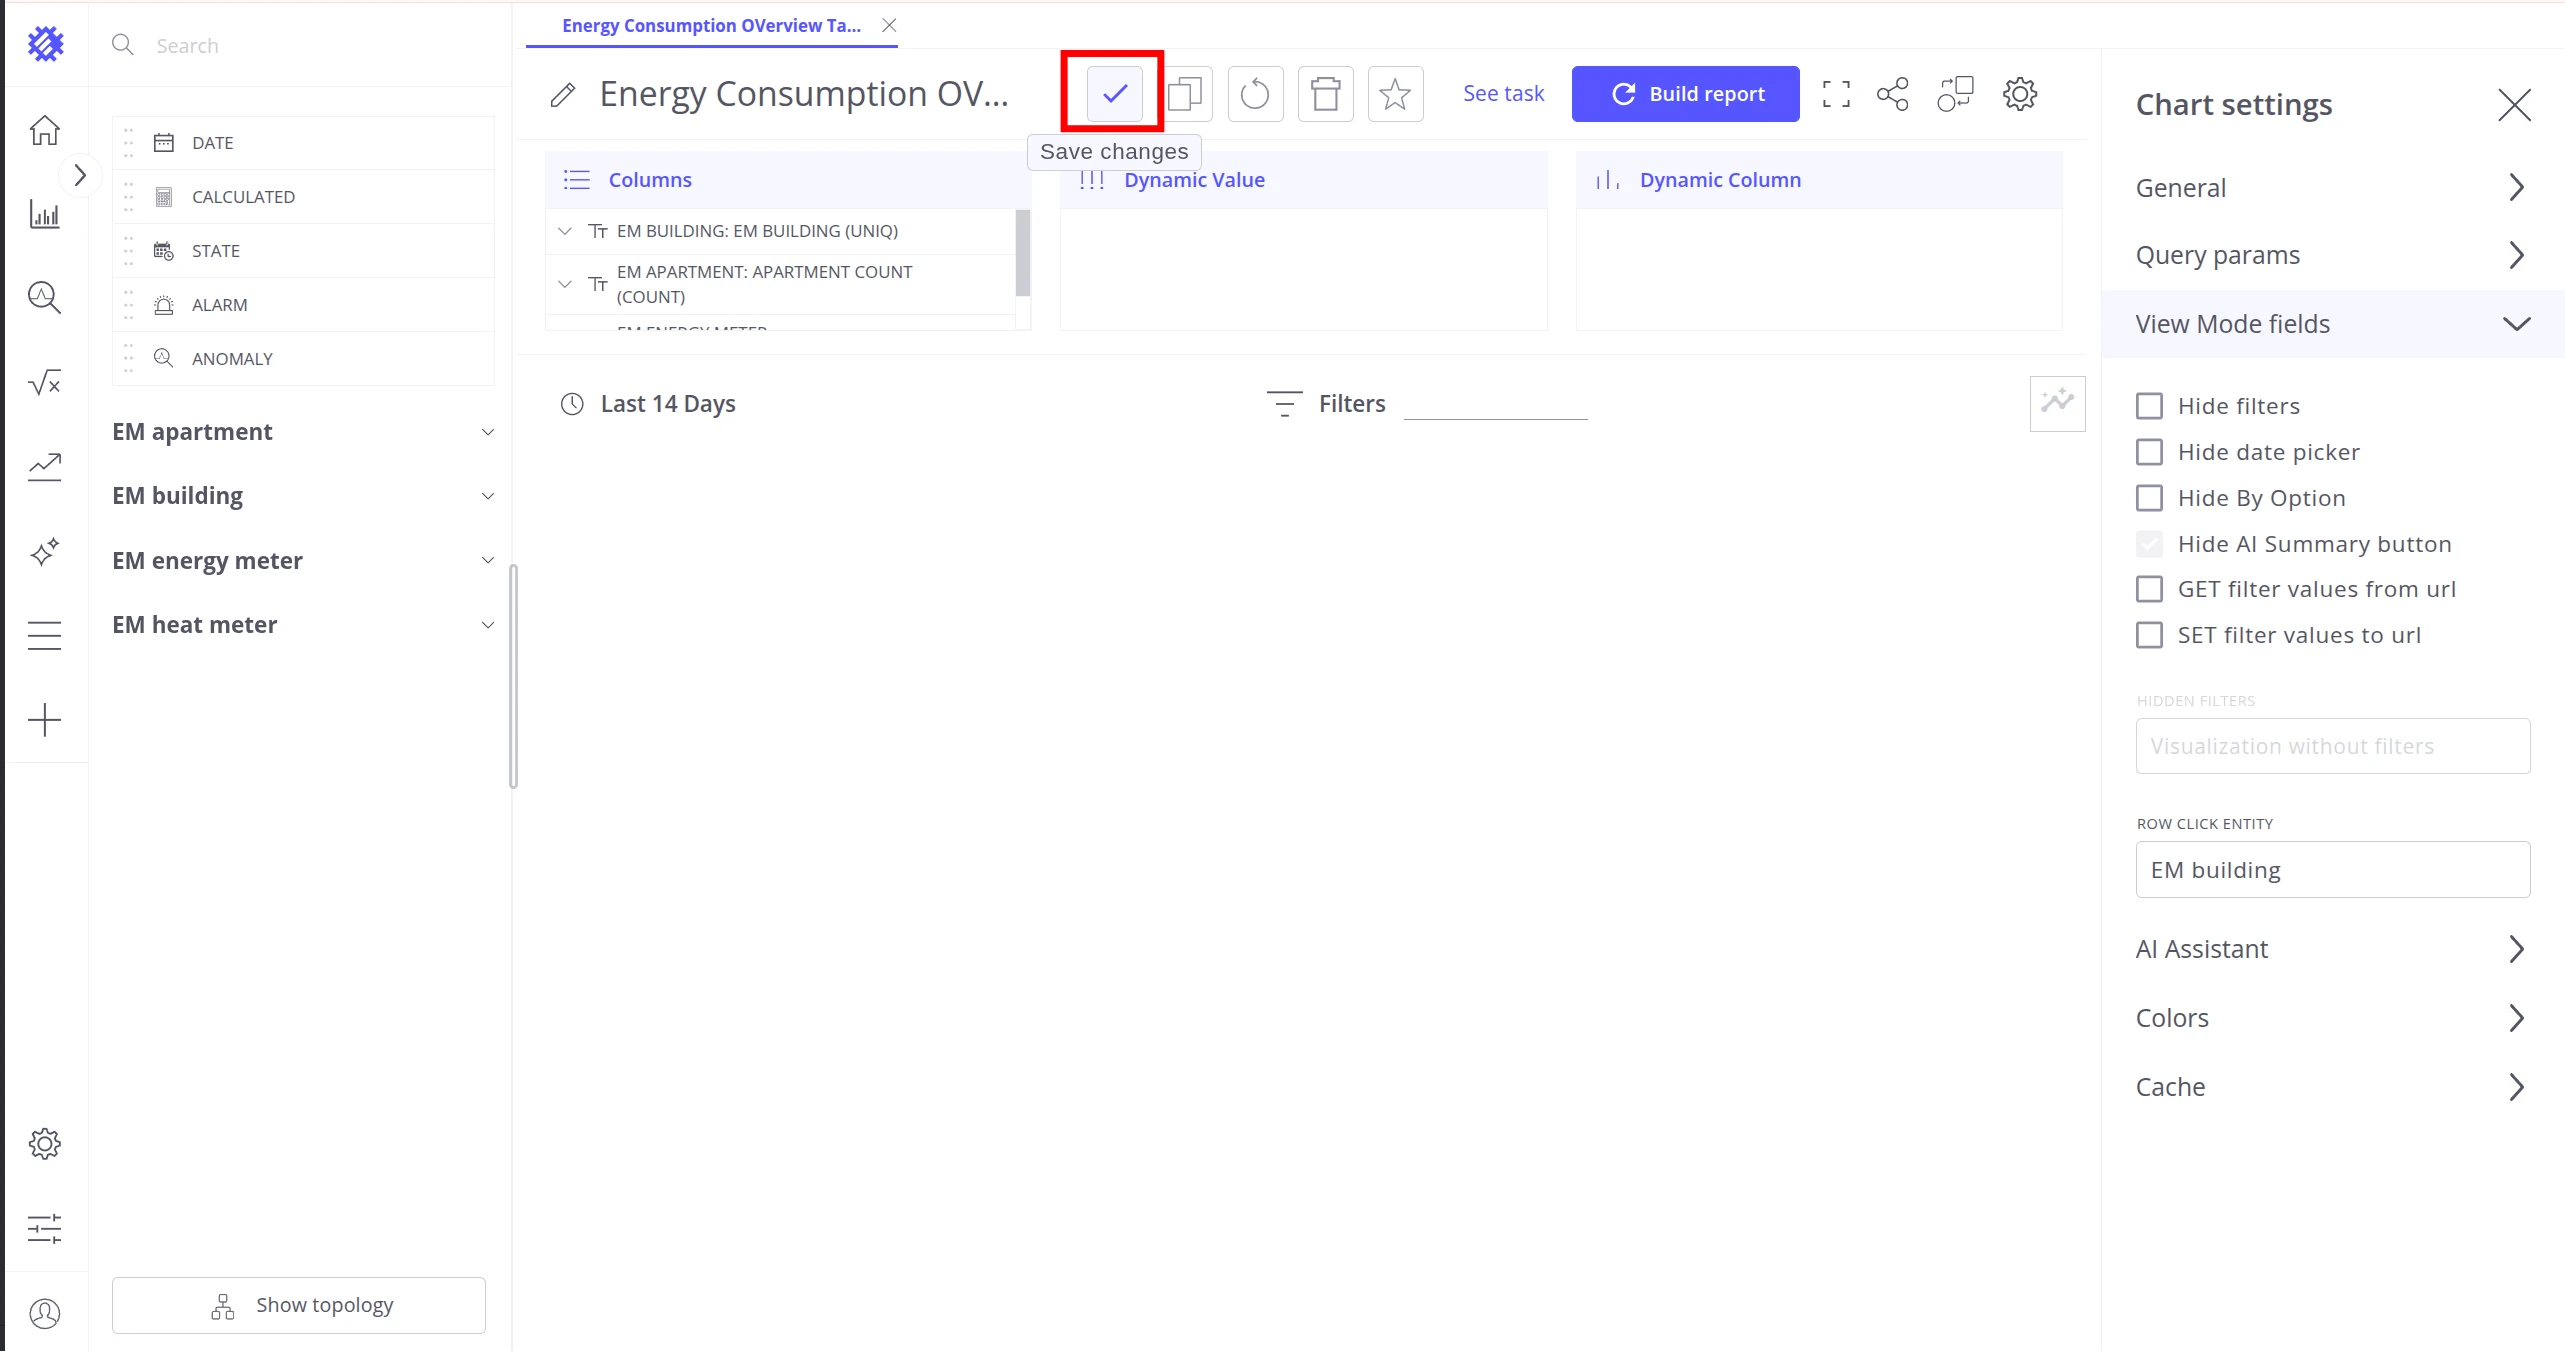
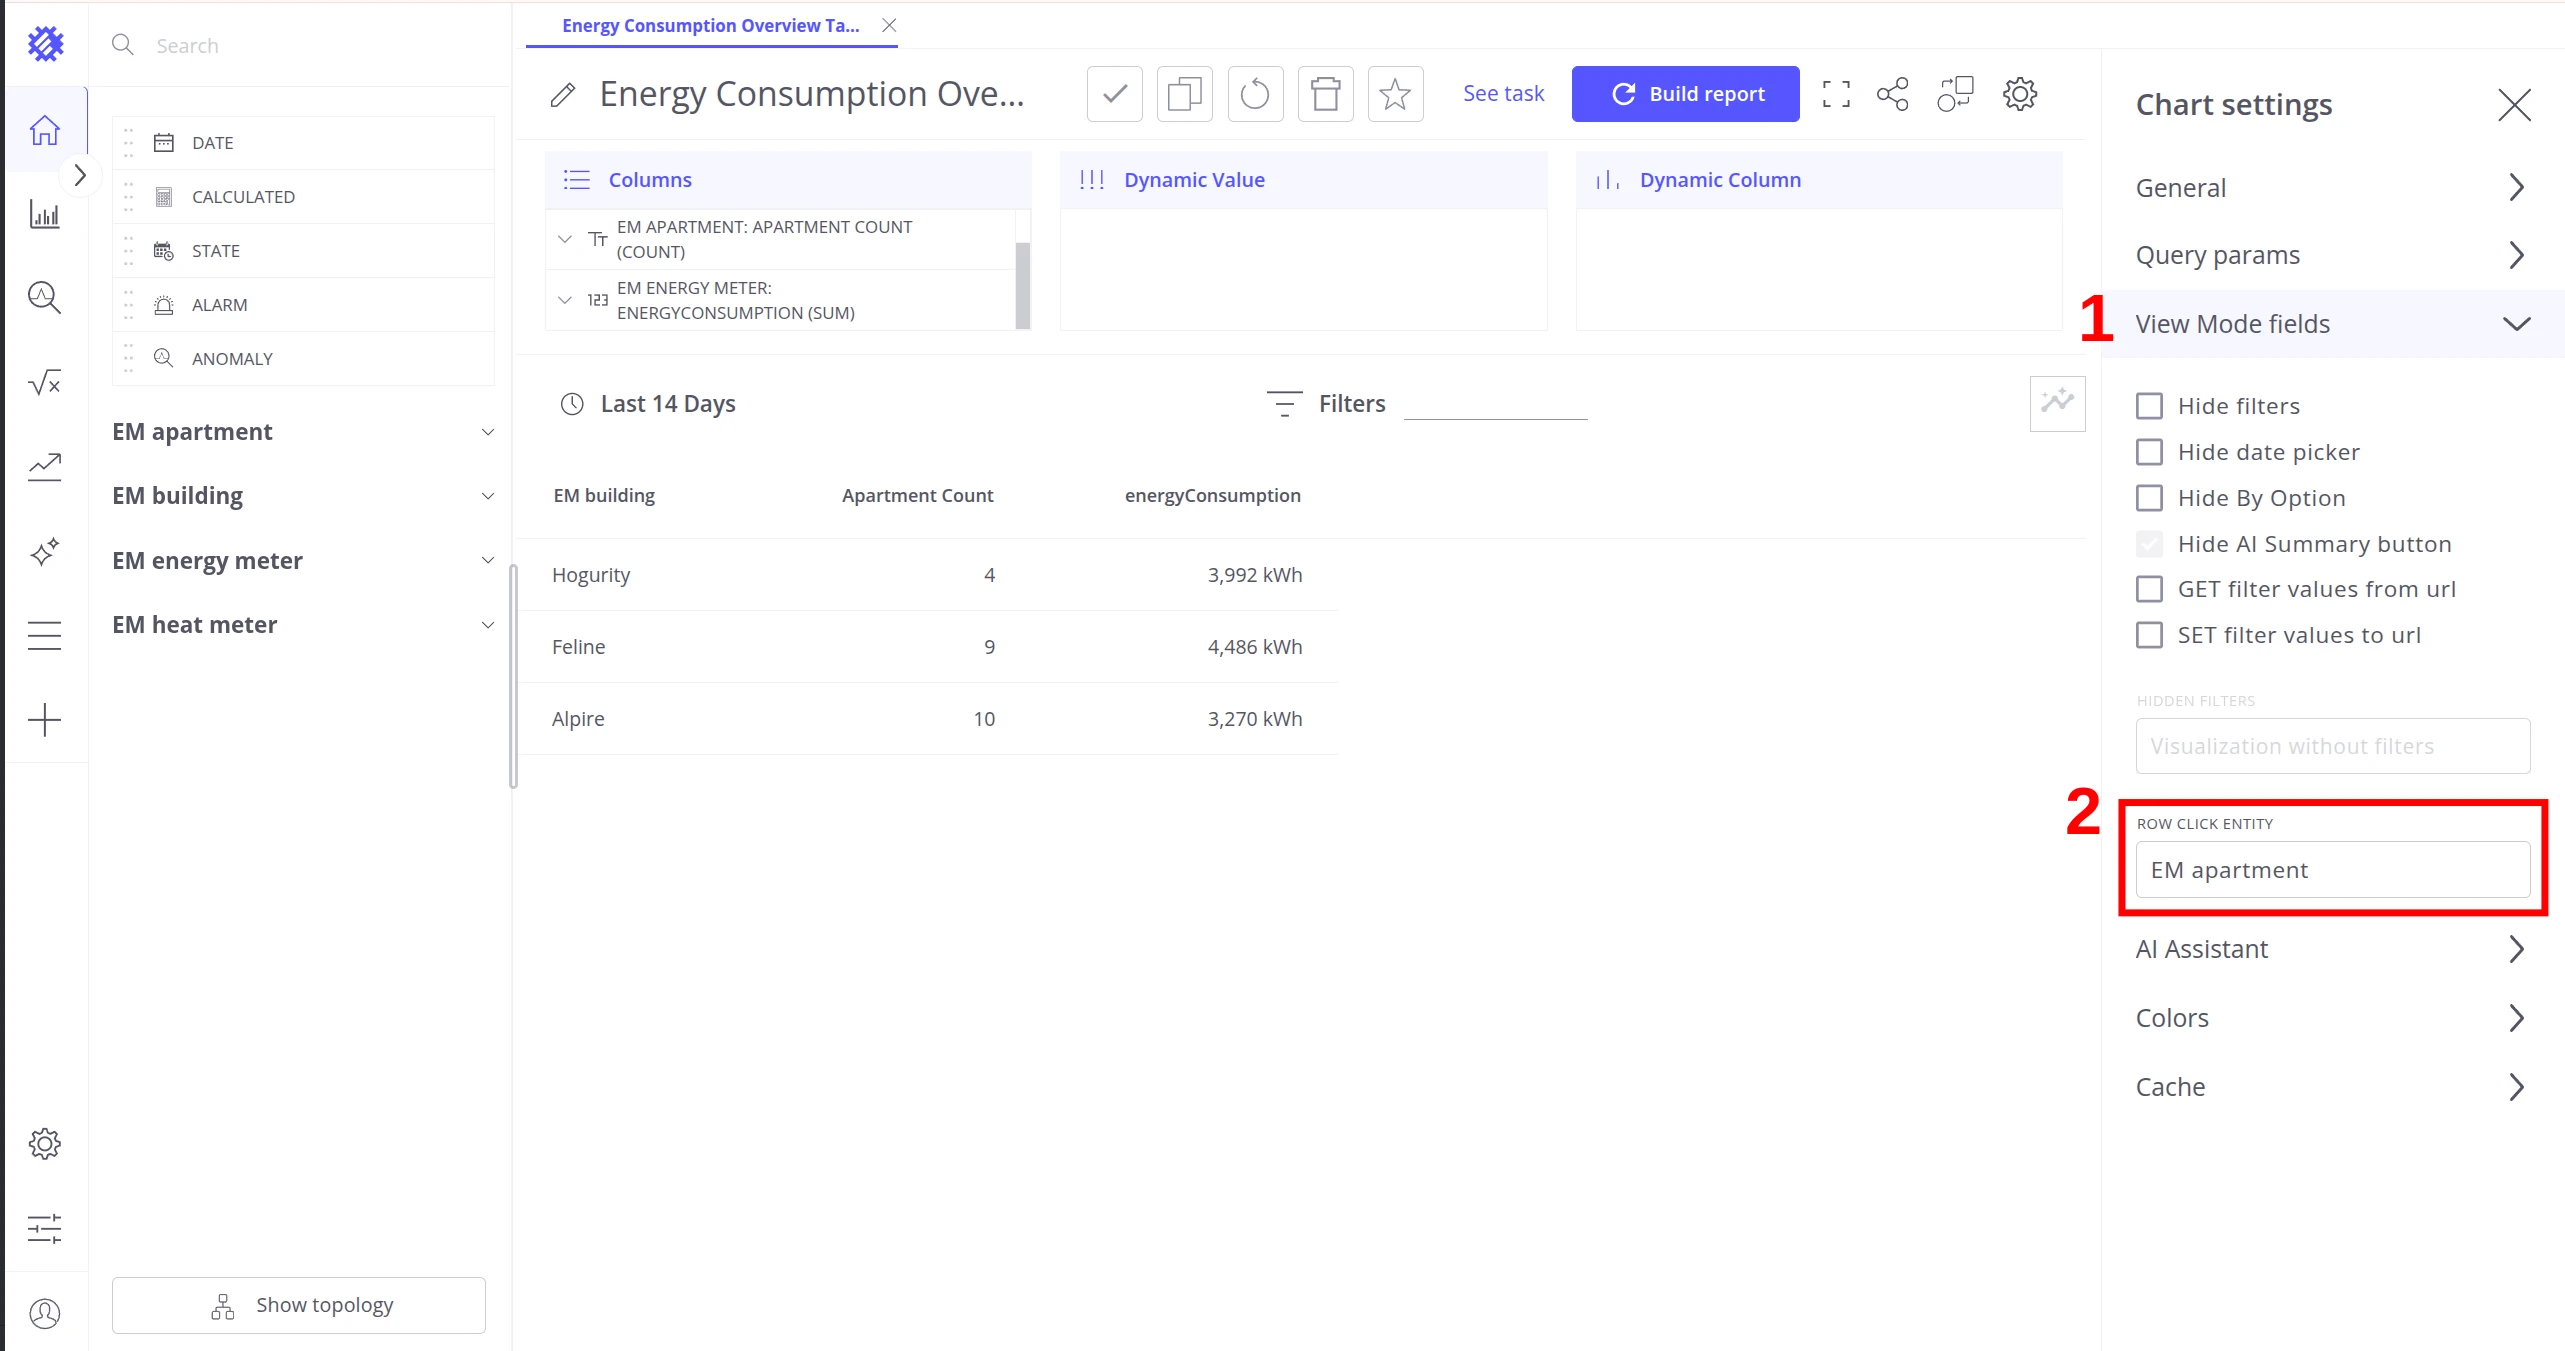
Expand the View Mode fields section.
-
In the Row click entity field, enter the entity type you want to select on row click (e.g. EM building).
-
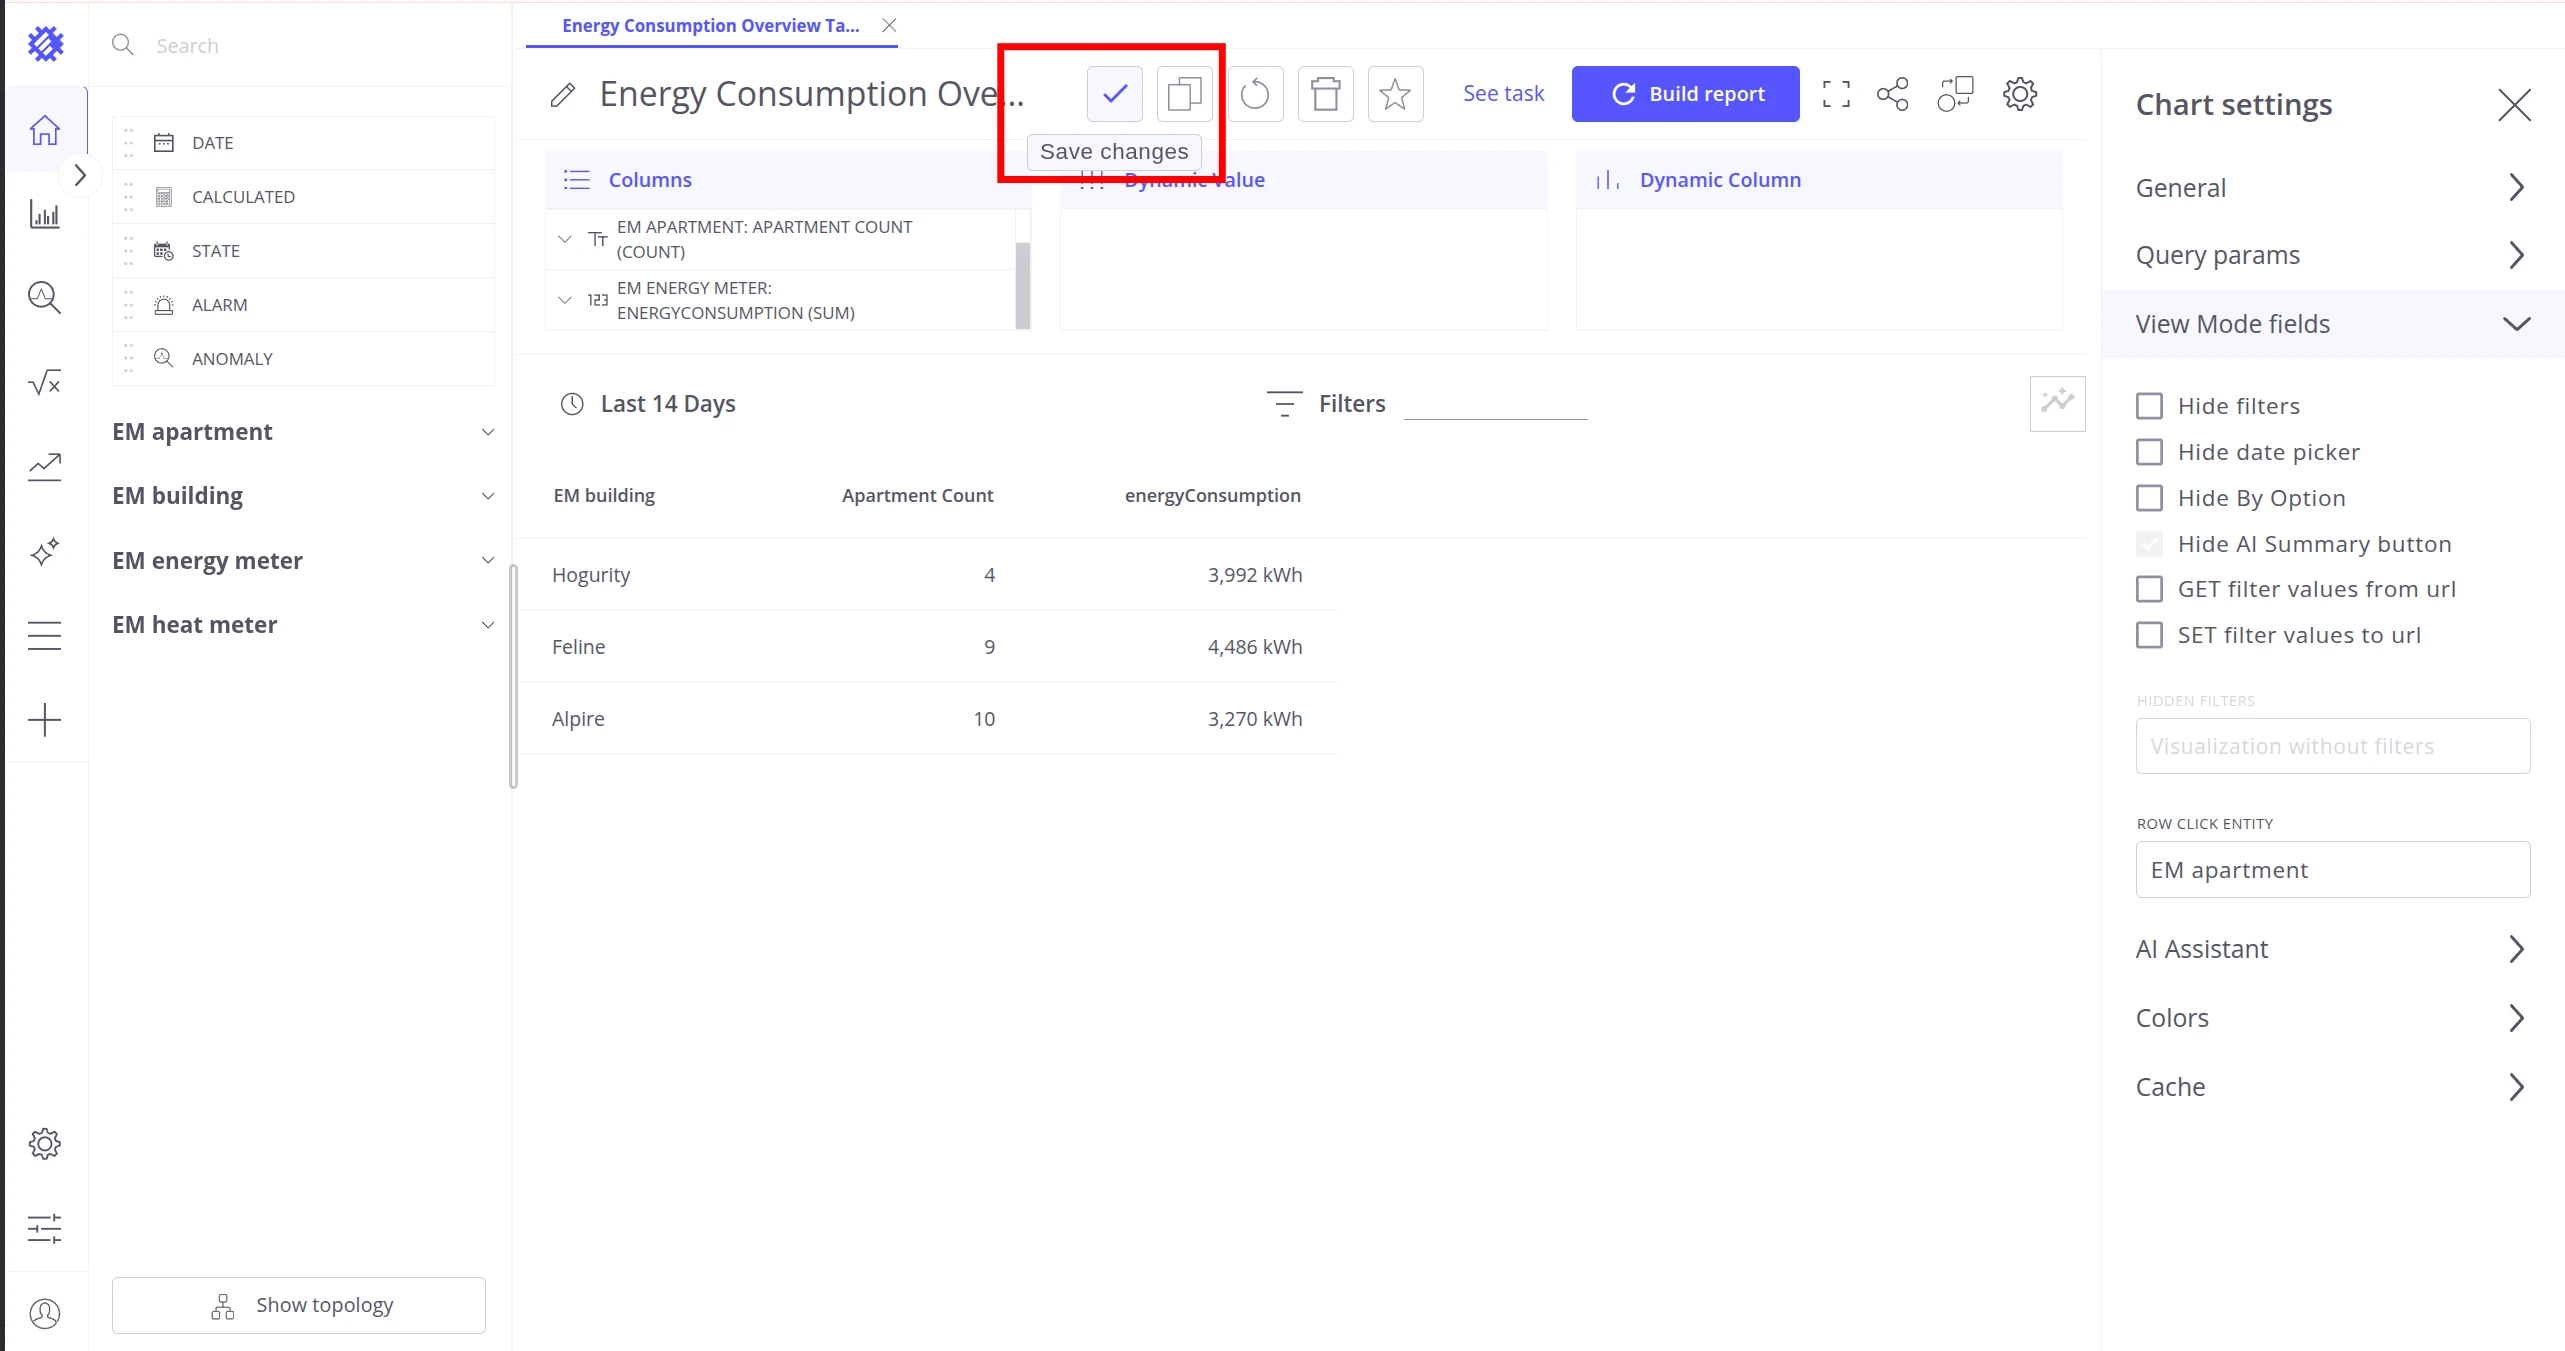
Click Save changes.

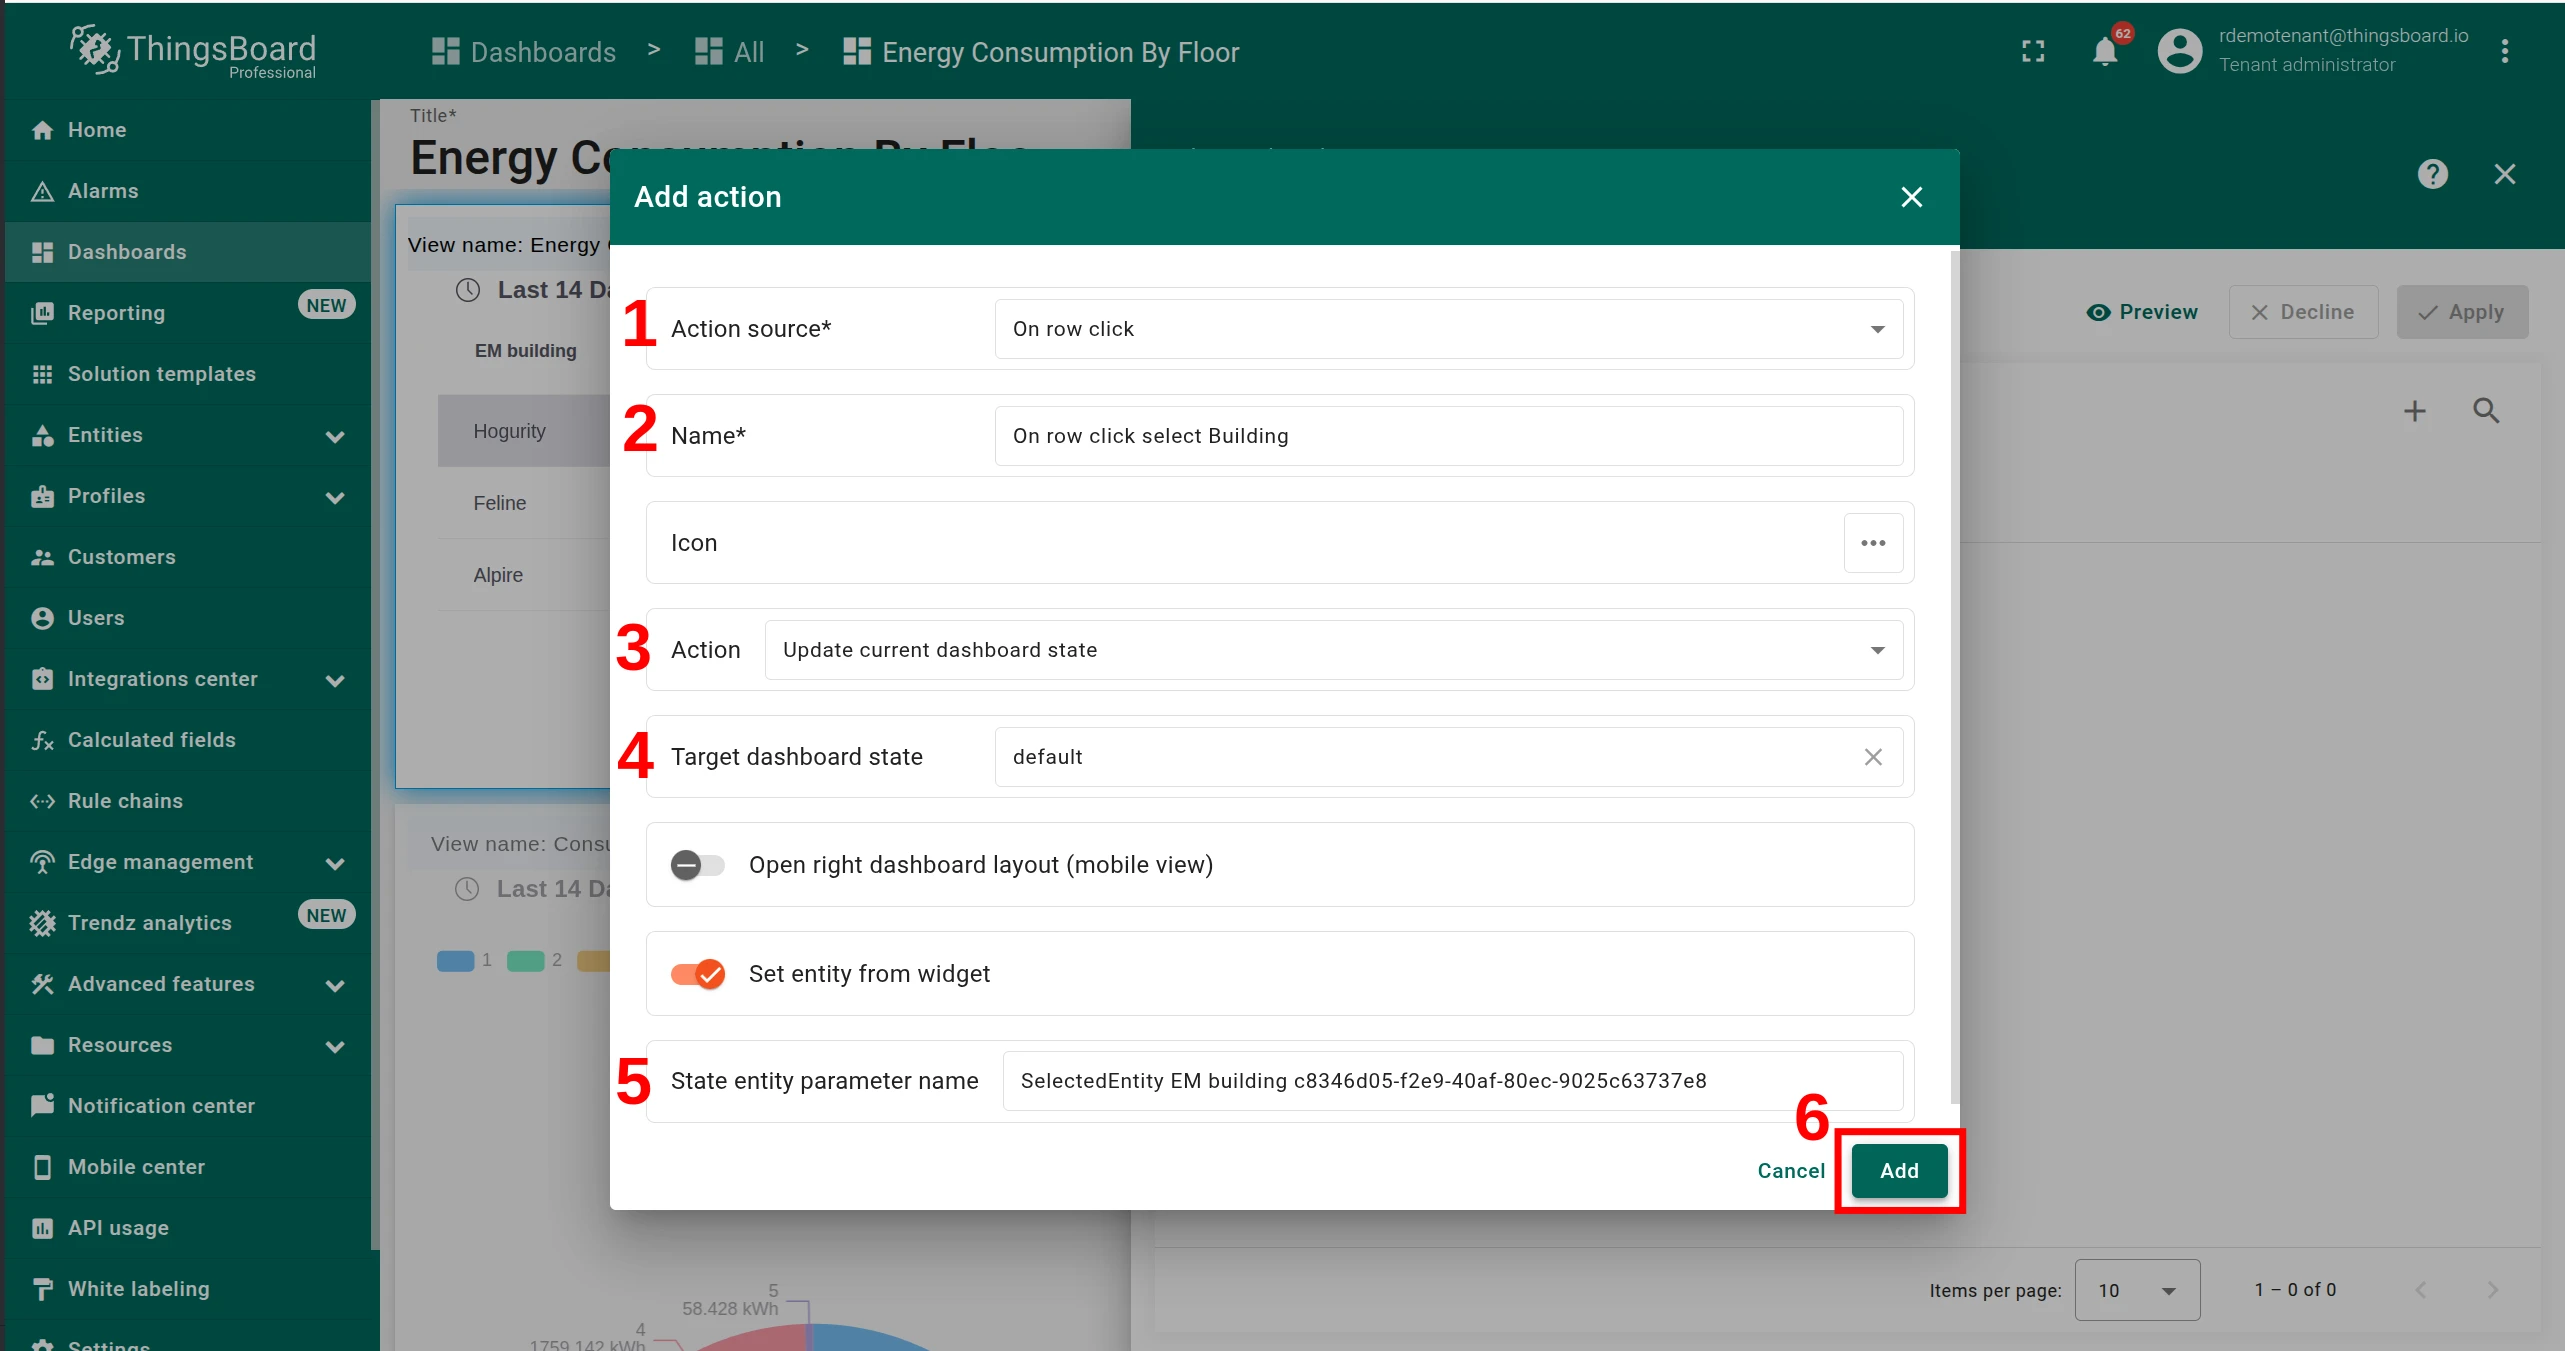
Step 2 — Configure the On row click action
Section titled “Step 2 — Configure the On row click action”-
Open the dashboard in edit mode and click Edit widget on the Trendz Table widget.
-
Switch to the Actions tab.
-
Click Add action.
-
In the Add action dialog, configure the action:
- Set Action source to On row click.
- Enter a Name (e.g.
On row click select Building). - Choose any Action type. In this example, use Update current dashboard state.
- Set Target dashboard state to the state you want to update (e.g. default).
- Set State entity parameter name to the alias name used as the datasource by the other Trendz views on the dashboard (e.g. the alias that drives their filters).
-
Click Add.
-
Click Apply.

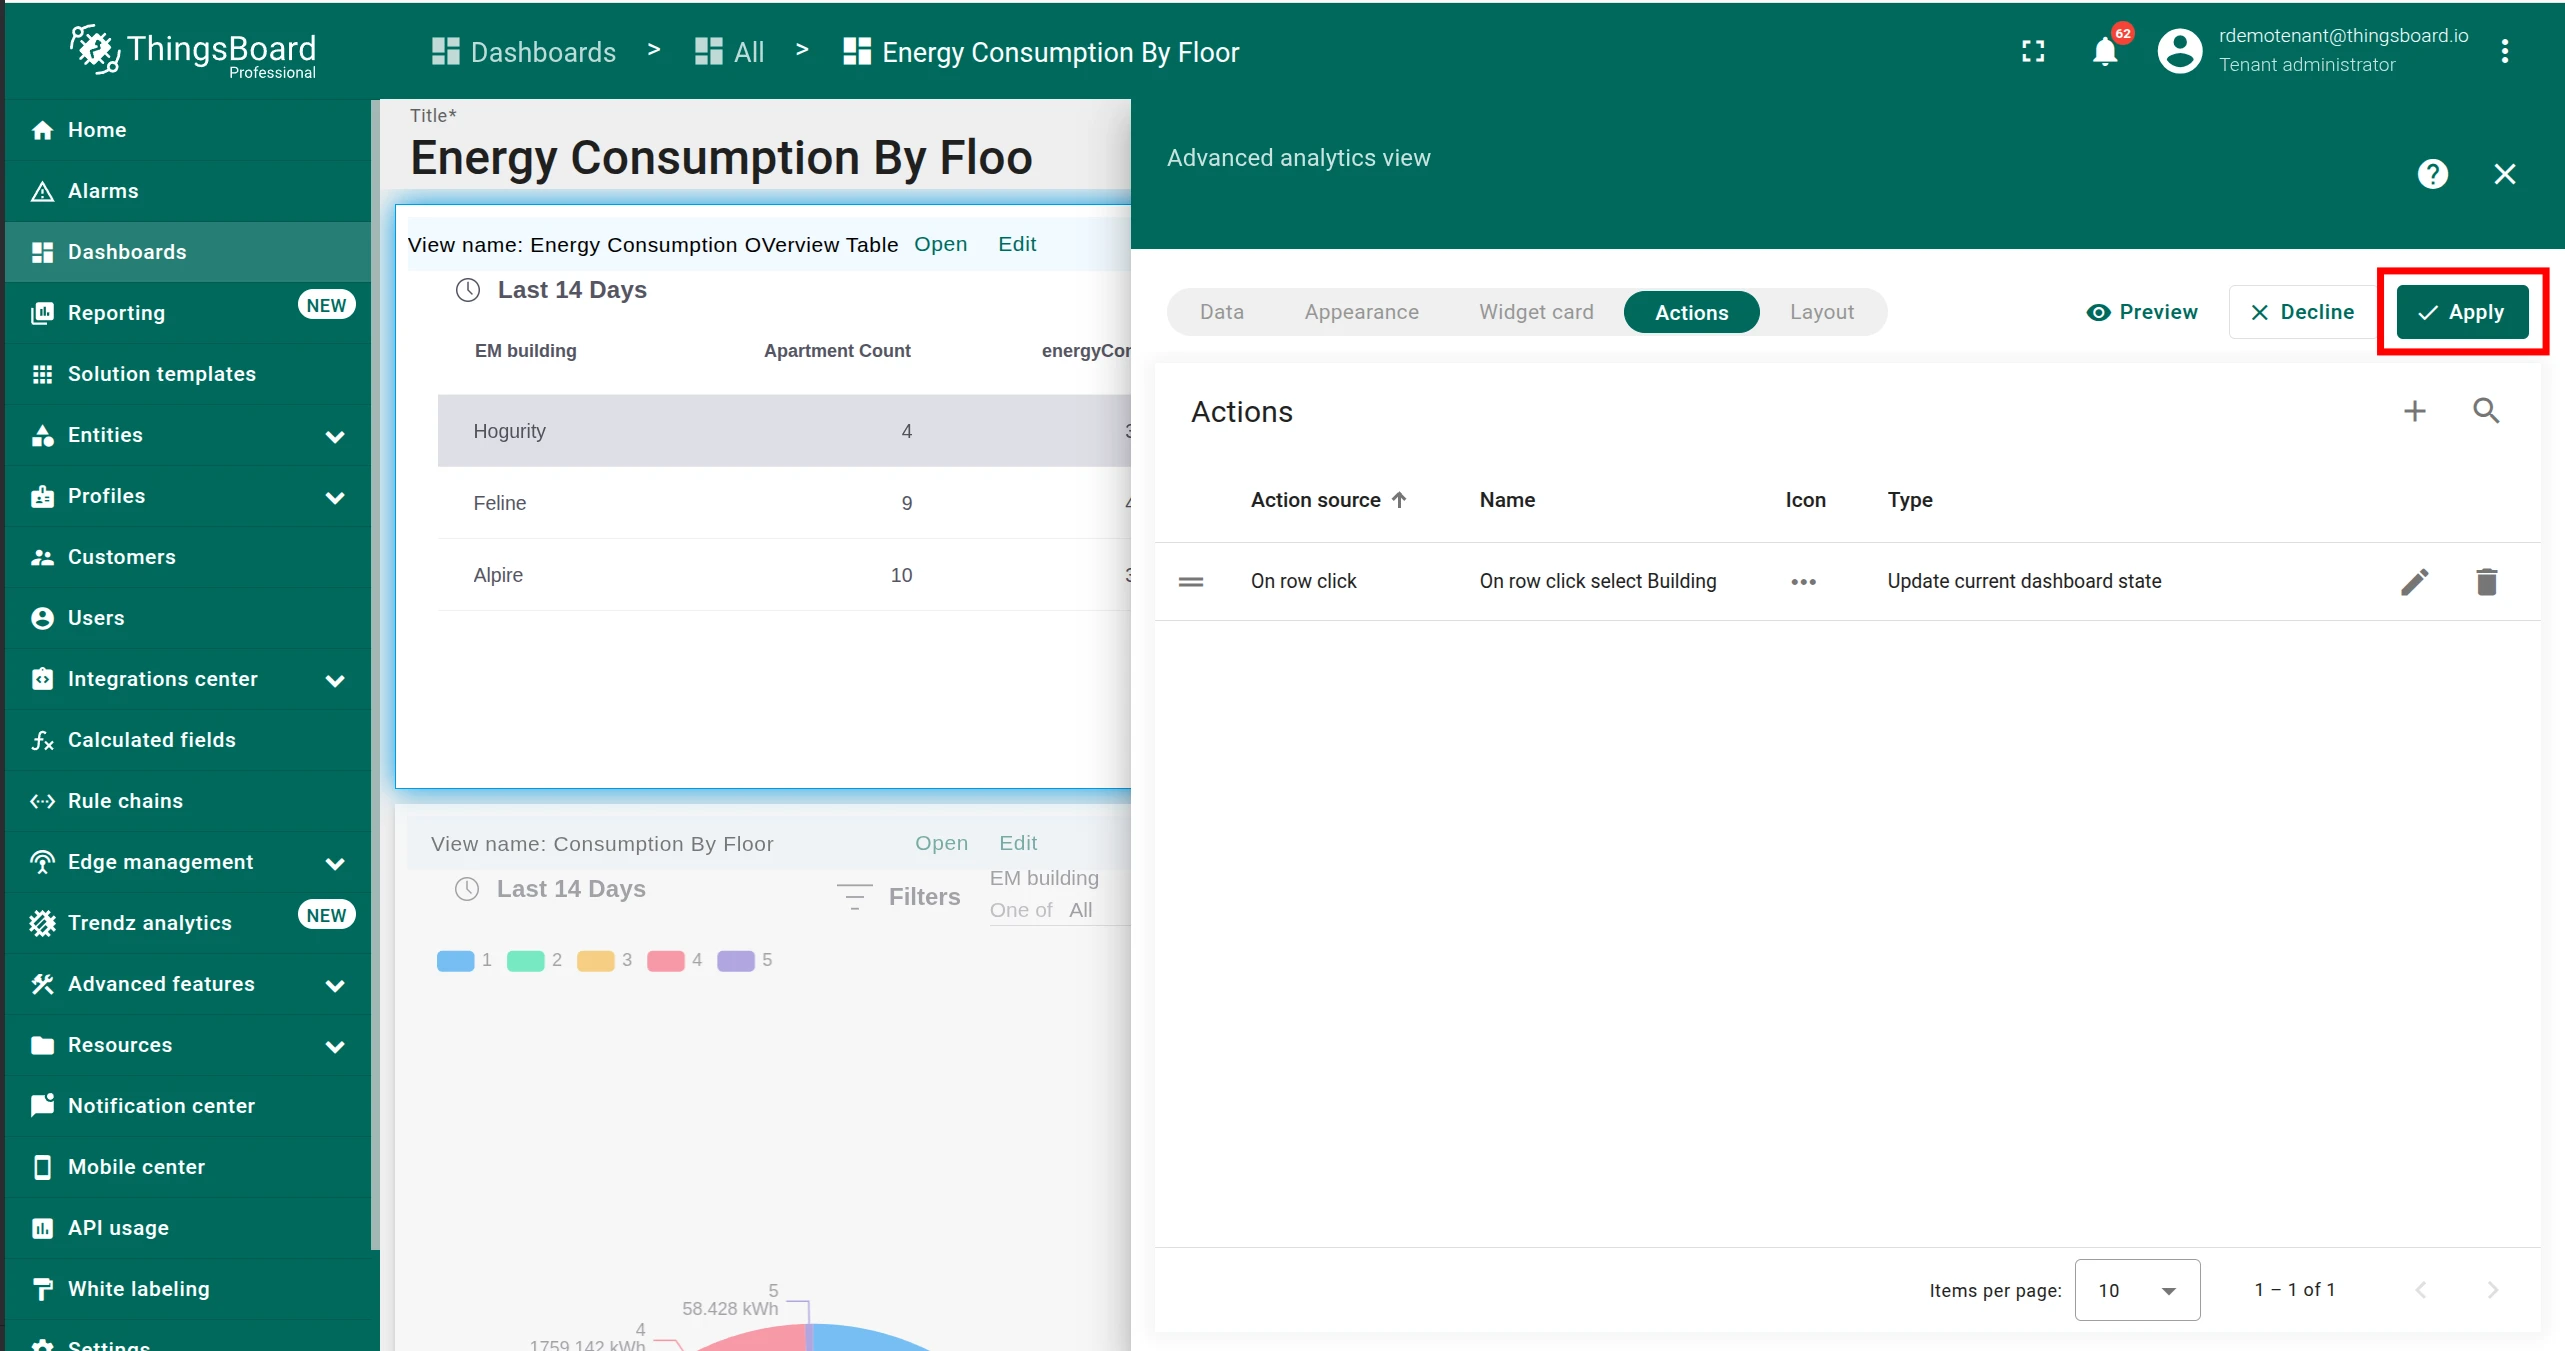
Now when a user clicks a row in the table, ThingsBoard selects the corresponding entity and all connected widgets update instantly.
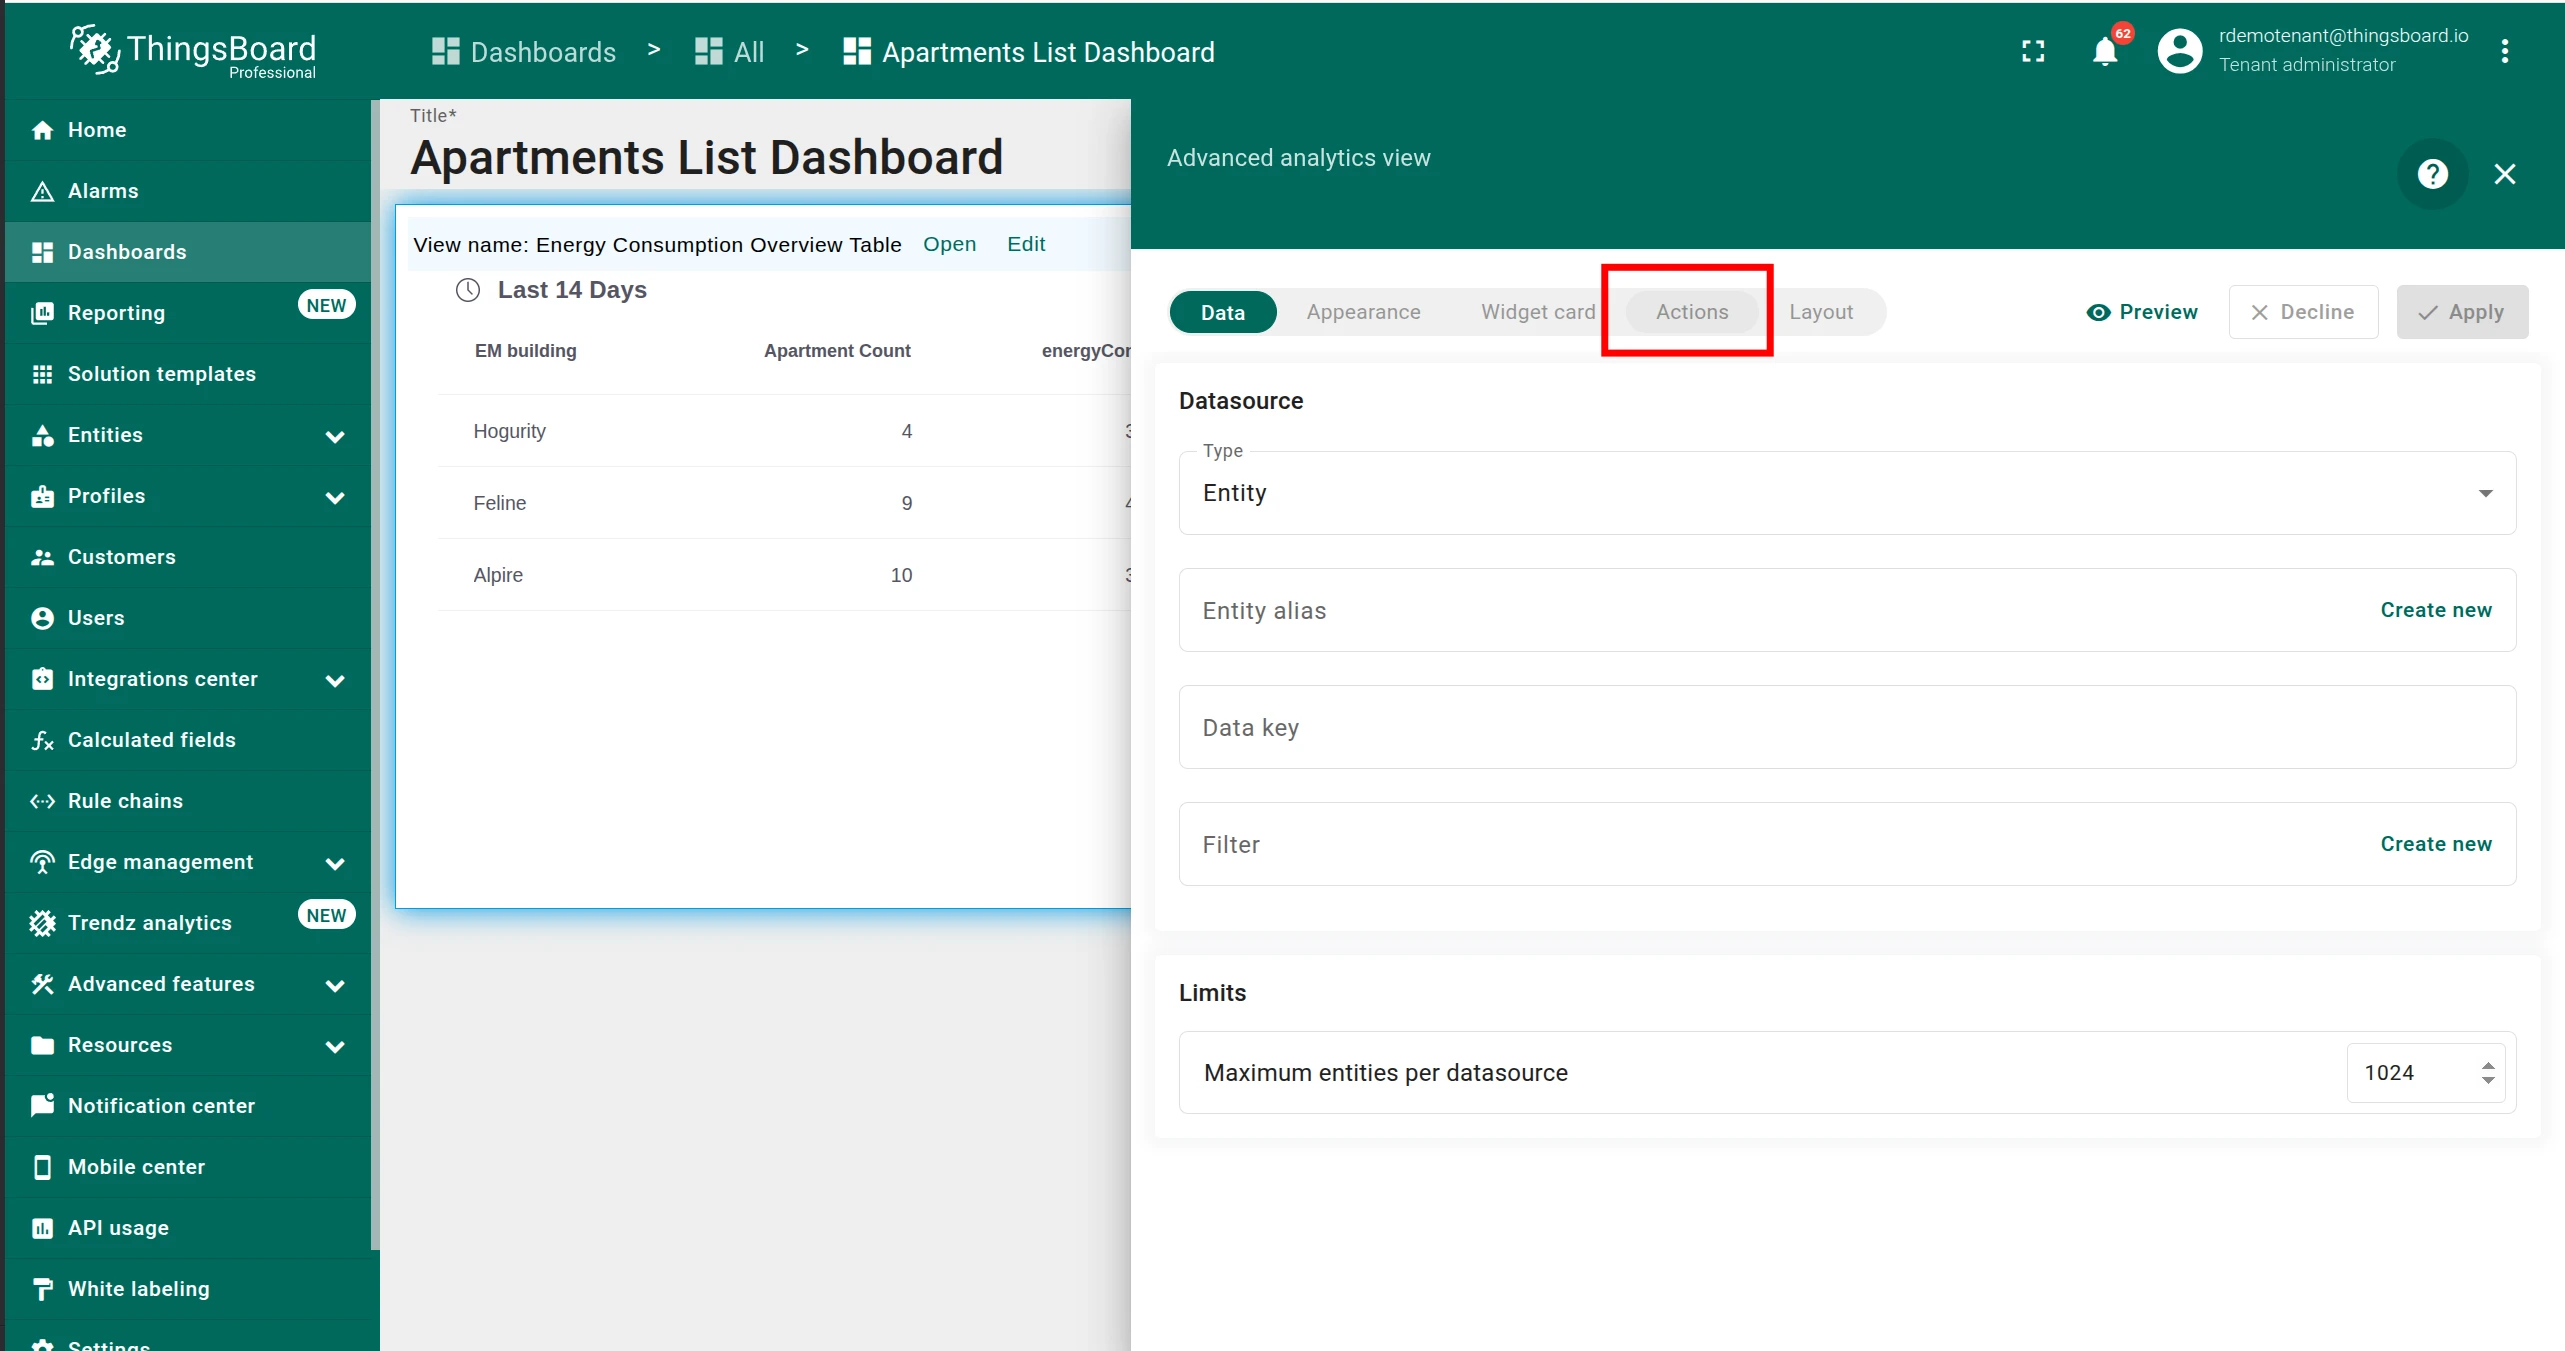
On row click — Pass related entities into alias
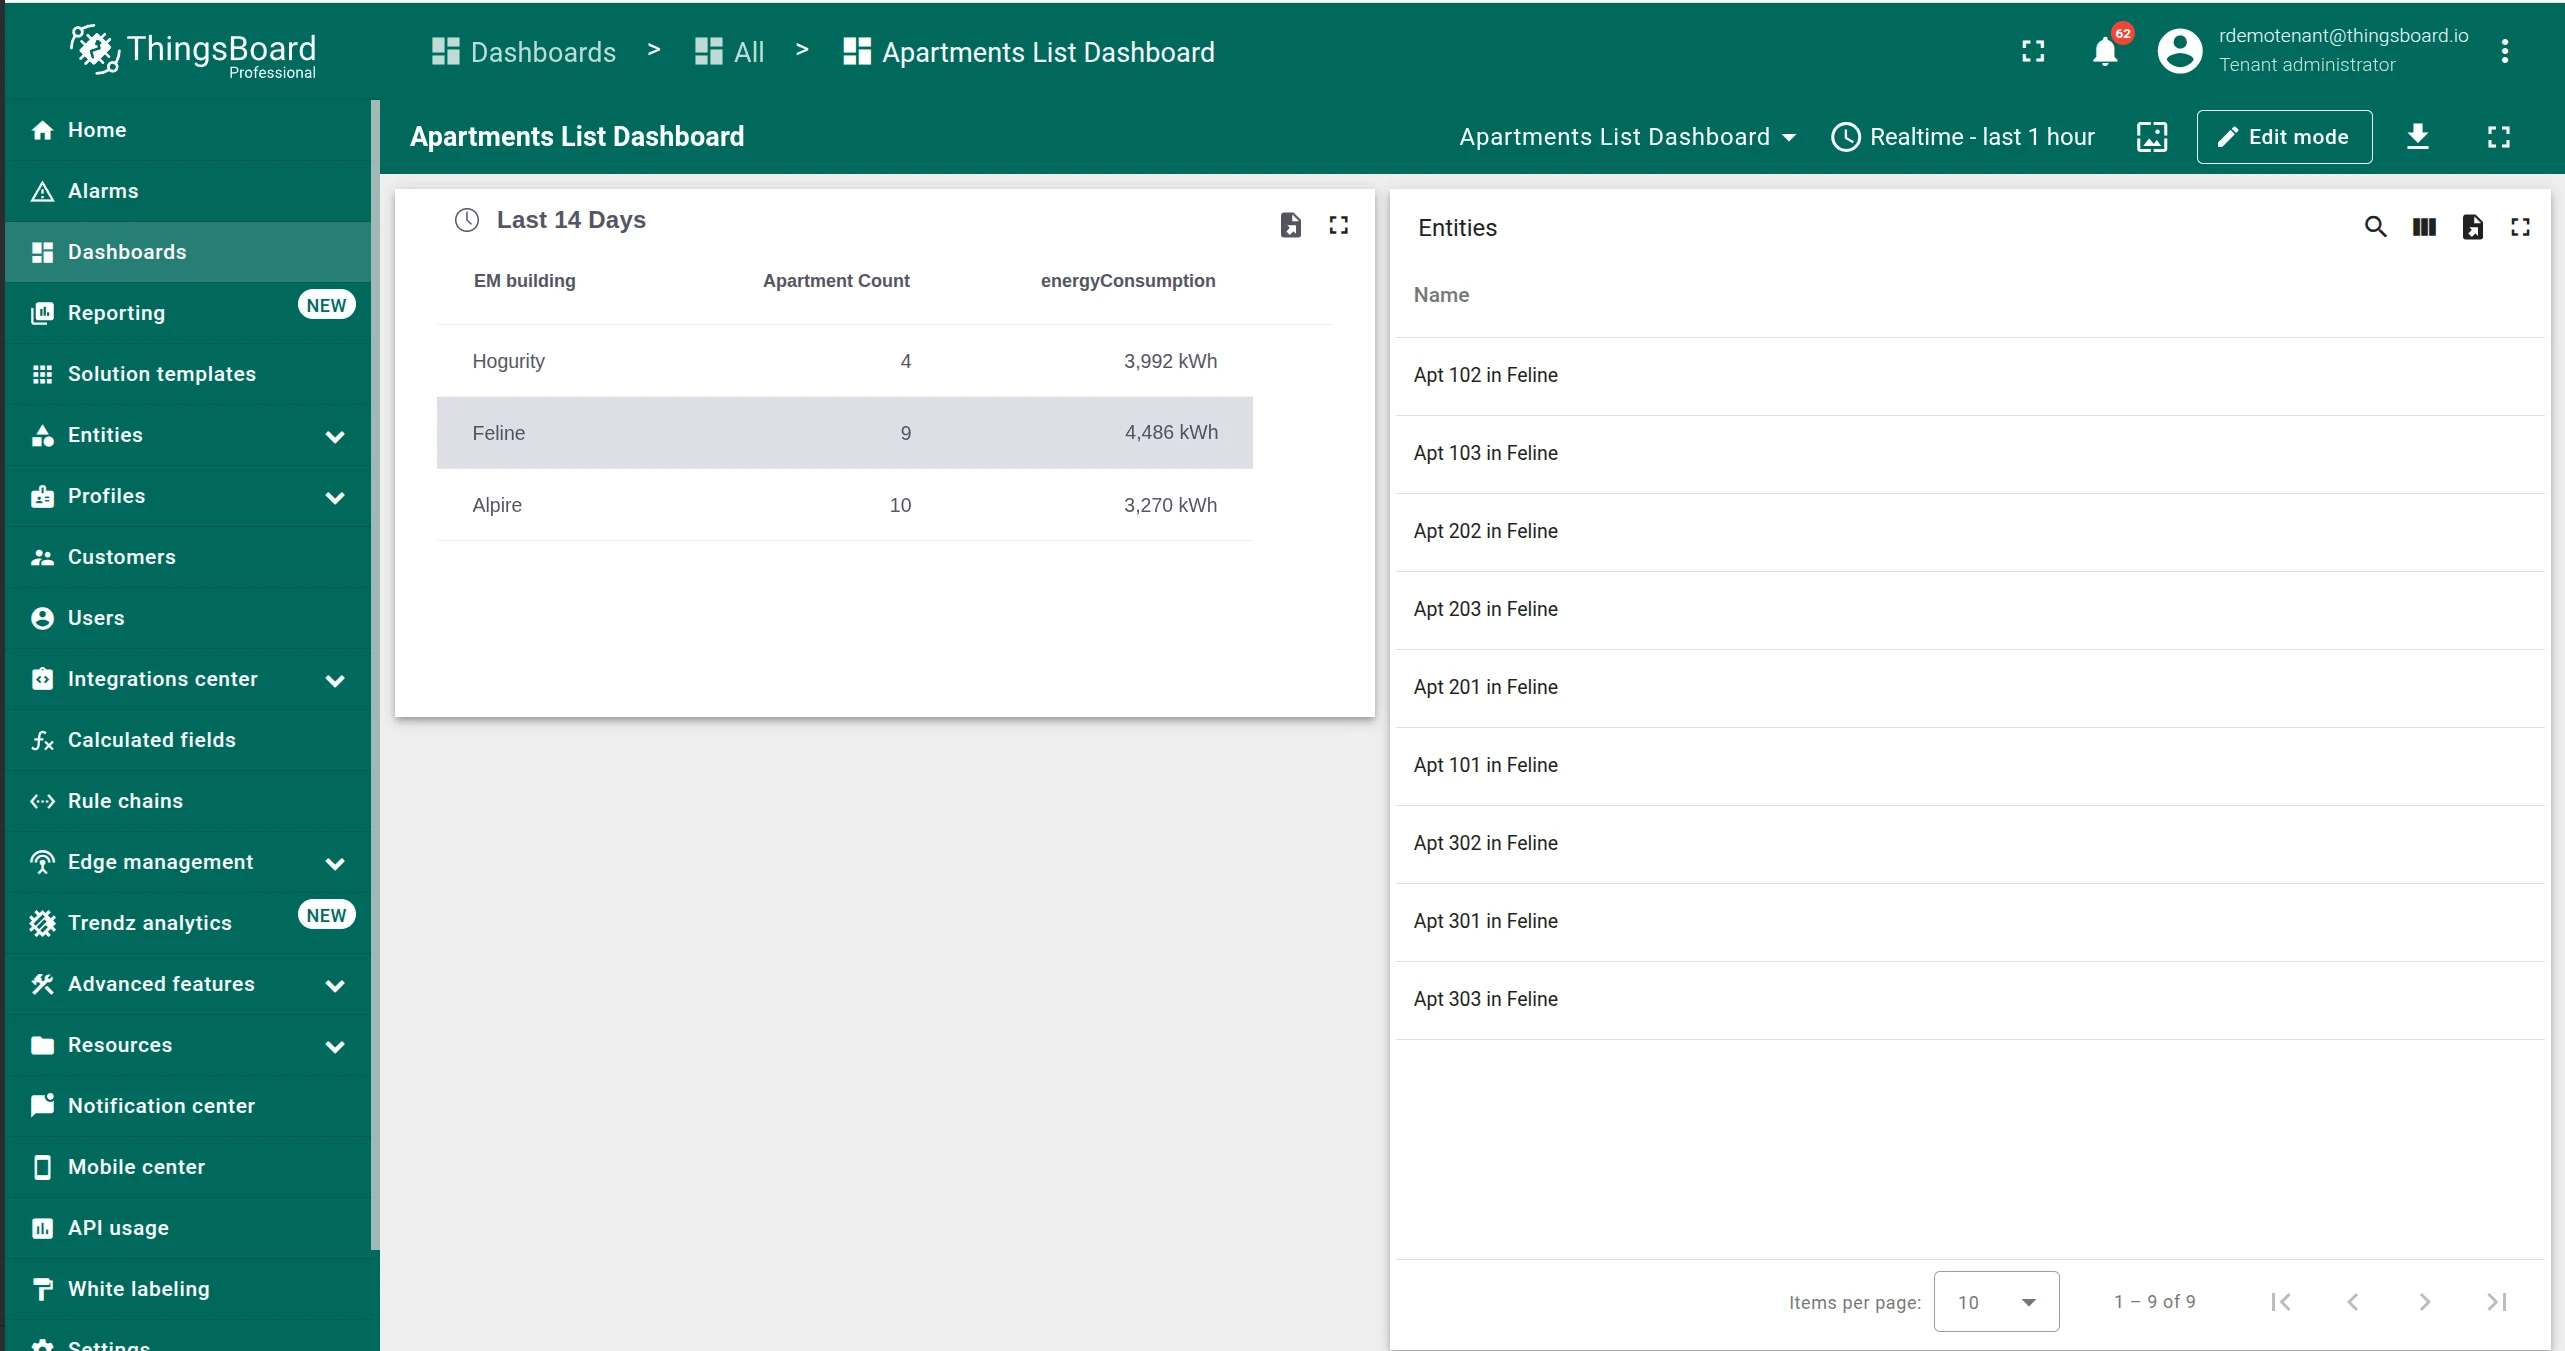
Section titled “On row click — Pass related entities into alias”When a user clicks a row in a Trendz table, you can push all entities related to that row into a dashboard alias. Any widget using that alias — a map, a chart, an entities table — instantly updates to show only those entities.
Example: A table shows buildings with aggregated energy consumption. Clicking a building row sends all its apartments into an alias. A widget on the right side of the dashboard refreshes to show only those apartments.
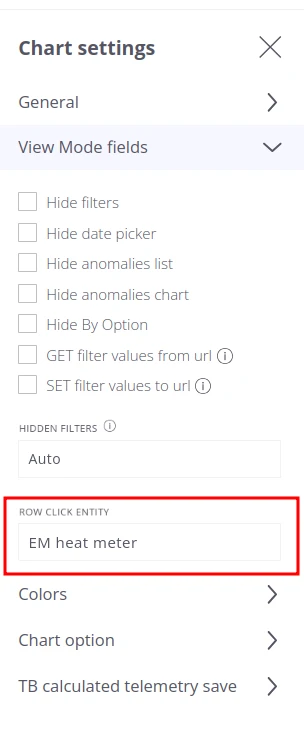
Step 1 — Set the Row click entity in Trendz
Section titled “Step 1 — Set the Row click entity in Trendz”-
Open the view in Trendz and click View Settings (the gear icon in the top-right corner).
-
Expand the View Mode fields section.
-
In the Row click entity field, enter the entity type whose IDs you want to pass to the alias (e.g. EM apartment).
-
Click Save changes.
Step 2 — Create the alias on the dashboard
Section titled “Step 2 — Create the alias on the dashboard”-
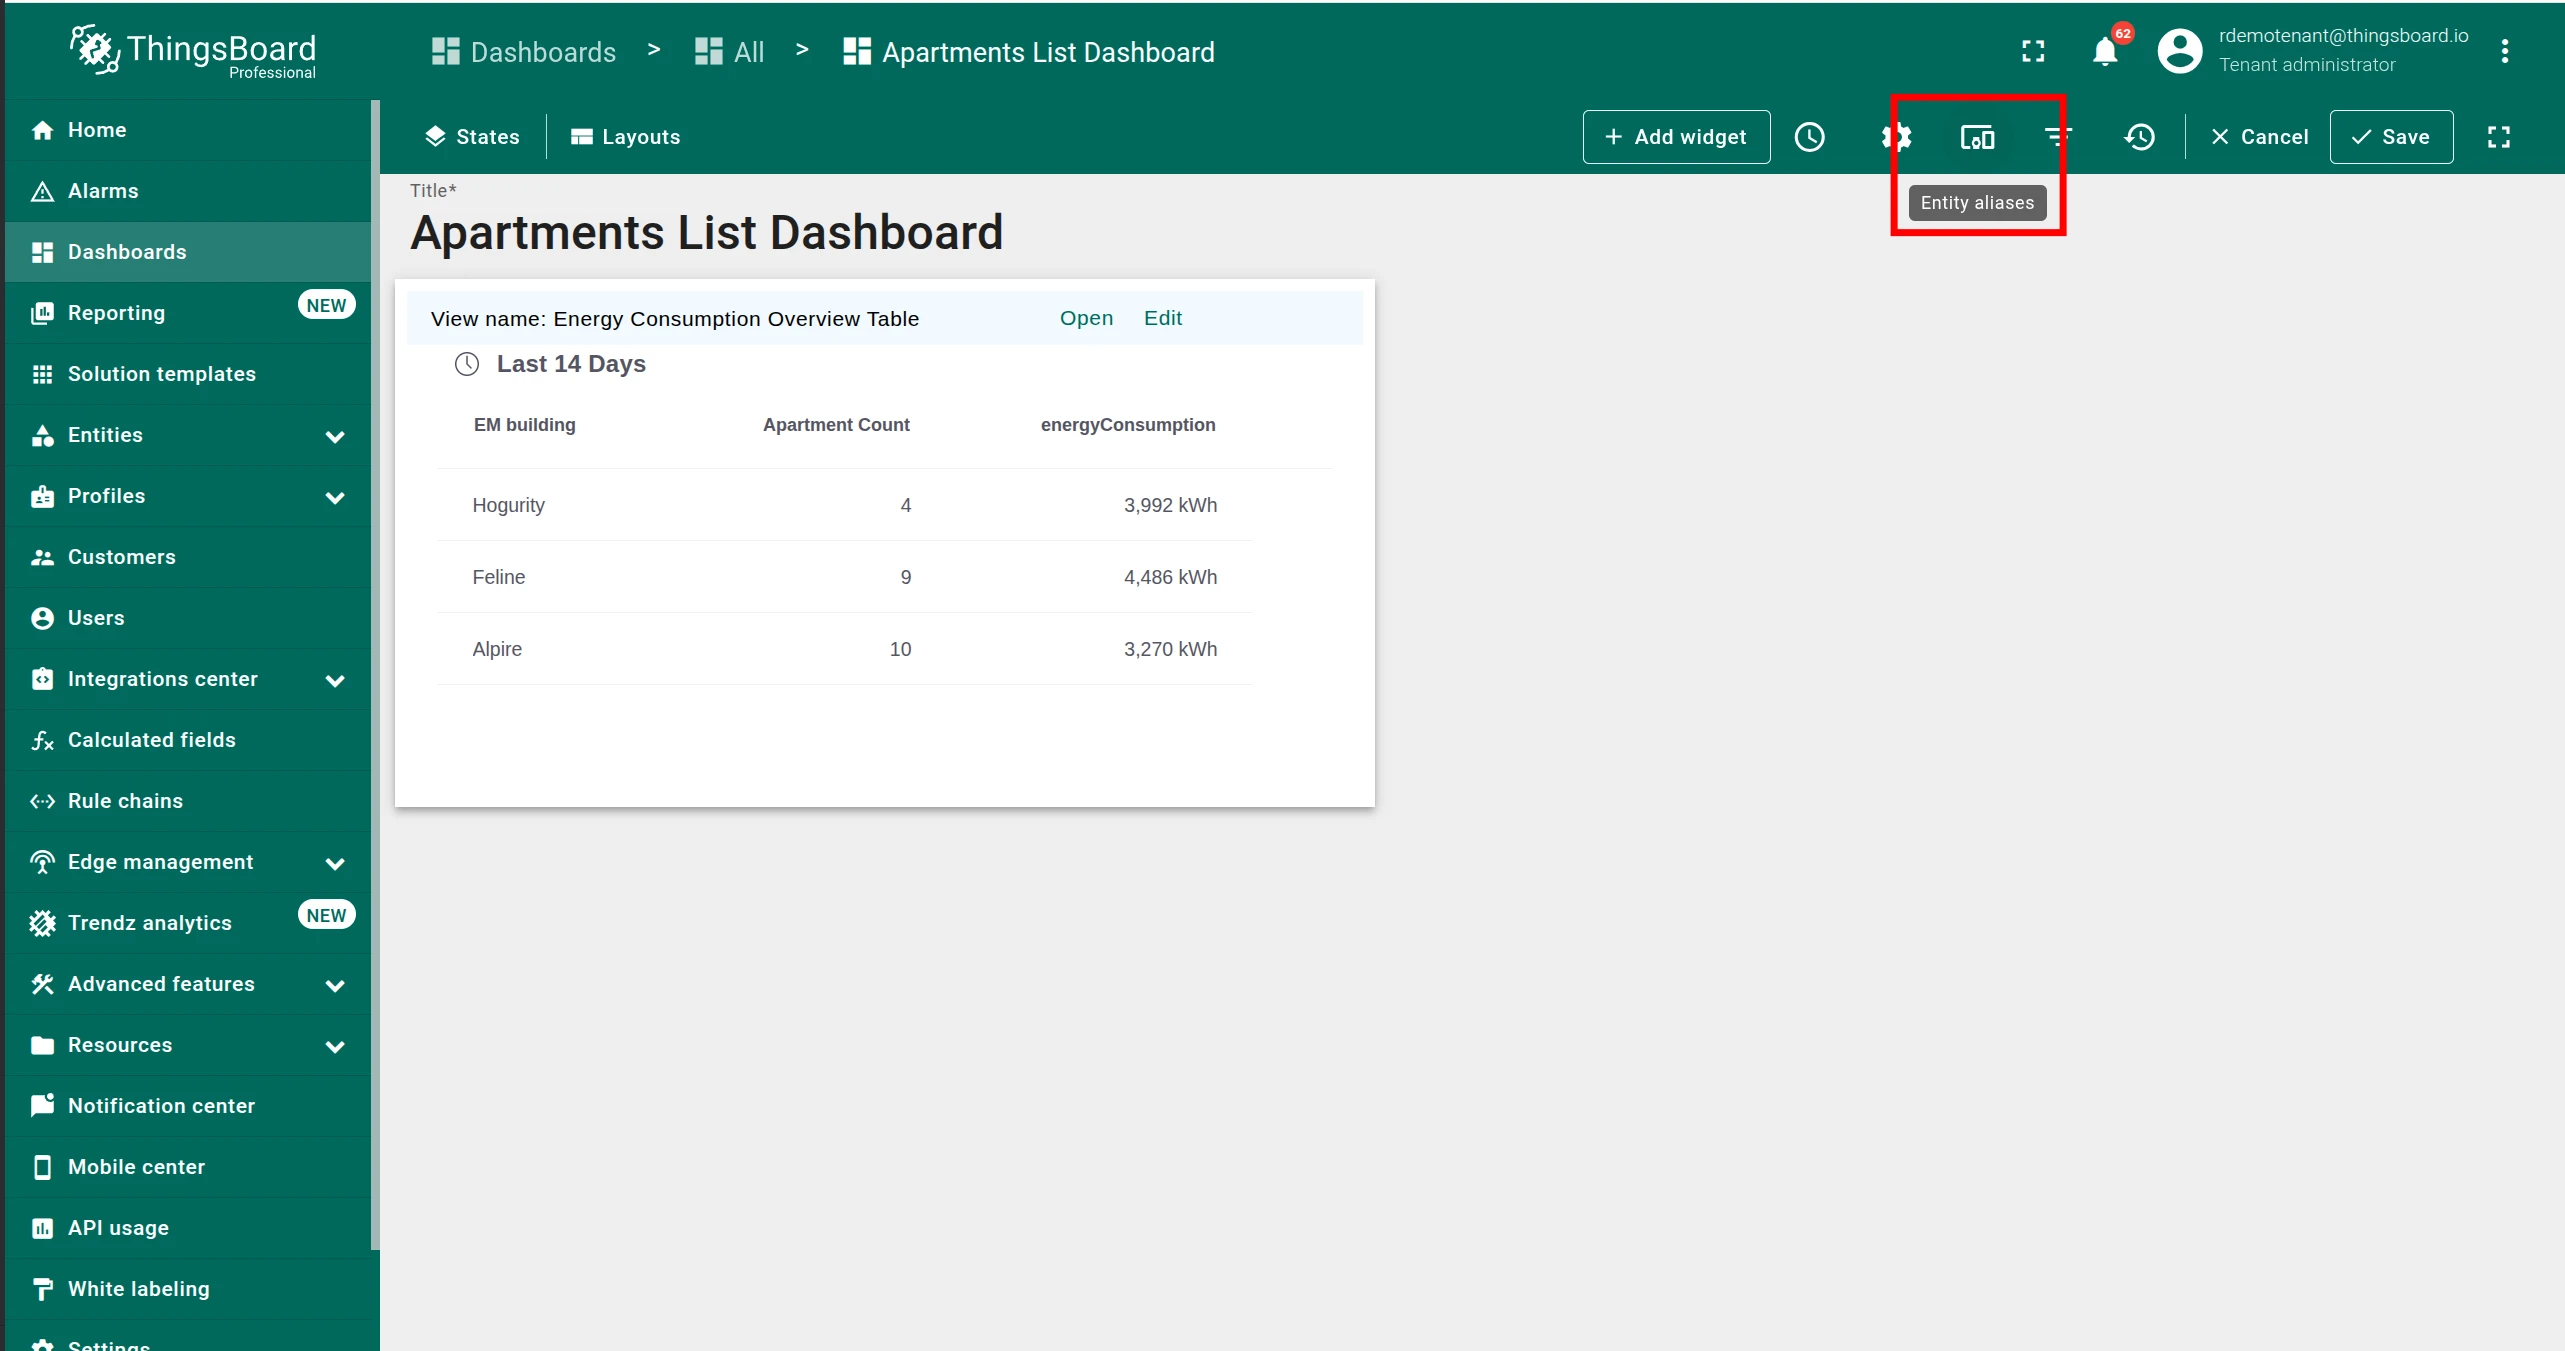
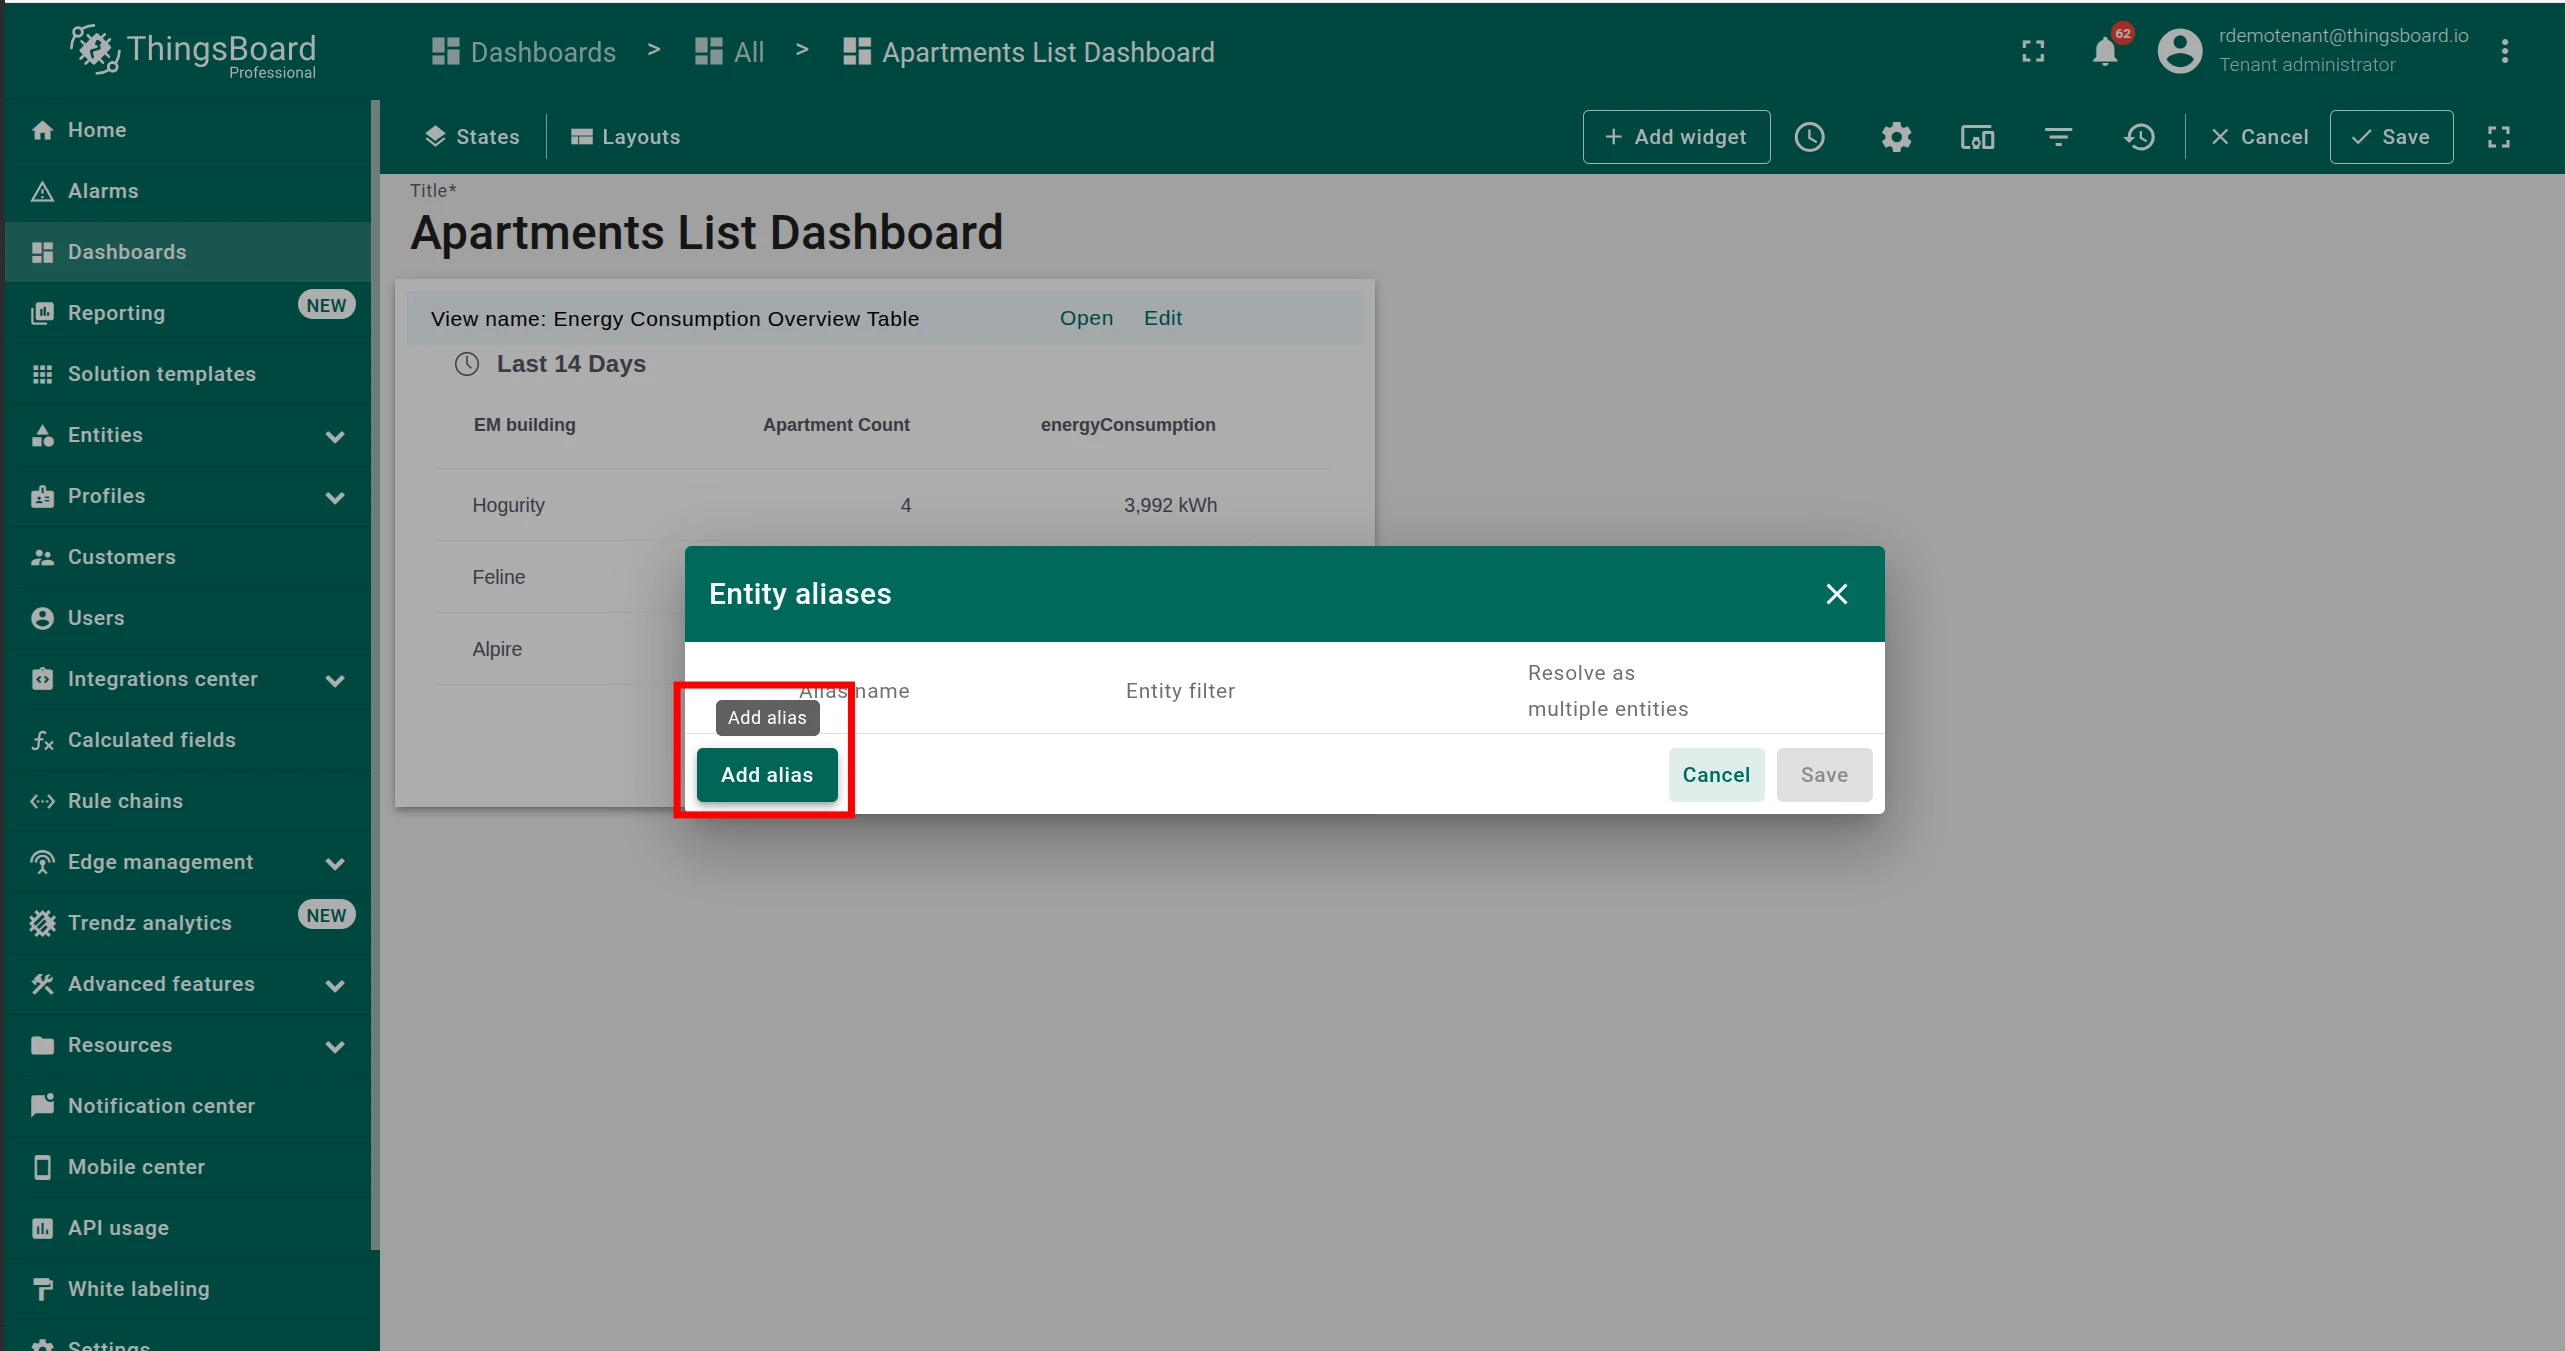
Open the dashboard in edit mode and click Entity aliases in the toolbar.
-
Click Add alias.
-
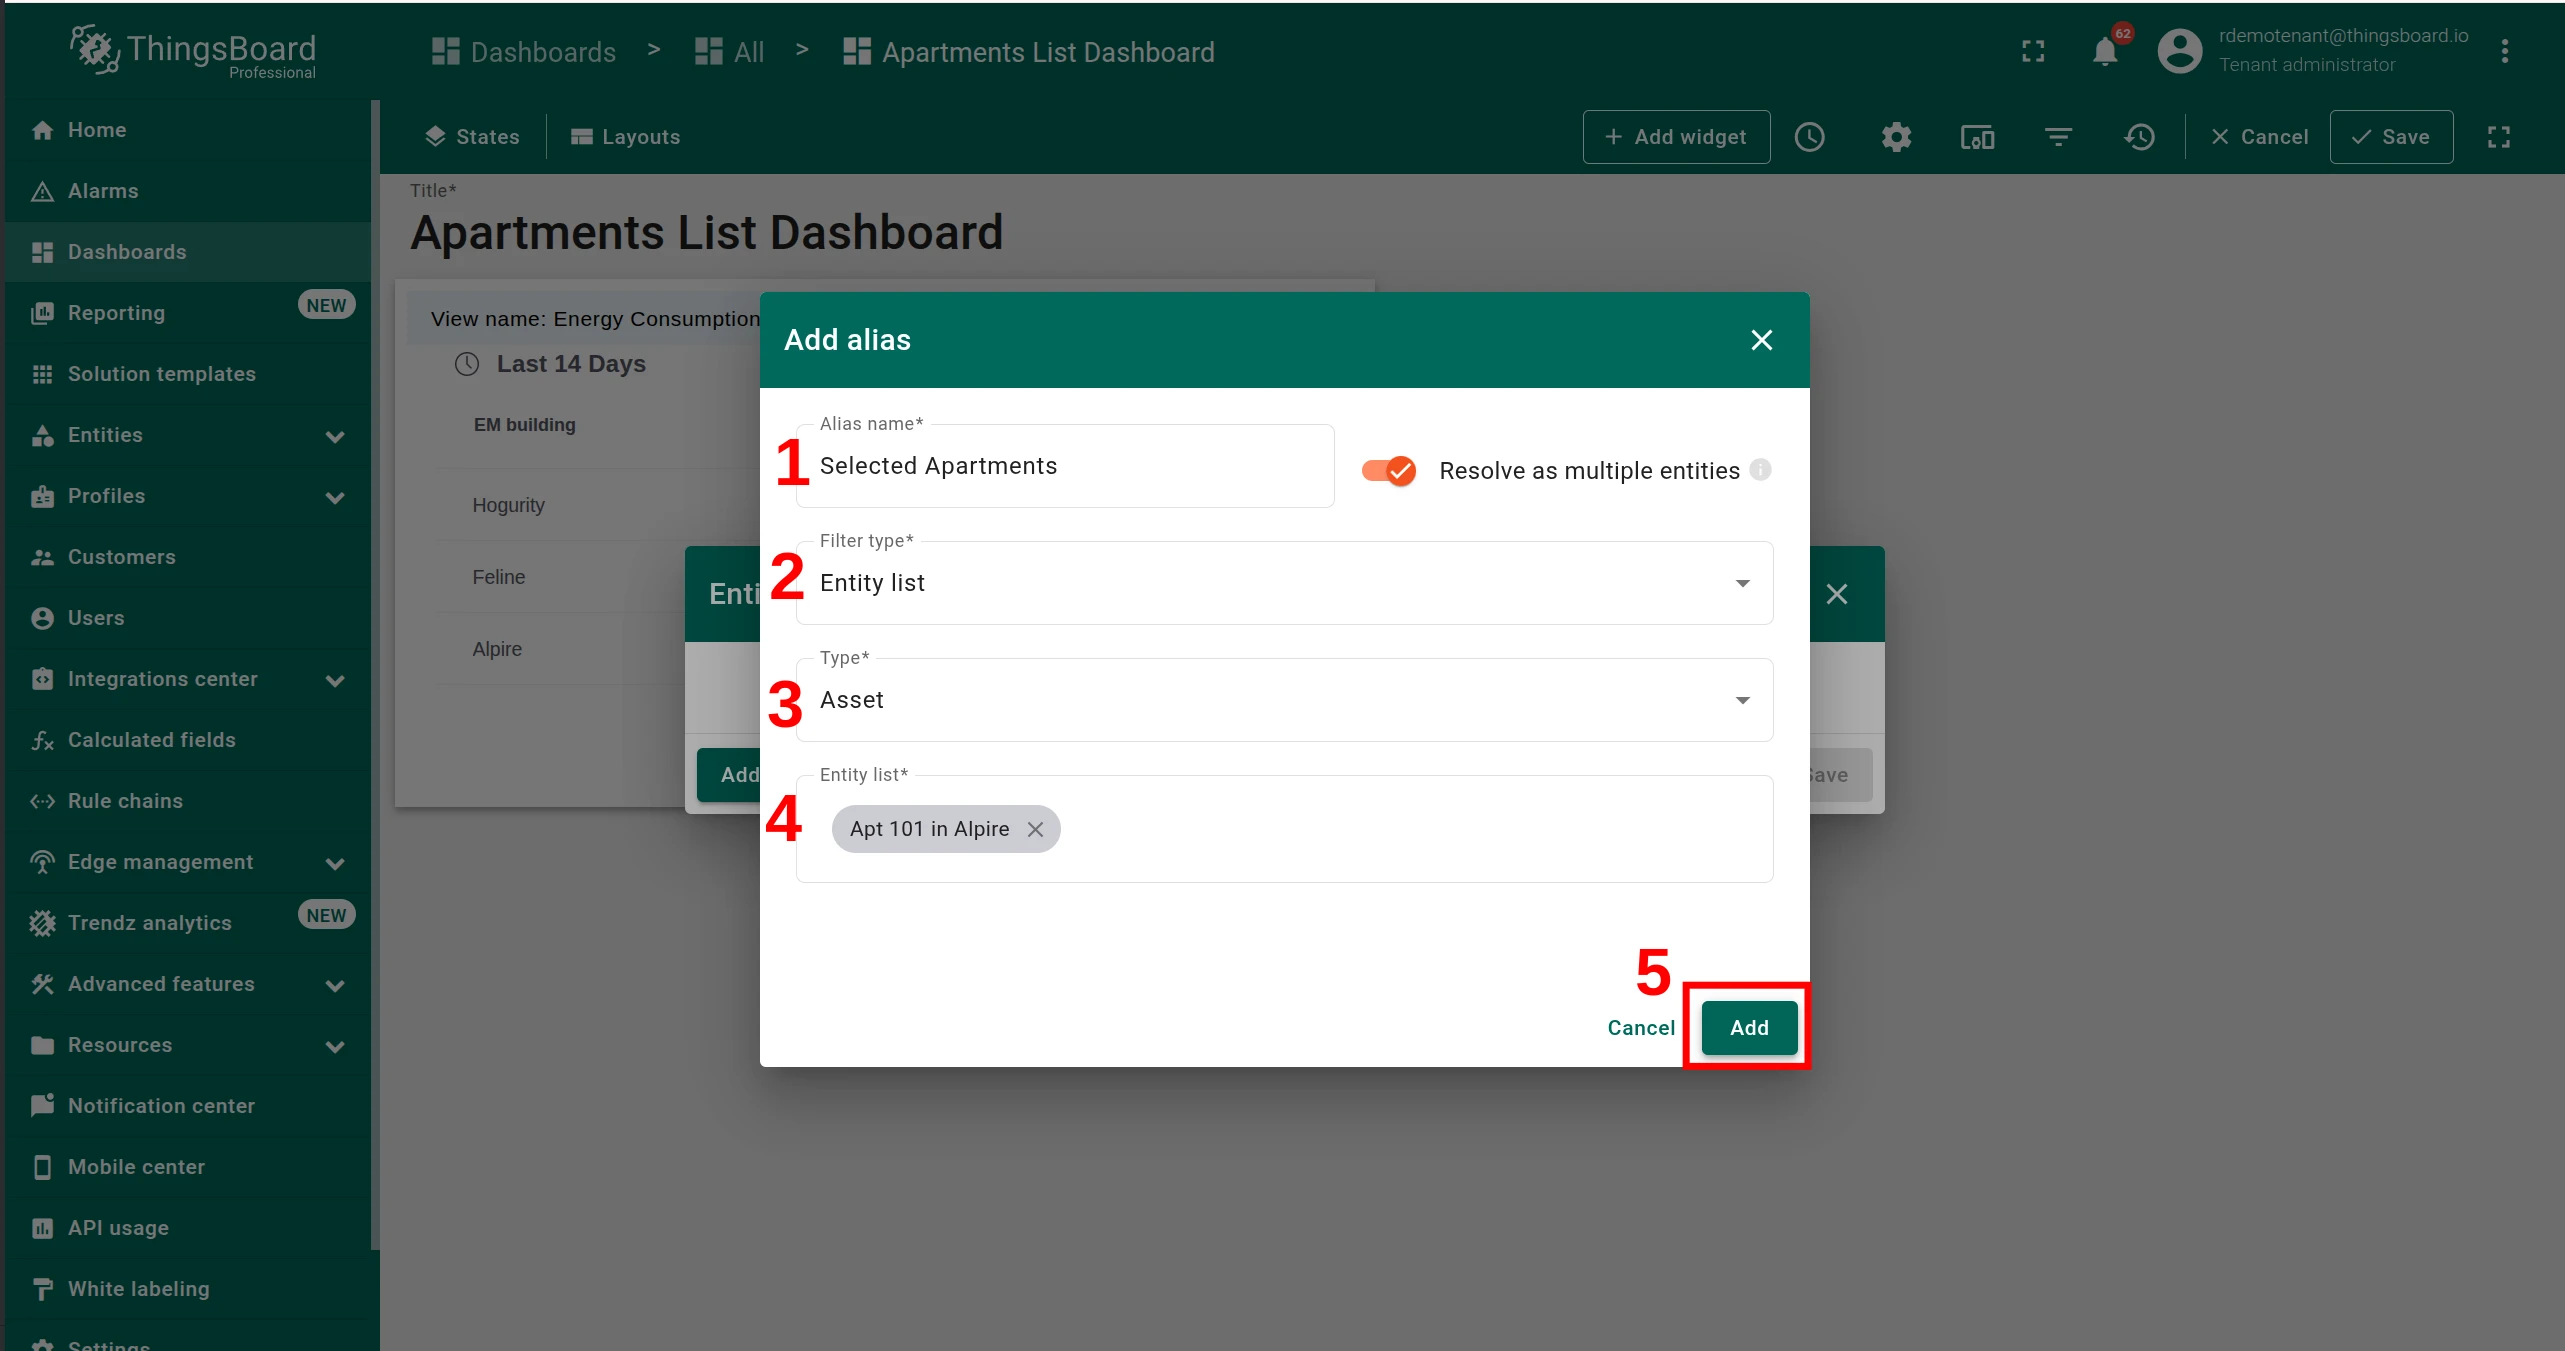
In the Add alias dialog:
- Enter a name (e.g. Selected Entities — you will reference this exact name in the action code).
- Enable Resolve as multiple entities.
- Set Filter type to Entity list.
- Set Type to the entity type that will be passed on row click.
- Optionally add default entities to show before any row is clicked.
-
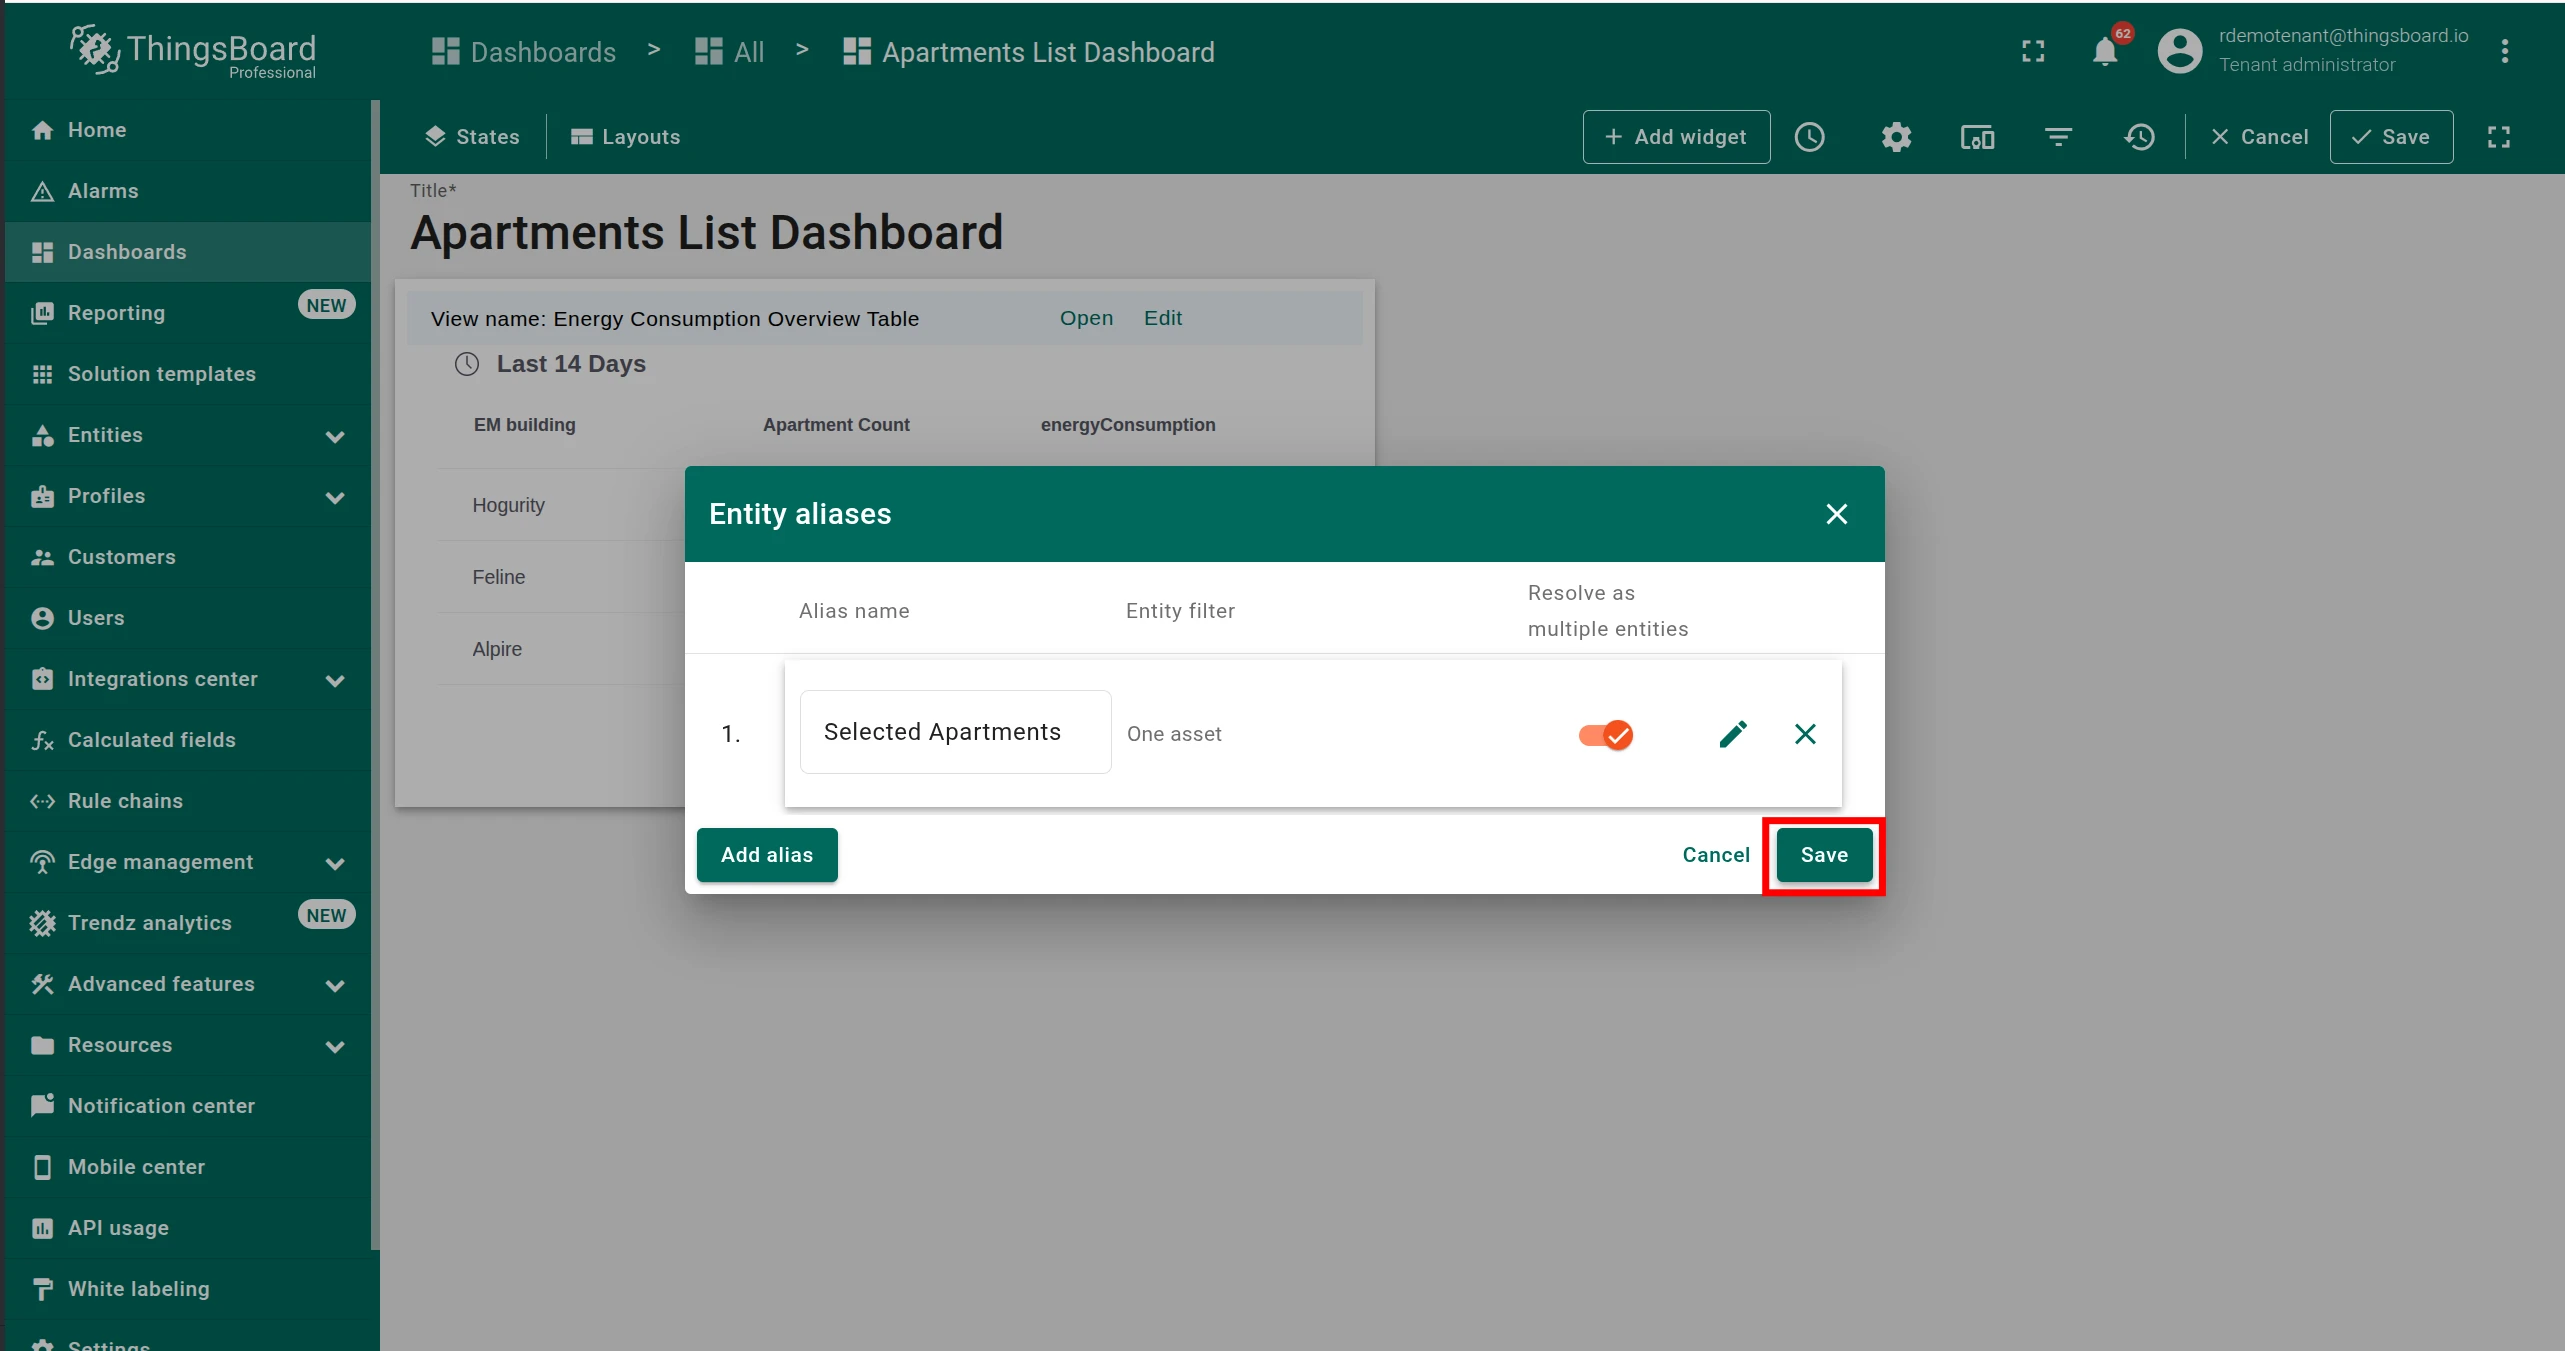
Click Add, then Save.
Step 3 — Configure the custom action
Section titled “Step 3 — Configure the custom action”-
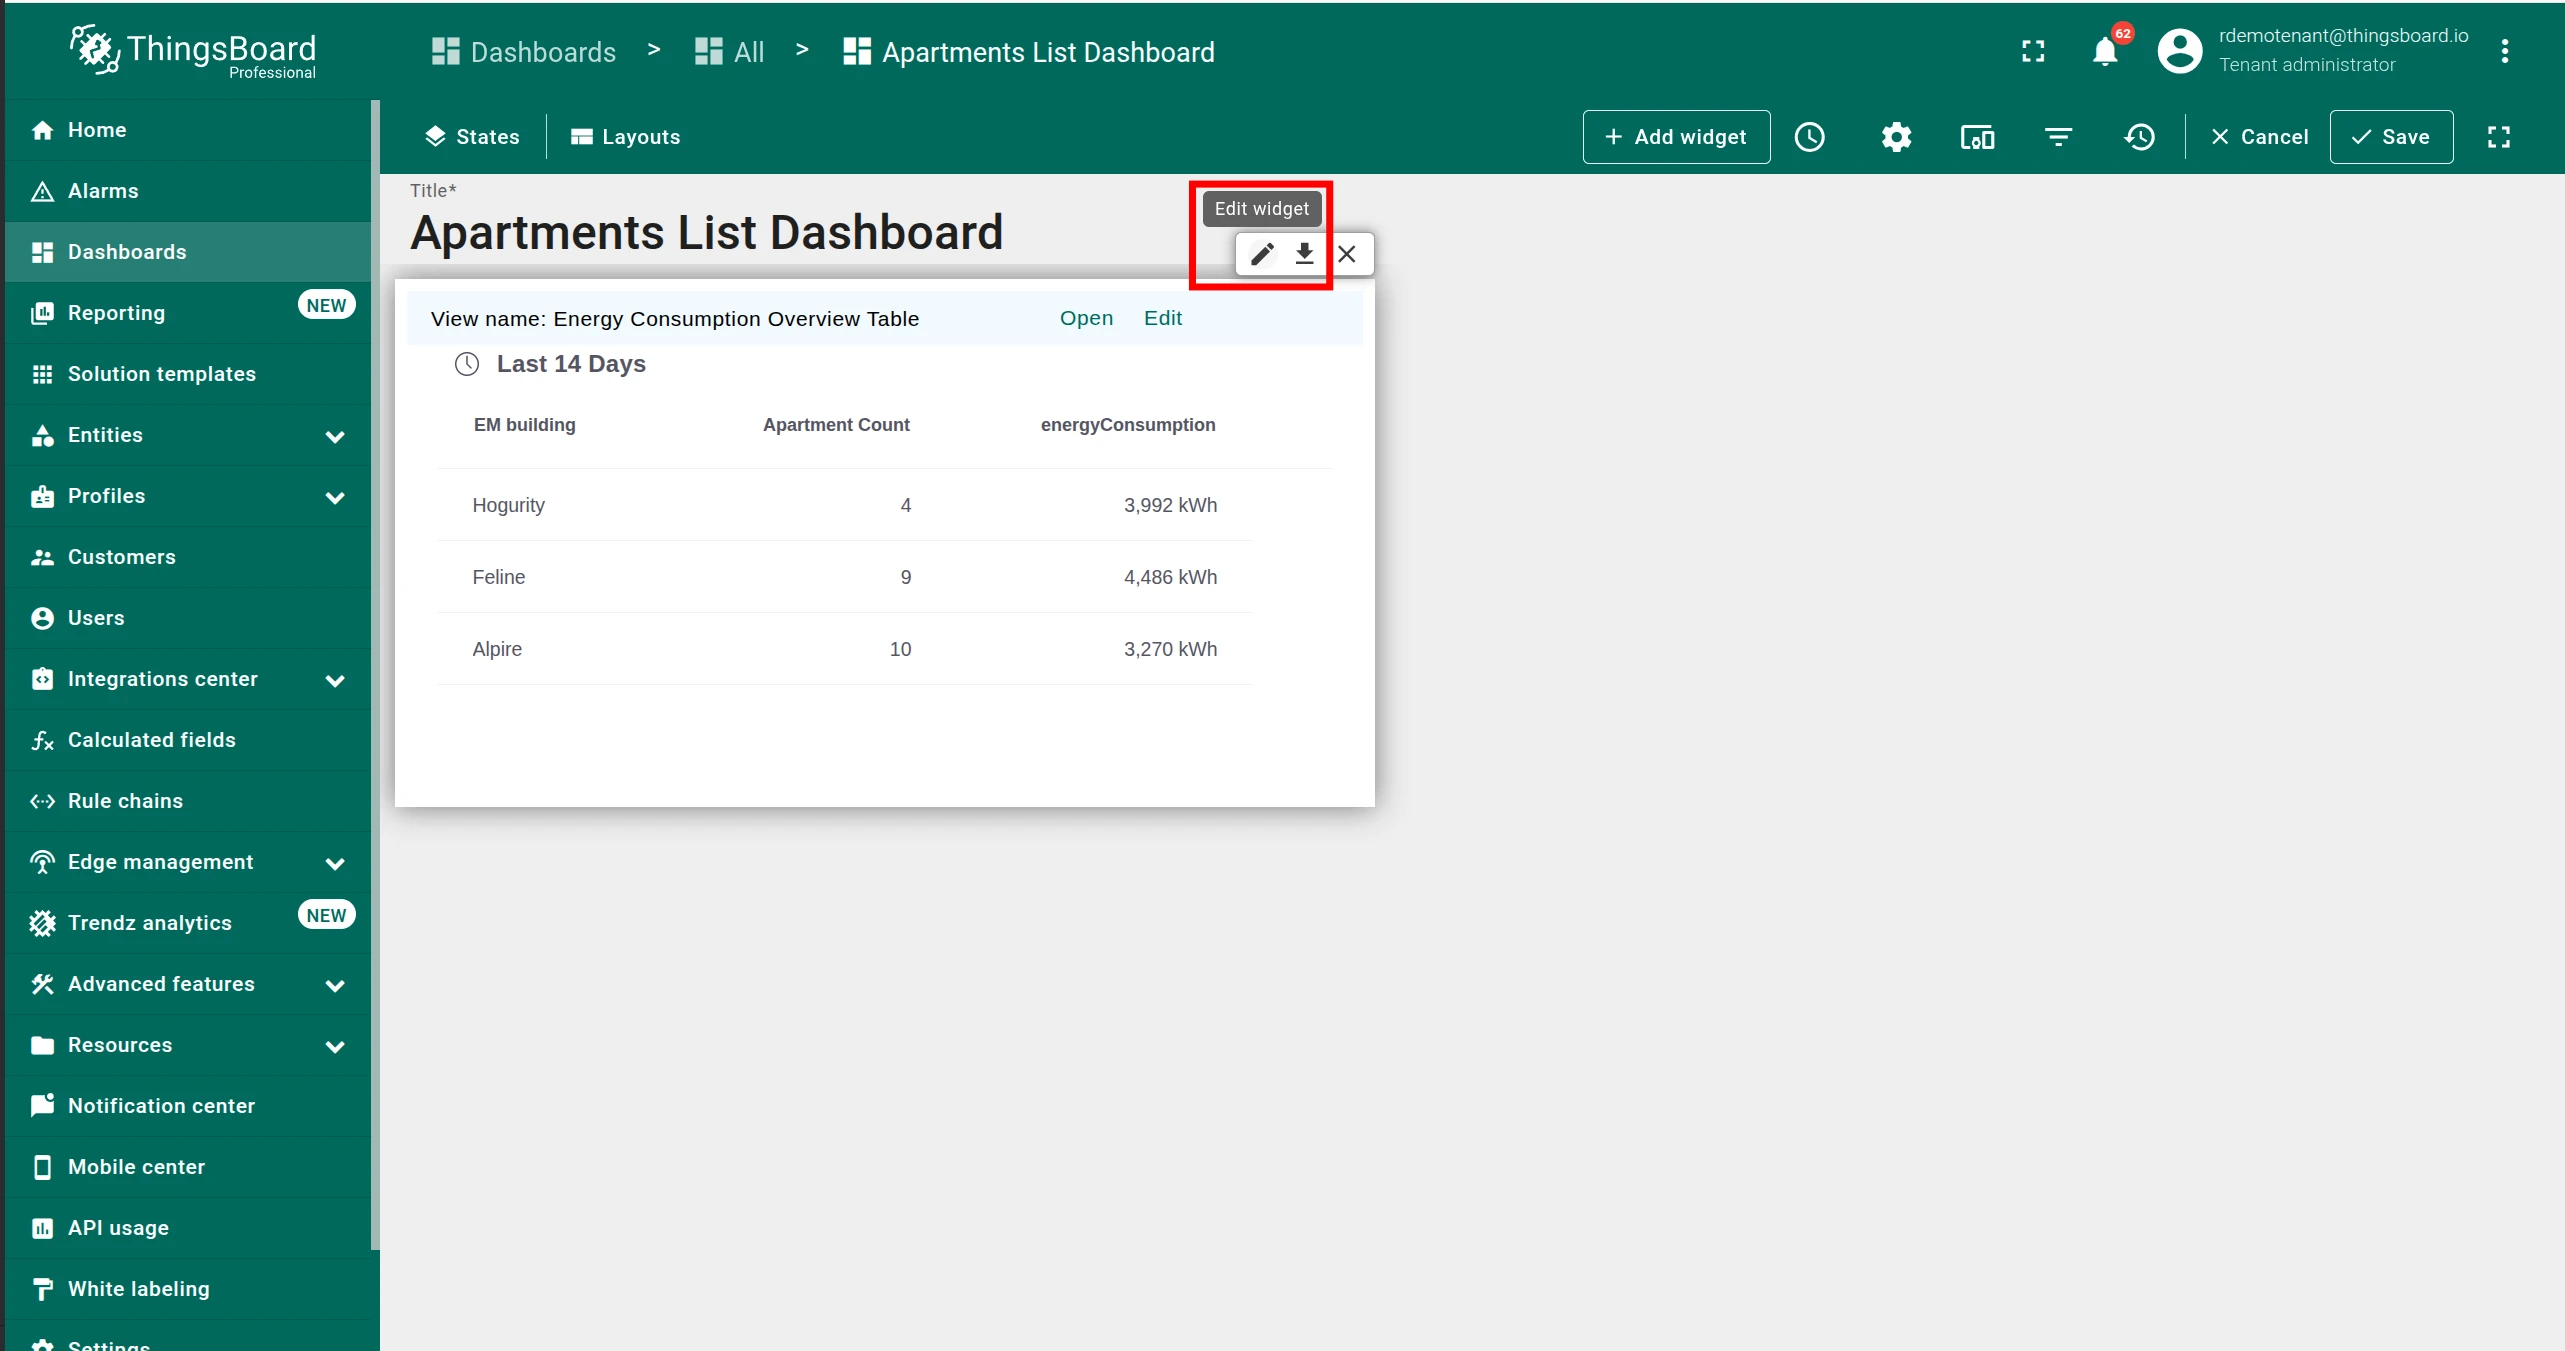
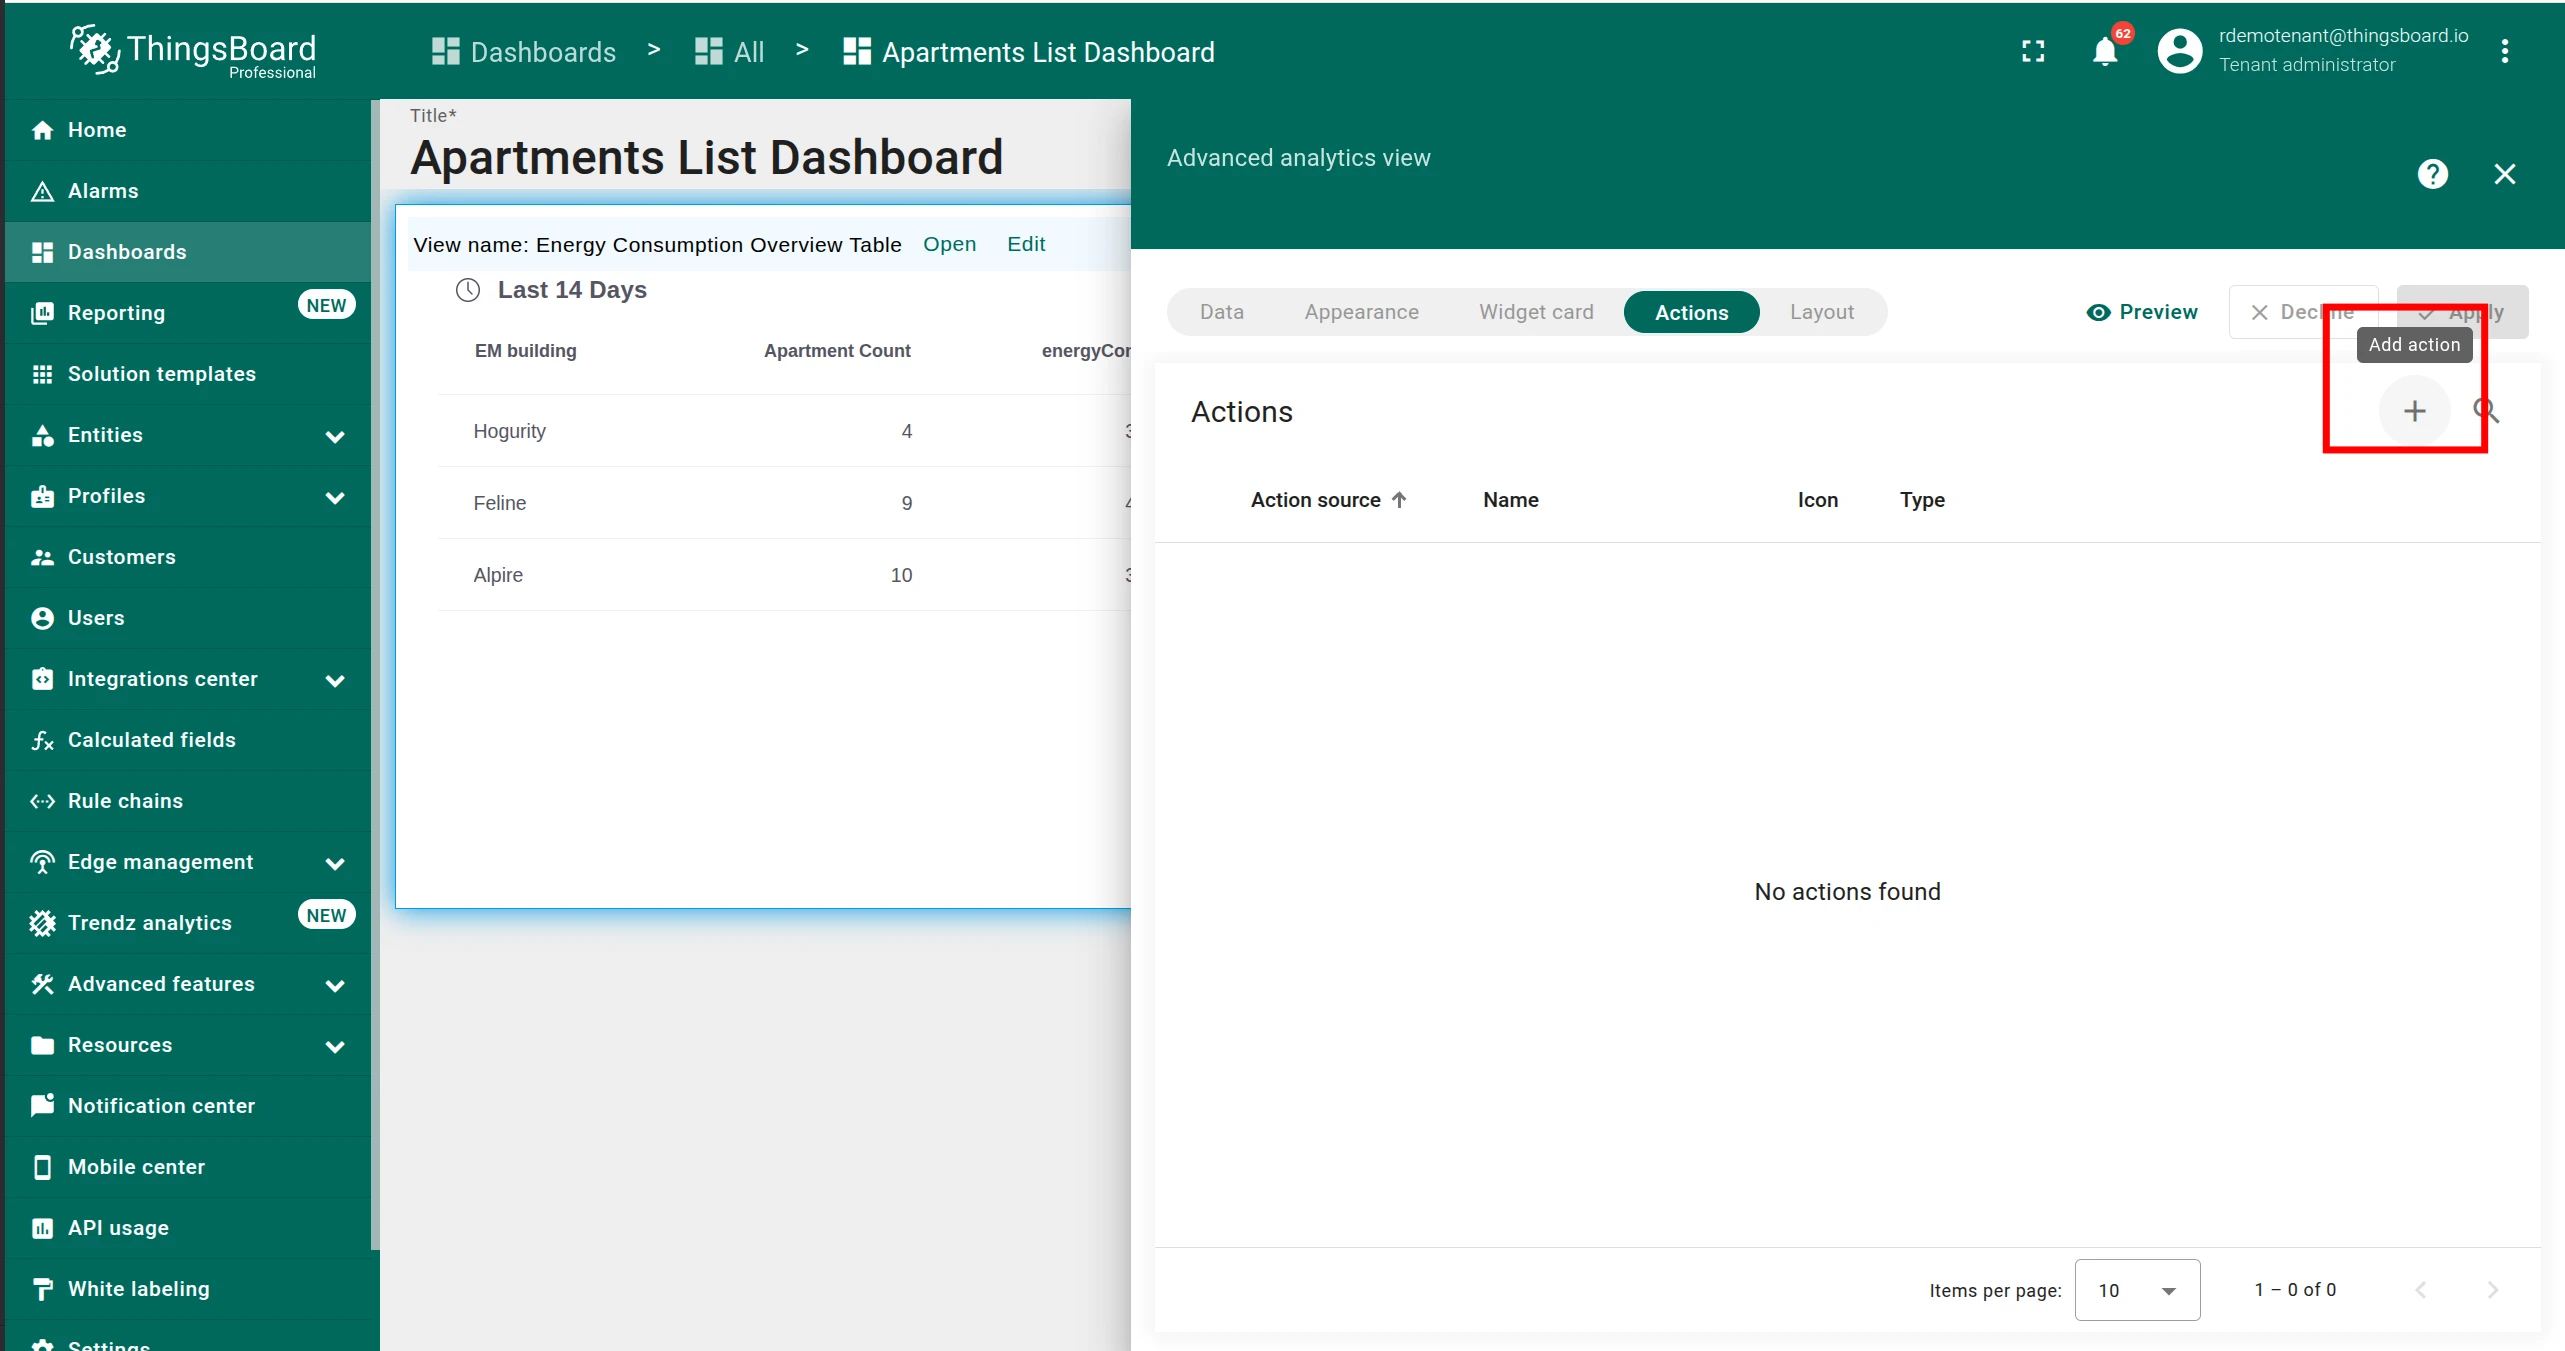
Open the dashboard in edit mode and click Edit widget on the Trendz Table widget.
-
Switch to the Actions tab.
-
Click Add action.
-
In the Add action dialog:
- Set Action source to On row click.
- Enter a Name (e.g.
Populate Selected Entities alias). - Set Action to Custom action.
- Paste the following code — it finds the alias by name, extracts the entity IDs from the clicked row, and updates the alias:
// Find the alias by namelet entityAlias = Object.values(widgetContext.aliasController.entityAliases).find(el => el.alias === 'Selected Entities');// Update alias with entity IDs from the clicked rowif (entityAlias && additionalParams.entityIds?.length) {entityAlias.filter.entityList = additionalParams.entityIds.map(entity => entity.entityId.id);widgetContext.updateAliases([entityAlias.id]);}Replace
'Selected Entities'with the exact alias name you created in Step 2. -
Click Save.
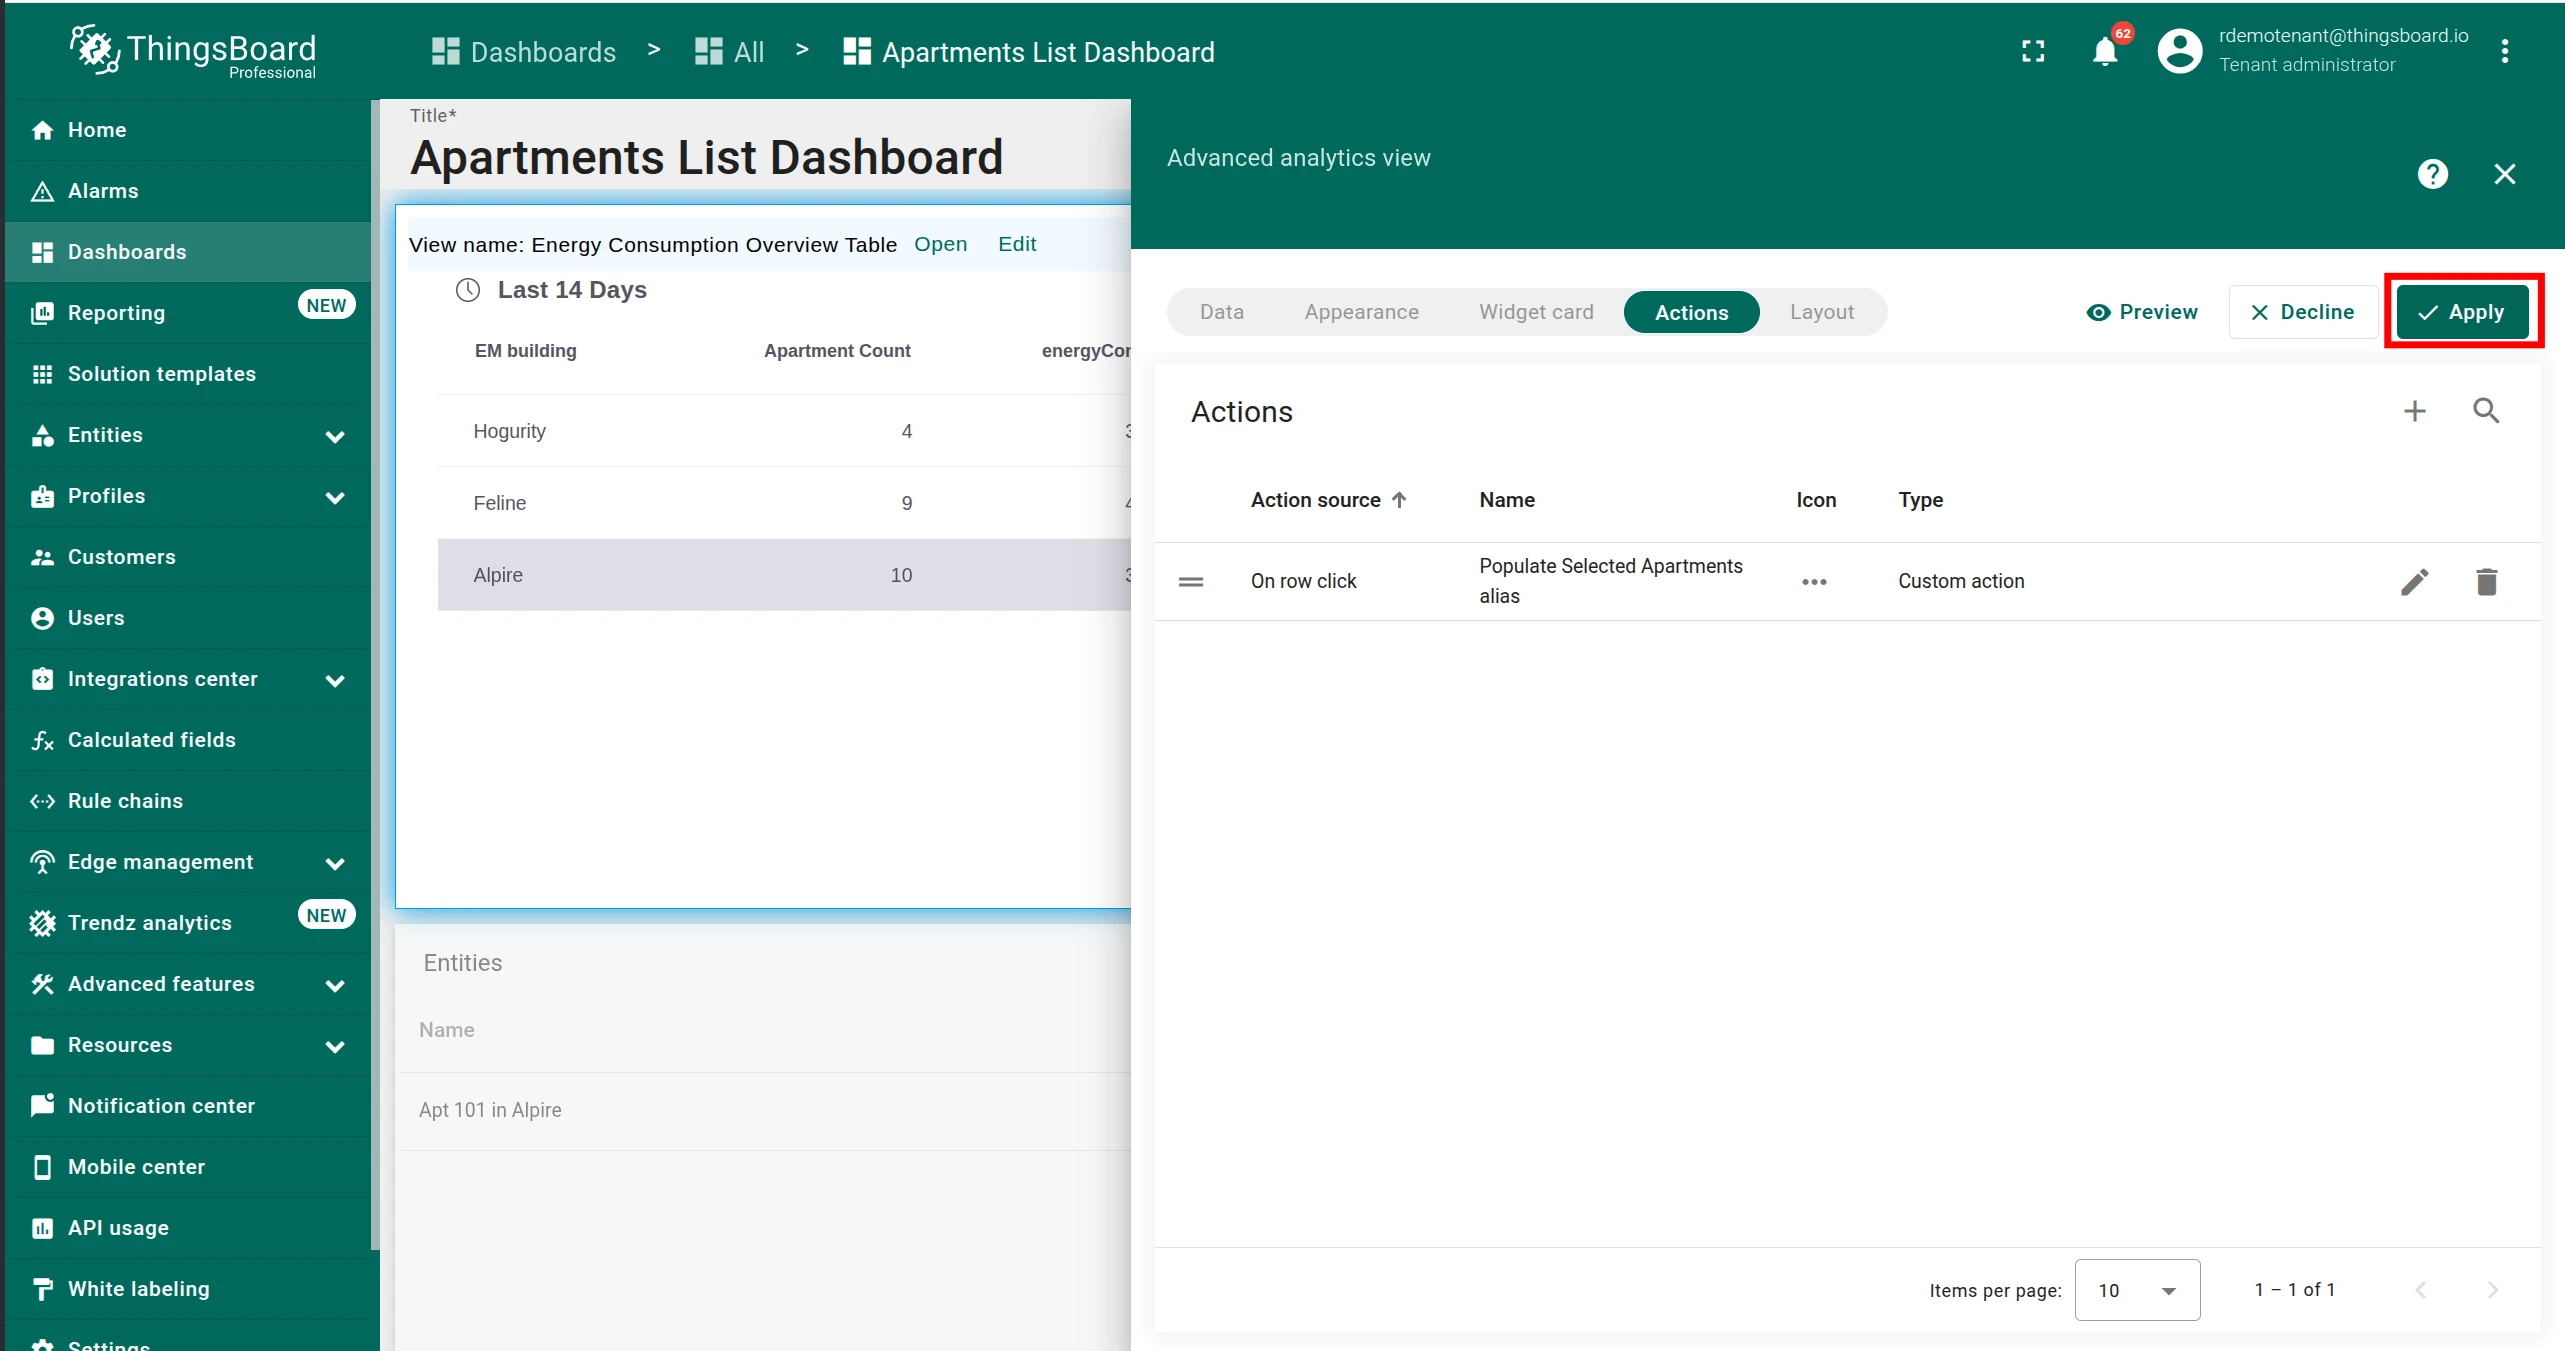
-
Click Apply.
Step 4 — Add a widget driven by the alias
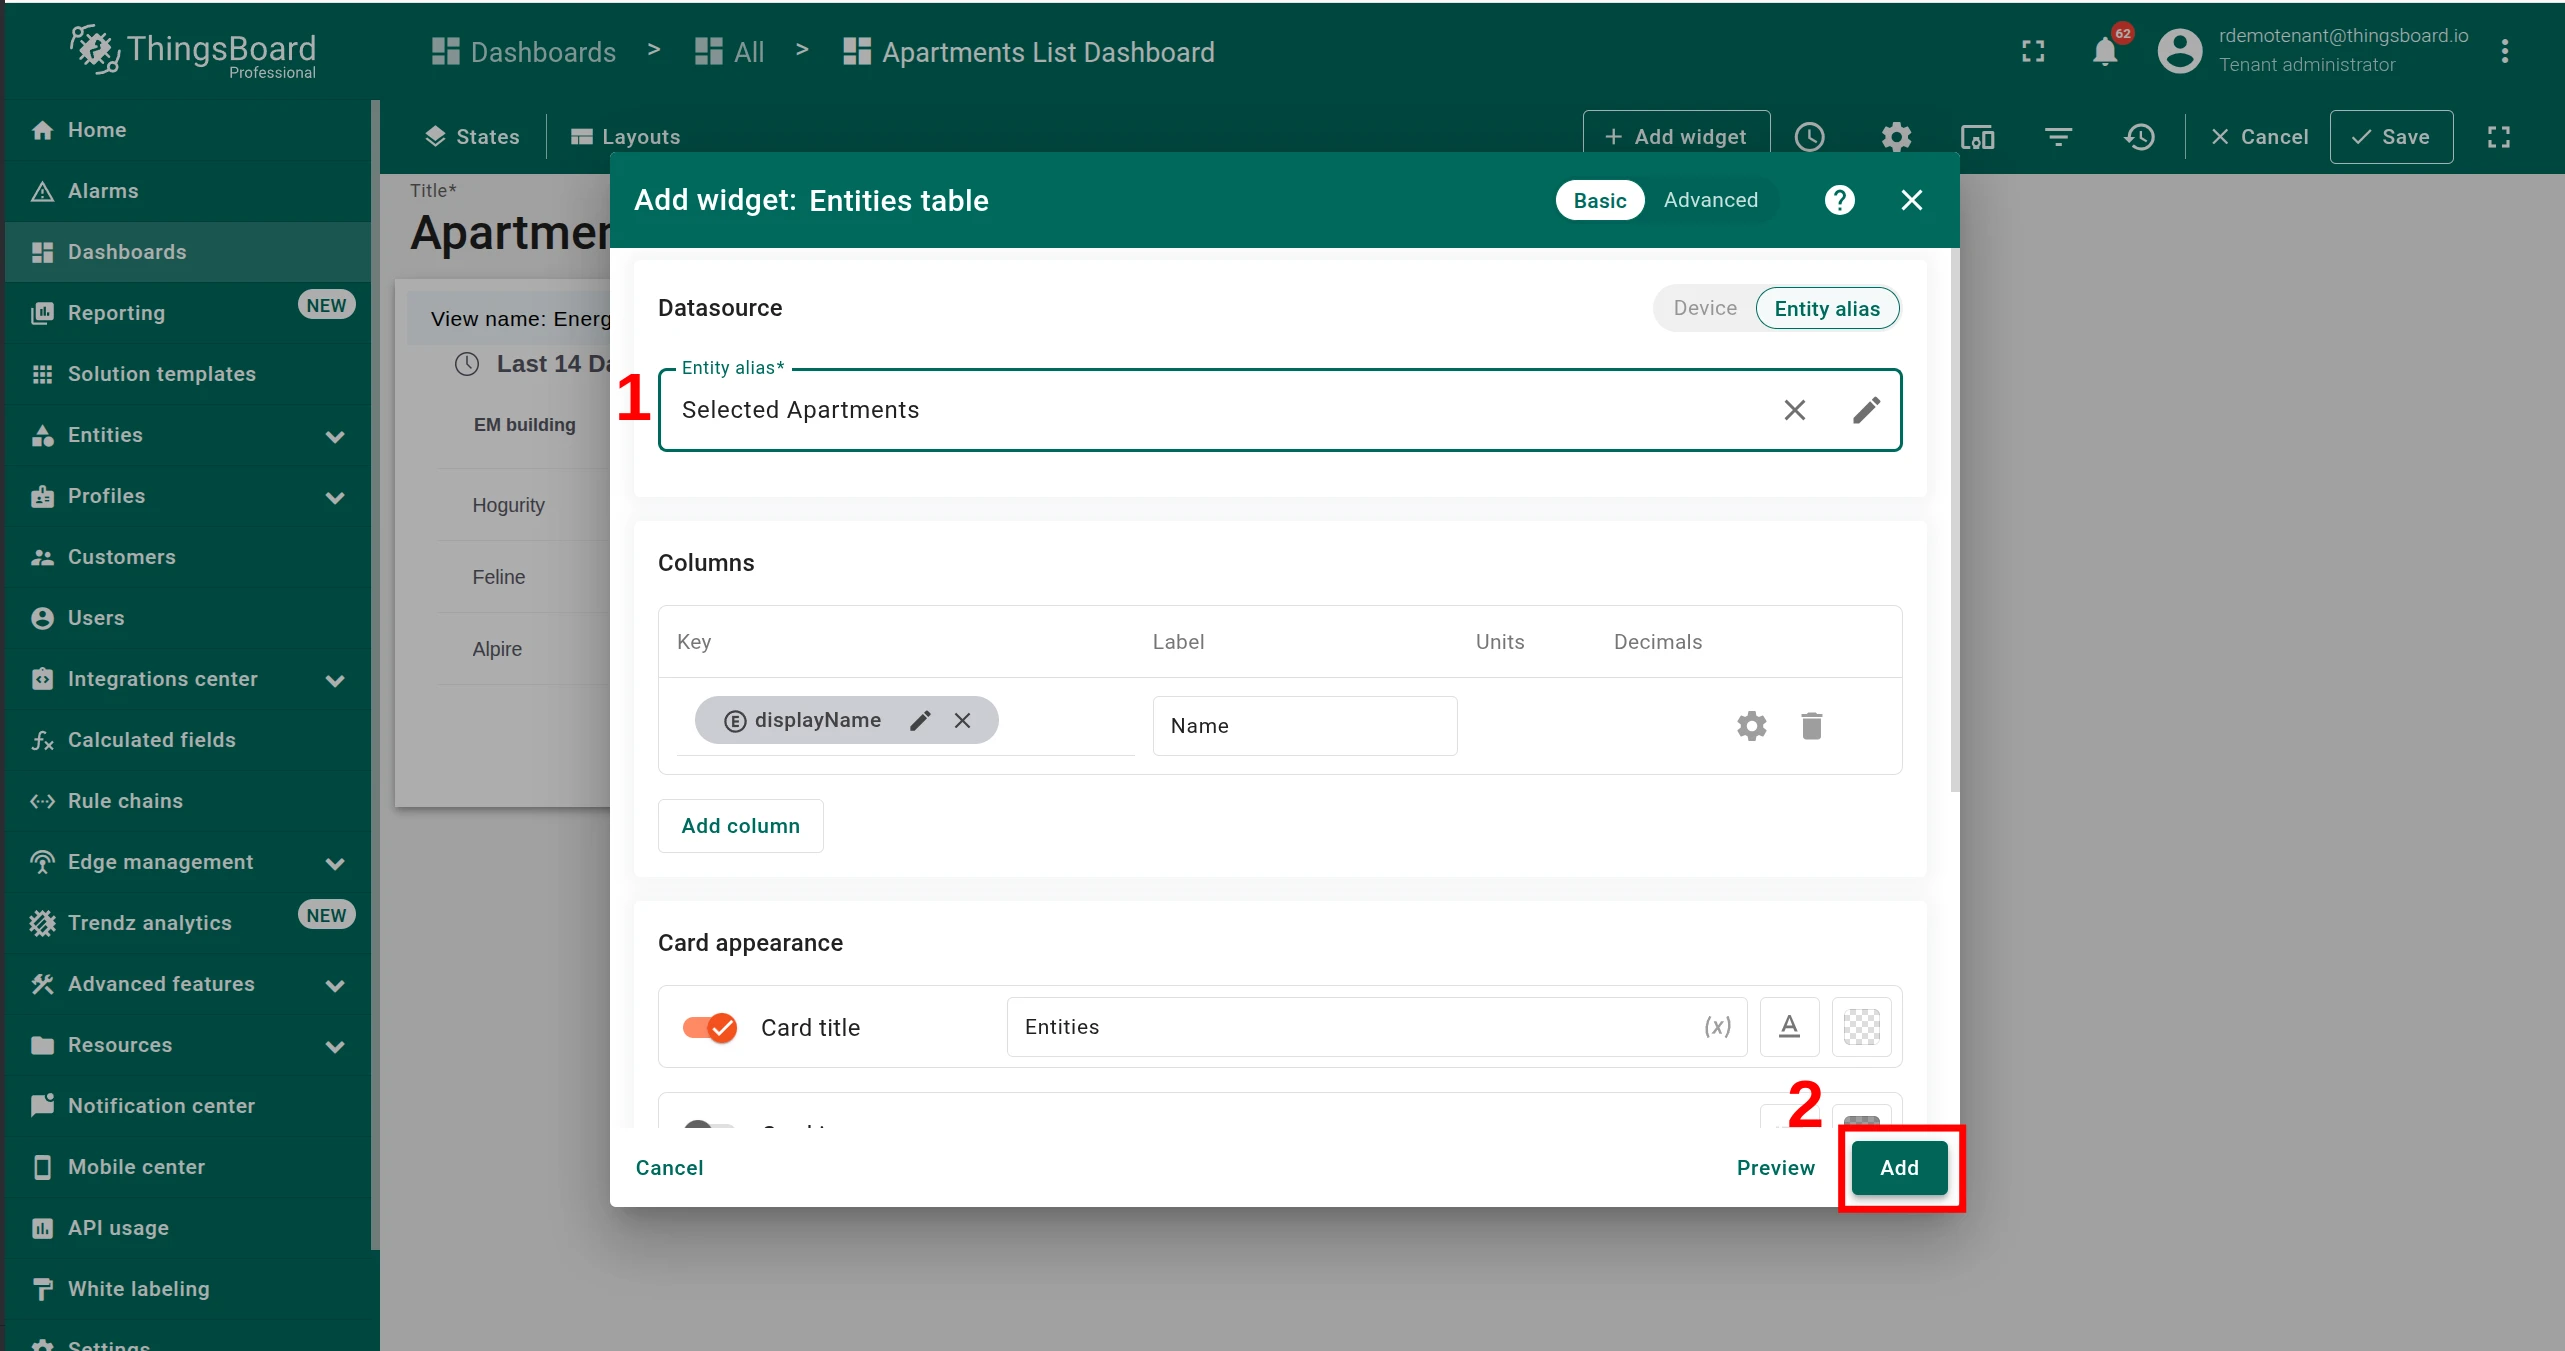
Section titled “Step 4 — Add a widget driven by the alias”Add any ThingsBoard widget to the dashboard and set its datasource to the Selected Entities alias. In this example we use an Entities table to verify the alias is populated correctly — but you can use a Map, a chart, or any other widget.
-
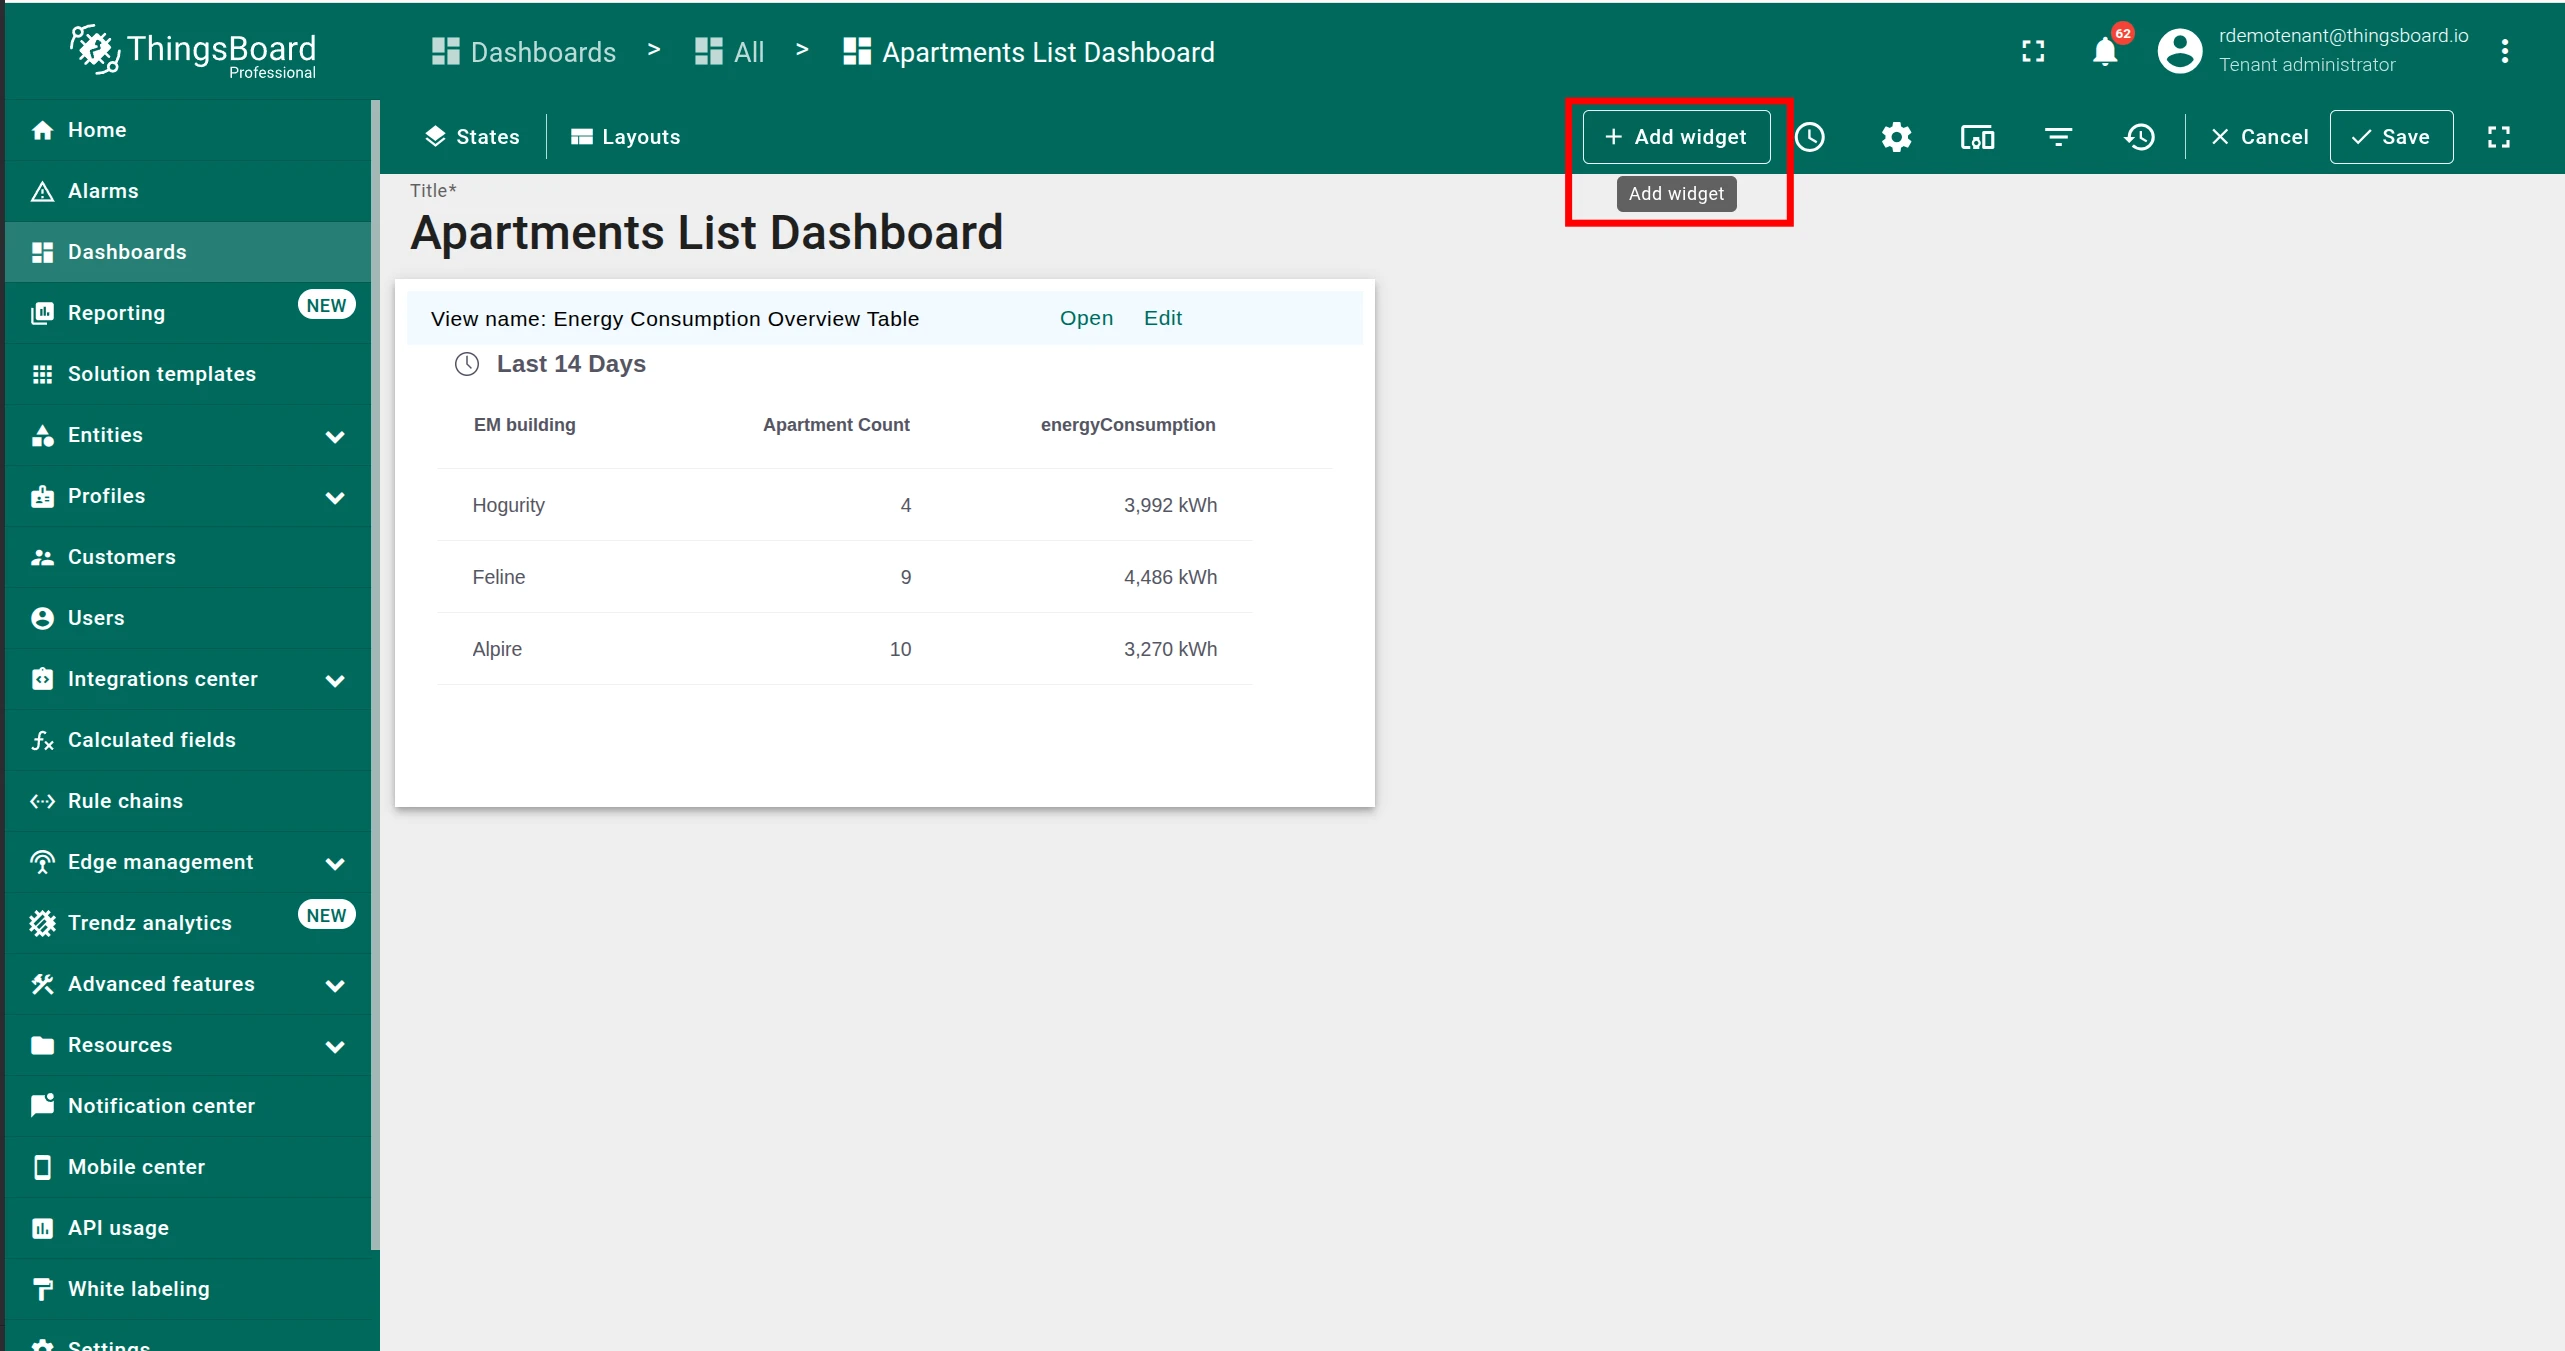
Click Add widget (+) in the dashboard toolbar.
-
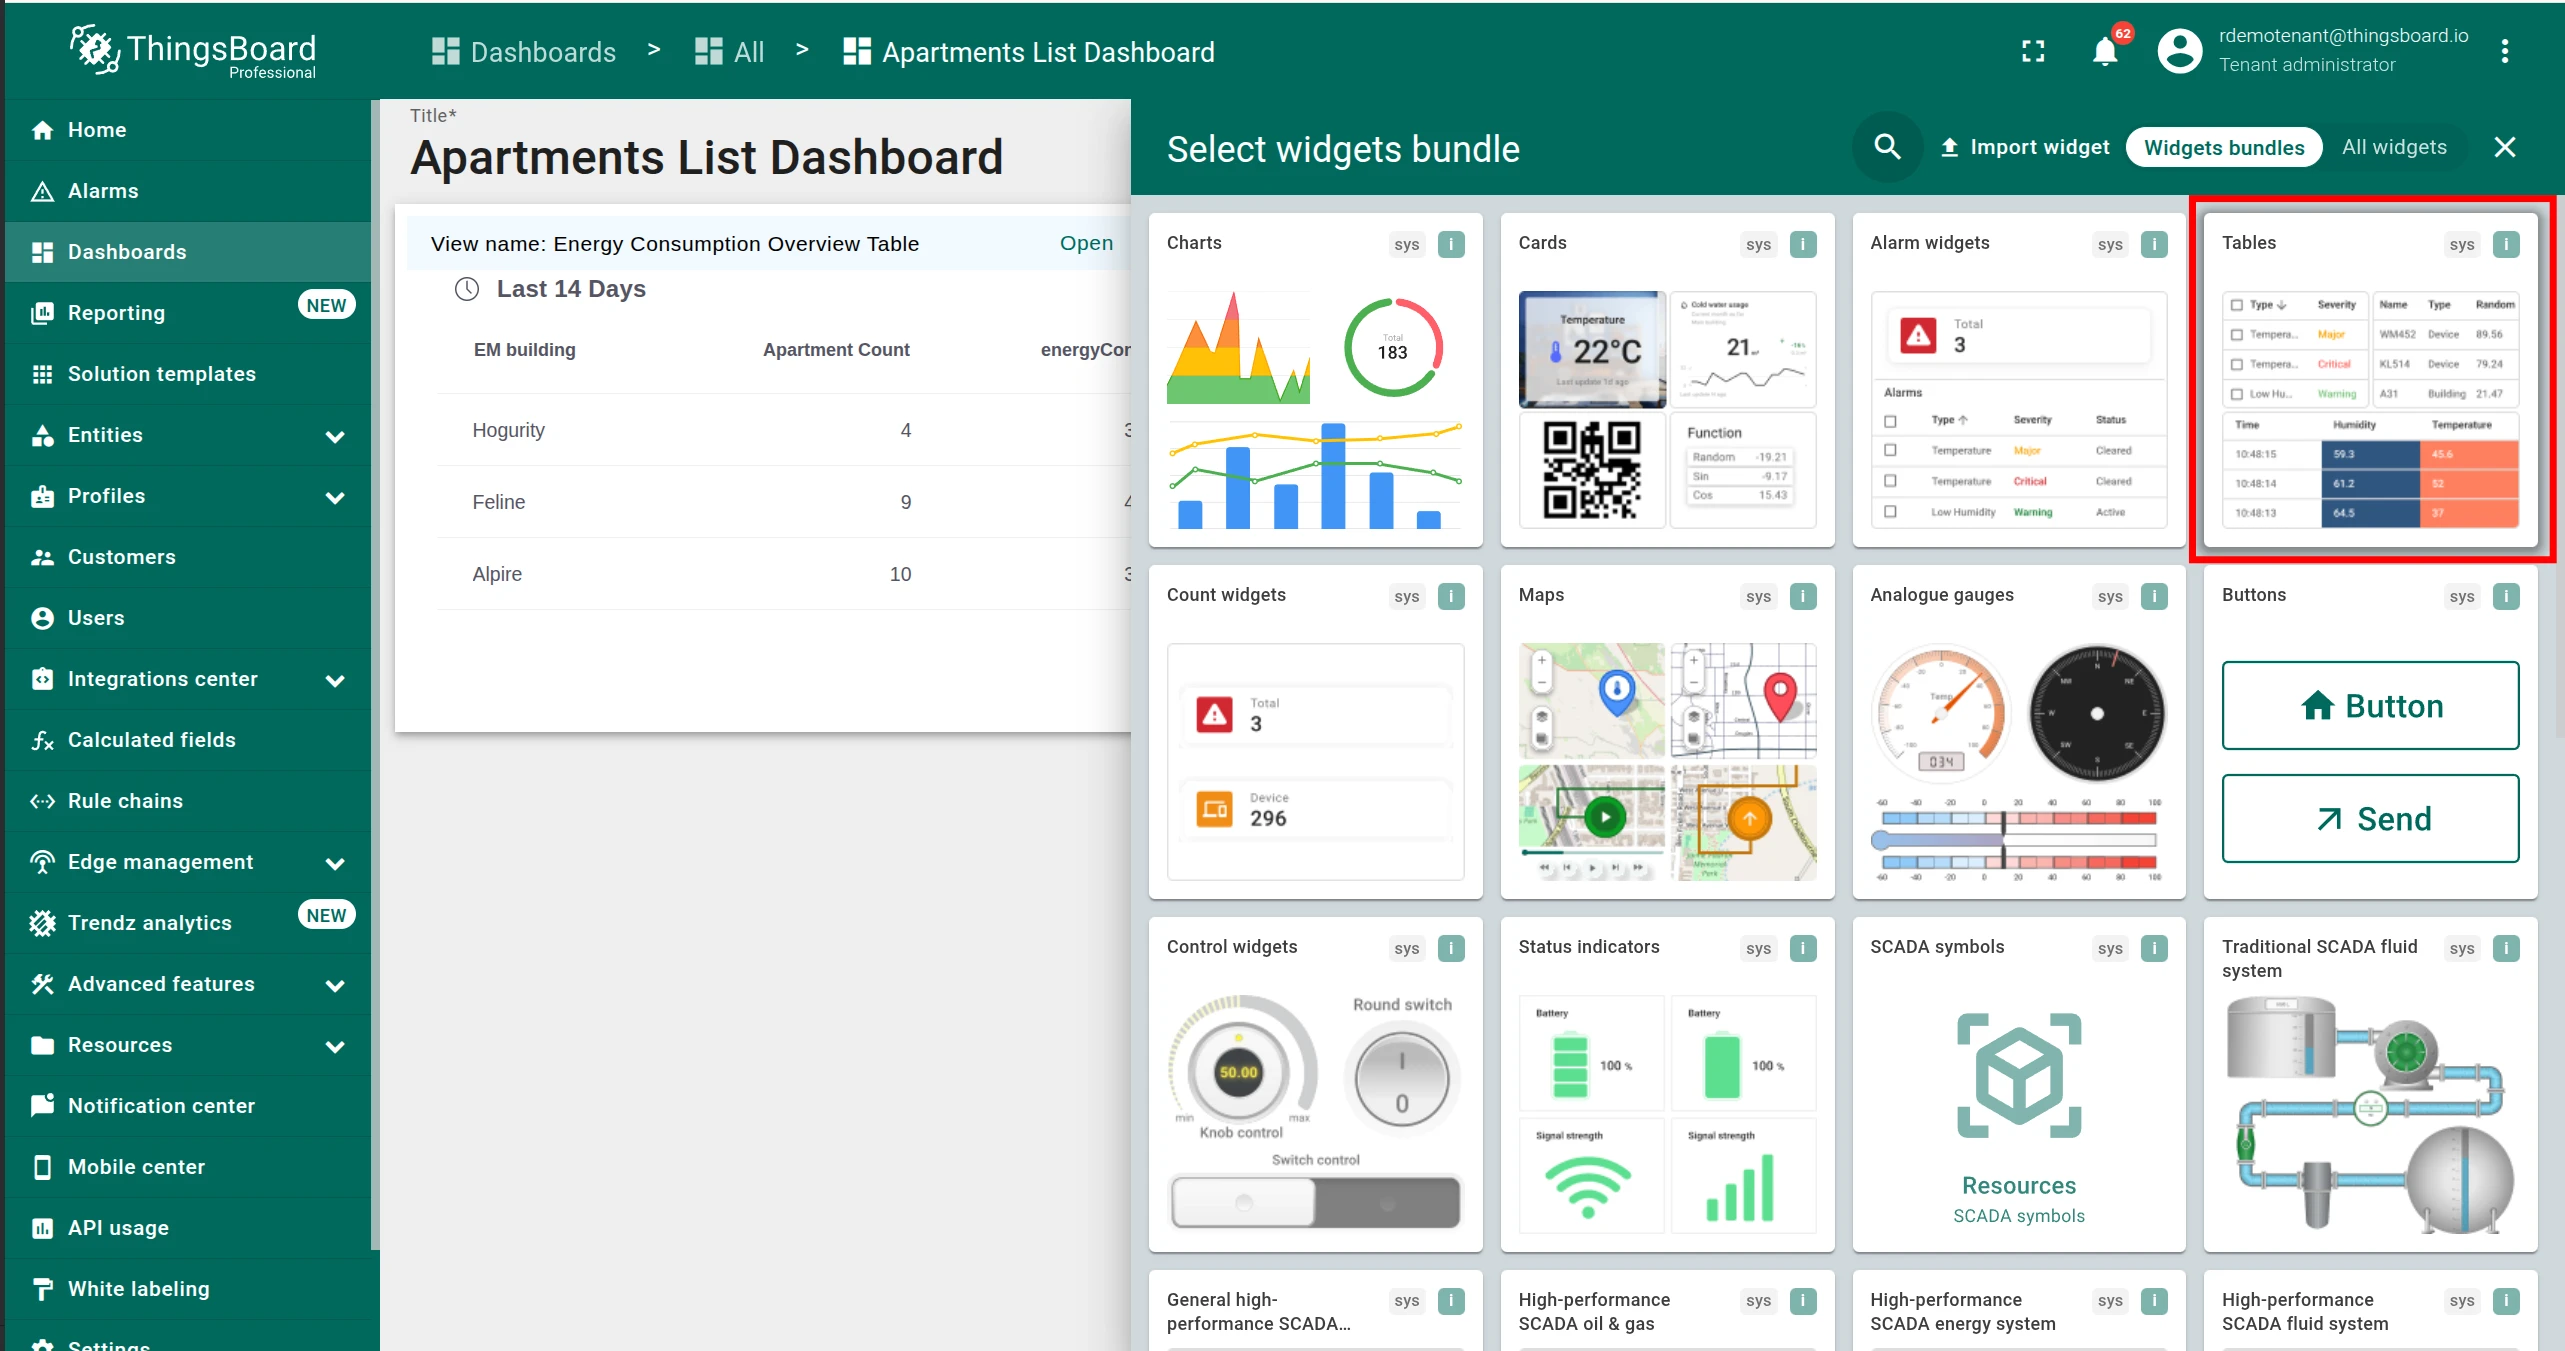
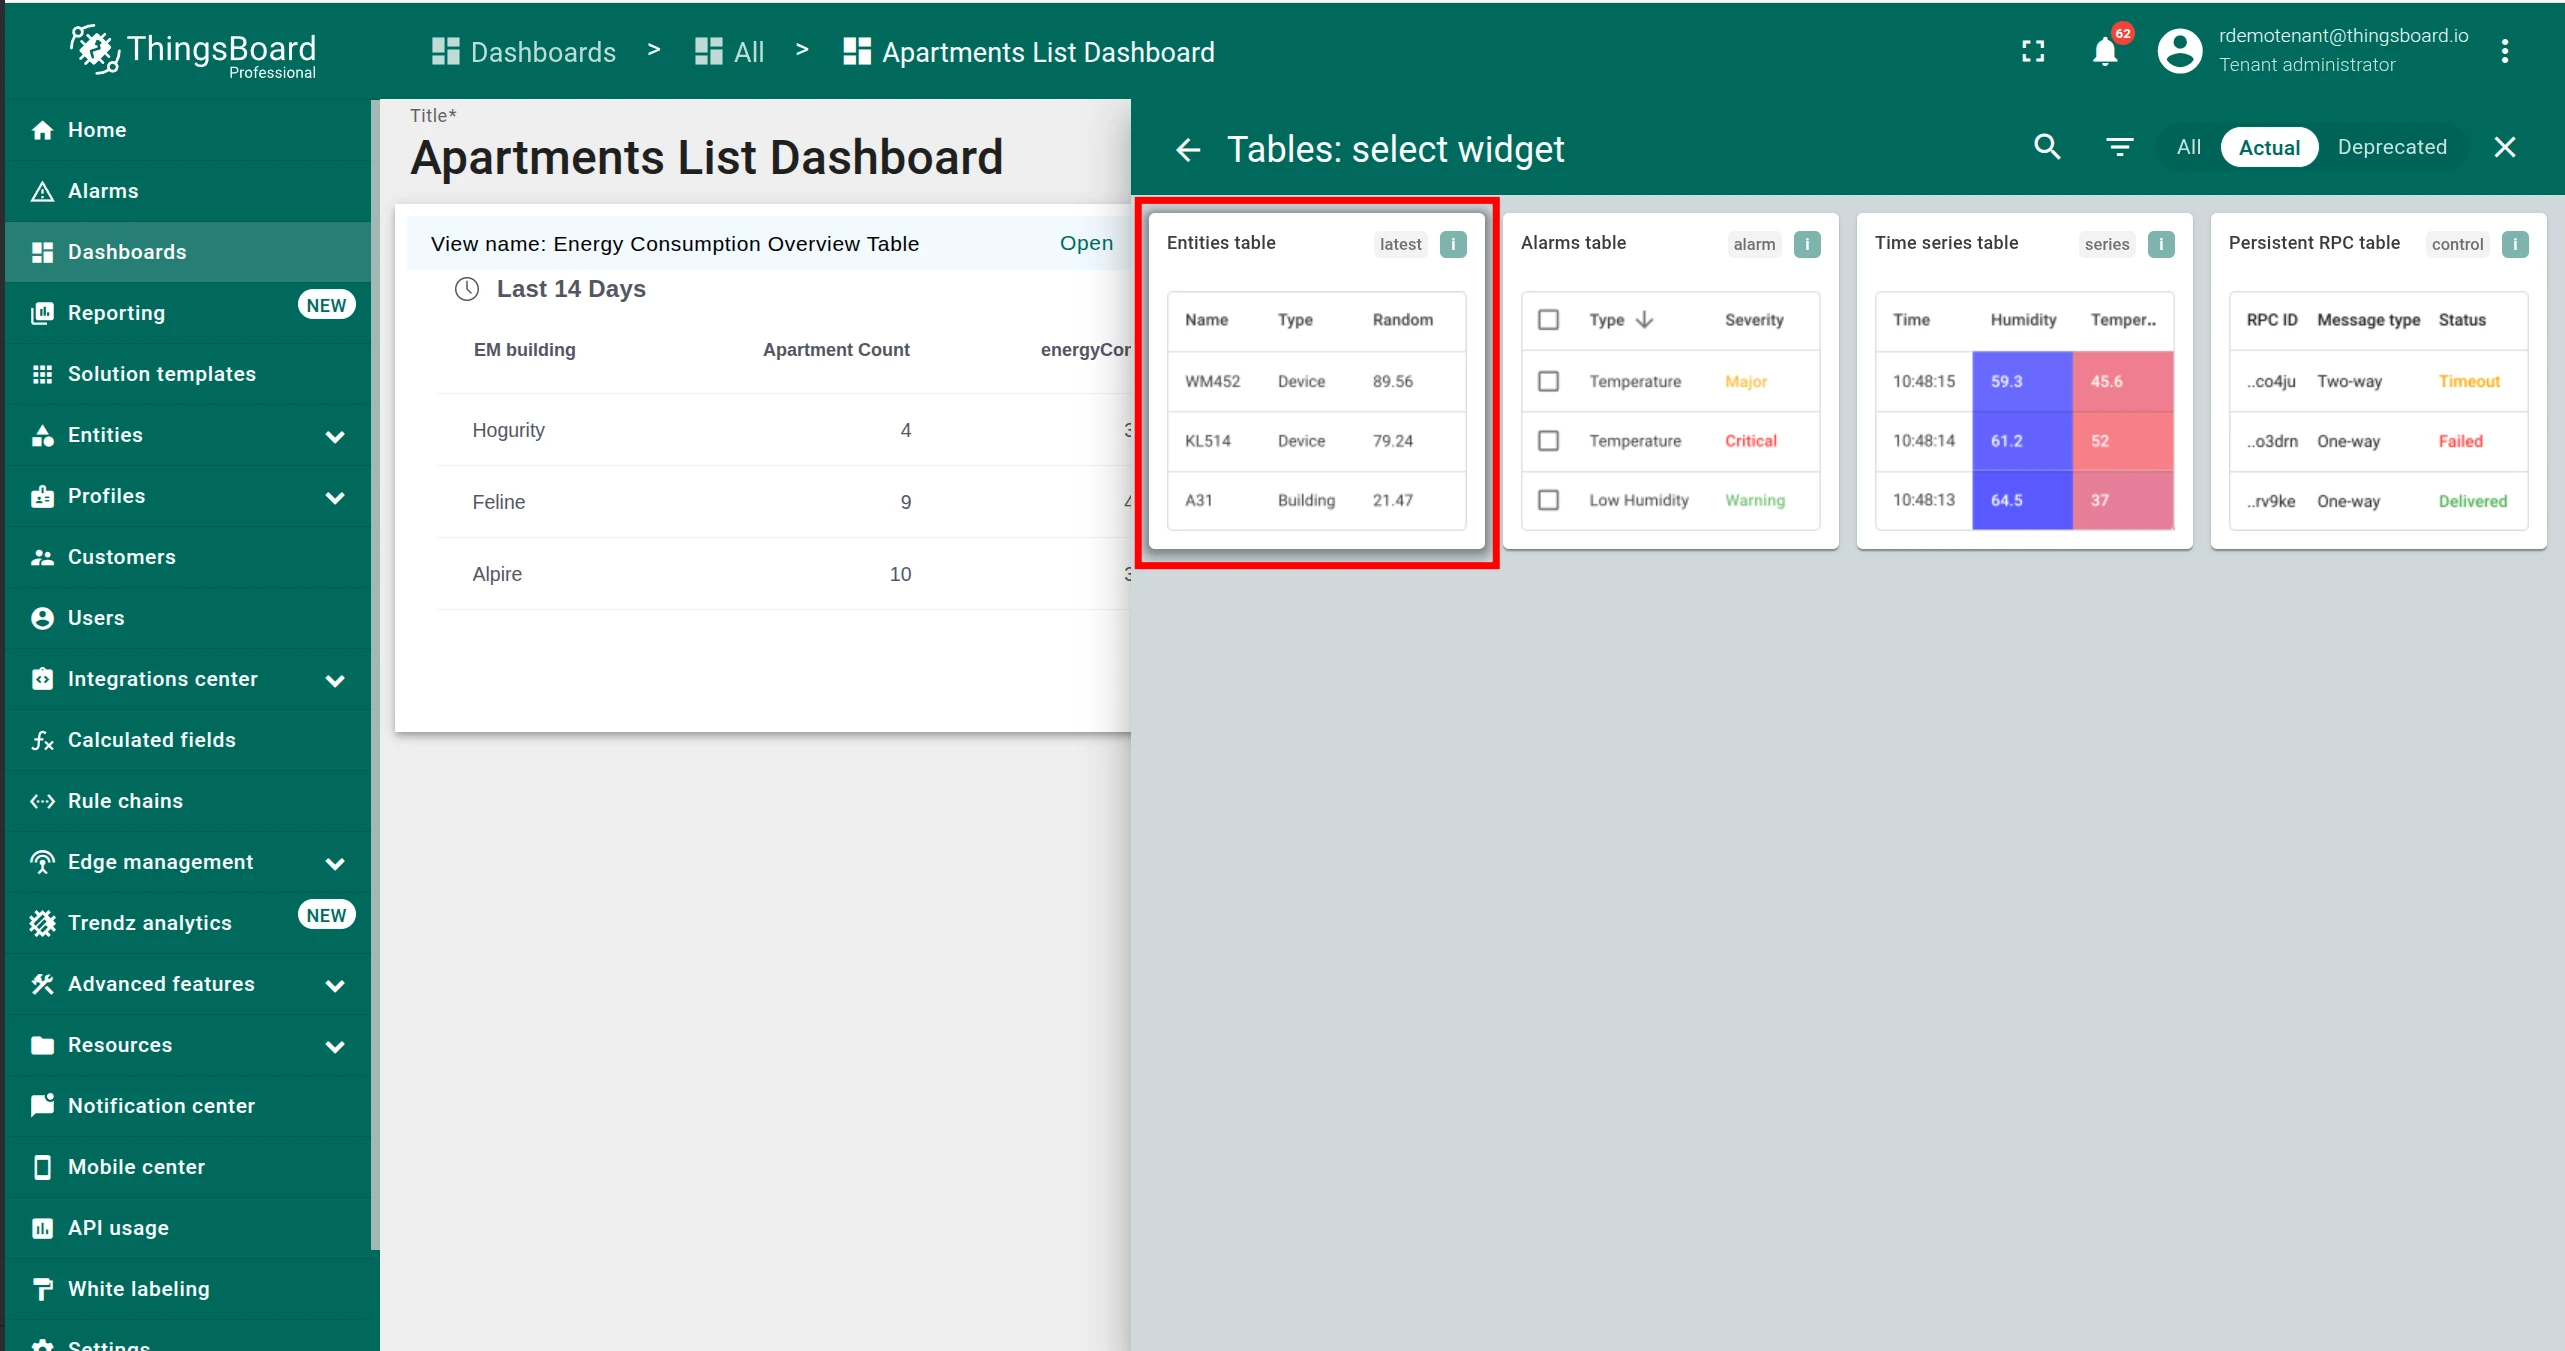
Select the Tables bundle and choose Entities table.
-
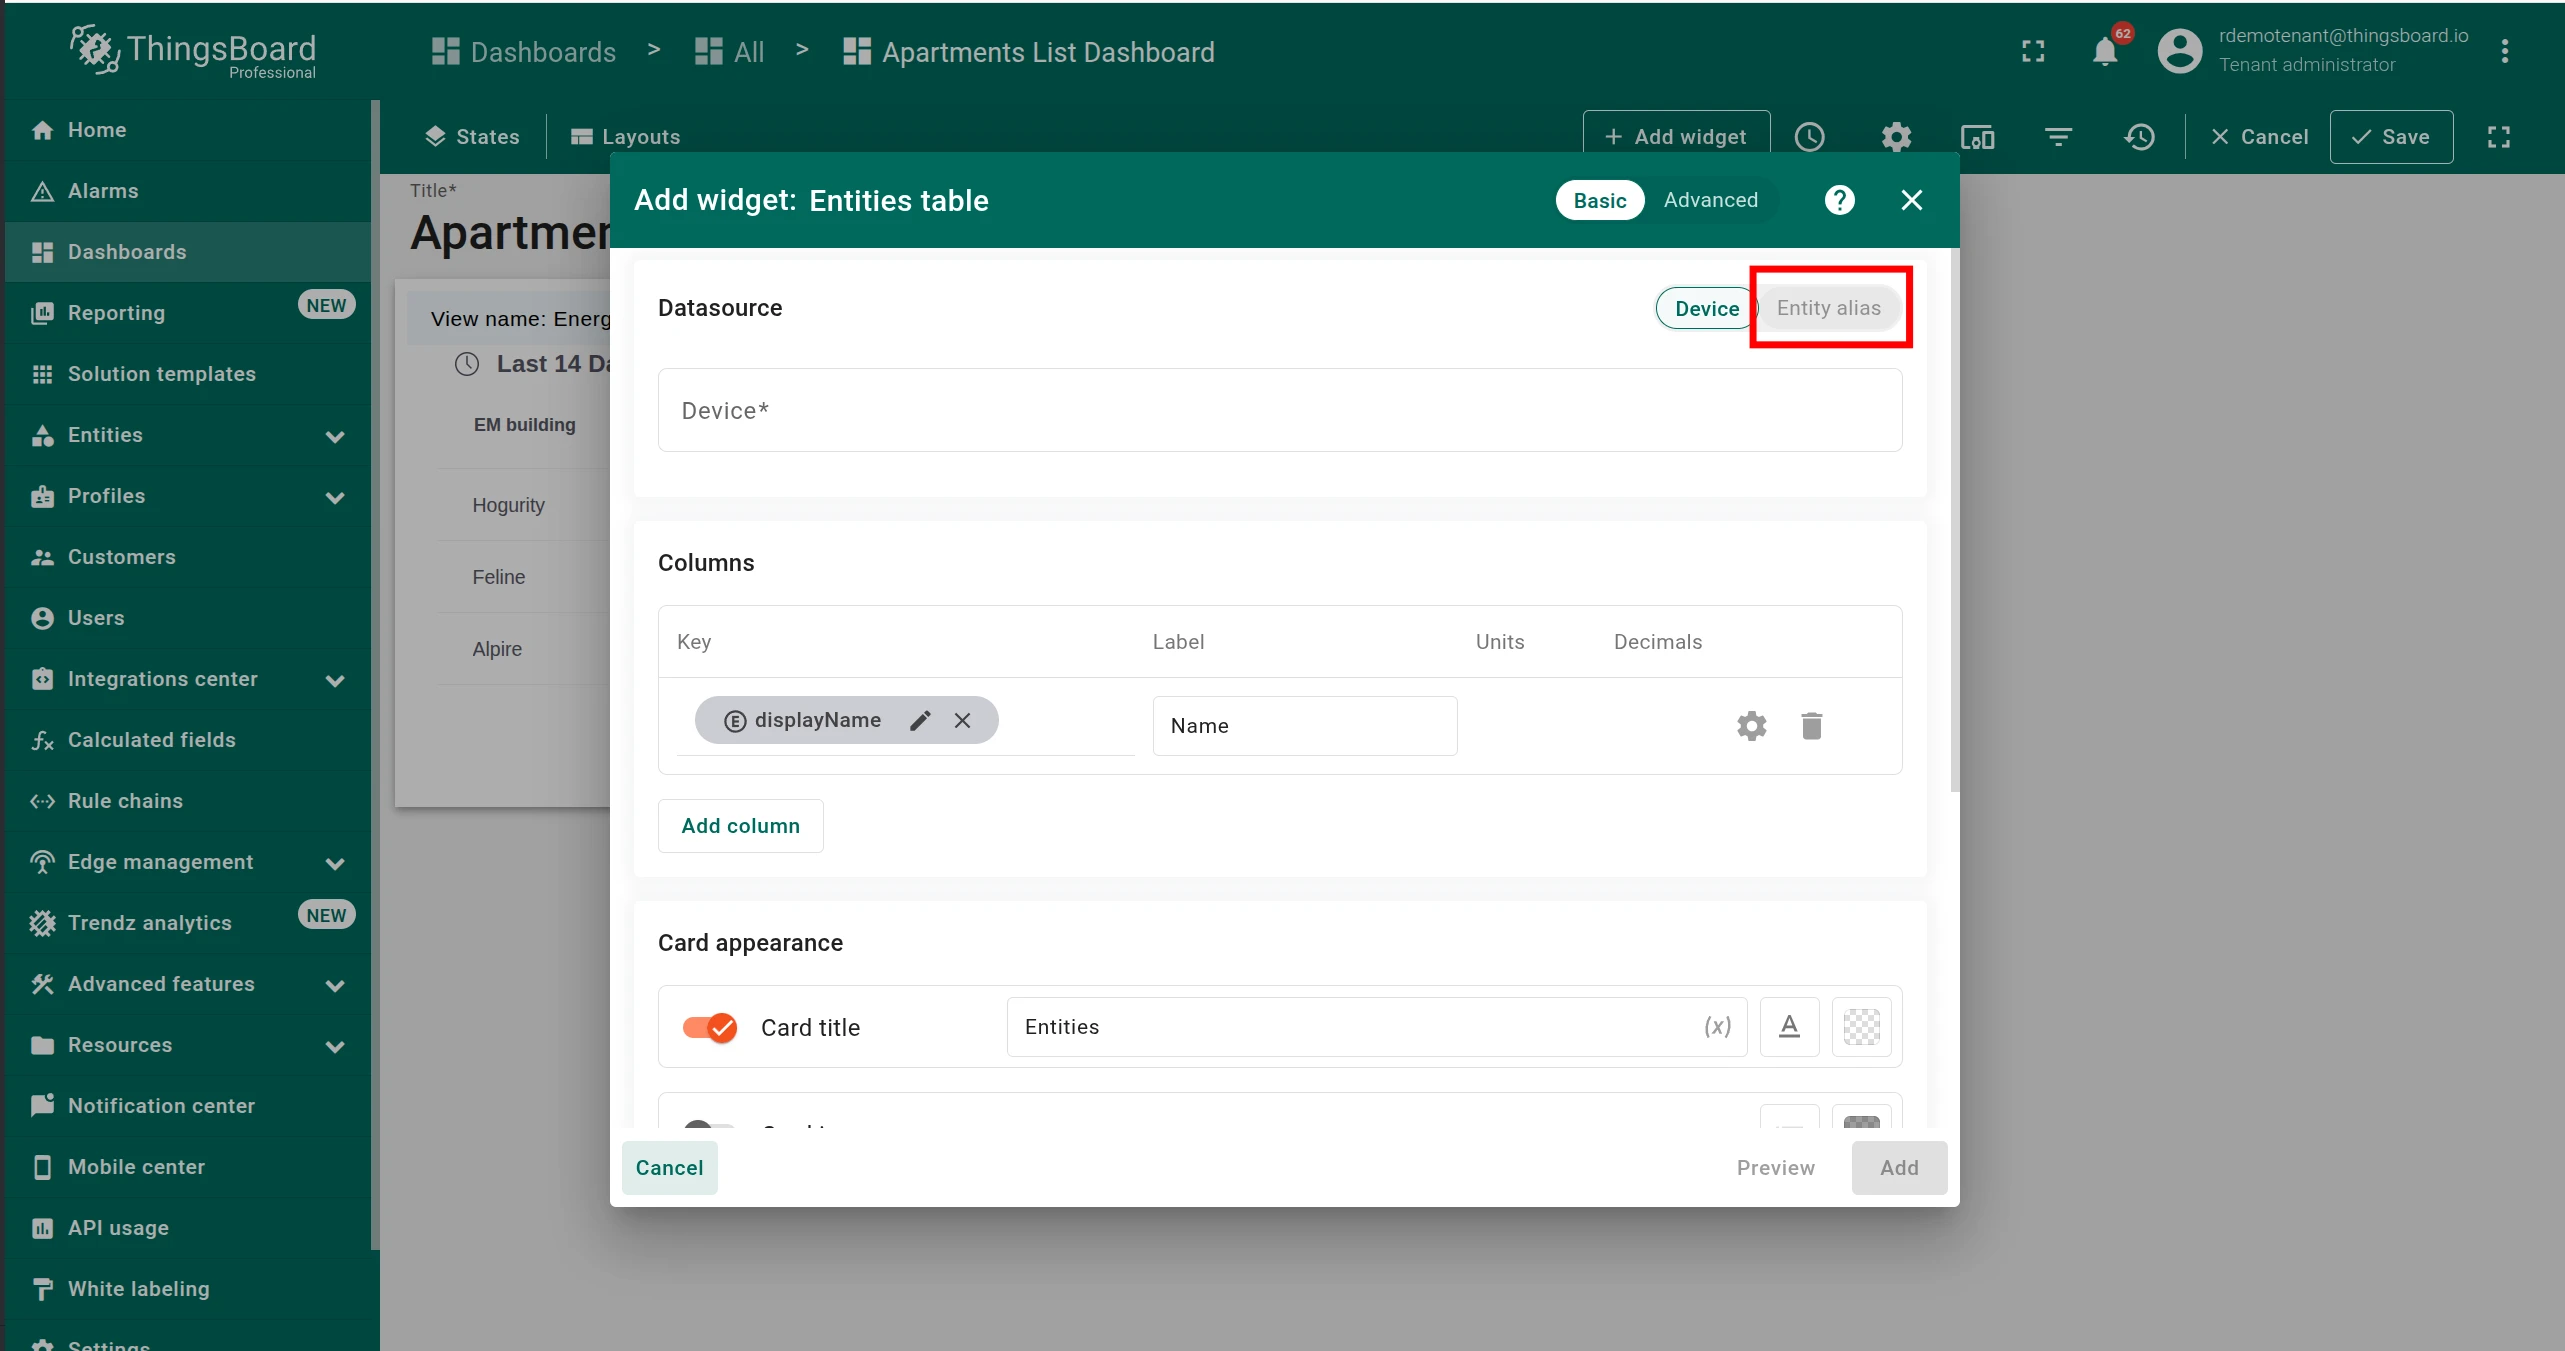
Switch to the Entity alias datasource tab and select Selected Entities.
-
Click Add, then Save the dashboard.
Now when a user clicks a building row, all apartments in that building are pushed into the alias and the widget updates instantly.
On row click — Anomaly table
Section titled “On row click — Anomaly table”If you are using the Anomaly Table on a dashboard and want the row click to both select an entity and update the dashboard time window:
-
In the Trendz chart settings, set the Row click entity (see step above).
-
On the ThingsBoard dashboard, open the Anomaly widget in edit mode, switch to the Actions tab, and add a new action.
-
Set Action source to On row click and Action type to Custom action.
-
Use the following code to update both the selected entity and the dashboard time window:
let stateId = widgetContext.stateController.getStateId();let stateParams = widgetContext.stateController.getStateParams();stateParams.selectedDevice = {entityId: entityId,entityName: entityName,};widgetContext.dashboard.onUpdateTimewindow(additionalParams.startTs,additionalParams.endTs);widgetContext.stateController.updateState(stateId, stateParams);Replace
selectedDevicewith the alias name used in your dashboard state.
Was this helpful?