Card with Line Chart
The Card with Line Chart widget displays a single key metric alongside a sparkline showing its trend over time. You can also compare the current value with the previous equivalent period to see whether the metric is improving or declining.
Simple card with line chart
Section titled “Simple card with line chart”Drop the field you want to monitor into the Value column and select an aggregation type. The card shows the aggregated result for the current time range with a line chart reflecting the trend.
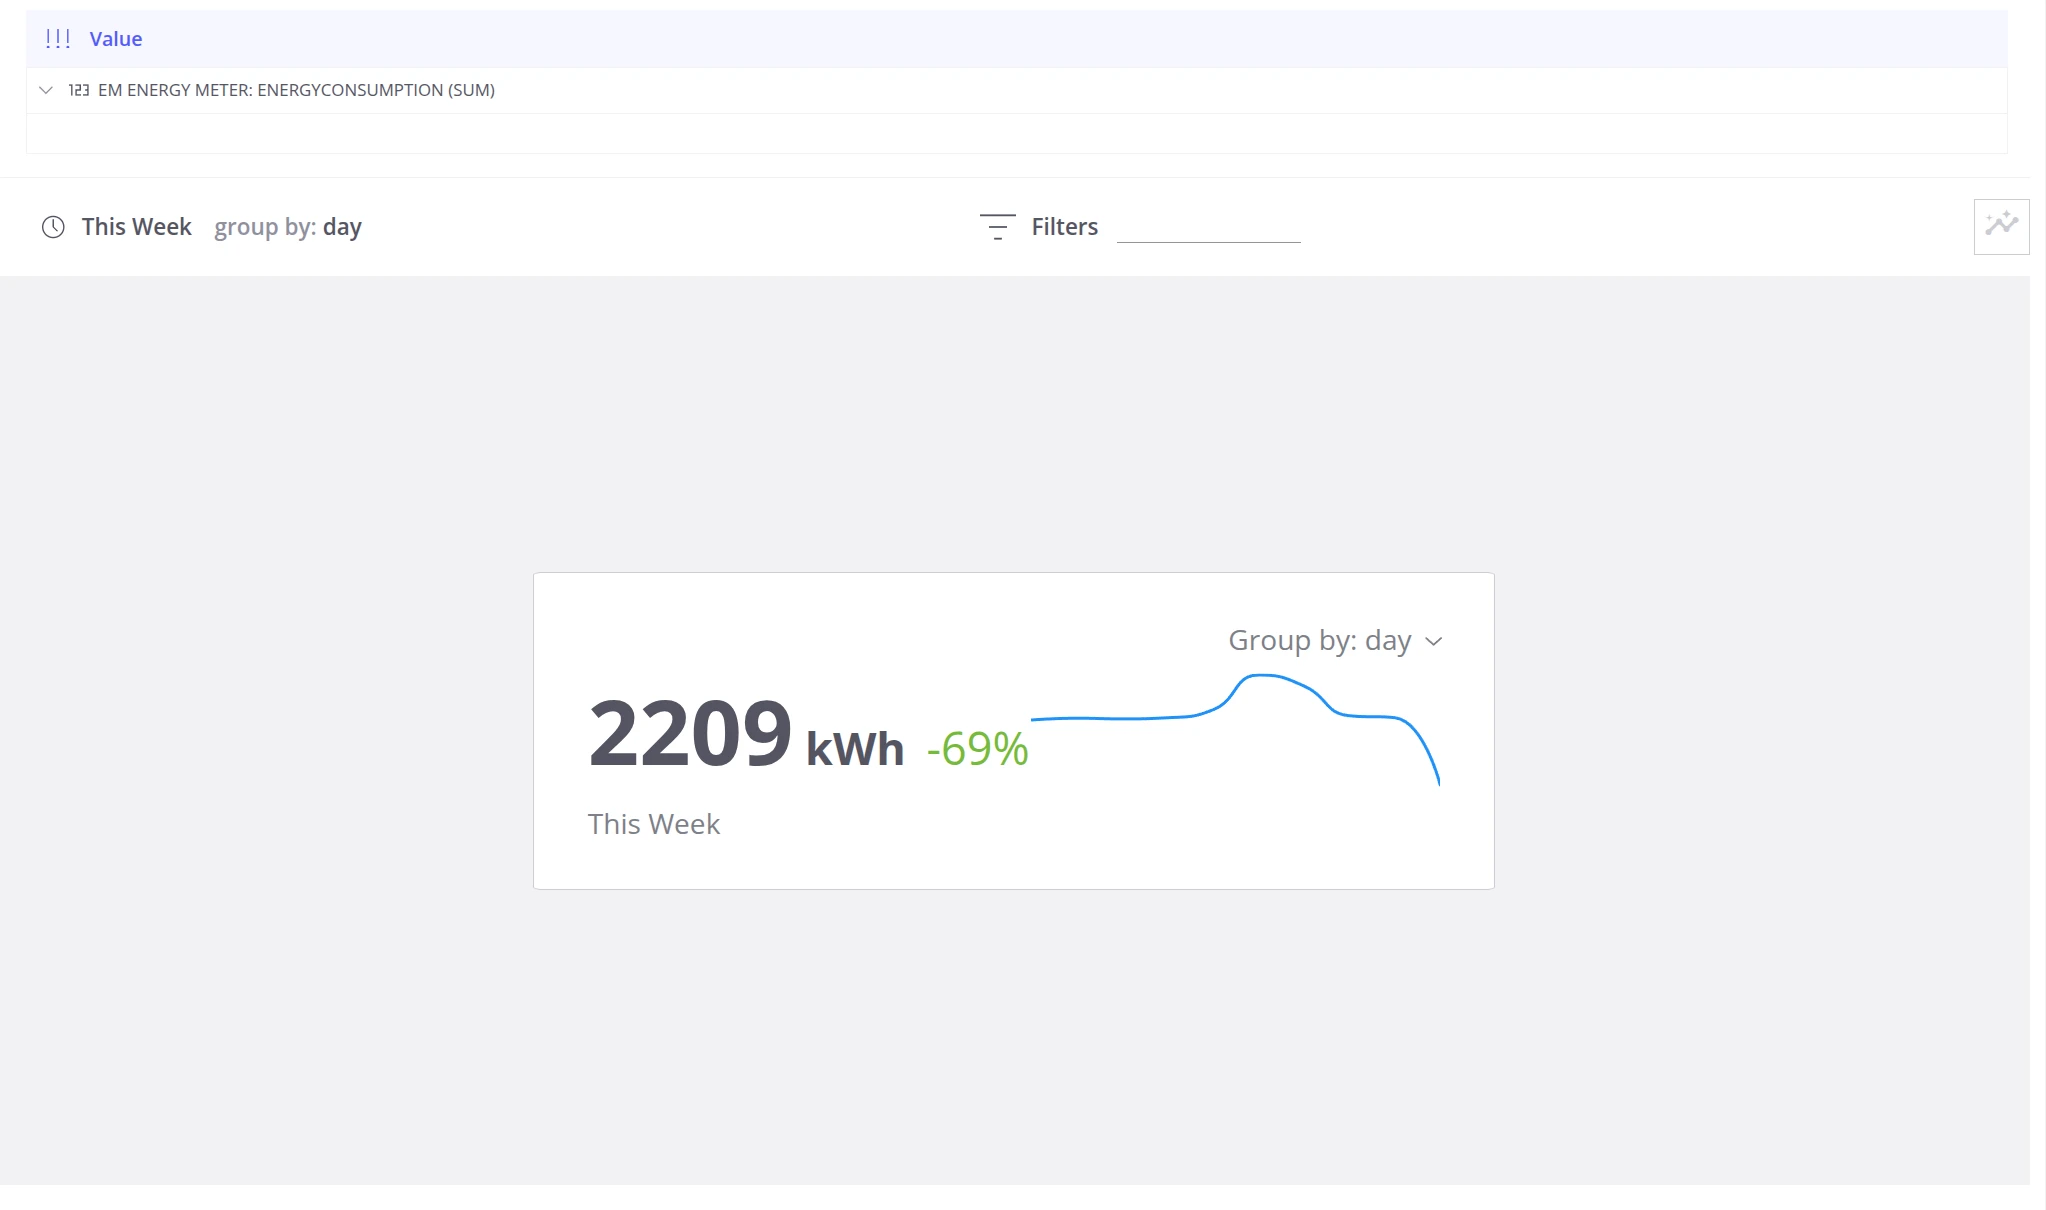
Comparison with the previous period
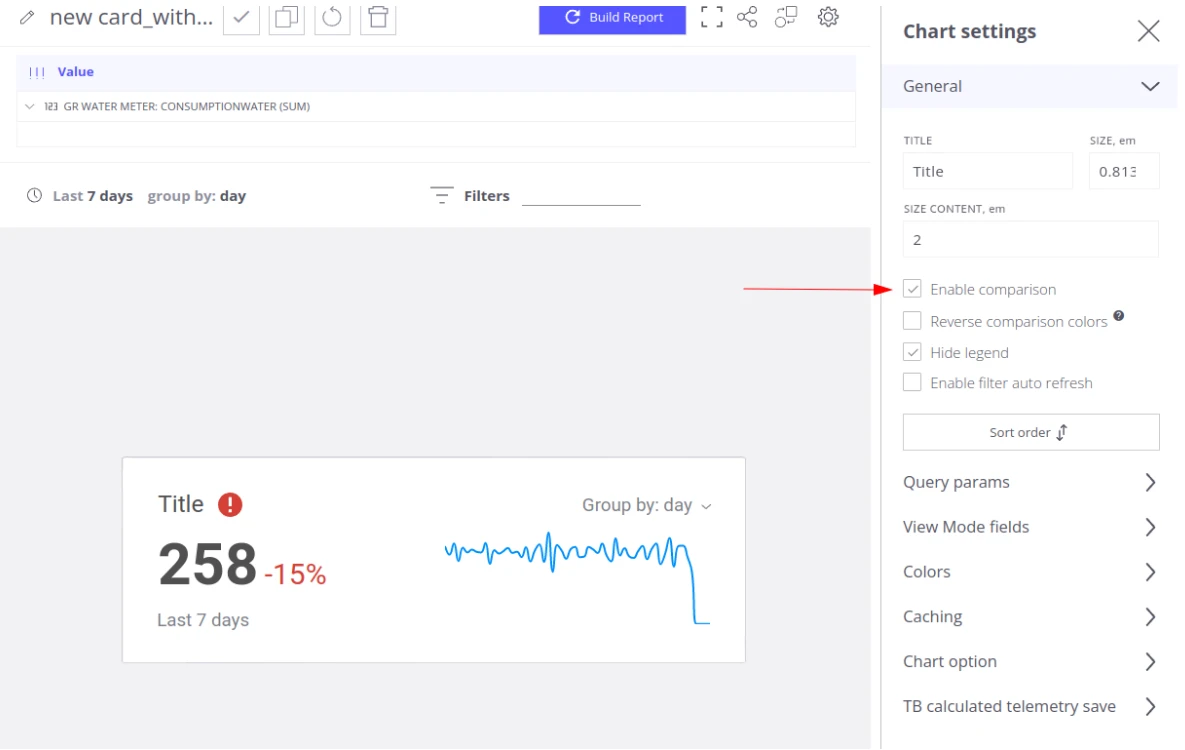
Section titled “Comparison with the previous period”Enable comparison to show how the current value differs from the corresponding previous period. For example, if the selected time range is the last 7 days, the card compares the current 7-day total against the previous 7-day total.
-
Open Settings and enable Enable comparison.
-
Click Build Report.
The card shows the percentage difference between the two periods. The line chart displays both periods overlaid so you can see the dynamics side by side.
Reverse comparison colors
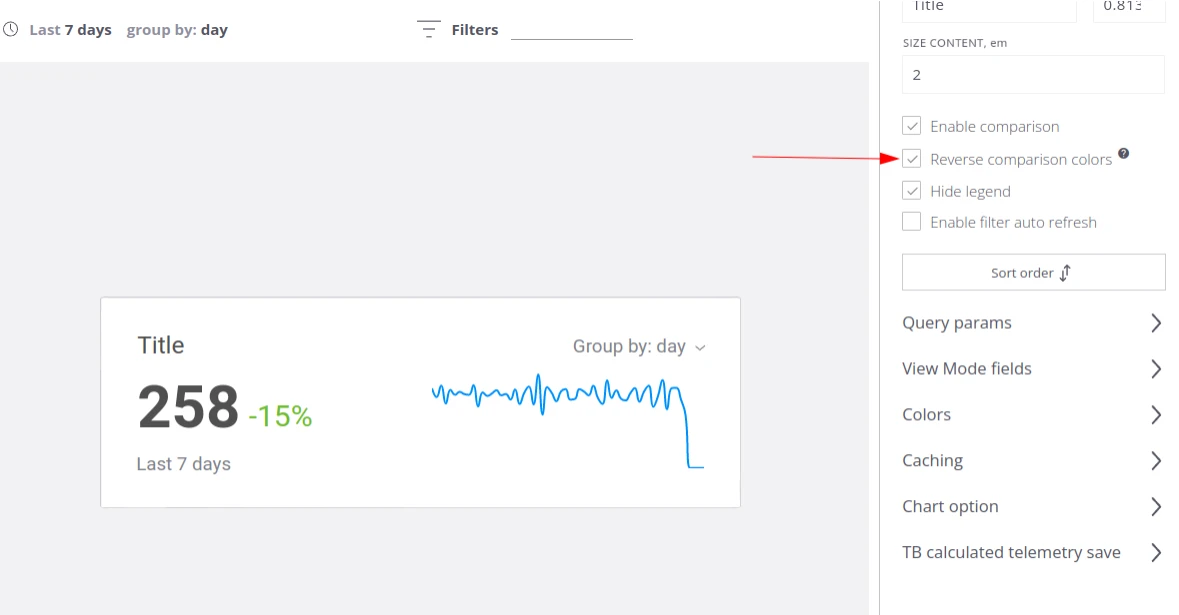
Section titled “Reverse comparison colors”By default, a negative change is shown in red (warning) and a positive change in green. If a lower value is the desired outcome — for example, reduced energy consumption — invert this convention.
-
Open Settings and enable Reverse comparison colors.
-
Click Build Report.
Custom color ranges
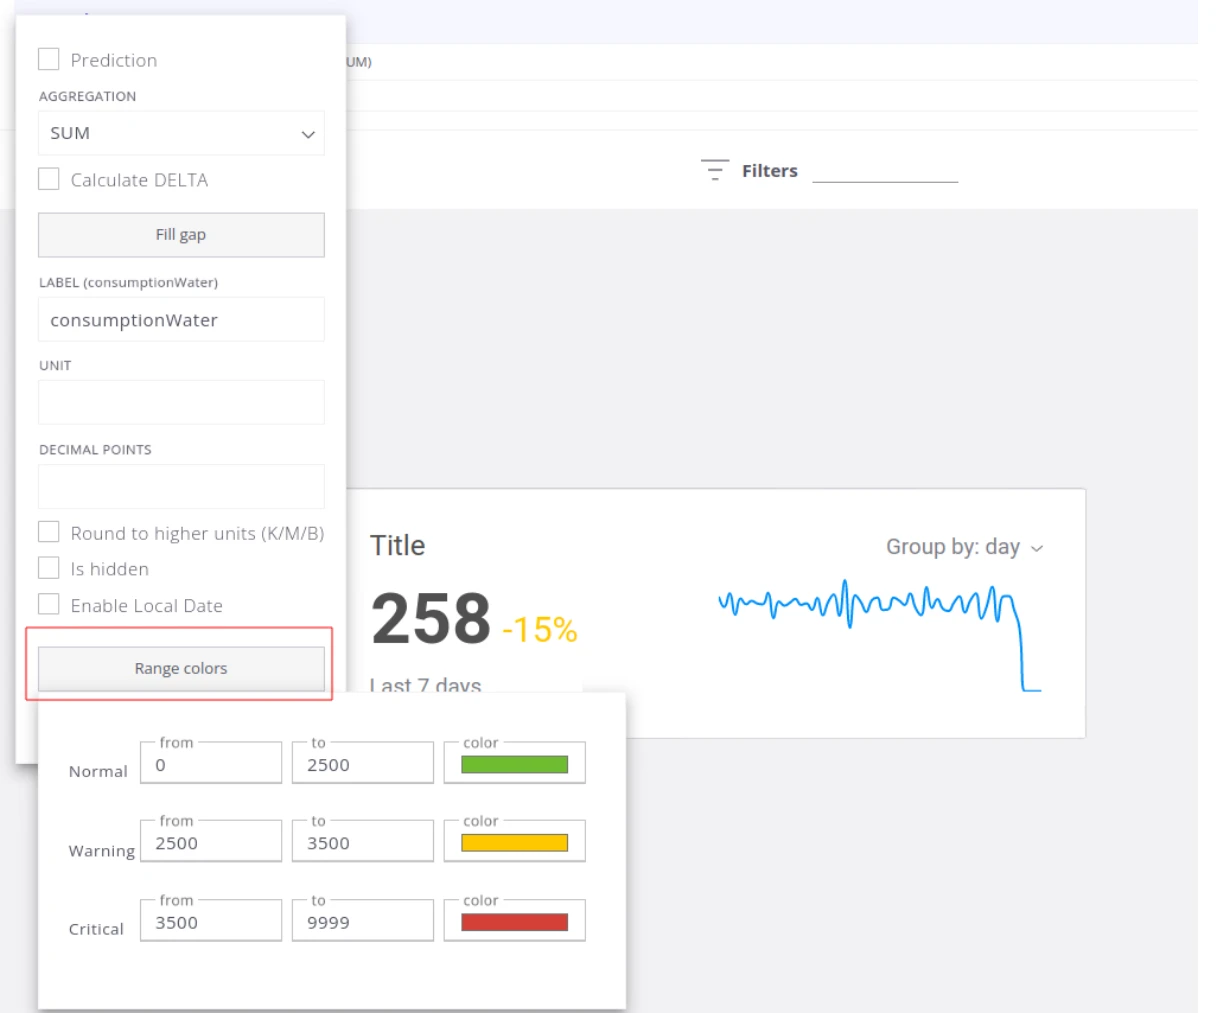
Section titled “Custom color ranges”For fine-grained control, define explicit value ranges with individual colors for normal, warning, and dangerous states.
-
Open the field settings and set the minimum and maximum boundaries for each range.
-
Click Build Report.
When custom ranges are configured, the Reverse comparison colors setting is ignored — the range definitions take precedence.
Was this helpful?