Prompt management in Trendz is a workspace where you define reusable prompt templates that combine your expert instructions with live telemetry data collected by ThingsBoard. From the dashboard you can trigger any template with a single click: Trendz automatically pulls the relevant device or asset metrics, injects them into your template, submits the assembled prompt to the configured language model, and then displays the model’s response directly alongside your telemetry. This lets you run AI-driven queries over real-time operational data without manually gathering data or retyping prompts.
Prompts Tab
In this tab, you can check, create, rename, modify, or delete prompts.
To access the Prompts tab, you can follow these steps:
- You can click on the
 icon labeled Assistant located on the left side of the workspace.
 - You can then click on the Prompts tab located at the upper left side of the workspace.

Available Actions
-
Check prompt metadata
In the Prompts tab, you can see a table of prompts with the following columns: Name, Updated, Created, Type, and Actions.
The Type column can have two different values: “System” and “Custom”.- System: Created by Trendz. These prompts cannot be renamed, edited, or deleted. You can read more about system prompts in the related section.
- Custom: Created by the user. These prompts can be renamed, edited, or deleted.

-
Create a new prompt
You can click the New Prompt button to create a new prompt. This action will navigate you to the Markdown tab (see more about interacting with the Markdown tab in the relevant section).
Then, you can follow these steps:
- Write the prompt content;
- Enter a prompt name;
- Save the prompt.


- Test prompt
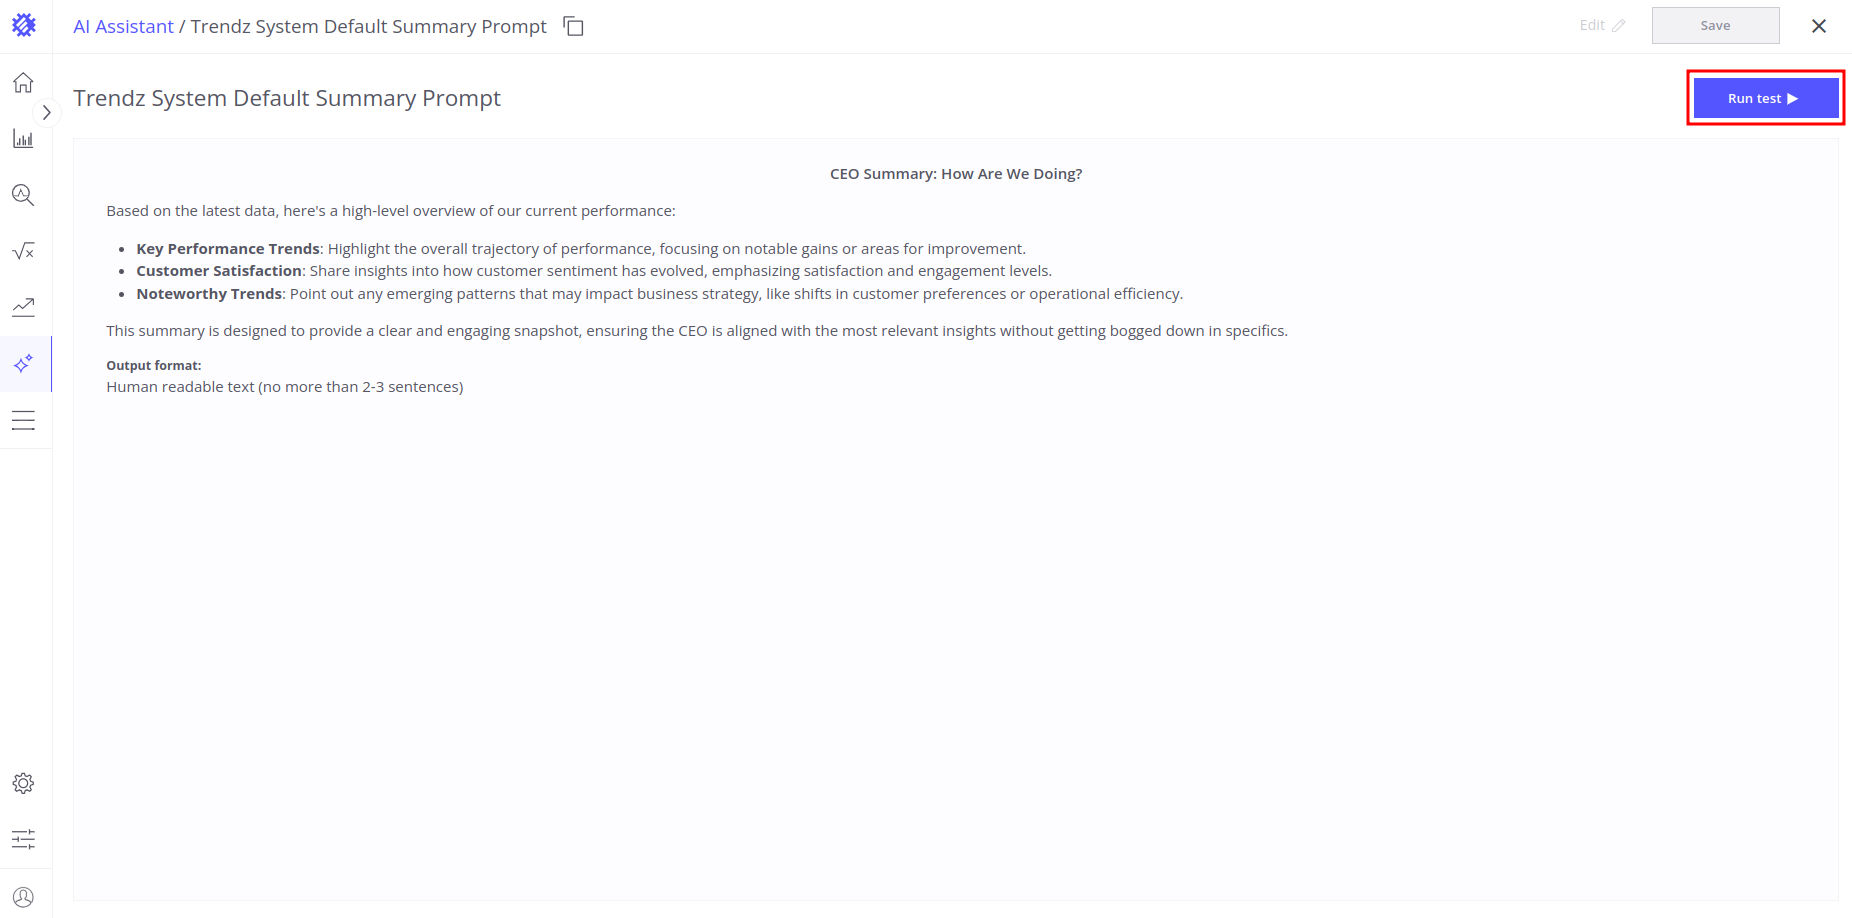
The Test feature allows you to preview how your prompt will analyze and summarize actual data from your saved views. This is especially useful when creating or refining custom prompts, as it lets you see the AI-generated output in real-time before applying the prompt to production dashboards.
To test your prompt, follow the next steps:
- Click the Run test button in the upper-right corner of the prompt editor;
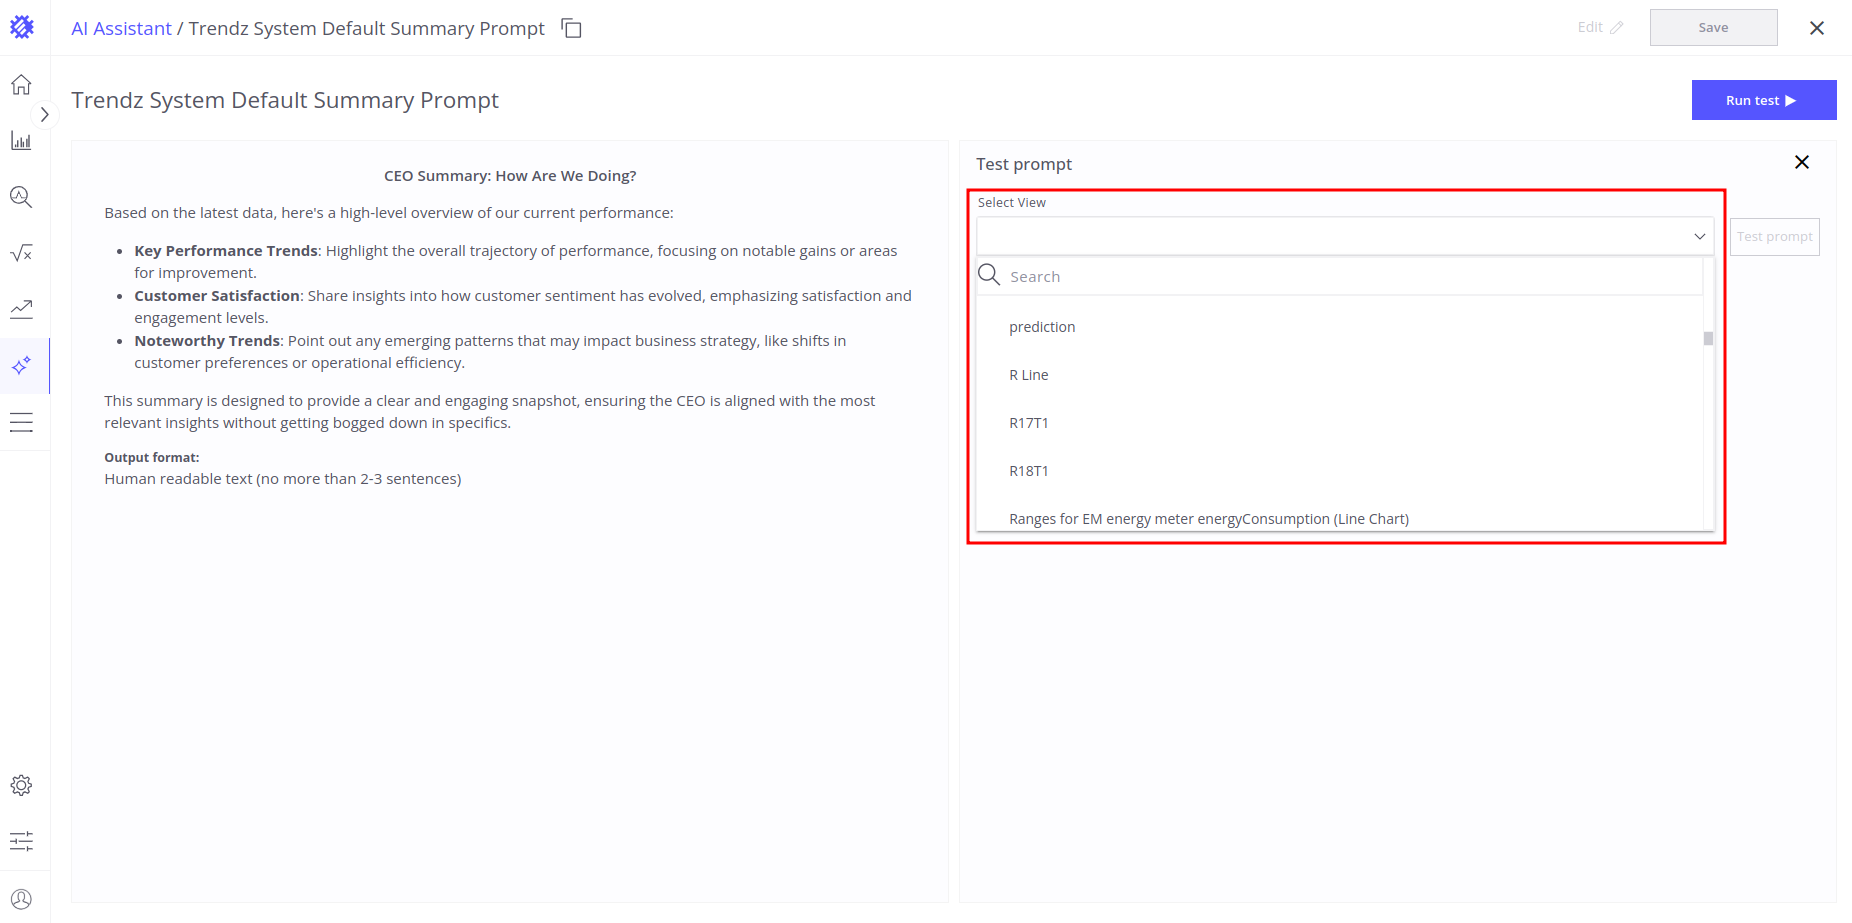
- A test panel will open on the right side with a Select View dropdown. Choose one of your saved views from the dropdown menu.
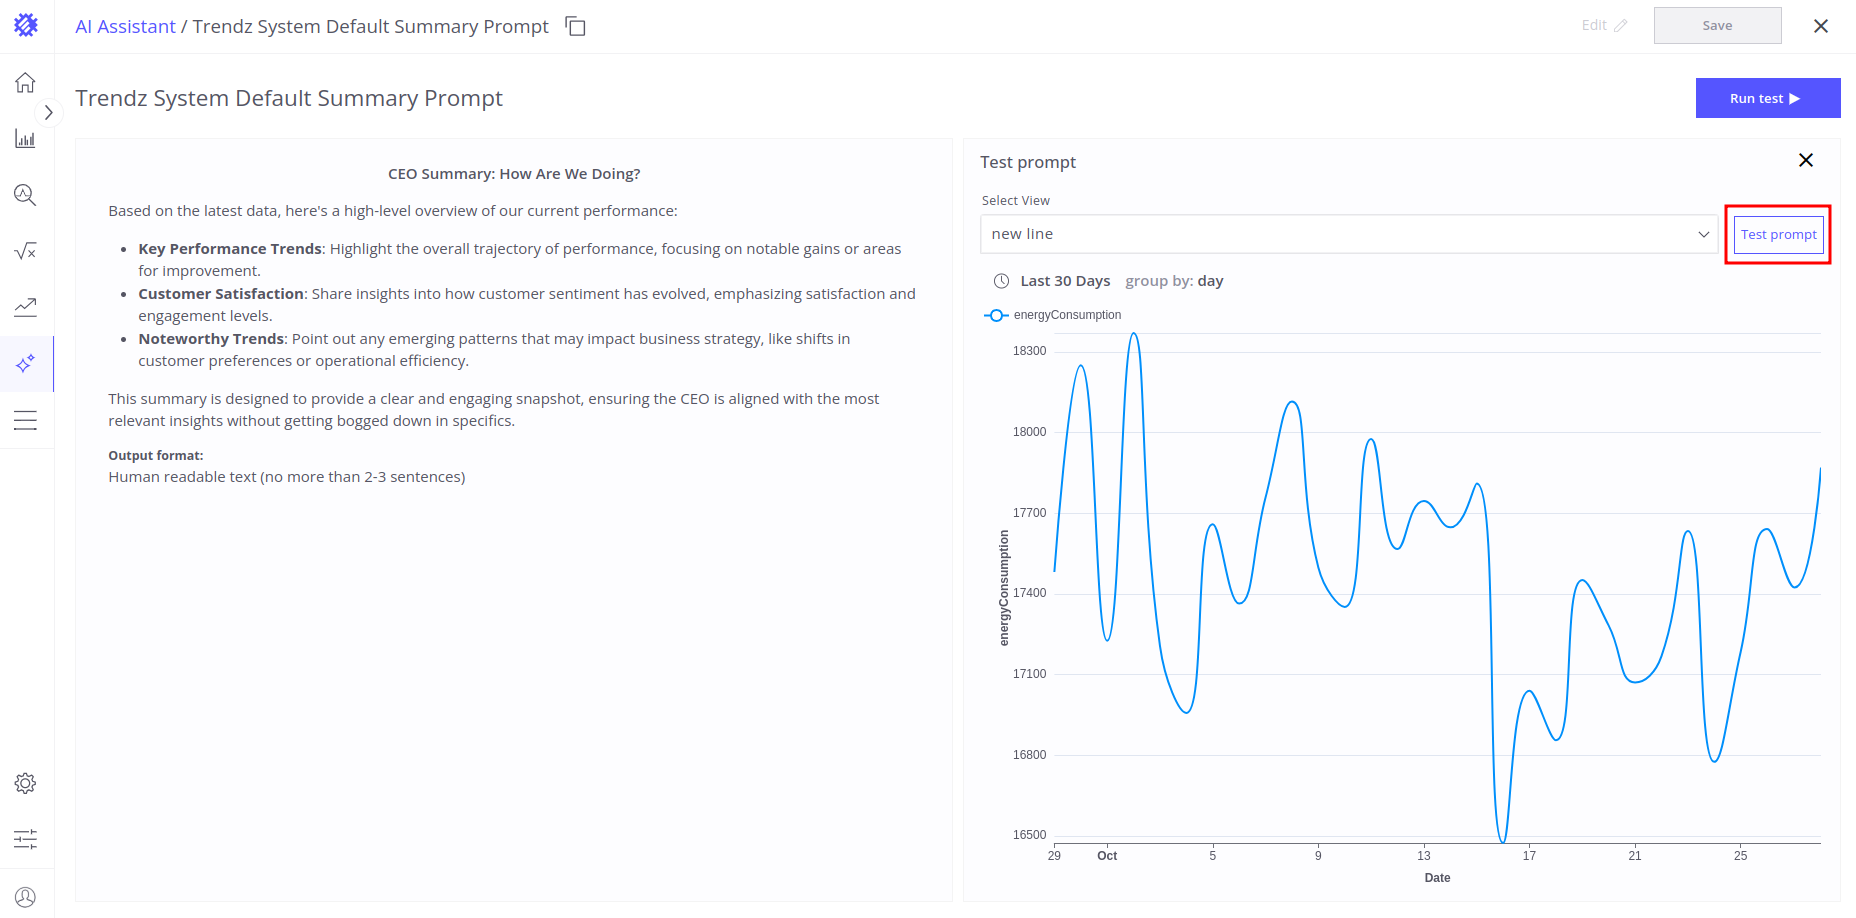
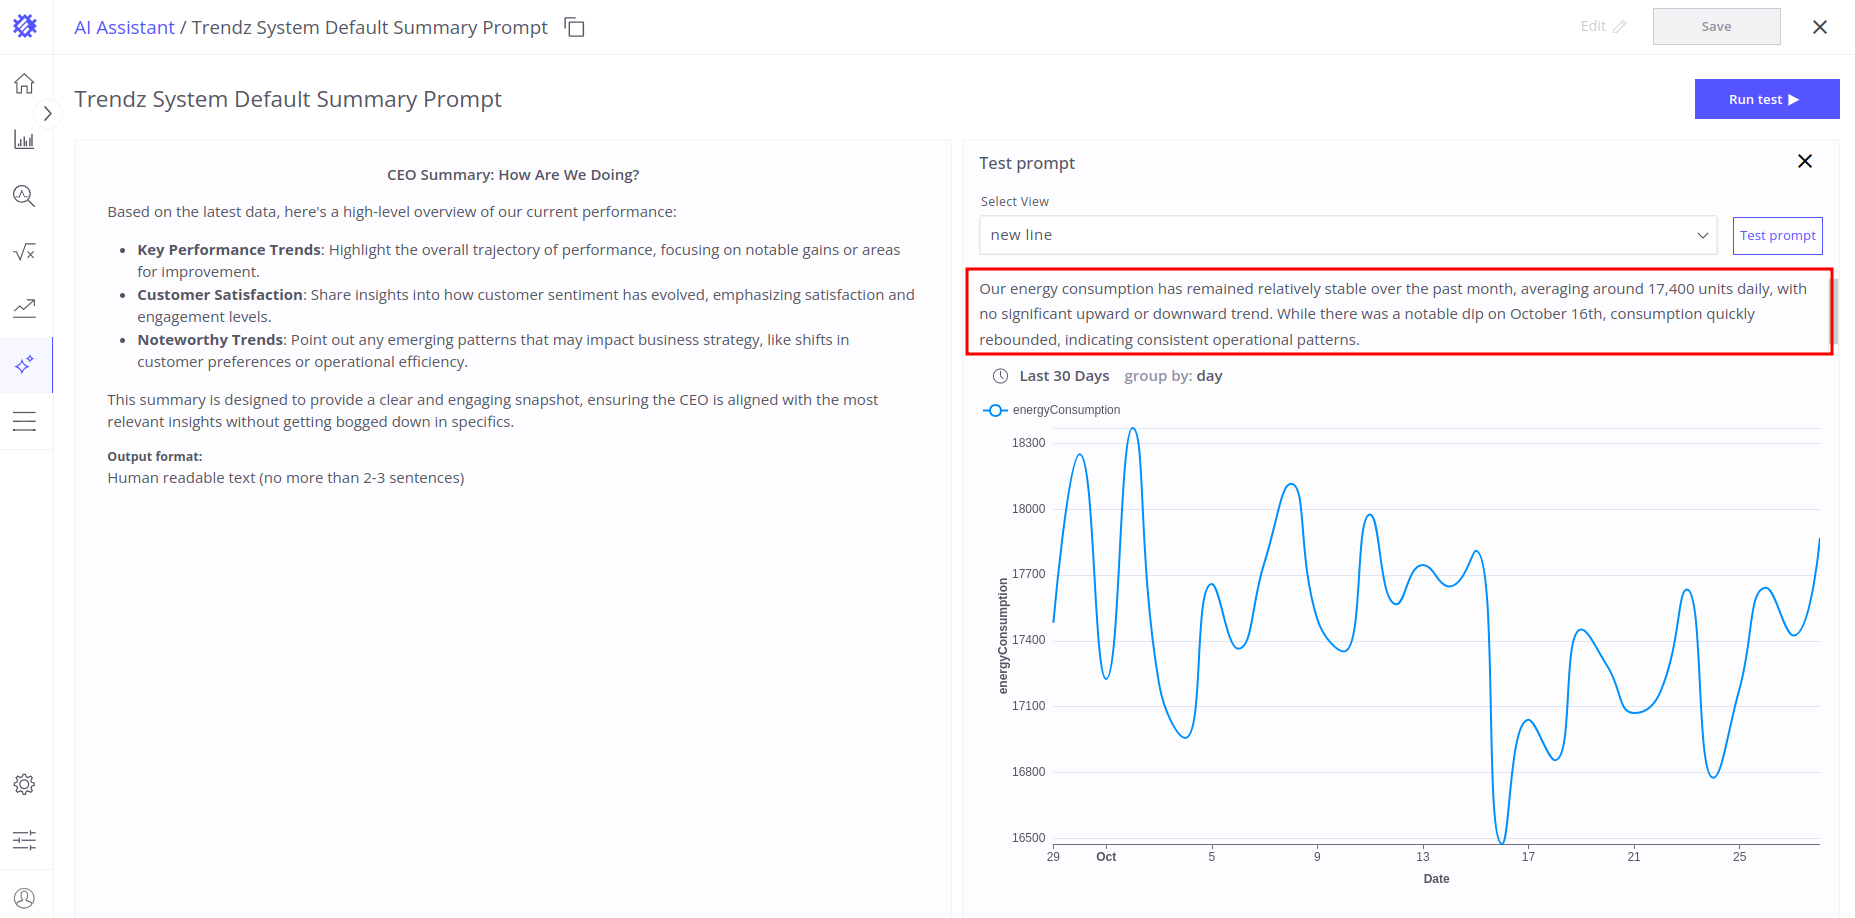
- Click the Test prompt button to generate the summary.
-
Check selected prompt and Copy prompt ID
You can click on any prompt in the table to view its content. This will take you to the Markdown tab (see more about interacting with the Markdown tab in the relevant section).
Additionally, you can copy the prompt ID by clicking the Copy prompt ID button in the upper-right corner of the tab. The prompt ID will be copied to the clipboard.


-
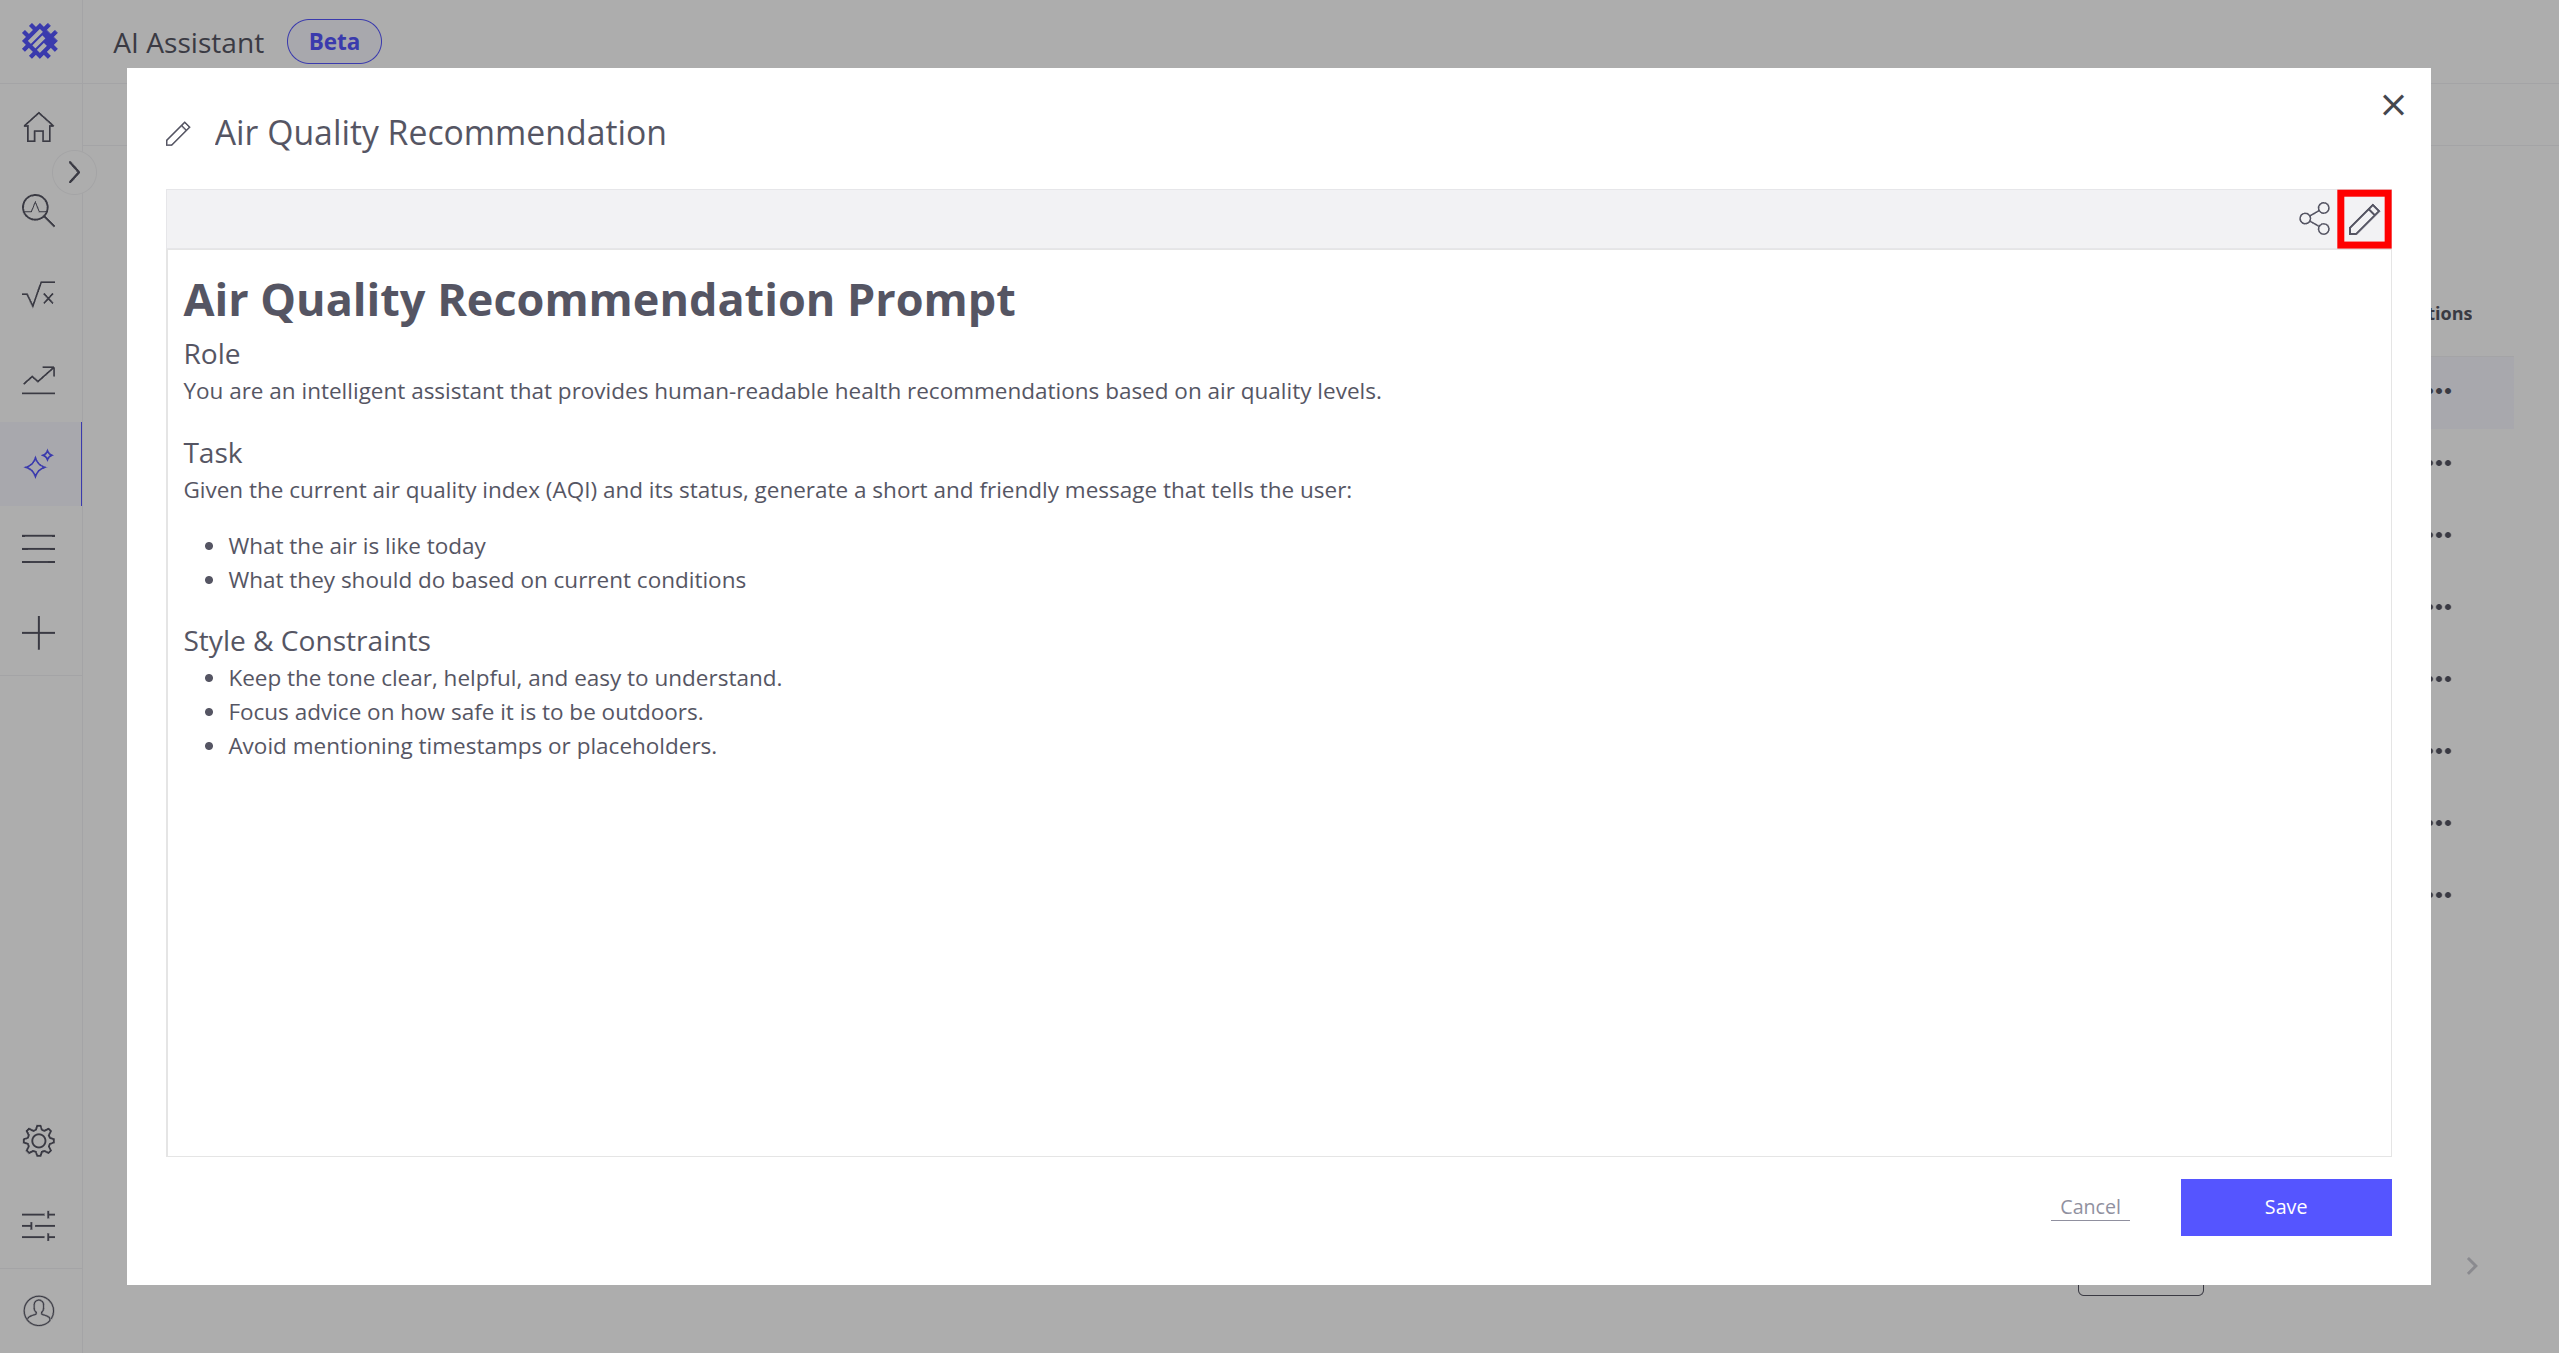
Edit selected prompt
You can click on any prompt in the table to edit its content. This will also take you to the Markdown tab (see more about interacting with the Markdown tab in the relevant section).
Then, you can follow these steps:
- Press the Edit button;
- Update the prompt content;
- Save the prompt.


-
Rename prompt
You can rename a prompt in two ways:
-
You can click on the desired prompt to open it in the Markdown tab, then rename it there (see the Markdown Tab > Rename section for details).
-
You can click the three-dot menu under the Actions column for the desired prompt, select Rename, enter the new name, and press Enter.
-


-
Delete prompt
You can delete a prompt by clicking the three-dot menu under the Actions column for the desired prompt, selecting Delete, and confirming by clicking Yes.


Markdown Tab
LLM (Large Language Models) understand prompts in the Markdown format. This format makes prompts not only understandable for both humans and the model but also more structured.
You can access the Markdown tab by editing or creating prompts (refer to the corresponding sections in the Available Actions section).
The Markdown tab has the following functions:
-
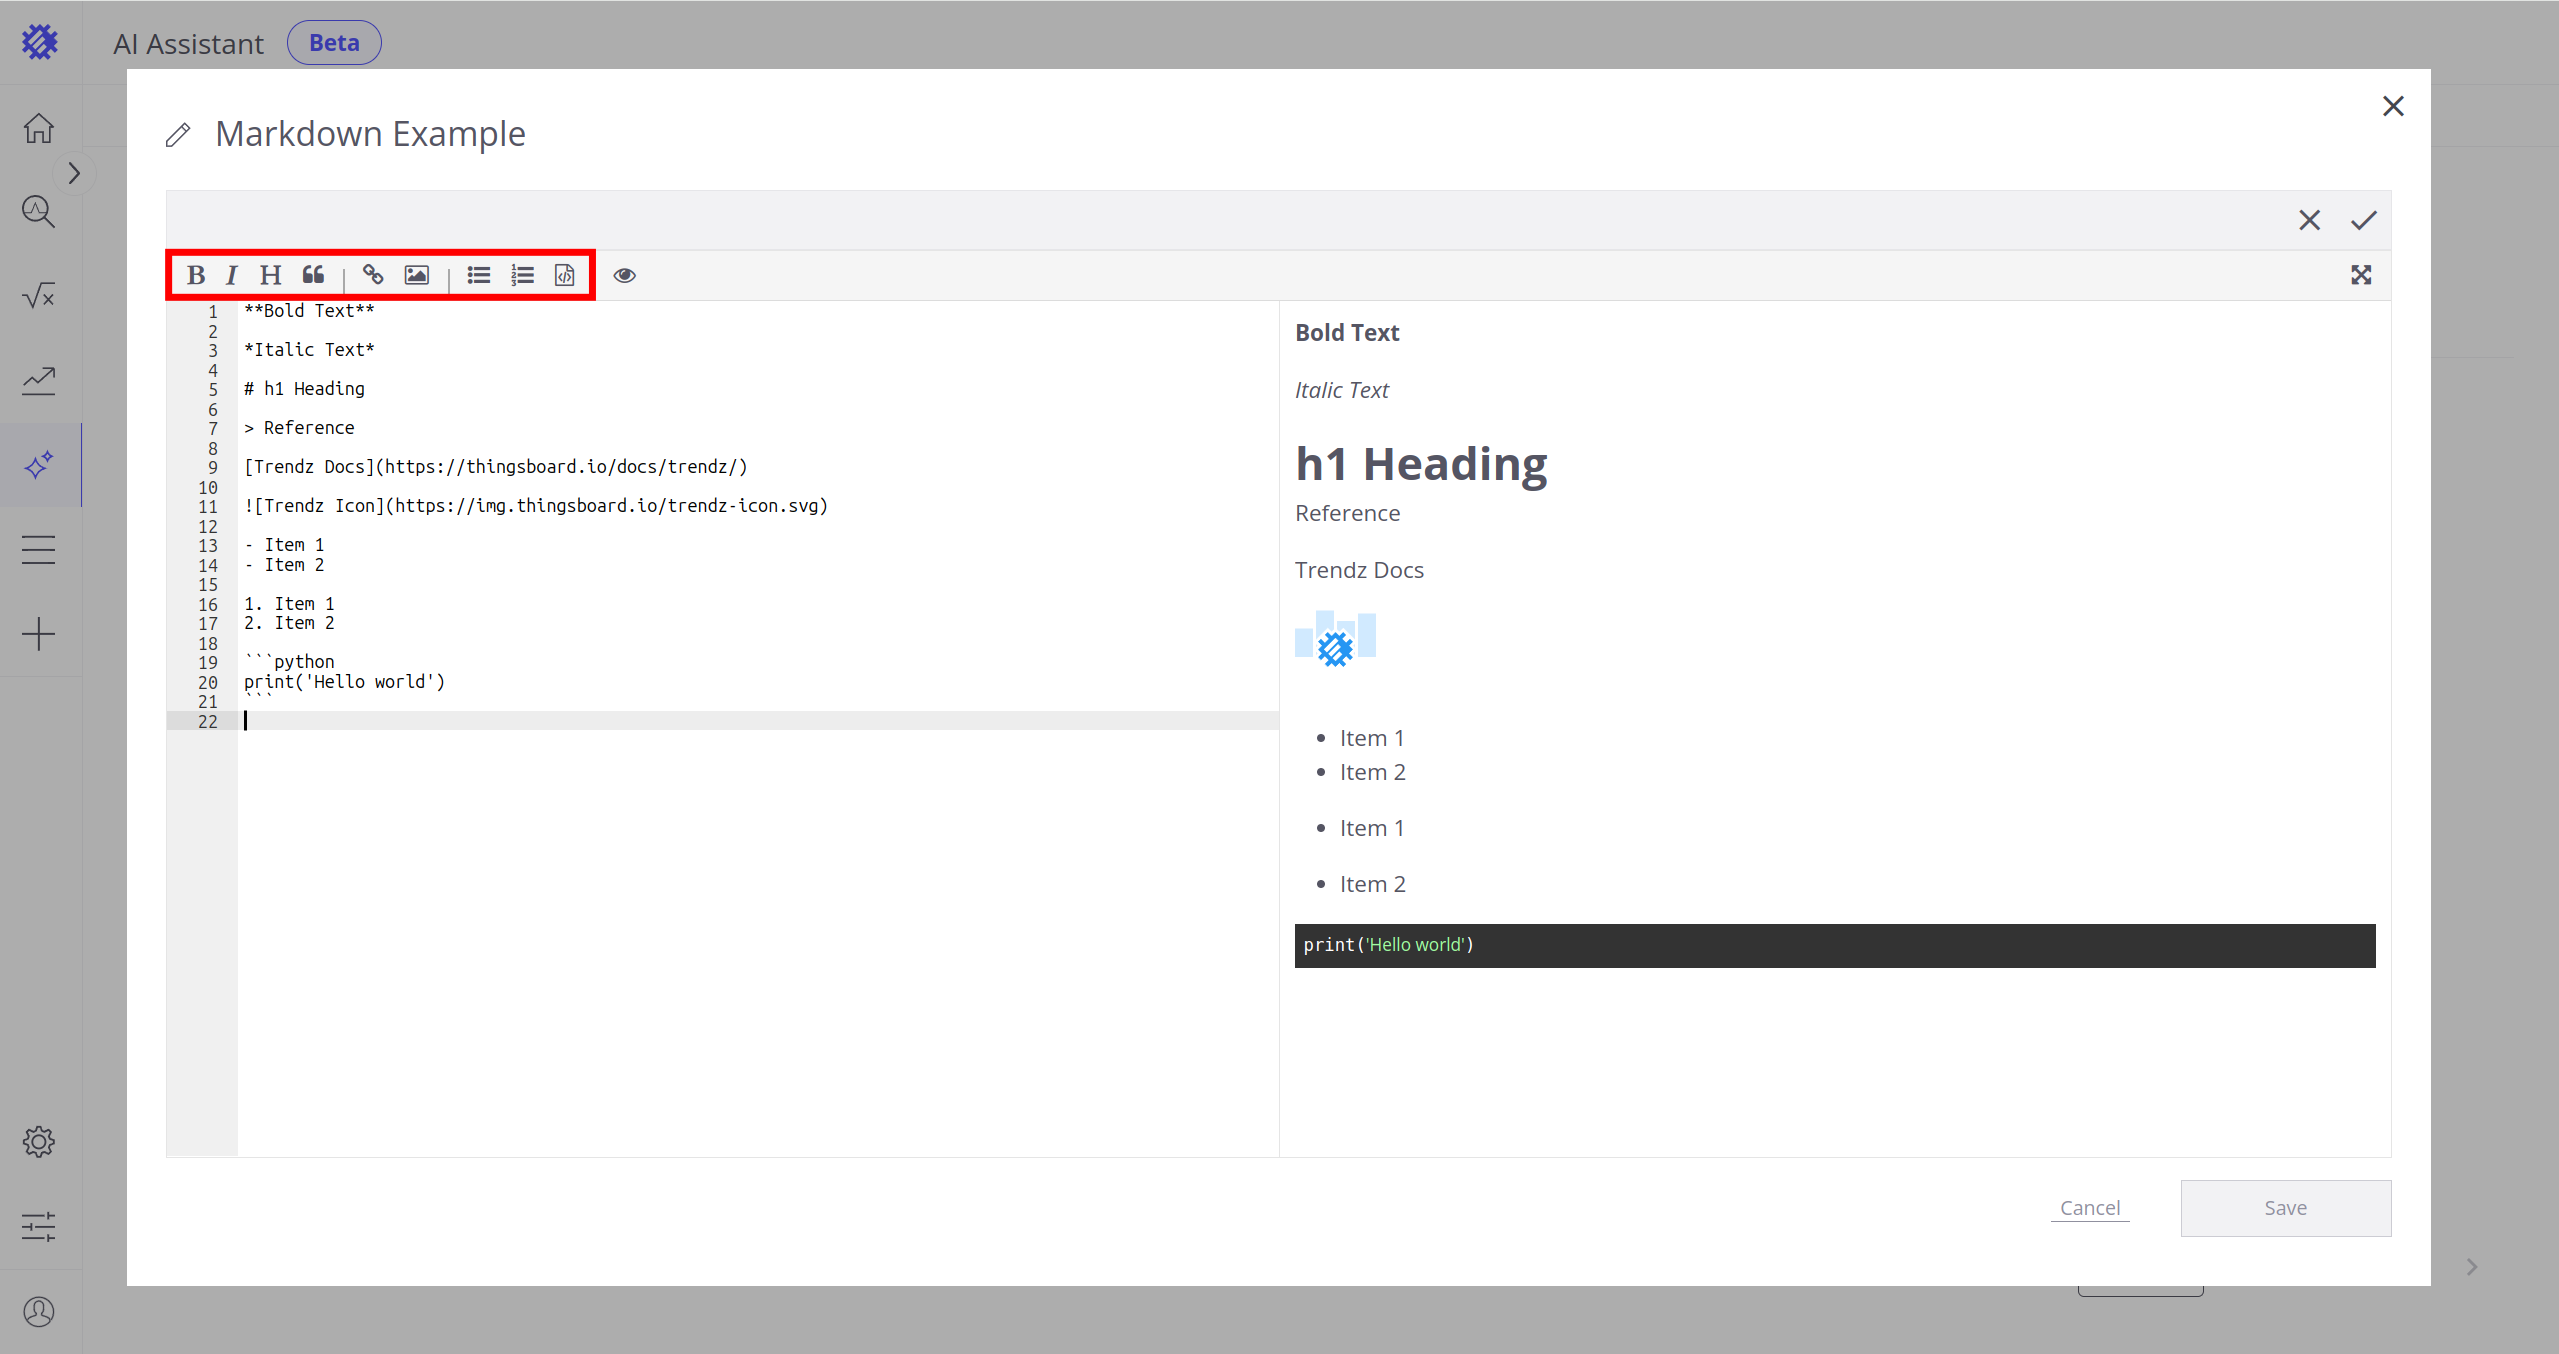
Show Preview Button
You can split your screen into two sides: one for the Markdown code and the other for your prompt in a human-readable format, by clicking the Show Preview button.
To exit preview mode, you can click the Hide Preview button.


-
Markdown Blocks
The Markdown tab supports various markdown blocks. In the upper left corner of the screen, you can find shortcuts for the following blocks:
- Bold Text
- Italic Text
- H1 header
- Reference
- Link
- Image
- Unordered list
- Ordered list
- Code block
You can learn more about Markdown blocks in the GitHub tutorial.
-
Rename Prompt
To rename the prompt, click the pencil icon, enter the new name, and click any free space to confirm the changes.
Note: The prompt will not be renamed until you click the “Save” button.


-
Save/Cancel
After editing the prompt, you can either save or cancel the changes.
- Click Save to apply all changes and finalize the prompt.
- Click Cancel to discard any changes made.
Note: These buttons will only be enabled after confirming or declining the prompt changes.

System Prompts
Trendz includes a set of default system prompts available upon installation. These prompts guide how Trendz generates summaries, diagnoses issues, and identifies patterns from datasets. Below is the updated list of system prompts used by the platform:
- Trendz System Default Summary Prompt
Provides a high-level overview of performance, customer sentiment, and emerging trends. It delivers a concise 2–3 sentence executive summary meant for leadership stakeholders.
- Trendz System Operational Efficiency Optimization Prompt
Detects opportunities to improve throughput or reduce resource use based solely on observed telemetry. Focuses on utilization gaps, inefficiencies, and bottlenecks with actionable suggestions.
- Trendz System Data Quality Review Prompt
Highlights data quality issues like inconsistencies, outliers, or anomalies. Evaluates their impact on business analysis and suggests actions to improve data integrity.
- Trendz System Positive Performance Prompt
Identifies areas of strong performance and growth potential. Summarizes key positive trends and explains their contribution to business success.
- Trendz System Incident Identification And Prioritization Prompt
Analyzes time-based or event-based datasets to detect significant anomalies, such as outliers, spikes, or rare behaviors. Focuses on identifying and describing these events with context.
- Trendz System Root Cause Analysis Prompt
Explains the likely root cause of a performance issue by identifying correlated changes in telemetry. Offers one-paragraph plain-language reasoning, with a confidence rating.
Best practices
Creating effective prompts is key to getting accurate and meaningful responses from Large Language Models (LLMs). Here are some essential best practices:
-
Be Clear and Specific
Ensure your prompt is clear and specific to avoid vague or ambiguous responses. The more detail you provide, the better the model can understand and respond accurately. -
Use Natural Language
Write prompts as you would speak to another person. This helps the model interpret your request and generate a natural-sounding response. -
Leverage Markdown for Structure
Use Markdown formatting to organize and structure your prompt. For example:- Use bold for emphasis
- Use italics for subtle hints or notes
- Include headers for clear topic segmentation
This not only helps the model interpret your request more effectively but also makes your prompt more readable.
-
Keep Prompts Concise
While detail is important, keep your prompts concise. Too much information can overwhelm the model, leading to less focused responses. -
Test and Refine
Prompt creation is an iterative process. Test your prompts, review the responses, and refine them to improve accuracy and relevance.
By following these practices, you can create effective prompts that lead to better results from LLMs.
Next Steps
-
Getting started guide - These guide provide quick overview of main Trendz features.
-
Installation guides - Learn how to setup ThingsBoard on various available operating systems.
-
Metric Explorer - Learn how to explore and create new metrics with Trendz Metric Explorer.
-
Anomaly Detection - Learn how to identify anomalies in the data.
-
Calculated Fields - Learn about Calculated fields and how to use them.
-
States - Learn how to define and analyse states for assets based on raw telemetry.
-
Prediction - Learn how to make forecasts and predict telemetry behavior.
-
Filters - Learn how filter dataset during analysis.
-
Available Visualizations - Learn about visualization widgets available in Trendz and how to configure them.
-
Share and embed Visualizations - Learn how to add Trendz visualizations on ThingsBoard dashboard or 3rd party web pages.