Application shared subscriptions
The Application Shared Subscription entity enables the Shared Subscriptions feature for APPLICATION clients, allowing multiple clients to subscribe and receive messages from a shared subscription.
Usage notes
Section titled “Usage notes”- Create an Application Shared Subscription entity when you plan to use shared subscriptions with APPLICATION clients.
- After creation, the Topic filter and Partitions fields cannot be changed.
- Shared subscriptions work with MQTT 5 and earlier versions.
Administrators can manage shared subscriptions via the Web UI or REST API.
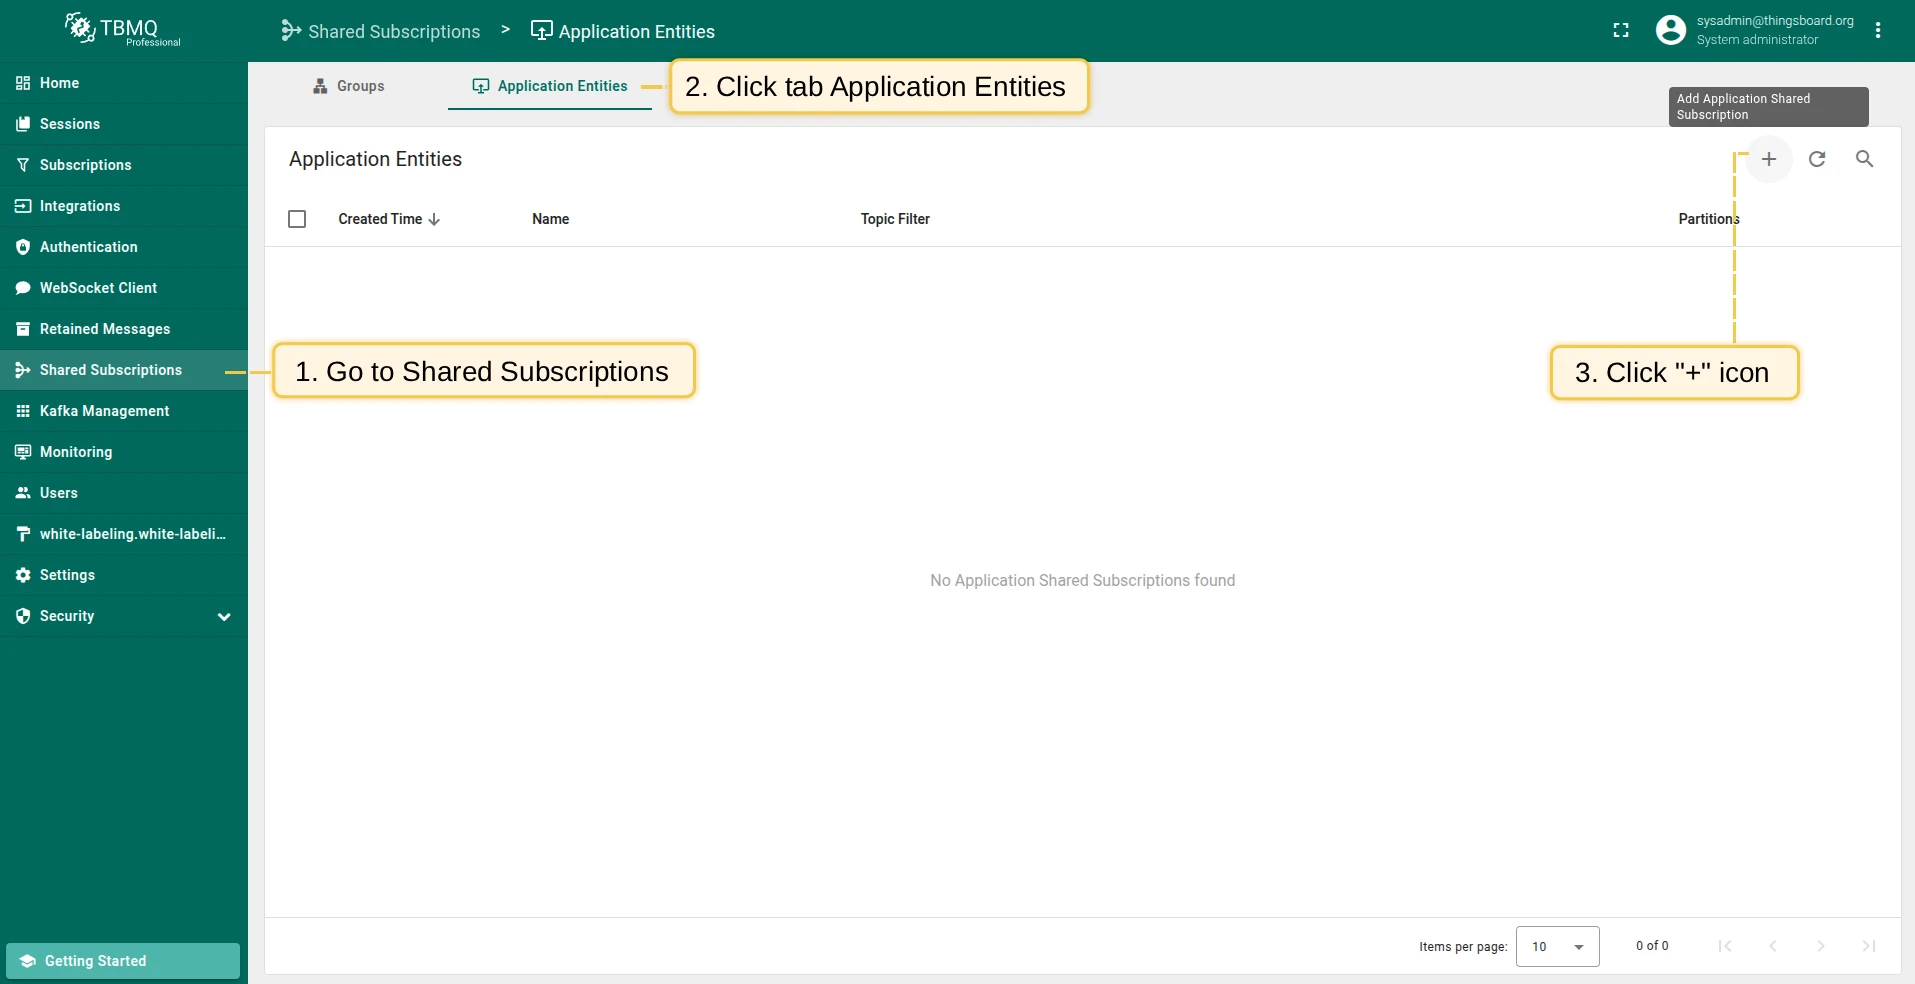
Add shared subscription
Section titled “Add shared subscription”- Open the Shared Subscriptions page and click the plus icon.
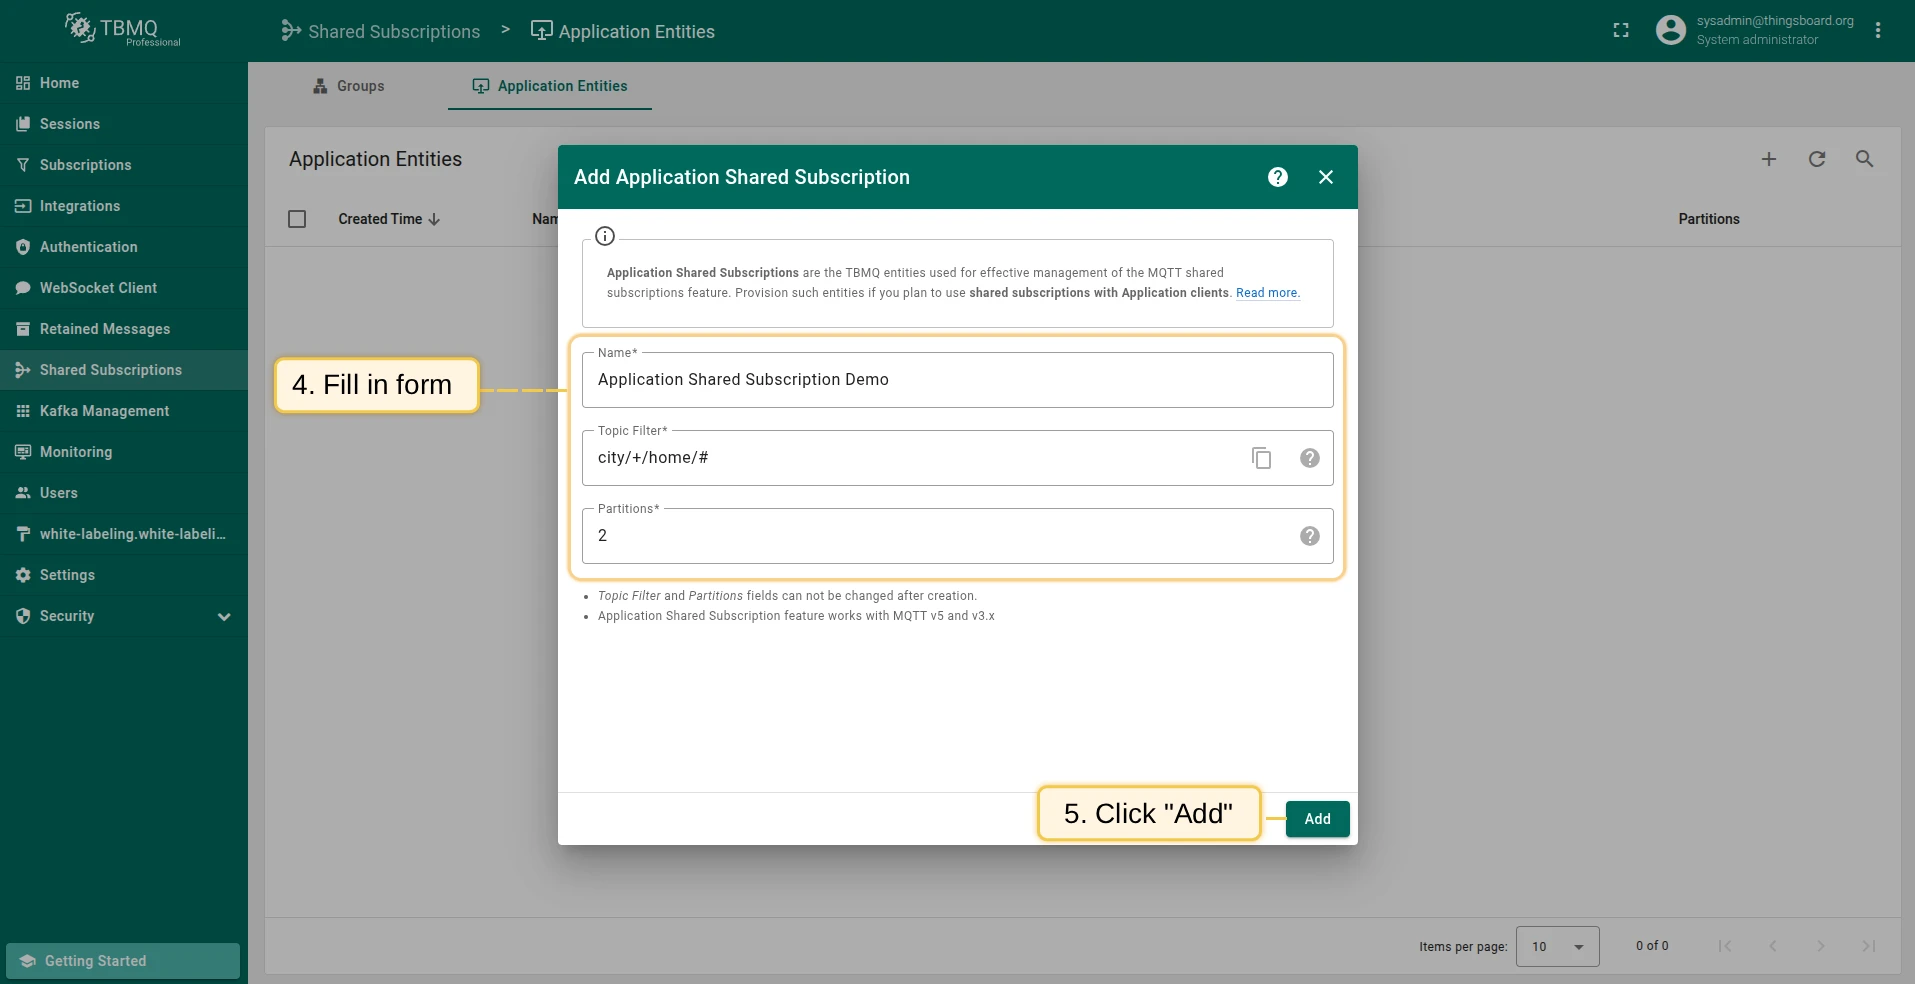
- Fill in the following fields:
- Name — any display name, e.g., “Application Shared Subscription”.
- Topic filter — the actual MQTT topic filter (wildcards
#and+are supported). If your full shared subscription topic filter is$share/group1/city/+/home/#, set this field tocity/+/home/#. Cannot be changed after creation and must be unique. - Partitions — set to equal or a multiple of the expected number of subscriber clients for even load distribution. For example, if 5 clients will subscribe, use 5, 10, or 15. Cannot be changed after creation.
- Click Add.
After creation, a dedicated Kafka topic is created using the following naming convention:
| MQTT topic filter | Kafka topic |
|---|---|
test/topic | tbmq.msg.app.shared.test.topic |
test/# | tbmq.msg.app.shared.test.mlw |
test/+ | tbmq.msg.app.shared.test.slw |
Where / → ., # → mlw (multi-level wildcard), + → slw (single-level wildcard).
If the topic filter contains special characters beyond alphanumerics, a hash is used instead:
tbmq.msg.app.shared.$TOPIC_FILTER_HASHThis behavior is controlled by TB_APP_PERSISTED_MSG_SHARED_TOPIC_VALIDATION (enabled by default). When disabled, Kafka topics are not created for topic filters with special characters.
Edit shared subscription
Section titled “Edit shared subscription”Only the Name field can be edited after creation.
- Click on the shared subscription row.
- Click the Toggle edit mode button (pencil icon).
- Modify the name and click Apply changes.
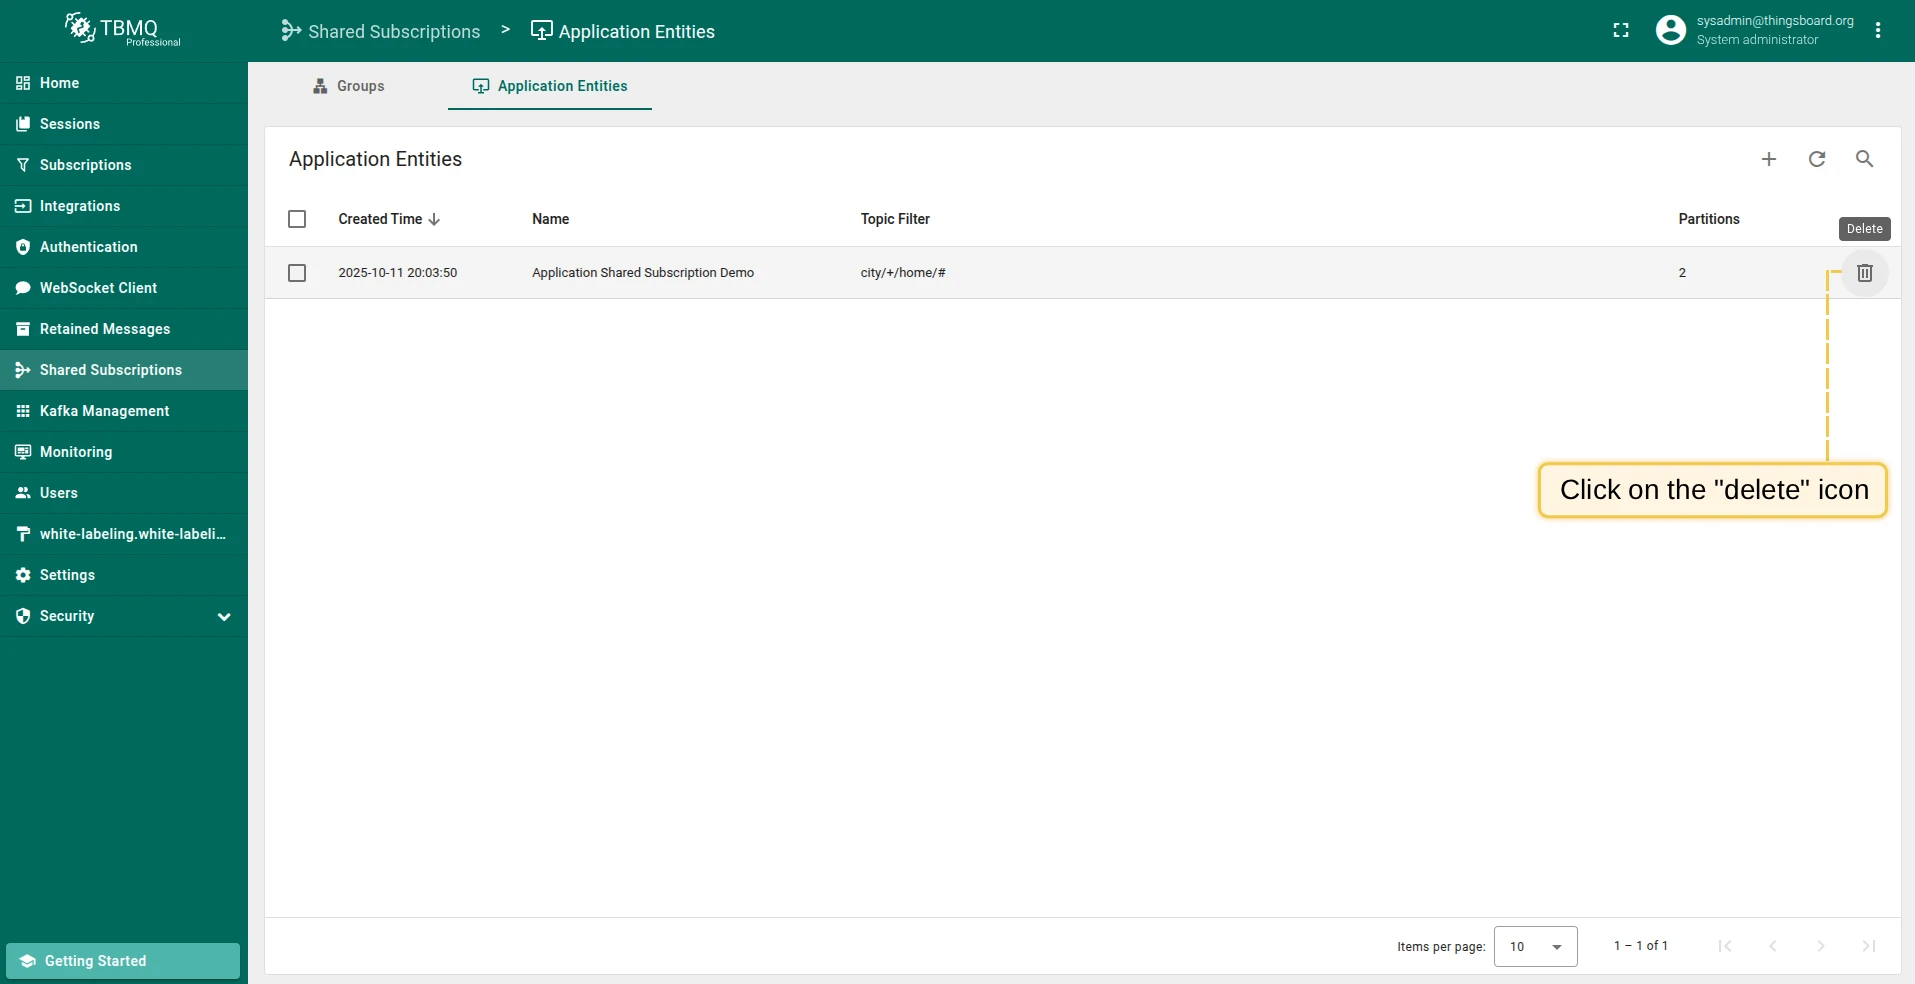
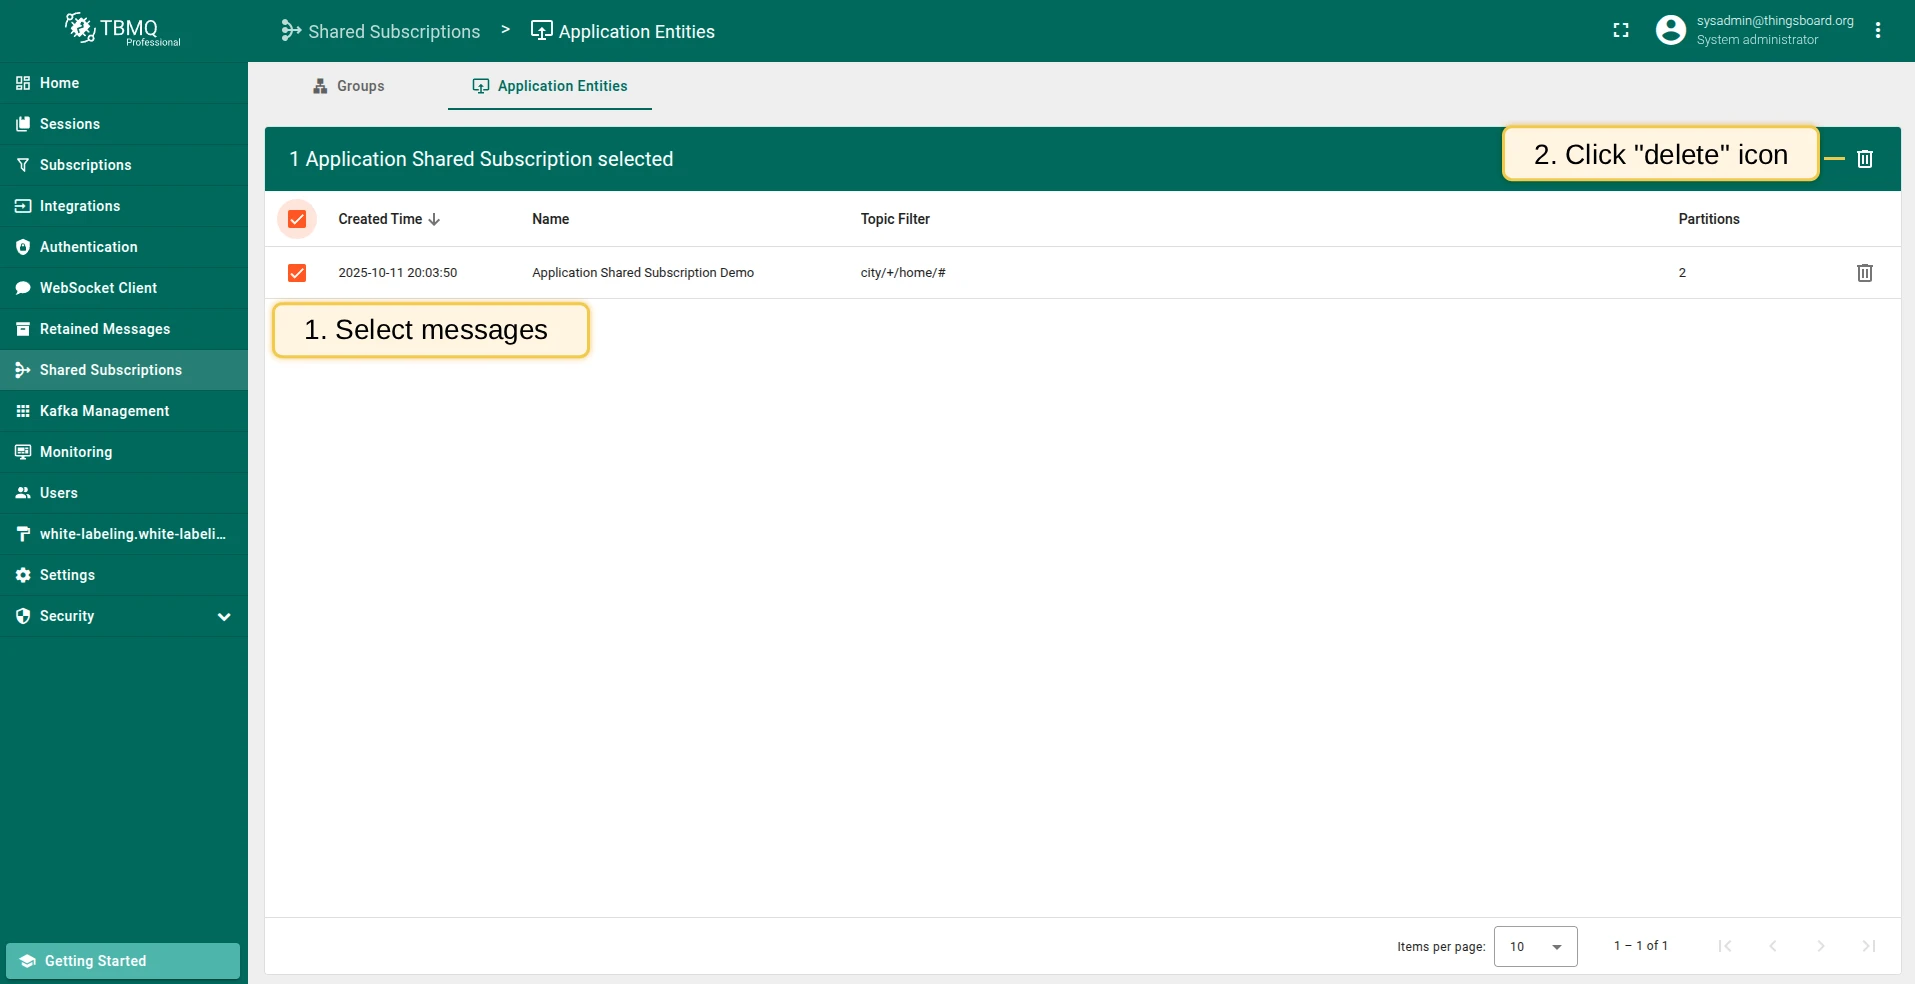
Delete shared subscription
Section titled “Delete shared subscription”- Delete single — click the Delete icon in the corresponding row, or open the entity and click the Delete button.
- Delete multiple — select multiple items using checkboxes, then click the Delete icon in the top right corner.
Was this helpful?