Interface Overview
The Anomaly Detection section is organized into three tabs — Summary, Models, and Anomalies — each providing a different level of visibility into your anomaly detection setup.
Summary Tab
Section titled “Summary Tab”The Summary tab is the default view when you open Anomaly Detection. It gives a fleet-wide picture of monitoring coverage, detected anomalies, and recent system activity across all your models.
KPI Cards
Section titled “KPI Cards”Four cards at the top of the page show the most important metrics across all anomaly models:
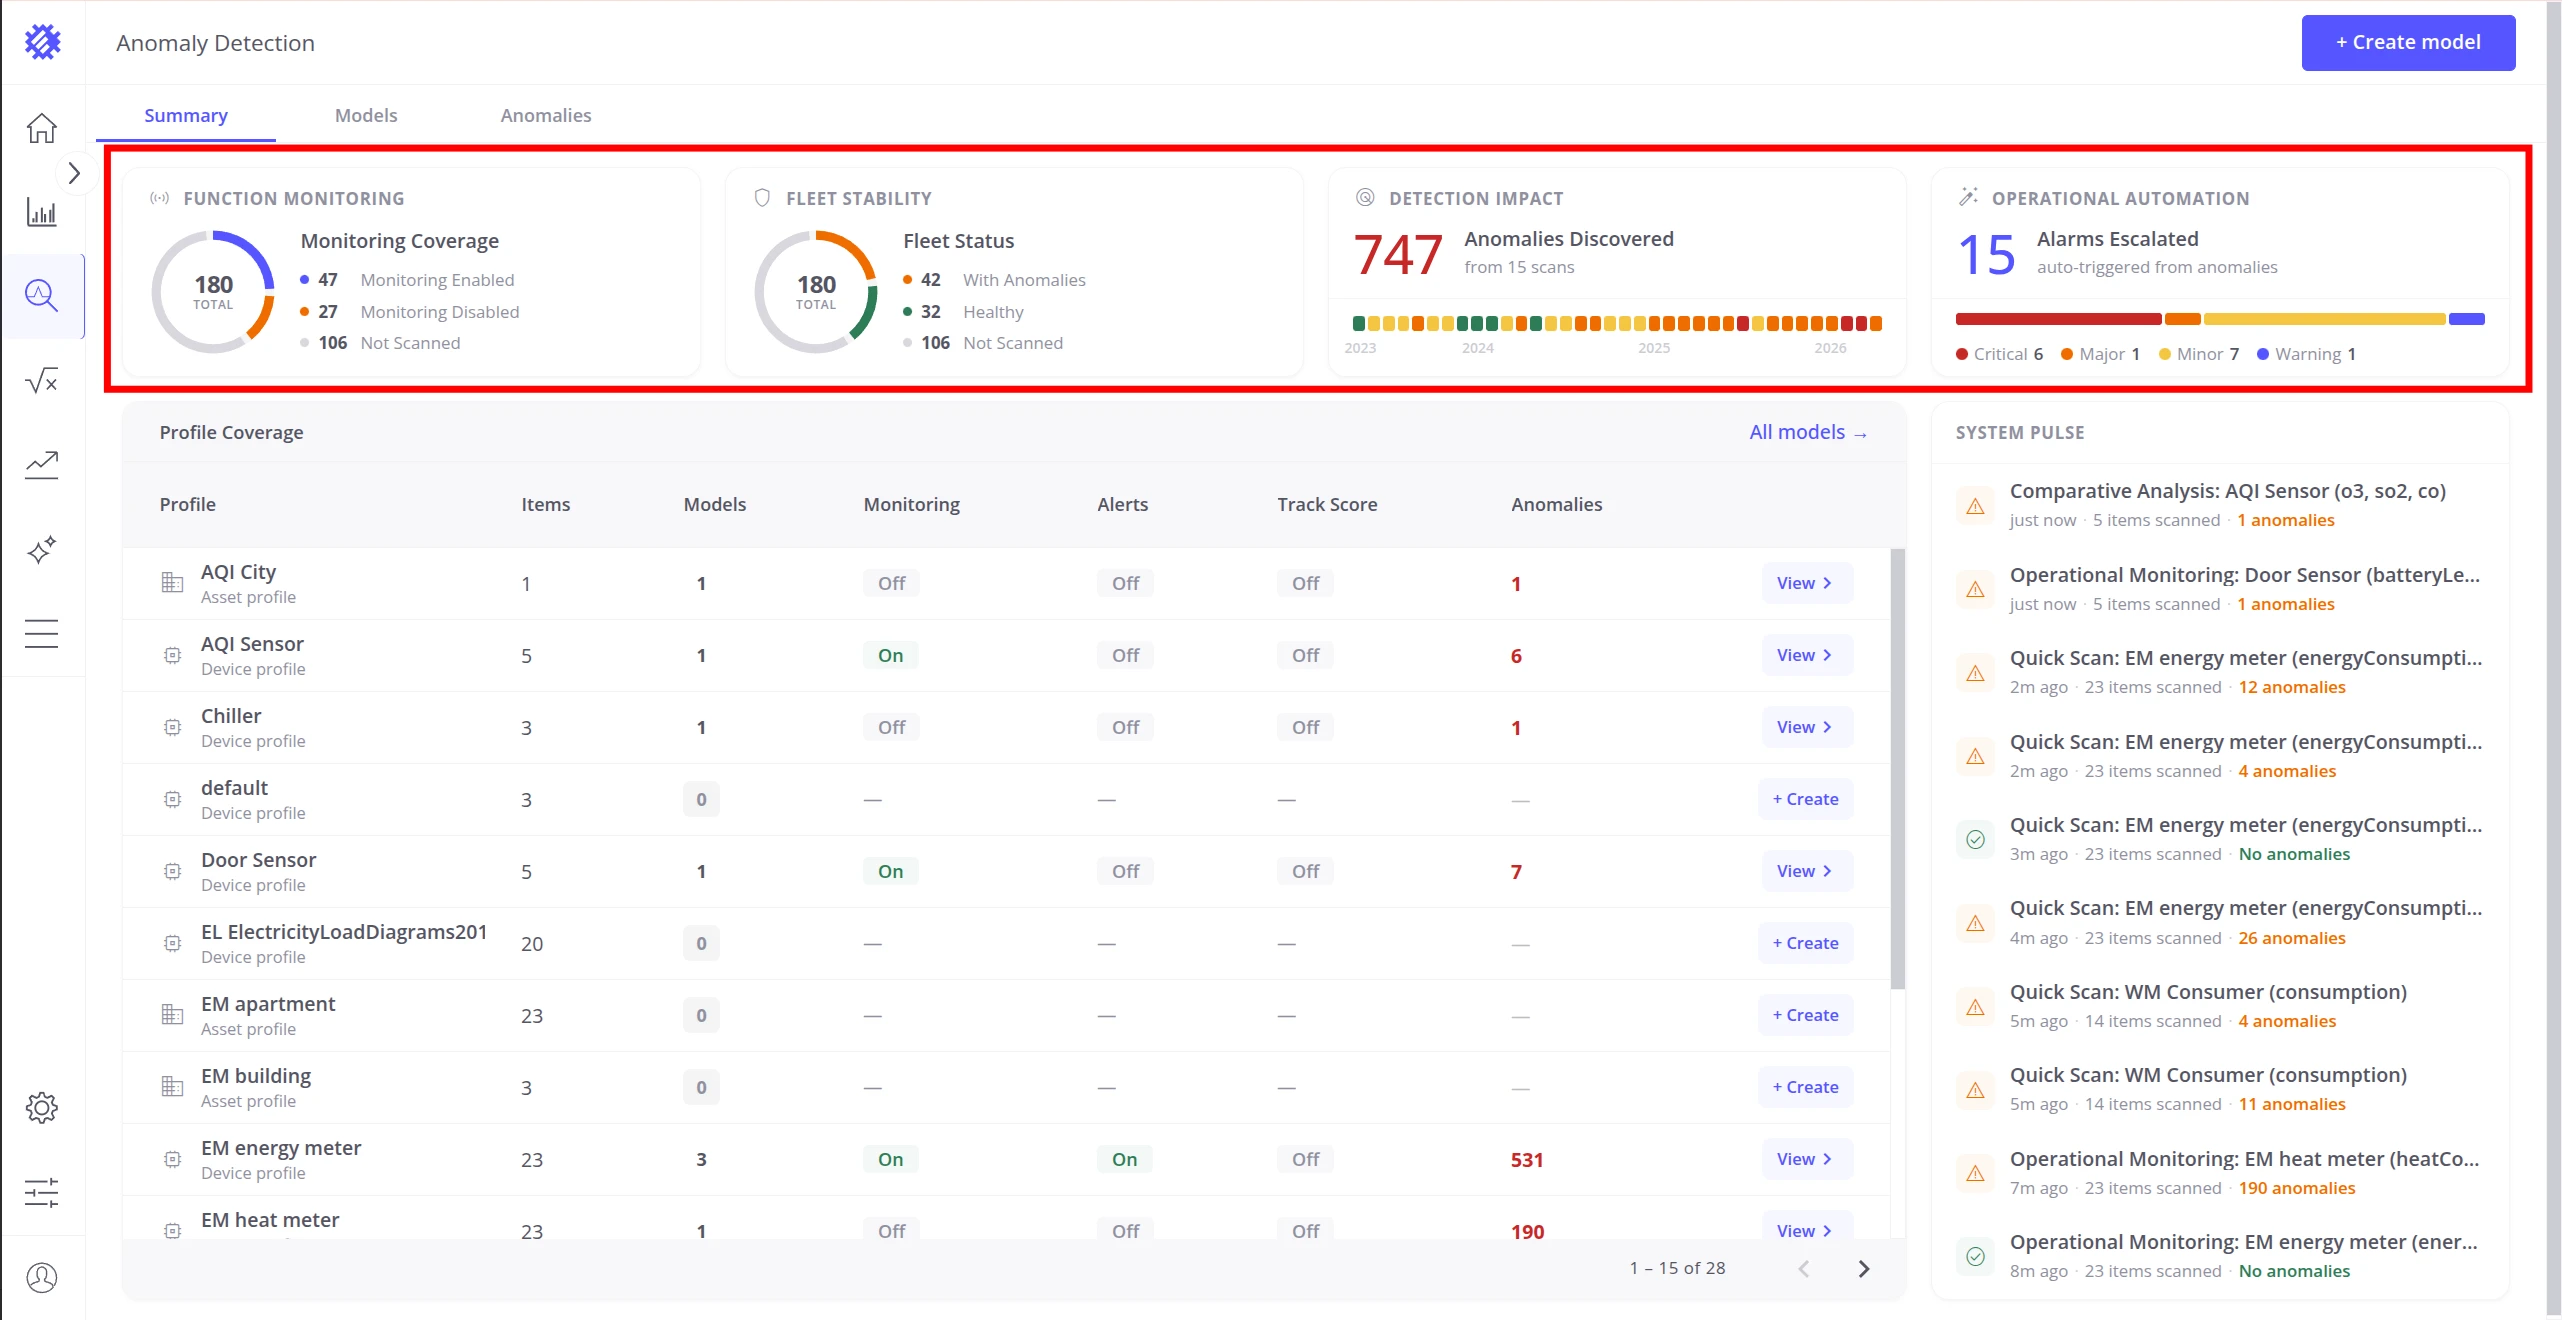
Function Monitoring — shows how well your devices and assets are covered by anomaly models:
| Segment | Meaning |
|---|---|
| Monitoring Enabled | Devices and assets included in an anomaly model with periodic scanning active |
| Monitoring Disabled | Devices and assets covered by a model but without periodic scanning enabled |
| Not Scanned | Devices and assets not yet included in any anomaly model |
Fleet Stability — shows the health distribution across scanned devices and assets:
| Segment | Meaning |
|---|---|
| With Anomalies | Devices and assets where at least one anomaly was detected |
| Healthy | Devices and assets that were scanned but no anomalies were found |
| Not Scanned | Devices and assets not yet included in any anomaly model scan |
Detection Impact — shows the total number of anomalies discovered and their distribution over time:
| Metric | Description |
|---|---|
| Anomalies Discovered | Total count of anomaly events detected across all models |
| From N scans | Number of scan executions that contributed to those discoveries |
| Timeline | Monthly heatmap — each cell represents one month; grey means not scanned, green means no anomalies, yellow/orange/red indicates increasing anomaly count |
Operational Automation — shows alarm activity triggered by anomaly detection:
| Element | Description |
|---|---|
| Alarms Escalated | Total count of ThingsBoard alarms created from anomalies |
| Severity bar | Breakdown by severity: Critical, Major, Minor, Warning |
Profile Coverage
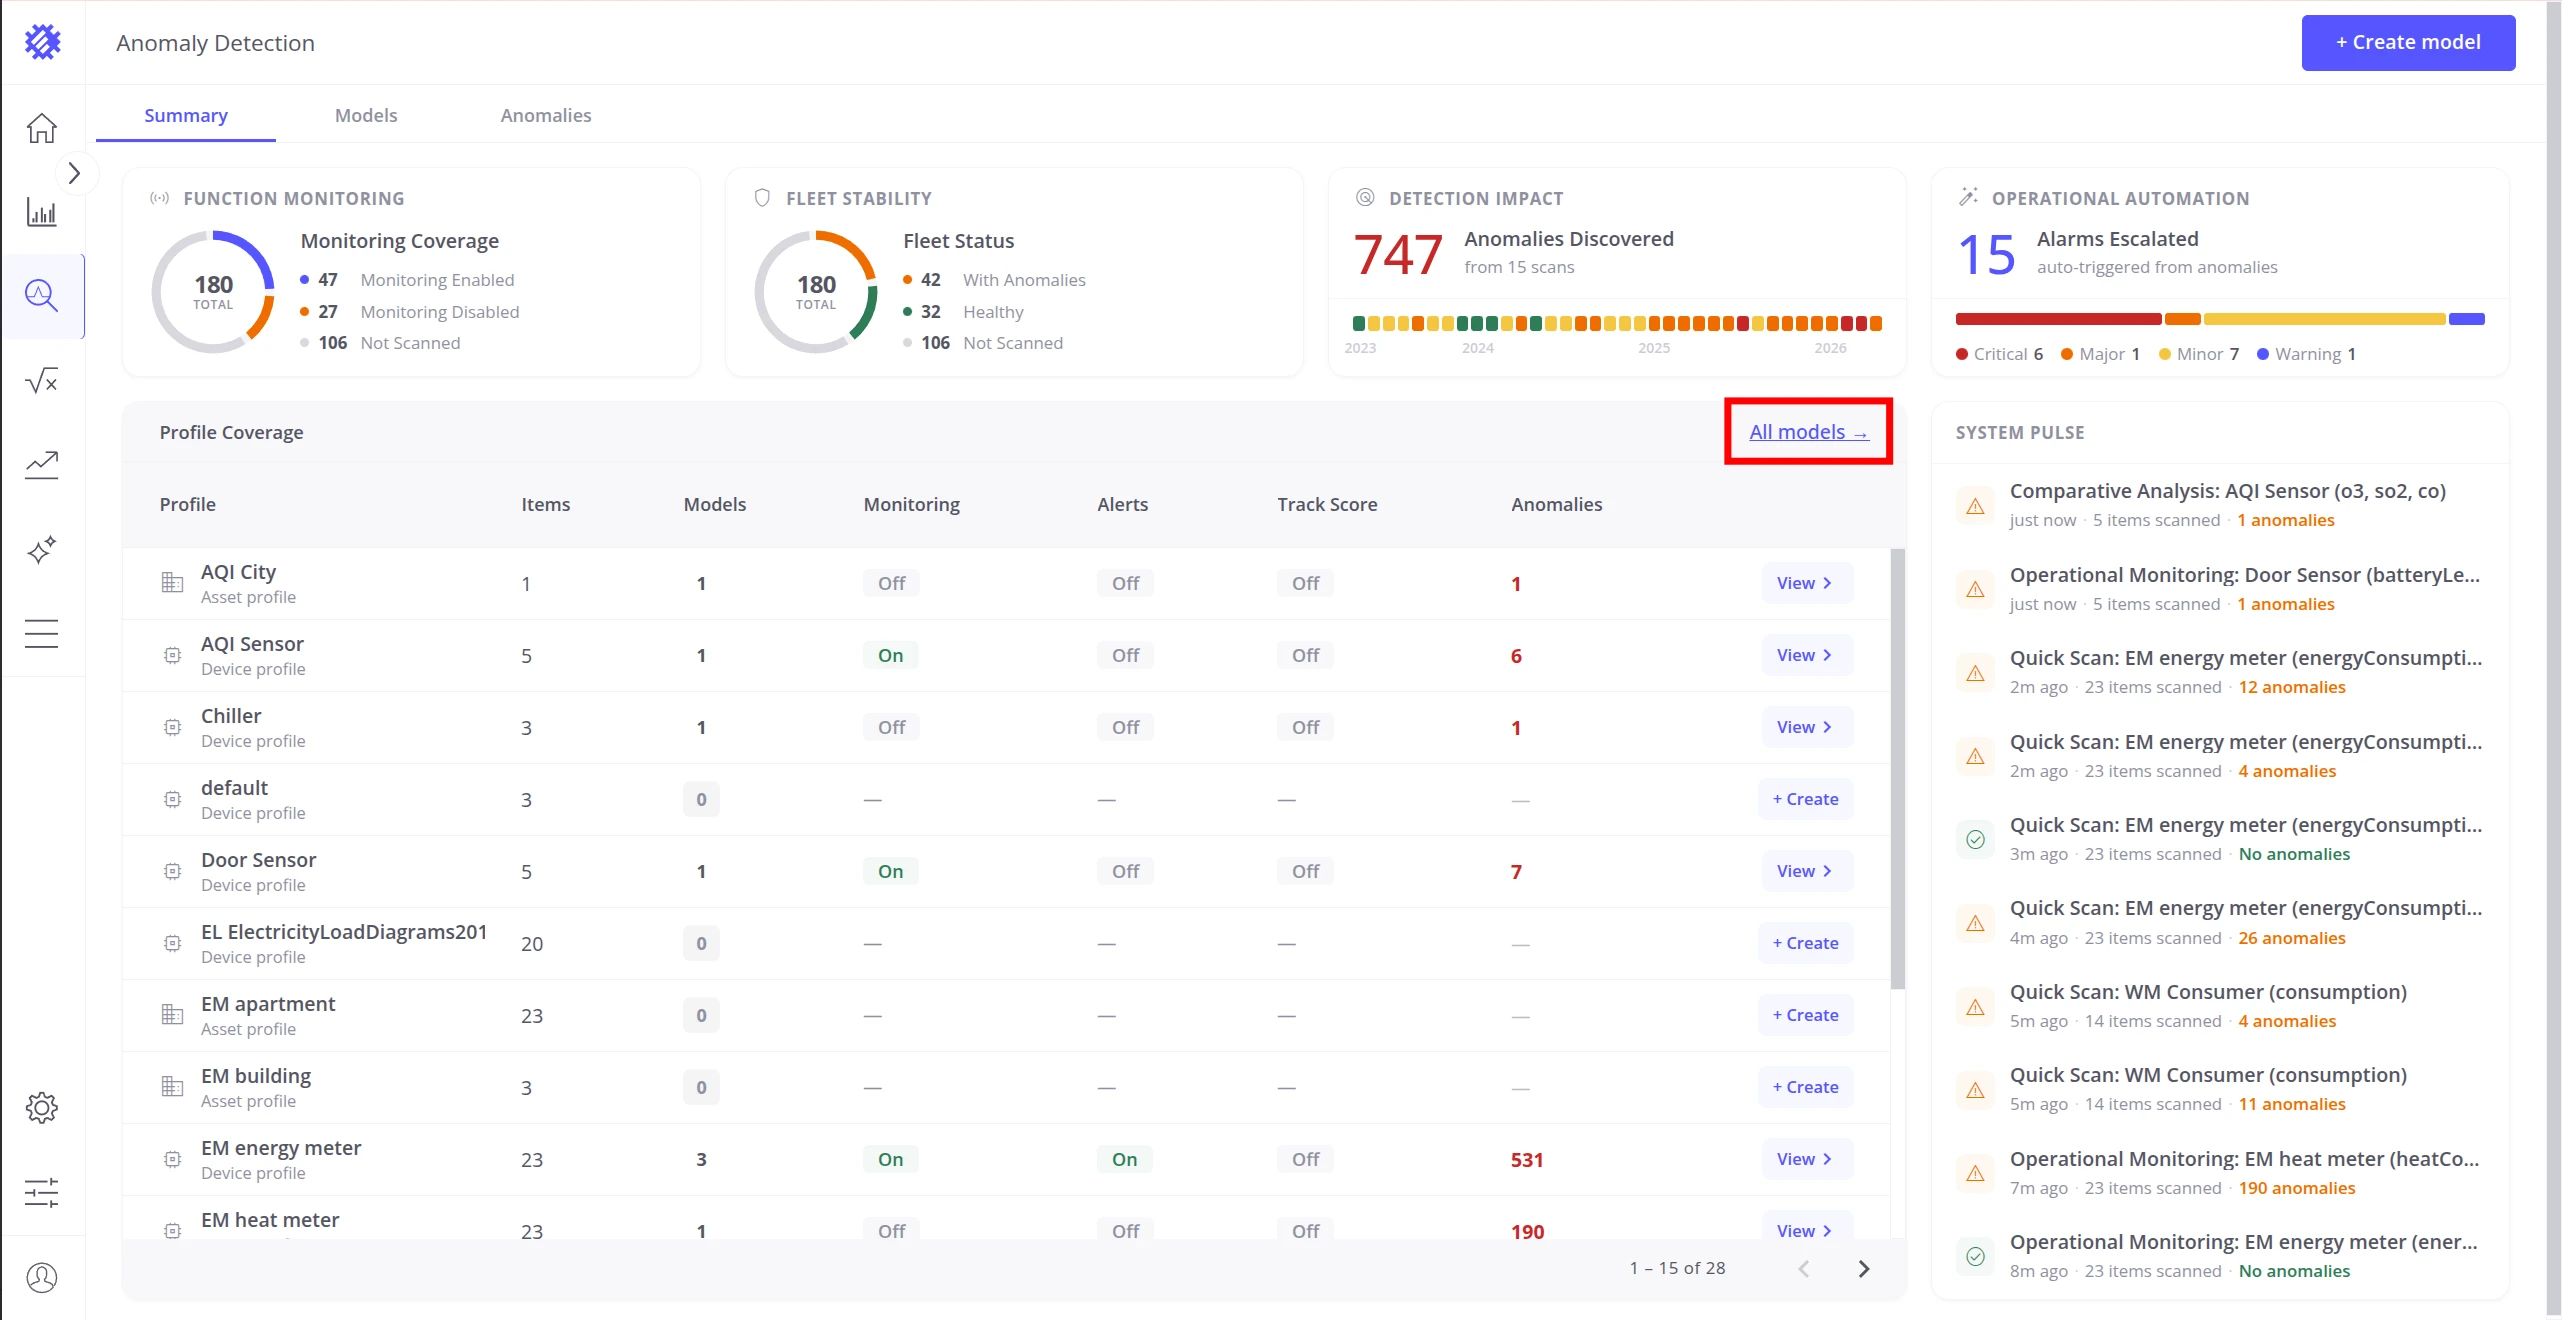
Section titled “Profile Coverage”The Profile Coverage table lists every device and asset profile and summarizes anomaly detection activity across it:
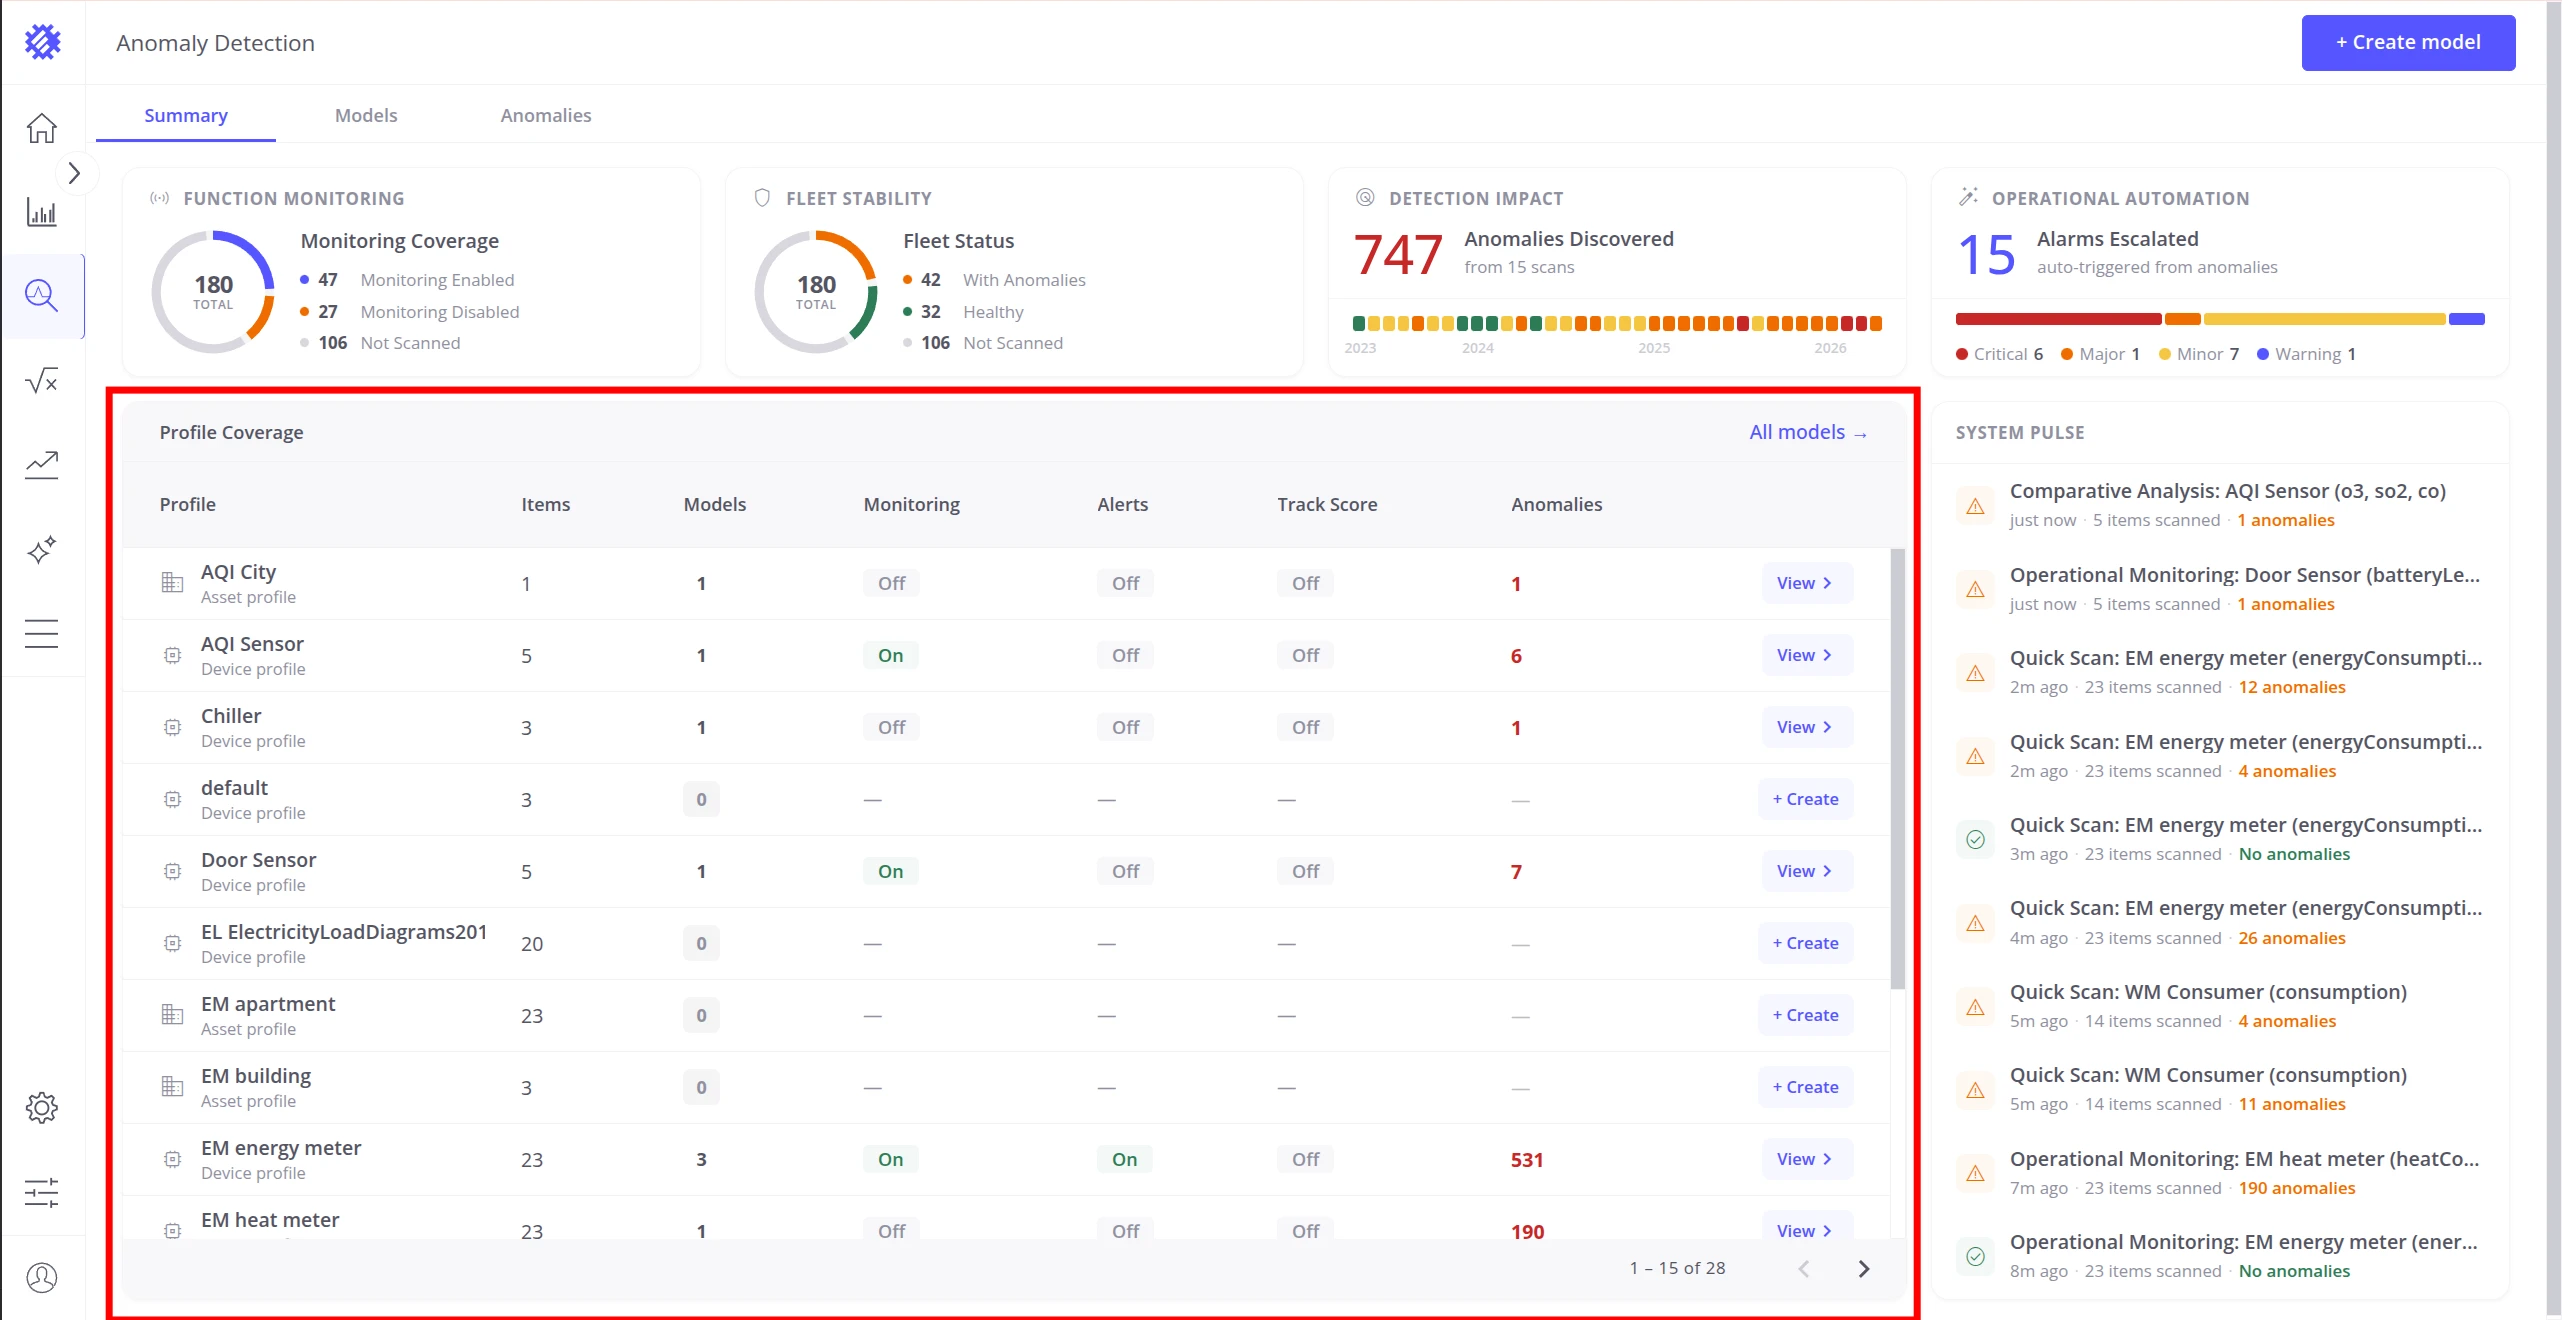
| Column | Description |
|---|---|
| Profile | Profile name and type (Device or Asset) |
| Items | Total number of devices or assets in the profile |
| Models | Number of anomaly models configured for this profile |
| Monitoring | ON if at least one model has periodic scanning enabled |
| Alerts | ON if at least one model has alarm creation enabled |
| Track Score | ON if at least one model is saving anomaly scores to ThingsBoard |
| Anomalies | Total anomaly count detected across all models for this profile |
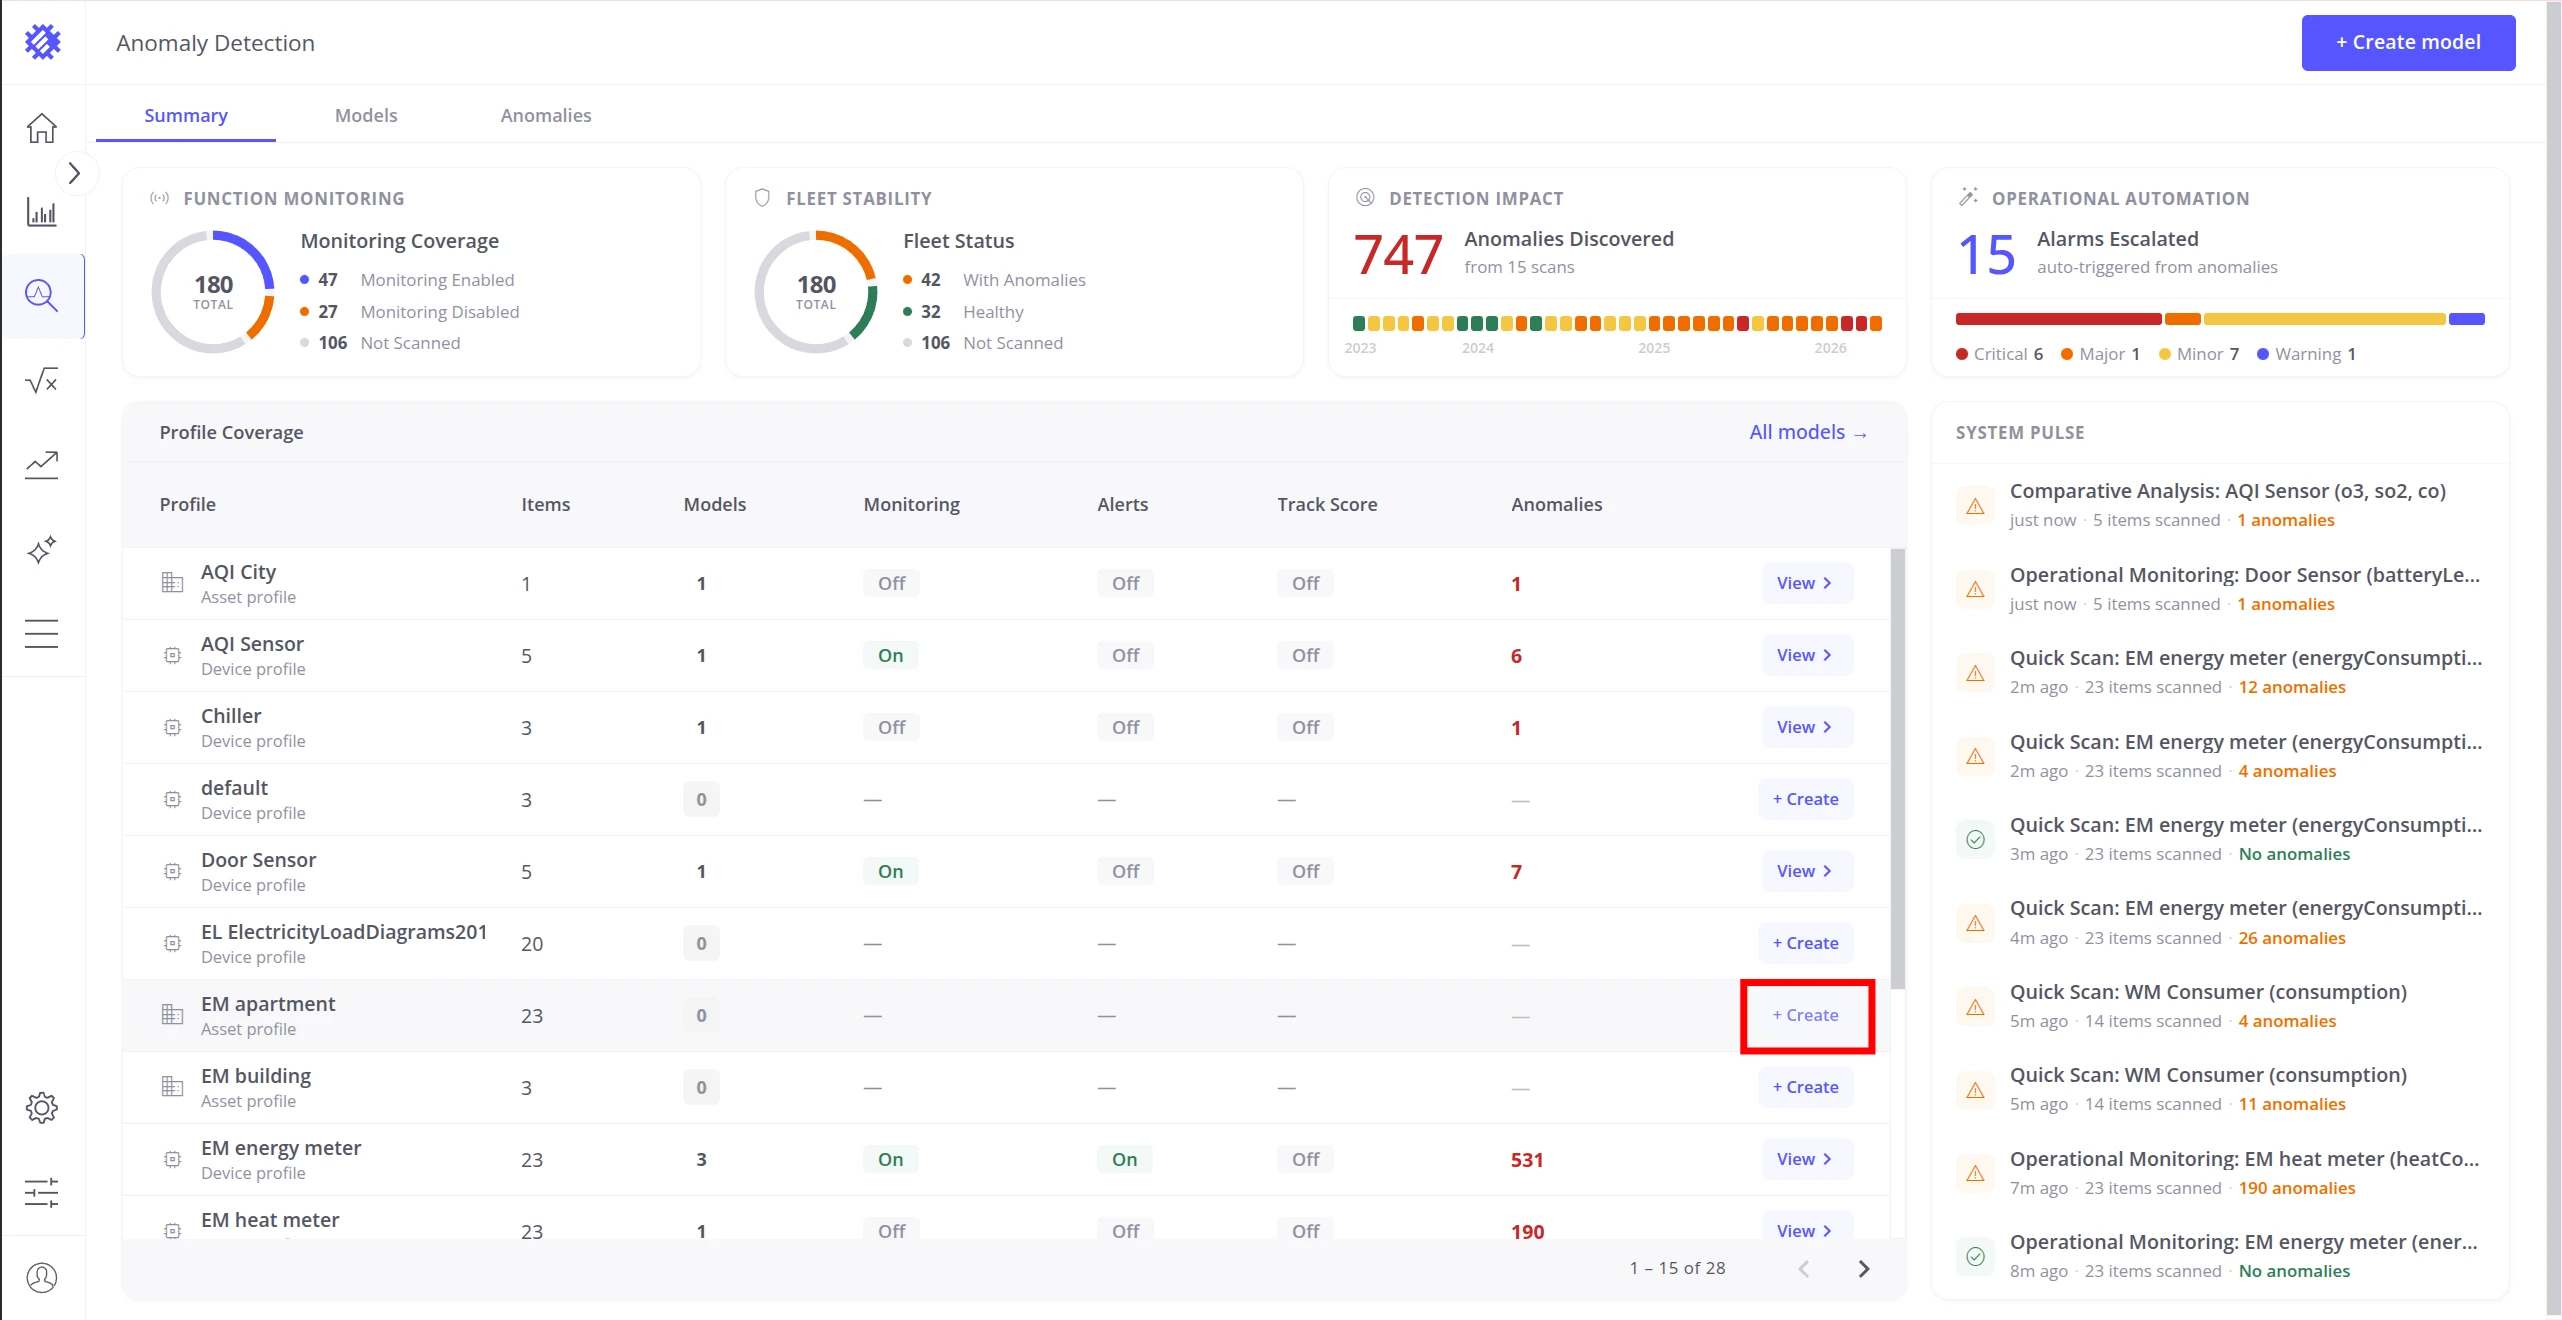
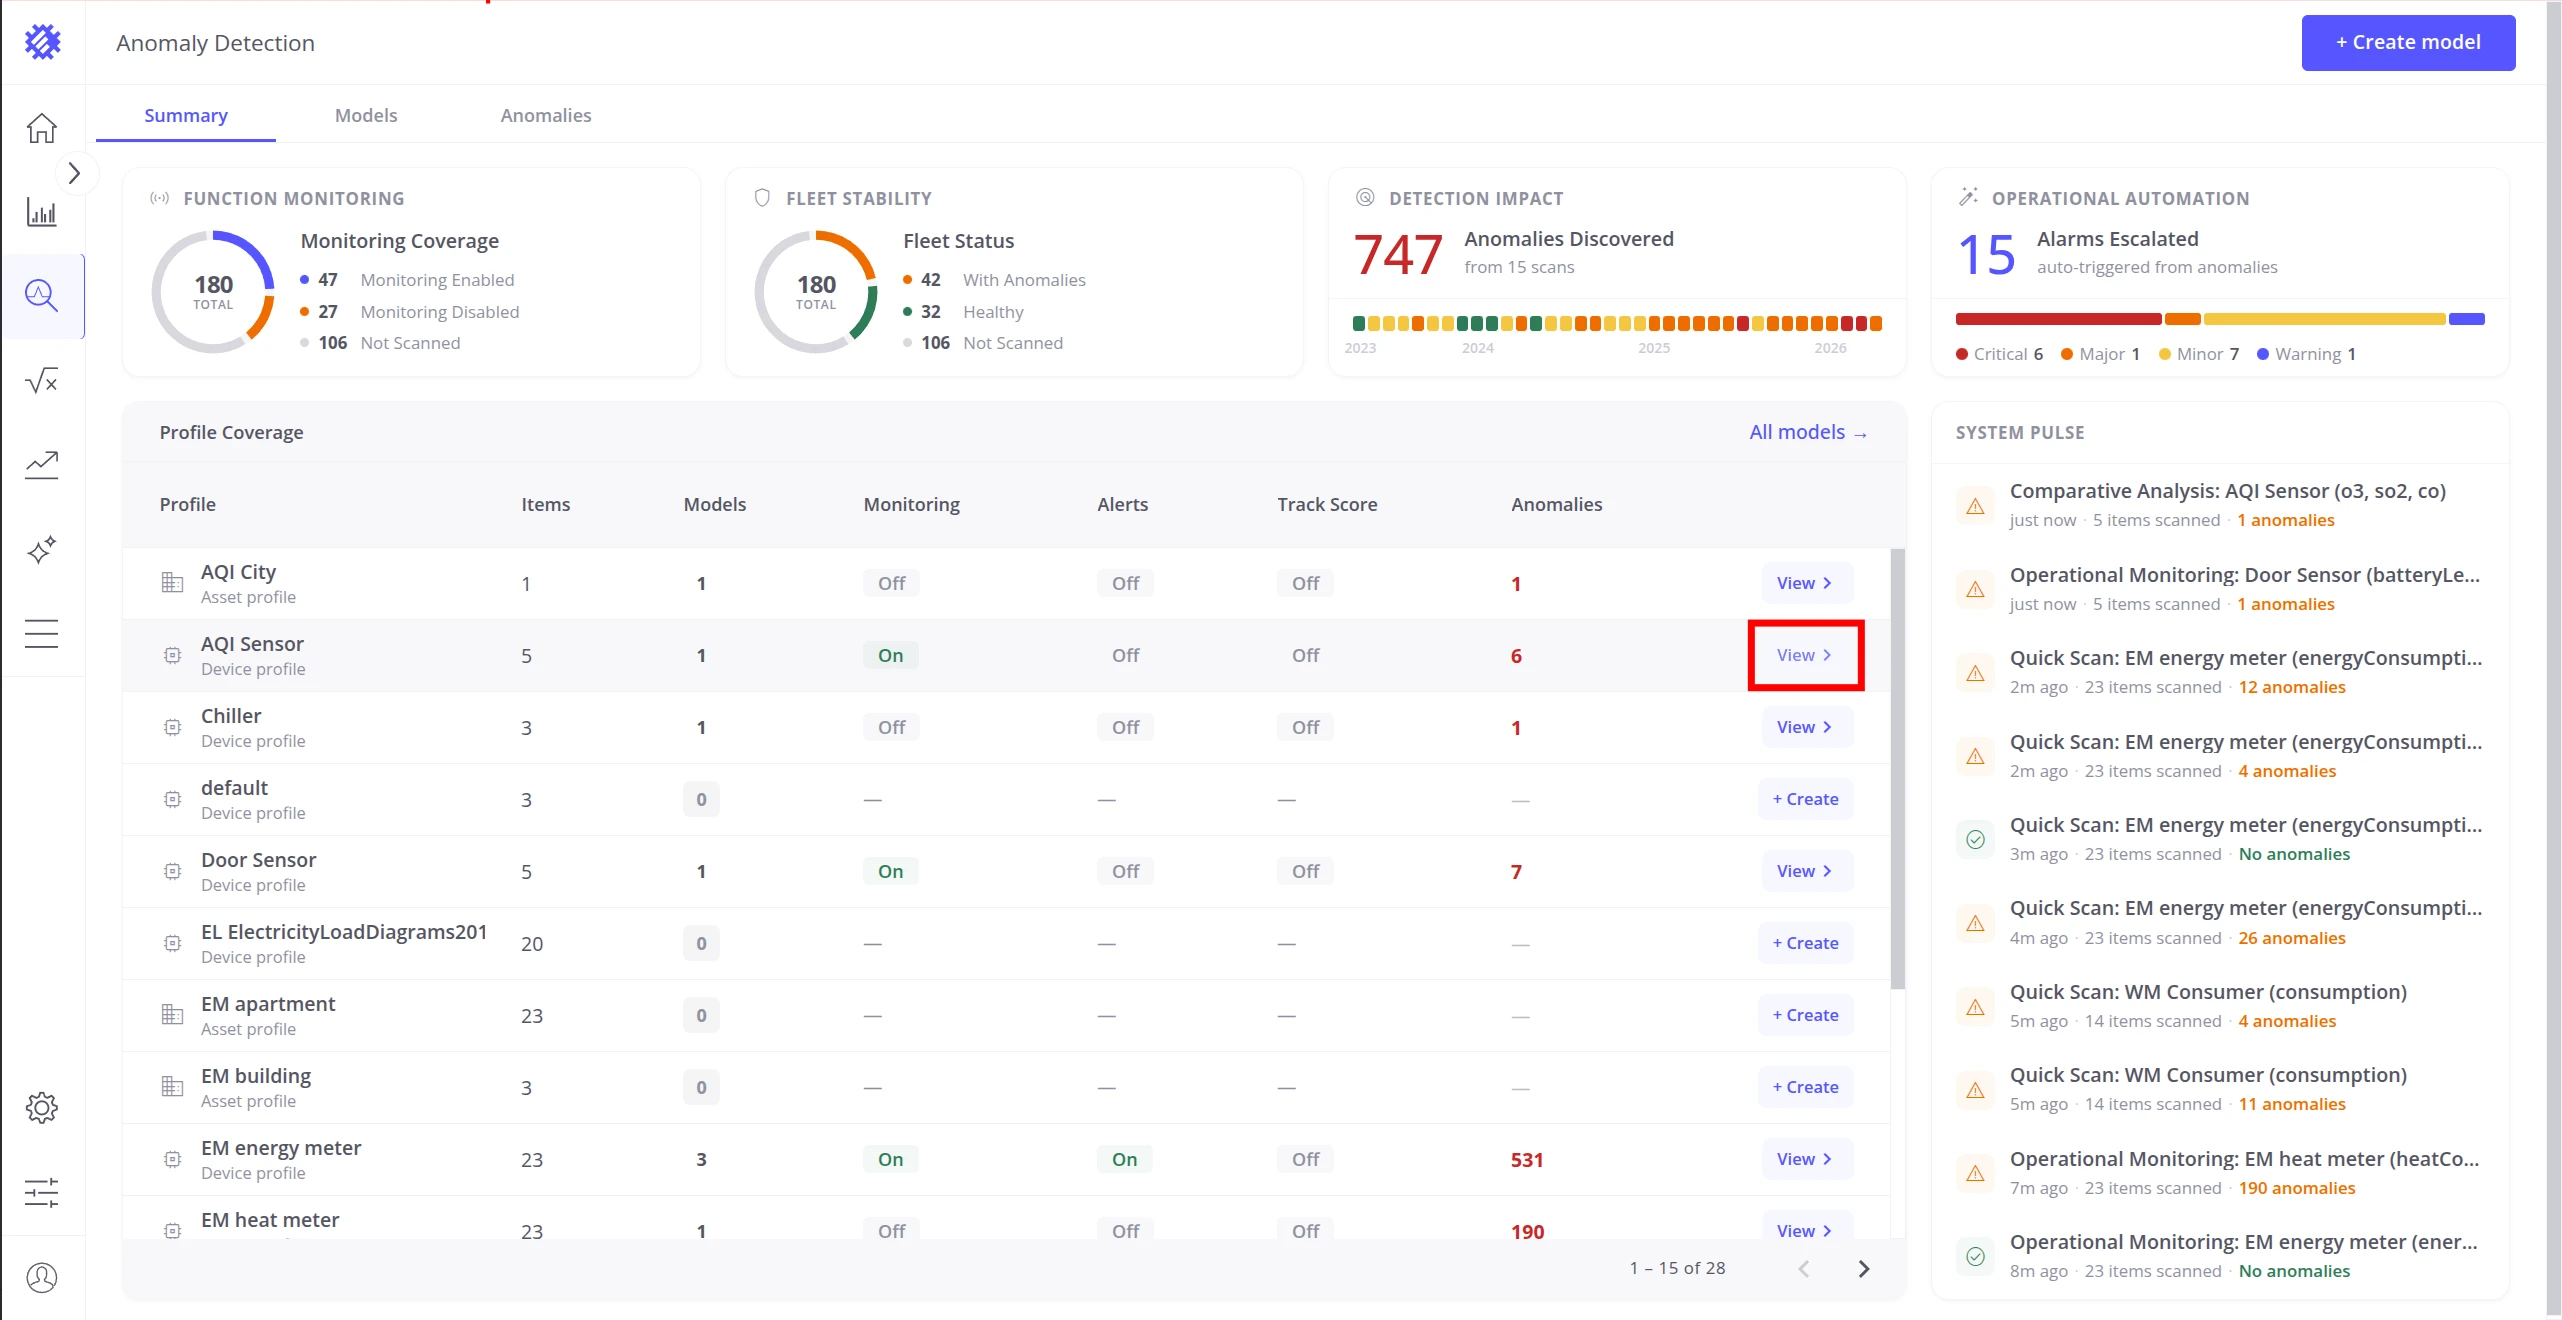
Each profile row has two action buttons:
- + Create — opens the creation wizard with this profile pre-selected.
- View > — opens the Models tab filtered to show only models for this profile.
Click All models in the top-right corner of the Profile Coverage section to open the Models tab with no profile filter applied — showing all models across all profiles.
System Pulse
Section titled “System Pulse”The System Pulse panel on the right side of the Summary tab shows the status of the last 10 anomaly model scan executions. It gives you a real-time view of whether your models are running successfully and detecting anomalies as expected.
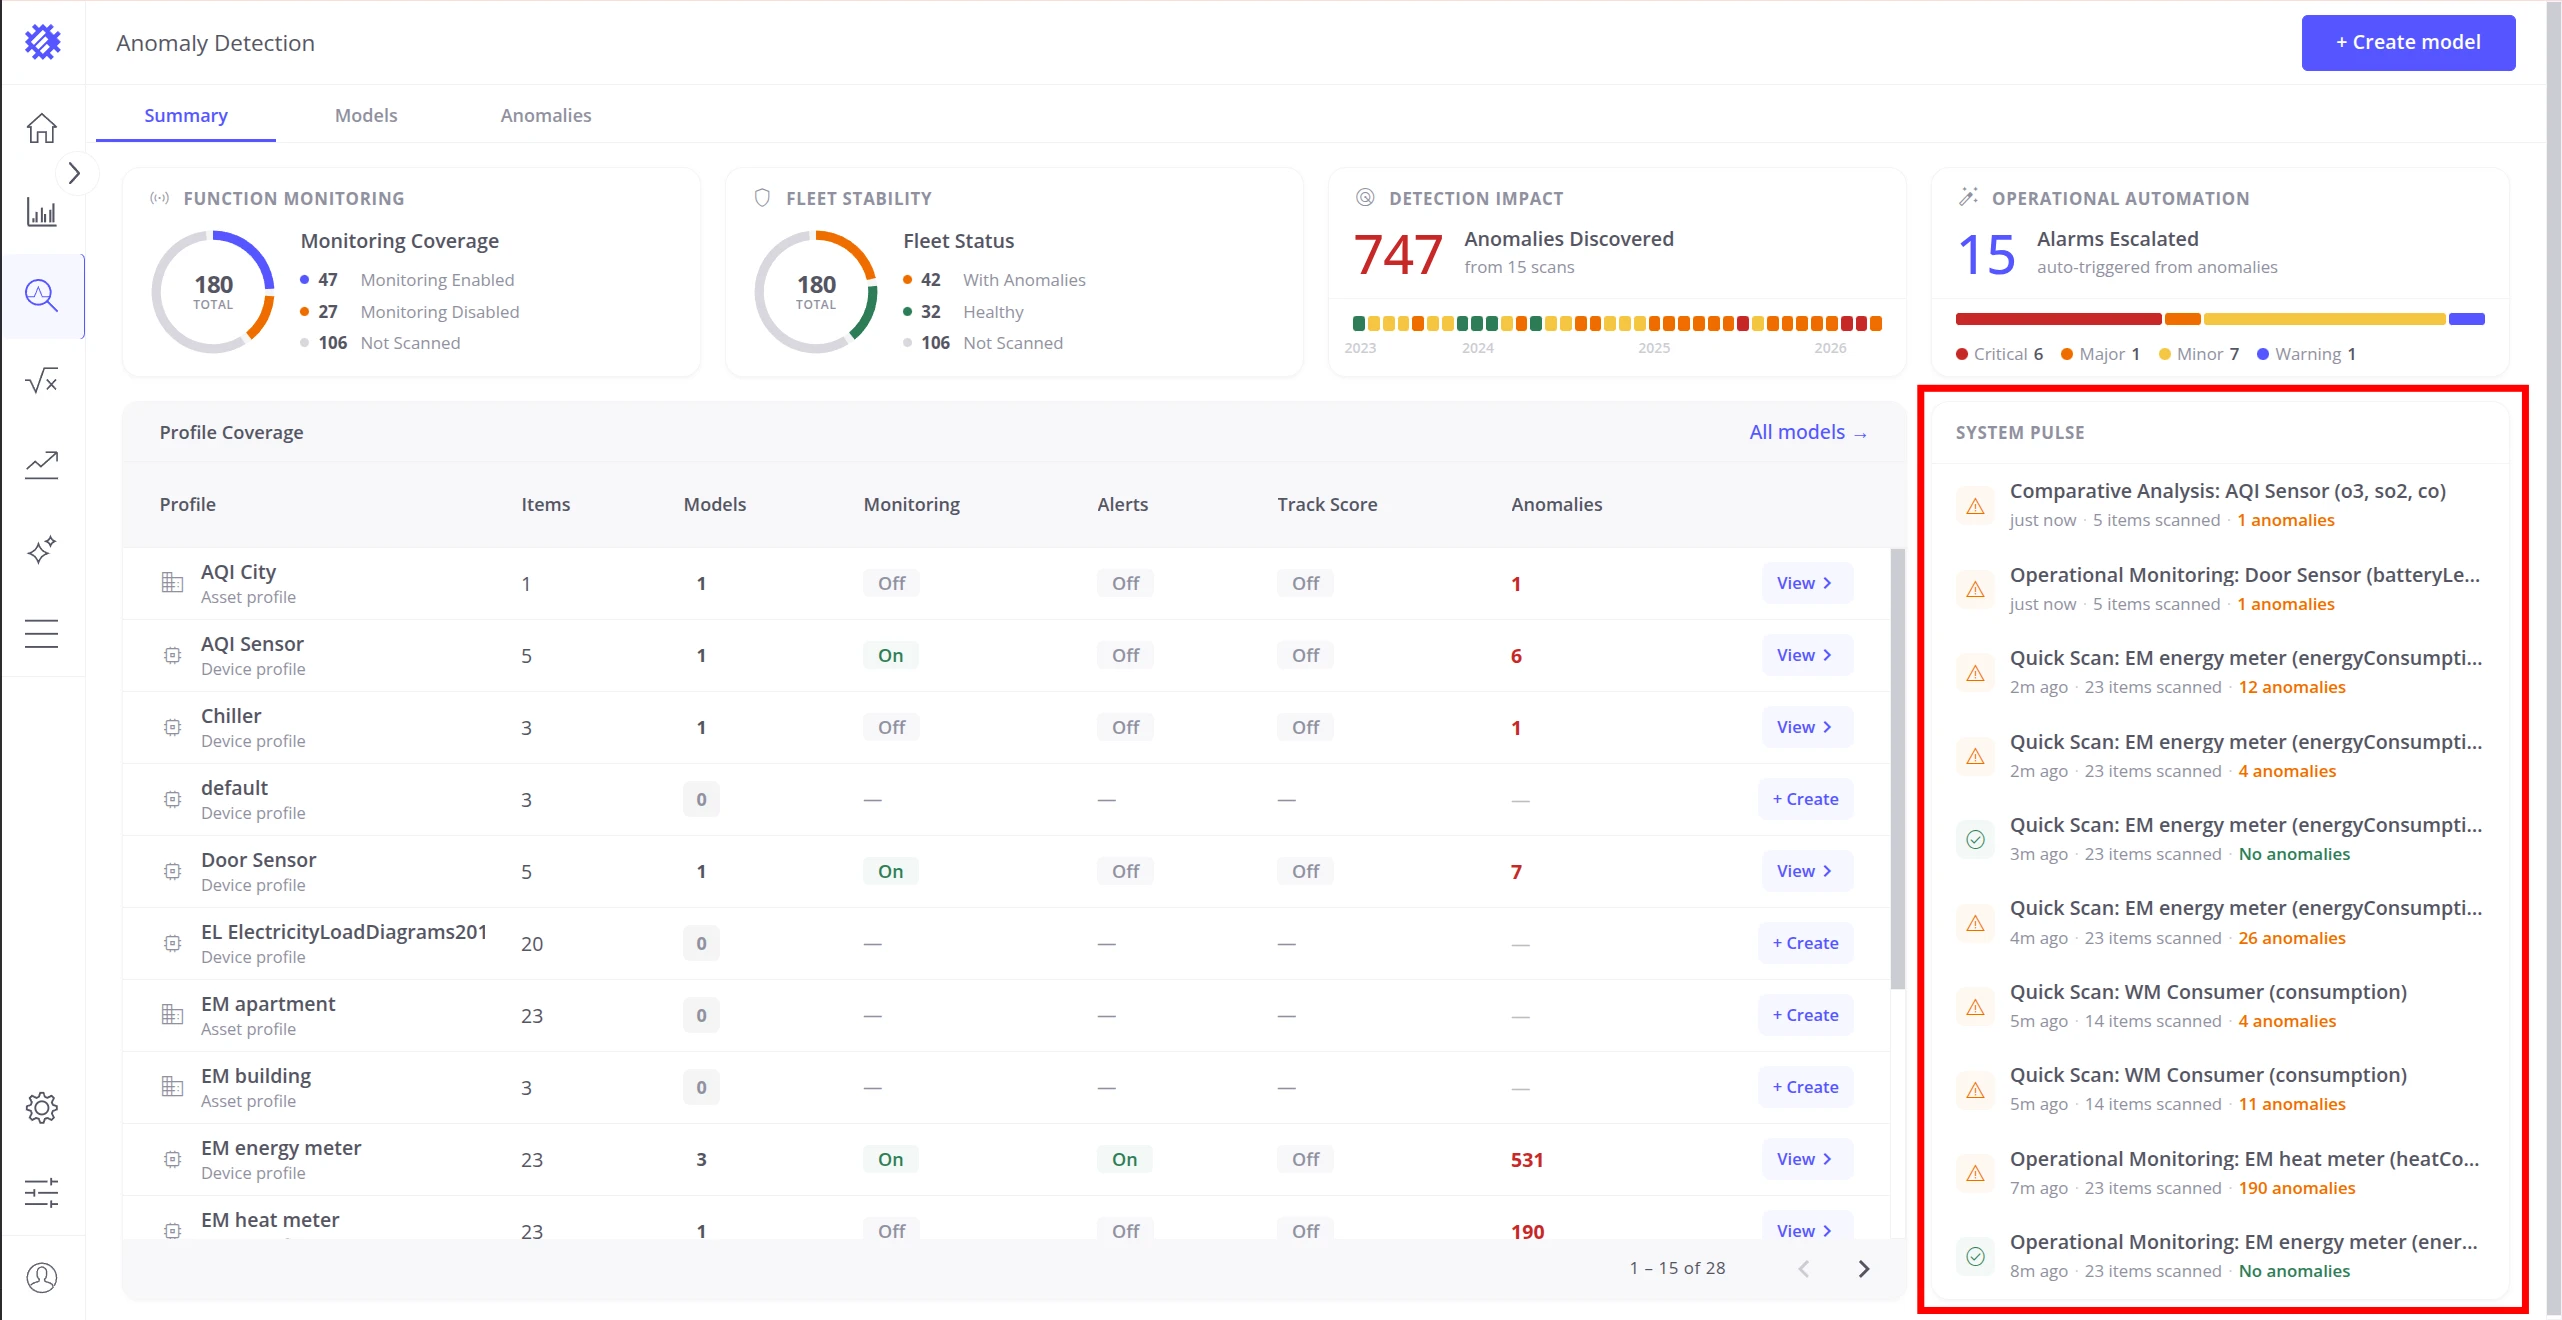
Each entry in the pulse shows the model name, execution time, and one of four status colors:
| Color | Meaning |
|---|---|
| Green | Scan completed successfully — no anomalies found |
| Orange | Scan completed successfully — anomalies were detected |
| Red | Scan failed due to an unexpected error |
| Gray | Scan task was canceled |
Click any entry in the System Pulse to open the full execution details for that scan run.
Models Tab
Section titled “Models Tab”The Models tab lists all anomaly models across all profiles in a single table. Access it by clicking the Models tab in the top navigation:
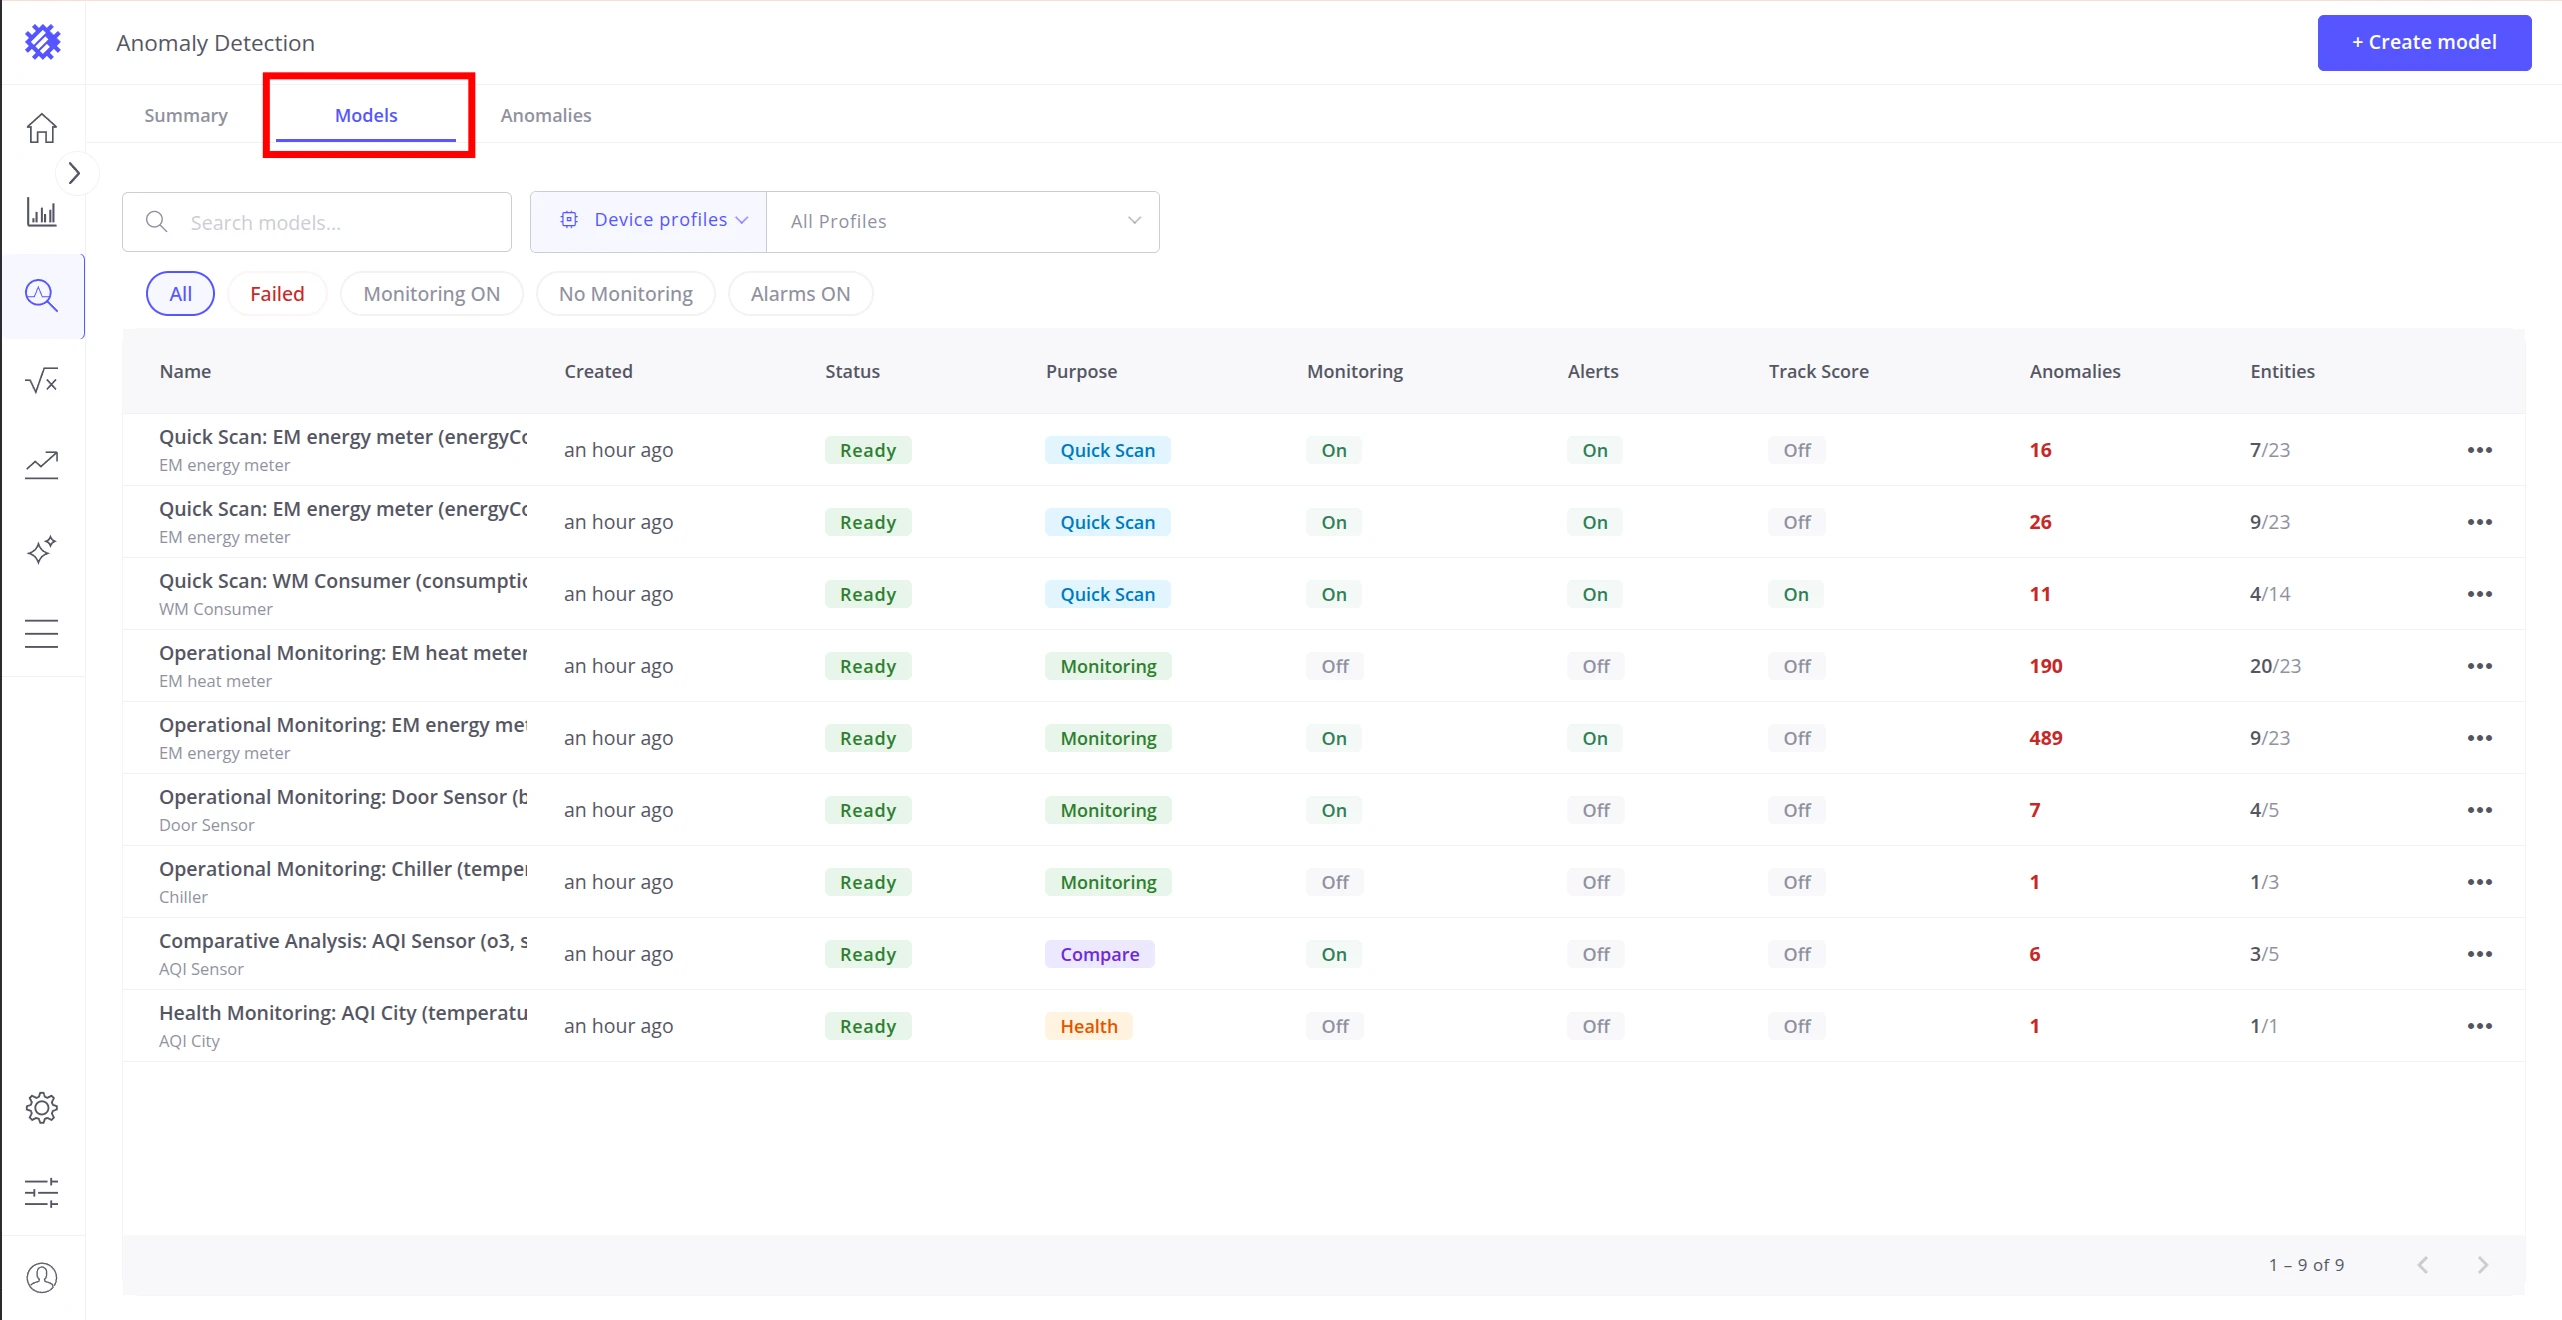
Each row in the table shows:
| Column | Description |
|---|---|
| Name | Model name and the profile it belongs to |
| Created | When the model was created |
| Status | Queued — waiting to be processed; Running — training in progress; Ready — trained and operational; Failed — training error; Canceled — build was canceled |
| Purpose | Detection intent chosen when the model was created (e.g. Quick Scan, Monitoring) |
| Monitoring | Whether periodic scanning is enabled |
| Alerts | Whether alarm creation is enabled |
| Track Score | Whether anomaly scores are being saved as telemetry |
| Anomalies | Total count of detected anomalies |
| Entities | Ratio of devices/assets with anomalies to total monitored |
Filtering Models
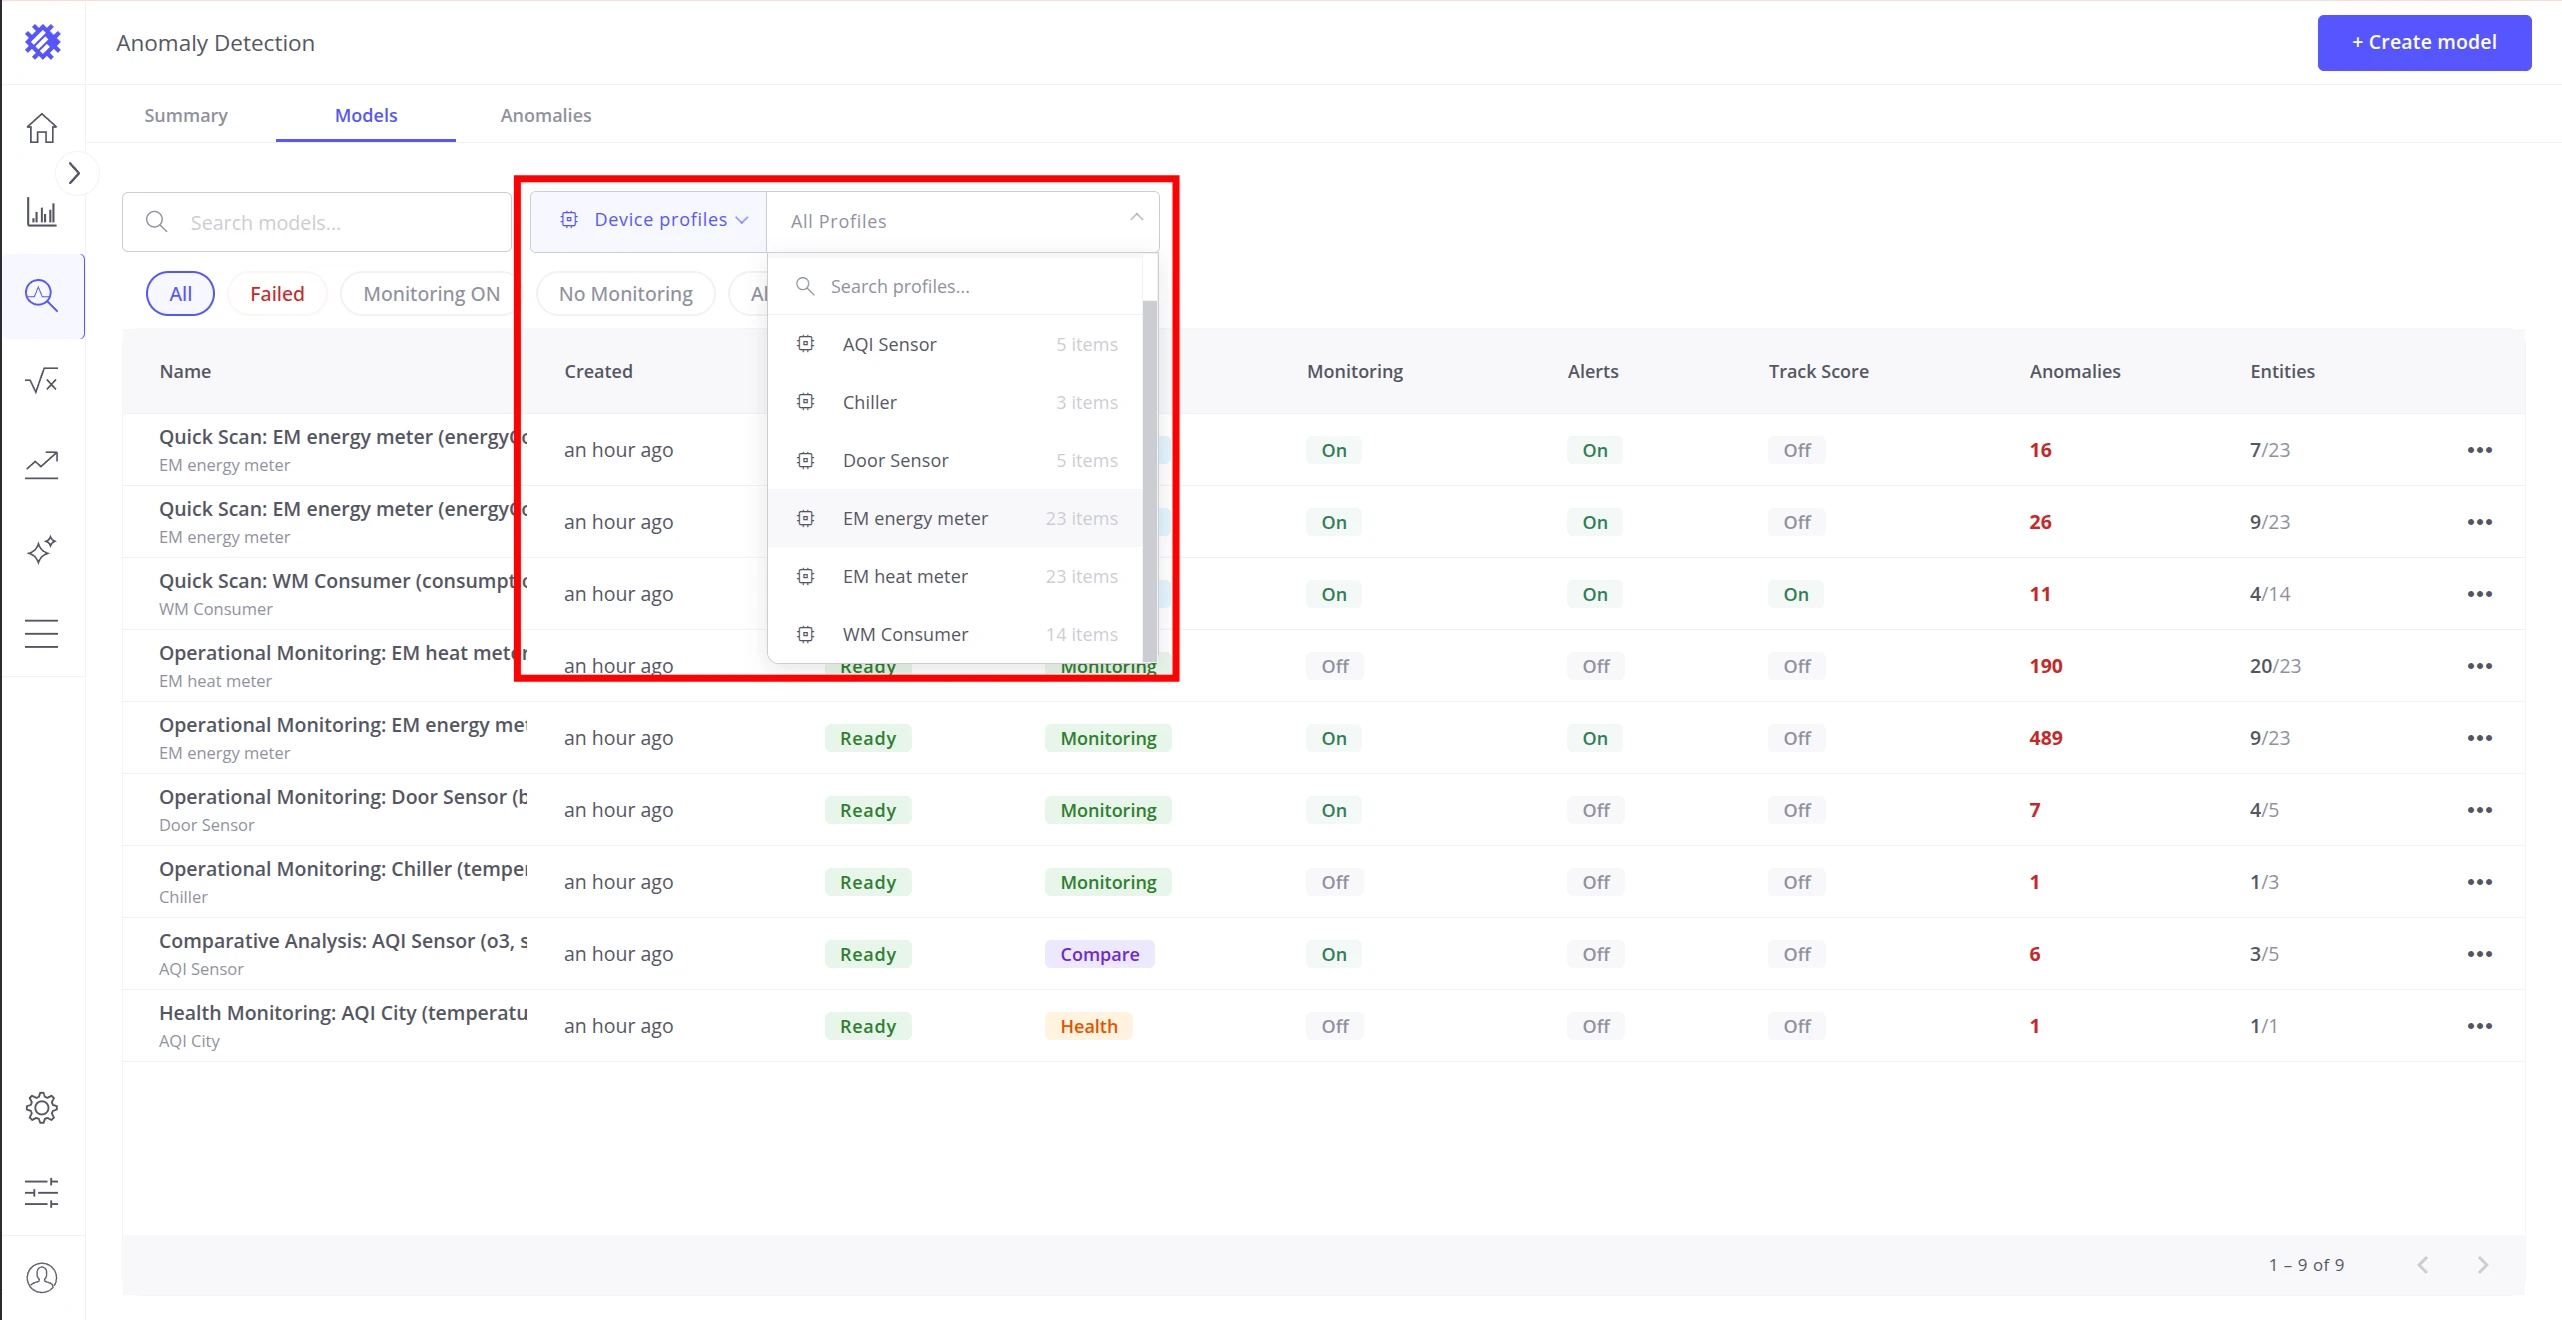
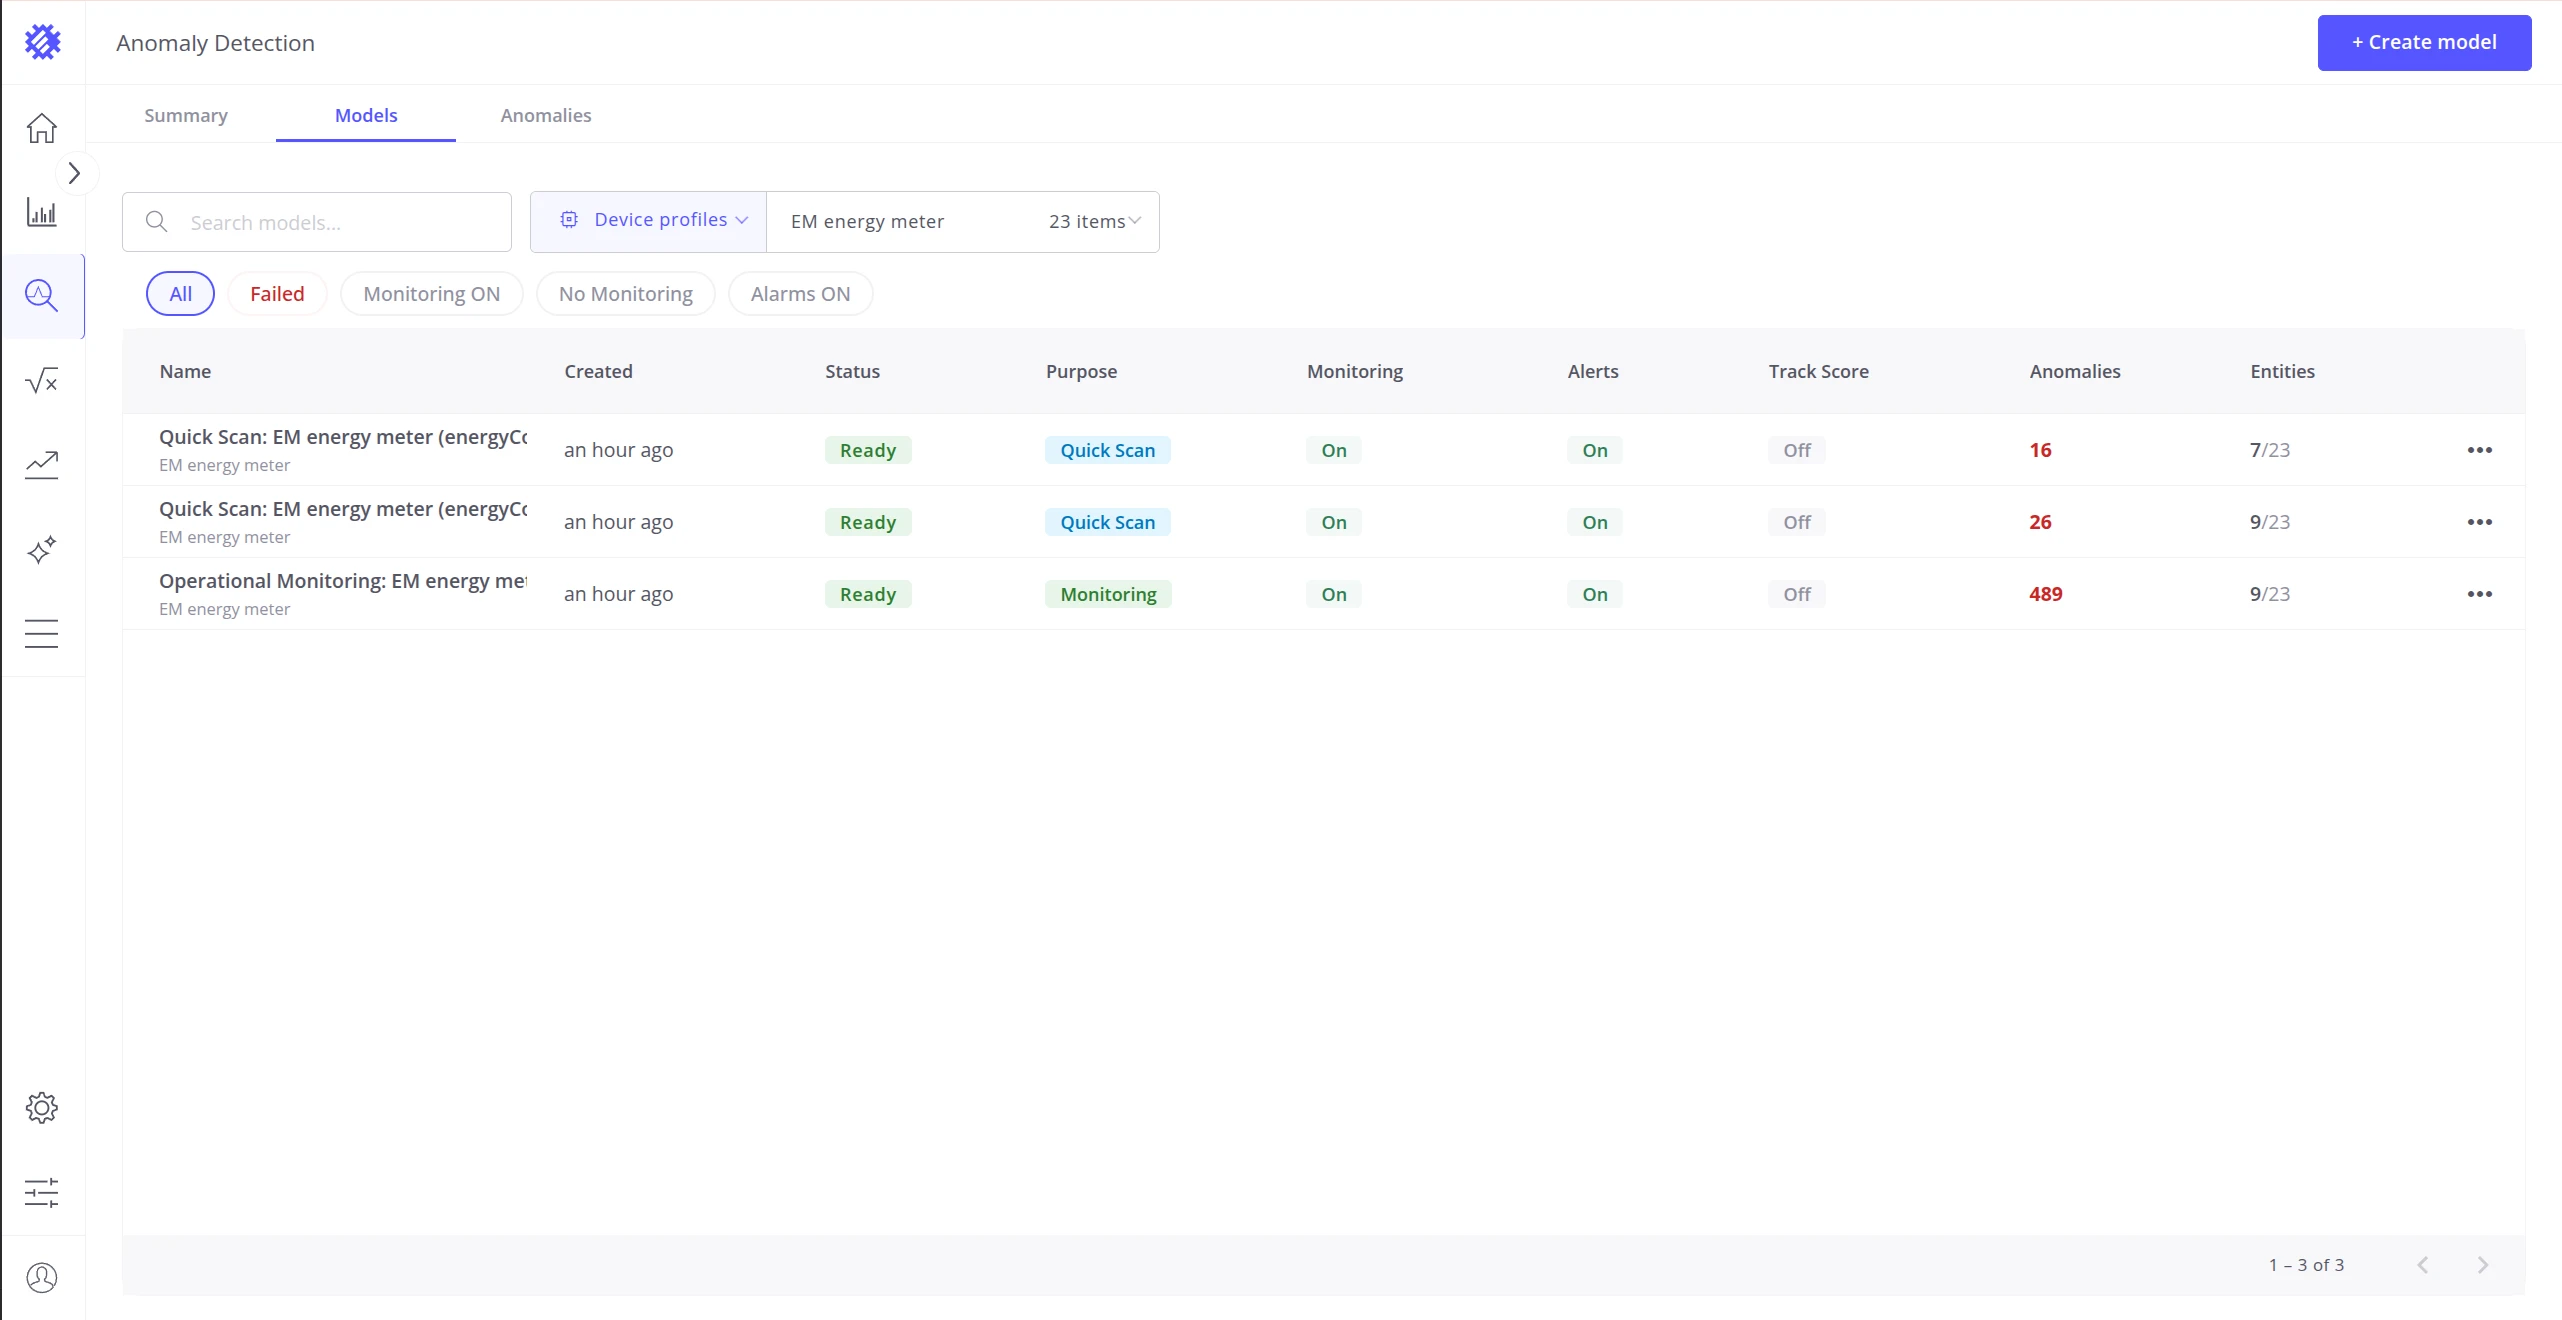
Section titled “Filtering Models”By profile — click the Device profiles dropdown to filter by a specific device or asset profile:
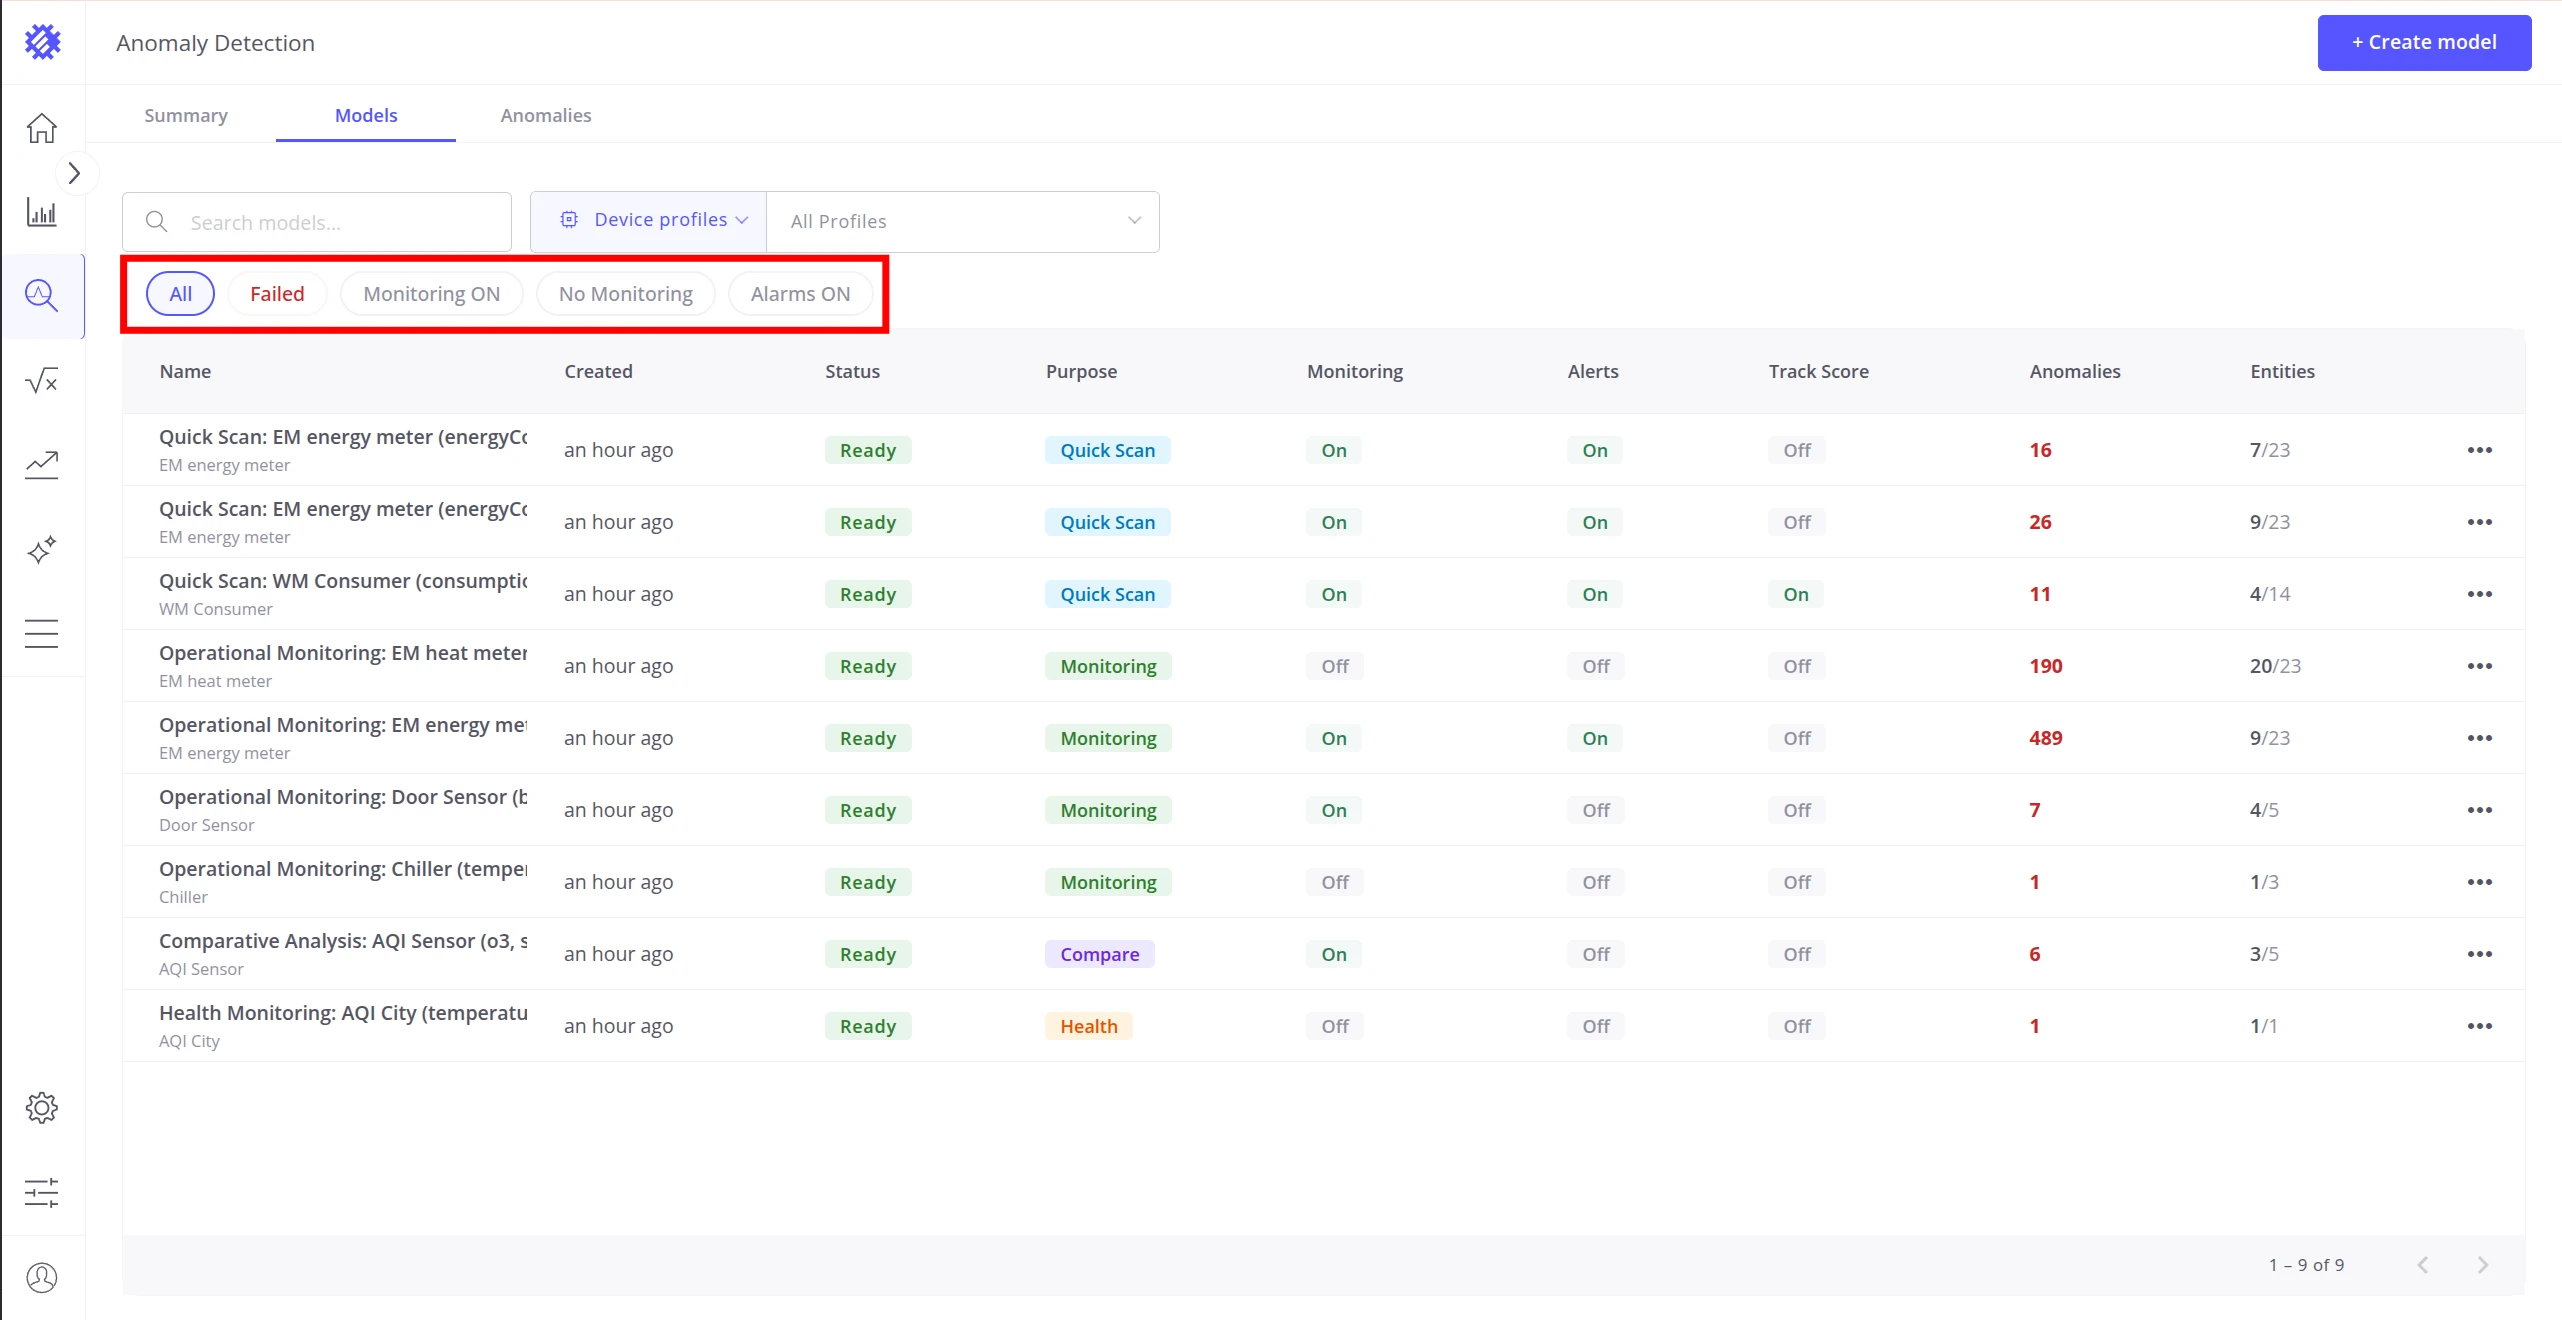
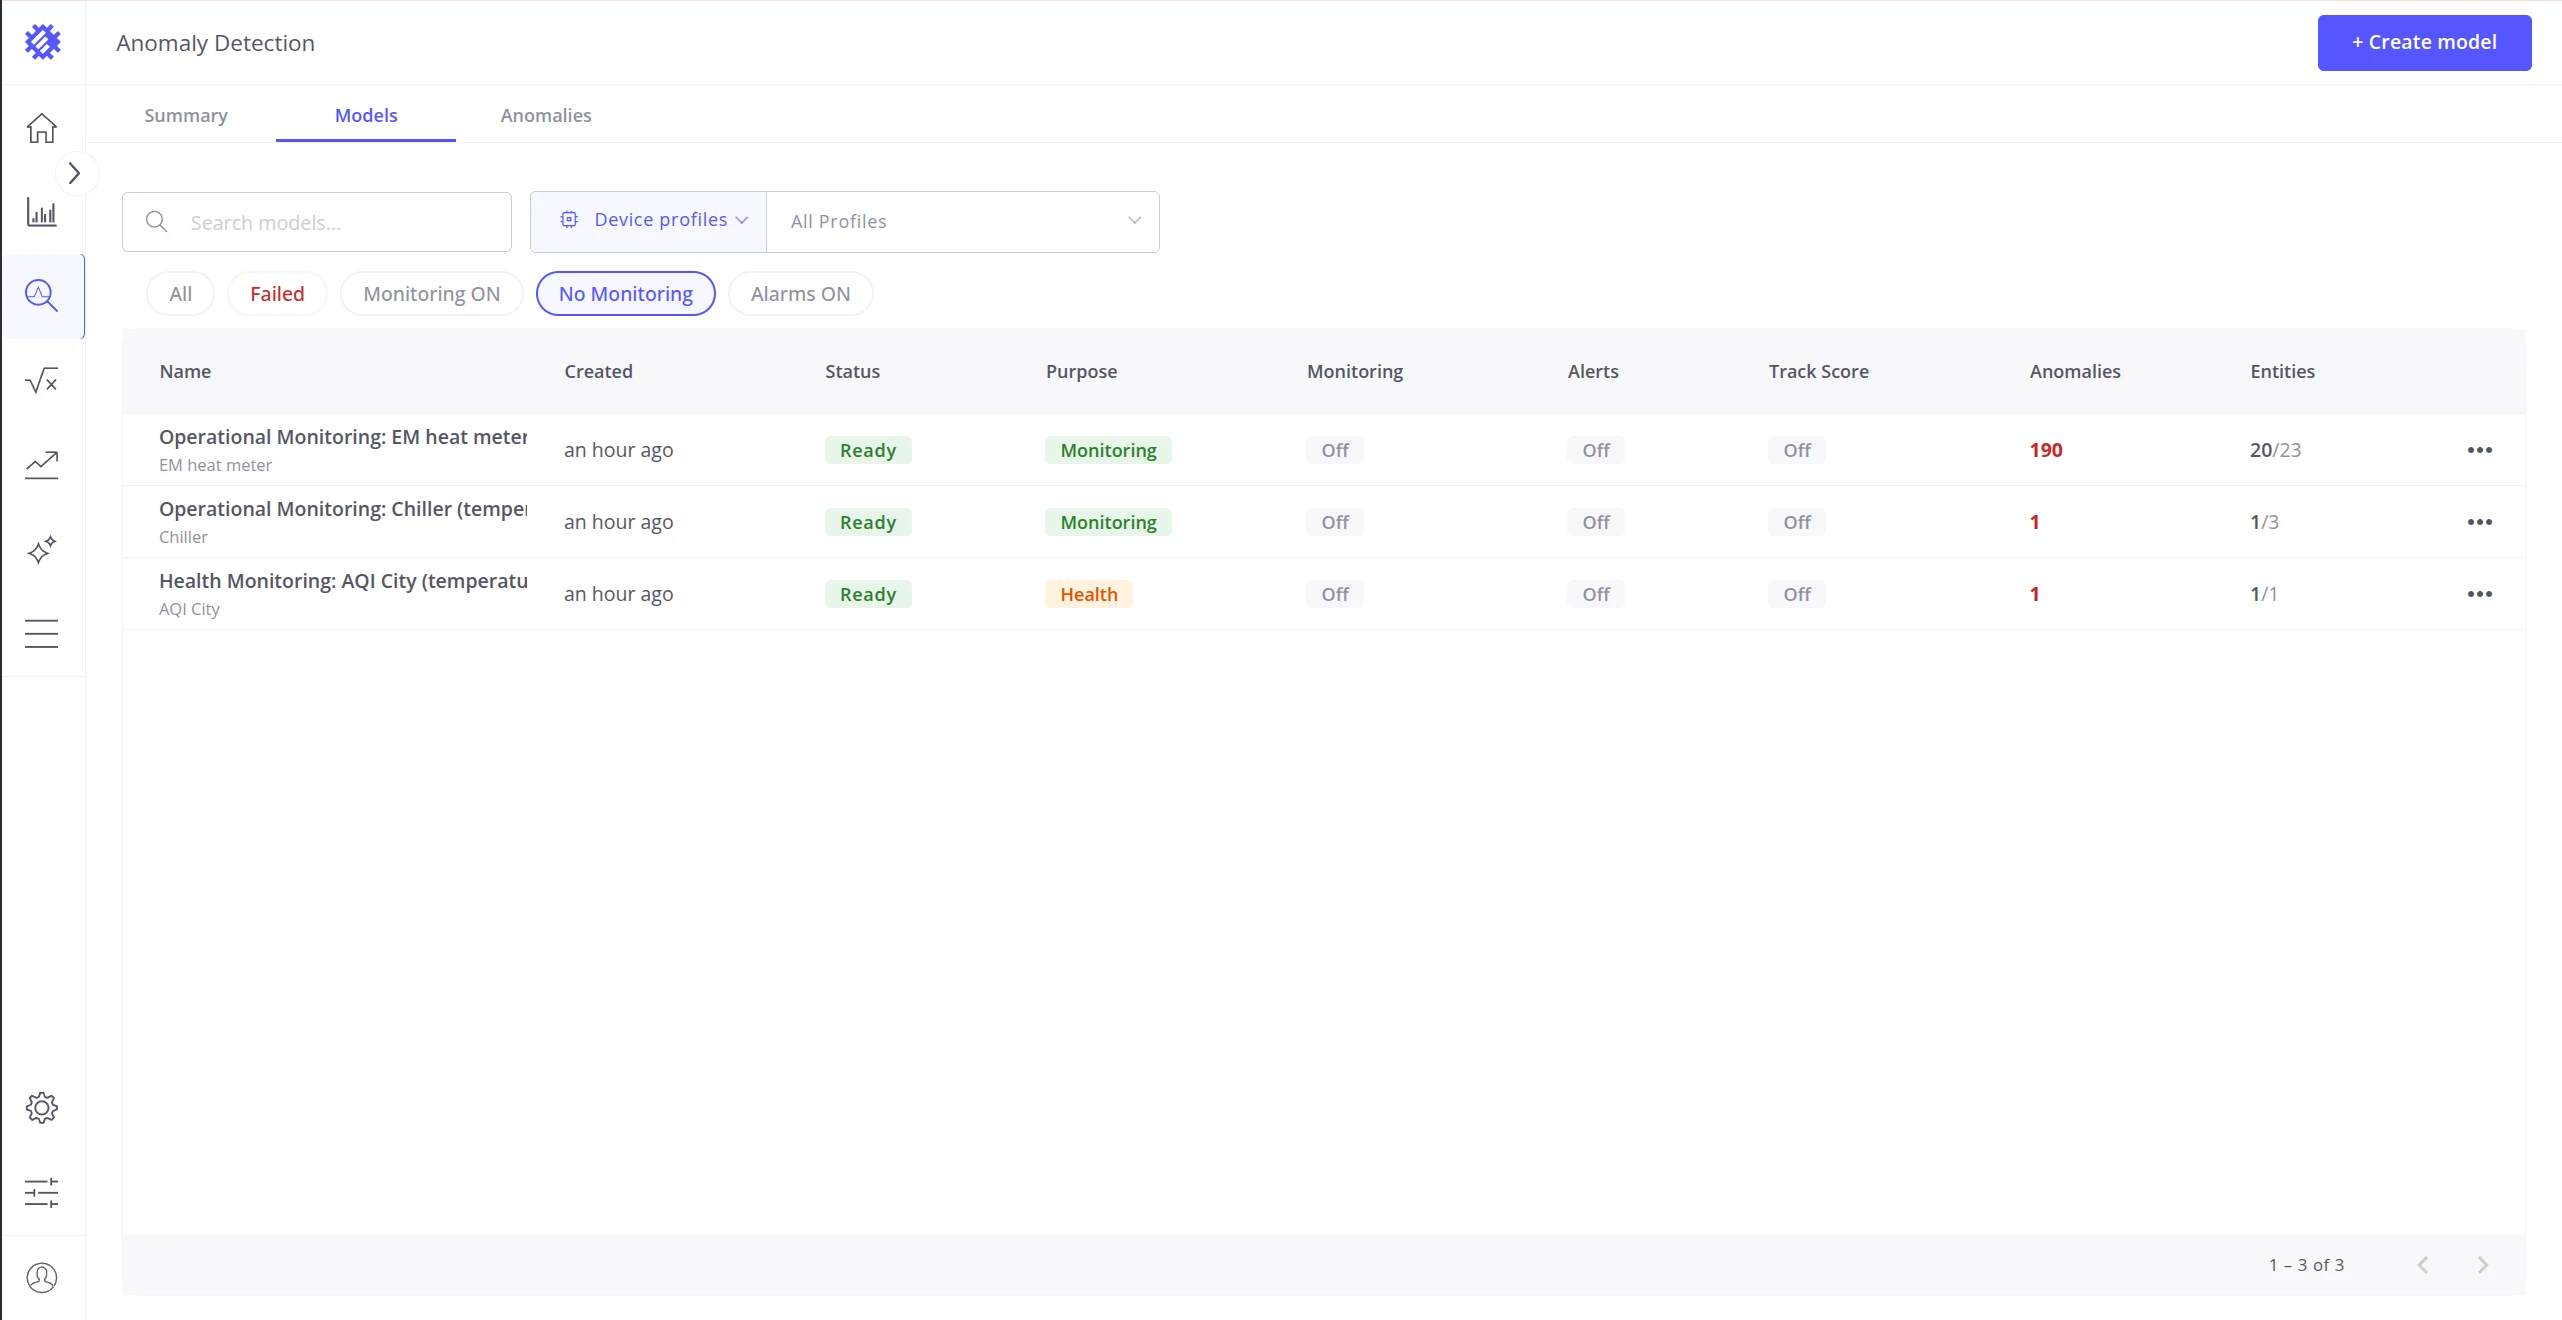
By status or configuration — use the filter chips below the search bar to quickly narrow results:
| Chip | Shows |
|---|---|
| All | All models |
| Failed | Models where training failed |
| Monitoring ON | Models with periodic scanning enabled |
| No Monitoring | Models without periodic scanning |
| Alerts ON | Models with alarm creation enabled |
Model Detail Panel
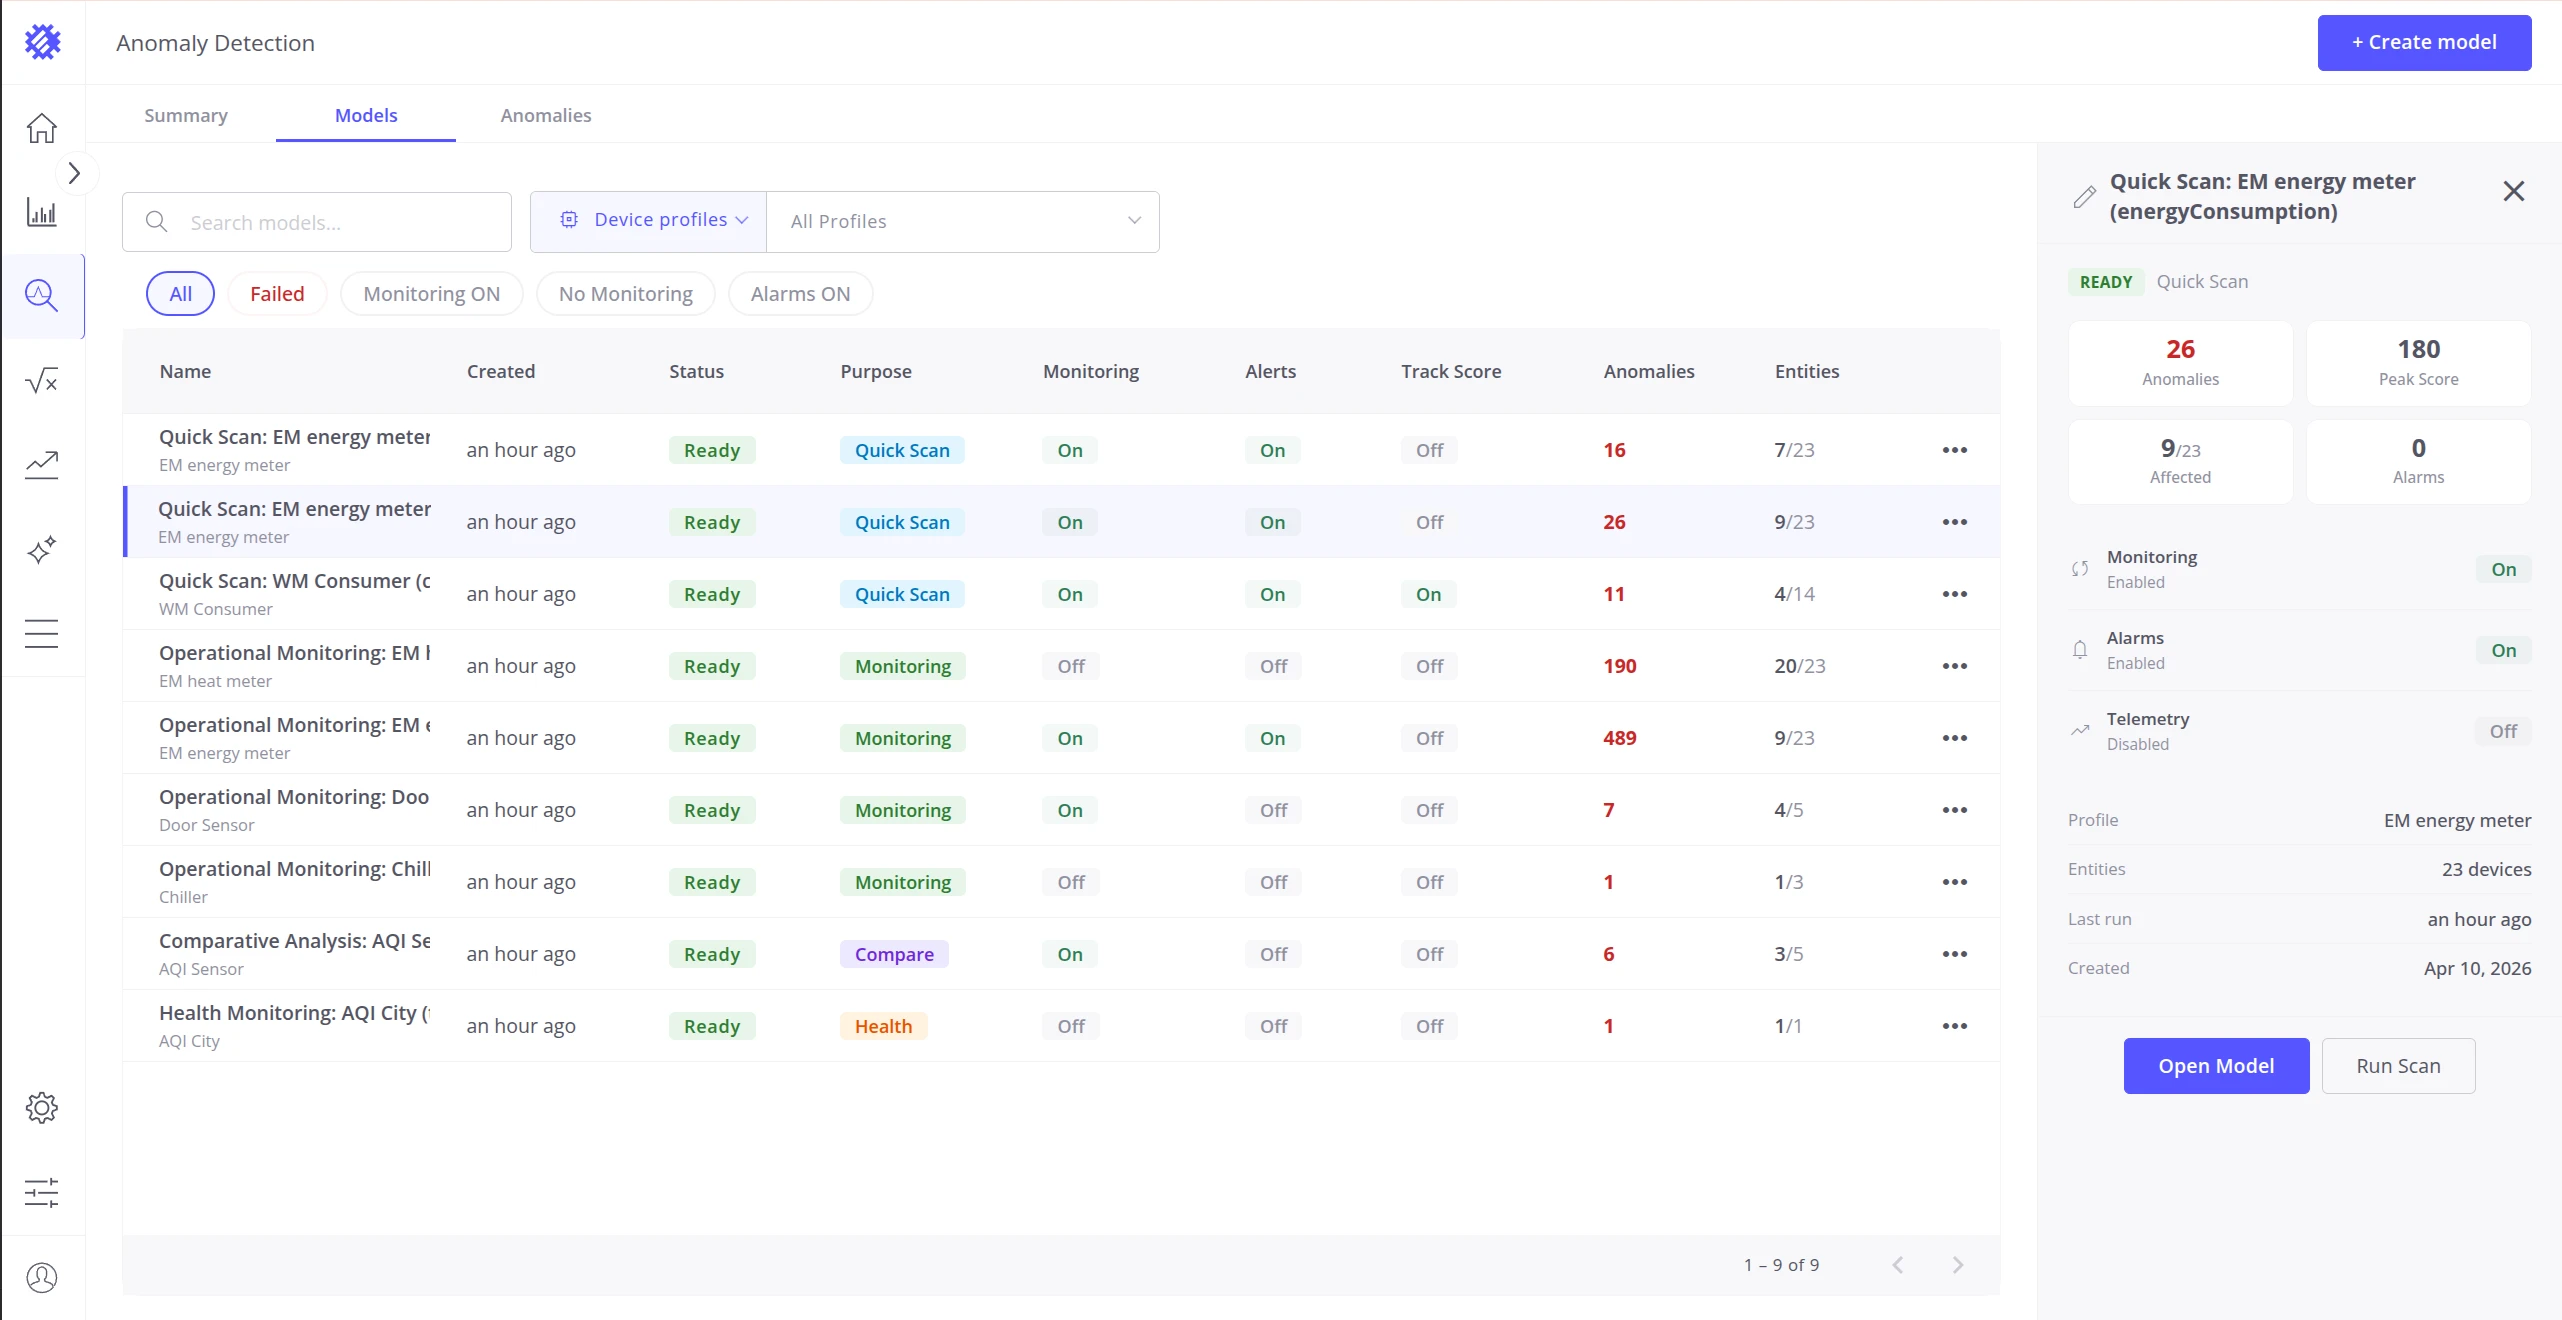
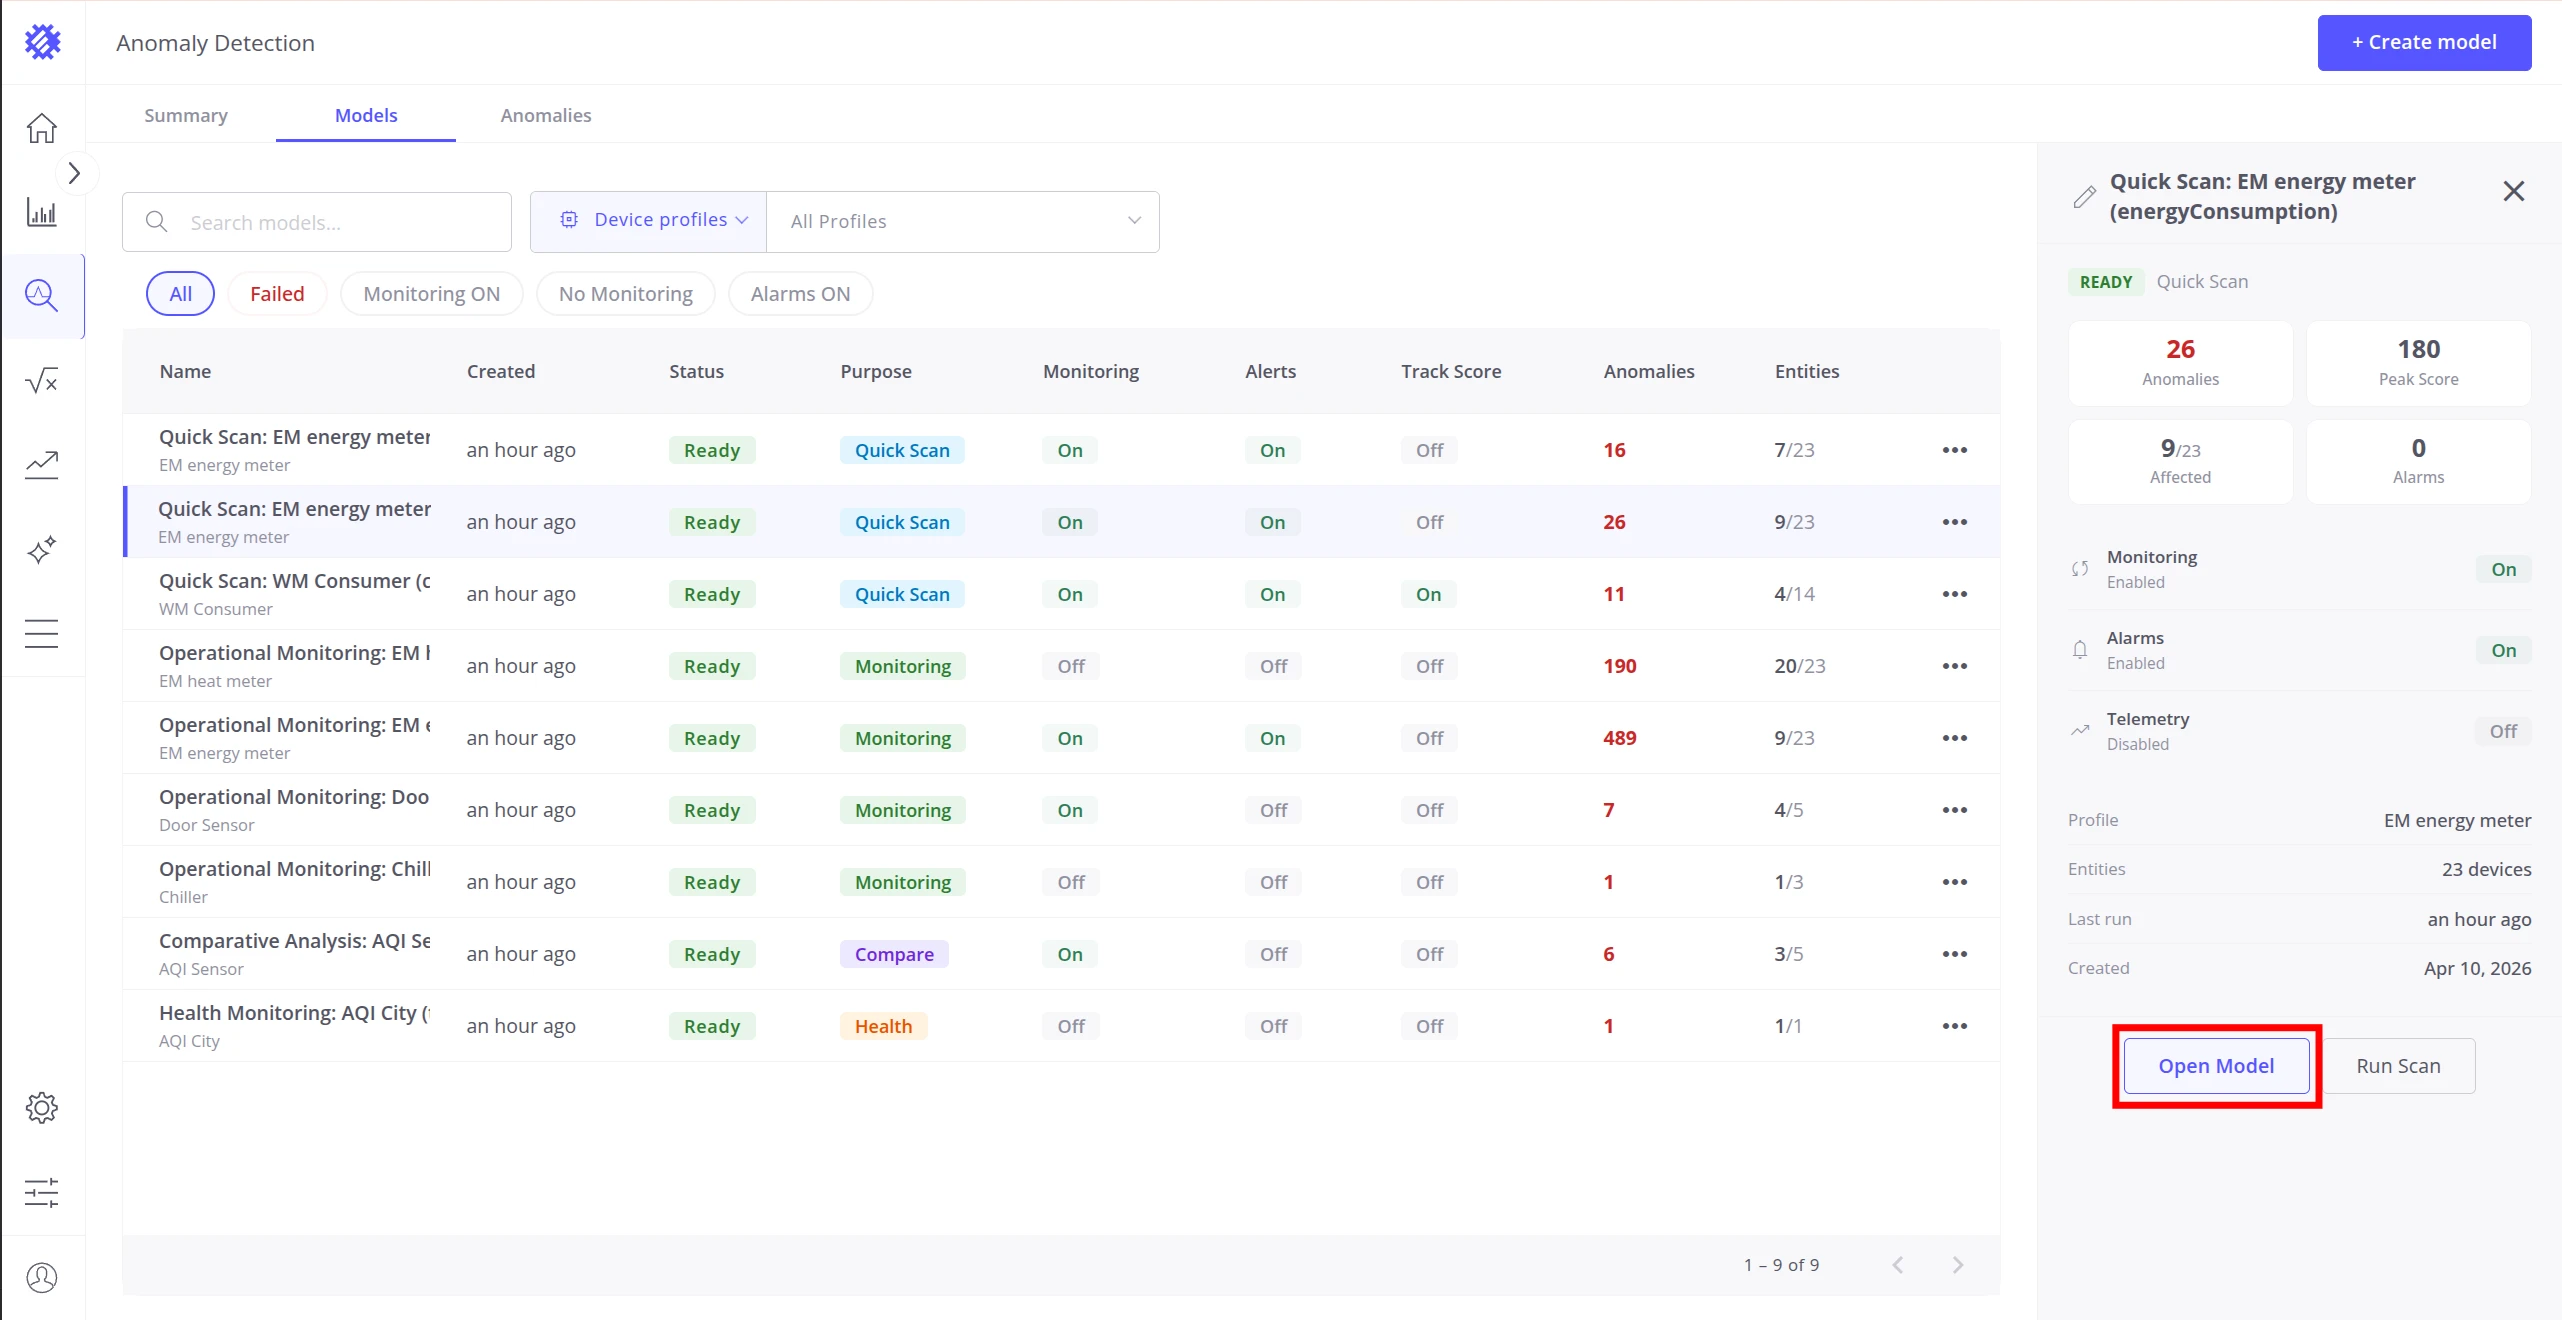
Section titled “Model Detail Panel”Click any model row to open a detail panel on the right side. The panel shows a summary of the model’s configuration and performance:
| Field | Description |
|---|---|
| Status | Queued — waiting to be processed; Running — training in progress; Ready — trained and operational; Failed — training error; Canceled — build was canceled |
| Purpose | Detection intent used to build the model — Quick Scan, Monitoring, Compare, or Health |
| Anomalies | Total count of anomaly events detected by this model |
| Peak Score | The highest anomaly score recorded across all devices and assets |
| Affected | Ratio of devices or assets with at least one detected anomaly to the total scanned by this model |
| Alarms | Total count of ThingsBoard alarms raised by this model |
| Monitoring | Whether periodic scanning is enabled |
| Alerts | Whether alarm creation is enabled |
| Telemetry | Whether anomaly scores are being saved as telemetry to ThingsBoard |
| Profile | The device or asset profile this model monitors |
| Entities | Number of devices or assets monitored by this model |
| Last Run | Time elapsed since the most recent scan |
| Created | Date the model was created |
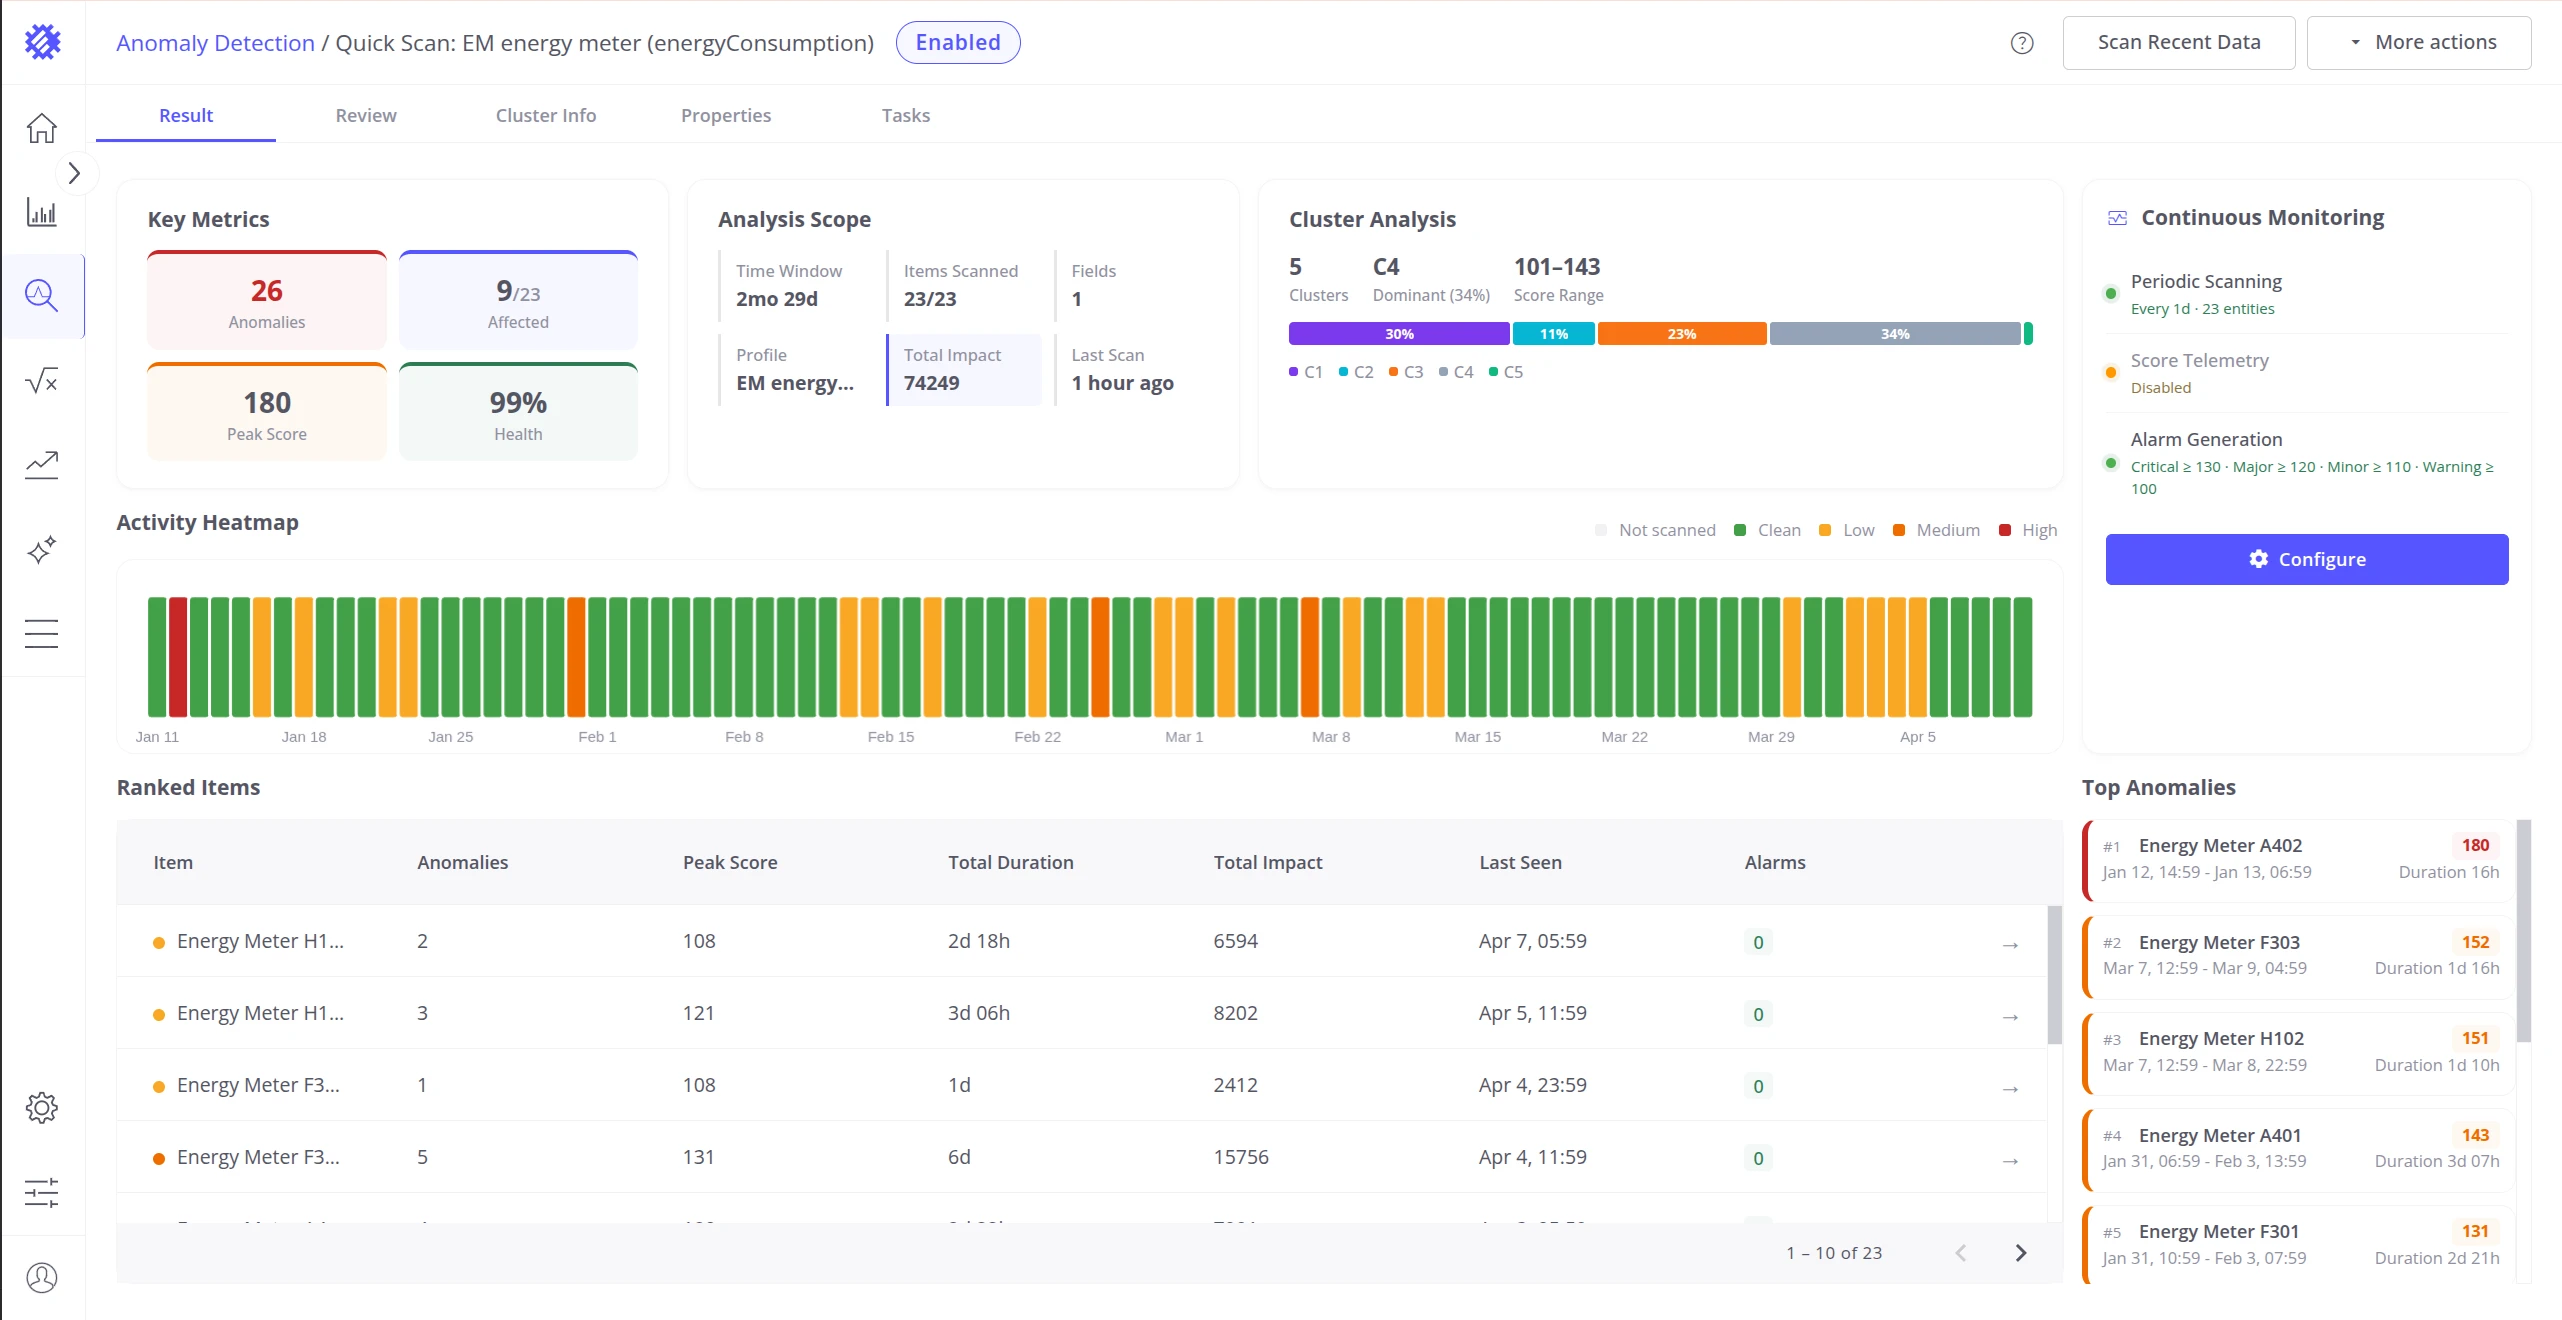
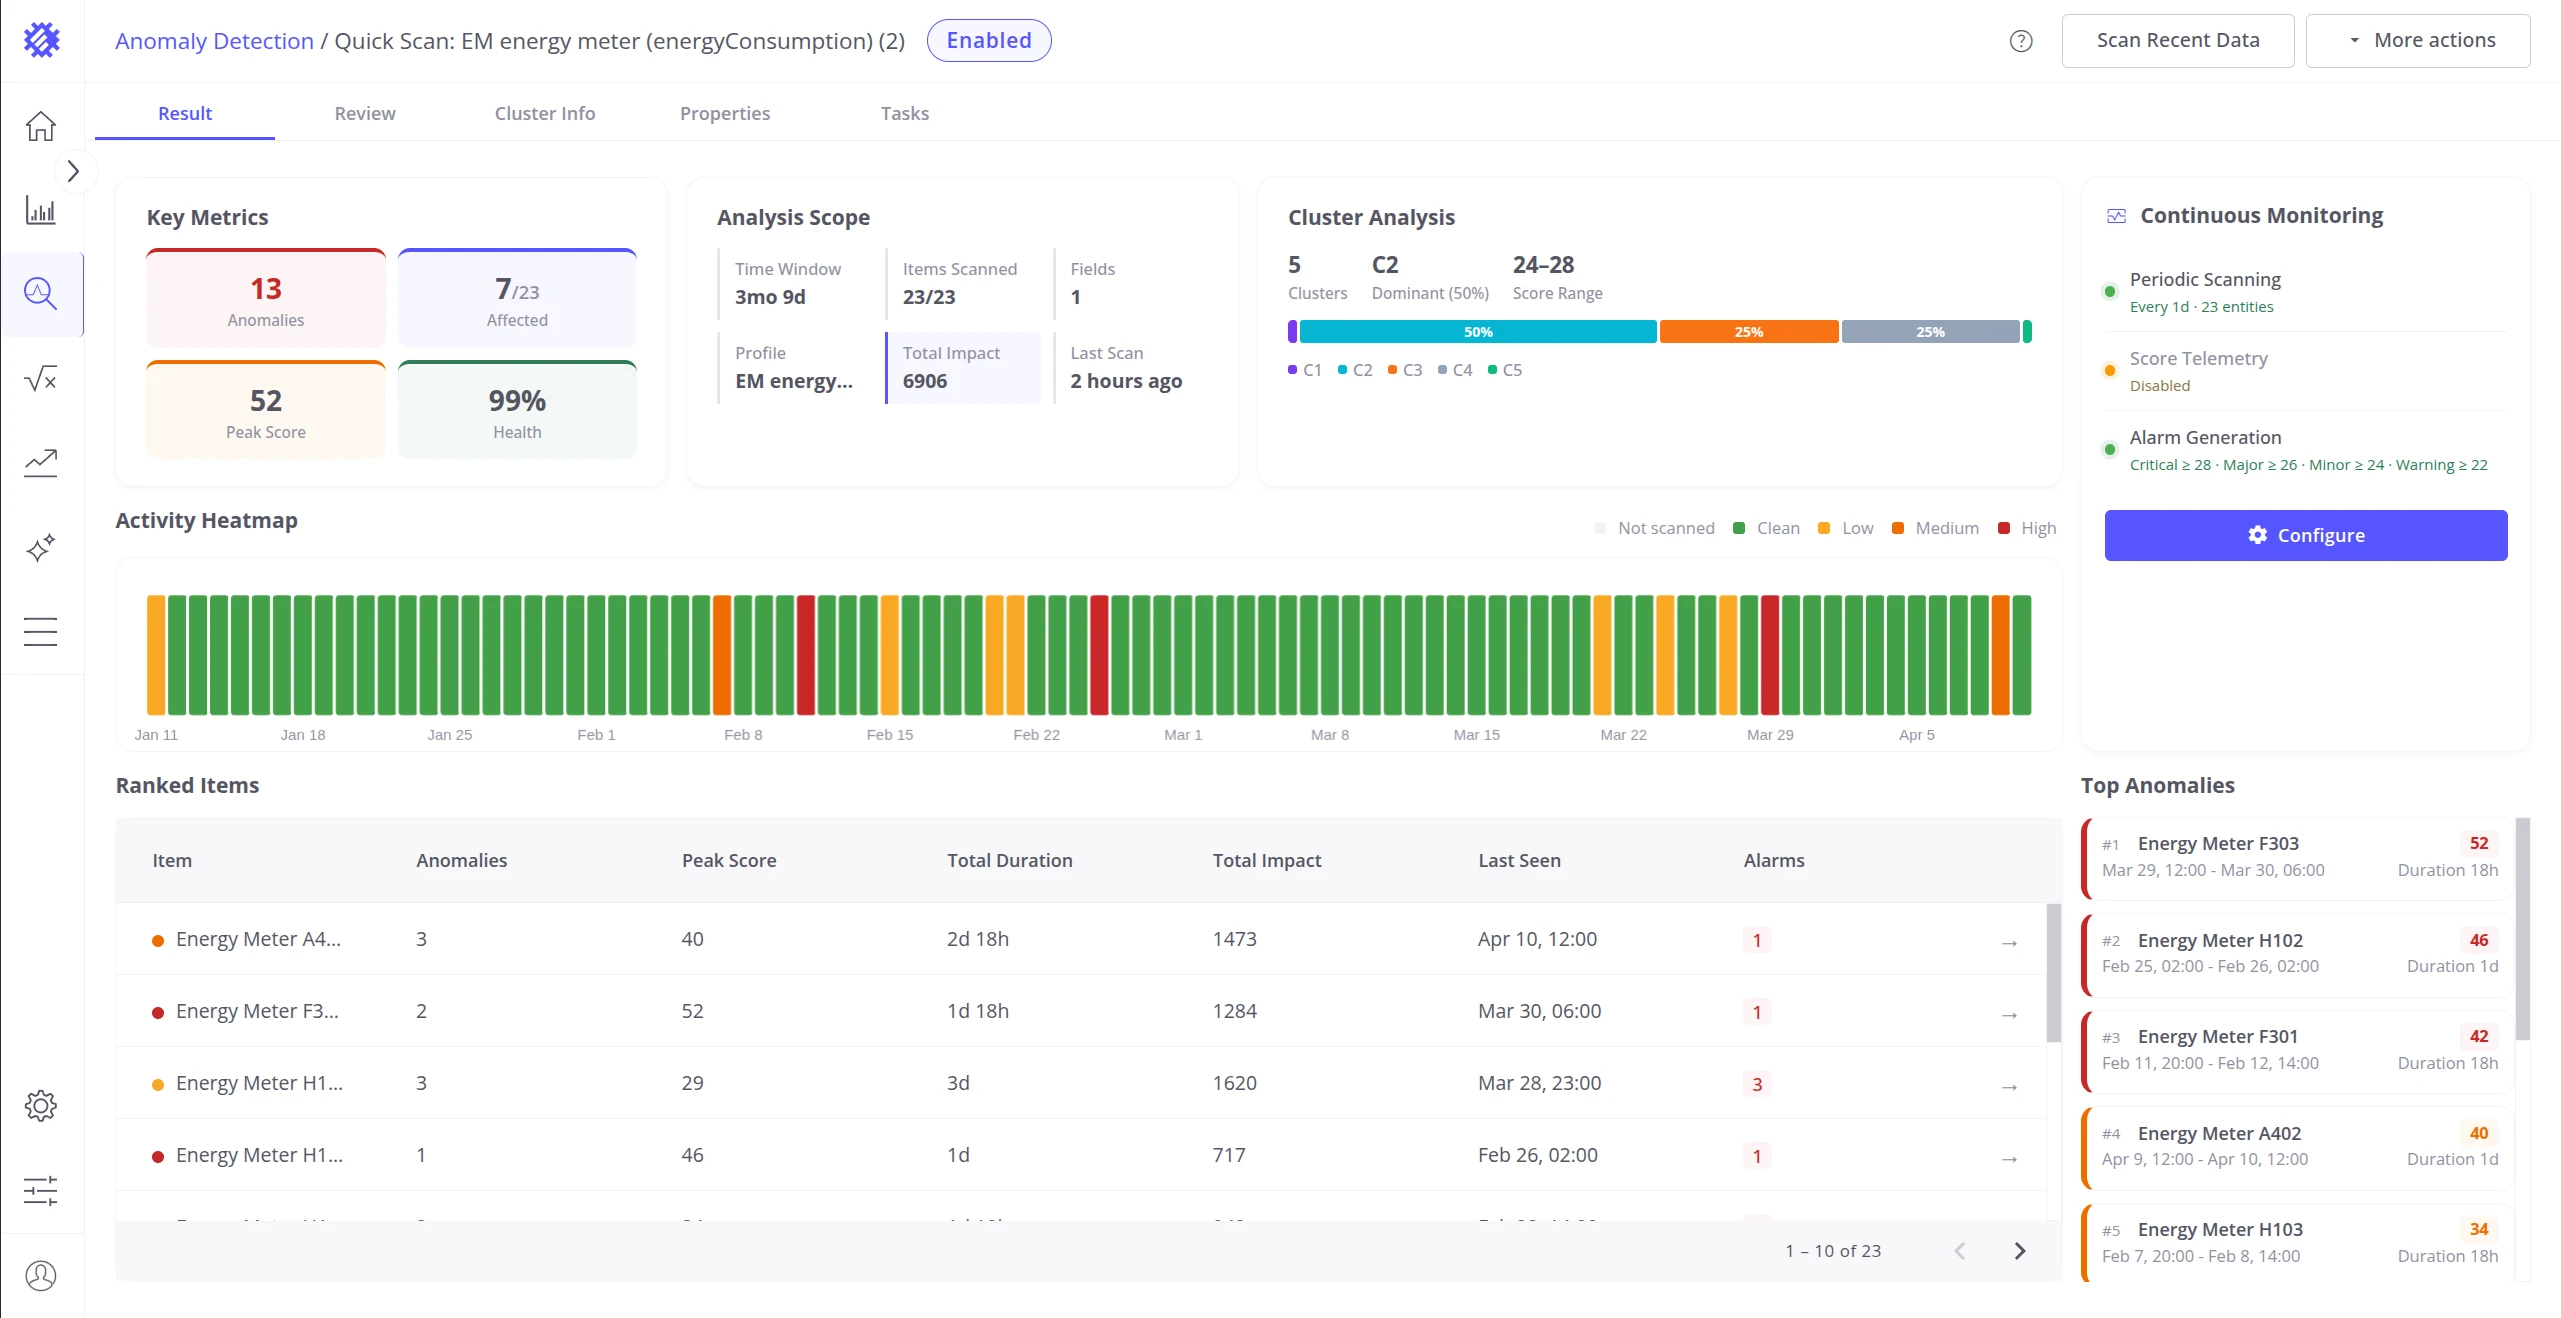
Open Model — navigates to the full Result view for this model where you can inspect detected anomalies in detail:
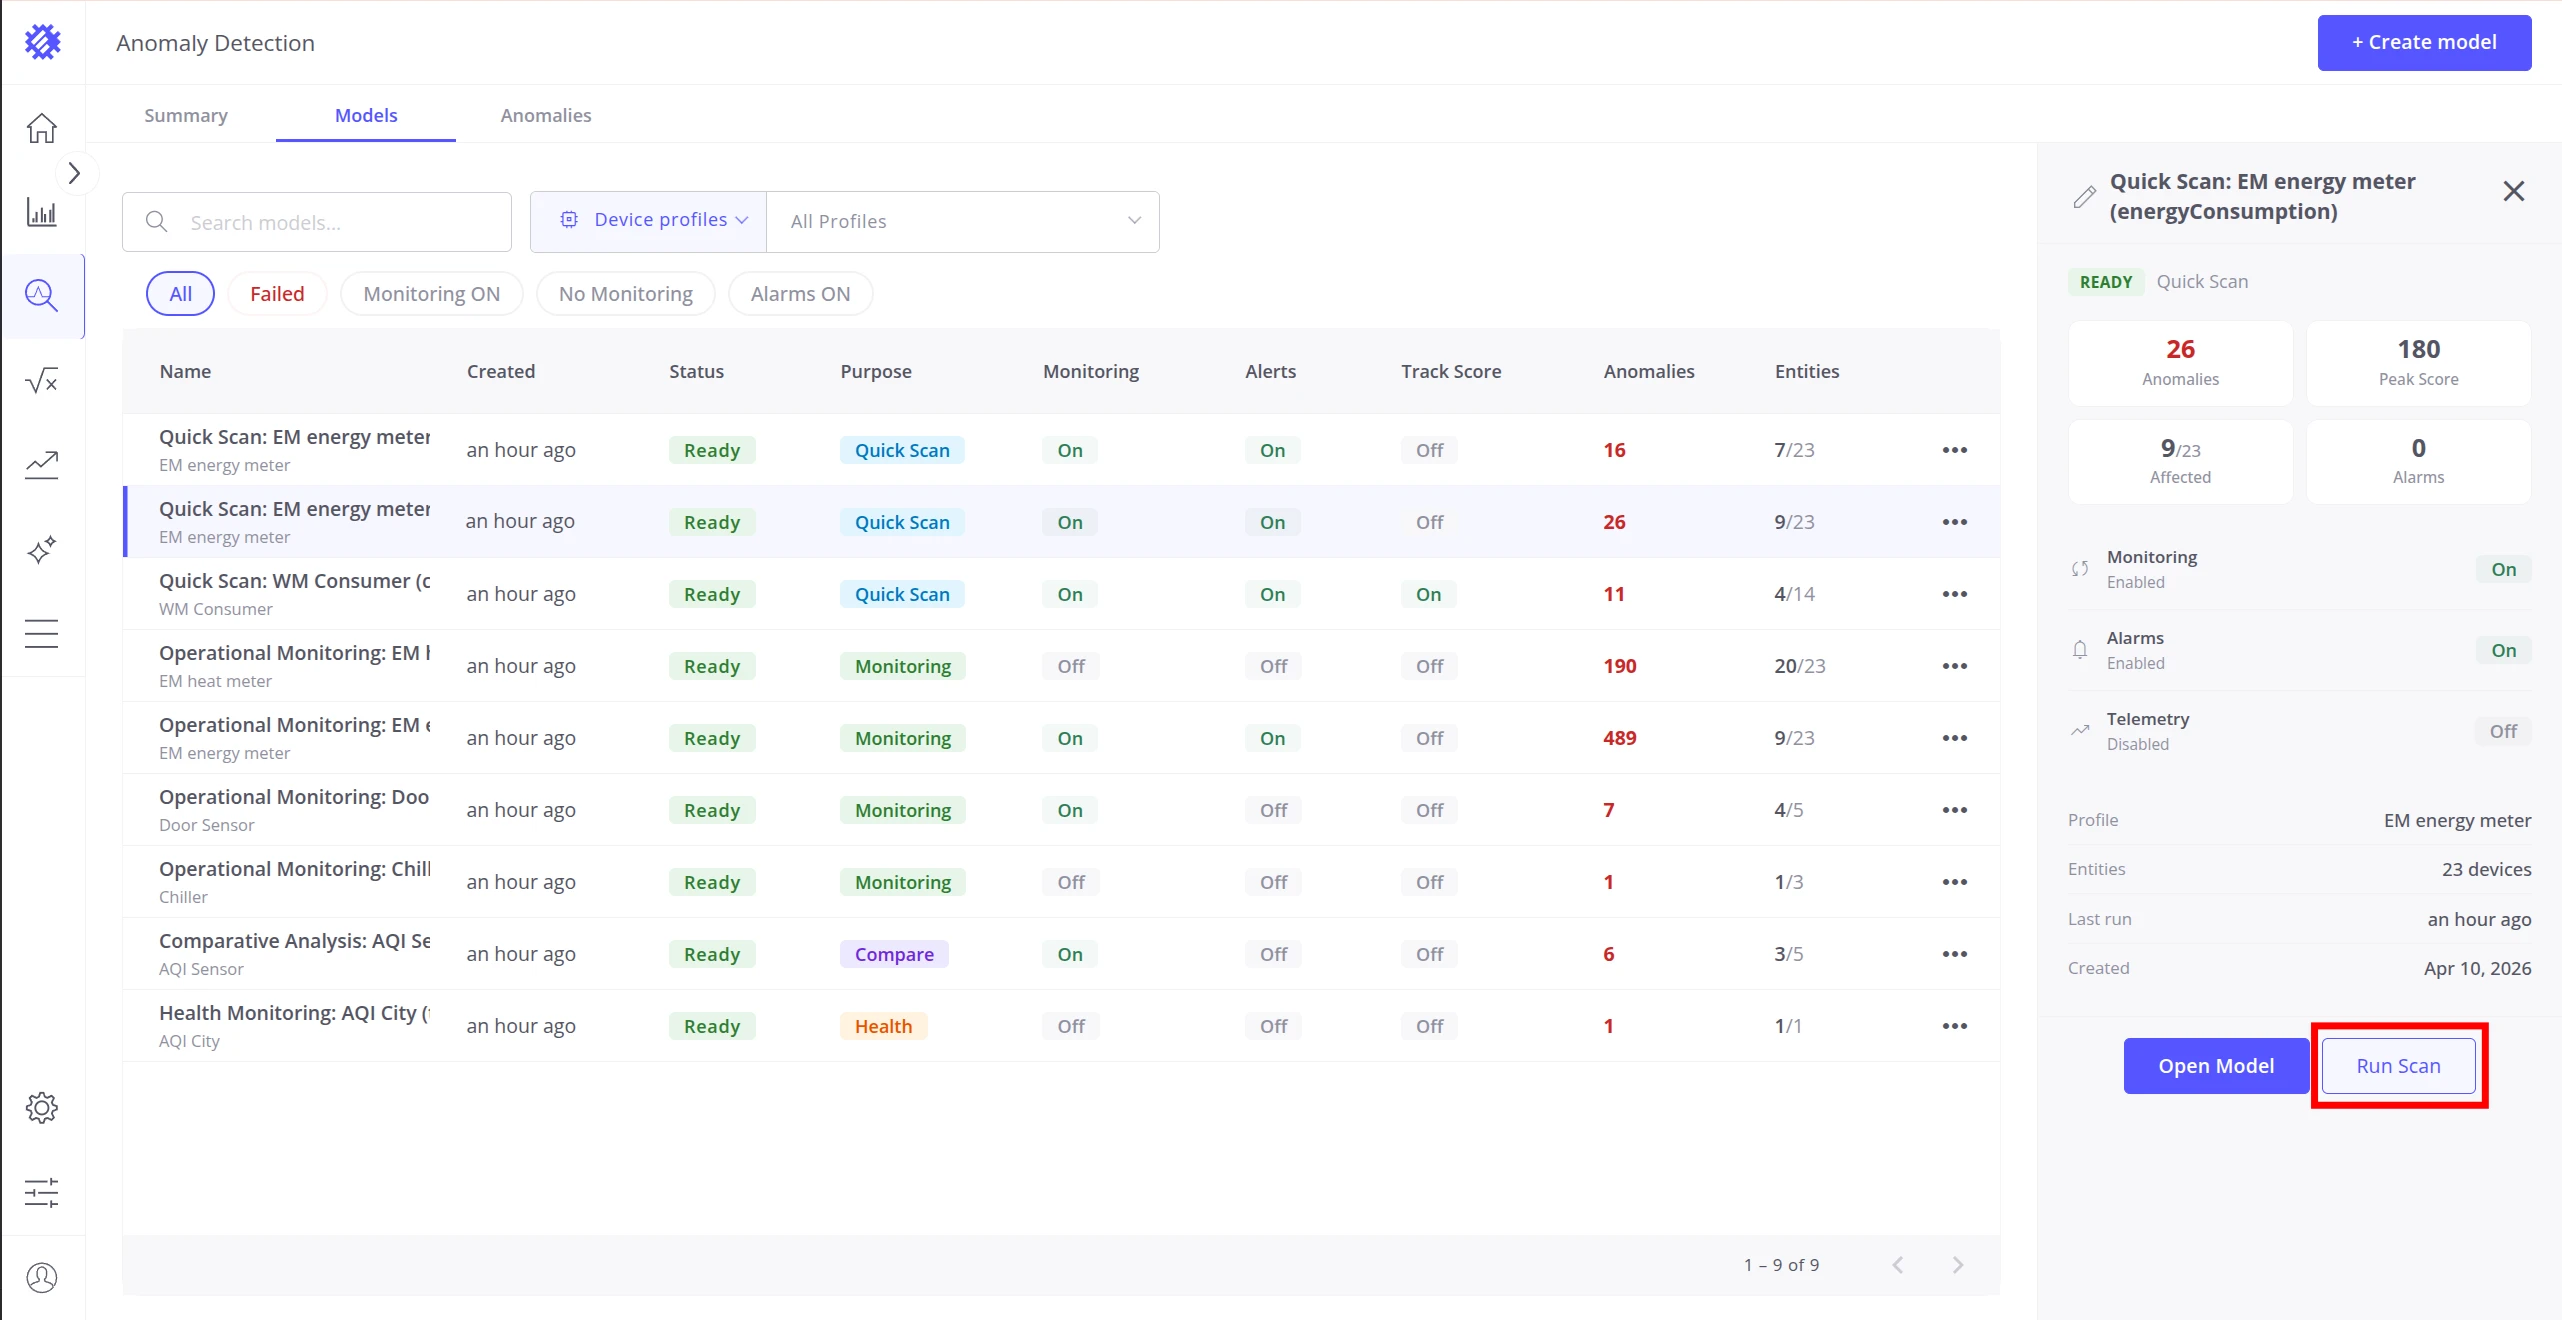
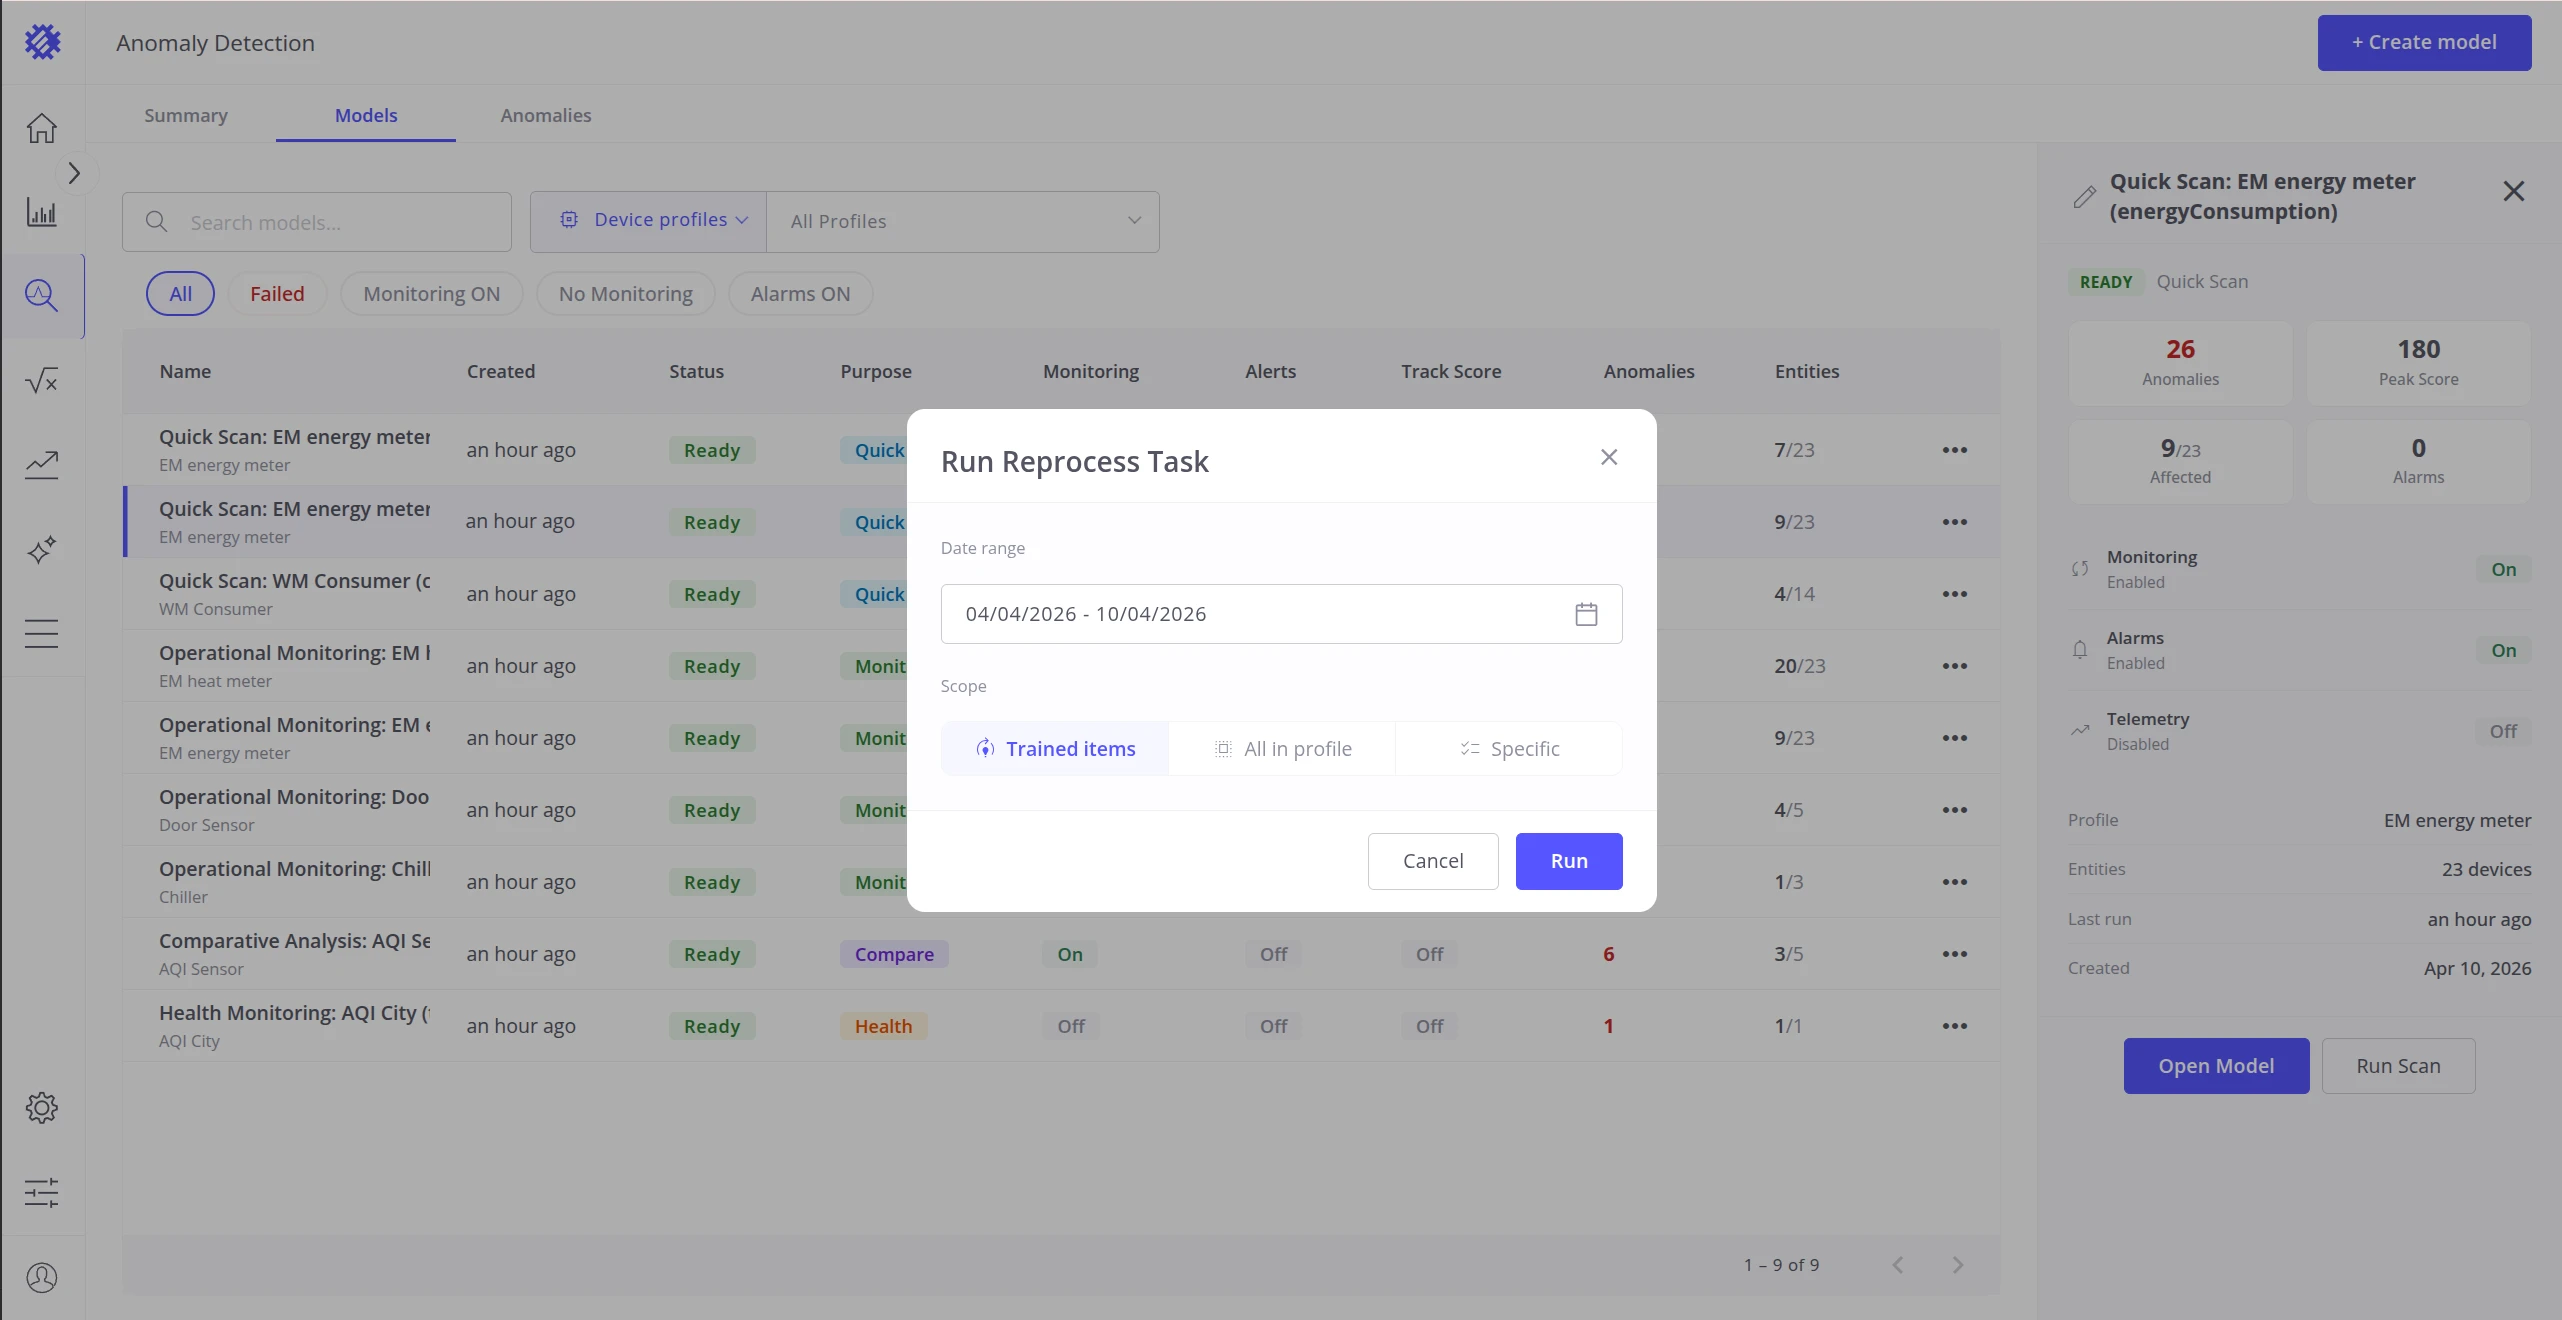
Run Scan — opens the Reprocess Task dialog to trigger an on-demand scan of historical data:
Renaming a Model
Section titled “Renaming a Model”There are two ways to rename a model:
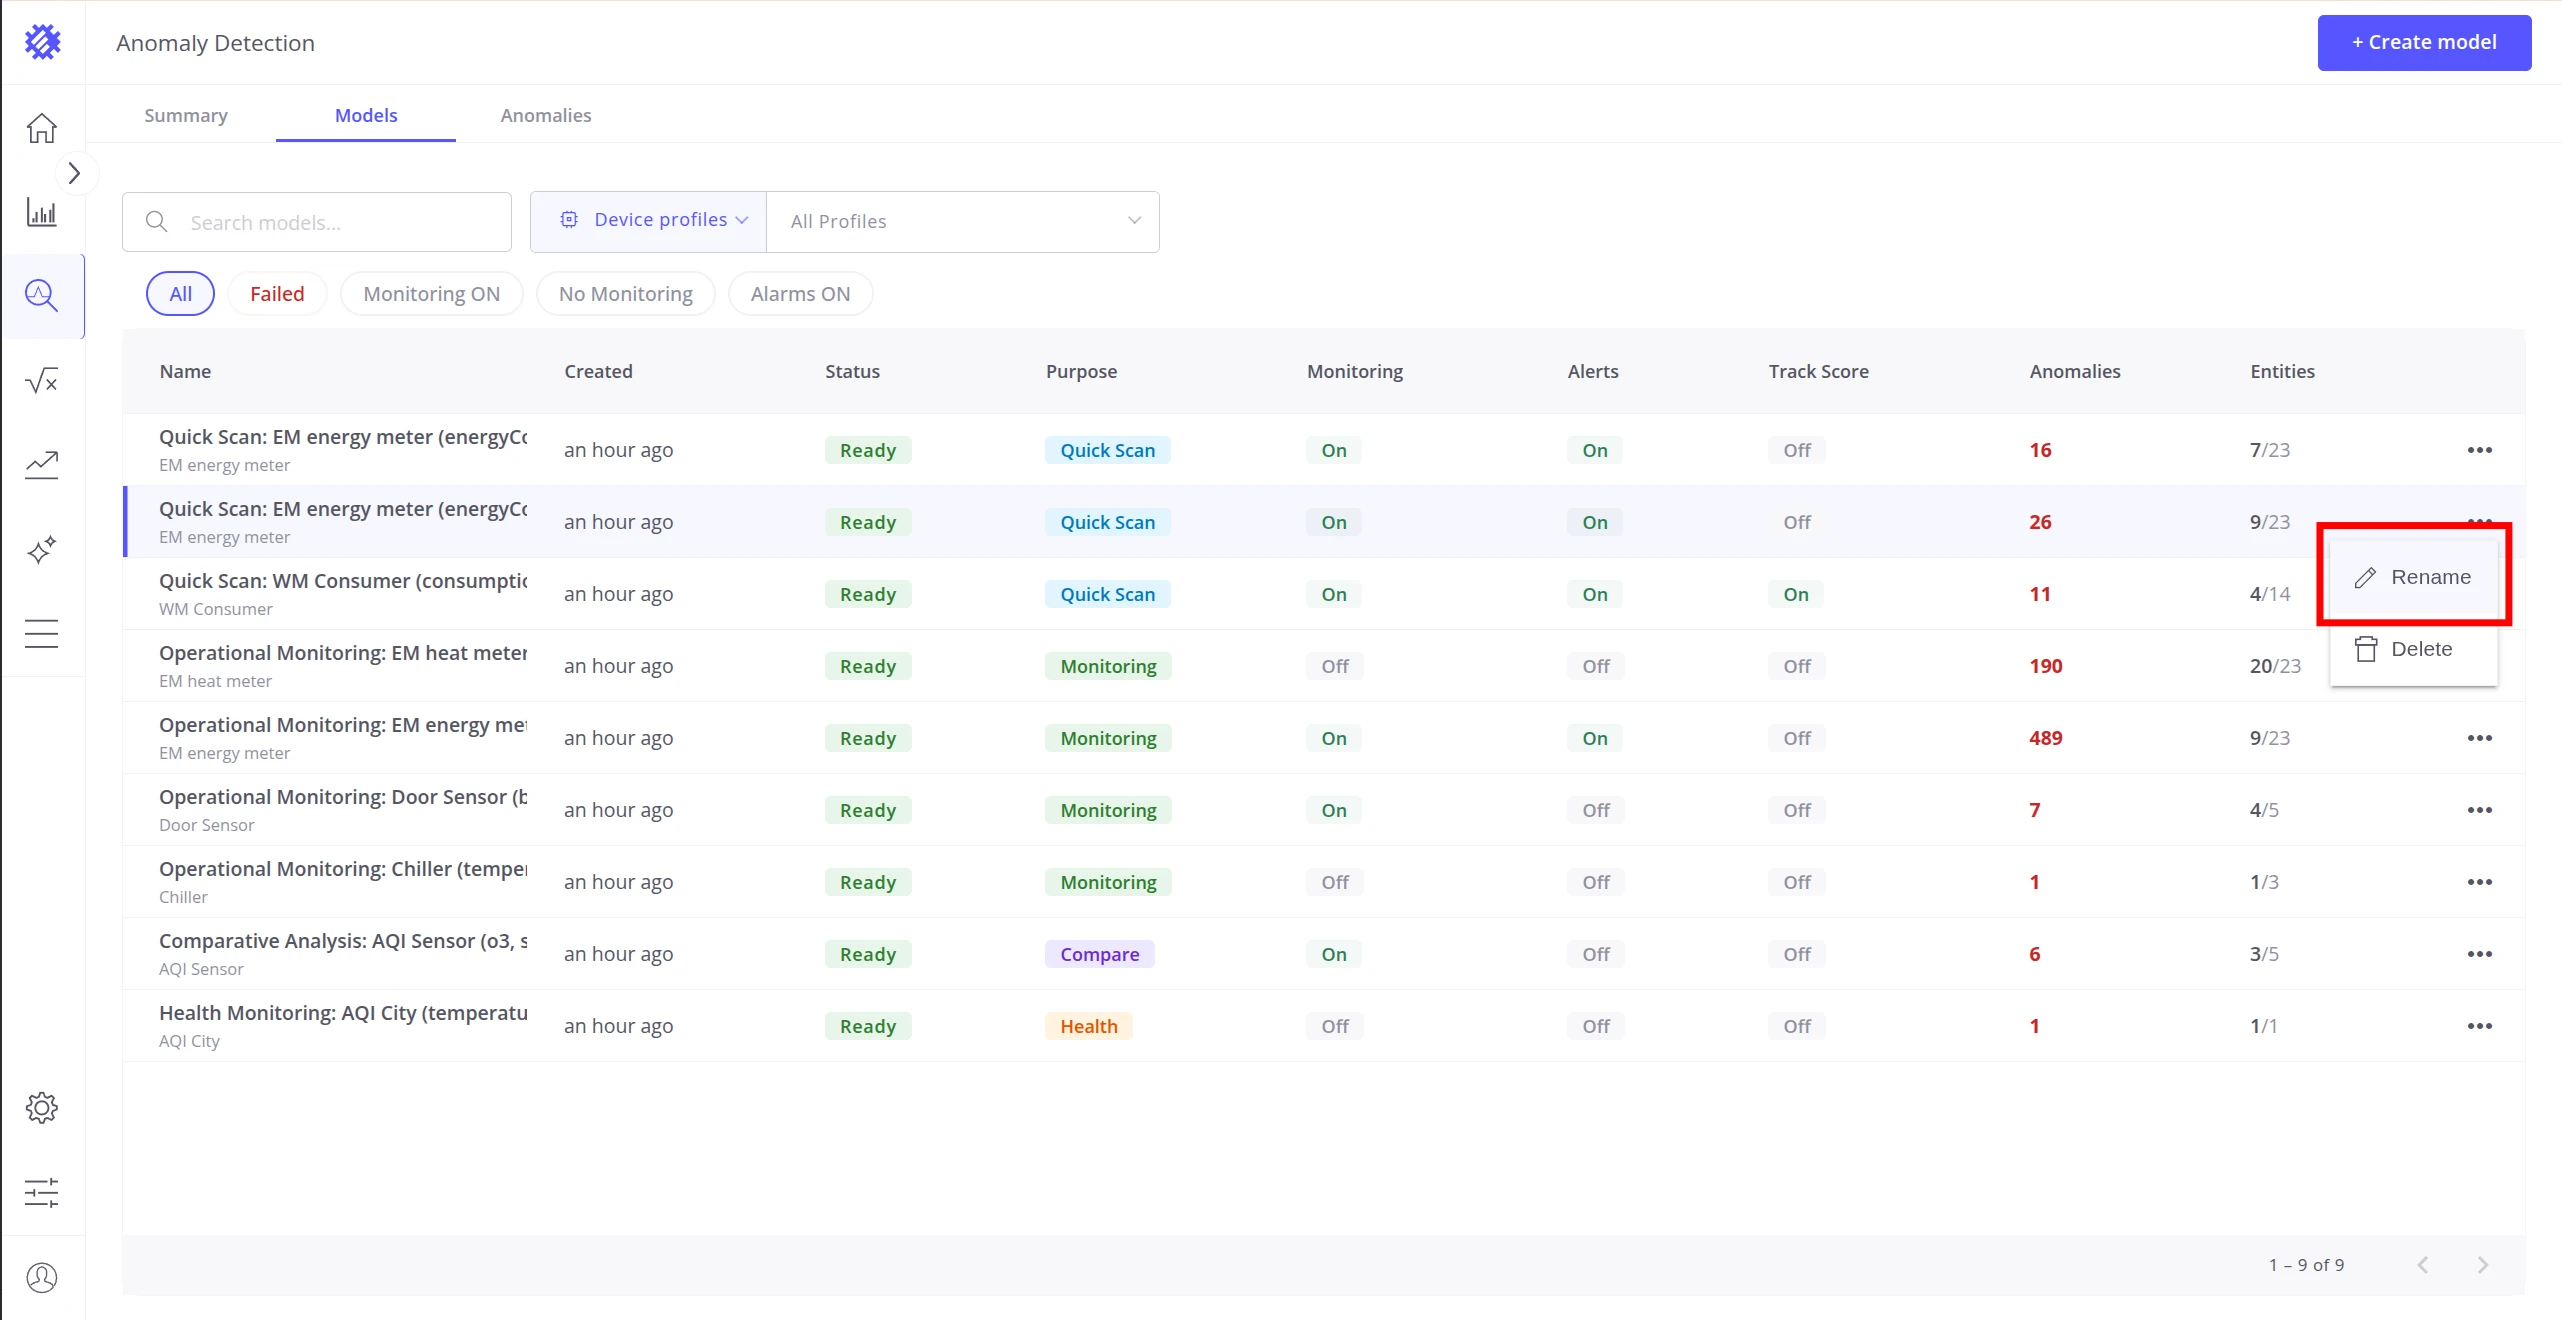
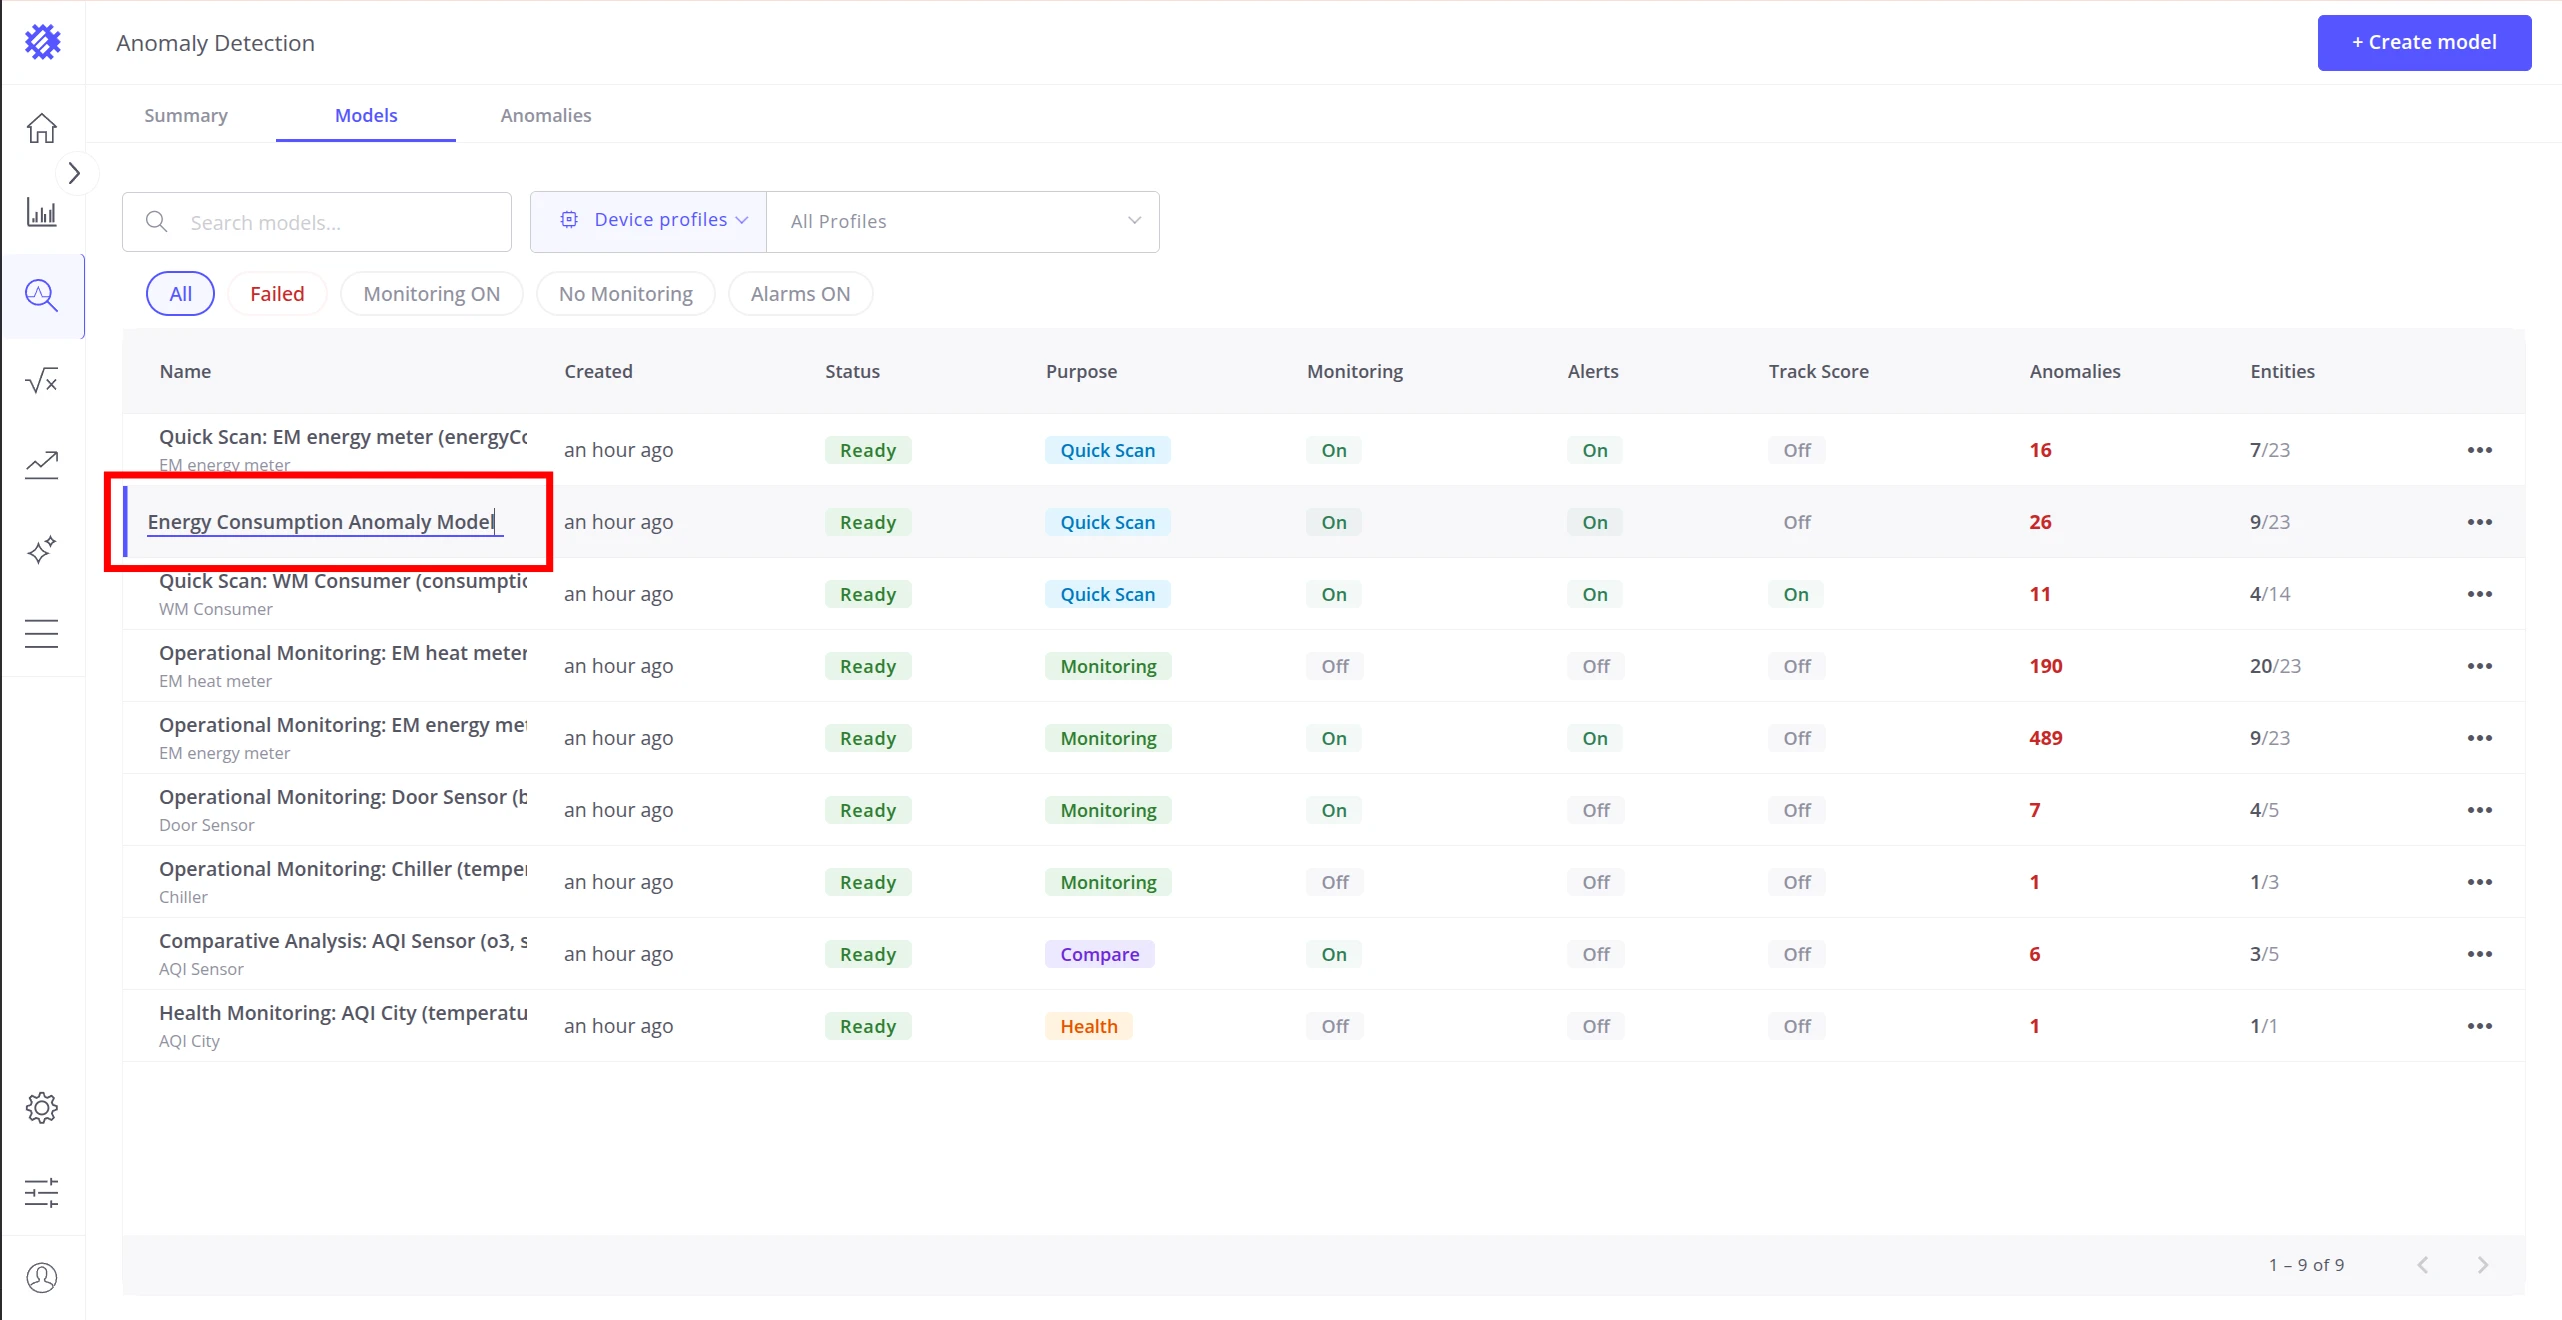
Option 1 — Three-dot menu. Click the ⋯ at the end of any model row and select Rename. The model name becomes editable inline in the table. Press Enter to apply:
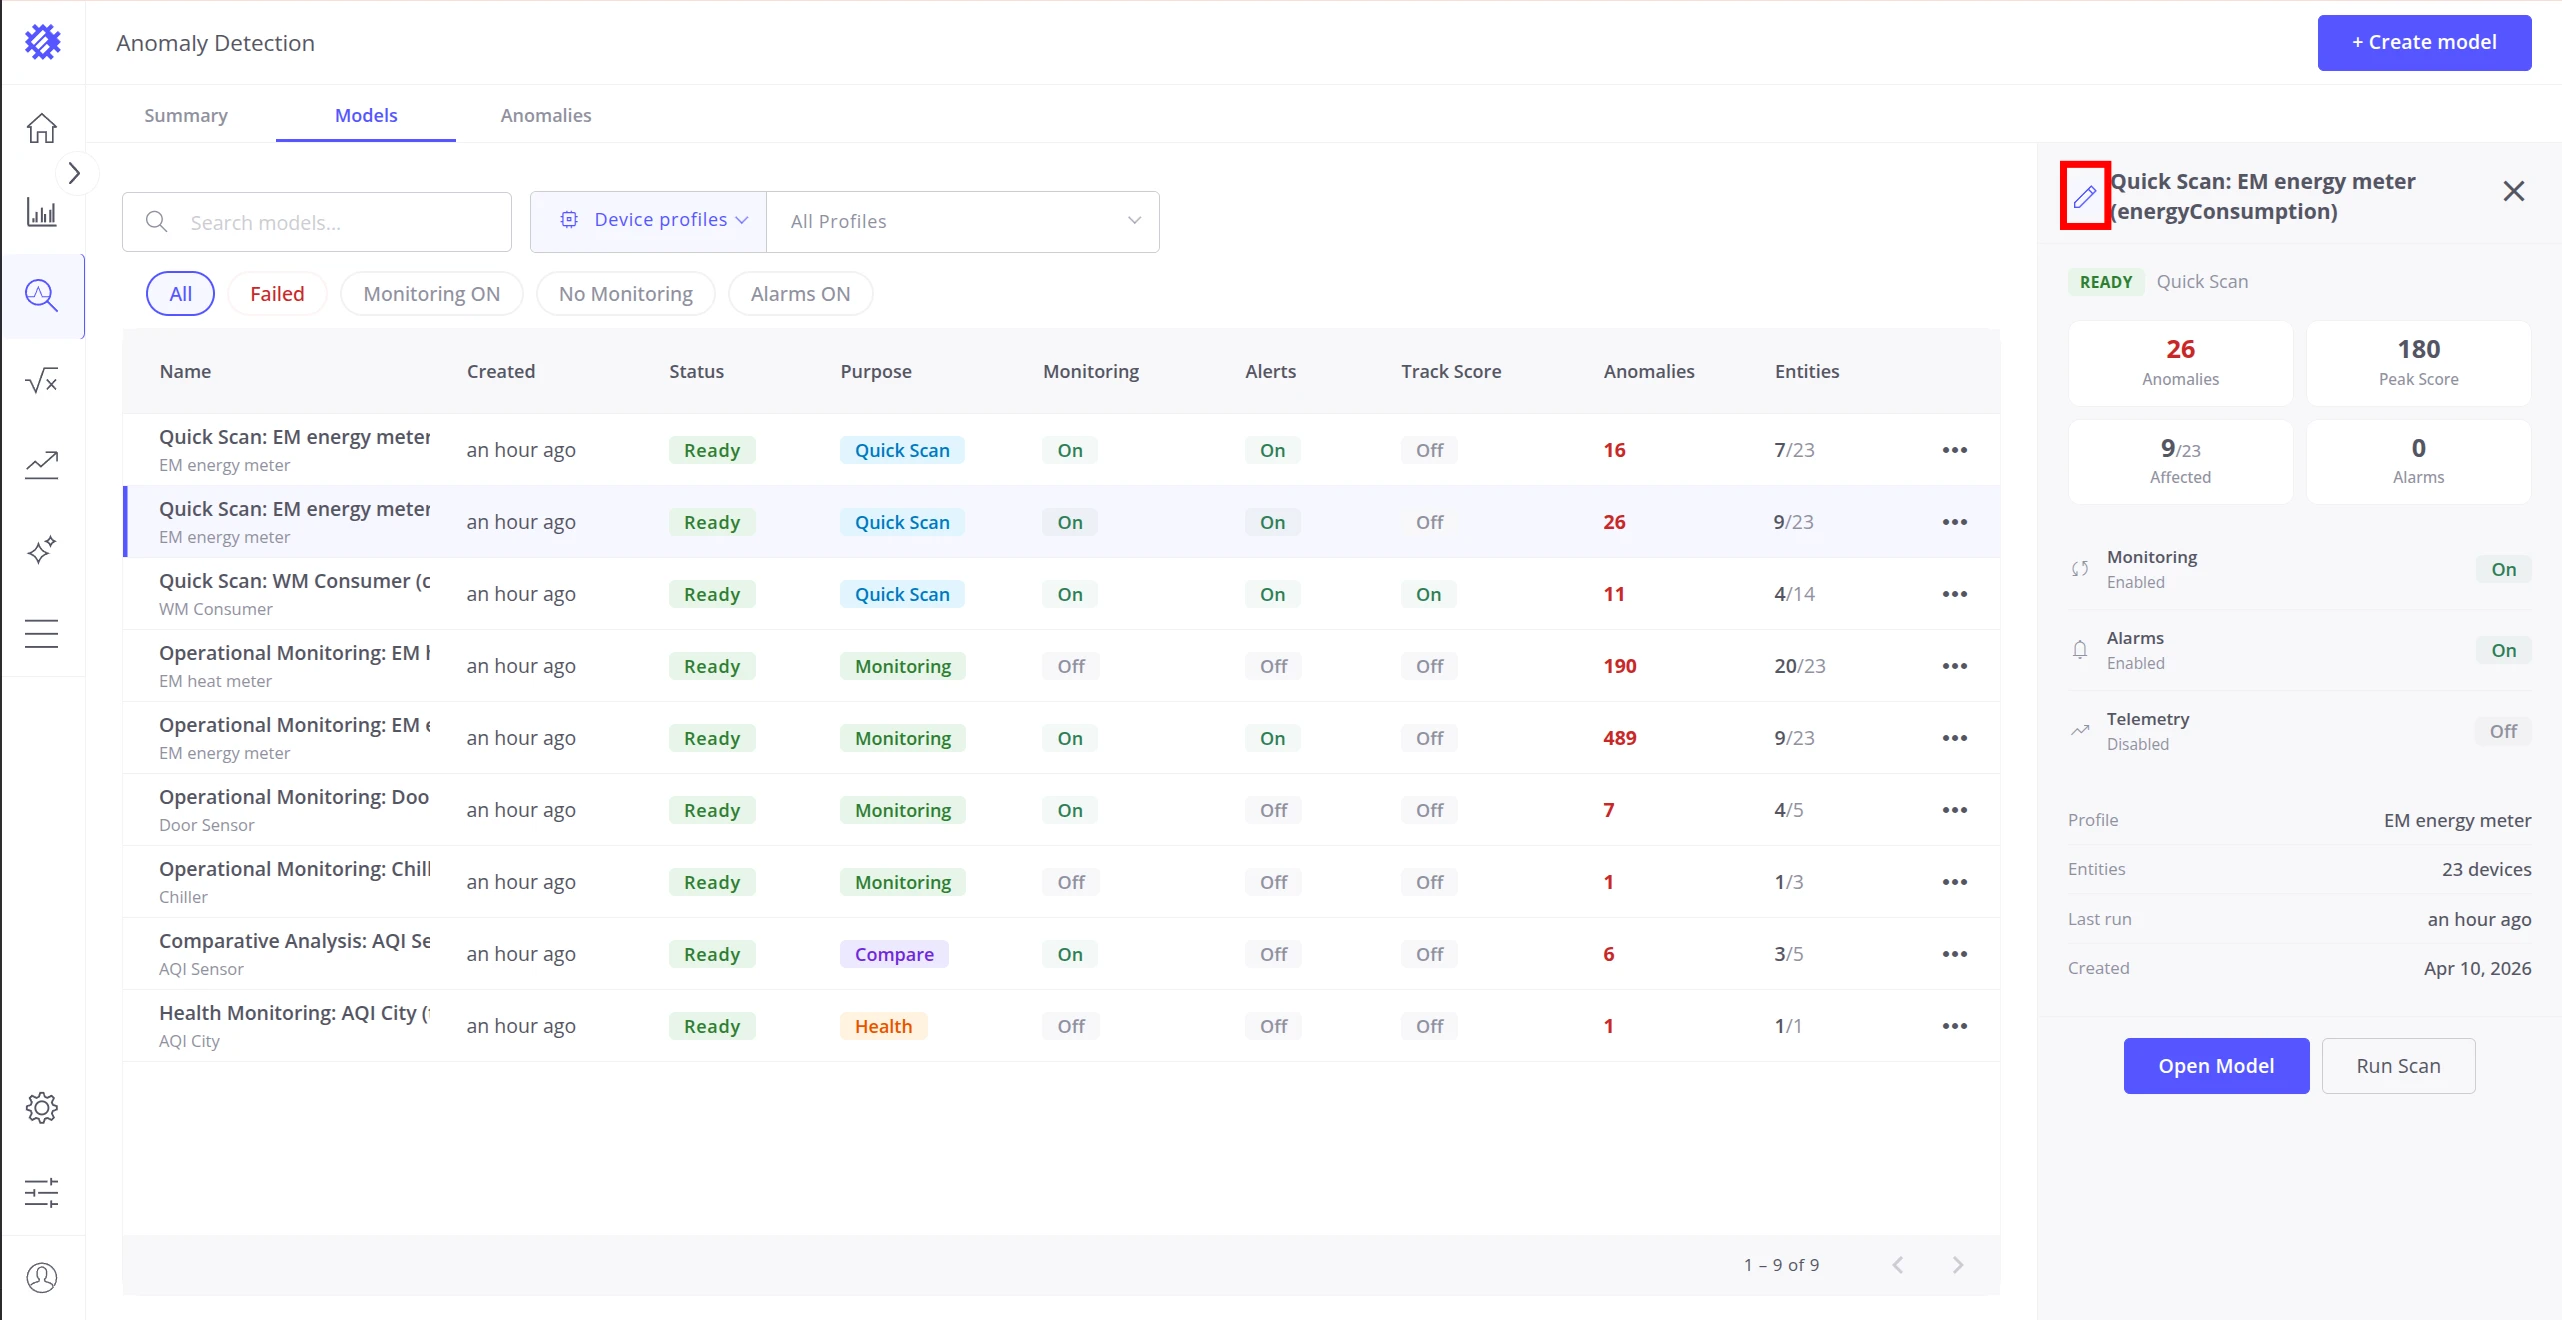
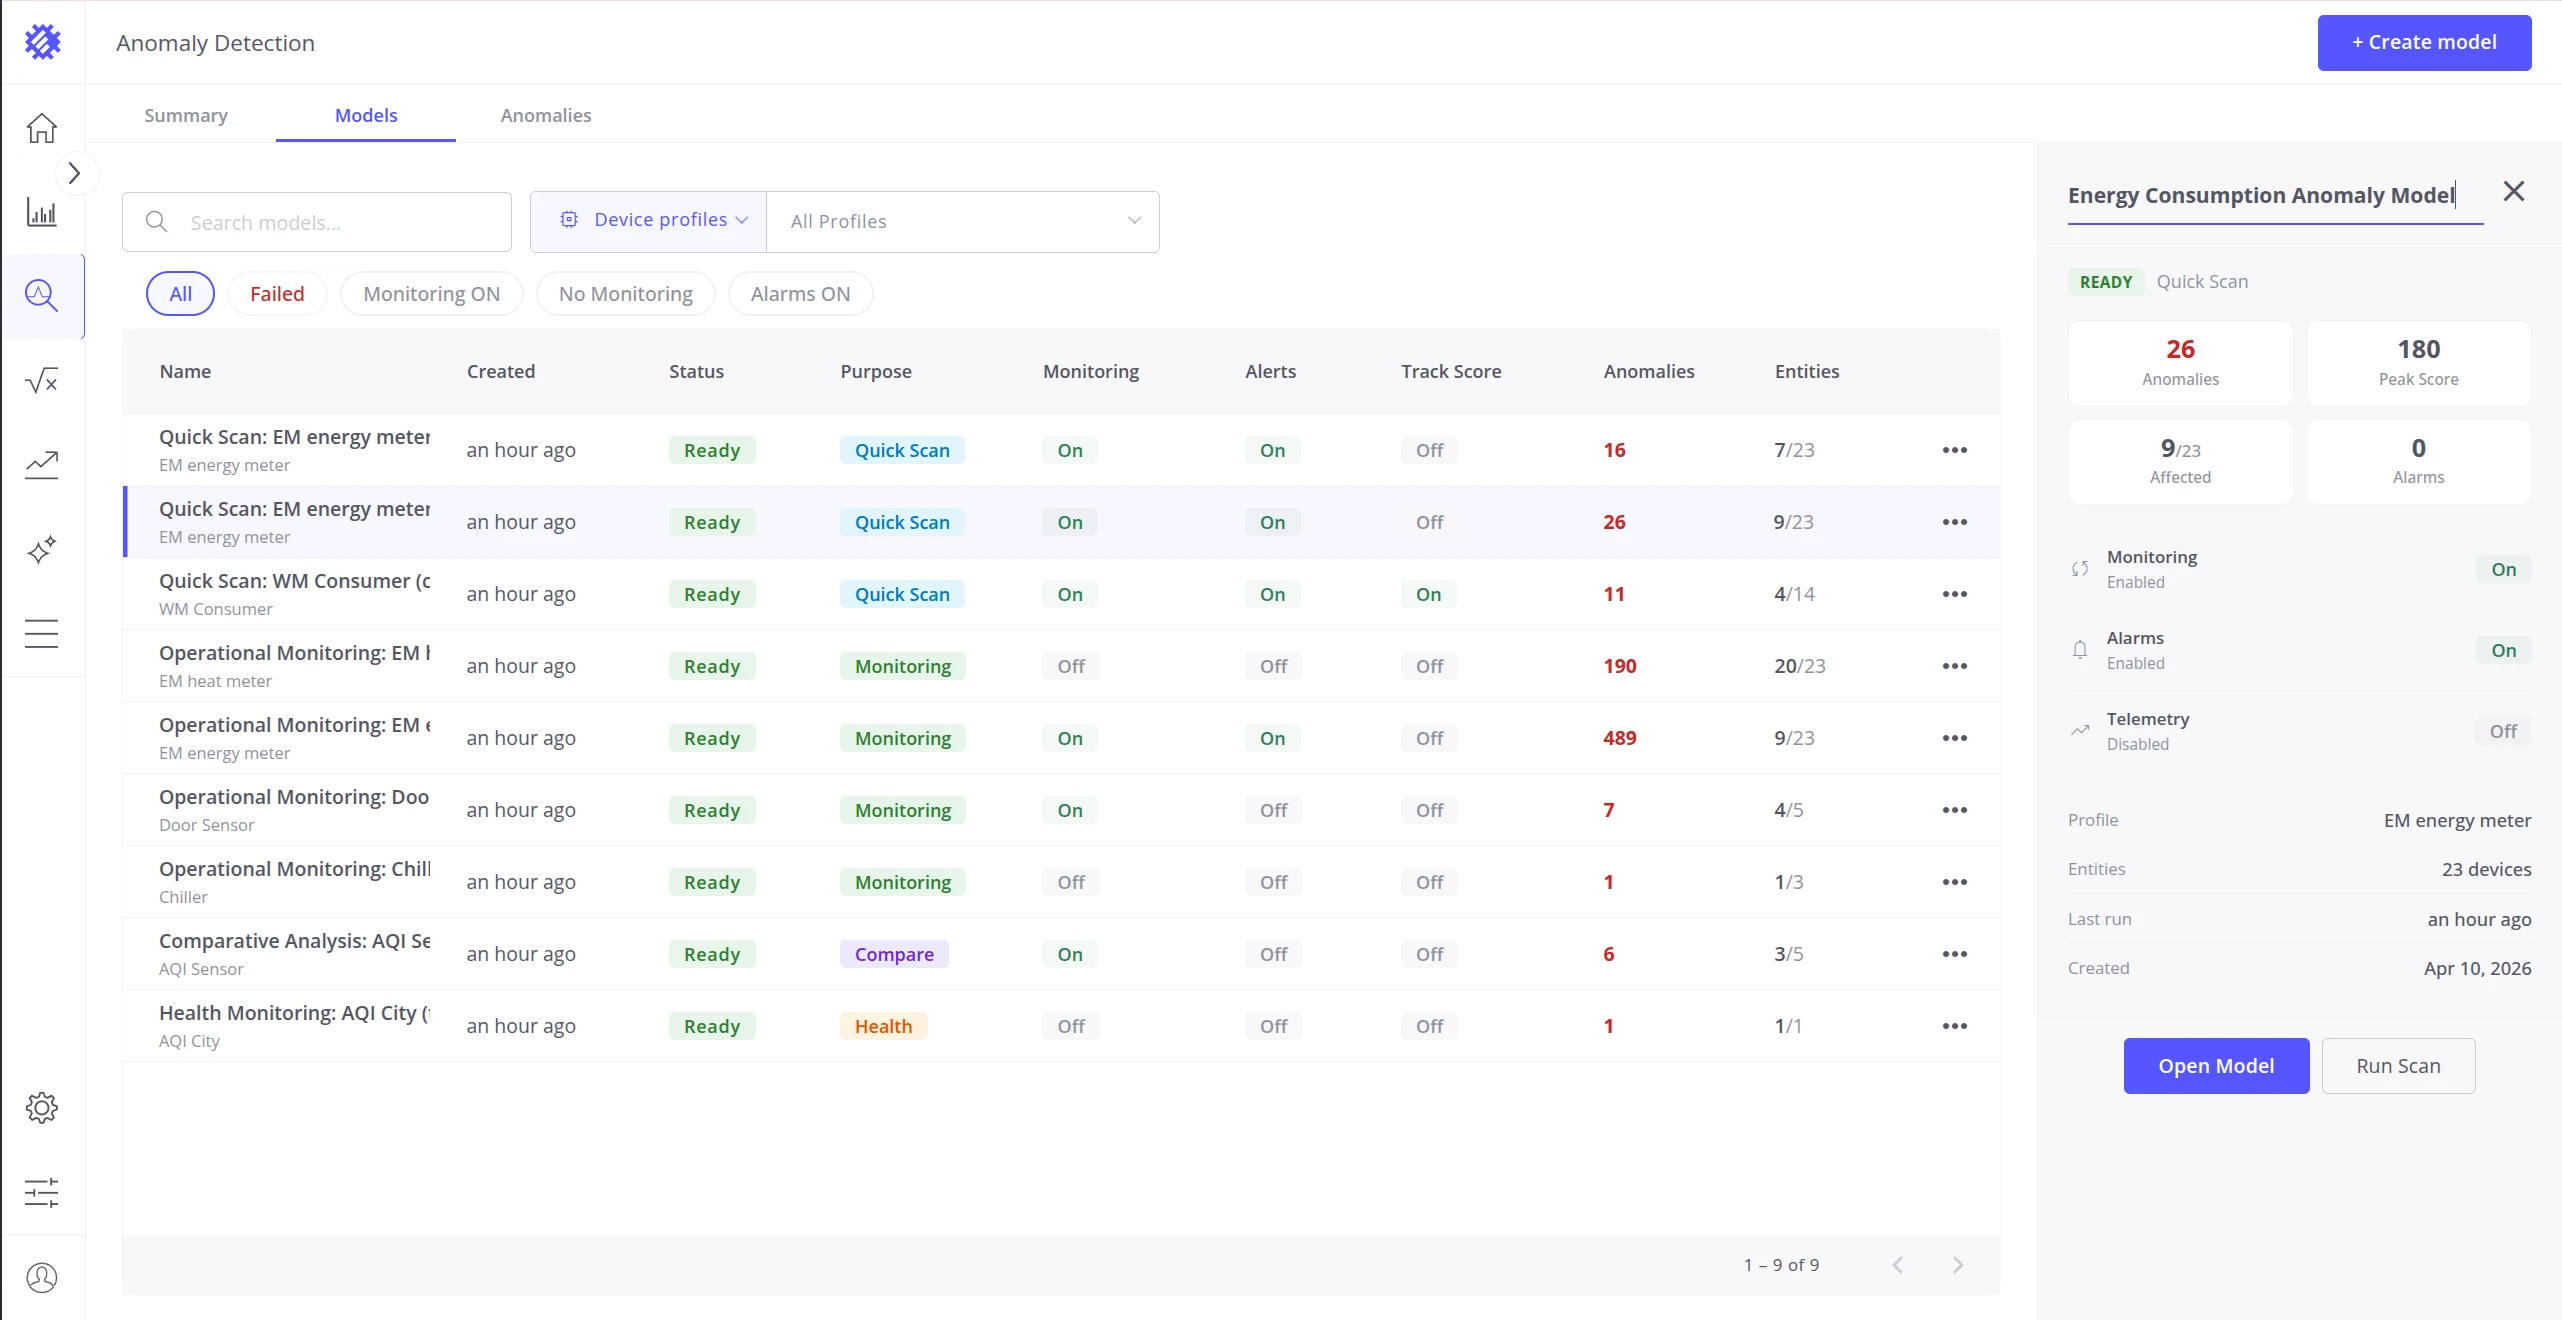
Option 2 — Detail panel. Click any model row to open the detail panel, then click the model name in the panel header to edit it in place. Press Enter to apply:
Deleting a Model
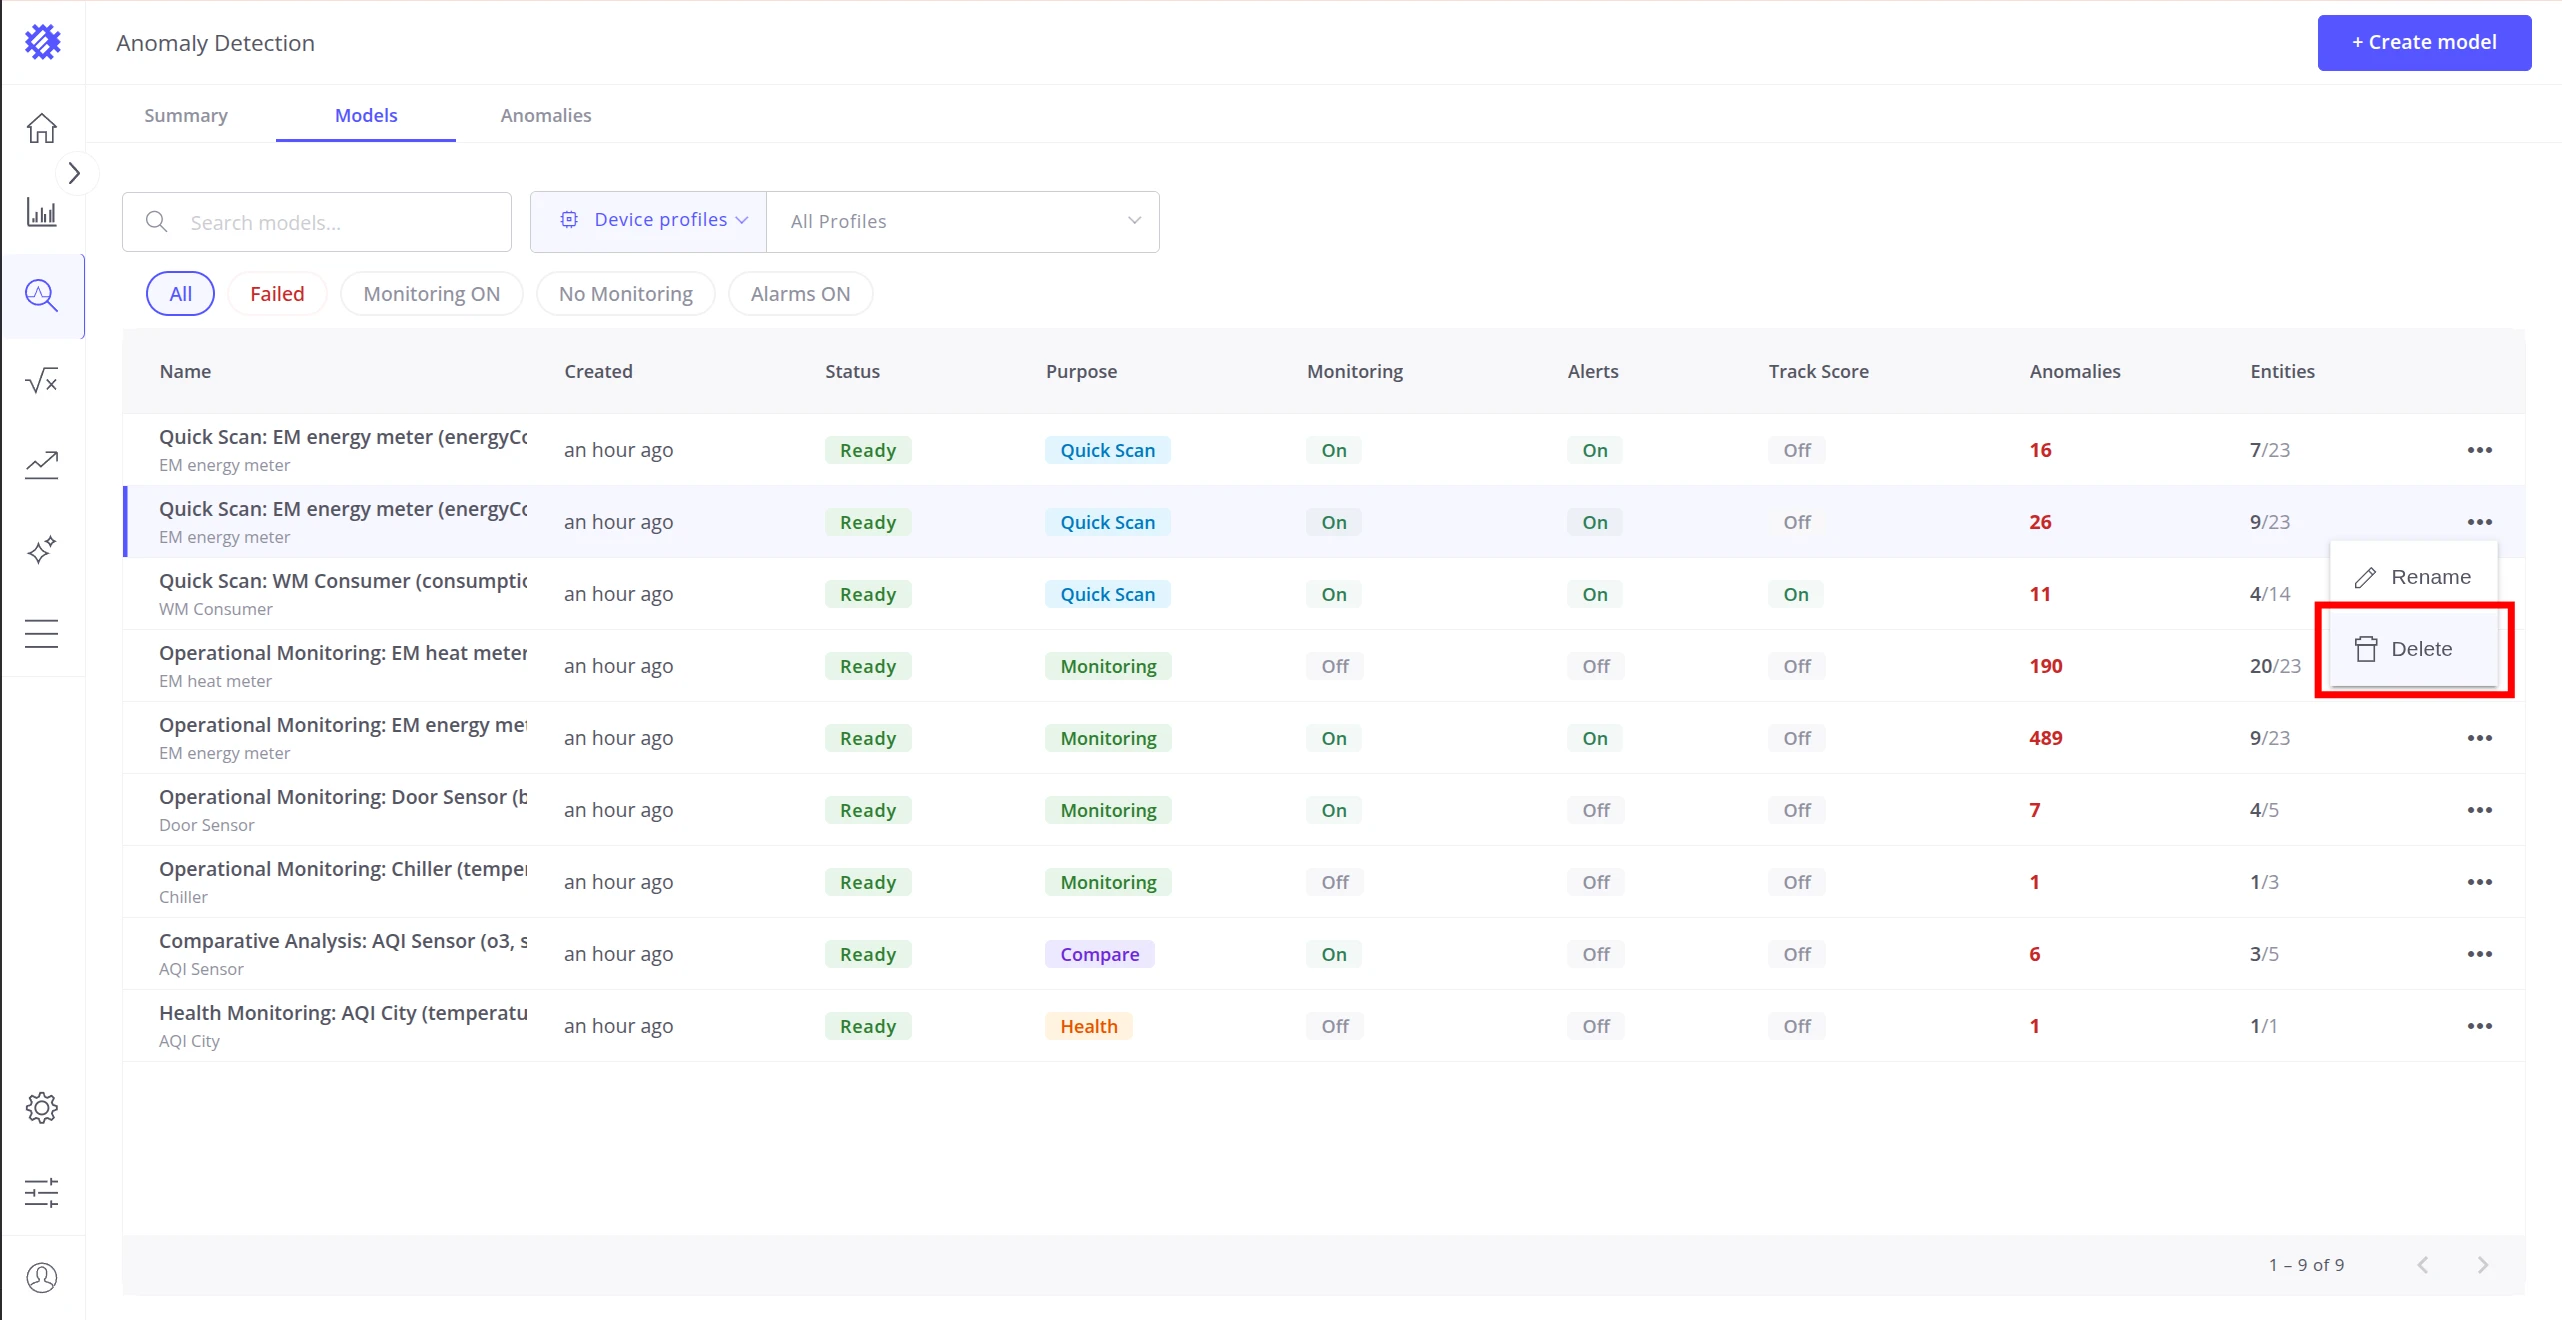
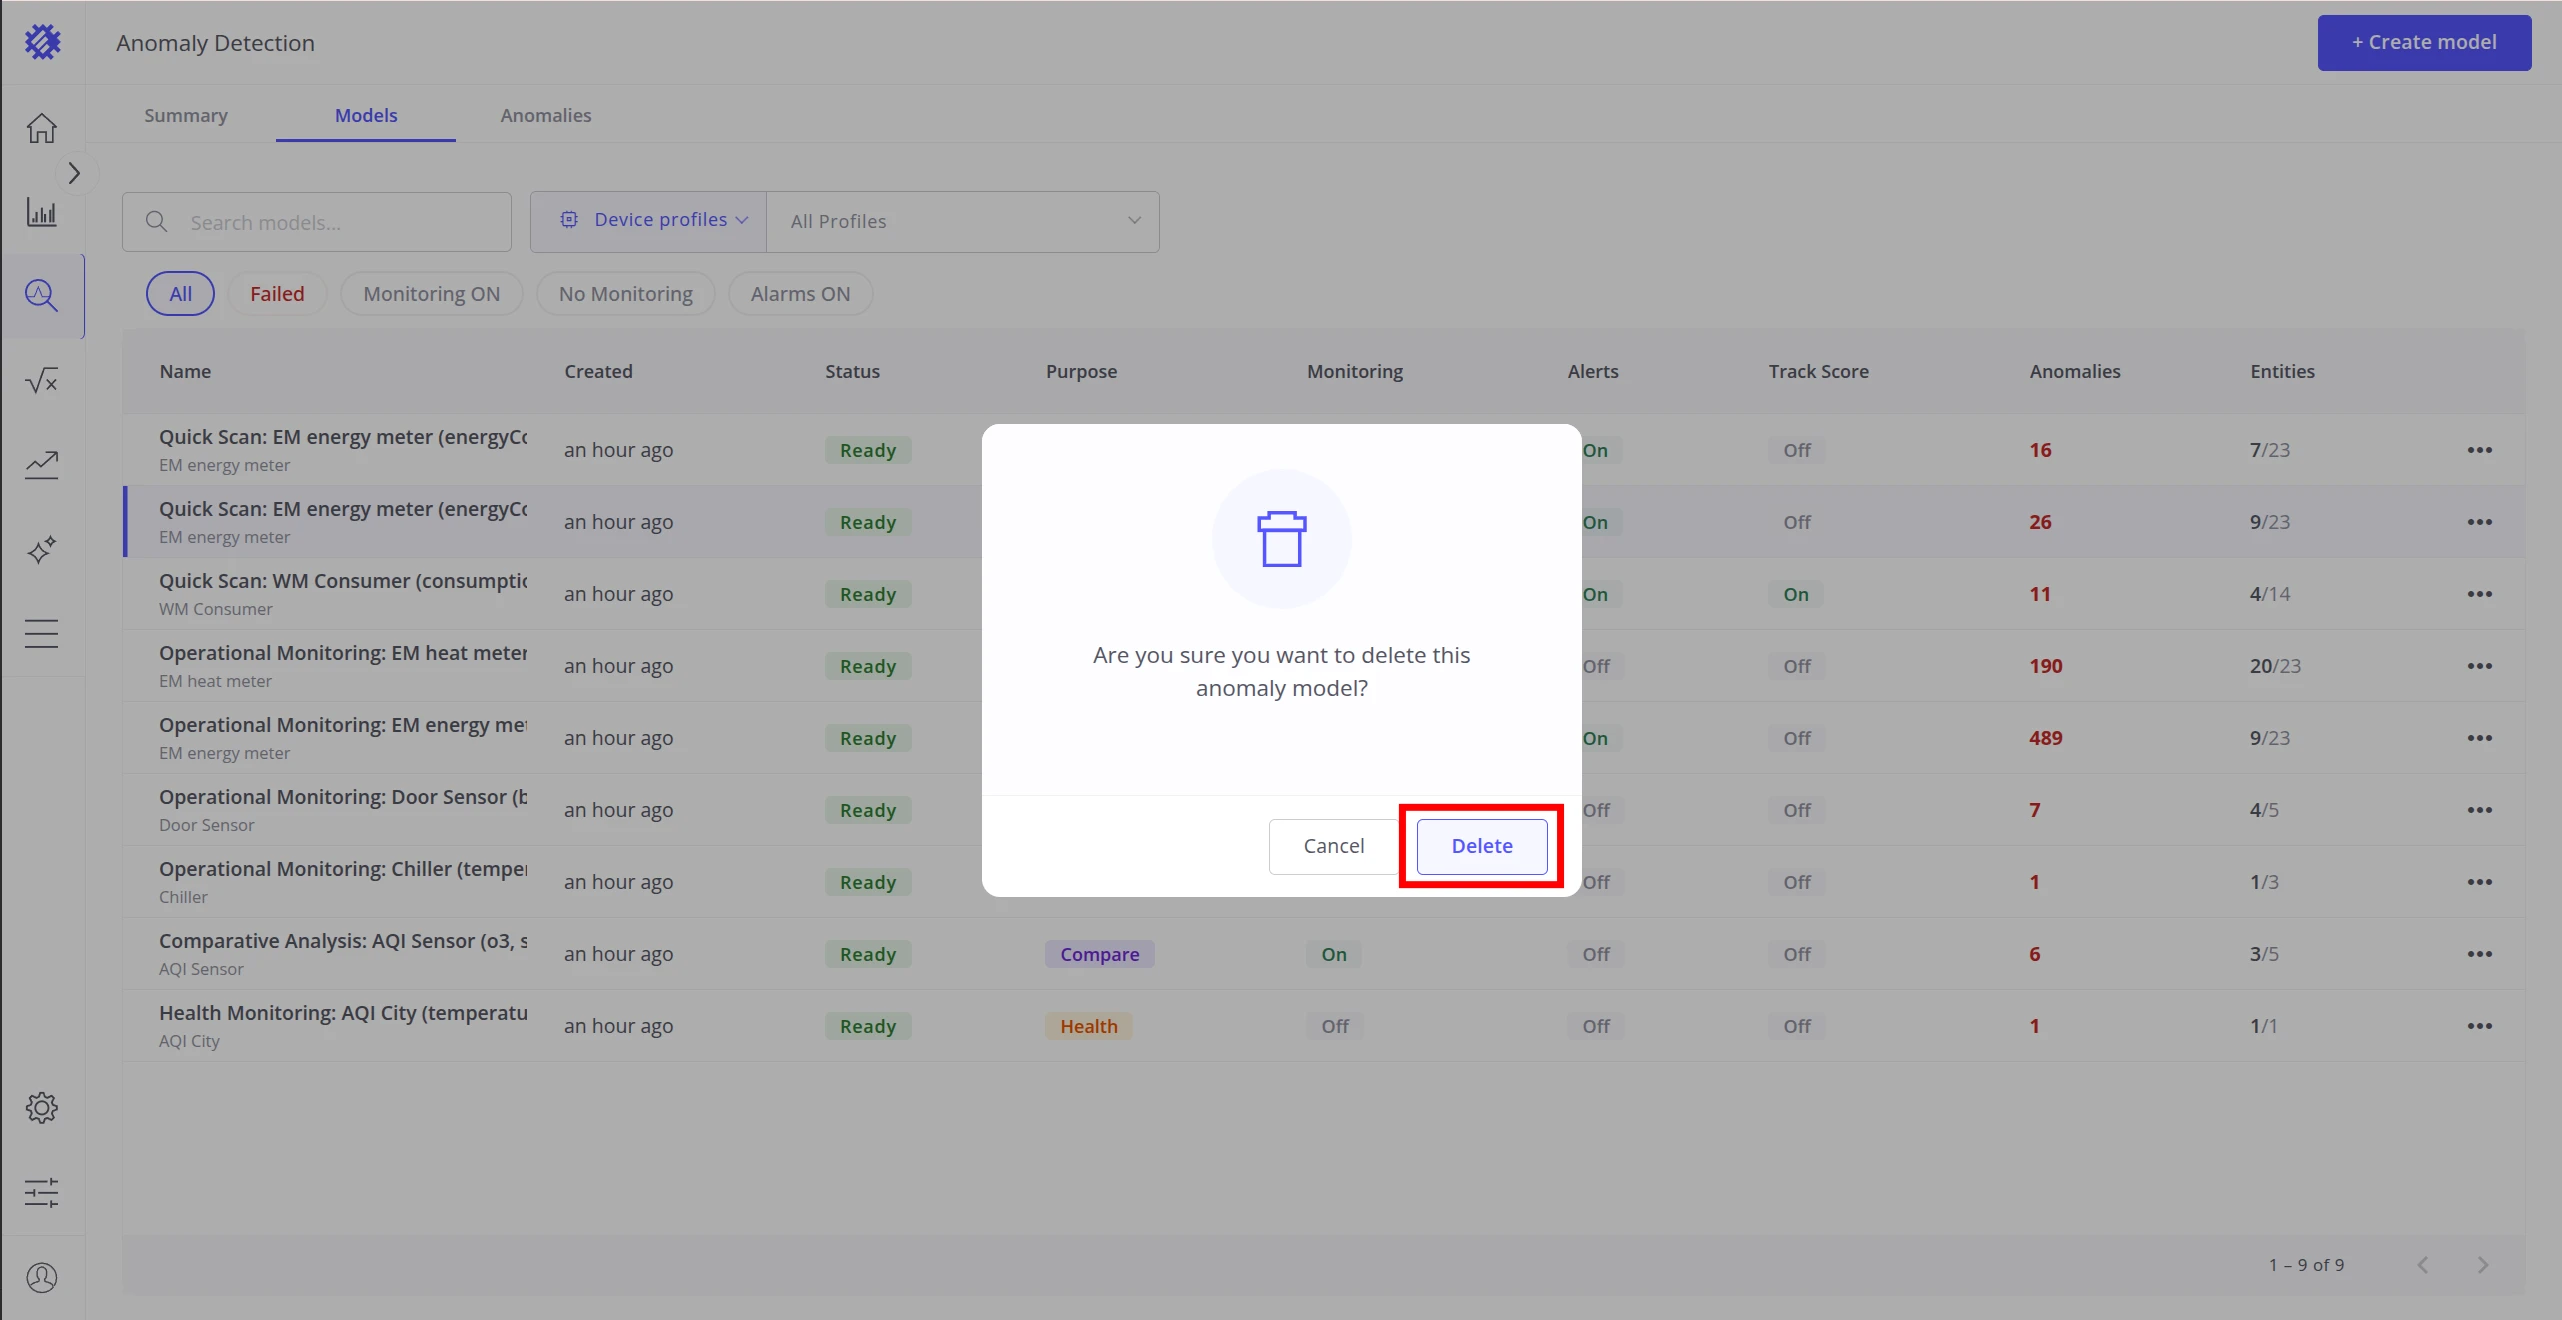
Section titled “Deleting a Model”Click the ⋯ at the end of any model row and select Delete. A confirmation dialog will appear before the model is removed:
Anomalies Tab
Section titled “Anomalies Tab”The Anomalies tab provides a unified table of every anomaly detected across all your models. Use it to search, filter, and investigate individual anomaly events without opening each model separately.
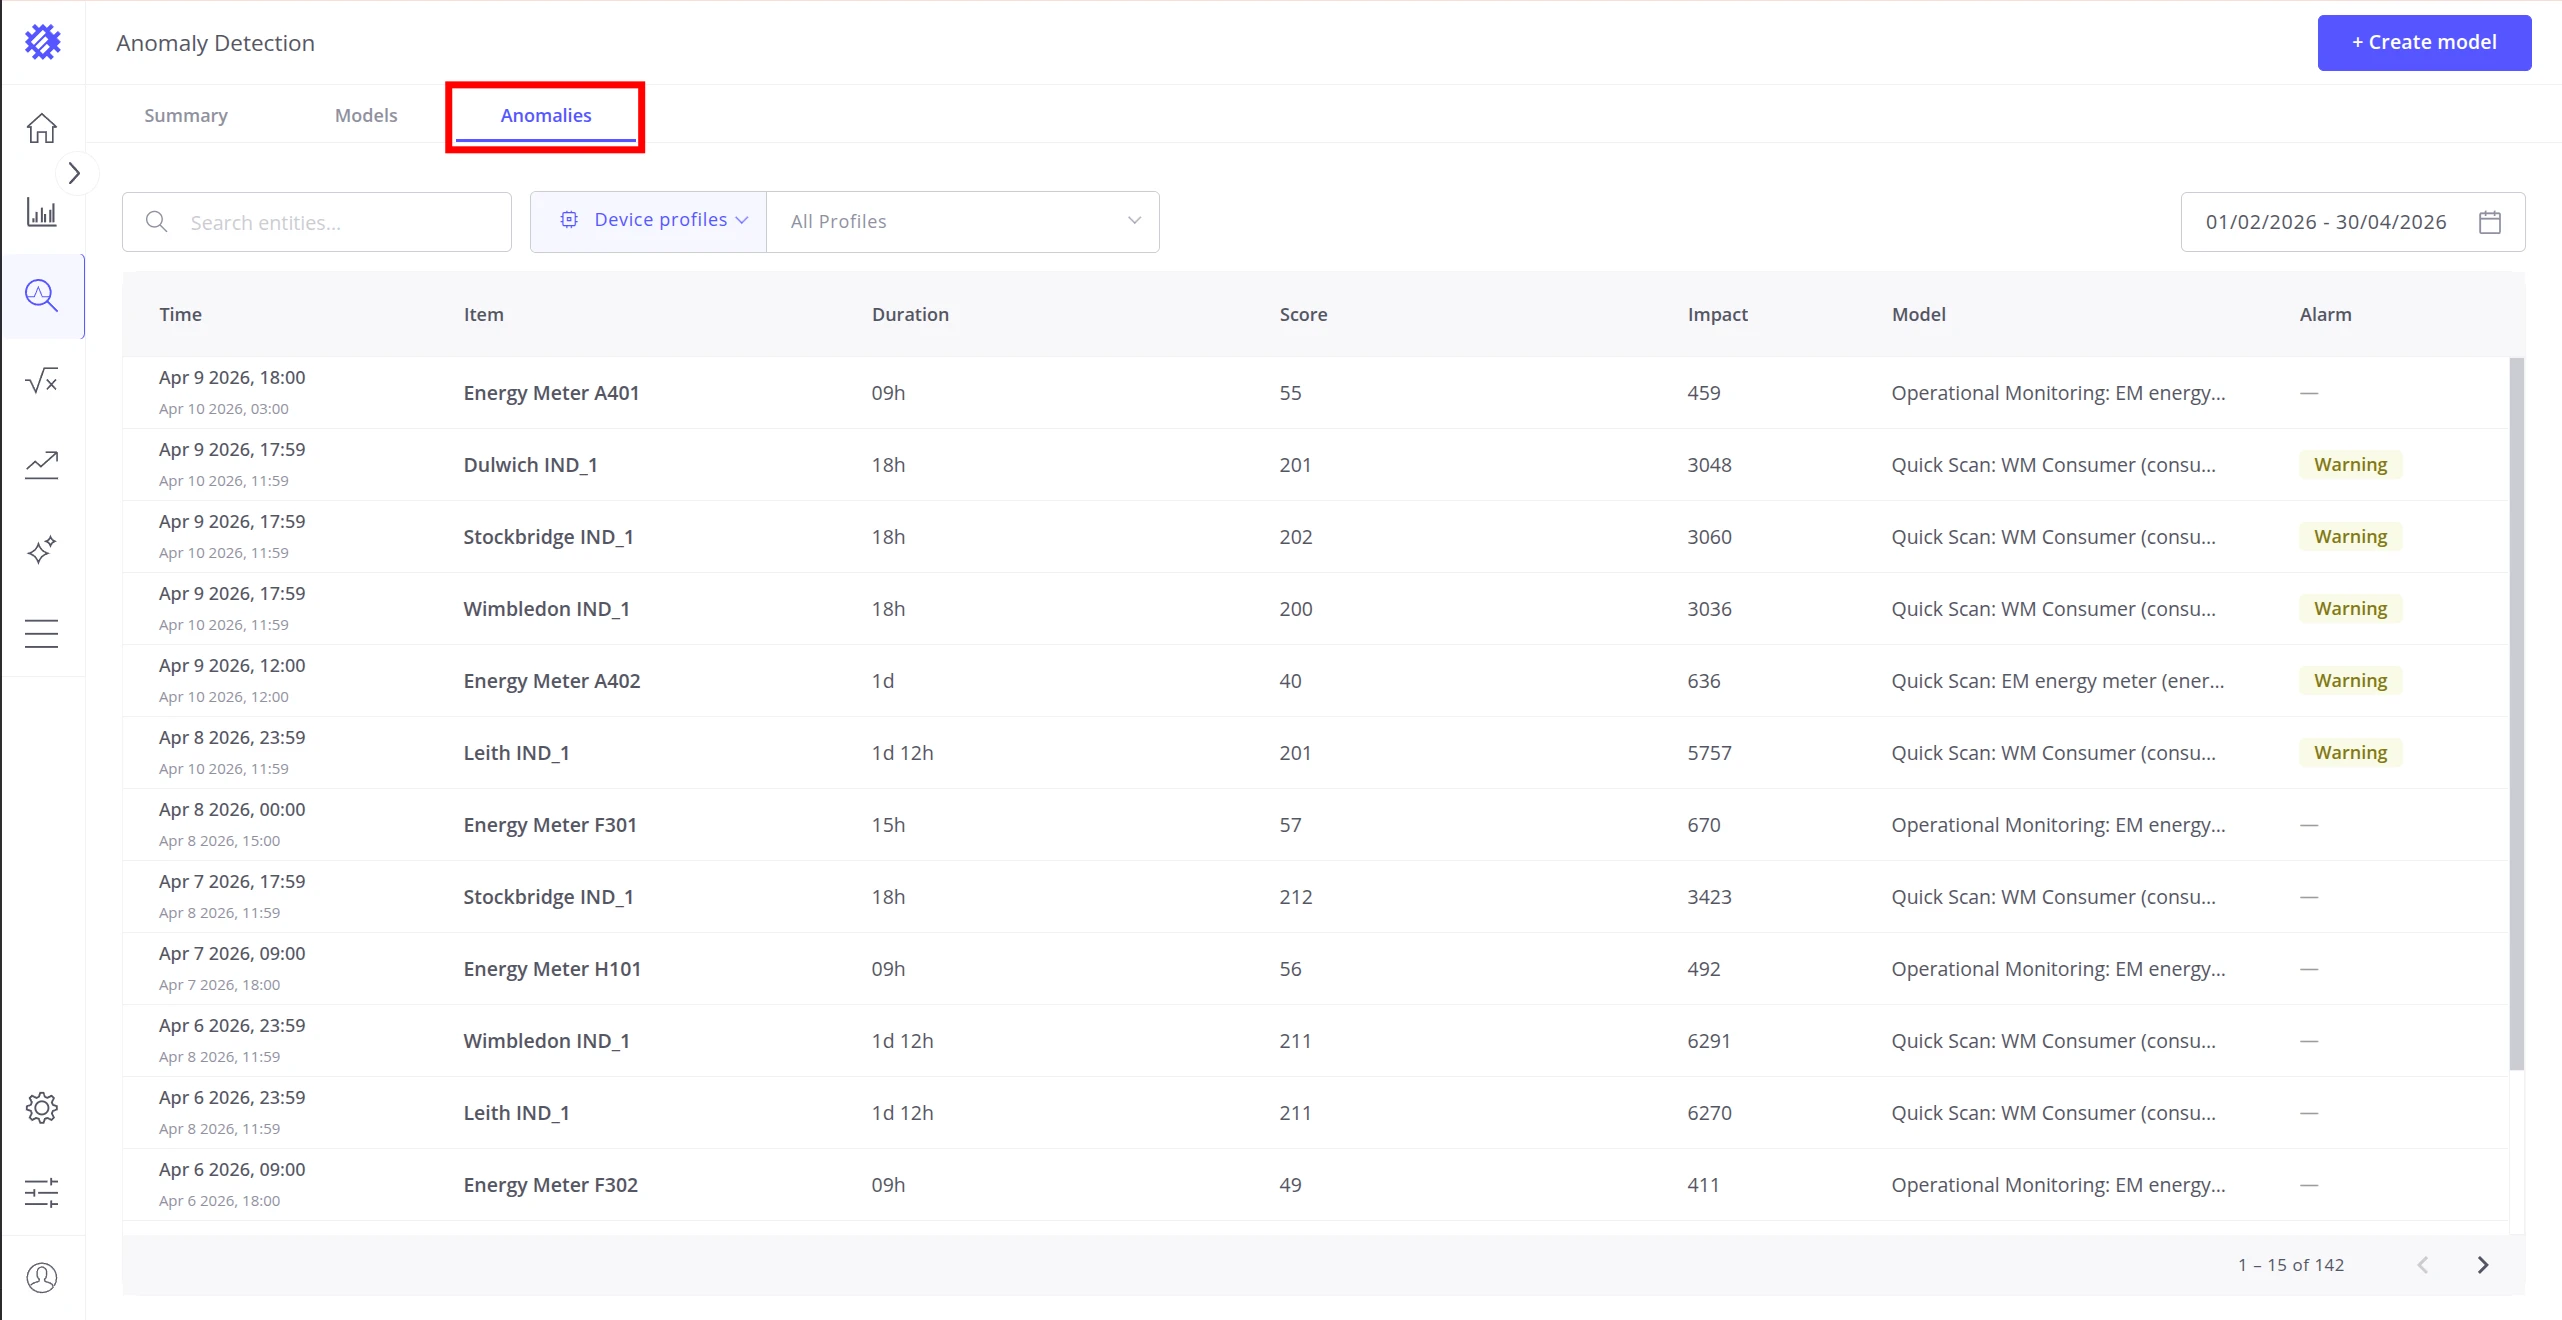
Each row in the table shows:
| Column | Description |
|---|---|
| Time | Start and end timestamps of the anomaly |
| Item | The device or asset on which the anomaly was detected |
| Duration | How long the anomalous behavior lasted |
| Score | Maximum anomaly score reached during the event |
| Impact | Anomaly Score Index — combines score with duration to reflect cumulative impact |
| Model | The anomaly model that detected this event |
| Alarm | The ThingsBoard alarm raised for this anomaly, if alarm creation is enabled |
Filtering Anomalies
Section titled “Filtering Anomalies”Three filters let you narrow the anomaly list:
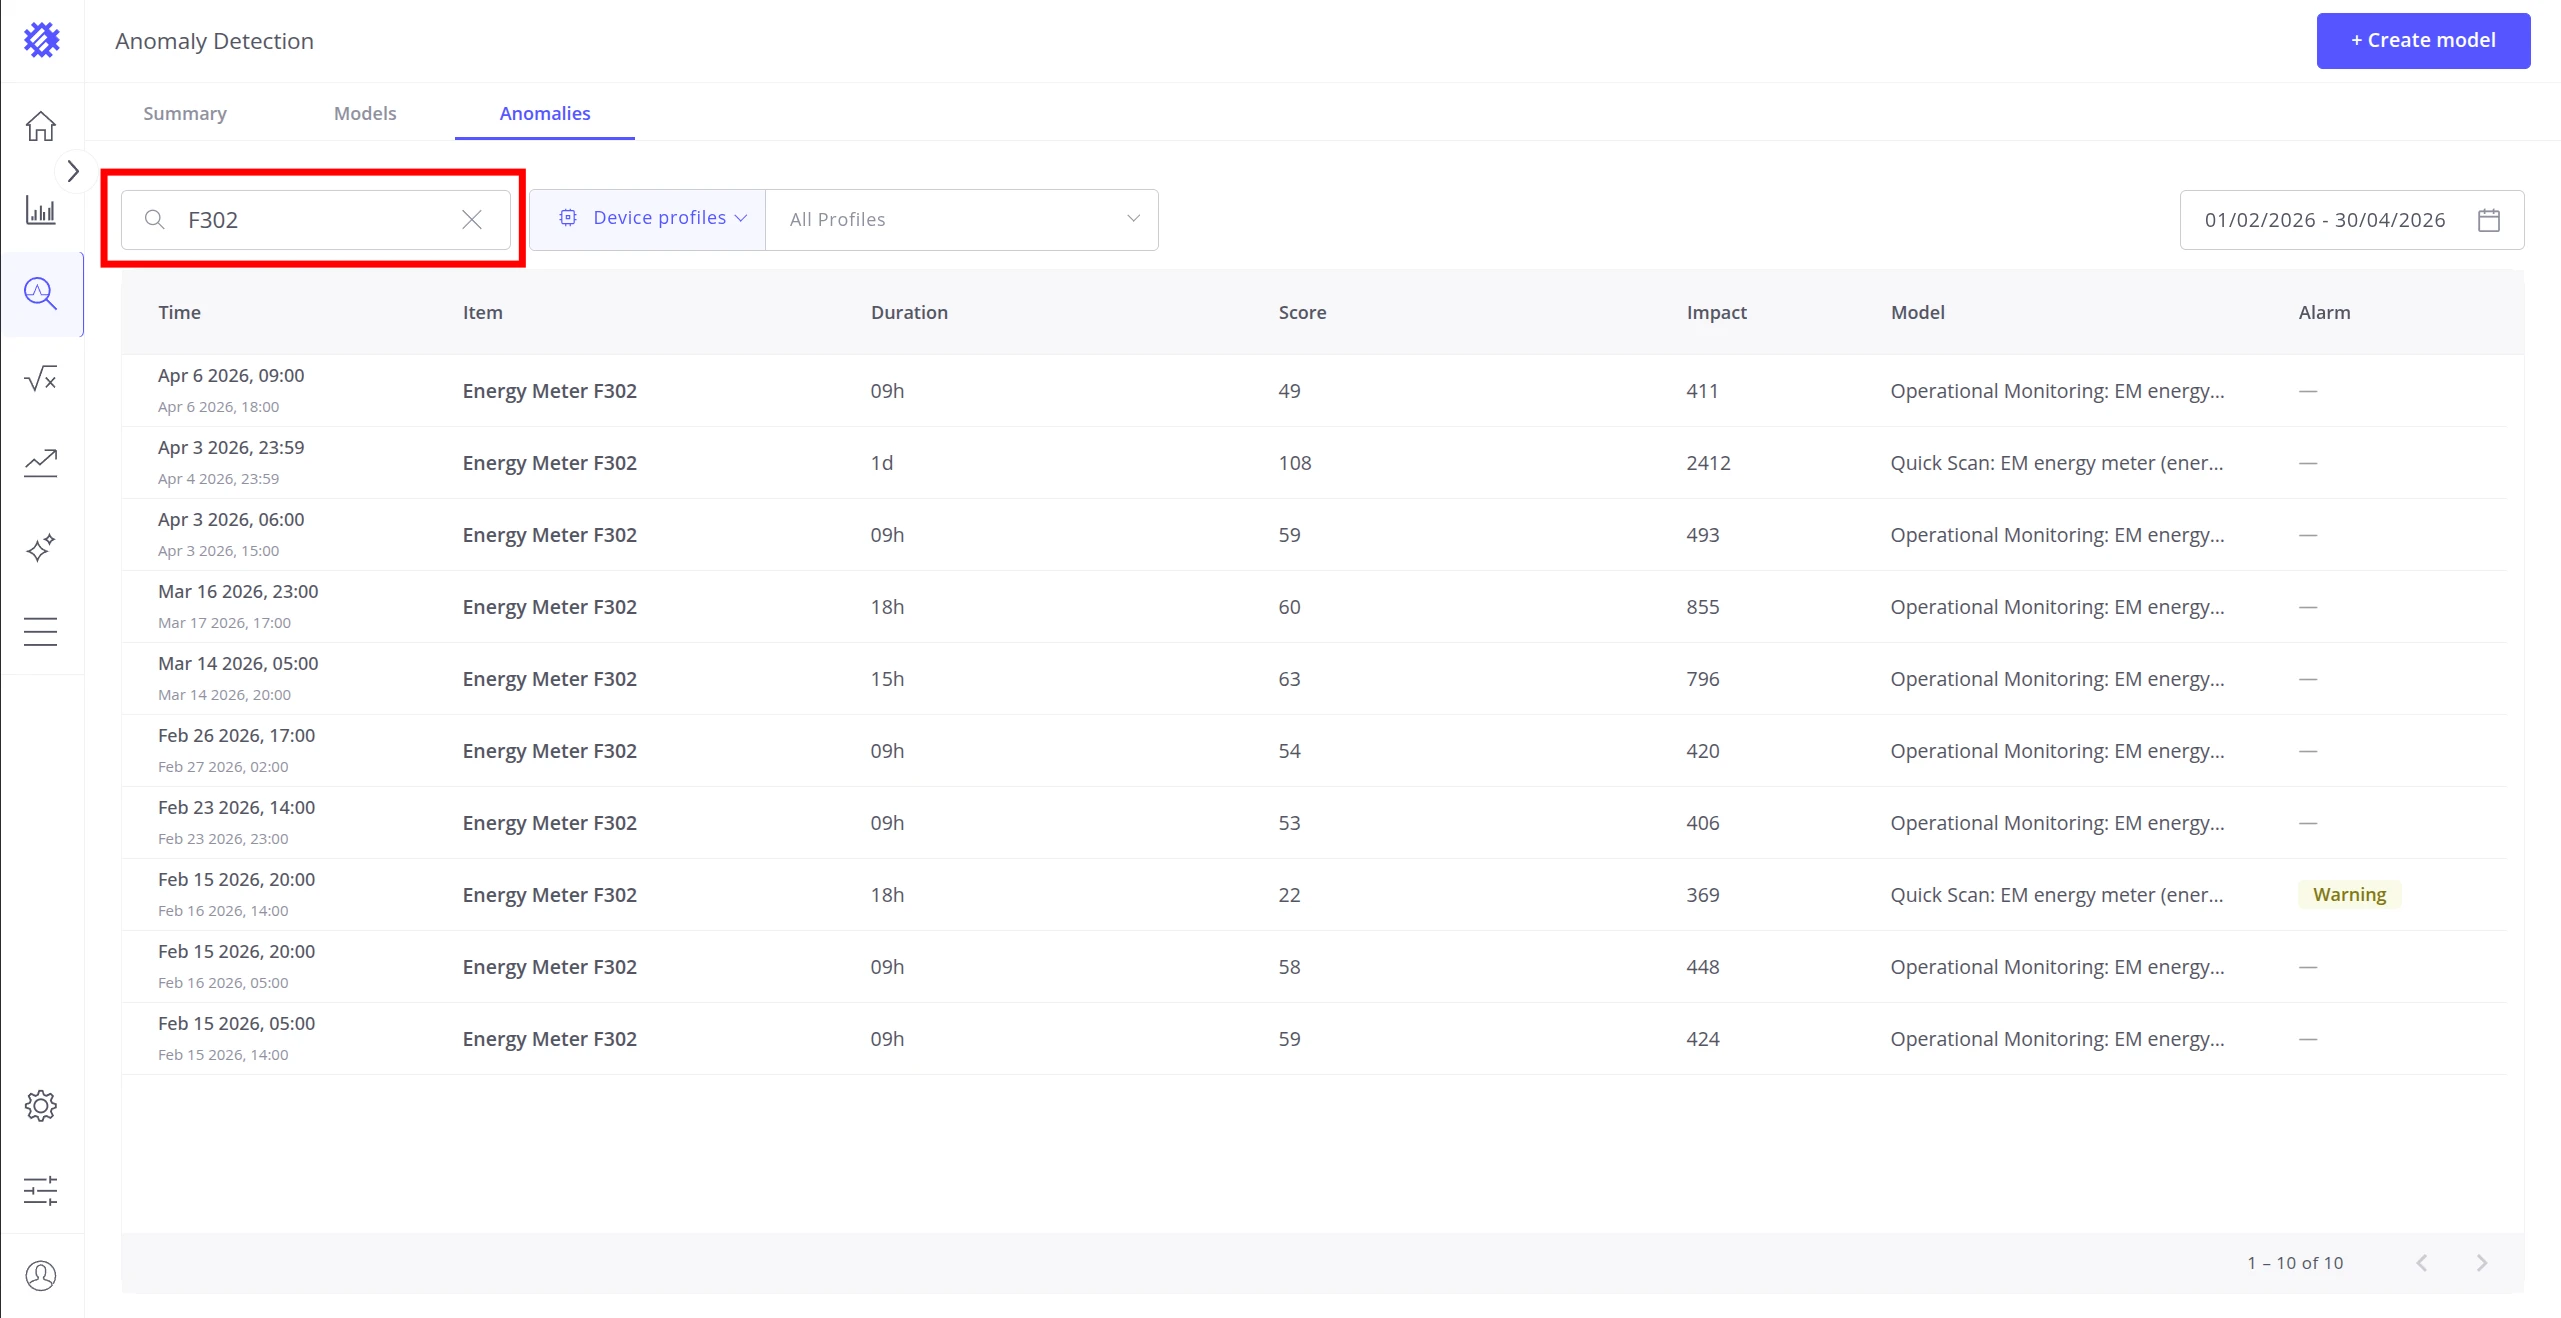
Search by item name — type part of a device or asset name to filter results instantly:
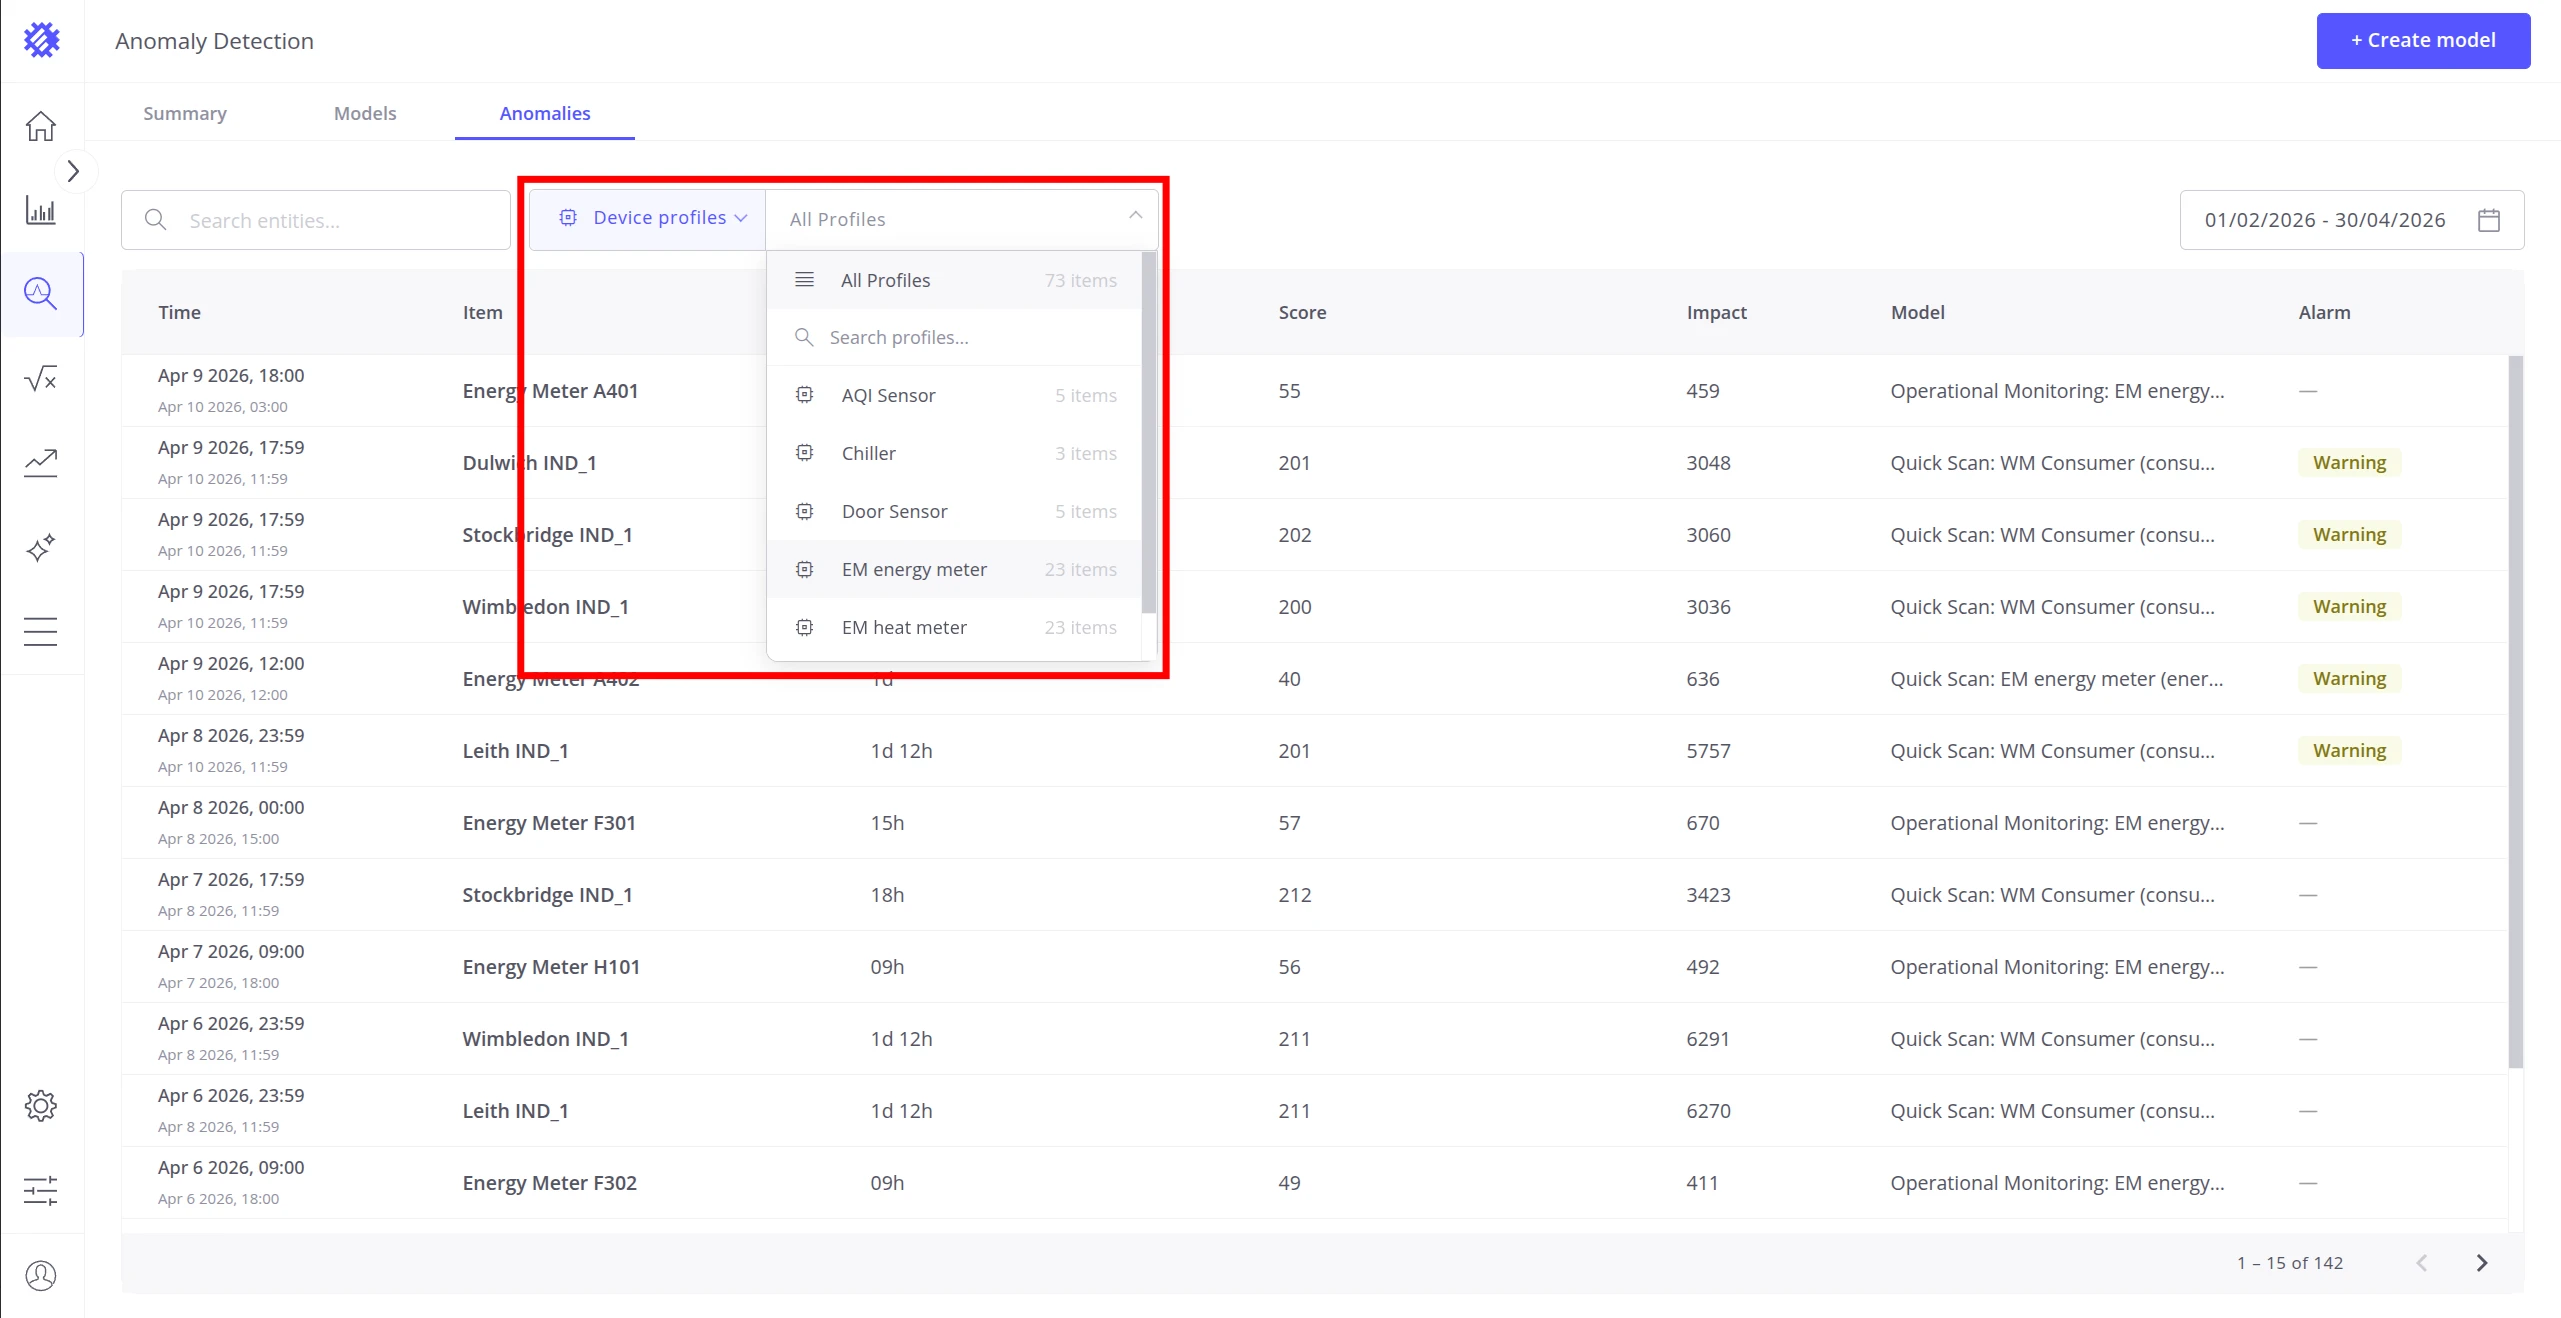
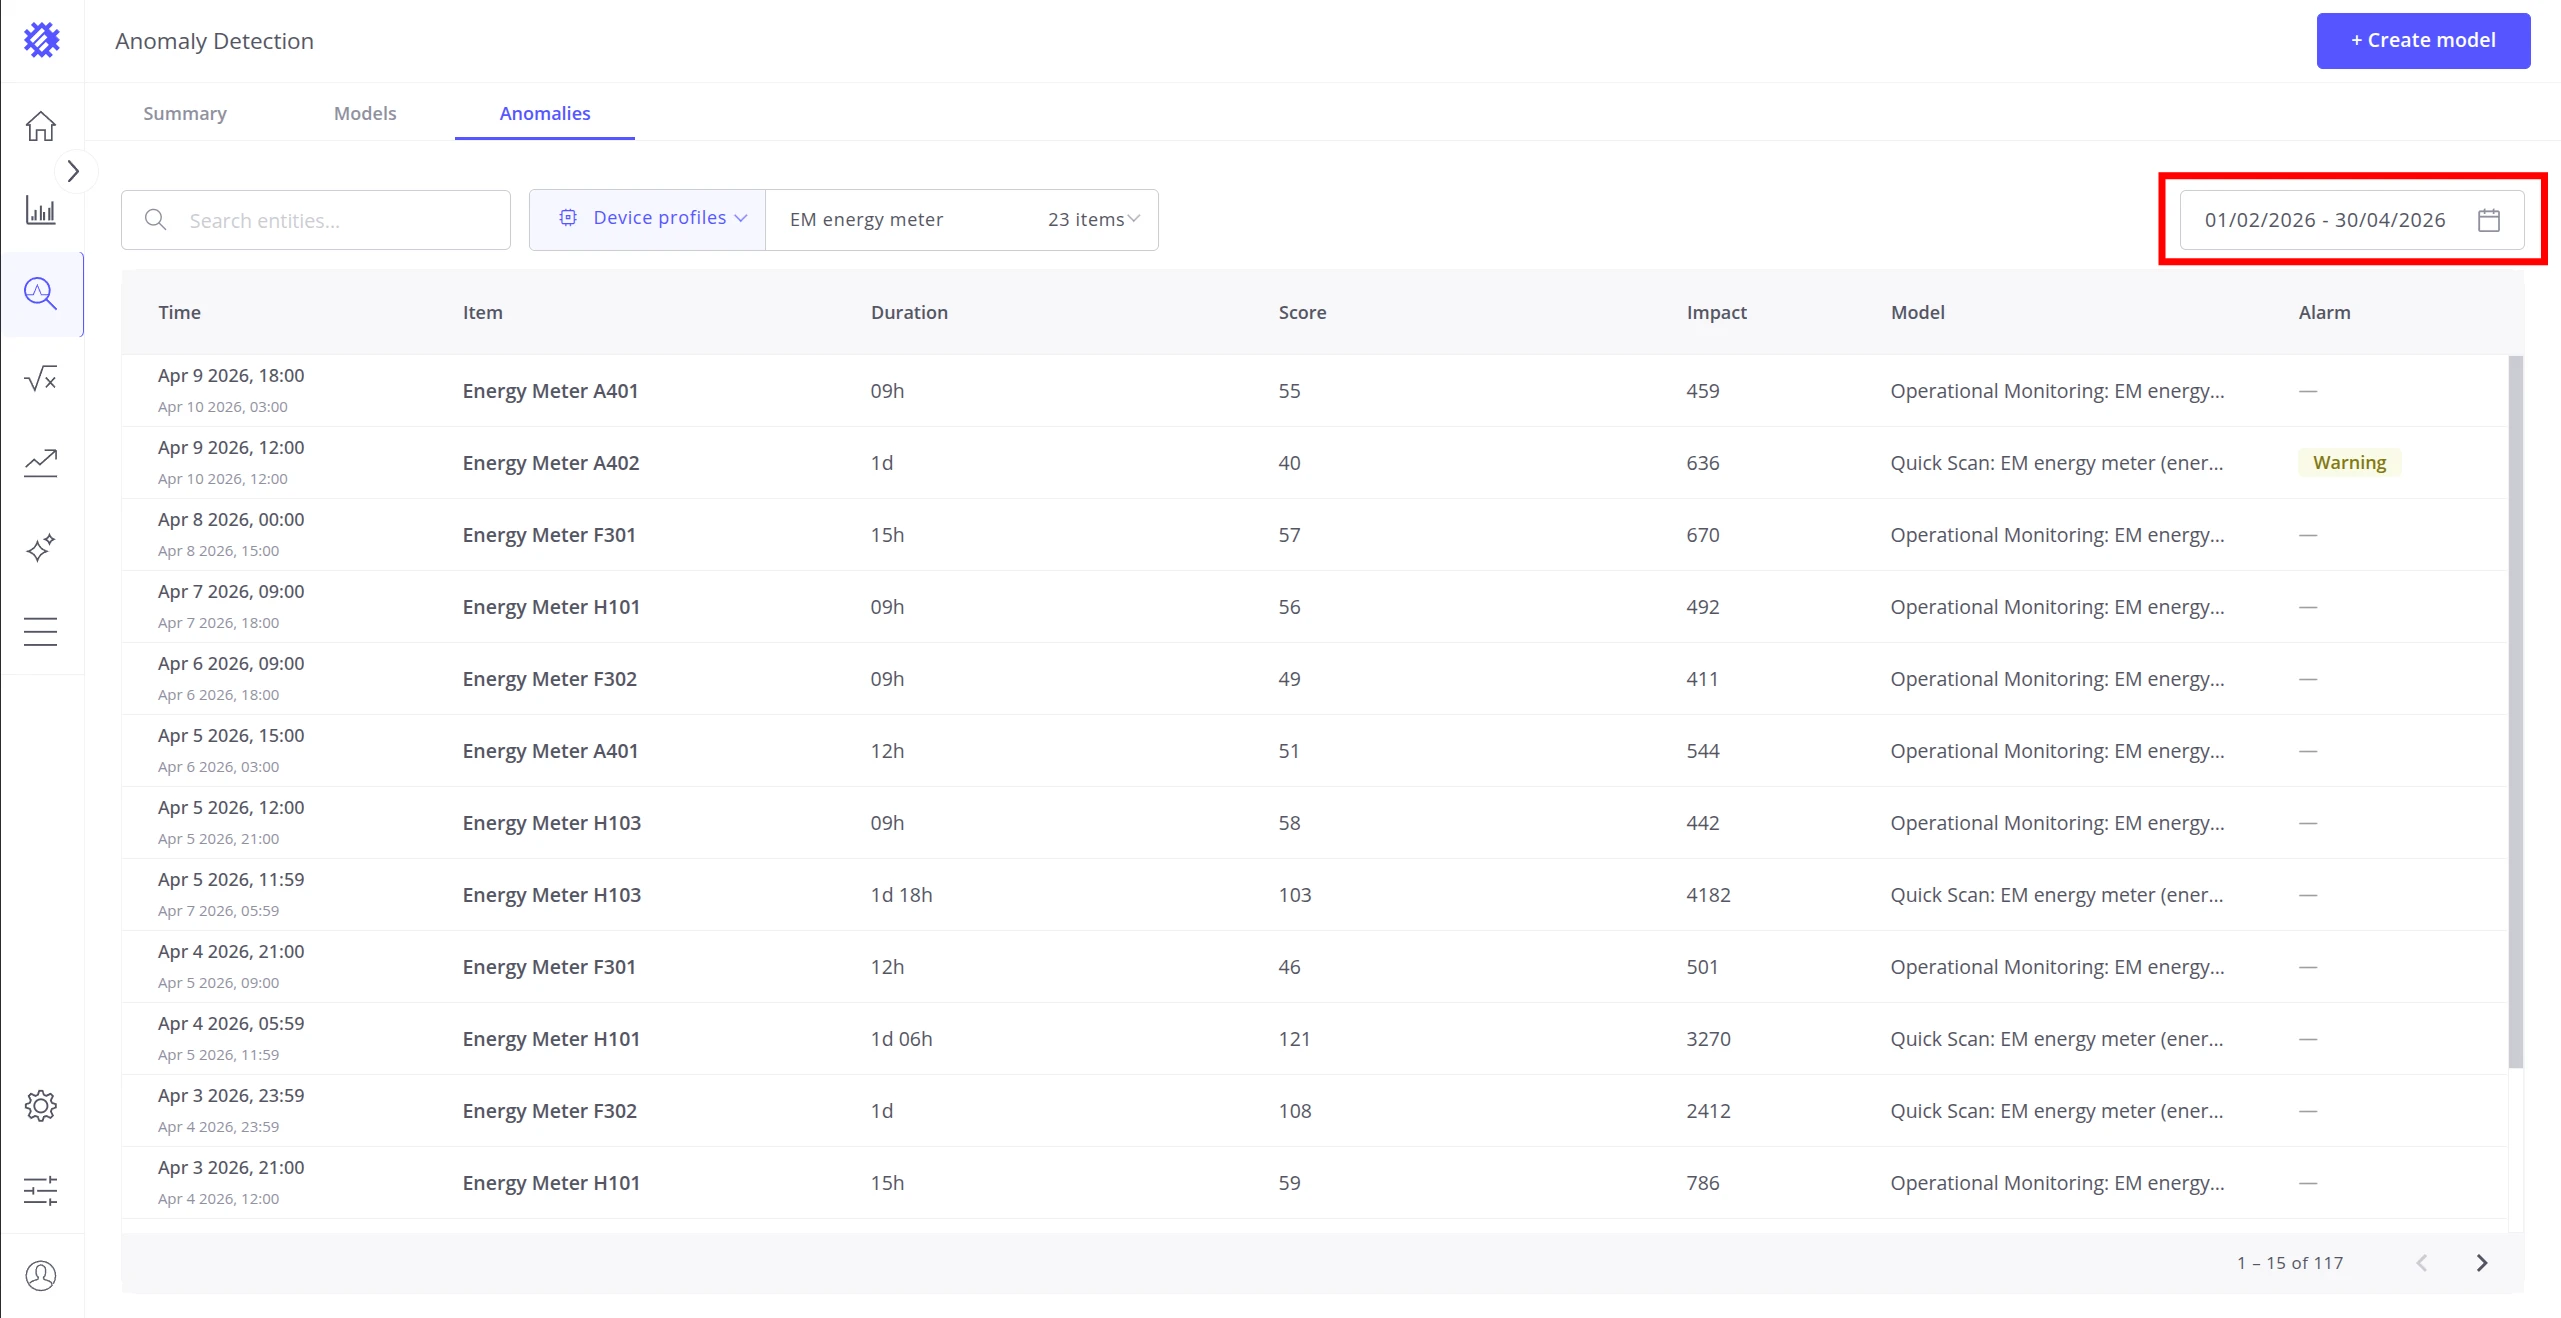
Filter by profile — click the Device profiles dropdown to narrow results to a specific device or asset profile:
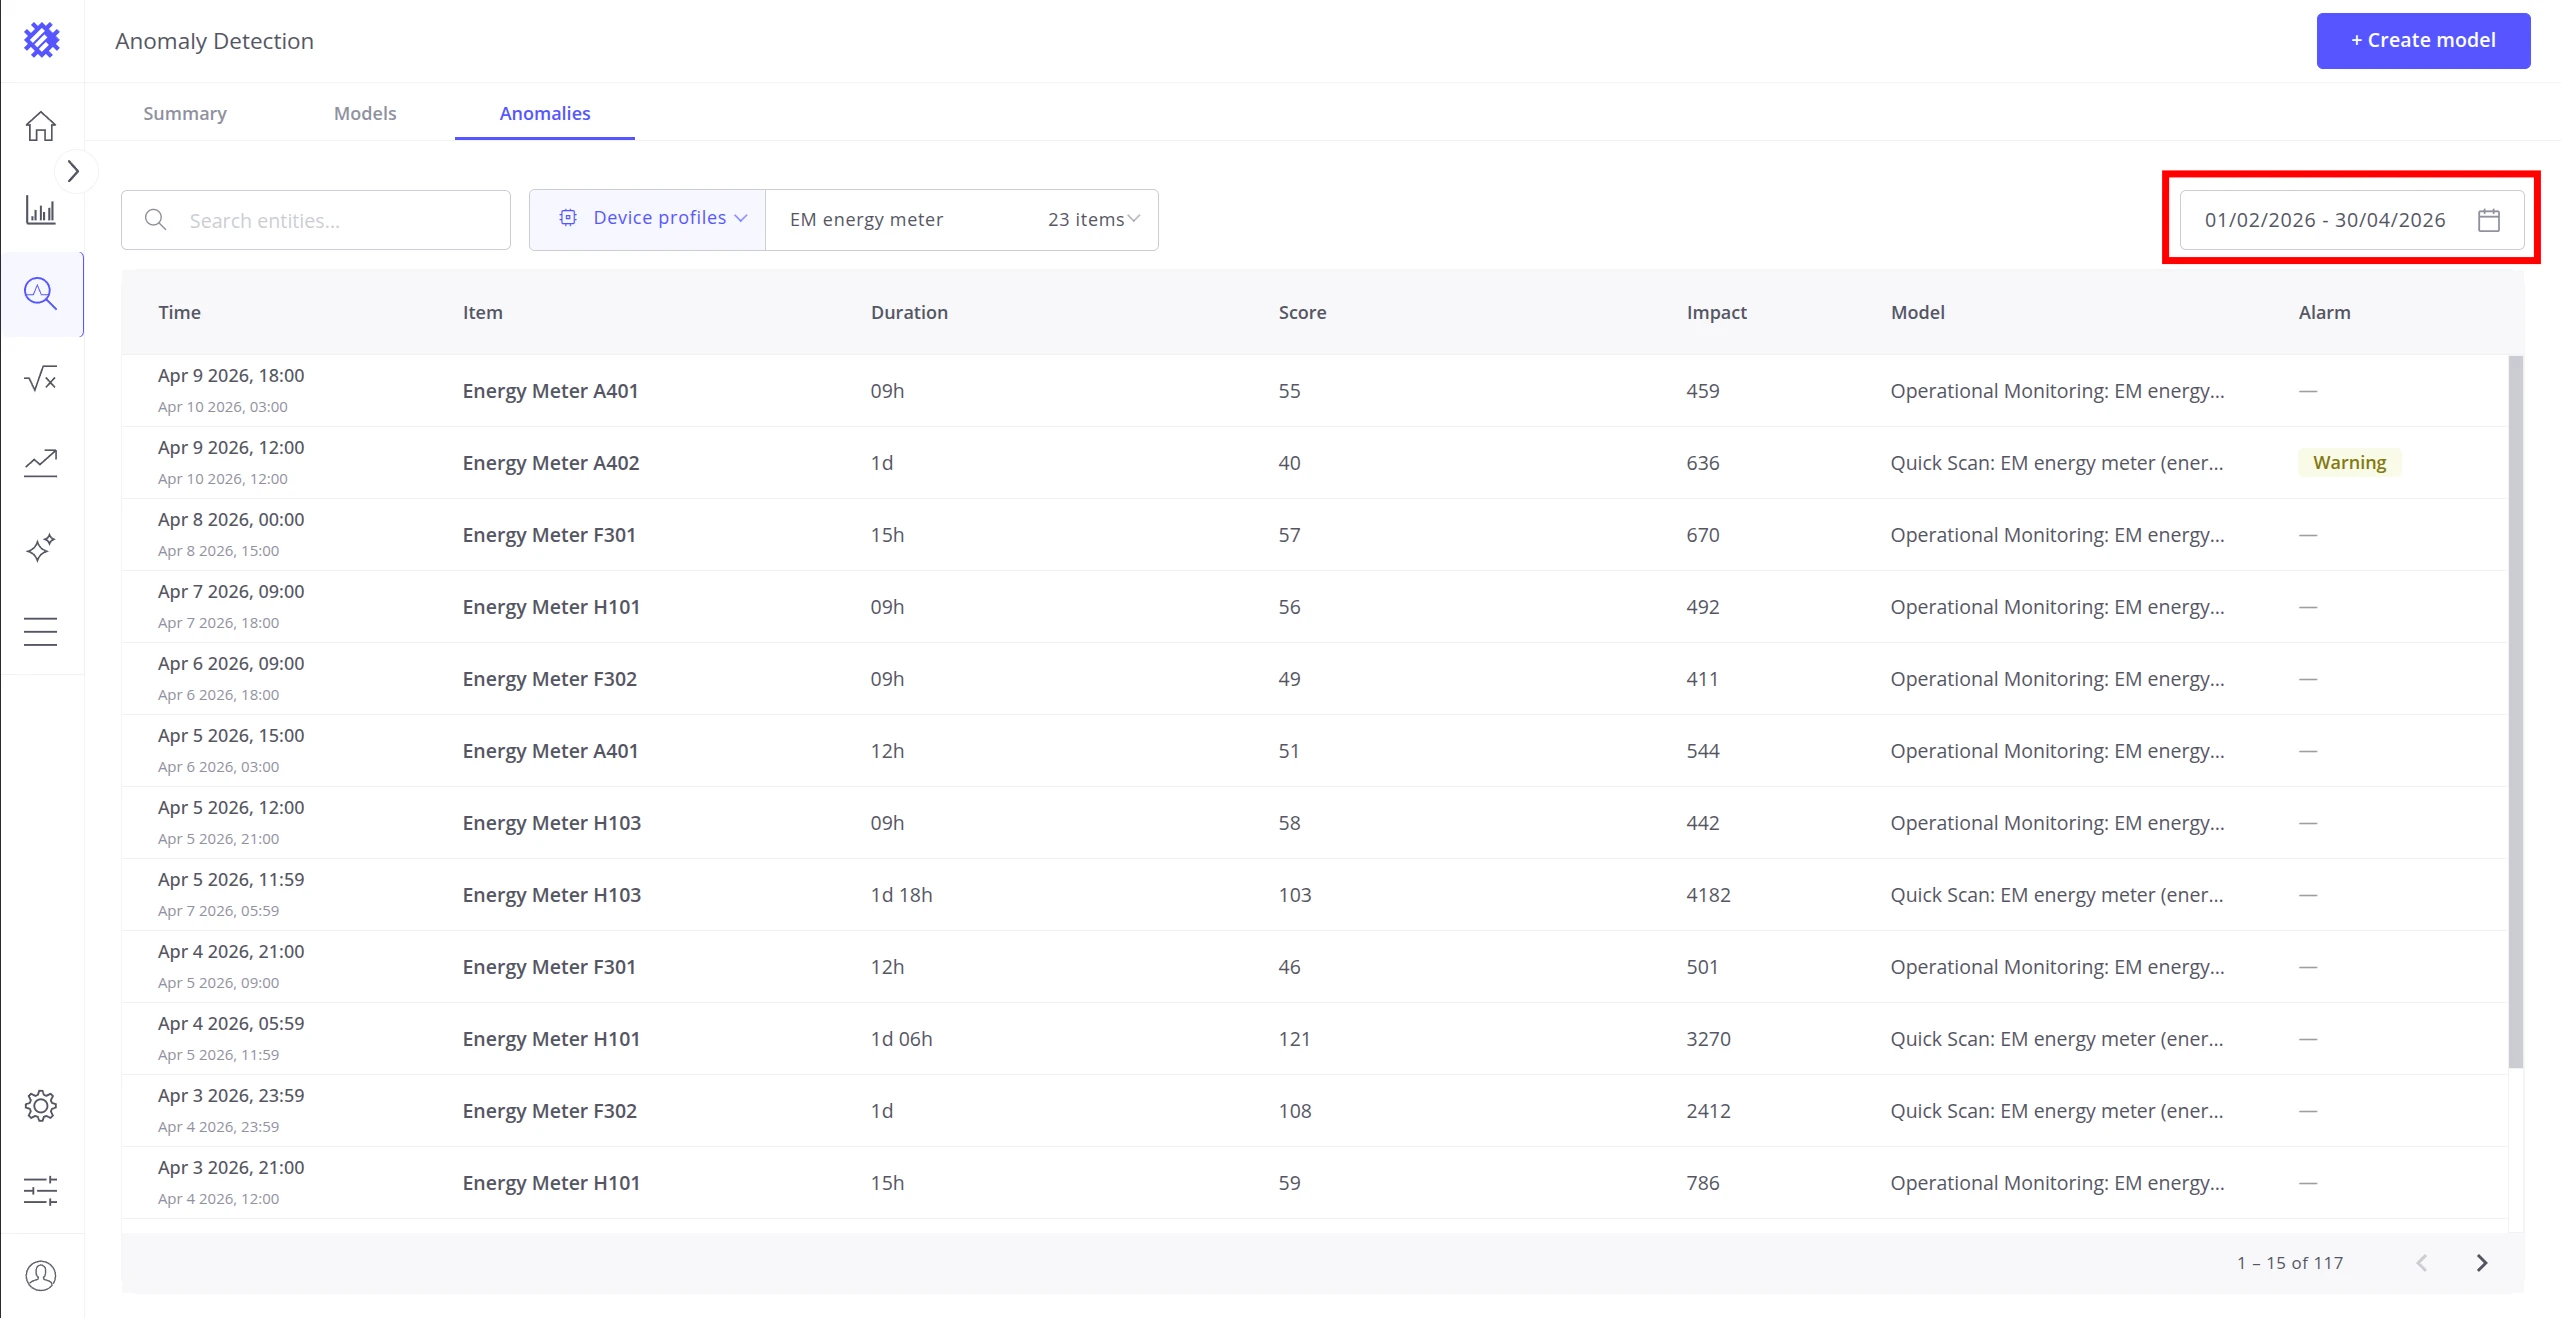
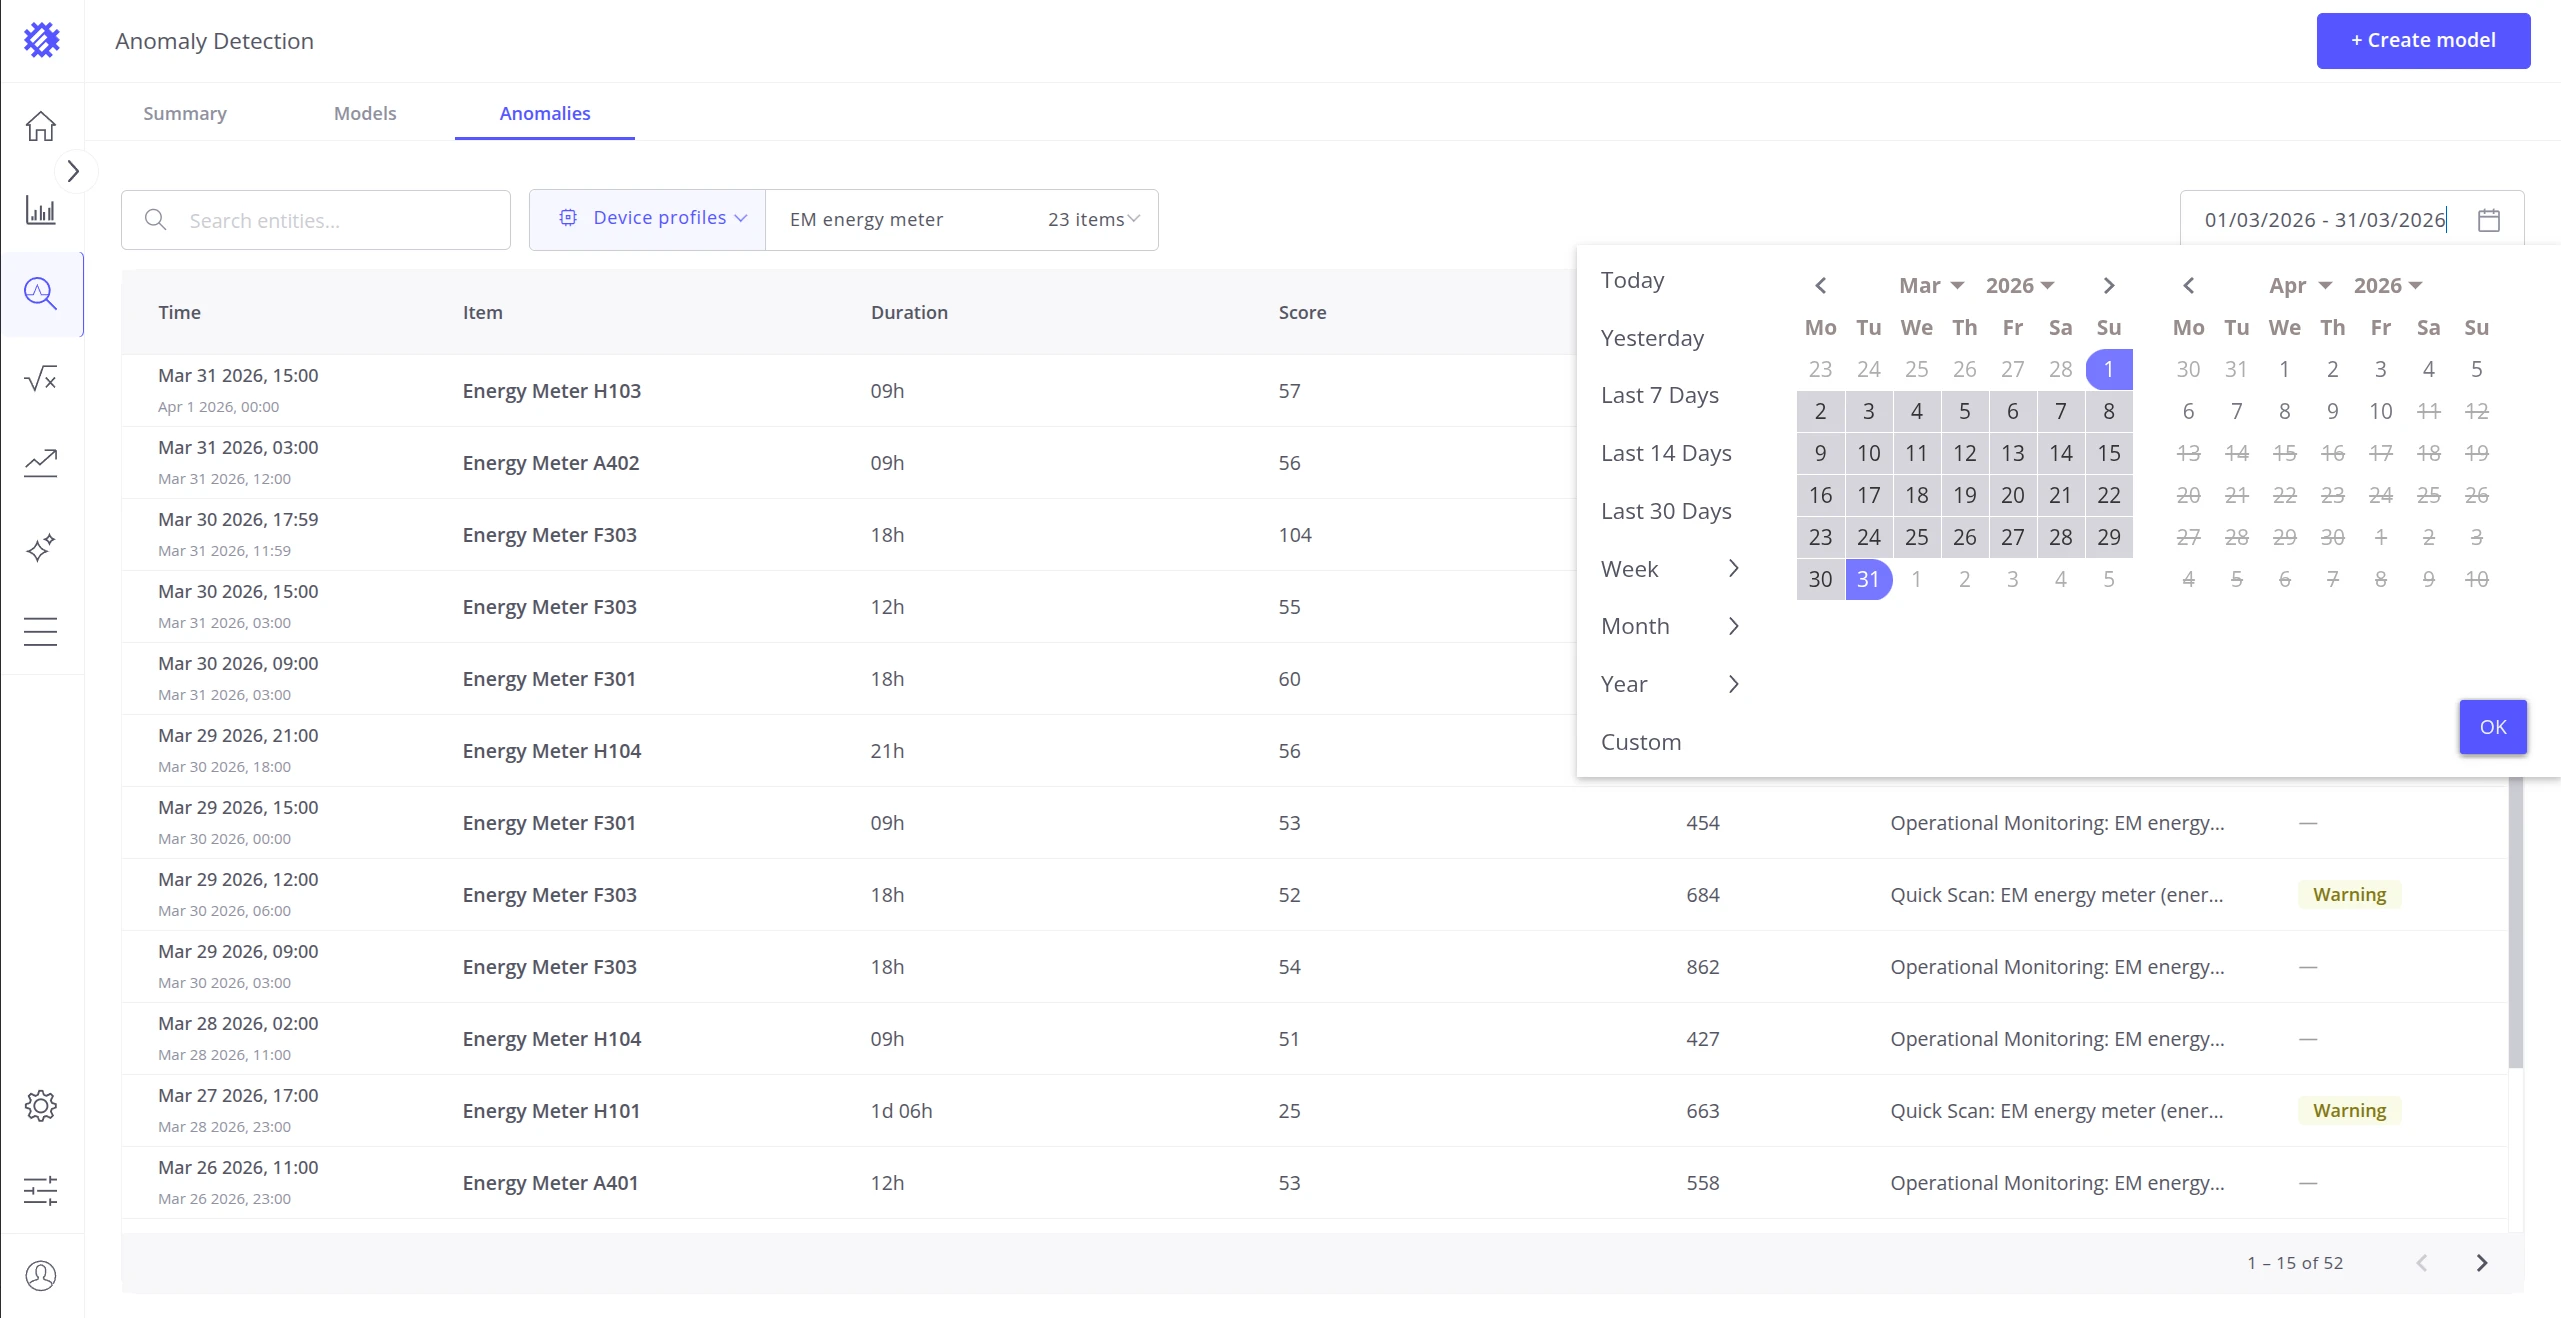
Filter by time range — click the date range field in the top-right corner to set the period. Quick presets (Today, Yesterday, Last 7 Days, Last 30 Days, Week, Month, Year) are available alongside a full calendar picker:
Anomaly Detail Panel
Section titled “Anomaly Detail Panel”Click any anomaly row to open a detail panel on the right side. The panel shows the full context of the anomaly event:
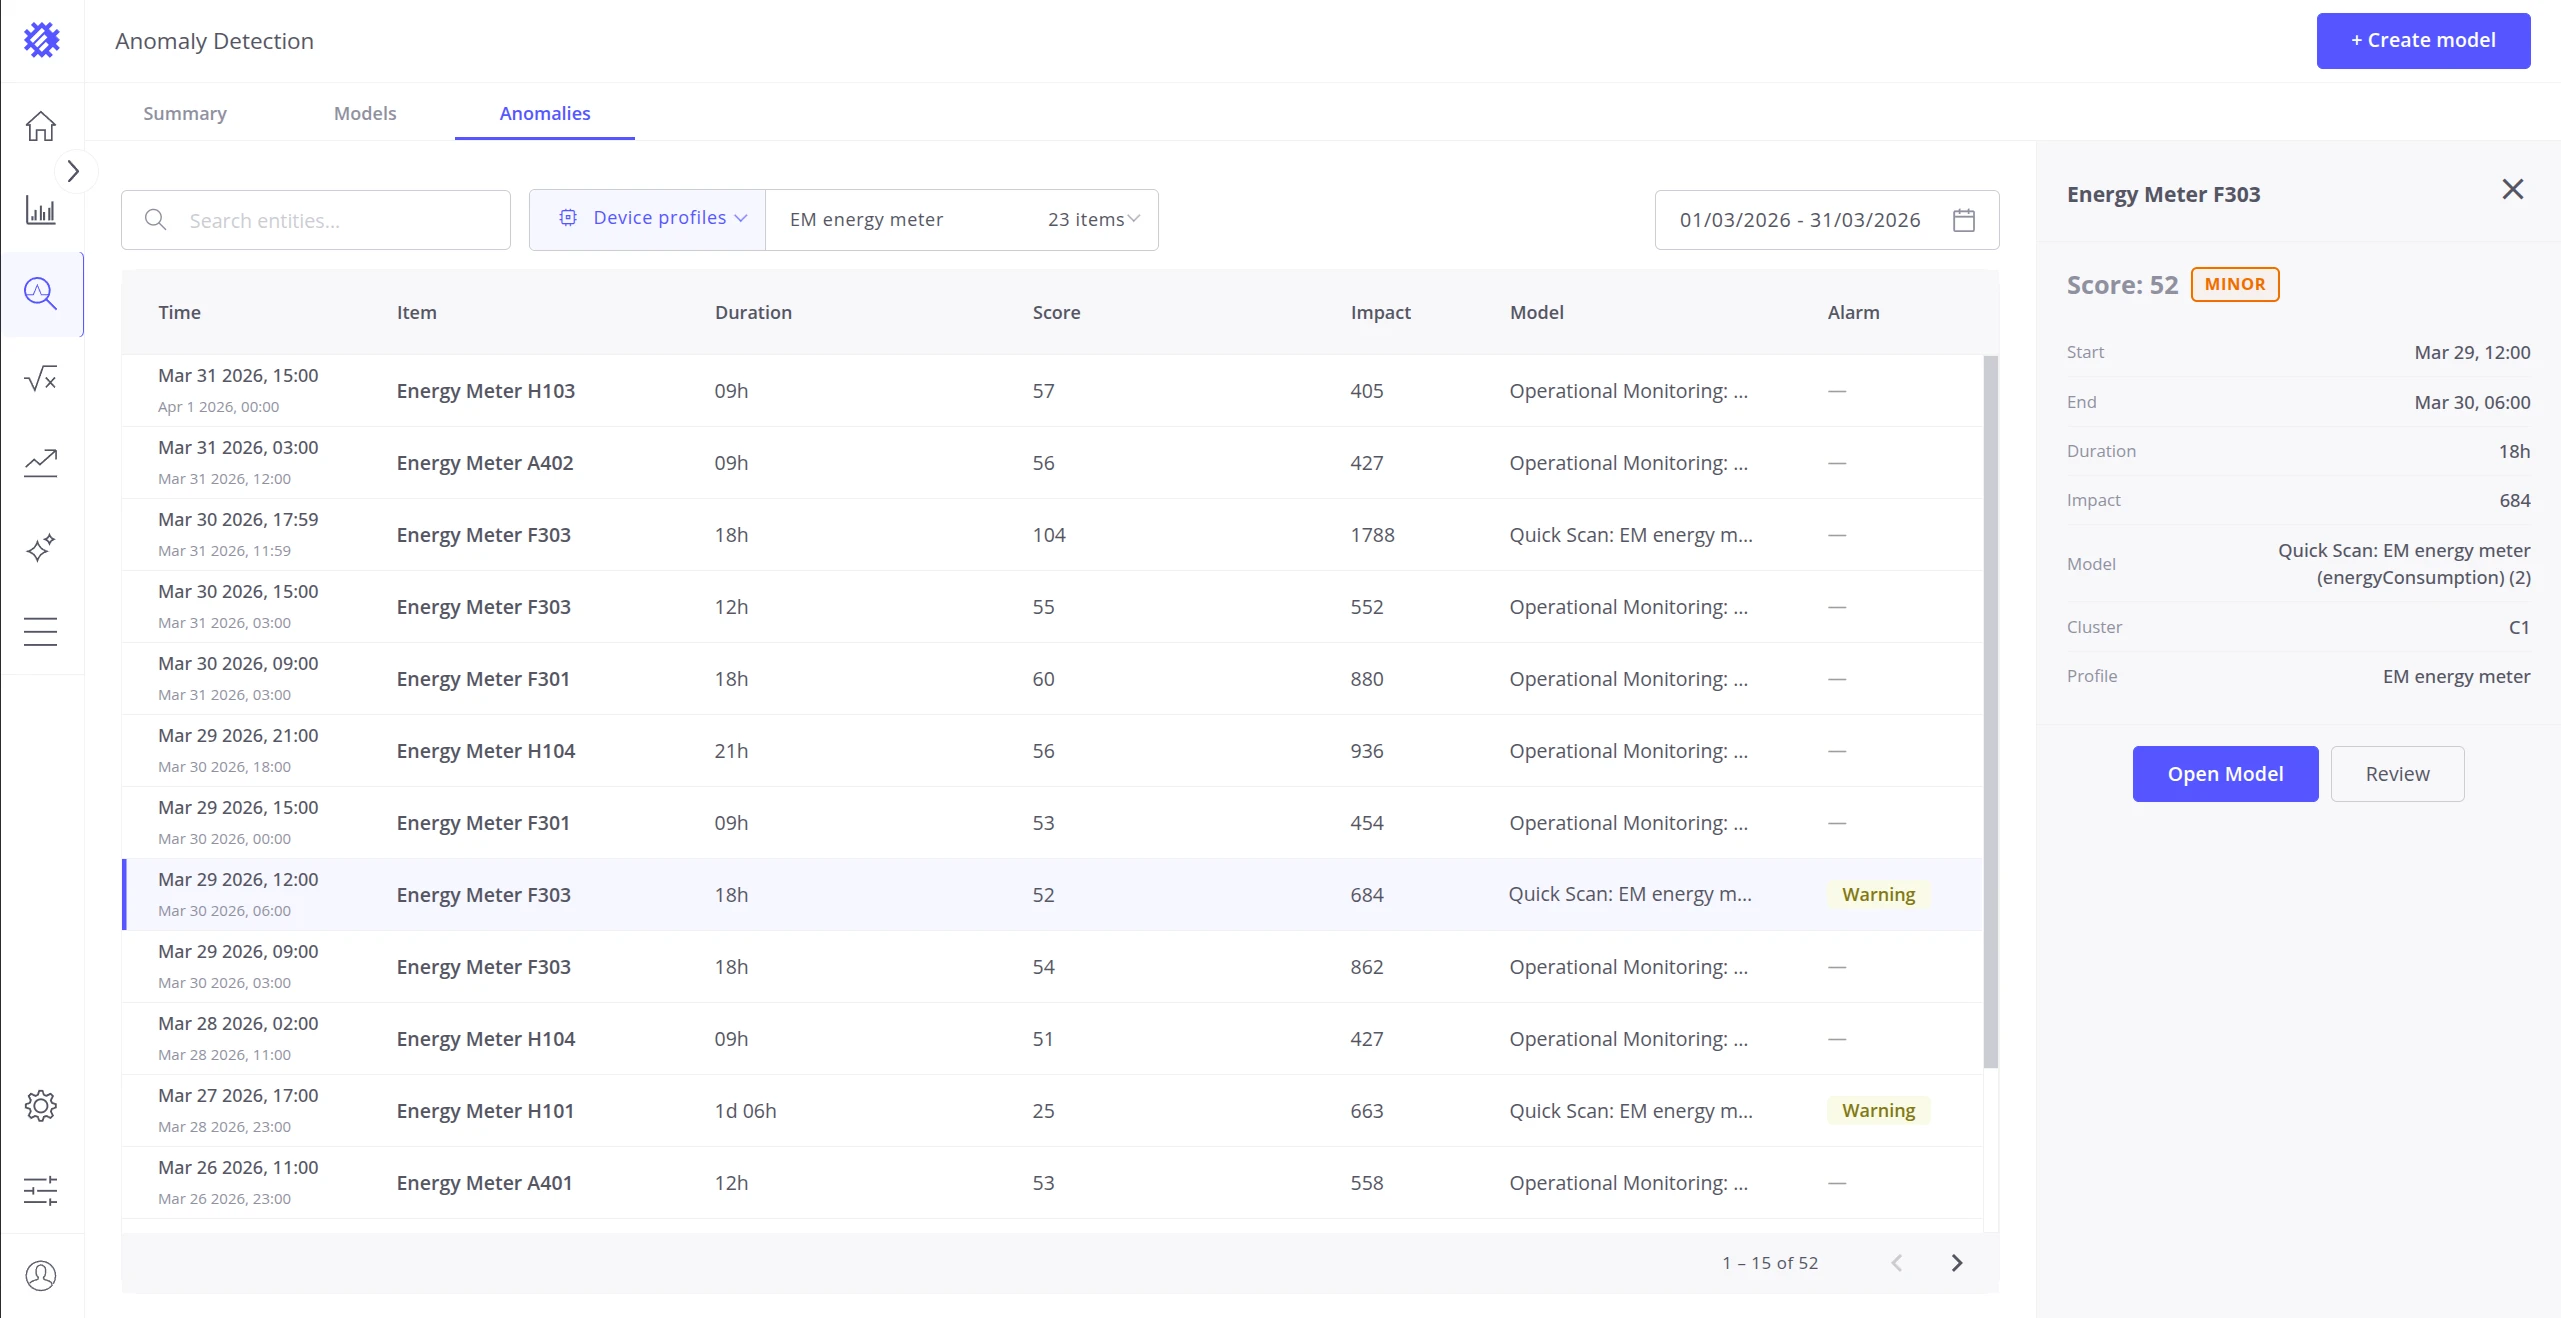
| Field | Description |
|---|---|
| Score | Maximum anomaly score during the event |
| Start / End | Exact timestamps of the anomaly |
| Duration | Length of the anomalous period |
| Impact | Anomaly Score Index value |
| Model | The model that detected this anomaly |
| Profile | The device or asset profile the item belongs to |
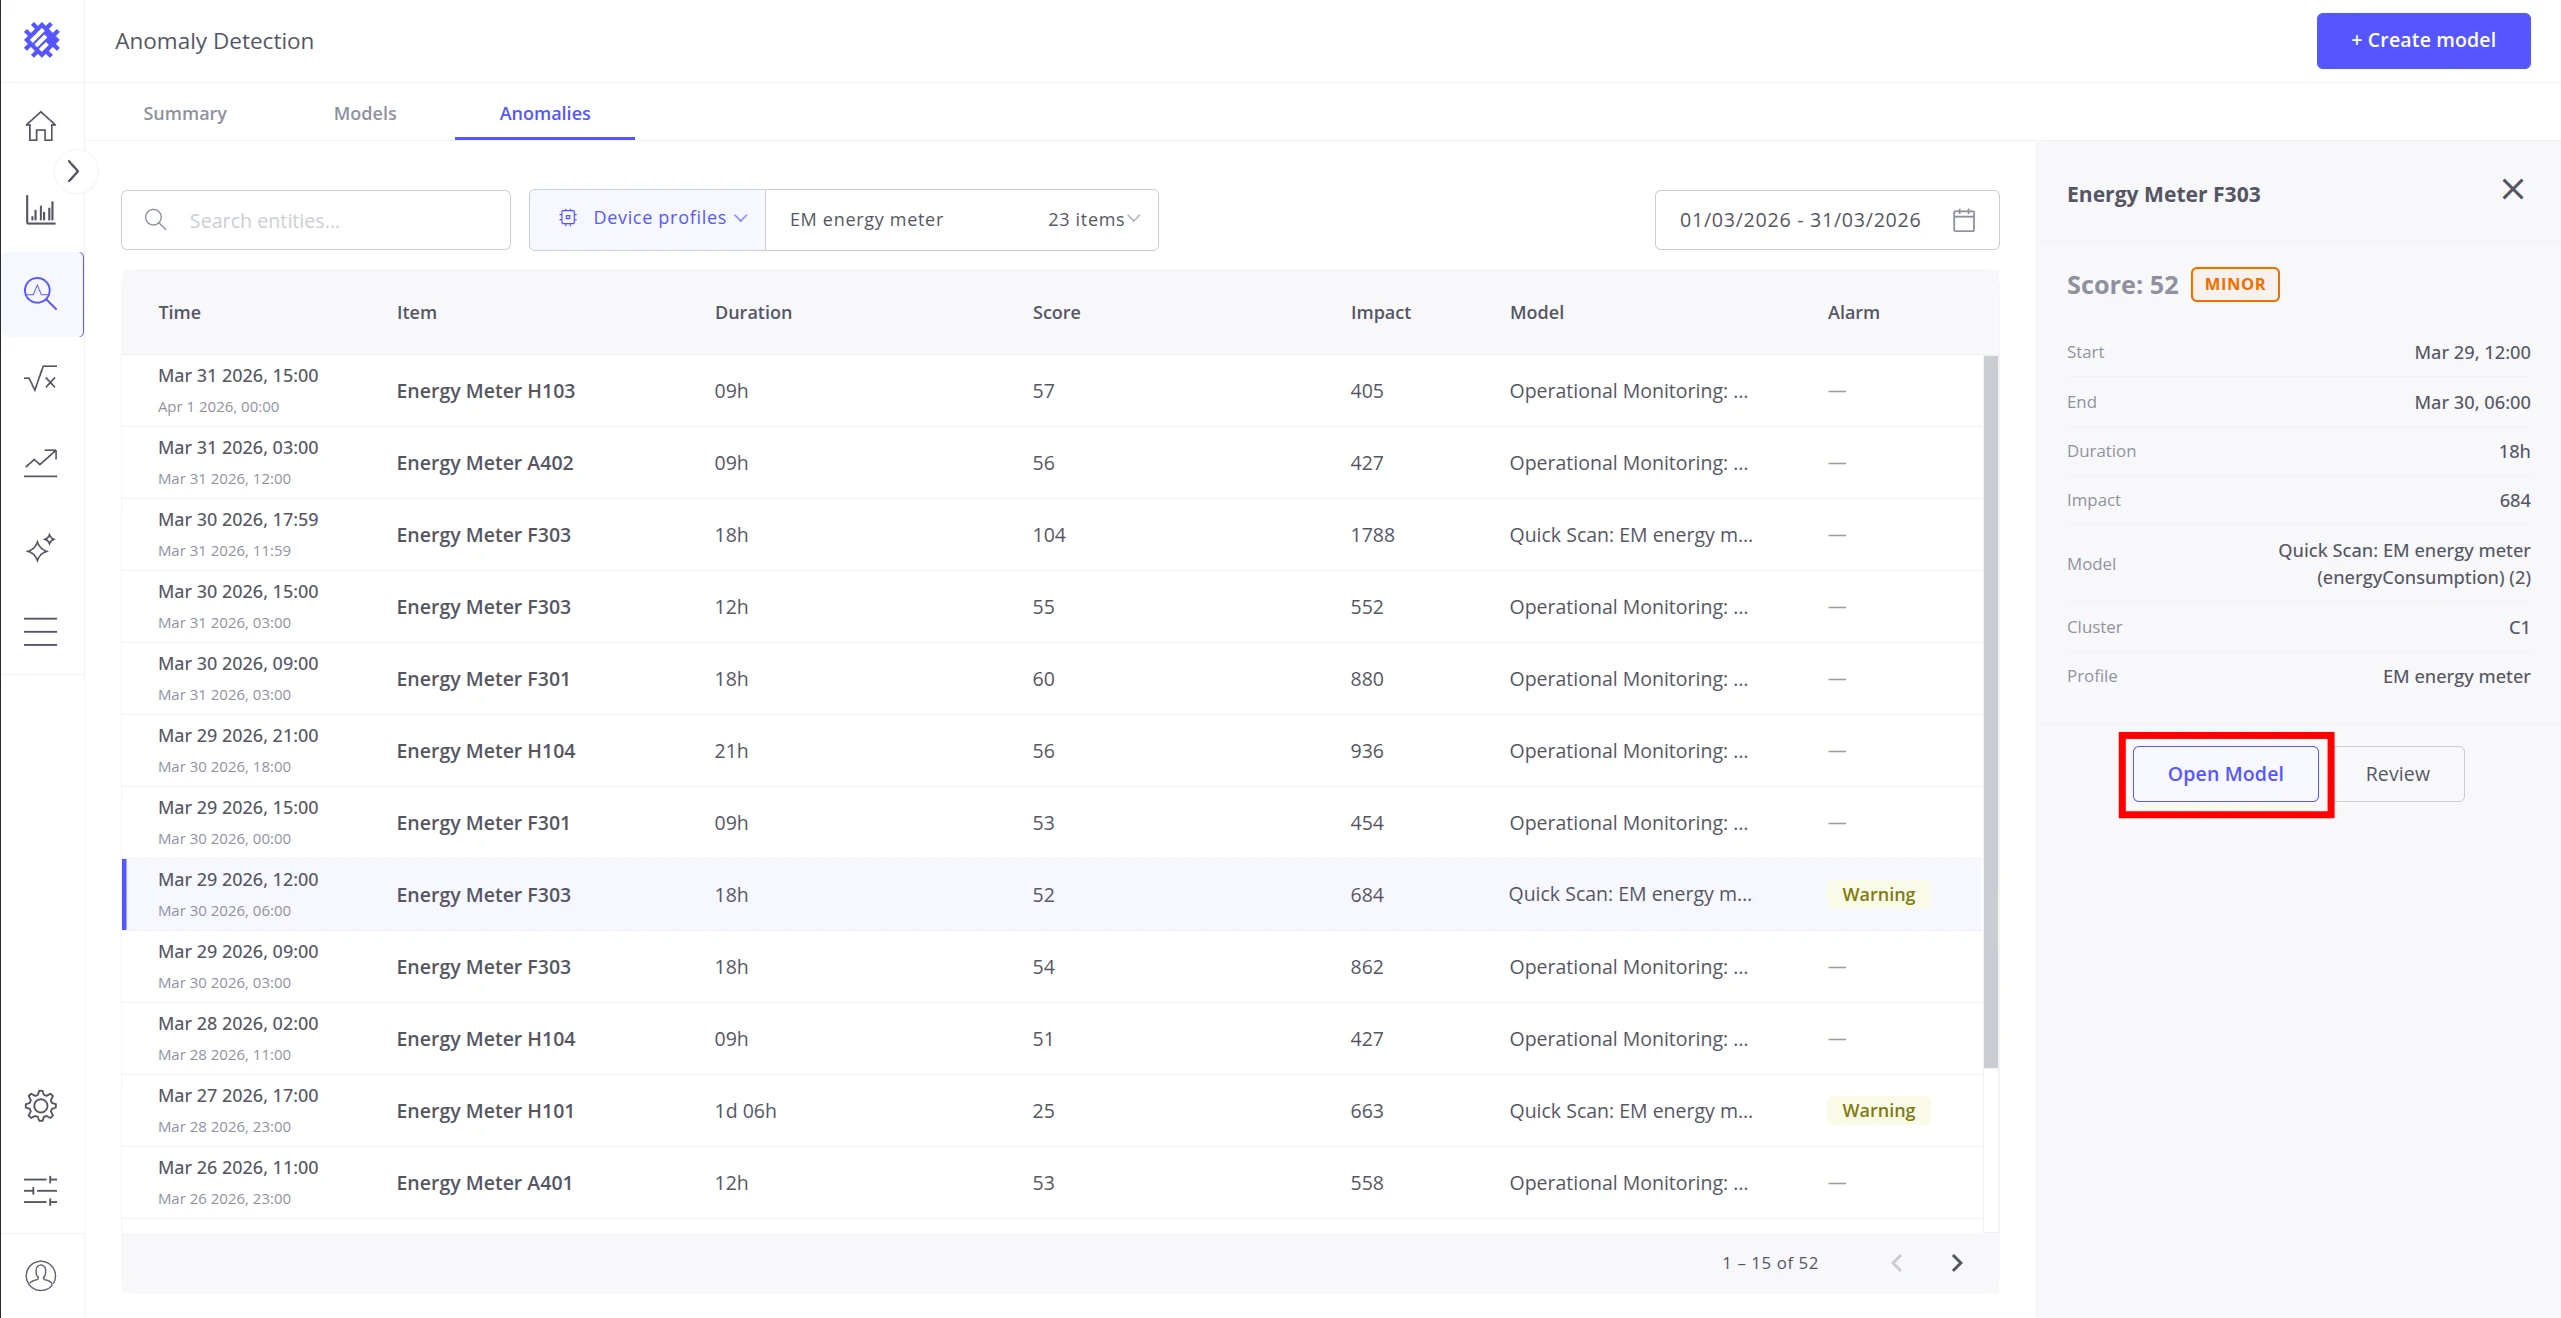
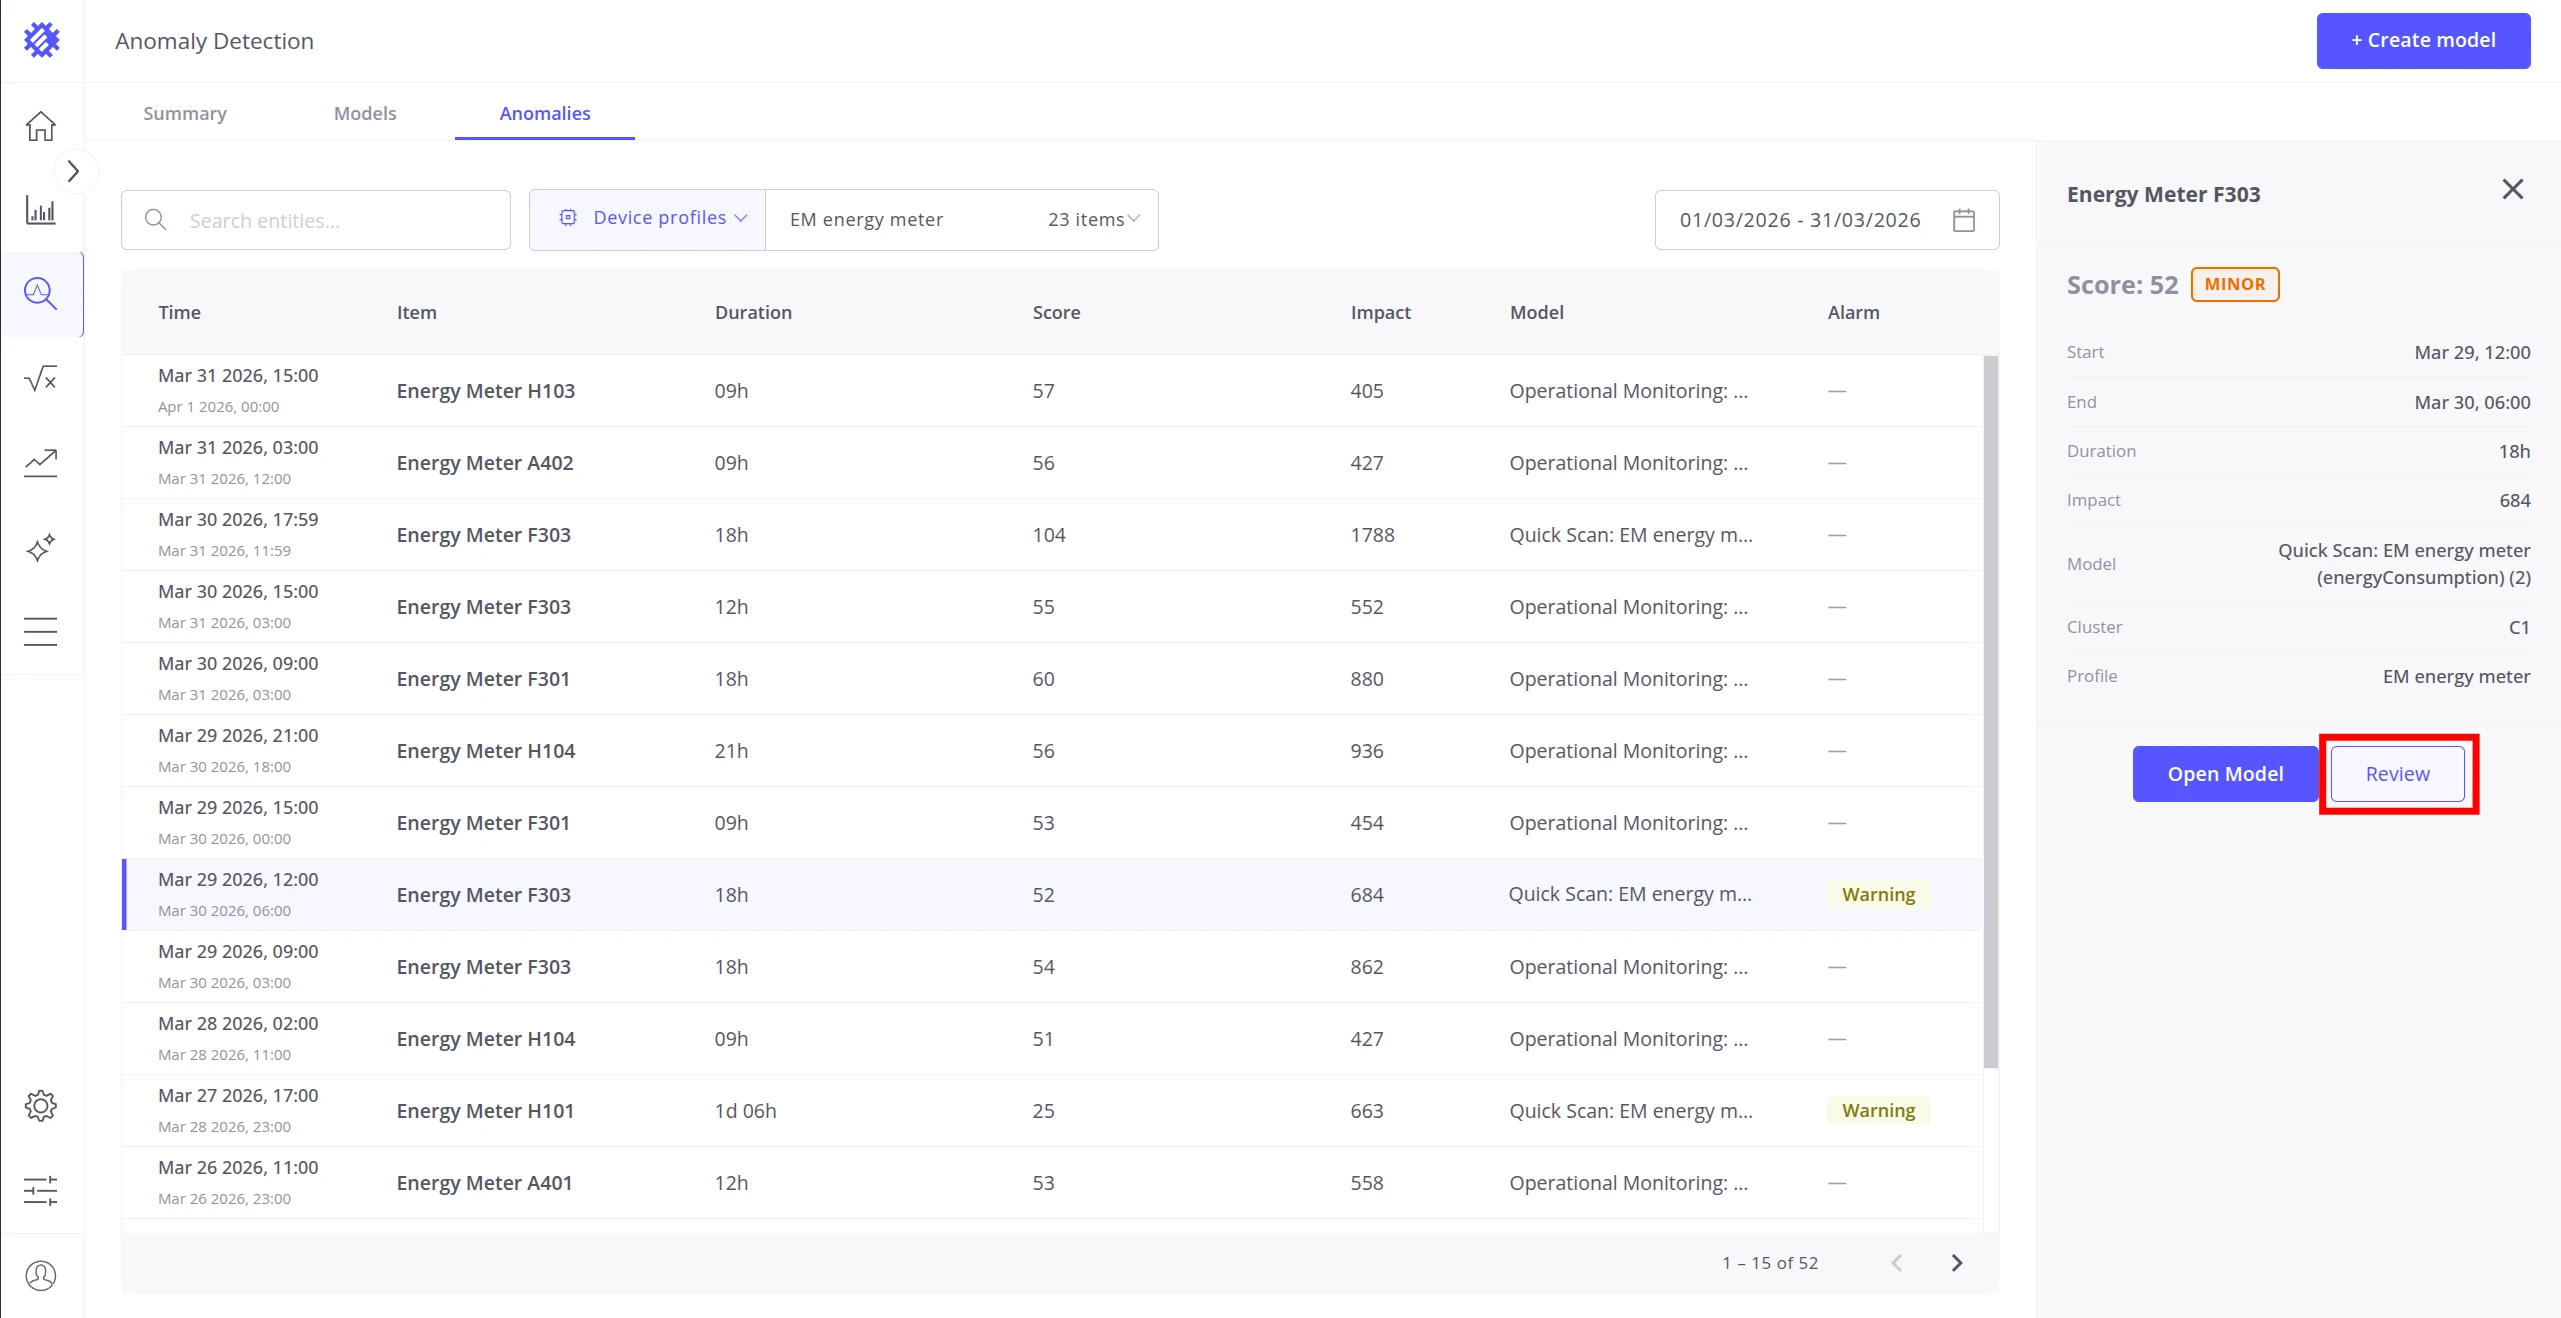
Two action buttons are available in the panel:
Open Model — navigates directly to the Result tab of the model that detected this anomaly, with the relevant item and time range pre-selected:
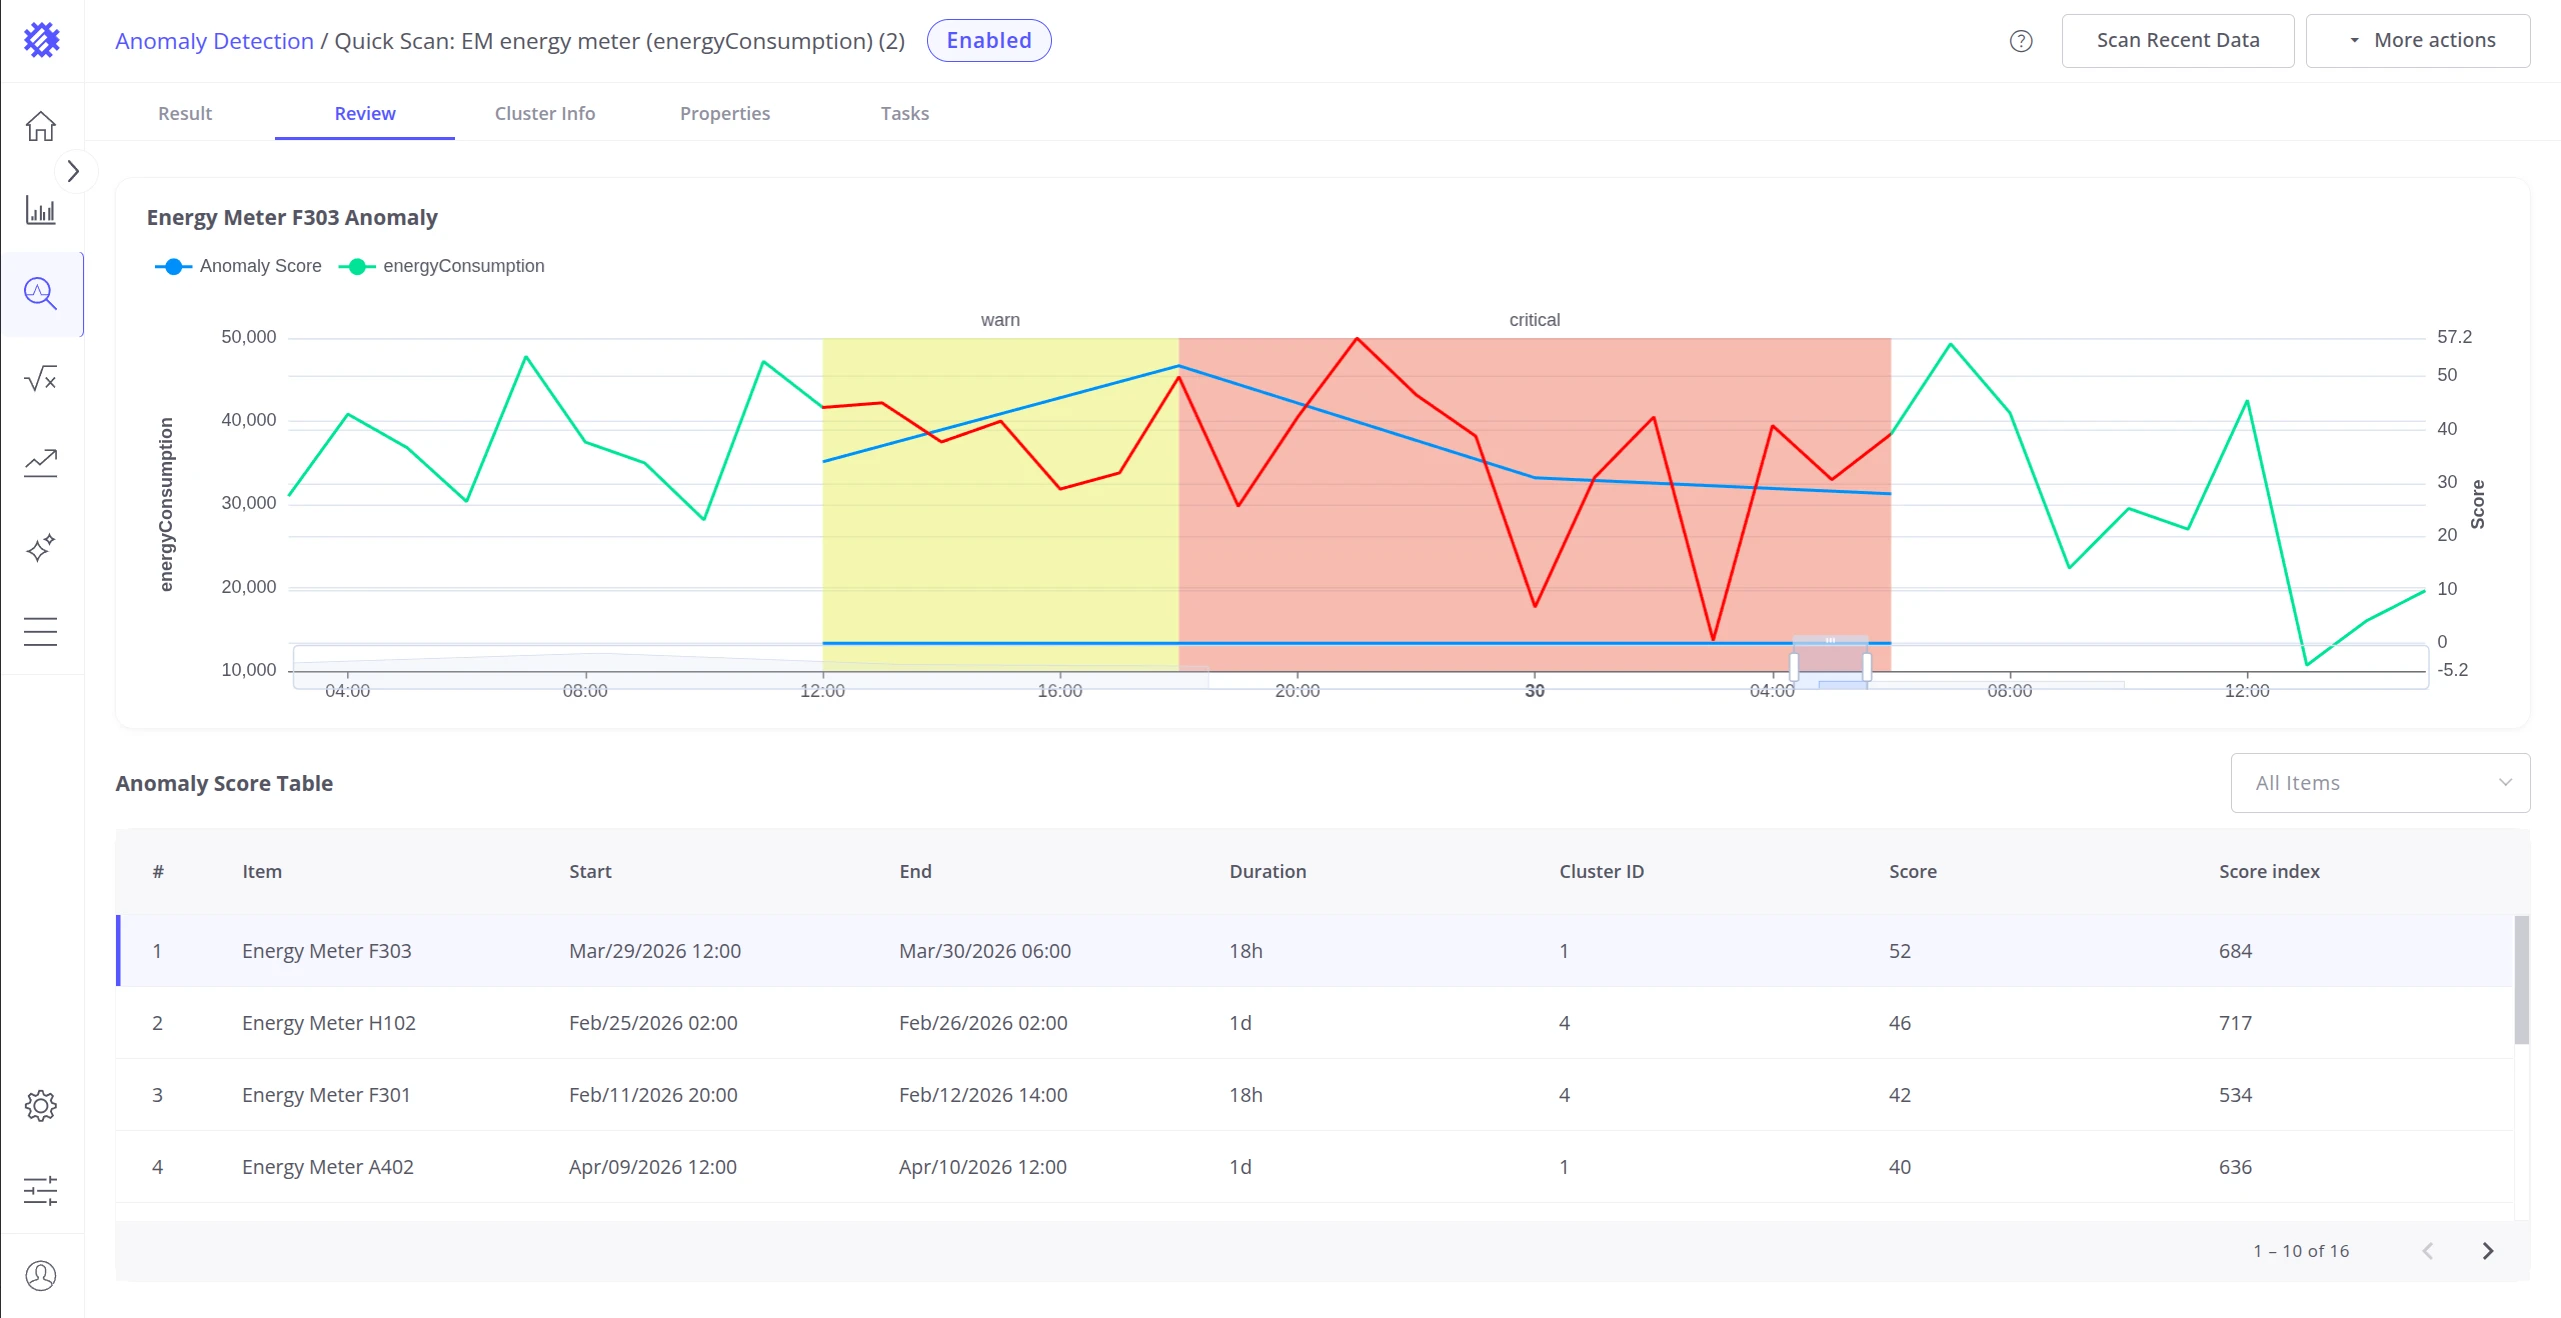
Review — opens the Review tab of the model, navigated directly to the anomaly chart for the selected item so you can inspect the raw telemetry alongside the anomaly score:
Was this helpful?