Installing ThingsBoard Edge on Raspberry Pi
This guide provides step-by-step instructions for installing ThingsBoard Edge on Raspberry Pi.
Prerequisites
Section titled “Prerequisites”To run ThingsBoard Edge, you need an active ThingsBoard Professional Edition account that supports Edge functionality.
You can use ThingsBoard Cloud or install a local ThingsBoard PE server.
Hardware requirements
Section titled “Hardware requirements”The hardware requirements for ThingsBoard Edge depend on the number of connected devices and platform interaction intensity.
| Workload | RAM | Description |
|---|---|---|
| Light | 1 GB | Fewer than 100 devices, minimal dashboard/device management usage |
| Heavy | 4 GB | 100+ devices or intense platform interactions |
Deploy a new Edge instance
Section titled “Deploy a new Edge instance”To create a new Edge instance on your ThingsBoard Server:
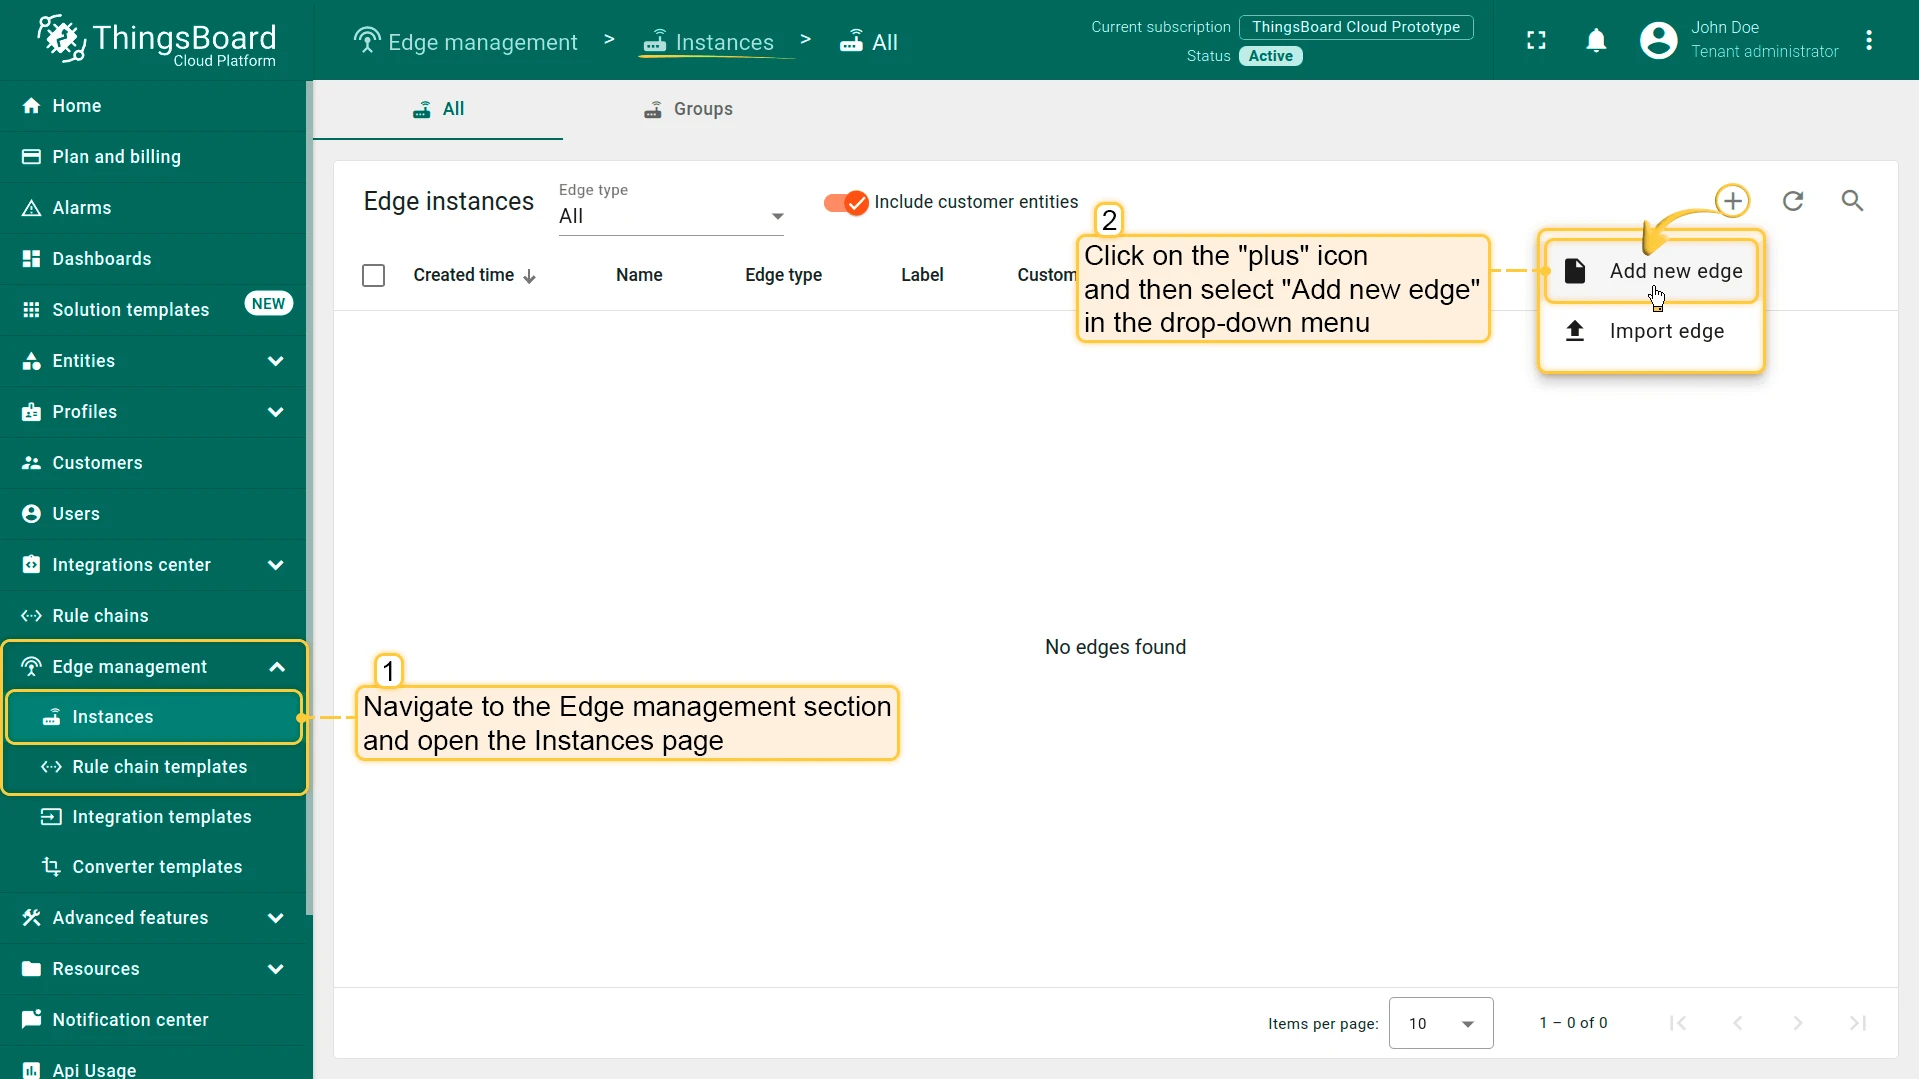
- Sign in to your ThingsBoard PE instance and go to Edge Management → Instances. Click Add (+) in the top-right corner and select Add new edge.
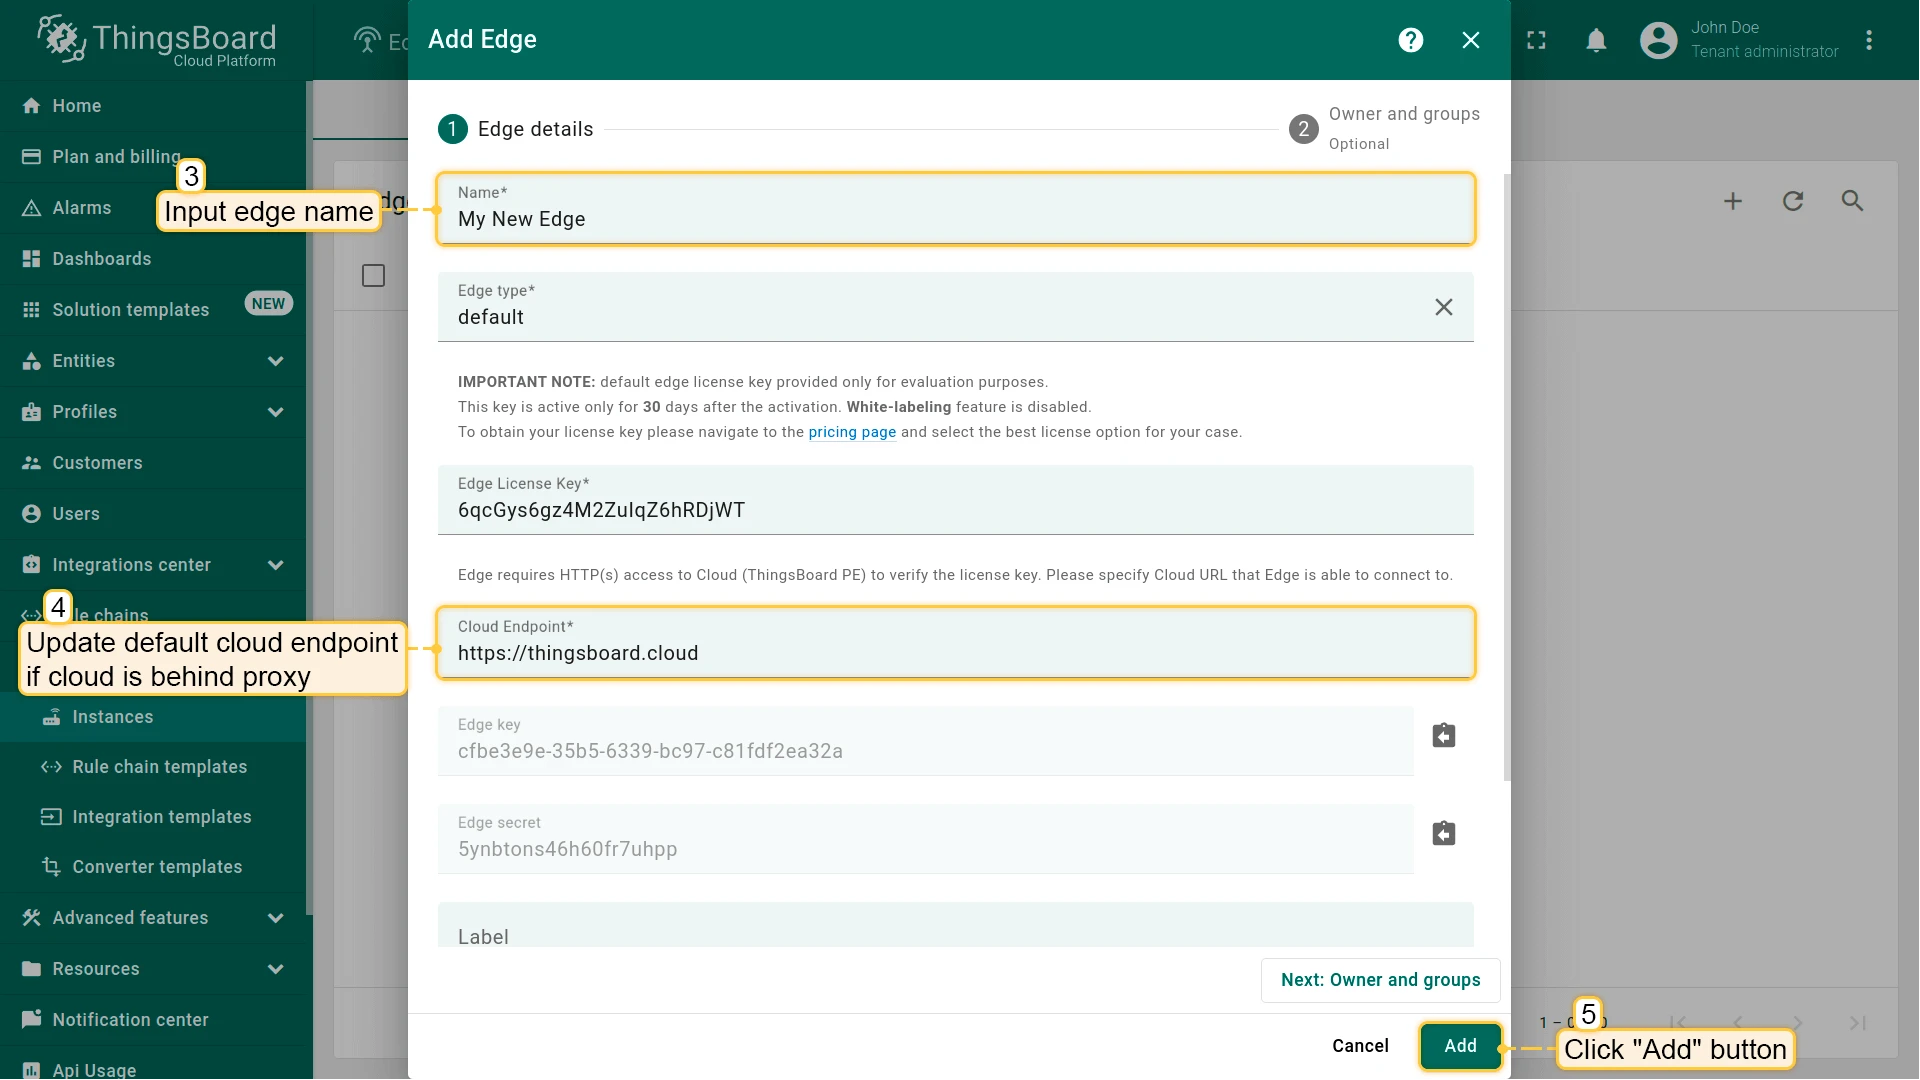
Enter a name for the Edge, like My New Edge.
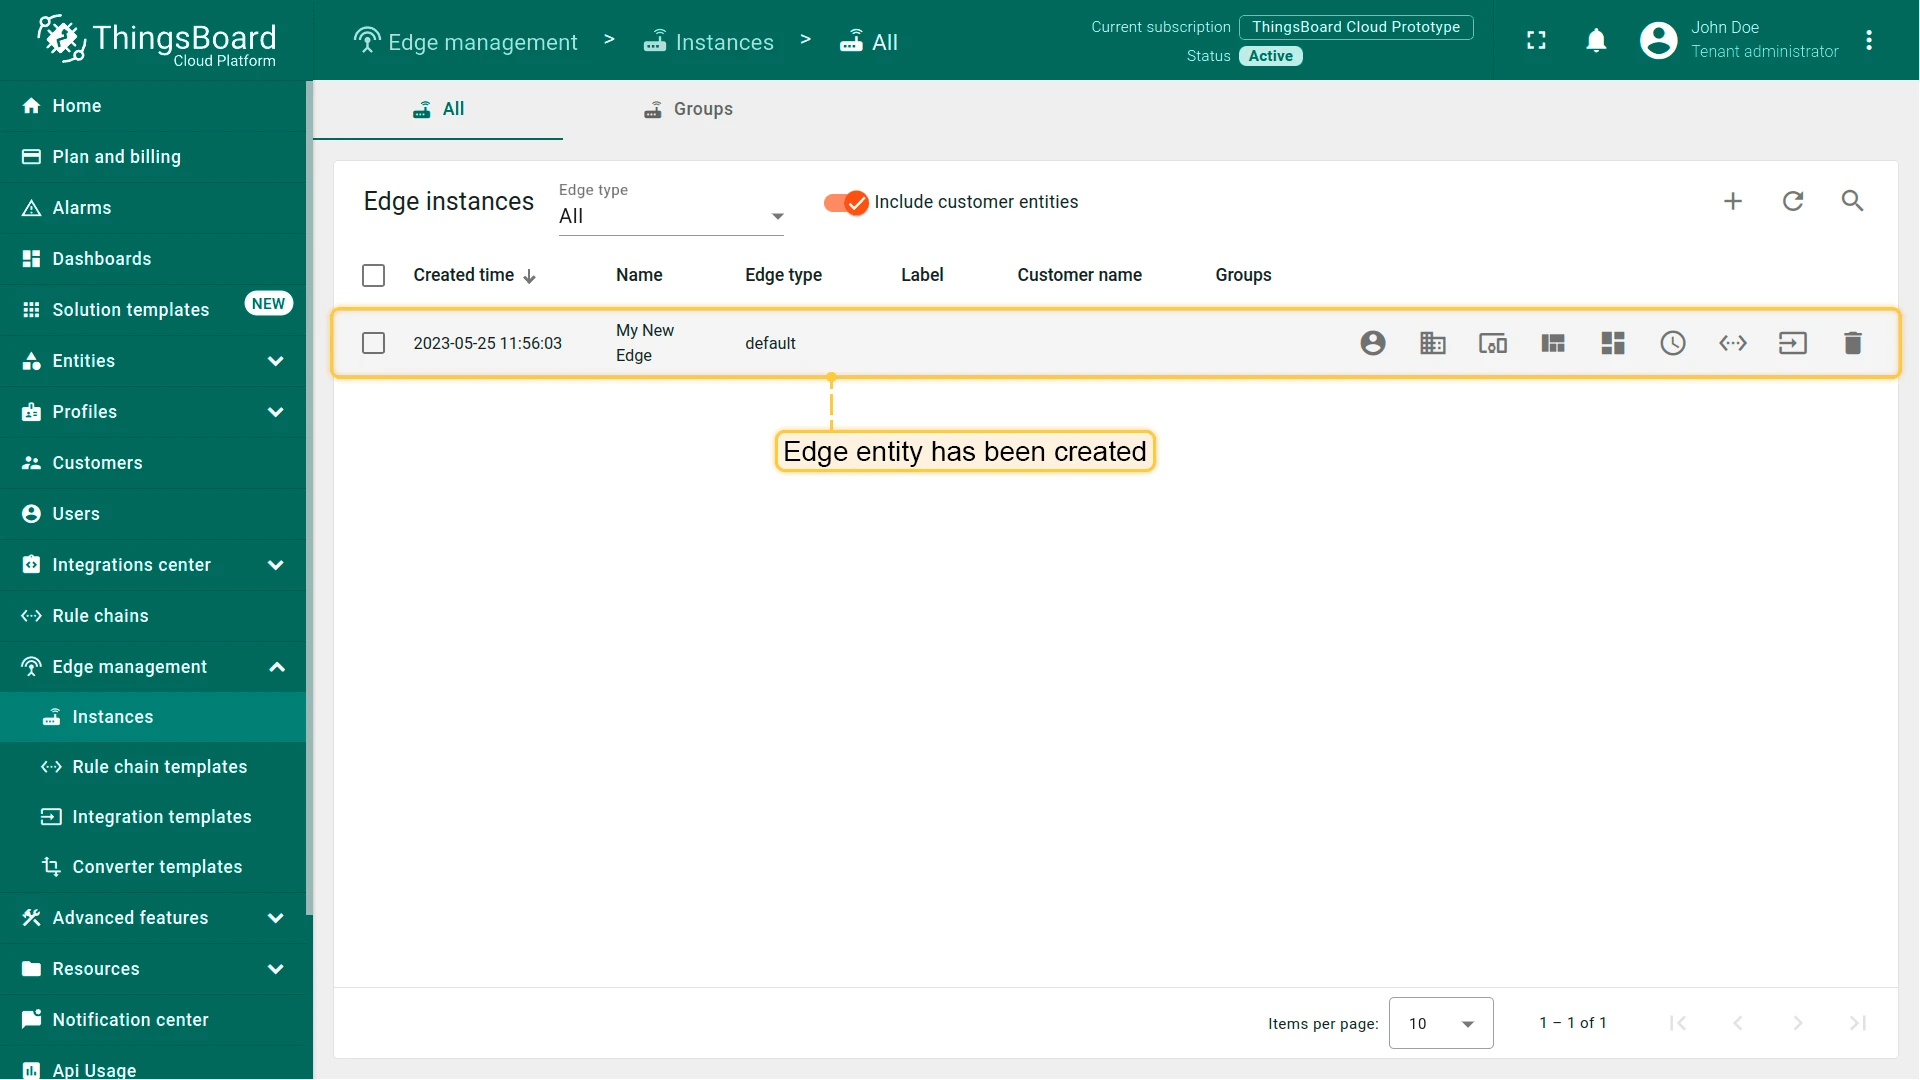
If needed, update the Cloud endpoint. If Edge runs in a Docker container, do not uselocalhost— use the IP address of the machine where ThingsBoard PE is hosted (e.g.,http://10.7.2.143:8080). If you use ThingsBoard Cloud, keep the default. Click Add.- Your new Edge instance is created and appears at the top of the list.
Guided installation using ThingsBoard Server instructions
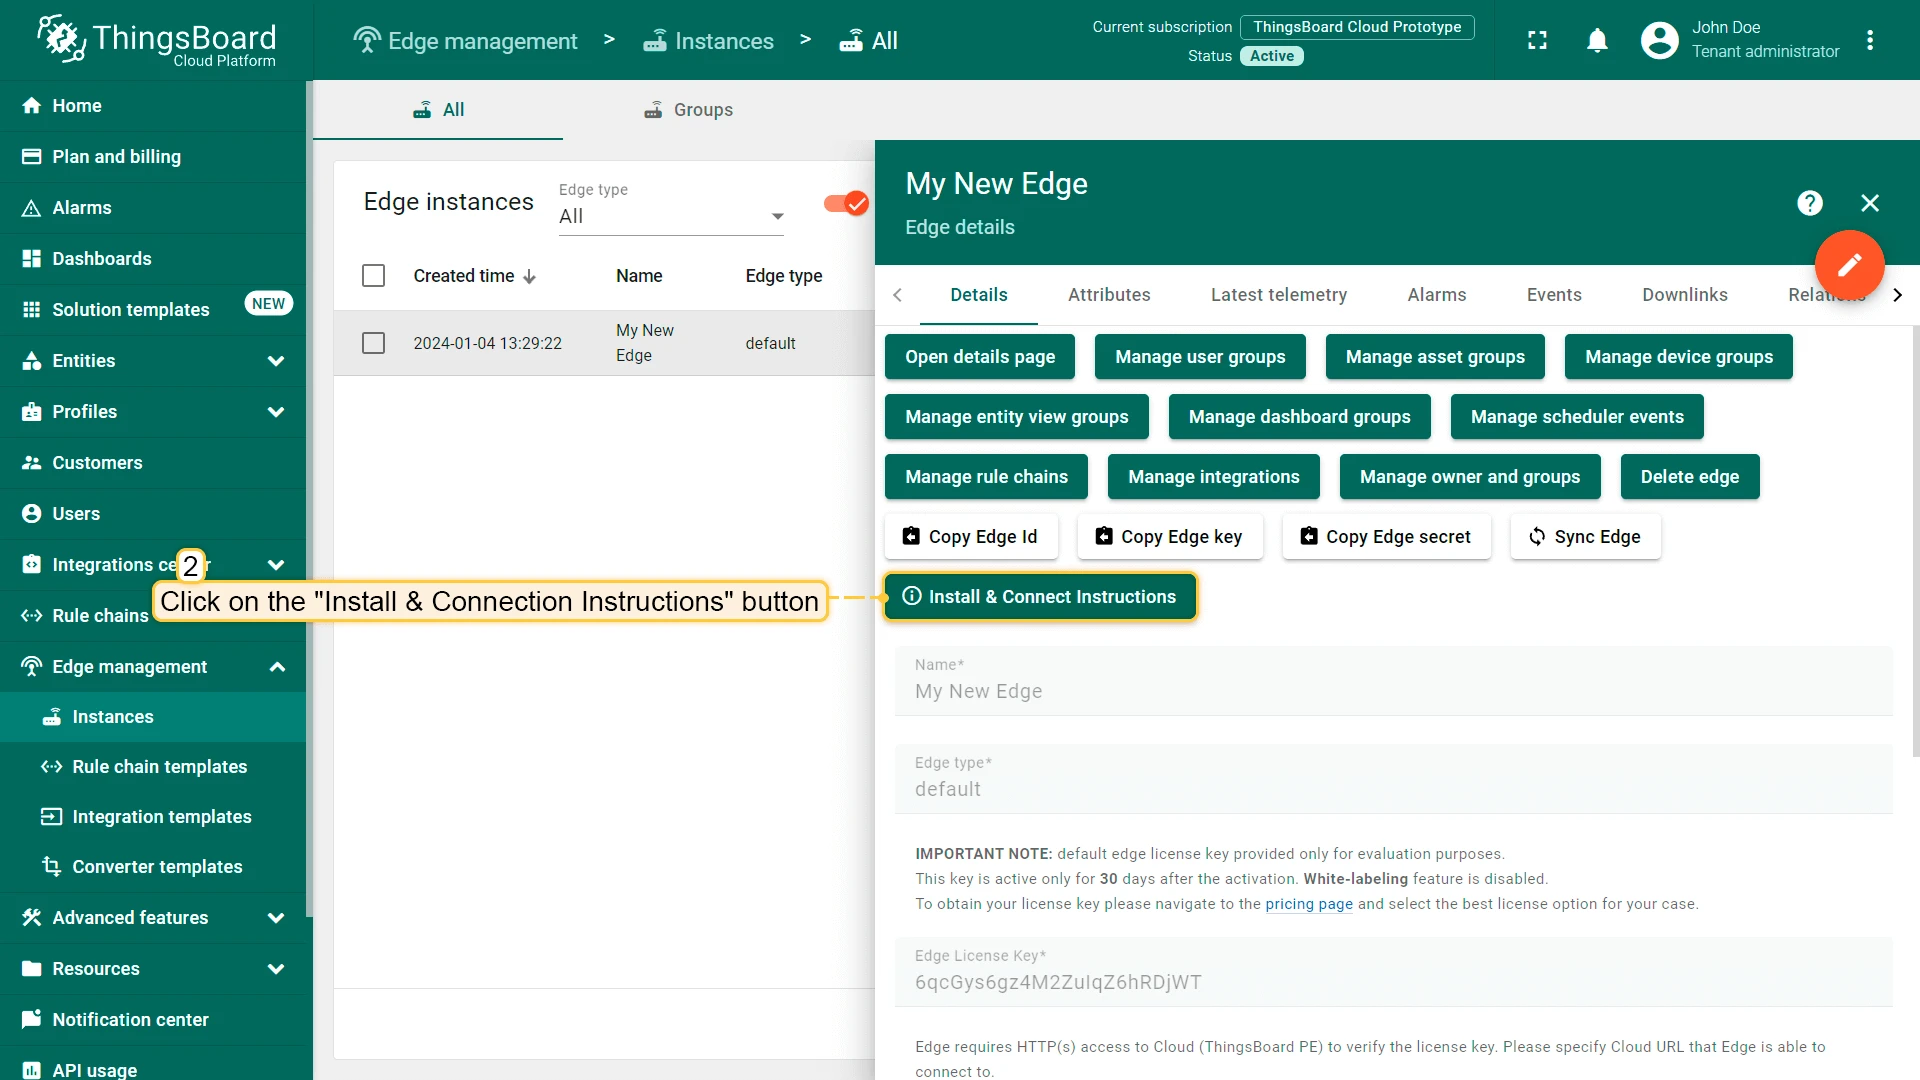
Section titled “Guided installation using ThingsBoard Server instructions”Once an Edge instance is created, the server generates pre-configured installation instructions containing the Edge credentials (Edge Key, Edge Secret, etc.). To access them:
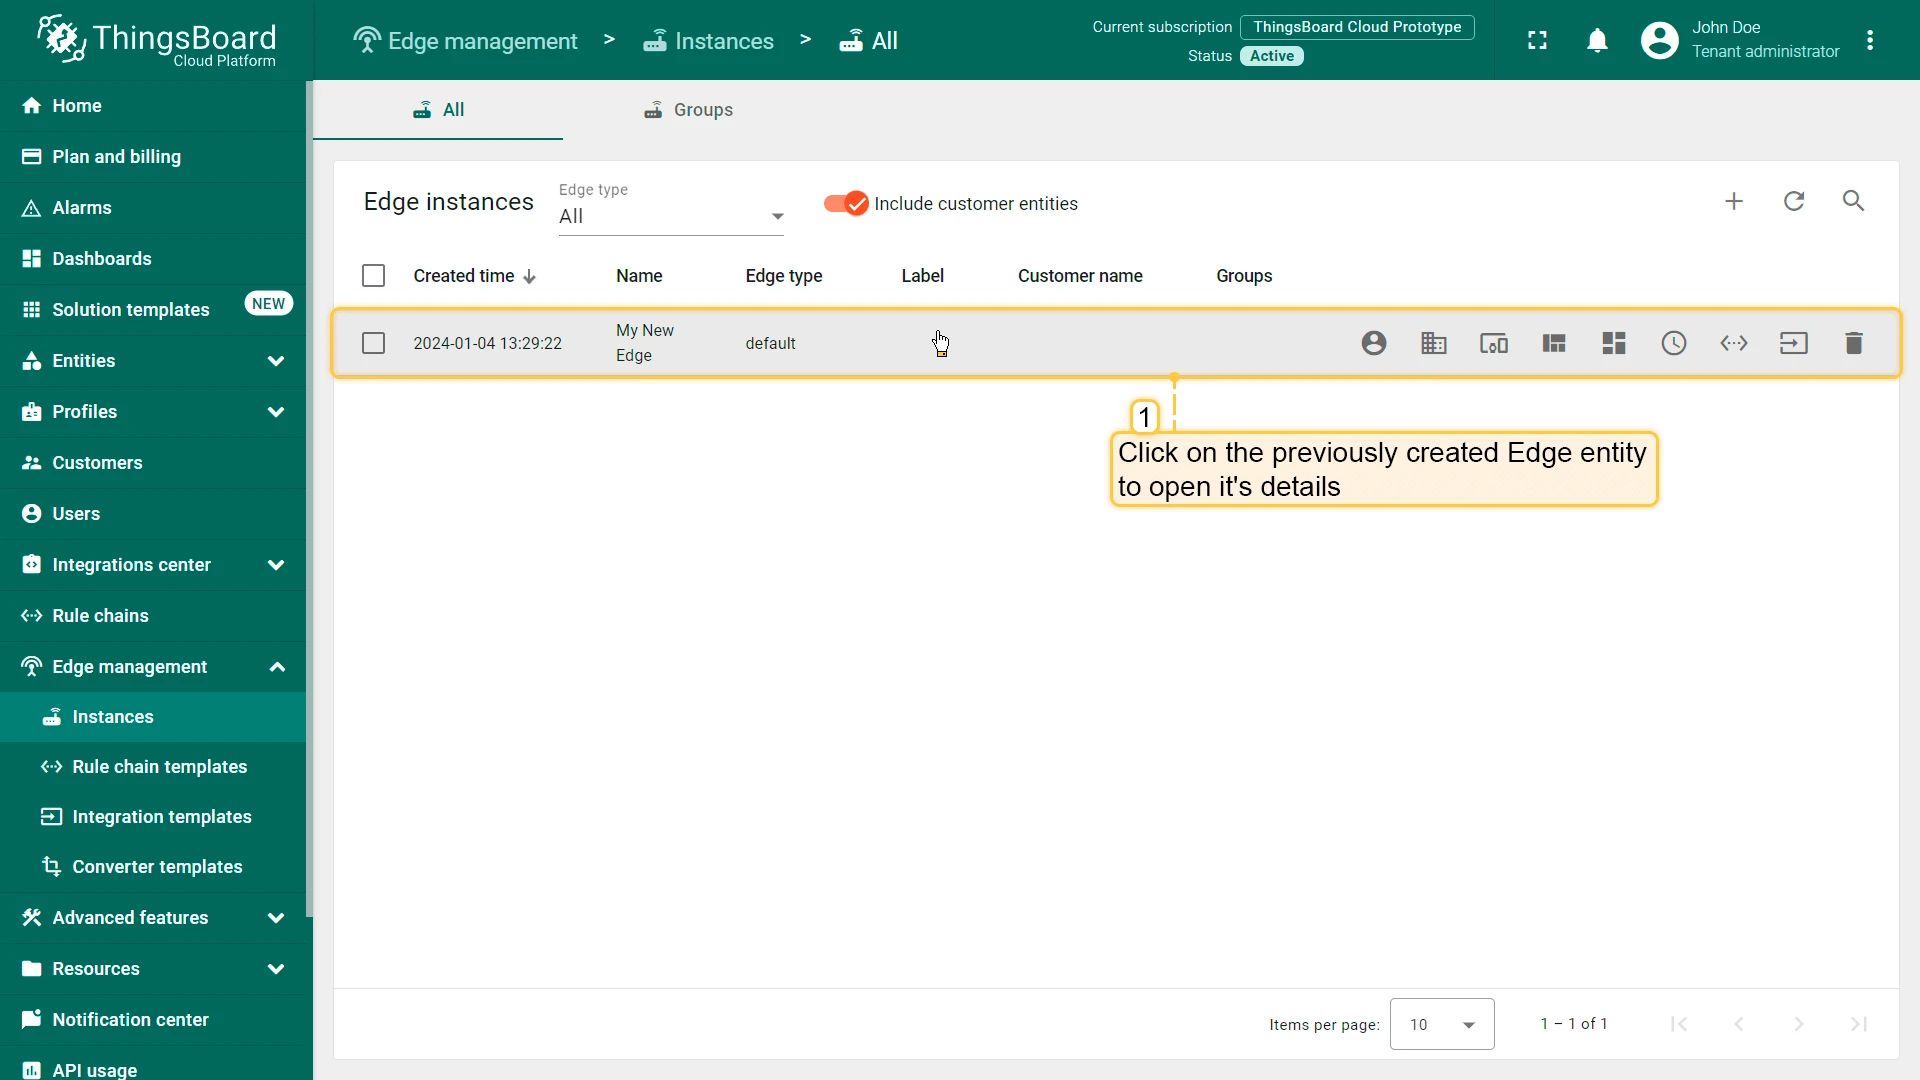
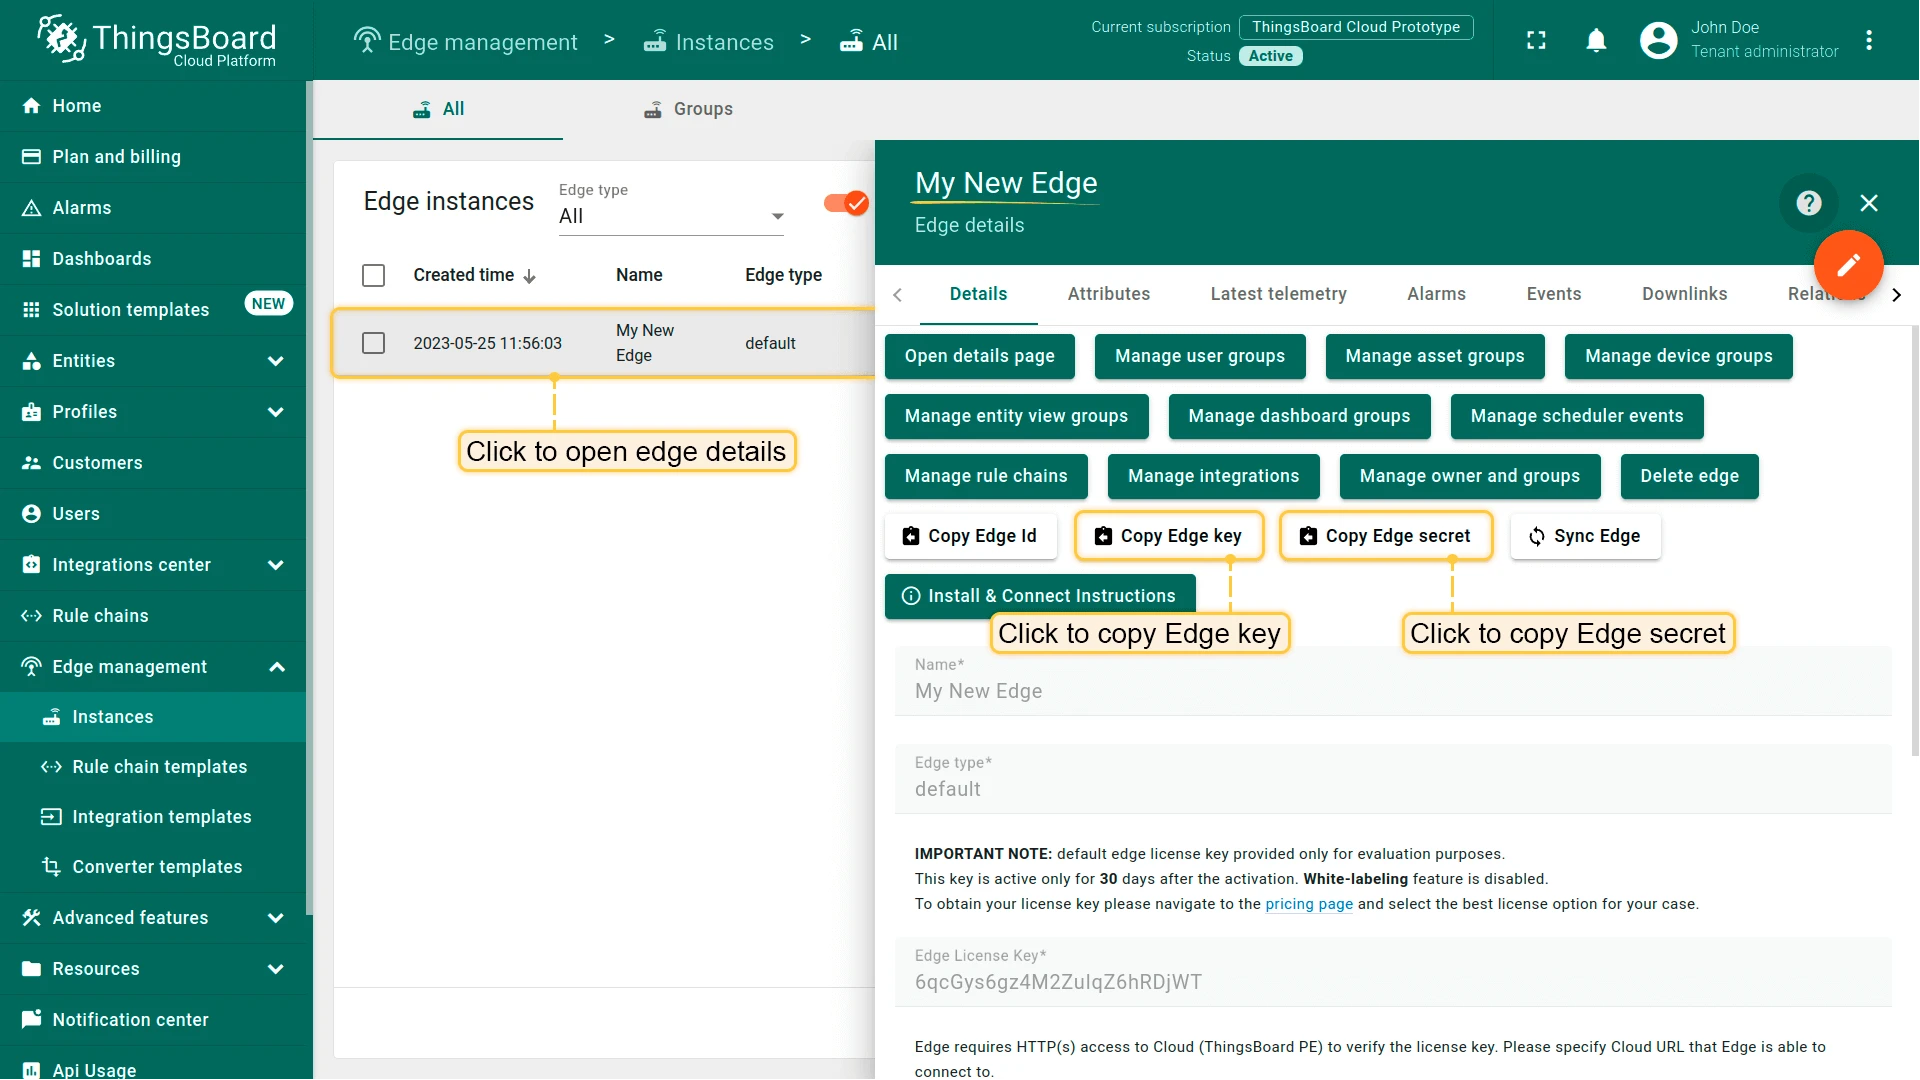
- Click the Edge entity to open its details.
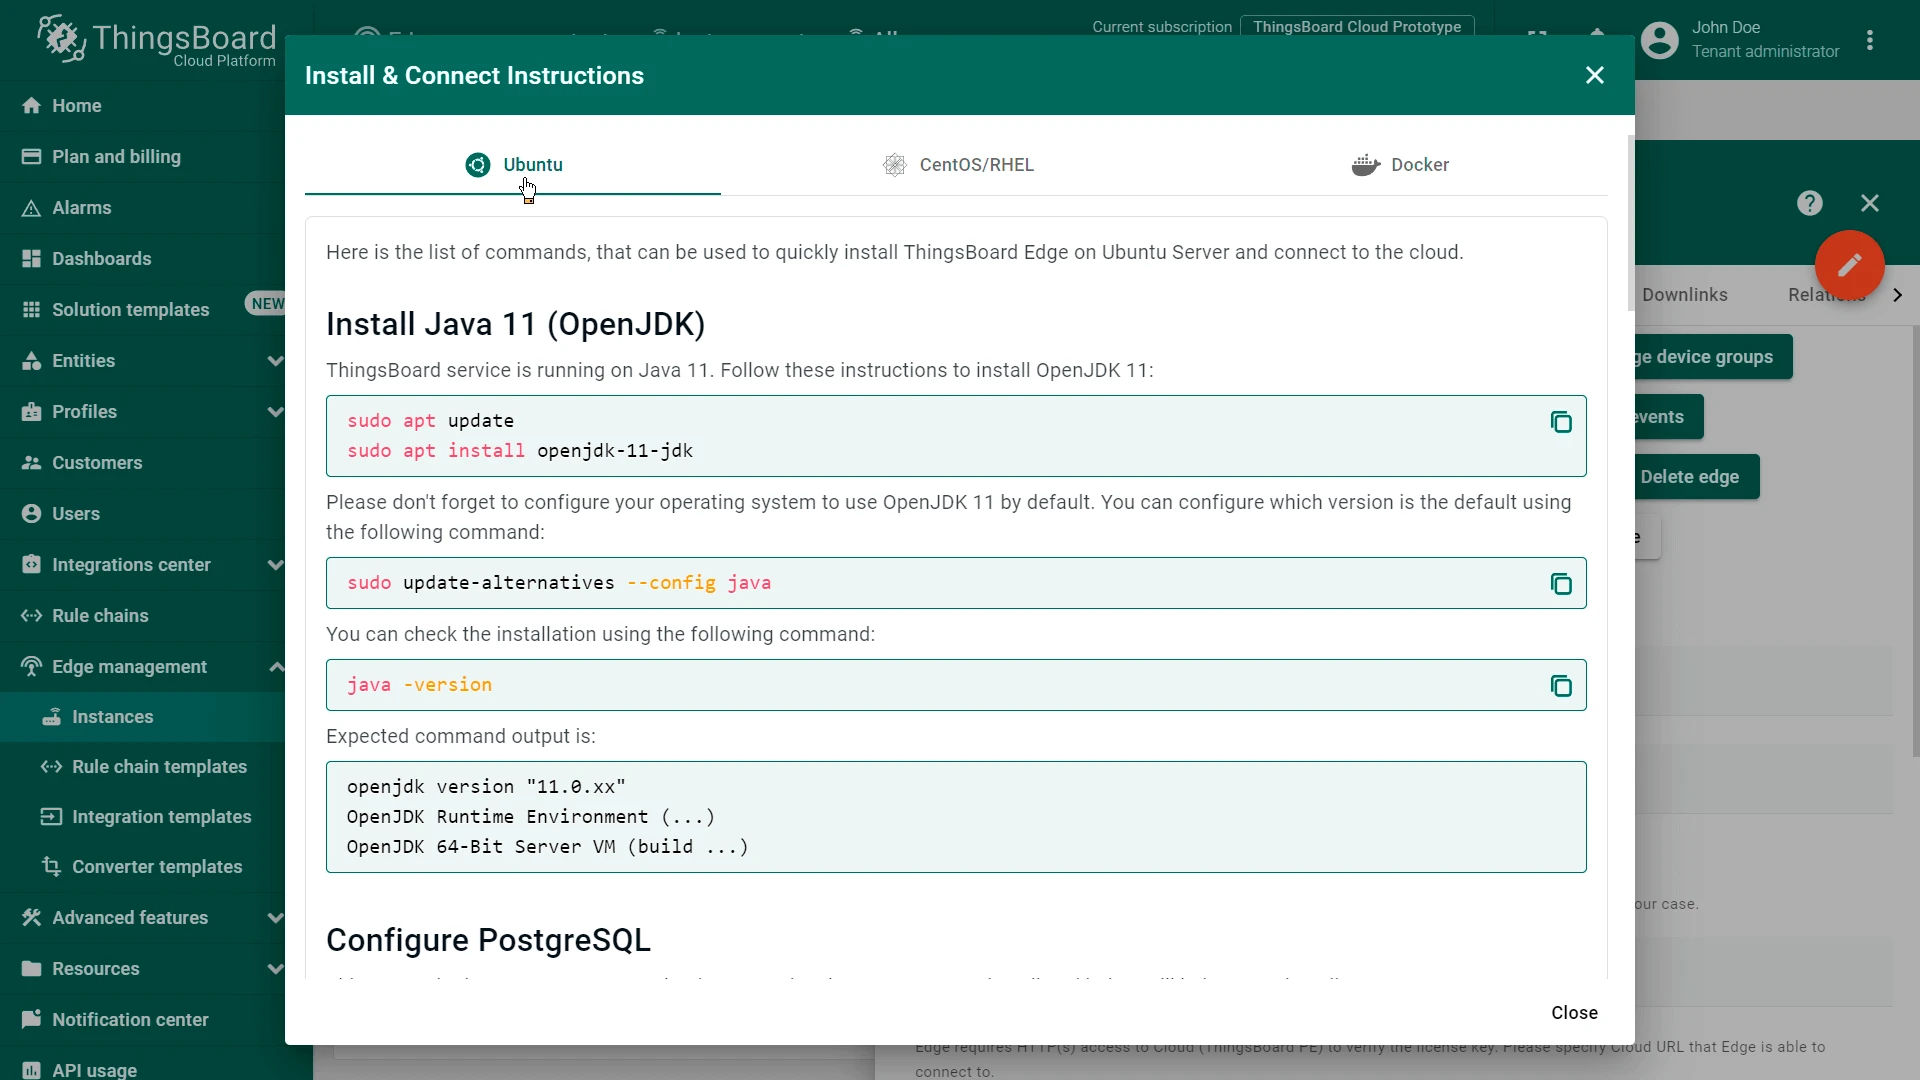
- Click Install & Connection Instructions.
- Select the installation method and follow the instructions to install Edge and connect it to the server.
Manual installation and configuration
Section titled “Manual installation and configuration”If you are unable to use the guided instructions above, follow the steps below to install and configure Edge manually.
Step 1. Install Java 17 (OpenJDK)
Section titled “Step 1. Install Java 17 (OpenJDK)”ThingsBoard Edge requires Java 17. To install OpenJDK 17:
sudo apt update && sudo apt install openjdk-17-jdk-headlessConfigure your operating system to use OpenJDK 17 by default:
sudo update-alternatives --config javaVerify the installation:
java -versionThe expected output:
openjdk version "17.x.xx"OpenJDK Runtime Environment (...)OpenJDK 64-Bit Server VM (...)Step 2. Configure the ThingsBoard Edge database
Section titled “Step 2. Configure the ThingsBoard Edge database”ThingsBoard Edge uses PostgreSQL as its local database.
Install PostgreSQL:
# Install wget if not already installed:sudo apt install -y wget
# Import the repository signing key:wget --quiet -O - https://www.postgresql.org/media/keys/ACCC4CF8.asc | sudo apt-key add -
# Add the repository to your system:echo "deb https://apt.postgresql.org/pub/repos/apt/ $(lsb_release -cs)-pgdg main" | sudo tee /etc/apt/sources.list.d/pgdg.list
# Install and start PostgreSQL:sudo apt updatesudo apt -y install postgresqlsudo service postgresql start
Set the password for the main PostgreSQL user:
sudo -u postgres psql -c "\password"Enter and confirm the password when prompted.
Create a new PostgreSQL database named tb_edge:
echo "CREATE DATABASE tb_edge;" | psql -U postgres -d postgres -h 127.0.0.1 -WAdd the database connection settings to the ThingsBoard Edge configuration file:
sudo bash -c 'cat >> /etc/tb-edge/conf/tb-edge.conf <<EOLexport DATABASE_TS_TYPE=sqlexport SPRING_DATASOURCE_URL=jdbc:postgresql://localhost:5432/tb_edgeexport SPRING_DATASOURCE_USERNAME=postgresexport SPRING_DATASOURCE_PASSWORD=PUT_YOUR_POSTGRESQL_PASSWORD_HEREexport SQL_POSTGRES_TS_KV_PARTITIONING=MONTHSEOL'Replace PUT_YOUR_POSTGRESQL_PASSWORD_HERE with your actual PostgreSQL password.
SQL_POSTGRES_TS_KV_PARTITIONING sets the partitioning interval for time-series storage. Allowed values: DAYS, MONTHS, YEARS, INDEFINITE.
Step 3. Download and install ThingsBoard Edge
Section titled “Step 3. Download and install ThingsBoard Edge”wget https://dist.thingsboard.io/tb-edge-4.3.1.1pe.debsudo dpkg -i tb-edge-4.3.1.1pe.debStep 4. Configure ThingsBoard Edge
Section titled “Step 4. Configure ThingsBoard Edge”In the Edge instance details panel, click Copy Edge Key and Copy Edge Secret. Store these values — you need them in the next step.
Edit the ThingsBoard Edge configuration file to set your Edge credentials and cloud connection parameters.
Use this configuration to connect to ThingsBoard Cloud hosted in North America.
sudo sh -c 'cat <<EOL >> /etc/tb-edge/conf/tb-edge.confexport CLOUD_ROUTING_KEY=PUT_YOUR_EDGE_KEY_HEREexport CLOUD_ROUTING_SECRET=PUT_YOUR_EDGE_SECRET_HEREexport CLOUD_RPC_HOST=thingsboard.cloudexport CLOUD_RPC_PORT=7070export CLOUD_RPC_SSL_ENABLED=trueexport INTEGRATIONS_RPC_PORT=19090EOL'Use this configuration to connect to ThingsBoard Cloud hosted in Europe.
sudo sh -c 'cat <<EOL >> /etc/tb-edge/conf/tb-edge.confexport CLOUD_ROUTING_KEY=PUT_YOUR_EDGE_KEY_HEREexport CLOUD_ROUTING_SECRET=PUT_YOUR_EDGE_SECRET_HEREexport CLOUD_RPC_HOST=eu.thingsboard.cloudexport CLOUD_RPC_PORT=7070export CLOUD_RPC_SSL_ENABLED=trueexport INTEGRATIONS_RPC_PORT=19090EOL'Use this configuration to connect to a self-hosted ThingsBoard PE server on your local network.
sudo sh -c 'cat <<EOL >> /etc/tb-edge/conf/tb-edge.confexport CLOUD_ROUTING_KEY=PUT_YOUR_EDGE_KEY_HEREexport CLOUD_ROUTING_SECRET=PUT_YOUR_EDGE_SECRET_HEREexport CLOUD_RPC_HOST=PUT_YOUR_RPC_HOSTexport CLOUD_RPC_PORT=7070export CLOUD_RPC_SSL_ENABLED=falseexport HTTP_BIND_PORT=18080export MQTT_BIND_PORT=11883export COAP_BIND_PORT=15683export LWM2M_ENABLED=falseexport SNMP_ENABLED=falseexport INTEGRATIONS_RPC_PORT=19090EOL'Configuration parameters:
| Parameter | Description |
|---|---|
CLOUD_ROUTING_KEY | Your Edge key (copied above) |
CLOUD_ROUTING_SECRET | Your Edge secret (copied above) |
CLOUD_RPC_HOST | Hostname or IP address of the ThingsBoard Server |
CLOUD_RPC_PORT | gRPC port used for Edge–server communication (default: 7070) |
CLOUD_RPC_SSL_ENABLED | Set to true to enable SSL — required when connecting to ThingsBoard Cloud |
INTEGRATIONS_RPC_PORT | Port used for integration communication between Edge and ThingsBoard PE |
Step 5. [Optional] Tune JVM memory for low-memory devices
Section titled “Step 5. [Optional] Tune JVM memory for low-memory devices”On devices with limited RAM, you can constrain the JVM heap size to prevent out-of-memory issues:
echo 'export JAVA_OPTS="$JAVA_OPTS -Xms512M -Xmx1G"' | sudo tee -a /etc/tb-edge/conf/tb-edge.conf| Parameter | Description |
|---|---|
-Xms512M | Initial JVM heap size — 512 MB |
-Xmx1G | Maximum JVM heap size — 1 GB |
Adjust these values based on available RAM. A good rule of thumb: set -Xmx to half the total RAM if ThingsBoard Edge is the only memory-intensive process, or one-third if other services are also running.
Step 6. Complete the installation
Section titled “Step 6. Complete the installation”Once ThingsBoard Edge is installed and configured, execute the installation script:
sudo /usr/share/tb-edge/bin/install/install.shStart the ThingsBoard Edge service:
sudo service tb-edge startOnce the service is running, open the Edge UI at http://localhost:8080, or replace localhost with your Raspberry Pi’s local IP address if accessing from another device on the network.
Log in using your tenant credentials from ThingsBoard Server or ThingsBoard Cloud.
Troubleshooting
Section titled “Troubleshooting”ThingsBoard Edge logs are stored in:
/var/log/tb-edgeTo check for errors:
cat /var/log/tb-edge/tb-edge.log | grep ERRORService management
Section titled “Service management”To stop the ThingsBoard Edge service:
sudo service tb-edge stopTo restart the ThingsBoard Edge service:
sudo service tb-edge restartTo check the status of the ThingsBoard Edge service:
sudo service tb-edge statusWas this helpful?