Dashboards
Dashboards on ThingsBoard Edge work the same way as on the ThingsBoard server. They display real-time IoT data from devices connected locally to the Edge, and continue working even when the Edge instance is offline — widgets show the most recently received data during an outage. When the connection is restored, any changes made on Edge are synchronized to the server automatically.
For a general introduction to dashboards and widgets, see Dashboards.
Assign a dashboard from the server
Section titled “Assign a dashboard from the server”Dashboards created on the ThingsBoard server can be assigned to one or more Edge instances. This is the recommended approach when you want to deploy the same dashboard layout to multiple Edge instances simultaneously.
- Log in to the ThingsBoard server and go to Edge management → Instances.
- Click the Edge instance to open the context menu and select Manage edge dashboard groups.
- Click + to assign an existing dashboard group, or open a group and click + to add individual dashboards to it.
The dashboards are added to the Edge event queue and appear on Edge once the connection is established.
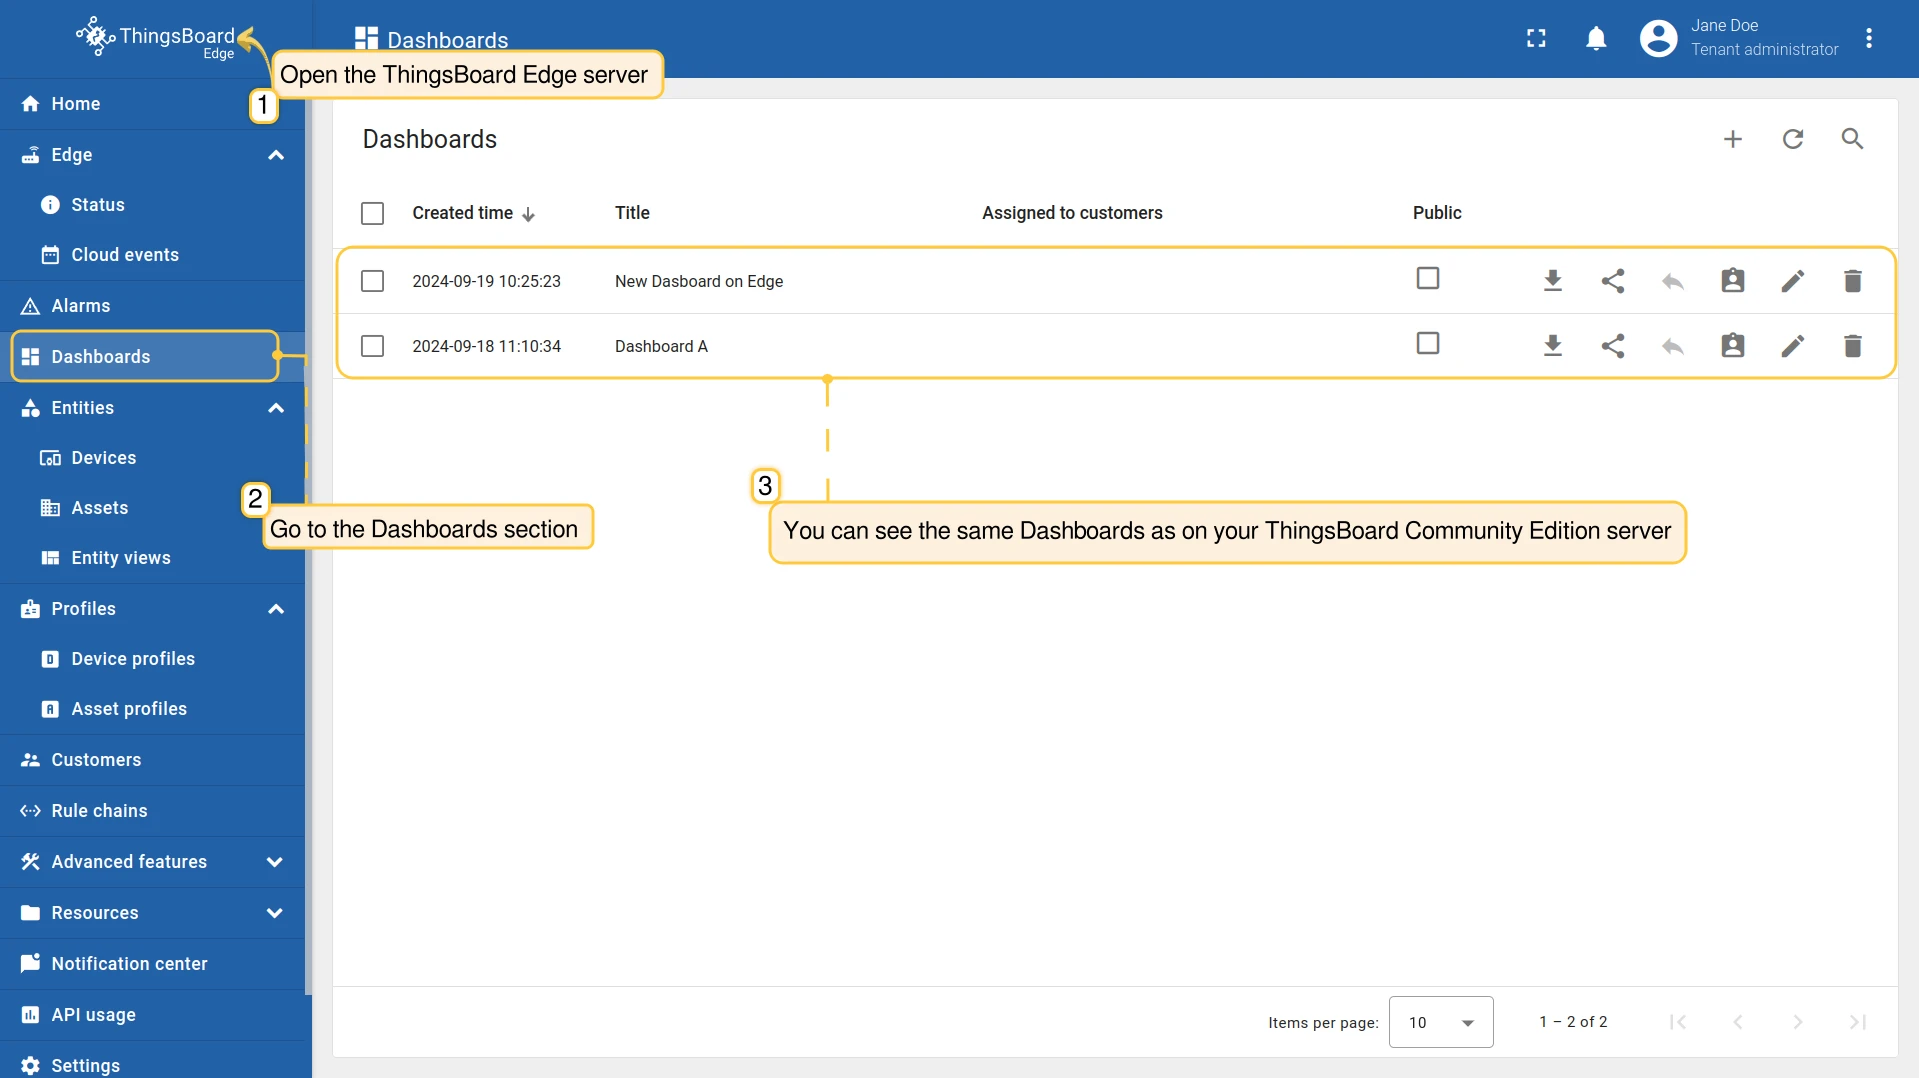
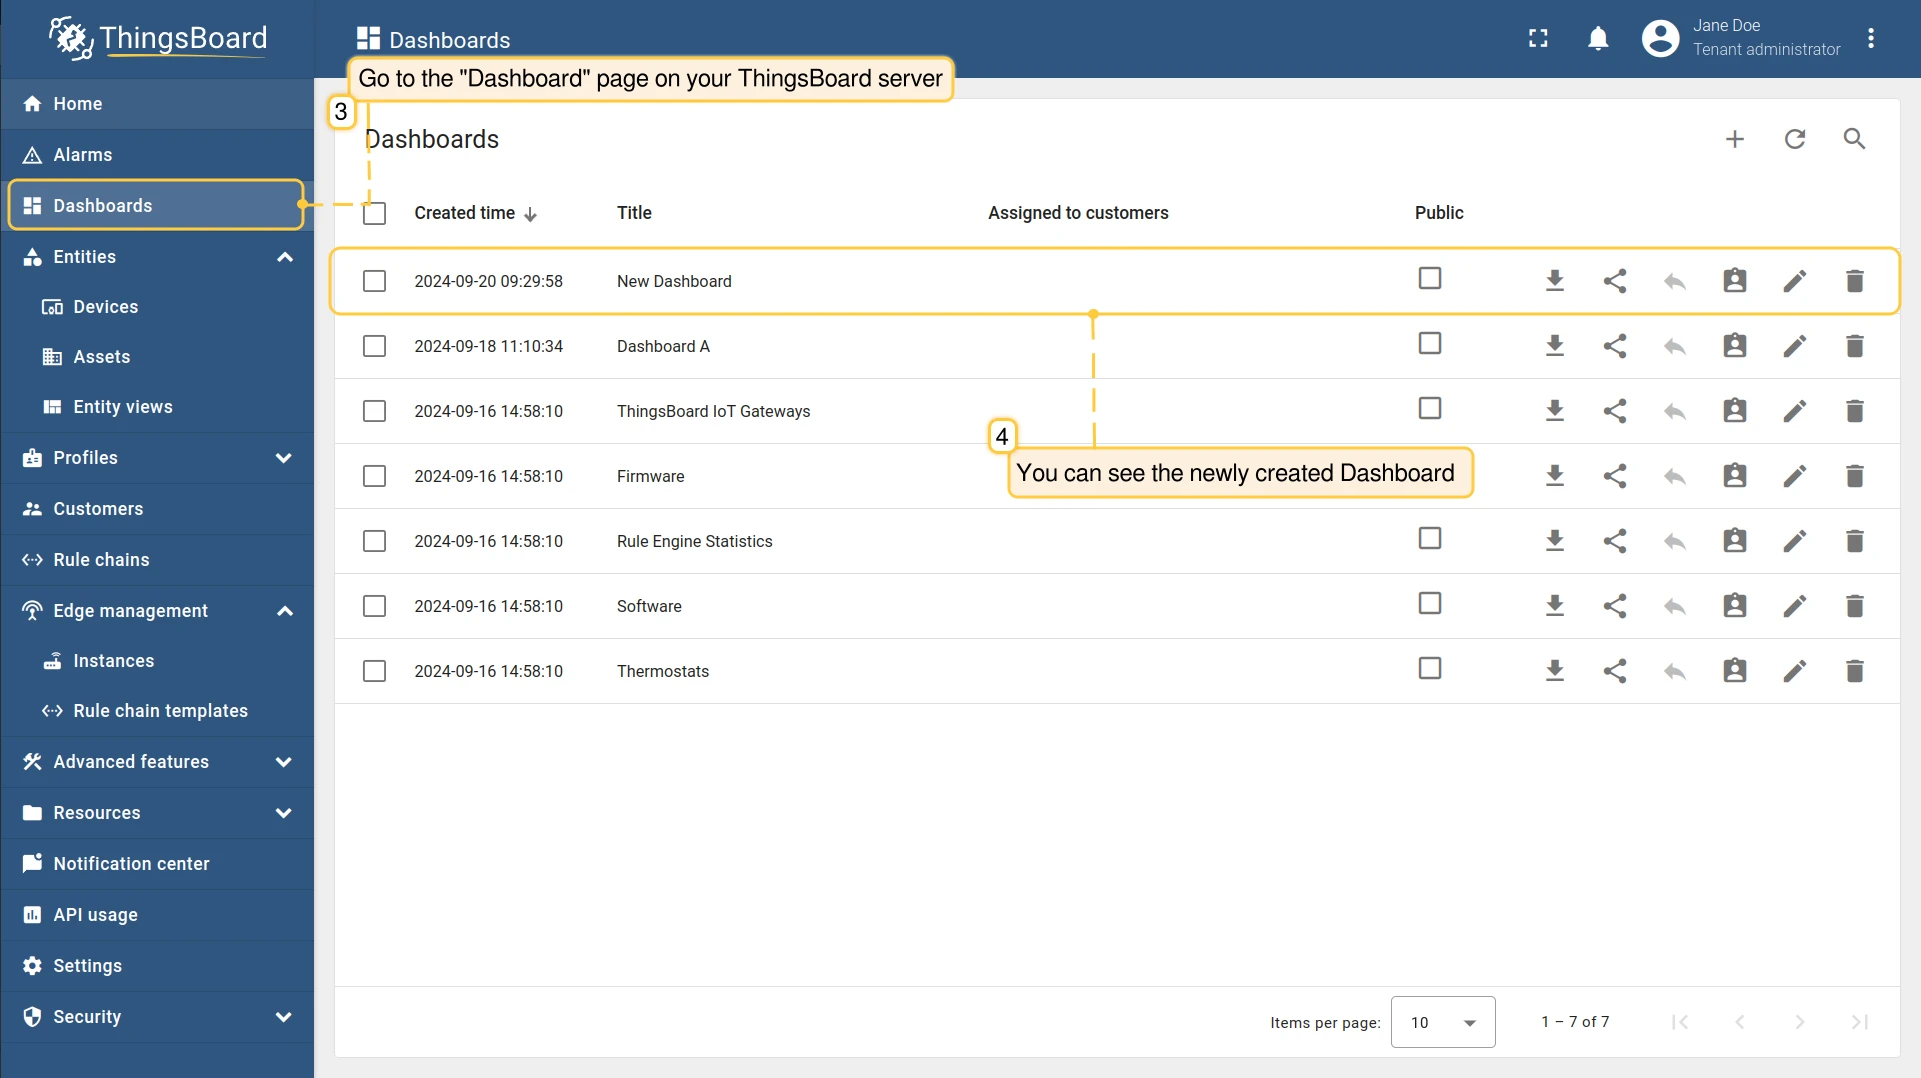
To verify the assignment, log in to the Edge instance and go to Dashboards. The assigned dashboards appear in the list.
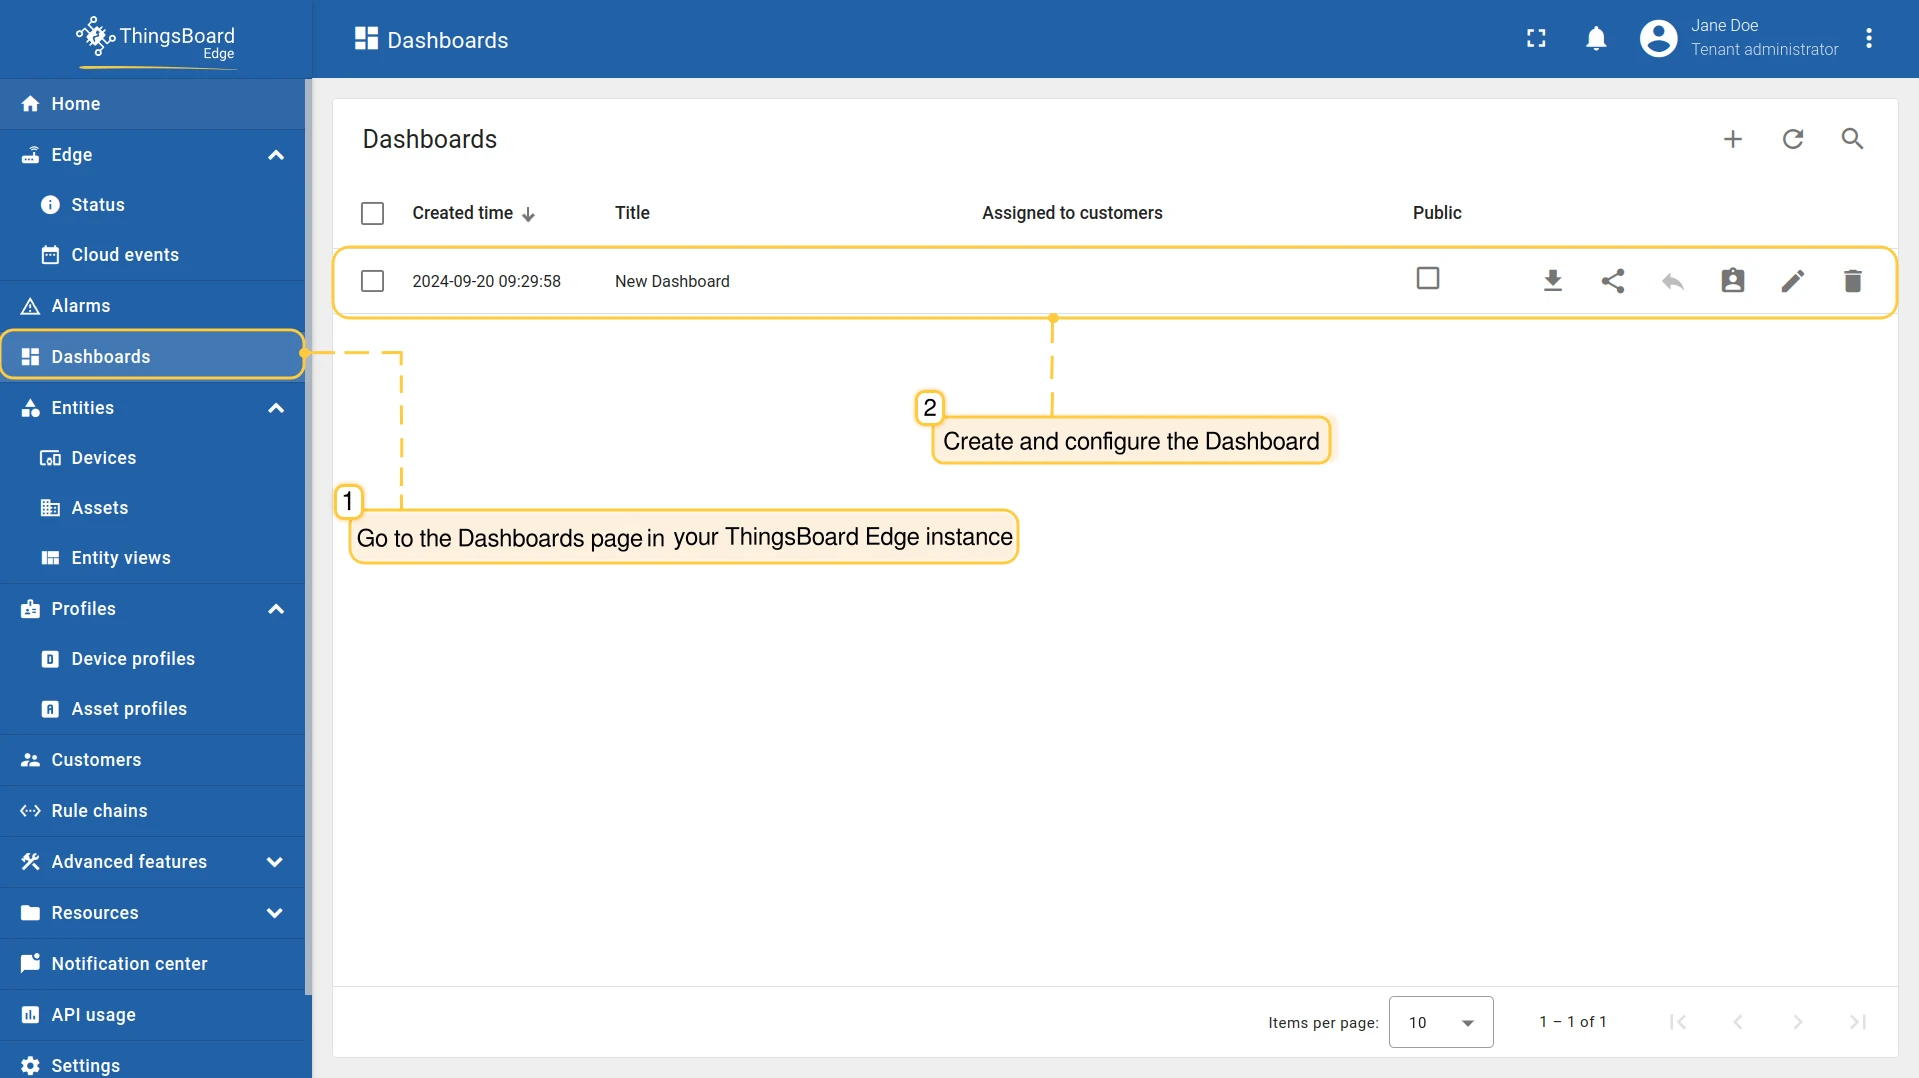
Create a dashboard on Edge
Section titled “Create a dashboard on Edge”You can also create dashboards directly on the Edge instance. Dashboards created on Edge are automatically propagated to the ThingsBoard server when the connection is established.
-
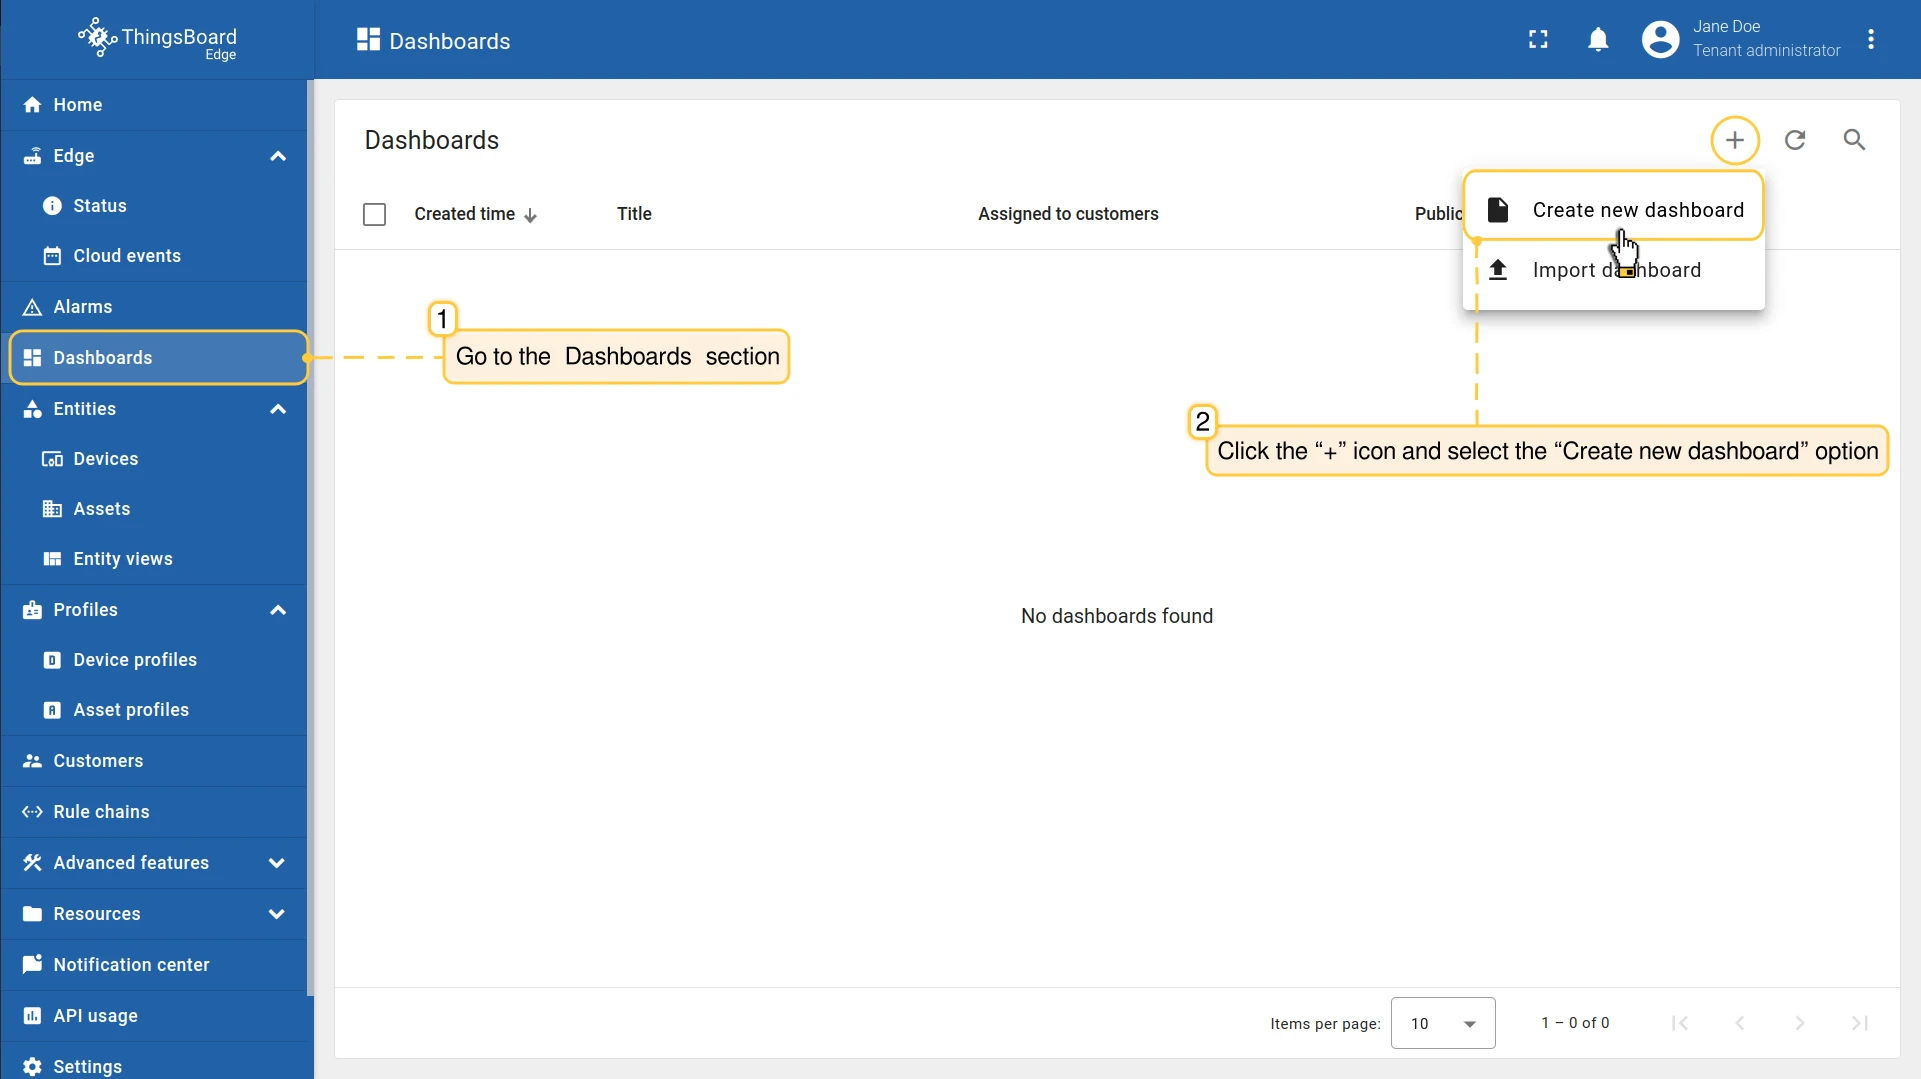
Log in to the ThingsBoard Edge instance and go to Dashboards.
-
Click Add (+) and select Create new dashboard. To upload a previously exported dashboard JSON file instead, select Import dashboard.
-
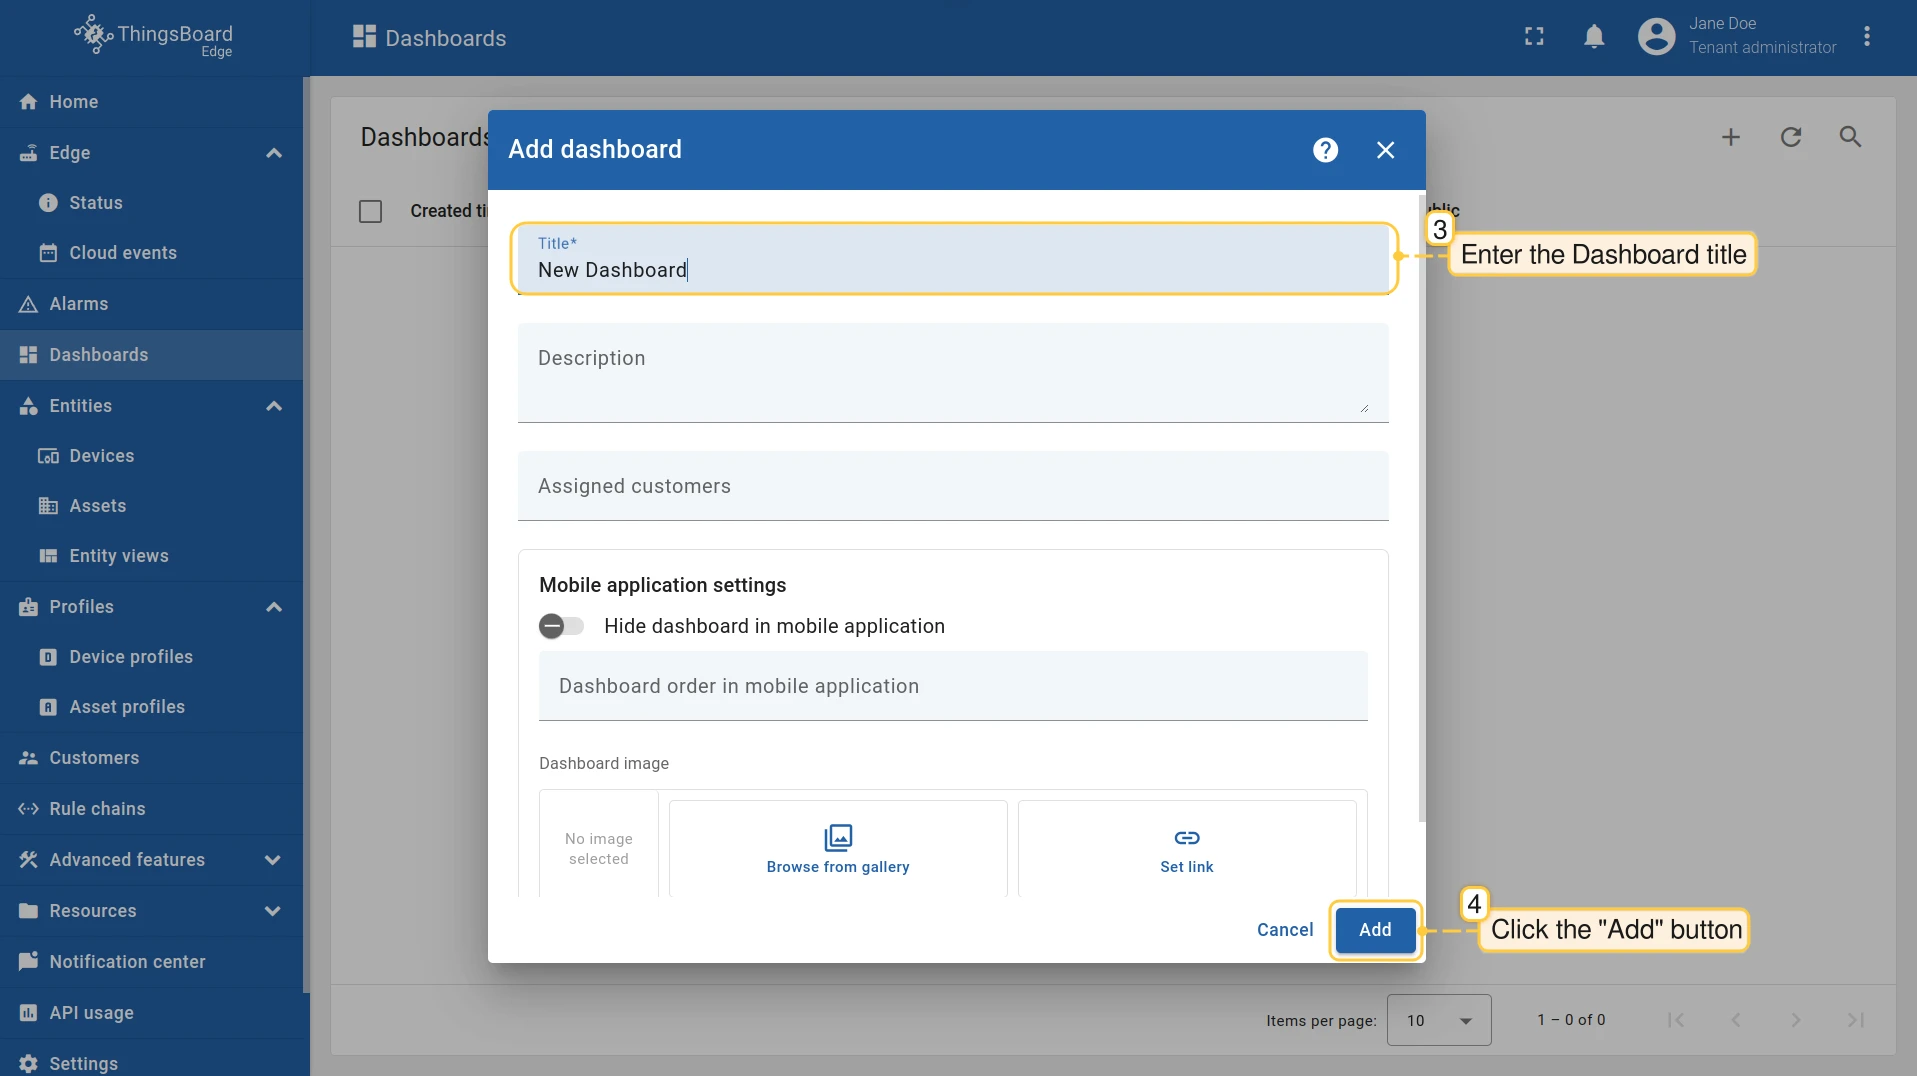
Enter the dashboard Title and click Add.
-
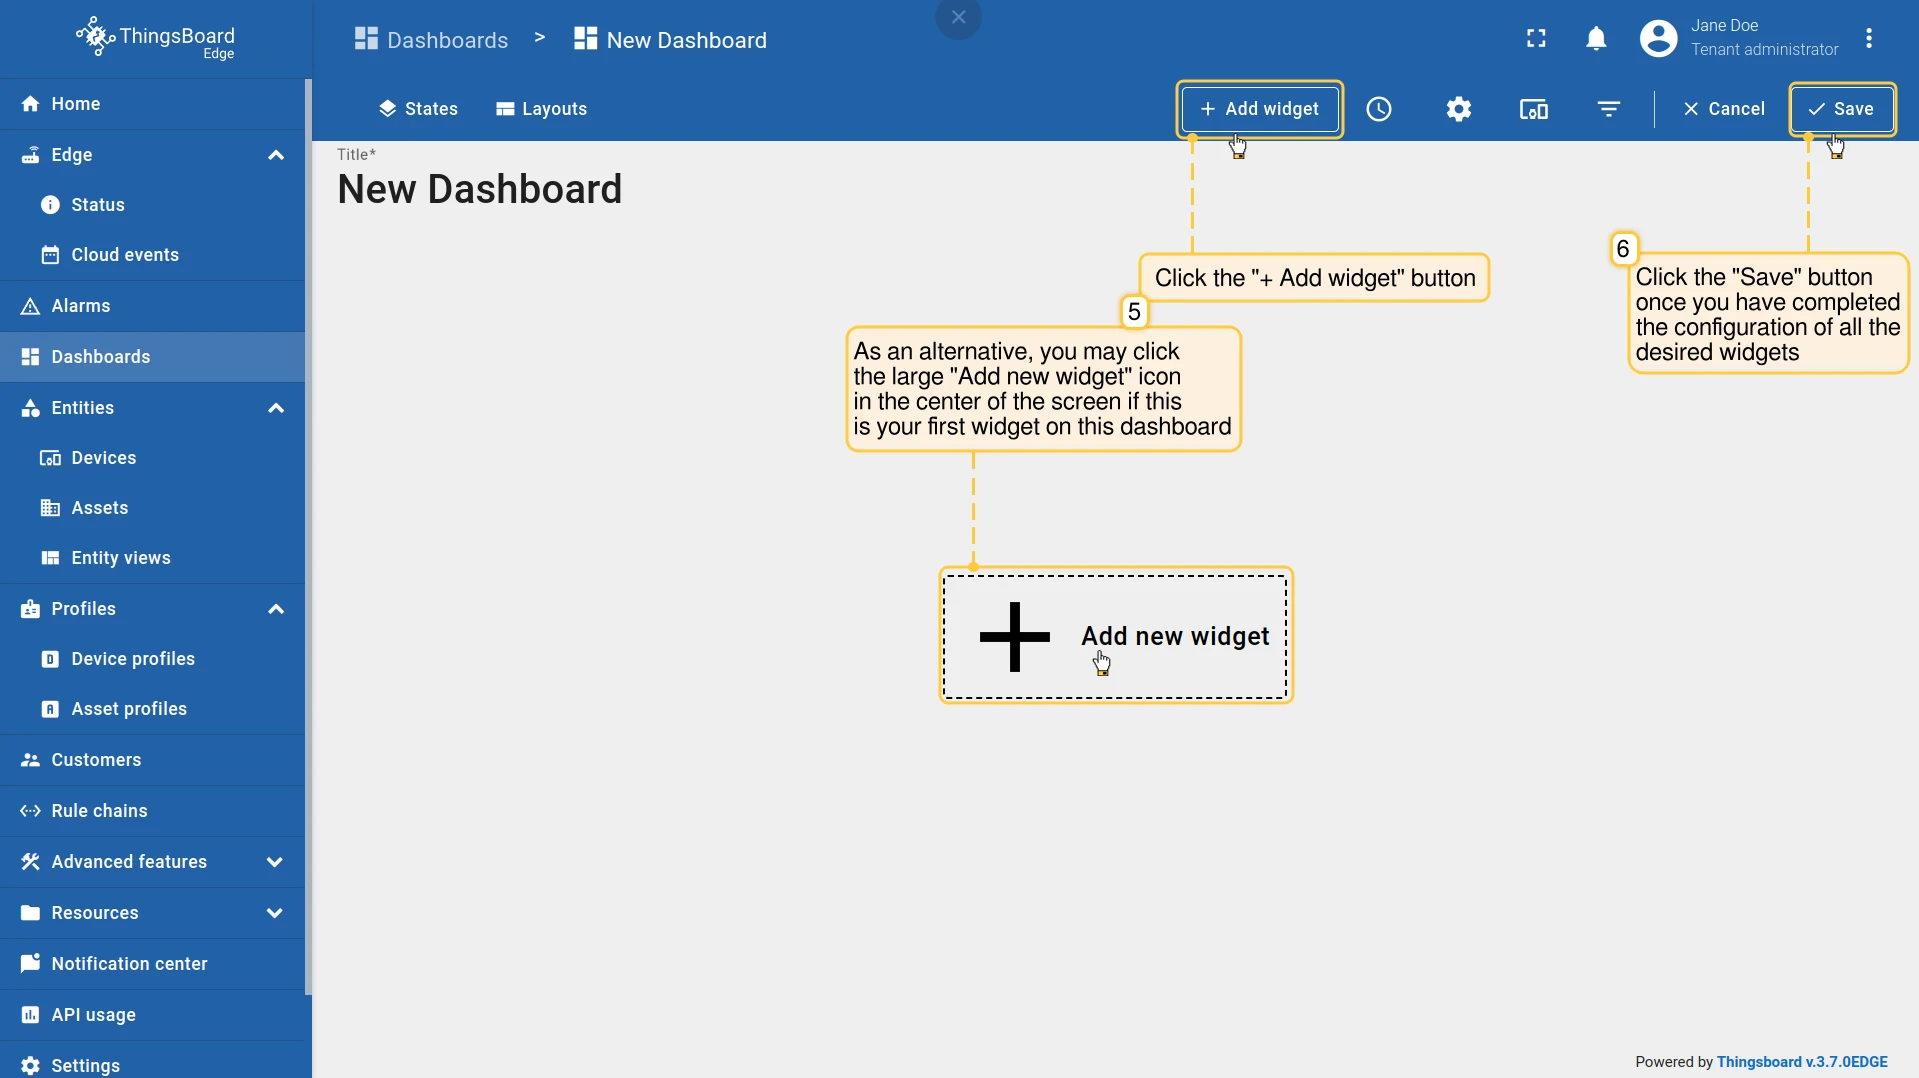
Add widgets using + Add widget, then click Save.
The dashboard appears in the list and is pushed to the server automatically.
To edit an existing dashboard, open it and click Edit in the toolbar, or click the edit icon (pencil) in the dashboard list row. The dashboard editor works identically to the server. For details, see Dashboards.
Assign customers to a dashboard
Section titled “Assign customers to a dashboard”Make a dashboard public
Section titled “Make a dashboard public”A public dashboard is accessible to anyone with the link, without logging in. On Edge, the link points to the Edge instance’s local URL, so the dashboard remains available on the local network even if the internet connection is lost.
Assign entity views to Edge
Section titled “Assign entity views to Edge”Entity views expose a filtered subset of a device’s attributes and telemetry to specific users, without granting access to the full device. They must be created on the ThingsBoard server and assigned to Edge before they appear on the Edge instance.
For a general introduction to entity views, see Entity views.
- Log in to the ThingsBoard server and go to Edge management → Instances.
- Click the Edge instance to open the context menu and select Manage edge entity view groups.
- Click + to assign an existing entity view group, or open a group and click + to add individual entity views to it.
The entity views appear on Edge once the connection is established.
Remove a dashboard from Edge
Section titled “Remove a dashboard from Edge”Removing a dashboard unassigns it from the Edge instance only. The dashboard remains on the server and can be reassigned at any time.
- Log in to the ThingsBoard server and go to Edge management → Instances.
- Click the Edge instance to open the context menu and select Manage edge dashboard groups.
- Find the dashboard group in the list and remove it, or open the group and remove individual dashboards.
The dashboards are removed from the Edge instance on the next synchronization.
Was this helpful?