Understanding data flow and entity synchronization
In this step, you will learn how telemetry flows from Edge to your ThingsBoard account, how entities created on Edge are synchronized to the server, and how to assign server-side entities to an Edge instance.
Push data from Edge to server
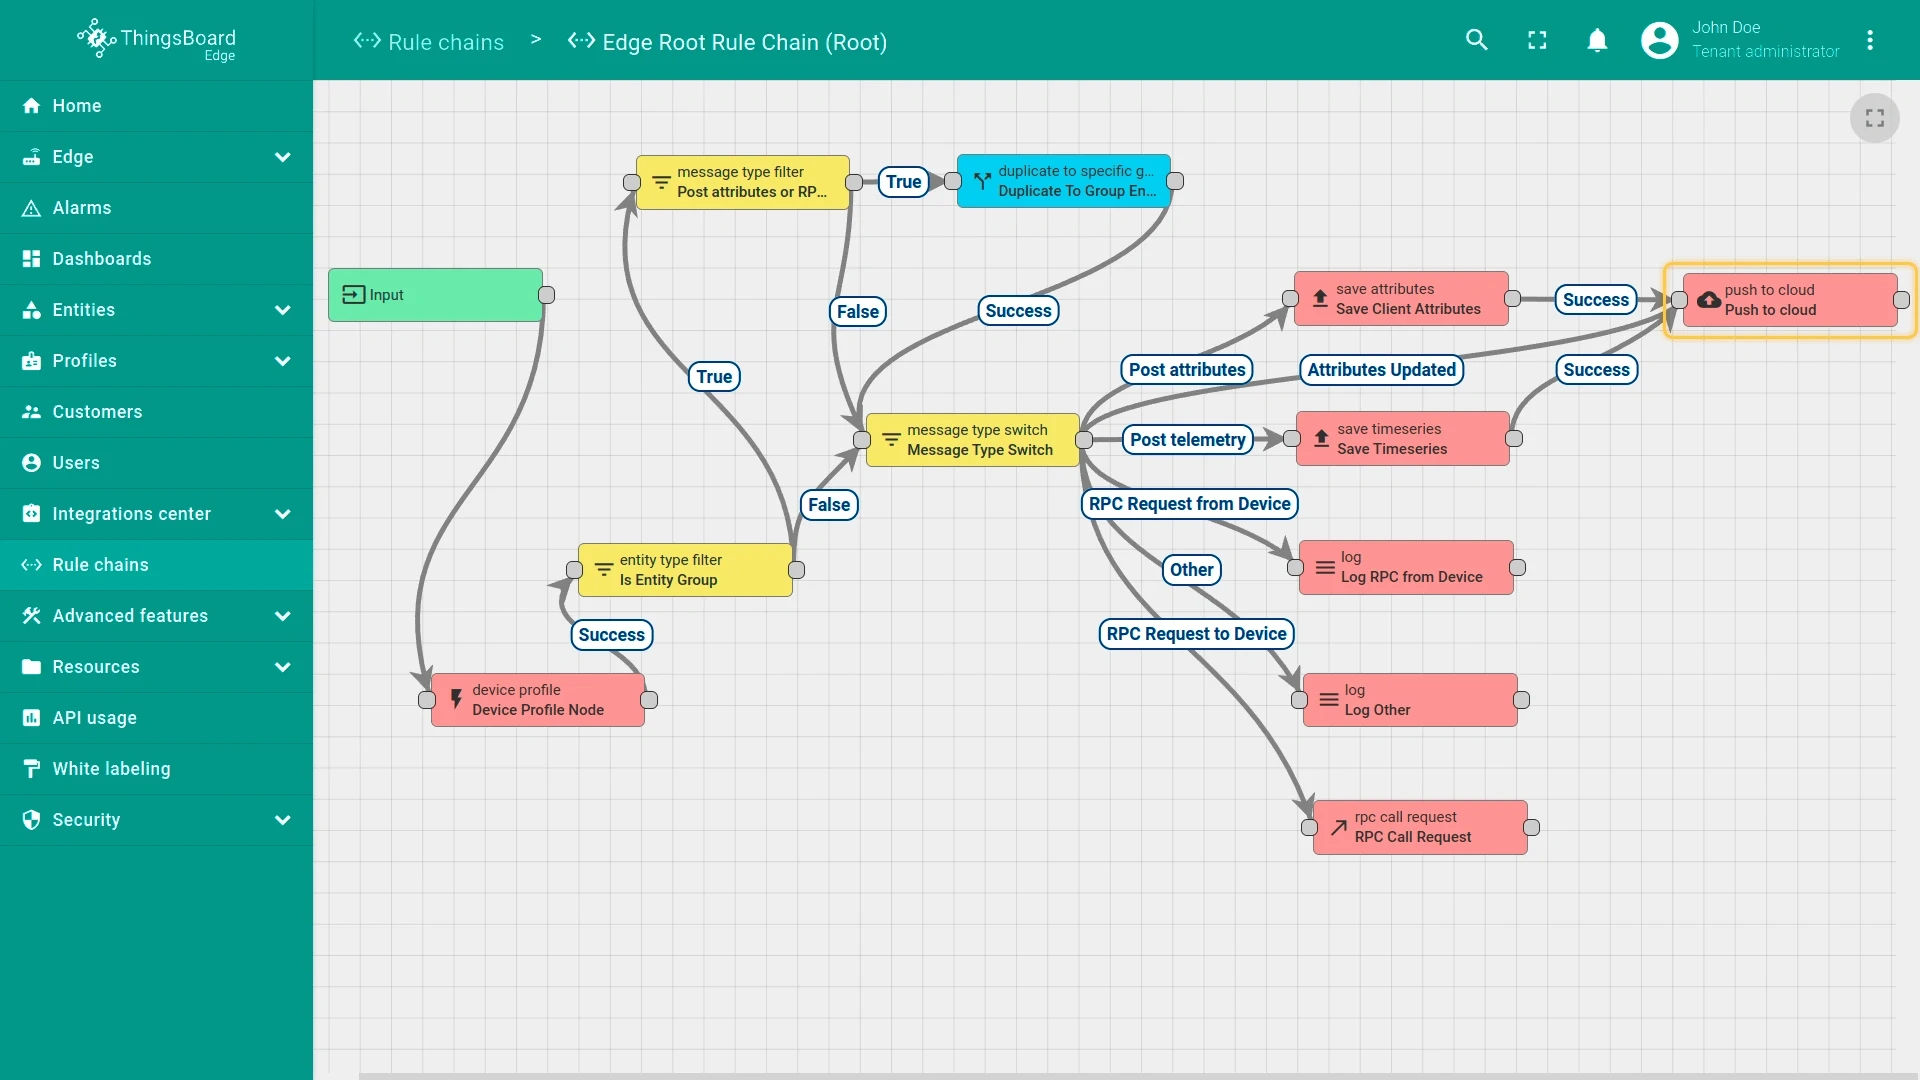
Section titled “Push data from Edge to server”The Edge Root Rule Chain controls how Edge processes and forwards data locally. It includes a Push to Cloud node that transmits telemetry and attributes to your ThingsBoard account after storing them in the local Edge database.
-
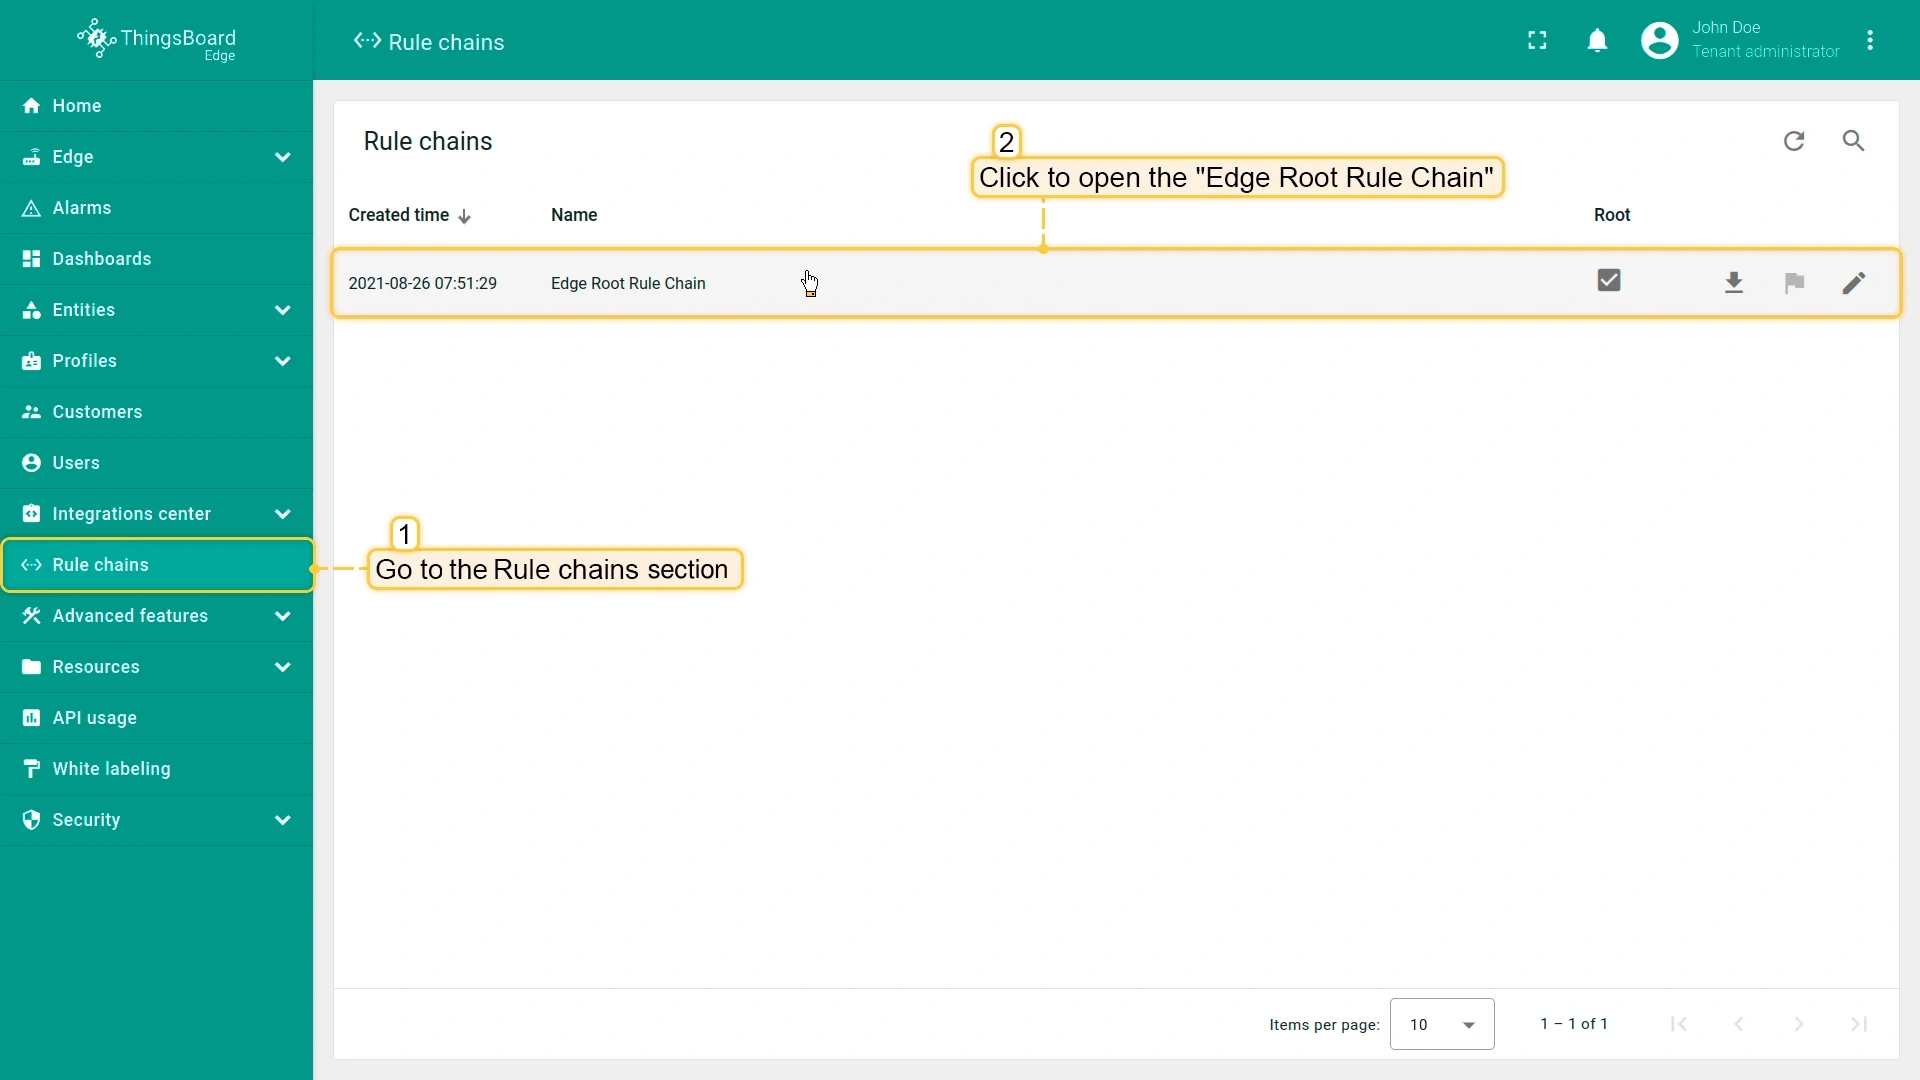
Go to Rule Chains in the Edge UI to create or modify rule chains.
-
Open the Edge Root Rule Chain — you will see that the Push to Cloud node is connected to the Post telemetry and Post attributes message types.
Step 4.2 Provision entities from Edge to server
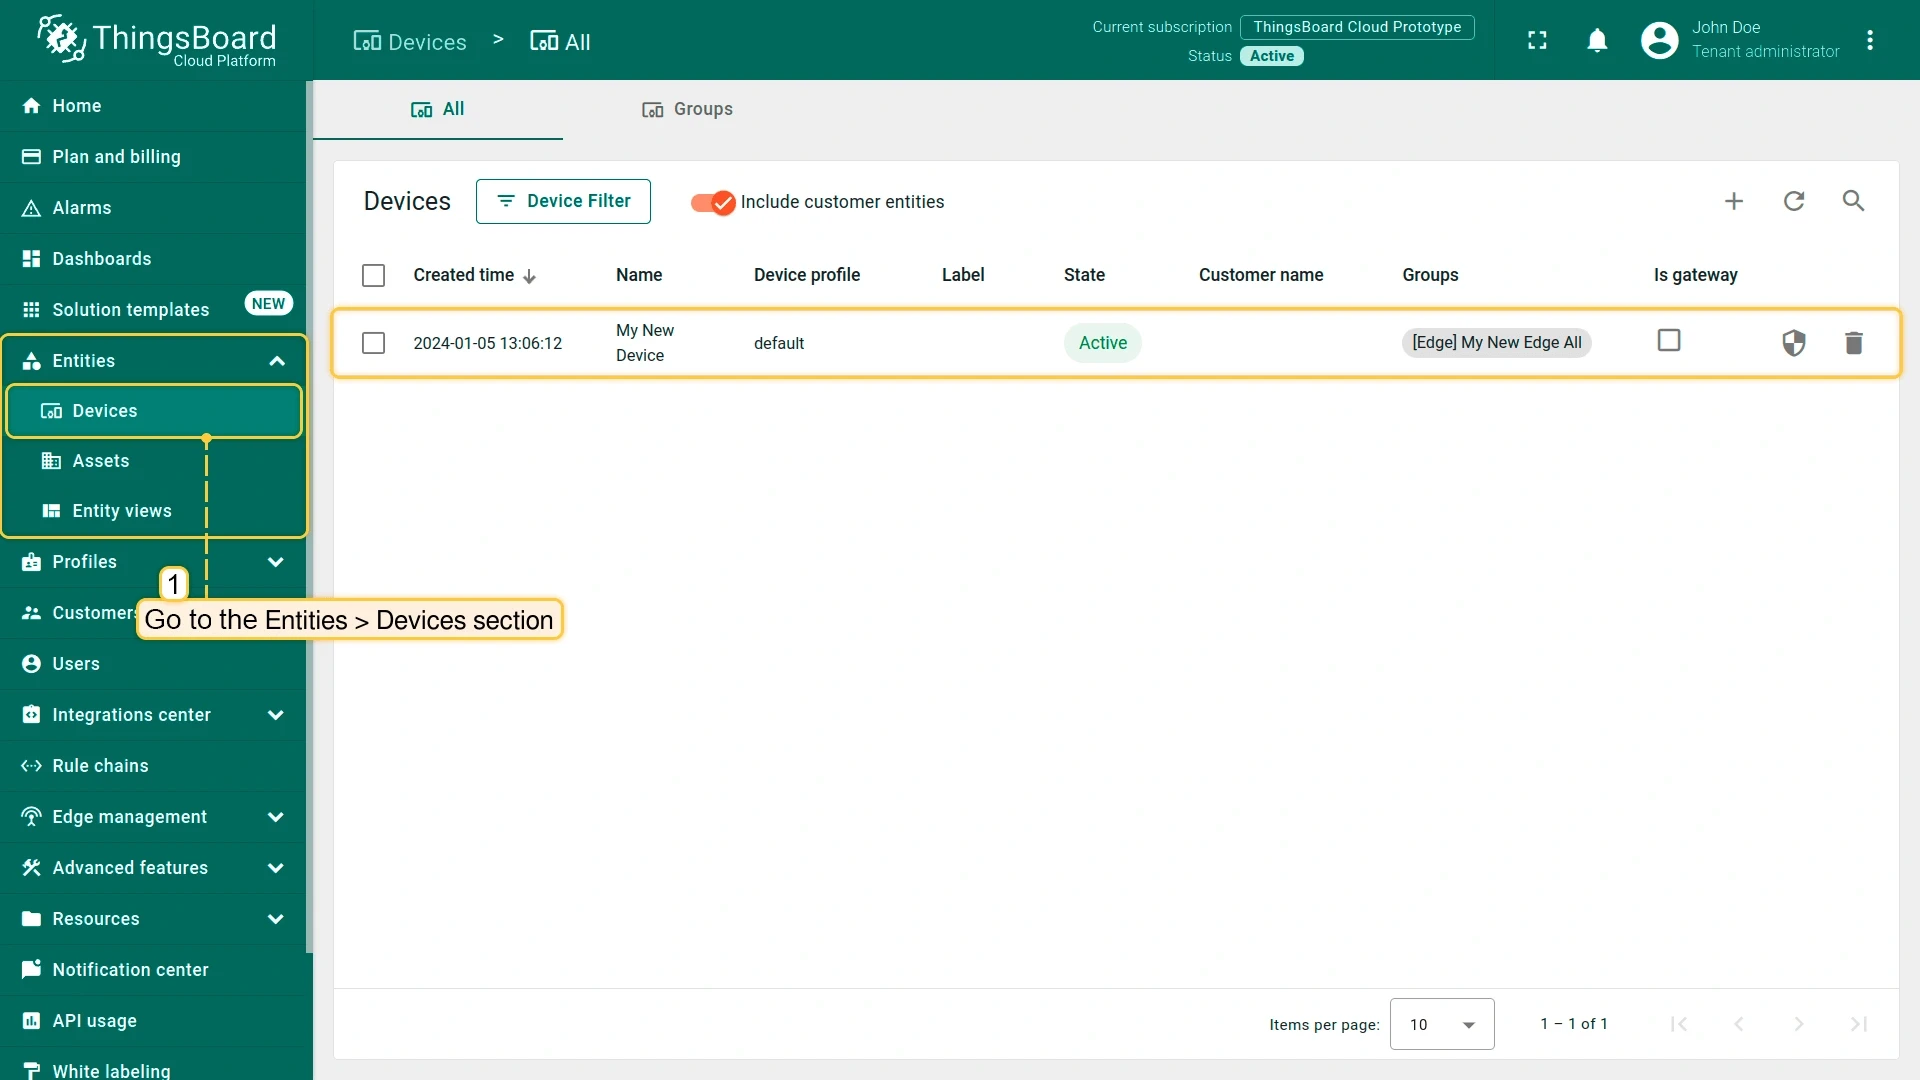
Section titled “Step 4.2 Provision entities from Edge to server”Entities created on an Edge instance — devices, assets, and dashboards — are synchronized to your ThingsBoard account automatically.
To verify:
-
In your ThingsBoard account, go to Entities → Devices. The devices you created on Edge appear here.
-
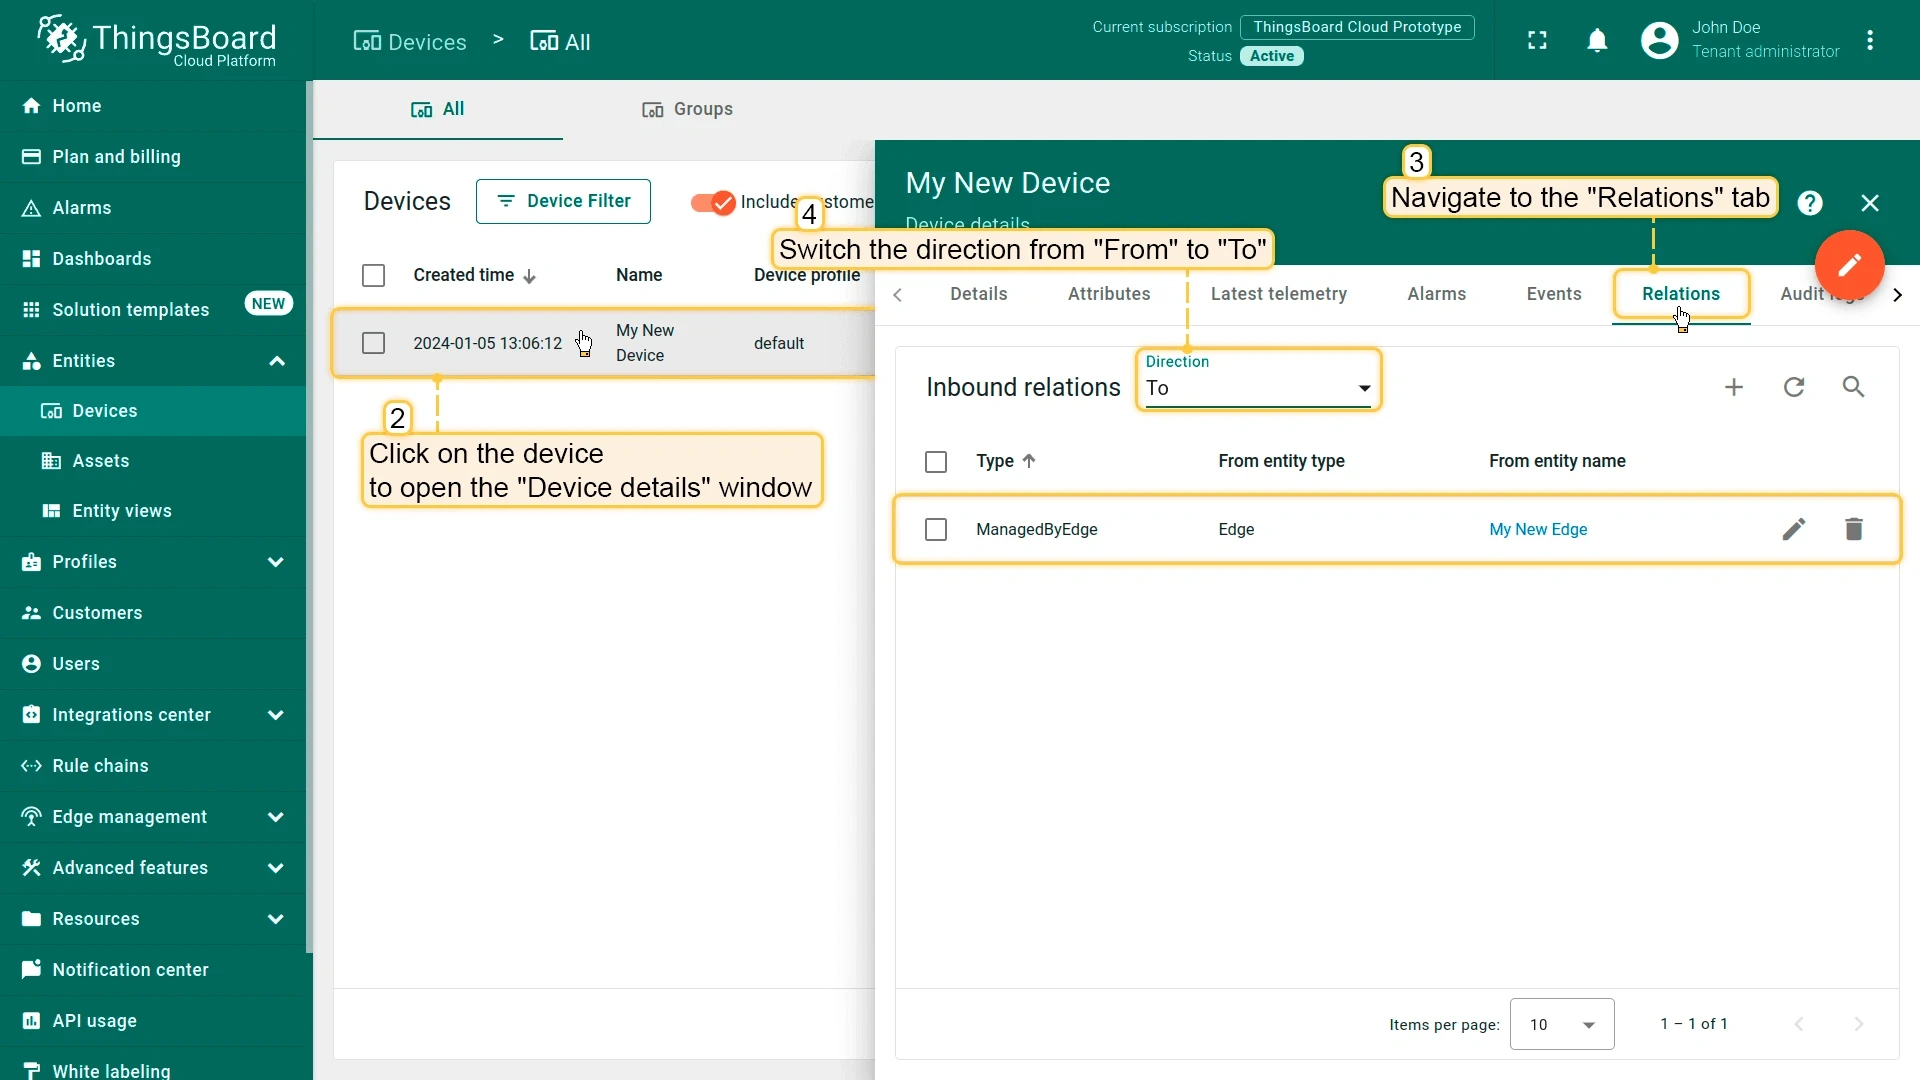
Open the device and go to the Relations tab. Switch the direction from From to To to see the relationship with the Edge instance.
Step 4.3 Provision entities from server to Edge
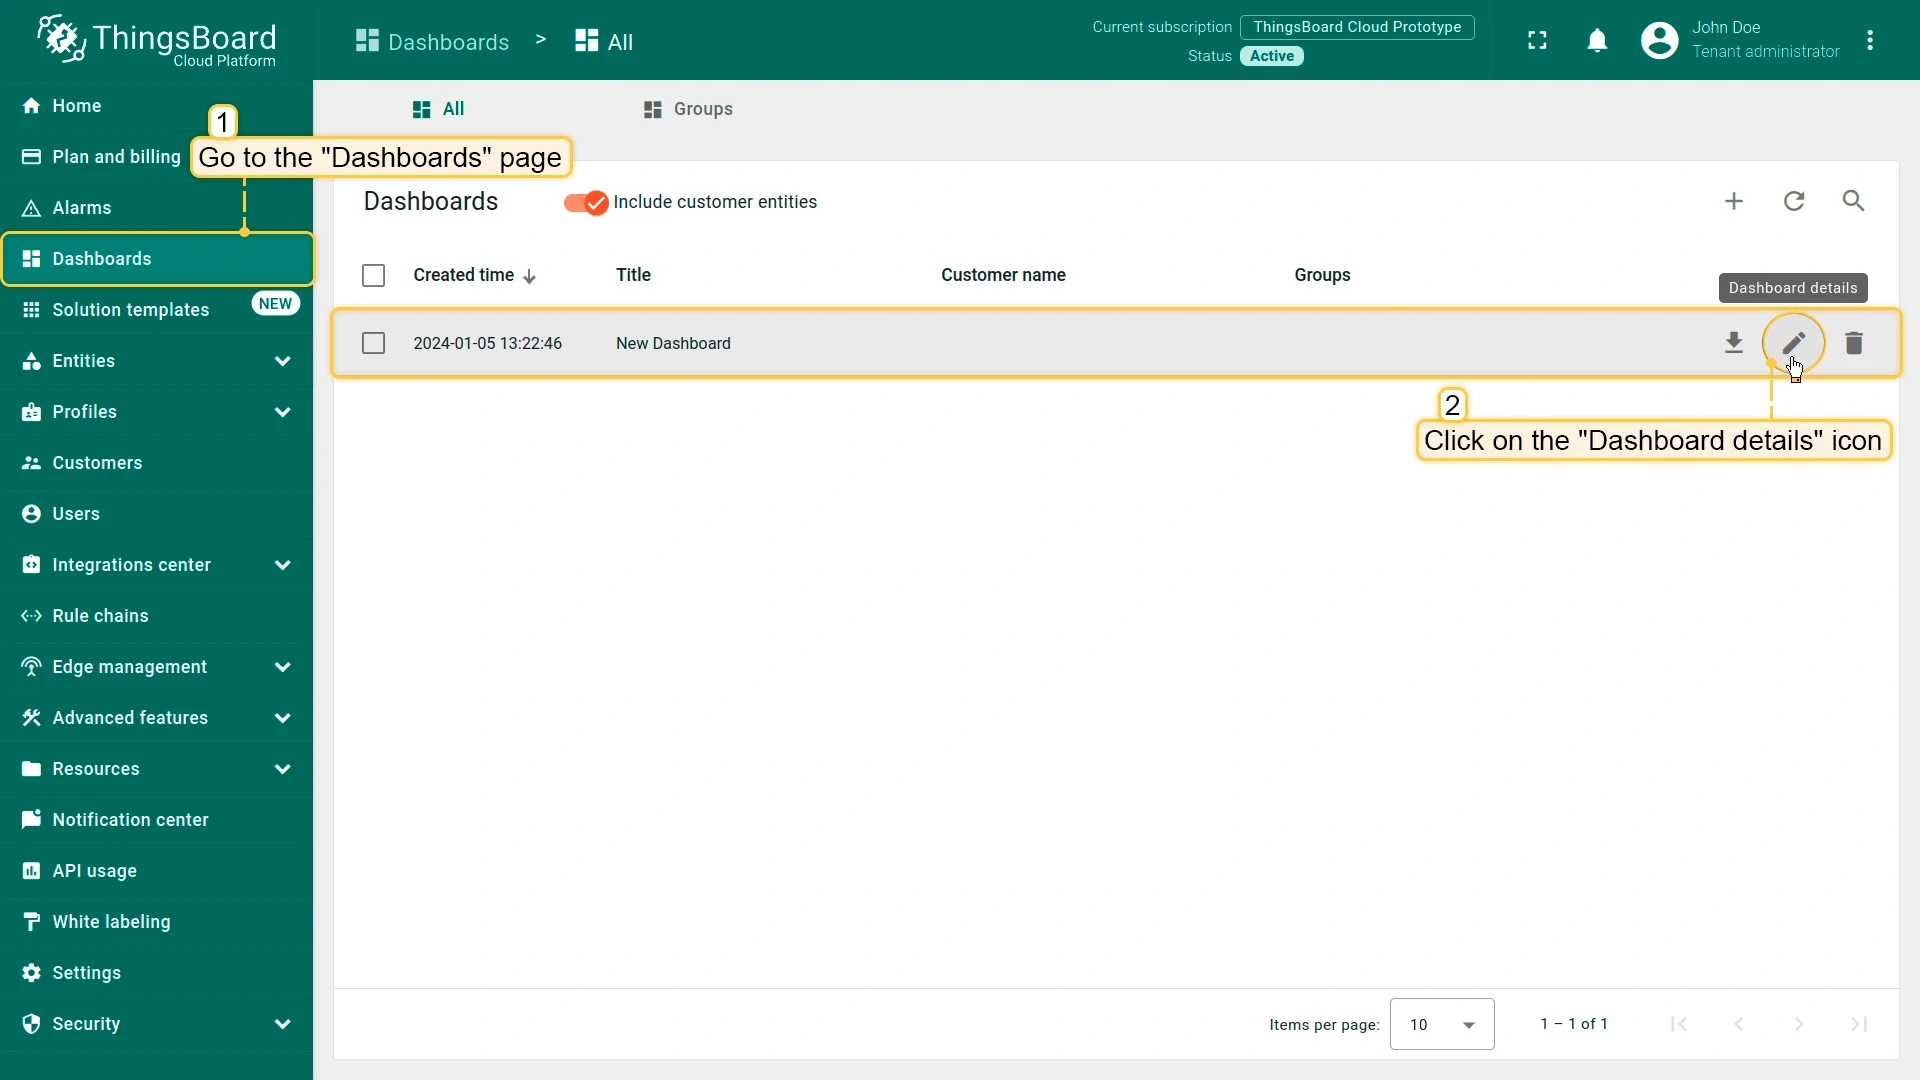
Section titled “Step 4.3 Provision entities from server to Edge”You can assign entities created in your ThingsBoard account — like dashboards, device profiles, or rule chains — to an Edge instance. Once assigned, they synchronize to Edge automatically. The steps below demonstrate this using a dashboard assignment as an example.
- In your ThingsBoard account, go to Dashboards and create a new dashboard. Once configured and saved, click the Dashboard details icon (pencil) to open it.
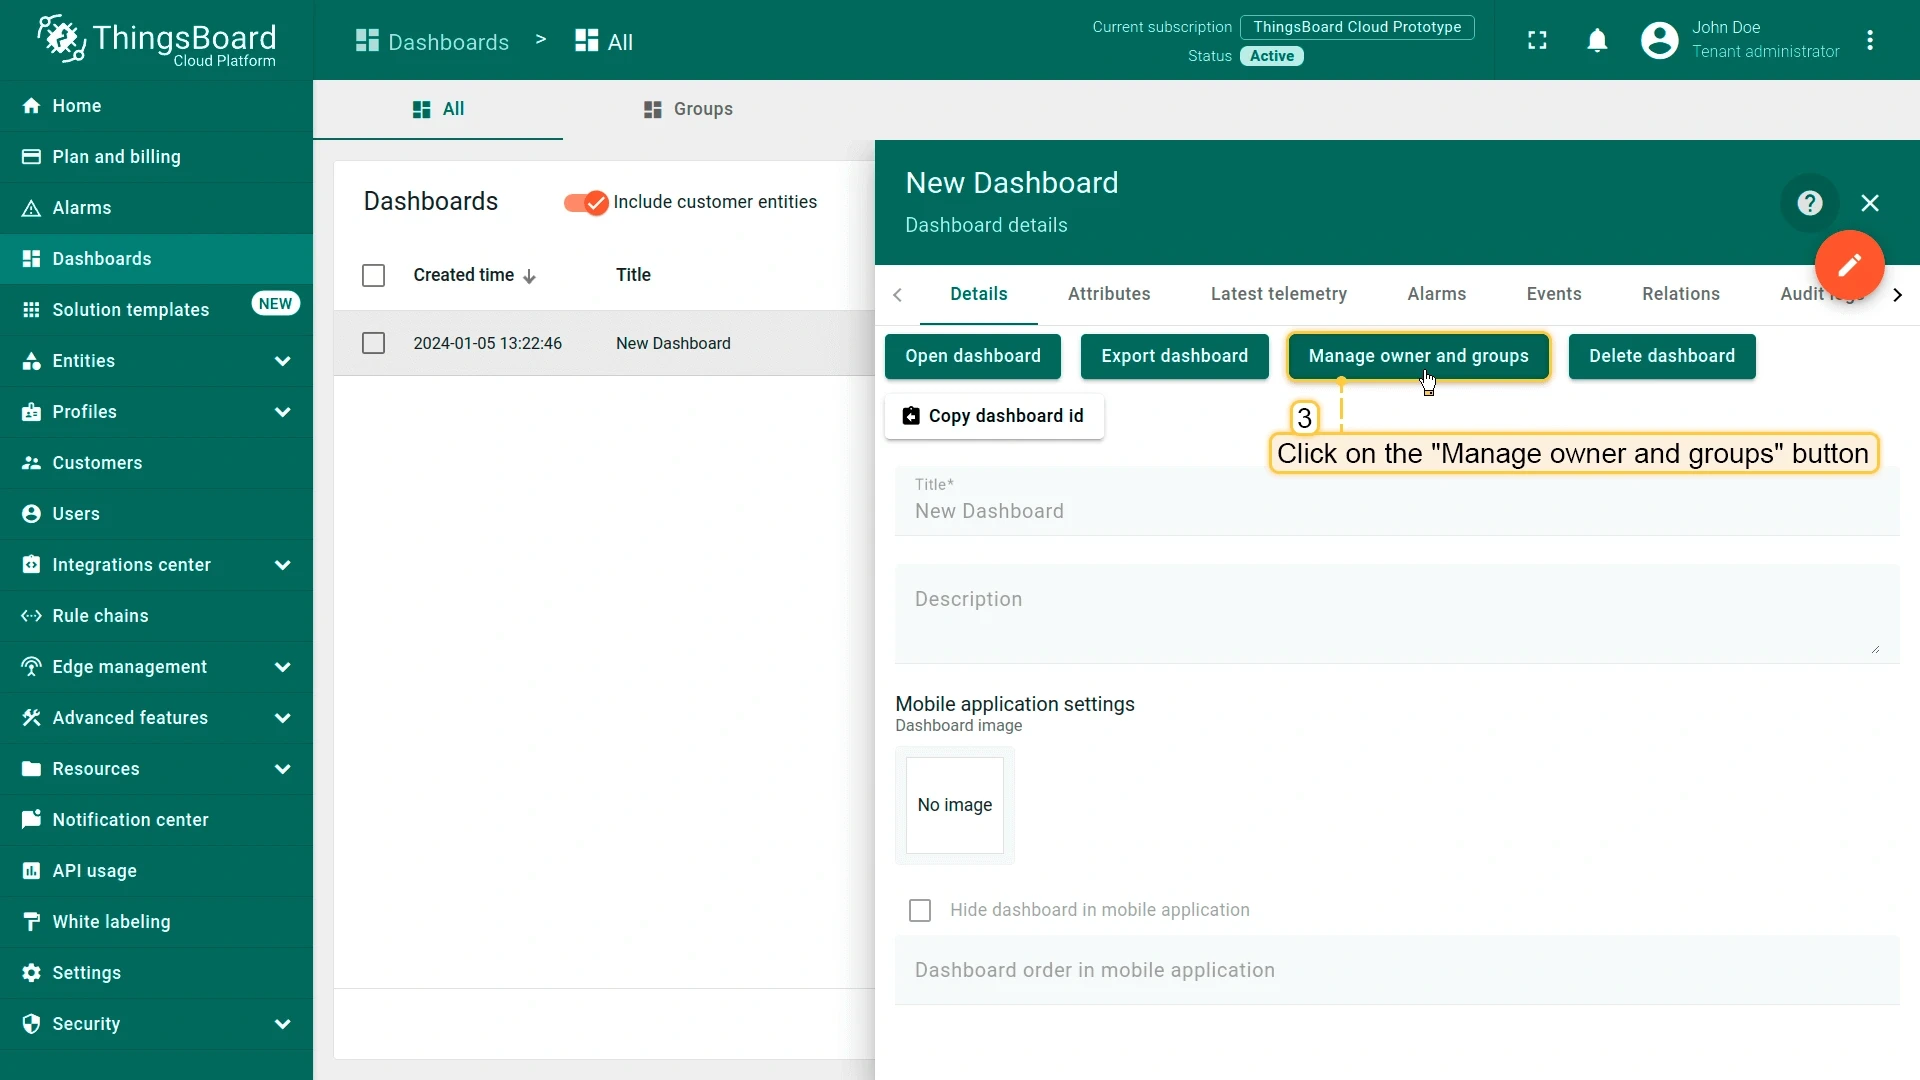
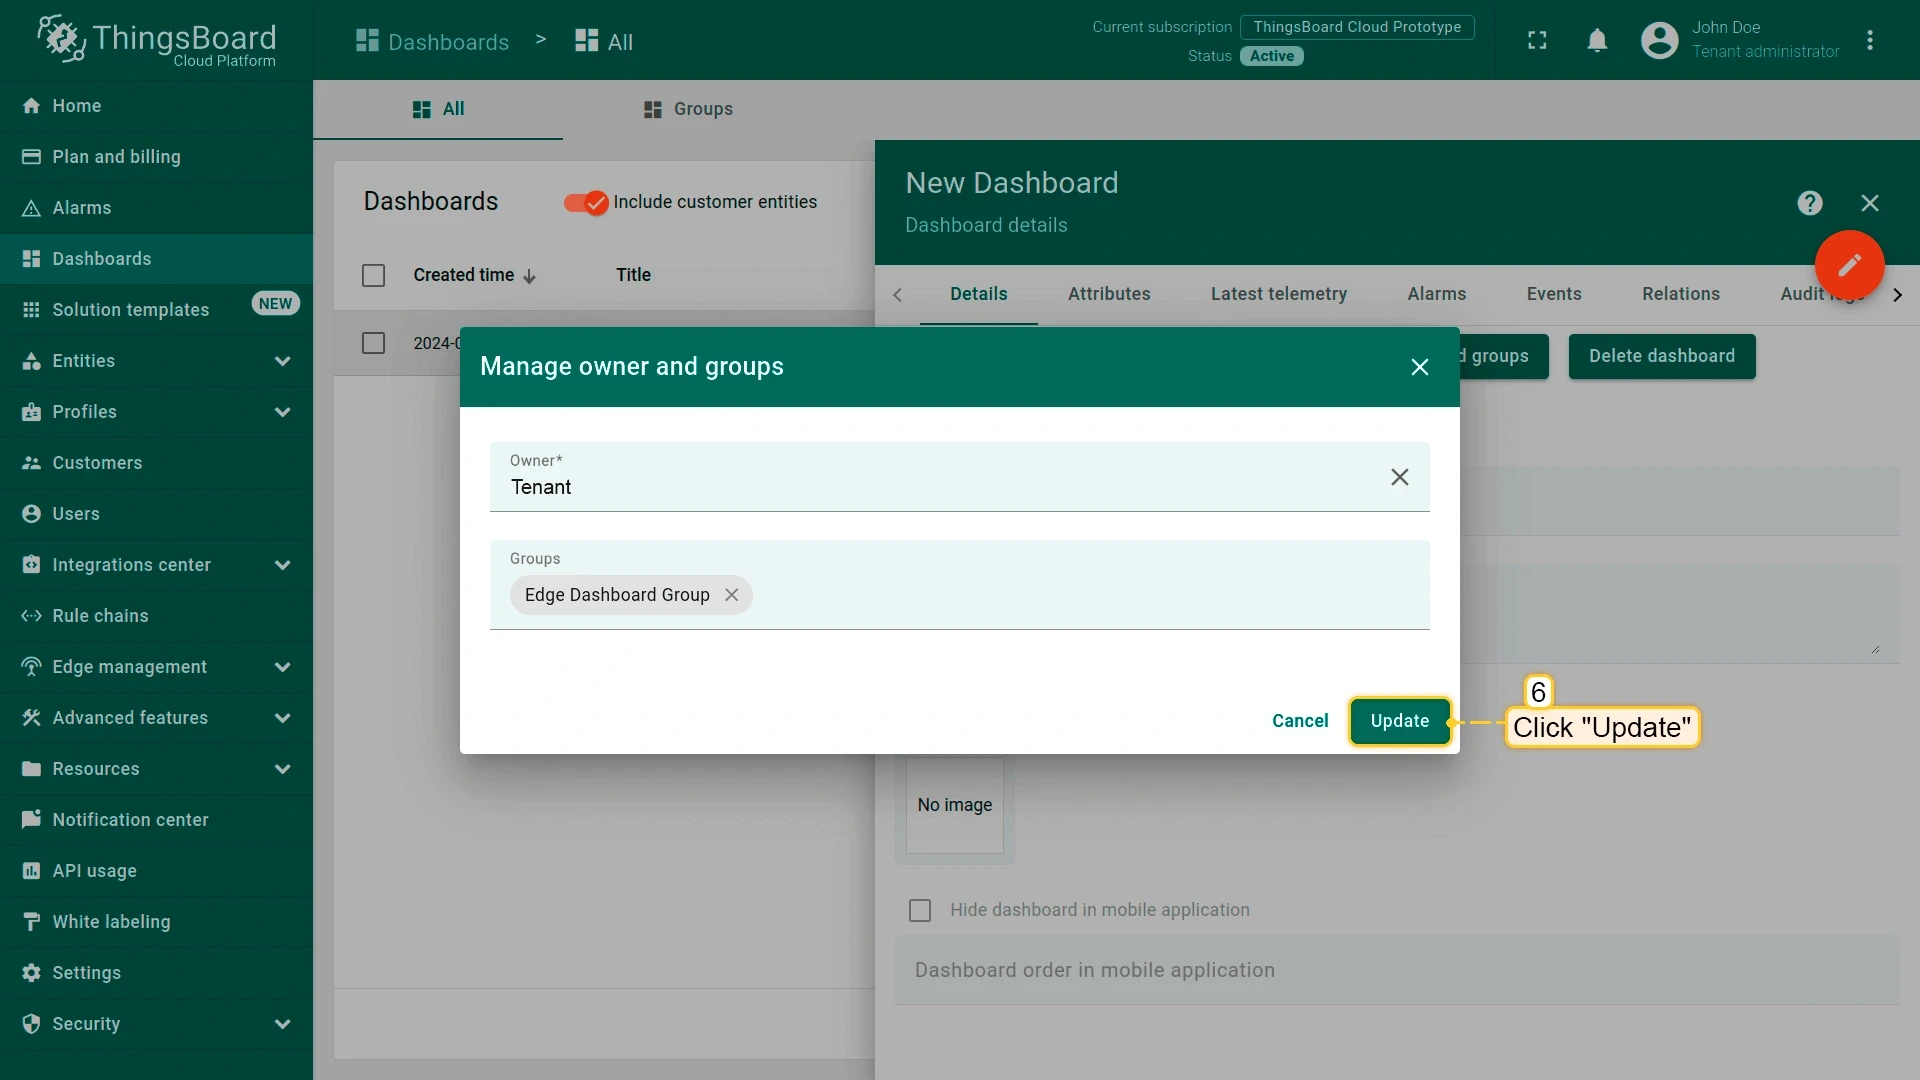
- Click Manage owner and groups.
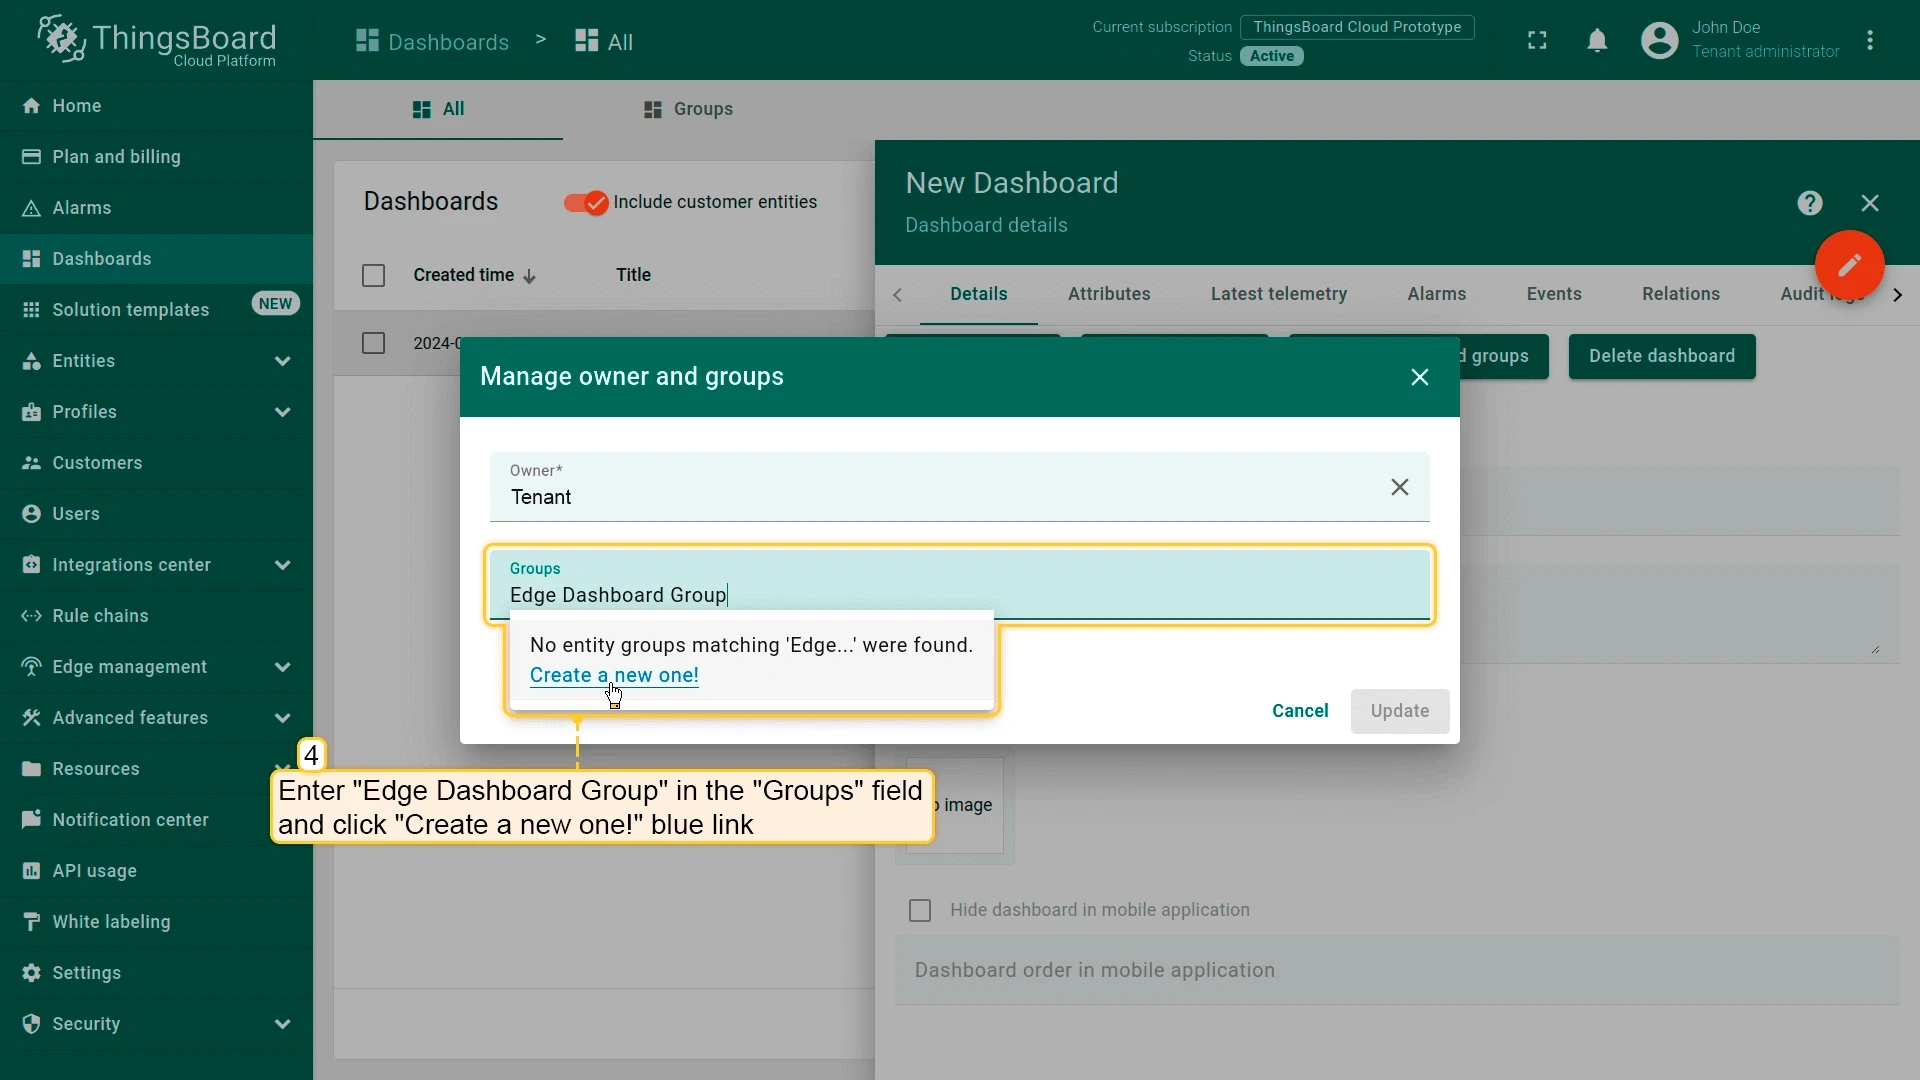
- In the pop-up window, in the Groups field, enter a group name and click Create a new one! in the dropdown menu.
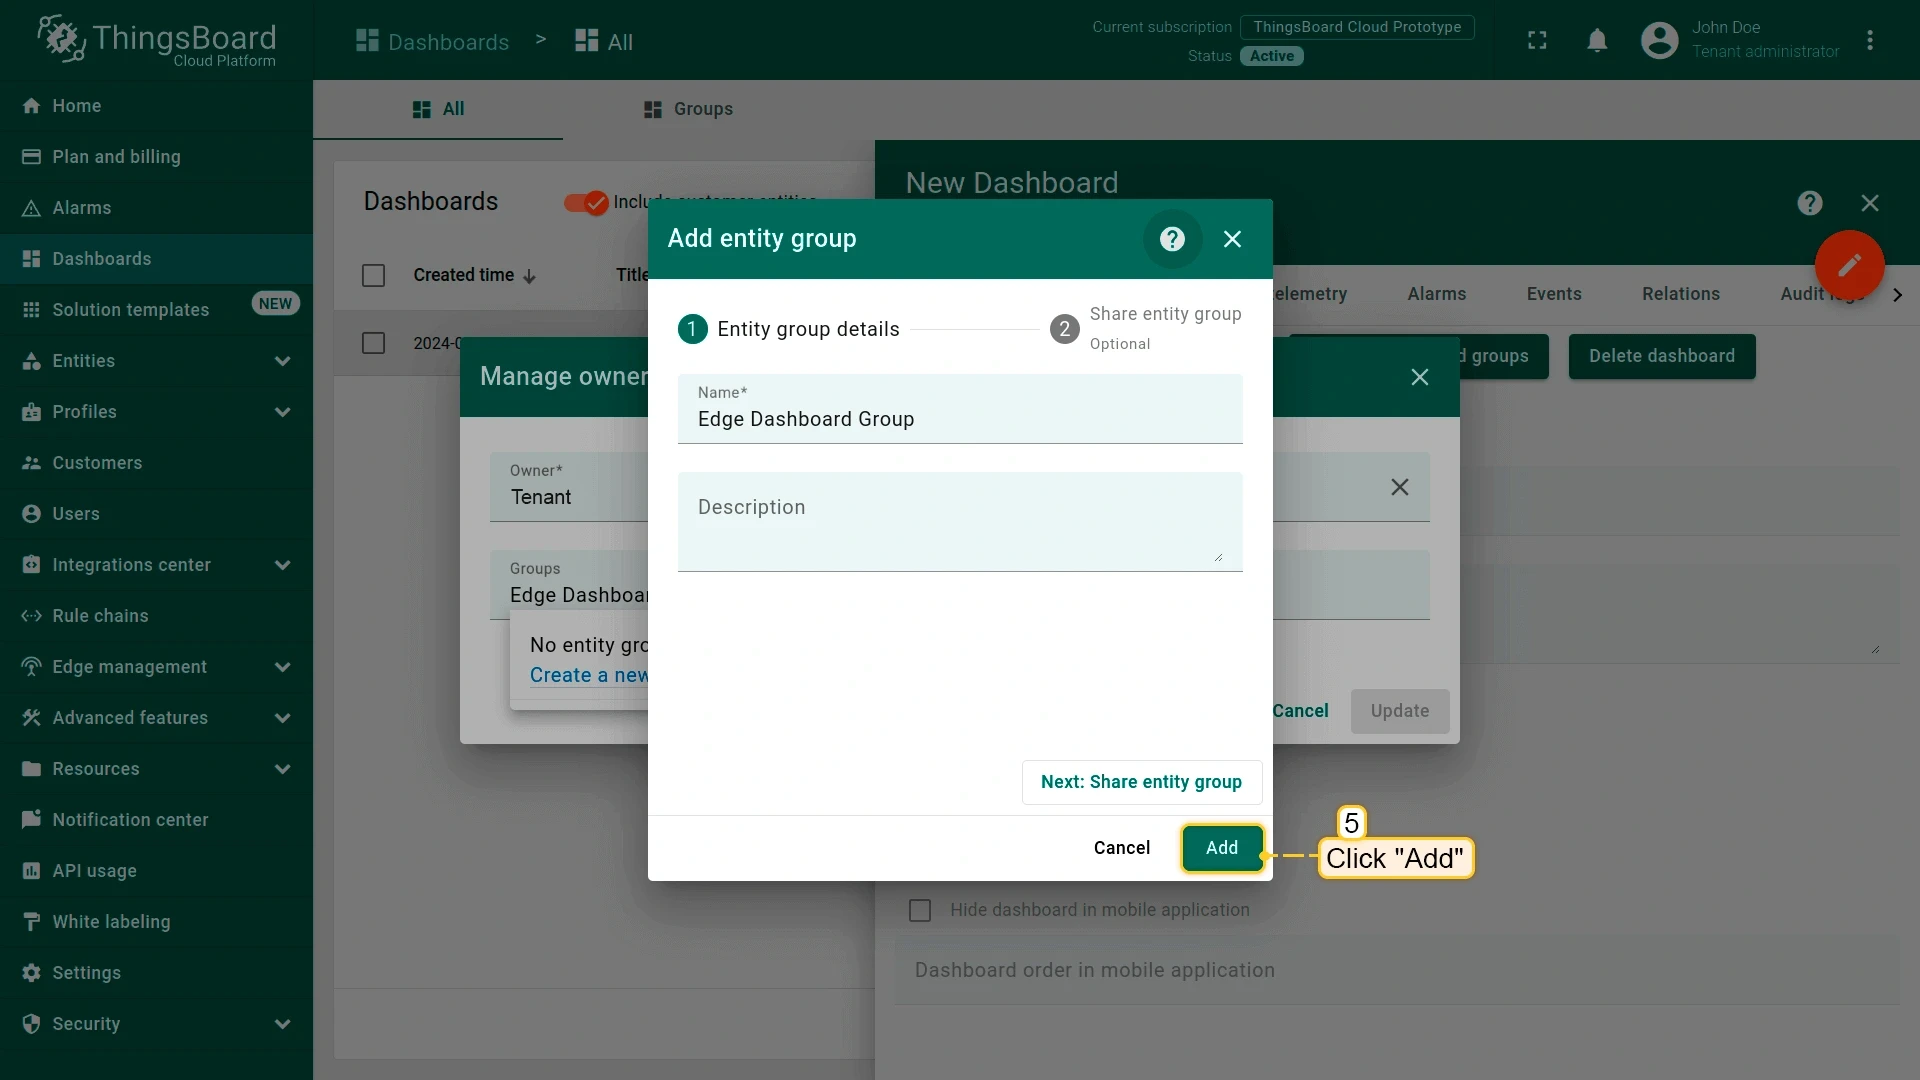
- Click Add.
- Click Update.
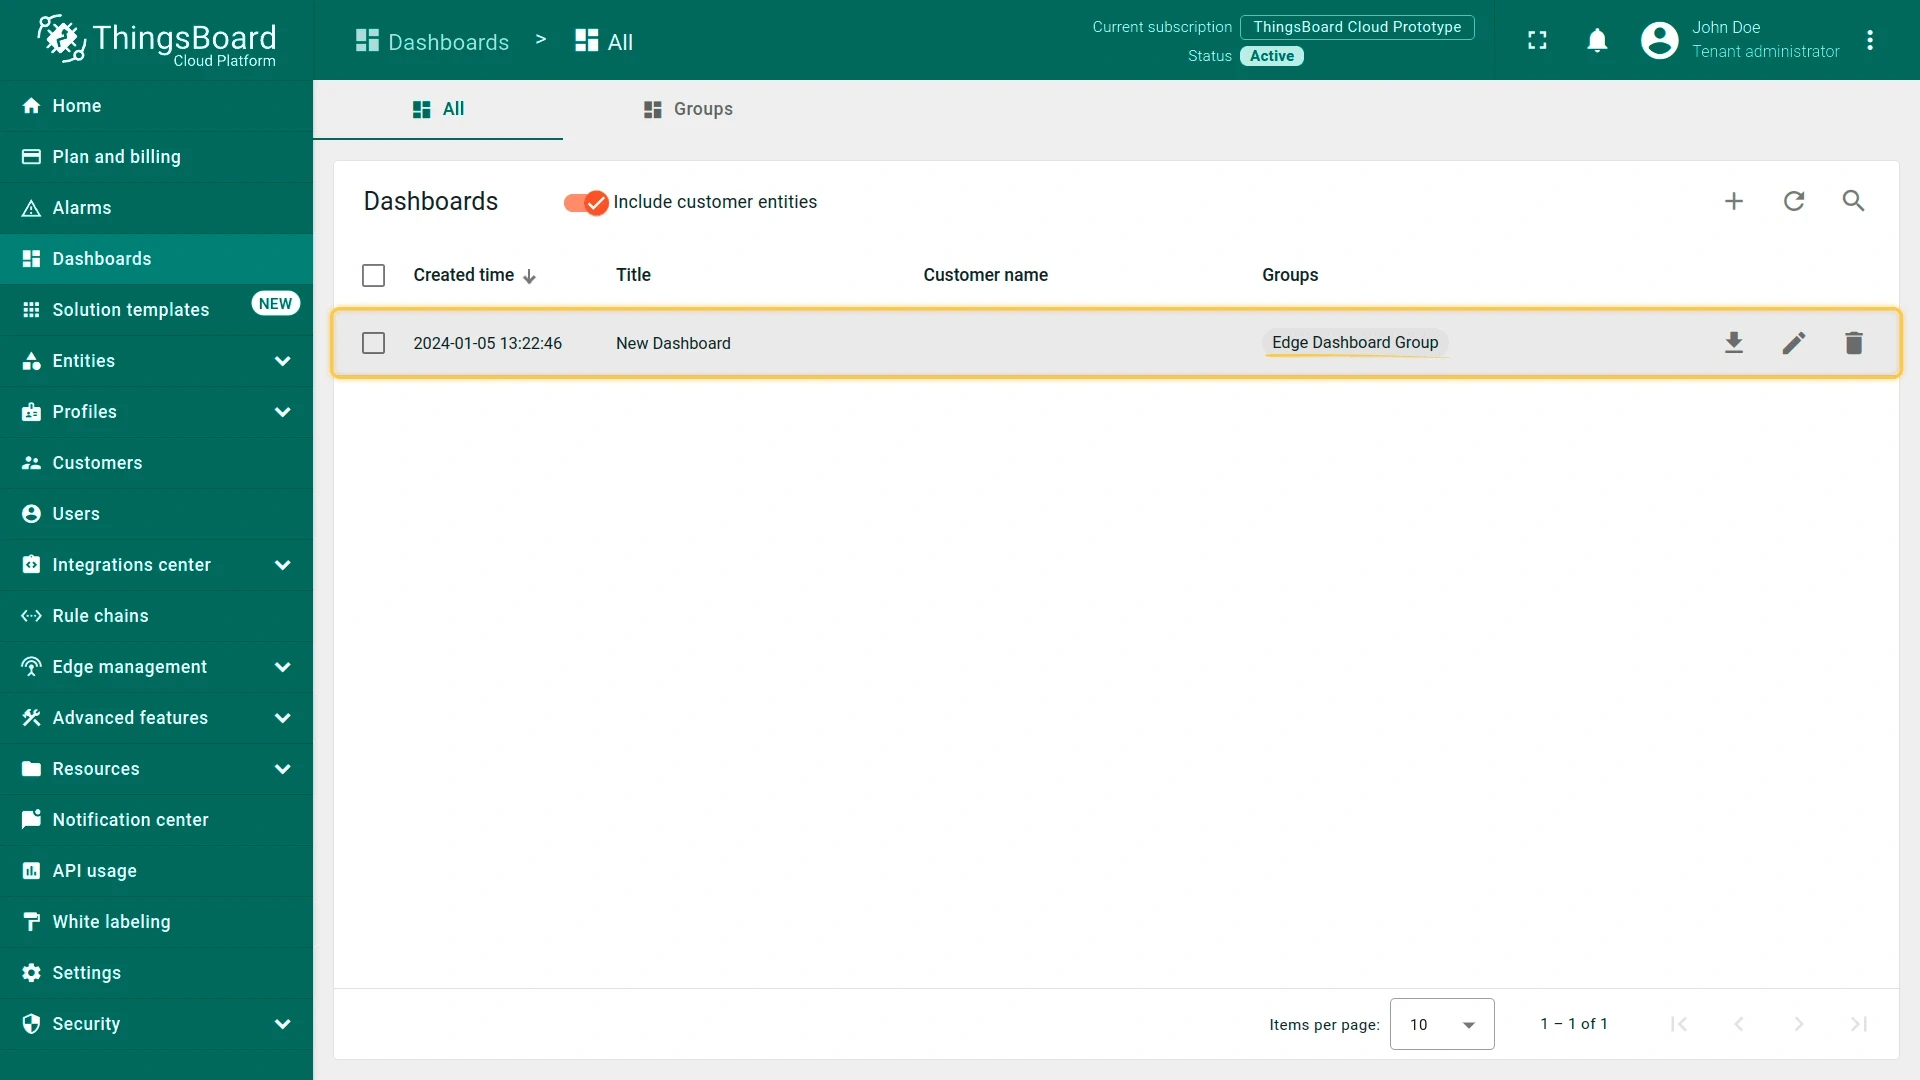
- The dashboard is now assigned to the new group, visible in the Groups column.
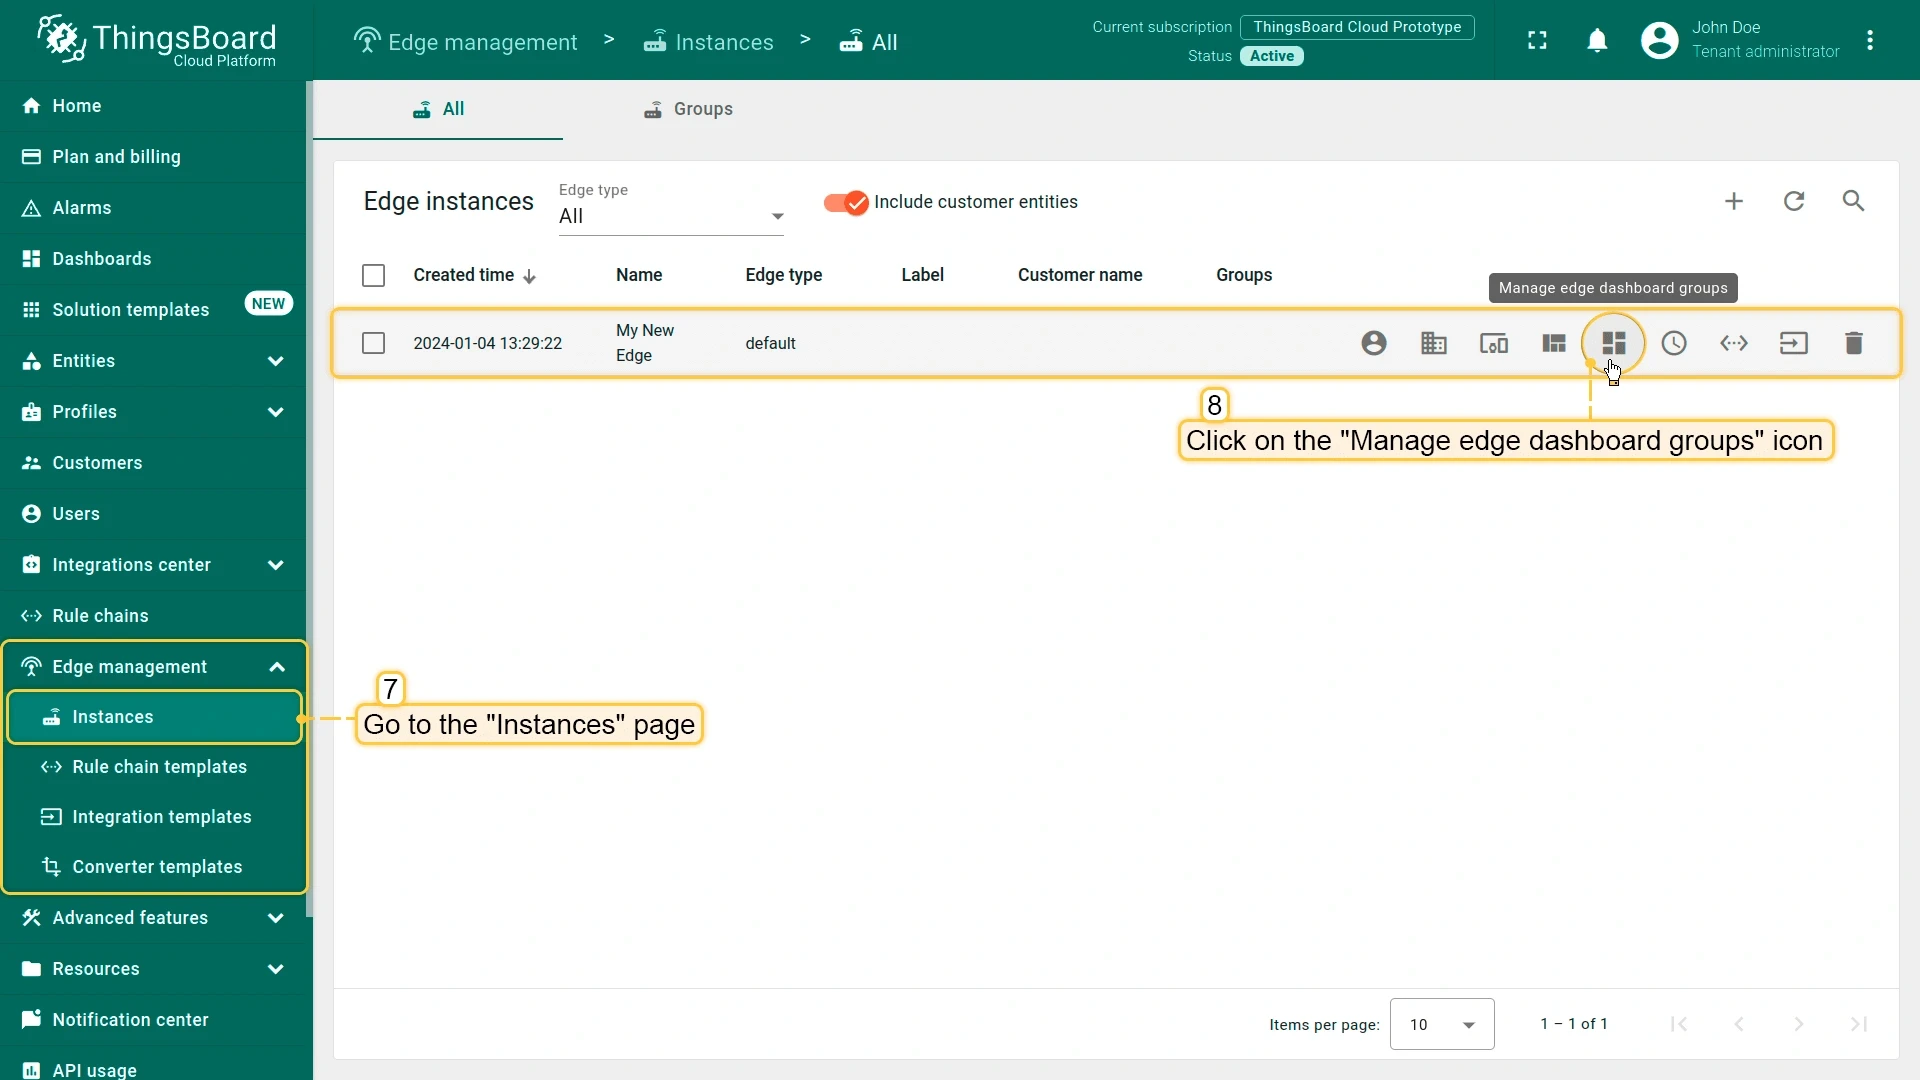
- Go to Edge Management → Instances and click the Manage edge dashboard groups icon for your Edge instance.
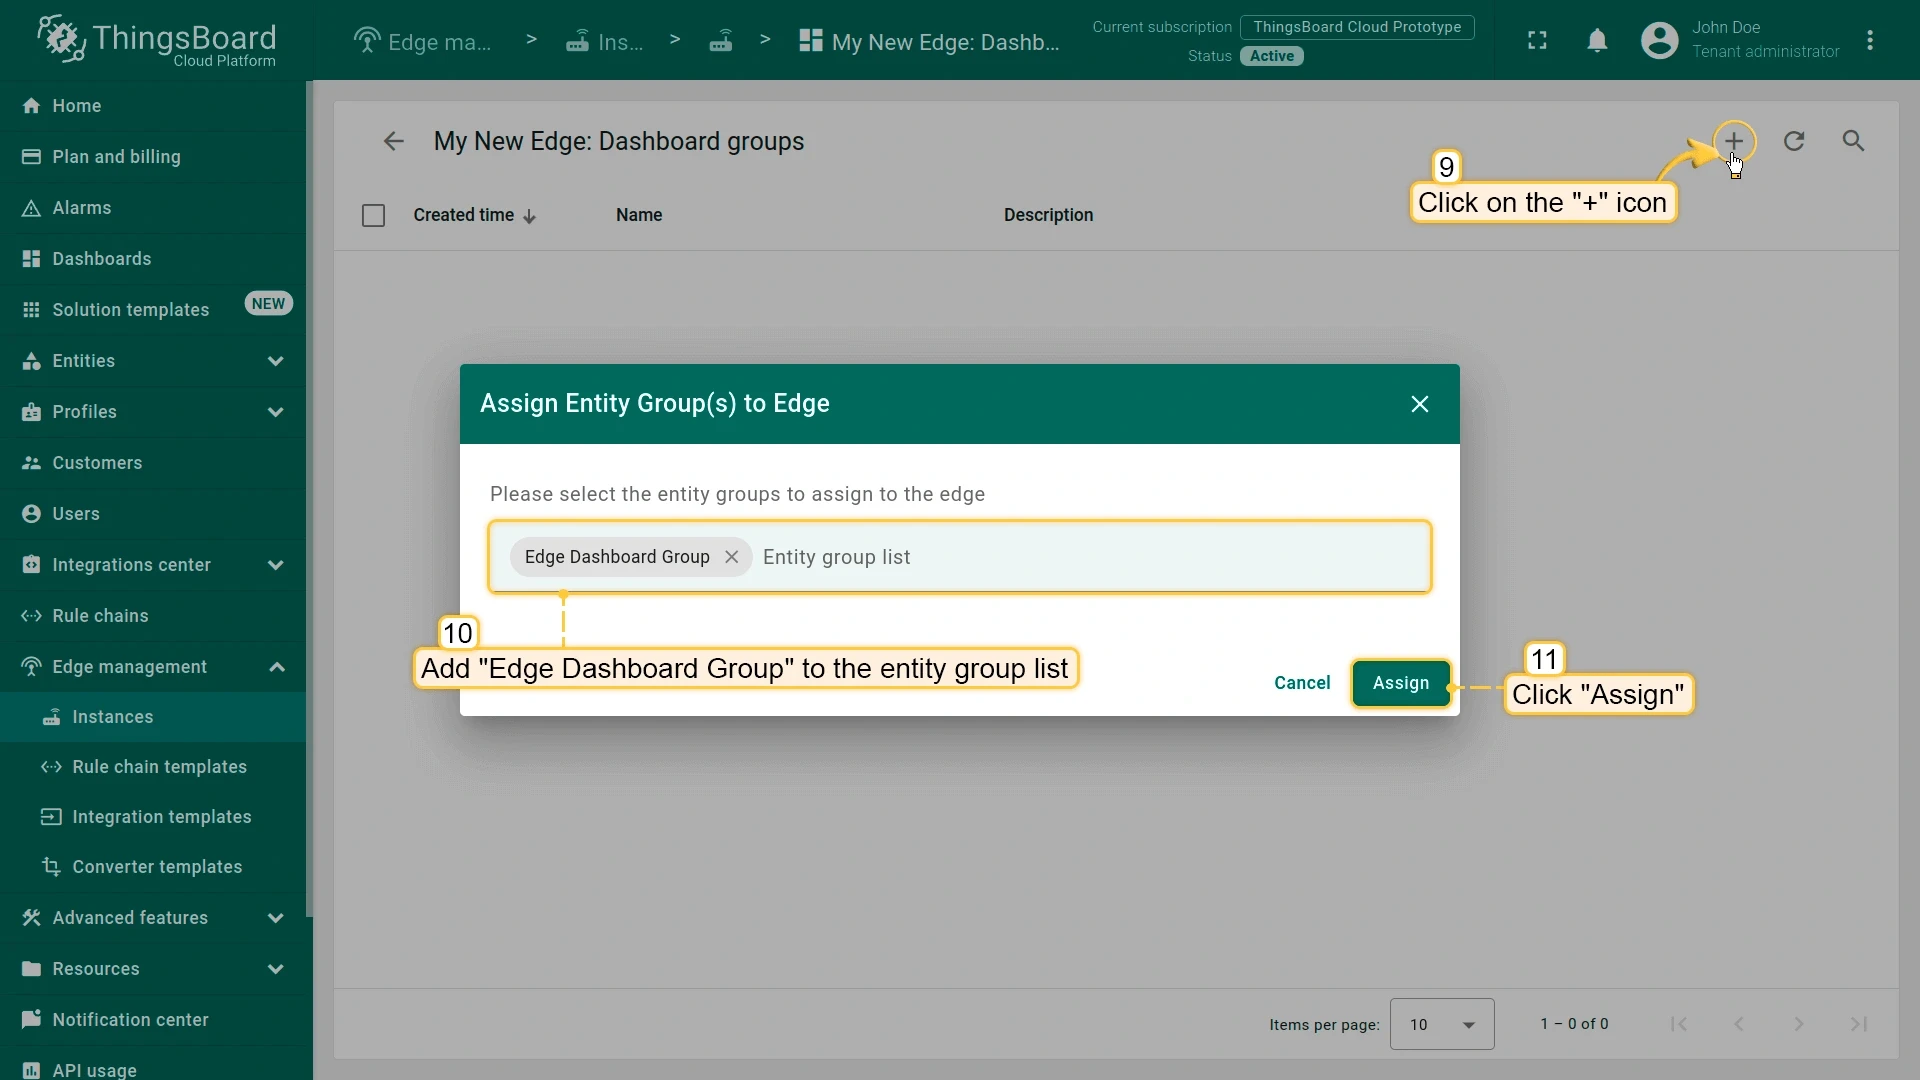
- On the Edge Dashboard Groups page, click Assign to Edge (+), select the new group from the dropdown, and click Assign.
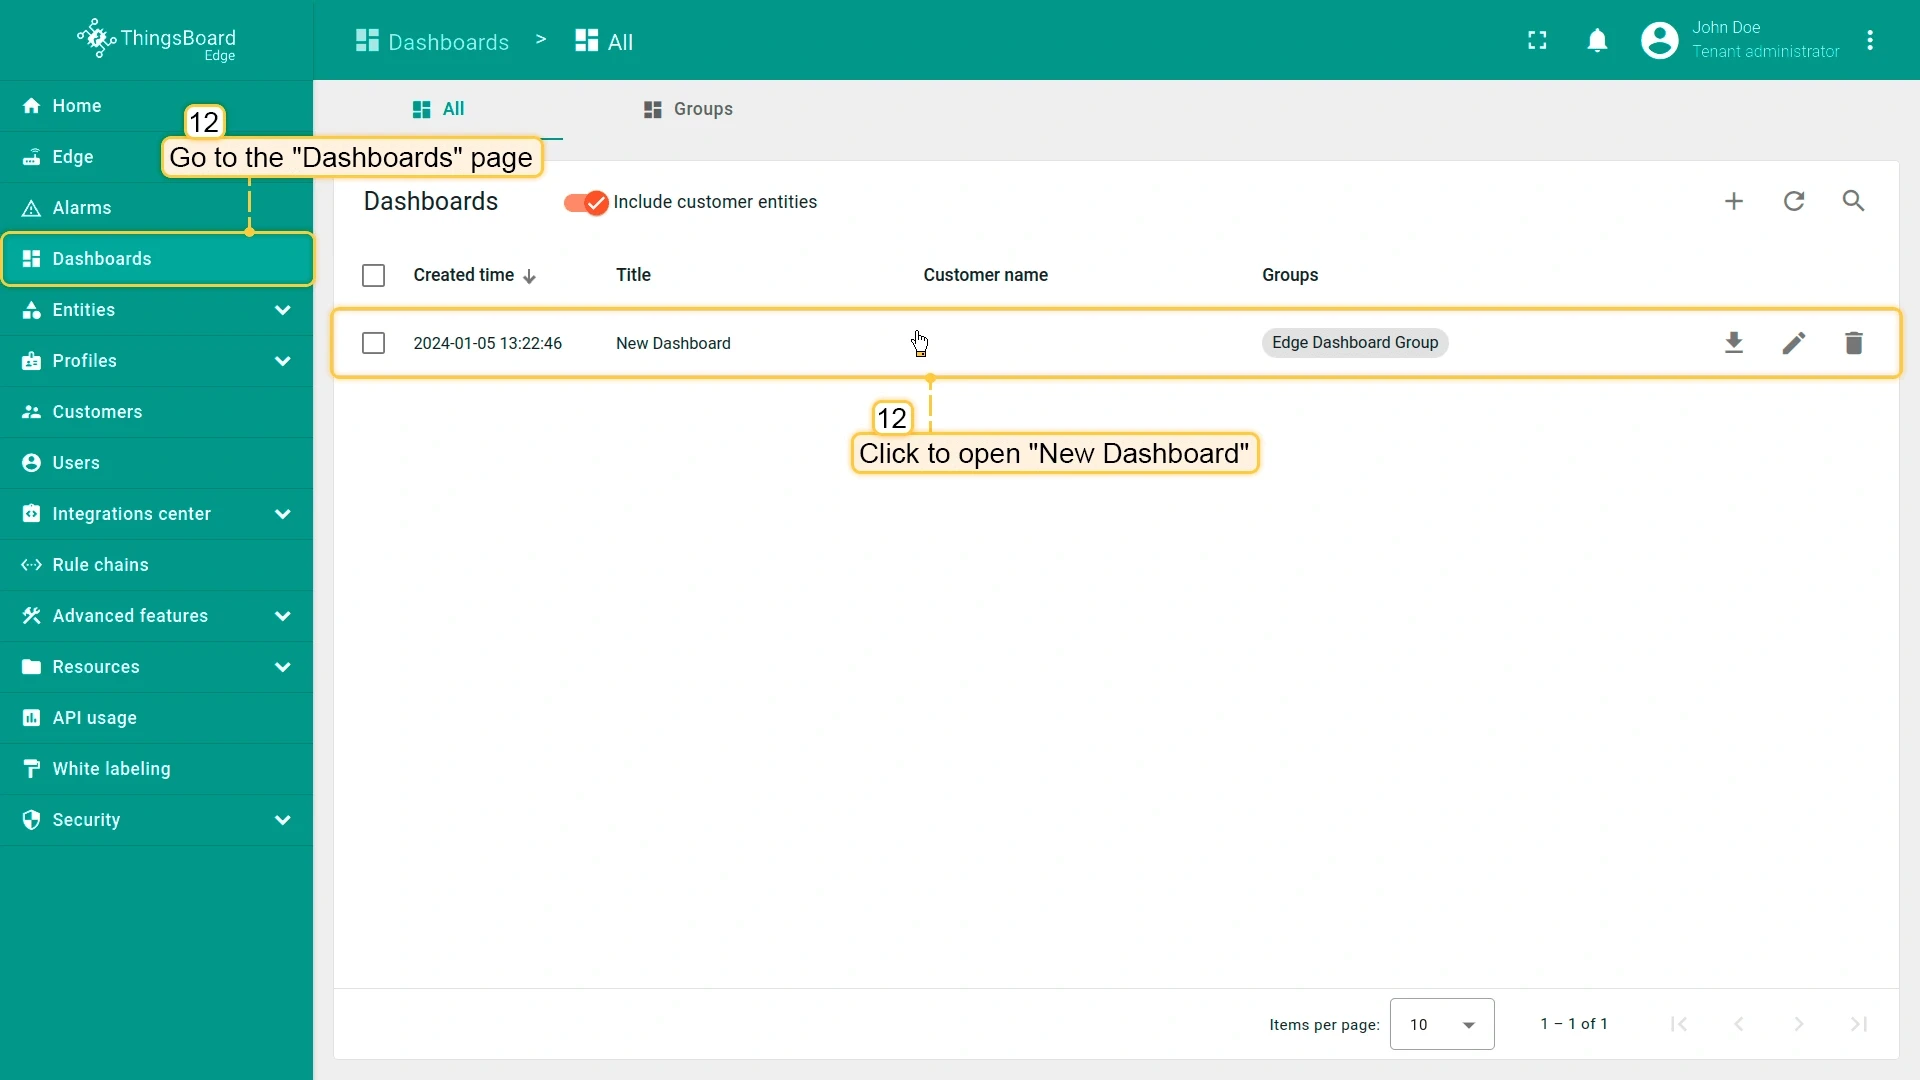
- Open the Edge UI (http://localhost:8080), go to Dashboards — the assigned dashboard is now available on Edge.
Checklist
Section titled “Checklist”Was this helpful?