Custom Translation in HTML Value Card
This recipe shows how to use custom translation keys inside an HTML Value Card widget. The i18n keys in the HTML template are automatically resolved to the user’s interface language.
Prerequisites
Section titled “Prerequisites”- A ThingsBoard PE instance with custom translation configured
- A device sending temperature telemetry
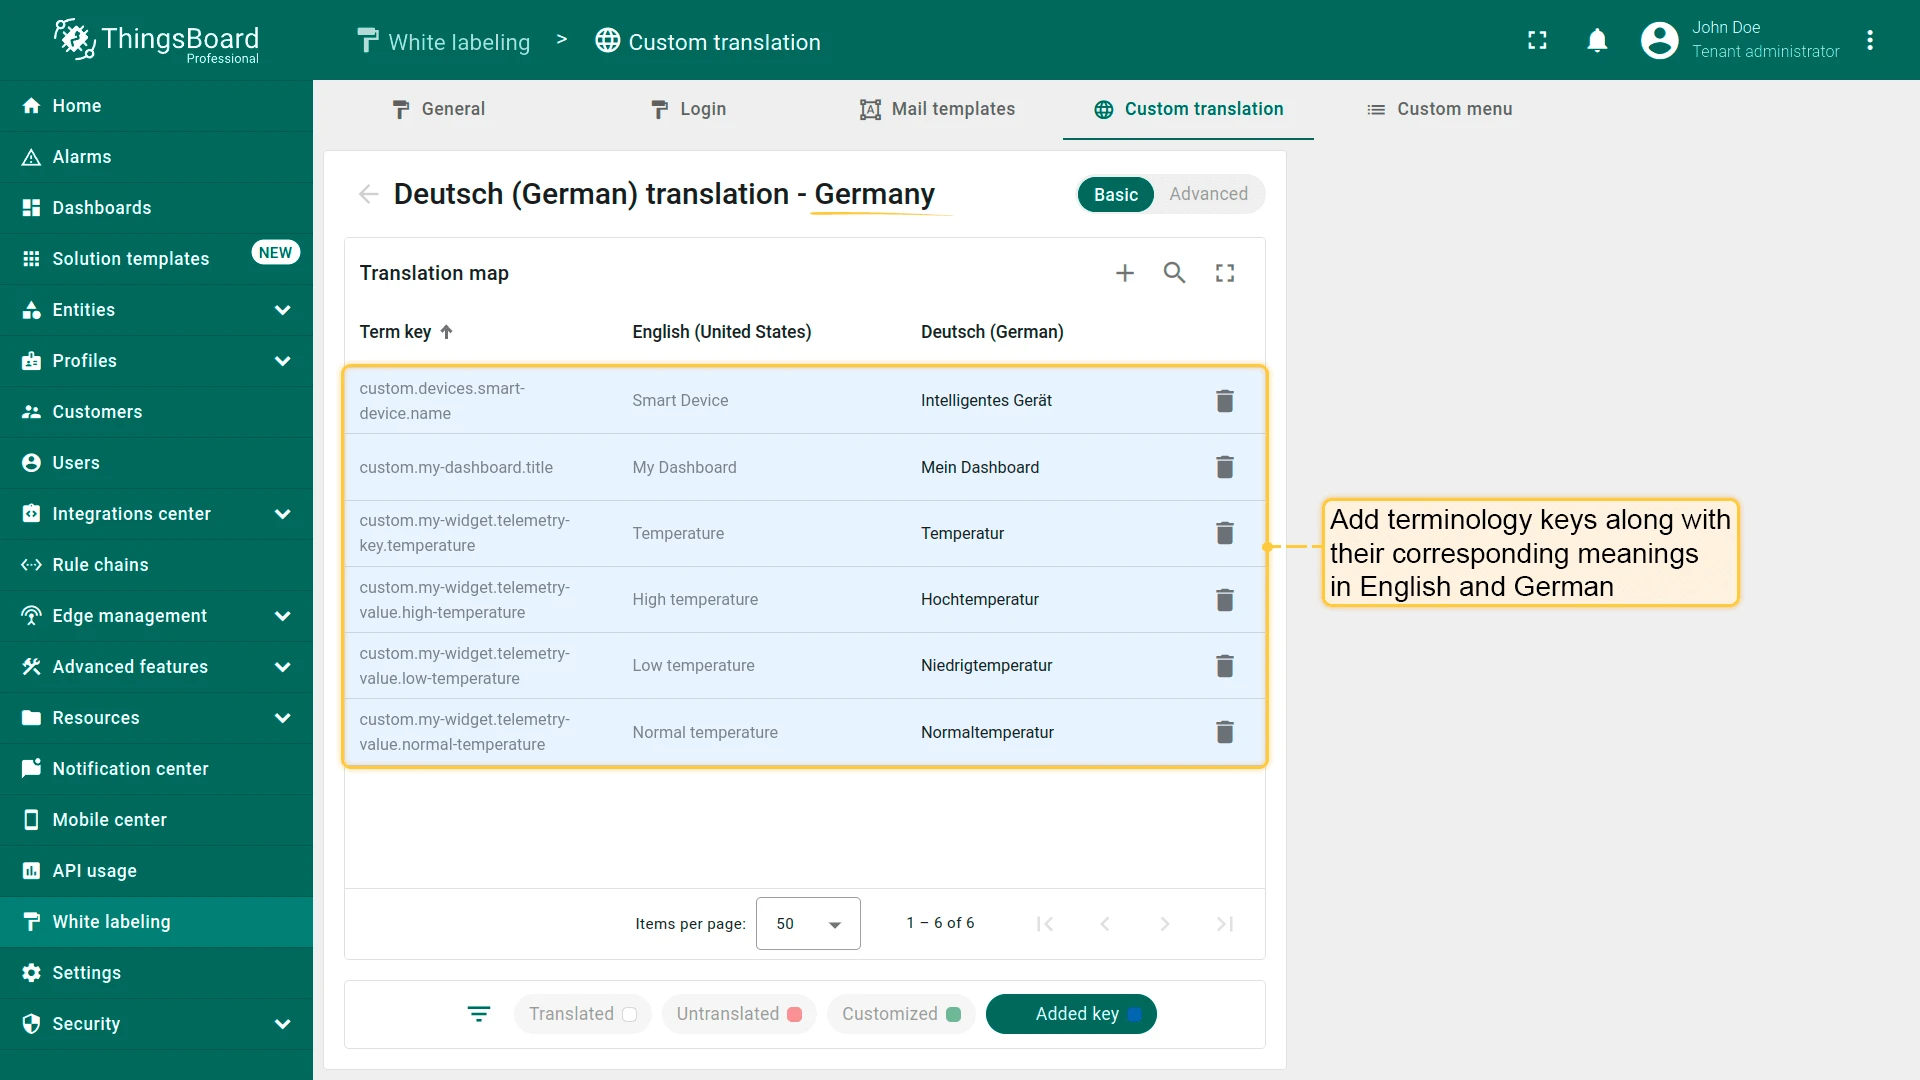
Add translation keys
Section titled “Add translation keys”Navigate to White labeling > Custom translation and add the following keys for the target language (e.g., German):
| Term key | English | German | Description |
|---|---|---|---|
custom.devices.smart-device.name | Smart Device | Intelligentes Gerät | Device name |
custom.my-dashboard.title | My Dashboard | Mein Dashboard | Dashboard title |
custom.my-widget.telemetry-key.temperature | Temperature | Temperatur | Telemetry key label |
custom.my-widget.telemetry-value.low-temperature | Low temperature | Niedrigtemperatur | Low temperature |
custom.my-widget.telemetry-value.high-temperature | High temperature | Hochtemperatur | High temperature |
custom.my-widget.telemetry-value.normal-temperature | Normal temperature | Normaltemperatur | Normal temperature |
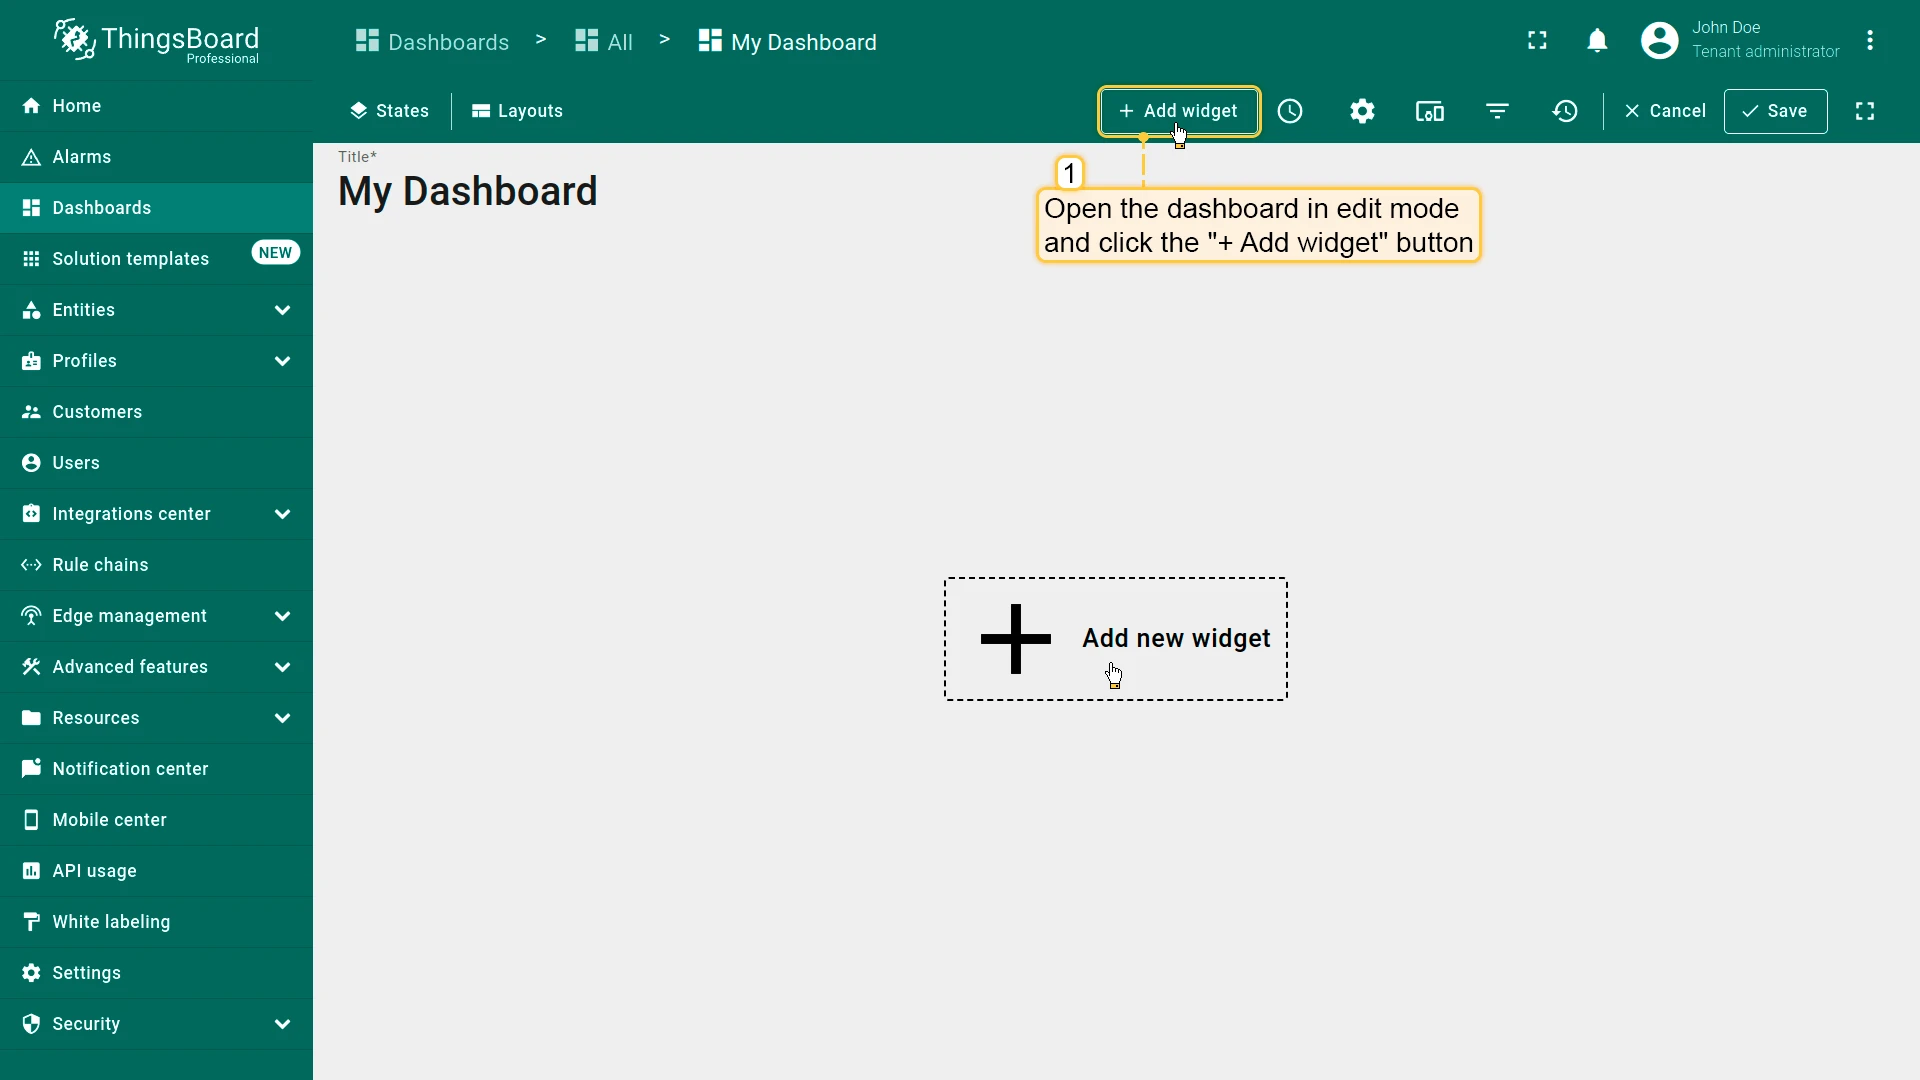
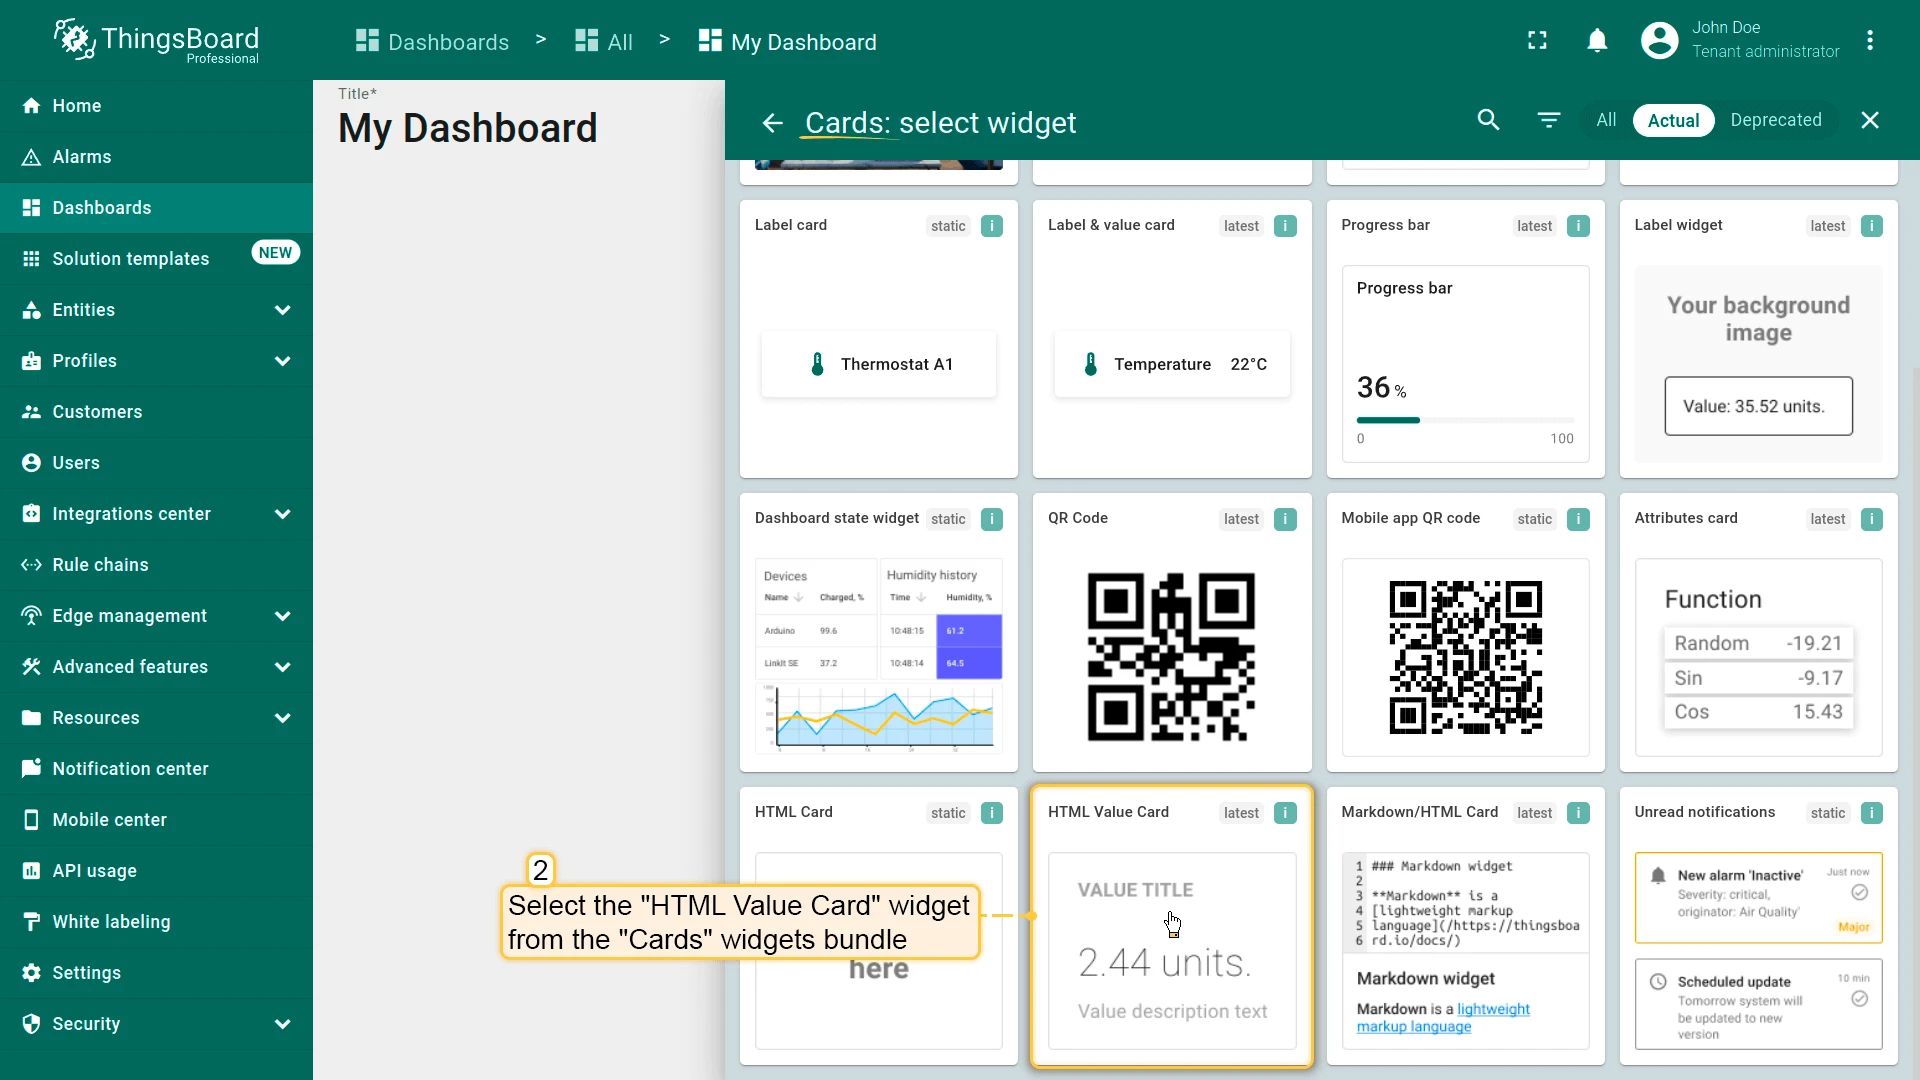
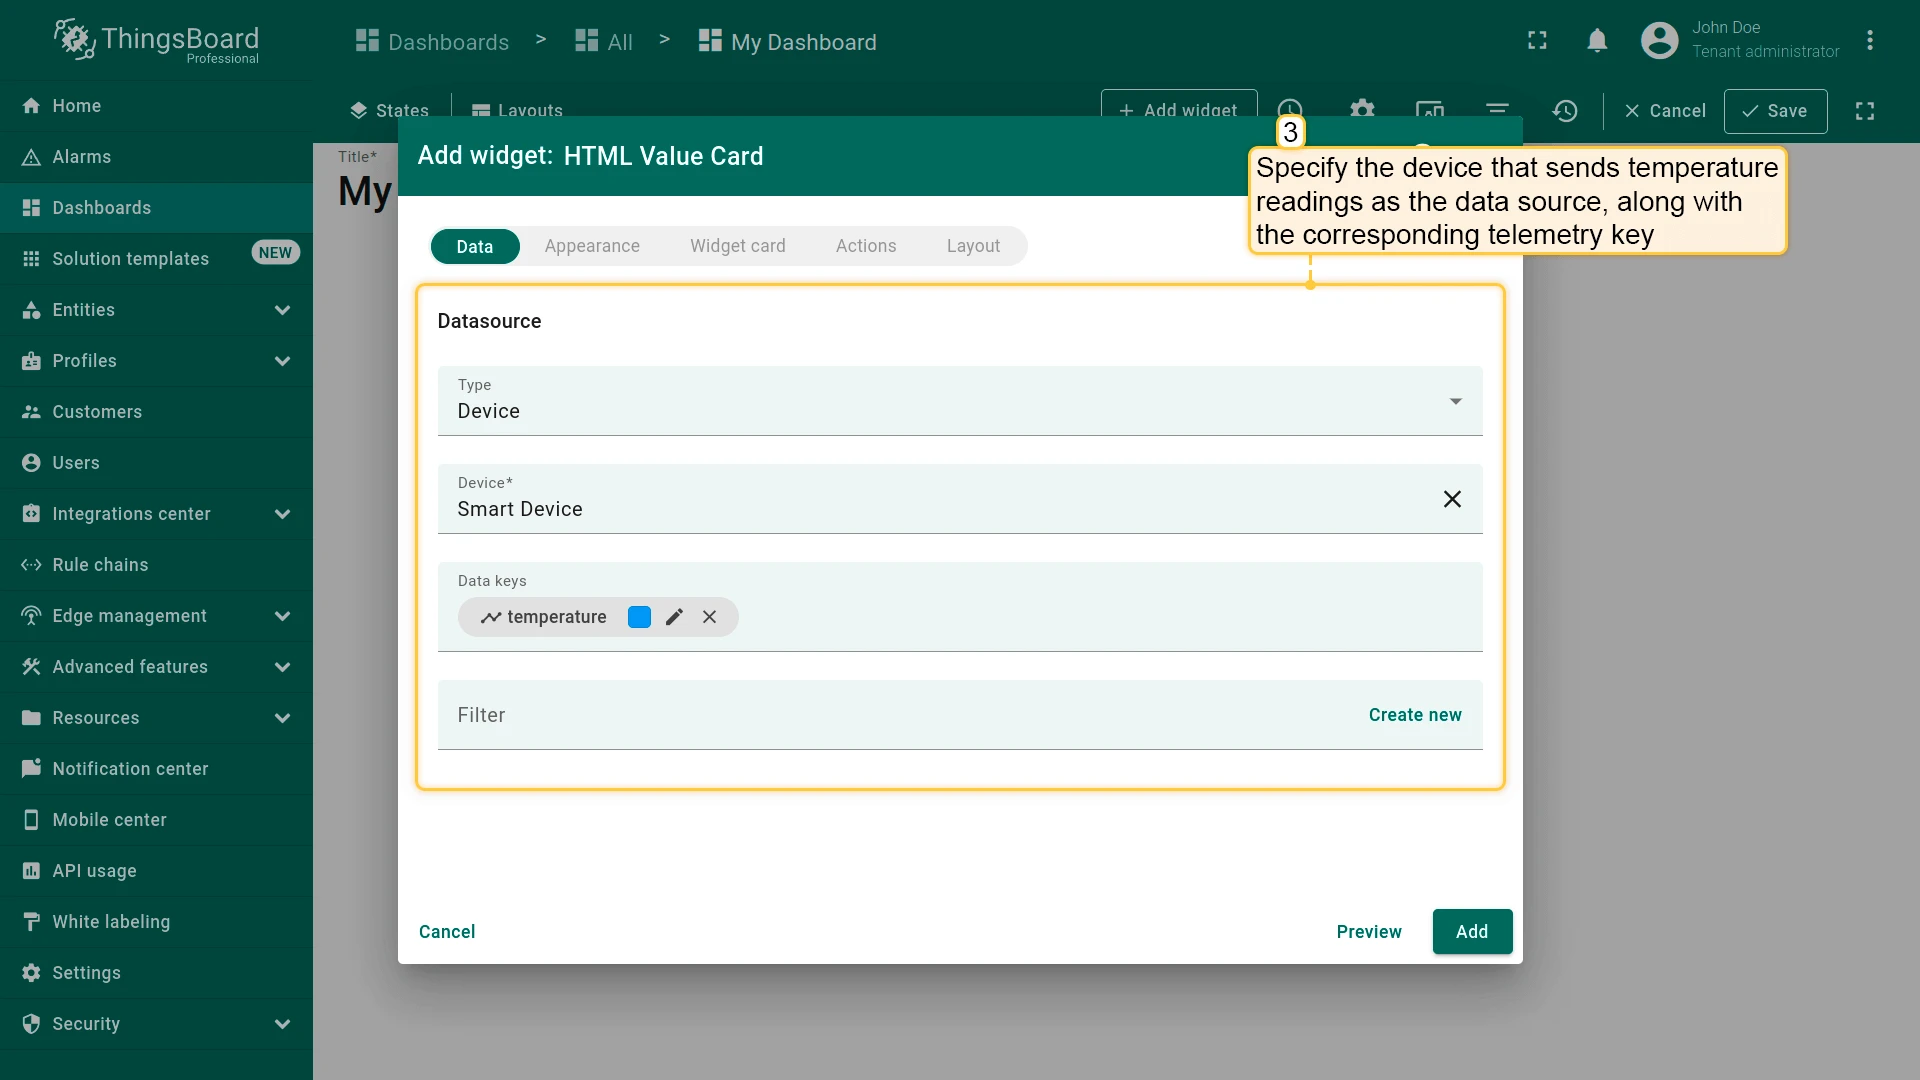
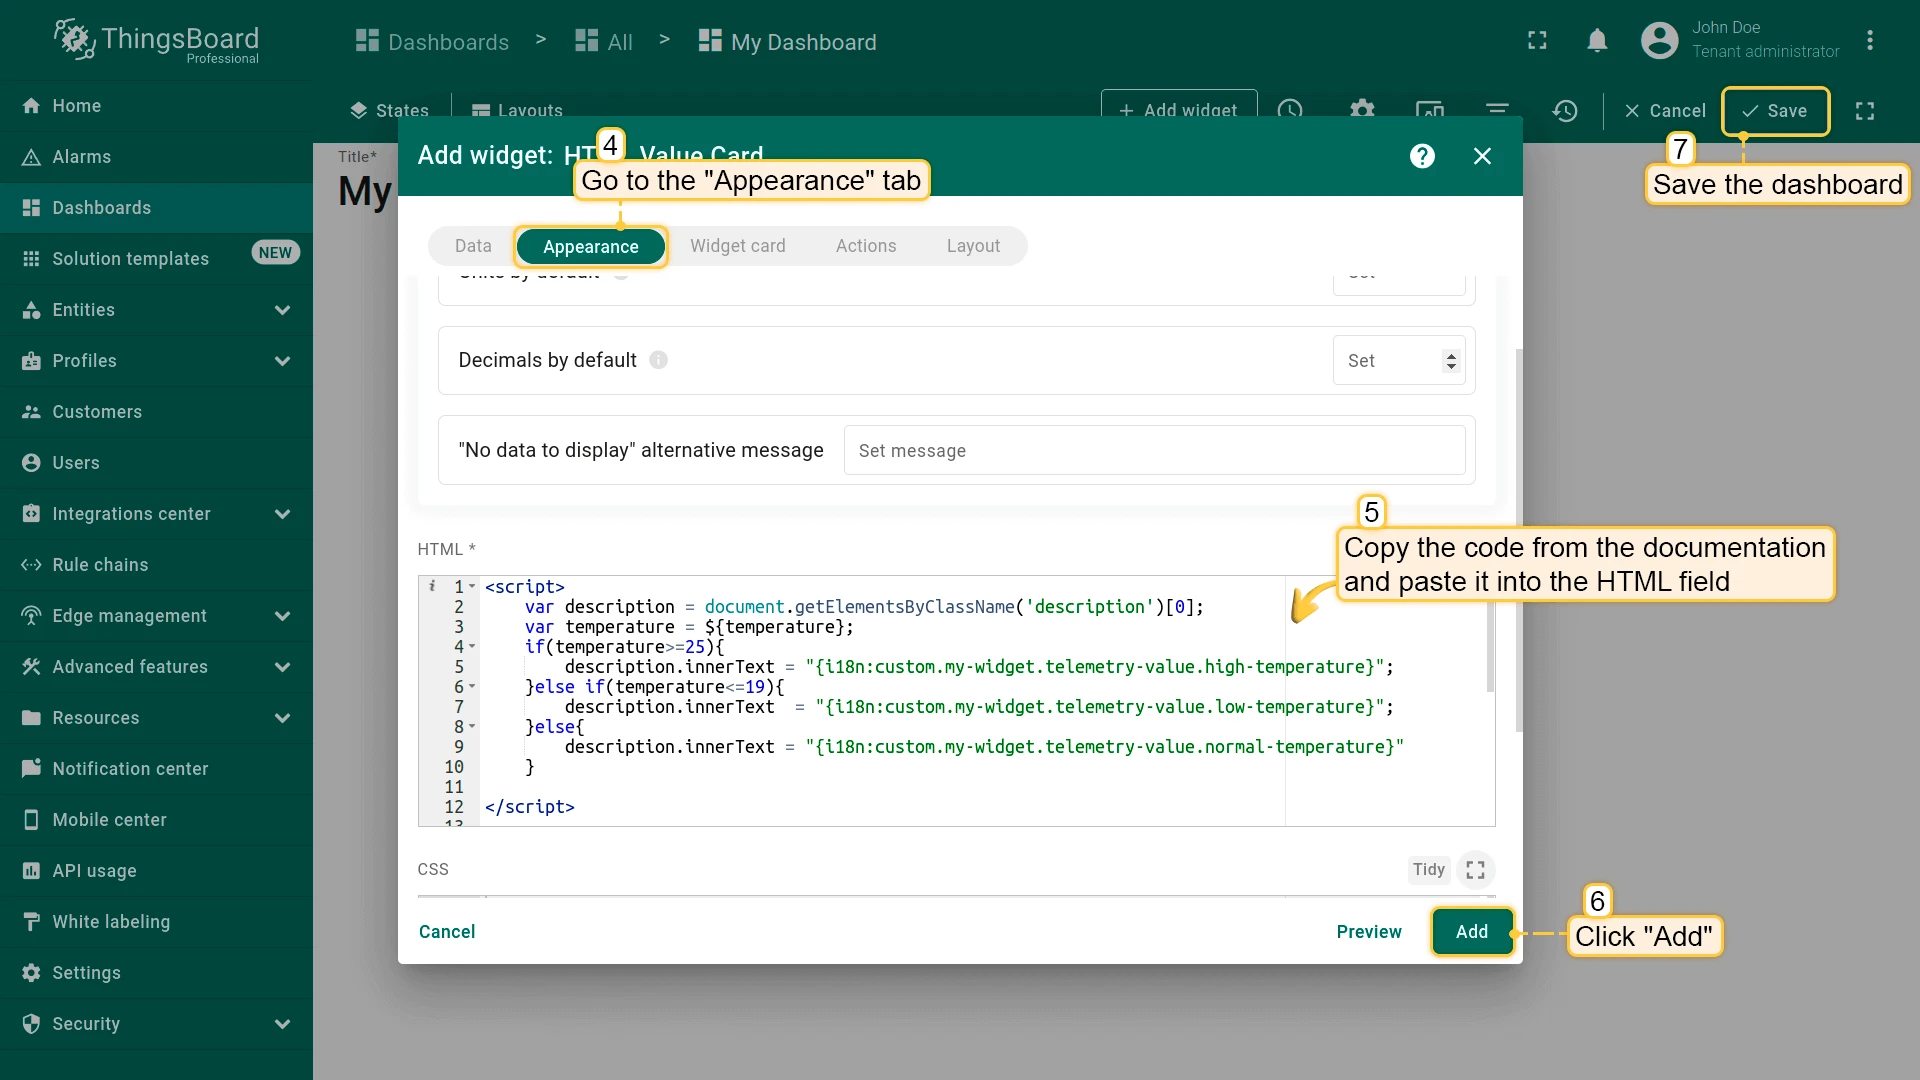
Add the HTML Value Card widget
Section titled “Add the HTML Value Card widget”-
Open the dashboard in edit mode and click Add widget.
-
Select HTML Value Card from the Cards widgets bundle.
-
Specify the device and temperature telemetry key as the data source.
-
Go to the Appearance tab and paste the following HTML into the HTML field:
<script>    var description = document.getElementsByClassName('description')[0];    var temperature = ${temperature};    if(temperature>=25){        description.innerText = "{i18n:custom.my-widget.telemetry-value.high-temperature}";    }else if(temperature<=19){        description.innerText  = "{i18n:custom.my-widget.telemetry-value.low-temperature}";    }else{        description.innerText = "{i18n:custom.my-widget.telemetry-value.normal-temperature}"    }</script>
<div class='card'> <div class='content'> <div class='column'> <h1>{i18n:custom.devices.smart-device.name}</h1> <div class='value'> {i18n:custom.my-widget.telemetry-key.temperature}: ${temperature:0} °C </div> <div class='description'> </div> </div> </div></div>- Click Add, then save the dashboard.
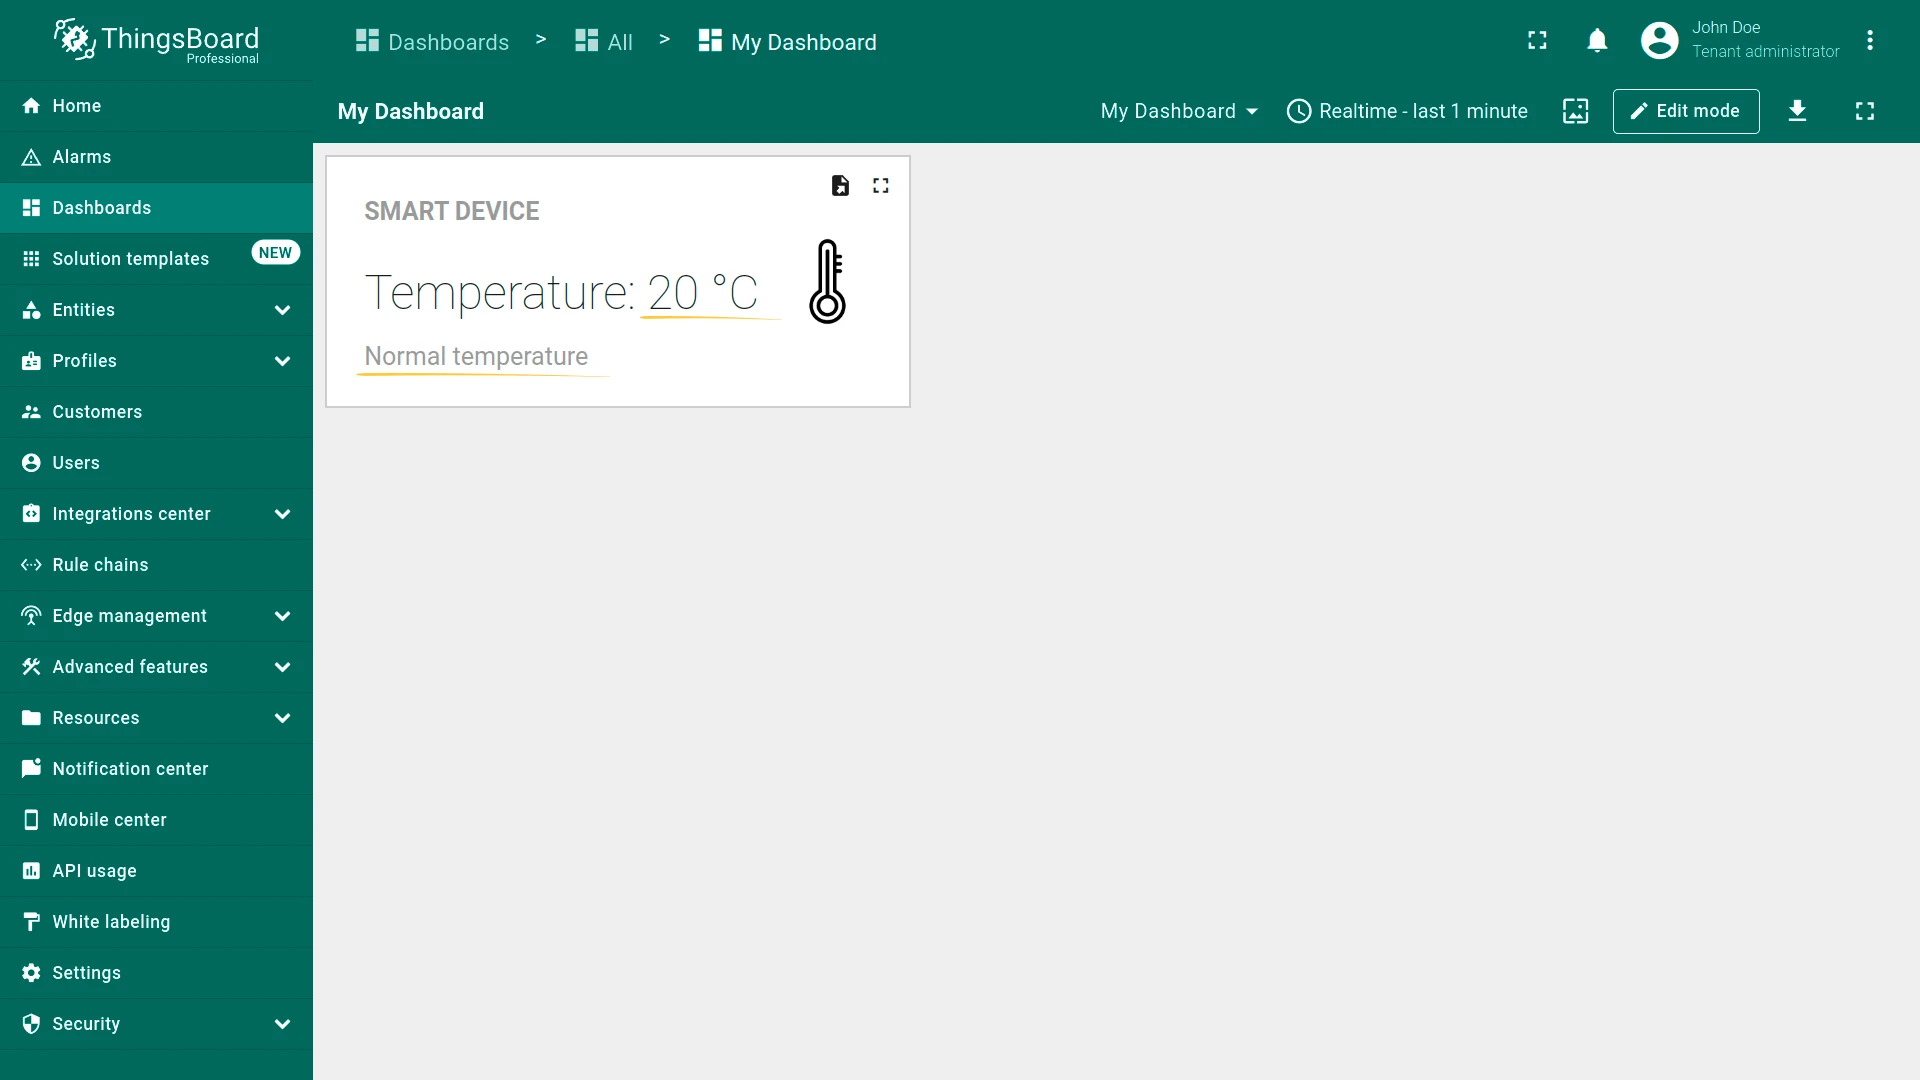
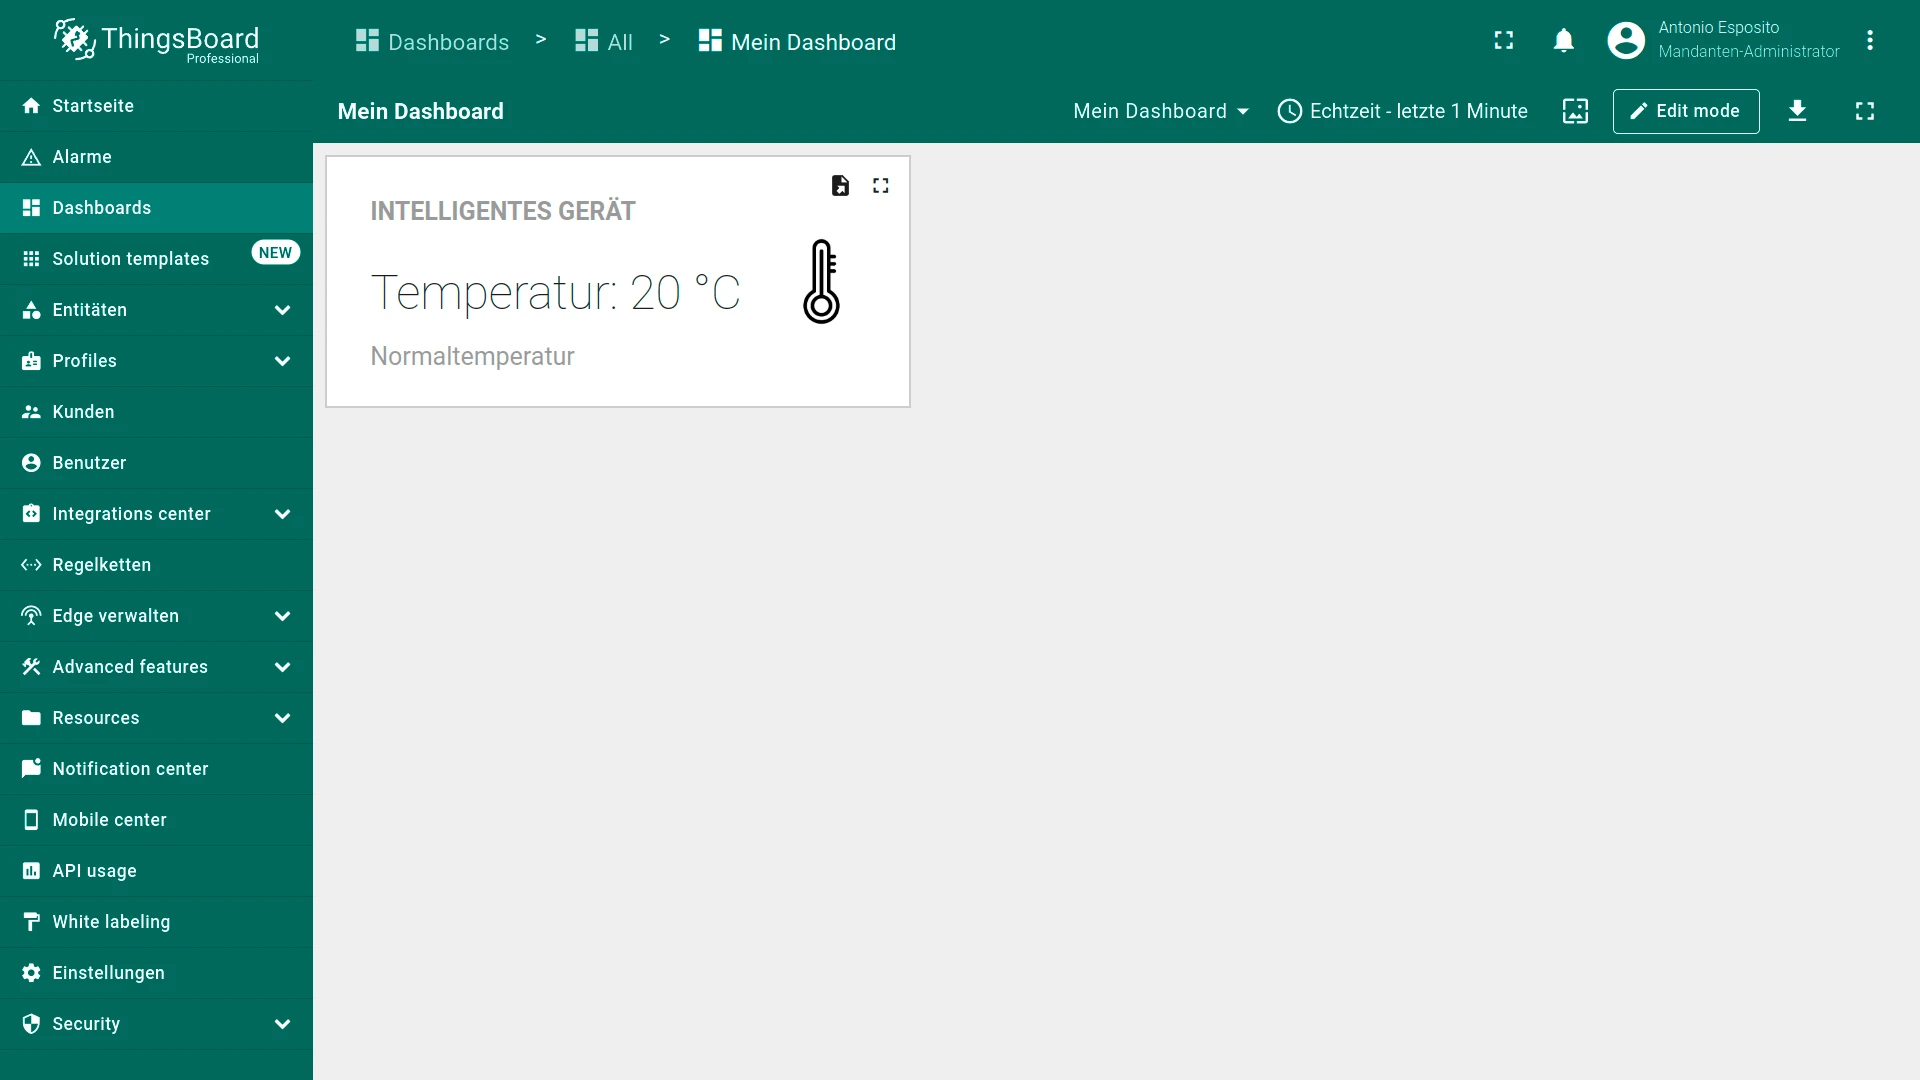
Verify the result
Section titled “Verify the result”The card displays dynamic text based on the temperature value and the user’s language:
Was this helpful?
Thank you for your feedback!