Installing ThingsBoard PE from GCP Marketplace
This guide walks you through installing ThingsBoard Professional Edition from GCP Marketplace using the BYOL (Bring Your Own License) model. You get the license directly from ThingsBoard, Inc, and purchase the server instances and infrastructure from GCP.
Prerequisites
Section titled “Prerequisites”- Active GCP account
Step 1. Launch ThingsBoard PE BYOL
Section titled “Step 1. Launch ThingsBoard PE BYOL”Open the ThingsBoard Professional Edition BYOL product page on GCP Marketplace.
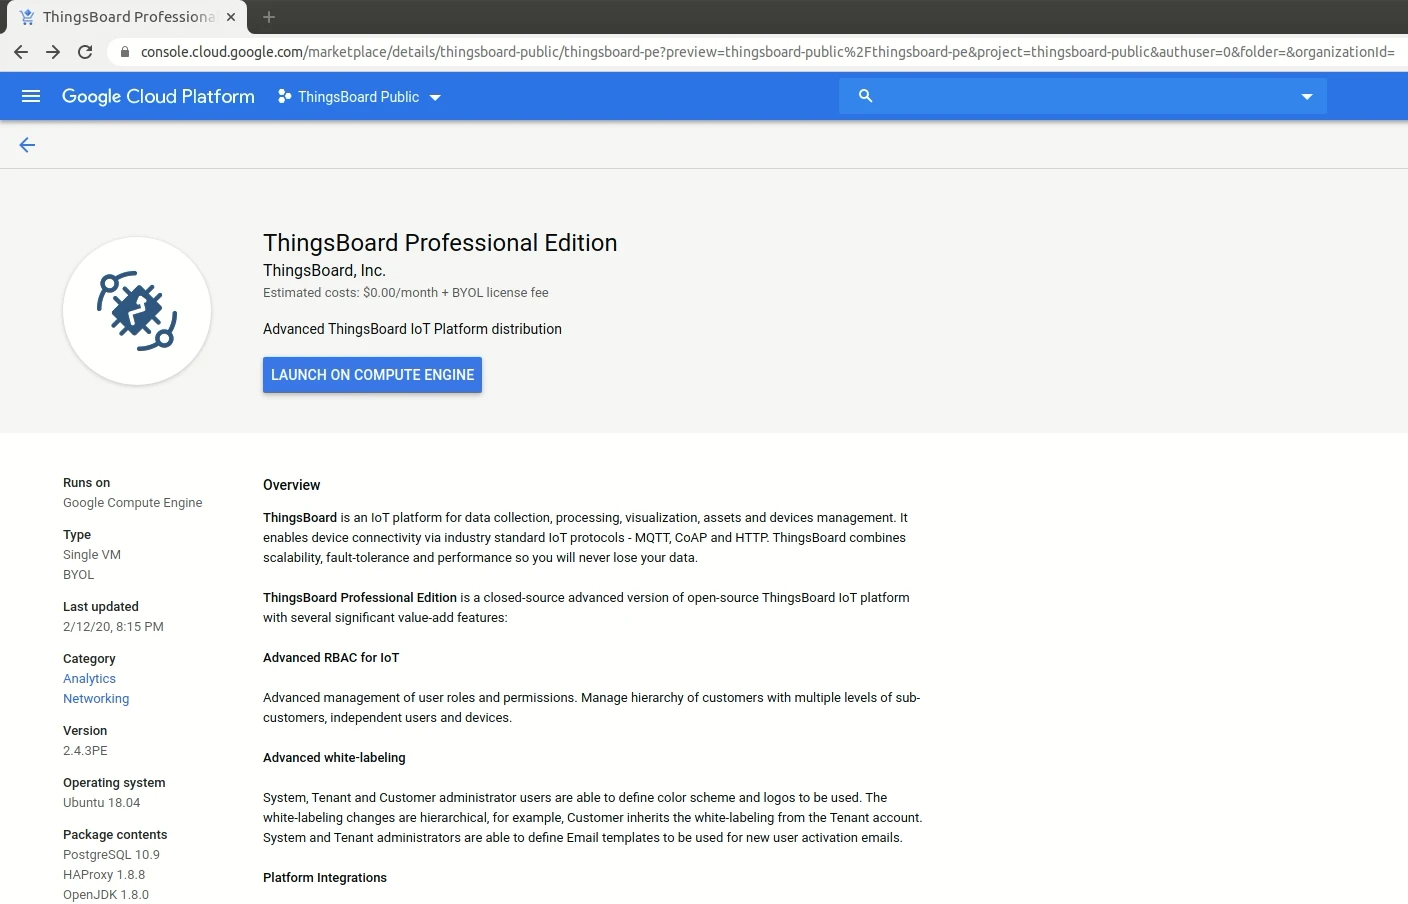
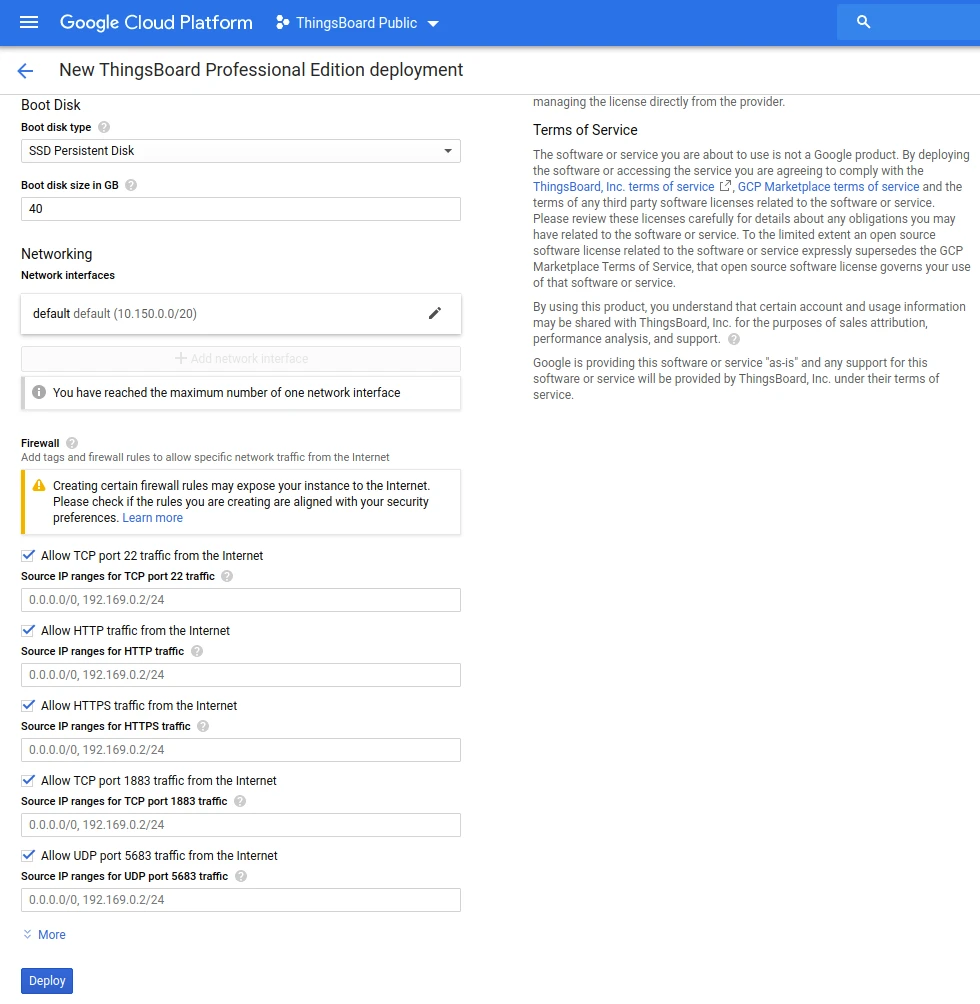
Click Launch on Compute Engine. You can use the default settings or customize them. When ready, click Deploy.
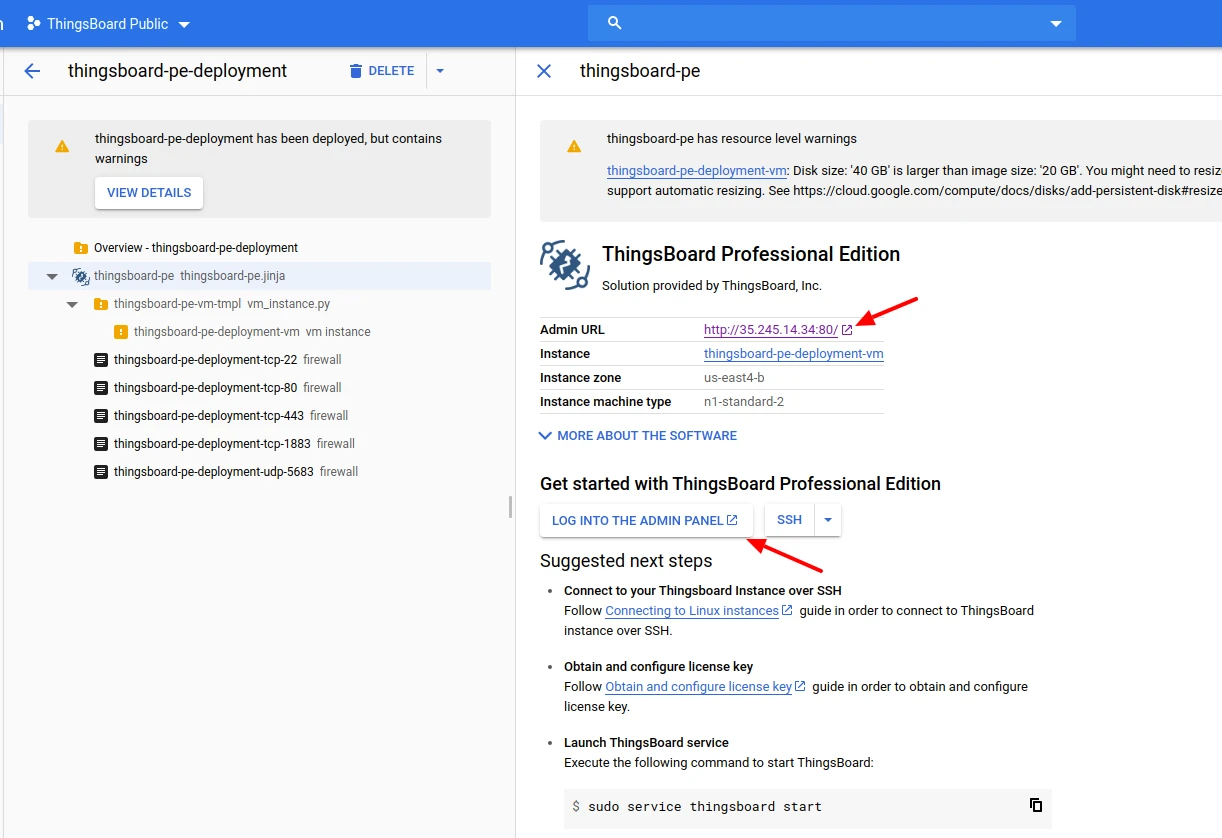
Once the deployment completes:
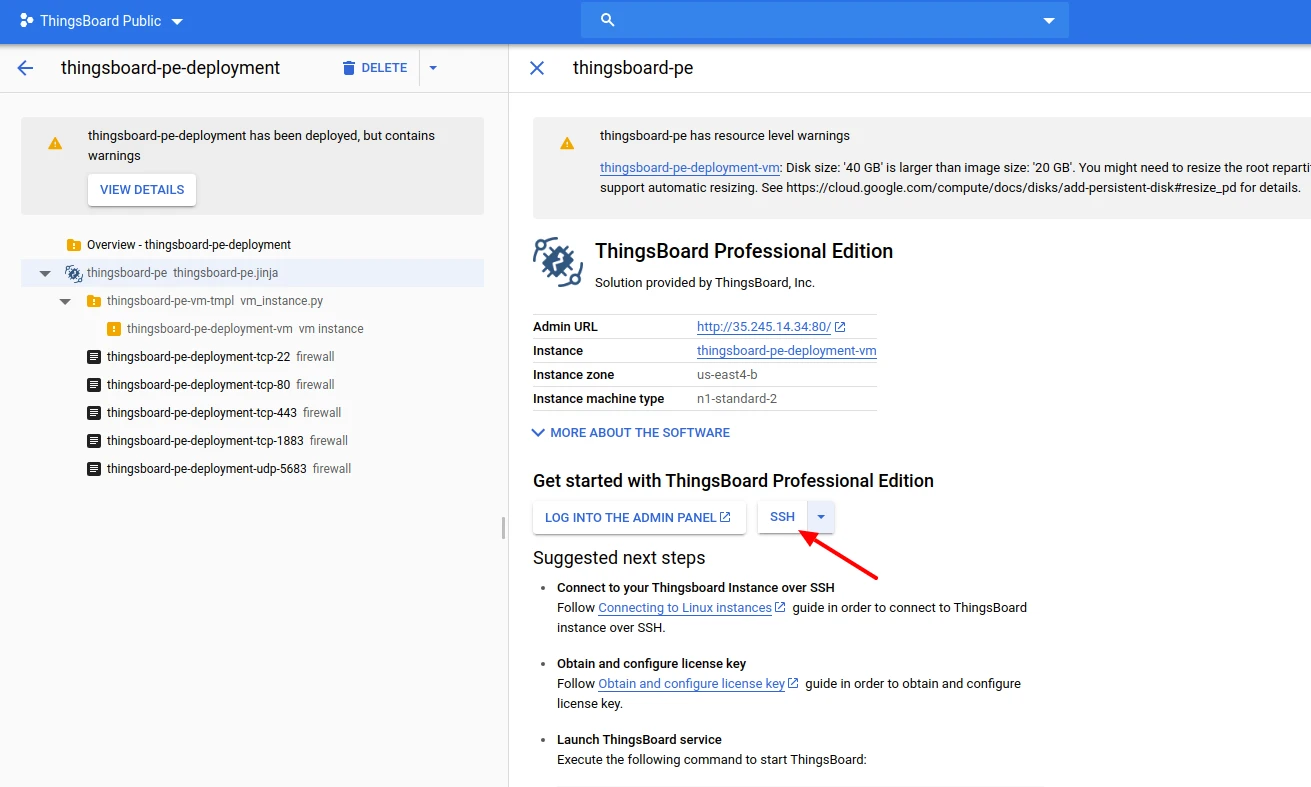
Click SSH to open a browser-based SSH session. Keep this window open — you will use it in Step 3.
Step 2. Obtain your license secret
Section titled “Step 2. Obtain your license secret”Register on the ThingsBoard License Portal to get your license. See How to get a pay-as-you-go subscription or How to get a perpetual license for details.
Save your license secret — you will need it in the next step.
Step 3. Configure your license secret
Section titled “Step 3. Configure your license secret”Open the configuration file:
sudo nano /etc/thingsboard/conf/thingsboard.confLocate the license configuration block and uncomment the export statement. Replace YOUR_LICENSE_SECRET_HERE with your actual license secret:
# License secret obtained from ThingsBoard License Portal (https://license.thingsboard.io)# UNCOMMENT NEXT LINE AND PUT YOUR LICENSE SECRET:export TB_LICENSE_SECRET=YOUR_LICENSE_SECRET_HEREStep 4. Launch ThingsBoard service
Section titled “Step 4. Launch ThingsBoard service”sudo service thingsboard startStep 5. Connect to ThingsBoard UI
Section titled “Step 5. Connect to ThingsBoard UI”Open the ThingsBoard web interface in your browser using your instance’s external IP address.
Default credentials:
- Login: sysadmin@thingsboard.org
- Password: sysadmin
Post-installation steps
Section titled “Post-installation steps”Configure HTTPS
Section titled “Configure HTTPS”-
Assign a valid DNS record to your instance’s external IP address.
-
Connect to your instance via SSH.
-
Run the following commands, replacing the domain and email with your own:
Terminal window sudo certbot-certonly --domain smth.yourcompany.com --email support@yourcompany.comsudo haproxy-refresh
Was this helpful?